
LEDRO 4300 - Gazebo PALRAM - Free user manual and instructions
Find the device manual for free LEDRO 4300 PALRAM in PDF.
| Product type | Garden gazebo |
| Brand | PALRAM |
| Model | LEDRO 4300 |
| Main material | Steel structure with anti-corrosion coating, polycarbonate panels |
| Dimensions (L x W x H) | 3.0 x 3.0 x 2.5 m (estimate) |
| Weight | Approximately 70 kg (estimate) |
| Covered area | 9 m² |
| Roof | Polycarbonate with UV protection |
| Side walls | Optional, removable panels |
| Use | Garden shelter, terrace, outdoor space |
| Number of people for assembly | Minimum 2 |
| Anchoring | Required for stability and warranty validity |
| Maintenance | Clean with mild detergent and cold water; do not use acetone or abrasive cleaners |
| Weather resistance | Designed for normal conditions; snow removal and leaf clearance recommended |
| Warranty | 10-year limited (see conditions in manual) |
| Certifications | Complies with current safety standards |
| Included accessories | Screws, dowels, sealing strip, silicone |
| Repairability | Spare parts available from manufacturer |
| Installation requirements | Flat and solid surface (concrete, wooden deck); check local permits |
Frequently Asked Questions - LEDRO 4300 PALRAM
User questions about LEDRO 4300 PALRAM
0 question about this device. Answer the ones you know or ask your own.
Ask a new question about this device
Download the instructions for your Gazebo in PDF format for free! Find your manual LEDRO 4300 - PALRAM and take your electronic device back in hand. On this page are published all the documents necessary for the use of your device. LEDRO 4300 by PALRAM.
USER MANUAL LEDRO 4300 PALRAM
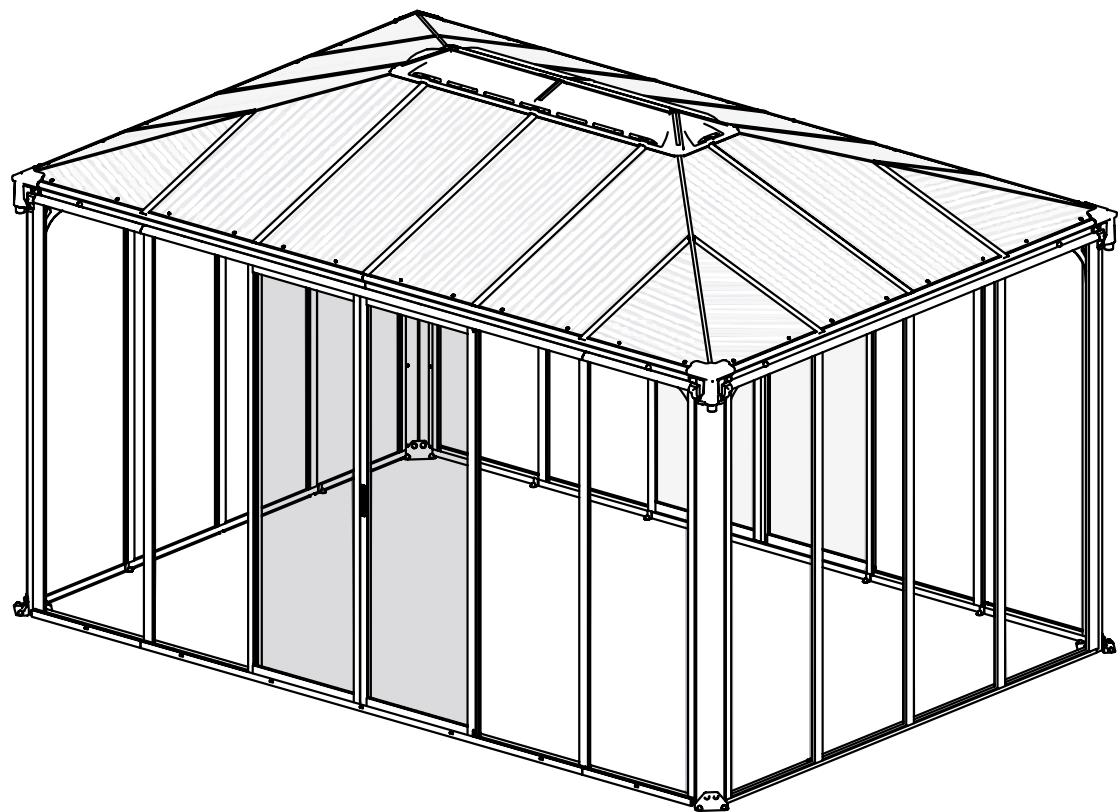
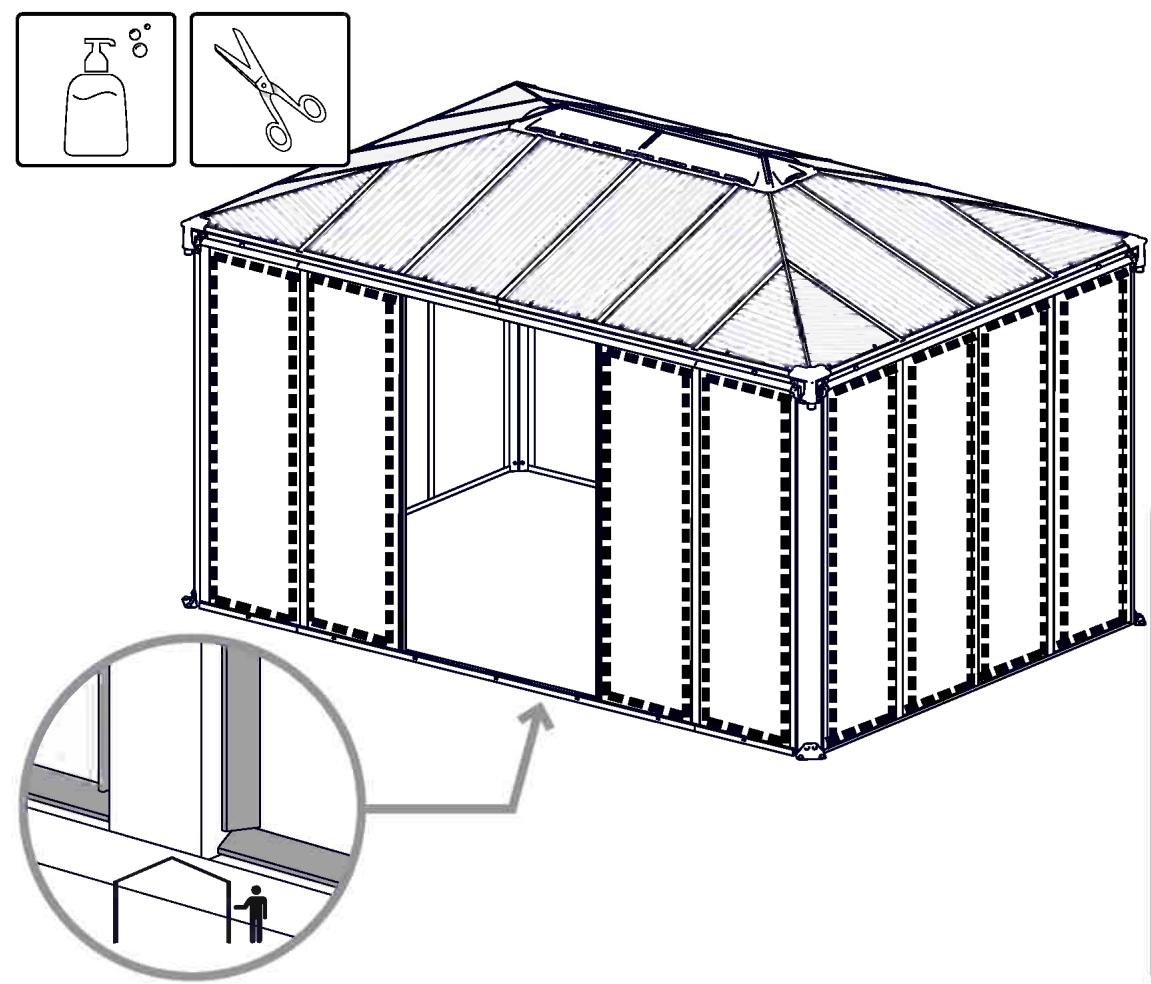
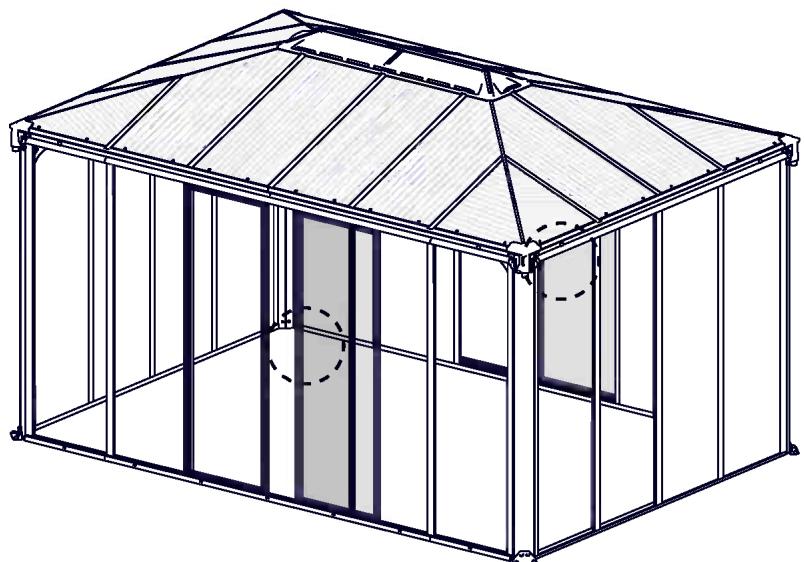
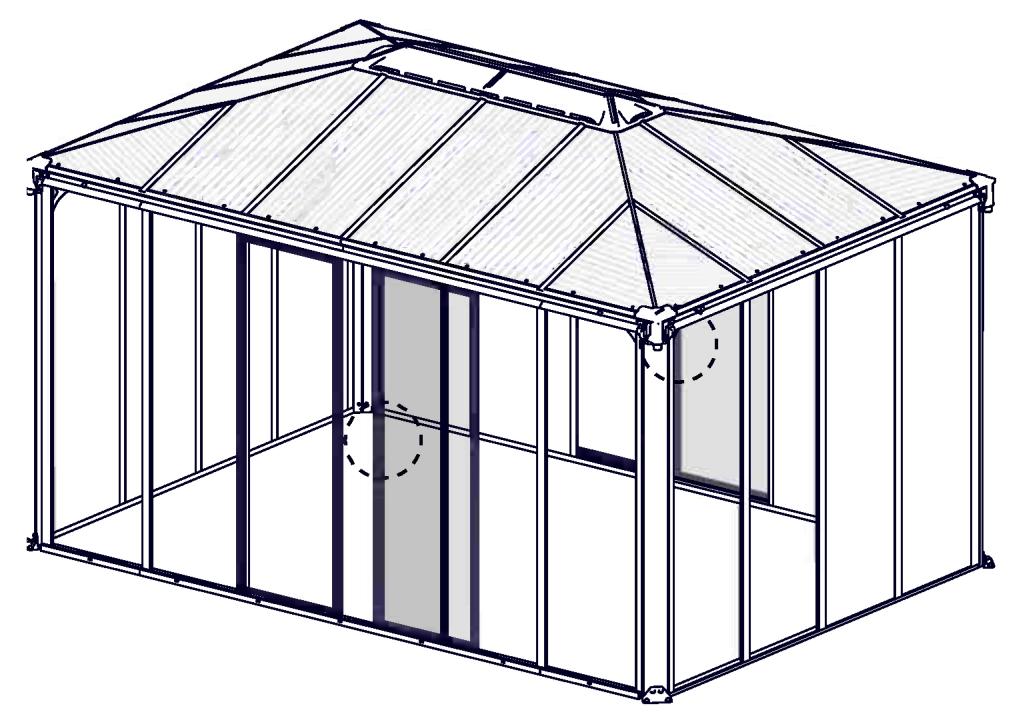
Ledro™ 4300 - Enclosed Gazebo

Snow Load
75kg/m²
15.4bs/ft²

Wind Resistance
90km/hr
56ml/hr

Light Transmission
Roof - 15%
Wall - 90%


AFTER SALE SERVICE

palramapplications.com/after-sales-service
| LOCATIONS | @ | |
| USA | customer.service@palram.com | 877-627-8476 |
| England | customer.serviceUK@palram.com | 01302-380775 |
| France | customer.serviceFR@palram.com | 0169-791-094 |
| Germany | customer.serviceDE@palram.com | 0180-522-8778 |
| International | customer.service@palram.com | +972 4-848-6816 |
www.palramapplications.com
EN
Site Preparation!
- Base or foundation must be flattened, leveled and prepped prior to installing the product!
-
The product must be built on a solid level surface in order to perform properly. We recommend using concrete or wood deck as base.
-
We recommend checking for restrictions or covenants for building this product in your area. In addition we advise you to check if you need to sumbit any forms or if any permits are required prior to building the product.
-
Clear the surface of loose empediments
-
Level the ground surface
-
See below recommended option
A Solid Base (Concrete / Wood Deck) (drawing)
- In order to allow easy access during assembly, make sure you clear the surface around the product's assembly site.
- Make sure you have at least 5 cm (2 in.) between the product's base and the edge of your foundation.
A
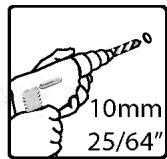
Use the screws and masonry anchors supplied with the kit.
*For frozen areas, please check the required depth needed for these holes.
PNNN NPTNNN,NNNPYPNONNN*
.
Platsforberedelse!
A Fast ground (Betong / Trädäck) (ritning)
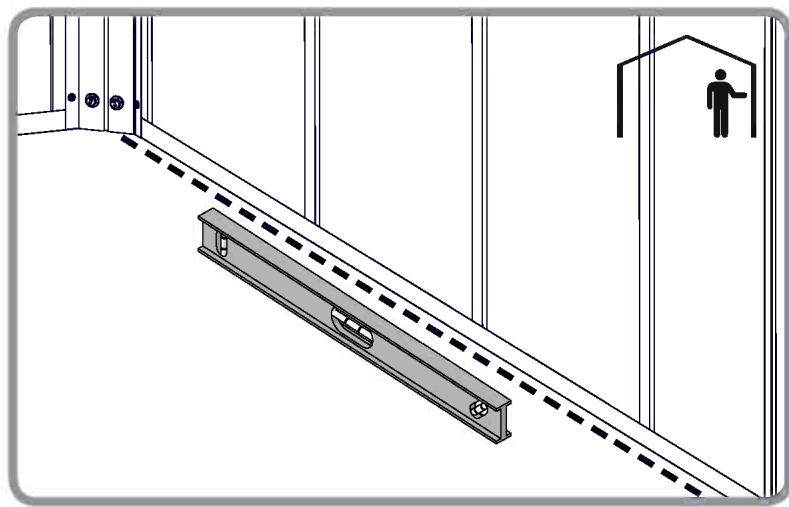
It is imperative for the base to be perfectly flat and leveled. A solid base should be prepared in advance.
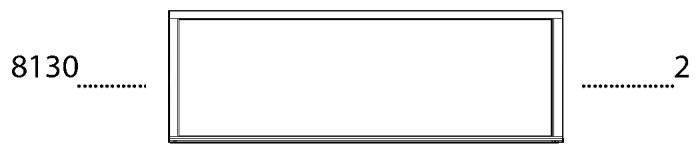
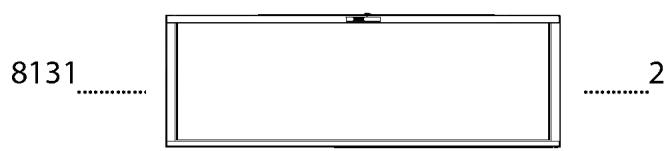
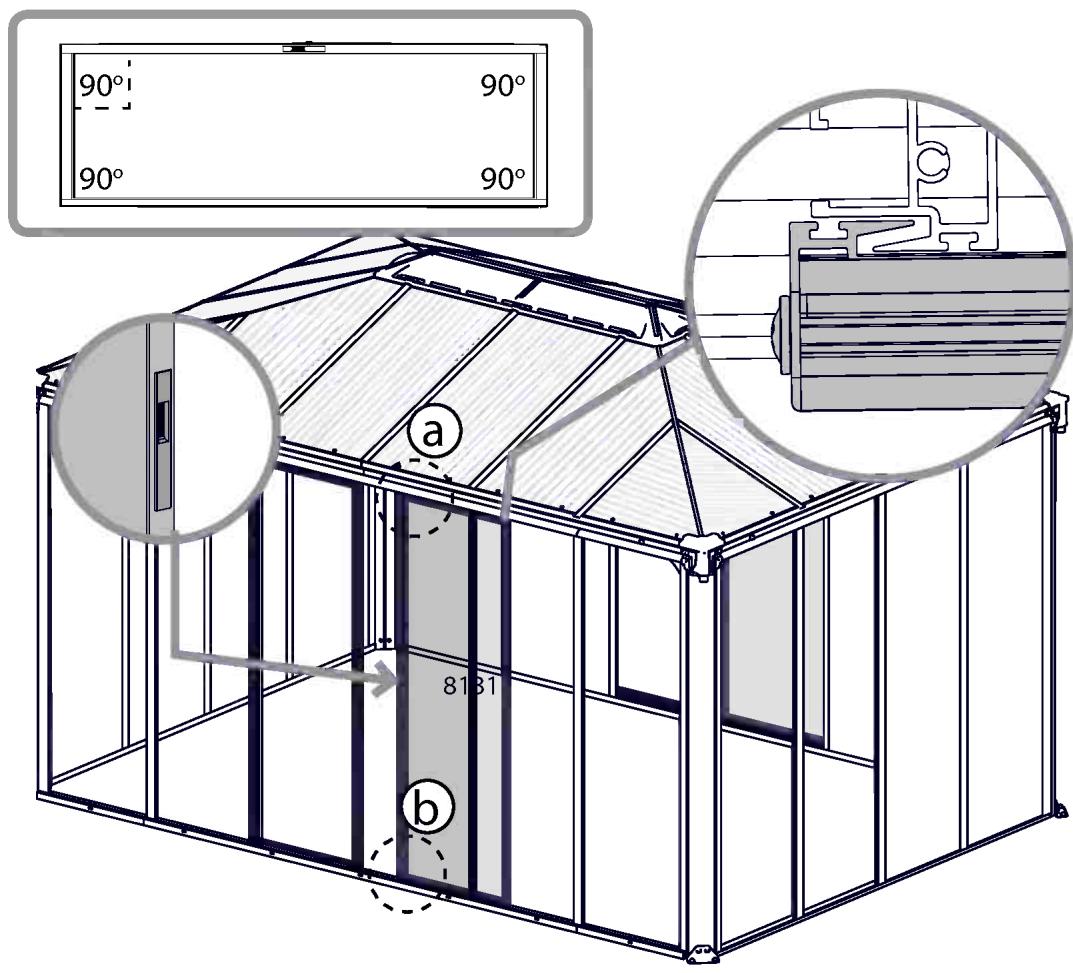
- The below measurements of the walls' perimeter do not include the gazebo's poles.
- The measurements of the walls' perimeter may vary due to direction of the doors and set walls, see below drawings of both options.

Attention!
Baxho, yTo6bl OCHOBaHne 6blIO pIoHOCTbIO pIoCKoe IN BblPOBHeHHoe. TbePdA OCHOBa DOnJkHa 6blTb POnIroTOBnEHa 3apaHee.
- Hnke daHb pa3MebpI nepmertpa cTeHb He BKliuohaOT cTo6a 6e6ekn.
Pa3MepbI IepmMeTpA CTeHbI MOyT BapbIpOBaTbCBy 3aBcIMOCTn OT HaipabJIeHn yBepn UyCTaHaBJIuBaEmbIX CTeH, cm. YcpTeKx o6oX BapnaHTOB.

Uzmanibu!
Svarigi, lai pamats butu pilnigi plakans un izlidzinats. Cietam pamatam jau ieprieks jabut sagatavotam.
Zemak dotie sienas perimetra izmerti neieklauj lapenes stabus.
- Sienu perimetra izméri var mainities atkaribā no durvju virzena un iestatāmām sienām, sk. abus iespejamos variantus zimējumos.

Pozor!
You must build the Palermo Gazebo before you attached the Ledro walls.
Before beginning please refer to the Assembly Manual in the Palermo Gazebo carton.
Please read these instructions carefully before you start to assemble this product.
Please carry out the steps in the order set out in these instructions.
Keep these instructions in a safe place for future reference.
Safety advice
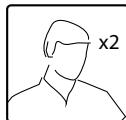
- For safety purposes we strongly recommend the product to be assembled by at least two people.
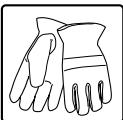
- Some parts may have sharp edges. Please be careful when handling components. Always wear gloves, eye protection, and long sleeves when assembling or performing any maintenance on your product.
- Do not attempt to assemble the product in windy or wet conditions.
- Do not attempt to assemble the product if you are tired, have taken drugs, medications or alcohol, or if you are prone to dizzy spells.
- Dispose of all plastic bags safely - keep them away from children's reach.
- Keep children away from the assembly area.
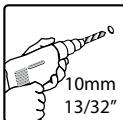
- When using a stepladder or power tools, make sure that you are following the manufacturer's safety advice.
- Do not climb or stand on the roof.
- Do not hang or lay on the profiles.
- Heavy articles should not be leaned against the poles.
- Keep roof and gutters clear of snow, dirt & leaves.
- Heavy snow load on the roof can make it unsafe to stand below or nearby.
- If color was scratched during assembly it can be fixed.
Cleaning instructions
- In order to clean the product, use a mild detergent solution and rinse with cold clean water.
- Do not use acetone, abrasive cleaners, or other special detergents to clean the panels.
- Clean the product once assembly is complete.
Before starting assembly
- Choose your site carefully before beginning assembly.
- The ground surface must be perfectly flat and leveled and have a solid base such as concrete, asphalt, deck etc.
- Sort the parts and check against the content parts list.
- Parts should be laid out close at hand. Keep all small parts (screws etc.) in a bowl so they do not get lost.
- Please consult your local authorities if any permits are required prior to constructing the product.
During Assembly

When encountering the information icon, please refer to the relevant assembly step for additional comments and assistance.

This icon indicates that the installer should be inside the product.


This icon indicates that the installer should be outside the product.

Attention
- During assembly use a soft surface below the parts to avoid scratches and damages.
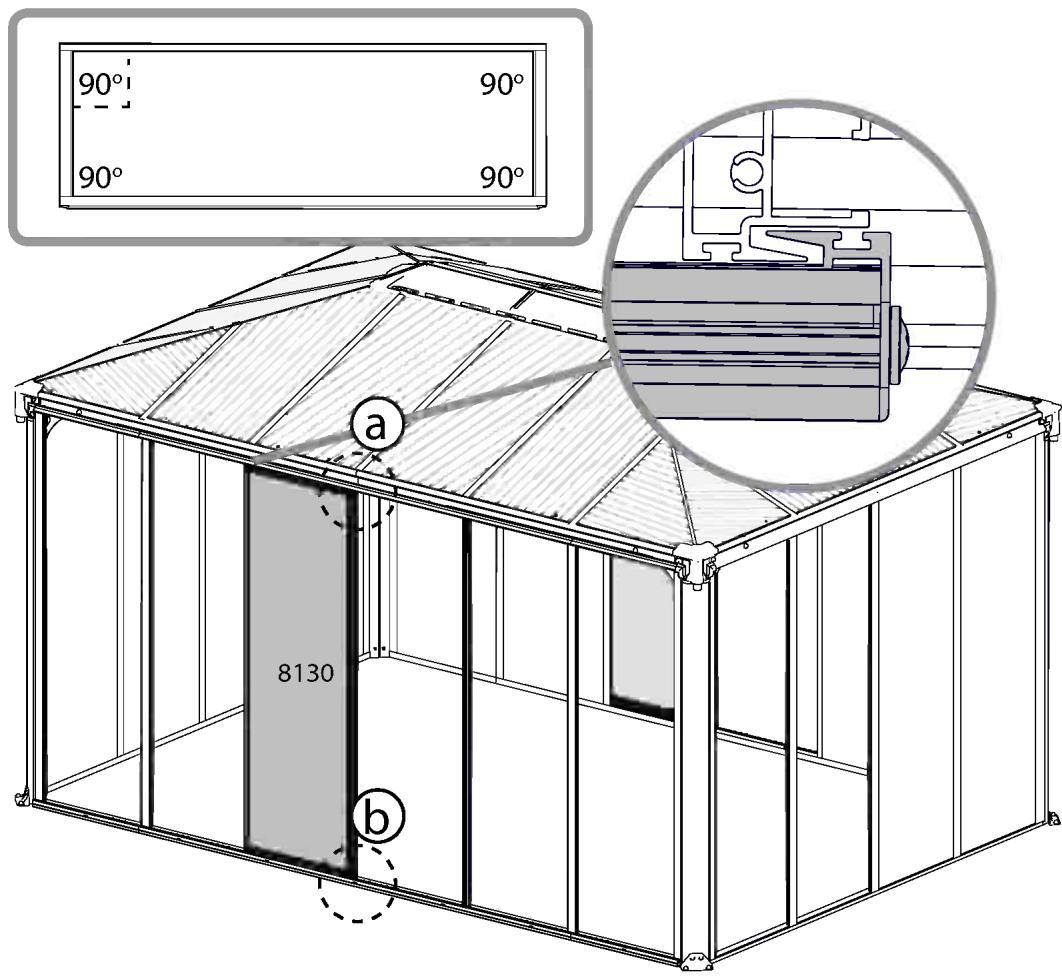
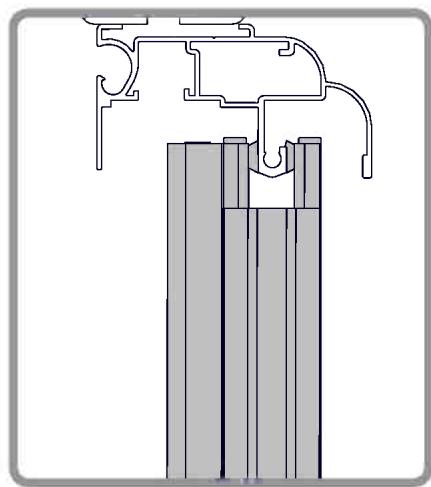
- Please make sure you install the panels with the UV protected side out (marked with "THIS SIDE OUT") and remove the sticker as panels are in place.
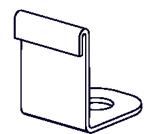
Step 1: Please assemble the gazebo as per its instructions. Do not assemble the plastic corner pieces (part #8327), the plastic clips (part #7829) and do not anchor to the base you prepared in advance!
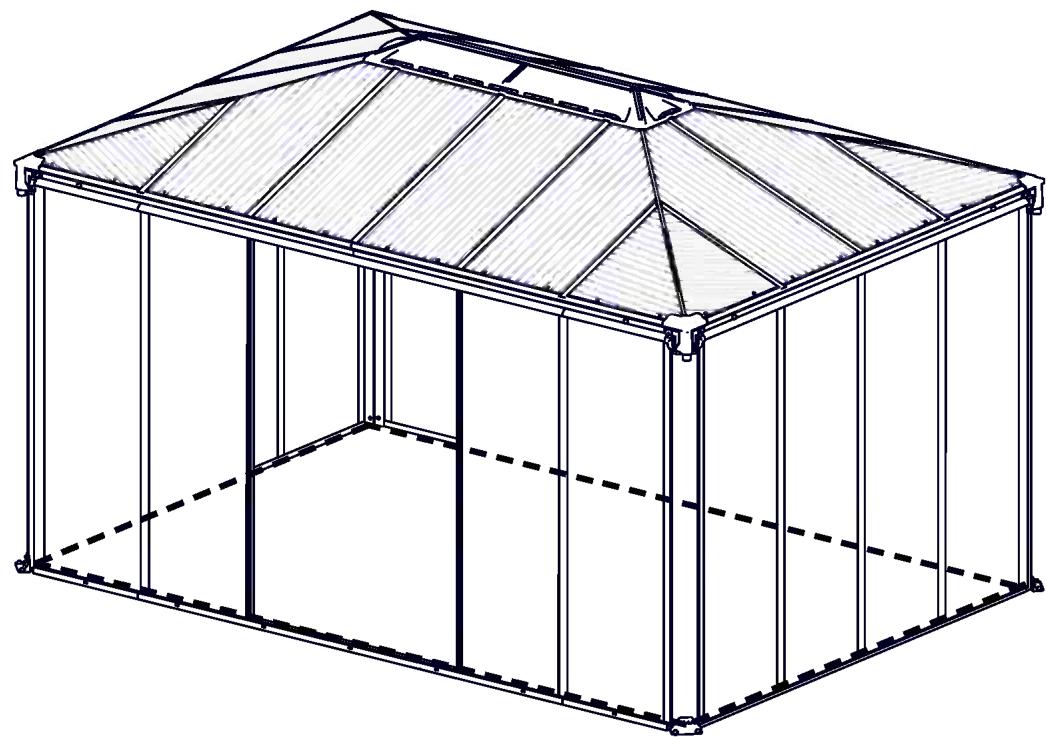
Step 2: Dismentle the internal foot-pads (part #212 or 8758).
Step 5,13: During assembly, from this step onwards, use a carton or other soft material below the parts to avoid scratches and damages.
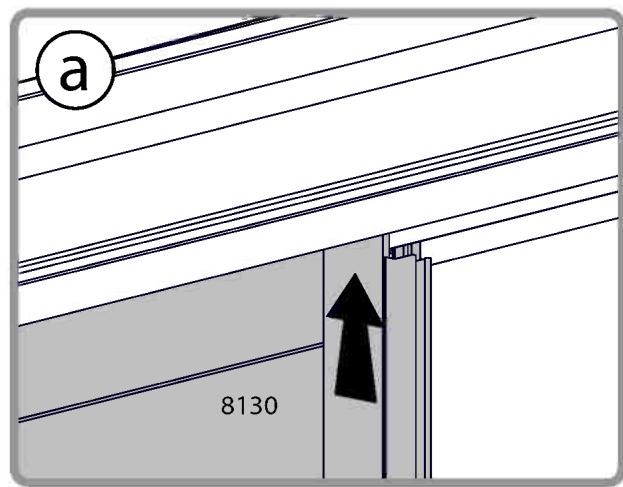
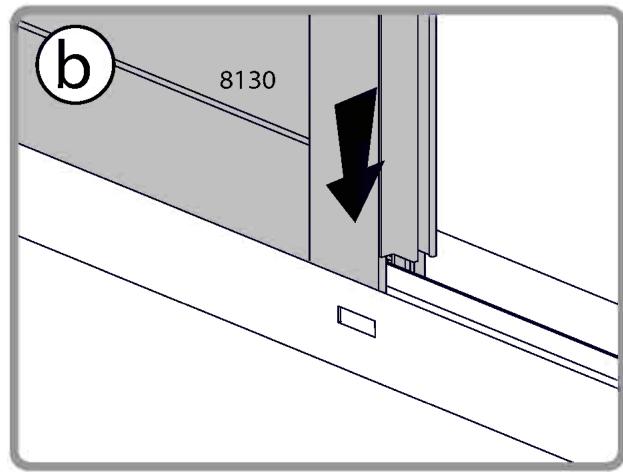
Step 8: Peel the film from the panels' edges before sliding them into the profiles, peel the entire film once the assembly is complete.
Step 12: Note - done from inside the gazebo.
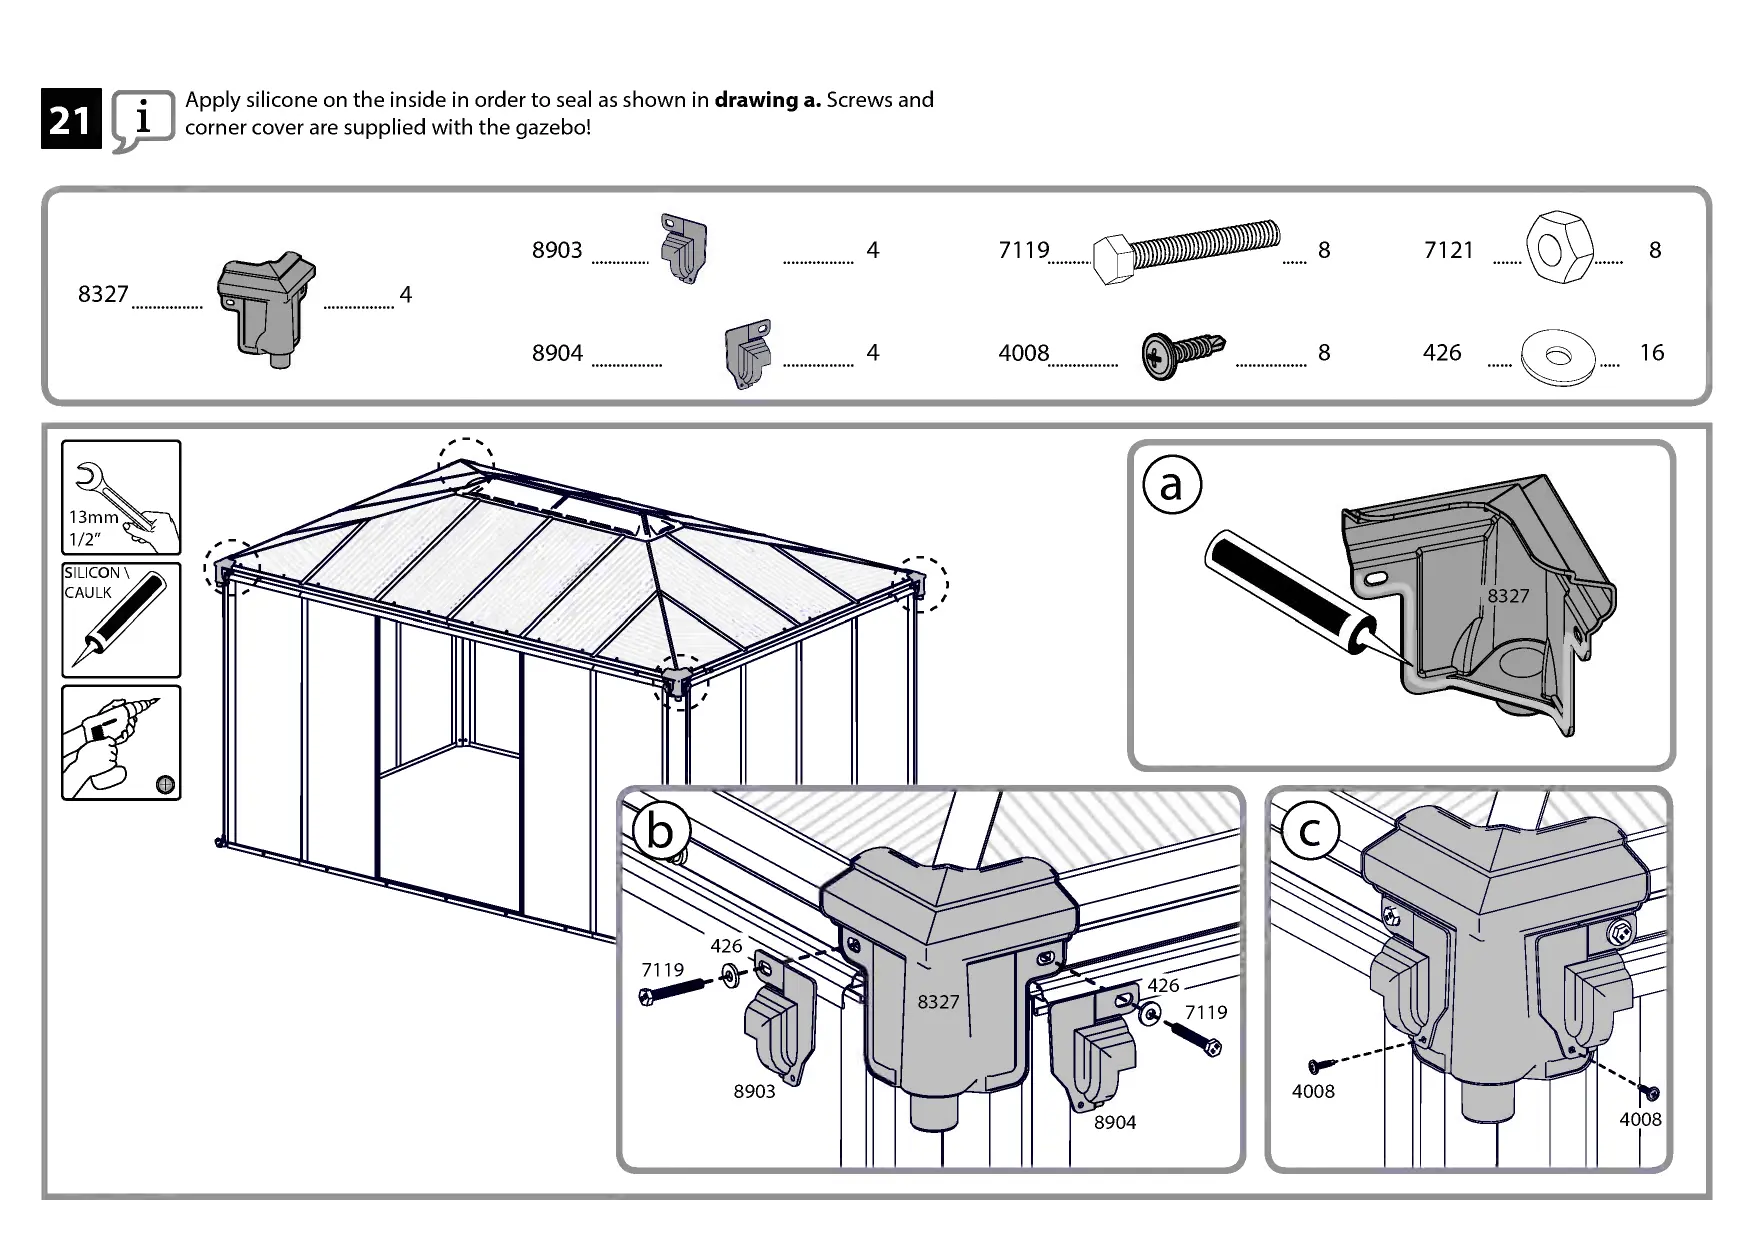
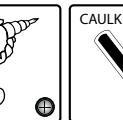
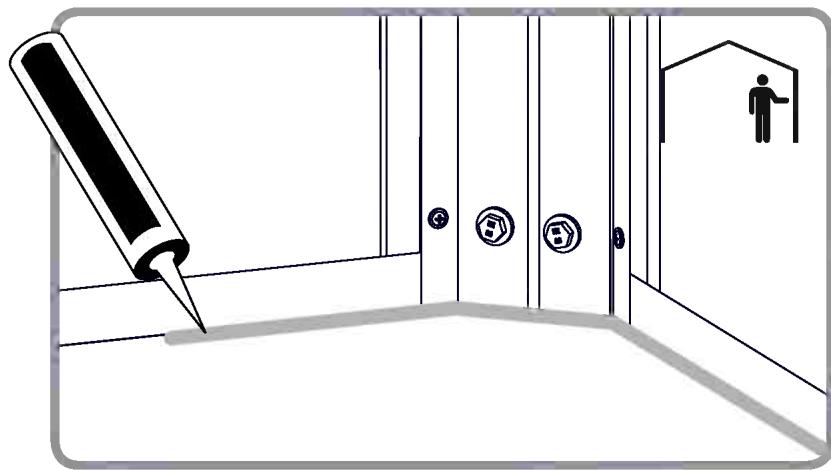
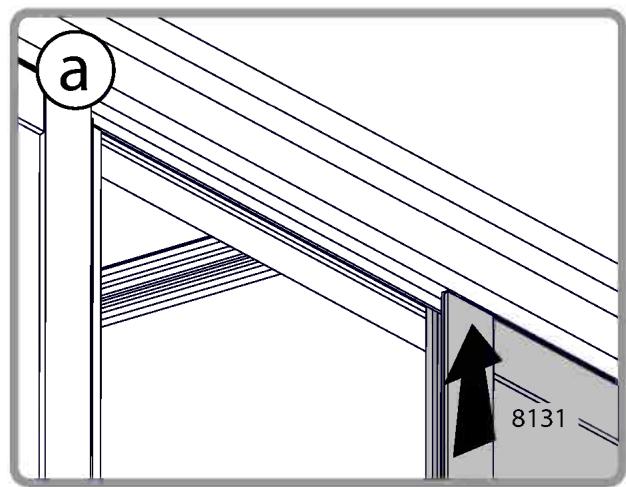
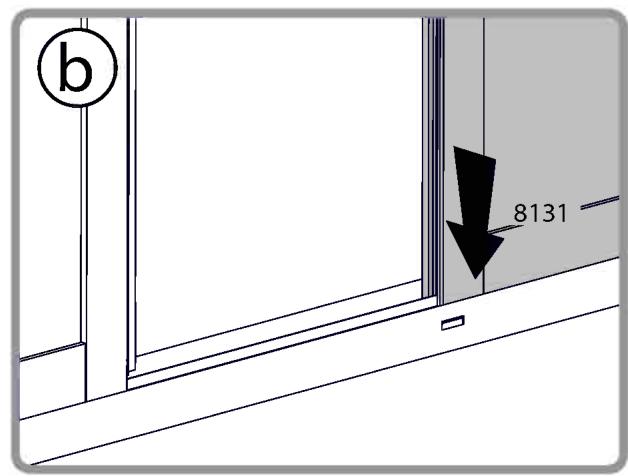
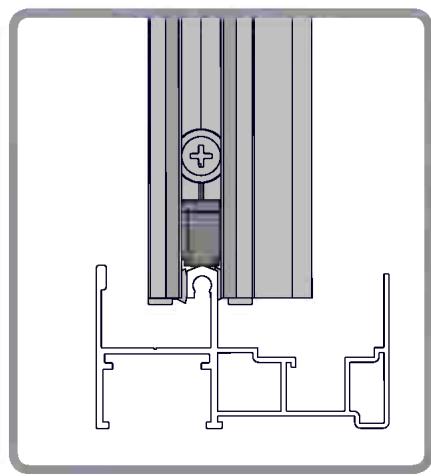
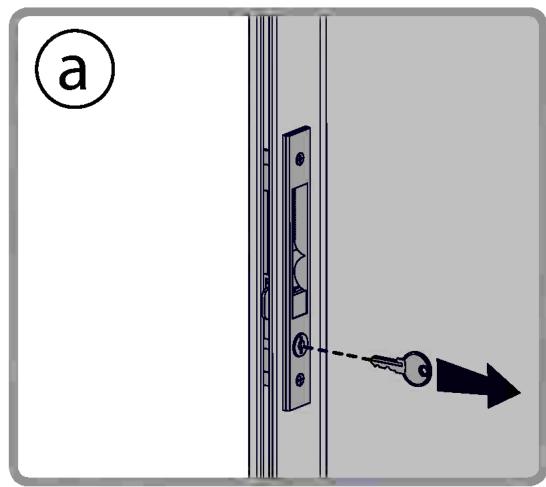
Step 21: Apply silicone on the inside in order to seal as shown in drawing a. Screws and corner cover are supplied with the gazebo!
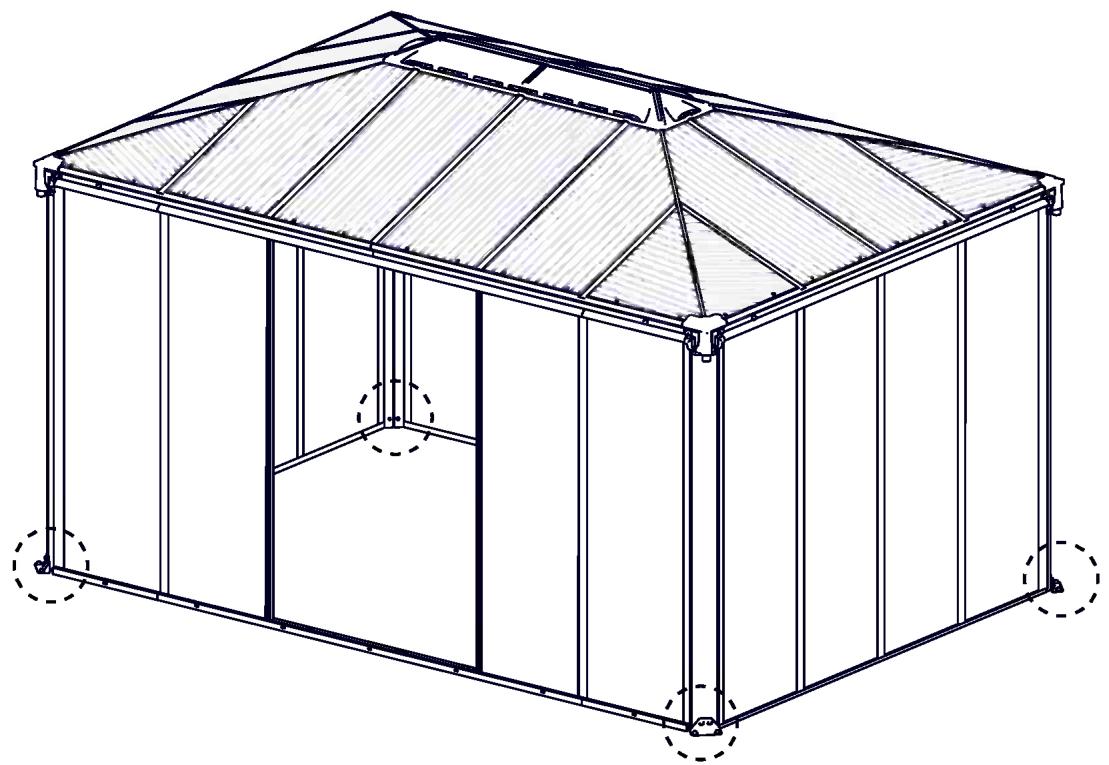
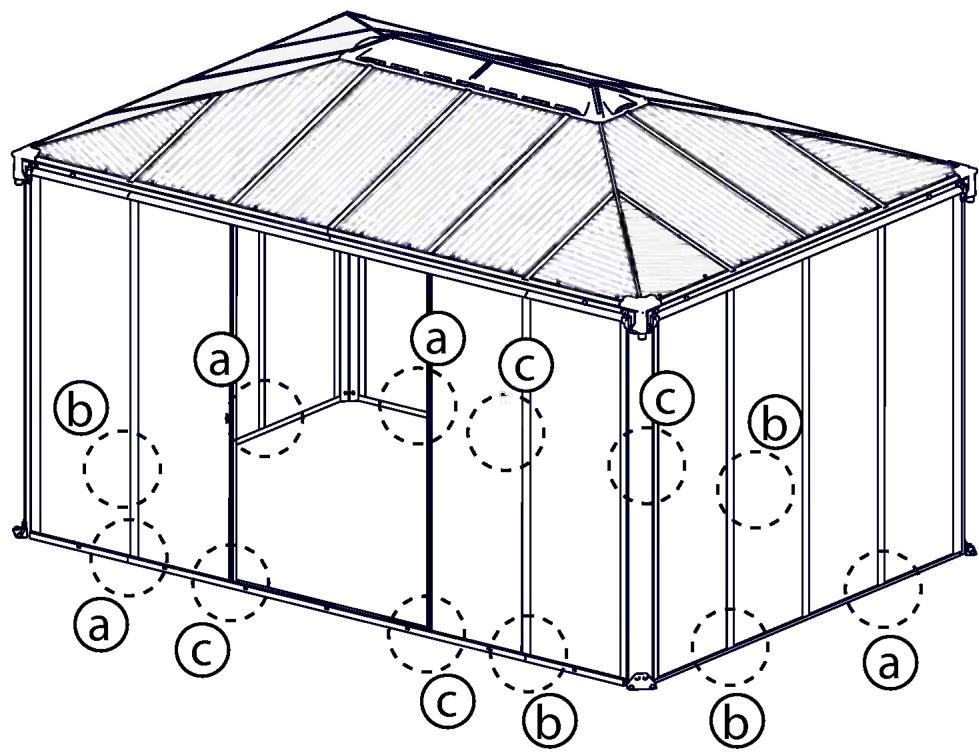
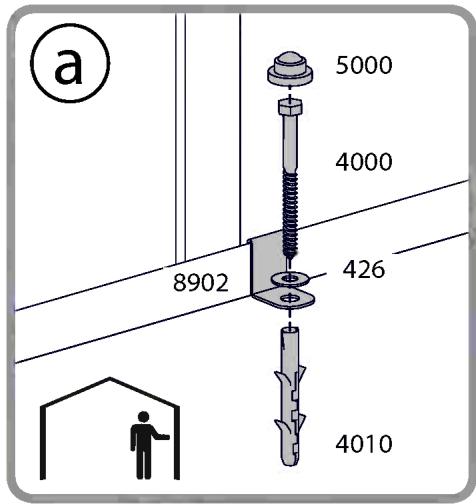
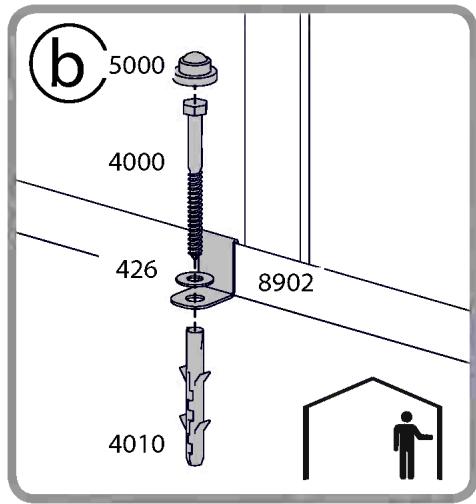
Step 22: Make sure the gazebo is leveled prior to anchoring the corner poles, use suitable screws and plugs as per your chosen base.
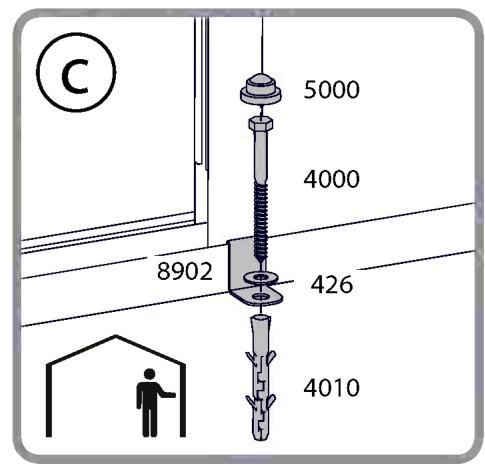
Step 24: Make sure the entire gazebo is leveled prior to anchoring it to the surface of your choosing. Use suitable screws and plugs.
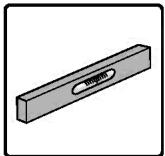
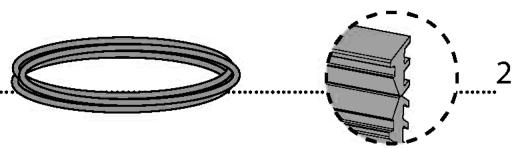
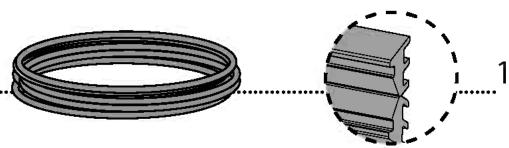
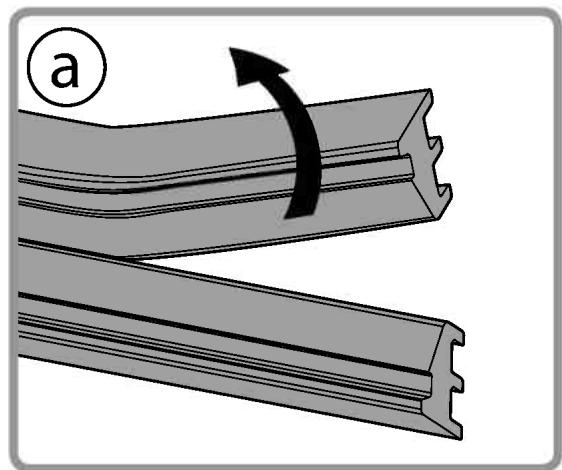
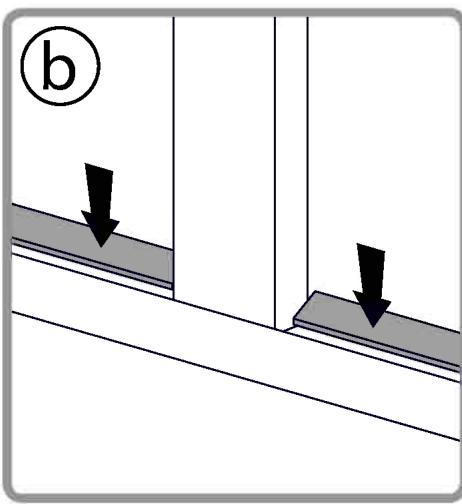
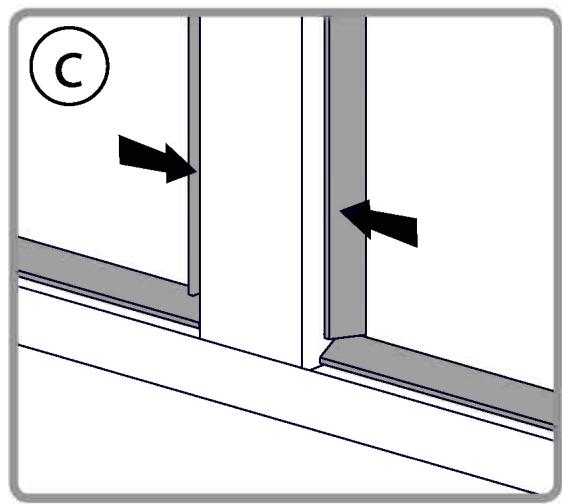
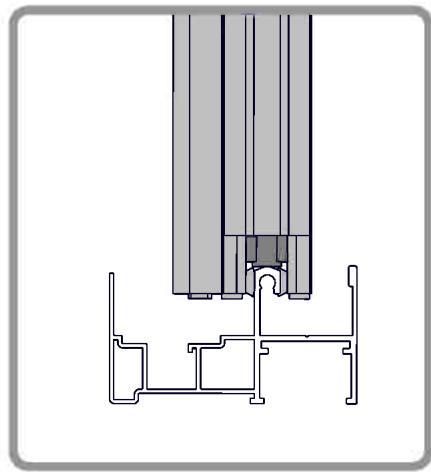
Step 25: Install the sealing strip on the outer side as shown in the diagram. Use mild soap if needed.
- Tighten all screws at the end of assembly.
Do not tighten screws and nuts (8192 & 466) until completion of assembly process. These 2 icons indicate if screws'tightening is required or not.


Note:
Anchoring this product to the ground is essential to its stability and rigidity. It is required to complete this stage in order for your warranty to be valid.

IMPORTANT
nnpnn nnnn nn nnnn nnnn nnnn nnnn
- 100
N

VIKTIGT
Du maste bygga Lusthus Palermo innan du fester Ledro-vaggarna. Innan du börjar, se monteringsanvisningen i Lusthus Palermo-kartongen.
Make sure the gazebo is leveled prior to anchoring the corner poles, use suitable screws and plugs as per your chosen base.


24

Make sure the entire gazebo is leveled prior to anchoring it to the surface of your choosing. Use suitable screws and plugs.
8902
12
4000 12
4010 12
426 12
5000 12
25

Install the sealing strip on the outer side as shown in the diagram. Use mild soap if needed.
8146
8479

+

Palram's 10 years Limited Warranty
Product Details: Garden shelters and patio covers

Palram Applications (1995) Ltd (Company number: 512106824) whose registered office is at Teradion Industrial Park, M.P. Misgav 20174, Israel ("Palram") warrants that the product will be free from defects in material or workmanship for a period of 10 years from the original date of purchase subject to the definitions, terms and conditions contained in this warranty.
1. Conditions
1.1 This warranty shall be valid only if the product is installed, cleaned, handled and maintained in accordance with Palram's written recommendations.
1.2 Without derogating from the above, damage caused by use of force, incorrect handling, inappropriate use, neglectful use or assembly or maintenance, accidents, impact from foreign objects, vandalism, pollutants, alteration, painting, connecting, gluing, sealing not in accordance with the user's manual, or damage resulting from cleaning with incompatible detergents and minor deviations of the product are not covered by this warranty.
This warranty does not apply to damage resulting from "force majeure", which includes but is not limited to, hail, storm, tornado, hurricane, blizzard, flood, fire effects.
1.4 This warranty is void if structural parts and components used are not compatible with Palram's written recommendations.
1.5 This Warranty applies only to the original purchaser of the product. It does not extend to any other purchaser or user of the product (including, but not limited to, any person who acquires the product from the original purchaser).
2. Claims and Notifications
2.1 Every warranty claim must be notified in writing to Palram within 30 days after the discovery of the defective product, enclosing the original sales receipt and this warranty.
2.2 The claimant must allow Palram to inspect the product involved and the installation site itself while the product is still in its original position and has not been removed or moved or altered in any way and/or return the product to Palram for testing.
2.3 Palram reserves the right to investigate independently the cause of any failure.
3. Compensation
3.1 If a claim under this Warranty is properly notified and approved by Palram, the purchaser, at Palram's option, may either (a) purchase a replacement product or part/s; or (b) receive refund of the original product or part/s purchase price, all in accordance with the following schedule:
| Period After Purchasing | Replacement Product or Part/s | Refund |
| From date of purchase up to end of 1styear | Free of charge | 100% |
| End of 1stYear up to end of 2ndyear | purchaser will pay 10% of the original purchase price | 90% |
| End of 2ndyear up to end of 3rdyear | purchaser will pay 20% of the original purchase price | 80% |
| End of 3rdyear up to end of 4thyear | purchaser will pay 30% of the original purchase price | 70% |
| End of 4thyear up to end of 5thyear | purchaser will pay 40% of the original purchase price | 60% |
| End of 5thyear up to end of 6thyear | purchaser will pay 50% of the original purchase price | 50% |
| End of 6thyear up to end of 7thyear | purchaser will pay 60% of the original purchase price | 40% |
| End of 7thyear up to end of 8thyear | purchaser will pay 70% of the original purchase price | 30% |
| End of 8thyear up to end of 9thyear | purchaser will pay 80% of the original purchase price | 20% |
| End of 9thyear up to end of 10thyear | purchaser will pay 90% of the original purchase price | 10% |
3.2 For avoidance of any doubt, calculation for determination regarding compensation for defective part/s, according to the schedule above, will be based on the contribution of the defective part to the original cost of the product. Palram reserves the right to provide substitutions if the product or any part of it is unavailable or obsolete.
3.3 This warranty does not cover any costs and expenses of removal and installation of the product or taxes or shipping cost or any other direct or indirect loss(es) which may result from the product failure.
4. General Conditions and Limitations
4.1 OTHER THAN HAS BEEN SPECIFICALLY STATED IN THIS WARRANTY, ALL OTHER WARRANTYES, WHETHER EXPRESS OR IMPLIED, INCLUDING ALL IMPLIED WARRANTYES OF MERCHANTABILITY OR FITNESS FOR A PRTICULAR PURPOSE ARE EXCLUDING SO FAR AS THE LAW PERMITS.
4.2 EXCEPT WHERE WE HAVE SPECIFICALLY STATED IN THIS WARRANTY, PALRAM SHALL NOT BE LIABLE FOR ANY LOSSES OR DAMAGES THE PURCHASER SUFFERS DIRECTLY, INDIRECTLY, OR AS A CONSEQUENCE OF USING, OR IN ANY OTHERWAY CONNECTED TO THE PRODUCT.
4.3 IF PALRAM IS PROHIBITED UNDER ANY APPLICABLE LAW FROM EXCLUDING THE IMPLIED WARRANTYES OF MERCHANTABILITY OR FITNESS FOR A PARTICULAR PURPOSE IN RELATION TO THE PRODUCT, THE DURATION OF ALL SUCH IMPLIED WARRANTYES IS EXPRESSLY LIMITED TO THE DURATION OF THIS WARRANTY OR, IF LONGER, THE MAXIMUM PERIOD REQUIRED BY APPLICABLE LAW.
4.4 THE PURCHASER IS SOLELY RESPONSIBLE FOR DETERMINING WHETHER THE HANDLING, STORAGE, ASSEMBLY, INSTALLATION OR USE OF THE PRODUCT IS SAFE AND APPROPRIATE IN ANY LOCATION, FOR ANY GIVEN APPLICATION OR IN ANY GIVEN CIRCUMSTANCE. PALRAM IS NOT RESPONSIBLE FOR ANY DAMAGES OR INJURY TO THE PURCHASER, ANY OTHER PERSON OR ANY PROPERTY RESULTING FROM THE IMPROPER HANDLING, STORAGE, INSTALLATION, ASSEMBLY OR USE OF THE PRODUCT OR THE FAILURE TO FOLLOW THE WRITTEN INSTRUCTIONS REGARDING THE HANDLING, STORAGE, INSTALLATION, ASSEMBLY AND USE OF THE PRODUCT.
4.5 UNLESS OTHERWISE EXPRESSLY INDICATED BY PALRAM, THE PRODUCT IS INTENDED FOR NORMAL RESIDENTIAL AND COMMERCIAL USE ONLY. PALRAM IS NOT RESPONSIBLE FOR ANY LOSS, DAMAGE, COST OR EXPENSE RESULTING FROM ANY USE OF THE PRODUCT FOR ANY PURPOSE THAT IS NOT RECOMMENDED BY THE WRITTEN INSTRUCTIONS OR THAT IS NOT PERMITTED BY ANY APPLICABLE LEGISLATION OR OTHER CODES IN EFFECT IN THE LOCATION WHERE THE PURCHASER WILL USE THE PRODUCT.
4.6 PLEASE NOTE: ANCHORING THIS PRODUCT TO THE GROUND IS ESSENTIAL TO ITS STABILITY AND RIGIDITY. IT IS REQUIRED TO COMPLETE THIS STAGE IN ORDER FOR YOUR WARRANTY TO BE VALID.
N NNNN NNNNNNNNNNNNNNNNNNN
nnn nn nnnnnnnnnnnnnnnnnnnnnnnnnnnnnnnnnnnnnnnnnnnnnnnnnnnnnnnnnnnnnnnnnnnnnnnnnnnnnnnnnnnnnnnnnnnnnnnnnnnnnnnnn
y
.yn by
4.4
NNN,nnn nn nnnn nn nnnn nn nnnn nn nnnn nn nnnn nn nnnn nn nnnn nn nnnn nn nnnn nn nnnn nn nnnn nn nnnn nn nnnn nn nnnn nn nnnn nn nnnn nn nnnn nn nnnn nn nnnn nn nnnn nn nnnn nn nnnn nn nnnn nn nnnn nn nnnn nn
mnnnnn nn nnnn nn nnnn nn nnnn nn nnnn nn nnnn nn nnnn nn nnnn nn nnnn nn nnnn nn nnnn nn nnnn nn nnnn nn nnnn nn nnnn nn nnnn nn nnnn nn nnnn nn nnnn nn nnnn nn nnnn nn nnnn nn nnnn nn nnnn nn nnnn nn nnnn nn
nnnn
, 45
n 1 n n n n n n n n n n n n n n n n n n n n n n n n n n n n n n n n n n n n n n n
n nn nnnnnnnnnnnnnnnnnnnnnnnnnnnnnnnnnnnnnnnnnnnnnnnnnnnnnnnnnnnnnnnnnnnnnnnnnnnnnnnnnnnnnnnnnnnnnnnnnnnnnnnnnnn
4.6