
Arcade Legends Ultimate 300 JEUX - Arcade Machine ATGAMES - Free user manual and instructions
Find the device manual for free Arcade Legends Ultimate 300 JEUX ATGAMES in PDF.
User questions about Arcade Legends Ultimate 300 JEUX ATGAMES
0 question about this device. Answer the ones you know or ask your own.
Ask a new question about this device
Download the instructions for your Arcade Machine in PDF format for free! Find your manual Arcade Legends Ultimate 300 JEUX - ATGAMES and take your electronic device back in hand. On this page are published all the documents necessary for the use of your device. Arcade Legends Ultimate 300 JEUX by ATGAMES.
USER MANUAL Arcade Legends Ultimate 300 JEUX ATGAMES
More Games to Play
Discounts and Special Offers for Members
Online Multiplayer and Voice Chat
Global Leaderboards and Leagues Events

Sign Up at www.arcadenet.net
INDEX
ASSEMBLYGUIDE P2
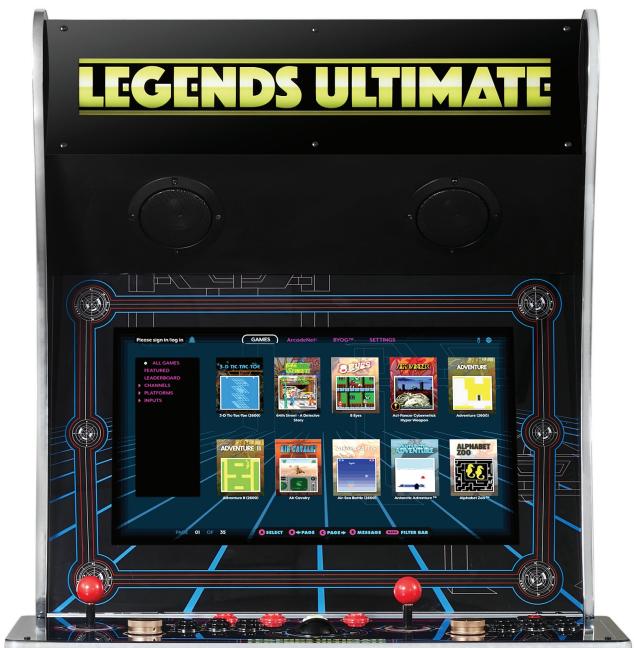
LEGENDS ULTIMATE FEATURES P 11
QUICK START GUIDE P 12
HOW TO UPDATE FIRMWARE P 12
HOW TO SIGN IN WITH YOUR ARCADENET® ACCOUNT P 13
HOW TO CONNECT ATGAMES BLAST! DONGLES AND CONSOLES P 14 TO LEGENDS ULTIMATE
WHEN TO SAFELY POWER OFF ARCADE P 15
WARRANTY INFO P 15
FEATURED GAMES P 16
SAFETY NOTICE, FCC STATEMENT P 17
- TOOLS NEEDED (NOT INCLUDED)
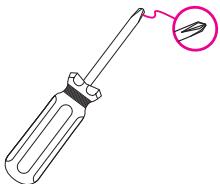
Phillips head screwdriver
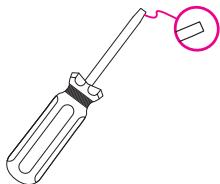
Straight head screwdriver
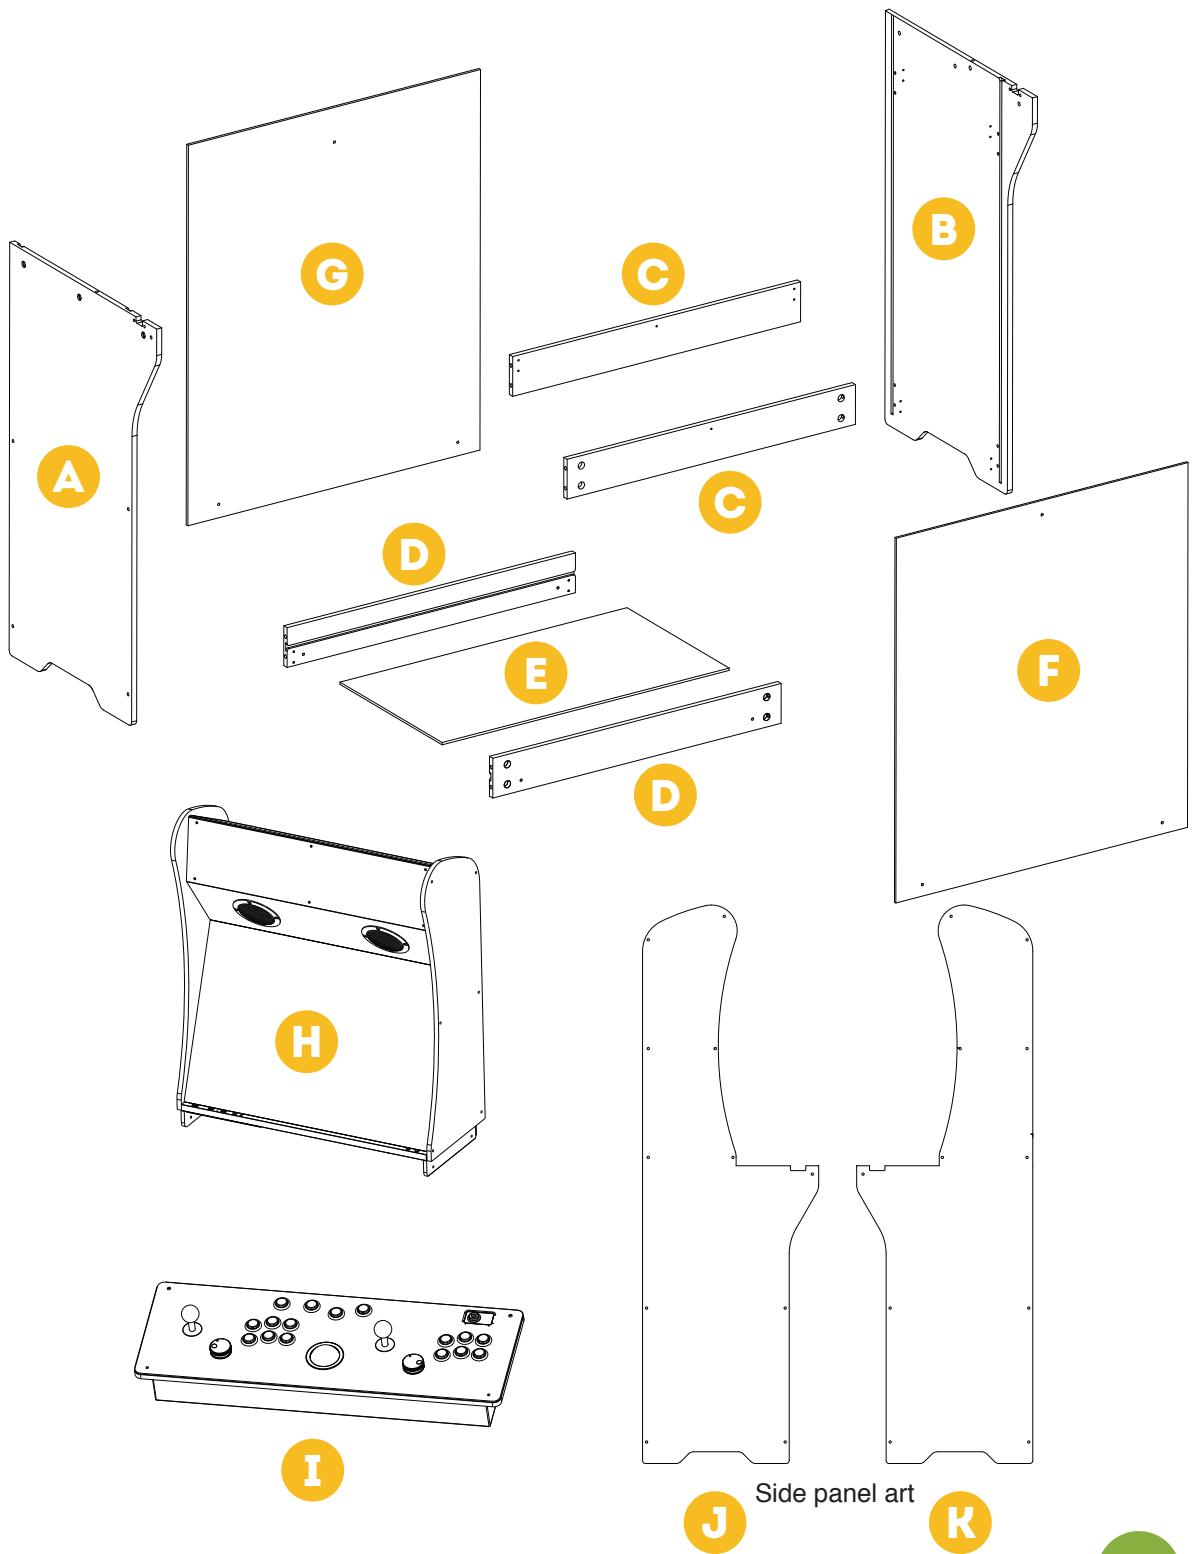
PARTS
SCREWS


X16


X6
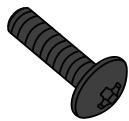

X2
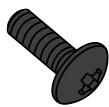


X22
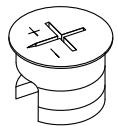
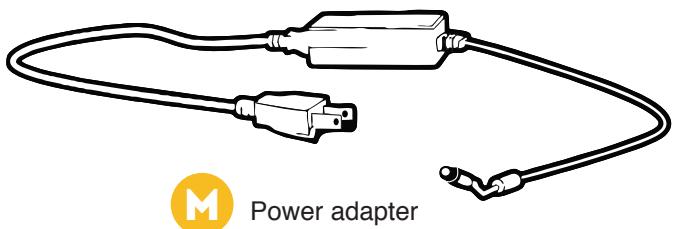
CORD
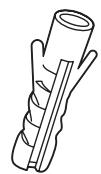
ANTI-TIPPING KIT


Cable tie
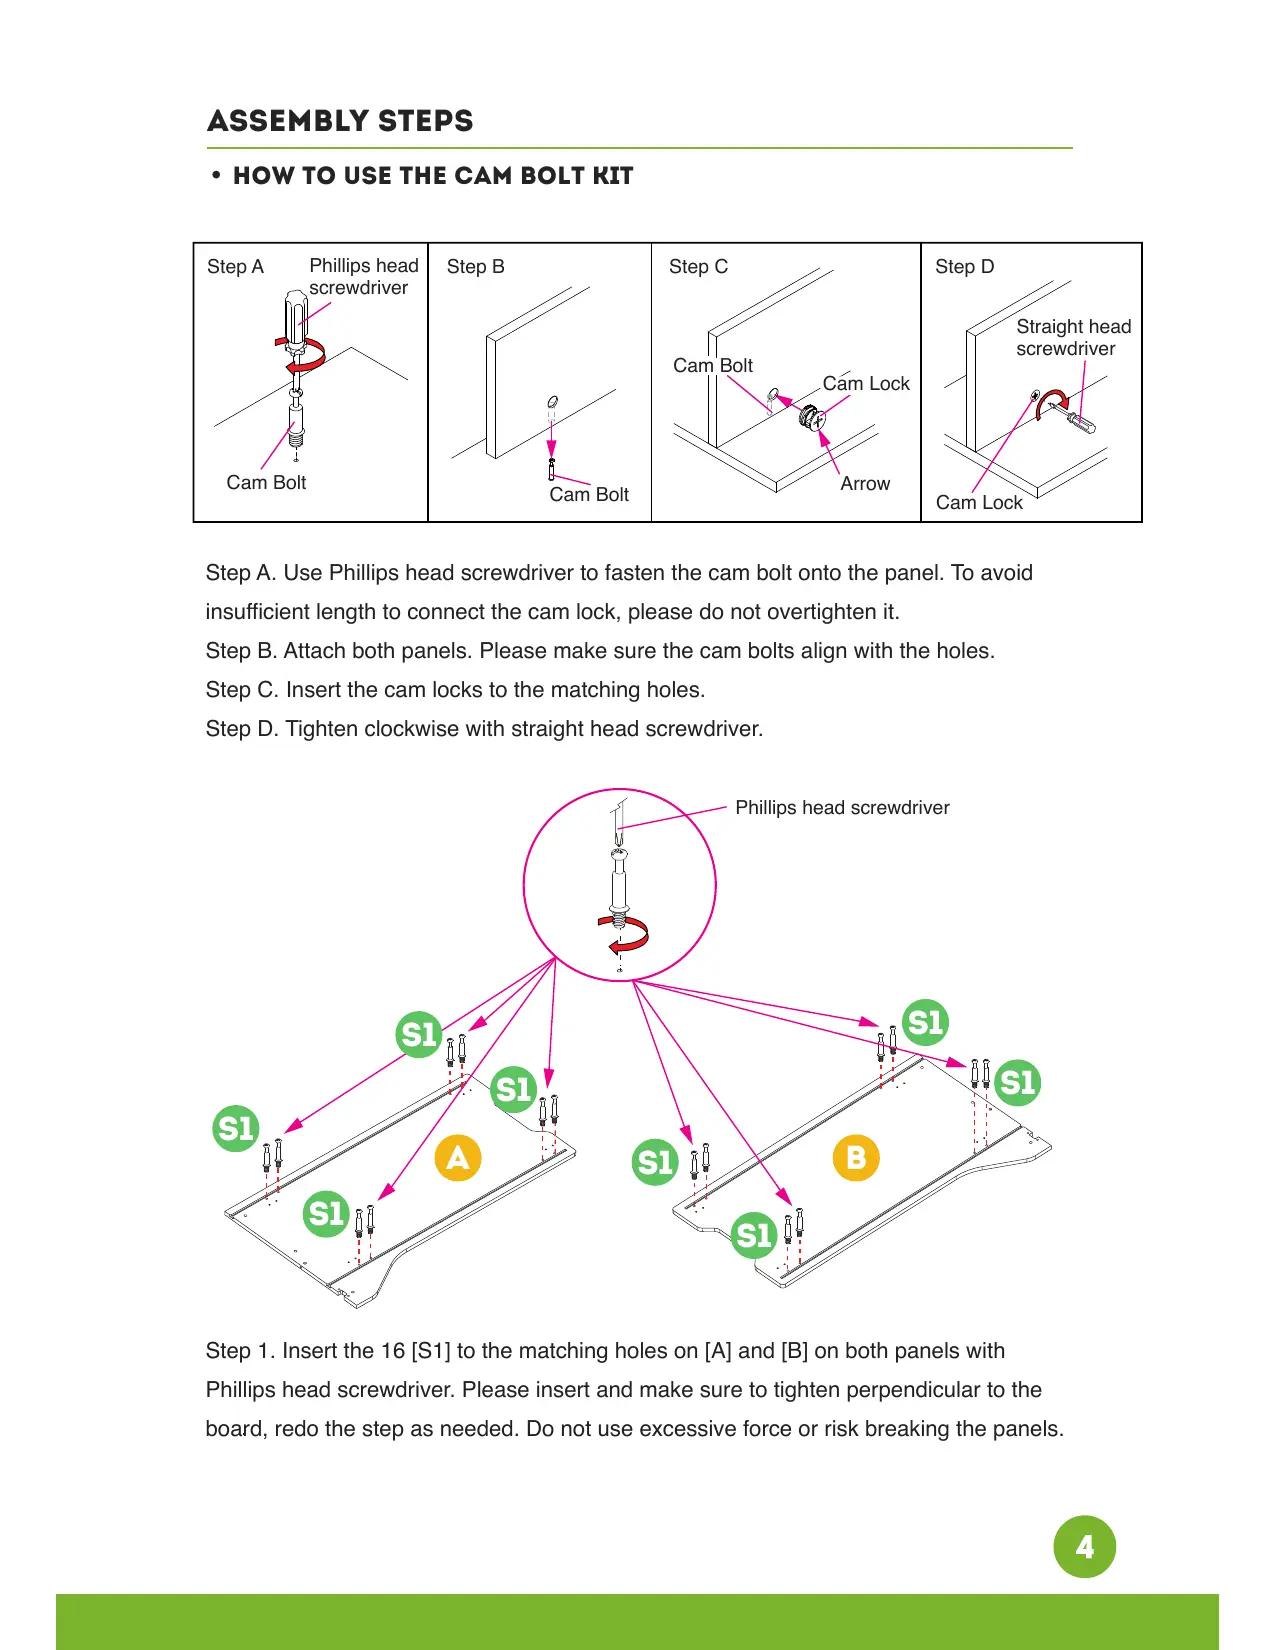
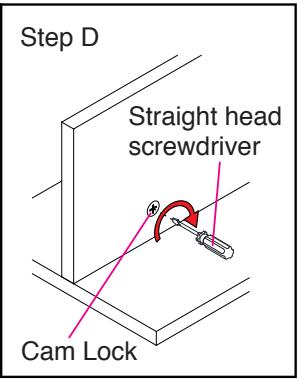
HOW TO USE THE CAM BOLT KIT
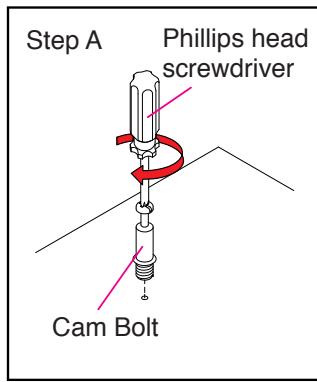

Step A. Use Phillips head screwdriver to fasten the cam bolt onto the panel. To avoid insufficient length to connect the cam lock, please do not overtighten it.
Step B. Attach both panels. Please make sure the cam bolts align with the holes.
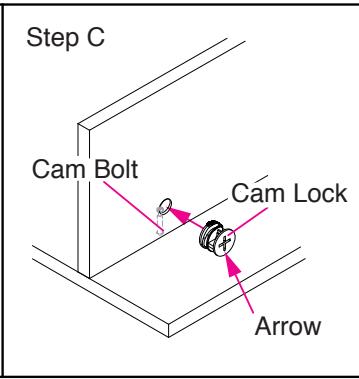
Step C. Insert the cam locks to the matching holes.
Step D. Tighten clockwise with straight head screwdriver.
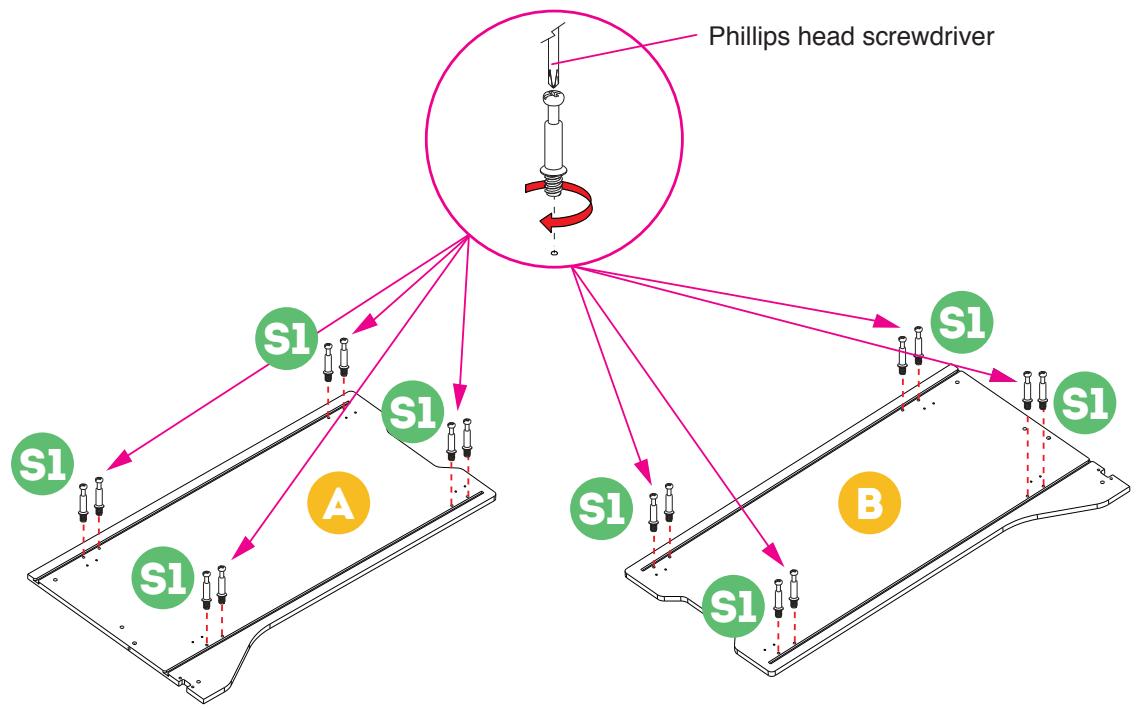
Step 1. Insert the 16 [S1] to the matching holes on [A] and [B] on both panels with Phillips head screwdriver. Please insert and make sure to tighten perpendicular to the board, redo the step as needed. Do not use excessive force or risk breaking the panels.
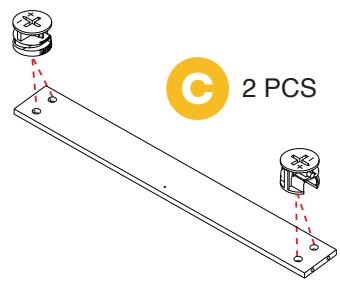
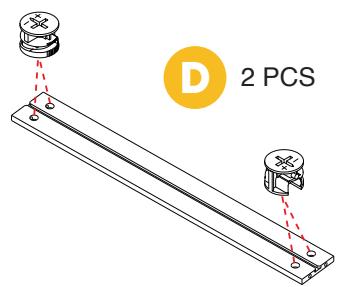
Step 2. Insert 16 [S2] to the matching holes on the pairs of [C] and [D]. Please note the side with the slotted faces outwards.

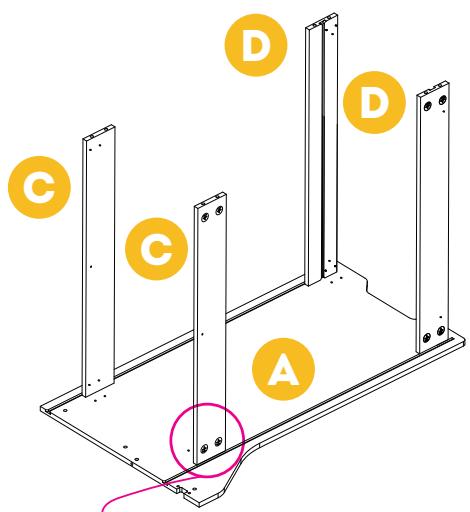

Step 3. Lay [A] aside and take out a piece of [C]. Insert [C] into [A]. Please note the sides with holes face outwards. Use straight head screwdriver to rotate [S2] with mark "+" to tighten. Repeat process for the rest of [C] and [D].
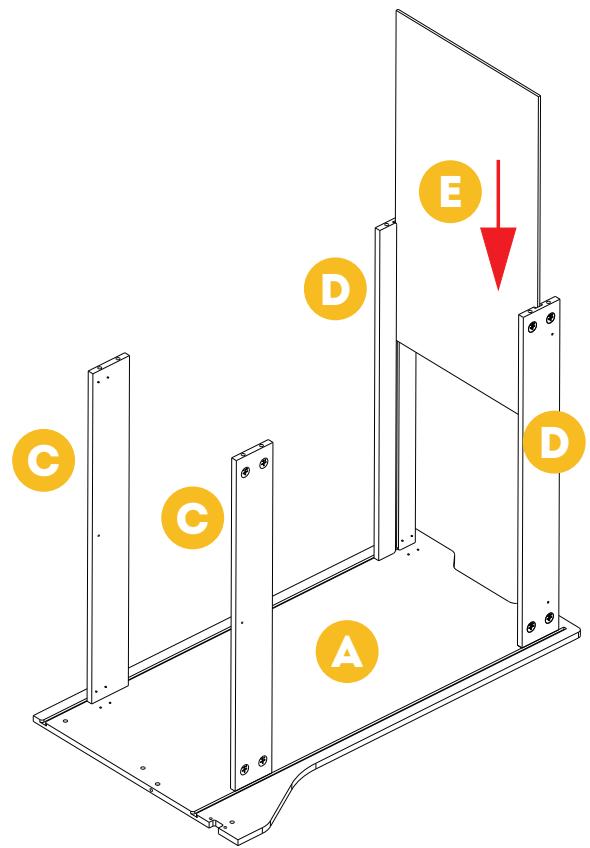
Step 4. Slide [E] into the tracks of the pair of [D].
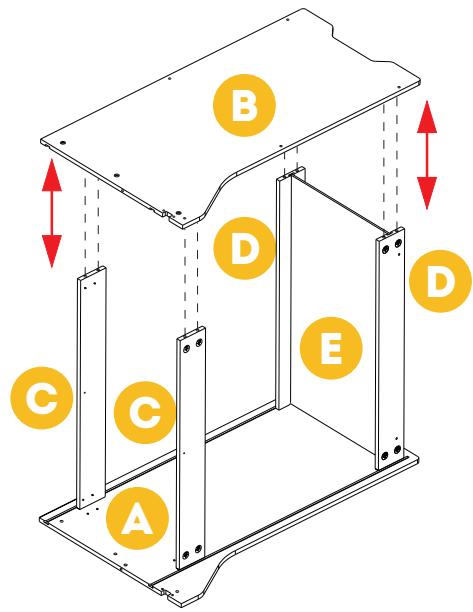
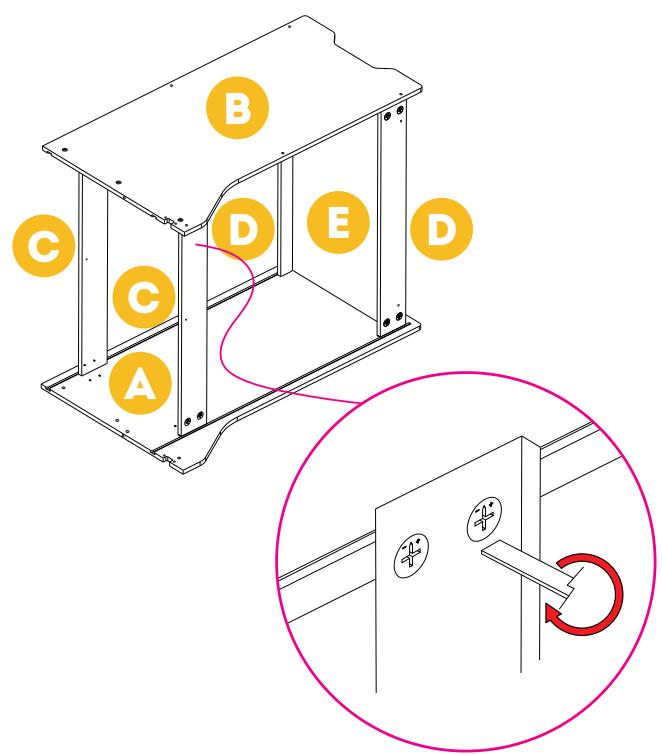
Step 5. Insert [B] to the matching holes on [C] and [D]. Use straight head screwdriver to rotate the 8 [S2] with mark "+" to tighten.
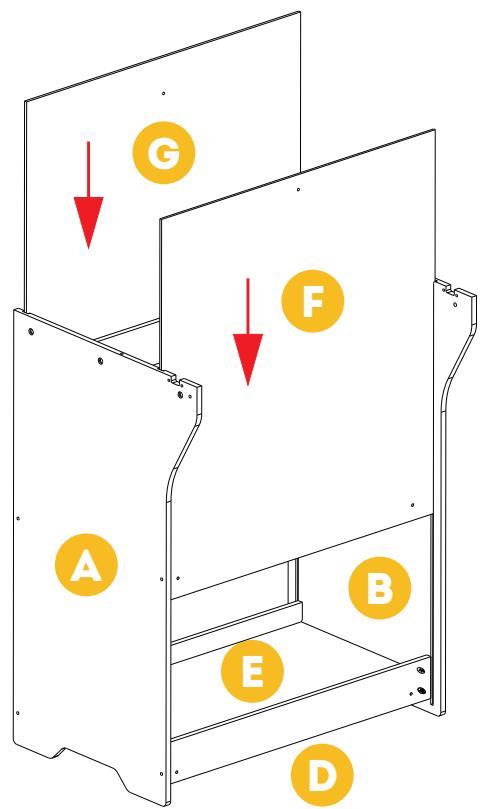
Step 6. Slide [G] and [F] into the tracks of [A] and [B].
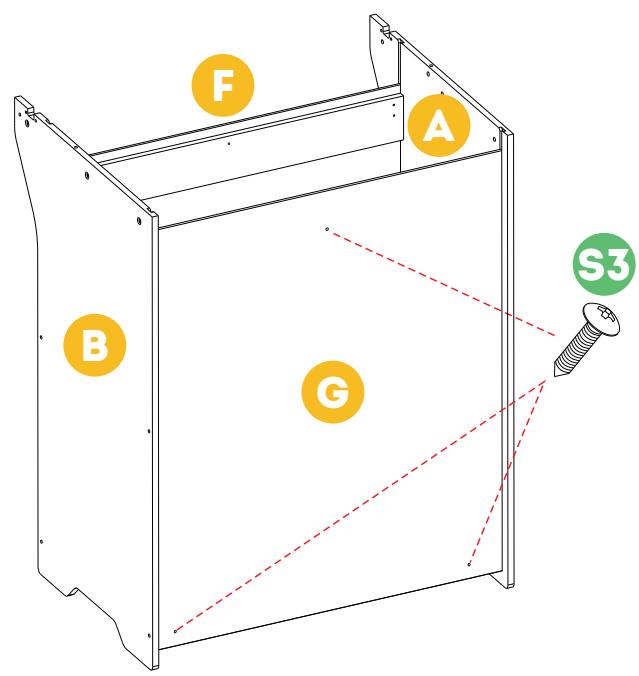
Step 7. Insert [S3] to the matching holes on [G] and [F] with Phillips head screwdriver.
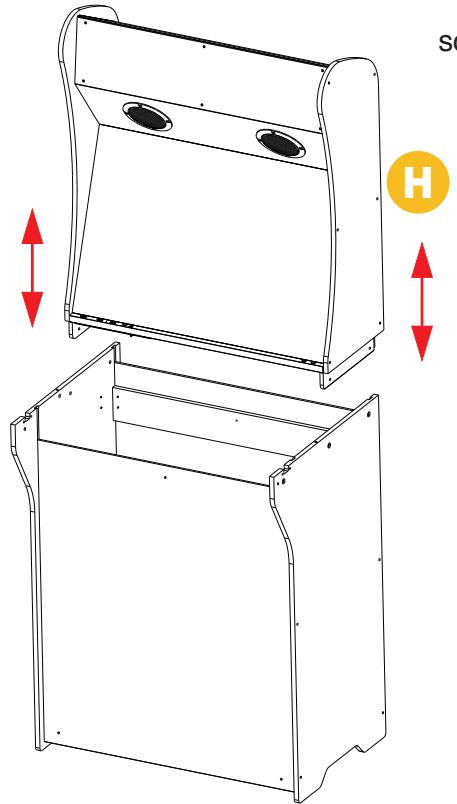
Step 8. Attach bar top [H] to the bottom part of the cabinet.
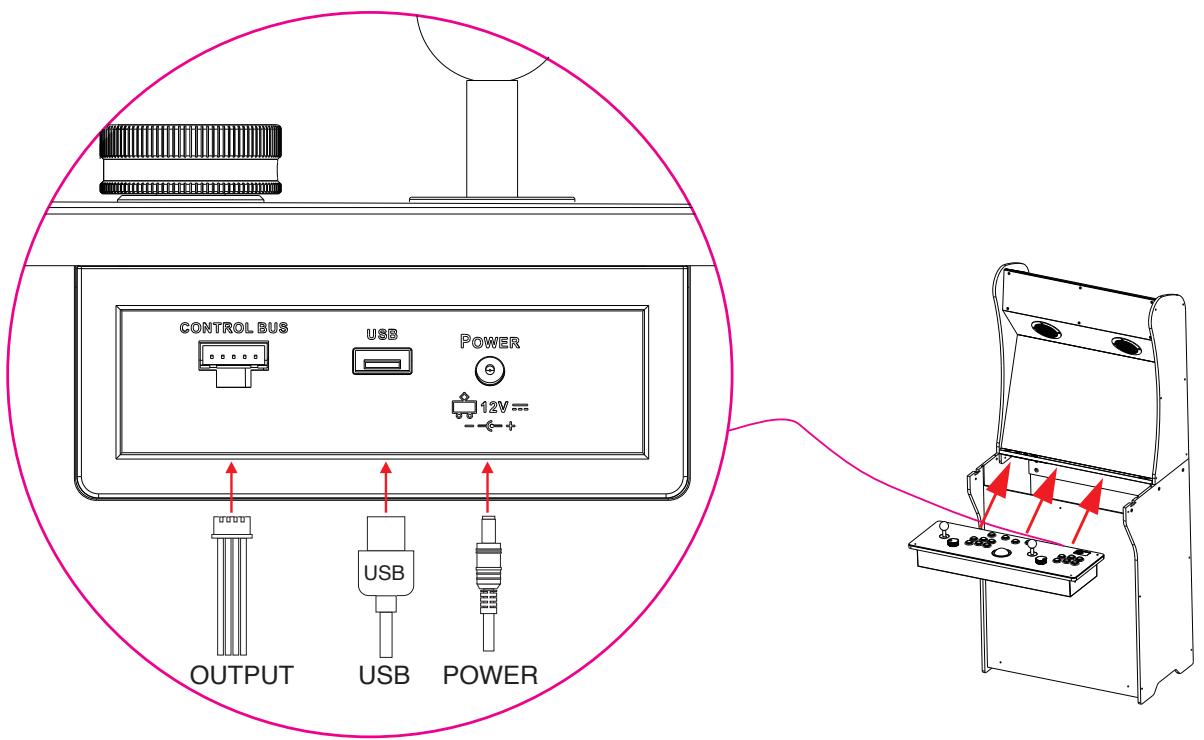
Step 9. Connect the cables to the matching slots on the control panel [I]. Please make sure the slots are aligned. Insert [I] to the cabinet.
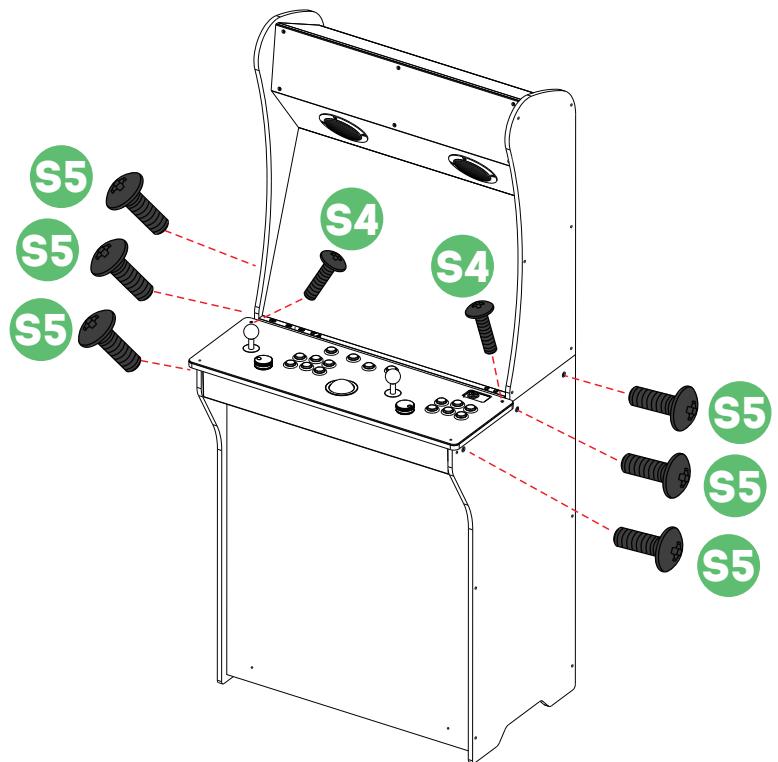
Step 10. Insert a pair of [S4] to the matching holes on [I], and then insert [S5] to 6 matching holes on the sides of the cabinet and tighten.
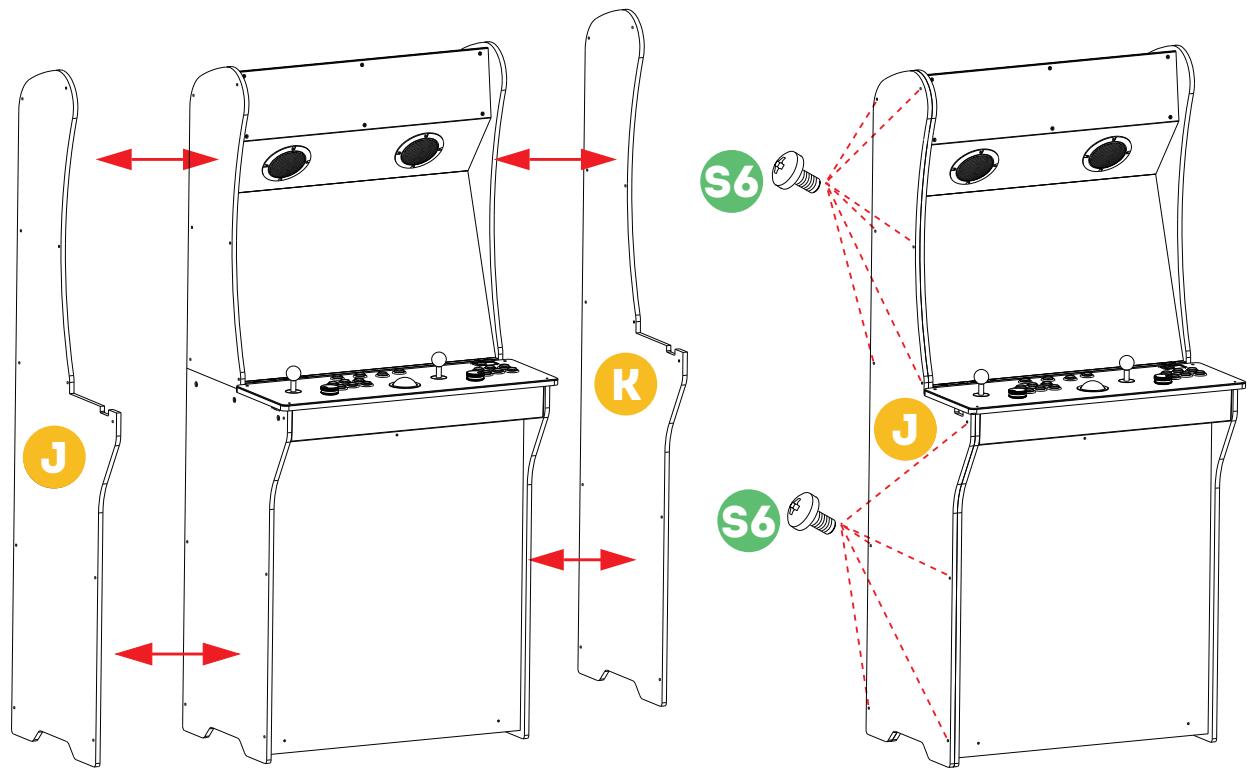
Step 11. Insert [S6] to 22 matching holes on [J] and [K] and tighten.
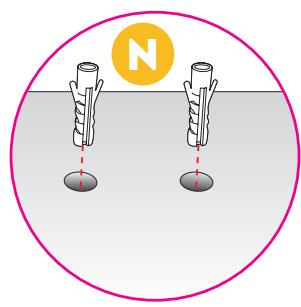
Step 13. Drill holes against the wall and insert plastic anchors [N] into the holes firmly.
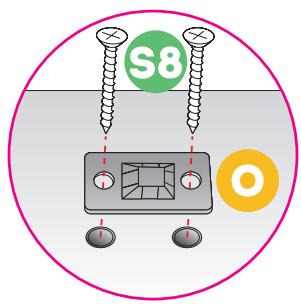
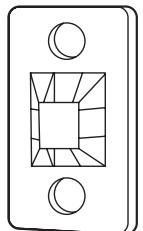
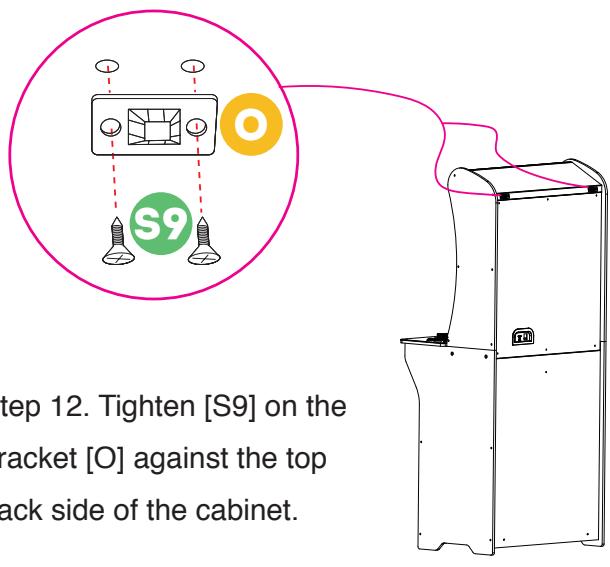
Step 14. Tighten [S8] on the bracket [O] against the wall.

- P1 JOYSTICK
- P2 JOYSTICK
- P1 SPINNER
- P2 SPINNER
-
TRACKBALL
-
RETURN
- P1 START
- HOME/MENU
- P2 START
-
POWER
-
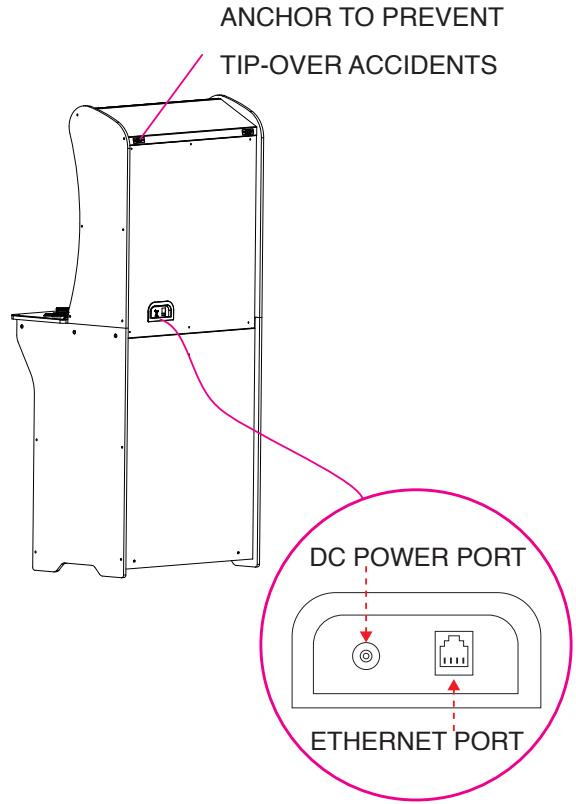
HDMI PORT
- USB PORT
- RESET BUTTON
- USB PORT
- CHANNEL BUTTON
- VOLUME ADJUSTER

-FRONT
REAR
QUICK START GUIDE
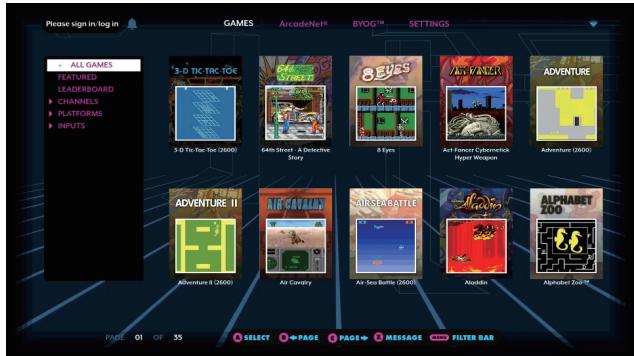
Note: All screenshots shown are for illustration purposes only. Actual screens may vary.
- Plug in AC adapter and press the Power button to turn on.
- Use P1 joystick to select and play 300 pre-loaded games. (Note: Internet connection is not required. The games can be played offline.)
-
Connect internet via Ethernet (Ethernet cable is not included) or Wi-Fi to play more games on ArcadeNet®.
-
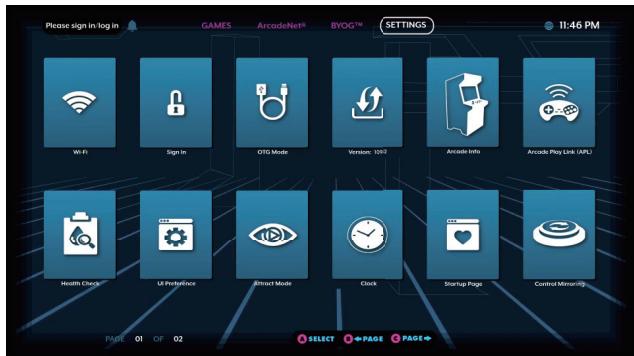
To connect through Wi-Fi:
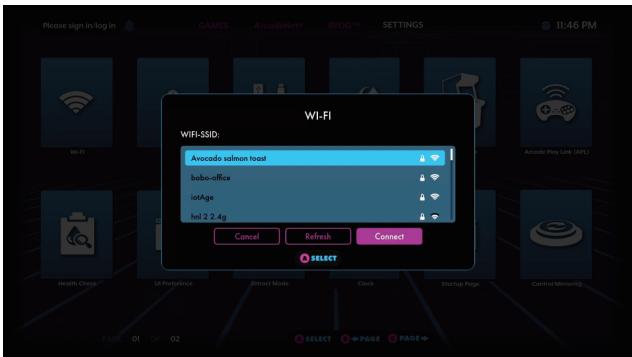
4-1. Select [Wi-Fi] under the [ SETTINGS] page.
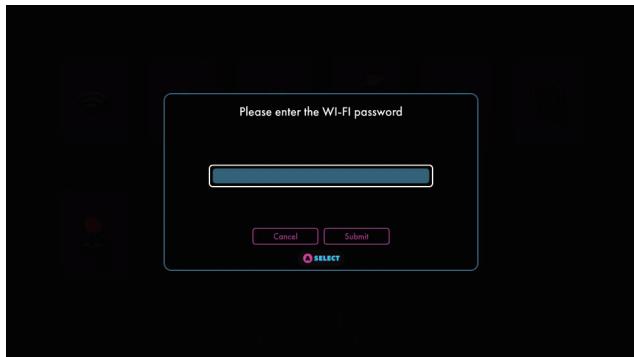
4-2. Select the Wi-Fi SSID you would like to connect to, and select [Connect]. If prompted, enter the Wi-Fi password using the on-screen keyboard and select [Submit] when done.
HOW TO UPDATE FIRMWARE
- Power on the arcade.
- Connect internet via Ethernet (Ethernet cable is not included) or Wi-Fi.
- Go to [ SETTINGS] and select [Version].
- If there is a newer version, follow the instruction and start download the latest firmware. Make sure the internet connection is stable during this process.
- Once the firmware is downloaded successfully, select [Upgrade] and the device will reboot automatically to activate the new firmware version.
Note: If you encounter any issues on firmware update, please refer to: https://www.atgames.net/arcades/release-notes/ or contact support@atgames.net
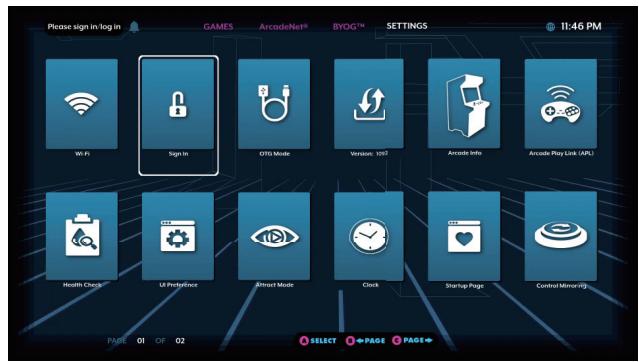
HOW TO SIGN IN WITH YOUR ARCADENET® ACCOUNT
- Go to [SETTINGS] and select [SIGN IN].
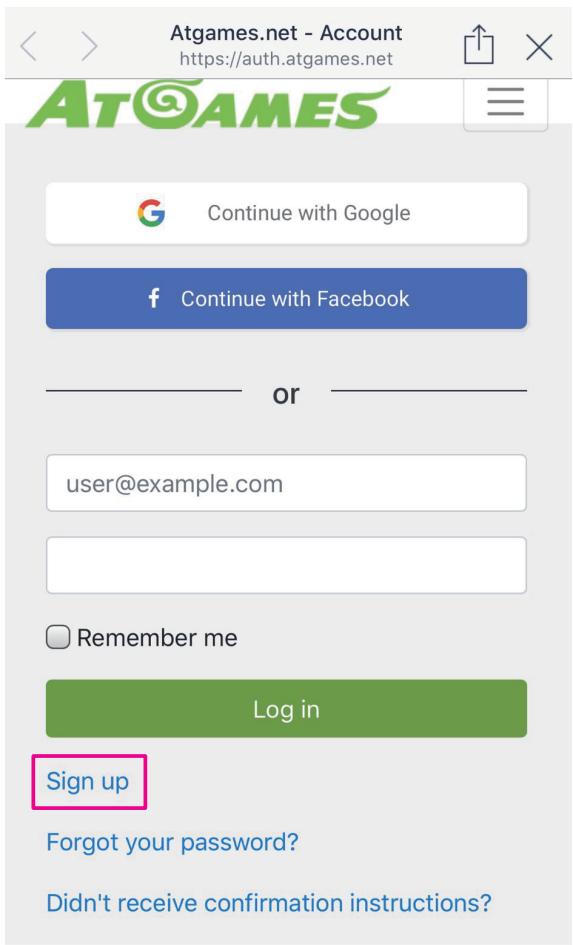
- Sign up for a new account if you don't have one yet.
- Once you have an ArcadeNet® account, you can choose either to sign in with your email or with the QR code. To sign in with your email, enter the email address and password.
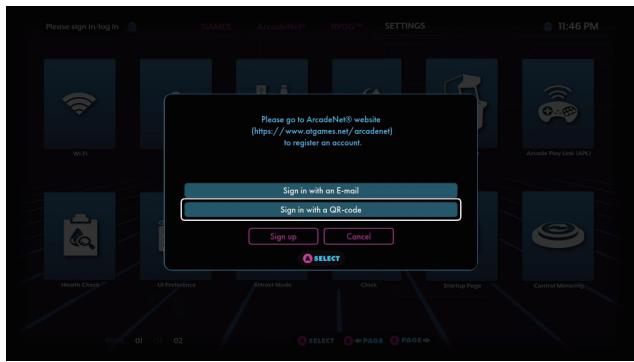
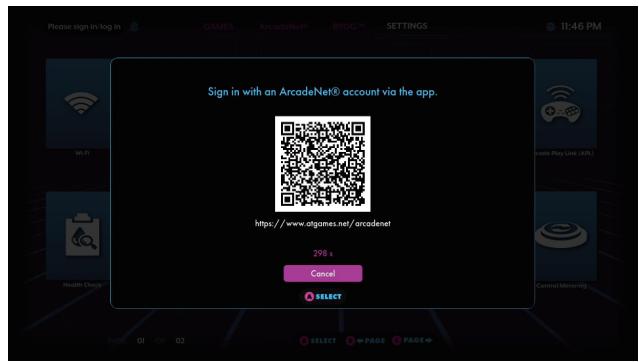
- To sign in with the QR-code, a smartphone is required.
- Use a smartphone to scan the QR-code on the screen to launch the ArcadeNet® website. You will be directed to the login page, where you can choose either to sign in with your existing Google/Facebook account or your e-mail.
Copyright © AtGames Cloud Holdings Ltd. All rights reserved.
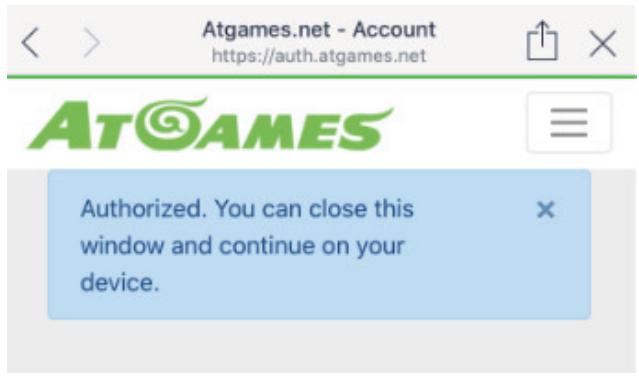
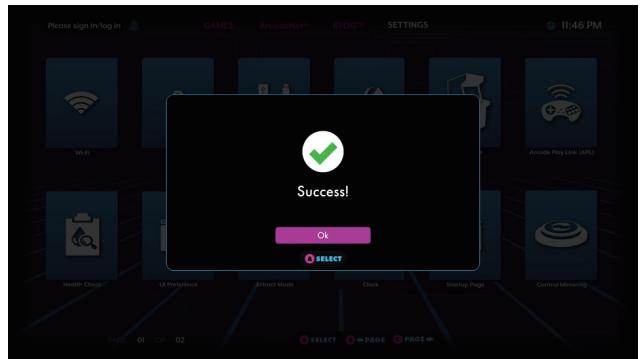
- You will see the authorization notification once complete. Now you can close the window and return to your arcade. A "Success!" message will show on the arcade once signed in.
HOW TO CONNECT ATGAMES BLAST! DONGLES AND CONSOLES TO LEGENDS ULTIMATE*
Step 1. Plug the "Blast! dongle" or connect "AtGames console" with HDMI cable in the HDMI PORT, and connect USB power cord.
Step 2. Press HDMI CHANNEL button to selected HDMI source.
Step 3. The Games Menu will display on the screen. Select the game you like and play!
*Legends Ultimate supports the following AtGames products:
2019: Legends Flashback (FB8660), Atari Flashback X (AR3060), Bandai Namco Arcade Blast! (WD3305 and WD3305S), Adventure Flashback Blast! (WD3308), Star Flashback Blast! (WD3309).
2018: Activision Flashback Blast! (WD3301), Atari Flashback Blast! Vol.1 (WD3302), Atari Flashback Blast! Vol.2 (WD3303), Legends Flashback Blast! (WD3304), Bandai Namco Flashback Blast! (WD3306).
For 2018 Blast! and 2019 WD3305S, please follow the instructions shown on the screen at SETTINGS to pair the dongle with Legends Ultimate.
Do not power off the cabinet during the following:
Firmware update
Factory reset
Data cleanup
- Read/write USB drive
This could prevent irreversible data loss and/or damage to your cabinet and USB drives.
WARRANTY INFO
The manufacturer warrants this product to be free and clear of defects in the materials and workmanship, under normal residential use and conditions, for a period of thirty (30) days from the original invoice date. Shipping and handling fees are to be paid for by the customer. To make a warranty claim, please submit a service request here: support@atgames.net.
Standard warranty coverage for the AtGames Legends Ultimate does not apply to and is considered invalid due to misuse, improper maintenance, self-repair, tampering, or invasive hardware modifications of any kind, and damages or dysfunction caused by shipping or non-manufacturing related causes.
Note: Standard warranty services are valid with receipt from an authorized retailer.
Purchases through third-party sellers and resellers do not fall under the standard warranty program. For warranty support, please contact the third-party seller or reseller where you purchased the product.
Adventure (2600)
Aladdin
Asteroids® (Arcade)
Bad Dude vs. Dragon Ninja
Bubble Bobble™
Bubble Symphony™
BurgerTime™ (Arcade)
Burnin' Rubber™ (Arcade)
CadashTM
Centipede® (Arcade)
Chack'n Pop™
City Connection
Colony 7^TM
Crystal Castles® (Arcade)
Donald in Maui Mallard
Elevator ActionTM
Fighter's History Dynamite / Karnov's Revenge
Fix-It Felix, Jr.
Front LineTM
Joe & Mac: Caveman Ninja (Arcade)
Karate Champ
Lock 'n' Chase (arcade)
Magical Drop / Chain Reaction
Major Havoc (Arcade)
Millipede® (Arcade)
Missile Command® (Arcade)
Operation Thunderbolt™
Operation WolfTM
Peter Pepper's Ice Cream Factory
Pong® (Arcade)
QixTM
RastanTM
Space InvadersTM
Space Invaders DX™
Super Breakout® (Arcade)
Super Burger Time
Super Star Wars
Super Star Wars: Return of the Jedi
Super Star Wars: The Empire Strikes Back
Tempest® (Arcade)
Tetris®
Tetris® Plus
The Jungle Book
The Lion King
Tron
Warlords® (Arcade)
Wild WesternTM
Yars' Revenge® (2600)
Zombies Ate My Neighbors
Zoo KeeperTM
And many more...
© 2020 Atari Interactive, Inc.
Atari and Atari logo are trademarks owned by Atari Interactive, Inc.
All individual Atari game names and logos are trademarks or registered trademarks of Atari Interactive, Inc. or its affiliates.
All other trademarks are the property of their respective owners.

CITY CONNECTION CO., LTD
DATA EAST and DATA EAST logo(s) are trademarks in United States and other countries or registered trademarks in European Union and Japan of G-MODE Corporation.
© 2020 Disney. All rights reserved.
© 2020 & ™ Lucasfilm Ltd. All rights reserved.
Copyright © Piko Interactive LLC - All Rights Reserved.
SPACE INVADERS™ & © TAITO CORPORATION 1978 ALL RIGHTS RESERVED.
BUBBLE BOBBLE™ & © TAITO CORPORATION 1986 ALL RIGHTS RESERV
TAITO, the TAITO logo, SPACE INVADERS™ and BUBBLE BOBBLE™ are trademarks and/or registered trademarks of TAITO CORPORATION in Japan and/or other countries.

Tetris © & © 1985~2020 Tetris Holding.
Tetris logos, Tetris theme song and Tetriminos are trademarks of Tetris Holding.
The Tetris trade dress is owned by Tetris Holding.
Licensed to The Tetris Company.
Tetris Game Design by Alexey Pajitnov.
All Rights Reserved.
SAFETY NOTICE
- Do not submerge the arcade cabinet in water or expose it to extreme heat or to strong magnetic fields. Doing so may cause permanent damage to your device.
- Always use a dry towel to clean the cabinet and the control top.
- Transformers are suitable for indoor use only. Transformers and power supplies for toys are not intended to be used as toys, and the use of these products by children shall be under the full supervision of parents.
FCC STATEMENT
This equipment has been tested and found to comply with the limits for a Class B digital device, pursuant to part 15 of the FCC Rules. These limits are designed to provide reasonable protection against harmful interference in a residential installation. This equipment generates, uses and can radiate radio frequency energy and, if not installed and used in accordance with the instructions, may cause harmful interference to radio communications. However, there is no guarantee that interference will not occur in a particular installation. If this equipment does cause harmful interference to radio or television reception, which can be determined by turning the equipment off and on, the user is encouraged to try to correct the interference by one or more of the following measures:
- Reorient or relocate the receiving antenna.
- Increase the separation between the equipment and receiver.
- Connect the equipment into an outlet on a circuit different from that to which the receiver is connected.
- Consult the dealer or an experienced radio/TV technician for help.
Caution
Any changes or modi fications to this device not explicitly approved by manufacturer could void your authority to operate this equipment.
This device complies with part 15 of the FCC Rules. Operation is subject to the following two conditions: (1) This device may not cause harmful interference, and (2) this device must accept any interference received, including interference that may cause undesired operation.
For Game Host
This equipment complies with FCC radiation exposure limits set forth for an uncontrolled environment. This equipment should be installed and operated with minimum distance 20cm between the radiator and your body. This transmitter must not be co-located or operating in conjunction with any other antenna or transmitter.
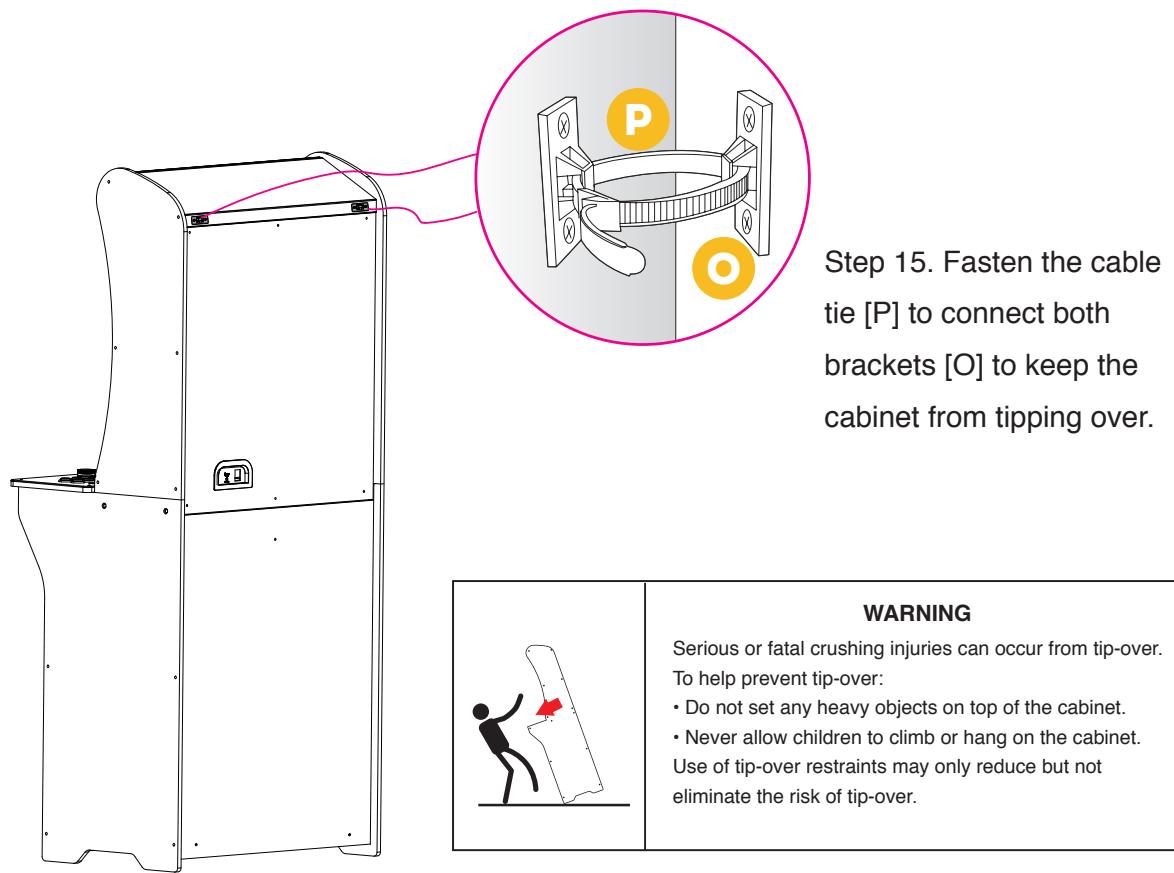
WARNING
Adult assembly required. Due to the presence of small parts during assembly, keep out of reach of children until assembly is complete.


For additional support please email: support@atgames.net
AT©AMES
© 2020 AtGames Interactive
www.atgames.net
PO Box 1691, El Segundo, CA 90245
All rights reserved.
*Content and images are for reference only and subject to change.
Made in China