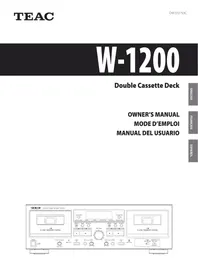
W-1200 - Platinum cd TEAC - Free user manual and instructions
Find the device manual for free W-1200 TEAC in PDF.



| Product type | Double cassette deck |
| Brand | TEAC |
| Model | W-1200 |
| Weight (European model) | 4.6 kg |
| Power supply (European model) | AC 230 V, 50 Hz |
| Power consumption | 22 W |
| Tape speed | 4.8 cm/s |
| Heads | 2 combined record/playback heads, 2 erase heads |
| Pitch control | ±12% (TAPE 1 only) |
| Frequency response (type II) | 30 Hz – 15 kHz (±4 dB) |
| Frequency response (type I) | 30 Hz – 13 kHz (±4 dB) |
| Signal-to-noise ratio | 59 dB (A-weighted) |
| Analog audio inputs | LINE IN (RCA), MIC (6.35 mm mono jack) |
| Analog audio outputs | LINE OUT (RCA), Headphone (stereo jack) |
| USB port | USB 2.0 type B (for computer recording) |
| Usable cassette types (playback) | Normal (type I), Chrome (type II), Metal (type IV) |
| Usable cassette types (recording) | Normal (type I), Chrome (type II) |
| Main functions | Playback, recording, dubbing (TAPE1→TAPE2), simultaneous recording, microphone mixing, timer, repeat, auto-return, noise reduction (playback only) |
| Remote control batteries | 2 AA batteries |
| Supplied items | Remote control, batteries, RCA audio cables, user manual |
Frequently Asked Questions - W-1200 TEAC
User questions about W-1200 TEAC
0 question about this device. Answer the ones you know or ask your own.
Ask a new question about this device
Download the instructions for your Platinum cd in PDF format for free! Find your manual W-1200 - TEAC and take your electronic device back in hand. On this page are published all the documents necessary for the use of your device. W-1200 by TEAC.
USER MANUAL W-1200 TEAC
Double Cassette Deck
OWNER'S MANUAL
MODE D'EMPLOI
MANUAL DEL USUARIO
CAUTION
RISK OF ELECTRIC SHOCK DO NOT OPEN
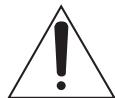
CAUTION: TO REDUCE THE RISK OF ELECTRIC SHOCK, DO NOT REMOVE COVER (OR BACK). NO USER-SERVICEABLE PARTS INSIDE. REFER SERVICING TO QUALIFIED SERVICE PERSONNEL.

The lightning flash with arrowhead symbol, within an equilateral triangle, is intended to alert the user to the presence of uninsulated “dangerous voltage” within the product’s enclosure that may be of sufficient magnitude to constitute a risk of electric shock to persons.

The exclamation point within an equilateral triangle is intended to alert the user to the presence of important operating and maintenance (servicing) instructions in the literature accompanying the appliance.
WARNING: TO PREVENT FIRE OR SHOCK HAZARD, DO NOT EXPOSE THIS APPLIANCE TO RAIN OR MOISTURE.
CAUTION
- DO NOT REMOVE THE EXTERNAL CASES OR CABINETS TO EXPOSE THE ELECTRONICS. NO USER SERVICEABLE PARTS ARE INSIDE.
- IF YOU ARE EXPERIENCING PROBLEMS WITH THIS PRODUCT, CONTACT THE STORE WHERE YOU PURCHASED THE UNIT FOR A SERVICE REFERRAL. DO NOT USE THE PRODUCT UNTIL IT HAS BEEN REPAIRED.
- USE OF CONTROLS OR ADJUSTMENTS OR PERFORMANCE OF PROCEDURES OTHER THAN THOSE SPECIFIED HEREIN MAY RESULT IN HAZARDOUS RADIATION EXPOSURE.
IN USA/CANADA, USE ONLY ON 120 V SUPPLY.
1) Read these instructions.
2) Keep these instructions.
3) Heed all warnings.
4) Follow all instructions.
5) Do not use this apparatus near water.
6) Clean only with dry cloth.
7) Do not block any ventilation openings. Install in accordance with the manufacturer's instructions.
8) Do not install near any heat sources such as radiators, heat registers, stoves, or other apparatus (including amplifiers) that produce heat.
9) Do not defeat the safety purpose of the polarized or grounding-type plug. A polarized plug has two blades with one wider than the other. A grounding type plug has two blades and a third grounding prong. The wide blade or the third prong are provided for your safety. If the provided plug does not fit into your outlet, consult an electrician for replacement of the obsolete outlet.
10) Protect the power cord from being walked on or pinched particularly at plugs, convenience receptacles, and the point where they exit from the apparatus.
11) Only use attachments/accessories specified by the manufacturer.
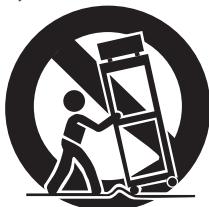
12) Use only with the cart, stand, tripod, bracket, or table specified by the manufacturer, or sold with the apparatus. When a cart is used, use caution when moving the cart/apparatus combination to avoid injury from tip-over.
13) Unplug this apparatus during lightning storms or when unused for long periods of time.
14) Refer all servicing to qualified service personnel. Servicing is required when the apparatus has been damaged in any way, such as power-supply cord or plug is damaged, liquid has been spilled or objects have fallen into the apparatus, the apparatus has been exposed to rain or moisture, does not operate normally, or has been dropped.
- The apparatus draws nominal non-operating power from the AC outlet with its POWER or STANDBY/ON switch not in the ON position.
- The mains plug is used as the disconnect device; the disconnect device shall remain readily operable.
- Caution should be taken when using earphones or headphones with the product because excessive sound pressure (volume) from earphones or headphones can cause hearing loss.
natural_image
Silhouette of a person climbing a ladder inside a circular frame (no text or symbols)CAUTION
- Do not expose this apparatus to drips or splashes.
- Do not place any objects filled with liquids, such as vases, on the apparatus.
- Do not install this apparatus in a confined space such as a book case or similar unit.
- The apparatus should be located close enough to the AC outlet so that you can easily reach the power cord plug at any time.
- If the product uses batteries (including a battery pack or installed batteries), they should not be exposed to sunshine, fire or excessive heat.
- CAUTION for products that use replaceable lithium batteries: there is danger of explosion if a battery is replaced with an incorrect type of battery. Replace only with the same or equivalent type.

Precautions concerning batteries
Misuse of batteries could cause them to rupture or leak leading to fire, injury or the staining of nearby things. Please read and observe the following precautions carefully.
- Be sure to insert the batteries with correct positive (⊕) and negative (⊖) orientations.
- Use batteries of the same type. Never use different types of batteries together.
- If the remote control is not used for a long time (more than a month), remove the batteries to prevent them from leaking.
- If the batteries leak, wipe away the leakage inside the battery compartment and replace the batteries with new ones.
- Do not use batteries of types other than those specified. Do not mix new batteries with old ones or use different types of batteries together.
- Do not heat or disassemble batteries. Never throw batteries into fire or water.
- Do not carry or store batteries with other metallic objects. The batteries could short circuit, leak or explode.
- Never recharge a battery unless it is confirmed to be a rechargeable type.
Declaration of Conformity
Responsible party:
TEAC AMERICA, INC.
Address: 1834 Gage Road, Montebello, California, U.S.A.
Telephone number : 1-323-726-0303
This device complies with Part.15 of FCC Rules.
Operation is subject to the following two conditions:
1) This device may not cause harmful interference
2) This device must accept any interference received, including interference that may cause undesired operation.
Model for USA
This equipment has been tested and found to comply with the limits for a Class B digital device, pursuant to Part 15 of the FCC Rules. These limits are designed to provide reasonable protection against harmful interference in a residential installation. This equipment generates, uses, and can radiate radio frequency energy and, if not installed and used in accordance with the instructions, may cause harmful interference to radio communications. However, there is no guarantee that interference will not occur in a particular installation. If this equipment does cause harmful interference to radio or television reception, which can be determined by turning the equipment off and on, the user is encouraged to try to correct the interference by one or more of the following measures:
- Reorient or relocate the equipment and/or the receiving antenna.
- Increase the separation between the equipment and receiver.
- Connect the equipment into an outlet on a circuit different from that to which the receiver is connected.
- Consult the dealer or an experienced radio/TV technician for help.
Model for Canada
Industry Canada's Compliance Statement:
This Class B digital apparatus complies with Canadian ICES-003.
Model for Europe

This product complies with the European Directives request, and the other Commission Regulations.
CAUTION
Changes or modifications not expressly approved by the party responsible for compliance could void the user's authority to operate the equipment.
For European Customers
Disposal of electrical and electronic equipment and batteries and/or accumulators
a) All electrical/electronic equipment and waste batteries/accumulators should be disposed of separately from the municipal waste stream via collection facilities designated by the government or local authorities.
b) By disposing of electrical/electronic equipment and waste batteries/accumulators correctly, you will help save valuable resources and prevent any potential negative effects on human health and the environment.
c) Improper disposal of waste electrical/electronic equipment and batteries/accumulators can have serious effects on the environment and human health because of the presence of hazardous substances in the equipment.
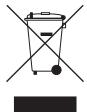
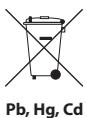
d) The Waste Electrical and Electronic Equipment (WEEE) symbols, which show wheeled bins that have been crossed out, indicate that electrical/electronic equipment and batteries/accumulators must be collected and disposed of separately from household waste.
If a battery or accumulator contains more than the specified values of lead (Pb), mercury (Hg), and/or cadmium (Cd) as defined in the Battery Directive (2006/66/EC), then the chemical symbols for those elements will be indicated beneath the WEEE symbol.
e) Return and collection systems are available to end users. For more detailed information about the disposal of old electrical/electronic equipment and waste batteries/accumulators, please contact your city office, waste disposal service or the shop where you purchased the equipment.
Microsoft and Windows are either registered trademarks or trademarks of Microsoft Corporation in the United States and/or other countries.
Apple, Mac, OS X and macOS are trademarks of Apple Inc., registered in the U.S. and other countries.
Other company names and product names in this document are the trademarks or registered trademarks of their respective owners.
Contents
Thank you for choosing TEAC.
Read this manual carefully to get the best performance from this unit.
After reading it, keep it in a safe place for future reference.
IMPORTANT SAFETY INSTRUCTIONS 2
Using the TEAC Global Site....5
Product registration 5
Capabilities of this unit....6
Before use....7
Cassette tapes....8
Names and functions of parts (main unit) 10
Using the remote control....11
Names and functions of parts (remote control)....12
Names and functions of parts (display)....13
Connections....14
Listening to a cassette tape....15
Returning to zero....17
Repeat playback....18
Recording to cassette tapes....18
Mic mixing with recording....21
Dubbing 23
Parallel recording....24
Recording with a computer....24
Timer-controlled playback and recording 26
Automatic power saving function....29
Troubleshooting....29
Specifications....31
Using the TEAC Global Site
You can download updates for this unit from the TEAC Global Site:
http://teac-global.com/
1) Open the TEAC Global Site.
2) In the TEAC Downloads section, click the desired language to open the Downloads website page for that language.
NOTE
If the desired language does not appear, click Other Languages.
3) Click the "Search by Model Name" section to open the Downloads page for that product. (Users in Europe should click the product name in the "Products" section instead.)
4) Select and download the updates that are needed.
Product registration
Customers in the USA, please visit the following TEAC website to register your TEAC product online.
http://audio.teac.com/support/registration/
Capabilities of this unit
Cassette tape playback
Listening to cassette tapes
→ page 15
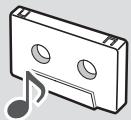
Adjusting the pitch when listening
→ page 17
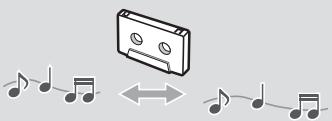
Moving to counter (0000) locations when listening
→ page 17
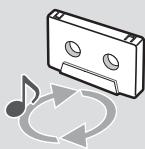
Listening to a set interval repeatedly (repeat playback)
→ page 18
Cassette tape recording
Recording from line inputs to a cassette tape (TAPE 1 or TAPE 2)
→ page 18
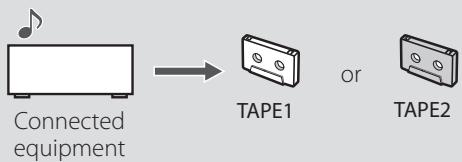
flowchart
graph LR
    A["Connected equipment"] --> B["TAPE1"]
    B --> C["or TAPE2"]
Recording from a cassette tape to a computer
→ page 24
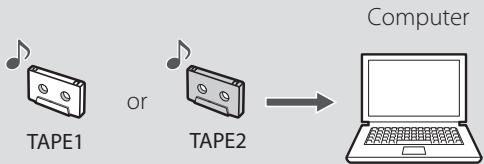
flowchart
graph LR
    A["TAPE1"] -->|or| B["TAPE2"]
    B --> C["Computer"]
Mixing line input sounds when recording
→ page 21
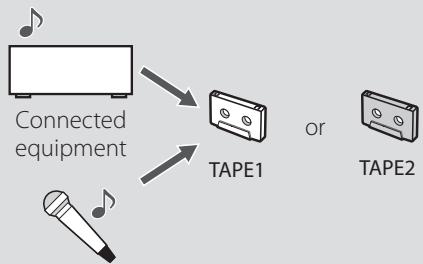
flowchart
graph TD
    A["Connected equipment"] --> B["TAPE1"]
    C["DAIR"] --> B
    D["TAPE2"] --> B
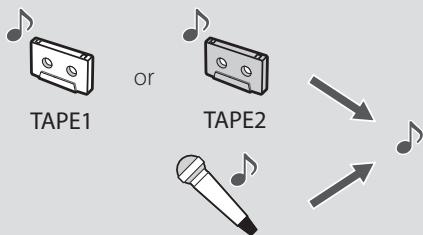
Mixing tape playback when recording
→ page 22
flowchart
graph TD
    A["TAPE1"] --> B["TAPE2"]
    C["TAPE1"] --> D["TAPE2"]
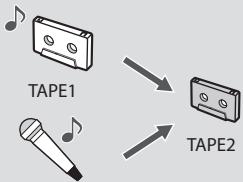
Enjoying karaoke with tape playback
→ page 22
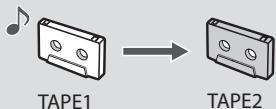
Dubbing from TAPE 1 to TAPE 2
→ page 23
Recording line inputs to 2 cassette tapes simultaneously (parallel recording)
→ page 24
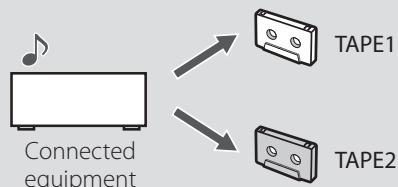
flowchart
graph TD
    A["Connected equipment"] --> B["TAPE1"]
    A --> C["TAPE2"]
Timer operation
Requires a commercially-available timer
Timer-controlled playback
→ page 26
Timer-controlled recording
→ page 27
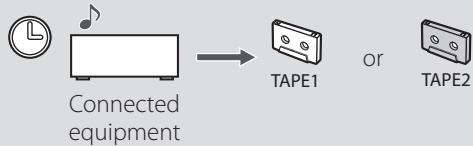
flowchart
graph LR
    A["Connected equipment"] --> B["TAPE1"]
    B --> C["or TAPE2"]
Included items
Check to be sure the box contains all the included items shown below. Please contact the store where you purchased this unit if any of these items are missing or have been damaged during transportation.
Remote control (RC-1331) × 1
Batteries for remote control (AA) × 2
RCA audio cables × 2
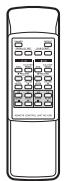

Owner's manual
(this document, including warranty) × 1
- For information about the warranty, users living in the USA and Canada should see pages 92-93 and the back cover (warranty document). Users living in Europe and other regions should see page 93.
Precautions for use
- Do not install this unit in a location that could become hot. This includes places that are exposed to direct sunlight or near a radiator, heater, stove or other heating equipment. Moreover, do not place it on top of an amplifier or other equipment that generates heat. Doing so could cause discoloration, deformation or malfunction.
- In order to enable good heat dissipation, leave at least 20 cm (8") between this unit and walls and other equipment when installing it. If you put it in a rack, take precautions to prevent overheating by leaving at least 5 cm (2") open above the top of the unit and at least 10 cm (4") open behind the unit.
Failure to provide these gaps could cause heat to build up inside and result in fire. - The voltage supplied to the unit should match the voltage that is printed on the rear panel. If you are in any doubt regarding this matter, consult an electrician.
- Do not open the cabinet as this might result in damage to the circuitry or electrical shock. If a foreign object should get into the unit, contact your dealer or service company.
- When removing the power plug from the wall outlet, always pull directly on the plug, never yank on the cord.

ATTENTION
Do not turn the unit off or disconnect the power cord during operation, including playback and recording.
Doing so could cause the tape to become stuck, for example.
Before use (continued)
Maintenance
Wipe dirt from the top cover and other panel surfaces using a soft cloth that has been slightly dampened with a diluted neutral cleanser.
Do not wipe with chemical cleaning cloths, thinner or other chemical agents. Doing so could damage the surface.

For your safety, disconnect the power cord from the outlet before cleaning.
Cleaning the cassette decks
If a head becomes dirty, the recording and playback sound quality will become worse and cause skipping. Dirt on the tape tracking roller could also cause the tape to become caught, for example.
Clean the head, pinch roller, and capstan with a cotton applicator dampened with a commercially-available cleaning solution about every ten hours of use.
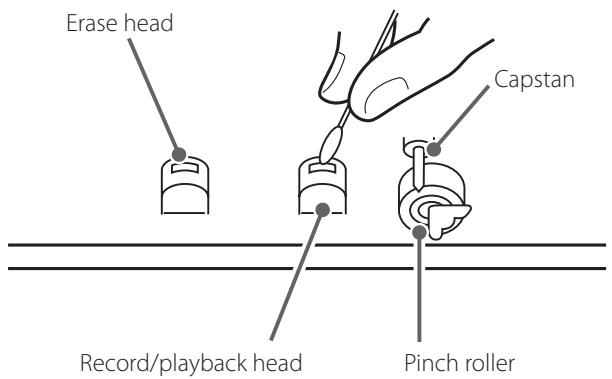
- Do not put a cassette tape in the cassette holder of the unit until the cleaning solution on the head dries.
Cassette tapes
Cassette tapes that can be used with this unit
Types of cassette tapes that can be played by this unit
Normal (type I), Chrome (type II), Metal (type IV)
Types of cassette tapes that can be used for recording by this unit
Normal (type I), Chrome (type II)
- TAPE 1 and TAPE 2 in this unit detect tape types separately, so different types of tapes can be used at the same time.
Precautions for use
- Do not open a cassette or pull out the tape.
- Do not touch the tape surface.
Storage precautions
- Keep cassette tapes away from magnets or magnetized items because they may cause noise or erase recorded contents.
- Do not leave cassette tapes in a dusty place.
- Do not store cassette tapes in areas with high temperatures and humidity.
Types of cassette tapes that should be avoided
The following types of cassette tapes might prevent the unit from operating or functioning normally. These types of cassette tapes could cause tape to become caught and other unexpected problems.
Deformed cassette tapes
Do not use a deformed cassette or one that has unstable tape movement or makes a strange sound during fast-forward or rewind.
Long play tapes
Tapes that allow recording for 90 minutes or longer sometimes get caught by the capstan because they are extremely thin and stretch easily. Do not use them in this unit. In the worst case, the cassette tape could become stuck in the unit.
Endless cassette tapes
Never use this type of cassette because its tape could become caught. In the worst case, the cassette tape could become stuck in the unit.
Tape slackening
Confirm that the tape in the cassette is not slack before use.
Slack can cause the tape to get tangled in the capstan or other rotating parts. To prevent this, take up all tape slack using a pencil or the like inserted into the reel hole.
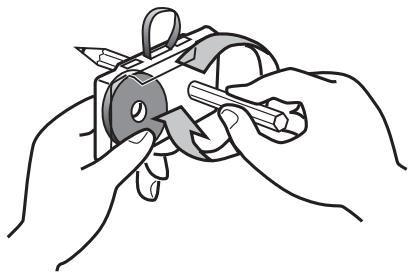
natural_image
Illustration of hands using a tool to cut or spread a mechanical component (no text or symbols visible)Automatic tape type detection function
This cassette deck can detect what type of tape is being used based on the detection holes in the cassette shell. Be sure to use cassettes with detection holes.
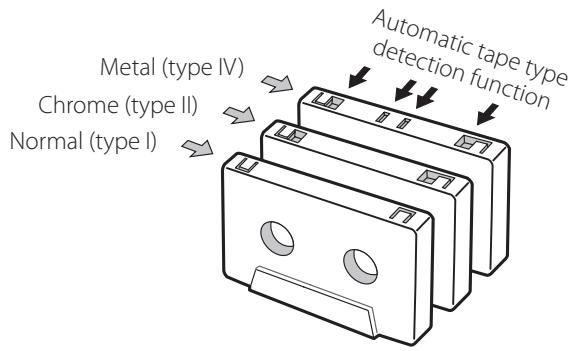
flowchart
graph TD
    A["Automatic tape type detection function"] --> B["Chrome (type II)"]
    B --> C["Normal (type I)"]
    C --> D["Metal (type IV)"]
Accidental erasure prevention tabs
Tabs on cassettes allow you to prevent important recordings from being erased by mistake. There are two tabs on each cassette shell: one for side "A" and the other for side "B".
Once these tabs have been removed using a screwdriver or the like, there is absolutely no chance of the recording function being activated.
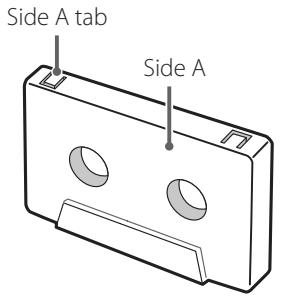
- To record on a cassette that has had its tab broken off, cover the hole using a piece of adhesive tape. Be careful not to block the tape type detection holes.
Names and functions of parts (main unit)
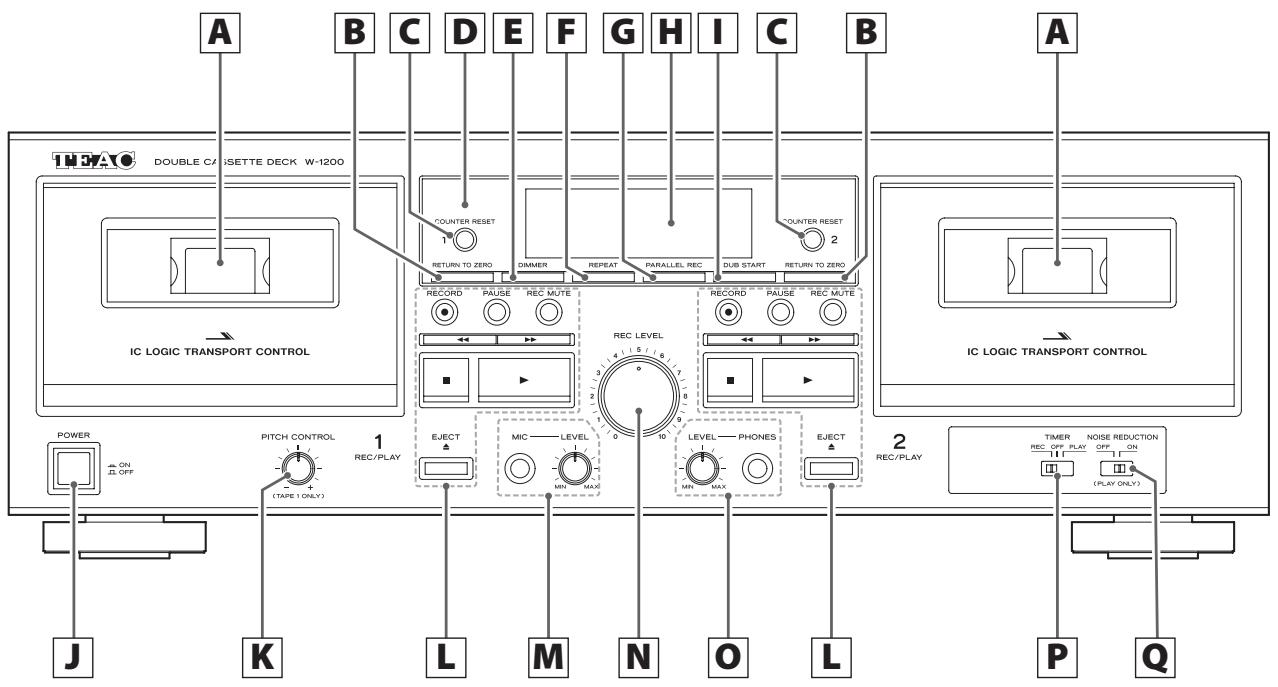
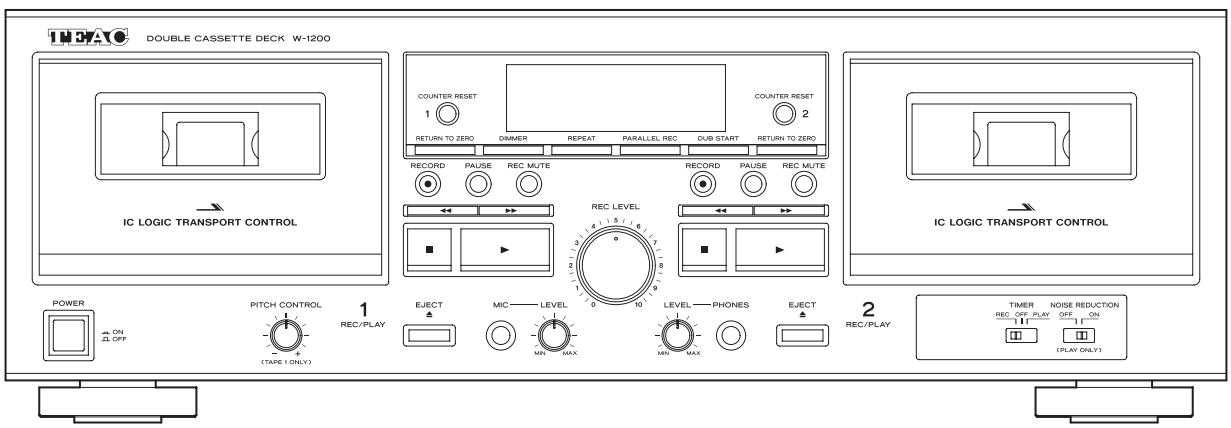
A Cassette compartment
B RETURN TO ZERO button
Press to return the tape to the "☐☐☐☐" counter position and stop (page 17).
COUNTER RESET buttons
Press to reset the tape counter to "☐☐☐☐".
D Remote control signal receiver
When operating the remote control, point it towards here.
E DIMMER button
Press to change the brightness of the display.
F REPEAT button
This allows repeat playback of a selected section of the tape (page 18).
G PARALLEL REC (parallel recording) button
This button starts recording to both TAPE 1 and TAPE 2 simultaneously (page 24).
H Display
This shows tape counters, level meters, etc (page 13).
I DUB START (dubbing start) button
This button is used when copying the contents of a tape from TAPE 1 to TAPE 2 at normal speed (page 23).
- Dubbing from TAPE 2 to TAPE 1 is not possible.
- Dubbing at high speed is not possible.
J POWER button
Press to turn the unit on and off.
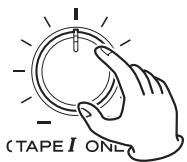
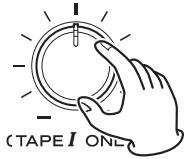
K PITCH CONTROL knob
This adjusts the playback pitch. This does not function when recording or dubbing (page 17).
L Cassette tape operation buttons
RECORD (●) button
Use when recording.
Press to start recording standby (page 18).
PAUSE button
Press to pause playback/recording.
Press again to resume playback/recording.
REC MUTE (record muting) button
Use to create a silence of about four seconds when recording or in recording standby (page 20).
Rewind/fast-forward ( ◀◀/▶▶ ) buttons
Use these buttons to rewind/fast-forward.
Stop (■) button
Press to stop playback, recording, rewinding or fast-forwarding.
PLAY (▶) button
Press to start cassette tape playback.
Press when playback/recording is paused to resume playback/recording.
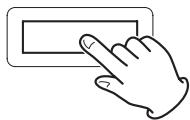
EJECT (▲) button
Press to open the cassette compartment when the tape is stopped.
Using the remote control
M MIC connector and mic LEVEL knob
When using a mic to record, insert the mic cable plug into this connector and turn the knob to a suitable level (page 21).
- This unit does not support stereo mics. Use a mono mic.
- When a mic is connected, the tape playback level is lowered slightly. When the mic is disconnected, the playback level will return to normal.
N REC LEVEL (recording level) knob
Use to adjust the recording level.
O PHONES jack/LEVEL knob
Plug headphones into this jack to use them with this unit. Sound will be output from the LINE OUT jacks even when headphones are plugged in here. Use the LEVEL knob to the left to adjust the headphone volume.
CAUTION
While wearing headphones, do not connect or disconnect them or turn the unit on or off. Doing so could result in a sudden loud noise that could harm your hearing.
P TIMER switch
Use this switch to set the timer setting mode (record, off or play). Leave this switch in the OFF position for normal use. To use timer playback/recording, connect a commercially-available timer to this unit (page 26).
Q NOISE REDUCTION switch
This function reduces hiss during tape playback.
- It only functions during playback.
- Using this during playback of tapes recorded with Dolby B noise reduction will reduce hiss. This cannot be used when recording to achieve a noise reduction effect like Dolby B.
Precautions for use
⚠️ Misuse of batteries could cause them to rupture or leak, which might result in fire, injury or the staining of nearby materials. Please carefully read and observe the precautions on page 3.
- When using the remote control, point it toward the remote control signal receiver on the main unit from a distance of 5 m (16 ft) or less. Do not place obstructions between the main unit and the remote control.
- The remote control might not work if the remote control signal receiver on the unit is exposed to direct sunlight or bright light. If this occurs, try moving the unit.
- Beware that use of this remote control could cause the unintentional operation of other devices that can be controlled by infrared rays.
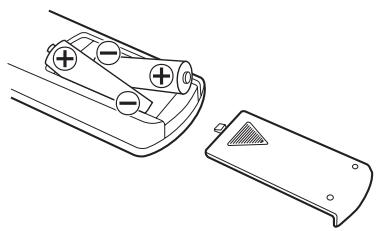
Installing batteries
Remove the cover from the back of the remote control and insert two AA batteries with their / oriented as shown in the case. Replace the cover.
natural_image
Technical line drawing of a remote control switch with two terminals and a separate cover (no text or symbols)When to replace batteries
If the distance required between the remote and the main unit decreases or if the unit stops responding to the remote buttons, replace both batteries with new ones. Dispose of the used batteries according to the instructions on them or requirements set by your local municipality.
Names and functions of parts (remote control)
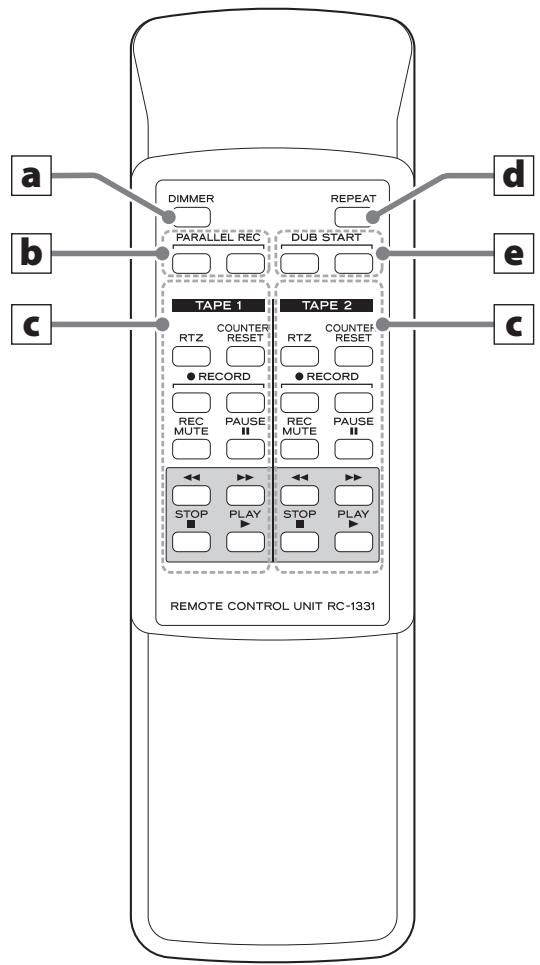
- When the main unit and the remote control both have buttons with the same functions, this manual explains how to use one of the buttons. The other corresponding button can be used in the same manner.
a DIMMER button
Press to change the brightness of the display.
b PARALLEL REC (parallel recording) buttons
These buttons start simultaneously recording to both TAPE 1 and TAPE 2. Press both buttons at the same time (page 24).
c TAPE 1 and TAPE 2 operation buttons
RTZ button
Press to return the tape to the "☐☐☐☐" counter position and stop (page 17).
COUNTER RESET button
Press to reset the tape counter to "☐☐☐☐".
RECORD (●) button
Use when recording.
Press both buttons at the same time to start recording standby (page 18).
REC MUTE (record muting) button
Press while recording to record about four seconds of silence (page 20).
PAUSE (II) button
Press to pause playback/recording.
Press again to resume playback/recording.
Rewind/fast-forward ( ◀◀/▶▶ ) buttons
Use these buttons to rewind/fast-forward.
STOP ( ■ ) button
Press to stop playback, recording, rewinding or fast-forwarding.
PLAY (▶) button
Press to start cassette tape playback.
Press to resume playback/recording when it is paused.
d REPEAT button
This allows repeat playback of a selected section of the tape (page 18).
e DUB START (dubbing start) buttons
This will start dubbing at normal speed. Press both buttons at the same time (page 23).
- Dubbing from TAPE 2 to TAPE 1 is not possible.
- Dubbing at high speed is not possible.
Names and functions of parts (display)
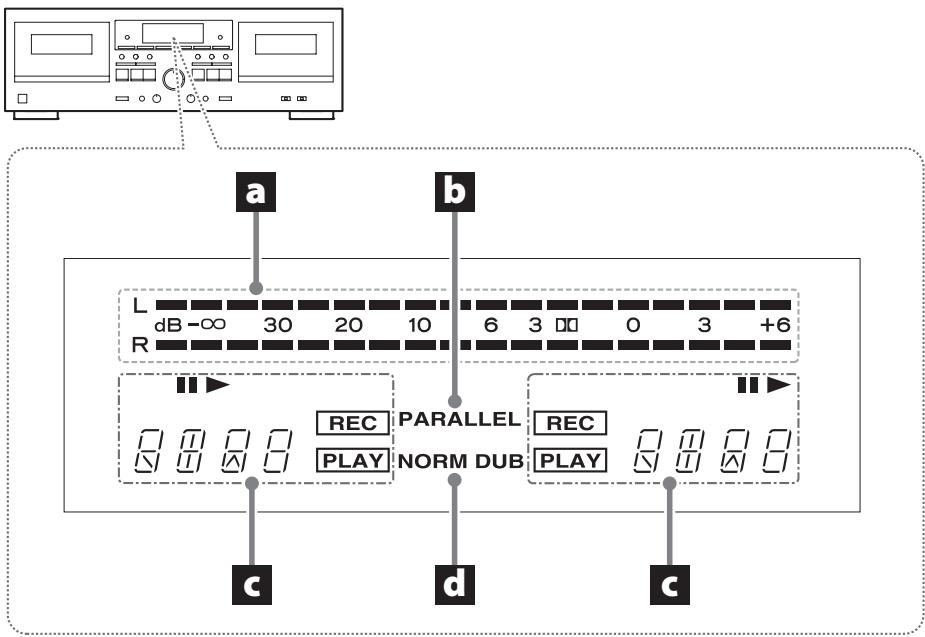
flowchart
graph TD
    A["Input"] --> B["L dB-∞ 30 20 10 6 3 0 3 +6"]
    B --> C["R"]
    C --> D["ReCK"]
    C --> E["PLAY"]
    C --> F["NORM DUB"]
    D --> G["PARALLEL"]
    E --> G
    F --> G
    G --> H["ReCK"]
    G --> I["PLAY"]
    H --> J["c"]
    I --> K["d"]
    J --> L["c"]
    K --> M["c"]
a Peak level meters
These show recording and playback levels.
b Parallel recording (PARALLEL) indicator
This lights when parallel recording to TAPE 1 and TAPE 2 (page 24).
C TAPE 1/TAPE 2 status indicators
During playback/recording, ▶ appears.
Pause (II) indicator
This appears when playback/recording is paused.
Tape counter (□□□□)
Press the COUNTER RESET 1/2 button to reset that tape counter to "☐☐☐☐".
During repeat playback, "REO1" and "REO2" will appear.
Record (REC) indicator
This appears when recording or in recording standby.
This blinks while recording is muted (page 20).
Play (PLAY) indicator
This appears when playing back or recording.
d Dubbing (NORM DUB) indicator
This appears when dubbing (page 23).
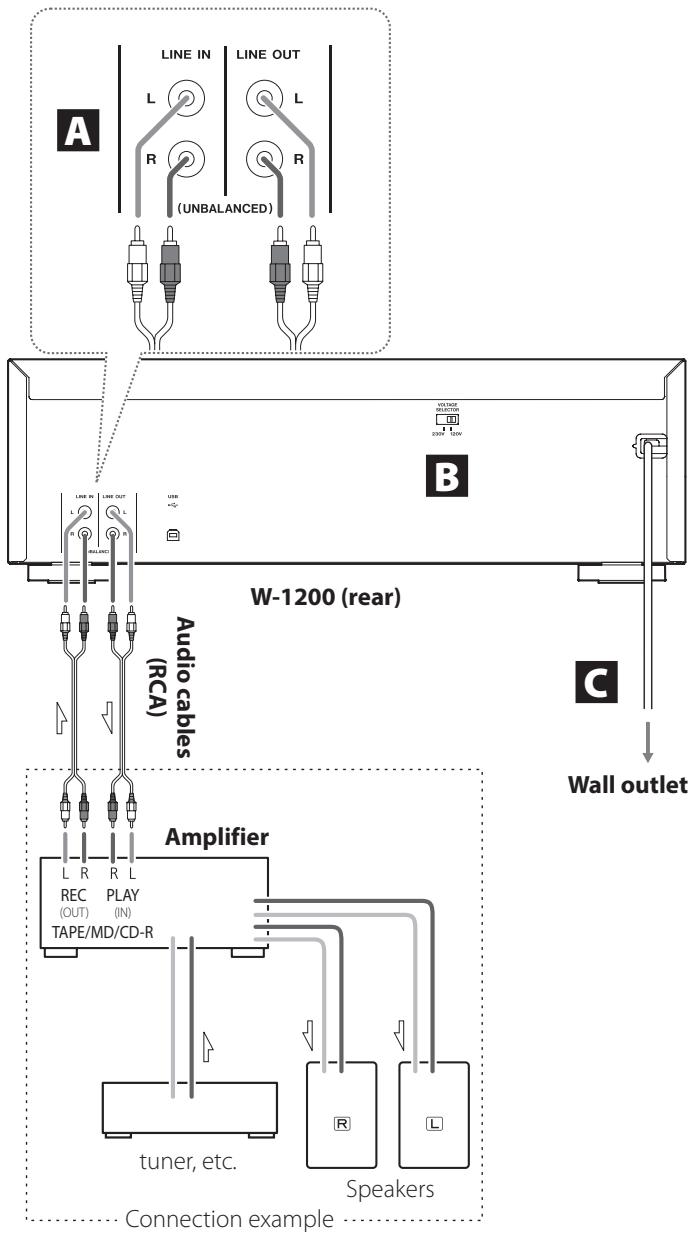
flowchart
graph TD
    A["Line IN"] --> B["L"]
    C["LINE OUT"] --> D["L"]
    E["(UNBALANCED)"] --> F["R"]
    G["W-1200 (rear)"] --> H["L"]
    I["Audio cables (RCA)"] --> J["L"]
    K["Wall outlet"] --> L["C"]
    M["Amplifier"] --> N["tuner, etc."]
    O["Speaker"] --> P["R"]
    Q["Connection example"] --> R["L"]

Complete all other connections before turning the unit on.
- Carefully read the manuals of the devices that you are connecting and follow their instructions when making connections.
- Do not bundle connecting cables with power cords. Doing so could cause noise.
- Connect all plugs completely.

Analog audio input/output (LINE IN/OUT) connectors
Connect these to the line output connectors of the amplifier or the output connectors of the CD player or other device.
LINE OUT (line outputs)
Connect these to the tape/MD/CD-R, AUX or other input connectors of the amplifier.
Refer to the connection diagram to the left.

Voltage selector
Use to switch the voltage to either 230 V or 120 V.
ATTENTION
The voltage selector is only available on units for specific markets.
IN USA/CANADA, USE ONLY ON 120V SUPPLY.

Power cord
After completing all other connections, plug the power plug into a power outlet.
- Unplug the cord from the outlet when not using the unit for a long time.

CAUTION
- Be sure to connect the power cord to an AC outlet that supplies the correct voltage. Connection to an outlet that supplies incorrect voltage could cause fire or electric shock.
- Hold the power plug when plugging it into an outlet or unplugging it. Never pull or yank on the power cord.
Listening to a cassette tape
This unit can play normal (type I), chrome (type II) and metal (type IV) tapes.
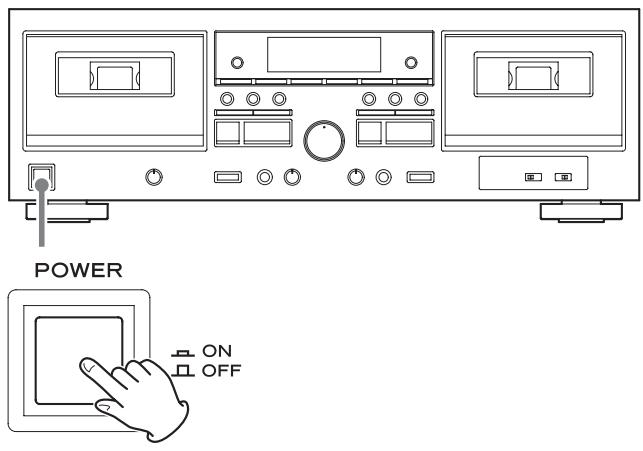
1 Press the POWER button to turn the unit on.
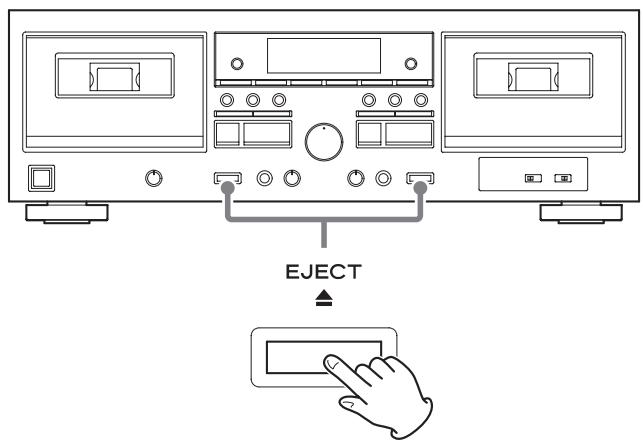
2 Press the EJECT (▲) button to open the cassette compartment.
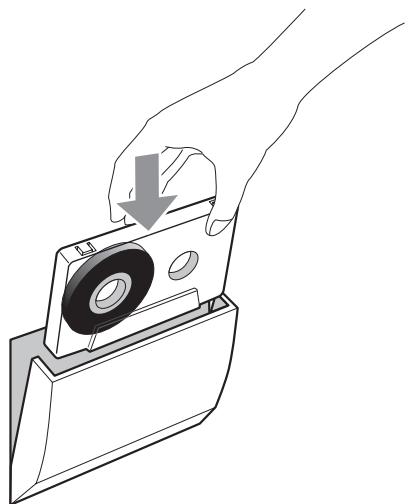
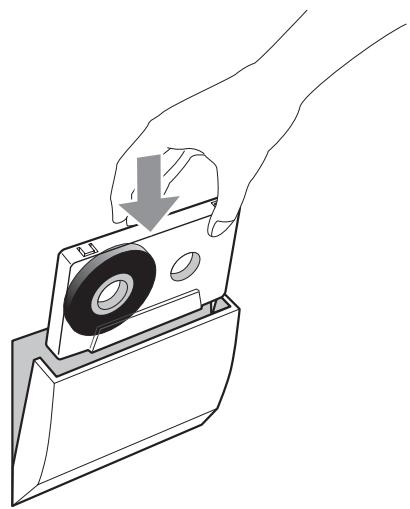
3 Load a cassette tape into the compartment.
natural_image
Hand placing a black circular object into a white rectangular container with a downward arrow (no text or symbols)Insert the cassette tape with the playback side facing forward and its open edge facing down. Then, close the cassette compartment by pushing it gently. Use caution, because forcing it shut could cause malfunction.
ATTENTION
- Confirm that the tape is not slack (page 8).
- Do not use deformed or slack tapes because they could cause malfunction. Do not force the door of the compartment by hand when opening it.
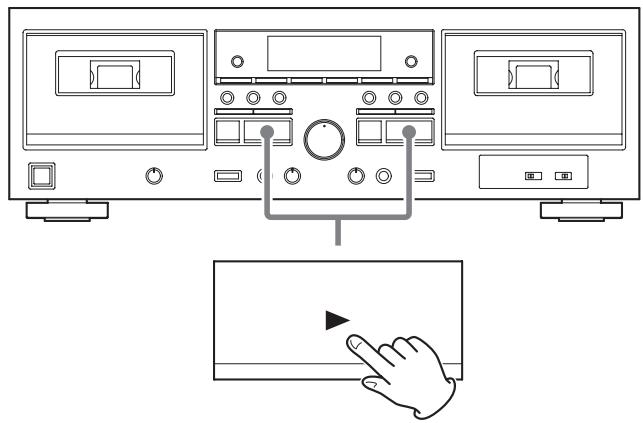
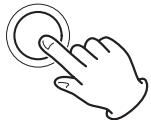
4 Press the play (▶) button to start playback.
natural_image
Line drawing of a computer monitor setup with control buttons and an icon of a hand pressing a button (no text or symbols present)ATTENTION
Never turn the power off or disconnect the power cord during playback. Doing so could cause the tape to become stuck, for example.
Notes about playing (recording) a tape in one deck when tapes are loaded in both cassette holders
If the play (▶) button is pressed for the tape that is not playing (recording)
The tape that is playing (recording) will stop, and the tape for which the play (▶) button was pressed will start playback. (Pressing the play button prioritizes that tape.)
If the record (●) button is pressed for the tape that is not playing (recording)
The tape that is playing (recording) will stop, and the tape for which the record (●) button was pressed will enter recording standby.
If a rewind/fast-forward (◀◀/▶▶) button is pressed for the tape that is not playing (recording)
The tape that is playing (recording) continues as is, and the tape for which the search rewind/fast-forward (◀◀/▶▶) button was pressed will rewind/fast-forward.
Stopping playback
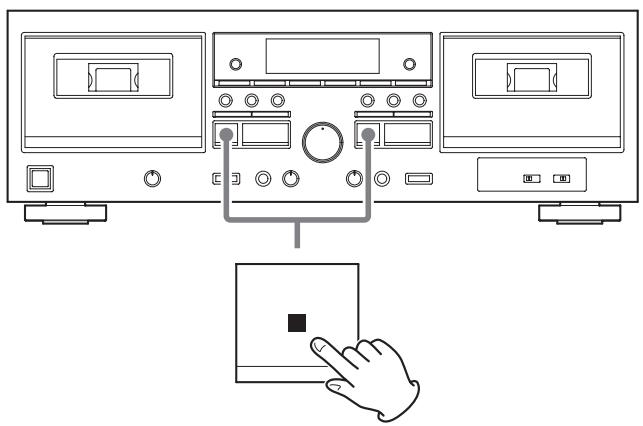
natural_image
Diagram of a hand interacting with a device via a control panel (no text or symbols present)Press the stop (■) button to stop playback.
Pausing playback
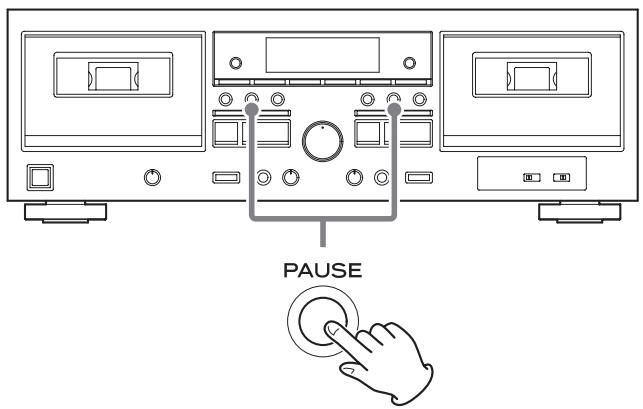
Press the PAUSE button to pause playback.
To resume playback, press the PAUSE button again or press the play (▶) button.
Removing cassette tapes
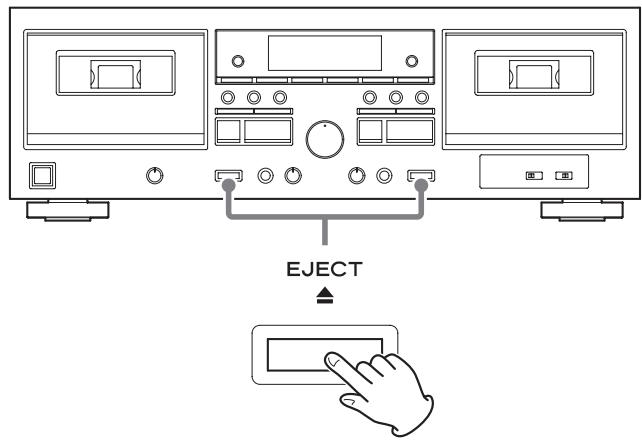
When a tape is stopped, press the EJECT (▲) button to open the cassette compartment it is in.
Rewinding/fast-forwarding
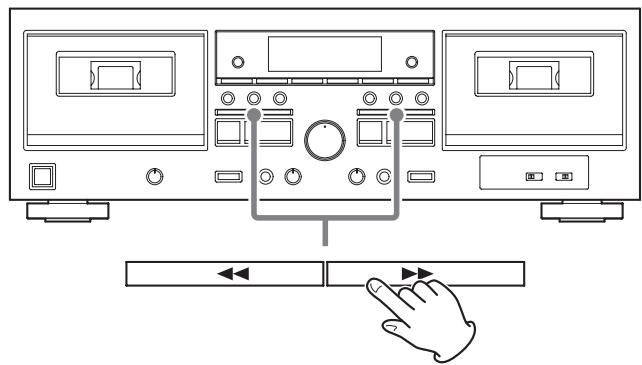
natural_image
Line drawing of a device front panel with control buttons and a hand interacting with the right button (no text or symbols)Press the rewind/fast-forward (◀◀/▶▶) button.
Winding stops when the end of the tape is reached.
To stop winding before the end, press the stop (■) button.
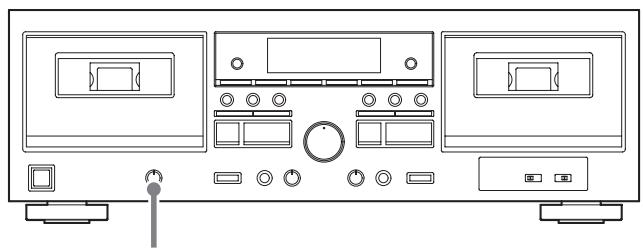
Pitch control (TAPE 1 only)
The pitch can be controlled during TAPE 1 playback.
natural_image
Front view line drawing of a vintage electronic device front panel with control knobs and buttons (no text or symbols)PITCH CONTROL
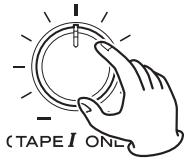
Turning the PITCH CONTROL knob clockwise (toward +) increases the playback speed and raises the pitch.
(The maximum is 12%, which is about two semitones higher.)
Turning this knob counterclockwise (toward -) reduces the play-back speed and lowers the pitch.
(The maximum is 12%, which is about two semitones lower.)
- This function is disabled when recording and dubbing. This can only be used to adjust playback.
Tape counter
natural_image
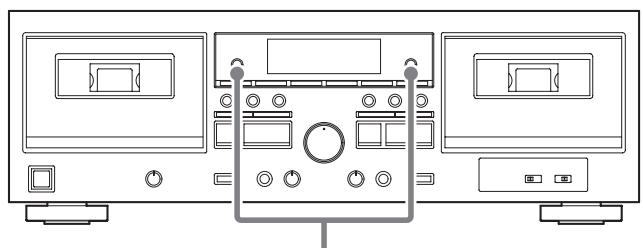
Line drawing of a front view of a three-chamber electronic device with control panels and buttons (no text or symbols)COUNTER RESET
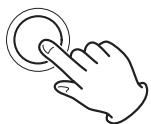
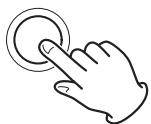
Press a COUNTER RESET button to reset that tape counter to "☐☐☐☐". You can use this function for easy relocation of any desired point on the tape. Using this with the "Returning to zero" function described in the following section can be convenient.
Returning to zero
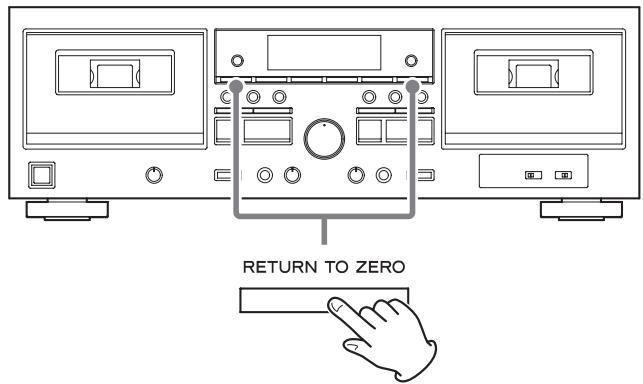
Press the RETURN TO ZERO button to fast-forward or rewind the TAPE 1 or TAPE 2 until the counter reaches "☐☐☐☐" and the tape stops.
- This function cannot be used if the counter is between "9995" and "0004".
Repeat playback
You can listen to a set interval repeatedly.
1 During playback, press the REPEAT button at the point where you want to start the repeat playback interval.
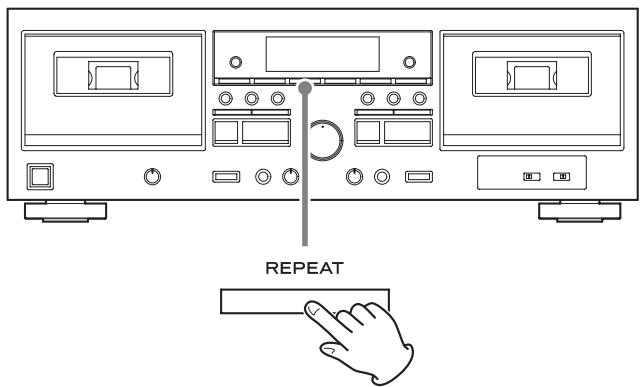
The REO I appears on the display.
2 Press the REPEAT button at the point where you want to end the repeat playback interval.
The appears on the display.
The tape automatically rewinds to the starting point and playback starts, continuing to the ending point. When the ending point is reached, playback stops temporarily, the tape rewinds again to the starting point, and playback to the ending point repeats.
Repeat playback stops automatically after 20 repetitions.
Press the stop (■) button to end repeat playback.
- During repeat playback, only the REPEAT and stop (■) buttons can be used.
- This function cannot be used for intervals of less than 10 counts on the tape counter between the starting and ending points.
Recording to cassette tapes
Using this unit, the sound from devices connected to the line input connectors can be recorded on cassette tapes.
This unit can record to normal (type I) and chrome (type II) tapes.
- This unit does not support recording to metal (type IV) tapes.
- This explanation describes how to record from a connected device to TAPE 1 or TAPE 2. This unit also has functions that allow recording a mix with sound input from a microphone (page 21) and parallel recording to both TAPE 1 and TAPE 2 at the same time (page 24).
1 Put a cassette tape for recording in the compartment.
natural_image
Hand placing a black circular object into a white plastic housing with a downward arrow (no text or symbols)- Load it with the side to be recorded facing forward.
- If the erasure prevention tabs of the loaded cassette tape have been broken off, stick a piece of adhesive tape over the hole(s).
2 Press the RECORD (●) button to start recording standby.
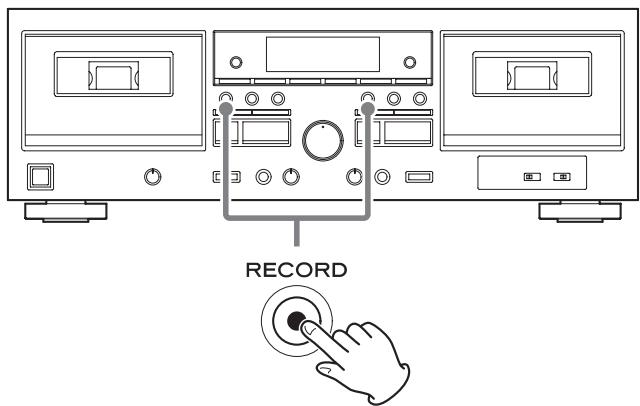
The Ⅱ and REC appear on the display.
- If you want to record using the remote control, press the two RECORD (●) buttons on the remote control at the same time.
- Press the stop (■) button to stop recording when in recording standby.
3 Adjusting the recording level.
Before recording, adjust the recording level. If the recording level is not suitable, the sound of the recording could be distorted (level too high) or noisy (level too low).
1. Play the source (external source) to be recorded.
Examples:
Play the input source of a connected amplifier.
Play the connected audio player.
Tune in a station on a connected radio tuner.
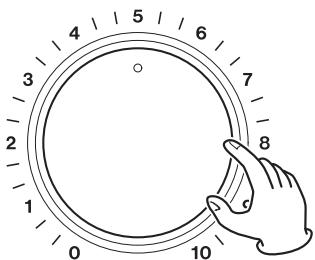
2. Use the REC LEVEL (recording level) knob so that the peak level meter never reaches 0.
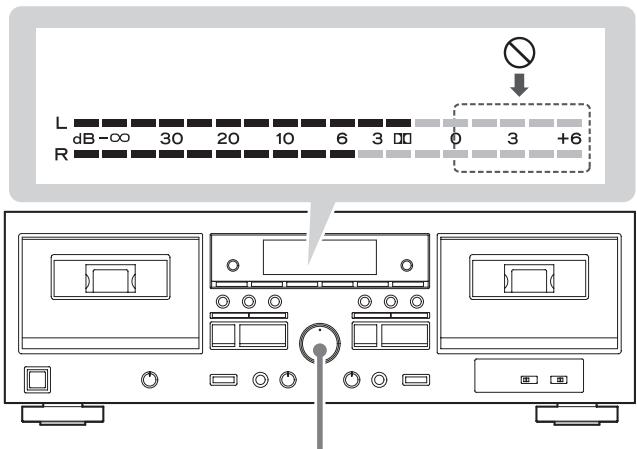
REC LEVEL
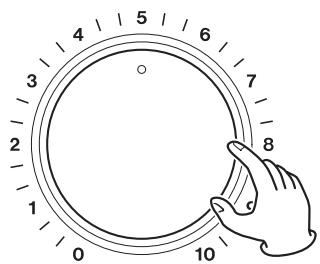

- The volume may differ depending on the recording source. In order to record different sources at appropriate volumes, you must adjust the recording level for each source.
4 Press the PAUSE button to start recording.
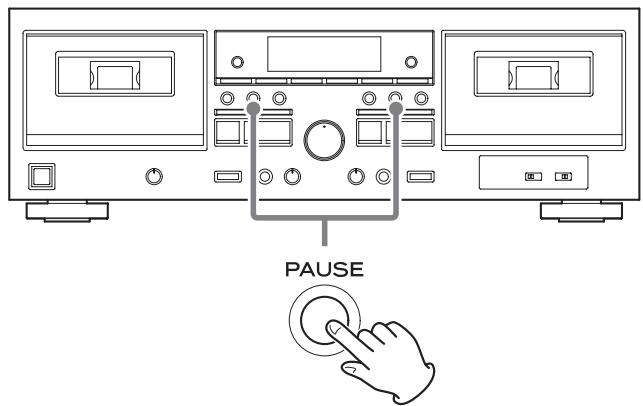
The Ⅱ disappears, and REC and PLAY appear on the display.
ATTENTION
Never turn the power off or disconnect the power cord during recording.
Doing so could cause the tape to become stuck, for example.
Pausing recording
Press the PAUSE button.
Press it again to resume recording.
Stopping recording
Press the stop (■) button.
- When source playback stops, recording does not automatically stop.
Erasing already recorded tapes
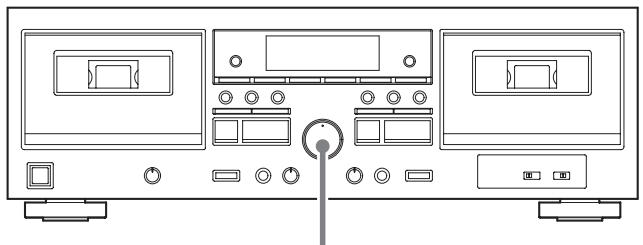
natural_image
Front view diagram of a vintage electronic device front panel with control buttons and indicator lights (no text or labels)REC LEVEL
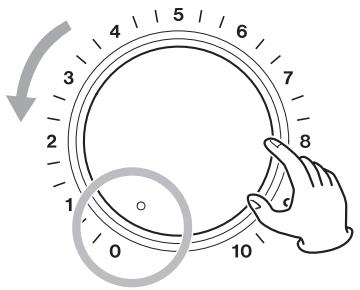
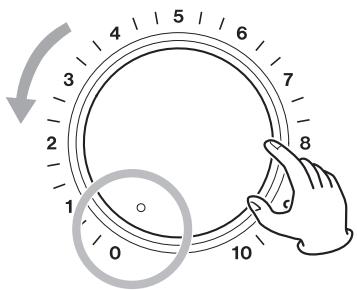
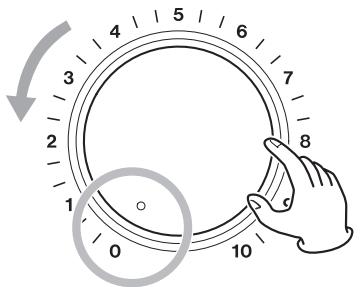
You can erase a cassette tape by setting the recording level to the minimum value (0) and recording silence.
After setting the REC LEVEL (recording level) knob to 0, follow the recording procedures (page 18) to record.
(Skip recording level adjustment in step 3. Setting the recording source is also unnecessary.)
Creating silences (REC MUTE)
Erasing unnecessary parts and creating spaces between songs while recording is possible.

natural_image
Line drawing of a three-panel computer setup with front, back, and side monitors (no text or symbols)REC MUTE
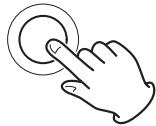
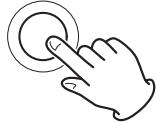
If you press the REC MUTE (record muting) button when recording or in recording standby, the unit records no signal for about 4 seconds and then enters recording standby.
To create a blank of more than 4 seconds long
Hold down the REC MUTE (record muting) button for the desired length of time.
Silence is recorded while you press the button. When you release the button, the unit enters recording standby.
To create a blank of less than 4 seconds long
Press the PAUSE button within 3 seconds of pressing the REC MUTE (record muting) button.
This stops the recording of silence and puts the unit in recording standby.
Press the PAUSE button to resume recording.
- REC blinks on the display while recording is muted.
Mixing line input sounds when recording
You can mix in the sound of a mic connected to this unit with an audio source from a connected device when recording.
You can also record only the sound from the mic.
This unit does not support stereo mics. Use a mono mic.
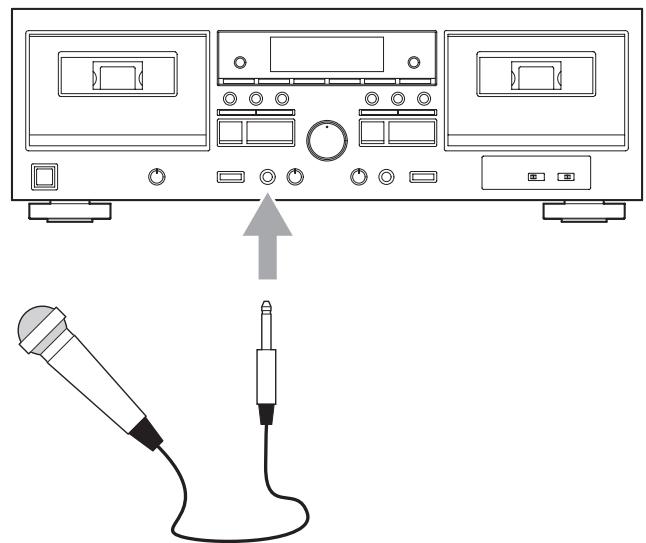
natural_image
Diagram showing connection between a device with an external microphone and connected audio jack (no text or symbols present)Connect the mic plug to the MIC connector on the front of the unit, and follow the recording procedures (page 18) to record.
When adjusting the recording level in step 3 of the recording procedures, adjust both the source and mic levels as follows.
1 Adjust the source level.
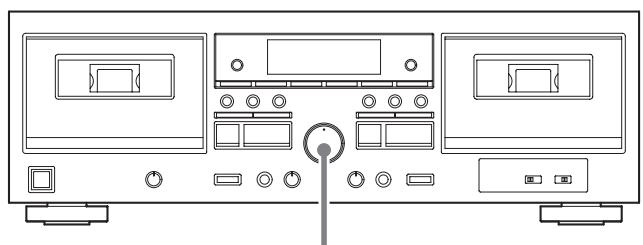
natural_image
Front view diagram of a vintage electronic device front panel with control buttons and indicator lights (no text or labels)REC LEVEL
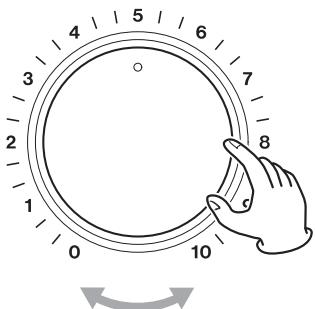
Play the source back and adjust the REC LEVEL (recording level) knob so that the level is slightly low.
2 Adjust the mic level.
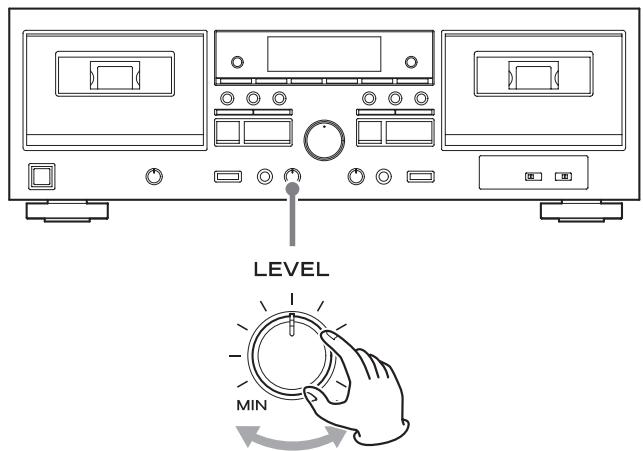
While inputting sound with the mic, turn the mic LEVEL knob to adjust the balance between the source and mic sounds.
3 Adjust the overall level.
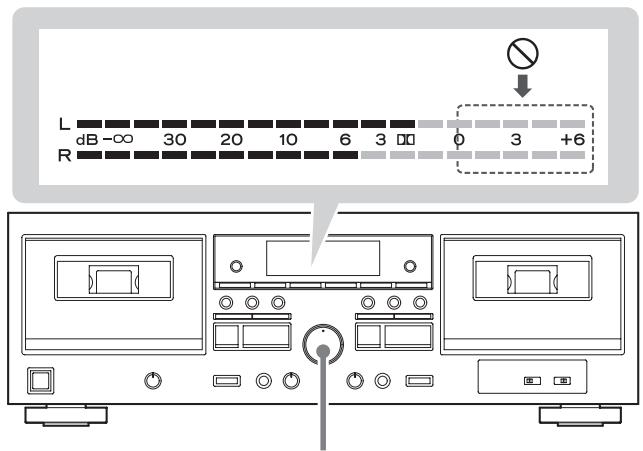
REC LEVEL
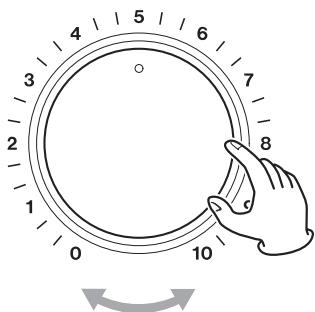
Play the source back and, while inputting the mic sound, adjust the REC LEVEL (recording level) knob so that the peak level meter never exceeds 0 continuously.
After adjusting, continue to the recording procedure (step 4) on page 19.
- The volume may differ depending on the recording source. In order to record different sources at appropriate volumes, you must adjust the recording level for each source.
- The mic sound will be placed equally in both left and right channels so that it sounds centered.
- Connect the source directly to the analog audio input (LINE IN) connectors, or select it on the amplifier connected to the LINE IN connectors (page 14).
Mic mixing with recording (continued)
- When recording a mic, we recommend using headphones for monitoring to prevent feedback.* If monitoring with speakers, be sure to lower their output volume and keep the mic away from them to prevent feedback.
*Feedback explanation
Feedback is when sound output from a speaker is picked up by a mic and returned causing oscillation. This could cause very loud noise that could even damage speakers.
- Silences can also be created (page 20) when recording with mic input.
- When recording a mix of the line input sound and mic input, the REC LEVEL (recording level) knob can be used to adjust the volume after mixing.
Mixing tape playback when recording
You can mix in the sounds of TAPE 1 and input from a mic connected to this unit when recording to TAPE 2.
This unit does not support stereo mics.
Use a mono mic.
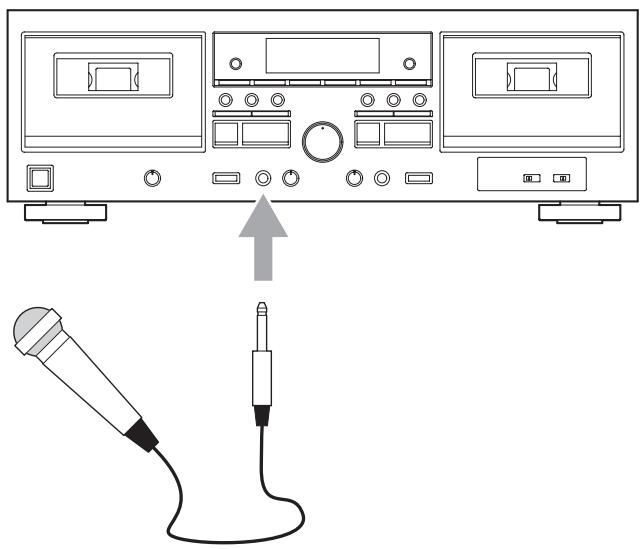
natural_image
Diagram showing a device connected to a microphone via cable, with no visible text or symbolsConnect the mic plug to the MIC connector on the front of the unit.
1 Load a cassette tape for playback into the TAPE 1 compartment and a cassette tape for recording into the TAPE 2 compartment.
2 Press the TAPE 1 play (▶) button to start tape playback. Then, turn the mic LEVEL knob to adjust the balance between the playback and mic sounds.
3 Press the TAPE 1 rewind (◀◀) button and cue the song to play.
4 Press the TAPE 1 stop (■) button to stop the tape.
5 Follow step 2 for dubbing on page 23, and start dubbing with mic mixing.
- When a mic is connected to the MIC connector on the front of the unit, the tape playback level is lowered slightly. This is to ensure enough headroom when the tape playback and mic input sounds are combined.
- When playing a dubbed tape, the playback level will be lowered slightly if a mic is connected to the MIC connector on the front of the unit. When the mic is disconnected, the playback level will return to normal.
- When recording a mix of the tape playback sound and mic input, the REC LEVEL (recording level) knob cannot be used to adjust the volume after mixing.
Enjoying karaoke with tape playback
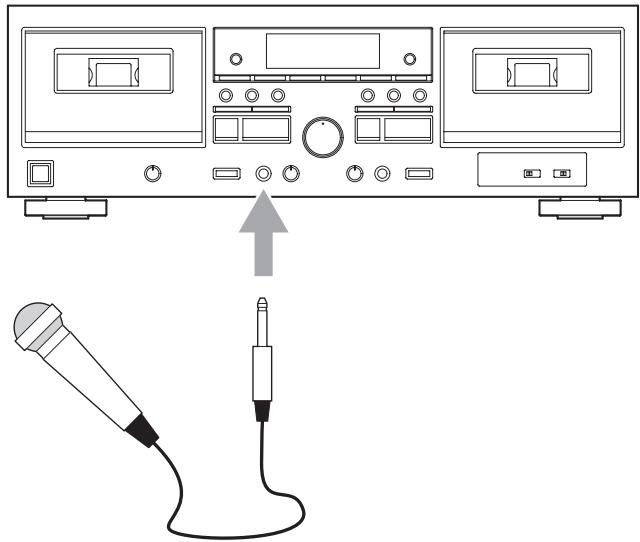
Connect the mic plug to the MIC connector on the front of the unit.
1 Load a cassette tape for playback into the TAPE 1 compartment.
2 Press the TAPE 1 play (▶) button to start tape playback. Then, turn the mic LEVEL knob to adjust the balance between the playback and mic sounds.
Sing along with the song.
- Use the PITCH CONTROL knob to adjust the pitch of the karaoke backing track as necessary.
- Karaoke can also be enjoyed with TAPE 2 playback, but controlling the pitch of the backing track is not possible when using TAPE 2.
- When a mic is connected to the MIC connector on the front of the unit, the tape playback level is lowered slightly. This is to ensure enough headroom when the tape playback and mic input sounds are combined while dubbing with mic mixing.
- The REC LEVEL (recording level) knob cannot be used to adjust the volume after mixing.
Dubbing
TAPE 1 can be dubbed to TAPE 2.
1 Load a cassette tape for playback into the TAPE 1 compartment and a cassette tape for recording into the TAPE 2 compartment.
2 Press the DUB START (dubbing start) button to start dubbing.
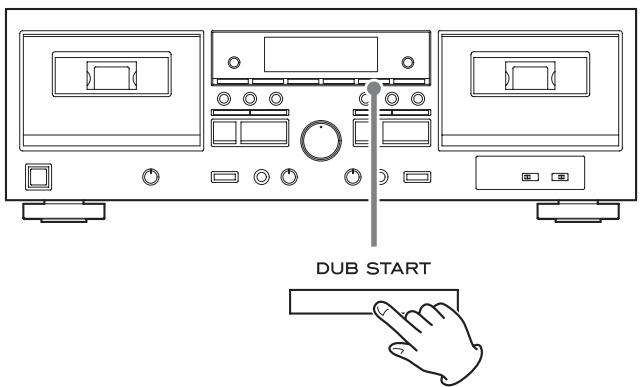
This will start dubbing at normal speed.
During dubbing, the dubbing (NORM DUB) indicator lights on the display.
- To start dubbing using the remote control, press both DUB START (dubbing start) buttons on it at the same time.
- The DUB START (dubbing start) button does not work immediately after the tape is fast-forwarded or rewound to the end. Wait for 5 seconds or more before pressing the button.
When TAPE 1 playback stops, dubbing also stops automatically.
Pausing dubbing
Press the TAPE 2 PAUSE button to pause dubbing. When paused, TAPE 1 will continue playing, but TAPE 2 will not record. Press it again to resume dubbing.
Stopping dubbing before playback ends
Press the TAPE 1 or TAPE 2 stop (■) button.
- The TAPE 2 REC MUTE (record muting) can be used to record silences (page 20) even while dubbing. (The TAPE 1 REC MUTE (record muting) button cannot be used.) Erasing unnecessary parts and creating spaces between songs is possible while dubbing.
- The pitch control function is disabled while dubbing.
- The recording level cannot be adjusted while dubbing.
- Use the same procedures to dub the other side of the tape as necessary.
- To disable mic mixing, do not connect a mic to the MIC connector on the front of the unit. Dubbing when a mic is connected will result in a slightly lower recording level.
Parallel recording
This function allows you to record the same source from a connected device to both TAPE 1 and TAPE 2 simultaneously.
1 Load cassette tapes for recording into both the TAPE 1 and TAPE 2 compartments.
- If the erasure prevention tabs of the loaded cassette tape have been broken off, stick a piece of adhesive tape over the hole(s).
2 Follow recording procedure steps 2–3 on pages 18–19 to adjust the recording level.
3 Press the TAPE 1 stop (■) button to end recording standby.
4 Press the PARALLEL REC (parallel recording) button to start recording.
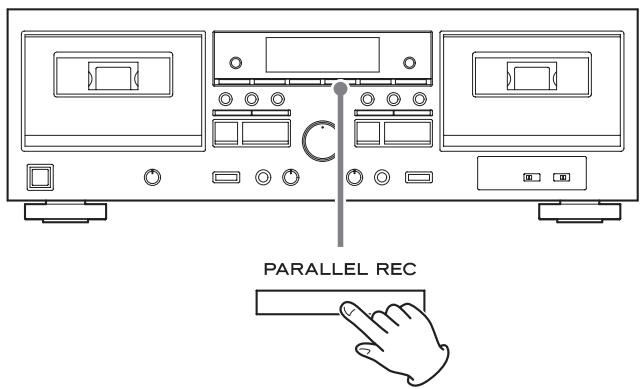
PARALLEL will appear on the display.
- When using the remote control, press both PARALLEL REC (parallel recording) buttons on it at the same time.
- Parallel recording cannot be started when paused. Stop the unit before starting.
- The TAPE 2 REC MUTE (record muting) button can be used to record silences even during parallel recording (page 20). (The TAPE 1 REC MUTE (record muting) button cannot be used.)
Pausing parallel recording
Press the TAPE 2 PAUSE button.
Press it again to resume parallel recording.
Stopping parallel recording
Press the TAPE 1 or TAPE 2 stop (■) button.
- When source playback stops, recording does not automatically stop.
Recording with a computer
Connect this unit to a computer using a commercially-available USB cable to convert audio signals from a cassette tape to digital data and send them to the computer.
Supported operating systems
Computers running the following operating systems can be connected by USB to this unit. Use with operating systems other than these is not guaranteed (as of November 2017).
Windows
Windows 7 (32-bit, 64-bit)
Windows 8 (32-bit, 64-bit)
Windows 8.1 (32-bit, 64-bit)
Windows 10 (32-bit, 64-bit)
Mac
OS X Lion (10.7)
OS X Mountain Lion (10.8)
OS X Mavericks (10.9)
OS X Yosemite (10.10)
OS X El Capitan (10.11)
macOS Sierra (10.12)
macOS High Sierra (10.13)
- This unit will run with the standard OS driver, so there is no need to install a special driver.
Connecting with a computer
1 Turn the computer on.
Confirm that the operating system is working correctly.
2 Use the USB cable to connect the computer and this unit.
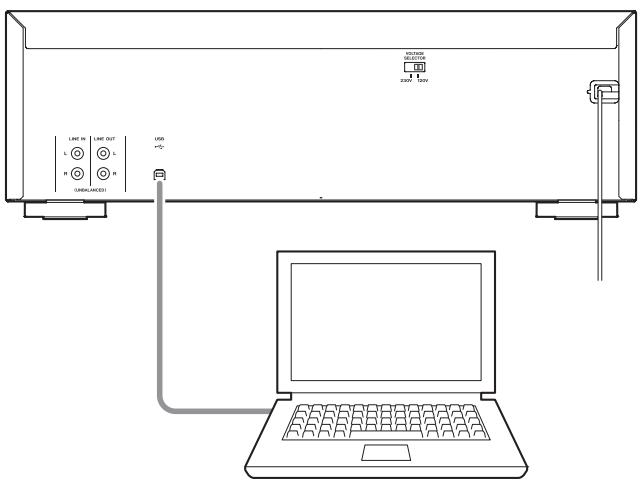
- For connecting to a computer, we recommend using a USB cable that has a ferrite core, which resists noise, attached.
3 Press the POWER button on this unit to turn the unit on.
When the computer and this unit are connected, the computer will automatically detect this unit's USB port and identify it as "USB Audio CODEC".
- To record audio from this unit using a computer, you must first install software that can be used for audio recording on the computer.
You may purchase the audio recording software that you prefer separately or download free software, such as Audacity (http://www.audacityteam.org/), from the Internet.
As free software, Audacity is not supported by TEAC.
- When connected to a computer by USB and recording audio, do not do any of the following. Doing so could cause the computer to malfunction. Always quit the computer recording software before doing the following.
- Disconnect the USB cable
- Turn the unit off
Computer settings
The following example explains the settings to make using Windows 7.
1 From the Start menu, select Control Panel.
2 Click "Sound".
3 Click the "Recording" tab, and confirm that "USB Audio CODEC" is set as the "Default Device".
4 Select "Microphone USB Audio CODEC", and click the Properties button.
5 Click the "Advanced" tab.
6 From the "Default Format" pull-down menu list, select the desired recording quality (format).
TIP
"2 channel, 16 bit, 48000 Hz (DVD quality)" provides high audio quality but also requires more file space. Recording with a lower sampling frequency reduces the audio quality but also uses less file space.
7 Click "OK".
Timer-controlled playback and recording
Recording and playback by this unit can be started at set times by connecting a commercially-available timer.
- Only cassette tapes loaded in this unit can be played back using timer playback. Timer playback cannot be used with other connected equipment.
- Timer recording sources are limited to connected equipment that can be operated by timer. This can be used for timed recording of radio broadcasts, for example.
● A timer cannot be used for dubbing from TAPE 1 to TAPE 2.
Connections
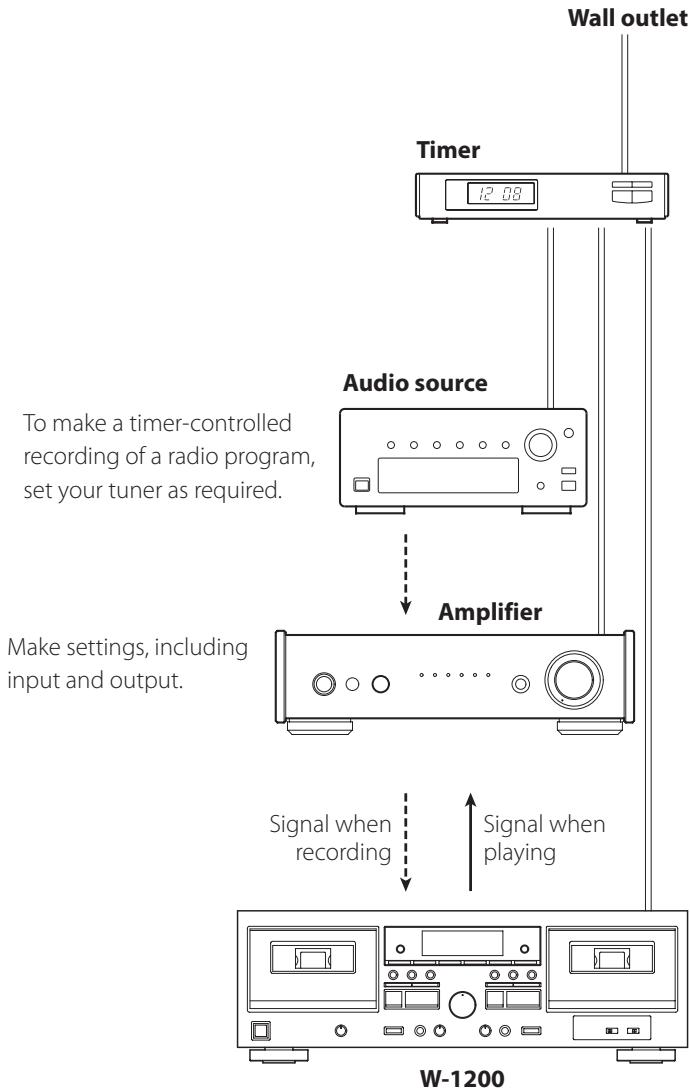
Referring to the illustration below, connect your audio equipment.
flowchart
graph TD
    A["Audio source"] --> B["Amplifier"]
    B --> C["Signal when recording"]
    C --> D["W-1200"]
    E["Timer"] --> F["Wall outlet"]
    G["Make settings, including input and output."] --> B
    H["To make a timer-controlled recording of a radio program, set your tuner as required."] --> B
    I["Signal when playing"] --> C

Complete all other connections before turning the unit on.
- Carefully read the manuals of the devices that you are connecting and follow their instructions when making connections.
- Do not bundle connecting cables with power cords. Doing so could cause noise.
Timer-controlled playback
- Only cassette tapes loaded in this unit can be played back using timer playback. Timer playback cannot be used with other connected equipment.
1 Connect the W-1200 and the other equipment to a commercially-available timer as shown in the illustration to the left.
2 Set the power switches of all components to ON.
3 Load the cassette that you want to use for timer playback.
- Load the cassette tape with the side to be played facing forward.
- If cassettes are loaded in both TAPE 1 and TAPE 2, TAPE 1 will play back and stop.
If a cassette is loaded only in TAPE 2, it will play back.
4 Set the TIMER switch to PLAY.
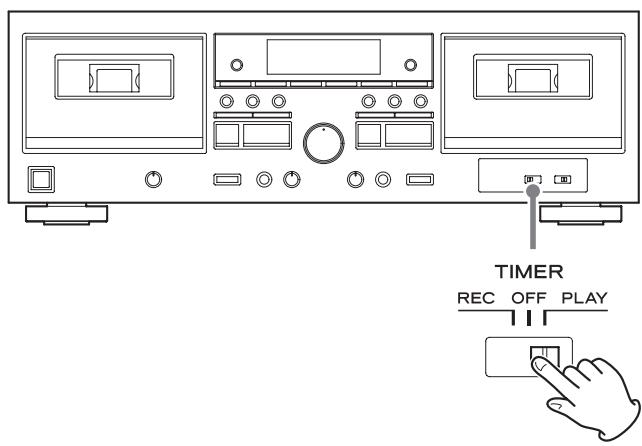
5 Set the timer to your desired start (power on) and stop (power off) times.
When this setting is completed, the power to all components should be turned off.
At this time, do not press this unit's POWER button.
Leave the button pushed in (the on position). If the POWER button is in the off position, timer playback will not function.
When the timer on time is reached, the timer will supply power to the connected devices and playback will start.
- When you do not want to use the timer, set the TIMER switch to OFF.
Timer-controlled recording
- Timer recording sources are limited to connected equipment that can be operated by timer. This can be used for timed recording of radio broadcasts, for example.
● A timer cannot be used for dubbing from TAPE 1 to TAPE 2.
1 Connect the W-1200 and the other equipment to a commercially-available timer as shown in the illustration on the previous page.
2 Set the power switches of all components to ON.
3 Load the cassette tape that you want to use for timer recording.
- If the erasure prevention tabs of the loaded cassette tape have been broken off, stick a piece of adhesive tape over the hole(s).
- This unit can record to normal (type I) and chrome (type II) tapes.
4 Set the TIMER switch to REC.
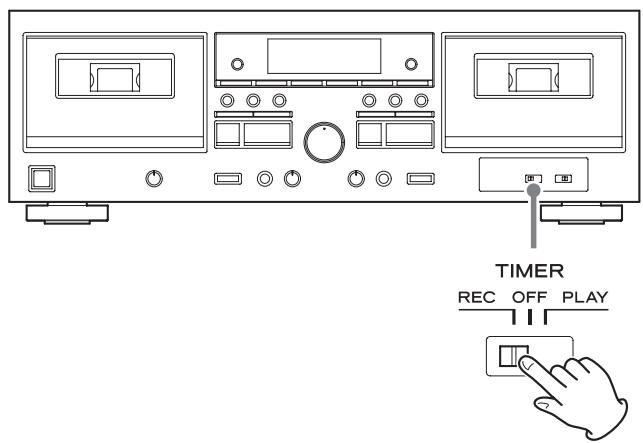
5 (When recording from radio) Tune in the radio station that you want to record.
Timer-controlled playback and recording (continued)
6 Adjusting the recording level.
Before recording, adjust the recording level. If the recording level is not suitable, the sound of the recording could be distorted (level too high) or noisy (level too low).
- Play the source (external source) to be recorded.
- Use the REC LEVEL (recording level) knob so that the peak level meter never reaches 0.
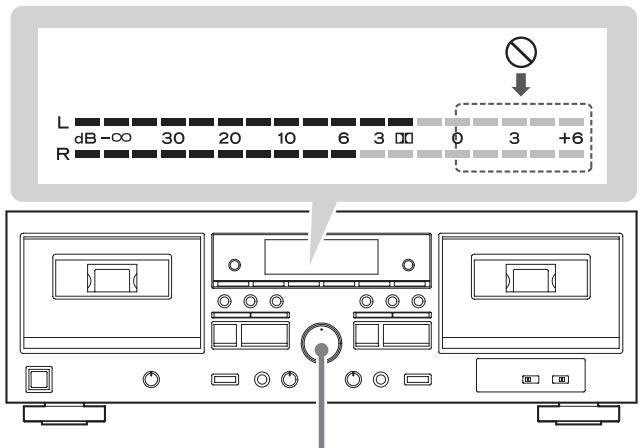
REC LEVEL
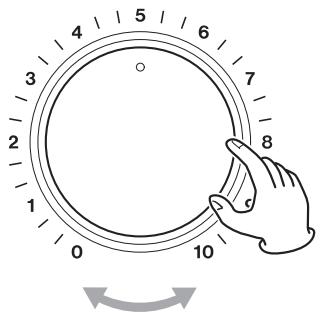
- The volume may differ depending on the recording source. In order to record different sources at appropriate volumes, you must adjust the recording level for each source.
7 Set the timer to your desired start (power on) and stop (power off) times.
When this setting is completed, the power to all components should be turned off.
At this time, do not press this unit's POWER button.
Leave the button pushed in (the on position). If the POWER button is in the off position, timer recording will not function.
When the timer on time is reached, the timer will supply power to the connected devices and recording will start.
- When you do not want to use the timer, be sure to set the TIMER switch to OFF to prevent accidentally recording over an important cassette tape.
Automatic power saving function
ATTENTION
The automatic power saving function is only included in European models.
The automatic power saving function is ON when this unit is shipped new, so it will automatically turn off if 30 minutes pass under the conditions shown below.
| Status | Cassette tape |
| No cassette tape | √ |
| Stopped | √ |
| Recording paused | - |
√ Automatic power saving function active
- Automatic power saving function not active
To reactivate the unit after it has turned off automatically, press the POWER button on the main unit twice.
Changing the automatic power saving setting
1 Stop both TAPE 1 and TAPE 2.
2 Press the TAPE 1 and TAPE 2 (■) buttons at the same time to show the current setting ("Apwr OFF" or "Apwr On") in the tape counter area.
3 Use the TAPE 2 play (▶) button to change the setting.
4 Press the TAPE 2 stop (■) button to return to the ordinary state.
Troubleshooting
If you experience a problem with the unit, please take a moment to review the following information before requesting service. Moreover, the problem might be caused by something other than this unit. Please also check the operation of the connected units. If it still does not operate correctly, contact the retailer where you purchased the unit.
The unit does not turn on.
→ Check that the power cord is plugged into a working power outlet.
→ Check that the power cord is properly connected to this unit.
→ Check that the power cord is completely plugged into the power outlet.
When the unit is turned on, playback/recording starts unexpectedly.
→ Set the TIMER switch to OFF.
Remote control does not work.
→ Press the POWER button to turn the unit on.
If the batteries are exhausted, replace both of them with new ones.
→ Point the remote control at the front panel of the unit from a distance of less than about 5 m (16 ft).
The remote control will not work if there is an obstruction between it and the main unit. In this case, try changing the position.
→ Turn off any strong light source near this unit.
When using the remote control, a television or another device operates in error.
The use of this unit's remote control might cause some televisions with wireless remote control functions to operate incorrectly. If this should occur, use the main unit's buttons.
The unit does not respond when buttons are pressed.
The unit sometimes does not respond when buttons are pressed during operation. Try pressing the button again after waiting a little while.
→ Load a cassette if one is not already loaded.
→ Insert the cassette correctly.
Troubleshooting (continued)
No or very little sound is output.
→ Confirm connections with the amplifier.
→ Confirm connections with the speakers and other devices.
→ Confirm that operation of the connected device is correct.
→ Confirm that speaker cable ⊕ and ⊖ are not shorted.
There is noise.
→ Place the unit as far away as possible from TVs, microwave ovens and other devices that have strong magnetism.
Cassette compartment does not close.
It will not close if the cassette tape is not properly loaded. Reinsert the cassette correctly.
Sound quality is poor.
→ Clean the heads (page 8).
Playback speed seems somewhat fast or slow.
→ Check the pitch control setting (page 17).
Recording is not possible.
If the erasure prevention tabs of the loaded cassette tape have been broken off, stick a piece of adhesive tape over the hole(s).
→ Check the recording level setting (page 19).
→ Confirm connections with the amplifier and the source device.
→ Confirm that the amplifier selector is set correctly.
Timer-controlled playback/recording does not start.
→ For timer playback, set the TIMER switch to PLAY.
→ For timer recording, set the TIMER switch to REC.
→ Press the POWER button on this unit to turn it on.
→ After setting timer playback/recording, turn the power off from the timer. (When the timer turns the power on, the W-1200 will operate.)
This unit uses a microprocessor, so noise and other external interference could cause it to stop functioning properly. If this occurs, unplug the power cord, wait for a while, and then turn the power back on to restart operations.
Specifications
Cassette recorder
Tracking system 4-track, 2-channel stereo
Head construction
Recording/playback head (1 each for TAPE 1 and TAPE 2)
Erase head (1 each for TAPE 1 and TAPE 2)
Tape speed 4.8 cm/s
Pitch control.... ±12%
Fast winding time .... About 120 seconds for a C-60 tape
Wow and flutter 0.25% (WRMS)
Frequency response
Chrome tape (Type II) 30 Hz – 15 kHz (±4 dB)
Normal tape (Type I).... 30 Hz – 13 kHz (±4 dB)
Total S/N ratio 59 dB
(during maximum recording level input, A-weighted)
Analog audio input connectors (RCA)
Nominal input level .... -9 dBu (0.28 Vrms)
Maximum input level....+20 dBu (7.75 Vrms)
Input impedance.... 33 kΩ
Mic input connector (standard mono jack)
Minimum input level ...... -66 dBu (0.388 mVrms)
Input impedance.... 3 kΩ or more
Analog audio output connectors (RCA)
Nominal output level.... -4.5 dBu (0.46 Vrms)
Output impedance....1 kΩ
Headphone output jack (standard stereo)
15 mW + 15 mW (into 32Ω load)
USB port (type B)
USB 2.0 (Full Speed) standard compliant
Sampling frequency
8 kHz, 11.025 kHz, 16 kHz, 22.05 kHz, 32 kHz, 44.1 kHz, 48 kHz
Quantization bit depth 8/16-bit
- 1 dBu = 0.775 Vrms
General
Power supply
Model for Europe. AC 230 V, 50 Hz
Model for U.S.A./Canada. AC 120 V, 60 Hz
Power consumption
Model for Europe.... 22 W
Model for U.S.A./Canada 22 W
External dimensions (W × H × D, including protrusions)
435 × 145 × 285.8 mm (17 1/4" × 5 3/4" × 11 3/8")
Weight
Model for Europe.... 4.6 kg (10 1/4 lb)
Model for U.S.A./Canada 4.2 kg (9 3/8 lb)
Included items
Remote control (RC-1331) × 1
Batteries for remote control (AA) × 2
RCA audio cables × 2
Owner's manual (this document, including warranty) × 1
- For information about the warranty, users living in the USA and Canada should see pages 92-93 and the back cover (warranty document). Users living in Europe and other regions should see page 93.
- Design and specifications are subject to change without notice.
● Weight and dimensions are approximate.
- Illustrations in this Owner's Manual might differ slightly from production models.
CAUTION
RISK OF ELECTRIC SHOCK DO NOT OPEN
ATTENTION : POUR RÉDUIRE LE RISQUE D'ÉLECTROCUTION, NE RETIREZ PAS LE CAPOT (OU L'ARRIÈRE). AUCUNE PIÈCE INTERNE N'EST RÉPARABLE PAR L'UTILISATEUR. CONFIEZ TOUTE RÉPARATION À UN SERVICE APRÈS-VENTE QUALIFIÉ.

natural_image
Silhouette of a person climbing a ladder inside a circular frame (no text or symbols)ATTENTION
Microsoft and Windows are either registered trademarks or trademarks of Microsoft Corporation in the United States and/or other countries.
Apple, Mac, OS X and macOS are trademarks of Apple Inc., registered in the U.S. and other countries.
flowchart
graph LR
    A["Music Device"] --> B["TAPE1"]
    B --> C["ou"]
    C --> D["TAPE2"]
flowchart
graph TD
    A["TAPE1"] --> B["TAPE2"]
    C["TAPE1"] --> B["TAPE2"]
flowchart
graph TD
    A["Appareil connecté"] --> B["TAPE1"]
    A --> C["TAPE2"]
Normal (type I), chrome (type II)
natural_image
Illustration of hands using a tool to cut a mechanical component (no text or symbols visible)natural_image
Technical line drawing of a remote control panel with two terminals and a separate cover (no text or symbols)natural_image
Line drawing of a front panel with two monitors, buttons, and a central control panel (no text or symbols)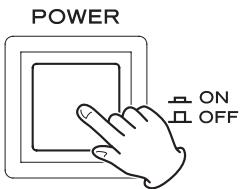
natural_image
Front view diagram of a vintage electronic device front panel with control knobs and buttons (no text or labels)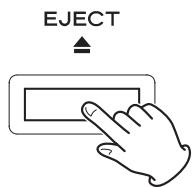
natural_image
Line drawing of a hand inserting a CD into a box with a downward arrow indicating compression (no text or symbols)natural_image
Line drawing of a device front panel connected to a screen with a hand pointing at the screen (no text or symbols present)ATTENTION
natural_image
Diagram of a hand interacting with a device via a control panel and display, showing no text or symbols.natural_image
Line drawing of a device front panel with control buttons and a hand interacting with the right button (no text or symbols)natural_image
Line drawing of a front panel with three monitors, control knobs, and indicator lights (no text or symbols)PITCH CONTROL
natural_image
Line drawing of a three-panel computer setup with front, top, and side monitors (no text or symbols)COUNTER RESET
natural_image
Hand inserting a CD into a plastic housing (no text or symbols visible)natural_image
Line drawing of a front panel with two monitors, buttons, and a central indicator (no text or symbols)REC LEVEL
natural_image
Line drawing of a three-panel computer setup with front, back, and side monitors (no text or symbols)REC MUTE
natural_image
Diagram showing connection between a device with a microphone and two monitors, no text or symbols presentnatural_image
Diagram showing a device with two monitors and a connected audio jack (no text or symbols present)natural_image
Diagram showing a device connected to a microphone via an audio jack (no text or symbols present)Windows 7 (32 bits, 64 bits)
Windows 8 (32 bits, 64 bits)
Windows 8.1 (32 bits, 64 bits)
Windows 10 (32 bits, 64 bits)
Mac
OS X Lion (10.7)
OS X Mountain Lion (10.8)
OS X Mavericks (10.9)
OS X Yosemite (10.10)
OS X El Capitan (10.11)
macOS Sierra (10.12)
macOS High Sierra (10.13)
8 kHz, 11,025 kHz, 16 kHz, 22,05 kHz, 32 kHz, 44,1 kHz, 48 kHz
Résolution de quantification.... 8/16 bits
Dimensions externes (L × H × P, saillies incluses)
435 × 145 × 285,8 mm
Poids
natural_image
Symbolic icon of a person lifting a large ladder inside a circle (no text or symbols)PRECAUCIÓN
Microsoft and Windows are either registered trademarks or trademarks of Microsoft Corporation in the United States and/or other countries.
Apple, Mac, OS X and macOS are trademarks of Apple Inc., registered in the U.S. and other countries.
http://audio.teac.com/support/registration/
natural_image
Illustration of hands using a tool to cut a mechanical component (no text or symbols visible)natural_image
Technical line drawing of a remote control panel with two terminals and a separate cover (no text or symbols)natural_image
Front view diagram of a vintage electronic device front panel with control buttons and indicator lights (no text or symbols)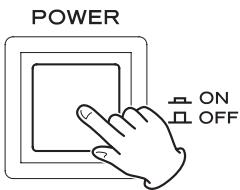
natural_image
Front view diagram of a computer setup with front panel, back panel, and control buttons (no text or labels)EJECT
[NO TEXT]
natural_image
Line drawing of a hand inserting a CD into a slot (no text or symbols)natural_image
Line drawing of a device front panel connected to a screen with a hand pointing at the screen (no text or symbols present)ATENCIÓN
natural_image
Diagram of a device setup with three monitors and a hand interacting with a screen (no text or symbols present)natural_image
Line drawing of a device front panel with control buttons and a hand pressing a button (no text or symbols)natural_image
Line drawing of a front panel with two monitors, control knobs, and a rotary knob (no text or symbols)PITCH CONTROL
natural_image
Line drawing of a vintage television set with two monitors and control knobs (no text or symbols)COUNTER RESET
natural_image
Line drawing of a hand pressing down on a mechanical component with a downward arrow indicating compression (no text or symbols)natural_image
Front view diagram of a vintage electronic device front panel with control buttons and indicator lights (no text or labels)REC LEVEL
natural_image
Line drawing of a three-panel computer setup with front, back, and side monitors (no text or symbols)REC MUTE
natural_image
Diagram showing a device with two monitors and a connected audio jack (no text or symbols present)natural_image
Front view diagram of a vintage electronic device front panel with control buttons and indicator lights (no text or labels)REC LEVEL

natural_image
Diagram showing a device connected to a microphone via cable, with no visible text or symbolsnatural_image
Diagram showing a device with three monitors and an audio jack connected to a cable, no text or symbols present.Windows 7 (32 bits, 64 bits)
Windows 8 (32 bits, 64 bits)
Windows 8.1 (32 bits, 64 bits)
Windows 10 (32 bits, 64 bits)
Mac
OS X Lion (10.7)
OS X Mountain Lion (10.8)
OS X Mavericks (10.9)
OS X Yosemite (10.10)
OS X El Capitan (10.11)
macOS Sierra (10.12)
macOS High Sierra (10.13)
8 kHz, 11,025 kHz, 16 kHz, 22,05 kHz, 32 kHz, 44,1 kHz, 48 kHz
Warranty provisions (United States and Canada only)
Length of Warranty
The parts and labor warranty will be effective for one (1) year from the date of the original purchase for products not used for commercial purposes. For products used commercially, the warranty is ninety (90) days for magnetic heads and optical pickups, one (1) year for all other parts and ninety (90) days for labor.
Who Is Covered Under This Warranty
This warranty is valid only in the United States or Canada, dependent upon the country in which original purchase was made, and enforceable only by the original purchaser within the country in which the purchase was made.
This warranty is not valid if the product was purchased through an unauthorized dealer.
What Is Not Covered Under This Warranty
● Damage to or deterioration of the external cabinet.
● Damage resulting from accident, misuse, abuse, or neglect.
- Damage resulting from failure to follow instructions contained in the products owners' manual or otherwise provided with the product.
- Damage occurring during shipment of the product (Claims must be presented to the carrier).
- Damage resulting from the repair or attempted repair by anyone other than TEAC or an authorized TEAC service station.
- Damage resulting from modification or attempted modification of product not authorized by TEAC.
- Damage resulting from causes other than product defects, including lack of technical skills, competence, or experience of the user.
- Damage to any unit that has been altered or which the serial number has been defaced, modified or removed.
What TEAC Will Pay For
TEAC will pay all labor and material expenses for items covered by the warranty. Payment of shipping charges is covered in the next section.
How To Obtain Warranty Service
Your unit must be serviced by an authorized TEAC service station within the country in which the product was purchased. If you are unable to locate an authorized service station in your area, please contact TEAC at the applicable address shown at the end of this warranty statement. PLEASE DO NOT RETURN YOUR UNIT TO TEAC WITHOUT OUR PRIOR AUTHORIZATION. You must pay shipping charges if it is necessary to ship the product for service. However, if the necessary repairs are covered by warranty, we will pay the return shipping charges to any destination within the country in which the product was purchased. Whenever warranty service is required, you must present the original dated sales receipt, or other proof indicating the purchase place and date, as proof of warranty coverage.
LIMITATION OF IMPLIED WARRANTIES
ALL IMPLIED WARRANTIES, INCLUDING WARRANTIES OF MERCHANTABILITY AND FITNESS FOR A PARTICULAR PURPOSE, ARE LIMITED IN DURATION TO THE LENGTH OF THIS WARRANTY.
EXCLUSION OF DAMAGES
TEAC'S LIABILITY FOR ANY DEFECTIVE PRODUCT IS LIMITED TO REPAIR OR REPLACEMENT OF THE PRODUCT, AT TEAC'S OPTION. TEAC SHALL NOT BE LIABLE FOR DAMAGE BASED UPON INCONVENIENCE, LOSS OF USE OF THE PRODUCT, INTERRUPTED OPERATION, COMMERCIAL LOSS OR LOST PROFITS, OR ANY OTHER DAMAGES, WHETHER INCIDENTAL, CONSEQUENTIAL, PUNITIVE OR OTHERWISE.
SOME STATES OR PROVINCES DO NOT ALLOW LIMITATIONS ON HOW LONG AN IMPLIED WARRANTY LASTS AND/OR DO NOT ALLOW THE EXCLUSION OR LIMITATION OF INCIDENTAL OR CONSEQUENTIAL DAMAGES, SO THE ABOVE LIMITATIONS AND EXCLUSIONS MAY NOT APPLY TO YOU.
THIS WARRANTY GIVES YOU SPECIFIC RIGHTS, AND MAY VARY FROM SOME OF THE RIGHTS PROVIDED BY LAW. THESE RIGHTS MAY VARY FROM STATE TO STATE OR PROVINCE TO PROVINCE.
This product is subject to the legal warranty regulations of the country of purchase. In case of a defect or a problem, please contact the dealer where you bought the product.
In countries/regions other than the USA, Canada and Europe
This warranty gives you specific legal rights, and you may also have other rights that vary by country, state or province.
If you have a warranty claim or request, please contact the dealer where you bought the product.

- Double Cassette Deck
- OWNER'S MANUAL
- MODE D'EMPLOI
- MANUAL DEL USUARIO
- CAUTION
- Precautions concerning batteries
- Declaration of Conformity
- Model for USA
- Model for Canada
- Model for Europe
- For European Customers
- Disposal of electrical and electronic equipment and batteries and/or accumulators
- Contents
- Using the TEAC Global Site
- http://teac-global.com/
- NOTE
- Product registration
- Capabilities of this unit
- Cassette tape playback
- Cassette tape recording
- Timer operation
- Included items
- Precautions for use
- ATTENTION
- Before use (continued)
- Maintenance
- For your safety, disconnect the power cord from the outlet before cleaning.
- Cleaning the cassette decks
- Cassette tapes
- Cassette tapes that can be used with this unit
- Types of cassette tapes that can be played by this unit
- Types of cassette tapes that can be used for recording by this unit
- Storage precautions
- Types of cassette tapes that should be avoided
- Deformed cassette tapes
- Long play tapes
- Endless cassette tapes
- Tape slackening
- Automatic tape type detection function
- Accidental erasure prevention tabs
- Names and functions of parts (main unit)
- A Cassette compartment
- B RETURN TO ZERO button
- COUNTER RESET buttons
- D Remote control signal receiver
- E DIMMER button
- F REPEAT button
- G PARALLEL REC (parallel recording) button
- H Display
- I DUB START (dubbing start) button
- J POWER button
- K PITCH CONTROL knob
- L Cassette tape operation buttons
- RECORD (●) button
- PAUSE button
- REC MUTE (record muting) button
- Rewind/fast-forward ( ◀◀/▶▶ ) buttons
- Stop (■) button
- PLAY (▶) button
- EJECT (▲) button
- Using the remote control
- M MIC connector and mic LEVEL knob
- N REC LEVEL (recording level) knob
- O PHONES jack/LEVEL knob
- P TIMER switch
- Q NOISE REDUCTION switch
- Installing batteries
- When to replace batteries
- Names and functions of parts (remote control)
- a DIMMER button
- b PARALLEL REC (parallel recording) buttons
- c TAPE 1 and TAPE 2 operation buttons
- RTZ button
- COUNTER RESET button
- PAUSE (II) button
- STOP ( ■ ) button
- d REPEAT button
- e DUB START (dubbing start) buttons
- Names and functions of parts (display)
- a Peak level meters
- b Parallel recording (PARALLEL) indicator
- C TAPE 1/TAPE 2 status indicators
- d Dubbing (NORM DUB) indicator
- Complete all other connections before turning the unit on.
- Analog audio input/output (LINE IN/OUT) connectors
- LINE OUT (line outputs)
- Voltage selector
- Power cord
- Listening to a cassette tape
- Press the POWER button to turn the unit on.
- Press the EJECT (▲) button to open the cassette compartment.
- Load a cassette tape into the compartment.
- Press the play (▶) button to start playback.
- Pitch control (TAPE 1 only)
- Tape counter
- Returning to zero
- Repeat playback
- Recording to cassette tapes
- Adjusting the recording level.
- Play the source (external source) to be recorded.
- Use the REC LEVEL (recording level) knob so that the peak level meter never reaches 0.
- Press the PAUSE button to start recording.
- Pausing recording
- Stopping recording
- Creating silences (REC MUTE)
- To create a blank of more than 4 seconds long
- To create a blank of less than 4 seconds long
- Mixing line input sounds when recording
- Mic mixing with recording (continued)
- Mixing tape playback when recording
- This unit does not support stereo mics.
- Follow step 2 for dubbing on page 23, and start dubbing with mic mixing.
- Enjoying karaoke with tape playback
- Dubbing
- Pausing dubbing
- Stopping dubbing before playback ends
- Parallel recording
- Load cassette tapes for recording into both the TAPE 1 and TAPE 2 compartments.
- Follow recording procedure steps 2–3 on pages 18–19 to adjust the recording level.
- Press the TAPE 1 stop (■) button to end recording standby.
- Press the PARALLEL REC (parallel recording) button to start recording.
- Pausing parallel recording
- Stopping parallel recording
- Recording with a computer
- Supported operating systems
- Windows
- Mac
- Connecting with a computer
- Turn the computer on.
- Use the USB cable to connect the computer and this unit.
- Press the POWER button on this unit to turn the unit on.
- Computer settings
- TIP
- Timer-controlled playback and recording
- Connections
- Timer-controlled playback
- Set the timer to your desired start (power on) and stop (power off) times.
- Timer-controlled recording
- Timer-controlled playback and recording (continued)
- Adjusting the recording level.
- Set the timer to your desired start (power on) and stop (power off) times.
- Automatic power saving function
- Changing the automatic power saving setting
- Troubleshooting
- The unit does not turn on.
- When the unit is turned on, playback/recording starts unexpectedly.
- Remote control does not work.
- When using the remote control, a television or another device operates in error.
- The unit does not respond when buttons are pressed.
- Troubleshooting (continued)
- No or very little sound is output.
- There is noise.
- Cassette compartment does not close.
- Sound quality is poor.
- Playback speed seems somewhat fast or slow.
- Recording is not possible.
- Timer-controlled playback/recording does not start.
- Specifications
- Cassette recorder
- General
- PRECAUCIÓN
- ATENCIÓN
- Warranty provisions (United States and Canada only)
- Length of Warranty
- Who Is Covered Under This Warranty
- What Is Not Covered Under This Warranty
- What TEAC Will Pay For
- How To Obtain Warranty Service
- LIMITATION OF IMPLIED WARRANTIES
- EXCLUSION OF DAMAGES
- In countries/regions other than the USA, Canada and Europe
Brand : TEAC
Model : W-1200
Category : Platinum cd