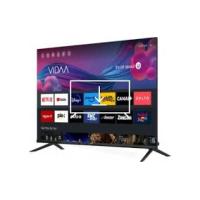
LT-32FA120 - TV JVC - Free user manual and instructions
Find the device manual for free LT-32FA120 JVC in PDF.
Download the instructions for your TV in PDF format for free! Find your manual LT-32FA120 - JVC and take your electronic device back in hand. On this page are published all the documents necessary for the use of your device. LT-32FA120 by JVC.
USER MANUAL LT-32FA120 JVC
BACK SUBT AUDIO RM-C3520 Colocar as pilhas
[European Union] Dear Customer, This apparatus is in conformance with the valid European directives and standards regarding electromagnetic compatibility and electrical safety. Etablissements Darty & ls ©, 9 Rue des Bateaux-Lavoirs, 94200 Ivry-sur-Seine, France LICENSE INFORMATION
- DVB and the DVB logo are trademarks of the DVB project.
- The Adopted Trademarks HDMI, HDMI High-De nition Multimedia Interface, and the HDMI Logo are trademarks or registered trademarks of HDMI Licensing Administrator, Inc. in the United States and other countries.
- Manufactured under license from Dolby Laboratories. Dolby, Dolby Audio and the double-D symbol are trademarks of Dolby Laboratories Licensing Corporation.
- Google, Google Play, Chromecast, YouTube, Android TV and other related marks and logos are trademarks of Google LLC.
- Net ix is a registered trademark of Net ix, Inc.
- The Bluetooth® word mark and logos are registered trademarks owned by Bluetooth SIG,Inc. and any use of such marks by Express Luck Technology Ltd. is under license. Other trademarks and trade names are those of their respective owners.
PLEASE READ THE FOLLOWING INSTRUCTIONS CAREFULLY BEFORE USING THE APPLIANCE AND KEEP FOR FUTURE REFERENCE.
- Ventilation: Allow at least a 10 cm gap all around the product.
- The ventilation should not be impeded by covering the ventilation openings with items, such as newspapers, table-cloths, curtains, etc.
- No naked ame sources, such as lighted candles, should be placed on the apparatus.
- The apparatus shall not be exposed to dripping or splashing and that no objects lled with liquids, such as vases, shall be placed on the apparatus.
- Where the MAINS plug or an appliance coupler is used as the disconnect device, the disconnect device shall remain readily operable.
- To protect the environment, use local recycling facilities for battery disposal.
- Batteries (battery pack or batteries installed) shall not be exposed to excessive heat such as sunshine, re or the like.
- Attention should be drawn to the environmental aspects of battery disposal. Don't throw used batteries in dustbin. Please contact your retailer in order to protect the environment.
- Disposal of a battery into re or a hot oven, or mechanically crushing or cutting of a battery or expose to excessive heat such as sunshine, re or the like that can result in an explosion.
- Leaving a battery in an extremely high temperature surrounding environment that can result in an explosion or the leakage of ammable liquid or gas.
- A battery subjected in extremely low air pressure that may result in an explosion or the leakage of ammable liquid or gas.
- Different types of batteries or new and used batteries are not to be mixed.
- Batteries are to be inserted with the correct polarity.
- Exhausted batteries are to be removed from the appliance.
- The supply terminal are not to be short-circuited.
To prevent possible high sound pressure and hearing damage risk, do not listen at highvolume levels for long periods. If your existing television set is being retained and relocated, the same considerations as above should be applied.
- Do not use this apparatus near water.
- Clean only with dry cloth.
- Do not install near any heat sources such as radiators, heat registers, stoves, or other apparatus (including ampli ers) that produce heat.
- Protect the power cord from being walked on or pinched particularly at plugs, convenience receptacles, and the point where they exit from the apparatus.
- Unplug this apparatus during lightning storms or when not in use for long periods of time. This symbol indicates that the apparatus complies with the European radio equipment directive. The letters 'CE' signify that products sold in the European Economic Area (EEA) have been assessed to meet high safety, health, and environmental protection requirements. Class II equipment : To identify equipment meeting the safety requirements speci ed for Class II equipment according to IEC 61140. This symbol indicates that a safety connection to electrical earth (ground) is not required.
Never place a television set in an unstable location. A television set may fall, causing serious personal injury or death. Many injuries, particularly to children, can be avoided by taking simple precautions such as:
- Using cabinets or stands recommended by the manufacturer of the television set.
- Only using furniture that can safely support the television set.
- Ensuring the television set is not overhanging the edge of the supporting furniture.
- Not placing the television set on tall furniture (for example, cupboards or bookcases) without anchoring both the furniture and the television set to a suitable support.
- Not placing the television set on cloth or other materials that may be located between the television set and supporting furniture.
- Educating children about the dangers of climbing on furniture to reach the television set or its controls. CAUTION
RISK OF ELECTRIC SHOCK
CAUTION: TO REDUCE THE RISK OF ELECTRIC SHOCK, DO NOT REMOVE COVER (OR BACK). NO USER-SERVICEABLE PARTS INSIDE. REFER SERVICING TO QUALIFIED SERVICE PERSONNEL. The exclamation point within an equilateral triangle is intended to alert the user to the presence of important operating instruction in the literature accompaning the apparatus.
The lightning ash within arrow-head symbol, within an equilateral triangle, is intended to alert the user to the presence of uninsulated dangerous voltage within the product enclosure that may be of sufficient magnitude to constitute a risk of electric shock to persons.
ASSEMBLY Stand Assembly Place the TV unit face down on a soft, at surface to prevent any damage to the screen. Attach the stand to the bottom of the TV using the included screws. Wall Mounting 10 cm 10 cm 10 cm 10 cm 100 x 100 M6 x 10
- The TV can be mounted on a wall using a 100 mm x 100 mm VESA kit sold separately.
- Place the TV face down on a clean, safe and cushioned surface. Remove the TV stands if you have already attached them.
- Mount the TV according to the instructions supplied with the kit. Beware of electrical cables, gas and water pipes in the wall.
- To complete the installation, please contact the store from which you purchase the TV.
Wall mount hole pattern VESA (mm) Wall mount screw size (mm) OVERVIEW Rear View
VOL + VOL – INFO + CH – Choose the channel directly or input a number. Display the Electronic Programme Guide (EPG) in DTV mode. Record program (This function is not available at this model) Increase or decrease the sound volume. Display the present channel information such as the current time and channel name in ATV / DTV mode. Change to the next or previous program. Display the Android TV homepage.
SUBT AUDIO RM-C3520 Navigate the menu to select the content you need. Con rm the selection in the OSD menus. BACK Return to the previous menu. EXIT Exit the OSD menu. Google Assistant This function is not available in certain languages and countries. Access Net ix. Access Youtube. Press this button to open multimedia player and then play media les in USB devices.
VOL AUDIO Function buttons Access the TELETEXT items in DTV mode. Access menu option. Fast forward/ backward Play/Pause/Stop program Display the subtitle language in DTV mode. Display the audio language list and select an audio language or audio format if the TV program has this feature. Turn on or off the teletext function in DTV mode.
SUBT EXIT AUDIO RM-C3520 Installing the Batteries
1. Open the cover at the back of the remote control.
2. Install two AAA size batteries (not included).
- Make sure to match the (+) and (-) ends of the batteries with the (+) and (-) ends indicated in the battery compartment.
3. Replace the cover.
CONNECTION All connection cables are not supplied. Check to ensure that you have selected the right cables for the ports and that they are connected securely. Loose connections can affect the quality of the picture image and colour. Connecting an antenna Antenna cable Room antenna terminal (75-ohm type) You can also use a satellite dish as a TV antenna. Satellite cable Connecting external devices using HDMI cable HDMI 2 HDMI 1/ARC
The HDMI ARC (Audio Return Channel) function allows you to send audio from your ARC-compliant TV to ARC-compliant audio devices (e.g. home theatre) through a single HDMI connection. HDMI 1/ARC With the HDMI ARC connection, you do not need to connect the extra audio cable that sends the sound of the TV picture to the ARC-compliant audio devices. The HDMI ARC connection combines both signals. Use an HDMI cable (not included) that supports the ARC function to connect your ARC-compliant audio devices with your ARC-compliant TV. HDMI-ARC compliant device HDMI port with ARC function Connecting external devices using AV cable Set-top box
Connecting external devices using optical cable OPTICAL Speakers Optical cable Optical Audio IN Sound bar Connecting to the internet RJ 45 You have to connect either LAN or Wi-Fi to access the Internet. LAN port on the wall Ethernet cable Connecting a USB device Your TV supports playback of a wide array of les via a USB connection.
Insert the USB device with recorded pictures, audio or videos into the USB 1 or USB 2 port on the TV.
Connect the power cord to the power socket after you have completed all the physical connections. The TV will enter Standby Mode and the red indicator light will illuminate. To turn on your TV, press Press .The indicator light will go out. again and your TV will enter the standby mode. INITIAL SETUP The rst time you switch the TV on, the initial setup screen appears, which guides you through the initial setup process. Follow the on-screen instructions to nish the initial setup process. Choose a language Press on the remote to select the language, then press OK to con rm. Quickly set up your TV with your Android phone? (Continue/skip) Steps: 1.On your Android Phone, open the pre-installed app “Google”. 2.Type or say, “Ok Google, set up my device”. 3.Tap the model name on the list. BACK
Note: Press to cancel. If you just want to use your TV normally, please select “Skip”.
Con gure the network Press on the remote to select Wi-Fi you wish to connect to, enter the password and then con rm to connect. If you select skip, it could be performed in homepage or settings menu. Google Account Sign in Sign in to get new apps, recommendations, movies, the Assistant, and more from Google. Use your remote: Use the remote to enter your Google account and password to sign in to Google account. Terms of Service
By accepting the Google Terms of Service to improve the product experience, select “Accept” to proceed with this condition.
Google Services Select “Accept” to con rm if you want your location identi ed on your Android TV and agree to automatically send diagnostic information to Google to help improve your Google experience. Play Auto Installs
Select install or un-install the recommended apps and Google apps by using this process. Press “Continue” to the next setting page.
Information screens will now appear, and you can scroll through steps by steps by pressing directional button to continue. right Pairing Your Remote Control to TV
Press the VOL – button rst and then press the BACK button, and hold them pressed together for at least 3 seconds until the indicator light on the remote ashes, then release the two buttons. ‒ The remote control must be kept close to the TV (within 1m distance) during pairing in order to ensure success.
A message will appear on the screen and please keep pointing the remote to the TV bottom. Please wait for below message to appear on the screen, indicating that pairing is successful.
Country select Press on the remote to select the country option, then press OK to con rm. Select TV mode (Home/Retail) Home mode is optimized for efficient energy usage for home use. Retail mode is optimized to store demo with xed settings. Please be sure in this step, select “Home” if you are using this TV for use at home. Make sure to con rm once you have selected “Home”. Chromecast built-inTM Select On/Off to make Chromecast built-in available. TV Channel Setting Select Antenna/Cable//Satellite to scan TV channel. If you select “skip”, the channel scan could be performed in menu.
Setup completed and Disclaimer Terms
ACCESSING HOMEPAGE Press Press on the remote control to display the Android TV homepage. and OK to enter the desired Apps, functions or settings. Use Google keyboard to type searching movies, TV and more
Sign in to your Google Account. Recommendations will be based on this account's activity.
Apps - Display the list of installed apps.
Google Assistant Use your voice to search for shows, control devices, and more.
Description Noti cations: Displayed when there are noti cations such as when there is a connection issue. The number indicates the number of noti cations. Inputs: Switches the input device connected to the TV. Con gure the network settings.
Favourite apps Display your favourite apps. Select + to add an app to favourites.
Channels Here, you can watch recommended content from video streaming services.
Con gure various TV-related settings. SETTINGS You can con gure settings of Android TV features, such as network, accounts, apps, device preferences, remotes and accessories, etc.
on the remote control to display the Android TV homepage.
to move the cursor to on the right top of the screen and press OK to enter to select the submenu, then press OK to enter the option list. BACK
to return to the previous menu. to close the settings menu and return to the homepage.
General settings Network & Internet Con gure the Wi-Fi and Ethernet settings. The network status is also displayed. Channel Press Press to select the “Channel” menu, and then press OK to enter the “Parental Controls”. or the numeric button to enter your PIN code.
Accounts & Sign In Sign in to your Google account to make the most of your TV. Apps View the list of recently opened apps, all installed apps, and the system apps. You can also add permissions for different apps, and con gure special app access to save power and storage, and more. Device Preferences Set the preferences of the Android TV. Press to select the items you want to set, and then press OK. BACK . To exit the menu, press EXIT.
Factory Reset Restore your TV to its original factory settings. ‒ Date & time Set the date and time. You can choose whether to auto synchronize or to manually set date and time. You can also set 24-hour format. ‒ Timer Allow you to manually set the timer. ‒ Language Select a menu language. The selected menu language will also be set as the voice recognition language.
‒ Keyboard Allow you to set the keyboard options. ‒ Inputs Set the name of the connected inputs (HDMI 1, HDM 2, HDMI 3 or Composite). In addition, you can set up the CEC functions. ‒ Power Allow to set the sleep timer. After the preset time has elapsed, the sleep timer puts the TV into standby. You can also set auto off time if no signal is received for the speci ed duration. ‒ Picture Allow to set the picture items (brightness, colour saturation, etc.) according to your preference. ‒ Sound Allow to set the sound items (Sound style, Balance, etc.) according to your preference. ‒ Storage View the memory usage status, clear data, cache and defaults, etc.
‒ Home screen Customize channels, enable video and audio previews, reorder apps and games, and view the open source licenses for Android TV home and Android TV core services. ‒ Google Assistant Con gure the Google search settings, including selecting which apps to be included in search results, enabling the SafeSearch lter, blocking offensive words, and viewing permissions and open source licenses. ‒ Chromecast View the version number and open source licenses of Chromecast. ‒ Screen saver Con gure the screen saver settings, including the way of screen saver, the inactivity time after which to start screen saver, the inactivity time after which to put device to sleep, the sleep timer, or to start screen saver right now. ‒ Location Set whether to enable the location function using Wi-Fi and view the list of apps that requested the location recently. ‒ Usage & Diagnostics Set whether to automatically send diagnostic information to Google or not. ‒ Accessibility Con gure Caption, High contrast text, and Accessibility shortcut, etc.
Press to select “Apps” on the homepage, then press OK to enter. Select “Get more apps” and input the app name. Select “search” which is in the upper right corner of the page. Example for “Facebook” Install Input “Facebook”. The “Facebook” App will be shown in the list, then press OK to select it. Select “Install”. Move Select “Facebook”, press and hold the OK button on the remote control, then press “Move”. Press to move, then press OK to con rm. Uninstall Select “Facebook”, press and hold the OK button on the remote control, then press “Uninstall”. Press OK to uninstall.
Press on the remote to select “Live TV” on Homepage. Press on the remote. Press on the remote to select “Channels” and then select “New Channels Available” to enter. USING EPG (ELECTRONIC PROGRAMME GUIDE) EPG is an on-screen guide available for digital channels ONLY. EPG allows you to view a list of digital programs being broadcast. To enter the EPG, press EPG on the remote control and the program guide menu will appear. Red button (Previous Day) : Display the programs of previous day. Green button (Next day) : Display the programs of the next day. Yellow button (View Detail) : Display the detailed information of programs in multiple pages. Blue button (Type Filter) : Display the type list of the program. You can navigate through the different types and available subtypes using on the remote control. Select one or more types and then press OK. After ltering, all your desired digital TV programs will be highlighted.
You can use on the remote control to navigate through the different programs. Use the related color buttons shown at the bottom of the screen to view EPG. MULTI MEDIA PLAYER (From USB connection) You can view photos or play your music and videos from a connected USB storage device. Format : Only use USB storage devices formatted with the FAT32 system provided by Windows Operating System.
1. Connect the USB storage device to the USB port of your TV.
2. The TV will detect the USB device and a message window will pop up.
3. Select [Con rm] and press OK on the remote control to display MMP (multi media player).
- You can also press USB on the remote control to display MMP.
4. On the MMP screen, select the desired media type ( Video, Photo or Music ) using
5. Press OK to enter the next screen.
6. Browse the list of folders and les and select the desired le using
7. Press OK and playback will start.
on the on the remote
You can add an additional satellite to your current satellite installation.
on the remote control to view your current input sources.
on the remote control to select the source [Satellite]. Then press OK on the remote control to con rm the selection. on the remote control. The TV options are shown.
menu. on the remote control to select Settings and press OK to enter the Settings
on the remote control to select [Channel] and press OK.
- The Channels menu is shown.
6. If the option [Satellite add] is greyed out, please do the followings to enable this option :
- Select Satellite re-scan and then press OK.
- If you currently have only 1 satellite installed, select More > Tone Burst
- Select the second line for instance Eutelsat 7E, then press OK to access the submenu and set to “On” [Satellite Status] in order to select the desired satellite in the submenu of [Satellite selection]. Once the satellite is selected, set back [ Satellite Status] to “Off”.
7. Go back to the Channels menu and the [Satellite add] option is enabled.
on the remote control to select [Satellite add] and press OK.
9. Follow the on-screen instructions to add a satellite.
mp4 Mp4 DVD Subtitle UTF-8 Plain Text mkv MKV ASS SSA UTF-8 Plain Text VobSub DVD Subtitle File Extension .srt Subtitle Parser SubRip Remark .ssa/ .ass SubStation Alpha Advanced SubStation Alpha .smi SAMI .sub MicroDVD SubIdx (VobSub) External Subtitles Your TV is capable of nding and updating software automatically. In order to perform software update, ensure that your TV must be connected to the Internet through a wired or wireless network. When accessing the TV homepage by pressing check for update. on the remote control, your TV will automatically If you want to update the software, you can select Details > Download, and then the TV screen will show the downloading and restarting progress. When the software update is installed, your TV will have the new software version. Users can also check themselves if the software update is available or not, through ABOUT in the setting menu.
3,5 kg Operation: 0°C ~ 40°C Storage: -10°C ~ 60°C Less than 80 % RH After 4 hours Operating Voltage Input rating power USB Output Audio Output Power (WRMS.) (10% THD) Dimensions DxLxH (with foot) Weight (with foot) Dimensions DxLxH (without foot) Weight (without foot) Surrounding temperature Operating Humidity Standby Mode Digital reception Reception range Input impedance Channel bandwidth
The radio equipment will be subject to some restrictions when placed on the markets in Belgium (BE), Bulgaria (BG), Czech Republic (CZ), Denmark (DK), Germany (DE), Estonia (EE), Ireland (IE), Greece (EL), Spain (ES), France (FR), Croatia (HR), Italy (IT), Cyprus (CY), Latvia (LV), Lithuania (LT), Luxembourg (LU), Hungary (HU), Malta (MT), Netherlands (NL), Austria (AT), Poland (PL), Portugal (PT), Romania (RO), Slovenia (SI), Slovakia (SK), Finland (FI), Sweden (SE) and Northern Ireland (UKNI). This device is restricted to indoor use only when operating in the 5150 to 5350 MHz frequency range.
PRODUCT INFORMATION SHEET
Parameter Supplier's name or trade mark Supplier's address Minimum guaranteed availability of software and rmware updates (from the date of end of the placement on the market) Minimum guaranteed availability of spare parts (from the date of end of the placement on the market) Minimum guaranteed product support Minimum duration of the general guarantee offered by the supplier Power supply type
TROUBLESHOOTING Problem No power Signal not received properly Possible Solution
- Check that the power plug is securely into the mains socket.
- Check the power is on.
- Double or phantom images may appear on your TV if there are high buildings or mountains close to where you are. You can adjust the image through manual operation or adjust the direction of external antenna.
- If you use an indoor antenna, signal reception may be more difficult under certain circumstances. Adjust the direction of the antenna for optimum reception. If this does not improve reception, you may have to switch to an external antenna.
Video appears with no audio Audio is present, but video does not appear or is discoloured. Static noise affects video and audio quality. Broken lines on screen The remote control does not work. What to do if the picture/image quality is poor when inputting DVI signal?
Check if the antenna is properly connected to your TV. View other channels to see if the problem still occurs. Try increasing the volume. Check if the TV sound is muted. Try adjusting the contrast and brightness. Check if the antenna is properly connected to the TV. Electrical appliances such as hair dryers or vacuums, etc. may be interfere with the TV. Switch off these appliances.
- Check if the TV is not switched on.
- Check that the batteries of the remote control are inserted properly.
- Check for any obstacles between the TV remote sensor and the remote control. Remove them if necessary.
- If the batteries have no power, replace them with two new batteries off the same type. When you use your TV as a monitor, you may use the following conversion cable (not supplied) to connect the legacy PC with DVI or VGA output. In this case, DVI signal is inputted to your TV. e.g. DVI to HDMI conversion cable, VGA to HDMI conversion cable If the picture/image quality is poor as below for example, please try the following steps. The gradation of the clouds in the highlight part disappears, and the shape cannot be distinguished. Good Poor The gradation of the grass shade in the lowlight part disappears and it becomes black.
1. Keep the selected input and disconnect the cable so that no signal is
displayed on the TV screen.
2. Enter the Settings menu and select items Device Preferences -> Picture ->
Advanced Video -> HDMI RGB Range.
3. Change the HDMI RGB Range setting from Auto (Default) to Full.
4. Connect the cable to the legacy PC again and check the picture/image
No picture DISPOSAL As a responsible retailer we care about the environment. As such we urge you to follow the correct disposal procedure for the product, packaging materials and if applicable, accessories and batteries. This will conserve natural resources and ensure that the material is recycled in a manner that protects health and the environment. You must follow laws and regulations about disposal. Waste electrical products and batteries must be disposed of separately from household waste when the product reaches the end of its life. Contact the store where you bought the product and your local authority to learn about disposal and recycling. The batteries must be disposed of at your local recycling point. We apologise for any inconvenience caused by minor inconsistencies in these instructions, which may occur as a result of product improvement and development.