HL-T7288W - TV SAMSUNG - Free user manual and instructions
Find the device manual for free HL-T7288W SAMSUNG in PDF.



| Product Type | DLP TV (Digital Light Processing) |
| Screen Size (Diagonal) | 72 inches |
| PC Resolution | 1920 x 1080 @ 60 Hz |
| Power Consumption | 250 W |
| Audio Output | 10 W x 2 |
| Dimensions (W x H x D) | 65.8 x 20.4 x 46.8 inches (1671 x 519 x 1189 mm) |
| Weight | 104.5 lb (47.4 kg) |
| Image Technology | DNle (Digital Natural Image engine) |
| Connectivity | HDMI (3 inputs), Component (2 inputs), S-Video (2 inputs), PC, USB (WISELINK), Bluetooth |
| Special Features | Anynet+ (HDMI-CEC), PIP, Still Picture, Game Mode, V-Chip, Subtitles, Timer |
| Lamp | Replaceable, limited lifespan; use authorized replacement bulb |
| Operating Temperature | 10 to 40 °C |
| Operating Humidity | 10 to 80% non-condensing |
| Power Supply | AC (see product label) |
| Included Accessories | Remote control, AAA batteries, power cord, user manual, warranty card |
| Maintenance | Clean with a dry cloth; do not use liquids or chemicals |
| Repairability | Lamp user-replaceable; other repairs by authorized technician |
| Channel Range | Up to 181 channels (VHF/UHF/cable) |
| Picture Formats | 16:9, 4:3, Zoom1, Zoom2, Wide, Scan Only |
Frequently Asked Questions - HL-T7288W SAMSUNG
User questions about HL-T7288W SAMSUNG
0 question about this device. Answer the ones you know or ask your own.
Ask a new question about this device
Download the instructions for your TV in PDF format for free! Find your manual HL-T7288W - SAMSUNG and take your electronic device back in hand. On this page are published all the documents necessary for the use of your device. HL-T7288W by SAMSUNG.
USER MANUAL HL-T7288W SAMSUNG
Owner's Instructions
HL-T7288W

Register your product at www.samsung.com/global/register Record your Model and Serial number here for future reference.
- Model
- Serial No.
A Guide to Digital TV
What is Digital Television?
Digital television (DTV) is a new way of transmitting high quality video and audio to your TV set. Using DTV, broadcasters can transmit high definition TV (HDTV) images, Dolby digital surround audio, and new services such as multicasting (transmitting more than one program on the same TV channel) and datacasting. Several of these services can be combined into a single digital broadcast.
Digital Television Services
Digital Picture Quality
DTV programs are transmitted in two different formats. The first is Standard Definition Television (SDTV) and the second is High Definition Television (HDTV).
- SDTV program formats include 480-line interlaced (480i) and 480-line progressive (480p) video. 480i programs are essentially a digital version of our current analog TV programs, while the 480p format offers improved image detail over 480i. Some 480p programs are broadcast in widescreen and are comparable to progressive-scan DVD movies in image quality.
HDTV program formats include 1080-line interlaced (1080i) and 720-line progressive (720p). Both HDTV formats are always broadcast in widenscreen, and offer much higher picture quality than SDTV.
- Dolby Surround Sound
With DTV, you can listen to a variety of Dolby digital audio formats from Dolby Surround 2.0 to Dolby Digital 5.1 surround, using your home audio system. Many HDTV programs are now broadcast with DD 5.1 soundtracks.
U.S.A Only
The product unit accompanying this user manual is licensed under certain intellectual property rights of certain third parties. In particular, this product is licensed under the following US patents:
5,991,715, 5,740,317, 4,972,484, 5,214,678, 5,323,396, 5,539,829, 5,606,618, 5,530,655, 5,777,992, 6,289,308, 5,610,985
5,481,643, 5,544,247, 5,960,037, 6,023,490, 5,878,080, and under US Published Patent Application No. 2001-44713-A1.
This license is limited to private non-commercial use by end-user consumers for licensed contents. No rights are granted for commercial use. The license does not cover any product unit other than this product unit and the license does not extend to any unlicensed product unit or process conforming to ISO/IEC 11172-3 or ISO/IEC 13818-3 used or sold in combination with this product unit. The license only covers the use of this product unit to encode and/or decode audio files conforming to the ISO/IEC 11172-3 or ISO/IEC 13818-3. No rights are granted under this license for product features or functions that do not conform to the ISO/IEC 11172-3 or ISO/IEC 13818-3.
Other countries
The product unit accompanying this user manual is licensed under certain intellectual property rights of certain third parties. This license is limited to private non-commercial use by end-user consumers for licensed contents. No rights are granted for commercial use. The license does not cover any product unit other than this product unit and the license does not extend to any unlicensed product unit or process conforming to ISO/IEC 11172-3 or ISO/IEC 13818-3 used or sold in combination with this product unit. The license only covers the use of this product unit to encode and/or decode audio files conforming to the ISO/IEC 11172-3 or ISO/IEC 13818-3. No rights are granted under this license for product features or functions that do not conform to the ISO/IEC 11172-3 or ISO/IEC 13818-3.
FCC Statements
This device complies with part 15 of the FCC Rules. Operation is subject to the following two conditions:
(1) This device may not cause harmful interference, and (2) this device must accept any interference received, including interference that may cause undesired operation.
Changes or modifications not expressly approved by the party responsible for compliance could void the user's authority to operate the equipment.
To comply with the FCC RF exposure compliance requirements, this device and its antenna must not be co-located or operated in conjunction with any other antenna or transmitter.
Q&A
1. Is the antenna I use for existing TV reception good enough for DTV?
Over-the-air (OTA) digital TV broadcasting uses the same channels as analog TV and works well with many existing TV antennas. However, DTV broadcast channel assignments are different than analog channels. You should find out whether your local DTV broadcasts are on VHF (channels 2-13) or UHF (channels 14-69) to see if you need a different antenna.
If your DTV channels are on UHF and you already get good UHF reception, your present antenna may work fine. The same holds true for VHF DTV reception. Note that in some markets, both VHF and UHF channels are used for DTV broadcasts.
You can find out the latest DTV channel assignments for your area by browsing selected Internet web sites such as www.titantv. com, www.10000watts.com, and www.fcc.gov.
2. How difficult is it to receive DTV signals indoors?
This depends on whether your local DTV stations are running full power or not and how close your location is to the transmission tower. DTV receivers do not require as much signal as analog TV receivers to produce high-quality images and sound.
Once the DTV signal level exceeds a certain threshold at the receiver, the digital video and audio data is decoded at the same quality it was originally encoded for broadcast.
This is a big advantage for DTV over analog TV - there is no noise, ghosting, static, or scratchy audio.
3. How can I connect an antenna in my townhouse, co-operative apartment, condominium, or apartment?
The Federal Communications Commission's OTARD Rule (part of the Telecommunications Act of 1996) allows residents of condominiums, townhouse, or members of neighborhood associations to put up outside antennas for reception of broadcast TV signals as long as those antennas are not located in common areas and are no more than 12^ in height.
Residents of rental units (apartments, etc.) are not covered by the OTARD rules and will have to use indoor antennas to receive DTV broadcasts. It is possible that the landlord of an apartment complex can provide broadcast DTV signals via a master TV antenna system to each apartment.
4. Can I connect my DTV set-top receiver to my cable TV service?
Cable TV systems use a different method for transmitting digital TV programs that is currently incompatible with broadcast DTV setup receivers. So you will still need to use an outdoor or indoor antenna to receive OTA broadcast DTV programs.
The good news is that you won't have to pay a monthly or per-program charge to watch OTA DTV and HDTV programs. They're free, unlike subscription satellite TV or premium cable TV. All you need is an antenna and a DTV set-top receiver to enjoy clear, sharp widescreen images and high-quality audio.
General Information
Viewing Position 5
List of Features. 5
- Checking Parts. 6
Viewing the Control Panel 6
Viewing the Connection Panel 8
Remote Control 9
■ Installing Batteries in the Remote Control 10
Connections
- Connecting VHF and UHF Antennas. 10
- Connecting Cable TV 11
- Connecting a VCR. 12
- Connecting a Camcorder 13
- Connecting a DVD Player/Cable/Satellite Box (Set-Top Box) .. 13
- Connecting a DVD Player/Cable/Satellite Box (Set-Top Box) via HDMI.. 14
- Connecting a DVD Player/Cable/Satellite Box (Set-Top Box) via DVI..14
- Connecting a Digital Audio System 15
- Connecting an Amplifier/DVD Home Theater...... 15
- Connecting a PC 16
Operation
Turning the TV On and Off 16
Plug & Play Feature 17
Changing Channels. 19
Adjusting the Volume. 19
Viewing the Display 20
Viewing the Menus 20
Using the TOOLS Button 20
■ Memorizing the Channels. 21
Setting Up Your Remote Control 22
To Select the Source 27
To Edit the Input Source Name 27
Picture Control
Using Automatic Picture Settings 28
Making Detailed Settings on the Picture 29
Changing the Screen Size. 30
Digital Noise Reduction 31
Setting the Active Color 31
DNle (Digital Natural Image engine) 32
Setting the Color Gamut 32
Adjusting the Screen Position 33
Resetting the Picture Settings 33
Viewing Picture-in-Picture 34
Freezing the Current Picture 35
Sound Control
Using the Automatic Sound Settings 36
Customizing the Sound 36
Setting the TruSurround XT. 37
Choosing a Multi-Channel Sound (MTS) Track - Digital 38
Choosing a Multi-Channel Sound (MTS) Track - Analog 38
Automatic Volume Control 39
Selecting the Internal Mute. 39
Resetting the Sound Settings 40
Symbols

Press

One-Touch

Note
Button
Channel Control
Clearing Scrambled Channels - Digital 40
Managing Channels 41
Fine Tuning Analog Channels 46
- Checking the Digital-Signal Strength 47
LNA (Low Noise Amplifier). 47
Function Description
■ Selecting a Menu Language 48
Setting the Time 48
Viewing Closed Captions (On-Screen Text Messages) - Digital 51
Viewing Closed Captions (On-Screen Text Messages) - Analog. 52
Using the Game Mode 53
Using the 3D/Dual-View Function 53
Using the V-Chip 54
■ Menu Transparency Level 59
Setting the HDMI Black Level. 59
Setting the Film Mode - Analog 60
Setting the Light Effect 60
Setting the Blue Screen Mode. 61
Adjusting the Melody Sound 61
Upgrading the Software 62
Setting the Function Help 62
PC Display
Using Your TV as a Computer (PC) Display 63
Display Modes 64
Setting up the TV with your PC 65
Changing the Picture Size (PC Mode) 67
Setting the Home Theater PC 67
Bluetooth
What is Bluetooth? 68
Bluetooth Communication and Setting Up PIN 68
- Connecting a Bluetooth Headset (Optional) 69
Capturing and Printing the Screen 69
Wiselink
Using the WISELINK Function 70
Using the WISELINK Mode 71
Using the Photo (JPEG) List 72
Using the Music (MP3) List 79
About Anynet+
What is Anynet+? 81
- Connecting Anynet+ Devices 81
Setting Up Anynet+ 82
Scanning and Switching between Anynet+ Devices...82
■ Recording 83
■ Listening through a Home theater 84
Troubleshooting for Anynet+ 84
Appendix
Identifying Problems. 85
Replacing the Lamp. 86
■ Cleaning and Maintaining Your TV. 87
Using Your TV in Another Country. 87
Technical Specifications 88
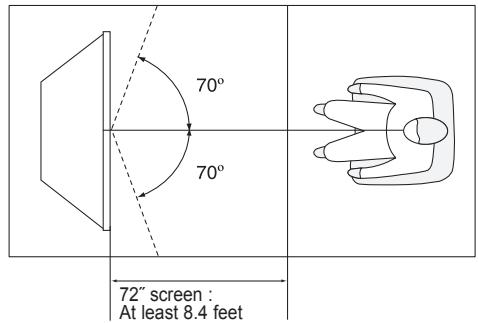
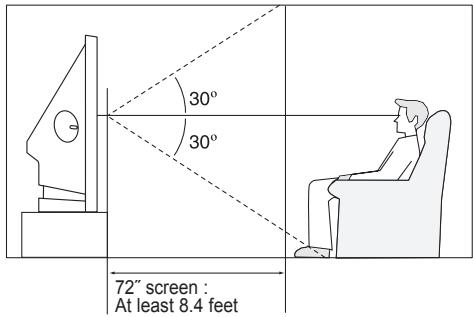
Viewing Position
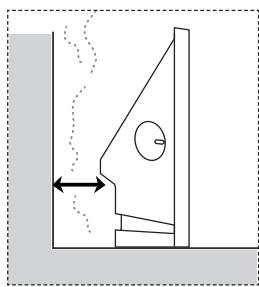
To optimize your viewing comfort, please follow the guidelines below for viewing distance. If viewing for an extended period of time, sit as far back from the screen as possible.
When installing the product, make sure to keep it away from the wall (more than 10cm / 4inches) for ventilation purposes. Poor ventilation may cause an increase in the internal temperature of the product, resulting in a shortened component life and degraded performance.
List of Features
Your TV is designed and engineered using the latest technology. It is a full-featured, high-performance unit that exceeds industry standards. In addition, it has these special features:
- Easy-to-operate remote control
- Dynamic menus and Navigating menus by using the menu map
- Easy-to-use on-screen menu system you can access from the side panel or remote control
Automatic timer to turn the TV on and off at any time you choose - Adjustable picture and sound settings and the ability to memorize your favorite settings
Automatic channel tuning for up to 181 channels
A special filter to reduce or eliminate reception problems - Fine tuning control for the sharpest picture possible
- A built-in multi-channel sound decoder for stereo and bilingual listening
Built-in, dual channel speakers
A special sleep timer
Widescreen TV with adjustable image size - Life-like clear images provided by DNle technology
My Color Control mode to correspond with your color preference
Digital Input jack - HDMI/DVI connection of your PC to this TV
Digital Audio Output (OPTICAL) jack - Theater Game Mode
Easy-to-use channel list menu. - AV network system (Anynet+) that enables you to easily control Samsung audio-video(AV) devices from this TV.
- TV supports wireless connection to selected Bluetooth stereo headsets and photo printers.
- WISELINK enables you to view and play photo (JPEG) and audio files (MP3) through the TV's WISELINK jack.
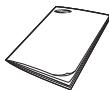
Owner's Instructions
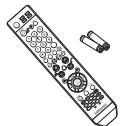
Remote Control (BP59-00126A)/ AAA Batteries

Warranty Card/ Registration Card/ Safety Guide Manual/ Quick Guide Manual

Power Cord (3903-000144)

Cloth-Clean
Sold Separately

Replacement Lamp
For purchasing a replacement lamp, ask at a nearby service center.
- Use authorized lamps only. The company cannot guarantee the quality of the product if an unauthorized lamp is used.

S-Video Cable
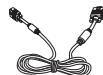
PC Cable

Video Cable
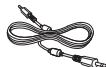
PC Audio Cable

Antenna Cable

HDMI/DVI Cable

Component Cables
HDMI Cable

Audio Cables

Optical Cable

3.5mm Stereo/ 2RCA Cable
Viewing the Control Panel
Buttons on the Lower-Right Part of the Panel
The buttons on the lower-right panel control your TV's basic features, including the on-screen menu. To use the more advanced features, you must use the remote control.
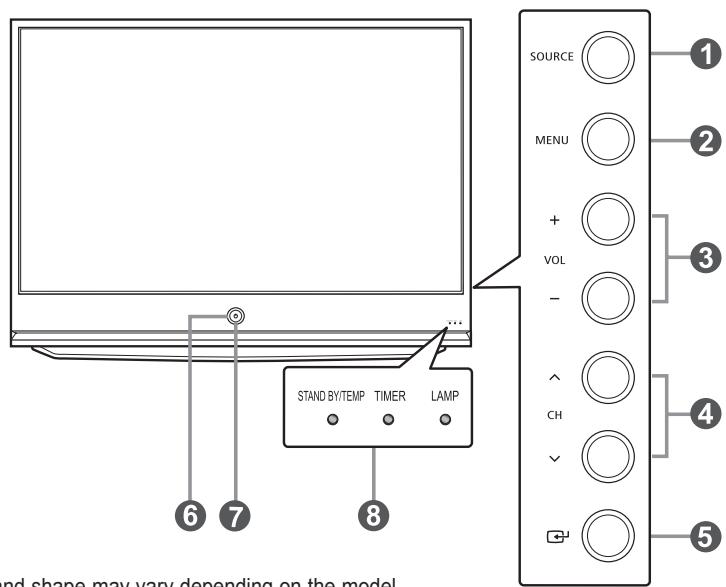
The product color and shape may vary depending on the model.
SOURCE
Toggles between all the available input sources (TV, AV1, AV2, AV3, S-Video1, S-Video2, Component1, Component2, PC, HDMI1, HDMI2, HDMI3/DVI, or USB).
2 MENU
Press to see an on-screen menu of your TV's features.
3 +VOL-
Press to increase or decrease the volume. In the on-screen menu, use the +VOL- buttons as you would use the and buttons on the remote control.
4 CH
Press to change channels. In the on-screen menu, use the CH buttons as you would use the and buttons on the remote control.
5 ^ (ENTER)
Press to confirm a selection.
6 POWER
Press to turn the TV on and off.
Remote Control Sensor
Aim the remote control towards this spot on the TV.
8 Indicator Lights
Blinks and turns off when the power is on and lights up in stand-by mode.

- You can use the channel selection buttons to switch on the TV when it is in standby mode depending on the model.
- When using the on-screen menu the volume adjustment and channel selection buttons have the same function as the / / buttons on the remote control.
- If the remote control no longer works or you have lost it, you can use controls on the TV's panel.
Indicator Light Key
(●:On, (●:Blinking, ○:Off)
| STAND BY/TEMP | TIMER | LAMP | Indication |
| ● | ○ | ○ | Standby state. |
| ○ | ○ | ➀ | The picture will automatically appear in about 15 seconds. |
| ○ | ● | ➁ | Auto Timer ON/OFF has been set and the set will automatically be turned on in about 15 seconds. |
| ➂ | ➂ | ○ | A cooling fan inside the set is not operating normally. |
| ➂ | ○ | ➂ | Lamp cover on the side of the set is not properly shut. |
| ➂ | ○ | ○ | Check if the ventilation hole on the side of the set is blocked, because if the inner temperature is too high, the power will shut off. |
| ➂ | ➂ | ➂ | Lamp may be defective. Please contact a certified technician. |
It takes about 30 seconds for the TV to warm up, so normal brightness may not appear immediately.
- The TV has a fan to keep the inside lamp from overheating. You'll occasionally hear it working.
Viewing the Connection Panel
Rear Panel Jacks
Use the rear panel jacks to connect A/V components that will be connected continuously, such as VCR or DVD players. For more information on connecting equipment, see pages 10~16.
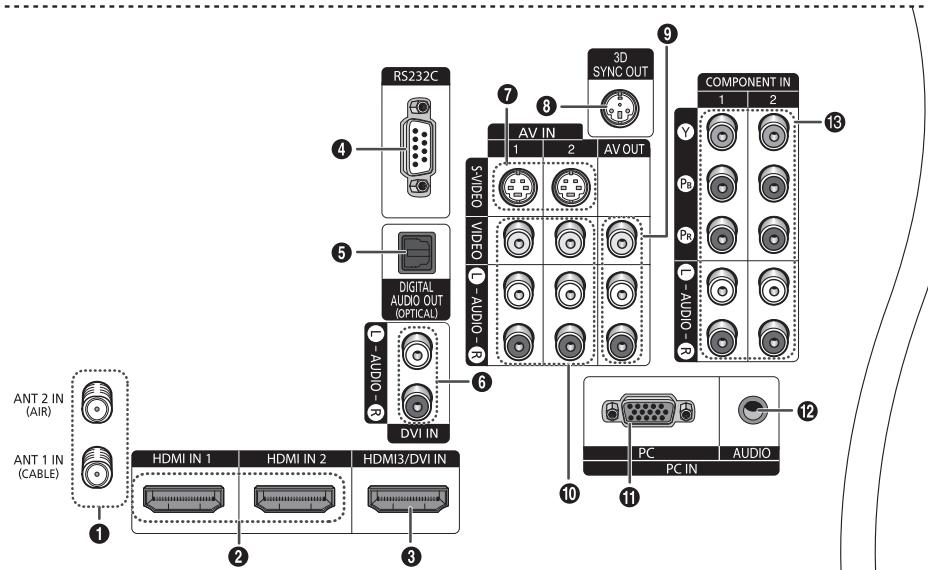
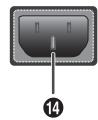
The product color and shape may vary depending on the model.
1 ANT 1 IN (CABLE)/ANT 2 IN (AIR)
75Ω Coaxial connector for Air/Cable Network.
HDMI IN 1, HDMI IN 2
Connect to the HDMI jack of a device with HDMI output.
3 HDMI3/DVI IN
Connect to the HDMI jack of a device with HDMI output. This input can also be used as a DVI connection with separate analog audio inputs. An optional HDMI/DVI cable will be necessary to make this connection.
When using an optional HDMI/DVI adapter, the DVI analog audio inputs on your TV allow you to receive left and right audio from your DVI device.
RS232C
For service only.
5 DIGITAL AUDIO OUT (OPTICAL)
Connect to a Digital Audio component.
6 DVI IN (AUDIO-L/R)
Connect to the DVI audio output jack of an external device.
7 S-VIDEO (AV IN 1,2)
Video input for external devices with an S-Video output, such as a Camcorder or VCR.
Side Panel Jacks
Use the right side panel jacks to connect a component that is used only occasionally, such as a camcorder or video game.
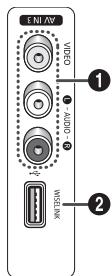
The product color and shape may vary depending on the model.
AVIN3
Video and audio inputs for external devices.
2 WISELINK
Connect an USB mass storage device to view photo files (JPEG) and play audio files (MP3).
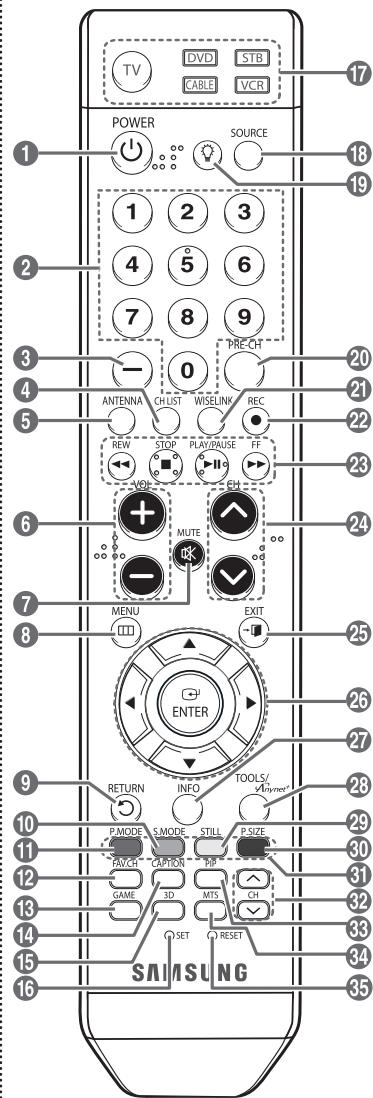
Remote Control
You can use the remote control up to a distance of about 23 feet from the TV. When using the remote, always point it directly at the TV. You can also use your remote control to operate your VCR, Cable box, DVD player, or Set-Top Box.
1 POWER
Turns the TV on and off.
2 Numeric Buttons
Press to directly select a channel.
3 -
Press to select additional channels being broadcast by the same station. For example, to select channel "54-3", press "54", then press "--" and "3".
CH LIST
Used to display Channel Lists on the screen.
5 ANTENNA
Press to select "Air" or "Cable".
6 VOL+,VOL-
Press to increase or decrease the volume.
MUTE
Press to temporarily cut off the sound.
8 MENU
Displays the main on-screen menu.
9 RETURN
Returns to the previous menu.
10 S.MODE
Press to select the sound mode.
1 P.MODE
Press to select the picture mode.
12 FAV.CH
Press to switch to your favorite channels.
13 GAME
Press to select the Game mode except for the TV mode.
14 CAPTION
Controls the caption decoder.
15 3D
Press to select the 3D/Dual-View mode.
16 SET
Sets the remote to control your TV, VCR, Cable, DVD, or Set-Top Box.
17 TV, DVD, STB, CABLE, VCR
Press to operate your TV, DVD, STB, CABLE (box), or VCR.
18 SOURCE
Press to display all of the available video sources.
19
Press to activate the backlight of the VOL, CH and the active source button (TV, DVD, CABLE, STB, VCR) on the remote control.
20 PRE-CH
Tunes to the previous channel.
WISELINK
This function enables you to view and play photo (JPEG) and audio files (MP3) from an external device. (See page 72 (JPEG), 79 (MP3))
2 REC
Use to make a recording.
VCR/DVD Functions
-
Rewind
-
Stop
-Play/Pause
- Fast Forward
CHA,CHV
Press to change channels.
25 EXIT
Press to exit from the menu.
Use to select on-screen menu items and change menu values.
INFO
Press to display information on the TV screen.
28 TOOLS
Use to quickly select frequently used functions.
Anynet+
Runs the Anynet+ view functions and sets up Anynet+ devices.
29 STILL
Press to stop the action during a particular scene.
Press again to resume normal video.
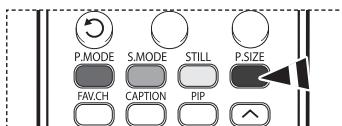
30 P.SIZE
Press to change the screen size.
Color buttons
Press to add or delete channels and to store channels to the favorite channel list in the Channel List menu. (Refer to pages 41-46)
CHA/V
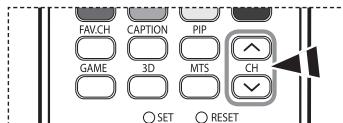
Displays the available channels in sequence. (These buttons change channels in the PIP window only.)
33 PIP
Picture-in Picture ON/OFF.
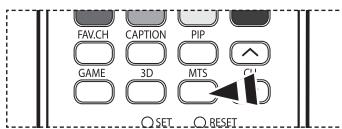
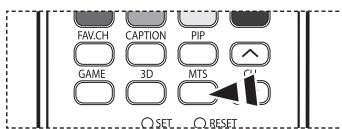
MTS
Press to choose stereo, mono or Separate Audio Program (SAP broadcast).
35 RESET
When your remote control does not work, change the batteries and press the RESET button for 2-3 seconds before use.
The performance of the remote control may be affected by bright light.
This is a special remote control for the visually impaired persons, and has Braille points on the POWER, Channel, Volume, STOP, and PLAY/PAUSE buttons.
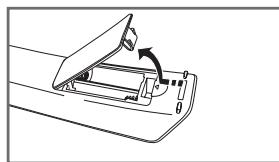
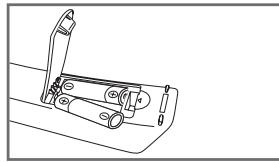
Installing Batteries in the Remote Control
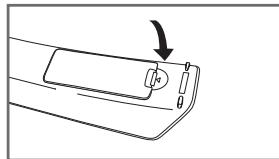
1 Lift the cover at the back of the remote control upward as shown in the figure.
2 Install two AAA size batteries.
Make sure to match the ^+ and - ends of the batteries with the diagram inside the compartment.
- Do not mix battery types, i.e. alkaline and manganese.
3 Close the cover as shown in the figure.
Remove the batteries and store them in a cool and dry place if you won't be using the remote control for a long time. The remote control can be used up to about 23 feet from the TV. (Assuming typical TV usage, the batteries last for about one year.)
If the remote control doesn't work! Check the following
- Is the TV power on?
- Are the plus and minus ends of the batteries reversed?
- Are the batteries drained?
- Is there a power cut, or is the power cord unplugged?
- Is there a special fluorescent light or a neon sign nearby?
Connections
Connecting VHF and UHF Antennas
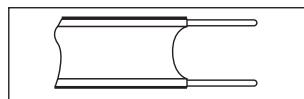
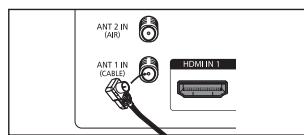
If your antenna has a set of leads that look like this, see "Antennas with 300 Ω Flat Twin Leads" below.
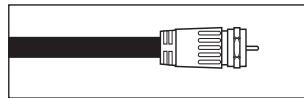
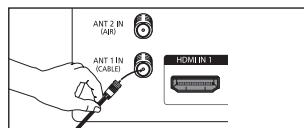
If your antenna has one lead that looks like this, see "Antennas with 75 Ω Round Leads". If you have two antennas, see "Separate VHF and UHF Antennas".
Antennas with 300 Ω Flat Twin Leads
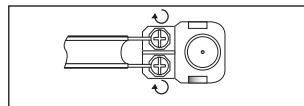
If you are using an off-air antenna (such as a roof antenna or "rabbit ears") that has 300 twin flat leads, follow the directions below.
1 Place the wires from the twin leads under the screws on a 300-75 adapter (not supplied). Use a screwdriver to tighten the screws.
2 Plug the adaptor into the ANT 1 IN (CABLE) or ANT 2 IN (AIR) terminal on the side of the TV.
Antennas with 75 Round Leads
1 Plug the antenna lead into the ANT 1 IN (CABLE) or ANT 2 IN (AIR) terminal on the side of the TV.
Separate VHF and UHF Antennas
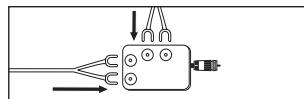
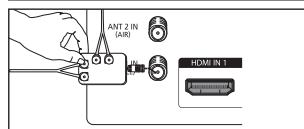
If you have two separate antennas for your TV (one VHF and one UHF), you must combine the two antenna signals before connecting the antennas to the TV. This procedure requires an optional combiner-adaptor (available at most electronics shops).
1 Connect both antenna leads to the combiner.
2 Plug the combiner into the ANT 1 IN (CABLE) or ANT 2 IN (AIR) terminal on the bottom of the side panel.
Connecting Cable TV
To connect to a cable TV system, follow the instructions below.
Cable without a Cable Box
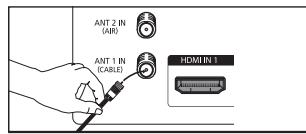
1 Plug the incoming cable into the ANT 1 IN (CABLE) terminal on the side of the TV.
Because this TV is cable-ready, you do not need a cable box to view unscrambled cable channels.
Connecting to a Cable Box that Descrambles All Channels
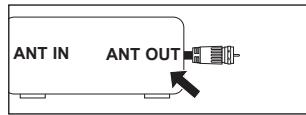
1 Find the cable that is connected to the ANT OUT terminal on your cable box.
This terminal might be labeled "ANT OUT", "VHF OUT" or simply, "OUT".
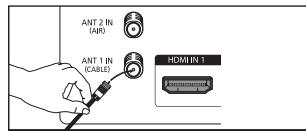
2 Connect the other end of this cable to the ANT 1 IN (CABLE) terminal on the side of the TV.
Connecting to a Cable Box that Descrambles Some Channels
If your cable box descrambles only some channels (such as premium channels), follow the instructions below. You will need a two-way splitter, an RF (A/B) switch, and four lengths of Antenna cable. (These items are available at most electronics stores.)
1 Find and disconnect the cable that is connected to the ANT IN terminal on your cable box.
This terminal might be labeled "ANT IN", "VHF IN" or simply, "IN".
2 Connect this cable to a two-way splitter.
3 Connect an Antenna cable between an OUTPUT terminal on the splitter and the IN terminal on the cable box.
4 Connect an Antenna cable between the ANT OUT terminal on the cable box and the B-IN terminal on the RF(A/B) switch.
5 Connect another cable between the other OUT terminal on the splitter and the A-IN terminal on the RF (A/B) switch.
6 Connect the last Antenna cable between the OUT terminal on the RF (A/B) switch and the ANT 1 IN (CABLE) terminal on the side of the TV.



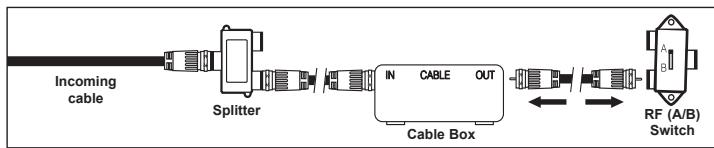
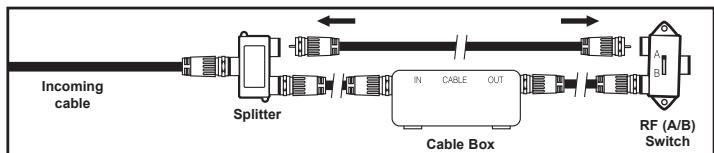
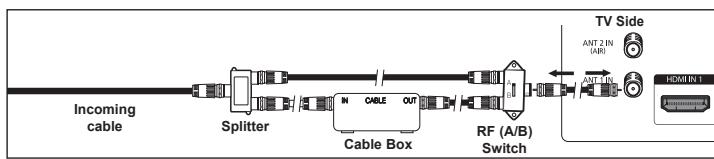
After you have made this connection, set the A/B switch to the "A" position for normal viewing. Set the A/B switch to the "B" position to view scrambled channels. (When you set the A/B switch to "B", you will need to tune your TV to the cable box's output channel, which is usually channel 3 or 4.)
Video Connection
These instructions assume that you have already connected your TV to an antenna or a cable TV system (according to the instructions on pages 10~11). Skip step 1 if you have not yet connected to an antenna or a cable system.
1 Unplug the cable or antenna from the back of the TV.
2 Connect the cable or antenna to the ANT IN terminal on the side of the VCR.
3 Connect an Antenna Cable between the ANT OUT terminal on the VCR and the ANT 1 IN (CABLE) or ANT 2 IN (AIR) terminal on the TV.
4 Connect a Video Cable between the AV IN 1 [VIDEO] (or AV IN 2 [VIDEO]) jack on the TV and the VIDEO OUT jack on the VCR.
5 Connect Audio Cables between the AV IN 1 [L-AUDIO-R] (or AV IN 2 [L-AUDIO-R]) jacks on the TV and the AUDIO OUT jacks on the VCR.
If you have a "mono" (non-stereo) VCR, use a Y-connector (not supplied) to

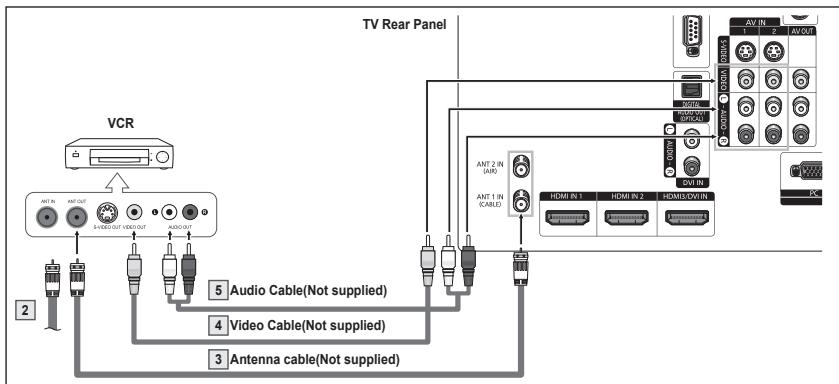
hook up to the right and left audio input jacks of the TV. If your VCR is stereo, you must connect two cables.
Each VCR has a different back panel configuration.
When connecting a VCR, match the color of the connection terminal to the cable.
S-Video Connection
Your Samsung TV can be connected to the S-Video jack of a VCR.
(This connection delivers a better picture when compared to the regular video connection above.)
1 To begin, follow steps 1-3 in the previous section to connect the antenna or cable to your VCR and your TV.
2 Connect an S-Video Cable between the AV IN 1 [S-VIDEO] (or AV IN 2 [S-VIDEO]) jack on the TV and the S-VIDEO OUT jack on the VCR.
3 Connect Audio Cables between the AV IN 1 [L-AUDIO-R] (or AV IN 2 [L-AUDIO-R]) jacks on the TV and the AUDIO OUT jacks on the VCR.
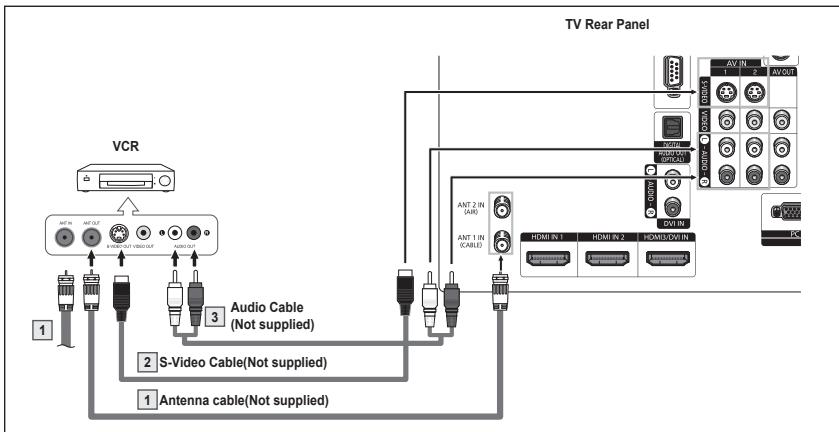
Each VCR has a different back panel configuration.
When connecting a VCR, match the color of the connection terminal to the cable.
Some games may be displayed with a cut off picture when the TV is connected to a game player.
Connecting a Camcorder
The side panel jacks on your TV make it easy to connect a camcorder to your TV. They allow you to view the camcorder tapes without using a VCR.
1 Connect a Video Cable or S-Video Cable between the AV IN 3 [VIDEO] jack on the TV and the VIDEO OUT jack on the camcorder.
2 Connect Audio Cables between the AV IN 3 [L-AUDIO-R] jacks on the TV and the AUDIO OUT jacks on the camcorder.
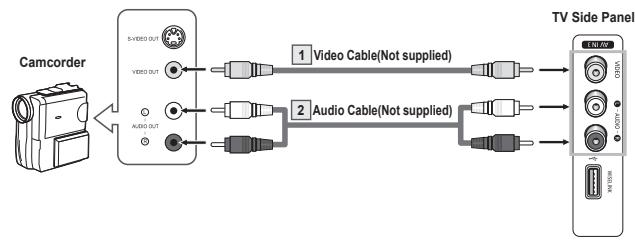
Each Camcorder has a different side panel configuration.
When connecting a Camcorder, match the color of the connection terminal to the cable.
Connecting a DVD Player/Cable/Satellite Box (Set-Top Box)
The rear jacks on your TV make it easy to connect a DVD Player/Cable/Satellite Box (Set-Top Box).
1 Connect Component Cables between the COMPONENT IN 1 [Y, P_B P_R] (or COMPONENT IN 2 [Y, P_B P_R] ) jacks on the TV and the COMPONENT OUT [Y, P_B P_R] jacks on the DVD Player/Cable/ Satellite Box (Set-Top Box).
2 Connect Audio Cables between the COMPONENT IN 1 [L-AUDIO-R] (or COMPONENT IN 2 [L-AUDIO-R]) jacks on the TV and the AUDIO OUT jacks on the DVD Player/ Cable/Satellite Box (Set-Top Box).
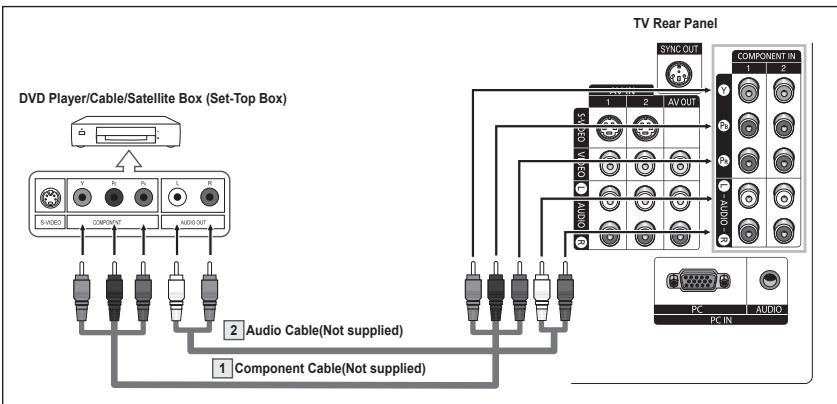
Component video separates the video into Y Luminance (brightness), PB (Blue) and PR (Red) for enhanced video quality. Be sure to match the component video and audio connections. For example, if connecting the video cable to COMPONENT IN, connect the audio cable to COMPONENT IN also.
Each DVD Player/Cable/Satellite Box (Set-Top Box) has a different back panel configuration.
When connecting a DVD Player/Cable/Satellite Box (Set-Top Box), match the color of the connection terminal to the cable.
Connecting a DVD Player/Cable/Satellite Box (Set-Top Box) via HDMI
HDMI offers the best video quality. This connection can only be made if there is an HDMI Output jack on the external device.
1 Connect an HDMI Cable between the HDMI IN 1 (or HDMI IN 2) on the TV and the HDMI OUT jack on the DVD Player/Cable/Satellite Box (Set-Top Box).
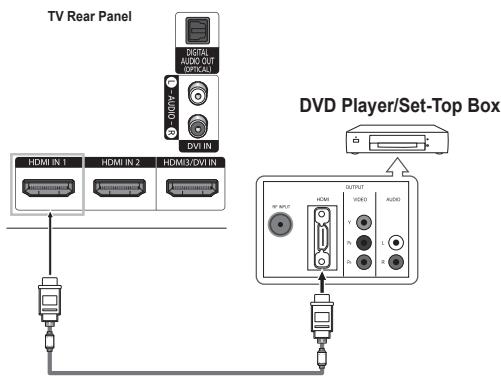
HDMI Cable(Not supplied)
What is HDMI?
- HDMI, or high-definition multimedia interface, enables the transmission of the digital audio and video signals using a single cable.
- "Multimedia interface" is a more accurate name for it especially because it allows multiple channels of digital audio (5.1 channels). The difference between HDMI and DVI is that the HDMI device is smaller in size, has the HDCP (High Bandwidth Digital Copy Protection) coding feature installed, and supports multi-channel digital audio.
Each DVD Player/Cable/Satellite Box (Set-Top Box) has a different back panel configuration.When connecting a DVD Player/Cable/Satellite Box (Set-Top Box), match the color of the connection terminal to the cable.
When connecting via HDMI, you do not need to connect Audio Cables. You only need to connect Audio cables when connecting via HDMI/DVI.
The TV may not output sound when DVD Players/Cable Boxes/Satellite receivers that support older HDMI versions than 1.3 are connected. If you connect an older version HDMI cable and do not hear sound, connect the HDMI cable to the HDMI3/DVI IN jack and audio cables to DVI IN [R-AUDIO-L] jacks on TV's back panel.
HDMI cables that are not 1.3 may cause annoying flicker or no screen display.
Connecting a DVD Player/Cable/Satellite Box (Set-Top Box) via DVI
This connection can only be made if there is a DVI Output jack on the external device.
1 Connect a HDMI/DVI Cable or DVI-HDMI Adapter between the HDMI3/DVI IN jack on the TV and the DVI OUT jack on the DVD Player/Cable/Satellite Box (Set-Top Box).
2 Connect Audio Cables between the DVI IN [L-AUDIO-R] jacks on the TV and the AUDIO OUT jacks on the DVD Player/Cable/Satellite Box (Set-Top Box).
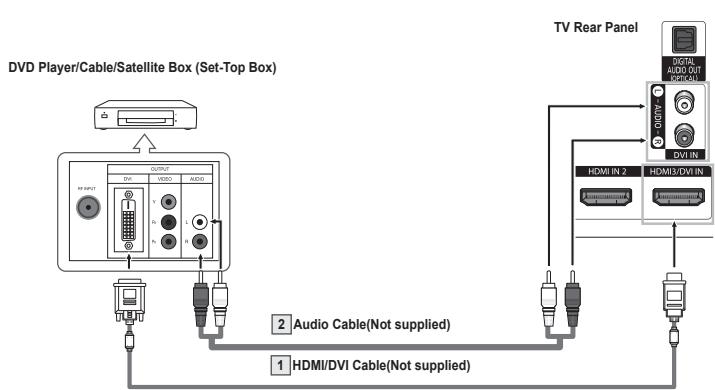
Each DVD Player/Cable/Satellite Box (Set-Top Box) has a different back panel configuration.
When connecting a DVD Player/Cable/Satellite Box (Set-Top Box), match the color of the connection terminal to the cable.
Connecting a Digital Audio System
The rear panel jacks on your TV make it easy to connect a Digital Audio System to your TV.
1 Connect an Optical Cable between the DIGITAL AUDIO OUT (OPTICAL) jack on the TV and the Digital Audio Input jack on the Digital Audio System. When a Digital Audio System is connected to the DIGITAL AUDIO OUT (OPTICAL) terminal: Decrease the volume of the TV, and adjust the volume level with the audio system's volume control.
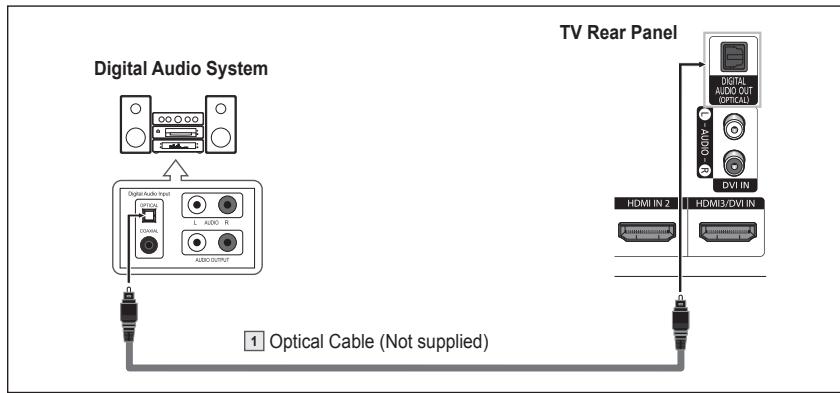
Each Digital Audio System has a different back panel configuration.
5.1CH audio is possible when the TV is connected to an external device supporting 5.1CH.
What is OPTICAL?
- Converts the electric signal into an optical light signal, and transmits it through glass fibers. S/PDIF is a transmission system of digital audio in the form of a light wave that uses a glass conductor.
| DIGITAL AUDIO OUT (OPTICAL) | RF (Digital/Analog), AV, S-Video | Sound is output |
When a DVD player or Cable/Satellite box is connected to the COMPONENT or HDMI IN jacks on the TV, the Optical jack outputs 2.1 channel audio only. If you want to hear 5.1 channel audio, connect the DIGITAL AUDIO OUT (OPTICAL) jack on the player or box directly to the Digital Audio System, not the TV.
Connecting an Amplifier/DVD Home Theater
1 Connect Audio Cables between the AV OUT [L-AUDIO-R] jacks on the TV and AUDIO IN [L-AUDIO-R] jacks on the Amplifier/DVD Home Theater.
When an audio amplifier is connected to the AV OUT [L-AUDIO-R] terminals: Decrease the volume of the TV, and adjust the volume level with the amplifier's volume control.
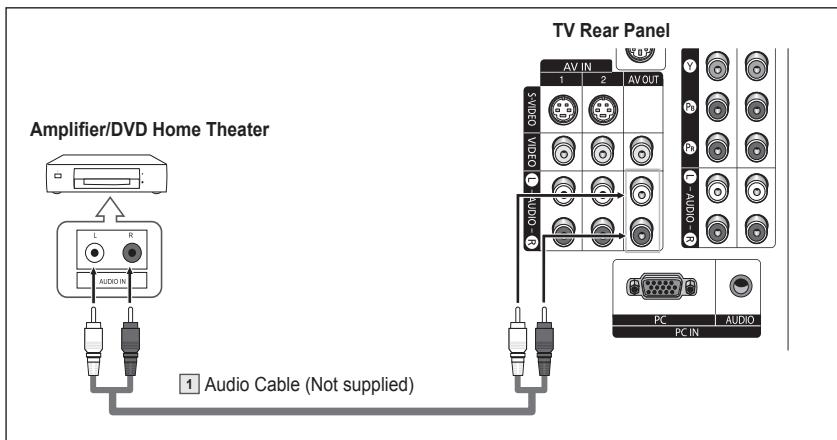
Each Amplifier/DVD Home Theater has a different back panel configuration.
When connecting an Amplifier/DVD Home Theater, match the color of the connection terminal to the cable.
Connecting a PC
Using a D-Sub Cable
1 Connect a D-Sub Cable between the PC IN [PC] jack on the TV and the PC output jack on your computer.
2 Connect a PC Audio Cable between the PC IN [AUDIO] jack on the TV and the Audio Out jack of the sound card on your computer.
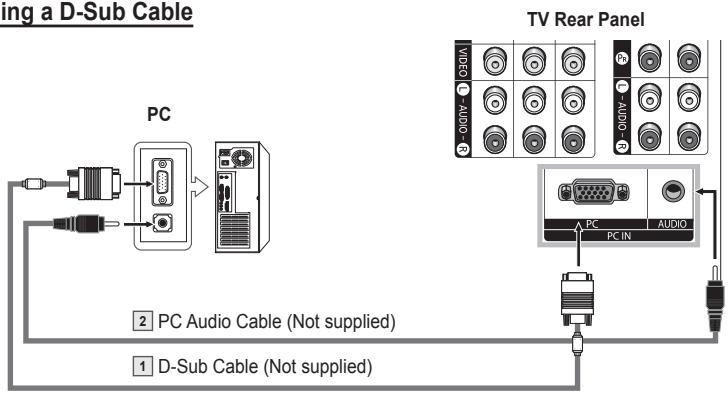
Using a D-Sub Cable
Using an HDMI/DVI Cable
1 Connect an HDMI/DVI Cable between the HDMI3/DVI IN jack on the TV and the PC output jack on your computer.
2 Connect a 3.5 mm Stereo miniplug/2RCA Cable between the DVI IN [L-AUDIO-R] jack on the TV and the Audio Out jack of the sound card on your computer.
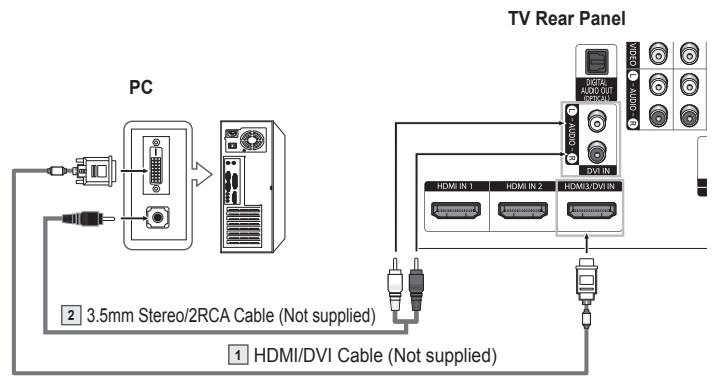
Using an HDMI/DVI Cable
Each PC has a different back panel configuration.
When connecting a PC, match the color of the connection terminal to the cable.
When connecting the HDMI/DVI to your PC, select HDMI3/DVI and in Edit Name (in the Input Menu) select PC to see the original screen with no cutting images. See page 27.
Operation
Turning the TV On and Off
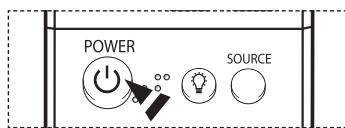
Press the POWER button on the remote control. You can also use the POWER button on the TV.
It may take a while when your TV starts.
Plug & Play Feature
The first time you turn on your new TV, choose your basic settings for language, input source and channels, and time of day using the plug and play feature. The TV will store these settings in memory. Storing the channels in memory will allow you to scan the stored channels rather than have to enter their digits each time you want to change channels.
When the TV is initially powered on, basic settings proceed automatically:
1 Press the POWER button on the remote control.
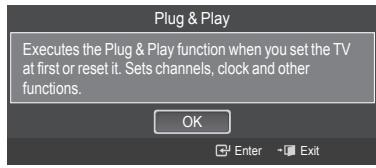
The message Executes the Plug & Play function when you set the TV at first or reset it. Sets channels, clock and other functions. is automatically displayed.
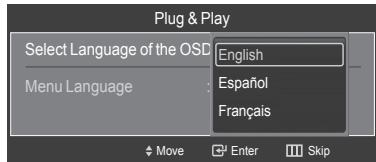
2 Press the ENTER button to enter the language.
Press the or button to select language, then press the ENTER button.
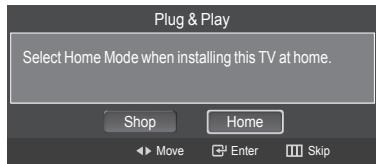
The message Select Home Mode when installing this TV at home. is automatically displayed.
3 Press the or button to select Shop or Home, then press the ENTER button.
The default selection is Home.
We recommend setting the TV to Home mode for the best picture in your home environment.
Shop mode is only intended for use in retail environments.
If the unit is accidentally set to Shop mode, and you want to return to Dynamic (Home) mode, press the Volume button and then hold down the MENU button for five seconds on the TV panel.
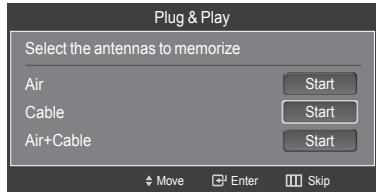
4 Press the or button to memorize the channels of the selected connection, then press the ENTER button.
If the antenna is connected to ANT 1 IN (CABLE), select Cable and if it is connected to ANT 2 IN (AIR), select Air.
If both ANT 1 IN (CABLE) and ANT 2 IN (AIR) are connected, select the Air + Cable.
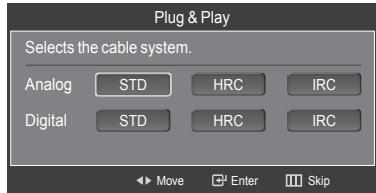
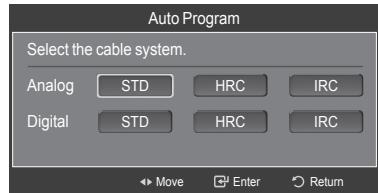
In Cable mode, you can select the correct analog signal source among STD, HRC, and IRC by pressing the or button, then press the ENTER button. If you have Digital cable, select the signal source for both Analog and Digital.
Contact your local cable company to identify the type of cable system that exists in your particular area.
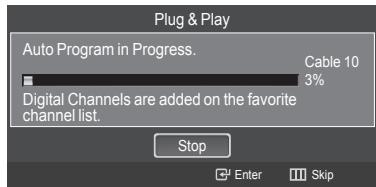
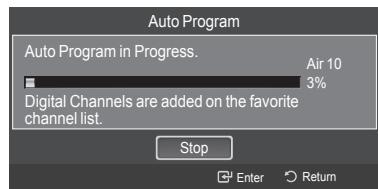
5 The TV will begin memorizing all of the available channels.
After all the available channels are stored, the Auto program menu reappears.
Press the ENTER button when channel memorization is complete.
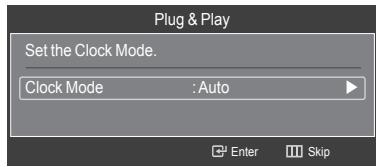
The Clock Mode menu is displayed.
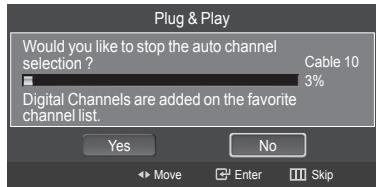
To stop the search before it has finished, press the ENTER button with stop selected.
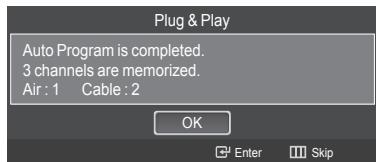
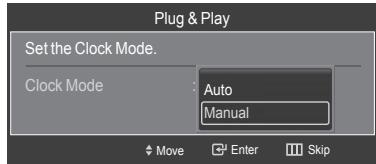
6 Press the ENTER button.
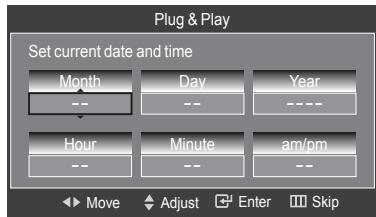
Press the or button to select Manual for setting the current time manually, then press the ENTER button. The message Set current date and time is displayed.
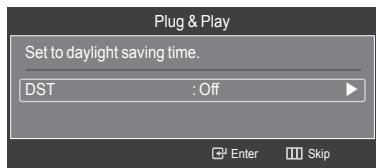
If you select Auto. Set to daylight saving time. is displayed, then go to step 9.
7 Press the or button to move to Month, Day, Year, Hour, Minute, or am/pm.
Set the date and time you want by pressing the or button, then press the ENTER button.
You can set the month, day, year, hour, and minute directly by pressing the number buttons on the remote control.
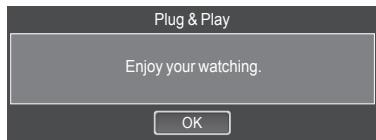
8 The message Enjoy your watching. is displayed.
When you have finished, press the ENTER button.
Even if the ENTER button is not pressed, the message will automatically disappear after several seconds.
Setting the Clock Automatically
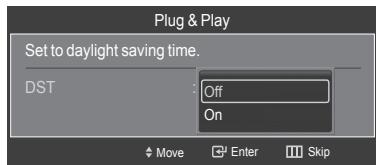
9 Press the ENTER button.
Press the or button to select Off or On, then the ENTER button.
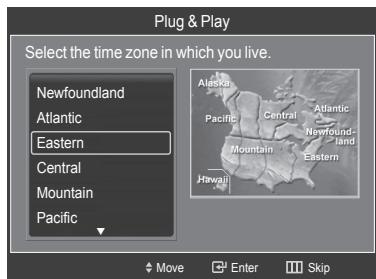
The message Select the time zone in which you live. is displayed.
10 Press the or button to highlight the time zone for your local area (and to move the highlight to the appropriate time zone on the map of the United States).
Press the ENTER button.
If clock is not automatically set, see pages 48~49 to set the clock.
11 The message Enjoy your watching. is displayed.
When you have finished, press the ENTER button.
Even if the ENTER button is not pressed, the message will automatically disappear after several seconds.
Changing Channels
Using the Channel Buttons
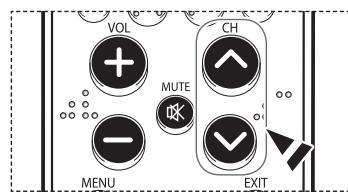
Press the CH or CH button to change channels.
When you press the CH or CH button, the TV changes channels in sequence. You will see all the channels that the TV has memorized. (The TV must have memorized at least three channels). You will not see channels that were either erased or not memorized. See page 21 to memorize channels.
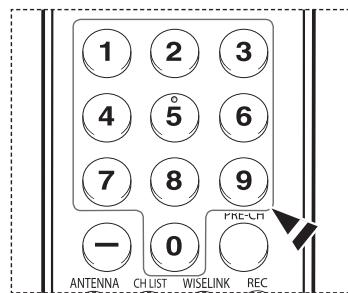
Using the Number Buttons
Use the number buttons to quickly tune to any channel.
Press the number buttons to go directly to a channel.
For example, to select channel 27, press "2," then "7."
The TV will change channels when you press the second number.
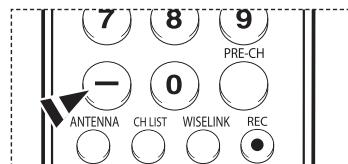
Using the - Button
The “-” button is used to select stations that broadcast a digital signal.
For example, for Channel 7-1, press "7", then " - ", and then "1".
HD indicates the TV is receiving a Digital High Definition signal. SD indicates the TV is receiving a Standard Definition signal.
For quick channel change, press the number buttons, then press the ENTER button.
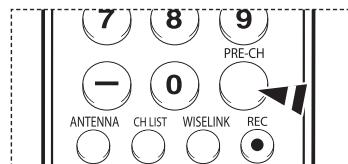
Using the PRE-CH Button to select the Previous Channel
Press the PRE-CH button.
The TV will switch to the last channel viewed.
To quickly switch between two channels that are far apart, tune to one channel, then use the number button to select the second channel. Then use the PRE-CH button to quickly alternate between them.
Adjusting the Volume
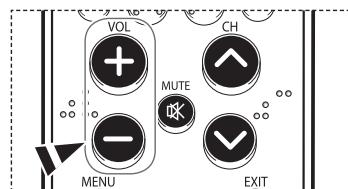
Press the VOL + or VOL - button to increase or decrease the volume.
Using the Mute Button
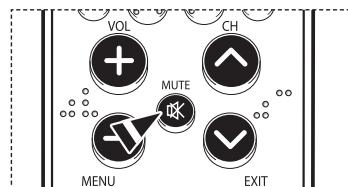
At any time, you can cut off the sound using the MUTE button.
1 Press the MUTE button and the sound cuts off. The is displayed on the screen.
2 To turn mute off, press the MUTE button again, or simply press the VOL + or VOL - button.
Viewing the Display
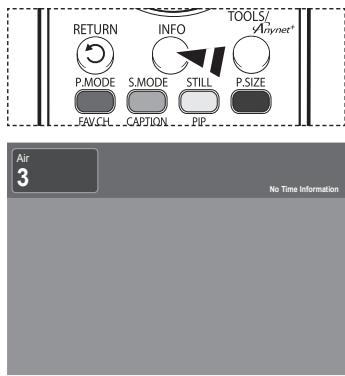
The display identifies the current channel and the status of certain audio-video settings.
Press the INFO button on the remote control.
Viewing the Menus
1 With the power on, press the MENU button.
The main menu will appear on the left side of the screen.
There are seven menu groups: Picture, Sound, Channel, Setup, Input, Guide, and PIP.
2 Press the or button, then press the ENTER button to select an item you want in the menu. Press the / / /ENTER button to display, change, or use the selected items.
Press the EXIT button to exit.
Using the TOOLS Button
The Tools button allows you to display frequently used Menu and Connection items with a Single button press.
1 Press the TOOLS button.
The TOOLS menu will appear.
2 Press the / button to select a menu, then press the ENTER button.
3 Press the / / ENTER buttons to display, change, or use the selected items. For a more detailed description of each function, refer to the corresponding page.
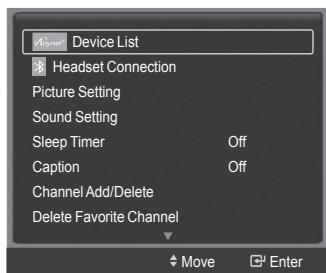
Device List, see page 82
Headset Connection, see page 69
Picture Setting, see page 28
Sound Setting, see page 36
Sleep Timer, see page 50
Caption, see page 51~52
Channel Add/Delete,see page 42
Delete Favorite Channel, see page 43
Auto Program, see page 21
Memorizing the Channels
Your TV can memorize and store all of the available channels for both air and cable channels. After the available channels are memorized, use the CH and CH button to scan through the channels. This eliminates the need to change channels by entering the channel digits. There are three steps for memorizing channels: selecting a broadcast source, memorizing the channels(automatic) and adding or deleting channels manual).
Selecting the Video Signal-source
Before your television can begin memorizing the available channels, you must specify the type of signal source that is connected to the TV (i.e. an air or a cable system).
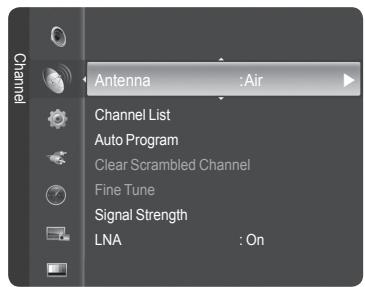
1 Press the MENU button.
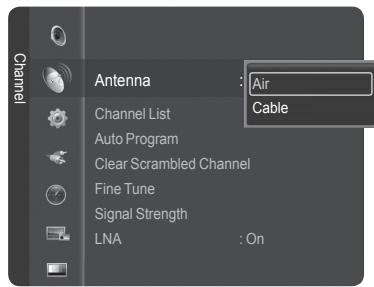
Press the or button to select Channel, then press the ENTER button. Press the ENTER button to select Antenna.
2 Press the or button to select Air or Cable, then press the ENTER button.
Storing Channels in Memory (Automatic Method)
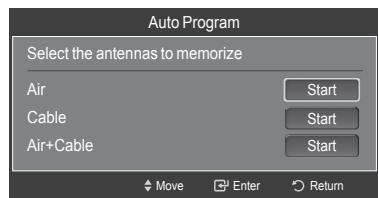
3 Press the or button to select Auto Program, then press the ENTER button.
4 Press the or button to select an antenna connection, then press the ENTER button.
Air: "Air" antenna signal.
Cable: "Cable" antenna signal.
Air+Cable: "Air" and "Cable" antenna signals.
If the antenna is connected to ANT 1 IN (CABLE), select Cable and if it is connected to ANT 2 IN (AIR), select Air.
If both ANT 1 IN (CABLE) and ANT 2 IN (AIR) are connected, select the Air+Cable.
If you selected Air, then go to step 6.
5 Press the or to select the correct analog signal source among STD, HRC, and IRC, then press the ENTER button. If you have Digital cable, select the signal source for both Analog and Digital.
STD, HRC, and IRC identify various types of cable TV systems. Contact your local cable company to identify the type of cable system that exists in your particular area. At this point the signal source has been selected.
6 The TV begins memorizing all available stations.
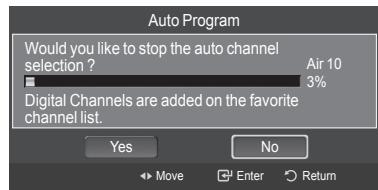
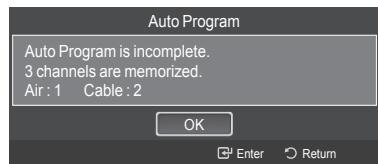
When pressing the ENTER button during a storing process, the message Would you like to stop the auto channel selection? is displayed. Select Yes by pressing the or button.
Press the EXIT button to exit.
The TV must be connected to an antenna/cable in order to receive digital TV signals. Even if a particular channel is deleted from the memory, you can always tune to that channel directly by using the number buttons on the remote control.
All available DTV and analog channels are automatically stored in memory. It takes approximately 3 to 10 minutes to memorize channels.
Setting Up Your Remote Control
After your remote control has been properly set up, your remote control can operate in five different modes: TV, VCR, Cable, DVD, or Set-Top Box. Pressing the corresponding button on the remote control allows you to switch among these modes, and control whichever piece of equipment you choose.
The remote control might not be compatible with all DVD Players, VCRs, Cable boxes, and Set-Top Boxes.
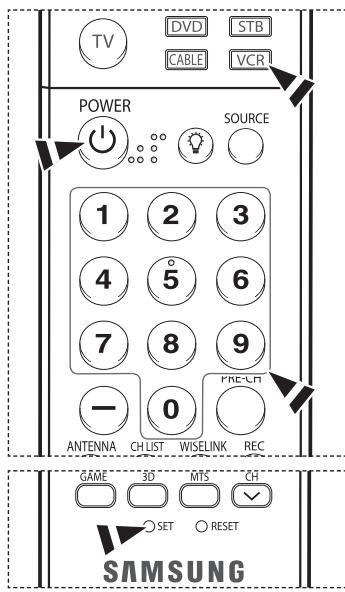
Setting Up the Remote to Operate Your VCR
1 Turn off your VCR.
2 Press the VCR button on your TV's remote control.
3 Press the SET button on your TV's remote control.
4 Using the number buttons on your remote control, enter three digits of the VCR code listed on page 24 of this manual for your brand of VCR. Make sure you enter three digits of the code, even if the first digit is a "0". (If more than one code is listed, try the first one.)
5 Press the POWER button on the remote control. Your VCR should turn on if your remote is set up correctly.
If your VCR does not turn on after set-up, repeat steps 2, 3 and 4, but try one of the other codes listed for your brand of VCR. If no other codes are listed, try each VCR code, 000 through 080.
Note on Using Remote Control Modes: VCR
When your remote control is in VCR mode, the volume buttons still control your TV's volume.
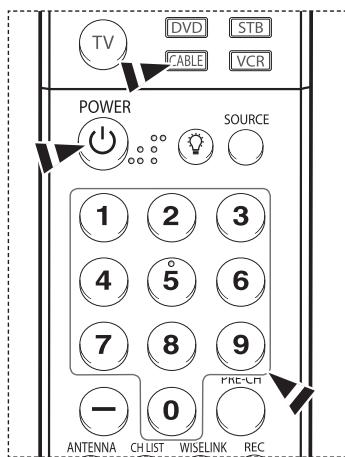
Setting Up the Remote to Operate Your Cable Box
1 Turn off your cable box.
2 Press the CABLE button on your TV's remote control.
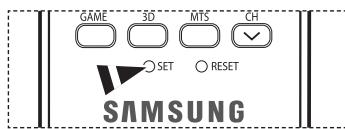
3 Press the SET button on your TV's remote control.
4 Using the number buttons on your remote control, enter three digits of the cable box code listed on page 25 of this manual for your brand of cable box. Make sure you enter three digits of the code, even if the first digit is a "0". (If more than one code is listed, try the first one.)
5 Press the POWER button on the remote control.
Your cable box should turn on if your remote is set up correctly.
If your cable box does not turn on after set-up, repeat steps 2, 3 and 4, but try one of the other codes listed for your brand of cable box. If no other codes are listed, try each code, 000 through 046.
Note on Using Remote Control Modes: Cable Box
When your remote control is in CABLE mode, the volume buttons still control your TV's volume.
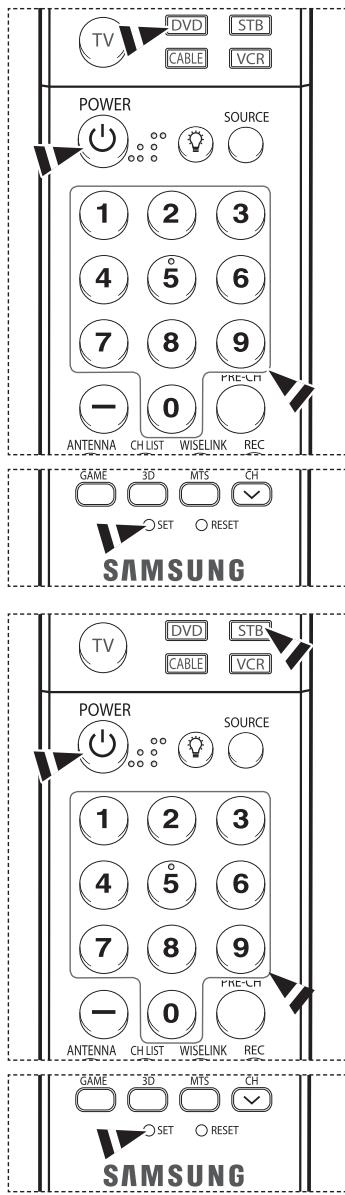
Setting Up the Remote to Operate Your DVD
1 Turn off your DVD.
2 Press the DVD button on your TV's remote control.
3 Press the SET button on your TV's remote control.
4 Using the number buttons on your remote control, enter three digits of the DVD code listed on page 26 of this manual for your brand of DVD. Make sure you enter three digits of the code, even if the first digit is a "0". (If more than one code is listed, try the first one.)
5 Press the POWER button on the remote control.
Your DVD should turn on if your remote is set up correctly.
If your DVD does not turn on after set-up, repeat steps 2, 3 and 4, but try one of the other codes listed for your brand of DVD. If no other codes are listed, try each code, 000 through 141.
Note on Using Remote Control Modes: DVD
When your remote control is in DVD mode, the volume buttons still control your TV's volume.
Setting Up the Remote to Operate Your Set Top Box
1 Turn off your STB.
2 Press the STB button on your TV's remote control.
3 Press the SET button on your TV's remote control.
4 Using the number buttons on your remote control, enter three digits of the STB code listed on page 25 of this manual for your brand of STB. Make sure you enter three digits of the code, even if the first digit is a "0". (If more than one code is listed, try the first one.)
5 Press the POWER button on the remote control.
Your STB should turn on if your remote is set up correctly.
If your STB does not turn on after set-up, repeat steps 2, 3 and 4, but try one of the other codes listed for your brand of STB. If no other codes are listed, try each code, 000 through 074.
Note on Using Remote Control Modes: STB
When your remote control is in STB mode, the volume buttons still control your TV's volume.
VCR
| Brand | Code |
| SAMSUNG | 000 001 002 003 004 005 077 078 079 |
| ADMIRAL | 020 |
| AIWA | 025 |
| AKAI | 004 027 032 |
| AUDIO DYNAMICS | 007 026 |
| BELL&HOWELL | 018 |
| BROKSONIC | 022 |
| CANDLE | 002 003 006 008 015 055 |
| CANON | 021 056 |
| CITIZEN | 002 003 006 008 015 055 |
| COLOURYME | 007 |
| CRAIG | 002 024 |
| CURTIS MATHES | 002 007 008 017 021 025 056 064 066 |
| DAEWOO | 003 010 011 012 013 014 015 016 |
| DB | 007 026 |
| DIMENSIA | 017 |
| DYNATECH | 025 |
| ELECTROHOME | 034 |
| EMERSON | 001 003 006 021 022 025 030 032 034 |
| 040 047 050 052 060 063 065 066 067 | |
| 069 073 | |
| FISHER | 018 024 028 029 048 051 061 |
| FUNAI | 025 |
| GENERAL ELECTRIC | 002 005 017 021 056 |
| GO VIDEO | 002 |
| LG(Goldstar) | 006 007 008 009 010 |
| HARMAN KARDON | 007 |
| HITACHI | 019 025 041 042 074 |
| INSTANT REPLAY | 021 |
| JC PENNEY | 002 007 018 019 021 026 037 041 |
| 054 056 | |
| JCL | 007 008 018 021 026 037 |
| KENWOOD | 007 008 018 026 037 |
| KLH | 070 |
| LIOYD | 025 |
| LOGIK | 038 |
| LXI | 025 |
| JVC | 081 082 083 |
| MAGNAVOX | 021 056 059 |
| MARANTZ | 007 008 018 021 026 037 062 |
| MARTA | 006 |
| KONIA | 036 |
| ORION | 073 074 075 076 |
| MEI | 021 |
| MEMOREX | 006 021 024 025 |
| MGA | 034 |
| MIDLAND | 005 |
| MINOLTA | 019 041 075 |
| Brand | Code |
| MITSUBISHI | 019 034 041 046 |
| MONTGOMERY WARD | 020 |
| MTC | 002 025 |
| MULTITECH | 002 005 025 038 |
| NEC | 007 008 018 026 037 062 064 |
| OPTIMUS | 020 |
| PANASONIC | 021 056 071 072 |
| PENTAX | 019 041 075 |
| PENTEX RESEARCH+ | 008 |
| PHILCO | 021 056 059 |
| PHILIPS | 021 080 |
| PIONEER | 019 026 039 053 |
| PORTLAND | 015 049 055 |
| PROSCAN | 017 |
| QUARTZ | 018 |
| QUASAR | 021 056 |
| RADIO SHACK/REALISTIC | 006 018 020 021 024 025 029 034048 056 |
| RCA | 002 017 019 021 035 041 043 057068 076 |
| SANSUI | 026 |
| SANYO | 018 024 |
| SCOTT | 003 047 052 067 |
| SEARS | 006 018 019 024 028 029 041 048 051 |
| SHARP | 020 034 045 015 |
| SHIMTOM | 027 033 038 058 |
| SIGNATURE | 025 |
| SONY | 027 033 044 |
| SYLVANIA | 021 025 056 059 |
| SYMPHONIC | 025 |
| TANDY | 018 025 |
| TASHIKA | 006 |
| TATUNG | 037 |
| TEAC | 025 037 068 |
| TECHNICS | 021 |
| TEKNIKA | 006 021 025 031 |
| TMK | 066 |
| TOSHIBA | 003 019 029 051 052 |
| TOTEVISION | 002 006 |
| UNITECH | 002 |
| VECTOR RESEARCH | 007 026 |
| VICTOR | 026 |
| VIDEO CONCEPTS | 007 026 |
| VIDEOSONIC | 002 |
| WARDS | 002 003 006 019 020 021 024 025 034038 041 |
| YAMAHA | 007 008 018 026 037 |
| ZENITH | 023 027 033 |
CABLEBOX
| Brand | Code |
| SAMSUNG | 000 001 002 003 004 005 006 007 |
| GI | 041 |
| HAMILIN | 003 024 031 |
| HITACHI | 025 030 |
| JERROLD | 038 039 |
| MACOM | 025 030 |
| MAGNAVOX | 019 023 028 |
| OAK | 026 |
| PANASONIC | 003 022 027 037 044 |
| PHILIPS | 019 021 023 028 |
| PIONEER | 004 018 020 044 |
| RCA | 014 022 040 |
| REGAL | 003 |
| Brand | Code |
| REGENCY | 015 023 |
| SA | 042 043 |
| SCIENTIFIC ATLAN | 042 043 |
| SPRUCER | 022 |
| STARGATE 2000 | 036 |
| SYLVANIA | 016 |
| TEXSCAN | 016 |
| TOCOM | 032 |
| UNIVERSAL | 033 034 |
| VIEWSTAR | 019 021 023 028 |
| WARNER AMEX | 046 |
| ZENITH | 017 029 035 037 045 |
SAMSUNG SET-TOP BOX
| Product | Code |
| Ground wave STB | 001 002 |
| Satellite STB | 003 |
| CABLE STB | 004 |
| STB DVD COMBO | 008 |
| Satellite STB HDD COMBO Standard | 009 |
| Product | Code |
| Satellite STB HDD COMBO Premium | 010 |
| CABLE STB HDD COMBO Standard | 011 |
| CABLE STB HDD COMBO Premium | 012 |
| Ground wave STB HDD COMBO Standard | 013 |
| Ground wave STB HDD COMBO Premium | 014 |
SET-TOP BOX
| Brand | Code |
| ALPHASTAR | 023 |
| ANAM | 043 |
| CHANNEL MASTER | 018 034 |
| CROSSDIGITAL | 019 |
| CHAPARRAL | 035 |
| DIRECT TV | 015 016 017 019 022 045 060 |
| 061 062 065 066 067 068 | |
| DAEWOO | 074 |
| DISH NETWORK SYSTEM | 069 070 |
| DISHPRO | 069 |
| DRAKE | 018 024 032 |
| DX ANTENNA | 027 |
| ECHOSTAR | 025 069 070 071 |
| EXPRESSVU | 069 |
| GOI | 069 |
| GE | 065 |
| GENERAL INSTRUMENT | 046 047 048 063 064 |
| HTS | 069 |
| HOME CABLE | 056 |
| HITACHI | 022 |
| HUGHEs NETWORK | 015 017 |
| IQ | 020 |
| IQ PRISM | 020 |
| JANEIL | 059 |
| JERROID | 063 |
| JVC | 069 070 |
| Brand | Code |
| LG(Goldstar) | 044 073 |
| MAGNAVOX | 016 021 036 038 039 040 041 042 |
| MEMOREX | 016 |
| MOTOROLA | 064 |
| MACOM | 018 |
| MITSUBISHI | 015 |
| NEXT LEVEL | 047 048 064 |
| PHILIPS | 015 016 017 021 033 036 038 039 |
| 040 041 042 067 | |
| PRIMESTAR | 046 049 050 063 |
| PANASONIC | 058 059 061 062 |
| PAYSAT | 016 |
| PROSCAN | 065 066 |
| RCA | 051 052 053 065 066 |
| RADIOSHACK | 064 |
| REALISTIC | 057 |
| STS | 020 027 |
| STAR TRAK | 026 |
| SKY | 031 |
| SKY LIFE | 005 006 007 |
| SHACK | 064 |
| STAR CHOICE | 064 |
| SONY | 054 060 |
| TOSHIBA | 015 017 028 029 030 072 |
| ULTIMATE TV | 060 066 |
| UNIDEN | 016 021 037 055 056 057 |
| ZENITH | 024 031 068 |
SAMSUNG DVD
| Product | Code |
| DVD | 000 001 002 |
| DVDR | 003 004 |
| BD Record | 005 006 |
| VCR COMBO | 007 008 009 010 011 |
| VCR Record | 012 |
| DHR COMBO | 013 |
| Product | Code |
| Home Theater VCR COMBO | 014 015 016 |
| HDD Record COMBO | 017 |
| TWIN TRAY COMBO | 018 |
| STB DVD COMBO | 019 |
| DVD Receiver | 020 |
| AV Receiver | 021 |
DVD
| Brand | Code |
| ANAM | 030 |
| AUDIOVOX | 075 |
| AUDIOLOGIC | 085 |
| ANABA | 072 |
| APEX DIGITAL | 070 071 074 086 083 084 088 |
| 111 112 | |
| AIWA | 114 |
| BROKSONIC | 062 |
| BLAUPUNKT | 074 |
| B&K | 122 123 |
| CURTIS MATHES | 027 |
| CYBER HOME | 065 077 078 079 082 |
| CLARION | 080 125 |
| CIRRUS | 081 |
| CINEVISION | 095 |
| DAEWOO | 066 |
| DENON | 146 |
| FARENHEIT | 067 068 |
| FISHER | 090 |
| GPX | 060 |
| GO VIDEO | 061 089 133 135 |
| GE | 069 074 |
| GREENHILL | 074 |
| HITACHI | 064 113 |
| HITEKER | 071 |
| HOYO | 073 |
| HARMAN / KARDON | 091 110 |
| IRT | 089 |
| INTEGRA | 092 |
| JBL | 091 |
| JVC | 022 033 115 116 |
| JATON | 073 |
| KENWOOD | 051 108 109 |
| KISS | 073 |
| KONKA | 059 100 106 107 |
| KLH | 074 075 |
| LG(Goldstar) | 025 031 |
| LOEWE | 057 |
| LASONIC | 058 |
| MOBILE AUTHORITY | 054 |
| MEMOREX | 055 |
| MALATA | 056 |
| MAGNAVOX | 076 093 |
| MINTEK | 074 094 |
| MONYKA | 073 |
| Brand | Code |
| NORCENT | 048 049 050 |
| NEXT BASE | 052 |
| NEC | 053 |
| NANTAUS | 144 |
| NESA | 074 |
| OPTOMEDIA ELECTRONICS | 105 |
| OPTIVIEW | 072 |
| ONKYO | 076 092 119 |
| PHILCO | 044 045 |
| PRINCETON | 046 047 |
| PROSCAN | 023 |
| PANASONIC | 024 034 124 134 136 137 138 |
| PHILIPS | 036 076 |
| ROTEL | 117 118 |
| RIO | 120 |
| RCA | 023 035 074 075 131 132 |
| RAITE | 073 |
| ROWA | 038 |
| SAMPO | 104 |
| SONY | 026 029 126 127 128 129 |
| 130 141 | |
| SHERWOOD | 039 041 |
| SVA | 042 |
| SYLVANIA | 043 093 |
| SHARP | 140 |
| SANSUI | 062 |
| SANYO | 062 |
| SHINSONIC | 094 |
| SANYO | 090 |
| THOMSON | 145 |
| TOSHIBA | 028 062 076 |
| TECHNICS | 139 |
| TVIEW | 072 |
| TOKAI | 073 |
| TEAC | 096 |
| TECHWOOD | 097 |
| TREDEX | 098 099 101 |
| URBAN CONCEPTS | 076 |
| VENTURER | 075 |
| VOCOPRO | 102 |
| YAMAHA | 032 063 |
| YAMAKAWA | 040 073 |
| XWAVE | 103 |
| ZENITH | 076 121 |
To Select the Source
Use to select TV or other external input sources such as DVD players, VCRs, etc. connected to the TV.
1 Press the MENU button.
Press the or button to select Input, then press the ENTER button.
Press the ENTER button to select Source List.
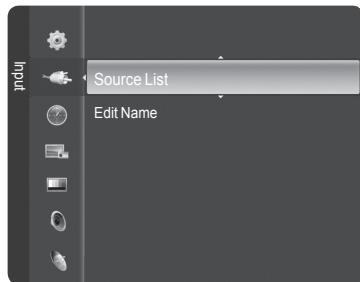
2 Press the or button to select a signal source, then press the ENTER button.
Press the EXIT button to exit.
You can choose between the following sets of jacks: TV, AV1, AV2, S-Video1, S-Video2, Component1, Component2, PC, HDMI1, HDMI2, or HDMI3/DVI on the TV's rear panel and AV3 or USB on the TV's side panel.
HDMI1, HDMI2, or HDMI3/DVI input can only be selected when the external device is turned on and connected via HDMI.
You can choose only those external devices that are connected to the TV.
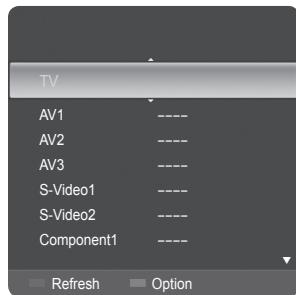

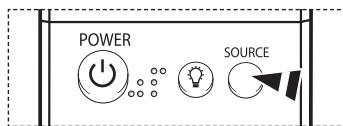
Press the SOURCE button on the remote control to view an external signal source.
To Edit the Input Source Name
Name the external device connected to the input jacks to make your input source selection easier.
1 Press the MENU button.
Press the or button to select Input, then press the ENTER button.
Press the or button to select Edit Name, then press the ENTER button.
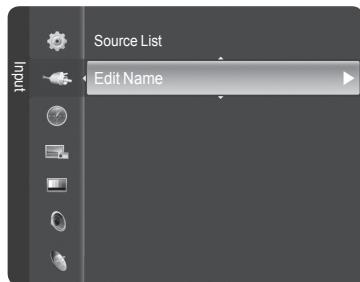
2 Press the or button to select AV1, AV2, AV3, S-Video1, S-Video2, Component1, Component2, PC, HDMI1, HDMI2, or HDMI3/DVI input jack, then press the ENTER button.
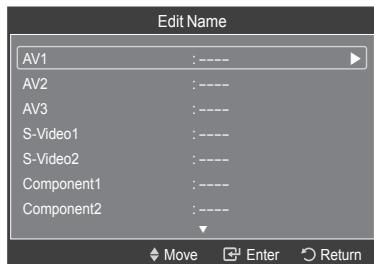
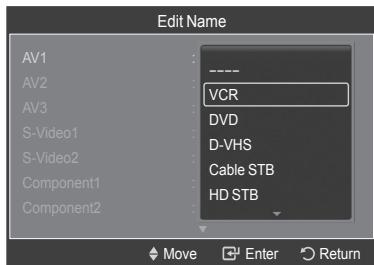
3 Press the or button to select VCR, DVD, D-VHS, Cable STB, HD STB, Satellite STB, PVR STB, AV Receiver, DVD Receiver, Game, Camcorder, DVD Combo, DVD HDD Recorder, PC, Internet TV Recv., Interactive TV Recv., VOD STB, or TV input source, then press the ENTER button.
Press the EXIT button to exit.
Using Automatic Picture Settings
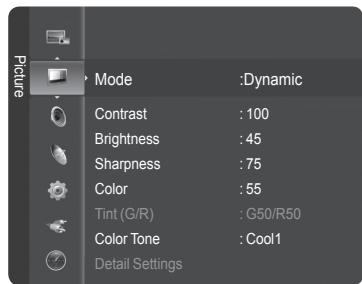
Your new DLP TV gives you optimal control over the picture you're watching. You can change the screen size, improve the image quality, even watch something else without turning off what you're currently watching. Please be aware that the best picture on this TV will be obtained from High Definition (HD) sources such as Digital cable or DVD players. Your TV has three automatic picture settings ("Dynamic", "Standard", "Movie") that are preset at the factory. You can activate a Picture Setting by making a selection from the menu.
1 Press the MENU button.
Press the ENTER button to select Picture.
Press the ENTER button again to select Mode.
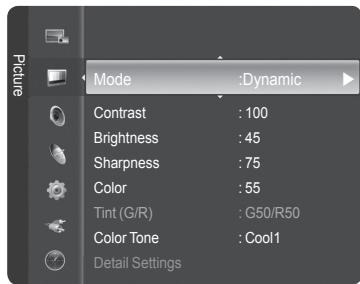
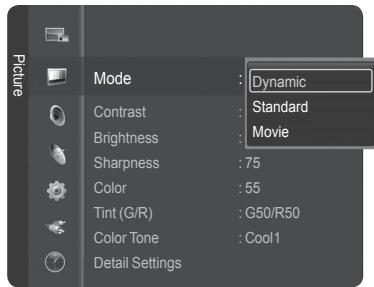
2 Press the or button to select Dynamic, Standard, or Movie, then press the ENTER button.
- Choose Dynamic to increase the clarity and sharpness of the picture.
- Choose Standard for general TV watching mode.
- Choose Movie when watching movies.

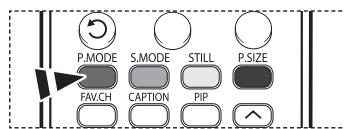
Press the P.MODE button on the remote control to select one of the standard picture settings.
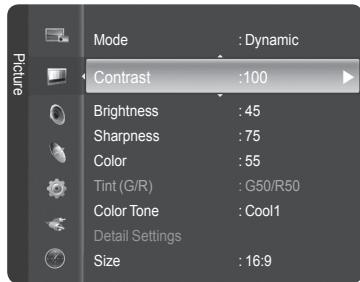
3 Press the or button to select Contrast, Brightness, Sharpness, Color, or Tint (G/R), then press the ENTER button.
Tint (G/R) is not available in DTV or PC mode.
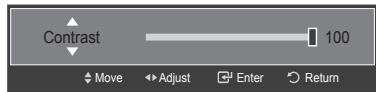
4 Press the or button to decrease or increase the value of a particular item. Press the ENTER button.
Each adjusted setting will be stored separately according to its input mode.
- When you make changes to Contrast, Brightness, Sharpness, Color, or Tint (G/R), OSD color will also be adjusted accordingly.
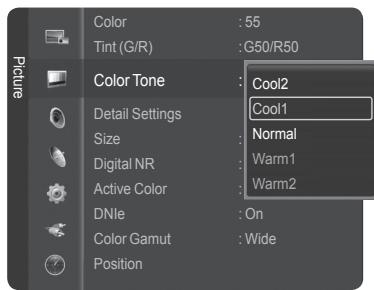
5 Press the or button to select Color Tone, then press the ENTER button.
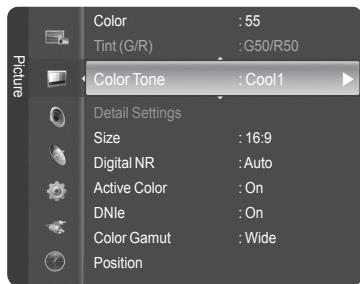
6 Press the or button to select Cool2, Cool1, Normal, Warm1, or Warm2, then press the ENTER button.
When the picture mode is set to Dynamic or Standard, Warm1, and Warm2 cannot be selected.
Press the EXIT button to exit.
Making Detailed Settings on the Picture
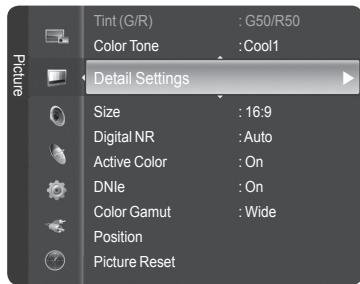
Samsung's new TVs allow you to make even more precise picture settings than previous models. See below to make Detailed picture settings.
1 Press the MENU button.
Press the ENTER button to select Picture.
Press the or button to select Detail Settings, then press the ENTER button.
2 Select the desired option by pressing the or button, then press the ENTER button.
3 When you are satisfied with your setting, press the ENTER button.
Press the EXIT button to exit.
When the picture mode is set to Standard or Movie, Detail Settings can be selected.
If DNle is selected Off when Picture mode is Standard, Detail Settings cannot be selected.
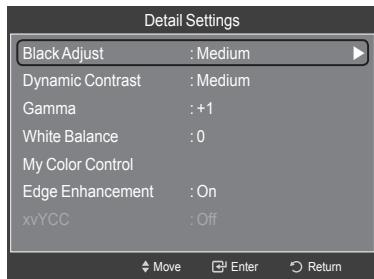
- Black Adjust: Off/Low/Medium/High
You can directly select the black level on the screen to adjust the screen depth.
Dynamic Contrast: Off/Low/Medium/High
You can adjust the screen contrast so that the optimal contrast is provided.
- Gamma: -3 +3
You can adjust the Primary Color (Red, Green Blue) Intensity.
Press the or button until you reach the optimal setting.
White Balance: -10 +10
You can adjust the color temperature for more natural picture colors.
Press the or button until you reach the optimal setting.
My Color Control: Pink/Green/Blue/Reset
This setting can be adjusted to suit your personal preferences.
Select the Pink, Green or Blue by pressing the or button, then press the ENTER button.
Press the or button until you reach the optimal setting.
Reset: The previously adjusted colors will be reset to the factory defaults.
- Edge Enhancement: Off/On
You can emphasize object boundaries.
- xvYCC: Off/On
Setting the xvYCC mode to On increases detail and color space when watching movies from an external device (ie. DVD player) connected to the HDMI or Component IN jacks. You must set the Picture Mode to Movie to enjoy this feature.
Changing the Screen Size
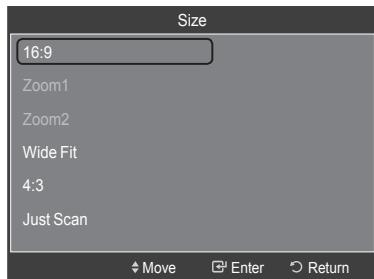
Occasionally, you may want to change the size of the image on your screen. Your TV comes with six screen size options, each designed to work best with specific types of video input. Your cable box or satellite receiver may have its own set of screen sizes as well.
1 Press the MENU button.
Press the ENTER button to select Picture.
Press the or button to select Size, then press the ENTER button.
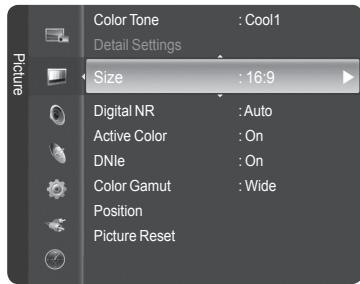
2 Press the or button to select the screen format you want, then press the ENTER button.
Press the EXIT button to exit.
16:9: Sets the picture to 16:9 wide mode.
- Zoom1: Magnifies the size of the picture on the screen.
- Zoom2: Expands the Zoom1 format picture.
- Wide Fit : Enlarges the aspect ratio of the picture to fit the entire screen.
- 4:3 : Sets the picture to 4:3 normal mode.
- Just Scan : Use this function to see the full image without cutting off the picture when DTV, Component, or HDMI 1080i/1080p signals are input.

Press the P.SIZE button on the remote control to change the picture size.
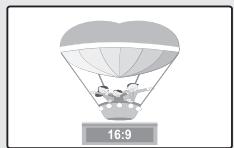
16:9
Sets the picture to 16:9 wide mode.
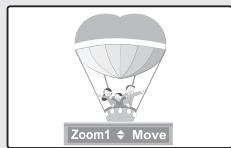
Zoom1
The screen size when Wide screen is vertically enlarged.
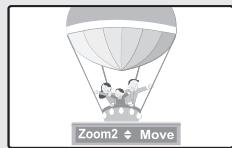
Zoom2
The screen size when the Zoom1 screen is vertically enlarged.
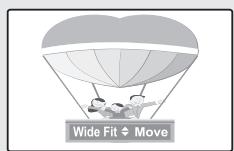
Wide Fit
Enlarges the aspect ratio of the picture to fit the entire screen.
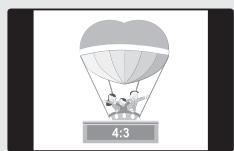
4:3
Sets the picture to 4:3 normal mode.
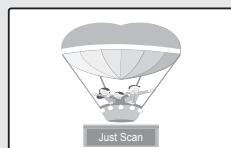
Just Scan
Use this function to see the full image without cutting off the picture when DTV, Component, or HDMI 1080i/1080p signals are input.
Some cable boxes and satellite receivers have their own set of screen sizes, which may differ from the ones above.
- Only 16:9 and 4:3 are available in DTV, Component (720p, 1080i) and HDMI (720p, 1080i) modes.
- In COMPONENT(720p, 1080i) or HDMI(720p, 1080i) mode, 16:9, 4:3 and Wide Fit can be selected.
- You can select the 16:9, 4:3, Wide Fit and Just Scan screen sizes in the Component (1080i, 1080p), HDMI (1080i, 1080p), or DTV (1080i, 1080p) mode.
- In Zoom1, Zoom2 and Wide Fit modes, you can move the picture on the screen by pressing the or button.
Each adjusted setting will be stored separately according to its input mode.
- When watching an HD(High Definition 720p,1080i,1080p) signal, you can use Wide Fit. Wide Fit sets the optimum picture format by expanding it both horizontally and vertically. For example, you can reset the picture in 4:3 format to 16:9. Wide Fit does not support all external devices (DVD, VCR etc.).
Digital Noise Reduction
If the broadcast signal received by your TV is weak, you can activate the Digital Noise Reduction feature to help reduce any static and ghosting that may appear on the screen.
1 Press the MENU button.
Press the ENTER button to select Picture.
Press the or button to select Digital NR, then press the ENTER button.
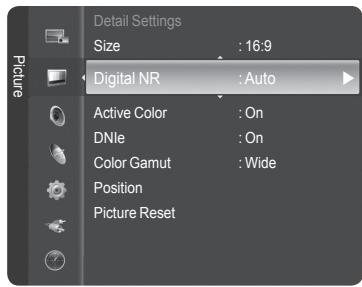
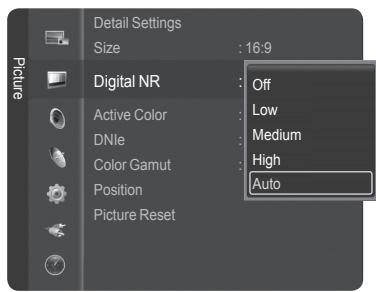
2 Press the or button to select Off, Low, Medium, High, or Auto, then press the ENTER button.
Press the EXIT button to exit.
- Off: Switches the Digital NR function off.
Low: Sets Digital NR to low.
Medium: Sets Digital NR to mid range.
High: Sets Digital NR to high. - Auto: Reduces the noise of the picture automatically.
Setting the Active Color
If you turn on this option, the blue and green colors will be more vivid.
1 Press the MENU button.
Press the ENTER button to select Picture.
Press the or button to select Active Color, then press the ENTER button.
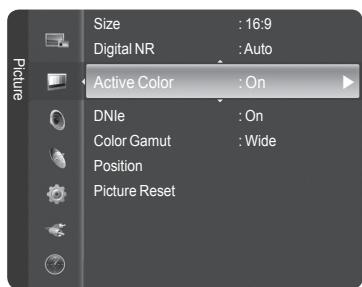
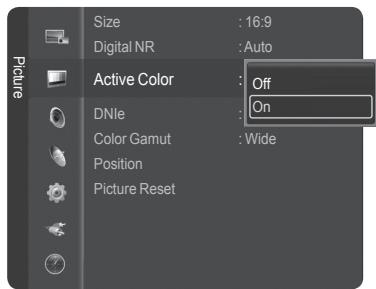
2 Press the or button to select Off or On, then press the ENTER button.
Press the EXIT button to exit.
This function is not available in PC mode.
When you select Standard or Movie in Picture Mode, the Active Color automatically changes to Off and it is deactivated. When the Picture Mode is set to Dynamic, the Active Color is activated regardless of the Picture Mode setting.
DNle (Digital Natural Image engine)
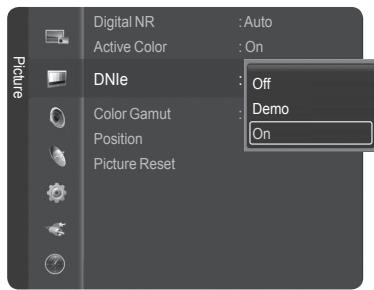
This TV includes the DNle function to provide high visual quality. If you set DNle to on, you can view the screen with the DNle feature activated. If you set the DNle to Demo, you can view the applied DNle and normal pictures on the screen, for demonstration purposes. Using this function, you can view the difference in the visual quality.
1 Press the MENU button.
Press the ENTER button to select Picture.
Press the or button to select DNIE, then press the ENTER button.
This function doesn't work when the Input Source is PC.
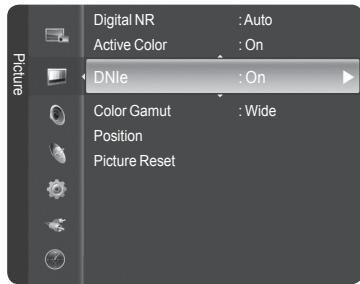
2 Press the or button to select Off, Demo, or On, then press the ENTER button.
Press the EXIT button to exit.
- Off: Switches off the DN1e mode.
Demo: The screen before applying DN1e appears on the left and the screen after applying DN1e appears on the right. - On: Switches on the DN1e mode.
The DNle function is not supported in the Movie mode. (It is inactivated.)
DNlTe (Digital Natural Image engine) DNlTe
This feature brings you more a detailed image with 3D/Dual-View noise reduction and detail, contrast and white enhancement.
Setting the Color Gamut
Color gamut is a color matrix made up of the basic colors of Red, Green and Blue.
1 Press the MENU button.
Press the ENTER button to select Picture.
Press the or button to select Color Gamut, then press the ENTER button.
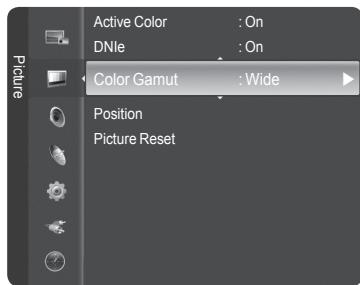
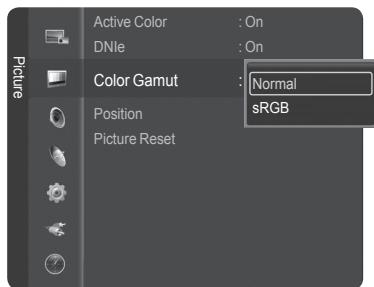
2 Press the or button to select Normal or sRGB, then press the ENTER button.
Press the EXIT button to exit.
- Normal: Normal Color Gamut offers flat and natural color tone.
sRGB: Supports color tone of sRGB format. sRBG is a standard Red/Green /Blue color matrix designed to be used in typical home environments.
Adjusting the Screen Position
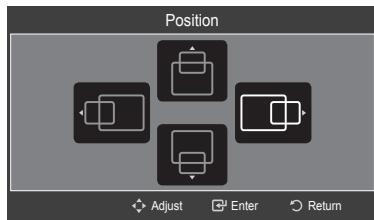
You can adjust the horizontal and vertical position of the screen.
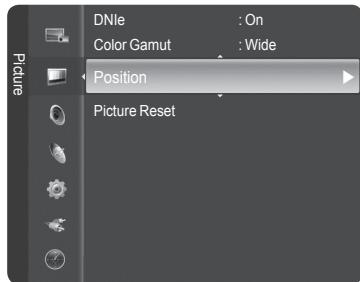
1 Press the MENU button.
Press the ENTER button to select Picture.
Press the or button to select Position, then press the ENTER button.
2 Press the / / button to adjust the screen position.
Press the EXIT button to exit.
Resetting the Picture Settings
Using the Picture menu, you can restore the settings to the factory defaults.
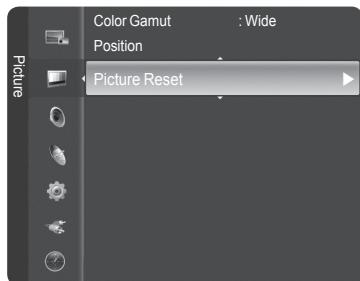
1 Press the MENU button.
Press the ENTER button to select Picture.
Press the or button to select Picture Reset, then press the ENTER button.
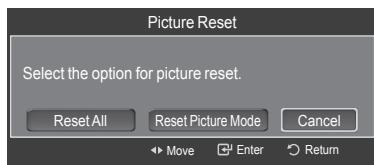
2 Press the or button to select Reset All, Reset Picture Mode, or Cancel, then press the ENTER button.
- Reset All: All the picture values return to default settings.
Reset Picture Mode: Current picture values return to default settings.
Viewing Picture-in-Picture
This product has one built-in tuner, which does not allow PIP to function in the same mode. For example, you cannot watch one TV channel in the main screen, and a different one in the PIP screen. Please see 'PIP Settings' below for details. You can use the PIP feature to simultaneously watch two video sources.
While V-Chip is in operation, the PIP function cannot be used. (Refer to page 54)
Activating Picture-in-Picture
1 Press the MENU button.
Press the or button to select PIP, then press the ENTER button.
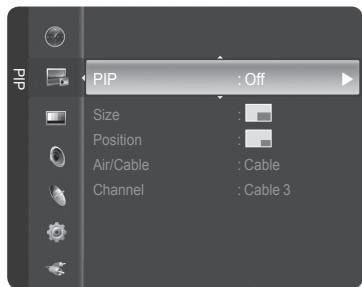
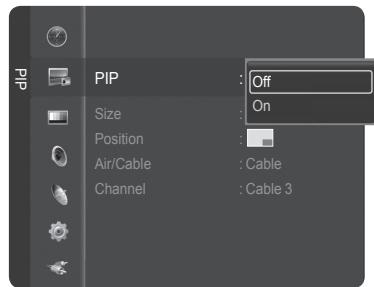
2 Press the ENTER button again.
Press the or button to select On, then press the ENTER button.
If you turn the TV off while watching in PIP mode and turn it on again, the PIP window will disappear.
You can view Analog TV broadcasts on the PIP screen (sub-picture) when the main picture is from an external device connected to HDMI1,2,3 Component1,2 or PC.
| Main picture | Sub picture |
| Component 1,2HDMI 1,2,3PC | Analog TV broadcasts only |

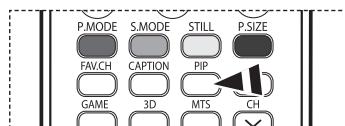
Press the PIP button on the remote control to activate or deactivate the PIP.
Changing the Size of the PIP Window
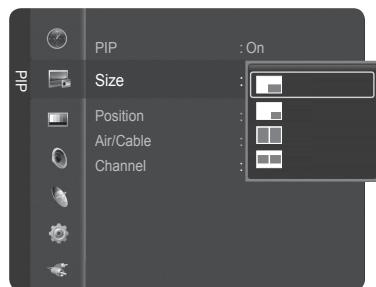
3 Press the or button to select Size, then press the ENTER button.
Press the or button to select the desired size of the PIP window, then press the ENTER button.
You may notice that the picture in the PIP window becomes slightly unnatural when you use the main picture to view a game or karaoke.
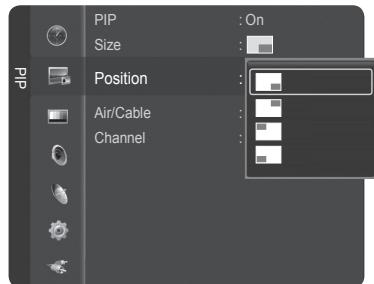
Changing the Position of the PIP Window
4 Press the or button to select Position, then press the ENTER button.
Press the or button to select the desired PIP window position, then press the ENTER button.
In Double Window (□) and Double Wide (□) modes, Position cannot be selected.
If the PIP window is set to Double Window (□) or Double Wide (□) mode, the screen size or alignment may slightly differ depending on the signal type.
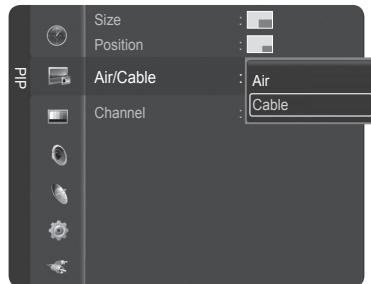
Selecting a Signal Source (Air or Cable) for PIP
5 Press the or button to select Air/Cable, then press the ENTER button.
Press the or button to select Air or Cable, then press the ENTER button.
Air:Air antenna signal
Cable : Cable antenna signal
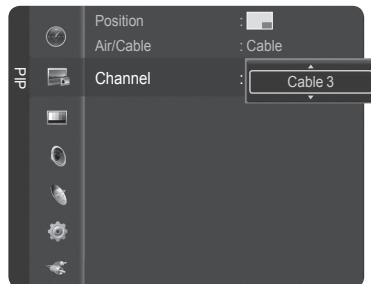
Changing the PIP Channel
6 Press the or button to select Channel, then press the ENTER button.
Press the or button at the bottom of the remote to select the desired channel in the PIP window, then press the ENTER button.
The channel can be active when the sub picture is set to TV.
Press the EXIT button to exit.

Press the PIP CH and CH and buttons on the remote control to change the PIP channel.
Freezing the Current Picture
Press the STILL button to freeze a moving picture. (Normal sound will still be heard.) To cancel this function, press the STILL button again or press any button on the remote control.
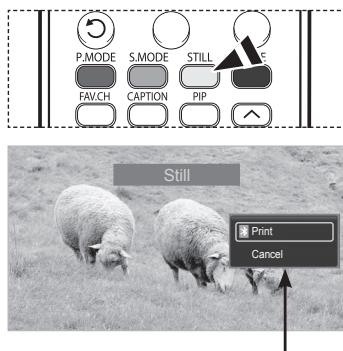
This menu will appear, but the Print function is available only when a Bluetooth printer is connected to the TV. (Refer to page 69)
Using the Automatic Sound Settings
Your TV has automatic sound settings ("Standard", "Music", "Movie", "Speech", and "Custom") that are preset at the factory. Or, you can select "Custom", which automatically recalls your personalized sound settings.
1 Press the MENU button.
Press the or button to select Sound, then press the ENTER button.
2 Press the ENTER button to select Mode.
Press the or button to select Standard, Music, Movie, Speech, or Custom sound setting, then press the ENTER button.
Press the EXIT button to exit.
- Choose Standard for the standard factory settings.
- Choose Music when watching music videos or concerts.
- Choose Movie when watching movies.
- Choose Speech when watching a show that is mostly dialog (i.e., news).
- Choose Custom to recall your personalized settings (see "Customizing the Sound").
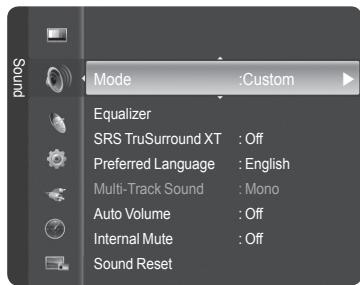
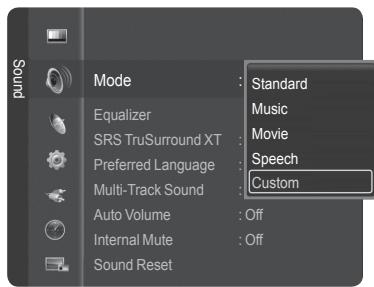

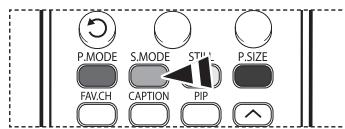
Press the S.MODE button on the remote control to select one of the standard sound settings.
Customizing the Sound
The sound settings can be adjusted to suit your personal preference.
(Alternatively, you can use one of the "automatic" settings.)
1 Press the MENU button.
Press the or button to select Sound, then press the ENTER button.
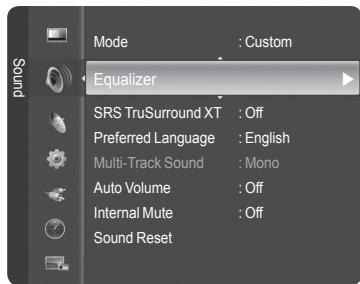
Press the or button to select Equalizer, then press the ENTER button.
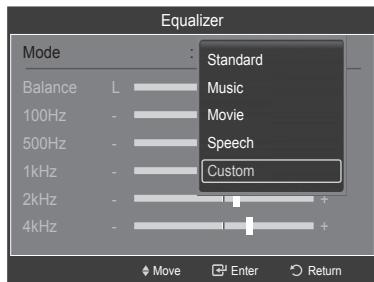
2 Press the ENTER button to select Mode.
Press the or button to select a particular item (Standard, Music, Movie, Speech,
Custom), then press the ENTER button.
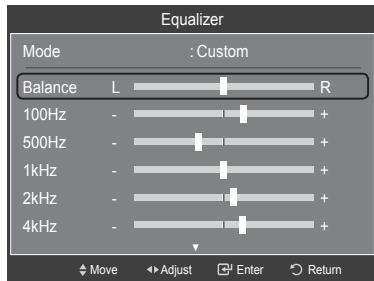
3 Press the or button to select a particular frequency to adjust.
Press the or button to increase or decrease the level of the particular frequency.
L/R Sound Balance Adjustment : To adjust the sound balance of the L/R speakers.
- Bandwidth Adjustment (100Hz, 500Hz, 1kHz, 2kHz, 4kHz, 8kHz, 15kHz): To adjust the level of different bandwidth frequencies.
Resetting the Equalizer Settings to the Factory Defaults
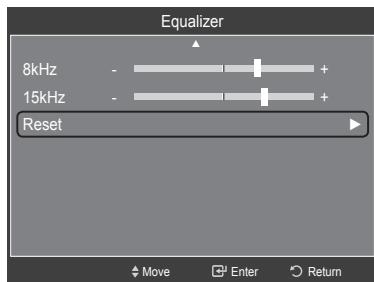
4 Press the or button to select Reset, then press the ENTER button.
The equalizer resets to the factory defaults.
Press the EXIT button to exit.
Setting the TruSurround XT
TruSurround XT is a patented SRS technology that solves the problem of playing 5.1 multichannel content over two speakers. TruSurround delivers a compelling, virtual surround sound experience through any two-speaker playback system, including internal television speakers. It is fully compatible with all multichannel formats.
1 Press the MENU button.
Press the or button to select Sound, then press the ENTER button
Press the or button to select SRS TruSurround XT, then press the ENTER button.
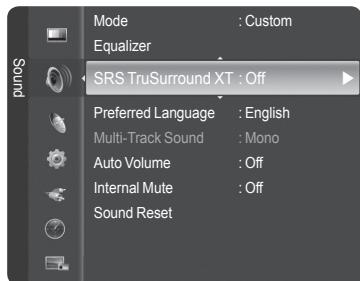
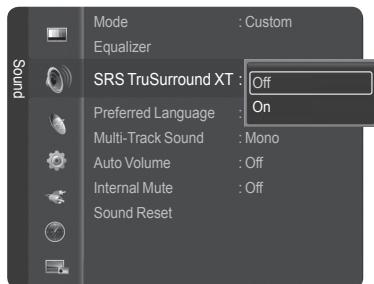
2 Press the or button to select Off or On, then press the ENTER button.
Press the EXIT button to exit.
TRADEMARK & LABEL LICENSE NOTICE

SRS TruSurround XT

Surround XT, SRS and () Symbol are trademarks of SRS Labs, Inc.
Surround XT technology is incorporated under license from SRS Labs, Inc.
Choosing a Multi-Channel Sound (MTS) Track - Digital
The digital-TV transmission system is capable of simultaneous transmission of many audio tracks (for example, simultaneous translations of the program into foreign languages). The availability of these additional "multitracks" depends upon the program.
Preferred Language
1 Press the MENU button.
Press the or button to select Sound, then press the ENTER button.
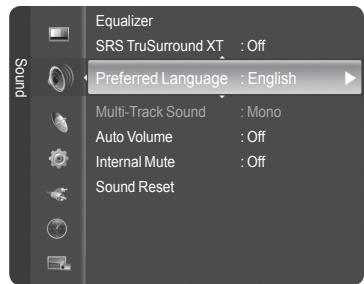
Press the or button to select Preferred Language, then press the ENTER button.
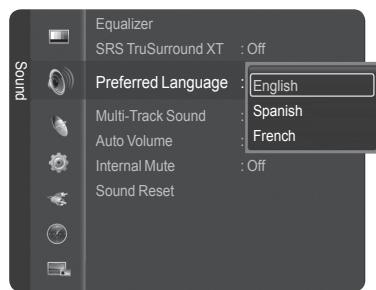
2 Press the or button to choose the language (English, Spanish, or French) you want, then press the ENTER button.
Press the EXIT button to exit.
You can only select the language among the actual languages being broadcast.

Press the MTS button on the remote control to listen in a language other than the preferred language.
Choosing a Multi-Channel Sound (MTS) Track - Analog
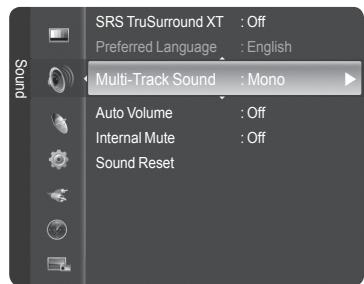
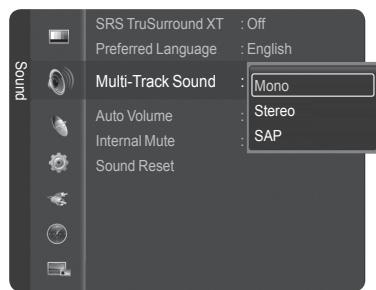
Depending on the particular program being broadcast, you can listen to Mono, Stereo or SAP.
Multi-Track Sound
1 Press the MENU button.
Press the or button to select Sound, then press the ENTER button.
Press the or button to select Multi-Track Sound, then press the ENTER button.
2 Press the or button to select a setting you want, then press the ENTER button.
Press the EXIT button to exit.
- Choose Mono for channels that are broadcasting in mono, or if you are having difficulty receiving a stereo signal.
- Choose Stereo for channels that are broadcasting in stereo.
- Choose SAP to listen to the Separate Audio Program, which is usually a foreign language translation.

Press the MTS button on the remote control repeatedly to select Mono, Stereo, or SAP.
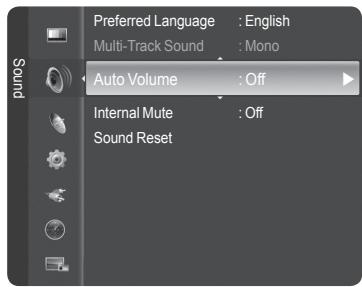
Automatic Volume Control
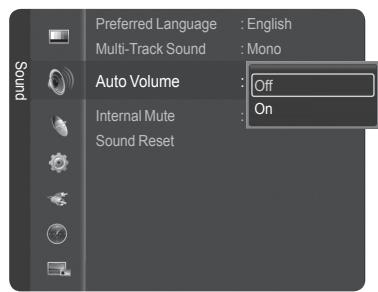
Reduces the difference in volume level among broadcasters.
1 Press the MENU button.
Press the or button to select Sound, then press the ENTER button.
Press the or button to select Auto Volume, then press the ENTER button.
2 Press the or button to select Off or On, then press the ENTER button.
Press the EXIT button to exit.
Selecting the Internal Mute
Sound output from the TV speakers is muted. This is useful when you want to listen to audio through your sound system instead of the TV.
1 Press the MENU button.
Press the or button to select Sound, then press the ENTER button.
Press the or button to select Internal Mute, then press the ENTER button.
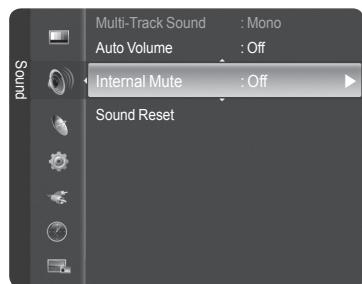
2 Press the or button to select Off or On, then press the ENTER button.
Press the EXIT button to exit.
The left/right audio outputs and digital audio outputs (Optical) remain enabled.
- The VOL+, VOL-, MUTE, and S.MODE buttons do not operate when the Internal Mute is set to On.
- When Internal Mute is set to On, Sound menu except Multi-Track Sound cannot be adjusted.
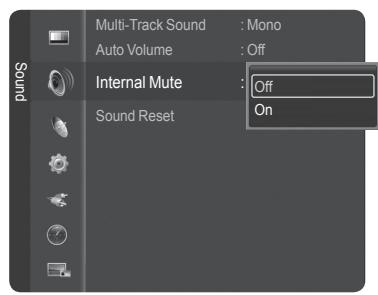
| TV's Internal Speakers | Audio Out Optical (R/L Out) to Sound System | |||||
| TV | AV, S-Video | Component, PC, HDMI | TV | AV, S-Video | Component, PC, HDMI | |
| Internal Mute Off | Speaker Output | Speaker Output | Speaker Output | Sound Output | Sound Output | Sound Output |
| Internal Mute On | Mute | Mute | Mute | Sound Output | Sound Output | Sound Output |
| Video No Signal | Mute | Mute | Mute | Mute | Mute | Mute |
Resetting the Sound Settings
You can restore the Sound settings to the factory defaults.
1 Press the MENU button.
Press the or button to select Sound.
Press the or button to select Sound Reset, then press the ENTER button.
2 Press the or button to select Reset All, Reset Sound Mode, or Cancel, then press the ENTER button.
- Reset All: All the sound values return to default settings.
- Reset Sound Mode: Current sound values return to default settings.
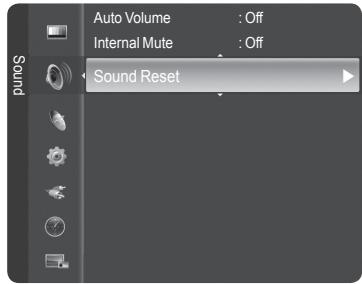
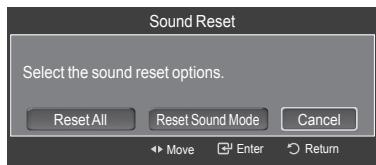
Channel Control
Clearing Scrambled Channels - Digital
The Clear Scrambled Channel function is used to filter out scrambled channels after Auto Program is completed. It removes the scrambled channels from the list by tuning the digital cable channels. This process may take up to 20-30 minutes.
1 Press the MENU button.
Press the or button to select Channel, then press the ENTER button.
Press the or button to select Clear Scrambled Channel, then press the ENTER
button. It searches scrambled channels, which are to be removed from the list.
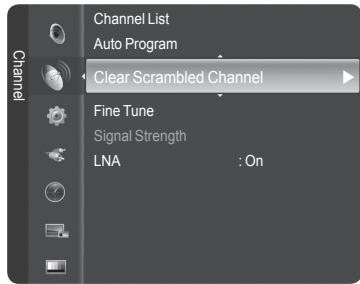
To stop searching scrambled channels;
Press the button to select Stop, then press the ENTER button.
Press the button to select Yes, then press the ENTER button.
2 When the scrambled channel searching is completed, press the ENTER button.
Press the EXIT button to exit.
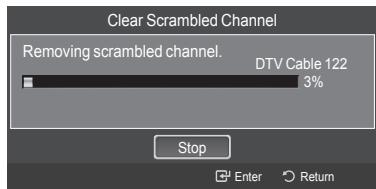
Managing Channels
Using this menu, you can Add/Delete or set Favorite channels and use the program guide for digital broadcasts.
Viewing All Channels
Show all currently available channels.
To use the Channel List function, first run Auto Program (see page 21).
1 Press the MENU button.
Press the or button to select Channel, then press the ENTER button.
Press the or button to select Channel List, then press the ENTER button.
2 Press the button to select Added Channels.
3 Press the or button to select All Channels, then press the ENTER button. Shows all currently available channels.
4 Press the or button to select a channel to view, then press the ENTER button. You can watch the selected channel.
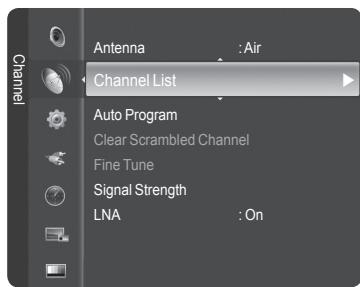
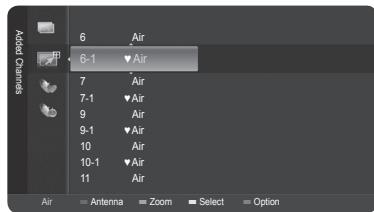
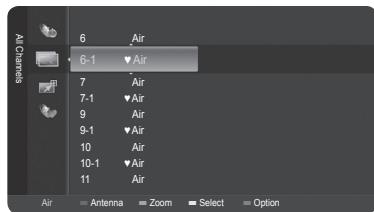

Press the CH LIST button on the remote control to bring up the channel lists.
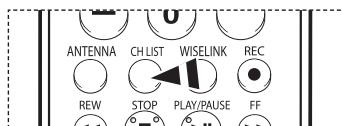
Using the Color buttons on the Remote with the Channel List
Red (Antenna): Switches to air or cable.
Green (Zoom): Enlarges or shrinks the channel number.
Yellow (Select): Selects multiple channel lists.
Blue (Option): Displays the Add (or Delete), Add to Favorite (or Delete from Favorite), Timer Viewing, Channel Name Edit, and Deselect All menus.
A gray-colored channel refers to a deleted channel. The Add menu only appears for deleted channels.
A channel marked with the mark refers to a channel set as a Favorite. The Delete from Favorite menu only appears for channels with the mark.
Adding and Erasing Channels
You can add or delete a channel to display the channels you want.
1 Press the MENU button.
Press the or button to select Channel, then press the ENTER button. Press the or button to select Channel List, then press the ENTER button.
2 Press the button to select Added Channels.
3 Press the or button to select All Channels, then press the ENTER button. Show all currently available channels.
4 Press the or button to select a channel to add, then press the blue button.
5 Press the ENTER button to select Add.
All added channels will be shown on Added Channels menu.
6 Press the or button to select a channel to delete, then press the blue button. Press the ENTER button to select Delete.
Press the EXIT button to exit.
You can also delete a channel in the Added Channels menu in the same manner.

Press the CH LIST button on the remote control to bring up the channel lists.
Easy Setting
- Press the TOOLS button on the remote control.
- Press the / button to select Channel Add/Delete, then press the ENTER button.
- Press the CH and CH button to select the channel to be added or deleted, then press the ENTER button.
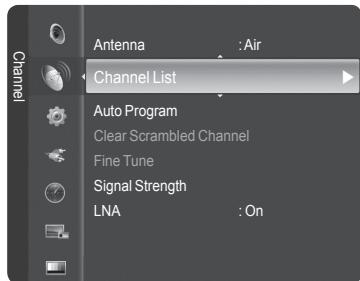
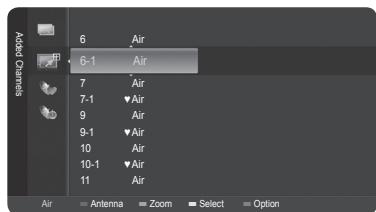
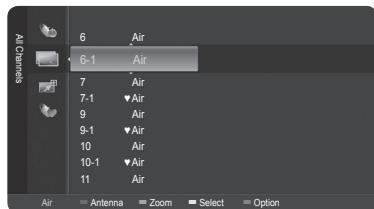
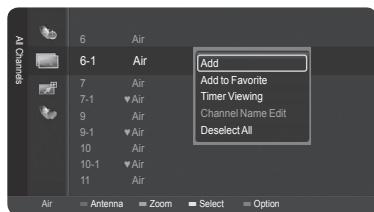
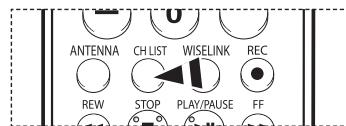
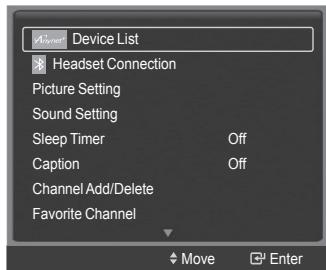
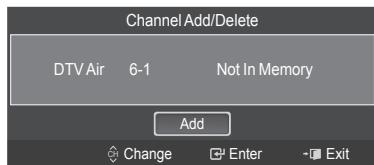
Setting Your Favorite Channels
You can set channels you watch frequently as favorites.
1 Press the MENU button.
Press the or button to select Channel, then press the ENTER button. Press the or button to select Channel List, then press the ENTER button.
2 Press the or button to select a channel as a favorite channel, then press the blue button.
3 Press the or button to select Add to Favorite, then press the ENTER button. The "♥" symbol will be displayed and the channel will be set as a favorite.
4 To cancel your favorite channel selection, press the blue button when a favorite channel is selected. Press the or button to select Delete from Favorite, then press the ENTER button. The channel is deleted from Favorites and the “ ” mark also disappears.
Press the EXIT button to exit.
You can also Add or Delete a channel from Favorites in the All Channels menu in the same manner.
Only memorized channels can be set as favorite channels.
All favorite channels will be shown on Favorite menu.

Press the CH LIST button on the remote control to bring up the channel lists.
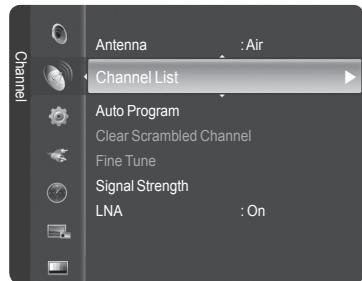
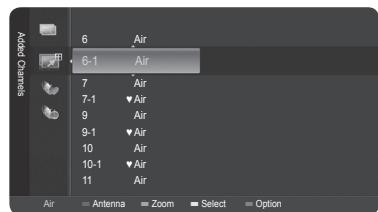
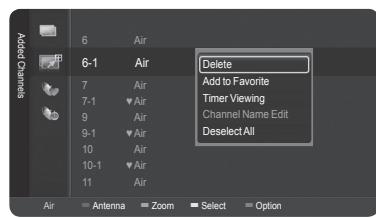
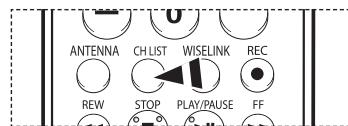
Easy Setting
- Press the TOOLS button on the remote control.
- Press the / button to select Favorite Channel or Delete Favorite Channel, then press the ENTER button. The current channel is added to or deleted from Favorites.
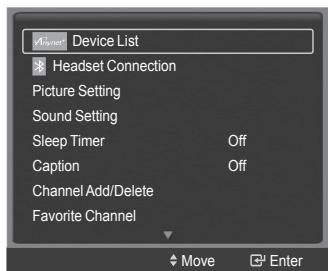

To select the favorite channels you have set up, press the FAV.CH button on the remote control.
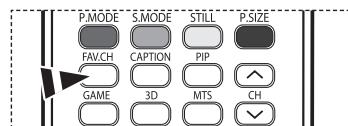
Reserving a Program (Time Viewing)
If you reserve a program you want to watch, the channel is automatically switched to the reserved channel in the Channel List even when you are watching another channel.
To reserve a program set the current time first. See pages 48~49. Reserved channels can only be set if they are in the Channel List (See page 41).
1 Press the MENU button.
Press the or button to select Channel, then press the ENTER button. Press the or button to select Channel List, then press the ENTER button.
2 Press the or button to select a channel, then press the Blue (Options) button.
3 Press the or button to select Timer Viewing, then press the ENTER button. The Reserve a Program (Timer Viewing) screen appears.
4 Press the / / buttons to reserve a program and then press the ENTER button. Reserving a program has been completed.
Press the EXIT button to exit.
You can also reserve a program in the All Channels or Favorite menus using the same procedures.
For information on how to confirm a viewing reservation, refer to page 45.

Press the CH LIST button on the remote control to bring up the channel lists.
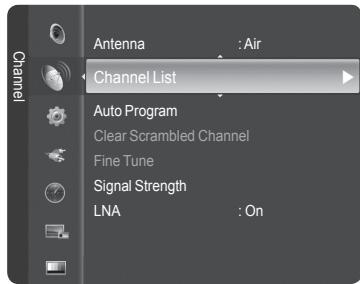
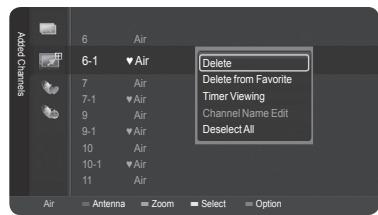
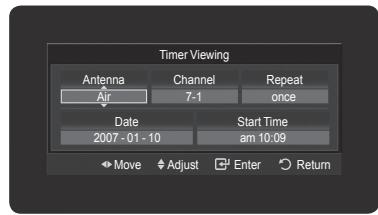
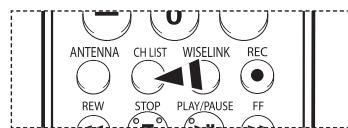
Digital Program Guide and Viewing Reservation
When a digital channel is selected, and you press the button, the Program Guide for the channel appears. You can reserve a program according to the procedures described above.
A program currently being broadcast.
A reserved program
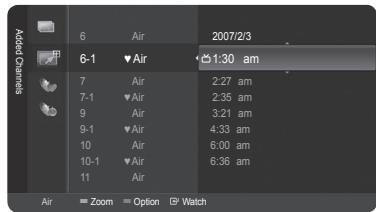
Confirming a Viewing Reservation
You can view, modify or delete a reservation.
1 Press the MENU button.
Press the or button to select Channel, then press the ENTER button.
Press the or button to select Channel List, then press the ENTER button.
2 Press the button to select Added Channels.
3 Press the or button to select Programed, then press the ENTER button. You can view reservations.
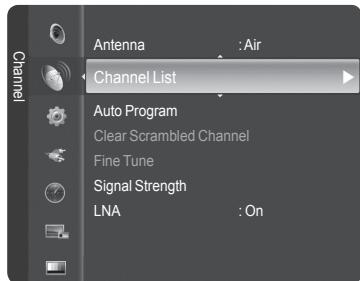
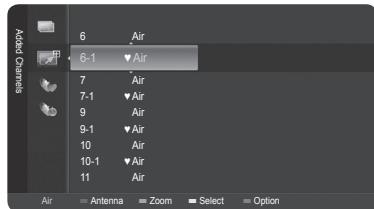
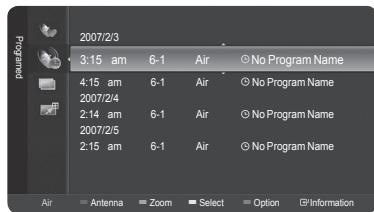
Modifying a viewing reservation
4 To select a reservation item to be modified, press the or button and then press the blue button.
5 Press the ENTER button to select Change Info.
6 Press the / / buttons to change a reservation setting and then press the ENTER button.
The reservation modification is applied.
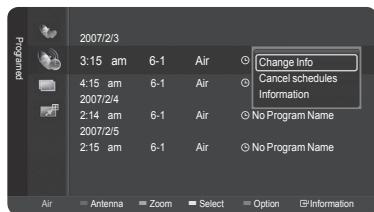
Canceling a reservation
4 To select a reservation item to be canceled, press the or button, and then press the blue button.
5 Press the or button to select Cancel schedules, then press the ENTER button.
6 Press the or button to select OK, then press the ENTER button.
The viewing reservation has been canceled.
Press the EXIT button to exit.
Programed Menu
Change Info: Select to change a viewing reservation.
Cancel schedules: Select to cancel a viewing reservation.
Information: Select to view a viewing reservation.

Press the CH LIST button on the remote control to bring up the channel lists.
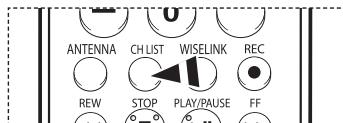
Labeling Channels - Analog
Channels can labeled so that their call letters appear whenever the channel is selected.
1 Press the MENU button.
Press the or button to select Channel, then press the ENTER button. Press the or button to select Channel List, then press the ENTER button.
2 Press the or button to select the channel to be assigned a new name, then press the blue button.
3 Press the or button to select Channel Name Edit, then press the ENTER button.
4 Press the / / button to select a letter, then press the ENTER button.
- Numeric buttons: You can enter numbers.
- Red button: You can switch between English and Characters.
- Green button: You can delete an already entered character.
Yellow button: You can enter a blank space.
Blue button: Press this button to finish renaming a channel.
5 When you have finished, press the blue button to assign the new name.
Press the EXIT button to exit.
The names of digital broadcasting channels are automatically assigned and cannot be labelled.
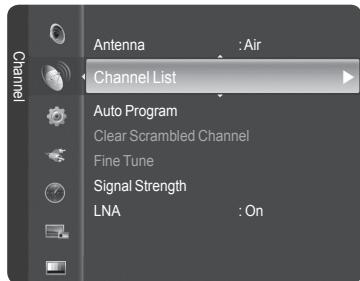
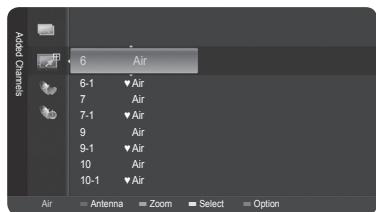
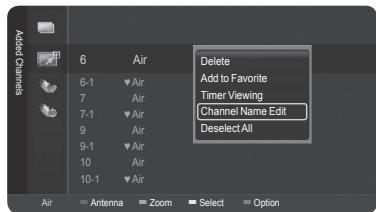
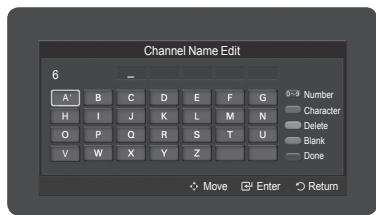
Fine Tuning Analog Channels
Use fine tuning to manually adjust a particular channel for optimal reception.
1 Press the MENU button.
Press the or button to select Channel, then press the ENTER button. Press the or button to select Fine Tune, then press the ENTER button
2 Press the or button to adjust the fine tuning.
3 To store the fine tuning setting in the TV's memory, press the ENTER button.
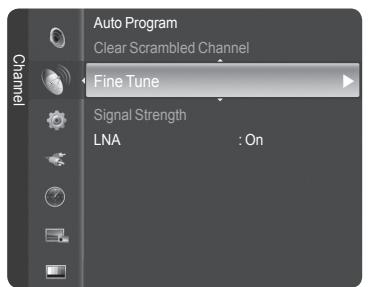
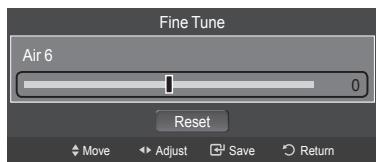
4 To reset the fine tuning setting, press the button to select Reset, then press the ENTER button.
Press the EXIT button to exit.
Only analog TV channels can be fine tuned.
" will appear next to the number of fine-tuned channels.
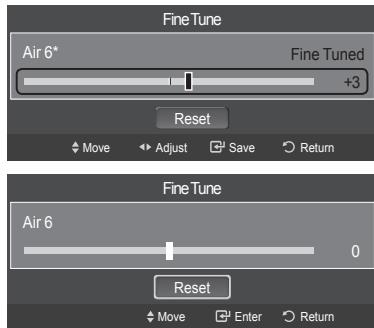
Checking the Digital-Signal Strength
Unlike analog channels, which can vary in reception quality from "snowy" to clear, digital (HDTV) channels have either perfect reception quality or you will not receive them at all. So, unlike analog channels, you cannot fine tune a digital channel. You can, however, adjust your antenna to improve the reception of available digital channels.
1 Press the MENU button.
Press the or button to select Channel, then press the ENTER button.
Press the or button to select Signal Strength, then press the ENTER button.
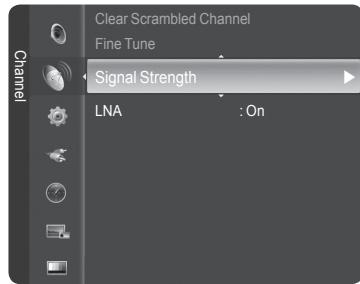
2 If the signal strength meter indicates that the signal is weak, physically adjust your antenna to increase the signal strength.
Continue to adjust the antenna until you find the best position with the strongest signal.
Press the EXIT button to exit.
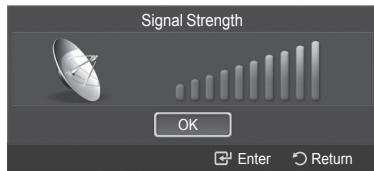
If the TV is operating in a weak-signal area, sometimes the LNA function can improve the reception (a low-noise preamplifier boosts the incoming signal).
1 Press the MENU button.
Press the or button to select Channel, then press the ENTER button.
Press the or button to select LNA, then press the ENTER button.
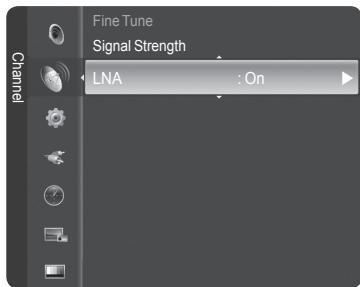
2 Press the or button to select Off or On, then press the ENTER button.
Press the EXIT button to exit.
If the picture is noisy with the LNA set to On, select Off.
The LNA setting must be made separately for each channel.
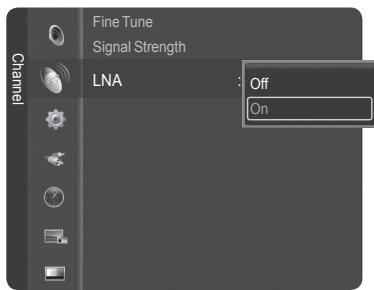
Selecting a Menu Language
1 Press the MENU button.
Press the or button to select Setup, then press the ENTER button.
Press the or button to select Language, then press the ENTER button.
2 Press the or button to select the appropriate language: English, Espanol or Frangais, then press the ENTER button.
Press the EXIT button to exit.
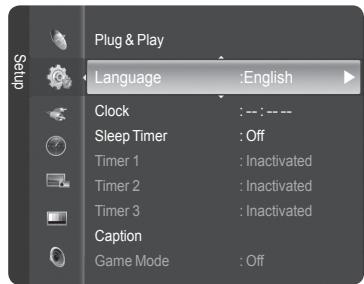
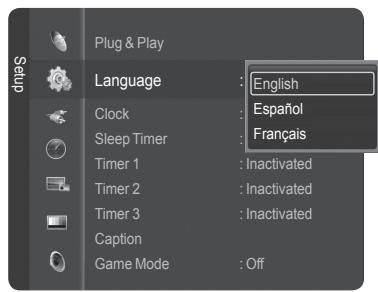
Setting the Time
Setting the clock is necessary in order to use the various timer features of the TV. Also, you can check the time while watching the TV. (Just press the INFO button.)
Option 1: Setting the Clock Automatically
The Clock can be set automatically if you are receiving a digital signal.
1 Press the MENU button.
Press the or button to select Setup, then press the ENTER button.
Press the or button to select Clock, then press the ENTER button.
2 Press the ENTER button to select Clock Mode.
Press the or button to select Auto, then press the ENTER button.
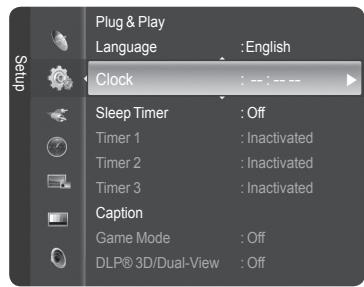
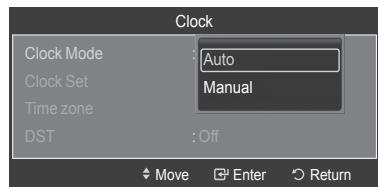
3 Press the or button to select Time Zone, then press the ENTER button. Press the or button to highlight the time zone for your local area (and to move the highlight to the appropriate time zone on the map of the United States), then press the ENTER button.
4 Press the or button to select DST (Daylight Saving Time), then press the ENTER button. Press the or button to select Off or On, then press the ENTER button.
Press the EXIT button to exit.
Depending on the broadcast station and signal, the auto time may not be set correctly. If this occurs, set the time manually.
Antenna or Cable must be connected in order to set the time automatically.
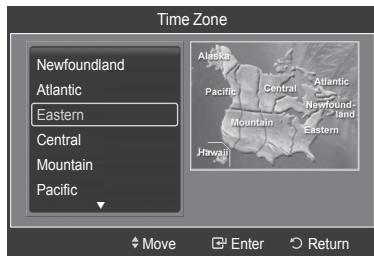
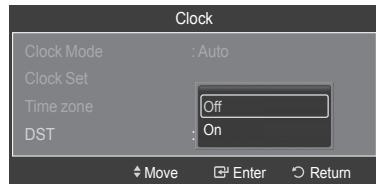
Option 2: Setting the Clock Manually
1 Press the MENU button.
Press the or button to select Setup, then press the ENTER button.
Press the or button to select Clock, then press the ENTER button.
2 Press the ENTER button to select Clock Mode.
Press the or button to select Manual, then press the ENTER button.
3 Press the or button to select Clock Set, then press the ENTER button.
4 Press the or button to move to Month, Day, Year, Hour, Minute, or am/pm. Set the date and time you want by pressing the or button, then press the ENTER button.
Press the EXIT button to exit.
The current time will appear every time you press the INFO button.
You can set the Month, Day, Year, Hour, and Minute directly by pressing the number buttons on the remote control.
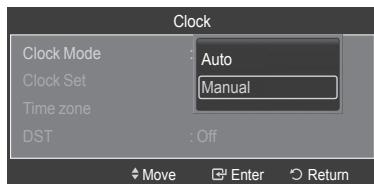
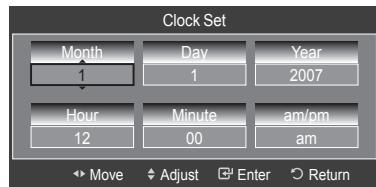
Setting the On/Off Timer
Use this feature to set the TV to turn on or off at a desired time.
1 Press the MENU button.
Press the or button to select Setup, then press the ENTER button.
Press the or button to select Timer 1, then press the ENTER button.
The Timer 1 menu is displayed.
2 Press the or button to select the required item below.
Press the or button to adjust to the setting satisfied.
Press the EXIT button to exit.
- On Time: Select Hour, Minute, am/pm, and No/Yes. (To activate timer with the setting satisfied, set to Yes.)
- Off Time: Select Hour, Minute, am/pm, and No/Yes. (To activate timer with the setting satisfied, set to Yes.)
- Repeat: Select Once, Everyday, Mon~Fri, Mon~Sat, or Sat~Sun.
Volume: Select the required volume level. - Contents: When the On Time is active, you can turn on a specific channel or play back contents such as photo or audio files. (Make sure that a USB device is connected to your TV.)
> Auto Power Off
When you set the timer On, the TV will eventually turn off if no controls are operated for 3 hours after the TV was turned on by timer. This function is only available in timer On mode and prevents overheating, which may occur if a TV is on for too long time.
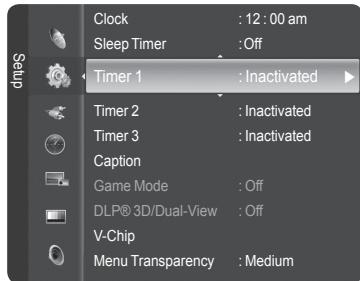
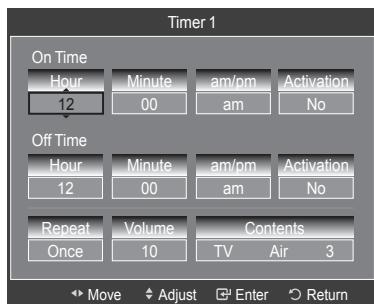
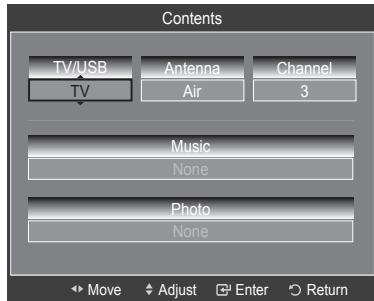
Setting the Sleep Timer
The sleep timer automatically shuts off the TV after a preset time (30, 60, 90, 120, 150 and 180 minutes).
1 Press the MENU button.
Press the or button to select Setup, then press the ENTER button.
Press the or button to select Sleep Timer, then press the ENTER button.
2 Press the or button to select the minute, then press the ENTER button.
To cancel the set sleep timer:
Press the or button to select Off, then press the ENTER button.
Press the EXIT button to exit.
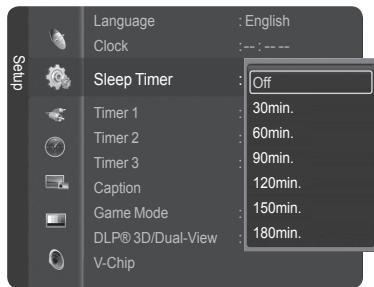
Viewing Closed Captions (On-Screen Text Messages) - Digital
The Digital Captions function operates on digital channels.
1 Press the MENU button.
Press the or button to select Setup, then press the ENTER button.
Press the or button to select Caption, then press the ENTER button.
2 Press the ENTER button to select Caption.
Press the or button to select On, then press the ENTER button.
3 Press the or button to select Caption Mode, then press the ENTER button. Press the or button to select submenu (Default, Service1~Service6, CC1~CC4, or Text1~Text4) you want, then press the ENTER button.
4 Press the or button to select Digital Caption Options, then press the ENTER button.
Digital Caption Options are available only when Default and Service1~Service6 can be selected in Caption Mode.
Service1~Service6 in digital caption mode may not be available depending on the broadcast.
5 Press the or button to select the desired caption option, then press the ENTER button. Press the or button to select the desired sub-menu options (see options below), then press the ENTER button.
Press the EXIT button to exit.
The availability of captions depends on the program being broadcast.
Default means to follow the standard set by the broadcaster.
Foreground and Background cannot be set to have the same color.
Foreground Opacity and Background Opacity cannot be both set to Transparent.
- Size: This option consists of Default, Small, Standard, and Large.
- Font Style: This option consists of Default, Style0 ~ Style 7. You can change the font you want.
- Foreground Color: This option consists of Default, White, Black, Red, Green, Blue, Yellow, Magenta, and Cyan. You can change the color of the letter.
- Background Color: This option consists of Default, White, Black, Red, Green, Blue, Yellow, Magenta, and Cyan. You can change the background color of the caption.
- Foreground Opacity: This option consists of Default, Transparent, Translucent, Solid, and Flashing. You can change the opacity of the letter.
- Background Opacity: This option consists of Default, Transparent, Translucent, Solid, and Flashing. You can change the background opacity of the caption.
- Return to Default: This option sets each of Size, Font Style, Foreground Color, Background color, Foreground Opacity, and Background Opacity to its default.

Press the CAPTION button on the remote control to select On or Off.
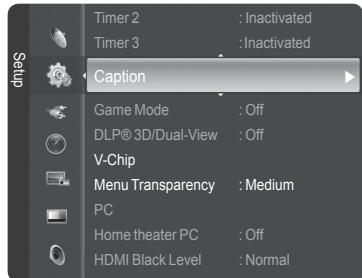
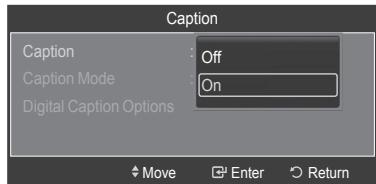
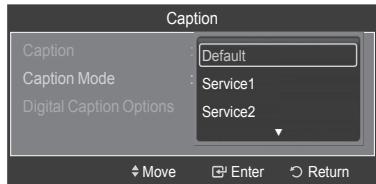
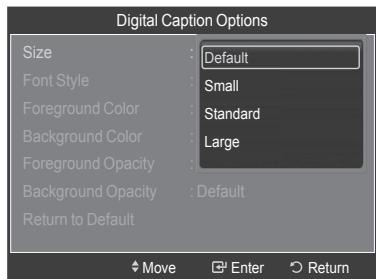
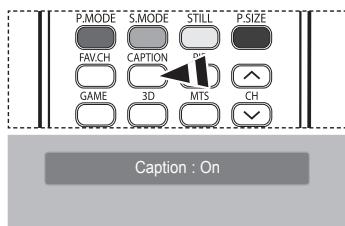
Viewing Closed Captions (On-Screen Text Messages) - Analog
The Analog Caption function operates in either analog TV channel mode or external signal mode. (Depending on the broadcasting signal, the Analog Caption function may operate on digital channels.)
1 Press the MENU button.
Press the or button to select Setup, then press the ENTER button.
Press the or button to select Caption, then press the ENTER button.
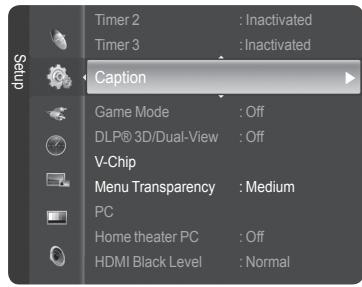
2 Press the ENTER button to select Caption, then press the ENTER button.
Press the or button to select On, then press the ENTER button.
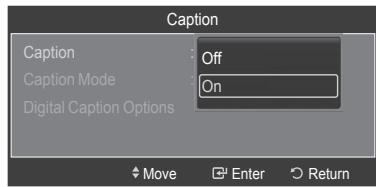
3 Press the or button to select Caption Mode, then press the ENTER button.
Press the or button to select submenu (Default, CC1~CC4, or Text1~Text4) you
want, then press the ENTER button.
Press the EXIT button to exit.
- CC1: The Primary Synchronous Caption Service. These are captions in the primary language that must be in sync with the sound, preferably matched to a specific frame.
CC2: The Special Non-Synchronous Use Captions.
This channel carries data that is intended to augment information carried in the program.
- CC3: Secondary Synchronous Caption Service.
Alternate program-related caption data, typically second language captions. - CC4: Special Non-Synchronous Use Captions. Similar to CC2.
Text1: First Text Service. This may be various non-program related data. - Text2: Second Text Service. Additional data, usually not program related.
- Text3/Text4: Third and Fourth Text Services.
These data channels should be used only if Text1 and Text2 are not sufficient.
The default is the caption mode provided by broadcasters.
- The Caption feature doesn't work in COMPONENT, PC, HDMI(DVI) modes.
- When the Caption is not available to view, change the setup value to CC1 and such.

Press the CAPTION button on the remote control to select On or Off.
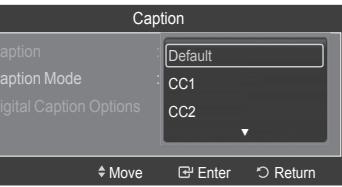
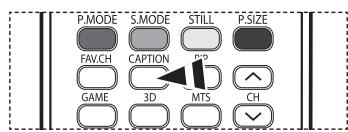
Caption : On
Using the Game Mode
When connecting to a game console such as PlayStation™ or Xbox™, you can enjoy a more realistic gaming experience by selecting game menu.
1 Press the MENU button.
Press the or button to select Setup, then press the ENTER button.
Press the or button to select Game Mode, then press the ENTER button.
2 Press the or button to select Off, Adventure, Sports, or Standard, then press the ENTER button.
Press the EXIT button to exit.
- Off: It cancels the game mode.
- Adventure: It provides clearer images when the game setting is dark.
- Sports: Improves synchronization of pictures and sound with sports games.
Standard: Use this setting for general game play.
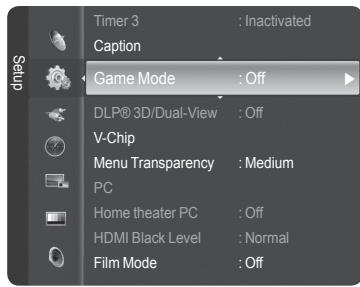
Restrictions on Game Mode (Caution)
- To disconnect the game console and connect another external device, set Game Mode to Off in the Setup menu.
- If you display the TV menu in Game Mode, the screen shakes slightly.
- The mark ( ) appears on the screen which means that Game Mode is On with the selected source.
If Game Mode is On
- Picture Mode is automatically changed to Game and users cannot change the mode.
- Sound Mode in the Sound menu is deactivated. Adjust the sound using the equalizer.
- The Reset in the Sound menu is activated. Reset function initializes the Equalizer settings to the factory default setting.
- The Channel menu is deactivated.
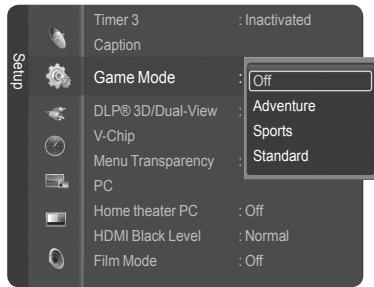
Game Mode is not available in TV mode.
If the picture is poor when external device is connected to TV, check if Game Mode is On. Set Game Mode to Off and connect external devices.
Using the 3D/Dual-View Function
For the information of how to use the 3D/Dual-View Function,
Please go to www.samsung.com 'PRODUCTS' 'HDTV' 'DLP TV'
Click "3D/Dual-View Information"
Using the V-Chip
The V-Chip feature automatically locks out programs that are deemed inappropriate for children. The user must enter a PIN (personal ID number) before any of the V-Chip restrictions are set up or changed.
V-Chip function is not available in HDMI or component mode.
How to Enable/Disable the V-Chip
1 Press the MENU button.
Press the or button to select Setup, then press the ENTER button.
Press the or button to select V-Chip, then press the ENTER button.
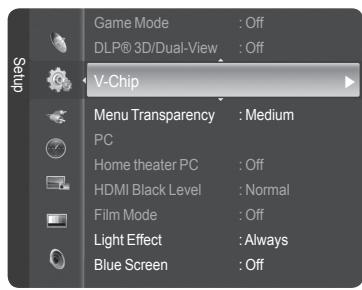
2 Press the number buttons to enter your current 4-digit PIN.
The default PIN for a new TV set is "0-0-0-0".
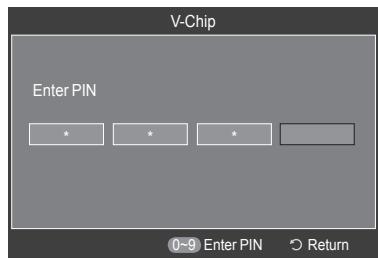
3 The V-Chip screen will appear.
To enable the V-Chip feature, press the ENTER button so that the V-Chip Lock field is On. (Pressing the or button will alternate between On and Off.) Press the ENTER button.
Press the EXIT button to exit.
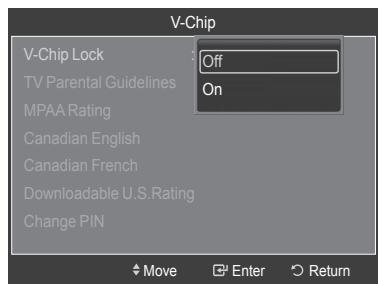
Setting Up Your Personal ID Number (PIN)
1 Press the MENU button.
Press the or button to select Setup, then press the ENTER button.
Press the or button to select V-Chip, then press the ENTER button.
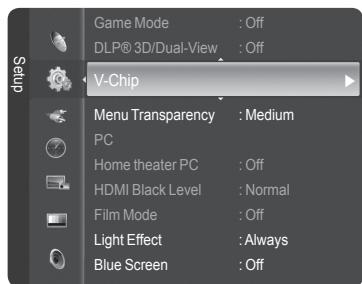
2 Press the number buttons to enter your current 4-digit PIN.
The default PIN for a new TV set is "0-0-0-0".
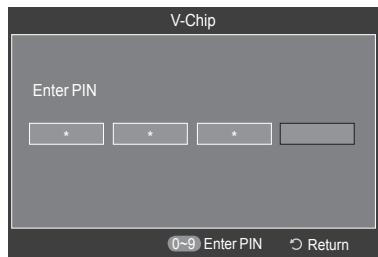
3 The V-Chip screen will appear.
Press the or button to select Change PIN, then press the ENTER button.
4 The Change PIN screen will appear.
Press the number buttons to enter your new 4-digit PIN.
Re-enter the same 4 digits. The message PIN is changed successfully. is displayed, then your PIN has been memorized.
Press the EXIT button to exit.
If you forget the PIN, press the remote-control buttons in the following sequence, which resets the pin to 0-0-0-0: Power Off. Mute 8 2 4 Power On.
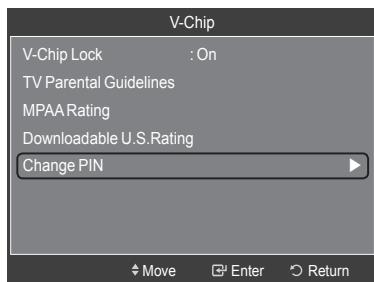
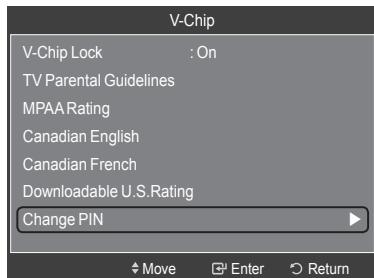
U.S.A Only
This product is covered by the following U.S. patents: US4,930,158 US4,930,160
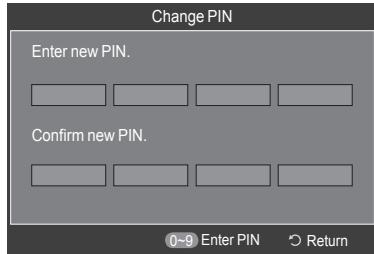
How to Set up Restrictions Using "TV Parental Guidelines"
First, set up a personal identification number (PIN), and enable the V-Chip. (See previous section.)
Parental restrictions can be set up using either of two methods: The TV guidelines or the MPAA rating.
1 Press the MENU button.
Press the or button to select Setup, then press the ENTER button.
Press the or button to select V-Chip, then press the ENTER button.
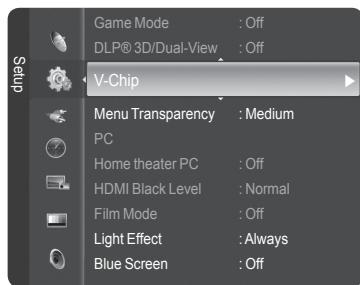
2 Press the number buttons to enter your current 4-digit PIN.
The default PIN for a new TV set is "0-0-0-0".
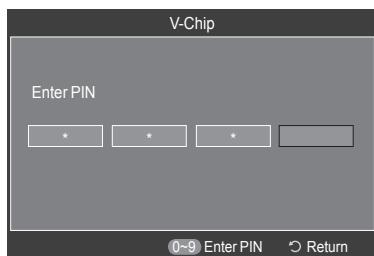
3 The V-Chip screen will appear.
Press the or button to select TV Parental Guidelines, then press the ENTER button.
4 The TV Parental Guidelines screen will appear.
Press the or button to select one of the six aged based categories:
| • TV-Y: | All children. The themes and elements in this program are specifically designed for a very young audience, including children from ages two to six. |
| • TV-Y7: | Directed to older children. The themes and elements in this program may include mild physical or comedic violence, or may frighten children under the age of seven. |
| • TV-G: | General audience. It contains little or no violence, no strong language, a little or no sexual dialog or situations. |
| • TV-PG: | Parental guidance suggested. This program may contain infrequent coal language, limited violence, some suggestive sexual dialog and situation. |
| • TV-14: | Parents strongly cautioned. This program may contain sophisticated themes, sexual content, strong language and more intense violence. |
| • TV-MA: | Mature audiences only. This program may contain mature themes, profa language, graphic violence and explicit sexual content. |
5 At this point, one of the TV-Ratings is selected. Press the ENTER button. Depending on your existing setup, the “ ” symbol will be selected. (Blank = Unblocked, = Locked) While “ ” is selected, press the ENTER button to block or unblock the category. To select a different TV-Rating, press the or button and then repeat the process.
ALL: Lock all TV ratings.
FV: Fantasy violence.
V: Violence.
S: Sexual situation.
L: Adult language.
D: Sexually suggestive dialog.
Allow All:Press to unlock all TV ratings. Block All: Press to lock all TV ratings.
The TV-Y, TV-Y7, TV-G, TV-PG, TV-14 and TV-MA have additional options. See the next step to change any of the following sub-ratings:
The V-Chip will automatically block certain categories that are "more restrictive". For example, if you block TV-Y category, then TV-Y7 will automatically be blocked. Similarly, if you block the TV-G category, then all the categories in the "young adult" group will be blocked (TV-G, TV-PG, TV-14, and TV-MA). The substratings (D, L, S, V) work together similarly. (See next section.)
6 How to set the FV, D, L, S and V sub-ratings. First, select one of these TV-Ratings: TV-Y, TV-Y7, TV-G, TV-PG, TV-14, or TV-MA (See Step 4), and press the ENTER button.
The “ ” symbol will be displayed for each sub-rating. While “ ” is selected, press the button to go to a sub rating.
Press the ENTER button to block the sub rating. To select a different TV-Rating, press the or button and then repeat the process.
Press the RETURN button to return to V-Chip.
The V-chip will automatically block certain categories that are "more restrictive". For example, if you block L sub-rating in TV-PG, then the L sub-ratings in TV-14 and TV-MA will automatically be blocked.
These categories consist of two separate groups: TV-Y and TV-Y7 (young children through age 7), and TV-G through TV-MA (everybody else). The restrictions for these two groups work independently: If a household includes very young children as well as young adults, the TV guidelines must be set up separately for each age group.
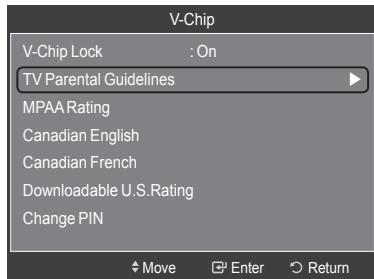
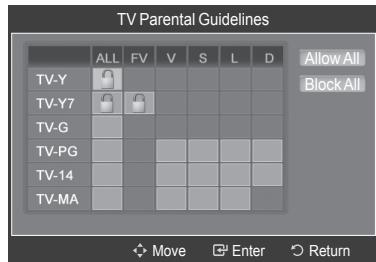
The MPAA rating system uses the Motion Picture Association of America (MPAA) system, and its main application is for movies. When the V-Chip lock is on, the TV will automatically block any programs that are coded with objectionable ratings (either MPAA or TV-Ratings).
7 Press the or button to select MPAA Rating, then press the ENTER button.
8 The MPAA Rating screen will appear.
Press the or button to select an appropriate restriction.
Press the ENTER button to activate the restriction selected.
The “ ” symbol is indicated. While “ ” is selected, press the ENTER button to block or unblock the category.
Press the RETURN button to return to V-Chip.
G: General audience (no restriction).
PG: Parental guidance suggested.
PG-13: Parents strongly cautioned.
- R: Restricted. Children under 17 should be accompanied by an adult.
- NC-17: No children under age 17.
X: Adults only.
NR: Not rated.
Allow All:Press to unlock all TV ratings
Block All: Press to lock all TV ratings.
The V-Chip will automatically block any category that is "more restrictive".
For example, if you block the PG-13 category, then R, NC-17 and X will
automatically be blocked also.
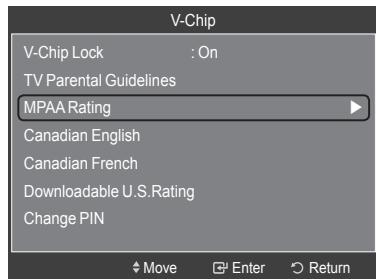
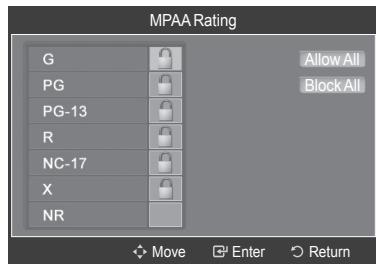
How to Set up Restrictions Using "Canadian English" (for Canada Models)
9 Press the or button to select Canadian English, then press the ENTER button.
10 The Canadian English screen will appear.
Press the or button to select an appropriate restriction.
Press the ENTER button to activate the restriction selected. The “ ” symbol is indicated.
Press the RETURN button to return to V-Chip.
C: Programming intended for children under age 8.
C8+: Programming generally considered acceptable for children 8 years and over to watch on their own.
G: General programming, suitable for all audiences.
PG: Parental guidance.
14+: Programming contains themes or content which may not be suitable for viewers under the age of 14.
18+: Adult programming.
Allow All:Press to unlock all TV ratings.
Block All: Press to lock all TV ratings.
The V-Chip will automatically block any category that is "more restrictive".
For example, if you block the G category, then PG, 14+ and 18+ will automatically be blocked also.
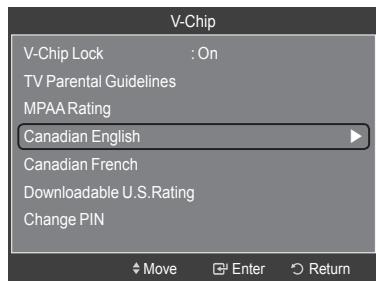
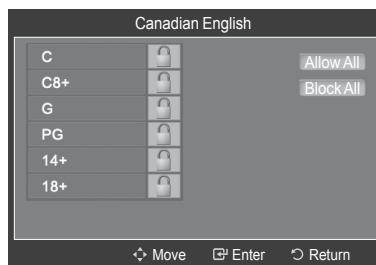
How to Set up Restrictions Using "Canadian French" (for Canada Models)
11 Press the or button to select Canadian French, then press the ENTER button.
12 The Canadian French screen will appear.
Press the or button to select an appropriate restriction.
Press the ENTER button to activate the restriction selected. The “ ” symbol is indicated.
Press the RETURN button to return to V-Chip.
G: General.
8 ans+: Not recommended for young children.
- 13 ans+: Programming may not be suitable for children under the age of 13.
16 ans+: Programming is not suitable for children under the age of 16.
18 ans+: Programming restricted to adults.
Allow All:Press to unlock all TV ratings.
Block All: Press to lock all TV ratings.
The V-Chip will automatically block any category that is "more restrictive". For example, if you block 8 ans+ category, then 13 ans+, 16 ans+ and 18 ans+ will automatically be blocked also.
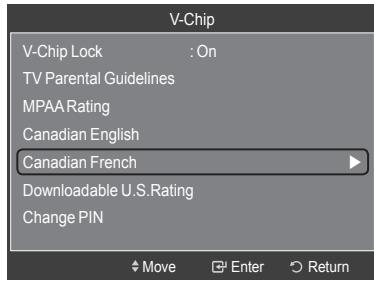
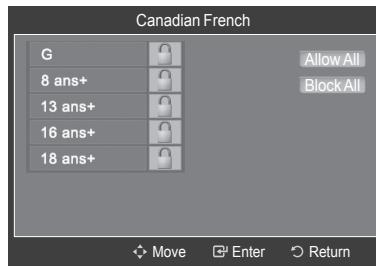
Using the V-Chip for Digital Channels
Parental restriction information can be used while watching DTV channels.
13 Press the or button to select Downloadable U.S. Rating, then press the ENTER button.
If information is not downloaded from the broadcasting station, the Downloadable U.S. Rating menu is deactivated.
Parental restriction information is automatically downloaded while watching DTV channels. It may take several seconds.
The Downloadable U.S. Rating menu is available for use after information is downloaded from the broadcasting station. However, depending on the information from the broadcasting station, it may not be available for use.
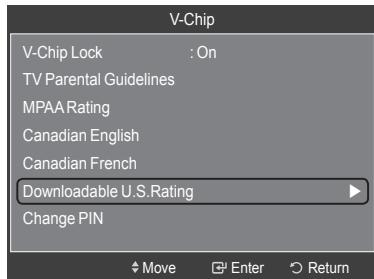
14 The Downloadable U.S. Rating screen will appear.
Press the or button to select an appropriate restriction.
Press the ENTER button to activate the restriction selected. The “ ” symbol is indicated.
Press the EXIT button to exit.
Allow All:Press to unlock all TV ratings. Block All:Press to lock all TV ratings.
Parental restriction levels differ depending on the broadcasting station.
The default menu name and downloadable US rating changes depending on the downloaded information.
Even if you set the on-screen display to your desired language, the Downloadable U.S. Rating menu will appear in English only.
The rating will automatically block certain categories that are more restrictive.
The rating titles (for example: Humor Level...etc) and TV ratings (for example: DH, MH, H...etc) may differ depending on the broadcasting station.
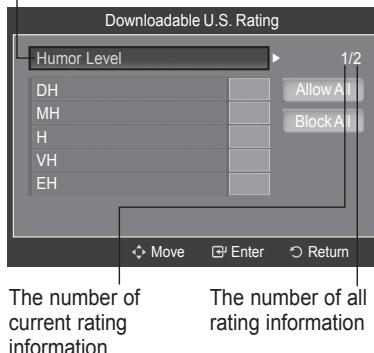
Rating title
Menu Transparency Level
Adjusts the transparency of the menu screen.
1 Press the MENU button.
Press the or button to select Setup, then press the ENTER button.
Press the or button to select Menu Transparency, then press the ENTER button.
2 Press the or button to select level, then press the ENTER button.
Press the EXIT button to exit.
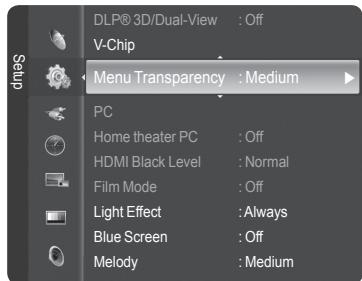
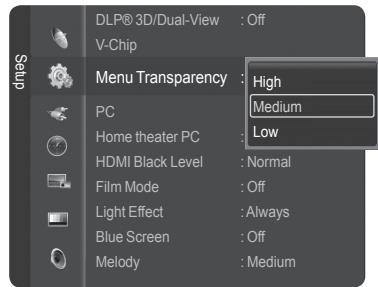
Setting the HDMI Black Level
Use this function when the screen is too dark in the HDMI mode.
1 Press the MENU button.
Press the or button to select Setup, then press the ENTER button.
Press the or button to select HDMI Black Level, then press the ENTER button.
2 Press the or button to select Normal or Low, then press the ENTER button.
Press the EXIT button to exit.
This function is only available when you have an external device connected via HDMI to the TV.
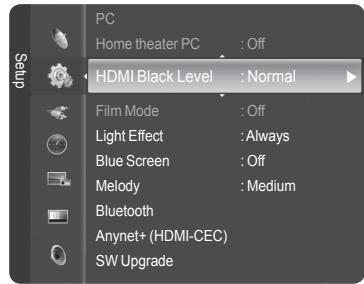
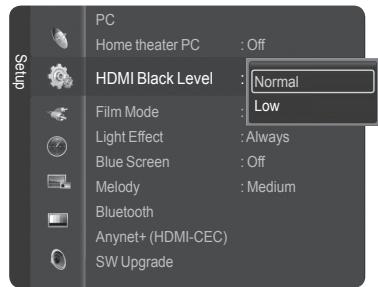
Setting the Film Mode - Analog
You can automatically sense and process film signals and adjust the picture for optimum quality.
1 Press the MENU button.
Press the or button to select Setup, then press the ENTER button.
Press the or button to select Film Mode, then press the ENTER button.
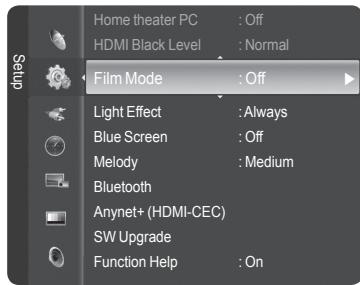
2 Press the or button to select Off or On, then press the ENTER button.
Press the EXIT button to exit.
Film Mode is available in TV (analog), AV, and S-Video modes.
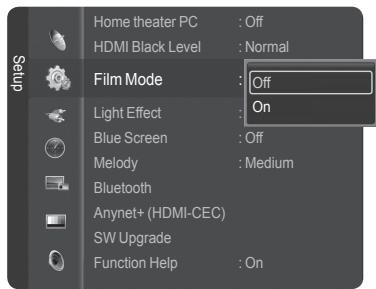
Setting the Light Effect
You can turn the blue LED on the front of TV on or off. Turning it off will lower power consumption.
1 Press the MENU button.
Press the or button to select Setup, then press the ENTER button.
Press the or button to select Light Effect, then press the ENTER button.
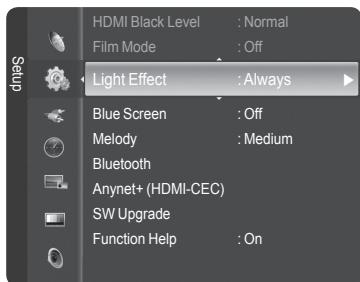
2 Press the or button to select submenu (Off, In Standby, In Watching, and Always) you want, then press the ENTER button.
Press the EXIT button to exit.
- Off: LED (Blue) will not come on.
- In Standby: The blue LED lights while in Standby mode and it turns off when your TV is turned on.
- In Watching: The blue LED lights when watching TV and it turns off when your TV is turned off.
Always: LED (Blue) will always be on.
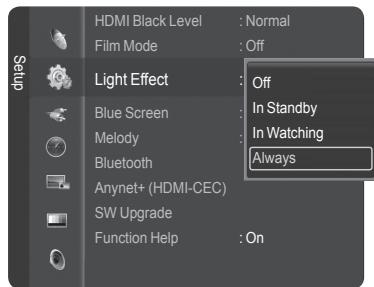
Setting the Blue Screen Mode
If no signal is being received or the signal is very weak, a blue screen automatically replaces the noisy picture background. If you wish to continue viewing the poor picture, you must set the "Blue Screen" mode to "Off".
1 Press the MENU button.
Press the or button to select Setup, then press the ENTER button.
Press the or button to select Blue Screen, then press the ENTER button.
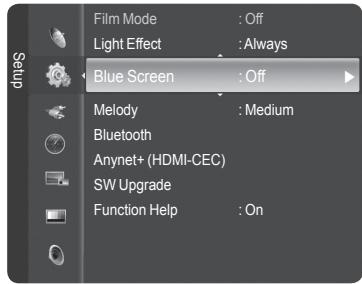
2 Press the or button to select Off or On, then press the ENTER button.
Press the EXIT button to exit.
Blue Screen is displayed when there is no signal from an external device, regardless of the Blue Screen Setting.
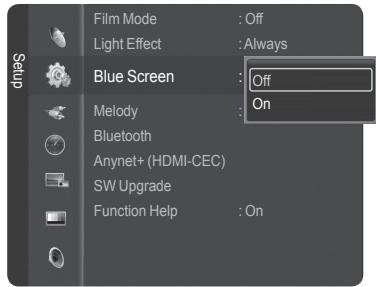
Adjusting the Melody Sound
The TV power on/off melody sound can be adjusted.
1 Press the MENU button.
Press the or button to select Setup, then press the ENTER button.
Press the or button to select Melody, then press the ENTER button.
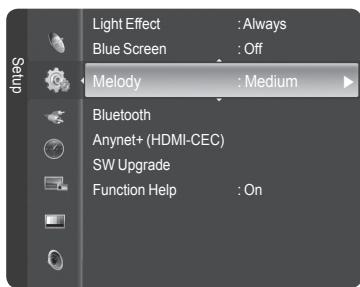
2 Press the or button to select Off, Low, Medium, or High, then press the ENTER button.
Press the EXIT button to exit.
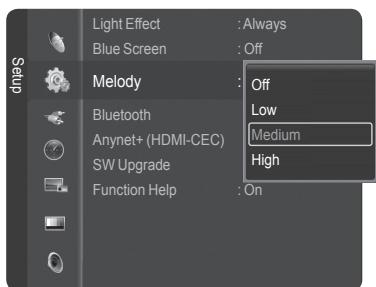
TRADEMARK & LABEL LICENSE NOTICE
DOLOBY Manufactured under license from Dolby Laboratories. Dolby and the
DIGITAL double-D symbol are trademarks of Dolby Laboratories.
Upgrading the Software
Samsung may offer upgrades for your TV's firmware in the future. Please contact the Samsung call center at 1-800-SAMSUNG to receive information about downloading upgrades and using the USB device. Upgrades will be possible by connecting a USB drive to the USB port located on the side of your TV.
1 Insert a USB drive containing the firmware upgrade into the USB Upgrade Port on the side of the TV.
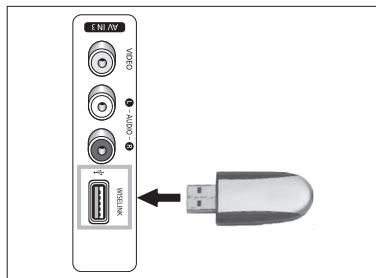
2 Press the MENU button.
Press the or button to select Setup, then press the ENTER button. Press the or button to select SW Upgrade, then press the ENTER button. The message Scanning for USB... It may take up to 30 seconds. is displayed.
3 If the firmware on the USB is properly recognized, the message Upgrade version xxxx to version xxxx? The system would be reset after upgrade. is displayed. Press the or button to select OK, then press the ENTER button. The upgrade starts.
Please be careful not to disconnect the power or remove the USB drive while upgrades are being applied. The TV will shut off and turn on automatically after completing the firmware upgrade. Please check the firmware version after the upgrades are complete.
When software is upgraded, video and audio settings you have made will return to their default (factory) settings. We recommend you write down your settings so that you can easily reset them after the upgrade.
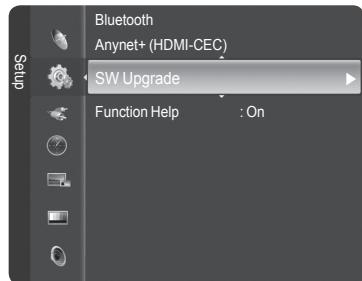
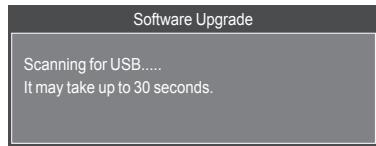
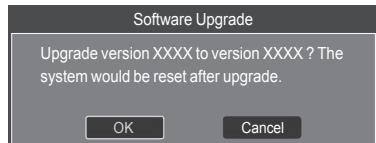
Setting the Function Help
Displays help on the menu functions.
1 Press the MENU button.
Press the or button to select Setup, then press the ENTER button.
Press the or button to select Function Help, then press the ENTER button.
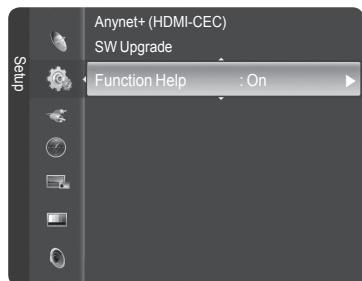
2 Press the or button to select Off or On, then press the ENTER button.
Press the EXIT button to exit.
The Function Help default setting is On.
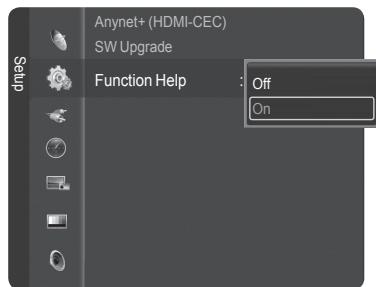
Using Your TV as a Computer (PC) Display
Setting Up Your PC Software (Based on Windows XP)
The Windows display-settings for a typical computer are shown below. The actual screens on your PC will probably be different, depending upon your particular version of Windows and your particular video card. However, even if your actual screens look different, the same basic set-up information will apply in almost all cases. (If not, contact your computer manufacturer or Samsung Dealer.)
1 First, click on Control Panel on the Windows start menu.
2 When the control panel window appears, click on Appearance and Theme and a display dialog-box will appear.
3 When the control panel window appears, click on Display and a display dialog-box will appear.
4 Navigate to the Settings tab on the display dialog-box.
The correct size setting (resolution)
Optimum: 1920 x 1080 pixels
If a vertical-frequency option exists on your display settings dialog box, the correct value is 60 or 60Hz . Otherwise, just click OK and exit the dialog box.
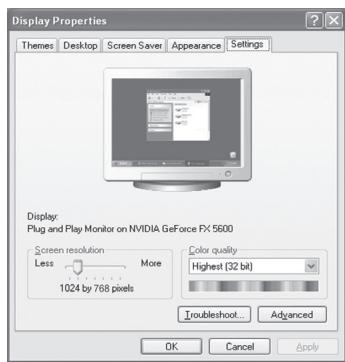
Display Modes
If the signal from the system equals the standard signal mode, the screen is adjusted automatically. If the signal from the system doesn't equal the standard signal mode, adjust the mode by referring to your videocard user guide; otherwise there may be no video. For the display modes listed below, the screen image has been optimized during manufacture.
D-Sub Input
| Video Signal | Resolution (Dot X Line) | Horizontal frequency (KHz) | Vertical frequency (Hz) | Horizontal Polarity | Vertical Polarity |
| IBM | 640 x 350 | 31.46 | 70.08 | P | N |
| 720 x 400 | 31.46 | 70.08 | N | P | |
| 640 x 480 | 31.46 | 59.94 | N | N | |
| VESA | 640 x 480 | 35.00 | 70.00 | ||
| 37.86 | 72.80 | N | N | ||
| 37.50 | 75.00 | N | N | ||
| 800 x 600 | 37.87 | 60.31 | P | P | |
| 43.75 | 70.00 | P | |||
| 48.07 | 72.18 | P | P | ||
| 46.87 | 75.00 | P | P | ||
| 1024 x 768 | 48.36 | 60.00 | N | N | |
| 56.47 | 70.06 | N | N | ||
| 57.67 | 72.00 | ||||
| 79.99 | 75.02 | P | P | ||
| 1152 x 864 | 53.70 | 60.00 | |||
| 63.00 | 70.00 | ||||
| 64.87 | 72.00 | ||||
| 67.50 | 75.00 | P | P | ||
| 1280 x 960 | 60.00 | 60.00 | P | P | |
| 69.93 | 70.00 | ||||
| 72.07 | 72.00 | ||||
| 75.23 | 75.00 | N | P | ||
| 1280 x 1024 | 63.98 | 60.02 | P | P | |
| 74.62 | 70.00 | ||||
| 76.82 | 72.00 | ||||
| 79.97 | 75.02 | P | P | ||
| 1920 x 1080 | 66.58 | 60.00 | P | N |
HDMI/DVI Input
| Mode | Resolution | Horizontal Frequency (KHz) | Vertical Frequency (Hz) | Pixel Clock Frequency (MHz) | Sync Polarity (H/V) |
| IBM | 640 x 350 | 31.469 | 70.086 | 25.175 | + / - |
| 720 x 400 | 31.469 | 70.086 | 28.322 | - / + | |
| 640 x 480 | 31.469 | 59.940 | 25.175 | - / - | |
| VESA | 800 x 600 | 37.879 | 60.317 | 40.000 | + / + |
| 1024 x 768 | 48.364 | 60.000 | 65.000 | - / - | |
| 1280 x 1024 | 63.981 | 60.020 | 108.000 | + / + | |
| 1920 x 1080 | 66.587 | 59.934 | 138.500 | + / - |
When this TV is used as a PC display, 32-bit color is supported.
Depending on the manufacturer, your PC display screen might appear different. (and depending on your particular version of Windows.) Check your PC instruction book for information about connecting your PC to a TV.
- If a vertical and horizontal frequency-select mode exists, select 60Hz (vertical) and 66.58KHz (horizontal).
- In some cases, abnormal signals (such as stripes) might appear on the TV screen when the PC power is turned off (or if the PC is disconnected). If so, press the SOURCE button on the remote control or SOURCE button on the side panel to enter a VIDEO mode. Also, make sure that the PC is connected.
Setting up the TV with your PC
How to Auto Adjust
Use the Auto Adjust function to have the TV set automatically adjust the video signals it receives from the PC. The function also automatically fine-tunes the settings and adjusts the frequency values and positions.
Change to the PC mode first.
1 Press the MENU button.
Press the or button to select Setup, then press the ENTER button.
Press the or button to select PC, then press the ENTER button.
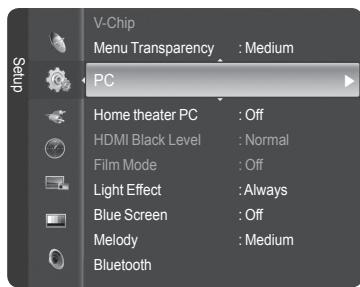
2 Press the or button to select Auto Adjustment, then press the ENTER button.
The message Auto Adjustment in Progress. Please wait. appears on the screen and the picture adjustments are automatically activated.
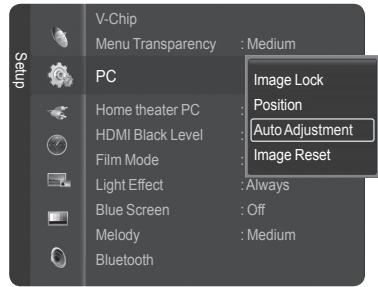

Auto Adjustment in Progress. Please Wait.
Adjusting the Screen Quality
The purpose of the picture quality adjustment is to remove or reduce picture noise. If the noise is not removed by fine tuning alone, then do the frequency adjustments to the utmost and fine tune again. After the noise has been reduced, re-adjust the picture so that it is aligned on the center of the screen.
Change to the PC mode first.
3 Press the ENTER button to select PC, then press the ENTER button to select Image Lock.
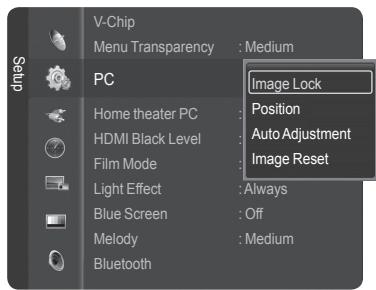
4 Press the or button to select Coarse or Fine, then press the ENTER button.
Press the or button to adjust the screen quality, then press the ENTER button.
This feature may change the width of the image. If necessary, adjust the position to center.
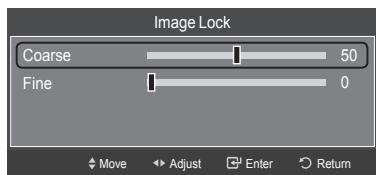
Changing the Screen Position
After connecting the TV to your PC, adjust the position of the screen if it is not well-aligned.
Change to the PC mode first.
5 Press the ENTER button to select PC, then press the or button to select Position, then press the ENTER button.
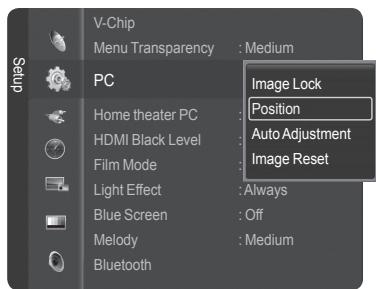
6 Press the or button to adjust the vertical position. Press the or button to adjust the horizontal position. Press the ENTER button.
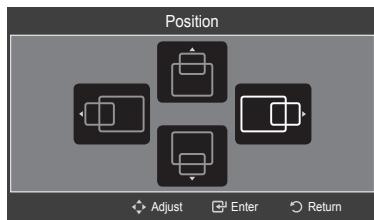
Initializing the Image Settings
You can reset the previously adjusted settings to the factory defaults.
Change to the PC mode first.
7 Press the ENTER button to select PC, then press the or button to select Image Reset, then press the ENTER button.
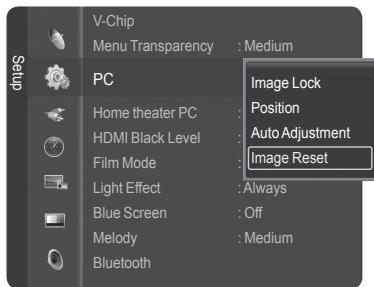
8 The message Image Reset is completed. appears on the screen.

Changing the Picture Size (PC Mode)
You can select the picture size which best corresponds to your viewing requirements.
1 Press the MENU button.
Press the ENTER button to select Picture.
Press the or button to select Size, then press the ENTER button.
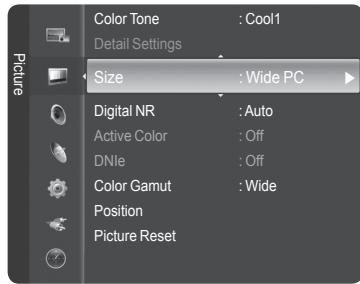
2 Press the or button to select the screen format you want, then press the ENTER button.
Press the EXIT button to exit.
- Wide TV: Sets the picture in Wide TV format.
- Wide PC: Set the picture in Wide PC format.
4:3: Set the picture in 4:3 format
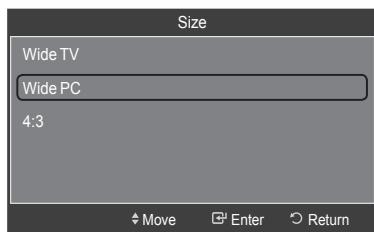

Press the P.SIZE button on the remote control to change the picture size.
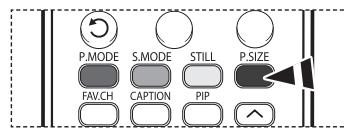
Wide PC: The picture position (□, □) and size (⊕⊕) adjustment are available by pressing the / / button.
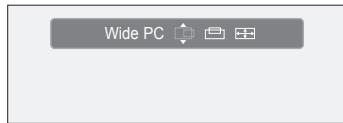
Setting the Home Theater PC
This function enables you to view higher quality pictures while in PC Mode. After setting the Home Theater PC function to On, you can go into the Detailed Settings menu and make adjustments without affecting settings in the regular TV mode.
1 Press the MENU button.
Press the or button to select Setup, then press the ENTER button.
Press the or button to select Home theater PC, then press the ENTER button.

2 Press the or button to select Off or On, then press the ENTER button.
Press the EXIT button to exit.
This function is available only in PC mode.
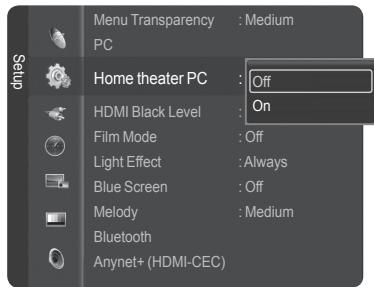
What is Bluetooth?
Bluetooth is the wireless short-range networking technology, which enables you to connect between multiple mobile devices using the 2.45GHz frequency. Using Bluetooth, you can make a wireless connection between this TV and selected Bluetooth headsets or photo printers.
For more information on Bluetooth, refer to the user manual of the Bluetooth device.
This TV supports the Bluetooth communication capability so that you can connect a Bluetooth stereo headset and photo printer wirelessly.
Instructions for use
- Use the product within the range shown in the picture below.
If you use the product out of the range or there is an obstacle, it may cause a communication failure.
Depending on other devices you have nearby, there may be a communication failure.
-
Communication failure may occur due to interference from the following devices: microwave oven, wireless LAN, PDP display, and range hood. (Those products use the same frequency as Bluetooth.)
-
The time it takes to search devices may vary depending on the operation condition and the number of the Bluetooth devices operating nearby. The fewer the number of devices are connected, the faster the searching time takes.
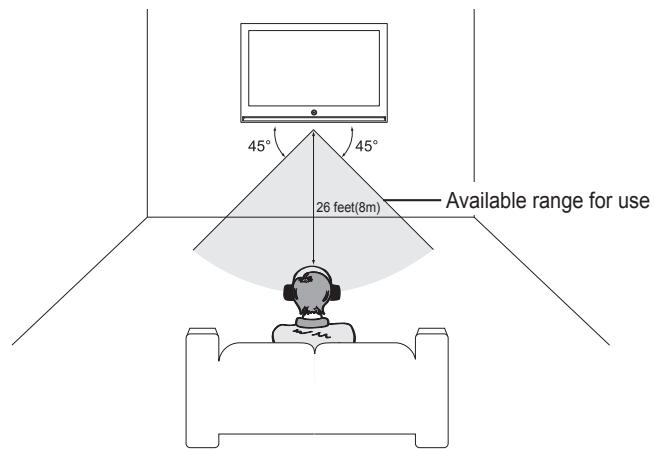
Bluetooth Communication and Setting Up PIN
In order for the TV to communicate with a Bluetooth photo printer or stereo headset, a PIN must be set up for these devices. You have to set a PIN for first time use only.
1 Press the MENU button.
Press the or button to select Setup, then press the ENTER button.
Press the or button to select Bluetooth, then press the ENTER button.
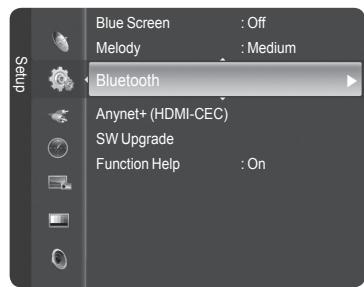
2 Press the ENTER button to select Bluetooth.
Press the or button to select On, then press the ENTER button.
Bluetooth communication is on.
To not use Bluetooth communication, select Off.
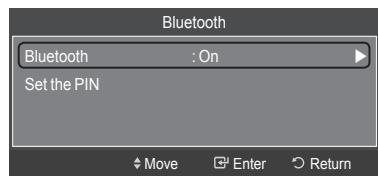
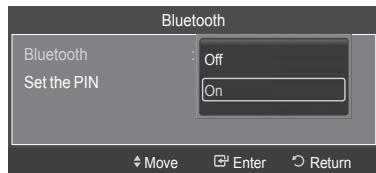
Setting a PIN
3 Press the or button to select Set the PIN, then press the ENTER button.
4 Enter a PIN for the headset or printer to be connected.
For the PIN, refer to the headset or printer's user manual.
Press the EXIT button to exit.
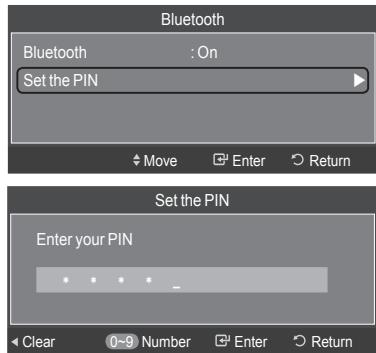
Connecting a Bluetooth stereo headset (Sold separately)
If you select Bluetooth stereo headset in Headset Connection, you can listen to the TV through a Bluetooth stereo headset without using a cable connection. Check if the Bluetooth stereo headset is ready. For information on how to switch the device to the ready state, refer to the user manual of the corresponding device.
1 Press the TOOLS button.
Press the or button to select Headset Connection, then press the ENTER button.
2 Press the or button to select the Bluetooth headset and press the ENTER button.
The Bluetooth stereo headset is connected to the TV.
- If you cannot find the headset in the Device List, press the Red button to rescan it.
- To find the Bluetooth headset, it must be in the ready state.
For more detailed information, refer to the headset's user manual.
Use the compatible stereo headset (model name: iSkin CERULEAN™ F1(CE-F1000)). If you use a different headset, the lip synchronization problem can happen and the available communication range is not guaranteed. For purchasing a compatible headset, access the following website: www.iskin.com
You can also select a Bluetooth stereo headset or printer in the Source List menu.
You can only scan and connect an officially certified Bluetooth stereo headset.
You can only connect a Bluetooth stereo headset which supports the A2DP (AV) profile.
You cannot connect a Bluetooth stereo headset supporting the HF (Hands Free) profile only.
If the configured Bluetooth device PIN differs from the PIN in the manual of the headset, you will not be able to make a connection. For more detailed information, refer to the user manual of the device.
If you fail to make a connection because of a different headset PIN, change the PIN.
In the following circumstances, you may fail to scan or make a connection.
- When there is a strong radiation source nearby.
- When there are a number of Bluetooth devices.
- When the headset or printer is off or malfunctioning.
Communication failure may happen with the products such as microwave oven, wireless LAN, PDP display, and range hood because those products are using the same frequency as Bluetooth.
You can only connect one headset at a time.
You cannot connect a headset to another Bluetooth device.
A connection that is disrupted by turning the TV off is not automatically restored. In this case, reconnect the device.
While using the Anynet+ enabled Samsung receiver, you cannot use the Bluetooth functions. Disconnect the receiver. See page 82.
Capturing and Printing the Screen
You can capture and print the screen while watching TV or an external video source when the Bluetooth printer is located within the available range without any obstacles.
1 While watching TV or an external video source, press the STILL button when a screen shot you wish to print is displayed. The screen stops playing and the Print and Cancel menu appears.
2 Press the ENTER button to select Print.
3 Bluetooth Printer name appears on the menu. Press the or button to select the Bluetooth printer and press the ENTER button.
The captured screen picture is printed by the Bluetooth printer selected.
- If you cannot find the printer in the Device List, press the Red button to rescan it.
- The Bluetooth printer must be turned on in order for it to appear in the Device List. For more detailed information, refer to the printer's user manual.
Canceling Print
In Step 2 above, press the or button to select Cancel and press the ENTER button. The print is canceled and the screen play resumes.
If a Bluetooth printer is connected when you are listening to TV sound through the Bluetooth stereo headset, the connection with the headset is automatically terminated.
To connect a Bluetooth printer, a PIN setting is not required.
In case of 16:9 display, the image may be partly printed depending on the printer. Sending the still images using the Bluetooth printer supports the OPP (Object Push Profile) only.
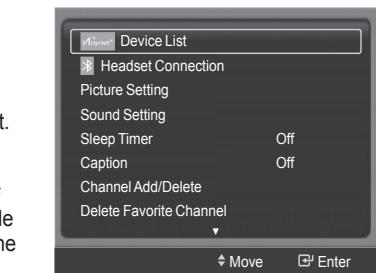
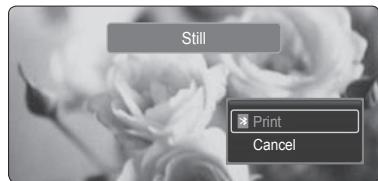
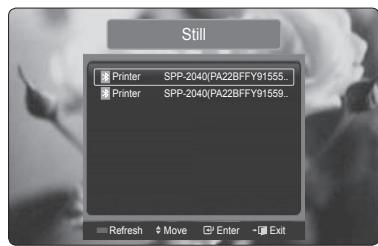
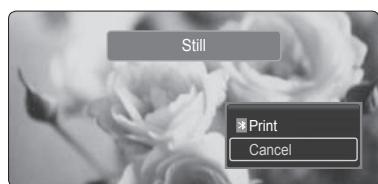
Using the WISELINK Function
This function enables you to view and listen to photo (JPEG) and audio files (MP3) saved on a USB Mass Storage Class (MSC) device.
1 Press the power button on the remote control or front panel.
2 Connect a USB device containing JPEG and/or MP3 files to the WISELINK jack (USB jack) on the side of the TV.
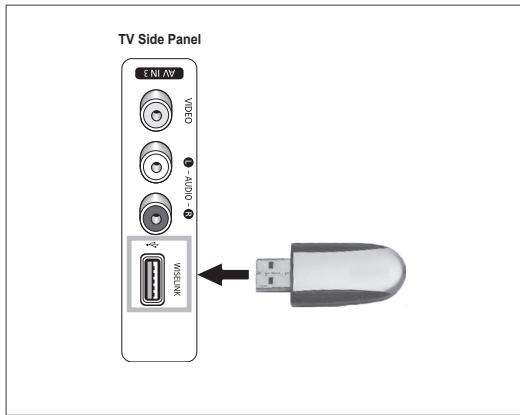
Removing a USB Device
1 Press the MENU button.
Press the or button to select Guide, then press the ENTER button.
2 Press the ENTER button to select WISELINK.
The photo or music files saved on the memory device are listed.
3 Press the blue button and press the or button to select Safe Remove and press the ENTER button.
The Removing the device safe... message appears and then the USB could be removed safe message appears.
4 Remove the USB device from the TV.
If you enter the WISELINK mode with no USB device connected. "No external storage device found. Check the connection status." message will appear. In this case, insert the USB device, exit the screen by pressing the WISELINK button on the remote control and enter the WISELINK screen again.
- Photo and audio files must be named in English, French, or Spanish. If not, the files can not be played. Change the file names to English, French, or Spanish if necessary.
- Folder or file names can not exceed 128 characters. If exceeded, they won't function.
The file system only supports the FAT16/32. - Certain types of USB Digital camera and audio devices may not be compatible with this TV.
- WISELINK supports USB Mass Storage Class (MSC) devices only.
- MSC is the device for mass storage class bulk-only transport. (e.g. thumb device, flash card reader)
- WISELINK only supports the USB Mass Storage Class device (MSC). MSC is a Mass Storage Class Bulk-Only Transport device. Examples of MSC are Thumb drives and Flash Card Readers.
- Before connecting your device to the TV, please back up your files to prevent them from damage or loss of data. SAMSUNG is not responsible for any data file damage or data loss.
- The USB hub is not supported and you cannot use a digital camera (PTP: Picture Transfer Protocol) and USB storage device at the same time.
- To remove a USB storage device from the TV or to turn it off (if available), exit WISELINK first for a proper system operation.
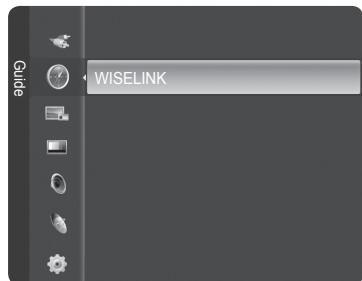
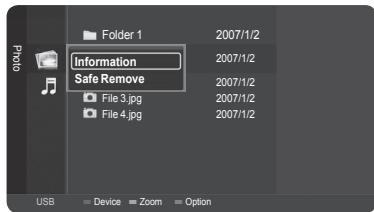

Using the Remote Control Button in WISELINK Menu
| Button | Operations |
| Move the cursor and select an item | |
| Select the currently selected item. | |
| PLAY/PAUSE | Play or pause the Slide Show or MP3 file. |
| RETURN | Return to the previous menu. |
| TOOLS/Server | Run various functions from the Photo and Music menus. |
| STOP | Stop the current slide show or MP3 file. |
| REW/FF | Page Up or Down (file list item) |
Using the WISELINK Mode
1 Press the MENU button.
Press the or button to select Guide, then press the ENTER button.
Press the ENTER button to select WISELINK.
2 Press the or button to select Photo or Music, then press the ENTER button.
The photo or music files saved on the storage device are listed.
To exit WISELINK mode, press the EXIT button on the remote control.
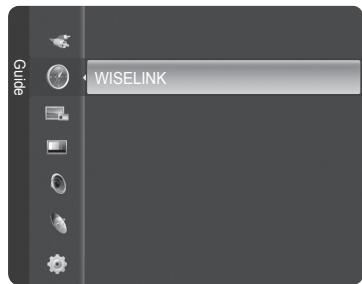
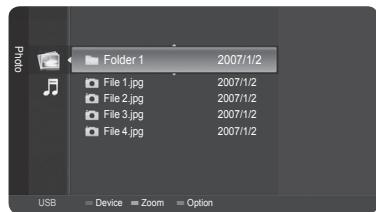

Press the WISELINK button on the remote control to turn on the WISELINK mode.
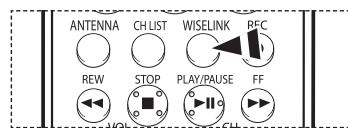
Using the Photo (JPEG) List
You can play back the JPEG files saved on a memory device in various ways.
1 After switching the mode to WISELINK, select a memory device that you have installed. (Refer to page 70~71)
2 Press the ENTER button to select Photo. JPEG files and existing folders are displayed.
3 Press the or button to select a photo, then press the ENTER button.
Pressing the button over a photo icon shows the currently selected photo in full screen.
Pressing the button over a folder icon shows the JPEG files included in the folder.
While a full screen is displayed, or button will let you see another photo image in the same folder.
Press the PLAY/PAUSE button when a photo icon is selected to start a Slide Show.
To exit WISELINK mode, press the EXIT button on the remote control.
Moving to a photo may take a few seconds because the file needs to be loaded. At this point, the icon will appear.
This menu shows only the files whose extension isjpeg (or jpg). Files with other formats such as gif or tiff will not be displayed.
Folders are displayed first and they are followed by all JPEG files in the current folder. The folders and JPEG files are sorted in alphabetical order.
If the photo is displayed in full screen, you can zoom in and out or rotate the photo on the screen. (Refer to pages 75~76)
If the size of a photo file is too big, the playing of the background music may be interrupted intermittently. (When Background Music is On) See page 77.
WISELINK for this product supports JPEG files up to 8K x 8K pixels. When trying to view a progressive JPEG file, the Not supported mode message will appear. When trying to view a file exceeding 8MB, the This file is too large to decode message will appear.
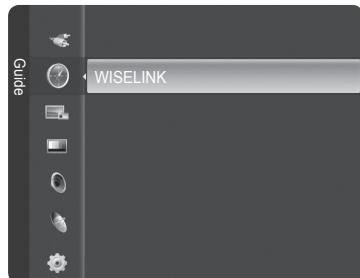
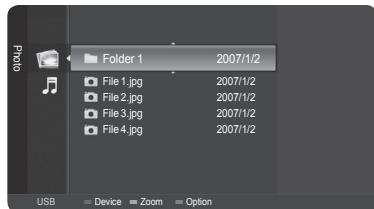
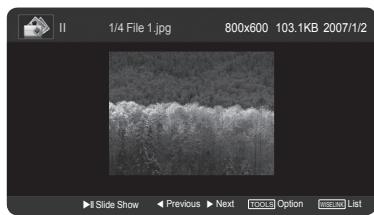

Press the WISELINK button on the remote control to turn on the WISELINK mode.
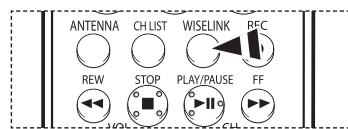
Using the Options Menu
Start Slide Show (or Stop Slide Show):
You can start or stop a Slide Show.
(Refer to "Viewing a Slide Show" on page 74)
Zoom:
You can zoom into images in full screen mode. Images are zoomed in, in the order of x1 (original size), x2 and x4. (Refer to "Zooming-In" on page 75)
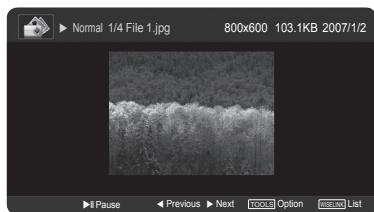
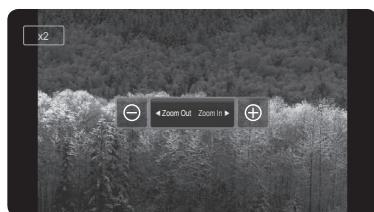
Continued...
Rotate:
You can rotate images in full screen mode.
Images are rotated in the order of 0^ (original state), 180^ , 270^ and 90^ .
(Refer to "Rotating" on page 76)
Slide Show Setting:
You can determine the slide interval and whether to repeat the background music.
(Refer to "Setting a Slide Show" on page 74)
Background Music:
You can determine whether to play the configured background music.
(Refer to "Background Music On/Off" on page 77)
Background Music Setting:
You can set the background music.
(Refer to "Background Music Setting" on page 77)
Delete:
You can delete a photo (JPEG) file.
(Refer to "Deleting the Photo files" on page 78)
Picture Setting:
You can set the Picture mode.
(Refer to on page 28)
Sound Setting:
You can set the Sound mode.
(Refer to on page 36~37)
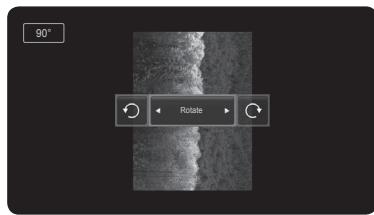
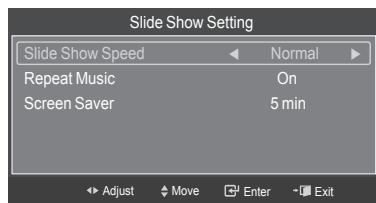
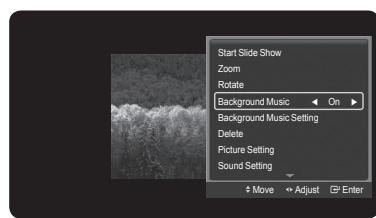
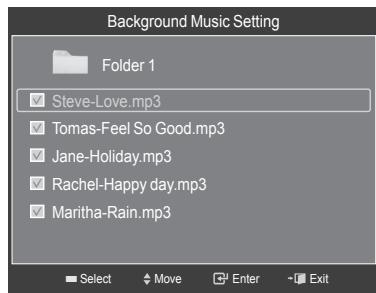
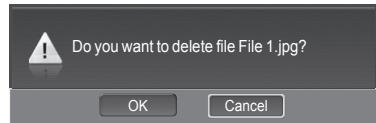
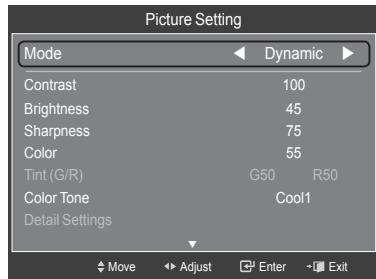
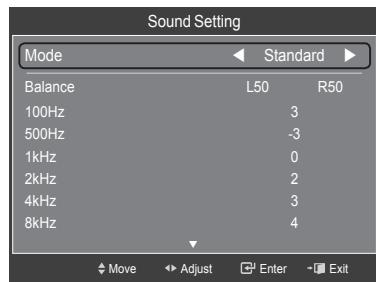
Information:
The photo file information including the order of the file in the current directory, the name, the size, the resolution, and the date modified is displayed.
Viewing a Slide Show
1 After switching the mode to WISELINK, select a memory device that you have installed. (Refer to page 70~71)
2 Press the ENTER button to select Photo. JPEG files and existing folders are displayed.
3 Press the or button to select a photo, then press the blue button to display the option (View, Start Slide Show, Delete, Delete All, Select All, Information, Safe Remove).
Press the or button to select Start Slide Show, then press the ENTER button.
Slide show displays all JPEG files in the selected folder at a pre-set speed.
During the slide show, files are displayed in order from the currently shown file.
MP3 files can be automatically played during the slide show if the Background Music is set to On. To enable this function, MP3 files and other photo files must be located in the same folder on the memory device.
Press the PLAY/PAUSE button when a photo icon is selected to start a Slide Show.
4 Press the TOOLS button during slide show to set the option (Slide Show Setting).
To exit WISELINK mode, press the EXIT button on the remote control.
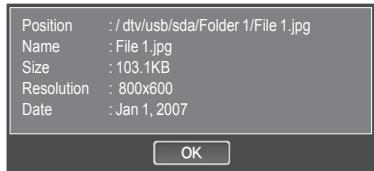
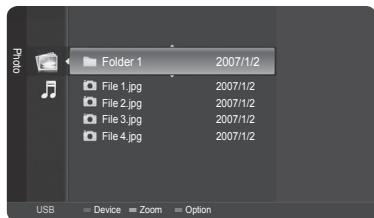
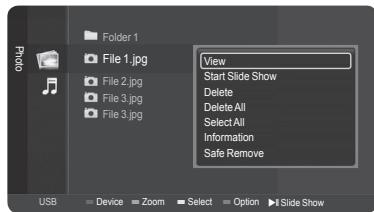
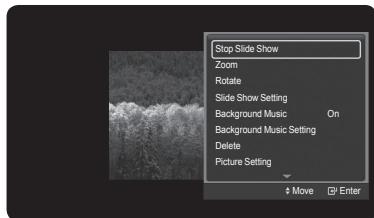

Press the WISELINK button on the remote control to turn on the WISELINK mode.
Setting a Slide Show
You can determine the slide interval and whether to repeat the background music.
1 Press the TOOLS button during a Slide Show.
2 Press the or button to select Slide Show Setting, then press the ENTER button.
3 Press the or button to select a desired item, then press the or button to select the item you want.
To exit WISELINK mode, press the EXIT button on the remote control.
Slide Show Speed:
Select to control the slide show speed.
Each time the or button is pressed, the speed changes repeatedly.
(Fast Slow Normal)
Repeat Music:
Select to determine whether to repeat playing the music when all MP3 files in the current folder have been played. You can select On or Off.
- On: Plays back a music file or all music files repeatedly.
- Off: Doesn't play back repeatedly.
Screen Saver:
Select to set the waiting time before the screen saver is run when no button is pressed.
You can select from Off (Do Not Use), 5min or 10min.
To prevent a residual image on the screen, the time to run the Screen Saver is set to 5min by default. Users can change the setting to Off, 5min or 10min according to user requirements.
To listen to music during a Slide Show, you have to set the background music first. See page 77.
To play background music during a Slide Show, the photo (JPEG) files and the background music (MP3) file must be on the same USB storage device.
To move to the photo lists during a Slide Show, press the WISELINK button.

Press the WISELINK button on the remote control to turn on the WISELINK mode.
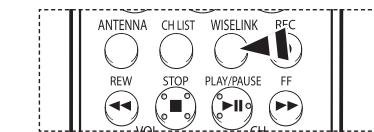
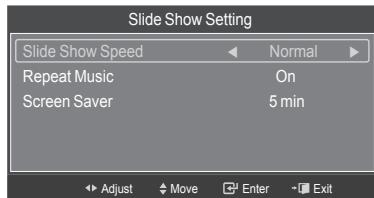
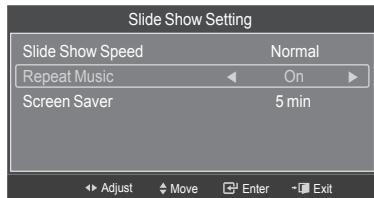
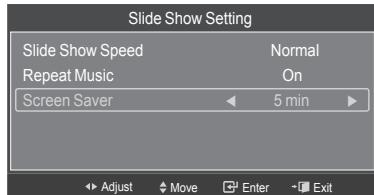
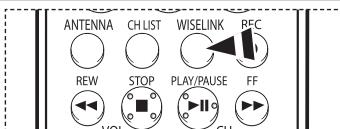
Zooming-In
1 After switching the mode to WISELINK, select a memory device that you have installed. (Refer to page 70~71)
2 Press the ENTER button to select Photo. JPEG files and existing folders are displayed.
3 Press the or button to select a photo, then press the ENTER button. Pressing the button over a photo icon shows the currently selected photo in full screen.
4 Press the TOOLS button.
Press the or button to select Zoom, then press the ENTER button.
Each time the or button is pressed, the photo size decreases or increases. (x1 x2 x4)
- x1: Restore the photo to its original size.
- x2: Zoom-in to the photo x2.
- x4: Zoom-in to the photo x4.
5 To move the enlarged photo image up/down/left/right, press the ENTER button, then press the / / buttons.
Note that when the enlarged picture is smaller than the original screen size, the location change function doesn't work.
To exit WISELINK mode, press the EXIT button on the remote control.
The enlarged file is not saved.
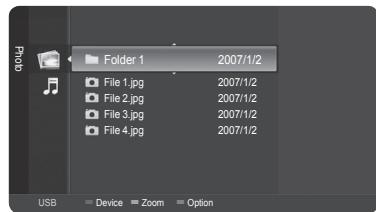
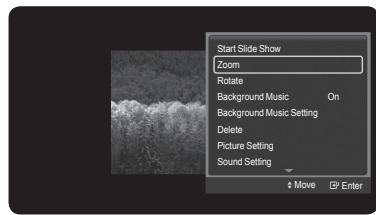
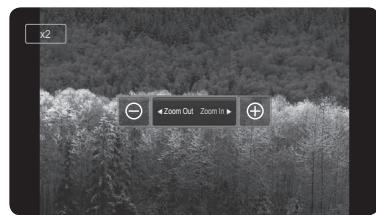

Press the WISELINK button on the remote control to turn on the WISELINK mode.
Zoom function information icon (Displayed at the top left of the screen).
| Icon | Current OSD | Function |
| x1 | Zoom (x 1) | Restore a photo to its original size. |
| x2 | Zoom (x 2) | Zoom-in to a photo x2. |
| x4 | Zoom (x 4) | Zoom-in to a photo x4. |
| Δ | Pan Up | Pan up to view the upper part of a zoomed-in photo. |
| Pan Down | Pan down to view the lower part of a zoomed-in photo. | |
| Pan Left | Pan left to view the left side of a zoomed-in photo. | |
| Pan Right | Pan right to view the right side of a zoomed-in photo. |
Rotating
1 After switching the mode to WISELINK, select a memory device that you have installed. (Refer to page 70~71)
2 Press the ENTER button to select Photo. JPEG files and existing folders are displayed.
3 Press the or button to select a photo, then press the ENTER button. Pressing the button over a photo icon shows the currently selected photo in full screen.
4 Press the TOOLS button.
Press the or button to select Rotate, then press the ENTER button.
Press the or button to rotate the photo by the required amount.
Whenever you press the button, it rotates by 270^ , 180^ , 90^ , and 0^ .
Whenever you press the button, it rotates by 90^ , 180^ , 270^ , and 0^ .
Rotating directly from 90 degrees to 270 degrees is not allowed.
To exit WISELINK mode, press the EXIT button on the remote control.
The rotated file is not saved.
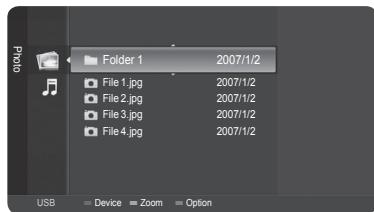
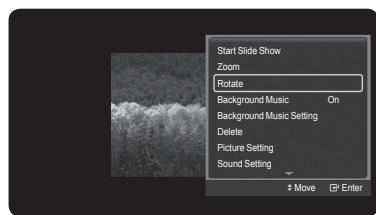
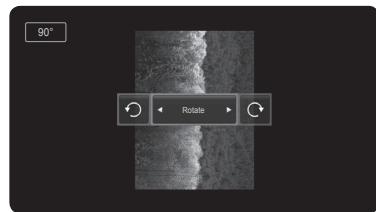

Press the WISELINK button on the remote control to turn on the WISELINK mode.
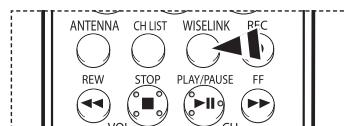
The Rotating function information icon (Displayed at the top left of the screen).
| Icon | Current OSD | Function |
| 270° | Rotating (270°) | To rotate a photo by 270 degrees |
| 180° | Rotating (180°) | To rotate a photo by 180 degrees |
| 90° | Rotating (90°) | To rotate a photo by 90 degrees |
| 0° | Rotating (0°) | To rotate a photo to its original state |
Background Music On/Off
If you set Background Music On, the background music will be played when viewing photos one by one or in a Slide Show.
1 After switching the mode to WISELINK, select a memory device that you have installed. (Refer to page 70~71)
2 Press the ENTER button to select Photo. JPEG files and existing folders are displayed.
3 Press the or button to select a photo, then press the ENTER button. Pressing the button over a photo icon shows the currently selected photo in full screen.
4 Press the TOOLS button. Press the or button to select Background Music, then press the or button to select On or Off.
On: When the background music is available, if you select On, the music is played back.
Off: Background music is not played.
To exit WISELINK mode, press the EXIT button on the remote control.
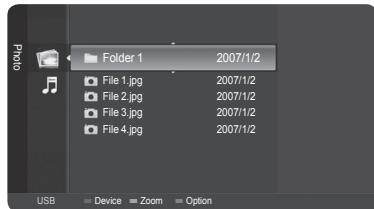
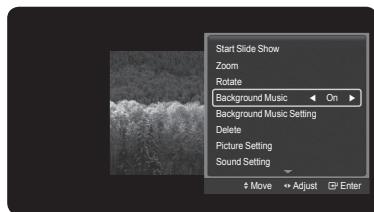

Press the WISELINK button on the remote control to turn on the WISELINK mode.
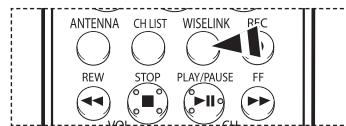
Background Music Setting
1 After switching the mode to WISELINK, select a memory device that you have installed. (Refer to page 70~71)
2 Press the ENTER button to select Photo. JPEG files and existing folders are displayed.
3 Press the or button to select a photo, then press the ENTER button. Pressing the button over a photo icon shows the currently selected photo in full screen.
4 Press the TOOLS button. Press the or button to select Background Music Setting, then press the ENTER button. The music (MP3) files are listed.
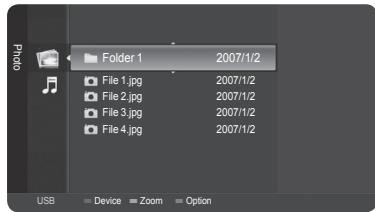
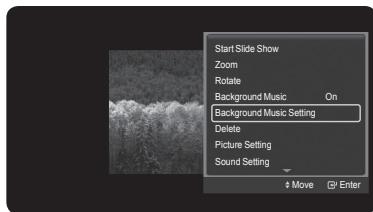
5 Press the or button to select a particular music file and press the yellow button.
The <> mark appears to the left of the selected music (MP3).
Repeat the above operation to select multiple music files.
Press the ENTER button to save the current selections.
To exit WISELINK mode, press the EXIT button on the remote control.
If you turn Off the Background Music, even if the Background Music Settings have been set up, the background music will not be played.
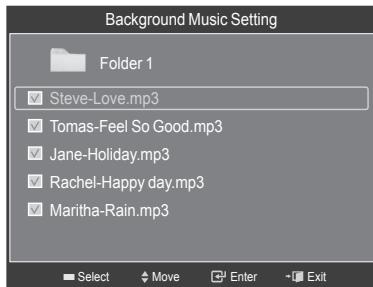

Press the WISELINK button on the remote control to turn on the WISELINK mode.
Deleting the Photo files
You can delete photo (JPEG) files saved on a USB storage device.
1 After switching the mode to WISELINK, select a memory device that you have installed. (Refer to page 70~71)
2 Press the ENTER button to select Photo. JPEG files and existing folders are displayed.
3 Press the or button to select a photo you want to delete and then press the blue button.
4 Press the or button to select Delete or Delete All and then press the ENTER button.
If you select Delete, only the selected photo will be deleted.
If you select Delete All, all photos in the folder will be deleted.
5 Press the or button to select OK and press the ENTER button.
The photo will be deleted.
If you select Cancel, the deletion is canceled.
To exit WISELINK mode, press the EXIT button on the remote control.
You cannot remove the following files:
- PTP-connected digital camera picture files
- Read-only files
While removing files, don't remove the USB memory device.
You cannot recover a deleted photo file.
Removing read-only files
When removing any read-only files, the screen to the right appears.
Press the or button to select OK, then press the ENTER button.
If you select Cancel, the removing operation is cancelled.

Press the WISELINK button on the remote control to turn on the WISELINK mode.
Deleting Multiple Photos
1 In the Photo list, press the or button to select a photo to be deleted and press the yellow button.
The <> mark appears to the left of the selected photo.
Repeat the above operation to select multiple photos.
2 Press the blue button, press the or button to select Delete selected File and press the ENTER button.
3 Press the or button to select OK and press the ENTER button.
The selected photos are deleted.
If you select Cancel, the deletion will be canceled.
To exit WISELINK mode, press the EXIT button on the remote control.
You cannot remove the read-only files from the selected ones.
You cannot restore the removed pictures.

Press the WISELINK button on the remote control to turn on the WISELINK mode.
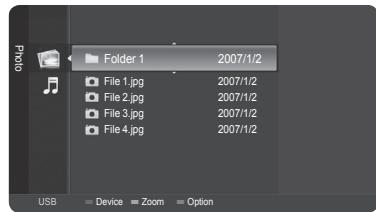
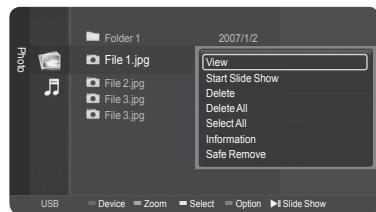
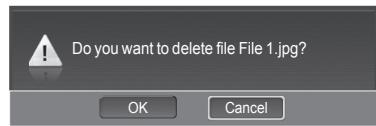
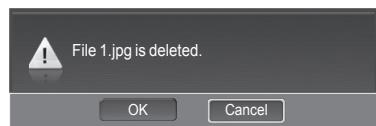
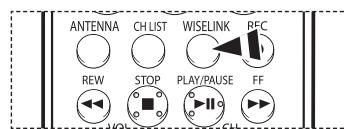
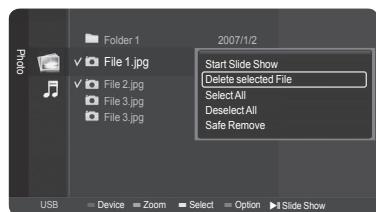
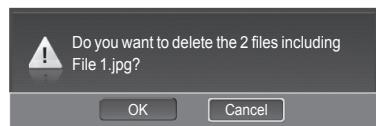
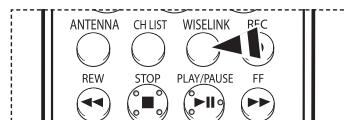
Using the Music (MP3) List
You can play back the MP3 files saved on a memory device in various ways.
1 After switching the mode to WISELINK, select a memory device that you have installed. (Refer to page 70~71)
2 Press the or button to select Music, then press the ENTER button. MP3 files and existing folders are displayed.
3 Press the or button to select a music to be played, then press the ENTER button.
Pressing the ENTER button while a music file is highlighted immediately plays the music file.
Pressing the ENTER button while a folder is highlighted shows the music files in the folder.
To select a file on the next page, press the REW or FF button.
Pressing the or button while playing a music file will let you play another music file in the same folder.
To play back the files repeatedly, change the setting by referring to page 80.
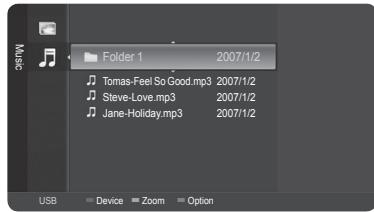
4 Press the PLAY/PAUSE button while playing an MP3 file to pause the file. Press the STOP button to stop playback.
To exit WISELINK mode, press the EXIT button on the remote control.
This menu shows only the files whose extension is mp3. Files with other extensions are not displayed, even if they have been saved on the same memory device.
The selected file is displayed on the top of the screen with its playing time.
To adjust the music volume, press the VOL+ or VOL- button on the remote control. To mute the sound, press the MUTE button on the remote control.
To move to the music list while playing a music file, press the WISELINK button.
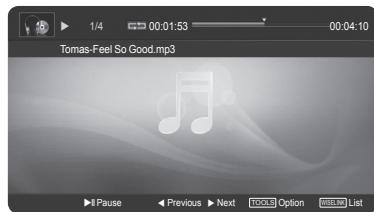

Press the WISELINK button on the remote control to turn on the WISELINK mode.
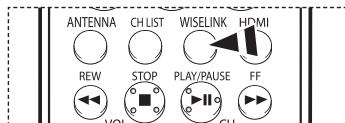
Playing a Selected Music File
1 In the Music list, press the or button to select a music file and then press the yellow button.
The <> mark appears to the left of the selected music.
Repeat the above operation to select multiple music files.
2 Press the blue button, then press the ENTER button to select Play selected File.
To exit WISELINK mode, press the EXIT button on the remote control.
The selected music files are played.
Music function information icon (Displayed at the top left of the screen).
| Icon | Current OSD | Function |
| Music | (Music) One Repeat | When a music file is repeated. |
| Music | (Music) One | When a music file is played once. |
| Music | (Music) Play/Pause | When pressing the PLAY/PAUSE button on the remote control while music is playing. The music stops and the ‘Play’ text appears at the top of the screen. |
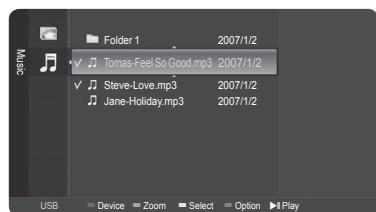
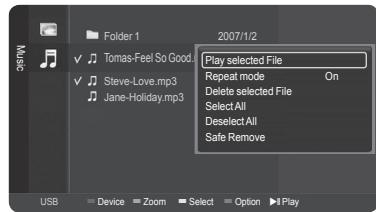

Press the WISELINK button on the remote control to turn on the WISELINK mode.
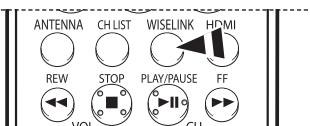
Repeating Music Play
You can play music repeatedly.
1 After switching the mode to WISELINK, select a memory device that you have installed. (Refer to page 70~71)
2 Press the or button to select Music, then press the ENTER button. MP3 files and existing folders are displayed.
3 Press the or button to select a music, then press the blue button. Press the or button to select Repeat mode, then press the or button to select On.
To cancel Repeat mode, select Off.
To exit WISELINK mode, press the EXIT button on the remote control.

Press the WISELINK button on the remote control to turn on the WISELINK mode.
Deleting the Music files
You can delete music (MP3) files saved on the USB storage device.
1 After switching the mode to WISELINK, select a memory device that you have installed. (Refer to page 70~71)
2 Press the or button to select Music, then press the ENTER button. MP3 files and existing folders are displayed.
3 Press the or button to select a music file to be deleted and then press the blue button.
4 Press the or button to select Delete or Delete All and then press the ENTER button.
If you select Delete, only the selected music will be deleted.
If you select Delete All, all music files in the selected folder are deleted.
5 Press the or button to select OK and press the ENTER button.
The music will be deleted.
If you select Cancel, the deletion will be canceled.
You cannot remove the following files:
- Read-only files
While removing any files, don't remove the USB memory device.
You cannot restore a deleted music file.
Removing read-only files
When removing read-only files, the screen to the right appears.
Press the or button to select OK, then press the ENTER button.
The music files are removed.
If you select Cancel, the removing operation is cancelled.
To exit WISELINK mode, press the EXIT button on the remote control.

Press the WISELINK button on the remote control to turn on the WISELINK mode.
Deleting Multiple Music Files
1 In the Music list, press the or button to select a music file to be deleted and press the yellow button.
The <> mark appears to the left of the selected music file.
Repeat the above operation to select multiple music files.
2 Press the blue button, press the or button to select Delete selected File and press the ENTER button.
3 Press the or button to select OK and press the ENTER button.
The selected music files will be deleted.
If you select Cancel, the deletion will be canceled.
To exit WISELINK mode, press the EXIT button on the remote control.
You cannot remove the read-only files from the selected ones.
You cannot restore the removed pictures.

Press the WISELINK button on the remote control to turn on the WISELINK mode.
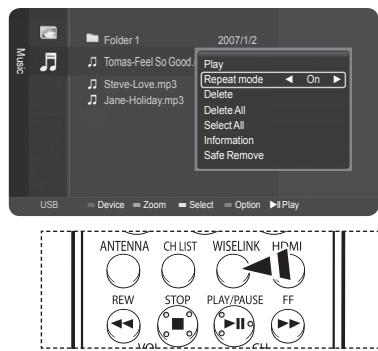
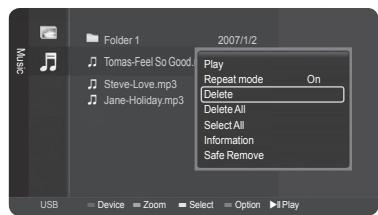
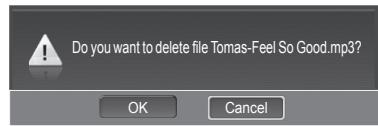
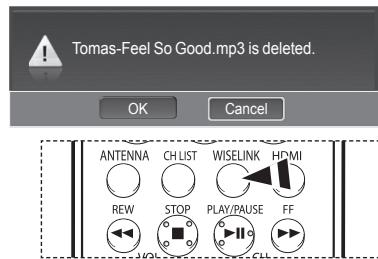
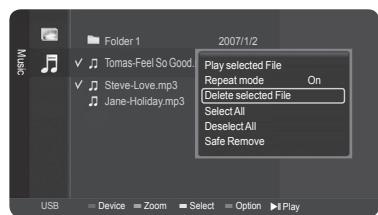
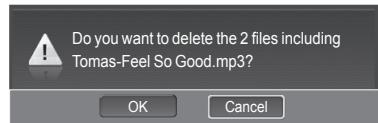
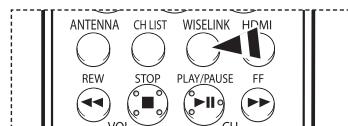
What is Anynet+?
Anynet+ is an AV network system that enables you to control all connected Samsung AV devices with your Samsung TV's remote.
Connecting Anynet+ Devices
The Anynet+ system can be used only with Samsung AV devices that have the Anynet+ feature. To be sure your Samsung AV device has this feature, check if there is an Anynet+ mark on it.
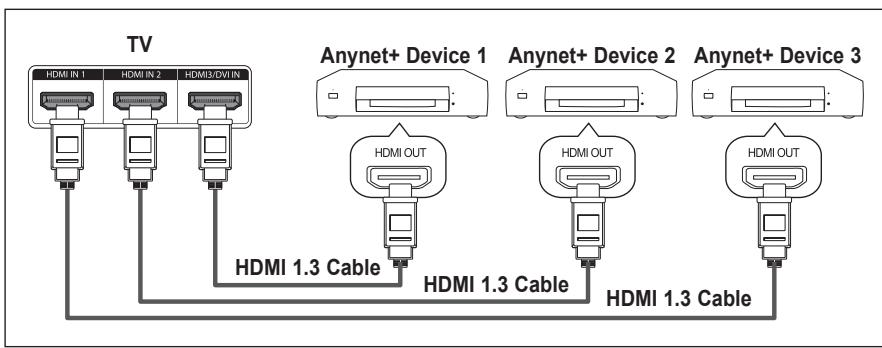
To directly connect to TV
Connect the [HDMI 1], [HDMI 2] or [HDMI 3] jack on the TV and the HDMI OUT jack of the corresponding Anynet+ device using the HDMI cable.
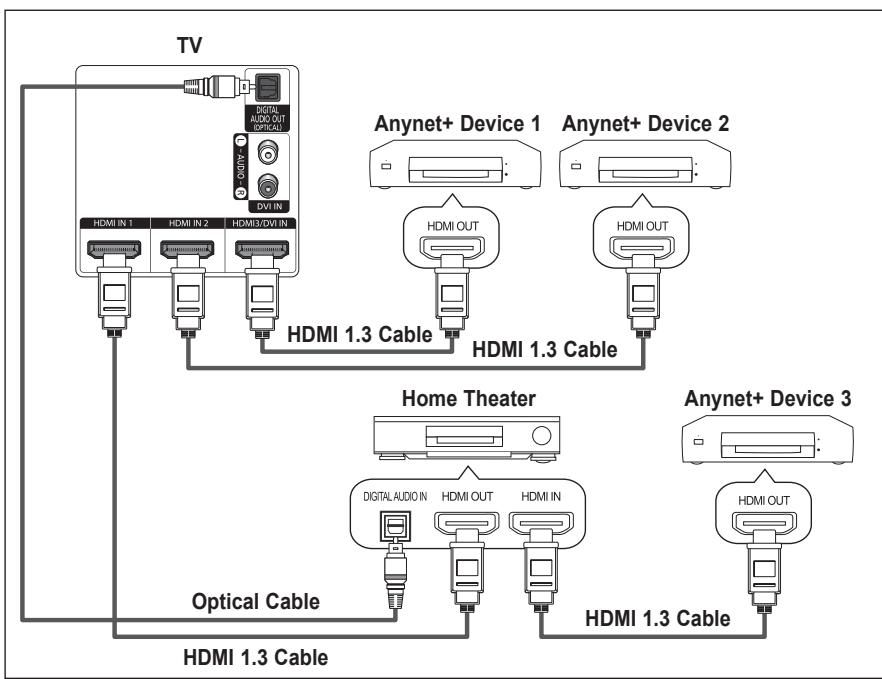
To connect to Home Theater
- Connect the [HDMI 1], [HDMI 2] or [HDMI 3] jack on the TV and the HDMI OUT jack of the corresponding Anynet+ device using the HDMI cable.
- Connect the HDMI IN jack of the home theater and the HDMI OUT jack of the corresponding Anynet+ device using the HDMI cable.
Connect the Optical cable between [Digital Audio Out (Optical)] on your TV and Digital Audio Input on the Home Theater.
Connect only one Home Theater.
When following the connection above, the Optical jack only outputs 2 channel audio. You will only hear sound from the Home Theater's Front Left and Right speakers and the subwoofer. If you want to hear 5.1 channel audio, connect the DIGITAL AUDIO OUT (OPTICAL) jack on the DVD player or Cable/Satellite Box (ie Anynet Device 1 or 2) directly to the Amplifier or Home Theater, not the TV. Please see the home theater's user manual for more information.
You can connect an Anynet+ device using the HDMI 1.3 cable. Some HDMI cables may not support Anynet+ functions.
Anynet ^+ works when the AV device supporting Anynet ^+ is in the Standby or On status.
Anynet+ supports up to 12 AV devices in total.
Setting Up Anynet+
The following settings help set the Anynet+ functions.
To use the Anynet ^+ Function, Anynet^+ (HDMI-CEC) must be set to On
1 Press the MENU button.
Press the or button to select Setup, then press the ENTER button.
2 Press the or button to select Anynet+ (HDMI-CEC), then press the ENTER button.
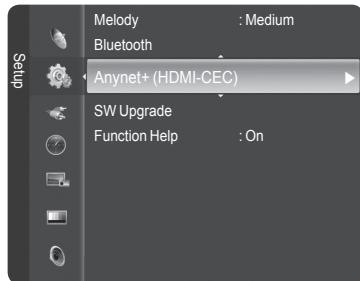
3 Press the ENTER button to select Anynet+ (HDMI-CEC), then press the ENTER button.
4 Press the or button to select On, then press the ENTER button.
The Anynet ^+ function is enabled.
If you select Off, Anynet+ is disabled.
When the Anynet+ (HDMI-CEC) function is disabled, all the Anynet+ related operations are deactivated.
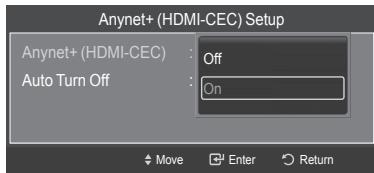
Setting an Anynet+ Device to turn Off Automatically when the TV is Turned Off
3 Press the or button to select Auto Turn Off, then press the ENTER button.
4 Press the or button to select On, then press the ENTER button.
The Auto turn off function is enabled.
If you select Off, the Auto turn off function is canceled.
Press the EXIT button to exit.
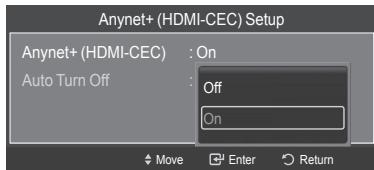
The active source on the TV remote must be set to TV to use the Anynet ^+ function.
If you set the Anynet+ (HDMI-CEC) to On, the Device List menu appears when you press the TOOLS button on the remote control.
If you set Auto Turn Off to On, connected external devices are also turned off when the TV is turned off.
However, if the device is recording, it may not be turned off.
Scanning and Switching between Anynet+ Devices
1 Press the Anynet+ button.
Press the ENTER button to select Device List.
Anynet+ devices connected to the TV are listed.
If you cannot find a device you want, press the red button to scan for devices.
2 Press the or button to select to a particular device and press the ENTER button. It is switched to the selected device.
Only when you set Anynet+ (HDMI-CEC) to On in the Setup menu, the Device List menu appears.
Switching to the selected devices may take up to 2 minutes. You cannot cancel the operation during the switching operation.
The time required to scan for devices is determined by the number of connected devices.
When the device scan is complete, the number of devices found is not displayed.
Although the TV automatically scans devices when it is turned on using the POWER button, devices connected when the TV is already on are not displayed in the device list. Therefore press the red button to re-scan devices if necessary.
If you have selected an external device by pressing the SOURCE button, you cannot use the Anynet+ function. Make sure to switch to an external Anynet+ device by using the Anynet+ button.
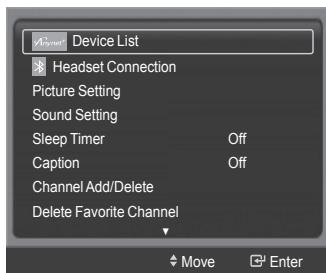
Anynet+Menu
The Anynet+ menu changes depending on the type and status of the Anynet+ devices connected to the TV.
| Anynet+ Menu | Description |
| View TV | Switches from Anynet+ to TV broadcast mode. |
| Device List | Displays the Anynet+ device list. |
| Menu on Device | Shows the menu of the connected device. Example. When a DVD Recorder is connected, the DVD Recorder's title menu appears. |
| Device Operation | Shows the play control menu of the connected device. Example. When a DVD Recorder is connected, the play control menu of the DVD Recorder appears. |
| Record | Starts a recording immediately. (This menu works only for a device supporting recording.) |
| Timer Recording | Allows reserving a recording. (This menu works only for a device supporting recording reservations.) |
| Stop Recording | Stops recording. |
| Receiver | Sound is output through the receiver (home theater). |
TV Remote Control Buttons Available in Anynet+ Mode
| Device Type | Operating Status | Available Buttons |
| Anynet+ Device | After switching to the device, when the menu of the corresponding device is displayed on the screen. | Numeric buttons▲/▼/</▶/ENTER buttonsColor buttonsEXIT button |
| After switching to the device, while playing a file | Backward search)Forward search)(Stop)II Play/Pause) | |
| Device with built-in Tuner | After switching to the device, when you are watching a TV program | CH ∧/∨ button |
| Audio Device | When Receiver is activated | VOL +/- buttonMUTE button |
| Anyview2 | When watching TV | II Play/Pause) |
The Anynet ^+ function only works when the remote control is set to TV.
The REC button works only in View TV status.
You cannot control Anynet+ devices using the buttons on the side of the TV. You can control Anynet+ devices only using the TV remote control.
The TV remote control may not work under certain conditions. In this case, re-select the Anynet+ device.
The Anynet+ functions don't operate for the products from other manufacturers.
The Anynet+ functions do not work with other manufacturers' products.
The , operations may differ depending on the device.
Recording
You can make a recording of a TV program using a recorder.
1 Press the Anynet+ button.
2 Press the or button to select to Record Immediately and press the ENTER button. Recording begins.
When there are more than one recording device
When multiple recording devices are connected, the recording devices are listed. Press the or button to select to a recording device and press the ENTER but Recording begins.
When the recording device is not displayed
Select Device List and press the red button to search devices.
Press the EXIT button to exit.
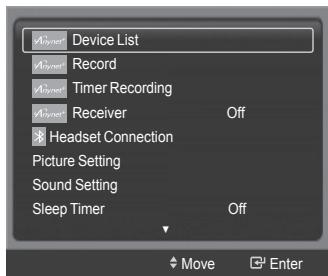
You can record instantly using the REC button of the TV remote control.
The current TV program is recorded in the Watching TV status. If you are watching video from another device, the video from the device is recorded.
Before recording, check whether the antenna jack is properly connected to the recording device. For the antenna connection to the recording device, refer to its user manual.
Listening through a Home theater
You can listen to sound through a receiver (home theater) instead of the TV's speakers.
1 Press the Anynet+ button.
2 Press the or button to select Receiver, press the or button to select to On. Now you can listen to sound through the Home theater receiver.
Press the EXIT button to exit.
When the receiver (home theater) is set to On, you can hear sound output from the TV's Optical jack. When the TV is displaying a DTV(air) signal, the TV will send out 5.1 channel sound to the Home theater receiver. When the source is a digital component such as a DVD and is connected to the TV via HDMI, only 2 channel sound will be heard from the Home Theater receiver.
If your Home Theater receiver supports audio only, it may not appear in the device list.
The receiver will work when you have properly connected the Optical IN jack of the receiver to the Optical Out jack of the TV.
When the Home Theater is set to On, a Bluetooth device connected to the TV may not work properly. Operating a connected Bluetooth device may also make it impossible to hear audio from the Home Theater Receiver.
When using the WISELINK feature, sound may not output properly through the receiver.
When listening through the receiver, there are restrictions for using the PIP and audio-related(MTS, Preferred language) menus.
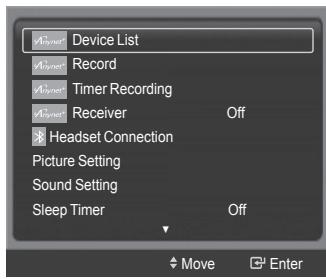
Troubleshooting for Anynet+
| Symptom | Solution |
| Anynet+ does not work. | Check if the device is an Anynet+ device. The Anynet+ system supports Anynet+ devices only. Connect only one receiver (home theater). Check if the Anynet+ device power cord is properly connected. Check the Anynet+ device's Video/Audio/HDMI cable connections. Check whether the TV remote control is in TV mode. Check whether it is Anynet+ exclusive remote control. Anynet+ doesn't work at a certain condition. (Searching channels, operating WISELINK) When connecting or removing the HDMI cable, please make sure to search devices again or restart your TV. Check if the Anynet+ Function of Anynet+ device is set on. |
| I want to start Anynet+. | Check if the Anynet+ device is properly connected to the TV and check if the Anynet+ (HDMI-CEC) is set to On in the Anynet+ Setup menu. Press the TV button on the TV remote control to switch to TV. Then press the Anynet+ button to show the Anynet+ menu and select a menu you want. |
| I want to exit Anynet+. | Select View TV in Anynet+ menu. Press the SOURCE button on the TV remote control and select a device other than Anynet+ devices. Press any of CH, CH LIST, PRE-CH, and FAV.CH to change to the TV mode. (Note that the channel button operates only when an Anynet+ device with a built-in tuner is not connected.) |
| The Connecting to Anynet+ device ...message appears on the screen. | You cannot use the remote control when you are configuring Anynet+ or switching to a view mode. Use the remote control when the Anynet+ setting or switching to view mode is complete. |
| The Anynet+ device does not play. | You cannot use the play function when Plug & Play is in progress. |
| The connected device is not displayed. | Check whether or not the device supports Anynet+ functions. Check whether or not the HDMI cable is properly connected. Check whether <Anynet+ (HDMI-CEC)> is set to <On> in the Anynet+ setup menu. Search Anynet+ devices again. You can connect an Anynet+ device using the HDMI cable only. Some HDMI cables may not support Anynet+ functions. |
| The TV program cannot be recorded. | Check whether the antenna jack on the recording device is properly connected. |
| The TV sound is not output through the receiver. | Connect the optical cable between TV and the receiver. |
Identifying Problems
If the TV seems to have a problem, first try this list of possible problems and solutions. If none of these troubleshooting tips apply, call your nearest Samsung service center.
| Problem | Possible Solution |
| Poor picture quality. | - Try another channel. - Adjust the antenna. - Check all wire connections. |
| Poor sound quality. | - Try another channel. - Adjust the antenna. |
| No picture or sound. | - Try another channel. - Press the SOURCE button. - Make sure the TV is plugged in. - Check the antenna connections. - Make sure the MUTE button is off. |
| No sound or sound is too low at maximum volume. | First, check the volume of units connected to your TV (digital broadcasting receiver, DVD, cable broadcasting receiver, VCR, etc.). Then, adjust the TV volume accordingly. |
| Picture rolls vertically. | Check all connections. |
| The TV operates erratically. | Unplug the TV for 30 seconds, then try operating it again. |
| The TV won't turn on. | Make sure the wall outlet is working. |
| Remote control malfunctions | - Replace the remote control batteries. - Clean the upper edge of the remote control(transmission window). - Check the battery terminals. - Press the TV button to put your remote control in the TV mode. - Make sure the remote has batteries. - Check that the "+" and "-" ends of the batteries are inserted correctly. |
| Digital broadcasting screen problem. | Please check the digital signal strength and input antenna. |
| The image is too light or too dark. | - Adjust the Brightness and Contrast. - Adjust the Fine tuning. |
| The visual qualities of digital channels vary. | The visual qualities of digital channels may vary depending on the original production method(analog or digital). - If the original production method is digital: High visual quality program. - If the original production method is analog: The digital program displayed on the screen is originally an analog program which has been converted to digital. The visual quality is of an SD(Standard Definition) grade. |
| Although the TV caption shows HD, the visual quality is not satisfactory. | The HD(High Definition) caption that appears when switching channels or when pressing the Information button on the remote control means the selected channel is a digital channel. If the broadcasting station converts an analog signal into digital and transmits the signal, the visual quality may not be perfect. |
The display panel used for the DLP TV is composed of many tiny pixels. These pixels may occasionally appear on the screen.
Replacing the Lamp
Why do I need to replace the lamp?
- The lamp used in a DLP TV has a limited lifespan. For the best screen quality it needs to be replaced periodically. After replacing the lamp, the screen quality will be bright and clear as new.
When do I need to replace it?
It should be replaced when the screen becomes darker, less clear or when all three LEDs on the front (TIMER, LAMP, & STAND BY/TEMP) are flashing.
Check before lamp replacement
The lamp must be the same code number and type.
The lamp type is indicated on the side of the TV. It is also indicated on the lamp case.
After checking the code number for the lamp, give the code number to the store where you purchased the TV or to a Samsung Service center.
Caution
- Replace with the correct code numbered lamp to avoid damage to the TV.
- Turn the power off and wait for 30 minutes before replacing the lamp as it will be hot.
- Do not touch the glass part of the lamp with your bare hands and do not insert any foreign object inside the cover as it may cause poor screen quality, electric shock or fire.
- Do not place the old lamp near flammable objects or within the reach of children.
- Be sure to connect this TV directly to an AC wall outlet. If the TV's AC plug is connected to a cable box or other source, it will not allow for proper cool down time.
For replacement, you will need a 5.91-Inch screwdriver and a pair of gloves.
1 Unplug the TV, then use a screwdriver to remove the screws. (The lamp is located on the side of the TV.)
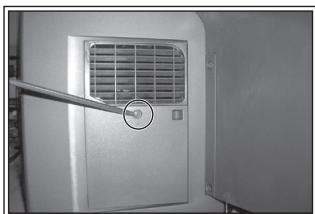
2 Remove the Lamp cover.
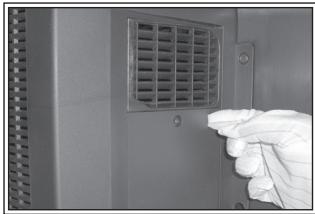
3 Push the clip and pull down the Lamp holder.
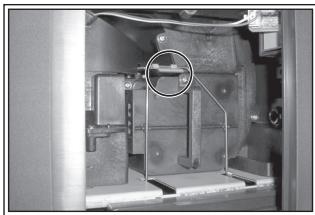
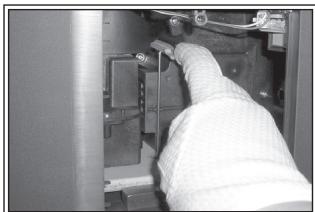
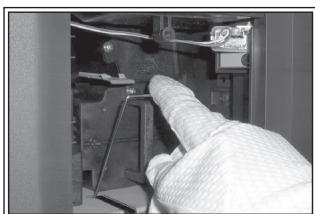
4 Separate the Lamp from the engine by holding the handle and pulling it out.
Be sure the replacement Lamp is the same type.
- After replacing the lamp, align the lamp cover with the groove and secure the screws.
- The TV will not turn on if the lamp cover is not correctly closed (as this will activate the protective circuit).
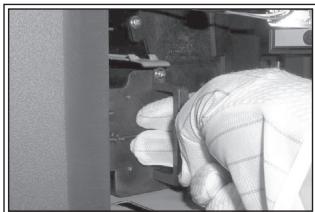
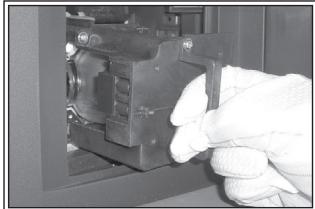
Cleaning and Maintaining Your TV
Please follow these guidelines to get the maximum performance from your TV.
Placement
- Do not put the TV near extremely hot, cold, humid or dusty places.
- Do not place the TV near appliances with electric motors that create magnetic fields, such as vacuum cleaners.
- Keep the ventilation openings clear; do not place the TV on a soft surface, such as cloth or paper.
- Place the TV in a vertical position only.
Liquids
- Do not handle liquids near or on the TV. Liquids that spill into it can cause serious damage.
Cabinet
- Never open the cabinet or touch the parts inside.
- Wipe your TV with a clean, dry cloth. Never use water, cleaning fluids, wax, or chemicals.
- Do not put heavy objects on top of the cabinet.
- This DLP TV projects the image onto a large screen by applying an optical system. If you place the TV set face down, it might cause a problem because dirt, or some other contaminant may become attached to the inside of the TV set.
Temperature
If your TV is suddenly moved from a cold to a warm place, unplug the power cord, and allow at least two hours for moisture that may have formed inside the unit to dry completely.
Using Your TV in Another Country
If you plan to take your TV with you to a foreign country, please be aware of the different television systems that are in use around the world. A TV designed for one system may not work properly with another system due to differences in the TV channel frequencies.
Technical Specifications
The descriptions and characteristics in this booklet are given for information purposes only and are subject to modification without notice.
| Model Name | HL-T7288W |
| Screen Size (Diagonal) | 72 inch |
| Power Consumption | 250 W |
| PC Resolution | 1920 X 1080 @ 60Hz |
| Sound (Output) | 10W X 2 |
| Dimension (W x H x D) | 65.8 x 20.4 x 46.8 inches (1671 x 519 x 1189 mm) |
| Weight | 104.5 lbs(47.4 Kg) |
| Environmental Considerations | |
| Operating Temperature | 50 °F to 104 °F (10 °C to 40 °C) |
| Operating Humidity | 10% to 80%, non-condensing |
| Storage Temperature | -4 °F to 113 °F (-20 °C to 45 °C) |
| Storage Humidity | 5% to 95%, non-condensing |
This device is a Class B digital apparatus.
Design and specifications are subject to change without prior notice.
For the power supply, refer to the label attached to the product.
This product uses parts of the software from the Independent JPEG Group.
This product uses parts of the software owned by the Freetype Project (www.freetype.org).
This product uses some software programs which are distributed under the GPL/LGPL license. Accordingly, the following GPL and LGPL software source codes that have been used in this product can be provided after asking to vdswmanager@samsung.com.
GPL software: Linux Kernel, Busybox, Binutils
LGPL software: Glibc, libusb, libgphoto2
The GNU General Public License (GPL)
Version 2, June 1991
Copyright (C) 1989, 1991 Free Software Foundation, Inc. 59 Temple Place, Suite 330, Boston, MA 02111-1307 USA
Everyone is permitted to copy and distribute verbatim copies of this license document, but changing it is not allowed.
Preamble
The licenses for most software are designed to take away your freedom to share and change it. By contrast, the GNU General Public License is intended to guarantee your freedom to share and change free software--to make sure the software is free for all its users. This General Public License applies to most of the Free Software Foundation's software and to any other program whose authors commit to using it. (Some other Free Software Foundation software is covered by the GNU Library General Public License instead.) You can apply it to your programs, too.
When we speak of free software, we are referring to freedom, not price. Our General Public Licenses are designed to make sure that you have the freedom to distribute copies of free software (and charge for this service if you wish), that you receive source code or can get it if you want it, that you can change the software or use pieces of it in new free programs; and th at you know you can do these things.
To protect your rights, we need to make restrictions that forbid anyone to deny you these rights or to ask you to surrender the rights. These restrictions translate to certain responsibilities for you if you distribute copies of the software, or if you modify it.
For example, if you distribute copies of such a program, whether gratis or for a fee, you must give the recipients all the rights that you have. You must make sure that they, too, receive or can get the source code. And you must show them these terms so they know their rights.
We protect your rights with two steps: (1) copyright the software, and (2) offer you this license which gives you legal permission to copy, distribute and/or modify the software.
Also, for each author's protection and ours, we want to make certain that everyone understands that there is no warranty for this free software. If the software is modified by someone else and passed on, we want its recipients to know that what they have is not the original, so that any problems introduced by others will not reflect on the original authors' reputations.
Finally, any free program is threatened constantly by software patents. We wish to avoid the danger that redistributors of a free program will individually obtain patent licenses, in effect making the program proprietary. To prevent this, we have made it clear that any patent must be licensed for everyone's free use or not licensed at all.
The precise terms and conditions for copying, distribution and modification follow.
TERMS AND CONDITIONS FOR COPYING, DISTRIBUTION AND MODIFICATION
- This License applies to any program or other work which contains a notice placed by the copyright holder saying it may be distributed under the terms of this General Public License. The "Program", below, refers to any such program or work, and a "work based on the Program" means either the Program or any derivative work under copyright law: that is to say, a work containing the Program or a portion of it, either verbatim or with modifications and/or translated into another language. (Hereinafter, translation is included without limitation in the term "modification.") Each licensee is addressed as "you".
Activities other than copying, distribution and modification are not covered by this License; they are outside its scope. The act of running the Program is not restricted, and the output from the Program is covered only if its contents constitute a work based on the Program (independent of having been made by running the Program). Whether that is true depends on what the Program does.
- You may copy and distribute verbatim copies of the Program's source code as you receive it, in any medium, provided that you conspicuously and appropriately publish on each copy an appropriate copyright notice and disclaimer of warranty; keep intact all the notices that refer to this License and to the absence of any warranty; and give any other recipients of the Program a copy of this License along with the Program.
You may charge a fee for the physical act of transferring a copy, and you may at your option offer warranty protection in exchange for a fee.
- You may modify your copy or copies of the Program or any portion of it, thus forming a work based on the Program, and copy and distribute such modifications or work under the terms of Section 1 above, provided that you also meet all of these conditions:
a) You must cause the modified files to carry prominent notices stating that you changed the files and the date of any change.
b) You must cause any work that you distribute or publish, that in whole or in part contains or is derived from the Program or any part thereof, to be licensed as a whole at no charge to all third parties under the terms of this License.
c) If the modified program normally reads commands interactively when run, you must cause it, when started running for such interactive use in the most ordinary way, to print or display an announcement including an appropriate copyright notice and a notice that there is no warranty (or else, saying that you provide a warranty) and that users may redistribute the program under these conditions, and telling the user how to view a copy of this License. (Exception: if the Program itself is interactive but does not normally print such an announcement, your work based on the Program is not required to print an announcement.)
These requirements apply to the modified work as a whole. If identifiable sections of that work are not derived from the Program, and can be reasonably considered independent and separate works in themselves, then this License, and its terms, do not apply to those sections when you distribute them as separate works. But when you distribute the same sections as part of a whole which is a work based on the Program, the distribution of the whole must be on the terms of this License, whose permissions for other licensees extend to the entire whole, and thus to each and every part regardless of who wrote it.
Thus, it is not the intent of this section to claim rights or contest your rights to work written entirely by you; rather, the intent is to exercise the right to control the distribution of derivative or collective works based on the Program.
In addition, mere aggregation of another work not based on the Program with the Program (or with a work based on the Program) on a volume of a storage or distribution medium does not bring the other work under the scope of this License.
- You may copy and distribute the Program (or a work based on it, under Section 2) in object code or executable form under the terms of Sections 1 and 2 above provided that you also do one of the following:
a) Accompany it with the complete corresponding machine-readable source code, which must be distributed under the terms of Sections 1 and 2 above on a medium customarily used for software interchange; or,
b) Accompany it with a written offer, valid for at least three years, to give any third party, for a charge no more than your cost of physically performing source distribution, a complete machine-readable copy of the corresponding source code, to be distributed under the terms of Sections 1 and 2 above on a medium customarily used for software interchange; or,
c) Accompany it with the information you received as to the offer to distribute corresponding source code. (This alternative is allowed only for noncommercial distribution and only if you received the program in object code or executable form with such an offer, in accord with Subsection b above.)
The source code for a work means the preferred form of the work for making modifications to it. For an executable work, complete source code means all the source code for all modules it contains, plus any associated interface definition files, plus the scripts used to control compilation and installation of the executable. However, as a special exception, the source code distributed need not include anything that is normally distributed (in either source or binary form) with the major components (compiler, kernel, and so on) of the operating system on which the executable runs, unless that component itself accompanies the executable.
If distribution of executable or object code is made by offering access to copy from a designated place, then offering equivalent access to copy the source code from the same place counts as distribution of the source code, even though third parties are not compelled to copy the source along with the object code.
-
You may not copy, modify, sublicense, or distribute the Program except as expressly provided under this License. Any attempt otherwise to copy, modify, sublicense or distribute the Program is void, and will automatically terminate your rights under this License. However, parties who have received copies, or rights, from you under this License will not have their licenses terminated so long as such parties remain in full compliance.
-
You are not required to accept this License, since you have not signed it. However, nothing else grants you permission to modify or distribute the Program or its derivative works. These actions are prohibited by law if you do not accept this License. Therefore, by modifying or distributing the Program (or any work based on the Program), you indicate your acceptance of this License to do so, and all its terms and conditions for copying, distributing or modifying the Program or works based on it.
-
Each time you redistribute the Program (or any work based on the Program), the recipient automatically receives a license from the original licensor to copy, distribute or modify the Program subject to these terms and conditions. You may not impose any further restrictions on the recipients' exercise of the rights granted herein. You are not responsible for enforcing compliance by third parties to this License.
-
If, as a consequence of a court judgment or allegation of patent infringement or for any other reason (not limited to patent issues), conditions are imposed on you (whether by court order, agreement or otherwise) that contradict the conditions of this License, they do not excuse you from the conditions of this License. If you cannot distribute so as to satisfy simultaneously your obligations under this License and any other pertinent obligations, then as a consequence you may not distribute the Program at all. For example, if a patent license would not permit royalty-free redistribution of the Program by all those who receive copies directly or indirectly through you, then the only way you could satisfy both it and this License would be to refrain entirely from distribution of the Program.
If any portion of this section is held invalid or unenforceable under any particular circumstance, the balance of the section is intended to apply and the section as a whole is intended to apply in other circumstances.
It is not the purpose of this section to induce you to infringe any patents or other property right claims or to contest validity of any such claims; this section has the sole purpose of protecting the integrity of the free software distribution system, which is implemented by public license practices. Many people have made generous contributions to the wide range of software distributed through that system in reliance on consistent application of that system; it is up to the author/donor to decide if he or she is willing to distribute software through any other system and a licensee cannot impose that choice.
This section is intended to make thoroughly clear what is believed to be a consequence of the rest of this License.
-
If the distribution and/or use of the Program is restricted in certain countries either by patents or by copyrighted interfaces, the original copyright holder who places the Program under this License may add an explicit geographical distribution limitation excluding those countries, so that distribution is permitted only in or among countries not thus excluded. In such case, this License incorporates the limitation as if written in the body of this License.
-
The Free Software Foundation may publish revised and/or new versions of the General Public License from time to time. Such new versions will be similar in spirit to the present version, but may differ in detail to address new problems or concerns.
Each version is given a distinguishing version number. If the Program specifies a version number of this License which applies to it and "any later version", you have the option of following the terms and conditions either of that version or of any later version published by the Free Software Foundation. If the Program does not specify a version number of this License, you may choose any version ever published by the Free Software Foundation.
- If you wish to incorporate parts of the Program into other free programs whose distribution conditions are different, write to the author to ask for permission. For software which is copyrighted by the Free Software Foundation, write to the Free Software Foundation; we sometimes make exceptions for this. Our decision will be guided by the two goals of preserving the free status of all derivatives of our free software and of promoting the sharing and reuse of software generally.
NO WARRANTY
-
BECAUSE THE PROGRAM IS LICENSED FREE OF CHARGE, THERE IS NO WARRANTY FOR THE PROGRAM, TO THE EXTENT PERMITTED BY APPLICABLE LAW. EXCEPT WHEN OTHERWISE STATED IN WRITING THE COPYRIGHT HOLDERS AND/OR OTHER PARTIES PROVIDE THE PROGRAM "AS IS" WITHOUT WARRANTY OF ANY KIND, Either EXPRESSED OR IMPLIED, INCLUDING, BUT NOT LIMITED TO, THE IMPLIED WARRANTY OF MERCHANTABILITY AND FITNESS FOR A PARTICULAR PURPOSE. THE ENTIRE RISK AS TO THE QUALITY AND PERFORMANCE OF THE PROGRAM IS WITH YOU. SHOULD THE PROGRAM PROVE DEFECTIVE, YOU ASSUME THE COST OF ALL NECESSARY SERVICING, REPAIR OR CORRECTION.
-
IN NO EVENT UNLESS REQUIRED BY APPLICABLE LAW OR AGREED TO IN WRITING WILL ANY COPYRIGHT HOLDER, OR ANY OTHER PARTY WHO MAY MODIFY AND/OR REDISTRIBUTE THE PROGRAM AS PERMITTED ABOVE, BE LIABLE TO YOU FOR DAMAGES, INCLUDING ANY GENERAL, SPECIAL, INCIDENTAL OR CONSEQUENTIAL DAMAGES ARISING OUT OF THE USE OR INABILITY TO USE THE PROGRAM (INCLUDING BUT NOT LIMITED TO LOSS OF DATA OR DATA BEING RENDERED INACCURATE OR LOSSES SUSTAINED BY YOU OR THIRD PARTIES OR A FAILURE OF THE PROGRAM TO OPERATE WITH ANY OTHER PROGRAMS), EVEN IF SUCH HOLDER OR OTHER PARTY HAS BEEN ADVISED OF THE POSSIBILITY OF SUCH DAMAGES.
END OF TERMS AND CONDITIONS
How to Apply These Terms to Your New Programs
If you develop a new program, and you want it to be of the greatest possible use to the public, the best way to achieve this is to make it free software which everyone can redistribute and change under these terms.
To do so, attach the following notices to the program. It is safest to attach them to the start of each source file to most effectively convey the exclusion of warranty; and each file should have at least the "copyright" line and a pointer to where the full notice is found.
One line to give the program's name and a brief idea of what it does. Copyright (C)
This program is free software; you can redistribute it and/or modify it under the terms of the GNU General Public License as published by the Free Software Foundation; either version 2 of the License, or (at your option) any later version.
This program is distributed in the hope that it will be useful, but WITHOUT ANY WARRANTY; without even the implied warranty of MERCHANTABILITY or FITNESS FOR A PARTICULAR PURPOSE. See the GNU General Public License for more details.
You should have received a copy of the GNU General Public License along with this program; if not, write to the Free Software Foundation, Inc., 59 Temple Place, Suite 330, Boston, MA 02111-1307 USA
Also add information on how to contact you by electronic and paper mail.
If the program is interactive, make it output a short notice like this when it starts in an interactive mode:
Gnomovision version 69, Copyright (C) year name of author Gnomovision comes with ABSOLUTELY NO WARRANTY; for details type 'show w'. This is free software, and you are welcome to redistribute it under certain conditions; type 'show c' for details.
The hypothetical commands show w' andshow c' should show the appropriate parts of the General Public License. Of course, the commands you use may be called something other than show w' andshow c'; they could even be mouse-clicks or menu items--whatever suits your program.
You should also get your employer (if you work as a programmer) or your school, if any, to sign a "copyright disclaimer" for the program, if necessary. Here is a sample; alter the names:
Yoyodyne, Inc., hereby disclaims all copyright interest in the program 'Gnomovision' (which makes passes at compilers) written by James Hacker.
signature of Ty Coon, 1 April 1989 Ty Coon, President of Vice
This General Public License does not permit incorporating your program into proprietary programs. If your program is a subroutine library, you may consider it more useful to permit linking proprietary applications with the library. If this is what you want to do, use the GNU Library General Public License instead of this License.
GNU Lesser General Public License (LGPL)
Version 2.1, February 1999
Copyright (C) 1991, 1999 Free Software Foundation, Inc. 59 Temple Place, Suite 330, Boston, MA 02111-1307 USA Everyone is permitted to copy and distribute verbatim copies of this license document, but changing it is not allowed.
[This is the first released version of the Lesser GPL. It also counts as the successor of the GNU Library Public License, version 2, hence the version number 2.1.]
Preamble
The licenses for most software are designed to take away your freedom to share and change it. By contrast, the GNU General Public Licenses are intended to guarantee your freedom to share and change free software--to make sure the software is free for all its users.
This license, the Lesser General Public License, applies to some specially designated software packages—typically libraries—of the Free Software Foundation and other authors who decide to use it. You can use it too, but we suggest you first think carefully about whether this license or the ordinary General Public License is the better strategy to use in any particular case, based on the explanations below.
When we speak of free software, we are referring to freedom of use, not price. Our General Public Licenses are designed to make sure that you have the freedom to distribute copies of free software (and charge for this service if you wish); that you receive source code or can get it if you want it; that you can change the software and use pieces of it in new free programs; and that you are informed that you can do these things.
To protect your rights, we need to make restrictions that forbid distributors to deny you these rights or to ask you to surrender these rights. These restrictions translate to certain responsibilities for you if you distribute copies of the library or if you modify it.
For example, if you distribute copies of the library, whether gratis or for a fee, you must give the recipients all the rights that we gave you. You must make sure that they, too, receive or can get the source code. If you link other code with the library, you must provide complete object files to the recipients, so that they can relink them with the library after making changes to the library and recompiling it. And you must show them these terms so they know their rights.
We protect your rights with a two-step method: (1) we copyright the library, and (2) we offer you this license, which gives you legal permission to copy, distribute and/or modify the library.
To protect each distributor, we want to make it very clear that there is no warranty for the free library. Also, if the library is modified by someone else and passed on, the recipients should know that what they have is not the original version, so that the original author's reputation will not be affected by problems that might be introduced by others.
Finally, software patents pose a constant threat to the existence of any free program. We wish to make sure that a company cannot effectively restrict the users of a free program by obtaining a restrictive license from a patent holder. Therefore, we insist that any patent license obtained for a version of the library must be consistent with the full freedom of use specified in this license.
Most GNU software, including some libraries, is covered by the ordinary GNU General Public License. This license, the GNU Lesser General Public License, applies to certain designated libraries, and is quite different from the ordinary General Public License. We use this license for certain libraries in order to permit linking those libraries into non-free programs.
When a program is linked with a library, whether statically or using a shared library, the combination of the two is legally speaking a combined work, a derivative of the original library. The ordinary General Public License therefore permits such linking only if the entire combination fits its criteria of freedom. The Lesser General Public License permits more lax criteria for linking other code with the library.
We call this license the "Lesser" General Public License because it does Less to protect the user's freedom than the ordinary General Public License. It also provides other free software developers Less of an advantage over competing non-free programs. These disadvantages are the reason we use the ordinary General Public License for many libraries. However, the Lesser license provides advantages in certain special circumstances.
For example, on rare occasions, there may be a special need to encourage the widest possible use of a certain library, so that it becomes a de-facto standard. To achieve this, non-free programs must be allowed to use the library. A more frequent case is that a free library does the same job as widely used non-free libraries. In this case, there is little to gain by limiting the free library to free software only, so we use the Lesser General Public License.
In other cases, permission to use a particular library in non-free programs enables a greater number of people to use a large body of free software. For example, permission to use the GNU C Library in non-free programs enables many more people to use the whole GNU operating system, as well as its variant, the GNU/Linux operating system.
Although the Lesser General Public License is Less protective of the users' freedom, it does ensure that the user of a program that is linked with the Library has the freedom and the wherewithal to run that program using a modified version of the Library.
The precise terms and conditions for copying, distribution and modification follow. Pay close attention to the difference between a "work based on the library" and a "work that uses the library". The former contains code derived from the library, whereas the latter must be combined with the library in order to run.
TERMS AND CONDITIONS FOR COPYING, DISTRIBUTION AND MODIFICATION
- This License Agreement applies to any software library or other program which contains a notice placed by the copyright holder or other authorized party saying it may be distributed under the terms of this Lesser General Public License (also called "this License"). Each licensee is addressed as "you".
A "library" means a collection of software functions and/or data prepared so as to be conveniently linked with application programs (which use some of those functions and data) to form executables.
The "Library", below, refers to any such software library or work which has been distributed under these terms. A "work based on the Library" means either the Library or any derivative work under copyright law: that is to say, a work containing the Library or a portion of it, either verbatim or with modifications and/ or translated straightforwardly into another language. (Hereinafter, translation is included without limitation in the term "modification".)
"Source code" for a work means the preferred form of the work for making modifications to it. For a library, complete source code means all the source code for all modules it contains, plus any associated interface definition files, plus the scripts used to control compilation and installation of the library.
Activities other than copying, distribution and modification are not covered by this License; they are outside its scope. The act of running a program using the Library is not restricted, and output from such a program is covered only if its contents constitute a work based on the Library (independent of the use of the Library in a tool for writing it). Whether that is true depends on what the Library does and what the program that uses the Library does.
- You may copy and distribute verbatim copies of the Library's complete source code as you receive it, in any medium, provided that you conspicuously and appropriately publish on each copy an appropriate copyright notice and disclaimer of warranty; keep intact all the notices that refer to this License and to the absence of any warranty; and distribute a copy of this License along with the Library.
You may charge a fee for the physical act of transferring a copy, and you may at your option offer warranty protection in exchange for a fee.
- You may modify your copy or copies of the Library or any portion of it, thus forming a work based on the Library, and copy and distribute such modifications or work under the terms of Section 1 above, provided that you also meet all of these conditions:
a) The modified work must itself be a software library.
b) You must cause the files modified to carry prominent notices stating that you changed the files and the date of any change.
c) You must cause the whole of the work to be licensed at no charge to all third parties under the terms of this License.
d) If a facility in the modified Library refers to a function or a table of data to be supplied by an application program that uses the facility, other than as an argument passed when the facility is invoked, then you must make a good faith effort to ensure that, in the event an application does not supply such function or table, the facility still operates, and performs whatever part of its purpose remains meaningful.
(For example, a function in a library to compute square roots has a purpose that is entirely well-defined independent of the application. Therefore, Subsection 2d requires that any application-supplied function or table used by this function must be optional: if the application does not supply it, the square root function must still compute square roots.)
These requirements apply to the modified work as a whole. If identifiable sections of that work are not derived from the Library, and can be reasonably considered independent and separate works in themselves, then this License, and its terms, do not apply to those sections when you distribute them as separate works. But when you distribute the same sections as part of a whole which is a work based on the Library, the distribution of the whole must be on the terms of this License, whose permissions for other licensees extend to the entire whole, and thus to each and every part regardless of who wrote it.
Thus, it is not the intent of this section to claim rights or contest your rights to work written entirely by you; rather, the intent is to exercise the right to control the distribution of derivative or collective works based on the Library.
In addition, mere aggregation of another work not based on the Library with the Library (or with a work based on the Library) on a volume of a storage or distribution medium does not bring the other work under the scope of this License.
- You may opt to apply the terms of the ordinary GNU General Public License instead of this License to a given copy of the Library. To do this, you must alter all the notices that refer to this License, so that they refer to the ordinary GNU General Public License, version 2, instead of to this License. (If a newer version than version 2 of the ordinary GNU General Public License has appeared, then you can specify that version instead if you wish.) Do not make any other change in these notices.
Once this change is made in a given copy, it is irreversible for that copy, so the ordinary GNU General Public License applies to all subsequent copies and derivative works made from that copy.
This option is useful when you wish to copy part of the code of the Library into a program that is not a library.
- You may copy and distribute the Library (or a portion or derivative of it, under Section 2) in object code or executable form under the terms of Sections 1 and 2 above provided that you accompany it with the complete corresponding machine-readable source code, which must be distributed under the terms of Sections 1 and 2 above on a medium customarily used for software interchange.
If distribution of object code is made by offering access to copy from a designated place, then offering equivalent access to copy the source code from the same place satisfies the requirement to distribute the source code, even though third parties are not compelled to copy the source along with the object code.
- A program that contains no derivative of any portion of the Library, but is designed to work with the Library by being compiled or linked with it, is called a "work that uses the Library". Such a work, in isolation, is not a derivative work of the Library, and therefore falls outside the scope of this License.
However, linking a "work that uses the Library" with the Library creates an executable that is a derivative of the Library (because it contains portions of the Library), rather than a "work that uses the library". The executable is therefore covered by this License. Section 6 states terms for distribution of such executables.
When a "work that uses the Library" uses material from a header file that is part of the Library, the object code for the work may be a derivative work of the Library even though the source code is not. Whether this is true is especially significant if the work can be linked without the Library, or if the work is itself a library. The threshold for this to be true is not precisely defined by law.
If such an object file uses only numerical parameters, data structure layouts and accessors, and small macros and small inline functions (ten lines or less in length), then the use of the object file is unrestricted, regardless of whether it is legally a derivative work. (Executables containing this object code plus portions of the Library will still fall under Section 6.)
Otherwise, if the work is a derivative of the Library, you may distribute the object code for the work under the terms of Section 6. Any executables containing that work also fall under Section 6, whether or not they are linked directly with the Library itself.
- As an exception to the Sections above, you may also combine or link a "work that uses the Library" with the Library to produce a work containing portions of the Library, and distribute that work under terms of your choice, provided that the terms permit modification of the work for the customer's own use and reverse engineering for debugging such modifications.
You must give prominent notice with each copy of the work that the Library is used in it and that the Library and its use are covered by this License. You must supply a copy of this License. If the work during execution displays copyright notices, you must include the copyright notice for the Library among them, as well as a reference directing the user to the copy of this License. Also, you must do one of these things:
a) Accompany the work with the complete corresponding machine-readable source code for the Library including whatever changes were used in the work (which must be distributed under Sections 1 and 2 above); and, if the work is an executable linked with the Library, with the complete machine-readable "work that uses the Library", as object code and/or source code, so that the user can modify the Library and then relink to produce a modified executable containing the modified Library. (It is understood that the user who changes the contents of definitions files in the Library will not necessarily be able to recompile the application to use the modified definitions.)
b) Use a suitable shared library mechanism for linking with the Library. A suitable mechanism is one that (1) uses at run time a copy of the library already present on the user's computer system, rather than copying library functions into the executable, and (2) will operate properly with a modified version of the library, if the user installs one, as long as the modified version is interface-compatible with the version that the work was made with.
c) Accompany the work with a written offer, valid for at least three years, to give the same user the materials specified in Subsection 6a, above, for a charge no more than the cost of performing this distribution.
d) If distribution of the work is made by offering access to copy from a designated place, offer equivalent access to copy the above specified materials from the same place.
e) Verify that the user has already received a copy of these materials or that you have already sent this user a copy.
For an executable, the required form of the "work that uses the Library" must include any data and utility programs needed for reproducing the executable from it. However, as a special exception, the materials to be distributed need not include anything that is normally distributed (in either source or binary form) with the major components (compiler, kernel, and so on) of the operating system on which the executable runs, unless that component itself accompanies the executable.
It may happen that this requirement contradicts the license restrictions of other proprietary libraries that do not normally accompany the operating system. Such a contradiction means you cannot use both them and the Library together in an executable that you distribute.
- You may place library facilities that are a work based on the Library side-by-side in a single library together with other library facilities not covered by this License, and distribute such a combined library, provided that the separate distribution of the work based on the Library and of the other library facilities is otherwise permitted, and provided that you do these two things:
a) Accompany the combined library with a copy of the same work based on the Library, uncombined with any other library facilities. This must be distributed under the terms of the Sections above.
b) Give prominent notice with the combined library of the fact that part of it is a work based on the Library, and explaining where to find the accompanying uncombined form of the same work.
-
You may not copy, modify, sublicense, link with, or distribute the Library except as expressly provided under this License. Any attempt otherwise to copy, modify, sublicense, link with, or distribute the Library is void, and will automatically terminate your rights under this License. However, parties who have received copies, or rights, from you under this License will not have their licenses terminated so long as such parties remain in full compliance.
-
You are not required to accept this License, since you have not signed it. However, nothing else grants you permission to modify or distribute the Library or its derivative works. These actions are prohibited by law if you do not accept this License. Therefore, by modifying or distributing the Library (or any work based on the Library), you indicate your acceptance of this License to do so, and all its terms and conditions for copying, distributing or modifying the Library or works based on it.
-
Each time you redistribute the Library (or any work based on the Library), the recipient automatically receives a license from the original licensor to copy, distribute, link with or modify the Library subject to these terms and conditions. You may not impose any further restrictions on the recipients' exercise of the rights granted herein. You are not responsible for enforcing compliance by third parties with this License.
-
If, as a consequence of a court judgment or allegation of patent infringement or for any other reason (not limited to patent issues), conditions are imposed on you (whether by court order, agreement or otherwise) that contradict the conditions of this License, they do not excuse you from the conditions of this License. If you cannot distribute so as to satisfy simultaneously your obligations under this License and any other pertinent obligations, then as a consequence you may not distribute the Library at all. For example, if a patent license would not permit royalty-free redistribution of the Library by all those who receive copies directly or indirectly through you, then the only way you could satisfy both it and this License would be to refrain entirely from distribution of the Library.
If any portion of this section is held invalid or unenforceable under any particular circumstance, the balance of the section is intended to apply, and the section as a whole is intended to apply in other circumstances.
It is not the purpose of this section to induce you to infringe any patents or other property right claims or to contest validity of any such claims; this section has the sole purpose of protecting the integrity of the free software distribution system which is implemented by public license practices. Many people have made generous contributions to the wide range of software distributed through that system in reliance on consistent application of that system; it is up to the author/donor to decide if he or she is willing to distribute software through any other system and a licensee cannot impose that choice.
This section is intended to make thoroughly clear what is believed to be a consequence of the rest of this License.
- If the distribution and/or use of the Library is restricted in certain countries either by patents or by copyrighted interfaces, the original copyright holder who places the Library under this License may add an explicit geographical distribution limitation excluding those countries, so that distribution is permitted only in or among countries not thus excluded. In such case, this License incorporates the limitation as if written in the body of this License.
- The Free Software Foundation may publish revised and/or new versions of the Lesser General Public License from time to time. Such new versions will be similar in spirit to the present version, but may differ in detail to address new problems or concerns.
Each version is given a distinguishing version number. If the Library specifies a version number of this License which applies to it and "any later version", you have the option of following the terms and conditions either of that version or of any later version published by the Free Software Foundation. If the Library does not specify a license version number, you may choose any version ever published by the Free Software Foundation.
- If you wish to incorporate parts of the Library into other free programs whose distribution conditions are incompatible with these, write to the author to ask for permission. For software which is copyrighted by the Free Software Foundation, write to the Free Software Foundation; we sometimes make exceptions for this. Our decision will be guided by the two goals of preserving the free status of all derivatives of our free software and of promoting the sharing and reuse of software generally.
NO WARRANTY
- BECAUSE THE LIBRARY IS LICENSED FREE OF CHARGE, THERE IS NO WARRANTY FOR THE LIBRARY, TO THE EXTENT PERMITTED BY APPLICABLE LAW. EXCEPT WHEN OTHERWISE STATED IN WRITING THE COPYRIGHT HOLDERS AND/OR OTHER PARTIES PROVIDE THE LIBRARY "AS IS" WITHOUT WARRANTY OF ANY KIND, EITHER EXPRESSED OR IMPLIED, INCLUDING, BUT NOT LIMITED TO, THE IMPLIED WARRANTY OF MERCHANTIBILITY AND FITNESS FOR A PARTICULAR PURPOSE. THE ENTIRE RISK AS TO THE QUALITY AND PERFORMANCE OF THE LIBRARY IS WITH YOU. SHOULD THE LIBRARY PROVE DEFECTIVE, YOU ASSUME THE COST OF ALL NECESSARY SERVICING, REPAIR OR CORRECTION.
- IN NO EVENT UNLESS REQUIRED BY APPLICABLE LAW OR AGREED TO IN WRITING WILL ANY COPYRIGHT HOLDER, OR ANY OTHER PARTY WHO MAY MODIFY AND/OR REDISTRIBUTE THE LIBRARY AS PERMITTED ABOVE, BE LIABLE TO YOU FOR DAMAGES, INCLUDING ANY GENERAL, SPECIAL, INCIDENTAL OR CONSEQUENTIAL DAMAGES ARISING OUT OF THE USE OR INABILITY TO USE THE LIBRARY (INCLUDING BUT NOT LIMITED TO LOSS OF DATA OR DATA BEING RENDERED INACCURATE OR LOSSES SUSTAINED BY YOU OR THIRD PARTIES OR A FAILURE OF THE LIBRARY TO OPERATE WITH ANY OTHER SOFTWARE), EVEN IF SUCH HOLDER OR OTHER PARTY HAS BEEN ADVISED OF THE POSSIBILITY OF SUCH DAMAGES.
END OF TERMS AND CONDITIONS
How to Apply These Terms to Your New Libraries
If you develop a new library, and you want it to be of the greatest possible use to the public, we recommend making it free software that everyone can distribute and change. You can do so by permitting redistribution under these terms (or, alternatively, under the terms of the ordinary General Public License).
To apply these terms, attach the following notices to the library. It is safest to attach them to the start of each source file to most effectively convey the exclusion of warranty; and each file should have at least the "copyright" line and a pointer to where the full notice is found.
This library is free software; you can redistribute it and/or modify it under the terms of the GNU Lesser General Public License as published by the Free Software Foundation; either version 2.1 of the License, or (at your option) any later version.
This library is distributed in the hope that it will be useful, but WITHOUT ANY WARRANTY; without even the implied warranty of MERCHANTABILITY or FITNESS FOR A PARTICULAR PURPOSE. See the GNU Lesser General Public License for more details.
You should have received a copy of the GNU Lesser General Public License along with this library; if not, write to the Free Software Foundation, Inc., 59 Temple Place, Suite 330, Boston, MA 02111-1307 USA
Also add information on how to contact you by electronic and paper mail.
You should also get your employer (if you work as a programmer) or your school, if any, to sign a "copyright disclaimer" for the library, if necessary. Here is a sample; alter the names:
Yoyodyne, Inc., hereby disclaims all copyright interest in the library 'Frob' (a library for tweaking knobs) written by James Random Hacker.
signature of Ty Coon, 1 April 1990
Ty Coon, President of Vice
That's all there is to it!
Téléviseur à DLP
TV, DVD, STB, CABLE, VCR
Press the WISELINK button on the remote control to turn on the WISELINK mode.
Servicios de television digital
When installing the product, make sure to keep it away from the wall (more than 10cm / 4inches) for ventilation purposes. Poor ventilation may cause an increase in the internal temperature of the product, resulting in a shortened component life and degraded performance.
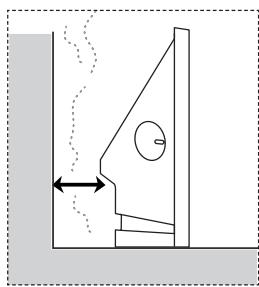
Characteristicas
5 DIGITAL AUDIO OUT (OPTICAL)
6 DVI IN (AUDIO-L/R)
TV, DVD, STB, CABLE, VCR
Lareshedelprogramaseha completed.
If you have any questions or comments relating to Samsung products, please contact the SAMSUNG customer care center.
- Owner's Instructions
- HL-T7288W
- A Guide to Digital TV
- What is Digital Television?
- Digital Television Services
- Digital Picture Quality
- - Dolby Surround Sound
- U.S.A Only
- Other countries
- FCC Statements
- Q&A
- Is the antenna I use for existing TV reception good enough for DTV?
- How difficult is it to receive DTV signals indoors?
- How can I connect an antenna in my townhouse, co-operative apartment, condominium, or apartment?
- Can I connect my DTV set-top receiver to my cable TV service?
- General Information
- Connections
- Operation
- Picture Control
- Sound Control
- Channel Control
- Function Description
- PC Display
- Bluetooth
- Wiselink
- About Anynet+
- Appendix
- Viewing Position
- List of Features
- Sold Separately
- Viewing the Control Panel
- Buttons on the Lower-Right Part of the Panel
- SOURCE
- MENU
- +VOL-
- CH
- G^ (ENTER)
- POWER
- Remote Control Sensor
- Indicator Lights
- Indicator Light Key
- Viewing the Connection Panel
- Rear Panel Jacks
- Side Panel Jacks
- Remote Control
- Installing Batteries in the Remote Control
- Connecting VHF and UHF Antennas
- Antennas with 300 Ω Flat Twin Leads
- Antennas with 75 Round Leads
- Separate VHF and UHF Antennas
- Connecting Cable TV
- Cable without a Cable Box
- Connecting to a Cable Box that Descrambles All Channels
- Connecting to a Cable Box that Descrambles Some Channels
- Video Connection
- S-Video Connection
- Connecting a Camcorder
- Connecting a DVD Player/Cable/Satellite Box (Set-Top Box)
- Connecting a DVD Player/Cable/Satellite Box (Set-Top Box) via HDMI
- What is HDMI?
- Connecting a DVD Player/Cable/Satellite Box (Set-Top Box) via DVI
- Connecting a Digital Audio System
- What is OPTICAL?
- Connecting an Amplifier/DVD Home Theater
- Connecting a PC
- Using a D-Sub Cable
- Using an HDMI/DVI Cable
- Turning the TV On and Off
- Plug & Play Feature
- Setting the Clock Automatically
- Changing Channels
- Using the Channel Buttons
- Using the Number Buttons
- Using the - Button
- Using the PRE-CH Button to select the Previous Channel
- Adjusting the Volume
- Using the Mute Button
- Viewing the Display
- Viewing the Menus
- Using the TOOLS Button
- Memorizing the Channels
- Selecting the Video Signal-source
- Storing Channels in Memory (Automatic Method)
- Setting Up Your Remote Control
- Setting Up the Remote to Operate Your VCR
- Setting Up the Remote to Operate Your Cable Box
- Setting Up the Remote to Operate Your DVD
- Setting Up the Remote to Operate Your Set Top Box
- To Select the Source
- To Edit the Input Source Name
- Using Automatic Picture Settings
- Making Detailed Settings on the Picture
- Changing the Screen Size
- Digital Noise Reduction
- Setting the Active Color
- DNle (Digital Natural Image engine)
- Setting the Color Gamut
- Adjusting the Screen Position
- Resetting the Picture Settings
- Viewing Picture-in-Picture
- Activating Picture-in-Picture
- Changing the Size of the PIP Window
- Changing the Position of the PIP Window
- Selecting a Signal Source (Air or Cable) for PIP
- Changing the PIP Channel
- Freezing the Current Picture
- Using the Automatic Sound Settings
- Customizing the Sound
- Resetting the Equalizer Settings to the Factory Defaults
- Setting the TruSurround XT
- TRADEMARK & LABEL LICENSE NOTICE
- Choosing a Multi-Channel Sound (MTS) Track - Digital
- Preferred Language
- Choosing a Multi-Channel Sound (MTS) Track - Analog
- Multi-Track Sound
- Automatic Volume Control
- Selecting the Internal Mute
- Resetting the Sound Settings
- Clearing Scrambled Channels - Digital
- Managing Channels
- Viewing All Channels
- Using the Color buttons on the Remote with the Channel List
- Adding and Erasing Channels
- Easy Setting
- Setting Your Favorite Channels
- Reserving a Program (Time Viewing)
- Digital Program Guide and Viewing Reservation
- Confirming a Viewing Reservation
- Modifying a viewing reservation
- Canceling a reservation
- Programed Menu
- Labeling Channels - Analog
- Fine Tuning Analog Channels
- Checking the Digital-Signal Strength
- Selecting a Menu Language
- Setting the Time
- Option 2: Setting the Clock Manually
- Setting the On/Off Timer
- > Auto Power Off
- Setting the Sleep Timer
- Viewing Closed Captions (On-Screen Text Messages) - Digital
- Viewing Closed Captions (On-Screen Text Messages) - Analog
- Using the Game Mode
- Using the 3D/Dual-View Function
- Using the V-Chip
- How to Enable/Disable the V-Chip
- Setting Up Your Personal ID Number (PIN)
- How to Set up Restrictions Using "TV Parental Guidelines"
- How to Set up Restrictions Using "Canadian English" (for Canada Models)
- How to Set up Restrictions Using "Canadian French" (for Canada Models)
- Using the V-Chip for Digital Channels
- Menu Transparency Level
- Setting the HDMI Black Level
- Setting the Film Mode - Analog
- Setting the Light Effect
- Setting the Blue Screen Mode
- Adjusting the Melody Sound
- Upgrading the Software
- Setting the Function Help
- Using Your TV as a Computer (PC) Display
- Display Modes
- Setting up the TV with your PC
- How to Auto Adjust
- Adjusting the Screen Quality
- Changing the Screen Position
- Initializing the Image Settings
- Changing the Picture Size (PC Mode)
- Setting the Home Theater PC
- What is Bluetooth?
- Instructions for use
- Bluetooth Communication and Setting Up PIN
- Setting a PIN
- Connecting a Bluetooth stereo headset (Sold separately)
- Capturing and Printing the Screen
- Canceling Print
- Using the WISELINK Function
- Removing a USB Device
- Using the WISELINK Mode
- Using the Photo (JPEG) List
- Using the Options Menu
- Zoom:
- Rotate:
- Slide Show Setting:
- Background Music:
- Background Music Setting:
- Delete:
- Picture Setting:
- Sound Setting:
- Information:
- Viewing a Slide Show
- Setting a Slide Show
- Slide Show Speed:
- Repeat Music:
- Screen Saver:
- Zooming-In
- Zoom function information icon (Displayed at the top left of the screen).
- Rotating
- Background Music On/Off
- Background Music Setting
- Deleting the Photo files
- Removing read-only files
- Deleting Multiple Photos
- Using the Music (MP3) List
- Playing a Selected Music File
- Repeating Music Play
- You can play music repeatedly.
- Deleting the Music files
- You can delete music (MP3) files saved on the USB storage device.
- Deleting Multiple Music Files
- What is Anynet+?
- Connecting Anynet+ Devices
- Setting Up Anynet+
- To use the Anynet + Function, Anynet+ (HDMI-CEC) must be set to On
- Setting an Anynet+ Device to turn Off Automatically when the TV is Turned Off
- Scanning and Switching between Anynet+ Devices
- Anynet+Menu
- TV Remote Control Buttons Available in Anynet+ Mode
- Recording
- Listening through a Home theater
- Identifying Problems
- Replacing the Lamp
- Why do I need to replace the lamp?
- When do I need to replace it?
- Check before lamp replacement
- Caution
- Cleaning and Maintaining Your TV
- Placement
- Liquids
- Cabinet
- Temperature
- Using Your TV in Another Country
- Technical Specifications
- The GNU General Public License (GPL)
- Version 2, June 1991
- Preamble
- TERMS AND CONDITIONS FOR COPYING, DISTRIBUTION AND MODIFICATION
- NO WARRANTY
- How to Apply These Terms to Your New Programs
- GNU Lesser General Public License (LGPL)
- END OF TERMS AND CONDITIONS
- How to Apply These Terms to Your New Libraries
- Téléviseur à DLP
- TV, DVD, STB, CABLE, VCR
- Servicios de television digital
- Characteristicas
Brand : SAMSUNG
Model : HL-T7288W
Category : TV