
TF 5060 - Range hood CATA - Free user manual and instructions
Find the device manual for free TF 5060 CATA in PDF.



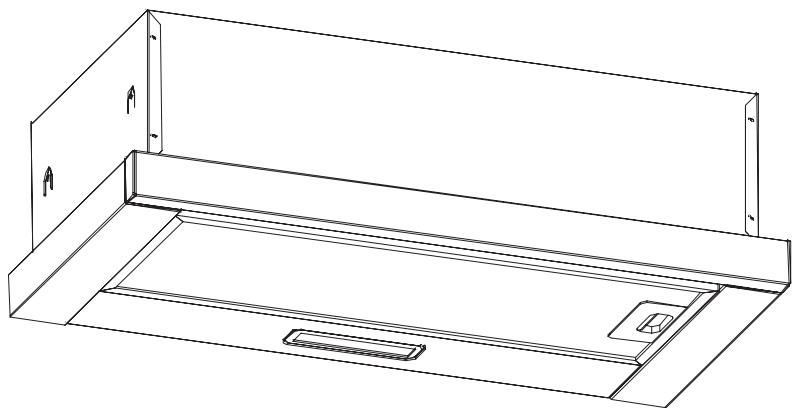
| Product type | Extractor hood |
| Brand | CATA |
| Model | TF 5060 |
| Installation mode | External evacuation or recirculation with charcoal filter |
| Dimensions (W x D x H) | 598 x 280 x 142.8 mm |
| Power supply | 220-240 V ~ 50 Hz |
| Number of speeds | 3 (Low, Medium, High) |
| Lighting type | Integrated LED |
| Extraction duct diameter | 120 mm |
| Grease filter | Metal, dishwasher safe (max 65 °C) |
| Activated carbon filter | Optional, replacement every 3 months (ref. CARBFLT4) |
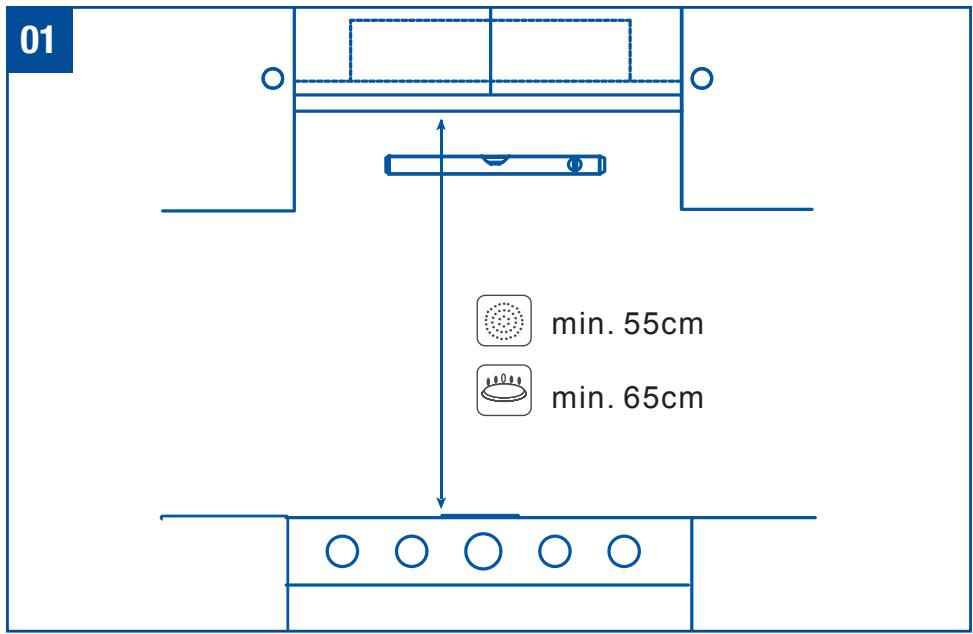
| Minimum safety distance | 55 cm above an electric hob, 65 cm for a gas hob |
| Controls | Push buttons (on/off, speed selection, lighting) |
| Material | Stainless steel and glass |
| Grease filter maintenance | Once a month |
| Exterior maintenance | Non-corrosive liquid cleaner, avoid abrasives |
| Warranty | 2 years (parts and labor, excluding filters and bulbs) |
| Energy efficiency class | Not specified |
Frequently Asked Questions - TF 5060 CATA
User questions about TF 5060 CATA
0 question about this device. Answer the ones you know or ask your own.
Ask a new question about this device
Download the instructions for your Range hood in PDF format for free! Find your manual TF 5060 - CATA and take your electronic device back in hand. On this page are published all the documents necessary for the use of your device. TF 5060 by CATA.
USER MANUAL TF 5060 CATA
flowchart
graph TD
    A["Start"] --> B{Node 1}
    B --> C["Node 2"]
    C --> D{Node 3}
    D --> E["Node 4"]
    E --> F{Node 5}
    F --> G["Node 6"]
    G --> H{Node 7}
    H --> I["Node 8"]
    I --> J{Node 9}
    J --> K["Node 10"]
    K --> L{Node 11}
    L --> M["Node 12"]
    M --> N{Node 13}
    N --> O["Node 14"]
    O --> P{Node 15}
    P --> Q["Node 16"]
    Q --> R{Node 17}
    R --> S["Node 18"]
    S --> T{Node 19}
    T --> U["Node 20"]
    U --> V{Node 21}
    V --> W["Node 22"]
    W --> X{Node 23}
    X --> Y["Node 24"]
    Y --> Z{Node 25}
    Z --> AA["Node 26"]
    AA --> AB{Node 27}
    AB --> AC["Node 28"]
    AC --> AD{Node 29}
    AD --> AE["Node 30"]
    AE --> AF{Node 31}
    AF --> AG["Node 32"]
    AG --> AH{Node 33}
    AH --> AI["Node 34"]
    AI --> AJ{Node 35}
    AJ --> AK["Node 36"]
    AK --> AL{Node 37}
    AL --> AM["Node 38"]
    AM --> AN{Node 39}
    AN --> AO["Node 40"]
    AO --> AP{Node 41}
    AP --> AQ["Node 42"]
    AQ --> AR{Node 43}
    AR --> AS["Node 44"]
    AS --> AT{Node 45}
    AT --> AU["Node 46"]
    AU --> AV{Node 47}
    AV --> AW["Node 48"]
    AW --> AX{Node 49}
    AX --> AY["Node 50"]
cata
new tech
natural_image
Technical line drawing of a cabinet or enclosure with mounting brackets and internal compartments (no text or symbols)EN Installation, use and maintenance instructions

flowchart
graph TD
    A["Start"] --> B{Decision}
    B -->|Yes| C["Process"]
    B -->|No| D["End"]
    C --> E{Branching}
    E -->|Yes| F["Loop Back"]
    E -->|No| G["Feedback Loop"]
    F --> H["End"]
    G --> I["End"]
Tisztelt ügyfelünk!
natural_image
Two blue silhouette figures standing side by side with a checkmark symbol (no text or labels)

natural_image
Illustration of various hand tools including a saw, screwdriver, measuring tape, drill bit, and pencil (no text or symbols present)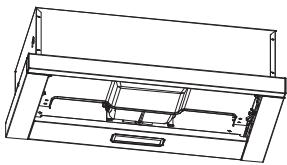
natural_image
Technical line drawing of a mechanical assembly with no visible text or symbols01 x 1
natural_image
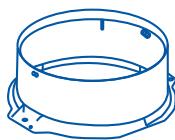
Line drawing of a cylindrical mechanical component with mounting flanges (no text or symbols)02 x 1
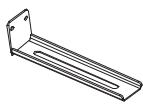
03 x 2
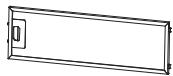
04 x 1
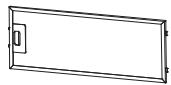
05 x 1
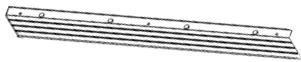
06 x 1

07x 4

08 x 4
(6 x 40mm)

09 x 4 (3)
(4x 8mm)

10 x 2
(3.5x 10mm)

11 x 4
(M4)

12 x 4
(M6)
Nem tartozék
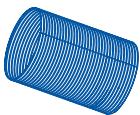
x 1
(∅125mm)

x2

natural_image
Simple 3D geometric shape resembling a parallelogram with no text or symbolsnatural_image
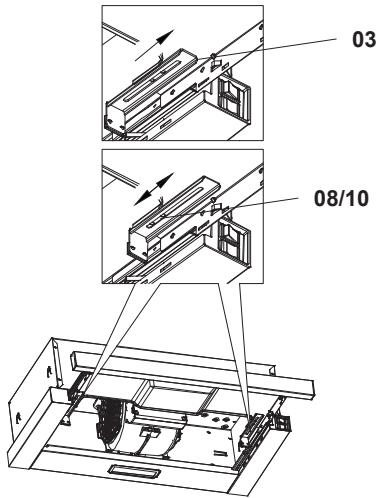
Technical diagram of a mechanical assembly with labeled parts (03, 08) and directional arrows indicating flow or movement (no text or symbols beyond labels)03
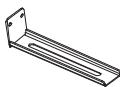
03 x 2


08 x 4
(4x 8mm)
10 x 4
(M4)
04-1

A x1
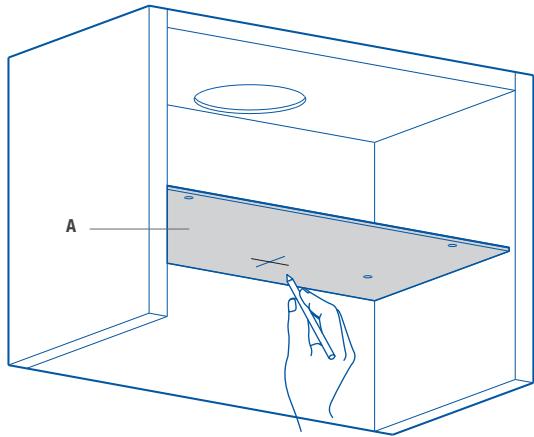
natural_image
Line drawing of a 3D box with a tray and a circular top, showing a hand holding a pointer (no text or symbols)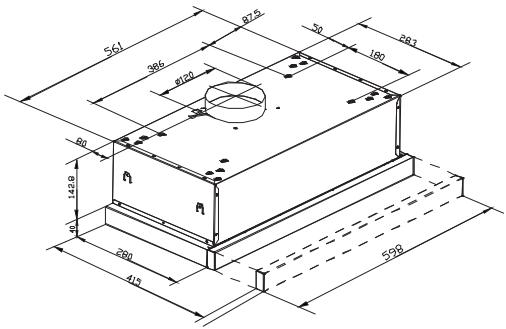
04-2

A x1

natural_image
Line drawing of a hand holding a pen inside a 3D box, with no text or symbols present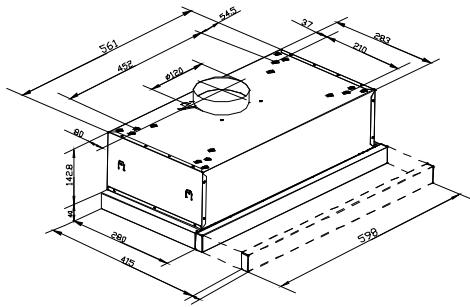
04-3

A x1
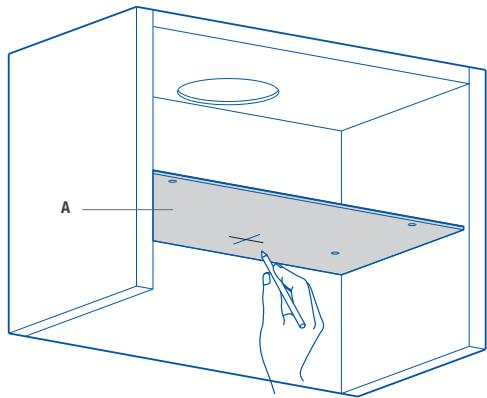
natural_image
Line drawing of a hand holding a pen inside a 3D box, with a circular object on top (no text or symbols)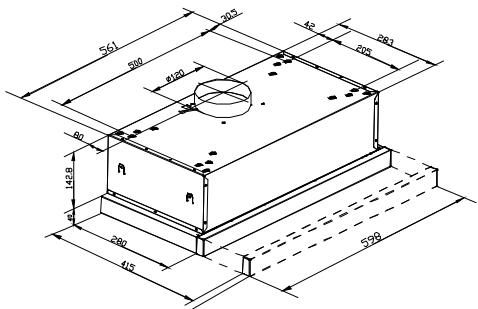
04-4

A x1
natural_image
Line drawing of a 3D box with a hand holding a pen, showing internal components and a circular element (no text or symbols)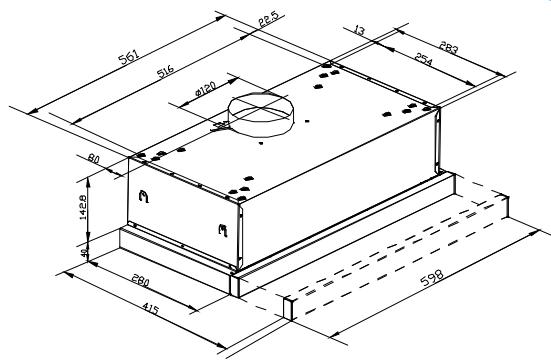
05
06
07

07 x 4

06 x 4

11 x 4
(M6)
ELSZÍVÓ VERZIÓ
natural_image
Technical line drawing of a mechanical assembly with three circular insets showing internal components (no text or symbols)09
natural_image
Line drawing of a cabinet with two doors and a floor plan (no text or symbols)SZÜRÖ VERZIÓ
natural_image
Technical line drawing of a cabinet or rack unit with internal components and directional arrows (no text or symbols)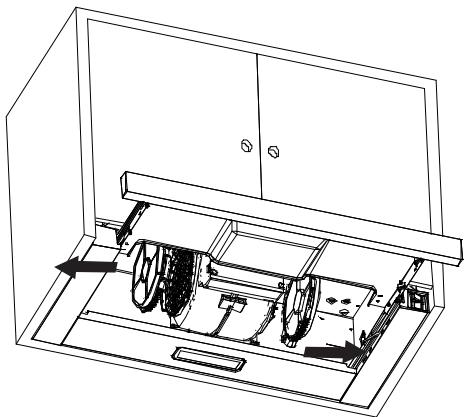
natural_image
Technical line drawing of a mechanical device with internal components and directional arrows (no text or symbols)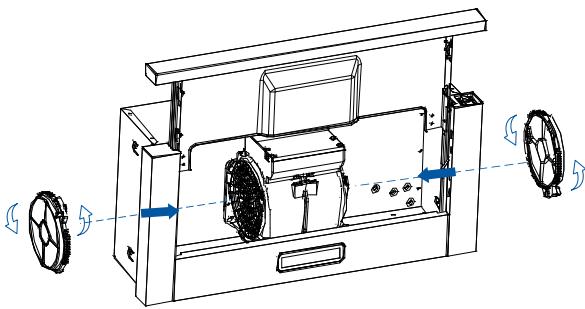
natural_image
Technical line drawing of a mechanical device with visible components and directional arrows (no text or symbols)Thank you for buying our hood. Please read these instructions carefully for its optimum installation, use and maintenance.
This appliance has been designed and manufactured exclusively for use at home.
In order to ensure optimal installation, use and maintenance of the appliance, we recommend that you read these instructions carefully.
Check the appliance before installing it. Do not use the hood if it is damaged or faulty. If this is the case, please contact your distributor or installer.

Warning: You must comply with existing legislation on emission of fumes and environmental ventilation. Do not connect the hood to another vent for smoke, ventilation or hot air which is already being used by other appliances that are fuelled by gas or another fuel.
For optimal and safe performance, the pressure in the room should not drop by more than 4 Pa (0.04 mbar). For this purpose, sufficient permanent air inlets should be provided to prevent the premises from being sealed.
If a kitchen extractor hood and appliances fuelled by gas or another fuel are used simultaneously, there must be an appropriate ventilation system in the room.
Connecting the hood to the grid

Warning: before connecting the hood: shut off the power supply and check that the voltage and frequency supply matches that indicated on the rating plate of the equipment.
If the appliance is equipped with a plug, connect the hood to a socket located in
EN
an accessible area which is compliant with existing standards.
If the appliance is not equipped with a plug, connect the appliance directly to the power grid, protected by an omnipolar separating device which can be accessed to disconnect it, in accordance with local regulations.
If the power cable is damaged, it must be replaced by the manufacturer through its post-sale service, or by similar, qualified personnel in order to prevent danger.
Using the hood

Warning: during electrostatic discharge (e.g. a flash of lightning) the hood may stop working. This does not involve risk of damage. Shut off the power supply to the hood and re-connect it after one minute.
Children under the age of 8 years should be kept away from the appliance unless under permanent supervision.
This appliance can be used by children of 8 years and over and people with reduced physical, sensory or mental capacities or a lack of experience or knowledge, if supervised by a person responsible for their safety or if they have been given suitable instructions regarding the safe use of the appliance and they understand the risks involved. Children should not play with the appliance. The cleaning and maintenance to be performed by the user should not be carried out by unsupervised children.
To avoid the risk of fire, the metal filter should be cleaned regularly.
Containers with hot oil should be monitored continuously.
Do not set food alight under the hood.
Accessible parts may become hot when used with cooking appliances.
Legal information
The manufacturer:
- Declares that this appliance complies with the essential requirements for low-voltage electrical equipment, as set out in Directive 2014/35/EU, and electromagnetic compatibility, as set out in Directive 2014/30/EU.
- Shall not be held responsible for failure to follow the instructions given in this manual or non-compliance with safety standards relating to the correct use of
the equipment.
- Shall not be held responsible for any damage caused by the incorrect installation, use or maintenance of the appliance.
- Reserves the right to make any changes to the equipment or this manual without giving prior notice.
Should you need technical assistance or additional information about our products, please contact your distributor or an official, authorised technical service.

ELECTRIC INSTALLATION
Make sure the maximum air extraction flow rate for the appliances in the room does not exceed 4 Pa (0.04 mbar). The room must have adequate ventilation if an extractor hood is used simultaneously with appliances that run on gas or other fuels. The evacuated air must be extracted through ducts that are used for evacuating fumes from appliances that run on gas or other fuels. Regulations regarding air extraction must be complied with.
This product in intended for HOUSEHOLD USE only.
Use a rigid PVC pipe with a min. ∅ l20 mm to evacuate fumes outside.
The above restrictions do not apply to hoods with no fumes outlet to outside (recirculation system with activated charcoal filter).

Warning: Failure to install the screws or fixing device in accordance with these instructions may result in electrical hazards.
Installation and connection
- This appliance is only intended for domestic use.
- Please observe the special installation instructions.
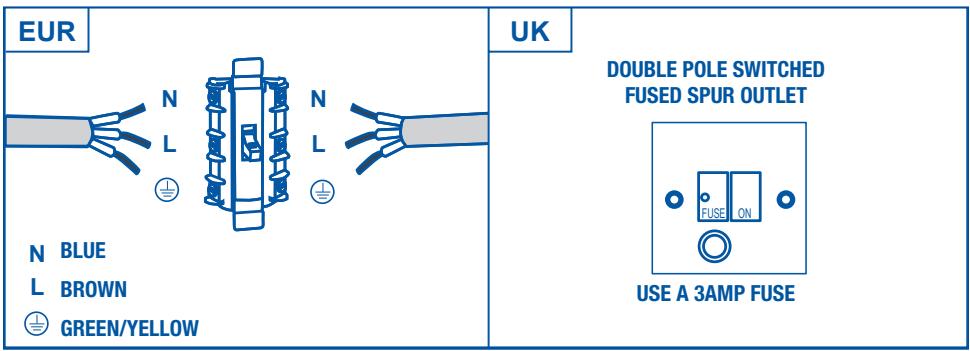
- The appliance is fitted with a plug and must only be connected to a properly installed earthed socket.
- The mains voltage must correspond to the voltage specified on the rating plate.
- The socket must be installed and connecting cable must only be replaced by a qualified electrician. If the plug is no longer to accessible following installation, an all-pole disconnecting device must be present on the installation side with a contact gap of at lease 3mm.
-Adapters, multi-way strips and extension leads must not be used. Overloading can result in a risk of fire.

Warning: This is a Class I appliance and MUST be earthed.
This appliance is supplied with a 3 core mains cable coloured as follows:
- Brown = L or Live
- Blue = N or Neutral
- Green and Yellow = E or Earth
x2

natural_image
Two blue human figures standing with a checkmark symbol (no text or labels)

natural_image
Illustration of various hand tools including a saw, screwdriver, measuring tape, drill bit, and pencil (no text or symbols present)
natural_image
Technical line drawing of a mechanical assembly with no visible text or symbols01 x 1
natural_image
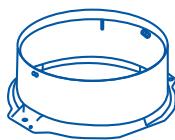
Line drawing of a cylindrical mechanical component with mounting flanges (no text or symbols)02 x 1
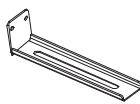
03 x 2
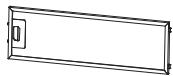
04 x 1
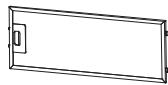
05 x 1
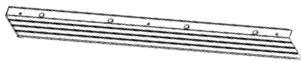
06 x 1

07x 4

08 x 4
(6 x 40mm)

09 x 4 (3)
(4x 8mm)

10 x 2
(3.5x 10mm)

11 x 4
(M4)

12 x 4
(M6)
Not included
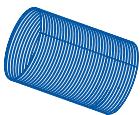
x 1
(∅125mm)

x 2

natural_image
Simple 3D geometric shape resembling a parallelogram with no text or symbolsChoose a type of installation:
| SUCTION VERSION(extraction to the outside) | FILTERING VERSION(no extraction to the outside) |
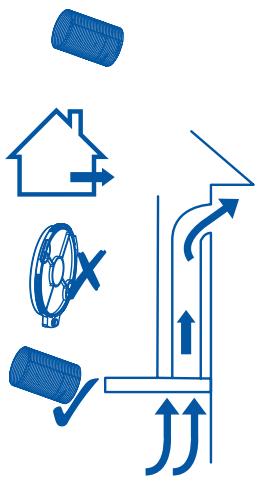 |  |
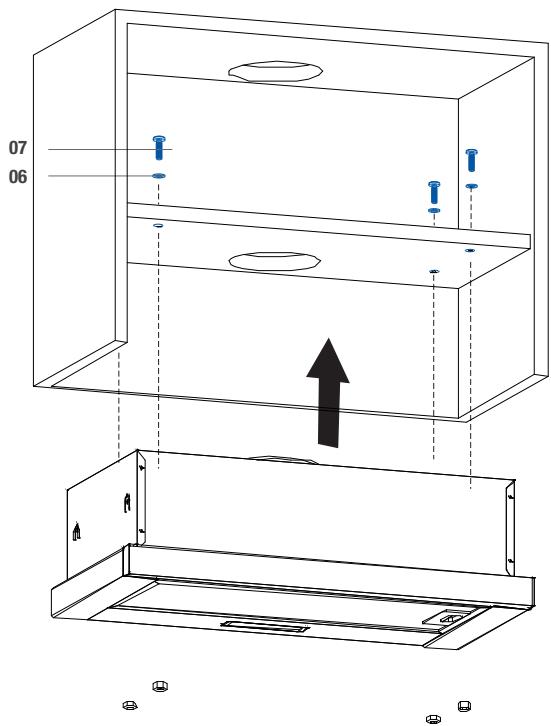
SUCTION VERSION
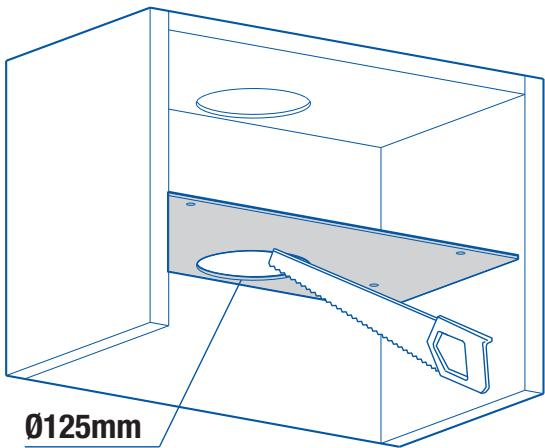
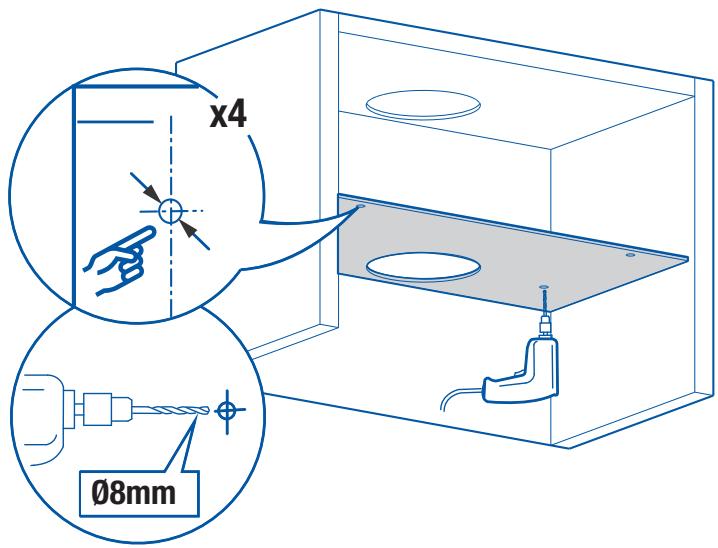
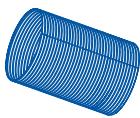
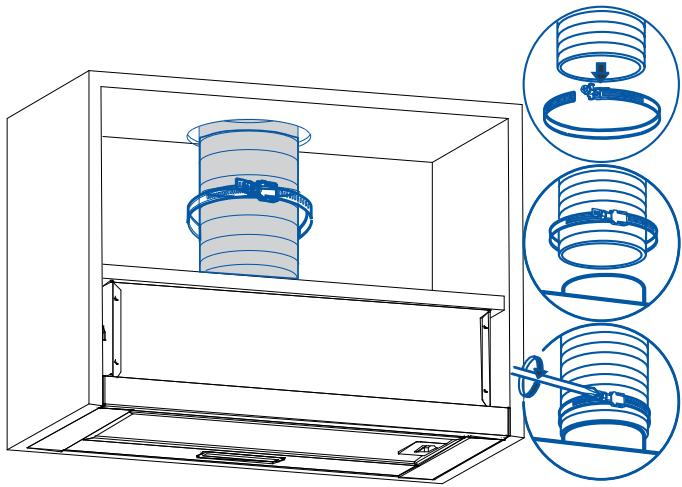
If the hood is to be installed as a SUCTION hood, connect the plastic outlet piece supplied with the hood (120mm diameter pipe for better performance and lower noise levels.
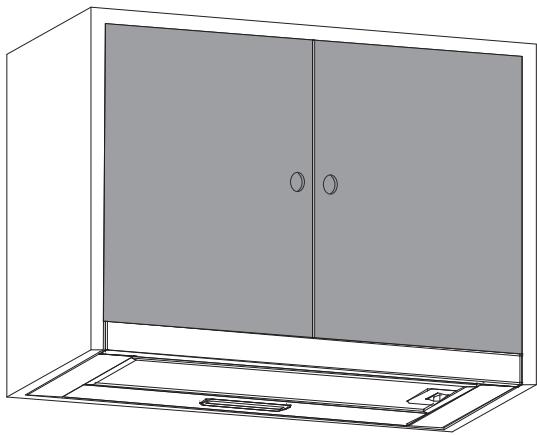
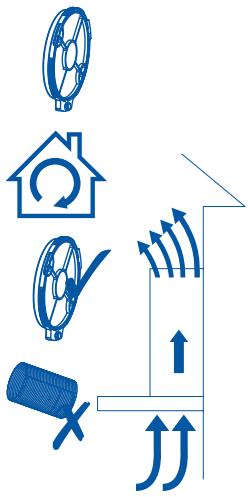
FILTERING VERSION (INTERNAL RE-CYCLING)
When there is no exhaust duct for venting out-door, you can use a carbon filter. The air is depu-rate by the filter and put again in the surrounding.
The air is released in the room through a connecting pipe, which goes through the hanging cupboard and us connected to the connecting ring supplied.
To use the appliance in this version, proceed as follows:
- Open the grids
- To proceed to change the charcoal filter, the screw has to be removed.
- Reinstall the grids.
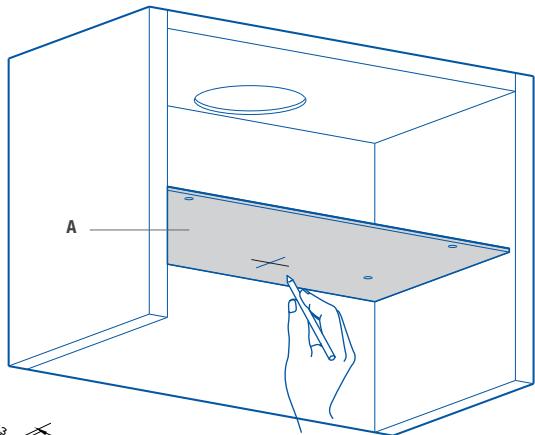
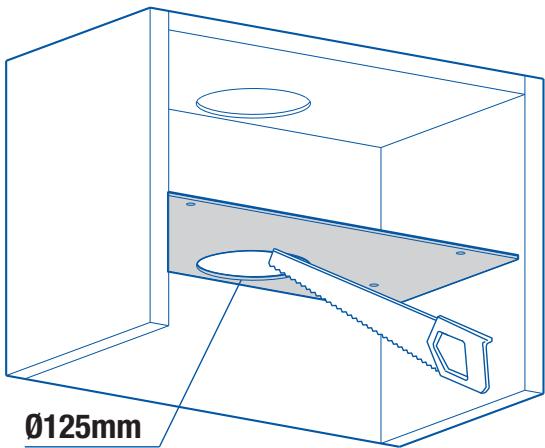
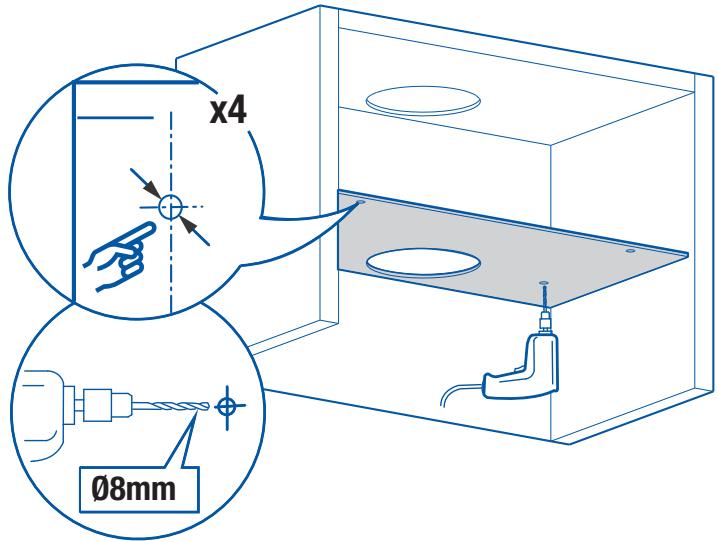
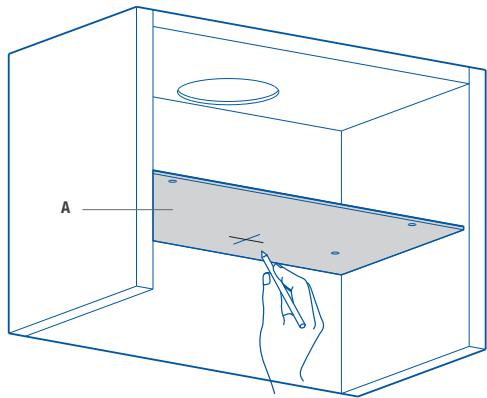
Install the hood in line with the instructions on the template.
For gas cooking appliances only: the minimum distance to the Hood must be at least 65 cm.

03
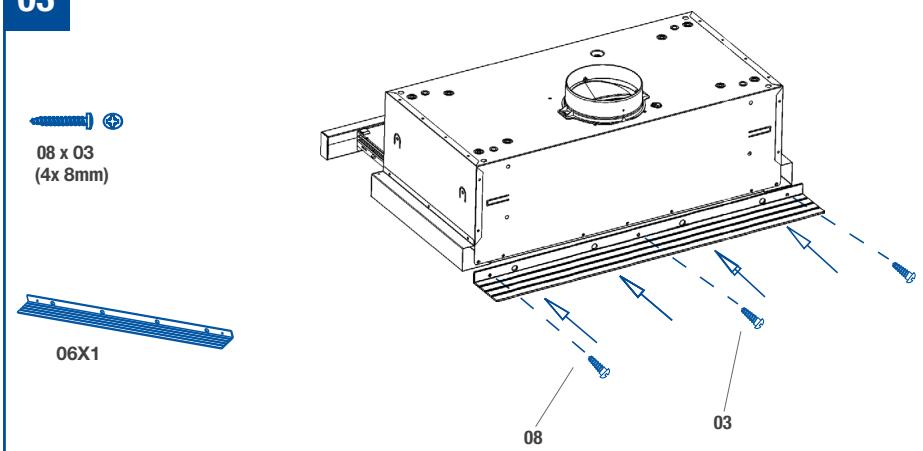
08 x 03
(4x 8mm)
03
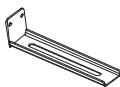
03 x 2


08 x 4
(4x 8mm)
10 x 4
(M4)

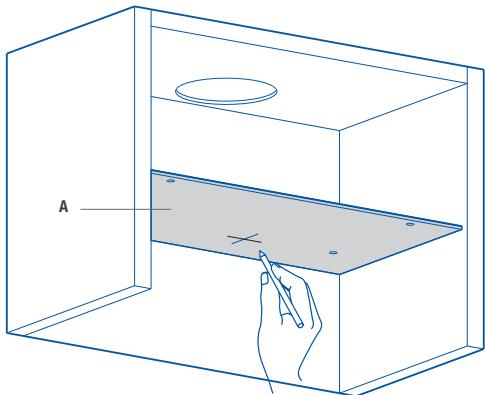
04-1

A x1

natural_image
Line drawing of a 3D box with a tray and a circular top, showing a hand holding a pointer (no text or symbols)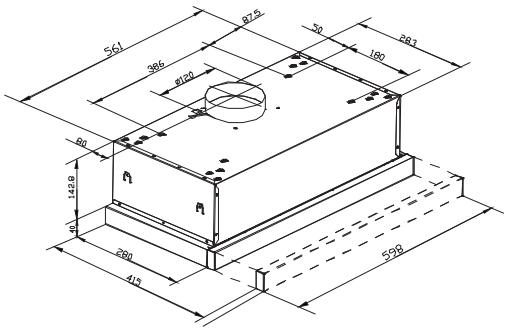
04-2

A x1
natural_image
Line drawing of a hand holding a pen inside a transparent box, with a circular object on top (no text or symbols)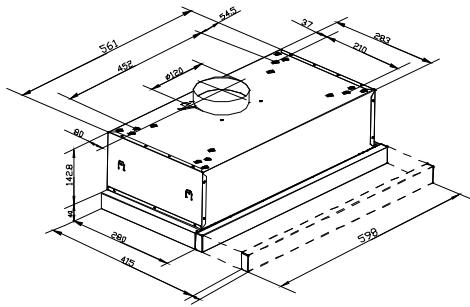
04-3

A x1
natural_image
Line drawing of a hand holding a pen inside a rectangular box, with a circular object on top (no text or symbols)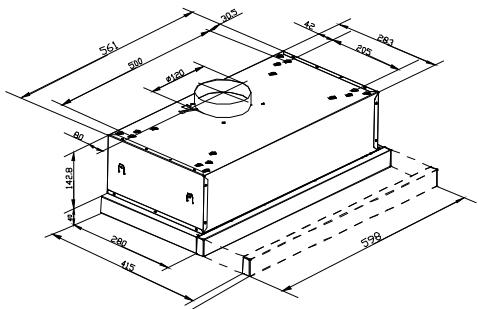
04-4

A x1

natural_image
Line drawing of a 3D box with a hand holding a pen, showing a tray and a circular object inside (no text or symbols)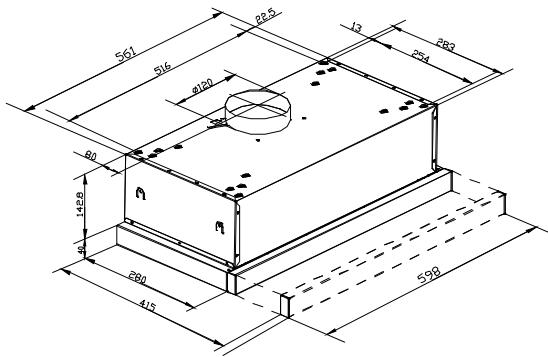
05
06
07

07 x 4

06 x 4

11 x 4
(M6)

SUCTION VERSION
(extraction to the outside)
08
x 1
(∅125mm)
natural_image
Technical line drawing of a mechanical assembly inside a housing, showing three circular insets with component diagrams (no text or labels)09
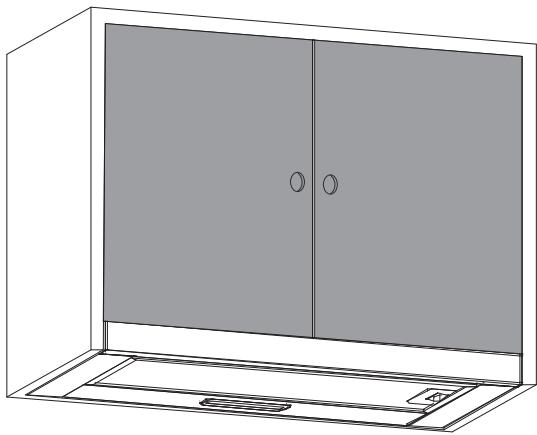
natural_image
Line drawing of a cabinet with two doors and a floor plan (no text or symbols)FILTERING VERSION (no extraction to the outside)
10

x 2
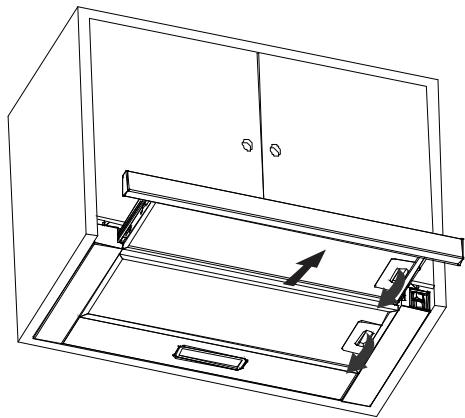
natural_image
Technical line drawing of a cabinet or rack unit with internal components and directional arrows (no text or symbols)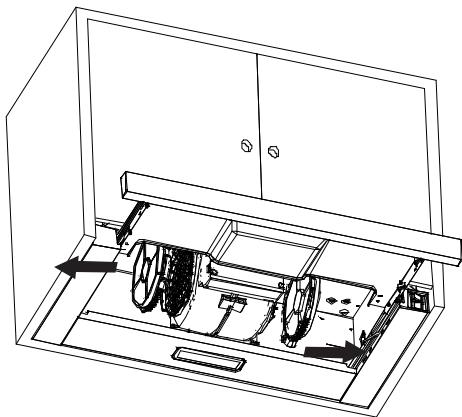
natural_image
Technical line drawing of a mechanical device with internal components and directional arrows (no text or symbols)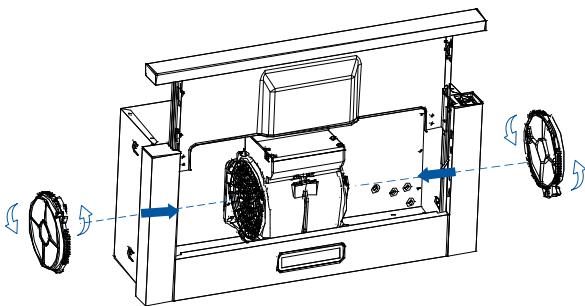
natural_image
Technical line drawing of a mechanical device with visible components and directional arrows (no text or symbols)The front panel has to be pulled its maximum extension so as to optimise the extraction capacity.
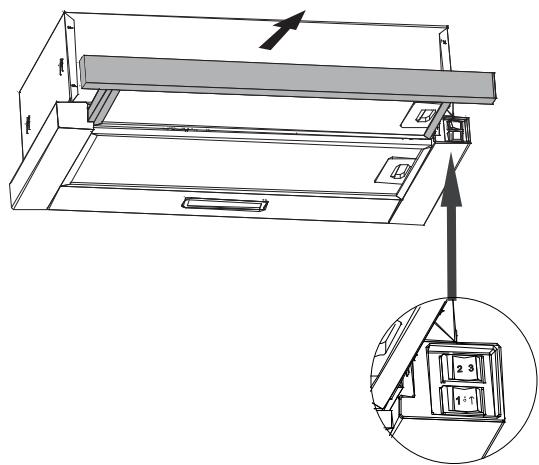
The three setting switch has the following functions:

| o | OFF |
| ↑ | Select the power level 2 & 3 |
| 1 | Low Speed |
| 2 | Middle Speed |
| 3 | High Speed |
Switch on the Lamps
Pull out the grill more than 50mm

Warning: always switch off the electricity supply before carrying out maintenance work on the hood. In the event of a fault, contact an official distributor or authorised dealer.
Cleaning the outside: use liquid, non-corrosive detergent and avoid using abrasive cleaning products and solvents. Do not use high-pressure or steam cleaning devices.

Important: increase the filter cleaning/replacement frequency if the hood is used for more than 2 hours a day. Always use genuine filters from the manufacturer.
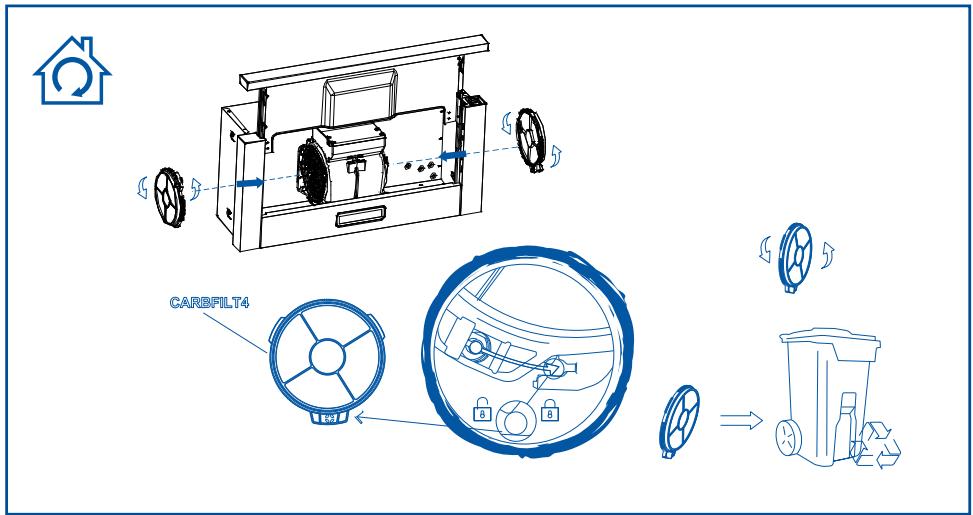
Carbon filter replacement
Activated charcoal filters: replace them every 3 months.
3 MONTHS
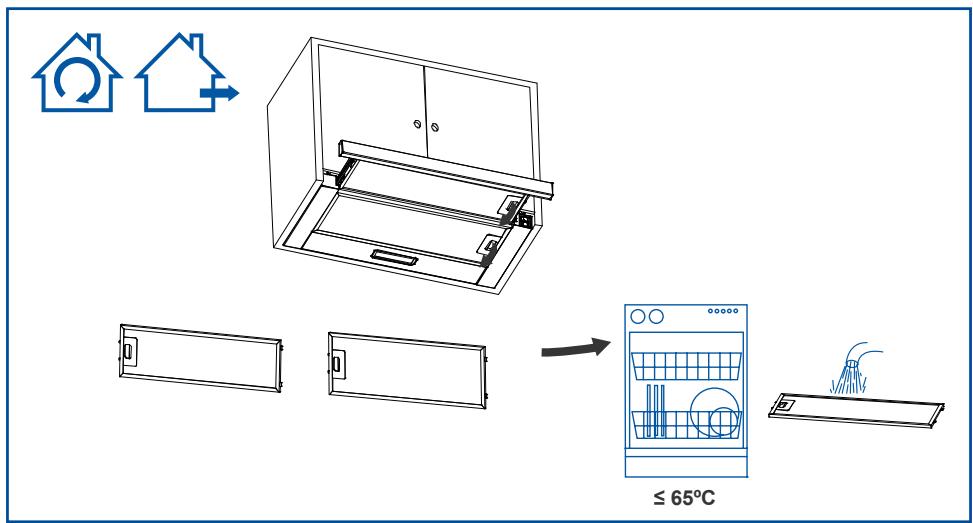
Grease cleaning
To avoid fires, clean thoroughly once a month or whenever the display pilot light indicates as such. To do so, remove the filters and wash with hot water and detergent. If using a dishwasher (metal parts may turn black without this affecting their functional capacity), load the filters vertically to avoid solid residue from being deposited.
1 month
EN
Lamp replacement

Warning: do not handle the bulbs until the electricity supply has been switched off and they have cooled.

Important: use new bulbs according to that indicated on the hood nameplate.
If using LED lighting, do not look directly at the light.
Use bulbs with an aluminium reflector to replace halogen bulbs. Do not use dichroic bulbs - risk of overheating.
For LED lamp replacements, please contact Technical Support or the distributor of the brand.
| Problem | Cause / Solution |
| The lamps do not work | A change may be necessary, but first check that the lamp is correctly positioned and that the contact is correct. Remember that lamps are not covered by the warranty. Disconnect the current hood before handling the lamps. Use lamps with the same properties described on the nameplate.It is advisable to use lamps supplied by the manufacturer of the hood. |
| The motor works, but it seems to have requested performance or extraction capacity | The selected speed is too low / Select a higher speed. Check the Metallic Filter (grease filter). If it has not been washed recently, it may be clogged with grease or dirt. Disassemble and wash it in hot water and detergent, and let it dry before reassembling again. Ensure that the air outlet tube has not been obstructed. |
| The hood works, but the smell of the food persists. | If you are using the hood in recirculation mode, the Active Carbon Filter must be replaced. |
| The hood does not work | Check that the hood is connected to power. Check that the fuses or automatic have not jumped. |
| The hood still does not work | If, after having checked the points mentioned above, your problem has not yet been solved, contact the technical service or your distributor. |
THE MANUFACTURER guarantees conformity of this product, which is designed solely and exclusively for household use, for a period of two (2) years from the date of the invoice, receipt of purchase or delivery note (in the case of distance selling) duly stating the acquired appliance.
This warranty includes both parts and labour, and the travel of the technical staff of the nearest Official Service (except in the case of products which, due to their small size and mobility, should be transported by the user to the Official Technical Service).
For the application of this warranty, the consumer should contact the distributor or the Customer Service of Cata Electrodomésticos (902 410 450 – info@cnagroup.es).
The Manufacturer may exercise its right of decisión to repair or replace the defective product when the cost of one of the two options is considered to be disproportionate.
If repair or replacement is not possible or not appropriate, the consumer may choose a price reduction or purchase cancellation (as specified in Articles 120 and following of RD 1/2007, and Article 12 of Act 7/1996).
"EXCLUSION CLAUSES This warranty does not apply in the following cases:"
- Failure to follow instructions covered in the Instruction Manual.
- Misuse or normal wear and tear of the product (filters, bulbs, gaskets, rubber components, paints, varnishes, etc.).
- Tampering thereof by unauthorized persons.
- Lack of cleaning or of regular maintenance of the product.
- Breakdowns or damage caused by the chemical or electrochemical effects of water or by contact with inappropriate substances, outside of that stipulated in the Instruction Manual.
- Incidents resulting from physical breakage not attributable to a manufacturing defect (casings, glass, trim, plastics, filters, controls, etc.).
This warranty does not affect the consumer rights set forth in Royal Legislative Decree 1/2007 of 16 November.

The symbol 📄 on the product or on its packaging indicates that this product may not be treated as household waste. Instead it shall be handed over to the applicable collection point for the recycling of electrical and electronic equipment. By ensuring this product is disposed of correctly, you will help prevent potential negative consequences for the environment and human health, which
could otherwise be caused by inappropriate waste handling of this product. For more detailed information about recycling of this product, please contact your local city office, your household waste disposal service or the shop where you purchased the product.
Importór:
MULTIKOMPLEX BUDAPEST KFT.


- cata
- Nem tartozék
- ELSZÍVÓ VERZIÓ
- SZÜRÖ VERZIÓ
- Connecting the hood to the grid
- EN
- Using the hood
- Legal information
- The manufacturer:
- ELECTRIC INSTALLATION
- Installation and connection
- Not included
- Choose a type of installation:
- SUCTION VERSION
- FILTERING VERSION (INTERNAL RE-CYCLING)
- 07
- (extraction to the outside)
- FILTERING VERSION (no extraction to the outside)
- Switch on the Lamps
- Carbon filter replacement
- MONTHS
- Grease cleaning
- month
- Lamp replacement
- Importór:
- MULTIKOMPLEX BUDAPEST KFT.
Brand : CATA
Model : TF 5060
Category : Range hood