
VOLAR T2 - USB TV Tuner AVERMEDIA - Free user manual and instructions
Find the device manual for free VOLAR T2 AVERMEDIA in PDF.



| Product Type | USB TV Tuner |
| Brand | AVERMEDIA |
| Model | VOLAR T2 |
| Compatibility | Windows 7, Windows 8, Windows 8.1, Windows 7 MCE |
| Reception | DVB-T/T2 (terrestrial digital) |
| Connectivity | USB 2.0, antenna input |
| Power | Via USB port (5V) |
| Dimensions | Approximately 9.5 x 3.0 x 1.5 cm |
| Weight | Approximately 50 g |
| Main functions | Digital TV reception, recording, timeshift, program guide |
| Included software | AVerMedia TVCenter, drivers |
| Package contents | USB tuner, remote control, battery, USB cable, antenna, installation CD, quick start guide |
| Maintenance and cleaning | Clean with a soft, dry cloth. Do not use chemical products. |
| Safety | Do not expose to moisture. Disconnect before cleaning. |
| Spare parts and repairability | Contact AVerMedia customer service. No spare parts available at retail. |
| General information | Indoor use only. Operating temperature: 0°C to 40°C. |
Frequently Asked Questions - VOLAR T2 AVERMEDIA
User questions about VOLAR T2 AVERMEDIA
0 question about this device. Answer the ones you know or ask your own.
Ask a new question about this device
Download the instructions for your USB TV Tuner in PDF format for free! Find your manual VOLAR T2 - AVERMEDIA and take your electronic device back in hand. On this page are published all the documents necessary for the use of your device. VOLAR T2 by AVERMEDIA.
USER MANUAL VOLAR T2 AVERMEDIA
European Community Compliance Statement

Class B
This product is herewith confirmed to comply with the requirements set out in the Council Directives on the approximation of the laws of the Member States relating to Electromagnetic Compatibility Directive (EMC) 2014/30/EU.
Responsible manufacturer:
AVerMedia Technologies, Inc.
No. 135, Jian 1st Rd., Zhonghe Dist., New Taipei City 23585, Taiwan
TEL: +886-2-2226-3630
European Community contact:
AVerMedia Technologies Europe B.V.
Kwartsweg 50, 2665 NN, Bleiswijk, The Netherlands
TEL: +31-10-7600-500
Technical Support: http://www.avemedia.com/averty/Support/

EMC Directive: TR CU 020/2011

IMPORTANT SAFETY INSTRUCTIONS
- Read Instructions - Read all the safety and operating instructions before connecting and operating your TV tuner to help ensure your own personal safety and to protect your product from potential damage.
- Retain Instructions - Retain all the safety and operating instructions for future reference.
- HeedWarnings - Adhere to all warnings on the product and the operating instructions.
-
Grounding - For continued protection against risk of electric shock and fire, this accessory should be installed/connected only to the products, such as a computer, equipped with a three-wire grounding plug, a plug having a third (grounding) pin. This plug will only fit into a grounding-type power outlet. This is a safety feature. If you are unable to insert the plug into the outlet, contact your electrician to replace the obsolete outlet. Do not defeat the safety purpose of the grounding-type plug.
-
Lightning - For added protection and to prevent damage due to lightning and power-line surges, unplug the host system, such as a computer, from the wall power outlet and disconnect the antenna or cable system. Unplug the host system from the wall power outlet when left unattended or unused for long periods of time.
- Never insert anything metallic into the TV tuner openings. Doing so may create the danger of electric shock.
Power Lines - An outside antenna system should not be located in the vicinity of overhead power lines or other light or power circuits, or where it can fall into such power lines or circuits. - Antenna Installation - When installing an outside antenna system, extreme care should be taken to prevent it from touching such power lines or circuits, as contact with them may be fatal.
- Outdoor Antenna Grounding - If an outside antenna is connected to the product, ensure that the antenna system is grounded so as to provide some protection against voltage surges and built up static charges. Article 810.21 of the National Electric Code, ANSI/NFPA No.70, provides information with regard to proper grounding of the mast and supporting structure, grounding of the lead-in wire to the antenna discharge unit, size of grounding conductors, location of antenna-discharge unit, connection of grounding electrodes, and requirements for the grounding electrode.

(for CATV system installer) This reminder is provided to call the CATV systems installer's attention to Section 820.93 of the National Electric Code, ANSI/NFPA 70:2005 (for US/Canada) and/or EN60728-11:2005 standard (for Europe), which provide guidelines for proper grounding and, in particular, specify that the coaxial cable shield shall be connected to the grounding system of the building, as close to the point of cable entry as practical.

The mark of crossed-out wheeled bin indicates that this product must not be disposed of with your other household waste. Instead, you need to dispose of the waste equipment by handing it over to a designated collection point for the recycling of waste electrical and electronic equipment. For more information about where to drop off your waste equipment for recycling, please contact your household waste disposal service or the shop where you purchased the product.
Disclaimer
All the screen shots in this documentation are only example images. The images may vary depending on the product and software version. Information presented in this documentation has been carefully checked for reliability; however, no responsibility is assumed for inaccuracies. The information contained in this documentation is subject to change without notice.
Copyright
©2015 by AVerMedia Technologies, Inc. All rights reserved. No part of this publication, in whole or in part, may be reproduced, transmitted, transcribed, altered or translated into any language in any form by any means without the written permission of AVerMedia Technologies, Inc. Information and specification contained in this manual are subject to change without notice and do not represent a commitment on the part of AVerMedia. For more information, please refer to www.avermedia.com. "AVerMedia" is a trademark or registered trademark of AVerMedia Technologies, Inc. The pictures contained in this manual are provided for reference purposes only. Made in Taiwan (Except Accessories).
1 Package Contents
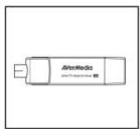
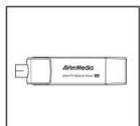
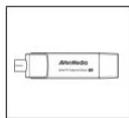
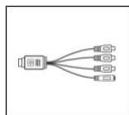
AVerT2 Hybrid Volar T2
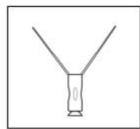
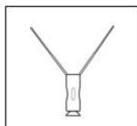
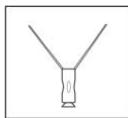
High Gain Antenna
Quick Installation Guide
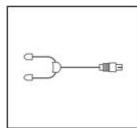
FM Radio Antenna
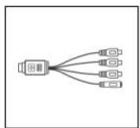
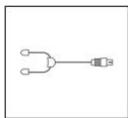
S-Video/
Composite
2-in-1 Cable
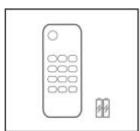
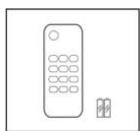
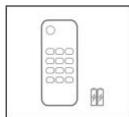
Remote Control
(Batteries
Included)
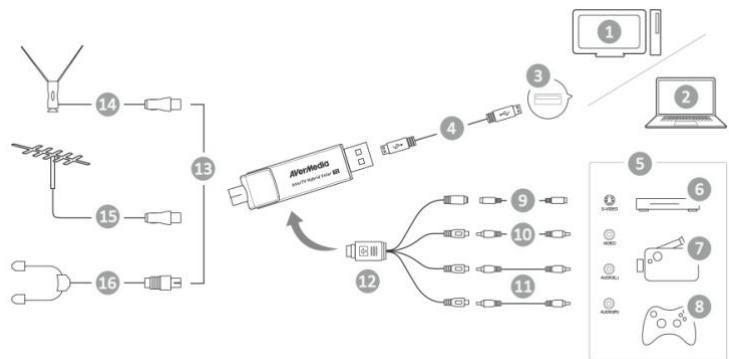
2 | Making Connections
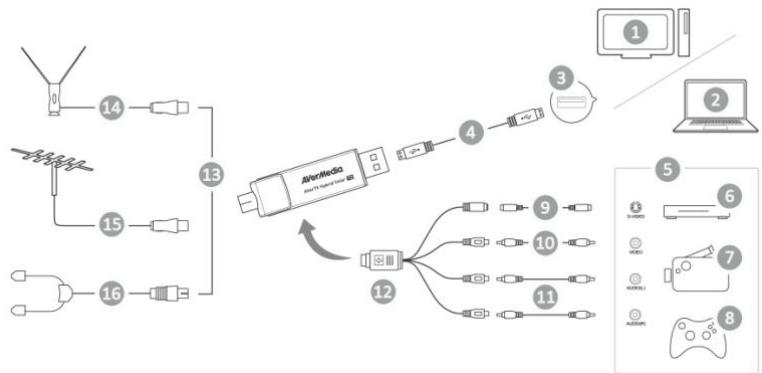
| NO | Item | NO | Item |
| 1 | PC | 9 | S-Video Cable (Not Supplied) |
| 2 | Notebook | 10 | Video Cable (Not Supplied) |
| 3 | USB Port | 11 | Audio Cable (Not Supplied) |
| 4 | USB Cable (Not Supplied) | 12 | S-Video/ Composite 2-in-1 Cable |
| 5 | Example | 13 | OR |
| 6 | Set-up Box | 14 | High Gain Antenna |
| 7 | VCR | 15 | TV Antenna (75Ω) |
| 8 | Video Game | 16 | FM Radio Antenna |
3 Installation
Installing Drivers and the TV Software Utility
After the device is installed properly, turn on the computer. The system will automatically detect the new device. Simply skip the wizard, and install the driver and TV software utility that you download from AVerMedia Official website.
Installing Drivers and the Application in Windows® 7 / Windows® 8 / Windows® 8.1
To install the driver and application, Windows 7 MCE users need to exit and switch to Windows mode if they are in Media Center Edition mode.
- The "Found New Hardware Wizard" dialog box will appear. Just click Cancel to skip the Wizard installation procedures.
- Launch software package you downloaded from AVerMedia Official website.
- When the "AutoPlay" dialog box appears, select Run Autorun.exe.
- When the installation main screen appears, choose Install AVerTV 3D.
- If the "User Account Control" dialog box appears, select Allow/Yes to continue the process.
- Click Next to continue the installation process.
- Read the license agreement and if you agree to the terms, select "I accept the
terms of the license agreement" and then click Next.
- Choose Complete to install all the necessary software, including AVerTV 3D, and Driver. Then click Next. For advanced users, it is recommended that you choose Custom to select the software you want. To choose a different destination folder, click Browse.
- Then click Finish to complete the installation.

- The product does not come with a software DVD decoder. If users can playback DVD or MPEG-2 video files on the computer, there is no need to install a DVD decoder. However, if the Decoded Error message appears on the screen, please install the compatible DVD decoder via the Windows XP Media Center Edition Partners site.
- The 3DTV functions in AVerTV 3D are not supported under the Windows XP operating system.
Activating the AVerTV 3D Application
Windows 7
To run the application from the Programs menu, choose Start Programs / All Programs AVerMedia AVerTV 3D AVerTV 3D.
Windows® 8 / Windows® 8.1
Click on AVerTV 3D on the Metro Start screen or double click on AVerTV 3D on the Desktop.
Uninstalling Application and Drivers
Windows® 7
- To remove the installed TV software utility from the system, simply choose Start All Programs AVerMedia AVerTV 3D Uninstaller.
- When the "User Account Control" dialog box appears, select Allow/Yes.
- Select Remove All Next OK Finish.
Windows® 8 / Windows® 8.1
- Right click on AVerTV 3D on the Metro Start screen, and click on Uninstall.
- In Programs and Features, select AVerTV 3D Uninstall/Change.
- Select Remove All Next OK Finish.
4 Remote Control
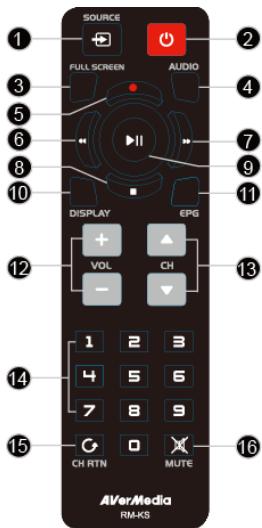
After installing drivers and applications, you can use a remote control to turn on/off the programs, select channels, and adjust volume and so on.
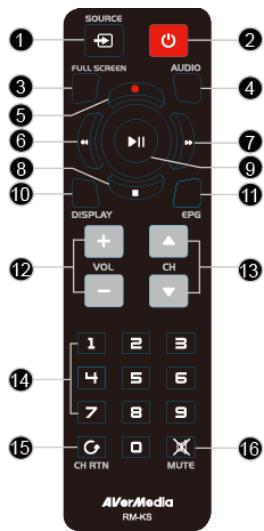
| # | Button | Description |
| 1 | SOURCE | Switch between available signal sources. |
| 2 | POWER | Turn on/off the application |
| 3 | FULL SCREEN | Display TV in full screen. |
| 4 | AUDIO | Switch between available audio modes. |
| 5 | (Record) | Switch to PVR mode and record the current program or video into your hard drive. |
| 6 | (Rewind) | TimeShift Mode: - Press to skip backward 10 seconds. Playback Mode: - Disabled |
| 7 | (Forward) | TimeShift Mode: - Press to skip forward 10 seconds. Playback Mode: - Fast Play Speed Loop (0.5x/1x/1.1x/1.2x/1.5x/2x) |
| 8 | (Stop) | - End the Playback or recording. - End the TimeShift mode and return to real-time TV or Radio mode. |
| 9 | Play (Play) / PAUSE | Play the last recorded or played file. / Freeze the playback. |
| 10 | DISPLAY | Display information. |
| 11 | EPG | Launch the Electronic Program Guide. |
| 12 | VOL+/- | Volume up/down. |
| 13 | CH ▲/▼ | Go up or down to the next active channel. |
14 Numeric Buttons
15 CH RTN
16 MUTE
- Select a TV channel.
- Under the 16-Channel preview mode, use 2 4 6 8 to highlight the intended channel.
Go to the previously selected channel.
Turn on/off the sound.

English
Battery Safety Information
- Store the batteries in a cool dry place.
- Do not dispose of used batteries in domestic waste. Dispose of batteries at special collection points or return to point of sale if applies.
- Remove the batteries during long periods of non-use. Always remove exhausted batteries from the remote control. Battery leakage and corrosion can damage this remote control, dispose of batteries safely.
- Do not mix old and new batteries.
- Do not mix different types of batteries: alkaline, standard (carbon-zinc) or rechargeable (nickel-cadmium).
- Do not dispose of batteries in a fire. The batteries may explode or leak.
- Never short circuit the battery terminals.
1 KomnneKT noCTaBKN
AVerTV Hybrid Volar T2
MHHa-antehHa (dTBA PaHIO)
KpaTkoe pykoBOcTBo no yCTAHOBke
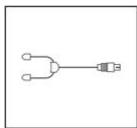
AHTeHHa FM
paHNo
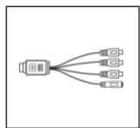
Ka6eNb S-Video / KOMN03NTHbI 2-B-1
- nai"Found New Hardware Wizard" uunu uunu Cnol (a m)
- 150
- danaiaTnau "AutoPlay" 17 ng tian Run Autorun.exe (Autorun.exe)
- 用awunwunwunwunwunwunwunwunwunwunwunwunwunwunwunwunwunwunwunwunwunwunwunwunwunwunwunwunwunwunwunwunwunwunwunwunwunwunwunwunw
- wnnnaaia "User Account Control" 17nng nn An Allow/Yes (oynm/n)
- Next (a)
- "I accept the
terms of the license agreement" uuaan Next (
- Complete (w) wauanovwunwnuAVerTV 3D uav Driver uanNext (a) wunwunu uunwnu Custom (nna) Wauanawwunwnuwnu wneonwnrwnlWaaarwnuwnuBrowse (iung)
- Finish (140) Wannrnnnne

- M P D V 2000 0000000000000000000000000000000000000000000000000000000000000000000000000
- 3DTV AVerTV 3D Windows XP
nntnnnnnaaAVerTV 3D
Windows® 7
wnnnaaunwauanuunnuunuunnAn Start (12) Programs (Tuun) / All Programs (Tuunununun) AVerMedia AVerTV 3D AVerTV 3D
Windows® 8 / Windows® 8.1
AVerTV 3D Metro Start AverTV 3D
nnaaunwaaeauuuaananaan
Windows® 7
- wannanrannnnaaennnnnnae aannnnnne nannnnae nannnnae Start (n) All Programs (Iunnnnnnnnna) AVerMedia AVerTV 3D Uninstaller (
- JanaiaJnaa "User Account Control" Jnng nn Allow/Yes (
- Remove All (a m m m m) Next (a m m) OK (a m m) Finish (1)
Windows® 8 / Windows® 8.1
- AVerTV 3D Metro Start Uninstall (
- Programs and Features (15) AVerTV 3D Uninstall/Change (0000000000000000000000000000000000000000000000000000000000000000000000000000000
- Remove All (a m m m m) Next (a m m) OK (a m m) Finish (a)
4
nannnnnnnnnnnnnnnnnnnnnnnnnnnnnnnnnnnnnnnnnnnnnnnnnnnnnnnnnnnnnnnnnnnnnnnnnnnnnnnnnnnnnnnnnnnnnnnnnnnnnnnnnnnnnnnnnnnnnnnnnnnnnnnnnnnnnn
| # | ### | ### |
| 1 | SOURCE | ### |
| 2 | POWER | ### |
| 3 | FULL SCREEN | ### |
| 4 | AUDIO | ### |
| 5 | ● (###) | ### |
| 6 | (###) | ### |
| 7 | (###) | ### |
| 8 | (###) | ### |
| 9 | (###) / | ### |
| 10 | DISPLAY | ### |
| 11 | EPG | ### |
| 12 | VOL+/- | ### |
| 13 | CH▲/▼ | ### |
14
15 CH RTN
16 MUTE
- -annunauananaaunauauauauuauu 16 yao uuaau 24 68 wataaiauuaaunauaa
yuaanunuianlinum
1

n
yaaanrnnnnaaannnnaaannnnae
- nnnnnnnnnnnnnnnnnnnnnnnnnnnnnnnnnnnnnnnnnnnnnnnnnnnnnnnnnnnnnnnnnnnnnnnnnnnnnnnnnnnnnnnnnnnnnnnnnnnnnnnnnnnnnnnnnnn
aannnnnnaanennnnnne aannnnnnnne annnnnnnne anannnnnne - WuTuTuTuTuTuTuTuTuTuTuTuTuTuTuTuTuTuTuTuTuTuTuTuTuTuTuTuTuTuTuTuTuTuTuTuTuTuTuTuTuTuTuTuTuTuTuTuTuTuTuTuTuTuTuTuTuTuTuTuTuTuTuTuTuTuTuTuTuTuTuTuTuTuTuTuTuTuTuTuTuTuTuTuTuTuTuTuTuTuTuTuTuTuTuTuTuTuTuTuTuTU
#
AVerTV
FM
S-Video 12
Jai) 2e jai jia (
C
2
J. "Found New Hardware Wizard" 1
Ccll (c) Cnle 1
AVerMedia 2
Run Autorun.exe "AutoPlay" 3
(AVerTV 3D) Install AVerTV 3D j
"User Account Control" 5
Ae (a/aj) Allow/Yes
L (g) Next 6
"I accept the terms of the license 1
((L) Next 出 出 "s jll"jll jll jll jllag"agreement
Driver AVerTV 3D (J) (J) Complete
y ylll llll y jnnnndell aull (gll) Next le jai
g j 100000000000000000000000000000000000000000000000000000000000000000000
(B) Browse
Jul (14-1)Finish jai dai.9
n nn nnnnnnnnnnnnnnnnnnnnnnnnnnnnnnnnnnnnnnnnnnnnnnnnnnnnnnnnnnnnnnnnnnnnnnnnnnnnnnnnnnnnnnnnnnnnnnnnnnnnnnnnnnnnnnnnnnnnnnnnnnnnnnnnn
Jg 15MPEG-2 DVD
(1) Decoded Error all s r 200. DVD
J 15
. Windows® XP 1200, jsr
- European Community Compliance Statement
- IMPORTANT SAFETY INSTRUCTIONS
- Disclaimer
- Copyright
- Package Contents
- | Making Connections
- Installation
- Installing Drivers and the TV Software Utility
- Installing Drivers and the Application in Windows® 7 / Windows® 8 / Windows® 8.1
- Activating the AVerTV 3D Application
- Windows 7
- Windows® 8 / Windows® 8.1
- Uninstalling Application and Drivers
- Windows® 7
- Remote Control
- English
- Battery Safety Information
- KomnneKT noCTaBKN
- nntnnnnnaaAVerTV 3D
- nnaaunwaaeauuuaananaan
- 4
- n
- yaaanrnnnnaaannnnaaannnnae
- #
- C
Brand : AVERMEDIA
Model : VOLAR T2
Category : USB TV Tuner