XELSIS SUPREMA - Automatic coffee machine SAECO - Free user manual and instructions

Find the device manual for free XELSIS SUPREMA SAECO in PDF.

SAECO XELSIS SUPREMA - Automatic coffee machine
📄 858 pages English EN Download 💬 AI Question 14 questions ⚙️ Specs
Notice SAECO XELSIS SUPREMA - page 7
Pick your language and provide your email: we'll send you a specifically translated version.
Product type Automatic coffee machine
Brand SAECO
Model XELSIS SUPREMA (SM8885, SM8889)
Dimensions (W x H x D) 287 x 396 x 487 mm
Weight 11 - 12.4 kg
Power supply See rating plate (230 V, 50 Hz)
Water tank capacity 1.7 L
Bean hopper capacity 450 g
Coffee grounds container capacity 15 doses
Milk container capacity 600 ml
Adjustable spout height 75 - 148 mm
Connectivity Wi-Fi 802.11 b/g/n 2.4 GHz
Main functions BeanMaestro, CoffeeEqualizer Touch+, CoffeeMaestro, HygieSteam, ExtraShot, personalized profiles, hot water, ground coffee
Maintenance and cleaning Automatic milk cleaning HygieSteam, descaling, cleaning and lubrication of the brew group, AquaClean filters
Safety Automatic shut-off, drip tray full detection, overheating protection
Spare parts and repairability AquaClean filter (CA6903), descaling solution (CA6700), grease (HD5061), degreasing tablets (CA6704), milk cleaner (CA6705)
General information Touch screen, beverage programming, Wi-Fi connection for updates and support

Frequently Asked Questions - XELSIS SUPREMA SAECO

How to connect my XELSIS SUPREMA machine to Wi-Fi?
Press the Settings icon ⚙, scroll to the Wi-Fi icon, follow the on-screen steps. Your machine must be within range of a 2.4 GHz router.
How to prepare a coffee with ground coffee?
Open the lid of the pre-ground coffee compartment, pour one scoop of ground coffee, close. Select a beverage, press the 'Pre-ground coffee' icon, then start.
What to do if the milk does not foam?
Clean the internal cappuccinatore and check that it is properly inserted. Use cold milk from the refrigerator. If necessary, run the Deep Milk Clean program via the Status menu.
How to clean the brew group?
Remove the brew group, rinse it with clear water. For degreasing, use Philips degreasing tablets via the Status menu > Brew group cleaning.
What is the HygieSteam function for?
HygieSteam automatically cleans the milk dispensing system with steam after each milk-based drink. You can also start a deep cleaning via the Status menu.
How to descale the machine?
Use only Philips descaling solution. Follow the on-screen instructions: empty and place the reservoirs, pour the descaling solution into the water tank up to the CALC CLEAN level, then start the cycle from Status > Descaling.
How to adjust the water hardness?
Use the provided test strip to measure the hardness. In Settings > Water hardness, select the corresponding number of red squares. This optimizes descaling.
Can I create a personalized profile for my drinks?
Yes. From the main menu, press the Profile icon, create a new profile, customize a drink with CoffeeEqualizer Touch+ or CoffeeMaestro, then save it in the profile.
What to do if error code 01 appears?
The pre-ground coffee compartment is clogged. Unplug the machine, remove the brew group, open the compartment lid and insert the handle of a spoon to unclog.
How to activate the AquaClean filter?
Prepare the filter by soaking it in water, install it in the water tank, then go to Status > AquaClean and follow the instructions. The machine must be free of limescale.

User questions about XELSIS SUPREMA SAECO

4 questions about this device. Answer the ones you know or ask your own.

Ask a new question about this device

Your email remains private: it is only used to notify you if someone answers your question.

How to set up or start a SAECO XELSIS SUPREMA for the first time?
Frequently Asked Questions - 24 d
Response Notice-Facile

Initial Setup Steps

Here’s how to properly start your SAECO XELSIS SUPREMA:

1. Preparation

  • Fill the water tank (capacity 1.7 liters) with tap water
  • Fill the coffee bean container (450 g) with coffee beans of your choice
2. Powering On

  • Press the main switch located at the back of the machine to turn it on
  • Press the center of the touch panel and follow the instructions displayed on the screen
  • The machine will automatically perform a rinsing cycle upon first startup

3. Recommended Setup

  • Access the Settings (⚙ icon) and connect the machine to Wi-Fi (2.4 GHz network)
  • Use the provided test strip to adjust the water hardness according to your region
  • Check for available software updates before first use

Once these steps are completed, your machine is ready to prepare your first coffees. The milk reservoir (600 ml) can also be added if you wish to prepare milk-based drinks.

Respond (be the first)
How to remove the AquaClean filter from the SAECO XELSIS SUPREMA?
Frequently Asked Questions - 06/28/2026
Response Notice-Facile

To remove the AquaClean CA6903 filter from your SAECO XELSIS SUPREMA machine, follow these steps:

  • Step 1: Remove the water tank from the coffee machine and empty it completely.
  • Step 2: Remove the old AquaClean filter from the tank. It can be easily removed by grasping it by the sides.

Important: After removing the old filter, you will need to install a replacement filter. Before placing it, soak the new filter in clean water for a few minutes - this step is crucial because if the filter is not properly moistened, air may be drawn into the machine instead of water, causing a sustained noise and preventing coffee preparation.

Once the new filter is installed, access the Status > AquaClean menu and confirm with the √ icon to finalize the activation.

Respond (be the first)
How to replace the water filter of the SAECO XELSIS SUPREMA?
Frequently Asked Questions - 06/11/2026
Response Notice-Facile

The AquaClean CA6903 filter is the water filter specifically designed for the SAECO XELSIS SUPREMA. It filters the water to reduce limescale and prolongs the lifespan of the machine. Here’s how to replace it correctly:

Important information about filter lifespan:

  • The filter filters approximately 95 liters of water before reaching its maximum capacity
  • You must replace the filter at least every 3 months, even if the machine does not indicate it yet
  • The filter status is displayed as a percentage in the Status menu on the touchscreen
  • When the filter reaches 0%, the machine will prompt you to replace it

Steps to replace the filter:

  • Step 1: Remove the water reservoir and empty it completely. Remove the old AquaClean filter
  • Step 2: Before installing the new filter, it is essential to soak it in clean water for a few minutes. This step prepares the filter and prevents air from entering the machine (which causes noise and prevents the machine from making coffee)
  • Step 3: Place the soaked filter in the water reservoir
  • Step 4: Press the Status icon on the touchscreen and scroll from left to right to select AquaClean
  • Step 5: Press the confirmation icon again when the activation screen appears, then follow the on-screen instructions to finalize the filter activation

Special case: If you do not replace the filter before it reaches 0%, the machine must first be completely descaled before you can install and activate the new filter. Use the descaling program from the Status menu and follow the proposed steps.

Main advantage: Using the AquaClean filter significantly reduces the need for descaling, which prolongs the lifespan of your SAECO XELSIS SUPREMA and maintains the quality of your coffee.

Respond (be the first)
How do I delete a saved coffee recipe from my profile on the SAECO XELSIS SUPREMA machine?
Frequently Asked Questions - 02/01/2026
Response Notice-Facile

To delete a saved coffee recipe from your profile on the SAECO XELSIS SUPREMA automatic coffee machine, follow these steps:

Steps to delete a coffee from your profile

  1. Turn on the machine and wait for the touchscreen to display the main menu.
  2. Access your user profile by selecting your name or avatar on the screen.
  3. Open the list of saved coffees in your profile, usually accessible via a section called “My Coffees” or “Saved Recipes”.
  4. Select the coffee recipe you wish to delete.
  5. Choose the delete option, often represented by a trash can icon or a “Delete” button.
  6. Confirm the deletion when prompted by the machine.

After confirmation, the coffee recipe will be removed from your profile. You will then be able to manage your preferences and keep only the recipes you wish to retain.

Respond (be the first)

Download the instructions for your Automatic coffee machine in PDF format for free! Find your manual XELSIS SUPREMA - SAECO and take your electronic device back in hand. On this page are published all the documents necessary for the use of your device. XELSIS SUPREMA by SAECO.

USER MANUAL XELSIS SUPREMA SAECO

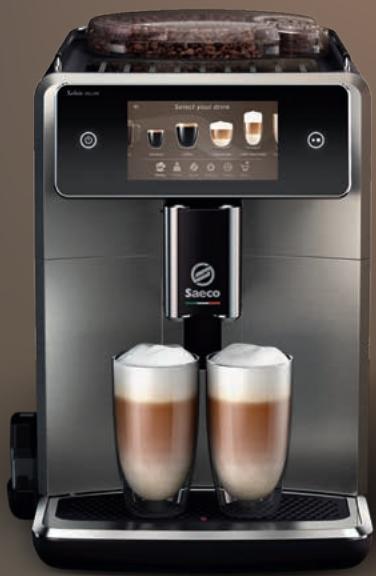
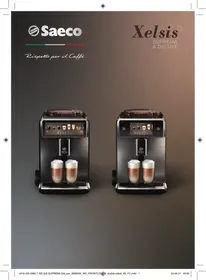
Modern Saeco coffee machine with two cups and digital display (no visible text or symbols)

EN USER MANUAL

English 4

Azərbaycanca 25

Čeština 47

Crnogorski 68

Dansk 90

Deutsch 111

Eesti 135

Español 156

Français 179

Hrvatski 201

Italiano 223

Latviešu 246

Lietuviškai 267

Hungarian 288

Dutch 310

Norwegian 332

Uzbek 353

Polish 375

Portuguese 397

Romanian 419

Albanian 441

Slovenian 463

Slovak 484

Serbian 506

Finnish 528

Swedish 549

Turkmen 570

Greek 592

Bulgarian 616

Kyrgyz 639

Macedonian 663

Russian 687

Tajik 712

Ukrainian 737

Kazakh 760

Ruijtntü 783

Jusmonyunn 865 807

Hebrew 832

Contents

Machine overview (Fig. A) 4

Control panel 5

Introduction 5

Special functions 6

Brewing drinks 7

Adjusting machine settings 10

AquaClean water filter 11

Removing and inserting the brew group 12

Cleaning and maintenance 13

Descaling procedure 15

Error codes 16

Ordering accessories 17

Software updates 18

Troubleshooting 18

Technical specifications 23

Declaration of Conformity 24

Wi-Fi 24

Machine overview (Fig. A)

A1 Lid of bean hopper

A2 Lid of pre-ground coffee compartment

A3 Cup tray

A4 Control panel

A5 Socket for cord

A6 Main switch

A7 Drip tray

A8 Drip tray release grip

A9 HygieSteam container

A10 HygieSteam cover with milk tube holder

A11 Height-adjustable coffee and milk dispensing spout

A13 Power cord with plug

Accessories

A25 Milk container

A26 Milk tube

A27 Cleaning brush

A28 Grease tube

A14 Grind setting knob (to learn more, visit www.saeco.com/care)

A15 Bean hopper

A16 Service door

A17 Coffee funnel

A18 Coffee residues drawer

A19 Brew group (to learn more, visit www.saeco.com/care)

A20 Coffee grounds container

A21 Water tank

A22 Lid of water tank

A23 'Drip tray full' indicator

A24 Drip tray cover

A29 AquaClean filter

A30 Measuring spoon

A31 Water hardness test strip

Control panel

There are two versions of this espresso machine. Their control panels look different, but all icons work the same way. Refer to figures B and C for an overview of all icons. Below you can find the descriptions.

B1 Off icon

B5/C5 Beans

C1 On/off icon

B6/C6 Machine settings

B2/C2 Drinks

B7/C7 Status menu

B3/C3 Drinks menu

B8/C8 Shop

B4/C4 Personal profiles

B9/C9 Start/stop ▶■ icon

Introduction

Congratulations on your purchase of a Saeco full-automatic coffee machine! To fully benefit from the online support that Saeco offers, you can use the control panel to register your machine via the built-in Wi-Fi connection, or go to www.saeco.com/MyCoffeeMachine and register your product there.

Read the separate safety booklet carefully before you use the machine for the first time and save it for future reference.

Your Saeco full-automatic coffee machine allows you to connect with your Wi-Fi network to enhance your coffee experience.

By connecting your machine to your Wi-Fi network, you will be able to:

  • receive personalized recommendations based on machine learning
  • enjoy regular software updates to enhance your user experience
  • make use of the shop functionality, if available in your country
  • you can link your machine to your Amazon account for accessory replenishment, if this option is available in your country
  • connect to your Alexa home device to make use of voice control, if available in your country

Note: This machine has been tested with coffee. Although it has been carefully cleaned, there may be some coffee residues left. We guarantee, however, that the machine is absolutely new.

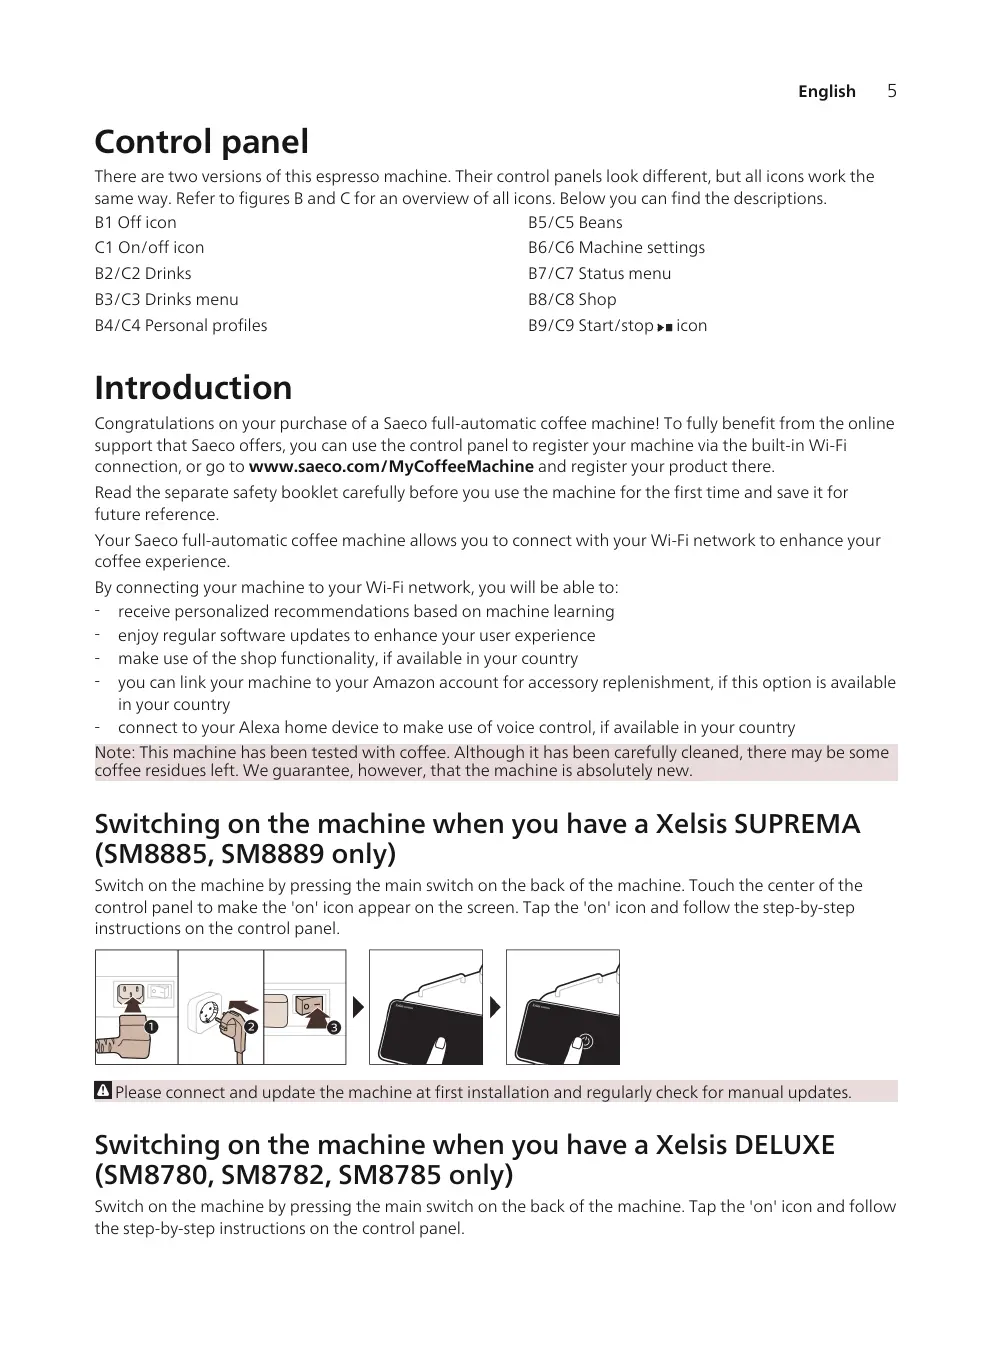
Switching on the machine when you have a Xelsis SUPREMA (SM8885, SM8889 only)

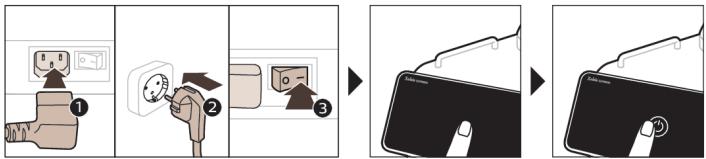
Switch on the machine by pressing the main switch on the back of the machine. Touch the center of the control panel to make the 'on' icon appear on the screen. Tap the 'on' icon and follow the step-by-step instructions on the control panel.

SAECO XELSIS SUPREMA - Switching on the machine when you have a Xelsis SUPREMA (SM8885, SM8889 only) - 1

Please connect and update the machine at first installation and regularly check for manual updates.

Switching on the machine when you have a Xelsis DELUXE (SM8780, SM8782, SM8785 only)

Switch on the machine by pressing the main switch on the back of the machine. Tap the 'on' icon and follow the step-by-step instructions on the control panel.

graph TD A["Plug with plug"] --> B["Switch with socket"] B --> C["Switch with socket"] C --> D["Switch with socket"]

Please connect and update the machine at first installation and regularly check for manual updates.

Connecting to Wi-Fi

Connect your coffee machine to a 2.4 GHz 802.11 b/g/n home Wi-Fi network. Connecting your coffee machine to your home Wi-Fi network provides you with an enhanced user experience. Make sure that the coffee machine and the Wi-Fi router are within range of each other.

Follow the steps below to connect your coffee machine to your Wi-Fi network.

graph LR A["Device"] --> B["Software Update"] B --> C["WiFi Connected"] C --> D["Current Network"] D --> E["Wi-Fi Interface"]

1. Tap the Settings icon and swipe from left to right to find the Wi-Fi icon. 2. Tap the Wi-Fi icon. 3. Follow the steps on the screen to connect your machine to your Wi-Fi network.

You are now ready to start your connected experience.

The machine will perform the automatic rinsing cycle when it is switched on and off via voice control and when the machine has been inactive for a while and switches off. Please make sure that the environment of the machine is safe.

Special functions

Special function

Bean Maestro

Purpose

With BeanMaestro you are able to select the type and roast of your beans. It then optimizes the brewing settings automatically, to get the best out of your coffee beans.

HygieSteam logo featuring a circular design with wave-like internal lines, no text or symbols on the diagram itself.

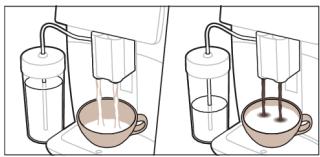
HygieSteam function automatically cleans the milk system, removing microorganisms: use it after brewing cappuccino or other milk-based drinks.

Simple line drawing of a gear and a tool icon labeled 'Ceramic Grinder' (no additional text or symbols)

Our durable grinder is made from 100% ceramic to be exceptionally hard and precise. It can be adjusted to your taste with 12-step levels.

Maintenance Dashboard

The Maintenance Dashboard gives you a helpful overview and notifies you with status information on things like your water level or tell you that the AquaClean is running low.

Brewing drinks

General steps

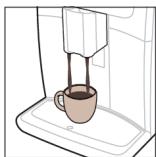
To brew a drink, you need to follow a few simple steps.

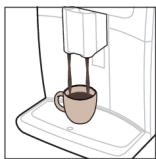
Line drawing of a coffee machine with a cup on a base (no text or symbols)

SAECO XELSIS SUPREMA - General steps - 2

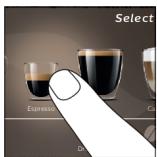
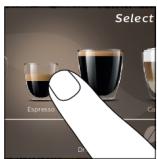
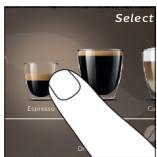
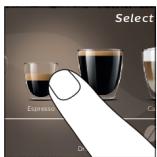
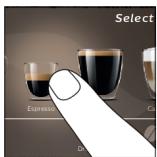
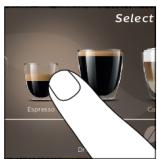
Select Espresso C D

SAECO XELSIS SUPREMA - General steps - 4

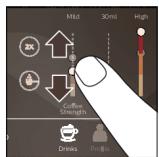
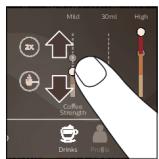
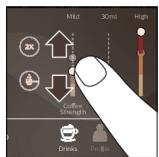
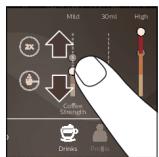
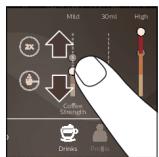
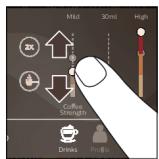
Mid 30ml High 20K Coffee Strength Drinks Profile

SAECO XELSIS SUPREMA - General steps - 6

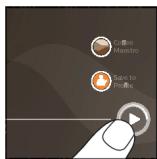
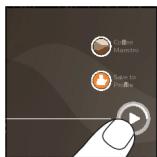
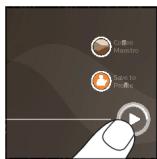
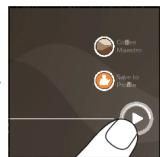
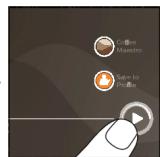
Create Maestro Save to Price

SAECO XELSIS SUPREMA - General steps - 8

Line drawing of a coffee machine with a cup on a sink (no text or symbols)

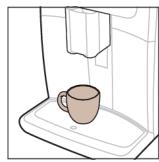
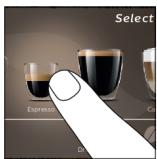
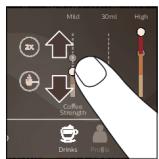
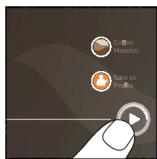
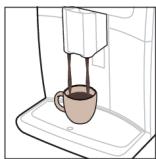
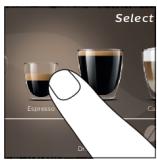
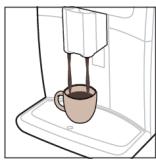
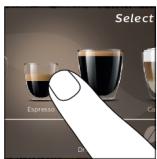
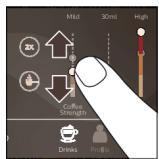
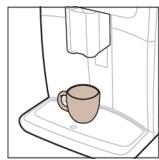
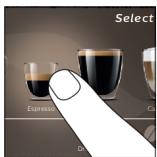
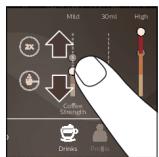
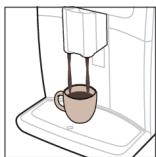
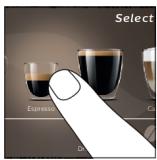
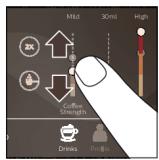
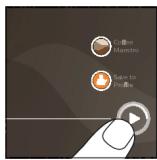
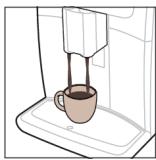
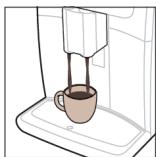
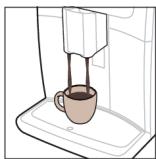
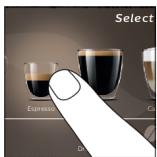
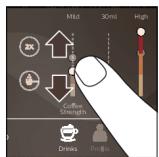
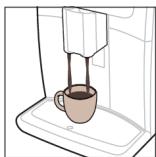
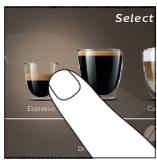
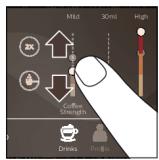
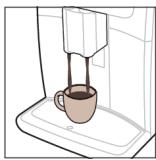
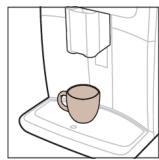
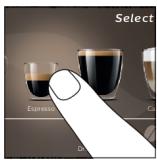
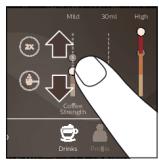
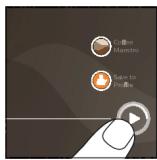
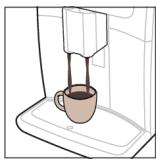
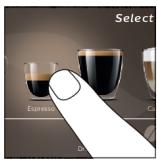
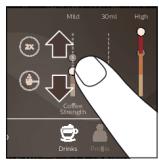
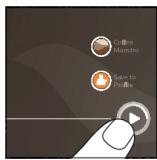
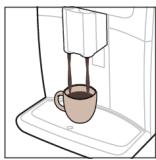
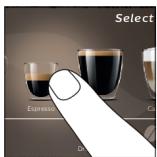
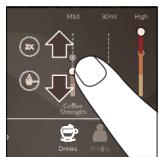
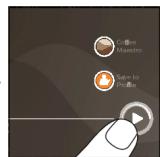
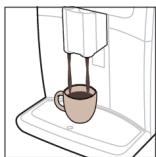
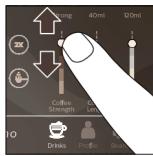
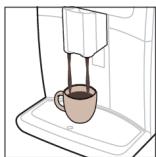
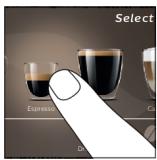
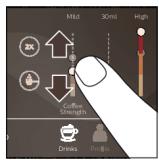
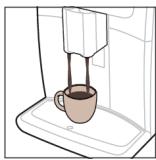
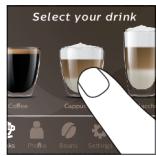
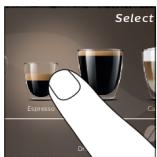
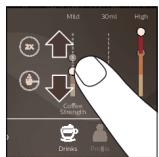
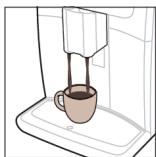
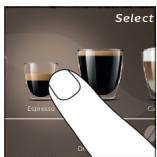
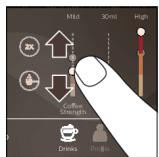
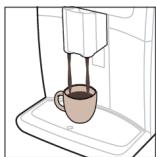
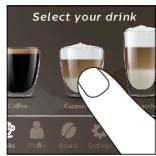
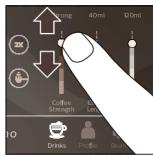
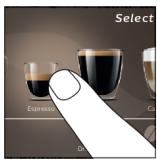
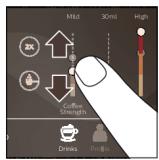
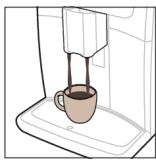
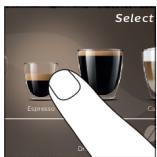
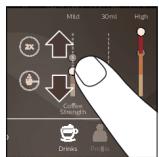
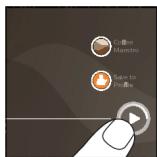
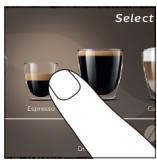
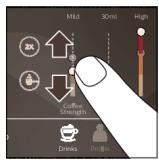
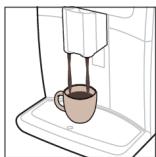
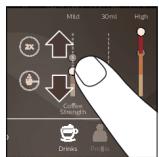
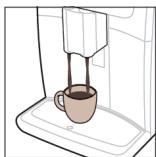
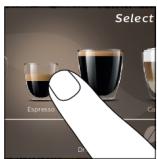
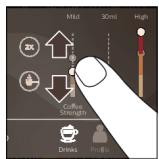
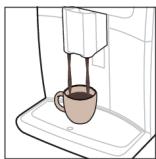
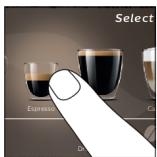
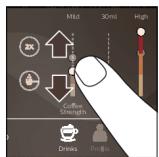
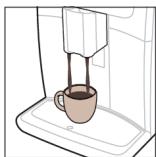
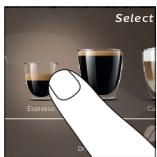
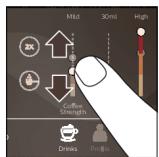
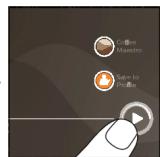
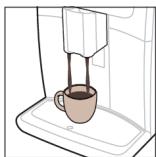
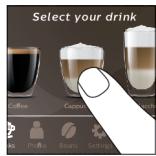
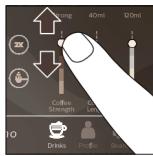
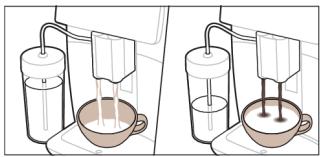
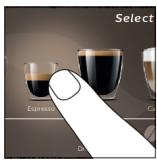
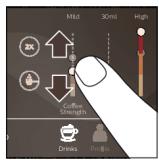
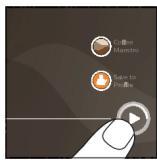
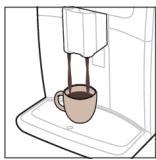
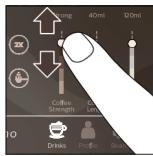
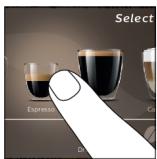
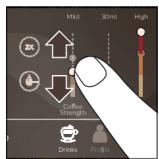
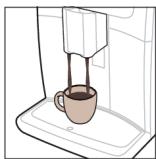
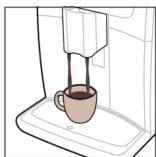
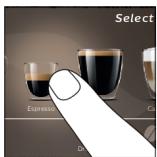
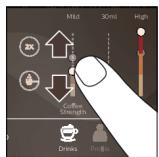
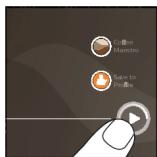
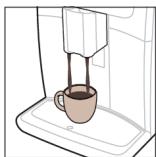
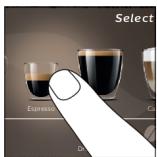
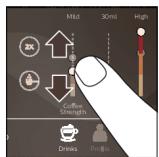
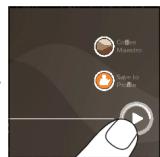
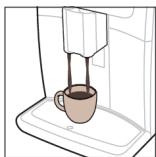
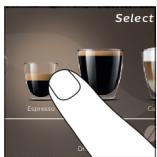
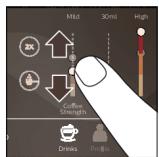
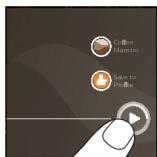
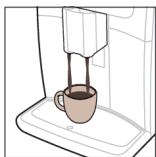
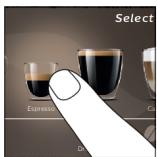
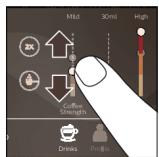
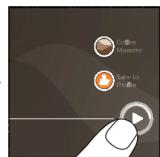
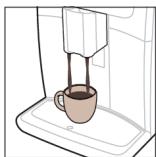
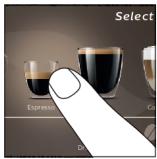
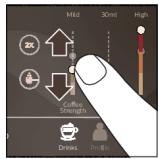
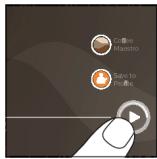
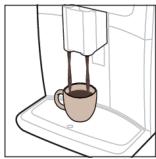
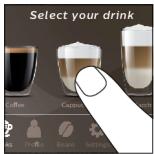
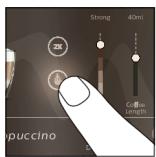
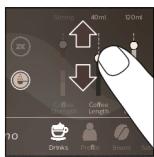
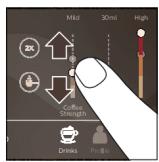
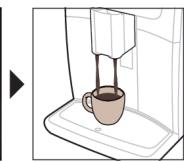
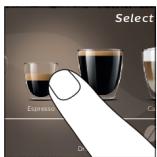
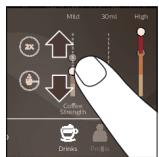
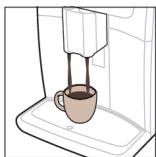
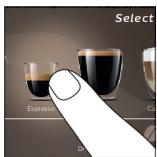
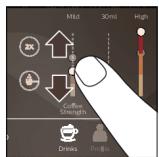
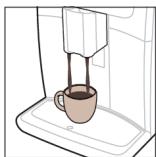
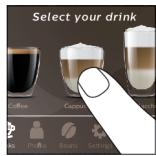
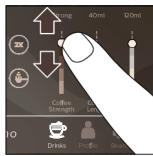
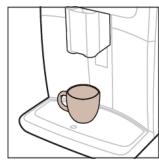
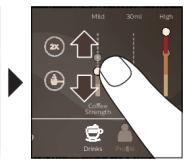
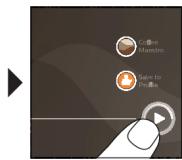
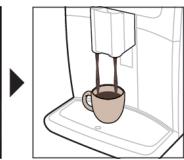
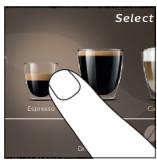
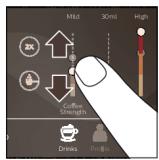
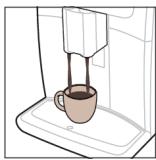
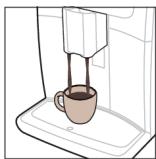
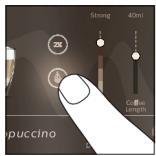
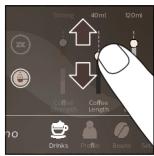
1 Fill the water tank with tap water and fill the bean hopper with beans. 2 Place one or two cups under the height-adjustable dispensing spout. Slide the dispensing spout up or down to adjust the height to the size of the cup or glass you are using. 3 Tap the Drinks icon to enter the 'Drinks' menu. Swipe from left to right to select your drink by tapping on it. - Tap the '2x' icon if you want to brew two cups. The machine automatically carries out two grinding cycles in sequence of the selected drinks. Note: The '2x' icon is not available for all drinks. 4 After selecting a drink, you can adjust the settings to your preference by swiping the adjustable bars up and down. 5 Press the start/stop icon to start brewing the selected drink.

Do not use caramelized or flavored coffee beans.

Note: Turn the grind setting knob in small steps and after brewing 5 cups of coffee you start to taste the difference.

Support on drink parameters

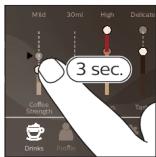
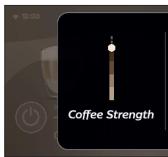
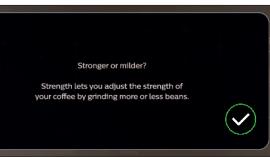
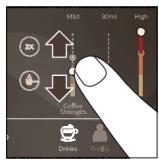
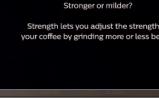
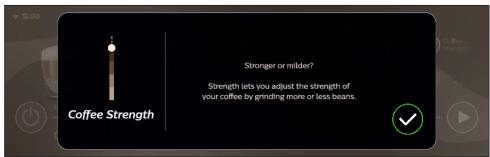
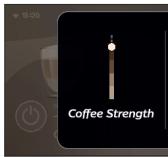
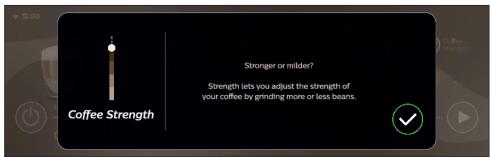
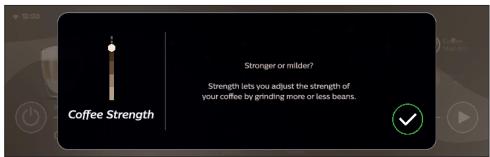
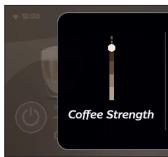
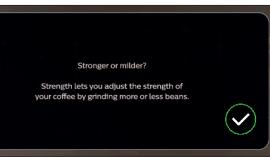
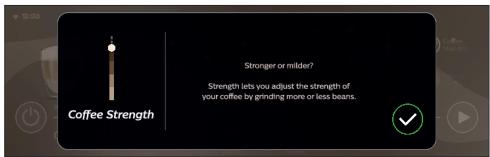
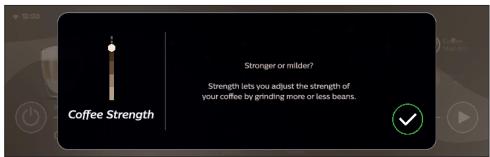
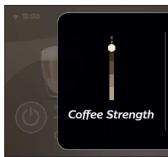
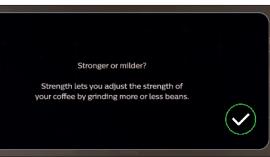
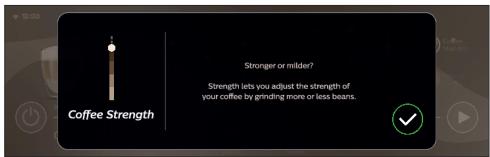
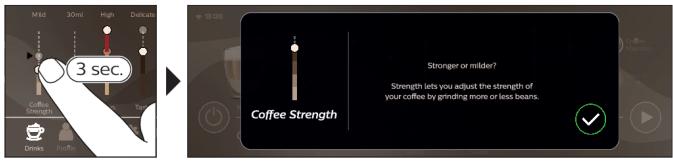
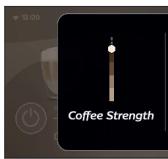
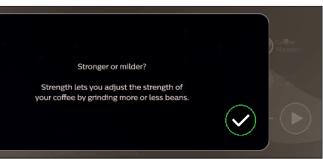
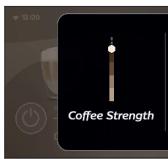
To get additional information about a specific drink parameter, press and hold an adjustable bar for 3 seconds.

Mild 30ml High Delicate 3 sec. Coffee Strength Tallo Drinks Profile

SAECO XELSIS SUPREMA - Support on drink parameters - 2

B:20 Coffee Strength

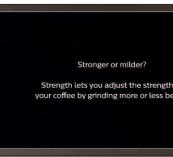
Stronger or milder? Strength lets you adjust the strength of your coffee by grinding more or less beans.

SAECO XELSIS SUPREMA - Support on drink parameters - 5

Brewing milk-based drinks

To brew milk-based drinks, you need to follow a few simple steps.

SAECO XELSIS SUPREMA - Brewing milk-based drinks - 1

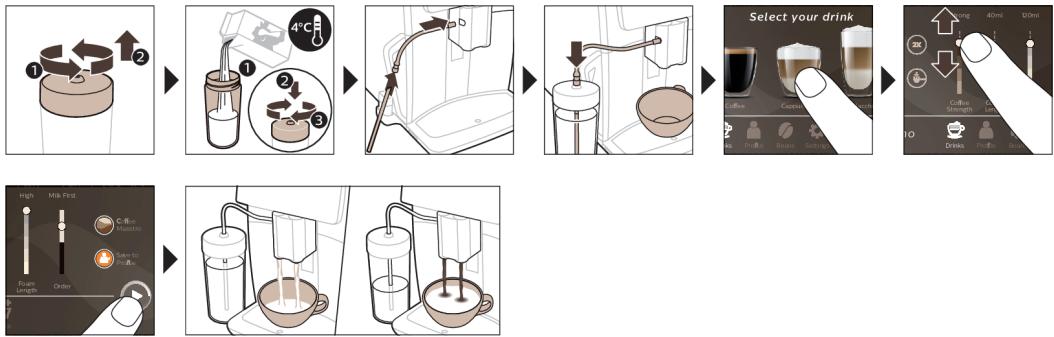
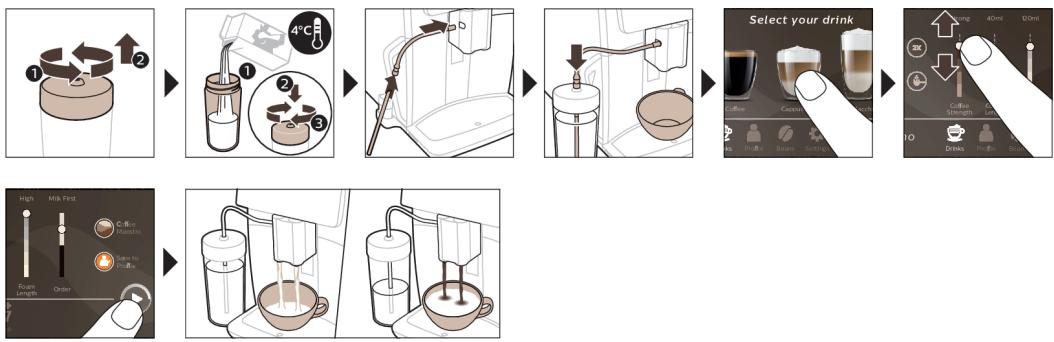
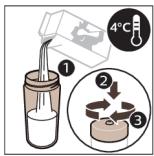
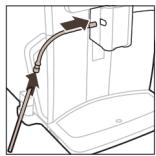
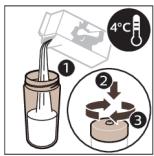
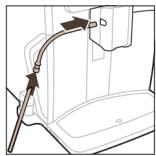
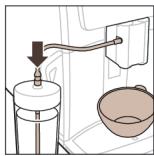
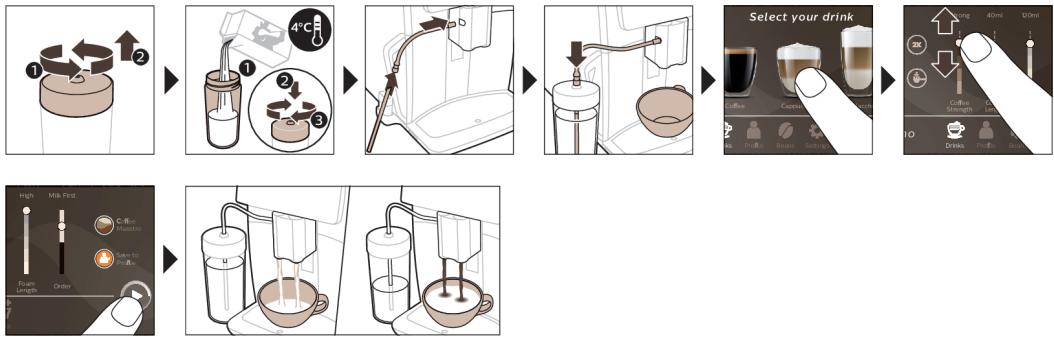
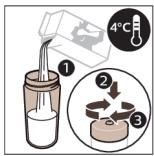
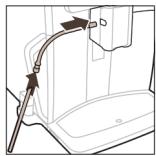
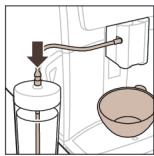
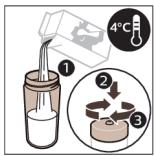
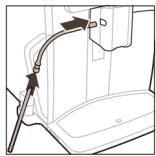
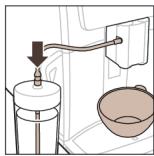
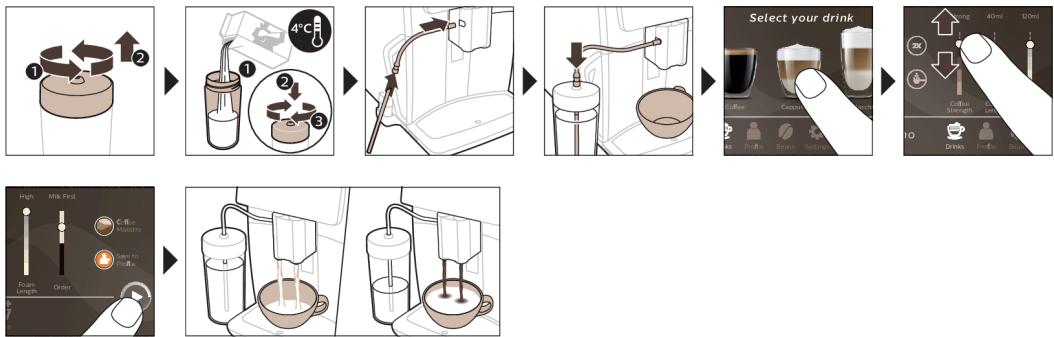
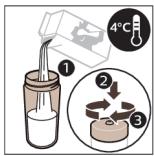
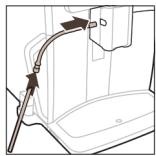
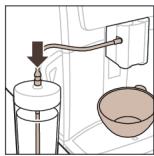
1 Fill the water tank with tap water and fill the bean hopper with beans. Tip: When the flexible milk tube is connected to the cappuccinatore, slide the dispensing spout to the uppermost position for easy access to the water tank. 2 Unscrew the lid of the milk container and fill the milk container with milk. Always use milk coming directly from the fridge for optimal results. 3 Connect the flexible milk tube to the cappuccinatore. 4 Place the metal milk tube in the container. 5 Tap the Drinks icon, scroll and select the milk-based drink icon of your choice. 6 You can adjust the settings to your preference by swiping the adjustable bars up and down. 7 Press the start/stop icon at any time to start brewing the selected drink.

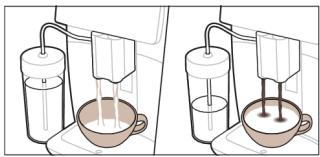
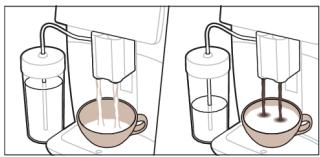
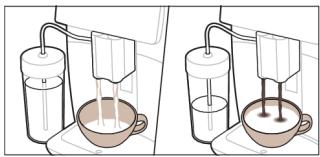
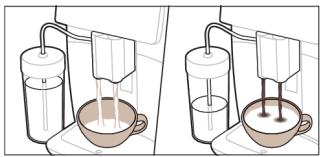
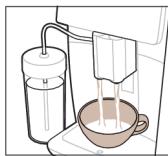
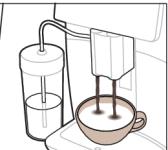
  • For specific drinks, the machine first dispenses milk and then coffee. For a number of other drinks this is the other way around, the machine will first dispense coffee and then milk.
  • To stop dispensing milk before the machine has dispensed the preset amount, press the start/stop icon (SM8780, SM8782, SM8785 only) or press the stop icon (SM8885, SM8889 only).
  • To stop dispensing the complete drink (milk and coffee) before the machine is finished, press and hold the start/stop icon (SM8780, SM8782, SM8785 only) or press the stop icon (SM8885, SM8889 only).

Directly after dispensing the milk, the 'HygieSteam Shot' is performed. The machine shoots steam through the internal milk system to rinse it quickly. The metal part of the milk tube may become hot. To avoid the risk of burns, let it cool down first.

Tip: You can also use a regular milk carton to brew your milk-based drinks. Place the metal milk tube directly into the milk carton.

Brewing coffee with pre-ground coffee

To brew coffee with pre-ground coffee, you need to follow a few simple steps.

SAECO XELSIS SUPREMA - Brewing coffee with pre-ground coffee - 1

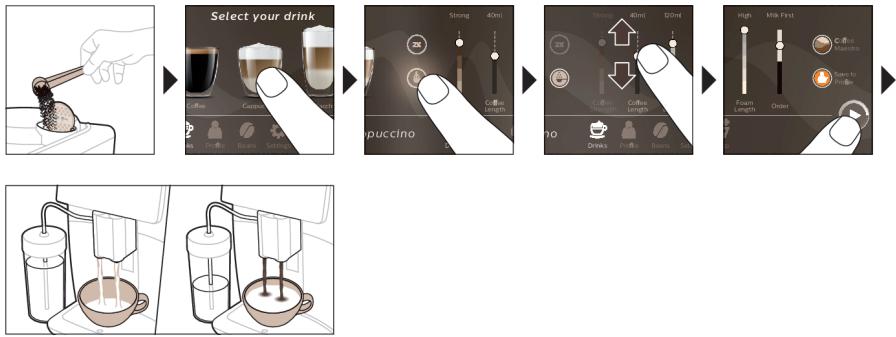
1 Open the lid of the pre-ground coffee compartment and pour one measuring spoon of pre-ground coffee into it. Then close the lid. 2 Tap the Drinks icon, scroll from left to right and select your drink. 3 Tap the pre-ground coffee icon. 4 You can adjust the settings to your preference by swiping the adjustable bars up and down. 5 Press the start/stop icon to start brewing the selected drink.

If you select pre-ground coffee, you cannot adjust the coffee strength or brew more than one drink at the same time.

Dispensing hot water

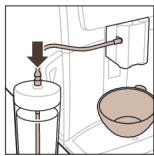
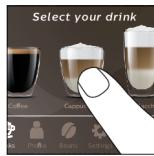
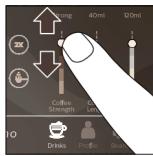
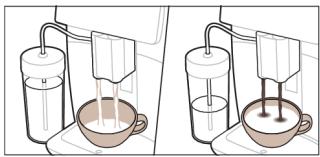
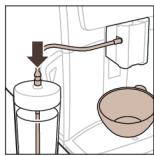
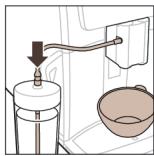
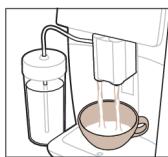
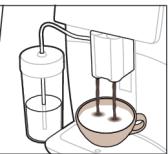
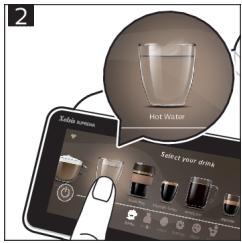
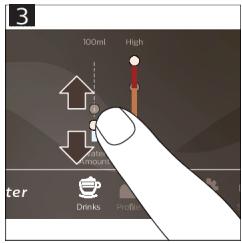
1 Make sure that the internal cappuccinatore is correctly attached to the machine (Fig. 1). 2 Place a cup under the spout. 3 Tap 'Hot Water' (Fig. 2). 4 Slide the adjustable bars up and down to adjust the hot water quantity or temperature to your preference (Fig. 3). 5 Press the start/stop icon. 6 To stop dispensing hot water before the machine is finished, press the start/stop icon again (SM8780, SM8782, SM8785 only) or press the stop icon again (SM8885, SM8889 only).

Personalization

The machine allows you to adjust the settings of a drink to your own preference and to store the adjusted drink in a personal profile. You can choose your own icon and your own profile name.

Get the best out of your beans with the BeanMaestro function

With BeanMaestro you are able to select the type and roast of your beans. It then optimizes the brewing settings automatically, to get the best out of your coffee beans.

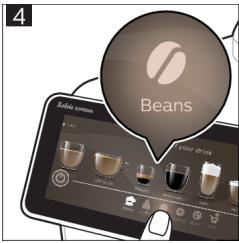
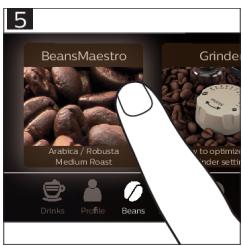
1 Tap on the Beans icon in the main menu (Fig. 4). 2 Tap the BeanMaestro function (Fig. 5). 3 Select the type of beans. You can choose between Arabica and Robusta blend. 4 Select the roasting level of your beans. 5 The brewing settings are optimized automatically. 6 Enjoy your next coffee.

Speed up with CoffeeMaestro

Your machine offers the possibility to select taste profiles instead of adjusting all settings separately with the CoffeeMaestro function. You can choose between Delicato, Intenso and Forte. To select a CoffeeMaestro taste profile:

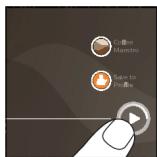
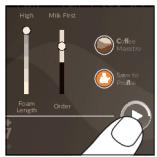
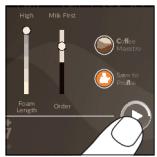
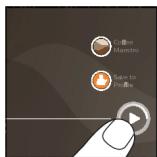
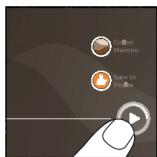
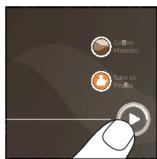
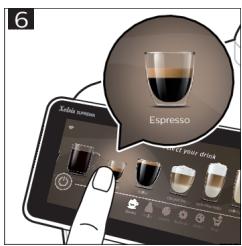
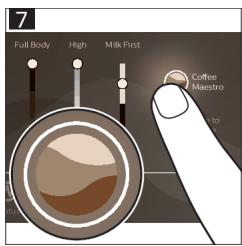
1 Tap the drink icon of your choice (Fig. 6). 2 Tap the CoffeeMaestro icon repeatedly (Fig. 7). - The main settings of the drink are now adjusted accordingly. 3 Press the start/stop icon to start brewing the drink.

Personalize your drink with the CoffeeEqualizer Touch+ function

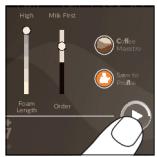
After selecting a drink, the CoffeeEqualizer Touch+ function is activated automatically, allowing you to adjust the drink settings. Long press on each of the items on the display to activate the help function and receive further information.

With the CoffeeEqualizer Touch+ function you can adjust the following settings:

1 Aroma strength 6 Foam amount 2 Coffee quantity 7 Coffee flavor 3 Milk quantity 8 You can also decide to prepare 1 or 2 cups 4 Water quantity 9 The order of first dispensing coffee or milk 5 Drink temperature

Note: It depends on the drink you choose which settings you can adjust.

Save your favorite drinks in a profile

The machine allows you to adjust the settings of a drink to your own preference and to store the adjusted drink in a personal profile. You can select a profile and store a recipe using the profiles.

You can create a profile and add a drink using the profile icon.

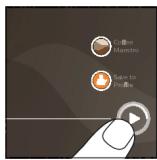
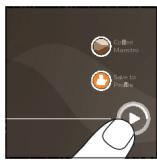
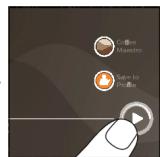
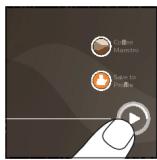
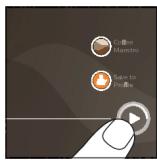
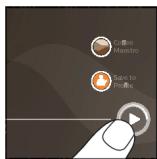
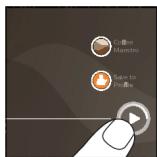
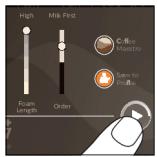
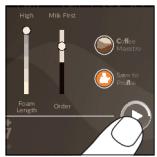
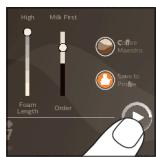
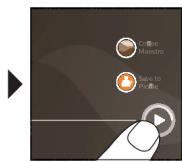
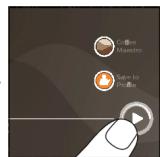
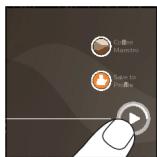
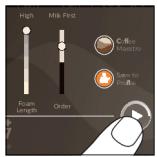
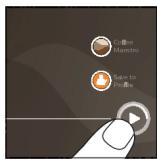
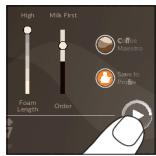
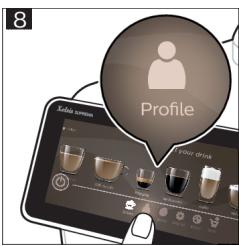
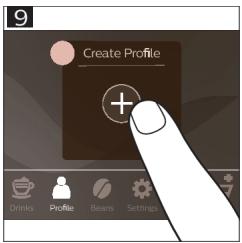
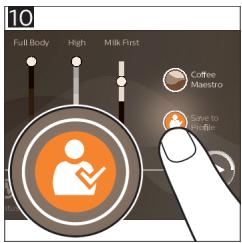
1 Tap the profile icon on the main menu (Fig. 8). 2 Tap the Plus icon (Fig. 9). 3 Type your name and select your favorite icon. 4 You are ready to add a drink. Tap the drink icon of your choice. 5 Personalize the drink via the CoffeeEqualizer Touch+ or the CoffeeMaestro function. 6 Tap on the 'Save to profile' icon to store it in your personal profile (Fig. 10).

Extra shot (ExtraShot)

Your machine offers you the possibility to add an extra shot of Ristretto to your coffee and milk drinks, for example if you want to have a stronger coffee.

1 Place a cup under the spout. 2 Tap one of the one-touch drinks icons to select a drink (Fig. 6). 3 Slide the adjustable bar up to set the strength to the top level and select the ExtraShot function (Fig. 11). 4 Then press the start/stop icon (SM8780, SM8782, SM8785 only) or press the start icon (SM8885, SM8889 only) to start brewing the drink. 5 To stop dispensing the drink before the machine has finished, press the start/stop icon again (SM8780, SM8782, SM8785 only) or press the stop icon again (SM8885, SM8889 only).

When you have selected the ExtraShot function, you can only brew one coffee at a time.

Note: The extra shot function is not available for all drinks.

Adjusting machine settings

You can adjust most machine settings by tapping the Settings icon and follow the steps on the screen.

For online support (frequently asked questions, movies etc.), scan the QR code on the cover of this booklet or visit www.saeco.com/care

Setting the water hardness

We advise you to adjust the water hardness setting to the water hardness level in your region for optimal performance and a longer lifetime of the machine. This also prevents you from having to descale the machine too often. The default water hardness setting is 4: hard water.

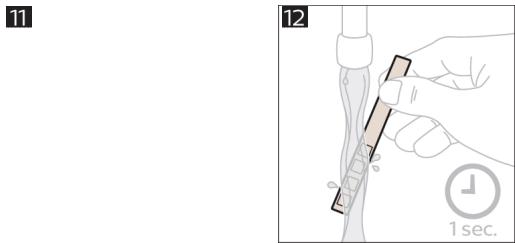
Use the water hardness test strip supplied in the box to determine the water hardness in your region:

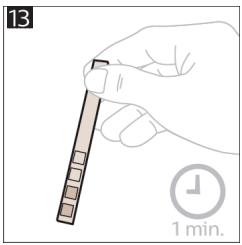
1. Immerse the water hardness test strip in tap water or hold it under the tap for 1 second (Fig. 12). 2. Wait 1 minute. The number of squares on the test strip that turn red indicate the water hardness (Fig. 13).

Set the machine to the correct water hardness:

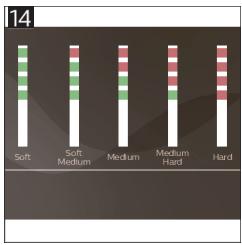
1. Tap the Settings ✿ icon and scroll from left to right to select 'Water hardness'. 2. Select the water hardness level. The number of red squares selected on the display should be the same as the number of red squares on the test strip (Fig. 14). 3. When you have set the correct water hardness, tap the confirmation √ icon to confirm.

Adjusting the grind setting

You can change the coffee strength with the grind setting knob inside the bean container. The lower the grind setting, the finer the coffee beans are ground and the stronger the coffee becomes. There are 12 different grind settings you can choose from.

The machine has been set up to get the best taste out of your coffee beans. Therefore we advise you not to adjust the grind setting until you have brewed 100-150 cups (approx. 1 month of use).

i You need to brew 2 to 3 drinks before you can taste the full difference.

Do not turn the grind setting knob more than one notch at a time to prevent damage to the grinder.

1. Tap the Beans icon in the main menu. 2. Tap on "Grinder". 3. Watch the how to video.

Restoring factory settings

The machine offers you the possibility to restore the factory settings at any moment.

1. Tap the Settings ⚙ icon. 2. Scroll from left to right to select 'Factory settings'. Confirm by tapping the confirmation √ icon. - The settings are now restored.

i The following factory settings are restored to default: water hardness, standby time, display brightness, sound, front illumination, profiles, tank light, measure/units, home screen settings, BeanMaestro preferences, Wi-Fi credentials, software update preferences, Saeco credentials, Amazon credentials.

AquaClean water filter

Your machine is AquaClean enabled. You can place the AquaClean water filter in the water tank to preserve the taste of your coffee. It also diminishes the need for descaling by reducing limescale build-up in your machine. You can purchase an AquaClean water filter from your local or online retailer or from authorized service centers.

AquaClean filter status indication

The status of the AquaClean filter is always visible in the 'Status' menu as a percentage.

  • If the status of the AquaClean filter is 10% or less, the screen shows a message for 2 seconds each time you switch on the machine. This message advises you to buy a new filter.
  • If the status of the filter is 0%, the machine asks you to replace the AquaClean filter every time you switch on the machine.

Activating the AquaClean water filter (5 min.)

i The machine does not automatically detect that a filter has been placed in the water tank. Therefore you need to activate each new AquaClean water filter that you install in the 'Status' menu. When the machine stops showing the filter activation message, you can still activate an AquaClean water filter, but you will need to descale the machine first. i Your machine has to be completely limescale-free before you start using the AquaClean water filter.

Before activating the AquaClean water filter, it has to be prepared by soaking it in water as described below. If you don't do this, air might be drawn into the machine instead of water, which makes a lot of noise and prevents the machine from being able to brew coffee.

1 Tap the 'Status' icon and scroll from left to right to select 'AquaClean'. 2 Tap the confirmation √ icon again when the activation screen appears. Follow the instructions on the screen.

Replacing the AquaClean water filter (5 min.)

After 95 liters of water have flowed through the filter, the filter will cease to work. The AquaClean status indicator drops to 0% to remind you to replace the filter. If you do not replace the AquaClean water filter in time, you can still replace the filter but you first need to descale the machine.

When the AquaClean status indicator drops to 0% or when the machine reminds you to replace the AquaClean filter:

1 take out the old AquaClean water filter. 2 install a new filter and activate it as described in chapter 'Activating the AquaClean water filter (5 min).' i Replace the AquaClean water filter at least every 3 months, even if the machine does not yet indicate that replacement is required.

Removing and inserting the brew group

Go to the 'Status' menu on the screen and select 'Brew group clean' or visit www.saeco.com/care for detailed video instructions on how to remove, insert and clean the brew group.

Removing the brew group from the machine

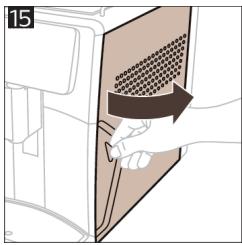
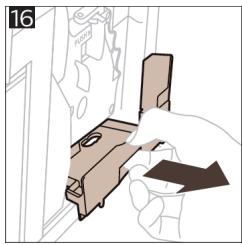
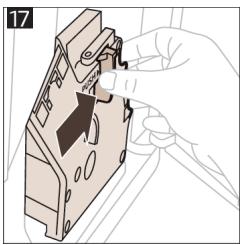
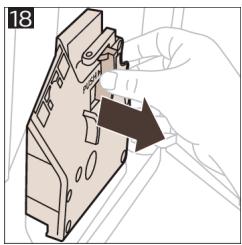
1 Open the service door (Fig. 15). 2 Remove the coffee residues drawer (Fig. 16). 3 Press the PUSH button (Fig. 17) and pull at the grip of the brew group to remove it from the machine (Fig. 18).

Reinserting the brew group

Before you slide the brew group back into the machine, make sure it is in the correct position.

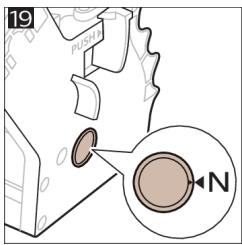
1 Check if the arrow on the yellow cylinder on the side of the brew group is aligned with the black arrow and N (Fig. 19).

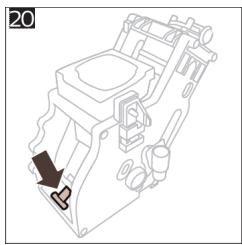
- If they are not aligned, push down the lever until it is in contact with the base of the brew group (Fig. 20).

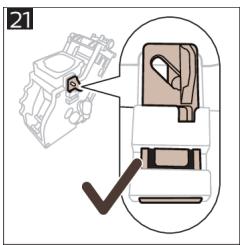
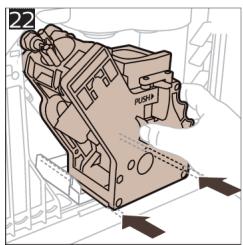
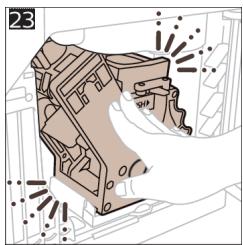
2 Make sure that the yellow locking hook on the other side of the brew group is in the correct position. - To position the hook correctly, push it upwards until it is in uppermost position (Fig. 21). 3 Slide the brew group back into the machine along the guiding rails on the sides (Fig. 22) until it locks into position with a click (Fig. 23). Do not press the PUSH button. 4 Place back the coffee residues drawer and close the service door.

Cleaning and maintenance

Your machine will advise you when to perform cleaning and maintenance.

Regular cleaning and maintenance keeps your machine in top condition and ensures good-tasting coffee for a long time with a steady coffee flow.

Consult the table below for a detailed description of when and how to clean all detachable parts of the machine. You can find more detailed information and video instructions on www.saeco.com/care. See figure C for an overview of which parts can be cleaned in the dishwasher.

ItemWhen to cleanHow to find in the control panel/What to do
AquaClean filterWhen the machine asks you or every three months.STATUS->CLEANING->AQUACLEAN. Follow the steps to activate the AquaClean filter.
i The machine does not automatically detect that a filter has been placed in the water tank. Therefore you need to activate each new AquaClean filter that you install in the 'Status' menu.
i Your machine has to be completely limescale-free before you start using the AquaClean filter.
i Replace the AquaClean filter at least every 3 months, even if the machine does not yet indicate that replacement is required.
Brew groupWeeklySTATUS -> PERFORMANCE ->BREW GROUP CLEAN. Follow the steps to remove and clean the brew group.
i Before you slide the brew group back into the machine, make sure it is in the correct position. The arrow on the yellow cylinder on the side of the brew group has to be aligned with the black arrow and N (Fig. 19).
MonthlySTATUS -> PERFORMANCE ->COFFEE OIL REMOVAL. Follow the steps of the self-cleaning process to automatically remove coffee oil residues from the brew group.
Milk system/internal cappuccinatoreAfter every day of useSTATUS -> HYGIESTEAM. Follow the steps of the self-cleaning process to clean the milk system. Wipe the outside of the metal milk tube with a damp cloth before placing it into the milk tube holder.
WeeklyRemove and disassemble the internal cappuccinatore. Rinse all parts under the tap with some washing-up liquid.
MonthlySTATUS -> HYGIESTEAM -> DEEP MILK CLEAN.Follow the steps of the self-cleaning process to clean the milk system.
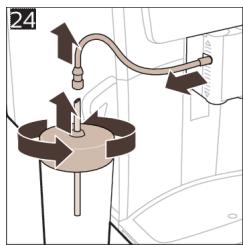
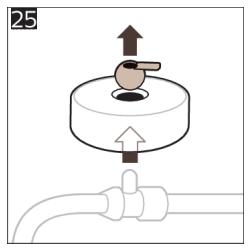
Milk containerWeeklyDisassemble the milk container (Fig. 24) and push out the ball using the pin of the milk tube (Fig. 25). Clean all parts of the milk container under the tap or in the dishwasher.
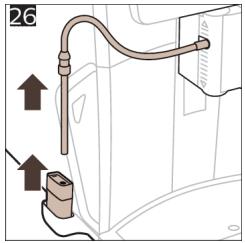
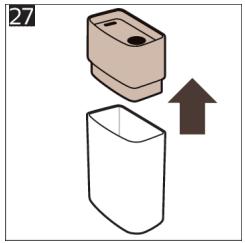
HygieSteam container (milk tube holder)Weekly or when the machine reminds youRemove the HygieSteam container from the machine (Fig. 26) and remove the HygieSteam cover (Fig. 27). Clean the HygieSteam container and cover under the tap.
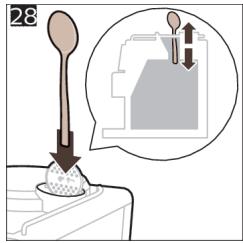
Pre-ground coffee compartmentCheck the pre-ground coffee compartment weekly to see if it is cloggedUnplug the machine and remove the brew group. Open the lid of the pre-ground coffee compartment and insert the spoon handle into it. Move the handle up and down until the clogged ground coffee falls down (Fig. 28). Go to www.saeco.com/care for detailed video instructions.
Coffee grounds containerEmpty the coffee grounds container when prompted by the machine. Clean it weeklyRemove the coffee grounds container while the machine is switched on. Rinse it under the tap with some washing-up liquid.
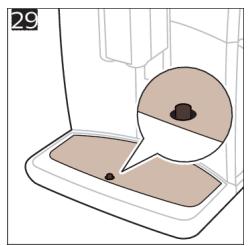
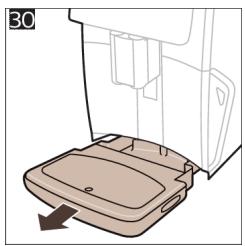
Drip trayEmpty the drip tray daily or as soon as the red 'drip tray full' indicator pops up through the drip tray (Fig. 29). Clean the drip tray weeklyRemove the drip tray (Fig. 30) and rinse it under the tap with some washing-up liquid.
Lubrication of the brew groupEvery 2 monthsLubricate the brew group with the by-packed grease (see 'Lubricating the brew group'). Go to www.saeco.com/care for detailed video instructions.
Water tankWeeklyRinse the water tank under the tap.
Machine frontWeeklyClean with a non-abrasive cloth.
Descaling of the machineWhen the machine asks you to descaleSTATUS -> DESCALING. Follow the steps to descale the machine. When descaling is needed, the machine asks you to descale it, press the OK icon to start and follow the steps.

Cleaning the brew group

Regular cleaning of the brew group prevents coffee residues from clogging up the internal circuits. Go to the 'Status' menu on the screen and select 'Brew group clean' or visit www.saeco.com/care for support videos on how to remove, insert and clean the brew group.

Cleaning the brew group under the tap

1 Tap the 'Status' icon and scroll to select 'Brew group clean'. 2 Tap the confirmation √ icon to confirm and then follow the instructions on the screen.

Cleaning the brew group with the coffee oil remover tablets

Only use Philips coffee oil remover tablets.

1 Tap the 'Status' icon and scroll to select 'Brew group clean'. 2 Tap the confirmation √ icon to confirm and then follow the instructions on the screen.

Lubricating the brew group

To improve your machine's performance, we suggest that you lubricate the brew group every 2 months, to ensure that the moving parts continue to move smoothly.

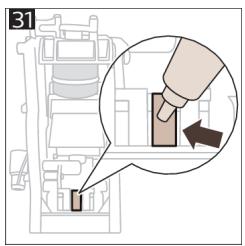
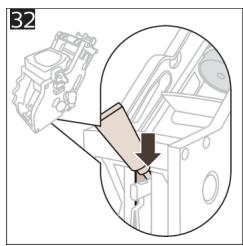
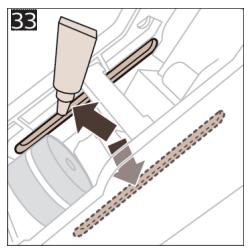
1 Apply a thin layer of grease on the piston (grey part) of the brew group (Fig. 31). 2 Apply a thin layer of grease around the shaft (grey part) in the bottom of the brew group (Fig. 32). 3 Apply a thin layer of grease to the guiding rails on both sides (Fig. 33).

Cleaning programs for the internal cappuccinatore

i The machines tells you when to clean the internal cappuccinatore.

The machine has three programs to clean the internal cappuccinatore:

  • 'HygieSteam Shot': during the preparation of a milk-based drink, the machine automatically shoots steam through the internal cappuccinatore to rinse it quickly.
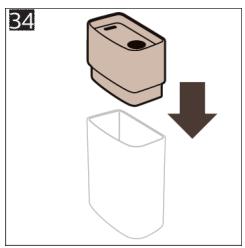
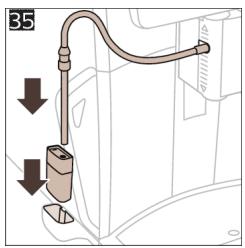
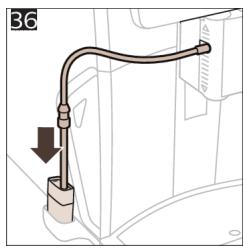
  • 'HygieSteam': the machine thoroughly cleans the internal milk system with steam. Make sure that the HygieSteam container is correctly assembled (Fig. 34) and attached to the machine (Fig. 35). Place the milk tube in the milk tube holder (Fig. 36) and follow the instructions on the screen.
  • 'Deep Milk Clean': Perform the 'Deep Milk Clean' procedure with the Philips milk circuit cleaner for a thorough cleaning of the internal milk system.

Cleaning the internal cappuccinatore under the tap

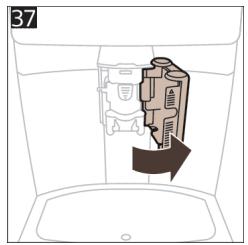
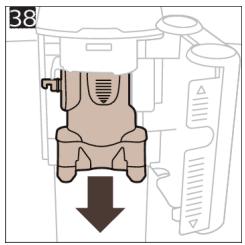
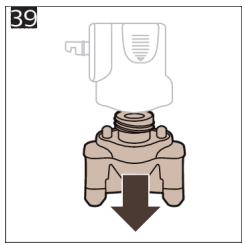
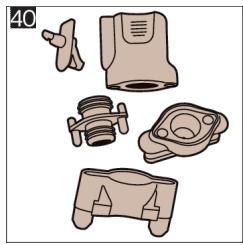
1 Open the door of the internal cappuccinatore (Fig. 37). 2 Remove the internal cappuccinatore by pulling it down (Fig. 38). 3 Disassemble the internal cappuccinatore by pulling the bottom part off the top part (Fig. 39). 4 Disassemble all parts (Fig. 40) and clean them under the tap. 5 Reassemble the internal cappuccinatore. 6 To place back the internal cappuccinatore, put it in upright position and make sure the holes are aligned with the two tubes on the machine. Then move the internal cappuccinatore upwards until it locks into place (Fig. 1). 7 Close the door.

Visit www.saeco.com/care for detailed video instructions.

Descaling procedure

Please use Philips descaler only. Under no circumstances should you use a descaler based on sulfuric acid, hydrochloric acid, sulfamic or acetic acid (vinegar) as this may damage the water circuit in your machine and will not dissolve the limescale properly. Not using the Philips descaler will void your warranty. Failure to descale the appliance will also void your warranty. You can buy Philips descaler from your local or online retailer or from authorized service centers.

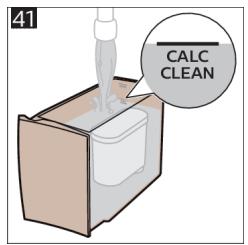
1 When the machine asks you to descale it, tap the confirmation √ icon to start. To start descaling without being prompted by the machine, tap the 'Status' icon and select 'Descal'. 2 Remove the drip tray, the coffee grounds container and the HygieSteam container (Fig. 26), empty them and put them back into place. 3 Remove the water tank and empty it. Then remove the AquaClean filter. 4 Pour the whole bottle of Philips descaler into the water tank and then fill it with water up to the CALC CLEAN level (Fig. 41). Then place the water tank back into the machine. 5 Place a large container (1.5 l) under the coffee dispensing spout. 6 Make sure that the HygieSteam container is correctly assembled (Fig. 34) and attached to the machine (Fig. 35). Place the milk tube in the milk tube holder. 7 Follow the instructions on the screen to start the descaling procedure. The descaling procedure lasts approx. 30 minutes and consists of a descaling cycle and a rinsing cycle. 8 Once the descaling cycle is finished, you need to rinse the water tank and water circuit. Follow the instructions on the screen. 9 Place a new AquaClean filter in the water tank and activate it (see 'Activating the AquaClean water filter (5 min).').

Tip: Using the AquaClean filter reduces the need for descaling!

What to do if the descaling procedure is interrupted

You can exit the descaling procedure by pressing the on/off icon on the control panel. If the descaling procedure is interrupted before it is completely finished, some descaling liquid may remain in the water tank or the water circuit. In that case, do the following:

1 Empty and rinse the water tank thoroughly. 2 Fill the water tank with fresh water up to the CALC CLEAN level indication and switch the machine back on. The machine will heat up and perform an automatic rinsing cycle. 3 Before brewing any drinks, perform a manual rinsing cycle. To perform a manual rinsing cycle, first dispense half a water tank of hot water and then brew 2 cups of pre-ground coffee without adding ground coffee.

Note: If the descaling procedure was not completed, the machine will require another descaling procedure as soon as possible.

Error codes

Below you find a list of the error codes showing problems that you can solve yourself. Video instructions are available on www.saeco.com/care. If another error code appears, please contact the Consumer Care Center in your country. For contact details, see the warranty leaflet.

Error codeProblemPossible solution
01The coffee funnel is clogged.Switch off the machine and unplug it. Remove the brew group. Then open the lid of the pre-ground coffee compartment and insert the spoon handle. Move the handle up and down until the clogged ground coffee falls down (Fig. 28). Visit www.saeco.com/care for detailed video instructions.
03The brew group is dirty or not well-greased.Switch off the machine. Rinse the brew group with fresh water, let it air-dry and then lubricate it (see 'Lubricating the brew group'). Consult chapter 'Cleaning the brew group' or visit www.saeco.com/care for detailed video instructions. Then switch the machine on again.
04The brew group is not positioned correctly.Switch off the machine. Remove the brew group and reinsert it. Make sure that the brew group is in the correct position before you insert it. Consult chapter 'Handling the brew group' or visit www.saeco.com/care for detailed video instructions. Then switch the machine on again.
05There is air in the water circuit.Restart the machine by switching it off and on again. If this works, dispense 2-3 cups of hot water. Descale the machine if you have not done so for a longer period of time.
The AquaClean filter was not prepared properly before installation or it is clogged.Remove the AquaClean filter and try to brew a coffee again. If this works, make sure that the AquaClean filter is prepared properly before you place it back (see 'Activating the AquaClean water filter (5 min.)'). Put the AquaClean filter back into the water tank. If this still does not work, the filter might be clogged and needs to be replaced.
11The machine needs to adjust to room temperatureAllow some time for the machine to adjust from transport/outdoor temperature to room temperature. Switch off the machine for 30 minutes and switch it on again. If this does not work, contact the Consumer Care Center in your country. For contact details, see the warranty leaflet.
14The machine is overheated.Switch off the machine and switch it back on after 30 minutes.
19The machine is not connected to the wall socket properly.Make sure that the small plug of the power cord is properly connected to the socket on the back of the machine.

Ordering accessories

To clean and descale the machine, only use Philips maintenance products. These products can be purchased by enabling Amazon Smart Reorders, from your local or online retailer or from authorized service centers.

To be able to use Amazon Smart Reorders, you first need to activate this service on Amazon. Then follow the steps on the screen of your machine to connect your Amazon account to your Saeco account. After you have completed these steps, you can use the Amazon Smart Reorder service. In the 'Shop' menu on the control panel of the machine you can view the availability of Philips maintenance products and accessories at local retailers.

To find a full list of spare parts online, enter the type number of your machine. You can find the type number on the inside of the service door.

Maintenance products and type numbers:

  • Descaling solution CA6700
  • AquaClean filter CA6903
  • Brew group grease HD5061
  • Coffee oil remover tablets CA6704
  • Milk circuit cleaner CA6705
  • Maintenance kit CA6707

Software updates

Updating is essential to safeguard your privacy and proper functioning of your coffee machine. You can set whether you want to update your machine manually or whether you want it to be done automatically.

When you have selected automatic updates, make sure that the machine is also plugged in at night and Wi-Fi is enabled, so that the machine can receive the software updates overnight. i Updates are made available when there are software improvements, new features for the machine and to prevent a possible security issue. i Mandatory firmware updates are started automatically when the coffee machine is in stand-by mode. During a firmware update the coffee machine cannot be used.

Troubleshooting

This chapter summarizes the most common problems you could encounter with the machine. Support videos and a complete list of frequently asked questions are available on www.saeco.com/care. If you are unable to solve the problem, contact the Consumer Care Center in your country. For contact details, see the warranty leaflet.

ProblemCauseSolution
There are some coffee residues inside my new coffee machine.This machine has been tested with coffee.Although it has been carefully cleaned, there may be some coffee residues left. However, the machine is absolutely new.
The machine is in DEMO mode.You pressed the standby icon for more than 8 seconds.Switch the machine off and then on again with the main switch on the back of the machine.
The drip tray fills up quickly / there is always some water in the drip tray.This is normal. The machine uses water to rinse the internal circuit and brew group. Some water flows through the internal system directly into the drip tray.Empty the drip tray daily or as soon as the red 'drip tray full' indicator pops up through the drip tray cover (Fig. 29). Tip: place a cup under the dispensing spout to collect rinsing water that comes out of it.
The 'empty coffee grounds container' icon remains on.You emptied the coffee grounds container while the machine was unplugged from the wall socket, or you placed it back too fast.Remove the coffee grounds container, wait at least 5 seconds and then insert it again.
The machine prompts to empty the coffee grounds container even though the container is not full.The machine did not reset the counter the last time you emptied the coffee grounds container.Always wait approx. 5 seconds when you place back the coffee grounds container. In this way, the coffee pucks counter will be reset to zero and the number of coffee pucks is counted correctly.
The coffee grounds container is too full and the 'empty coffee grounds container' icon did not appear on the display.You removed the drip tray without emptying the coffee grounds container.When you remove the drip tray, also empty the coffee grounds container even if it contains only a few coffee pucks. This ensures that the coffee pucks counter is reset to zero and that the number of coffee pucks is counted correctly.
I cannot remove the brew group.The brew group is not in the correct position.Reset the machine in the following way: close the service door. Switch the machine off and back on again and wait until the machine is ready for use. Try to remove the brew group again. See chapter 'Removing and inserting the brew group' for step-by-step instructions.
I cannot insert the brew group.The brew group is not in the correct position.Reset the machine in the following way: close the service door. Leave the brew group out. Switch off the machine and unplug it. Wait for 30 seconds and then plug the machine back in, switch it on and wait until the machine is ready for use. Then put the brew group in the correct position and reinsert it into the machine. See chapter 'Removing and inserting the brew group' for step- by-step instructions.
The coffee is watery.The brew group is dirty or needs to be lubricated.Remove the brew group, rinse it under the tap and leave it to dry. Then lubricate the moving parts (see 'Lubricating the brew group').
The machine is performing its self-adjustment procedure. This procedure is started automatically when you use the machine for the first time, when you change to another type of coffee beans or after a long period of non-use.Brew 5 cups of coffee initially to allow the machine to complete its self-adjustment procedure.
The grinder is set to a too coarse setting.Set the grinder to a finer (lower) setting. Brew 2 to 3 drinks to be able to taste the full difference.
The coffee is not hot enough.The temperature is set too low.Set the temperature to the maximum setting (Fig. 42).
A cold cup reduces the temperature of the drink.Preheat the cups by rinsing them with hot water.
Adding milk reduces the temperature of the drink.Regardless of whether you add hot or cold milk, adding milk always reduces the temperature of the coffee. Preheat the cups by rinsing them with hot water.
Coffee does not come out or coffee comes out slowly.The AquaClean water filter was not prepared properly for installation.Remove the AquaClean filter and dispense some hot water. If this works, the AquaClean filter was not installed properly. Reinstall and activate the AquaClean filter and follow all steps in chapter 'AquaClean water filter'.After a long period of non-use, you need to prepare the AquaClean water filter for use again and dispense 2-3 cups of hot water.
The AquaClean water filter is clogged.Replace the AquaClean water filter every 3 months. A filter that is older than 3 months can become clogged.
The grinder is set to a too fine setting.Set the grinder to a coarser (higher) setting. Note that this will impact the coffee taste.
The brew group is dirty.Remove the brew group and rinse it under the tap (see 'Cleaning the brew group under the tap').
The coffee dispensing spout is dirty.Clean the coffee dispensing spout and its holes with a pipe cleaner or needle.
The pre-ground coffee compartment is cloggedSwitch off the machine and remove the brew group. Open the lid of the pre-ground coffee compartment and insert the spoon handle into it. Move the handle up and down until the clogged ground coffee falls down (Fig. 28).
The machine circuit is blocked by limescale.Descale the machine with Philips descaler (see 'Descaling procedure'). Always descale when the machine prompts you.
The milk does not froth.The internal cappuccinatore is dirty or not inserted correctly.Clean the internal cappuccinatore and make sure that you position and insert it correctly (see 'Cleaning the internal cappuccinatore under the tap').
The type of milk used is not suitable for frothing.Different types of milk result in different amounts of froth and different froth qualities.
The milk is splashing.The milk you use is not cold enough.Make sure you use cold milk coming directly from the fridge.
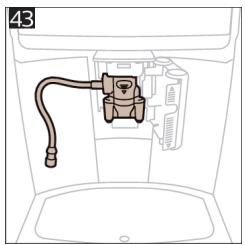
'The flexible milk tube is not connected properly.The cappuccinatore and milk tubes are not clean.Open the door of the coffee dispensing spout (Fig. 37) and check if the flexible milk tube is fully connected to the cappuccinatore (Fig. 43). Note that the cappuccinatore and milk tubes may be hot. Let the cappuccinatore and the tubes cool down before you touch them.Remove and disassemble the internal cappuccinatore (see 'Cleaning the internal cappuccinatore under the tap'). Rinse all parts under the tap. For thorough cleaning, use Philips milk circuit cleaner and perform the Deep Milk Clean procedure via the 'Status' and 'Hygiesteam' menu. Note that if the parts have been cleaned in the dishwasher, they may have become clogged by food particles or detergent residues. A visual check that they are not obstructed is also recommended.
We advise you to perform the HygieSteam program every day: 1) Press 'Status' on the control panel. 2) Select 'HygieSteam'. 3) Then confirm all steps on the display.
The milk tubes are clogged.Always store the milk container without the milk tubes in the refrigerator. Leftover milk could accumulate inside the milk tubes and block the flow of milk through the tubes. Rinse the milk tubes before storage.
The machine seems to be leaking.The machine uses water to rinse the internal circuit and brew group. This water flows through the internal system directly into the drip tray. This is normal.Empty the drip tray every day or as soon as the 'drip tray full' indicator pops up through the drip tray cover (Fig. 29). Tip: Place a cup under the dispensing spout to collect rinsing water and reduce the amount of water in the drip tray.
The drip tray is too full and has overflowed which makes it look like the machine is leaking.Empty the drip tray every day or as soon as the 'drip tray full' indicator pops up through the drip tray cover (Fig. 29).
The water tank is not fully inserted, some water is leaking out of the water tank and air is drawn into the machine.Make sure the water tank is in the correct position: remove it and reinsert it into the machine as far as possible.
The brew group is dirty/clogged.Rinse the brew group.
The machine is not placed on a horizontal surface.Place the machine on a horizontal surface so that the drip tray does not overflow and the 'drip tray full' indicator works properly.
I cannot activate the AquaClean water filter and the machine asks for descaling.The filter has not been installed or replaced in time after the screen showed the AquaClean reminder. This means your machine is not completely free of limescale anymore.Descale your machine first and then install the AquaClean water filter.
The new water filter does not fit.You are trying to install another filter than the AquaClean water filter.Only the AquaClean water filter fits into the machine.
The rubber ring on the AquaClean water filter is not in place.Place back the rubber ring on the AquaClean water filter.
The machine is making a loud noise.It is normal that your machine makes some noise during use.If the machine starts to make a different kind of noise, clean the brew group and lubricate it (see 'Lubricating the brew group').
The AquaClean water filter was not prepared properly and air is now drawn into the machine.Remove the AquaClean water filter from the water tank and prepare it for use properly before you place it back. See chapter 'AquaClean water filter' for step-by-step instructions.
The water tank is not fully inserted and air is drawn into the machine.Make sure the water tank is in the correct position: remove it and reinsert it by pushing it into the machine as far as possible.
When I try to connect the machine to Wi-Fi for the first time, the machine cannot connect to the Wi-Fi network.Your Wi-Fi name and password are not correct.Check your Wi-Fi name and password.
The coffee machine and the Wi-Fi router are not within range of each other.Ensure that the coffee machine and the Wi-Fi router are within range of each other.or use a Wi-Fi repeater.
The machine is not able to find the home Wi-Fi network.The Wi-Fi router is not working properly.Please make sure that the Wi-Fi router is working properly and is connected to the internet.
The machine is not within range of the router.Make sure the machine is within range of the router. You can also use a Wi-Fi signal repeater.
The router your coffee machine is trying to connect to is 5 GHz dual-band and your coffee machine is not trying to connect to a 2.4 GHz network.5 GHz networks are not supported.Temporarily switch off the 5 GHz band in your router and try to pair your coffee machine again to another band of the same router (2.4 GHz). Switch on your 5 GHz band again after successful pairing
I cannot use Alexa and Amazon Smart Reorders yet.You have not yet connected to your Amazon to your Saeco account.Please follow the instructions on the control panel of the machine to connect your Amazon account to your Saeco account to be able to use Alexa voice control and Amazon Smart Reorders.Note: To be able to use these features you need to have an Alexa app or an Alexa device and you need to enable the Smart Reorders service on Amazon.
The Wi-Fi connectivity of the machine used to work but is not working anymore.Your Wi-Fi name and/or password has changed.Follow the instructions of section 'Connecting to Wi-Fi' and choose the network with the new Wi-Fi name to connect to.
The Wi-Fi password has changed.Follow the instructions of section 'Connecting to Wi-Fi' and enter the new Wi-Fi password.
Your Wi-Fi router is not working properly.Check the router and make sure it is working.
The Wi-Fi connectivity can be interrupted by electromagnetic or other interferences.Keep the appliance away from other electronic devices that may cause interferences.
None of the solutions mentioned above work.Switch the machine off and then on again with the main switch on the back to recheck the Wi-Fi connection.

Technical specifications

The manufacturer reserves the right to improve the technical specifications of the product. All the preset quantities are approximate.

DescriptionValue
Size (w x h x d)287 x 396 x 487 mm
Weight11 - 12.4 kg
Power cord length1200 mm
Water tank1.7 liters, removable
Bean hopper capacity450 g
Coffee grounds container capacity15 pucks
Milk container capacity600 ml
Height-adjustable spout height75-148 mm
Nominal voltage - Power rating - Power supplySee data plate on the inside of service door
Wi-Fi frequency band2.4 GHz 802.11 b/g/n

Declaration of Conformity

Hereby, DAP B.V. declares that the fully automatic espresso machines SM8780, SM8782, SM8785, SM8885 and SM8889 are in compliance with Directive 2014/53/EU.

The full text of the EU declaration of conformity is available at the following internet address:

https://www.saeco.com.

The fully automatic espresso machines SM8780, SM8782, SM8785, SM8885 and SM8889 are equipped with a Wi-Fi module, 2.4 GHz 802.11 b/g/n (channels 1..13). Maximum transmitting power <100 mW(20 dBm).

Wi-Fi

The machine is a networked equipment, in compliance with reg. (EU) No 801/2013, and it is intended to be used permanently connected to a 2.4 GHz 802.11 b/g/n network.

SAECO XELSIS SUPREMA - Wi-Fi - 1

Select Express Cu D

SAECO XELSIS SUPREMA - Wi-Fi - 3

Mild 30ml High 2X Coffee Strength Drinks Profile

SAECO XELSIS SUPREMA - Wi-Fi - 5

Create Mastro Save to Picture

SAECO XELSIS SUPREMA - Wi-Fi - 7

Line drawing of a coffee machine with a cup on a base (no text or symbols)

SAECO XELSIS SUPREMA - Wi-Fi - 9

Select Espresso C D

SAECO XELSIS SUPREMA - Wi-Fi - 11

Mid 30ml High 20K Coffee Strength Drinks Profile

SAECO XELSIS SUPREMA - Wi-Fi - 13

Create Maestro Save to Price

SAECO XELSIS SUPREMA - Wi-Fi - 15

Line drawing of a coffee machine with a cup on a sink (no text or symbols)

SAECO XELSIS SUPREMA - Wi-Fi - 17

B20 Coffee Strength

SAECO XELSIS SUPREMA - Wi-Fi - 19

SAECO XELSIS SUPREMA - Wi-Fi - 20

SAECO XELSIS SUPREMA - Wi-Fi - 21

SAECO XELSIS SUPREMA - Wi-Fi - 22

B3/C3 Drinks menu

1 Touch the Settings icon ⚙ and swipe from left to right to find the "Wi-Fi" icon. 2 Touch the "Wi-Fi" icon. 3 Follow the on-screen steps to connect the machine to a Wi-Fi network.

You are now ready to start working in a connected environment.

The machine will perform an automatic rinse cycle when it is turned on and off via voice control, and if it has been inactive for some time, it will turn off. Make sure the area around the machine is safe.

Special functions

Special function

Purpose

Bean Maestro

BeanMaestro allows you to choose the type and degree of roasting of the coffee. It then automatically optimizes the brewing settings to make the best use of the coffee beans.

HygieSteam logo featuring a circular design with wavy lines and the brand name below (no additional text or symbols)

The maintenance dashboard provides a useful overview and notifications with information about the status of things such as the water level or informs you that the AquaClean filter level is low.

Brewing drinks

General steps

To brew a drink, you need to follow a few simple steps.

Line drawing of a coffee machine with a cup on the counter (no text or symbols)

SAECO XELSIS SUPREMA - General steps - 2

Select Expresso Cu D

SAECO XELSIS SUPREMA - General steps - 4

Mild 30ml High ZK Coffee Strength Drinks Proteink

SAECO XELSIS SUPREMA - General steps - 6

Create Master Save to Drive

SAECO XELSIS SUPREMA - General steps - 8

Line drawing of a coffee machine with a cup on a tray (no text or symbols)

1 Fill the water tank with tap water and fill the bean hopper with coffee beans. 2 Place one or two cups under the dispensing spout, which is adjustable in height. Swipe up or down on the dispensing spout to adjust its height to the size of the cup or glass you are using. 3 Touch the Drinks icon 🚫 to access the "Drinks" menu. Swipe from left to right and select a drink by touching it.

- Touch the "2x" icon if you want to brew two cups. The machine automatically performs two grinding cycles in a row for selected drinks.

Brewing milk-based drinks

To make milk-based drinks, you need to follow a few simple steps.

SAECO XELSIS SUPREMA - Brewing milk-based drinks - 1

B9/C9 Start/stop icon (Start/stop icon)

Introduction

SAECO XELSIS SUPREMA - Introduction - 1

Select Express Cu D

SAECO XELSIS SUPREMA - Introduction - 3

Mild 30ml High 2X Coffee Strength Drinks Profile

SAECO XELSIS SUPREMA - Introduction - 5

Create Mastro Save to Picture

SAECO XELSIS SUPREMA - Introduction - 7

Line drawing of a coffee machine with a cup on a base (no text or symbols)

Stronger or milder? Strength lets you adjust the strength of your coffee by grinding more or less beans. Coffee Strength

4°C ① ② ③

Diagram of a pipe connection with arrows indicating flow direction (no text or symbols)

Diagram of a kitchen appliance with a valve and handle, showing a bowl and a container (no text or symbols)

Select your drink: Coffee, Cappuccino, Coffee, Profile, Beans, Settings

30mg, 40ml, 120ml, 2K, Coffee Strength, C, Length, 10, Drinks, Profile, Big

High, Milk First, C Office, Master, Save to Profile, Foam, Length, Order

Two diagrams showing a mixing machine with liquid and a bowl, no text or symbols present.

B6/C6 Machine settings (B6/C6)

C1 On/off icon (C1 On/off symbol)

SAECO XELSIS SUPREMA - Introduction - 17

Select Espresso C

SAECO XELSIS SUPREMA - Introduction - 19

Mild 30ml High ZK Coffee Strength Draws Profile

SAECO XELSIS SUPREMA - Introduction - 21

Create Master Save to Pick

SAECO XELSIS SUPREMA - Introduction - 23

Line drawing of a coffee machine with a cup on the tray (no text or symbols)

B9/C9 Start/stop icon (B9/C9)

B4/C4 Personal profiles (B4/C4 Personal profiles)

SAECO XELSIS SUPREMA - Introduction - 25

Select Espresso C D

SAECO XELSIS SUPREMA - Introduction - 27

Mid 30ml High 20K Coffee Strength Drinks Profile

SAECO XELSIS SUPREMA - Introduction - 29

Create Maestro Save to Price

SAECO XELSIS SUPREMA - Introduction - 31

Line drawing of a coffee machine with a cup on a sink (no text or symbols)

SAECO XELSIS SUPREMA - Introduction - 33

B:20 Coffee Strength

Stronger or milder? Strength lets you adjust the strength of your coffee by grinding more or less be

of ans. Coffee Maestro Video 100%

A6 Main switch

A7 Drip tray

SAECO XELSIS SUPREMA - Introduction - 37

Select Espresso C

SAECO XELSIS SUPREMA - Introduction - 39

Mild 30ml High ZK Coffee Strength Draws Profile

SAECO XELSIS SUPREMA - Introduction - 41

Create Master Save to Pick

SAECO XELSIS SUPREMA - Introduction - 43

Line drawing of a coffee machine with a cup on the tray (no text or symbols)

B2/C2 Drinks

B3/C3 Drinks menu

B4/C4 Personal profiles

B5/C5 Grains

SAECO XELSIS SUPREMA - Introduction - 45

Select Express Cu D

SAECO XELSIS SUPREMA - Introduction - 47

Mild 30ml High 2X Coffee Strength Drinks Profile

SAECO XELSIS SUPREMA - Introduction - 49

Create Mastro Save to Picture

SAECO XELSIS SUPREMA - Introduction - 51

Line drawing of a coffee machine with a cup on a base (no text or symbols)

B2/C2 Drinks

B7/C7 Status menu

B3/C3 Drinks menu

B8/C8 Shop

B4/C4 Personal profiles

B9/C9 Start/stop ▶ icon

Introduction

1 Tap the Settings ⚙️ icon and swipe from left to right to find the Wi-Fi icon. 2 Tap the Wi-Fi icon. 3 To connect the device to a Wi-Fi network, follow the steps shown on the screen.

You are ready to start connecting.

Our durable grinder is made entirely of 100% ceramic to be extremely strong and precise. You can adjust it to your taste using 12-step levels.

Maintenance Dashboard

The maintenance dashboard provides a useful overview and gives you information about the status of individual items, for example, it tells you what water level is remaining and whether the AquaClean filter will soon need to be replaced.

Preparing drinks

General steps

To prepare a drink, you need to follow a few simple steps.

Line drawing of a coffee machine with a cup on a tray (no text or symbols)

SAECO XELSIS SUPREMA - General steps - 2

Select Express Cu D

SAECO XELSIS SUPREMA - General steps - 4

Mild 30ml High 2X Coffee Strength Drinks Profile

SAECO XELSIS SUPREMA - General steps - 6

Create Mastro Save to Picture

SAECO XELSIS SUPREMA - General steps - 8

Line drawing of a coffee machine with a cup on a base (no text or symbols)

SAECO XELSIS SUPREMA - General steps - 10

Select Express Cu D

SAECO XELSIS SUPREMA - General steps - 12

Mild 30ml High 2X Coffee Strength Drinks Profile

SAECO XELSIS SUPREMA - General steps - 14

Create Mastro Save to Picture

SAECO XELSIS SUPREMA - General steps - 16

Line drawing of a coffee machine with a cup on a base (no text or symbols)

Switch on the machine by pressing the main switch on the back of the machine. Tap the 'on' icon and follow the step-by-step instructions on the control panel.

graph TD A["Plug 1"] --> B["Switch"] B --> C["Pump"] C --> D["Battery"] D --> E["Power Outlet"] E --> F["Back to Battery"]

SAECO XELSIS SUPREMA - General steps - 19

Select Expresso Cu D

SAECO XELSIS SUPREMA - General steps - 21

Mild 30ml High ZK Coffee Strength Drinks Proteink

SAECO XELSIS SUPREMA - General steps - 23

Create Master Save to Drive

SAECO XELSIS SUPREMA - General steps - 25

Line drawing of a coffee machine with a cup on a tray (no text or symbols)

Stronger or milder? Strength lets you adjust the strength of your coffee by grinding more or less beans. Coffee Strength

4°C ① ② ③

Diagram of a vehicle interior showing a curved pipe or hose inserted into a car (no text or symbols visible)

Diagram of a kitchen appliance with a handle, lid, and bowl (no text or symbols)

Select your drink: Coffee, Cappuccino, Coffee, Profile, Beans, Settings

2K, 40ml, 120ml, Coffee Strength, Cafe, Lens, Drinks, Profile, Beach

High, Milk First, C Office, Master, Save to Profile, Foam, Length, Order

Illustration of two laboratory setups showing a mixing bowl and a stand mixer (no text or symbols)

SAECO XELSIS SUPREMA - General steps - 35

Select: Espresso, Cu, D

SAECO XELSIS SUPREMA - General steps - 37

Mild, 30ml, High, ZK, Coffee Strength, Drinks, Proteink

SAECO XELSIS SUPREMA - General steps - 39

Create, Master, Save to Drive

SAECO XELSIS SUPREMA - General steps - 41

Line drawing of a coffee machine with a cup on a tray (no text or symbols)

Preparing milk-based drinks

To prepare milk-based drinks, you need to follow a few simple steps.

HygieSteam

SAECO XELSIS SUPREMA - Preparing milk-based drinks - 2

Select Express Cu D

SAECO XELSIS SUPREMA - Preparing milk-based drinks - 4

Mild 30ml High 2X Coffee Strength Drinks Profile

SAECO XELSIS SUPREMA - Preparing milk-based drinks - 6

Create Mastro Save to Picture

SAECO XELSIS SUPREMA - Preparing milk-based drinks - 8

Line drawing of a coffee machine with a cup on a base (no text or symbols)

Stronger or milder? Strength lets you adjust the strength of your coffee by grinding more or less beans. Coffee Strength

4°C ① ② ③

Diagram of a vehicle interior showing a curved pipe or hose inserted into a car (no text or symbols visible)

Diagram of a kitchen appliance with a handle, lid, and bowl (no text or symbols)

Select your drink Coffee Cappucco Coffee Profile Beans Settings

2K, 40ml, 120ml, Coffee Strength, Glen, 10 Drinks, Profile, Beach

High, Milk First, C Office, Master, Save to Profile, Foam Length, Order

Illustration of two laboratory setups showing a mixing bowl and a stand mixer (no text or symbols)

B3/C3 Menu Drinks

B8/C8 Buy

B9/C9 Start/stop ▶■ icon

Introduction

SAECO XELSIS SUPREMA - Introduction - 1

Select, Expresso, Cu, D

SAECO XELSIS SUPREMA - Introduction - 3

Mild, 30ml, High, ZK, Coffee Strength, Drinks, Proteink

SAECO XELSIS SUPREMA - Introduction - 5

Create, Master, Save to Drive

SAECO XELSIS SUPREMA - Introduction - 7

Line drawing of a coffee machine with a cup on a tray (no text or symbols)

Extra shot

B6/C6 Machine settings

C1 On/off icon

Machine settings

B2/C2 Drinks

B7/C7 Status menu

B3/C3 Drinks menu

B8/C8 Shop

B4/C4 Personal profiles

B9/C9 Start/stop icon

B5/C5 Beans

Start/stop

Introduction

SAECO XELSIS SUPREMA - Introduction - 1

Select Expresso Cu D

SAECO XELSIS SUPREMA - Introduction - 3

Mild 30ml High ZK Coffee Strength Drinks Profile

SAECO XELSIS SUPREMA - Introduction - 5

Create Master Save to Decor

SAECO XELSIS SUPREMA - Introduction - 7

Line drawing of a coffee machine with a cup on a tray (no text or symbols)

Stronger or milder? Strength lets you adjust the strength of your coffee by grinding more or less beans. Coffee Strength

4°C ① ② ③

Diagram of a vehicle interior showing a curved pipe or hose inserted into a car (no text or symbols visible)

Diagram of a kitchen appliance with a handle, lid, and bowl (no text or symbols)

Select your drink Coffee Cappucco Coffee Profile Beans Settings

2K 40ml 120ml Coffee Strength Glen 10 Drinks Profile Beach

High Milk First C Office Master Save to Profile Foam Length Order

Illustration of two laboratory setups showing a mixing bowl and a stand mixer (no text or symbols)

AquaClean water filter

The HygieSteam function automatically cleans the milk system by eliminating microorganisms: use it after preparing a cappuccino or other milk-based drinks.

Simple line drawing of a gear and a cutting tool icon, labeled 'Ceramic Grinder' (no additional text or symbols)

Our durable grinder is made of 100% ceramic to be extremely hard and robust. You can adjust it to your taste using 12 levels.

Maintenance Dashboard

The maintenance panel provides you with useful information and reminds you of situations such as your water level or when the AquaClean filter is running low.

Brewing drinks

General steps

Follow these simple steps to brew a drink.

Line drawing of a coffee machine with a cup on a tray (no text or symbols)

SAECO XELSIS SUPREMA - General steps - 2

Select Express Cu D

SAECO XELSIS SUPREMA - General steps - 4

Mild 30ml High 2X Coffee Strength Drinks Profile

SAECO XELSIS SUPREMA - General steps - 6

Create Mastro Save to Picture

SAECO XELSIS SUPREMA - General steps - 8

Line drawing of a coffee machine with a cup on a base (no text or symbols)

1 Fill the water tank with tap water and the bean container with coffee beans. 2 Place one or two cups under the height-adjustable dispensing spout. Slide the dispenser up or down to adjust the height to the size of the cup or glass you are using. 3 Press the Drinks icon to access the Drinks menu. Swipe from left to right to select your drink by tapping on it.

- If you want to prepare two cups of coffee, press the "2x" icon. The machine will automatically perform the grinding cycle for the selected drinks in sequence.

Brewing milk-based drinks

Follow these simple steps to brew milk-based drinks.

SAECO XELSIS SUPREMA - Brewing milk-based drinks - 1

1 Fill the water tank with tap water and the bean container with coffee beans. Tip: When the flexible milk tube is connected to the cappuccinatore, slide the dispensing spout to the highest position for convenient access to the water tank. 2 Unscrew the lid of the milk container and fill it with milk. For optimal results, always use milk directly from the refrigerator. 3 Connect the flexible milk tube to the cappuccinatore. 4 Place the metal milk tube into the container. 5 Press the Drinks icon, swipe and tap the milk-based drink icon of your choice. 6 Adjust the settings to your preference by sliding the adjustable panels up and down. 7 Press the start/stop ▶ icon at any time to start brewing the selected drink.

  • For special drinks, the machine first dispenses milk and then coffee. For other drinks, it is the opposite: the machine first dispenses coffee and then milk.
  • If you want to stop the milk dispensing before the machine has dispensed the initially set amount, press the start/stop ▶ icon (only SM8780, SM8782, SM8785) or the stop icon (only SM8885, SM8889).
  • To stop dispensing the entire drink (milk or coffee) before the machine has finished, press and hold the start/stop ▶ icon (only SM8780, SM8782, SM8785) or the stop icon (only SM8885, SM8889).

B3/C3 Drinks menu (B3/C3 Menu Drinks (Napoje))

B4/C4 Personal profiles (B4/C4 Personal profiles (Profile osobiste))

B5/C5 Beans

B7/C7 Status menu (B7/C7 Menu Status (Stan))

B8/C8 Shop

SAECO XELSIS SUPREMA - Brewing milk-based drinks - 2

Select Espresso C

SAECO XELSIS SUPREMA - Brewing milk-based drinks - 4

Mild 30ml High ZK Coffee Strength Draws Profile

SAECO XELSIS SUPREMA - Brewing milk-based drinks - 6

Create Master Save to Pick

SAECO XELSIS SUPREMA - Brewing milk-based drinks - 8

Line drawing of a coffee maker using a stand mixer (no text or symbols)

A6 Main switch

A9 HygieSteam container

SAECO XELSIS SUPREMA - Brewing milk-based drinks - 10

Select Express Cu D

SAECO XELSIS SUPREMA - Brewing milk-based drinks - 12

Mild 30ml High 2X Coffee Strength Drinks Profile

SAECO XELSIS SUPREMA - Brewing milk-based drinks - 14

Create Mastro Save to Picture

SAECO XELSIS SUPREMA - Brewing milk-based drinks - 16

Line drawing of a coffee machine with a cup on a base (no text or symbols)

Order accessories

A9 HygieSteam container

B9/C9 Start/stop icon (B9/C9 Pictograma

B4/C4 Personal profiles (B4/C4 Personal profiles (Profiluri personale))

start/stop ▶■)

B5/C5 Beans

Introduction

www.saeco.com/MyCoffeeMachine.

SAECO XELSIS SUPREMA - www.saeco.com/MyCoffeeMachine. - 1

Select Expresso Cu D

SAECO XELSIS SUPREMA - www.saeco.com/MyCoffeeMachine. - 3

Mild 30ml High ZK Coffee Strength Drinks Prote

SAECO XELSIS SUPREMA - www.saeco.com/MyCoffeeMachine. - 5

Create Master Save to Drive

SAECO XELSIS SUPREMA - www.saeco.com/MyCoffeeMachine. - 7

Line drawing of a coffee machine with a cup on a tray (no text or symbols)

SAECO XELSIS SUPREMA - www.saeco.com/MyCoffeeMachine. - 9

Select Expresso Cl

SAECO XELSIS SUPREMA - www.saeco.com/MyCoffeeMachine. - 11

Mild 30ml High ZK Coffee Strength Drinks Proteink

SAECO XELSIS SUPREMA - www.saeco.com/MyCoffeeMachine. - 13

Create Master Save to Decor

SAECO XELSIS SUPREMA - www.saeco.com/MyCoffeeMachine. - 15

Line drawing of a coffee machine with a cup on a tray (no text or symbols)

B7/C7 Status menu

B2/C2 Drinks

B8/C8 Shop

B3/C3 Drinks menu

B9/C9 Start/stop icon

B4/C4 Personal profiles

B5/C5 Beans

Introduction

SAECO XELSIS SUPREMA - Introduction - 1

Select Espresso C D

SAECO XELSIS SUPREMA - Introduction - 3

Mid 30ml High 2K Coffee Strength Drinks Profile

SAECO XELSIS SUPREMA - Introduction - 5

Create Maestro Save to Price

SAECO XELSIS SUPREMA - Introduction - 7

Line drawing of a coffee machine with a cup on a sink (no text or symbols)

SAECO XELSIS SUPREMA - Introduction - 9

B:20 Coffee Strength

Stronger or milder? Strength lets you adjust the strength of your coffee by grinding more or less beans.

SAECO XELSIS SUPREMA - Introduction - 12

AquaClean water filter

B3/C3 Drinks menu

B9/C9 Start/stop icon

B4/C4 Personal profiles

start/stop ▶■

B5/C5 Coffee beans

Introduction

www.saeco.com/MyCoffeeMachine.

SAECO XELSIS SUPREMA - www.saeco.com/MyCoffeeMachine. - 1

Select Espresso Cup D

SAECO XELSIS SUPREMA - www.saeco.com/MyCoffeeMachine. - 3

Mild 30ml High ZK Coffee Strength Drinks Protein

SAECO XELSIS SUPREMA - www.saeco.com/MyCoffeeMachine. - 5

Create Master Save to Decor

SAECO XELSIS SUPREMA - www.saeco.com/MyCoffeeMachine. - 7

Line drawing of a coffee machine with a cup on a tray (no text or symbols)

B7/C7 Status menu

B2/C2 Drinks

B9/C9 Start/stop icon

B3/C3 Drinks menu

The HygieSteam function automatically cleans the milk system, removing microorganisms: use it after preparing cappuccino or other milk-based drinks.

Simple line drawing of a gear and a cutting tool icon labeled 'Ceramic Grinder' (no additional text or symbols)

SAECO XELSIS SUPREMA - www.saeco.com/MyCoffeeMachine. - 10

Select Espresso Cup D

SAECO XELSIS SUPREMA - www.saeco.com/MyCoffeeMachine. - 12

Mild 30ml High ZK Coffee Strength Drinks Protein

SAECO XELSIS SUPREMA - www.saeco.com/MyCoffeeMachine. - 14

Create Master Save to Drive

SAECO XELSIS SUPREMA - www.saeco.com/MyCoffeeMachine. - 16

Line drawing of a coffee machine with a cup on a tray (no text or symbols)

1 Fill the water tank with tap water and fill the coffee bean container with coffee beans. 2 Place one or two cups under the adjustable height dispensing spout. To adjust the height of the dispensing spout to the size of the cup or glass you are using, slide it up or down. 3 Touch the "Drinks" icon to open the Drinks menu. Swipe from left to right to select a drink by touching it. - Touch the "2x" icon if you want to brew two cups. The machine automatically performs two grinding cycles in sequence for the selected drinks.

Stronger or milder? Strength lets you adjust the strength of your coffee by grinding more or less beans. Coffee Strength

4°C ① ② ③

Diagram of a vehicle interior showing a curved pipe or hose inserted into a vehicle (no text or symbols visible)

Diagram of a kitchen appliance with a handle, lid, and bowl (no text or symbols)

Select your drink: Coffee, Cappucco, Coffee, Profile, Beans, Settings

2K, 40ml, 120ml, Coffee Strength, Cafe Lett, Drinks, Profile, Beach

High, Milk First, C Office, Master, Save to Profile, Foam, Length, Order

Illustration of two laboratory setups showing a mixing bowl and a stand mixer (no text or symbols)

1 Fill the water tank with tap water and fill the coffee bean container with coffee beans. Tip: When the flexible milk tube is connected to the milk frother, move the coffee dispensing spout to the highest position for easy access to the water tank. 2 Remove the lid from the milk container and pour milk into the container. For best results, always use milk that has been previously refrigerated. 3 Connect the flexible milk tube to the milk frother. 4 Place the metal milk tube into the container. 5 Touch the "Drinks" icon, navigate the menu, and select the icon for the milk-based drink you want. 6 You can customize the settings to your preference by sliding the adjustable bars up and down. 7 Press the start/stop icon ▶■ at any time to start brewing the selected drink.

  • For certain drinks, the machine first dispenses milk, then coffee. For many other beverages, this is done differently: the machine first dispenses coffee, then milk.
  • To stop the milk dispensing before the machine has dispensed the set amount, press the start/stop button ▶ (only SM8780, SM8782, SM8785) or press the stop icon (only SM8885, SM8889).
  • To stop the dispensing of the complete drink (milk and coffee) before the machine has finished, press and hold the start/stop icon ▶■ (only SM8780, SM8782, SM8785) or press the stop icon (only SM8885, SM8889).

A Immediately after milk dispensing, the "HygieSteam Shot" function is performed. The machine releases a jet through the internal milk system to rinse it quickly. The metal part of the milk tube can become hot. To avoid burns, let it cool down first.

SAECO XELSIS SUPREMA - www.saeco.com/MyCoffeeMachine. - 26

Select Express Cu D

SAECO XELSIS SUPREMA - www.saeco.com/MyCoffeeMachine. - 28

Mild 30ml High 2X Coffee Strength Drinks Profile

SAECO XELSIS SUPREMA - www.saeco.com/MyCoffeeMachine. - 30

Create Mastro Save to Picture

SAECO XELSIS SUPREMA - www.saeco.com/MyCoffeeMachine. - 32

Line drawing of a coffee machine with a cup on a base (no text or symbols)

Stronger or milder? Strength lets you adjust the strength of your coffee by grinding more or less beans. Coffee Strength

Diagram of a kitchen appliance with a valve and handle, showing a bowl and container (no text or symbols)

Select your drink Coffee Cappuccin Coffee Profile Beans Settings

30mg 40ml 120ml 2K Coffee Strength C Length 10 Drinks Profile Big

High Milk First C Office Master Save to Profile Foam Length Order

Two diagrams showing a hand washing a cup and another using a stand mixer (no text or symbols present)

B6/C6 Machine settings

C1 On/off icon

B3/C3 Drinks menu

B8/C8 Butik

B4/C4 Personal profiles

B9/C9 Start/stop icon (B9/C9 Start/stop icon ▶■)

B5/C5 Beans

Introduction

SAECO XELSIS SUPREMA - Introduction - 1

Select Espresso C D

SAECO XELSIS SUPREMA - Introduction - 3

Mid 30ml High 2K Coffee Strength Drinks Profile

SAECO XELSIS SUPREMA - Introduction - 5

Create Maestro Save to Price

SAECO XELSIS SUPREMA - Introduction - 7

Line drawing of a coffee machine with a cup on a sink (no text or symbols)

SAECO XELSIS SUPREMA - Introduction - 9

B:20 Coffee Strength

Stronger or milder? Strength lets you adjust the strength of your coffee by grinding more or less beans.

SAECO XELSIS SUPREMA - Introduction - 12

B4/C4 Personal profiles

The HygieSteam function automatically cleans the milk system and removes microorganisms: use it after brewing a cappuccino or other milk-based drinks.

Simple line icon of a gear and a grinding wheel on a brown background, labeled 'Ceramic Grinder' (no additional text or symbols)

Our durable grinder is made of 100% ceramic to be exceptionally hard and precise. It can be adjusted to your preferred taste with 12 steps.

Maintenance Dashboard

SAECO XELSIS SUPREMA - Introduction - 15

Select Expresso Cu D

SAECO XELSIS SUPREMA - Introduction - 17

Mild 30ml High ZK Coffee Strength Drinks Profile

SAECO XELSIS SUPREMA - Introduction - 19

Copy Maestro Save to Double

SAECO XELSIS SUPREMA - Introduction - 21

Line drawing of a coffee machine with a cup on the tray (no text or symbols)

SAECO XELSIS SUPREMA - Introduction - 23

Select Espresso C

SAECO XELSIS SUPREMA - Introduction - 25

Mild 30ml High ZK Coffee Strength Draws Profile

SAECO XELSIS SUPREMA - Introduction - 27

Create Master Save to Pick

SAECO XELSIS SUPREMA - Introduction - 29

Line drawing of a coffee machine with a cup on a tray (no text or symbols)

SAECO XELSIS SUPREMA - Introduction - 31

Select Espresso Cu D

SAECO XELSIS SUPREMA - Introduction - 33

Mild 30ml High ZK Coffee Strength Drinks Protein

SAECO XELSIS SUPREMA - Introduction - 35

Create Master Save to Drive

SAECO XELSIS SUPREMA - Introduction - 37

Line drawing of a coffee machine with a cup on a tray (no text or symbols)

SAECO XELSIS SUPREMA - Introduction - 39

Select Espresso Cu D

SAECO XELSIS SUPREMA - Introduction - 41

Mild 30ml High ZK Coffee Strength Drinks Protein

SAECO XELSIS SUPREMA - Introduction - 43

Create Master Save to Decor

SAECO XELSIS SUPREMA - Introduction - 45

Line drawing of a coffee machine with a cup on a tray (no text or symbols)

SAECO XELSIS SUPREMA - Introduction - 47

Select Espresso Cu D

SAECO XELSIS SUPREMA - Introduction - 49

Mild 30ml High ZK Coffee Strength Drinks Proteink

SAECO XELSIS SUPREMA - Introduction - 51

Create Master Save to Drive

SAECO XELSIS SUPREMA - Introduction - 53

Line drawing of a coffee machine with a cup on a tray (no text or symbols).

SAECO XELSIS SUPREMA - Introduction - 55

Select Espresso Chatter Dried

SAECO XELSIS SUPREMA - Introduction - 57

Mild 30ml High 2% Coffee Strength Drinks Profile

SAECO XELSIS SUPREMA - Introduction - 59

Coffee Master Save to Profile

SAECO XELSIS SUPREMA - Introduction - 61

Line drawing of a coffee machine with a cup on a base (no text or symbols)

Select your drink Coffee Cappuccino Read Profile Braze Setting

5n Strong 40ml ZK Coffee Length Cappuccino

Strong 40ml 120ml 2K Coffee Strength Coffee Length 10 Drinks Profile Beans Set

High Milk First Foam Length Order Coffee Maestro Save to Profile

Illustration of milk being poured into a cup (no text or symbols)

Illustration of a coffee machine with a glass stand and a cup, no text or symbols present

The reliable grinder is made of 100% ceramic material, making it very hard and precise. It can be adjusted to your taste via 12 levels.

Maintenance Dashboard

Select Express Ca D

Mild 30ml High 2K Coffee Strength Drinks Profile

Close to Master Save to Pick the

Line drawing of a coffee maker using a stand mixer (no text or symbols)

Fill the water tank with water and add coffee beans to the container.

SAECO XELSIS SUPREMA - Introduction - 74

Select Espresso C

SAECO XELSIS SUPREMA - Introduction - 76

Mild 30ml High ZK Coffee Strength Drinks Profile

SAECO XELSIS SUPREMA - Introduction - 78

Copy Maestro Save to Profile

SAECO XELSIS SUPREMA - Introduction - 80

Line drawing of a coffee machine with a cup on the tray (no text or symbols)

SAECO XELSIS SUPREMA - Introduction - 82

Select Espresso Cup D

SAECO XELSIS SUPREMA - Introduction - 84

Mild 30ml High ZK Coffee Strength Drinks Proteink

SAECO XELSIS SUPREMA - Introduction - 86

Create Master Save to Decor

SAECO XELSIS SUPREMA - Introduction - 88

Line drawing of a coffee machine with a cup on a tray (no text or symbols)

Stronger or milder? Strength lets you adjust the strength of your coffee by grinding more or less beans. Coffee Strength

Diagram of a kitchen appliance with a handle, lid, and bowl (no text or symbols)

Select your drink Coffee Cappucco Coffee Profile Beans Settings

2K 40ml 120ml Coffee Strength Cone Lens 10 Drinks Profile Beach

High Milk First C Office Master Save to Profile Foam Length Order

Illustration of two laboratory setups with pipettes and a bowl, no text or symbols present

A2 Unwgwð uninǎh hughlyh ywwhwnhş

A3 9wulwrah ulynintin

A15 Unipah hwnhylutph unwnw

A16 Uwwwwwnlywù nǐuwù

A17 Unipah dawqwn

A18 Uninǎh ʊ̥uωgnn̥ŋ̥ut̥nh ŋ̥wnw̥u

1 3wtp Yuqnqwlnpnnwutp ✉ wwnlytnwlyhù l uwhwhwnylwotp ðwuhg wg, nnwbuqh qunutp Wi-Fi-h wwnlytnwyn: 2 3wtp Wi-Fi wwnlytnwlyh: 3 3tunlup lynwuhu u2luwə pwjltnhu` unătuh utptuwu dtn Wi-Fi gwughu lwwwlgtni huuwn:

HygieSteam \$nìǔghwù wùnnúwùn yǔtnwnú lùwpnnuǐ t lùwḥ hūwúwùwnqù hānwǔtīnú lùhynnonquùhqùtīnn: oqunwànnòtip wjù lùwwùnighùn lùwú lùwḥ lùw hhuìwùwò wjj núwúlhpùtin wùwnnwuntīnig htùnn:

Simple line drawing of a gear and a cutting tool icon with the text 'Ceramic Grinder' below (no additional symbols or text)

Utn nhúwglniù unǎwnwgn ywwnnpuunluwð 100% lytnwúhlywjhg, npwbuqh wju lhuì pugwnwwtu lyn2n u ázqnhn: Ujù ywnnn 1 hwnúwntagulī ātān áw2wylhù 12 yhniuwng úwlwnnnwlútnnu:

Maintenance Dashboard

The AquaClean system is designed to be used with the following types of water:

Water hardness

Adjusting the water hardness

The water hardness setting determines the amount of water used for regeneration.

Line drawing of a coffee machine with a cup on a tray (no text or symbols)

Select Espresso Close

Mild 30ml High 2K Coffee Strength Drinks Profile

Create Manitro Save to Decor

Line drawing of a coffee maker using a stand mixer (no text or symbols)

1. Press the button repeatedly until the desired hardness level is displayed. 2. The display will show the current hardness level. Use the + or - buttons to adjust the hardness level. 3. Press the "OK" button to confirm the setting. The display will show the set hardness level. - The hardness level can be set from 1 to 10, with "2x" indicating a double regeneration. The default setting is 5.

The "2x" setting doubles the frequency of regeneration.

4. The water hardness can be adjusted according to the water analysis results, using the table below.

5. Press the "+" or "-" buttons to adjust the hardness level, then confirm with the "OK" button.

The water hardness setting affects the regeneration frequency.

The water hardness is measured in German degrees (°dH) and can be set from 1 to 10.

The water hardness setting is stored in the memory.

The water hardness setting can be changed at any time by pressing the "+" or "-" buttons.

3 sec. Coffee Strength Stronger or milder? Strength lets you adjust the strength of your coffee by grinding more or less beans. Coffee Strength

1. Press the "Menu" button to enter the settings.

2. Press the "OK" button to confirm.

Maintenance Dashboard

SAECO XELSIS SUPREMA - The water hardness setting is stored in the memory. - 3

Select Express Cu D

SAECO XELSIS SUPREMA - The water hardness setting is stored in the memory. - 5

Mild 30ml High 2X Coffee Strength Drinks Profile

SAECO XELSIS SUPREMA - The water hardness setting is stored in the memory. - 7

Create Mastro Save to Picture

SAECO XELSIS SUPREMA - The water hardness setting is stored in the memory. - 9

Line drawing of a coffee machine with a cup on a base (no text or symbols)

phosphorus

AquaClean grades

AquaClean grades & benefits of the quality

AquaClean -by-mn-2-3-m-4-m-5-6-7-8-9-10-11-12-13

qnmfmdn 95 qnmfnd bymnls gsd3gdnls dghdgg, qnmffn bysgfs dghsmdsl. AquaClean bhsfjbnl n6qn3fμmfn gjsds 0%-dgg, fnsb dghsblgbdon, fmd qnmffn j6pss dghzmmom. on gfmgmsq af dghzmmon AquaClean bymnls qnmfml, dsnb dghandmmom dlnn dghzms, dsgmud mszgmdn3gmsq j6pss gsslygons3mon s3sfyn.

fmmgjlsz AquaClean lψψψjlnb n6φn3ψmfin g3gds 0%-dφg, s6 fmmgjlsz s3sfsn g8abg6gdm, fmd d3g3smmon AquaClean qnmφh:

Bean Maestro

SAECO XELSIS SUPREMA - AquaClean -by-mn-2-3-m-4-m-5-6-7-8-9-10-11-12-13 - 2

Select Espresso C D

SAECO XELSIS SUPREMA - AquaClean -by-mn-2-3-m-4-m-5-6-7-8-9-10-11-12-13 - 4

Mid 30ml High 2K Coffee Strength Drinks Profile

SAECO XELSIS SUPREMA - AquaClean -by-mn-2-3-m-4-m-5-6-7-8-9-10-11-12-13 - 6

Create Maestro Save to Price

SAECO XELSIS SUPREMA - AquaClean -by-mn-2-3-m-4-m-5-6-7-8-9-10-11-12-13 - 8

Line drawing of a coffee machine with a cup on a sink (no text or symbols)

SAECO XELSIS SUPREMA - AquaClean -by-mn-2-3-m-4-m-5-6-7-8-9-10-11-12-13 - 10

B:20 Coffee Strength

Stronger or milder? Strength lets you adjust the strength of your coffee by grinding more or less beans.

5nong 40ml Cappuccino Length

Strong 40ml 120ml 2K Coffee Strength Coffee Length 70 Drinks Profile Beans Salt

High Milk First Foam Length Order Coffee Maestro Save to Profile

Illustration of milk being poured into a cup (no text or symbols present)

Illustration of a coffee machine with a glass tube and a cup, no text or symbols present

הכלההכלההכלה
תְׁרָה אַעֹרִים וְאָהוּלָם, בְּרָה אַעֹרִים וְאָהוּלָם, בְּרָה אַעֹרִים וְאָהוּלָם, בְּרָה אַעֹרִים וְאָהוּלָם, בָּרָה אַעֹרִים וְאָהוּלָם, בָּרָה אַעֹרִים וְאָהוּלָם, בָּרָה אַעֹרִים וְאָהוּלָם, וְאָהוּלָם, בָּרָה אַעֹרִים וְאָהוּלָם, וְאָהוּלָם, וְאָהוּלָם, וְאָהוּלָם, וְאָהוּלָם, וְאָהוּלָם, וְאָהוּלָם, וְאָהוֱלָם, וְאָהוֱלָם, וְאָהוֱלָם, וְאָהוֱלָם, וְאָהוֱלָם, וְאָהוֱלָם, וְאָהוֱלָם, וְא'מָבִים, וְא'מָבִים, וְא'מָבִים, וְא'מָבִים, וְא'מָבִים, וְא'מָבִים, וְא'מָבִים, וְא'מָבִים, וְא'מֵבִים, וְא'מֵבִים, וְא'מֵבִים, וְא'מֵבִים, וְא'מֵבִים, וְא'מֵבִים, וְא'מֵבִים, וְא'מֵבִים, וְי'מֵבִים, וְי'מֵבִים, וְי'מֵבִים, וְי'מֵבִים, וְי'מֵבִים, וְי'מֵבִים, וְי'מֵבִים, וְי'מֵבִיםתְׁרָה אַעֹרִים וְאָהוּלָם, בְּרָה אַעֹרִים וְאָהוּלָם, בְּרָה אַעֹרִים וְא'מָבִים, בְּרָה אַעֹרִים וְא'מָבִים, בְּרָה אַעֹרִים וְא'מָבִים, בְּרָה אַעֹרִים וְא'מָבִים, בָּרָה אַעֹרִים וְא'מָבִים, בָּרָה אַעֹרִים וְא'מָבִים, בָּרָה אַעֹרִים וְא'מָבִים, בָּר'מָבִים, וְא'מָבִים, וְא'מָבִים, וְא'מָבִים, וְא'מָבִים, וְא'מָבִים, וְא'מָבִים, וְא'מָבִיםתְׁרָה אַע'מָבִים וְא'מָבִים, בְּרָה אַע'מָבִים וְא'מָבִים, בְּר'מָבִים, בְּר'מָבִים, וְא'מָבִים, וְא'מָבִים, וְא'מָבִים, וְא'מָבִים, וְא'מָבִים, וְא'מָבִים, וְא'מָב'מָב'מָב'מָב'מָב'מָב'מָב'מָב'מָב'מָב'מָב'מָב'מָב'מָב'מָב'מָב'מָב'מָב'מָב'מָב'מָה'מָב'מָב'מָב'מָב'מָב'מָב'מָב'מָב'מָב'מָב'מָב'מָב'מָב'מָב'מָב'מָב'מָב'מָב'מָב'מָש'מָב'מָב'מָב'מָב'מָב'מָב'מָב'מָב'מָב'מָב'מָב'מָב'מָב'מָב'מָב'מָב'מָב'מָב'מָב'מָד'מָב'מָב'מָב'מָב'מָב'מָב'מָב'מָב'מָב'מָב'מָב'מָב'מָב'מָב'מָב'מָב'מָב'מָב'מָב'מָג'מָב'מָב'מָב'מָב'מָב'מָב'מָב'מָב'מָב'מָב'מָב'מָב'מָב'מָב'מָב'מָב'מָב'מָב'מָב'מָפ'מָב'מָב'מָב'מָב'מָב'מָב'מָב'מָב'מָב'מָב'מָב'מָב'מָב'מָב'מָב'מָב'מָב'מָב'מָב'מָא'מָב'מָב'מָב'מָב'מָב'מָב'מָב'מָב'מָב'מָב'מָב'מָב'מָב'מָב'מָב'מָב'מָב'מָב'מָב'מֵב'מָב'מָב'מָב'מָב'מָב'מָב'מָב'מָב'מָב'מָב'מָב'מָב'מָב'מָב'מָב'מָב'מָב'מָב'מָב'מֵק'מָב'מָב'מָב'מָב'מָב'מָב'מָב'מָב'מָב'מָב'מָב'מָב'מָב'מָב'מָב'מָב'מָב'מָב'מָב'מָég'מָב'מָב'מָב'מָב'מָב'מָב'מָב'מָב'מָב'מָב'מָב'מָב'מָב'מָב'מָב'מָב'מָב'מָב'מָב'מָع'מָב'מָב'מָב'מָב'מָב'מָב'מָב'מָב'מָב'מָב'מָב'מָב'מָב'מָב'מָב'מָב'מָב'מָב'מָב'מָח'מָב'מָב'מָב'מָב'מָב'מָב'מָב'מָב'מָב'מָב'מָב'מָב'מָב'מָב'מָב'מָב'מָב'מָב'מָב'מָע'מָב'מָב'מָב'מָב'מָב'מָב'מָב'מָב'מָב'מָב'מָב'מָב'מָב'מָב'מָב'מָב'מָב'מָב'מָב'מָק'מָב'מָב'מָב'מָב'מָב'מָב'מָב'מָב'מָב'מָב'מָב'מָב'מָב'מָב'מָב'מָב'מָב'מָב'מָב'מֶל'מָב'מָב'מָב'מָב'מָב'מָב'מָב'מָב'מָב'מָב'מָב'מָב'מָב'מָב'מָב'מָב'מָב'מָב'מָב'מָ Rag'מָ Rag'מ Rag'מ Rag'מ Rag'מ Rag'מ Rag'מ Rag'מ Rag'מ Rag'מ Rag'מ Rag'מ Rag'מ Rag'מ Rag'מ Rag'מ Rag'מ Rag'מ Rag'מ Rag'מ Rag'מ Rag'מ Rag'מ Rag'מ Rag'מ Rag'מ Rag'מ Rag'מ Rag'מ Rag'מ Rag'מ Rag'מ Rag'מ Rag'מ Rag'מ“.י"י"י"י"י"י"י"י"י"י"י"י"י"י"י"י"י"י"י"י"י"י"י"י"י"י"י"י"י"י"י"י"י"י"י"י"י"י"י"י"י"י"י"י"י"י"י"י"י"י"י"(י"י"י"י"י"י"י"י"י"י"י"י"י"י"י"י"י"י"י"י"י"י"י"י"י"י"י"י"י"י"י"י"י"י"י"י"י"י"י"י"י"י"י"י"י"י"י"י"י"י" תְׁרָה אַע'מָב'מָב'מָב'מָב'מָב'מָב'מָב'מָב'מָב'מָב'מָב'מָב'מָב'מָב'מָב'מָב'מָב'מָב'מָב'מּק'מָב'מָב'מָב'מָב'מָב'מָב'מָב'מָב'מָב'מָב'מָב'מָב'מָב'מָב'מָב'מָב'מָב'מָב'מָב'מּו'מָב'מָב'מָב'מָב'מָב'מָב'מָב'מָב'מָב'מָב'מָב'מָב'מָב'מָב'מָב'מָב'מָב'מָב'מָב'מָ harvesting'מָ harvesting'מָ harvesting'מ harvesting'מ harvesting'מ harvesting'מ harvesting'מ harvesting'מ harvesting'מ harvesting'מ harvesting'מ harvesting'מ harvesting'מ harvesting'מ harvesting'מ harvesting'מ harvesting'מ harvesting'מ harvesting'מ harvesting'מ harvesting'מ harvesting'מ harvesting'מ harvesting'מ harvesting'מ harvesting'מ harvesting'מ harvesting'מ harvesting'מ harvesting'מ harvesting'מ harvesting'מ harvesting'מ harvesting'מ harvesting'מ harvesting'מ harvested'מ harvesting'מ harvesting'מ harvesting'מ harvesting'מ harvesting'מ harvesting'מ harvesting'מ harvesting'מ harvesting'מ harvesting'מ harvesting'מ harvesting'מ harvesting'מ harvesting'מ harvesting'מ harvesting'מ harvesting'מ harvesting'מ harvesting'מ harvesting'מ harvesting'מ harvesting'מ harvesting'מ harvesting'מ harvesting'מ harvesting'מ harvesting'מ harvesting'מ harvesting'מ harvesting'מ harvesting'מ harvesting'מ harvesting'-תְׁרָה אַע'מָב'מָב'מָב'מָב'מָב'מָב'מָב'מָב'מָב'מָב'מָב'מָב'מָב'מָב'מָב'מָב'מָב'קּו'מָב'מָב'מָב'מָב'מָב'מָב'מָב'מָב'מָב'מָב'מָב'מָב'מָב'מָב'מָב'מָב'מָב'מָב'מָב'קּו'מָב'מָג'מָג'מָג'מָג'מָג'מָג'מָג'מָג'מָג'מָג'מָג'מָג'מָג'מָג'מָג'מָג'מָג'מָג'מָג'מָג'מָ harvesting'מ harvesting'מ harvesting'מ harvesting'מ harvesting'מ harvesting'מ harvesting'מ harvesting'מ harvesting'מ harvesting'מ harvesting'מ harvesting'מ harvesting'מ harvesting'מ harvesting'מ harvesting'מ harvesting'מ harvesting'מ harvesting'מ harvesting'מ harvesting'מ harvesting'מ harvesting'מ harvesting'מ harvesting'מ harvesting'מ harvesting'מ harvesting'מ harvesting'מ harvesting'מ harvesting'מ harvesting'ק�ו'מ harvesting'מ harvesting'מ harvesting'מ harvesting'מ harvesting'מ harvesting'מ harvesting'מ harvesting'מ harvesting'מ harvesting'מ harvesting'מ harvesting'מ harvesting'מ harvesting'מ harvesting'מ harvesting'מ harvesting'מ harvesting'מ harvesting'מ harvesting'מ harvesting'מ harvesting'מ harvesting'מ harvesting'מ harvesting'מ harvesting'מ harvesting'מ harvesting'מ harvesting'מ harvesting'מ harvesting'מ harvesting'מ harvesting' תְׁרָה אַע'מָב'מָב'מָב'מָב'מָב'מָב'מָב'מָב'מָב'מָב'מָב'מָב'מָב'מָב'מָב'מָב'מָב'ש'מב'מג'מג'מג'מג'מג'מג'מג'מג'מג'מג'מג'מג'מג'מג'מג'מג'מג'מג'מג'מג'מג'מג'מג'מג'מג'מג'מג'מג'מג'מג'מג'מג'מג'מג'<|content_end|>
5. 1977, 1978, 1979, 2000, 2001, 2002, 2003, 2004, 2005, 2006, 2007, 2008, 2009, 2010, 2011, 2012, 2013, 2014, 2015, 2016, 2017, 2018, 2019, 2020, 2021, 2022, 2023, 2024, 2025, 2026, 2027, 2028, 2029, 2030, 2031, 2032, 2033, 2034, 2035, 2036, 2037, 2038, 2039, 2040, 2041, 2042, 2043, 2044, 2045, 2046, 2047, 2048, 2049, 2050, 2051, 2052, 2053, 2054, 2055, 2056, 2057, 2058, 2059, 2060, 2061, 2062, 2063, 2064, 2065, 2066, 2067, 2068, 2069, 2070, 2071, 2072, 2073, 2074, 2075, 2076, 2077, 2078, 2079, 2080, 2081, 2082, 2083, 2084, 2085, 2086, 2087, 2088, 2089, 2090, 2091, 2092, 2093, 2094, 2095, 2096, 2097, 2098, 2099, 2100, 2101, 2102, 2103, 2104, 2105, 2106, 2107, 2108, 2109, 2110, 2111, 2112, 2113, 2114, 2115, 2116, 2117, 2118, 2119, 2120, 2121, 2122, 2123, 2124, 2125, 2126, 2127, 2128, 2129, 2130, 2131, 2132, 2133, 2134, 2135, 2136, 2137, 2138, 2139, 2140, 2141, 2142, 2143, 2144, 2145, 2146, 2147, 2148, 2149, 2150, 2151, 2152, 2153, 2154, 2155, 2156, 2157, 2158, 2159, 2160, 2161, 2162, 2163, 2164, 2165, 2166, 2167, 2168, 2169, 2170, 2171, 2172, 2173, 2174, 2175, 2176, 2177, 2178, 2179, 2180, 2181, 2182, 2183, 2184, 2185, 2186, 2187, 2188, 2189, 2190, 2191, 2192, 2193, 2194, 2195, 2196, 2197, 2198, 2199, 2200, 2201, 2202, 2203, 2204, 2205, 2206, 2207, 2208, 2209, 2210, 2211, 2212, 2213, 2214, 2215, 2216, 2217, 2218, 2219, 2220, 2221, 2222, 2223, 2224, 2225, 2226, 2227, 2228, 2229, 2230, 2231, 2232, 2233, 2234, 2235, 2236, 2237, 2238, 2239, 2240, 2241, 2242, 2243, 2244, 2245, 2246, 2247, 2248, 2249, 2250, 2251, 2252, 2253, 2254, 2255, 2256, 2257, 2258, 2259, 2260, 2261, 2262, 2263, 2264, 2265, 2266, 2267, 2268, 2269, 2270, 2271, 2272, 2273, 2274, 2275, 2276, 2277, 2278, 2279, 2280, 2281, 2282, 2283, 2284, 2285, 2286, 2287, 2288, 2289, 2290, 2291, 2292, 2293, 2294, 2295, 2296, 2297, 2298, 2299, 2300, 2301, 2302, 2303, 2304, 2305, 2306, 2307, 2308, 2309, 2310, 2311, 2312, 2313, 2314, 2315, 2316, 2317, 2318, 2319, 2320, 2321, 2322, 2323, 2324, 2325, 2326, 2327, 2328, 2329, 2330, 2331, 2332, 2333, 2334, 2335, 2336, 2337, 2338, 2339, 2340, 2341, 2342, 2343, 2344, 2345, 2346, 2347, 2348, 2349, 2350, 2351, 2352, 2353, 2354, 2355, 2356, 2357, 2358, 2359, 2360, 2361, 2362, 2363, 2364, 2365, 2366, 2367, 2368, 2369, 2370, 2371, 2372, 2373, 2374, 2375, 2376, 2377, 2378, 2379, 2380, 2381, 2382, 2383, 2384, 2385, 2386, 2387, 2388, 2389, 2390, 2391, 2392, 2393, 2394, 2395, 2396, 2397, 2398, 2399, 2400, 2401, 2402, 2403, 2404, 2405, 2406, 2407, 2408, 2409, 2410, 2411, 2412, 2413, 2414, 2415, 2416, 2417, 2418, 2419, 2420, 2421, 2422, 2423, 2424, 2425, 2426, 2427, 2428, 2429, 2430, 2431, 2432, 2433, 2434, 2435, 2436, 2437, 2438, 2439, 2440, 2441, 2442, 2443, 2444, 2445, 2446, 2447, 2448, 2449, 2450, 2451, 2452, 2453, 2454, 2455, 2456, 2457, 2458, 2459, 2460, 2461, 2462, 2463, 2464, 2465, 2466, 2467, 2468, 2469, 2470, 2471, 2472, 2473, 2474, 2475, 2476, 2477, 2478, 2479, 2480, 2481, 2482, 2483, 2484, 2485, 2486, 2487, 2488, 2489, 2490, 2491, 2492, 2493, 2494, 2495, 2496, 2497, 2498, 2499, 2500, 2501, 2502, 2503, 2504, 2505, 2506, 2507, 2508, 2509, 2510, 2511, 2512, 2513, 2514, 2515, 2516, 2517, 2518, 2519, 2520, 2521, 2522, 2523, 2524, 2525, 2526, 2527, 2528, 2529, 2530, 2531, 2532, 2533, 2534, 2535, 2536, 2537, 2538, 2539, 2540, 2541, 2542, 2543, 2544, 2545, 2546, 2547, 2548, 2549, 2550, 2551, 2552, 2553, 2554, 2555, 2556, 2557, 2558, 2559, 2560, 2561, 2562, 2563, 2564, 2565, 2566, 2567, 2568, 2569, 2570, 2571, 2572, 2573, 2574, 2575, 2576, 2577, 2578, 2579, 2580, 2581, 2582, 2583, 2584, 2585, 2586, 2587, 2588, 2589, 2590, 2591, 2592, 2593, 2594, 2595, 2596, 2597, 2598, 2599, 2600, 2601, 2602, 2603, 2604, 2605, 2606, 2607, 2608, 2609, 2610, 2611, 2612, 2613, 2614, 2615, 2616, 2617, 2618, 2619, 2620, 2621, 2622, 2623, 2624, 2625, 2626, 2627, 2628, 2629, 2630, 2631, 2632, 2633, 2634, 2635, 2636, 2637, 2638, 2639, 2640, 2641, 2642, 2643, 2644, 2645, 2646, 2647, 2648, 2649, 2650, 2651, 2652, 2653, 2654, 2655, 2656, 2657, 2658, 2659, 2660, 2661, 2662, 2663, 2664, 2665, 2666, 2667, 2668, 2669, 2670, 2671, 2672, 2673, 2674, 2675, 2676, 2677, 2678, 2679, 2680, 2681, 2682, 2683, 2684, 2685, 2686, 2687, 2688, 2689, 2690, 2691, 2692, 2693, 2694, 2695, 2696, 2697, 2698, 2699, 2700, 2701, 2702, 2703, 2704, 2705, 2706, 2707, 2708, 2709, 2710, 2711, 2712, 2713, 2714, 2715, 2716, 2717, 2718, 2719, 2720, 2721, 2722, 2723, 2724, 2725, 2726, 2727, 2728, 2729, 2730, 2731, 2732, 2733, 2734, 2735, 2736, 2737, 2738, 2739, 2740, 2741, 2742, 2743, 2744, 2745, 2746, 2747, 2748, 2749, 2750, 2751, 2752, 2753, 2754, 2755, 2756, 2757, 2758, 2759, 2760, 2761, 2762, 2763, 2764, 2765, 2766, 2767, 2768, 2769, 2770, 2771, 2772, 2773, 2774, 2775, 2776, 2777, 2778, 2779, 2780, 2781, 2782, 2783, 2784, 2785, 2786, 2787, 2788, 2789, 2790, 2791, 2792, 2793, 2794, 2795, 2796, 2797, 2798, 2799, 2800, 2801, 2802, 2803, 2804, 2805, 2806, 2807, 2808, 2809, 2810, 2811, 2812, 2813, 2814, 2815, 2816, 2817, 2818, 2819, 2820, 2821, 2822, 2823, 2824, 2825, 2826, 2827, 2828, 2829, 2830, 2831, 2832, 2833, 2834, 2835, 2836, 2837, 2838, 2839, 2840, 2841, 2842, 2843, 2844, 2845, 2846, 2847, 2848, 2849, 2850, 2851, 2852, 2853, 2854, 2855, 2856, 2857, 2858, 2859, 2860, 2861, 2862, 2863, 2864, 2865, 2866, 2867, 2868, 2869, 2870, 2871, 2872, 2873, 2874, 2875, 2876, 2877, 2878, 2879, 2880, 2881, 2882, 2883, 2884, 2885, 2886, 2887, 2888, 2889, 2890, 2891, 2892, 2893, 2894, 2895, 2896, 2897, 2898, 2899, 2900, 2901, 2902, 2903, 2904, 2905, 2906, 2907, 2908, 2909, 2910, 2911, 2912, 2913, 2914, 2915, 2916, 2917, 2918, 2919, 2920, 2921, 2922, 2923, 2924, 2925, 2926, 2927, 2928, 2929, 2930, 2931, 2932, 2933, 2934, 2935, 2936, 2937, 2938, 2939, 2940, 2941, 2942, 2943, 2944, 2945, 2946, 2947, 2948, 2949, 2950, 2951, 2952, 2953, 2954, 2955, 2956, 2957, 2958, 2959, 2960, 2961, 2962, 2963, 2964, 2965, 2966, 2967, 2968, 2969, 2970, 2971, 2972, 2973, 2974, 2975, 2976, 2977, 2978, 2979, 2980, 2981, 2982, 2983, 2984, 2985, 2986, 2987, 2988, 2989, 2990, 2991, 2992, 2993, 2994, 2995, 2996, 2997, 2998, 2999, 3000, 3001, 3002, 3003, 3004, 3005, 3006, 3007, 3008, 3009, 3010, 3011, 3012, 3013, 3014, 3015, 3016, 3017, 3018, 3019, 3020, 3021, 3022, 3023
הכלההכלההכלה
הכלה,הכלההכלההכלההכלההכלההכלההכלההכלההכלההכלההכלההכלההכלההכלההכלההכלההכלההכלההכלההכלההכלההכלההכלההכלההכלההכלההכלההכלההכלההכלההכלההכלההכלההכלההכלההכלההכלההכלההכלההכלההכלההכלההכלההכלההכלההכלההכלההכלההכלההכלההכלההכלההכלההכלההכלההכלההכלההכלההכלההכלההכלההכלההכלההכלההכלההכלההכלה
הכלההכלהAquaCleanהכלההכלההכchiaAquaCleanהכchia,הכchia,הכchia,הכchia,הכchia,הכchia,הכchia,הכchia,הכchia,הכchia,הכchia,הכchia,הכchia,הכchia,הכchia,הכchia,הכchia,הכchia,הכchia,הכchia,הכchia,הכchia,הכchia,הכchia,הכchia,הכchiaהכchia,הכchia,הכchia,הכchia,הכchia,הכchia,הכchia,הכchia,הכchia,הכchia,הכchia,הכchia,הכchia,הכchia,הכchia,הכchia,הכchia,הכchia,הכchia,הכchia,הכchia,הכchia,הכchia,הכchia,הכchia
הכchia,הכchia,הכchia,הכchia,הכchia,הכchia,הכchia,הכchia,הכchia,הכchia,הכchia,הכchia,הכchia,הכchia,הכchia,הכchia,הכchia,הכchia,הכchia,הכchia,הכchia,הכchia,הכchia,הכchia,הכcia,הכchia,הכchia,הכchia,הכchia,הכchia,הכchia,הכchia,הכchia,הכchia,הכchia,הכchia,הכchia,הכchia,הכchia,הכchia,הכchia,הכchia,הכchia,הכchia,הכchia,הכchia,הכchia,הכchia,הכchia,הכciaAquaClean, AquaClean, AquaClean, AquaClean, AquaClean, AquaClean, AquaClean, AquaClean, AquaClean, AquaClean, AquaClean, AquaClean, AquaClean, AquaClean, AquaClean, AquaClean, AquaClean, AquaClean, AquaClean, AquaClean, AquaClean, AquaClean, AquaClean, AquaClean, AquaClean, AquaClean,AquaClean, AquaClean, AquaClean, AquaClean, AquaClean, AquaClean, AquaClean, AquaClean, AquaClean, AquaClean, AquaClean, AquaClean, AquaClean, AquaClean, AquaClean, AquaClean, AquaClean, AquaClean, AquaClean, AquaClean, AquaClean, AquaClean, AquaClean, AquaClean, Aqua Clean, AquaClean, AquaClean, AquaClean, AquaClean, AquaClean, AquaClean, AquaClean, AquaClean, AquaClean, AquaClean, AquaClean, AquaClean, AquaClean, AquaClean, AquaClean, AquaClean, AquaClean, AquaClean, AquaClean, AquaClean, AquaClean, AquaClean, AquaClean, AquaClean, Aqua Clean,AquaClean, AquaClean, AquaClean, AquaClean, AquaClean, AquaClean, AquaClean, AquaClean, AquaClean, AquaClean, AquaClean, AquaClean, AquaClean, AquaClean, AquaClean, AquaClean, AquaClean, AquaClean, AquaClean, AquaClean, AquaClean, AquaClean, AquaClean, AquaClean, A Aqua Clean, A Aqua Clean, A Aqua Clean, A Aqua Clean, A Aqua Clean, A Aqua Clean, A Aqua Clean, A Aqua Clean, A Aqua Clean, A Aqua Clean, A Aqua Clean, A Aqua Clean, A Aqua Clean, A Aqua Clean, A Aqua Clean, A Aqua Clean, A Aqua Clean, A Aqua Clean, A Aqua Clean, A Aqua Clean, A Aqua Clean, A Aqua Clean, A Aqua Clean, A Aqua Clean, A Aqua Clean, A AquaClean, A Aqua Clean, A Aqua Clean, A Aqua Clean, A Aqua Clean, A Aqua Clean, A Aqua Clean, A Aqua Clean, A Aqua Clean, A Aqua Clean, A Aqua Clean, A Aqua Clean, A Aqua Clean, A Aqua Clean, A Aqua Clean, A Aqua Clean, A Aqua Clean, A Aqua Clean, A Aqua Clean, A Aqua Clean, A Aqua Clean, A Aqua Clean, A Aqua Clean, A Aqua Clean, A Aqua Clean, A A Aqua Clean, A Aqua Clean, A Aqua Clean, A Aqua Clean, A Aqua Clean, A Aqua Clean, A Aqua Clean, A Aqua Clean, A Aqua Clean, A Aqua Clean, A Aqua Clean, A Aqua Clean, A Aqua Clean, A Aqua Clean, A Aqua Clean, A Aqua Clean, A Aqua Clean, A Aqua Clean, A Aqua Clean, A Aqua Clean, A Aqua Clean, A Aqua Clean, A Aqua Clean, A Aqua Clean, A Aqua Clean
372000000000000000000000000000000000000000000000000000000000000000000000000000000000000000000000000000037200000000000000000000000000000000000000000000000000000000000000000000000000000000000000000000000AquaClean, AquaClean, AquaClean, AquaClean, AquaClean, AquaClean, AquaClean, AquaClean, AquaClean, AquaClean, AquaClean, AquaClean, AquaClean, AquaClean, AquaClean, AquaClean, AquaClean, AquaClean, AquaClean, AquaClean, AquaClean, AquaClean, AquaClean, AquaClean, AquaC
372000000000000000000000000000000000000000000000000000000000000000000000000000000000000000000000372001001001001001001001001001001001001001001001001001001001001001001001001001001001001001001001001001001AquaClean, AquaClean, AquaClean, AquaClean, AquaClean, AquaClean, AquaClean, AquaClean, AquaClean, AquaClean, AquaClean, AquaClean, AquaClean, AquaClean, AquaClean, AquaClean, AquaClean, AquaClean, AquaClean, AquaClean, AquaClean, AquaClean, AquaClean, AquaClean, AquaCC
37200100100100100100100100100100100100100100100100100100100100100100100100100100100100100100100100372011011011011011011011011011011011011011011011011011011011011011011011011011011011011011011011011011011AquaClean, AquaClean, AquaClean, AquaClean, AquaClean, AquaClean, AquaClean, AquaClean, AquaClean, AquaClean, AquaClean, AquaClean, AquaClean, AquaClean, AquaClean, AquaClean, AquaClean, AquaClean, AquaClean, AquaClean, AquaClean, AquaClean, AquaClean, AquaClean, A AquaClean, A AquaClean, A AquaClean, A AquaClean, A AquaClean, A AquaClean, A AquaClean, A AquaClean, A AquaClean, A AquaClean, A AquaClean, A AquaClean, A AquaClean, A AquaClean, A AquaClean, A AquaClean, A AquaClean, A AquaClean, A AquaClean, A AquaClean, A AquaClean, A AquaClean, A AquaClean, A AquaClean, A AquaClean, A 28 (28) (28) (28) (28) (28) (28) (28) (28) (28) (28) (28) (28) (28) (28) (28) (28) (28) (28) (28) (28) (28) (28) (28) (28) (28) (28).
3720110110110110110110110110110110110110110110110110110110110110110110110110110110110110110110110137201201201201201201201201201201201201201201201201201201201201201201201201201201201201201201201201201201AquaClean, AquaClean, AquaClean, AquaClean, AquaClean, AquaClean, AquaClean, AquaClean, AquaClean, AquaClean, AquaClean, AquaClean, AquaClean, AquaClean, AquaClean, AquaClean, AquaClean, AquaClean, AquaClean, AquaClean, AquaClean, AquaClean, AquaClean, AquaClean,
37201201201201201201201201201201201201201201201201201201201201201201201201201201201201201201201201372013013013013013013013013013013013013013013013013013013013013013013013013013013013013013013013013013013AquaClean, AquaClean, AquaClean, AquaClean, AquaClean, AquaClean, AquaClean, AquaClean, AquaClean, AquaClean, AquaClean, AquaClean, AquaClean, AquaClean, AquaClean, AquaClean, AquaClean, AquaClean, AquaClean, AquaClean, AquaClean, AquaClean, AquaClean, AquaClean, AquaGreen
37201201201201201201201201201201201201201201201201201201201201201201201201201201201201201201201237201301301301301301301301301301301301301301301301301301301301301301301301301301301301301301301301AquaClean, AquaClean, AquaClean, AquaClean, AquaClean, AquaClean, AquaClean, AquaClean, AquaClean, AquaClean, AquaClean, AquaClean, AquaClean, AquaClean, AquaClean, AquaClean, AquaClean, AquaClean, AquaClean, AquaClean, AquaClean, AquaClean, AquaClean, AquaClean, 43 (43) (43) (43) (43) (43) (43) (43) (43) (43) (43) (43) (43) (43) (43) (43) (43) (43) (43) (43) (43) (43) (43) (43) (43) (43) (43), (43) (43) (43) (43) (43) (43) (43) (43) (43) (43) (43) (43) (43) (43) (43) (43) (43) (43) (43) (43) (43) (43) (43) (43) (43)(43) (43) (43) (43) (43) (43) (43) (43) (43) (43) (43) (43) (43) (43) (43) (43) (43) (43) (43) (43) (43) (43) (43) (43) (43)

Hot Water Select your drink

3 100mt High Drinks Profile

4 Beans Audio console Power drink

5 BeansMaestro Grinde Arabica / Robusta Medium Roast Drinks Profile Beans

6 Espresso Red Water drink

7 Full Body High Milk First Coffee Maestro 10

Profile

9 Create Profile Drinks Profile Beans Settings

10 Full Body High Milk First Coffee Maestro Save to mixfile

11 12 1 sec.

Illustration of a hand holding a pen with a 1-minute time indicator (no text or symbols on the pen itself)

14 Soft Soft Medium Medium Medium Hard Hard

Illustration of a hand inserting a component into a device panel (no text or symbols visible)

Line drawing of a hand inserting a component into a device (no text or symbols)

Illustration of a hand using a tool to adjust or install a mechanical component (no text or symbols visible)

Illustration of a hand holding a mechanical component with a black arrow indicating direction (no text or symbols)

19 N

Technical line drawing of a mechanical device with a black arrow indicating a fastener (no text or symbols present)

21

Technical illustration of a mechanical component with directional arrows indicating movement (no text or symbols)

Illustration of a hand cleaning a mechanical component with radiating lines (no text or symbols)

24

Diagram showing a valve mechanism with an upward arrow and a pipe connection (no text or symbols)

26

Illustration of a container with an upward arrow indicating growth (no text or symbols)

28

Illustration of a coffee maker with a speech bubble highlighting the interior area (no text or symbols)

Diagram of a refrigerator interior showing a tray and door, with an arrow indicating left-side motion (no text or symbols)

31

32

33

Simple diagram showing a container being dropped with a downward arrow, no text or symbols present

35

Diagram of a pipe fitting with a downward arrow indicating direction, no text or symbols present.

Diagram of a device inside a container with an arrow indicating direction, no text or symbols.

Diagram of a mechanical component with a downward arrow indicating force or direction, no text or symbols.

Diagram of a mechanical valve or connector with a downward arrow indicating force or direction, no text or symbols.

Illustration of various mechanical components including a valve, housing, and bracket, no text or symbols.

41 CALC CLEAN

Diagram of a mechanical or electrical component with a coiled cable and housing, no text or symbols.

Diagram of a folding screen with grid patterns and curved arrows indicating movement, no text or symbols.

Black and white barcode image with vertical lines on both sides.

SAECO XELSIS SUPREMA - AquaClean -by-mn-2-3-m-4-m-5-6-7-8-9-10-11-12-13 - 60

SAECO XELSIS SUPREMA - AquaClean -by-mn-2-3-m-4-m-5-6-7-8-9-10-11-12-13 - 61

75% recycled paper

Table of contents Click a title to access it
Manual assistant
Powered by Anthropic
Waiting for your message
Product information

Brand : SAECO

Model : XELSIS SUPREMA

Category : Automatic coffee machine