
UF 245 F W742C - UF 245 F W742C - Refrigerator VALBERG - Free user manual and instructions
Find the device manual for free UF 245 F W742C - UF 245 F W742C VALBERG in PDF.
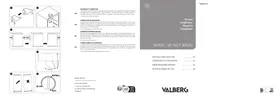


| Product type | Combined fridge-freezer |
| Brand | VALBERG |
| Model | UF 245 F W742C |
| Dimensions (H x W x D) | 1860 x 600 x 650 mm |
| Net weight | 62 kg |
| Climate class | SN / N / ST / T |
| Thermostat adjustment | 3 positions: MIN, NORMAL, MAX |
| Freezing capacity | Up to 4 kg/24h (estimated) |
| Power failure autonomy | Approximately 12 hours (estimated) |
| Door reversibility | Yes, reversible |
| Adjustable feet | Yes, 2 front feet |
| Interior lighting | Not specified (often present) |
| Power supply | 220-240 V ~ 50 Hz |
| Energy class | Not specified |
| Annual energy consumption | Not specified |
| Noise level | Not specified |
| Maintenance | Interior cleaning with warm water and mild soap; manual defrosting of the freezer |
| Safety | Grounding mandatory; unplug before cleaning; do not use steam cleaner |
| Spare parts and repairability | Use only original parts; repair by approved service |
| Warranty | 2 years (upon presentation of receipt) |
Frequently Asked Questions - UF 245 F W742C - UF 245 F W742C VALBERG
User questions about UF 245 F W742C - UF 245 F W742C VALBERG
0 question about this device. Answer the ones you know or ask your own.
Ask a new question about this device
Download the instructions for your Refrigerator in PDF format for free! Find your manual UF 245 F W742C - UF 245 F W742C - VALBERG and take your electronic device back in hand. On this page are published all the documents necessary for the use of your device. UF 245 F W742C - UF 245 F W742C by VALBERG.
USER MANUAL UF 245 F W742C - UF 245 F W742C VALBERG
This product is guaranteed for a period of 2 years from the date of purchase against any failure resulting from a manufacturing or material defect. This warranty does not cover defects or damage resulting from incorrect installation, improper use or abnormal wear of the product, as shown on the sales receipt.
WARRANTY CONDITIONS
Thank you for choosing this VALBERG product. Chosen, tested and recommended by ELECTRO DEPOT, VALBERG branded products are easy to use, reliable, and of an impeccable standard.
Thanks to this appliance, you can be sure that each use will bring you satisfaction.
Welcome to ELECTRO DEPOT.
Visit our website: www.electrodepot.fr www.electrodepot.be
Table of contents
A
Overview of the appliance
Recommended ambient temperature
Temperature control adjustment
Components
B
Using the appliance
Upside down door
Installation
Initial use
Daily use
Useful advice and tips
C
Useful information
Cleaning and maintenance
Troubleshooting
Recommended ambient temperature range
Respect the climatic classes indicated in the product information on the appliance's nameplate. You can use this to check the recommended temperature range of the room where the appliance is located:
SN: Between 10 and 32°C - N: Between 16 and 32°C ST: Between 16 and 38°C T: Between 16 and 43°C
A multi-class appliance can handle the lowest and highest temperature of all classes covered. Using the appliance outside the recommended temperature range will lead to inferior performance and premature ageing.
Temperature control adjustment
For optimal use and to save energy, adjust the temperature control(s) of the appliance according to the ambient temperature of the room in which it is being used, and respect the climate class.
Refer to the product sheet to find out the climatic class associated with the minimum and maximum recommended ambient temperatures for the appliance as well as the temperature setting recommended for storing food under optimal conditions.
The ambient temperatures in °C are given as a rough guide.
The set positions can be affected by the location of the appliance in the room, how often the door is opened, or the load of food inside.
The temperature control may need to be changed to compensate for these factors.
Examples of locations:
- Unheated room in winter like a garage in a cold region.
- Kitchen/lounge area with normal heating.
- Room that is not air-conditioned in summer in a hot region.
Components
Freezer drawers
3 Levelling the feet
Thermostat
- All images in this manual are for your information purposes only and actual product may vary; please refer to the different elements of your appliance for further details.
Reversed door
Tools required:
Phillips screwdriver, flat screwdriver, hexagon key. Make sure that the appliance is unplugged and empty. To remove the door, you need to tilt the appliance backwards. You need to position the appliance on something solid so that it does not slip whilst you are positioning the door the other way round. All the parts that have been removed must be kept in a safe place so that the door can be replaced.
- Do not lay the appliance flat as this could damage the cooling circuit. It is better for two people to handle the appliance during assembly.
Unscrew the hinge cover.
2. Open the door and unscrew the upper hinge. Then remove the door from the unit and place it on some soft padding to prevent damage.
Remove the cover and the screws on the left-hand side and then attach them on the right.
4. Carefully position the back of the unit flat on some soft padding. Start by removing the two levelling feet. Then unscrew the door hinge and the adjustable foot on the left. Caution! If there is a screw in the front left-hand corner, remove it before installing the hinge. Unscrew and remove the pin from the lower hinge. Turn the support over and reposition. Install the hinge on the left-hand side and the adjustable foot on the right. Then screw the two levelling feet onto their initial parts. Unscrew the pin in the upper hinge and insert it into the hole on the left. Return the appliance to its vertical position and place the door on the lower hinge. Make sure that the centre of the lower hinge is inserted in the hole in the door.
Then attach the upper hinge to the door. Before fixing the upper hinge firmly in place, try to open the door to check that the unit is properly sealed. Then screw the hinge cover onto the hinge.
Installation
9. Installing the door handle
Rear spacer
10. Screw the spacers onto the rear of the element.
Space required
11. Make sure that there is enough space to open the door.
Maintain at least 50 mm on both sides.
Levelling the appliance
To complete this step, adjust both feet on the element.
If the appliance is not level, the door will not be properly aligned and the magnetic seals will not be properly covered.
Positioning
- Install this appliance in a place where the room temperature corresponds to the climatic class indicated on the appliance's nameplate.
Location
- The appliance should be installed far from heat sources such as radiators, boilers, direct sunlight, etc. Make sure that air can circulate freely around the back of the element.
- To guarantee optimum performance, appliances which are positioned below an overhanging element should be at a minimum distance of at least 100 mm between the top of the appliance and the wall element. Ideally, the appliance should not be positioned underneath wall elements.
- Precise levelling is guaranteed using one or more adjustable feet positioned on the base of the appliance.
WARNING!
It must be possible to disconnect the appliance from the electricity supply; the plug must be easily accessible after installation.
Electrical connection
- Before connecting the appliance, make sure that the voltage and frequency indicated on the nameplate correspond to your domestic power supply. This appliance must be earthed. There is a contact in the plug for this purpose.
- If the domestic power supply is not earthed, contact a qualified electrician to connect the appliance to a separate earthing point according to the statutory requirements for electricity supplies.
- The manufacturer accepts no liability if the above-mentioned safety measures are not respected.
- The appliance is compliant with European directives.
Initial use
Cleaning the interior
- Before using the appliance for the first time, wash the interior and all internal accessories with lukewarm water and a neutral soap to remove the characteristic odor of new products.
Dry thoroughly.
CAUTION
Do not use abrasive powders or detergents as they will damage the finish.
Temperature setting
- Switch on your appliance. The interior temperature is controlled by a thermostat.
- There are 3 adjustments: MIN, NORMAL, and MAX. MIN corresponds to the warmest adjustment.
- MAX corresponds to the coldest adjustment.
- The appliance may not run at the correct temperature if it is located in a particularly warm area or if you open the door frequently.
Daily use
Freezing fresh food
- The freezing compartment is used to freeze fresh food and to keep food frozen and deep-frozen for a long period of time.
- Place the fresh food that you wish to freeze in the lower compartment.
- The maximum quantity of food that can be frozen in 24 hours is indicated on the nameplate.
- The freezing process takes 24 hours; do not add any other food to be frozen during this period.
Storing deep-frozen food
- When you use the appliance for the first time or after a period of disuse, leave the appliance to run for at least 2 hours on the highest settings before placing food in the compartment.
- Important! In case of accidental defrosting (e.g. if the power has been cut for a period longer than the one indicated in the "Technical Characteristics" table in the "Autonomy" section), defrosted food must be consumed quickly or cooked immediately and then refrozen (after cooking).
Defrosting
- Frozen or deep-frozen food can be defrosted in the refrigeration compartment or at room temperature, depending on the time available, before they are used.
- Small amounts or pieces of food can be cooked from frozen as soon as they are taken out of the freezer. In this case, they will take longer to cook.
Ice cubes
- This appliance may come with one or more ice trays.
Useful advice and tips
Advice for freezing
Here is some important advice to help you to optimise the freezing process:
The maximum quantity of food that can be frozen in 24 hours is indicated on the nameplate. - The freezing process takes 24 hours. Additional food products should not be added during this period. - You should only freeze fresh, perfectly clean, high-quality food products. - Prepare small portions so that they can freeze through quickly; this gives you the option of only defrosting the quantity that you need. - Wrap food in aluminium foil or polythene and make sure that the parcels are airtight. - To avoid increasing the temperature of frozen products, do not allow fresh food to come into contact with food which is already frozen. - Food which is low in fat and lean meat keeps better and for longer periods than fatty foods. Salt reduces the storage time of food. - Sorbets can sometimes cause burns to the skin and tongue if consumed straight from the freezer compartment. - The labelling of packages is important. Take note of the date of freezing indicated on the product and its packaging and respect the storage period indicated by the manufacturer.
Advice for storage of frozen food
To optimise the performance of this appliance, you should:
- Make sure that the deep-frozen product has been stored appropriately by the seller;
- Be sure that the frozen product was transferred from the store to the freezer within the shortest possible period of time;
- Do not open the door too often and do not leave it open for longer than necessary.
- Defrosted food products quickly deteriorate and should not be refrozen.
- Do not exceed the storage period indicated by the manufacturer.
- For hygiene reasons, the interior of the appliance including interior accessories should be cleaned regularly.
Cleaning and maintenance
WARNING!
- Risk of electrocution! Before cleaning, switch off the appliance and disconnect the plug from the socket or stop the appliance and remove the circuit breaker or fuse.
- Never clean the appliance with a steam cleaner. Moisture may accumulate in the electrical components. Risk of electric shock! Warm vapours can cause damage to plastic parts.
- The appliance must be dry before it is switched on again.
Essential oils and organic solvents can attack plastic parts. - Make sure that these substances (e.g. lemon juice, orange rind, butyric acid, products containing acetic acid) do not come into contact with appliance parts. - Do not use abrasive cleaning products. - Remove food from the freezer. Cover and store in a cool place. - Clean the appliance and interior accessories with a cloth and lukewarm water. After washing, rinse with fresh water and wipe down until completely dry. - The accumulation of dust on the condenser increases energy consumption. You should therefore clean the condenser at the back of the appliance carefully once a year with a soft brush or vacuum cleaner. - Switch the machine back on when all the parts are dry.
Defrosting the freezer
- The freezer compartment will gradually get covered with ice. The ice must be removed.
- Never use pointed metallic tools to scratch the ice off the evaporator as you could damage it.
- However, if the ice becomes very thick on the interior element, the appliance should be completely defrosted following the instructions below:
- disconnect the plug from the socket;
- remove all the food, wrap it in several layers of newspaper and store in a cool place;
- hold the door open and place a container underneath the appliance to collect the defrosting water;
- dry the interior thoroughly when defrosting is complete;
- insert the plug in the power supply to restart the appliance
WARNING!
- Disconnect the power supply before carrying out any repair work.
- This appliance must be repaired by an approved after sales service. Only original spare parts may be used.
- Important! Certain noises can be heard during normal use (compressor, cooling circuit).
| PROBLEM | POSSIBLE CAUSES | SOLUTION |
| The device does not work | The electric plug is not connected or is loose. The fuse has blown or is faulty. The plug is defective. | Insert the electric plug. |
| Check the fuse. Replace if necessary. | ||
| Operating faults must be repaired by an electrician. | ||
| The appliance freezes too much. | The temperature adjustment is too cold or the appliance is operating on the MAX. setting. | Turn the temperature regulator temporarily to a warmer setting. |
| The food is not sufficiently frozen. | The temperature is not properly adjusted. The door has been left open for an extended period. | Please consult the Adjusting the initial temperature section. |
| Only open the door for as long as is necessary. | ||
| A large amount of warm food has been placed in the appliance during the past 24 hours. The appliance is near a heat source. | Turn the temperature regulator temporarily to a colder setting. | |
| Please consult the Installation position. | ||
| Significant accumulation of ice on the door seals. | The door seal is not airtight. | Carefully heat the unstuck sections of the door seal with a hair-dryer (on a cold setting). At the same time, shape the heated door seal in your hand so that it can be correctly positioned. |
| Uncommon noises. | The appliance is not level. The appliance is touching the wall or other items. | Readjust the feet. |
| Move the appliance slightly. | ||
| The side panels are warm. | This is a normal phenomenon. The heat exchanger parts are located underneath the side panels. | |
- WARRANTY CONDITIONS
- TABLE OF CONTENTS
- RECOMMENDED AMBIENT TEMPERATURE RANGE
- TEMPERATURE CONTROL ADJUSTMENT
- COMPONENTS
- REVERSED DOOR
- TOOLS REQUIRED
- INSTALLATION
- REAR SPACER
- SPACE REQUIRED
- LEVELLING THE APPLIANCE
- POSITIONING
- LOCATION
- WARNING
- ELECTRICAL CONNECTION
- INITIAL USE
- CLEANING THE INTERIOR
- CAUTION
- TEMPERATURE SETTING
- DAILY USE
- FREEZING FRESH FOOD
- STORING DEEP-FROZEN FOOD
- DEFROSTING
- ICE CUBES
- USEFUL ADVICE AND TIPS
- ADVICE FOR FREEZING
- ADVICE FOR STORAGE OF FROZEN FOOD
- CLEANING AND MAINTENANCE
- DEFROSTING THE FREEZER
Brand : VALBERG
Model : UF 245 F W742C - UF 245 F W742C
Category : Refrigerator