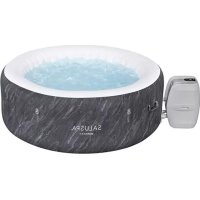
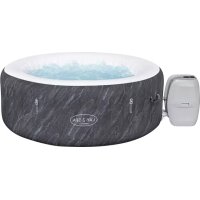
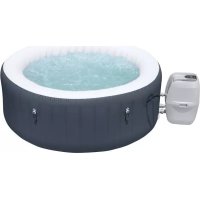
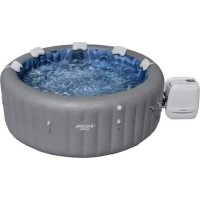
LAY-Z HAWAI AIRJET - Inflatable spa BESTWAY - Free user manual and instructions
Find the device manual for free LAY-Z HAWAI AIRJET BESTWAY in PDF.
Download the instructions for your Inflatable spa in PDF format for free! Find your manual LAY-Z HAWAI AIRJET - BESTWAY and take your electronic device back in hand. On this page are published all the documents necessary for the use of your device. LAY-Z HAWAI AIRJET by BESTWAY.
USER MANUAL LAY-Z HAWAI AIRJET BESTWAY
www.bestway-service.com

Bestway
Inflate Your Fun™
Lay-Z-Spa™
Owner's Manual
ENGLISH P5
FRANÇAIS P24
ESPÁÑOL P43
PORTUGUES P62
ITALIANO P81
POLSKI P100
MAGYAR P119
- Safety Instructions P05
- Specifications P08
- Installation Instructions P11
Selected Location
Pump Test
Assembly
- Pump Operation P18
Heating Reset
Control Panel
Alarms
- Maintenance P19
Maintaining Spa Water
For Filter Cartridge Cleaning & Replacement
For Water Balance
Fasten the Air-Valve
Draining the Spa
Cleaning the Spa
Spa Repair
Lay-Z-Spa Storage
Disposal
- Troubleshooting P22
- Warranty P23
SAFETY INSTRUCTIONS
WARNING
When installing and using this electrical equipment, basic safety precaution should always be followed, including the following:
IMPORTANT SAFETY INSTRUCTIONS - READ AND FOLLOW ALL INSTRUCTIONS.
WARNING:
- The spa must be supplied through an isolating transformer or supplied through a residual current device (RCD) having a rated residual operating current not exceeding 30mA .
- The pump must be tested before each use, to test follow the instruction of pump.
- If the supply cord is damaged, it must be replaced by the manufacturer, it service agent or similarly qualified persons in order to avoid a hazard.
- To reduce the risk of electric shock, do not use extension cord to connect unit to electric supply; provide a properly located outlet.
- No part of the appliance is to be located above the bath during use.
- Parts containing live parts, except parts supplied with safety extra-low voltage not exceeding 12V, must be inaccessible to a person in spa pool; Parts incorporating electrical components, except remote control devices, must be located or fixed so that they cannot fall into the spa pool.
- The plug of pump shall be more than 3.5m away from the spa.
- It is necessary to have the plug accessible after installation of the spa.
- TO AVOID ELECTRIC SHOCK, DO NOT USE THE SPA WHEN IT IS RAINING.
- Never wear your contact lenses when in your spa.
-
Do not use spa during chemical maintenance.
-
This appliance can be used by children aged from 8 years and above and persons with reduced physical, sensory or mental capabilities or lack of experience and knowledge if they have been given supervision or instruction concerning use of the appliance in a safe way and understand the hazards involved. Children shall not play with the appliance. Cleaning and user maintenance shall not be made by children without supervision.
-
Water attracts children; always attach a spa cover after each use.
-
Do not bury cord. Locate cord to minimize abuse from lawn mowers, hedge trimmers, and other equipment.
-
Risk of Accidental Drowning. Extreme caution must be exercised to prevent unauthorized access by children. To avoid accidents, ensure that children can not use this spa unless they are supervised at all times.
-
RISK OF INJURY. Never operate spa if inlet / outlet pipes are broken or missing. Never attempt to replace the inlet / outlet pipes. Always consult your local Aftersales centre.
-
RISK OF ELECTRIC SHOCK. Install at least 2m from all metal surfaces.
-
RISK OF ELECTRIC SHOCK. Never operate any electrical appliance when in your spa or when your body is wet. Never place any electric appliance, such as a light, telephone, radio, or television, within 2m of spa.
-
During pregnancy, soaking in hot water may cause damage to the fetus. Limit use to 10 minutes at a time.
-
TO REDUCE THE RISK OF INJURY:
A. The water in a spa should never exceed 40^ C ( 104^ F ). Water temperature between 38^ C ( 100^ F ) and 40^ C ( 104^ F ) is considered safe for a healthy adult. Lower water temperatures are recommended for young children and when spa use exceeds 10 minutes.
B. Since excessive water temperatures have a high potential for causing fetal damage during the early months of pregnancy, pregnant or possibly pregnant women should limit spa water temperature to 38^ C ( 100^ F ).
C. Before entering a spa, the user should measure the water temperature with an accurate thermometer since the tolerance of water temperature regulating device varies.
D. The use of alcohol, drugs, or medication before or during spa use may lead to unconsciousness with the possibility of drowning.
E. Obese persons and persons with a history of heart disease, low or high blood pressure, circulatory system problems, or diabetes should consult a physician before using a spa.
F. Persons using medication should consult a physician before using a spa since some medication may induce drowsiness while other medication may affect heart rate, blood pressure, and circulation.
- TO REDUCE THE RISK OF INJURY: Never pour water with a temperature higher than 40^ ( 104^ ) into the spa pool directly.
- The use of alcohol, drugs, or medication can greatly increase the risk of fatal hyperthermia. Hyperthermia occurs when the internal temperature of the body reaches a level that is several degrees above the normal body temperature of 37^ (98.6^) . The symptoms of hyperthermia include an increase in the internal temperature of the body, dizziness, lethargy, drowsiness, and fainting. The effects of hyperthermia include failure to perceive heat; failure to recognize the need to exit spa or hot tub; unawareness of impending hazard; fetal damage in pregnant women; physical inability to exit the spa or hot tub; and unconsciousness resulting in the danger of drowning.
- Electric installations should fulfill the requirements of standards VDE0100 part 702. Consult a qualified electrician with any questions.
CONSULT YOUR PHYSICIAN FOR RECOMMENDATIONS.
CAUTION:
- The spa should not be setup or left out in temperature lower than 4^ (40^) .
- Do not use the spa alone.
People with infectious diseases should not use a spa. - Do not use the spa immediately following strenuous exercise.
- Always enter and exit the spa slowly and cautiously. Wet surfaces are slippery.
- To avoid damage to the pump, the spa must never be operated unless the spa is filled with water.
- Immediately leave spa if the user feels uncomfortable or sleepy.
- Never add water to chemicals. Always add chemicals to water to avoid strong fumes or violent reactions that may result in hazardous chemical spray.
NOTE:
- Please examine equipment before use. Notify Bestway at the customer service address listed on this manual for any damaged or missing parts at the time of purchase. Verify that the equipment components represent the models that you had intended to purchase.
- This product is not intended for commercial use.
SAVE THESE INSTRUCTIONS
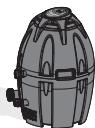
SPECIFICATIONS FOR LAY-Z-SPATVEGAS (#54112)
| Capacity: | 4-6 Adults | Massaging Turbo Blower: | 800W | Increased Heat Rate: | Approximately 1.5-2°C/h (3-4°F/h) |
| Water Capacity (80%): | 848 L (224 gal) | Heat Element: | 2,000W at 20°C | Actual Water Flow: | 1,325 L/h (350 gal/h) |
| Inflated Size: | 1.96m x 61cm (77" x 24") | Pump: | 50W Circulation Filter Pump | Power Rate: | 220-240V AC, 2,050W at 20°C |
| Filled Weight: | 1,100 kg (2,426 Lb) | Temperature Capacities: | 40°C (104°F) | Working Pressure: | 0.8PSI (0.0055MPa) |
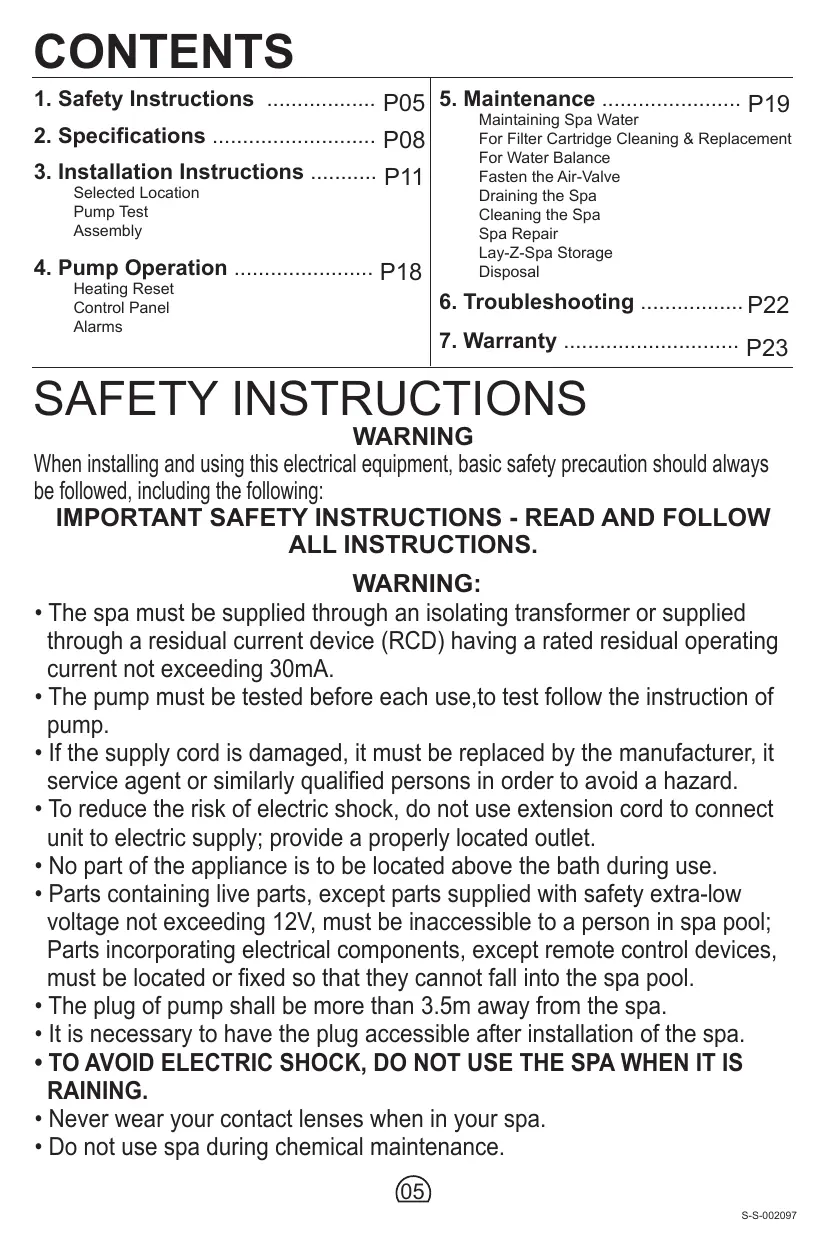
| Part N. | Part Code | Description | QTY |
| 001 | 54112TASS15 | Pool | 1 |
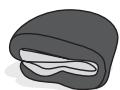
| 002 | P4H054ASS15 | Heater | 1 |
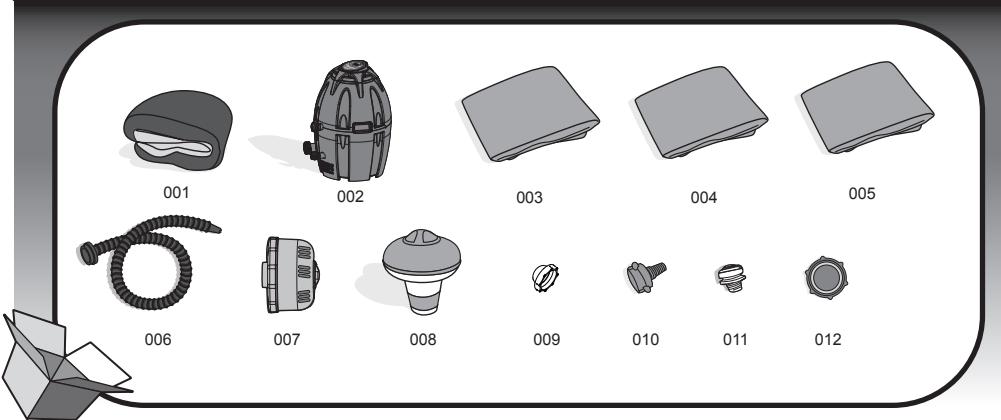
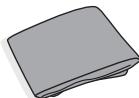
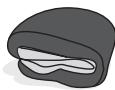
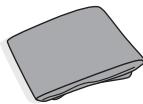
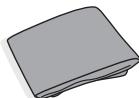
| 003 | P5H283GASS13 | Top Leatheroid Cover | 1 |
| 004 | P5H283TASS14 | Bottom Leatheroid Cover | 1 |
| 005 | 54112GASS15 | Inflatable Part Top Cover | 1 |
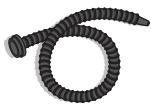
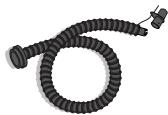
| 006 | P6613 | Inflation Hose | 1 |
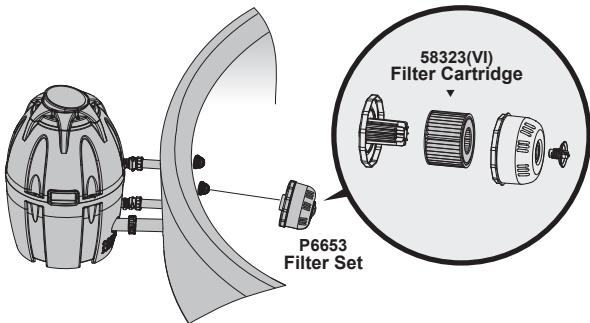
| 007 | P6653 | Filter Set | 1 |
| 008 | 58210S10 | Chemical Floater | 1 |
| 009 | P6575 | Stoppers | 2 |
| 010 | P6932 | Hose Adapter | 1 |
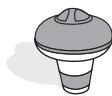
| 011 | F4A024ASS | Screw Valve | 1 |
| 012 | P6611 | Cover Adapter A | 1 |
SPECIFICATIONS FOR LAY-Z-SPATM MONACO (#54113)
| Capacity: | 6-8 Adults | Massaging Turbo Blower: | 800W | Increased Heat Rate: | Approximately 1-1.5°C/h (2-3°F/h) |
| Water Capacity (80%): | 1,540 L (407 gal.) | Heat Element: | 2,000W at 20°C | Actual Water Flow: | 1,325 L/h (350 gal/h) |
| Inflated Size: | 2.01m x 69cm (79" x 27") | Pump: | 50W Circulation Filter Pump | Power Rate: | 220-240V AC, 2,050W at 20°C |
| Filled Weight: | 1,973 kg (4,349 Lb) | Temperature Capacities: | 40°C (104°F) | Working Pressure: | 7PSI-10PSI (0.048MPa-0.069MPa) |

001
002
003
004
005

006
007
008
009

010

011

012

013
014
015
| Part N. | Part Code | Description | QTY |
| 001 | 54113TASS15 | Pool | 1 |
| 002 | P4D055ASS15 | Heater | 1 |
| 003 | P5D288ASS13 | Top Leatheroid Cover | 1 |
| 004 | 54113GASS15 | Inflatable Part Top Cover | 1 |
| 005 | P6931 | Inflation Hose | 1 |
| 006 | P6653 | Filter Set | 1 |
| 007 | 58210S10 | Chemical Floater | 1 |
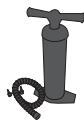
| 008 | P3039 | High Pressure Hand Pump | 1 |
| 009 | F6H189 | Wrench | 1 |
| 010 | P6575 | Stoppers | 2 |
| 011 | P6932 | Hose Adapter | 1 |
| 012 | P6608 | Pressure Gauge | 1 |
| 013 | P6611 | Cover Adapter A | 1 |
| 014 | 12632ASS14 | Inflated Cushions | 4 |
| 015 | P6H971 | Inflation Valve | 1 |
SPECIFICATIONS FOR LAY-Z-SPA™ MIAMI (#54123)
| Capacity: | 2-4 Adults | Massaging Turbo Blower: | 800W | Increased Heat Rate: | Approximately 1.5-2°C/h (3-4°F/h) |
| Water Capacity (80%): | 800 L (211 gal) | Heat Element: | 2,000W at 20°C | Actual Water Flow: | 1,325 L/h (350 gal/h) |
| Inflated Size: | 1.80m x 65cm (71" x 26") | Pump: | 50W Circulation Filter Pump | Power Rate: | 220-240V AC, 2,050W at 20°C |
| Filled Weight: | 1,026 kg (2,261 Lb) | Temperature Capacities: | 40°C (104°F) | Working Pressure: | 0.8PSI (0.0055MPa) |
001
002
003
004
005

006
007

008

009

010

011
| Part N. | Part Code | Description | QTY |
| 001 | 54123TASS15 | Pool | 1 |
| 002 | P4H054ASS15 | Heater | 1 |
| 003 | P5C364ASS14 | Top Reinforce Cover | 1 |
| 004 | 54123GASS15 | Inflatable Part Top Cover | 1 |
| 005 | P6613 | Inflation Hose | 1 |
| 006 | P6653 | Filter Set | 1 |
| 007 | 58210S10 | Chemical Floater | 1 |
| 008 | P6575 | Stoppers | 2 |
| 009 | P6932 | Hose Adapter | 1 |
| 010 | F4024ASS | Screw Valve | 1 |
| 011 | P6611 | Cover Adapter A | 1 |
SPECIFICATIONS FOR LAY-Z-SPATM PALM SPRINGS (#54129)
| Capacity: | 4-6 Adults | Massaging Turbo Blower: | 800W | Increased Heat Rate: | Approximately 1.5-2°C/h (3-4°F/h) |
| Water Capacity (80%): | 963 L (254 gal.) | Heat Element: | 2,000W at 20°C | Actual Water Flow: | 1,325 L/h (350 gal/h) |
| Inflated Size: | 1.96m x 71cm (77" x 28") | Pump: | 50W Circulation Filter Pump | Power Rate: | 220-240V AC, 2,050W at 20°C |
| Filled Weight: | 1,225 kg (2,701 Lb) | Temperature Capacities: | 40°C (104°F) | Working Pressure: | 1.2PSI (0.008MPa) |
001
002
003
004
005

006
007
008
009

010

011

012

013

014

| Part N. | Part Code | Description | QTY |
| 001 | 54129TASS15 | Pool | 1 |
| 002 | P4B079ASS15 | Heater | 1 |
| 003 | P5B401ASS15 | Top Leatheroid Cover | 1 |
| 004 | 54129GASS15 | Inflatable Part Top Cover | 1 |
| 005 | P6930 | Inflation Hose | 1 |
| 006 | P6653 | Filter Set | 1 |
| 007 | 58210S10 | Chemical Floater | 1 |
| 008 | 58321(H) S15 | Ground mat | 1 |
| 009 | F6H189 | Wrench | 1 |
| 010 | P6575 | Stoppers | 2 |
| 011 | P6H565 | Hose Adapter | 1 |
| 012 | P6933 | Pressure Gauge | 1 |
| 013 | P6611 | Cover Adapter A | 1 |
| 014 | P6H971 | Inflation Valve | 1 |
INSTALLATION INSTRUCTIONS
Selected Location
WARNING: The selected location has to be able to support of supporting the expected load.
WARNING: An adequate drainage system has to be provided to deal with overflow water for both indoor and outdoor installations.
IMPORTANT: Because of the combined weight of the Lay-Z-Spa, water, and users, it is extremely important that the base where the Lay-Z-Spa is installed is smooth, flat, level and capable of uniformly supporting the weight for the entire time the Lay-Z-Spa is installed (not on the carpet or other similar material). If the Lay-Z-Spa is placed on a surface, which does not meet these requirements, any damage caused by improper support is not covered under the manufacturer's warranty. It is the responsibility of the Lay-Z-Spa owner to assure the integrity of the site at all times.
1. Indoor Installation:
Be aware of special requirements if you install the spa indoors.
- Humidity is a natural side effect with Lay-Z-Spa installation. Determine the effects of airborne moisture on exposed wood, paper, etc. in the proposed location. To minimize these effects it is best to provide plenty of ventilation to the selected area. An architect can help determine if more ventilation is needed.
2. Outdoor Installation:
- During filling, draining or when in use, water may flow out of the spa. Therefore the Lay-Z-Spa should be installed near a floor drain.
- Do not leave the spa's surface exposed to direct sunlight for long periods of time.
WARNING: TO AVOID ELECTRIC SHOCK, DO NOT USE THE SPA WHEN IT IS RAINING.
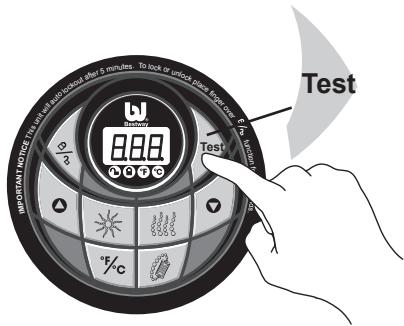
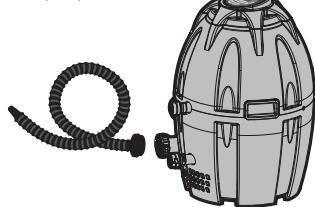
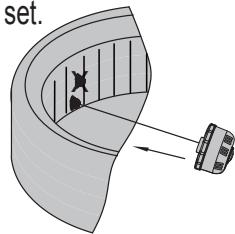
Pump Test
- Insert the plug into a mains socket. The LED automatically displays current water temperature.
- Press the "Test" button. All the indicator lights turn off, and the pump gives a warning beep.
- Unplug and then plug the pump back in to start the system. The pump is ready to use.
WARNING: RISK OF ELECTRIC
SHOCK. The pump must be tested before each use.
WARNING: Insert the plug into a residual current device (RCD) protected power outlet only.
WARNING: Before inserting plug into a power outlet, make sure the current rate of the power outlet is suitable for the pump.
WARNING: Do not use the pump if this test fails.
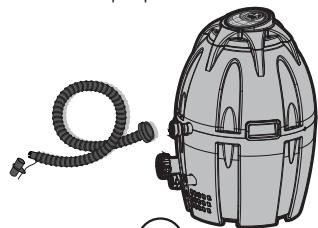
ASSEMBLY: VEGAS (#54112)
- Spread out the spa and leatheroid cover and make sure both are right side up.
- Connect the inflation hose to adapter A on the pump.
- As previously outlined, test the pump and press the Lay-Z-Massage button to activate the pump.
- NOTE: Do not use an air compressor to inflate the pool.
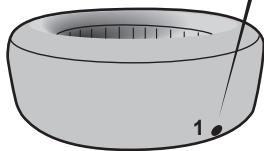
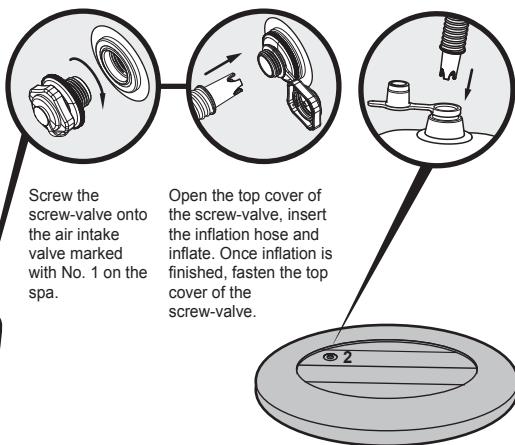
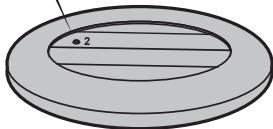
Use the inflation hose to inflate the chambers according to the printed numbers 1 on the spa and 2 on the cover.
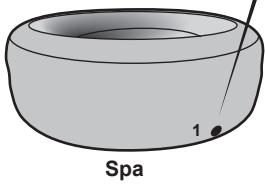
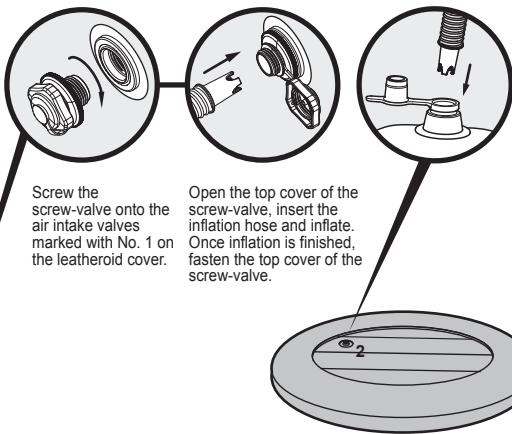
NOTE: Before use the Lay-Z-Spa Vegas, always make sure that all of the inflatable chambers are properly inflated and that there are no folds.
Open the top leatheroid cover and reverse. Insert the inflation hose onto the valve to inflate. When the inflation is finished close the valve.
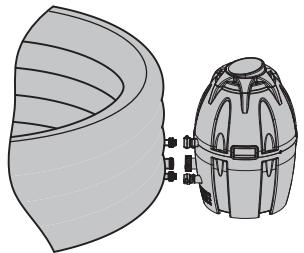
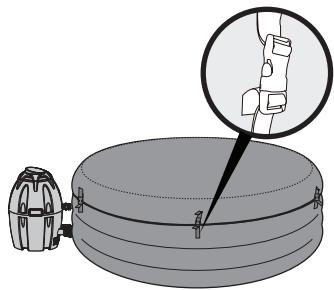
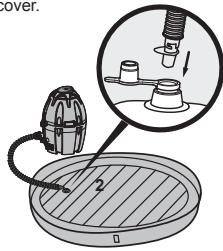
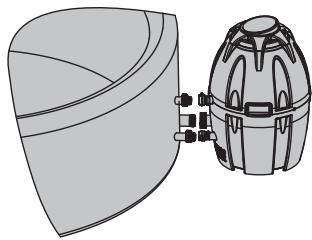
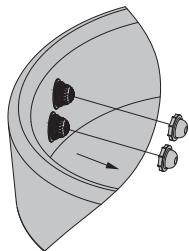
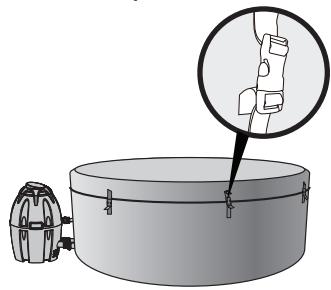
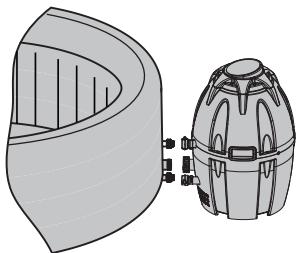
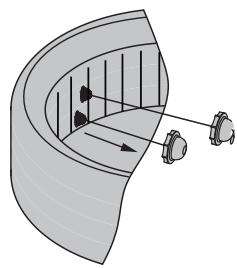
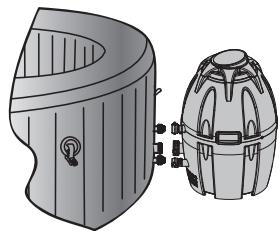
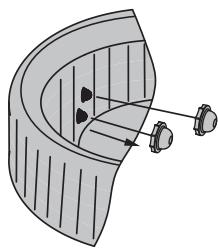
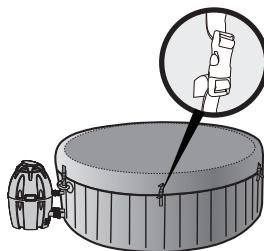
- Connect the pump to the spa by lining up the letters (A to A, B to B and C to C). Securely hand-tighten the adapters. Check all rubber seals are in place.
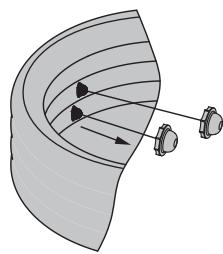
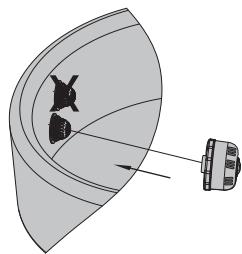
- Remove the two stopper caps from the inside of the spa's inlet and outlet pipes.
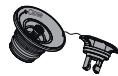
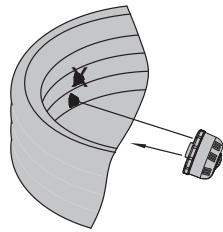
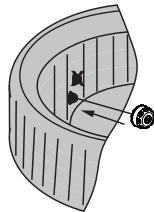
- Screw the filter set to the inside of the spa's outlet pipe.
NOTE: Must screw in lower position. NOTE: Do not sit on the filter set.
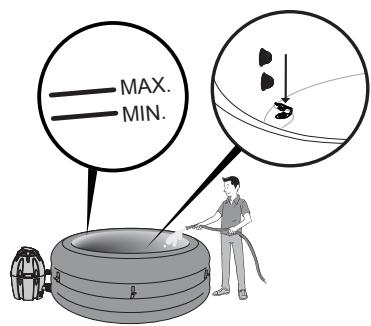
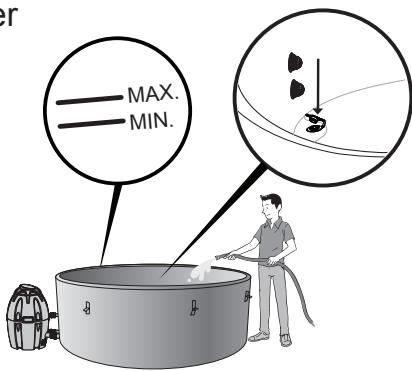
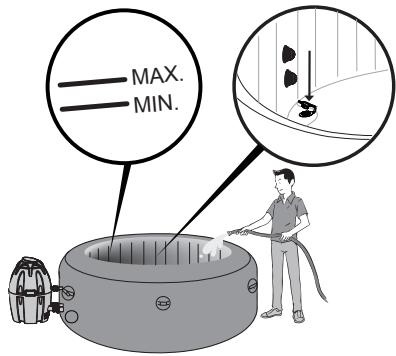
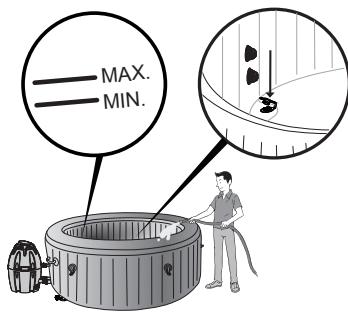
- Using a garden hose, fill the spa to the water level between maximum and minimum printed on the spa wall.
NOTE: Before filling, ensure the bottom drain valve is secured. To avoid pump failure, water level must reach the minimum water line but not exceed the maximum water line.
To heat the water, put the cover on, lock the clips, and push the heat button (see page 18).
WARNING: Do not run the Lay-Z-Massage system when the cover is attached.
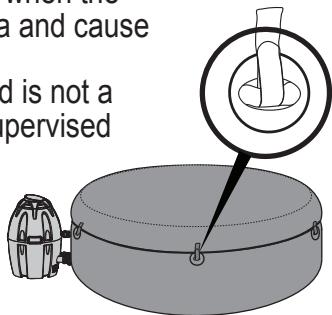
Air can accumulate inside the spa and cause irreparable damage and bodily harm.
WARNING: This spa cover is not a safety cover and is not a substitute for adult supervision; children must be supervised around the spa at all times.
Note: We recommend you take a shower before using your Lay-Z-Spa, as cosmetic products, lotions, and other residues on the skin can quickly degrade water quality.
ASSEMBLY: MONACO (#54113)
- Spread out the spa.
- Connect the inflation hose to adapter A on the pump.
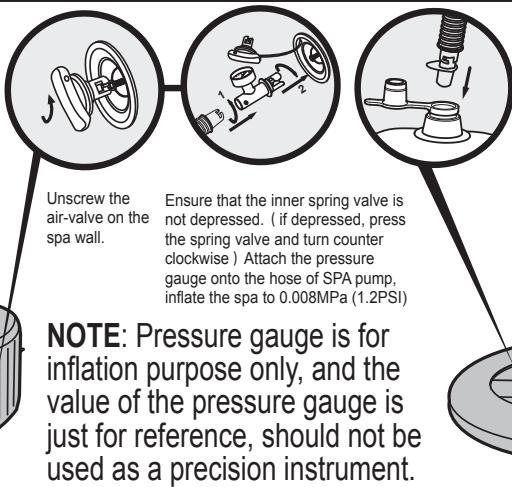
3. Inflate the spa wall.
Unscrew the air-valve on the spa wall.

Ensure that the inner spring valve is not depressed. (If depressed, press the spring valve and turn counter clockwise) Attach the pressure gauge onto the hose of SPA pump, inflate the spa 5 minutes.
NOTE: Pressure gauge is for inflation purpose only, and the value of the pressure gauge is just for reference, should not be used as a precision instrument.
As previously outlined, test the pump and press the Lay-Z-Massage button to activate the pump.
- Continue to inflate the liner with the high pressure hand pump. Stop inflation when the pressure is 0.048MPa (7PSI) ~ 0.069MPa (10PSI).

- Activate the Lay-Z-Massage system and inflate the inflatable cover.
7. Inflate the four inflated cushions with the high pressure hand pump.
- Connect the pump to the spa by lining up the letters (A to A, B to B and C to C). Securely hand-tighten the adaptors. Check all rubber seals are in place.
- Remove the two stopper caps from the inside of the spa's inlet and outlet pipes.
10. Screw the filter set to the inside of the spa's outlet pipe.
NOTE: Must screw in lower position.
NOTE: Do not sit on the filter set.
- Using a garden hose, fill the spa to the water level between maximum and minimum printed on the spa wall.
NOTE: Before filling, ensure the bottom drain valve is secured. To avoid pump failure, water level must reach the
minimum water
line but not exceed the maximum water line.
12 To heat the water, put the cover on, lock the clips, and push the heat button (see page 18).
WARNING: Do not run the Lay-Z-Massage system when the cover is attached. Air can accumulate inside the spa and cause irreparable damage and bodily harm.
WARNING: This spa cover is not a safety cover and is not a substitute for adult supervision; children must be supervised
around the spa at all times.
Note: We recommend you take a shower before using your
Lay-Z-Spa, as cosmetic products, lotions, and other residues on the skin can quickly degrade water quality.
ASSEMBLY: MIAMI (#54123)
- Spread out the spa and cover and make sure both are right side up.
- Connect the inflation hose to adapter A on the pump.
- As previously outlined, test the pump and press the Lay-Z-Massage button to activate the pump.
- NOTE: Do not use an air compressor to inflate the pool.
Use the inflation hose to inflate the chamber according to the printed number 1 on the spa.
Spa
NOTE: Before use the Lay-Z-Spa Miami, always make sure that the inflatable chamber is properly inflated and that there are no folds.
Open the top fabric coated cover and reverse. Insert the inflation hose onto the valve to inflate. When the inflation is finished, close the valve.
- Connect the pump to the spa by lining up the letters (A to A, B to B and C to C). Securely hand-tighten the adapters. Check all rubber seals are in place.
- Remove the two stopper caps from the inside of the spa's inlet and outlet pipes.
- Screw the filter set to the inside of the spa's outlet pipe.
NOTE: Must screw in lower position.
NOTE: Do not sit on the filter set.
- Using a garden hose, fill the spa to the water level between maximum and minimum printed on the spa wall.
NOTE: Before filling, ensure the bottom drain valve is secured. To avoid pump failure, water level must reach the minimum water line but not exceed the maximum water line.
To heat the water, put the cover on, lock the velcros, and push the heat button (see page 18).
WARNING: Do not run the Lay-Z-Massage system when the cover is attached, air can accumulate inside the spa and cause irreparable damage and bodily harm.
WARNING: This spa cover is not a safety cover and is not a substitute for adult supervision; children must be supervised around the spa at all times.
Note: We recommend you take a shower before using your Lay-Z-Spa, as cosmetic products, lotions, and other residues on the skin can quickly degrade water quality.
ASSEMBLY: PALM SPRINGS (#54129)
- Spread out the spa and cover and make sure both are right side up.
- Connect the inflation hose to adapter A on the pump.
- As previously outlined, test the pump and press the Lay-Z-Massage button to activate the pump.
- NOTE: Do not use an air compressor to inflate the pool.
Use the inflation hose to inflate the chambers on the spa and 2 on the cover.
Spa
NOTE: Before use the Lay-Z-Spa Palm Springs, always make sure that all of the inflatable chambers are properly inflated and that there are no folds. Open the top leatheroid cover and reverse. Insert the inflation hose onto the valve to inflate. When the inflation is finished, close the valve.
Cover
- Connect the pump to the spa by lining up the letters (A to A, B to B and C to C). Securely hand-tighten the adapters. Check all rubber seals are in place.
- Remove the two stopper caps from the inside of the spa's inlet and outlet pipes.
- Screw the filter set to the inside of the spa's outlet pipe.
NOTE: Must screw in lower position. NOTE: Do not sit on the filter set.
- Using a garden hose, fill the spa to the water level between maximum and minimum printed on the spa wall.
NOTE: Before filling, ensure the bottom drain valve is secured. To avoid pump failure, water level must reach the minimum water line but not exceed the maximum water line.
To heat the water, put the cover on, lock the clips, and push the heat button (see page 18).
WARNING: Do not run the Lay-Z-Massage system when the cover is attached, air can accumulate inside the spa and cause irreparable damage and bodily harm.
WARNING: This spa cover is not a safety cover and is not a substitute for adult supervision; children must be supervised around the spa at all times.
Note: We recommend you take a shower before using your Lay-Z-Spa, as cosmetic products, lotions, and other residues on the skin can quickly degrade water quality.
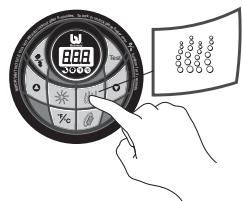
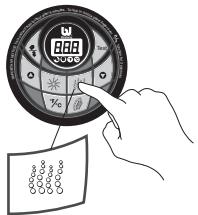
PUMP OPERATION
Heating Reset
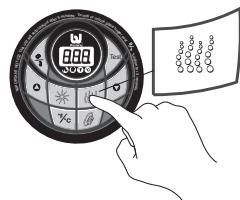
When using the Lay-Z-Spa for first time, or after a long period of inactivity, be sure to press the reset button on the pump using a small and thin object.
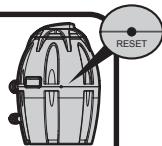
RESET BUTTON IMPORTANT INSTRUCTIONS FOR USING
If the temperature on the control panel (or the water temperature) has not changed 4-5 hours after activation of the heating system, use a thin object to press the RESET BUTTON, and restart the heating system.
IMPORTANT: The heating System will not operate if the outside temperature is above 40^(104^) or if the Lay-Z-Spa is under direct sunlight. Under these conditions, please wait until a cooler time of day before pressing the RESET BUTTON with a thin object and restart the heating System.

Lock/Unlock Button

The pump has a 5-minute auto-lock. To lock or unlock the pump, place a finger over the lock/unlock button for 3 seconds.

Temperature Adjustment Buttons

Pressing the Temperature Increase or Decrease buttons will cause the LED to flash. When flashing you can adjust to the desired temperature setting. If you hold these buttons down the values will rapidly increase or decrease. The new
and desired temperature setting will remain on the LED display for 5 seconds to confirm the new value.
NOTE: The default temperature is 40^ (104°F).
NOTE: Temperature adjustment ranges from 20^ (68^) to 40^ (104^) .
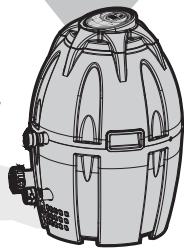

Heat Button

Use this button to activate the heating system. The pump will heat the spa water until the water temperature reaches 1^ (1.8^) higher than the
set temperature. After the current water temperature drops 2^ (3.6^) below the set temperature the heating system will restart. When the light above the heat button is red, the heating system is activated. When the light is green, the water is at the set temperature and the heating system is at rest.
The heating system is capable of increasing the water temperature by approximately 1.5 to 2^ (3-4°F) per hour for #54112, #54123, #54129 and 1-1.5°C (2-3°F) per hour for #54113.
NOTE: If the heating system is activated the filtration system will automatically start.
NOTE: After turning off the heating system the filtration system will continue to operate.
NOTE: The Lay-Z-Massage System will automatically shutoff when the heater is activated.

NOTE: The system's default is Celsius.

Water Filter Button

This button turns the filter pump on and off. The light above the Water Filter Button displays red when activated.

Lay-Z-Massage System Button
Use this button to activate the massage system, which has a 30-minute auto-shutoff feature. The light above the Lay-Z-Massage System Button displays red when activated.
WARNING: Do not run the Lay-Z-Massage system when the cover is attached, air can accumulate inside the spa and cause irreparable damage and bodily harm.
Alarms
| Causes | Reasons | Solutions | |
| E01 | The water flow sensors work without pressing the filter or heat button. | 1. The water flow sensors' flags didn't fall back into the correct position2. The water flow sensors are broken | 1. Unplug the plug gently, strike the side of the pump but not violently, and plug it back in2. Contact your local Bestway After Sales service point to get instructions |
| E02 | After starting or during the functions of filtering or/and heating, the water flow sensors do not detect water flow. | 1. You forgot to remove the 2 stopper caps from inside the pool2. Filters cartridges are dirtyActivate the filter or heat system and put your hand in front of the outlet pipe inside the pool to check if you can feel water flowing out3. If no water flows out the water pump is broken4. After changed the water pump, no water flows out, the transformer is broken5. Water flows out but the alarm appears The water flow sensors are broken | 1. Remove the 2 stopper caps before heating, refer to Assembly section in the User's Manual2. Remove the filter set from inside the pool and push the filter or heat button. If no alarm appears, clean or change the filter cartridges install the filter set inside the pool.Note: The filter cartridges must be cleaned every day3. Contact your local Bestway After Sales service point to get instructions4. Contact your local Bestway After Sales service point to get instructions5. Contact your local Bestway After Sales service point to get instructions |
| E03 | The pump's thermometer reads the water temperature below 4°C (40°F). | 1. The water temperature is lower than 4°C (40°F)2. The pump's thermometer is broken | 1. The spa is not designed to operate with water temperatures lower than 4°C (40°F). Unplug the pump and only re-start the pump when the water temperature reaches 6°C (43°F)2. Contact your local Bestway After Sales service point to get instructions |
| E04 | The pump's thermometer reads the water temperature over 50°C (122°F). | 1. The water temperature is over 50°C (122°F)2. The pump's thermometer is broken | 1. The spa is not designed to operate with water temperatures greater than 40°C (104°F). Unplug the pump and only re-start the pump when the water temperature reaches 38°C (100°F) or lowerIMPORTANT: Before you re-start the pump, push the pump's reset button2. Contact your local Bestway After Sales service point to get instructions |
| E05 | The pump's thermometer connections have issues. | 1. The pump's thermometer connectors don't work properly2. The pump's thermometer is broken | 1. Contact your local Bestway After Sales service point to get instructions2. Contact your local Bestway After Sales service point to get instructions |
| E06 | This alarm appears after pressing the pump's test button or during the automatic operations of the pump. | 1. The power port experienced some temporarily current variation2. Safety components are broken | 1. Unplug and plug the pump back in2. Contact your local Bestway After Sales service point to get instructions |
| E07 | The manual reset thermal cut-out has problem. | The manual reset thermal cut-out trips off | 1. Unplug the pump and push the reset button, then plug the pump backin. In case the alarm still remains, check the RESET BUTTON section in manual3. Contact your local Bestway After Sales service point to get instructions. |
| All lights on the control panel are off and the pump beeps | Safety circuits operation. | 1. The test button was pushed | 1. Unplug and plug the pump back in |
MAINTENANCE
Maintaining Spa Water
The spa owner must regularly maintain pool water, daily if necessary. Proper water maintenance disinfects spa water killing harmful microorganisms, removes oils, make-up and lotion ensuring the water is clean and safe.
Spa water quality can be extremely hazardous to your health. We recommend the following:
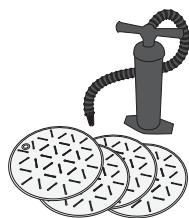
For Filter Cartridge Cleaning & Replacement
NOTE: To ensure you help your spa water stay clean, please check and clean your filter cartridge every day if required and we recommend you change your filter cartridge every three days depending on use.
CAUTION: YOU MUST ENSURE THE PUMP IS UNPLUGGED BEFORE BEGINNING SPA MAINTENANCE TO AVOID RISK OF INJURY OR DEATH.
- Unplug the pump.
- Remove the filter set from the spa.
- The filter cartridge can be rinsed off with a garden hose and reused. However, if the filter cartridge remains soiled and discolored, the filter cartridge should be replaced. It is recommended to replace filter cartridge every three days depending on use.
- Replace the filter set in the spa.
For Water Balance
- As a guide, the water should be changed about every 3 days. This is only a guide; water quality is influenced by frequency of use, persons using the spa and general maintenance.
- Chemical maintenance: use pool chemicals to maintain water chemistry. Use pool chemicals to maintain water chemistry and chlorine or bromine tablets (do not use granules) with the chemical floater. Be sure to consult your local pool chemical supplier for information on treating the water in your spa and information on using the chemical tablets.
NOTE: When performing chemical maintenance, active the Lay-Z-Massage function to quickly dissolve chemicals into the water. Do not use spa during chemical maintenance.
NOTE: Remove the chemical floater from spa when the spa is in use.
After performing chemical maintenance and before using the spa, use a test kit (not included) to test the water chemistry. pH lower 7.4 and over 7.6 will damage to the spa and pump. We recommend maintaining your water pH between 7.4 and 7.6, total alkalinity between 80 and 120ppm and free chlorine between 2-4ppm. Damage resulting from chemical imbalance is not covered by the warranty.
All spas require the use of pool chemicals. Pool chemicals are
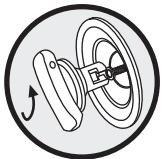
Fasten the Air-Valve (For #54113, #54129 Only)
When the spa is in use it is normal for internal air pressure to expand and/or contract. When this occurs, air may leak from the air-valve on the spa wall. Always check the air-valve carefully before use. If air is leaking, use the provided wrench to fasten the air-valve following these steps:
- Open the cap of the air-valve and put the wrench into the valve body.
- With one hand, hold the backside of the air-valve from the inner side of the spa wall and turn the wrench clockwise.
potentially toxic and should be handled with care. There are serious health risks from chemical vapors and the incorrect labeling and storage of chemical containers. Please consult your local pool supply retailer for more information about chemical maintenance. Pay close attention to the chemical manufacturer's instructions. Spa damage resulting from misuse of chemicals and mismanagement of spa water is not covered by the warranty.
NOTE:
- Do not over tighten.
- Always check the air-valve carefully before use.
- Do not adjust the air-valve connector when the spa is in use.
Draining the Spa
NOTE: Drawings for illustration purpose only. May not reflect actual product. Not to scale.
| 1. Remove the filter set from the spa. | 2. Insert the 2 stopper caps onto the spa's inlet and outlet pipes. | 3. Disconnect the pump from the spa. | 4. Screw the adapter cover onto adapter A of the spa. | ||
| 5. Connect the hose adapter to your garden hose and attach the hose adapter to the spa's B adapter. For #54129, attach the hose adaptor to the drain adaptor on the bottom of the SPA. | 6. With your hose positioned in a selected drain area, remove the lower stopper cap from inside the spa to release the water. For #54129, remove the drain cap on the bottom of the SPA to release the water. | 7. Once most of the spa water is drained, open the bottom drain valve on the pool floor to remove any remaining water. | 8. For #54112, #54123: Unscrew the valves to deflate the spa. 8. For #54113, #54129: To deflate, unscrew the air-valve counter clockwise from the air intake valve, press the spring valve and turn clockwise. | ||
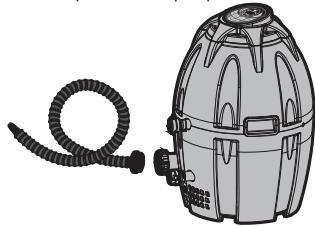
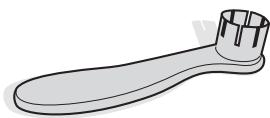
| 9. Use the inflation hose to blow dry the pump and the spa pool. Connect the inflation hose to adapter A on the pump and press the Lay-Z-Massage button to activate the blower. P6931/P6930/P6613 | 10. Make sure the pump is dried thoroughly. Clean the pump's inner housing using a towel. Tilt the pump to drain the residual water in the hose. It is recommended to use the inflation hose to aim to dry the Pump's adapter B. P6931/P6930/P6613 | 11. Use a new filter cartridge when resuming spa use. Please refer to page 19 for Filter Cartridge Replacement. | |||
Cleaning the spa
Detergent residues and dissolved solids from bathing suits and chemicals may build up on the spa walls. Use soap and water to clean the walls and rinse thoroughly.
NOTE: DO NOT use hard brushes or abrasive cleaners.
Spa Repair
For Spa #54112, #54123 and inflatable cover #54113, #54129
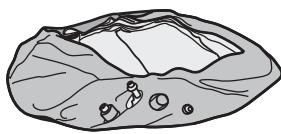
If the spa is torn or punctured, use the provided heavy-duty repair patch.
- Clean area to be repaired.
- Carefully peel patch.
- Press patch over area to be repaired.
- Wait 30 minutes before inflation.
For Spa #54113, #54129 (Not including inflatable cover)
If the spa is torn or punctured, use the provided PVC repair patch or Polyester 3-ply patch and glue (not included) following these steps:
- Clean and dry area to be repaired.
- Cut the provided PVC or Polyester 3-ply patch to appropriate size.
- Use glue to coat the one side of the newly cut patch. Make sure the glue is evenly distributed.
- Wait for 30 seconds and then place the cut patch with glue over the damaged area.
- Smooth out any bubbles of air that may be trapped underneath, and press firmly for two minutes.
- The product is once again ready for use. Repeat this process should further leaks occur.
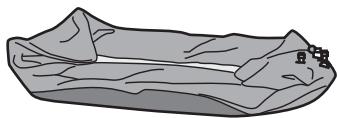
Lay-Z-Spa Storage
Make sure the spa and pump are completely dry. This is essential to extend the life of the spa. We recommend using the pump to blow dry the spa, pump and pipes. Remove the filter sets and discard the used filter cartridges. Re-attach the two stopper caps onto the spa's inlet and outlet valves. It is recommended you store the spa in its original package in a warm dry place.
NOTE: Plastic becomes brittle and susceptible to breaking when exposed to subzero temperatures. Freezing can severely damage the spa. Improper winterization of your spa can void your warranty.
Disposal

Meaning of crossed-out wheeled dustbin: Do not dispose of electrical appliances as unsorted municipal waste, use separate collection facilities. Contact your local government for information regarding the collection systems available. If electrical appliances are disposed of in landfills or dumps, hazardous substances can leak into the groundwater and get into the food chain, damaging your health and well-being. When replacing old appliances with new ones, the retailer is legally obligated to take back your old appliance for disposals at least free of charge.
TROUBLESHOOTING Bestway strives to provide the most trouble-free spas on the market. If you experience any problems whatsoever, do not hesitate to contact Bestway or your authorized dealer. Here are some helpful tips to help you to diagnose and rectify some common sources of trouble.
| Problems | Probable Causes | Solutions |
| Pump does not operate | - Power failure - Test Button is pushed - Power circuits broken | - Check power source - Unplug and plug the pump back in - Contact your local Bestway After Sales service point to get instructions |
| Pump does not heat properly | - Temperature set too low - Dirty Filter Cartridge - Improper water levels - The thermal cut-out cuts off - Heating element failed | - Set to a higher temperature refer to section pump operation - Clean/replace the Filter Cartridge refer to section filter cartridge cleaning and replacement - Add water to specified levels - Press the Reset button on the pump refer to section pump operation - Contact your local Bestway After Sales service point to get instructions |
| Lay-Z-Massage System does not work | - Air Pump is too hot - The Lay-Z-Spa Massage stops automatically - Air pump is broken | - Unplug the pump and wait two hours so the pump has cooled. Insert the plug and press the Lay-Z-Massage System Button - Press the Lay-Z-Massage System Button to reactivate - Contact your local Bestway After Sales service point to get instructions |
| Pump adapters are not level with the spa adapters | - One characteristic of PVC is that it changes shape, which is normal | - Elevate the pump with wood or another type of insulated material to bring the pump's adapters level with the spa's adapters |
| Spa leakage | - Spa is torn or punctured | - Use provided repair patch |
| Water is not clean | - Insufficient filtering time - Dirty Filter Cartridge - Improper water maintenance | - Increase filtration time - Clean/replace the Filter Cartridge refer to section filter cartridge cleaning and replacement - Refer to the chemical manufacturer's instructions |
Limited BESTWAY® Manufacturer's Warranty
The product you have purchased comes accompanied by a limited warranty. Bestway® stands behind our quality guarantee and assures, through a replacement warranty, your product will be free from manufacturer's defects that result in leaks.
To enact a warranty claim, this form must be completed and supplied with a copy of your purchase receipt to your local Bestway Aftersales Center. Please contact your local Bestway Aftersales Center before sending any documents, they will provide full instructions of what is needed for your claim. Bestway® will not replace any products deemed to have been neglected or having been used outside of the owner's manual guidelines.
Bestway's warranty covers manufacturing defects discovered whilst unpacking the product or during use as recommended within the user manual, this warranty applies only to products which have not been modified by any 3rd parties. The product must be stored and handled in accordance with the technical recommendations.
The warranty does not cover damages caused by misuse, abuse, negligence, including, but not limited to collision, fire, use of incorrect voltage, to excessive heat exposure, improper installation, improper wiring or testing, improper storage.
Replacements and repairs don't extend the duration of the warranty. The date to be considered as the start of the warranty is only the one showed in the original receipt/purchase invoice.
Please copy the Batch Number placed the body of the spa pump.
Batch Number
Batch Number:
Date of purchase receipt:
TO: Bestway® Service Department
DATE
Customer Code Number
FAX/E-MAIL/TEL: Please refer to your country according to the information you find on the back cover or on our website: www.bestway-service.com
Please provide your address details in full. Note: Incomplete address details will result in delayed shipments.
Bestway reserves the right to charge for redelivery of undelivered packages where the recipient is at fault.
REQUIRED INFORMATION - PLEASE WRITE THE DELIVERY ADDRESS
Name:
Address:
Zipcode:
Country:
City:
Mobile:
Telephone:
Fax:
E-mail:
Please Clearly Write Your Item Code:
Description of Problem
Spa leaking
Water Filtration System not working
Heating System not working
Control panel shows a failure which cannot be solved
Lay-Z-Massage System not working
Pump leaking
Adapter leaking
Missing Parts - Please use the code for the missing part, this can be found in the owner's manual.
Other (please describe)
Select the product you have purchased:
54112 54113 54123 54129
IMPORTANT: ONLY THE DAMAGED PART WILL BE REPLACED, NOT THE COMPLETE SET.
Bestway reserves the right to request photographic evidence of defective parts, or to require the sending of the item for additional testing.
In order to best assist you, we request all information you provide is complete.
VISIT OUR WEBSITE www.BESTWAY-SERVICE.COM TO BY SPARE PARTS, TO DOWNLOAD MANUALS, FAQ AND VIDEO, ALSO AVAILABLE ON OUR BESTWAY CHANNEL ON YOUTUBE.