
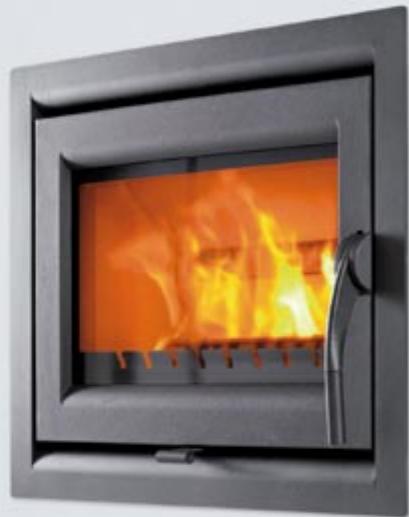
IN-LINE - Fireplace insert VARDE - Free user manual and instructions
Find the device manual for free IN-LINE VARDE in PDF.
User questions about IN-LINE VARDE
0 question about this device. Answer the ones you know or ask your own.
Ask a new question about this device
Download the instructions for your Fireplace insert in PDF format for free! Find your manual IN-LINE - VARDE and take your electronic device back in hand. On this page are published all the documents necessary for the use of your device. IN-LINE by VARDE.
USER MANUAL IN-LINE VARDE
Fitting instructions
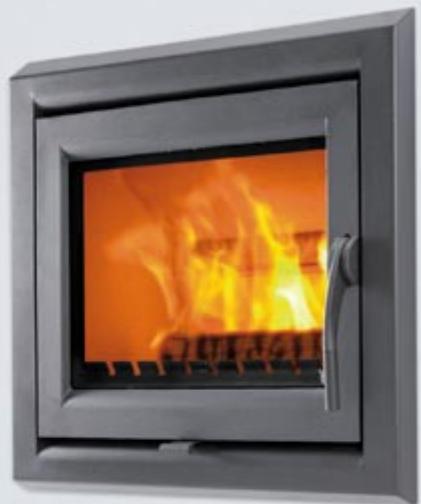
Congratulations on your new fireplace insert
Before you fit your new Varde Ovne fireplace insert and begin to use it, we recommend that you read these fitting instructions. Please note that these instructions are advisory only.
Consult your local fireplace dealer or chimney sweep for the current regulations covering the fitting of fireplace inserts. This will ensure that your particular fireplace insert is correctly fitted. There may be special conditions which require deviations from the fitting instructions, such as the type of flue that should be used.
NOTE! You are required to notify your local chimney sweep if a fireplace insert has been fitted. Your local chimney sweep must inspect and approve your fitted fireplace insert before it is used.
You may wish to consult your chimney sweep before commencing installation.
Why choose a fireplace insert from Varde Ovne?
Universal frame
Strong, no-nonsense cast iron doors
Cold handles
Easily reversible doors and handles
Two-step handle to light the stove or rekindle embers
Design which provides 20-40% better convection
Easy cleaning thanks to removable smoke plate
Adjusting screw for simple alignment
Designed for 7 or 8 types of brickwork
Environmentally approved: Nordic Swan Ecolabel
Before fitting
Before you begin fitting your new fireplace insert, make sure you have the right tools and materials.
THE FOLLOWING ITEMS ARE INCLUDED WITH YOUR
NEW FIREPLACE INSERT:
Fitting instructions
Instructions for installation and use
45° flue
Glove
YOU WILL ALSO NEED:
Flexible tubing
Jubilee clip
Fireplace mortar
Insulation batts
Tools, e.g. spirit level
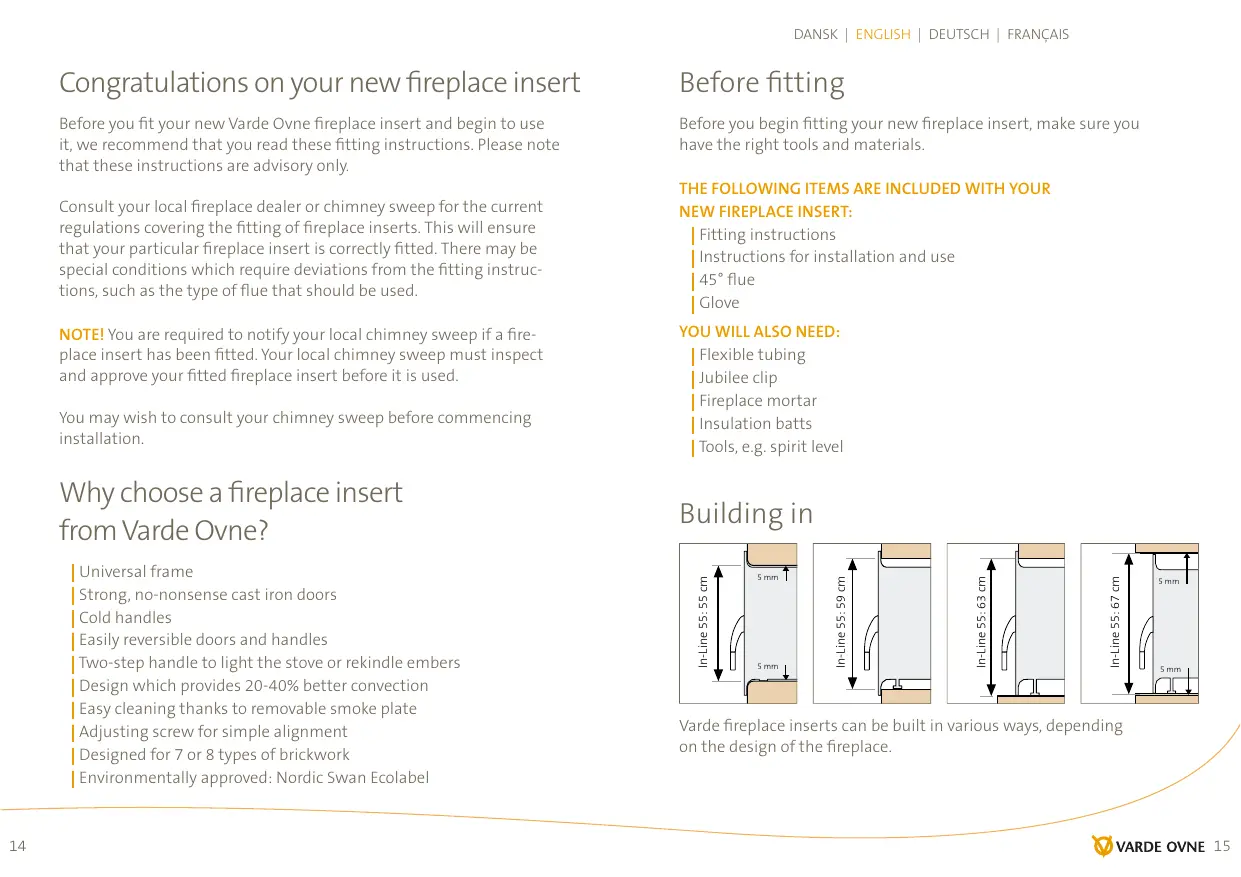
Building in
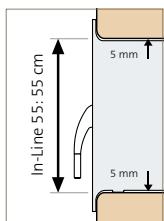
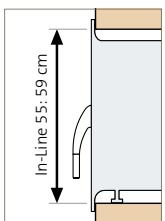
Varde fireplace inserts can be built in various ways, depending on the design of the fireplace.
Preparation
1 Brickwork
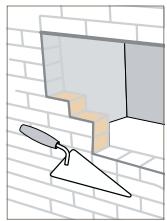
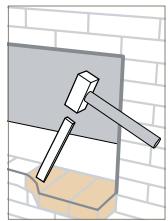
Before fitting your fireplace insert, make sure that the fireplace is ready and in good condition.
Remove any protrusions, or brick up.
Examine the bottom of the fireplace. The foundation must be level and stable, and must not be cracked or porous. Cast a new foundation if necessary.
2 Access hatch
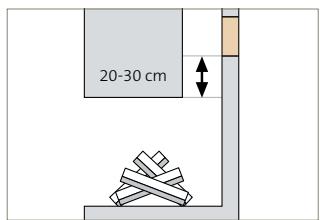
It is important that the inside of the chimney and pipes can be cleaned, so it is necessary to fit an access hatch. The access hatch is fitted 20 - 30cm up in the chimney. The location of the access hatch can be a major help when you later install the flexible tubing.
IMPORTANT! Other regulations for the installation of access hatches must always be observed.
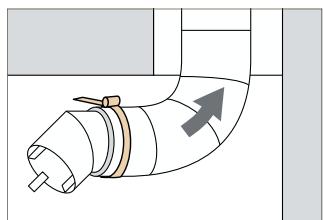
3 Flexible tubing
To connect the fireplace insert to the chimney, you must first install the flexible tubing in the chimney.
Pull the tubing 20 - 30cm up into the chimney from the fireplace, until the access hatch is reached.
Note the flow arrow indicating the direction of the smoke through the tubing.
Apply insulation batts to insulate the tubing. Leave the top 2-3 cm uncovered to facilitate the subsequent walling-in of the tubing (see point 8).
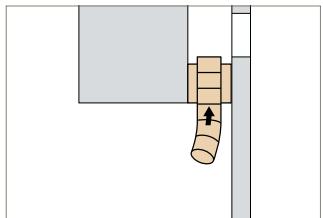
4 Flue
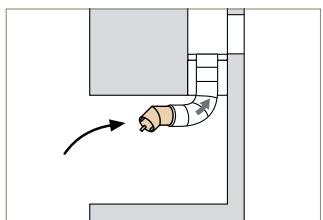
Once the tubing is secured in the chimney, the accompanying 45^ flue should be attached to the other end of the tubing.
Fit the flue to the tubing, and fasten with a jubilee clip or the like.
Fitting
5 Positioning
You can now fit the fireplace insert.
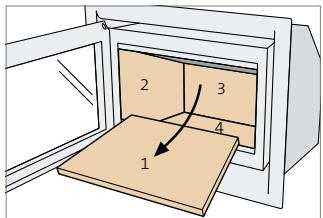
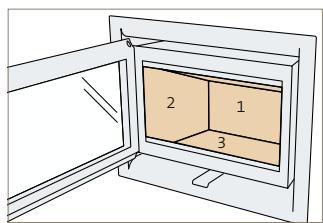
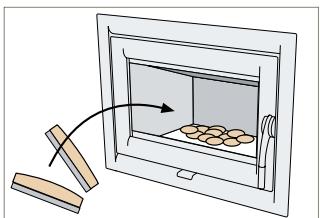
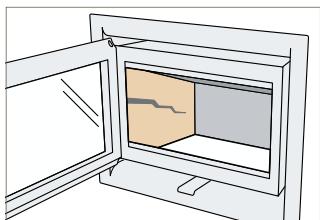
Remove the vermiculite plates and the base slab from the insert in the order shown.
Push the insert into position in the fireplace.
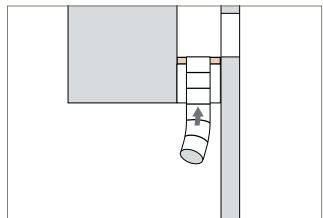
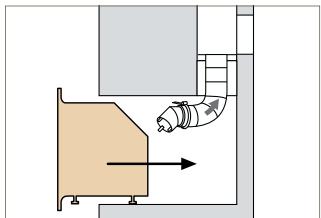
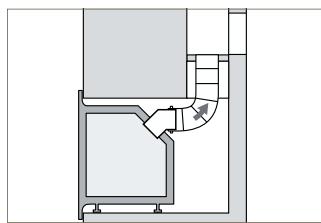
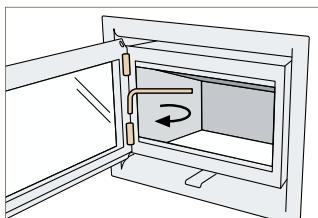
6 Connecting
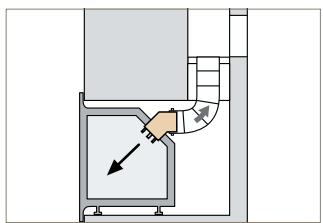
The fireplace insert can now be connected to the flue.
Pull the flue in through the rear opening in the fireplace insert.
Fasten the tubing in the fireplace insert by folding up the flaps, so that the tubing is held firmly in place.
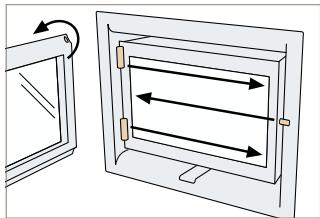
7 Adjustment
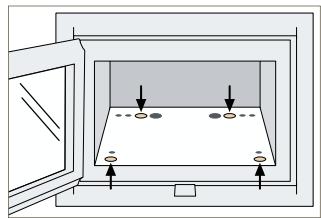
Before replacing the vermiculite plates and the base slab, adjust the fireplace insert until it is straight and flush with the front of the fireplace.
Adjust the four screws in the bottom of the insert, as shown.
A spirit level may be used to ensure that the insert is level.
You can also fasten the insert to the bottom of the fireplace with a couple of frame screws, concrete screws or the like, via the two large holes in the base.
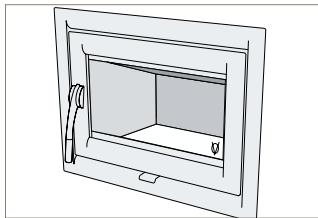
8 Completion
The fireplace insert must be reassembled before it is ready for use.
Replace the vermiculite plates and the base slab in the insert, in the order shown.
Fill in the top 2-3 cm with fireplace mortar to fix the tubing in place.
Your fireplace insert is now ready for use.
See the sections on Lighting and Stoking.
Specifications
VARDE IN-LINE 55
Nominal heat output: 7kW (4-9 kW)
Heats up to: 30-100 m²
Weight: 102kg
Smoke outlet: 15cm
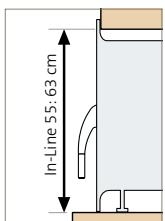
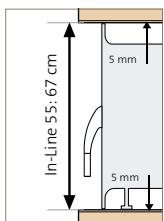
Exterior dimensions: height 54.5 x width 68 x depth 37 cm
Exterior dimensions of front frame: height 71.5 x width 79.5 cm
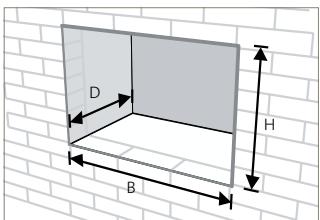
APERTURE DIMENSIONS FOR
STANDARD FRAMES:
Height: See the sketches under "Building in*"
Width: 70-75 cm
Depth: Min. 40 cm
Important information
Regulations
All local regulations, including those that refer to national and European standards, must be complied with during fitting, e.g. the Danish building regulations for small houses, BR-S 98, published by the National Agency for Enterprise and Construction.
Minimum distance to combustible materials, such as floors, walls or furniture
Varde In-Line 55: Behind: 35 cm Side: 35 cm Above the floor: 30 cm In front: 110 cm
Floor materials
If there is a floor made of combustible material by the fireplace insert, this must naturally be covered by a panel of non-combustible material such as a steel plate, glass sheet, Dutch brick or artificial slate. The floor panel must extend at least 15 cm from the sides of the insert and at least 30 cm from the front. We recommend however 50 cm at the front.
Fresh air intake
A supply of fresh air must be available in the room in which you install the fireplace insert, e.g. via ventilation grills in the walls. It must not be possible to block these grills. You should also be aware that any extraction ventilators (cooker hoods or the like) in the same room as the insert may cause problems in relation to the chimney updraught.
Damper
In some cases it may be necessary to install a damper in the chimney, so that the updraught can be adjusted. This can be especially useful on very windy days. There must always be at least 20~cm^2 of free passage via the chimney. Consult your dealer or chimney sweep for advice.
The fireplace insert is suitable for connection to a flue gas collector.
Always ensure that the flue gas connector and chimney can be cleaned. Consult your dealer or chimney sweep for advice.
Nominal operation and a room temperature of 20^ provides:
Varde In-Line 55: Smoke mass flow: 6.8g / sec Flue gas temperature: 274^
Lighting
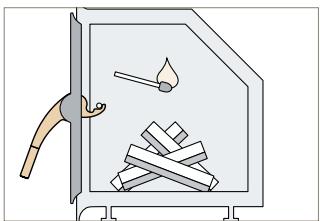
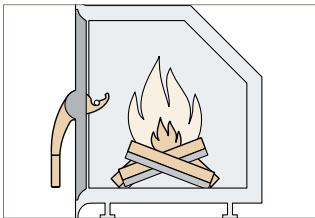
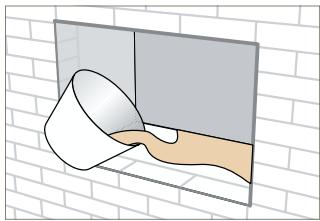
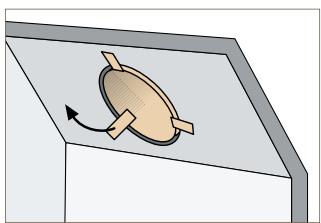
Light the fire, close the door and place the handle in the lighting position.
Light the fire, close the door and place the handle in the lighting position.
Stoking

When stoking, it is recommended that the door is not opened to insert more wood until only a few embers remain in the firebox. The presence of flames means that smoke and gases are still being produced, and there is thereby a risk of smoke downdraught.
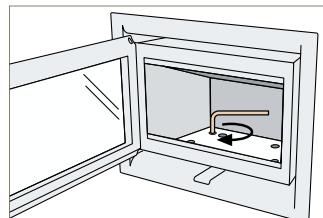
The air supply can be adjusted while the fire is burning using the air inlet, as shown.
Door
The fireplace insert's door can easily be reversed to suit the surroundings.
Remove the door, and move the hinges and the closing system to the opposite side.
| Reverse the door, then the door's handle and glass. The handle should point downward, with the Varde Ovne logo the right way up.
Replace the door and adjust if necessary.
Maintenance
Your fireplace insert will require very little maintenance.
Replace the vermiculite plates or base slab if cracks or breaks appear with a width of more than 12 cm, as the lifetime of the fireplace insert will otherwise be greatly reduced.
Adjust the door as necessary to ensure the optimum efficiency of the fireplace insert.
Einbauanleitung
DK-6510 Gram, Denmark
Tel. +45 74 82 00 03
Fax. +45 74 82 00 05
www.vardeovne.dk