SBE 1000 - Hammer drill METABO - Free user manual and instructions
Find the device manual for free SBE 1000 METABO in PDF.
| Product type | Percussion drill |
| Brand | METABO |
| Model | SBE 1000 |
| Power supply | Mains (voltage and frequency as per rating plate) |
| Additional handle | Yes, included |
| Chuck | Keyed or Futuro quick-release chuck (depending on version) |
| Number of speeds | 2 (speed selector) |
| Percussion drilling | Yes, selectable by sliding switch |
| Direction of rotation | Reversible (switch) |
| Torque limitation | Yes, 6 positions |
| Pulse function | Yes |
| Continuous operation | Yes (locking button) |
| Safety clutch | Metabo S-automatic |
| Restart protection | Yes (flashing electronic indicator) |
| Depth stop | Yes, adjustable |
| Maintenance | Chuck cleaning, carbon brush replacement by service center |
| Recommended accessories | Metabo accessories only |
| Protection class | II |
| Typical noise level | See manual (hearing protection recommended) |
Frequently Asked Questions - SBE 1000 METABO
User questions about SBE 1000 METABO
0 question about this device. Answer the ones you know or ask your own.
Ask a new question about this device
Download the instructions for your Hammer drill in PDF format for free! Find your manual SBE 1000 - METABO and take your electronic device back in hand. On this page are published all the documents necessary for the use of your device. SBE 1000 by METABO.
USER MANUAL SBE 1000 METABO
Original instructions
1. Declaration of Conformity
We declare under our sole responsibility that these impact drills comply with the specified standards and directives. Fig. P
2. Specified Use
The machine is suitable for drilling, without impact, in metal, wood, plastic and similar materials and for impact drilling in concrete, stone and similar materials. It is also suitable for thread tapping and for screwdriving (not SB 710).
The user bears sole responsibility for any damage caused by improper use.
Generally accepted accident prevention regulations and the enclosed safety information must be observed.
3. General Safety Instructions

WARNING - Reading the operating instructions will reduce the risk of injury.

WARNING Read all safety warnings and instructions. Failure to follow all safety warn-and instructions may result in electric shock, nd/or serious injury.
Keep all safety instructions and information for future reference.
Pass on your power tool only together with these documents.
4. Special Safety Instructions

For your own protection and for the protection of your power tool, pay attention to all parts of the text that are marked with this symbol!
Wear ear protectors when impact drilling.
Exposure to noise can cause hearing loss.
Use the additional handle supplied with the tool. Loss of control can cause personal injury.
Hold the power tool by insulated gripping surfaces, when performing an operation where the cutting accessory may contact hidden wiring or its own cord. Cutting accessory contacting a "live" wire may make exposed metal parts of the electrical tool "live" and could give the operator an electric shock.
Pull the plug out of the plug socket before any adjustments or servicing are performed.
Avoid inadvertent starts by always unlocking the switch when the plug is removed from the mains socket or in case of a power cut.
Ensure that the spot where you wish to work is free of power cables, gas lines or water pipes (e.g. using a metal detector).
Smaller workpieces must be secured such that they are not carried along with the drill bit when drilling (e.g. by clamping in a vice or on a work bench with screw clamps).
Keep hands away from the rotating tool! Remove chips and similar material only with the machine at standstill.
Metabo S-automatic safety clutch. When the safety clutch responds, switch off the machine immediately! If the tool jams or catches, the power supply to the motor is restricted. Due to the strong force which can arise, always hold the machine with both hands using the handles provided, stand securely and concentrate.
The Metabo S-automatic safety clutch must not be used for torque control.
Caution with hard screwdriving (driving of screws with either a metric or an imperial thread into steel)! The head of the screw may rip off or high restoring torques may be incurred at the handle.
Dust from material such as paint containing lead, some wood species, minerals and metal may be harmful. Contact with or inhalation of the dust may cause allergic reactions and/or respiratory diseases to the operator or bystanders.
Certain kinds of dust are classified as carcinogenic such as oak and beech dust especially in conjunction with additives for wood conditioning (chromate, wood preservative). Material containing asbestos must only be treated by specialists.
-
Where the use of a dust extraction device is possible it shall be used.
-
The work place must be well ventilated.
-
The use of a dust mask of filter class P2 is recommended.
Follow national requirements for the materials you want to work with.
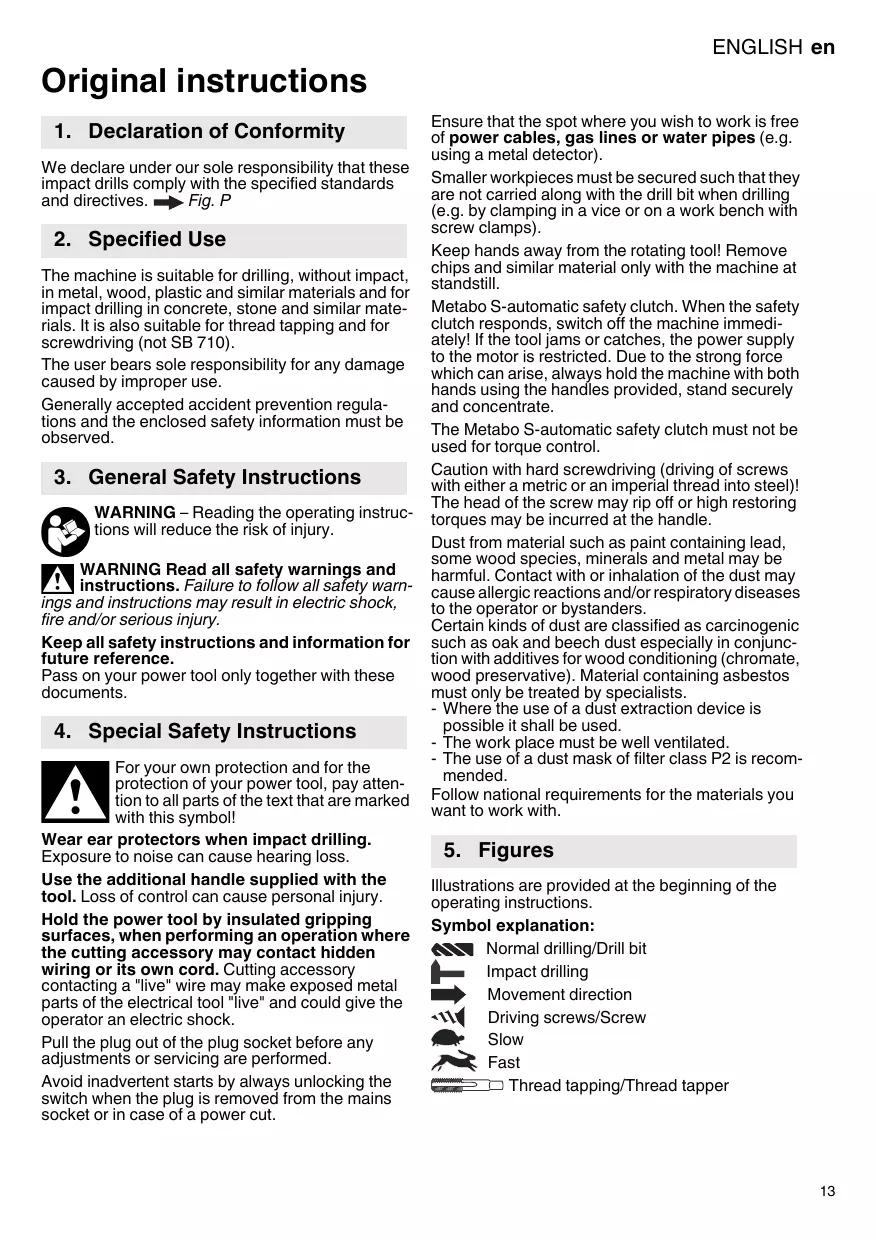
5. Figures
Illustrations are provided at the beginning of the operating instructions.
Symbol explanation:

Normal drilling/Drill bit

Impact drilling

Movement direction

Driving screws/Screw
Slow
Fast

Thread tapping/Thread tapper
6. Overview

Fig. A
1 Thumb-wheel for gear selection
2 Additional handle/Additional handle with vibration damping *
3 Depth stop
4 Geared chuck *
5 Futuro Plus keyless chuck *
6 Futuro Top keyless chuck *
7 Sliding switch (normal drilling/impact drilling)
8 Speed preselection wheel *
9 Setting wheel for torque control and impulse function *
10 Electronic signal indicator
11 Rotation selector switch *
12 Lock button for continuous activation
13 Trigger
* depending on model
7. Initial Operation

Before plugging in the device, check to see that the rated mains voltage and mains
frequency, as specified on the rating label, match your power supply.

To guarantee secure purchase of the chuck: After initial drilling (clockwise), use a screw to firmly tighten the safety screw inside the chuck (if available/depending on the model).
THE SAFETY SCREW HAS A LEFT-HANDED THREAD!
7.1 Fitting the additional handle (2) Fig. B

For safety reasons, always use the additional handle supplied.
Tighten the additional handle firmly by turning it.
8. Use
8.1 Setting depth stop Fig. C
8.2 Setting direction of rotation, transporting safety device (switch-on lock) Fig. D
Do not activate the rotation selector switch (11) unless the motor has completely stopped.
8.3 Setting for normal drilling, impact drilling Fig. E
Impact drilling and normal drilling only in a clockwise direction.
8.4 Selecting gear Fig.F
! Change thumbwheel (1) only when the machine is in the process of running down (briefly switch it on and off).
8.5 Setting torque control, impulse function Fig. G
Position 1-6: The motor comes to a complete stop when the preselected torque is reached.
1 = low torque
6 = high torque
+ = no torque control (max. torque, for drilling)
impulse function switched on constantly (to facilitate tightening and releasing of screws that are tight even when the screw heads are damaged. To enable clean drilling without centre punching in tiles, aluminium or other materials).
8.6 Preselecting rotational speed Fig. H See the table for recommended rotational speeds for drilling.
8.7 Switching On and Off
Switching on, rotational speed Fig. A: Press the trigger (13).
Release the trigger to switch off.
Continuous operation Fig. A: With the trigger (13) pressed, push in the locking button (12) and release the trigger. Press and release the trigger (13) again to switch off.
In continuous operation, the machine continues running if it is forced out of your hands. Therefore, always hold the machine with both hands using the handles provided, stand in a safe position and concentrate.
8.8 Tool change, Futuro Top keyless chuck (6) Fig.1
Clamp the tool by turning the sleeve firmly to its stop.
8.9 Tool change, Plus (5) keyless chuck Fig.J
The ratchet sound which can possibly be heard after opening the drill chuck is functional and is switched off by a reverse rotation of the sleeve.
If the chuck is very tightly closed: Firmly grip the chuck with an open-end spanner at the chuck head and firmly turn the sleeve in the direction of the arrow -1.
Clamping the tool
- Insert the tool -2- as far as possible.
- Using one hand, hold the retainer ring securely (depending on fittings).
- Turn sleeve in direction -3- until the noticeable mechanical resistance has been overcome.
- Caution! The tool is not yet fully tightened! Keep turning the sleeve (it must "click" when turning) until it cannot be turned any further - only now is the tool safely clamped.
With a soft tool shank, retightening may be required after a short period of operation.
8.10 Tool change, geared chuck (4) Fig. K
8.11 Unscrew the chuck (when driving screws without the chuck or for use with attachments) Fig. L, M, or N
Note for Fig. M, N: Release by tapping lightly with a rubber hammer, as shown, and unscrew.
Note: If a bit clamping bush (order no. 6.31281) is attached, the screwdriver bit inserted in the hexagon socket of the spindle is held in place.
9. Cleaning, Maintenance
Keyless chuck cleaning:
After prolonged use hold the chuck vertically, with the opening facing down, and fully open and close it several times. The dust collected falls from the opening. The application of cleaning spray to the jaws and jaw openings at regular intervals is recommended.
10. Troubleshooting
Electronic signal display (10):
Rapid flashing - restart protection
(SBE 1000, SBE 1100 Plus)
When power is restored after a power failure, the machine - which is still switched on - will not start for safety reasons. Switch machine on and off again.
Slow flashing - carbon brushes worn (SBE 1100 Plus)
The carbon brushes are almost completely worn. If the brushes are completely worn, the machine switches off automatically. Have the brushes replaced by an authorized service centre.
Permanently lit - overload (SBE 1100 Plus)
If the machine is subject to long periods of continuous overloading, the power input of the machine is limited. This prevents the further unauthorized heating of the motor.
11. Accessories
Use only genuine Metabo accessories.
Use only accessories which fulfil the requirements and specifications listed in these operating instructions.
Fit accessories securely. Secure the machine if it is operated in a bracket. Loss of control can cause personal injury.
For a complete range of accessories, see www.metabo.com or the main catalogue.
12. Repairs
Repairs to electrical tools must be carried out by qualified electricians ONLY!
If you have Metabo electrical tools that require repairs, please contact your Metabo service centre. For addresses see www.metabo.com.
You can download spare parts lists from www.metabo.com.
13. Environmental Protection
Observe national regulations on environmentally compatible disposal and on the recycling of disused machines, packaging and accessories.
Only for EU countries: Never dispose of power tools in your household waste! In accordance with European Guideline 2002/96/EC on used electronic and electric equipment and its implementation in national legal systems, used power tools must be collected separately and handed in for environmentally compatible recycling.
14. Technical Specifications
Fig. O. We reserve the right to make technical improvements.
P1 = Rated input
P2 =Power output
n1 =No-load speed
n2* =Load speed
max. dia. =Max. solid drill diameter
s max = Max.impact rate
b =Chuck capacity
G =Spindle thread
H =Spindle with hexagon socket
m =Weight
D = D=Collardiameter
Measured values determined in conformity with EN 60745.
Machine in protection class II
Alternating current
The technical specifications quoted are subject to tolerances (in compliance with the relevant valid standards).
- Energy-rich, high-frequency interference can cause fluctuations in speed. The fluctuations disappear, however, as soon as the interference fades away.

Emission values
Using these values, you can estimate the emissions from this power tool and compare these with the values emitted by other power tools. The actual values may be higher or lower, depending on the particular application and the condition of the tool or power tool. In estimating the values, you should also include work breaks and periods of low use. Based on the estimated emission values, specify protective measures for the user - for example, any organisational steps that must be put in place.
Vibration total value (vector sum of three directions) determined in accordance with EN 60745:
a_h, ID = Vibration emission value (impact drilling into concrete)
a_h,D =Vibration emission value (drilling into metal)
K_h,1D, K_h,D = Uncertainty(vibration)
Typical A-effective perceived sound levels:
L_pA =Sound pressure level
Allumage permanent - surcharge (SBE 1100 Plus)
H =Broche a six pans creux
m = Poids
D =Diametre du collet
K_h,ID, K_h,D = Incertitude (vibration)
a_h, ID = vibrationsemissionsvärde (slagbörning i betong)
a_h,D = Vibrationsemissionsvärde (borrning i metall)
Maks. = Maksimal bore diameter
Reservedelslicer kan downloads pa www.metabo.com.
13. Miljobeskyttelse
a_h, ID = Vibrationsemission (slagboring i beton)
a_h,D = Vibrationsemission (boring i metal)
K_h,1D, K_h,D = Usikkerhed (vibration)
Ipeed BBODOMB 3KcNlyaatauHIO npOBepbTe COOTBETCTBNE CETeBOrHO HApJxHeHnI N
YacTObI, Yka3aHHbIX Ha 3aBOcKO Ta6JIuHKe, NapameTpam Cetn 3JIeKTPoNITaHIN.

Дяобсpeонинаджнoctифкcaи CBepnIbHOrO natoHa: nocle nepBoro
CbepeHnna (npaBoe BpaueHne) 3aTnHte C nOMOsbIO OTBepTKN CTONOpHbIN BnHT BHyTpN
NaTPOHa (B CJIyuae HAIUHry/B 3aBHCIMOCTN OT MoJeI). JeBaJ pe3b6a!
7.1 YcTaHOBbA DOIOJHHTeJIbHOu pyKoTKn (2) pnc.B
13 Coo6paKeHn6BeOnaCHOCTN BcERda npIMeHnIe DoONJIHnITbHyU pyKoRTHy, BXOJyU BO KOMJIeHT NOCTaBKn.
Плотно 3атянite ДОпOLHINTEЛьнуpyКоТКу nyTem ee 3abOpaunBaHnru.
8. энспунатусян
8.1 PerylnpoBbA orpaHnHTeIaIy6HbI pnc.C
8.2 PerylnopOBka HnpaBLeHnBa BpaSeHHn, yctaHObKa 6LoKnOpBnДЯ TpaHcnpToPbONB (6LoKnOpBn BkIIOeHHN)
Pnc.D
HauimaiTepeKIOUcATEb HapabLeHnBbaeHn (10)ToIbKO npHepa6oTaIOeM3JIeKTOpDBrAteNe.
8.3 PerynpoBbpaepHmMa o6bIuHoro/ydapHoro cBepHeHH pnc.E
CbepeHne u yapHoe cBepeHne npou3BO- Dte ToJIbKO pRn PpaBOM BpaueHn.
8.4 BbI6Op chOpocTn pnc.F
!Ipeekluoyehne nepekluoyaTeIe(1)BbINOJIHnIeTOJbHO BO BPEM paOBoIHNCTpyMeHTa NO INHEPcun NocLe BbIKluoyehn(HaKOPOTKoe BPEM BHKIOUHTe/BbIKLUOHTe).
8.5 PerylnpoBHa orpaHnueHn KpyTaeero MOMeHTa, mNpybChOro peHmTa pnc.G
PonokHeHne 1-6: npn doctnKehnn npedyctaHoBLeHHoro KpyTaeo MOMeHTa 3JeKTPoDBnAratBeIbOCTaHaJIbAeTcR.
1 = Hn3Knn KpyTAAm MOMENT
6 = BBICOKH KpyTAAH MOMENT
- =6e3 orpaHnUeHnKpyTuaero MOMeHTa (MaHC.KpyTuaHIMOMeHT,ДЯ CBepJIeHnA)
=IMNpybcHbIpeJHKIM BKLIOUeH NOCTOHNO (ДЯЛERKORO 3aBOPaUHBAHn N bIBOPaHnBAHnПLOTHO CnDAJIUX WUPyOB,ДаЖe NOBPEJDEHNbIX;ДЯпОТВРаЧЕнnyBOda CBepla B MOMENT HauJaLc CBepLeHnR 6e3 KePHeHnI prN CBepLeHnIN B KepaMHeCKOJI PLNTke, aJIOMNHNEbIX INI INDpyrNX MaTepeHaJax.)
8.6 Празустанова чаctOTы Врашени →Pис.H
PeKOMeHdyemble 3HaueHnHa cactOTbI BpaueHnJaIcBpeHn,CM.Ta6J.
8.7 BhJIOUeHne/BbIKJIOUeHne
BhloueHne, yactota BpaueHn pnc. A: haxmnte nepekliouaTeIb (13).
ДяВыкlioуенЯ OTпстITE HaЖIMHои NepeKJIIO-yaTeIb.
PeknH HnepepbIBHO pa6oTbI pnc.A: npn HaKaTOM nepeKIOUaTeJe (13) HaKMITE KHOINKYΦHKaTOp (12) n OTNCTHe NaHMHOI nepeKIOUaTeJI.ДЯ BbIKIOUeHn HaKMITE HaKMHOI nepeKIOUaTeJI (13) eue pa3, a 3aTeM OTNCTNe erO.

B HenpepbibHom peKIMe INCTpymEnTpoJnKaet paBoTaB, daKe eCIn OH
BbIPBcTeN3pyKn.10eTOMy BceTaHaDeEHHo ydepHnBaTe 3eHTPOINHCTPymeHT DByMaPyKaMn 3a pyKoTkn,3aHmMaTe YcToHnBOe NIOJHOHe N cKoHcTeHpPyuTe BCE BHMaHHe Ha BbIOnJIeMOn pa6Ote.
8.8 CmeHa pa6oOerHOHCTpyMeHTa/6bICTpo-3aHHMHOI nATPOH Futuro Top (6)
PNC.1
3aJHIM INCTpyMeHTa: C yCNIJIeM IOBepHITe TINb3y Do yNopa.
8.9 Cmeha pa6oeryo HnHCTpyMeHa/6bIcTpo-3aHMMHO nATpon Plus (5) pnc.J
NotpecknBaHne, KOtOpoe MOKeT 6bItb CbIuHo
NocLe OTKpBtTH NaTPOHa (ObycNoBHeO
KOHCTpyKUne), yCTpaHReTcBApuCheHEm FnIb3bl
B nPOTNBONIOJXHOM HAnpabJIeHH.
EcIINaTPOH.3aTAYHTCNIUHKOM CnIbHo:3aXMMTE CBepINbHbN aTPOTHaRgAaeuHbIM KInIOChom 3a ROJOBKy nTAPOHa NIOBepHNTe C yCSINHeM TINb3y HnApBaJIeHN CTpeJIKN (-1-).
3aKpeIJIeHne IINCTpyMeNTa:
- BCTaBte pa6oHn INCTpyMeHT -2- KaK MoJHo rIy6Ke.
- YdepKnBaOJHOHpyKoI CTOpOpHoe KOJIbIcO (B 3aBNCIMOCTNOT KOMJIeKTAuN),
- noBOPaHbAaTe rHb3y B HnPaBHeHH CTpeKIN 3-, nKa He bEydt pEoDoJeHO OuyTmOe MekaHueCKOE cOpOTnBHeHne.
-BHMaHHe!Pa6OChn HNCTpymeHT B daHHbIMoMeHT ehe 3aJxAT!IpoDoJIkaJTeBpaUeHne CcynIeM (PnH 3OTm DOJIHHbI 6bITbCblIHbI cIeJHKn)do yOpna-TOIbHO TepehINHCTpymeHT 3aKaT NaIeJHNo.
NHCTPymETC XBOCTOBHOM I3 MMRHO MaTeprnla Heo6xOdIMO NOJtTgRbTaB TocSe HneHpoJoJIKIn-TeJIbHOrO BpeMeHN CBepIeHNA.
8.10 CmeHa pa6oOerO HnHcTpymeHTa/NaTPOH c 3y6aTbIM BeHcOM (4) pnc.K
8.11 OtBepHnte CBeprnIbHbI nAtpoN (JIA naBopauBaHnI 6e3 CBeprnIbHoro naTPOHa HIN IaN IcNoJIb3OBAHnC hacaDnAMn) PnC.L.M.HN N
YkaaHneIJIpaNc.M.N:ocna6bTeJeRKMU yapampe3HHOBOROMJONOTHa(CM.PHC.)INOTBHN-TNTe.
Yha3aHnE: npu yctahOBLeHHo 3aJHMHOB BTVJKe nla6nt (NqIy3aKa3a 6.31281) OTBeptOHyb 6BtBCTaJIaTeCBy B WeCTINrpaHHNK UwnHdJIa.
9. Ouinchka, Texhnyechoe 06cIyJHHBaHne
OuHCTKa 6bICTpO3aJHMHO CBePJIbHOro nATPOHa; nocLe dIITeJIbHO 3KcNpyAtaUm yCTaHOBHTe CBEPJIbHbIy naTPOH BePTIKaJIbHO OTBepCTnEM BHN3 HECHO bpa3 POJHOCtBbO OTKpOHTe 3aKpOHTeero.HaKONIBWJaCRA nbIb 6yDet BBICblNaTbCSnOTBepCTnE. PeKOMEnyETcpeYJrpho HAHOCTbV CHTaeee cpeCTBO a3po30JIbHO YNAKOBE Ha 3aJHMBlte KJUaHKn IN OTBepCTnM MeJdY 3aJHMbIMn KJNaChAMi.
10. YctpaHHeHne HEnCnpaBHOcTei
3JeIeHTPOHHBcHrHaJIbHbI INHdIHaTOp (10) 3AchToe MIRaHHe -3aUHTa OT NOBTOpHOrO pycha (SBE 1000, SBE 1100 Plus)
ПрвВОЗБHOBЛECHИ NOДачи элКТРОПТАнЯ NOCLE OEG OTKHIOCHENBA CEJIAX 6E3ONaCHOCTN He Ipon3BOJNTCABTOMATUeCKH NyCK BKLIQUEH HORO B Cetb INHCTPymeHTA. BbIKLIOChTE n CHOBA BKHIOHTe INHCTPymeHT.
PeHoe MInaHne - H3Hoc yroIbHbIX uTeTOK (SBE 1100 Plus)
PpOn3OeJN NOHT NIOHbI N3HOC yROJIbHbIX ΜEToK. PpN 3HOce yTOJIbHbIX ΚEToK INCTpyMeHT ABOTOMaTHUeCKN OTKINQUaTcER. BbINOJIhNTe 3aMeHy yTOJIbHbIX ΚEToK B CEPBcHcO HcLyJHK6e.
HenpepbIbHoe ropeHne - neperpy3ka (SBE 1100 Plus)
B clyae dIITeIbHnI nepepy3Kn IHCTpymeHTa ORpaHnHbAeTcNtPOeJIaEmaJ MoUHOCb, YTO n03BOJAErN36eKaTaB dAlbHeIWeero HeOnyCTuMoro HarpBeA 3JeKToPDBnATeJIa.
11.Пинадлжноctи
IcnoIb3yTe ToIbKO opnHaNbHbIe npHaadJeK-HocTn Metabo.
IcnoIb3yIteToIbHO Te npHaIeJHIOCTN, KOtOpIbe OTBeaIOT Tpe6OBAHNm I npaMeTpam, nepeuCJIeHHbIM B daHHom pyKOBoDCTBE IO 3KcNlIyatau.
HaJeKHO PhIKCnpyTe npHaJNeKHoCTn. Ppi 3KeJIpyatauun 3eKTPoHnCTpymeHTa B depKaTeIe: HaJeKHO 3aKpeNtte 3eKTPoHnCTpymeHT. IToepra KOHTpOJa Had 3eKTPoHnCTpymeHTom n HacaJKO MoKeT cTaTB pNCHIO nOlyceHn TpaBM.
Cπικη 3aŋuacteɪ moKHo cKaaTb Ha www.metabo.com.
13. 3aunta okpykaoue cpebl
BbInolnHte HaunohalbIbe IpaBvna LytniHa3aunn HnepebaOthm OTCJyKbIeO_HNCTpyMeHTA,ynakOBKn nPnHaNDeJxHOctEe.

TolbkoДЯСТРан EC: He BbIbpaBbAte TJIeTPOHCTPymENT BMcTe C bSbTOBbIMO OTXoDAMn! Corlacho DmpeKtNBe 2002/96/
EG 06 yTnIn3aunn CTapbIX 3NeKtpOnpnpoBOB n 3NeKTPoHORO 06OpUdoBaHN I COOTBeTCTByuIM HAuIOHaJIbHbIM HOPMAM 6bIBUne B yNtPpe6IeHN 3NeKTPoPrn6Opby I 3NeKTPoINHCTpyMeHTbl NOJLeKaT pa3dEJIbHOY TnIN3aUnn C cJeJIbIOHX nocLeDyUoSeI 3KoIorNuYeCKNs 6e3onacHo Npepepa6OTHN.
14. TexHnueechne xapaHTepnCTnHN
Pnc. O.Bo3MOxHbI N3MeHeHnB C8r3n CycOBepseHcTBoBaHnEm N3dJIIn.
P1 = HOMNHaJIbHaJ MOUHOCTb
P2 =BbIXOHaRA MOUHOCTb
n1* =yactotaBpaueHn6e3Harpy3KN
n² =YacTotaBpaueHnIoNHaRpy3KoI
Makc. = MakcmaJIbHbI JnAmeTp CBePJIa S MaKc. = MakcmaJIbHaJ YacTota YdapOB
b =Дианаэзн ЗдЖИмСсврльногor natpoHa
G =pe3b6a cBepnIbHOro IINHeJIa
H =CBePnIbHbI WIIINHdJIb C BHyTpeHHNIM WeCTnIgpaHNNKOM
m =macca
D =Диametршейнзхима
Pe3yIbTaTbI 3MpeHnIOJyHeB I B COOTBeCTBn CO CTaHapTom EN 60745.
3NeKtpOnHcTpymeHT Klaacca 3aunTbI II
PeremHHbI ToK
Ha yka3aHbIe TeXHueCKeXe xapaKTePnCTnHi pacnOcTpaHrIoTc DOnyCKn, npEydCMOTpeHHbIe DeiCTBMyIMN cTaHdaTpAMi.
*MouhBle BbICOKOACTOTHbLE NOMEXH MOryT BbI3BaTb KOJIe6aHnHa CTOTb I BpaueHn. Pn3 a3TuXaHNOMEX KOJIe6aHnI npEkaUaTOcT.

3haeHnIyMa n Bn6paun
3TN 3NaHEnnIO3BOJIAOT OeHNBaTb N CpaB
HnBaTb Wm N Bn6paCIO, CO3daBaemIe npn
paOte pa3JIuNHybIX 3JeKTPoHNCTPymENTOB. B
3aBNCIMoCTN OT yCLOBNI 3KcNlNyataCNI, COCTO
Hnra 3JeLTKPOHNCTpyMeNTa nPi naOboVHx (CMeHHbIX) HnCTpyMEnTOB 0aKTHueckAn Harpy3Ka
MOKeT 6bITb BblSe Nn HnKe. Pn OnpeDeleHn
pIpMepHOrO yPoBnHa Wmu N BmOpaCNIyUHTbI
BaTe nepePBbIb B paOte N a3aBi paObTb C NOHn
HeHNO (WMoBOI) Harpy3Kn. OPeJeNeTIte
pepeHb OPraHn3aOnOHbIX Mep no 3aUnITE
IIOJIb3OBATeJIa C UyeTOM TEX IIN INHbIX 3HaueHIn NUyMa N B6paun.
Cymma Tpex HapnabLeHIN paccHTbAeTcB COOTBeCTBnCO cTaHaDpTOM EN 60745:
ah, ID 3NaueHne BV6paun (yadpoe CbepeJIeNE B 6eTOHe)
a_h,D = 3NaueHneBv6paunn(CBepJIeHneBMetanne)
Kh,ID,Kh,D=Ko3ΦΦmUeHT norgpeuHocTn (Bn6paun)
YpOBeHbIyMa IOMeTOnyA:
LpA =ypoBHeH 3BykoBOrO daBHeHn
LWA =ypoBHeH 3ByKOBO MOUHOCTN
KpA, KwA= KOaΦΦnUeH NTorpeuHocTN
HaedeBaIte 3aunTHbIe HayuHnKn!
PROFESSIONAL POWER TOOLS
metabo®
work. don't play.
Metabowerke GmbH, 72622 Nürtingen, Germany www.metabo.com