PTV-360 - TV Decoder ADS TECH - Free user manual and instructions
Find the device manual for free PTV-360 ADS TECH in PDF.
User questions about PTV-360 ADS TECH
0 question about this device. Answer the ones you know or ask your own.
Ask a new question about this device
Download the instructions for your TV Decoder in PDF format for free! Find your manual PTV-360 - ADS TECH and take your electronic device back in hand. On this page are published all the documents necessary for the use of your device. PTV-360 by ADS TECH.
USER MANUAL PTV-360 ADS TECH
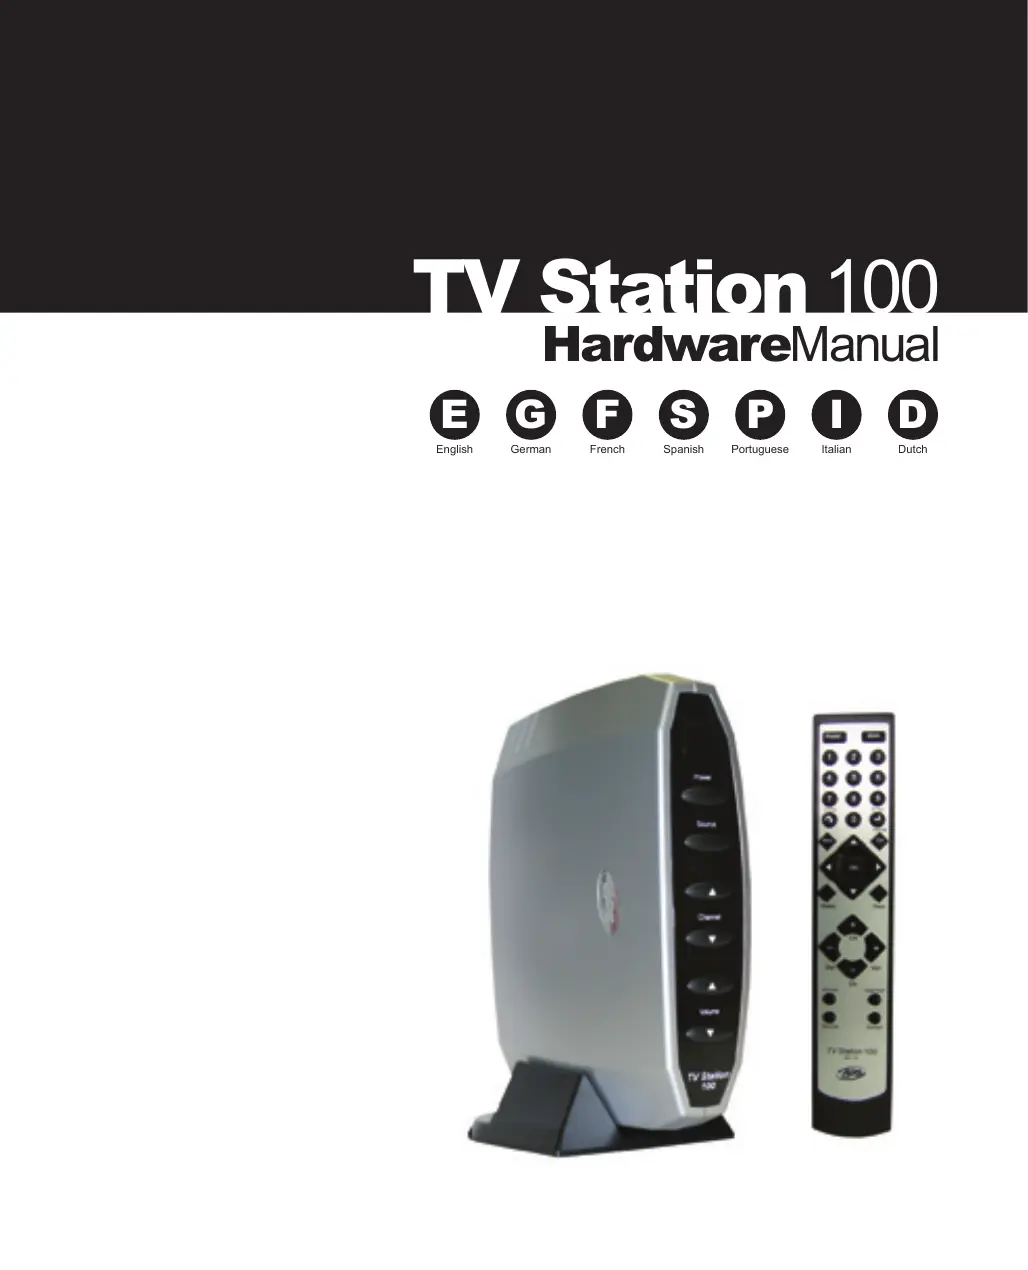
TV Station 100 HardwareManual

English

German

French

Spanish

Portuguese

Italian

Dutch
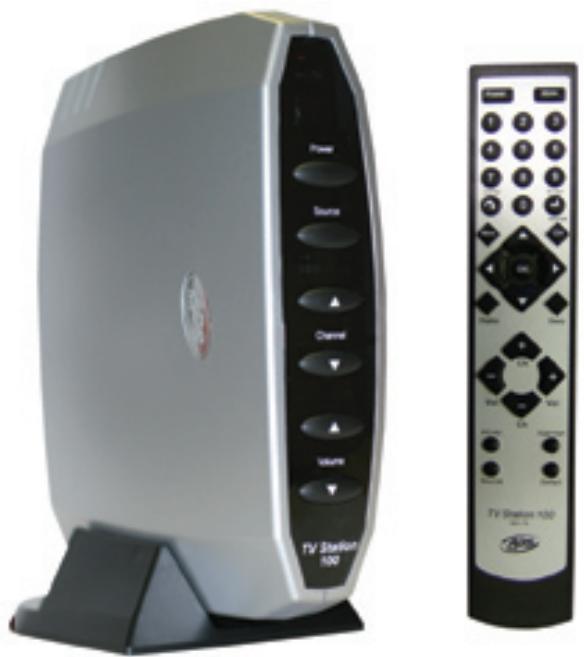
Table of Contents
4 Product Overview
6 Installation Guide • Installationsanleitung für TV Station 100 • Guide d'installation du TV Station 100 • Guía de instalación para TV Station 100 • Manual de instalação do TV Station 100 • Guida all'installazione di TV Station 100 • Installatiehandleiding voor TV Station 100
30 Troubleshooting · Troubleshooting · Guide de dépannage Resolução de problemas · Resolução de problemas Localizzazione e rettificà dei problemi Probleemoplossing
© 2005 ADS Technologies. All Rights Reserved
First Edition: February 2005
Microsoft, MS-DOS, Windows, Windows 95, Windows 98SE, Windows 2000, Windows ME and Windows XP are registered trademarks of Microsoft Corporation.
IBM is a registered trademark of the International Business Machines, Inc.
ADS is a registered trademark of ADS Technologies Inc.
ADS Technologies (ADS) makes no warranty of any kind with regard to this material,
including but not limited to, the implied warranties of merchantability and fitness for a particular purpose. The information furnished within this written document is for
information purposes only and is subject to change without notice. ADS Technologies assumes no responsibility or liability for any errors or inaccuracies
that may appear herein. ADS makes no commitment to update or to keep current information contained within this document. (rtt)
TV Station 100 Overview
- Turn your LCD monitor into an LCD TV
- Use as stand-alone TV Tuner without a PC
- Connect to PC and switch from PC to TV viewing
Supports Resolutions up to SXGA (1280 x 1024) - Connect to a Projector using Component or VGA connectors
Turn your LCD monitor into a TV
Convert any LCD or CRT monitor into a TV. Why buy expensive LCD TV's, when you can create one yourself with a computer LCD monitor and TV Station 100? TV Station 100 lets you connect to LCD or CRT monitors with either VGA or Component (Red, Green, Blue) connections for the highest quality TV signal.
TV Station 100 Features
- Auto Channel and Frequency Scan
- Channel Scan: Scan and remember channels in the frequency table
- Frequency Scan: Scan all of the possible channels and create the frequency table
Support CATV / Air TV
High Resolution and Frequency 640x480, 800x600, 1024x768, 1280x1024 @60 or 75 Hz
Composite RCA Video or S-Video Input
- Progressive Component Video Output
YPbPr 480p - Progressive
Motion-Adaptive 3D De-interlace
- OSD Menu Control Interface
Multi-TV Regions Support NTSC/NTSC-J (Model:PTV-360-N) PAL-I/PAL-BG/PAL-DK (Model:PTV-360-P) SECAM (Model:PTV-360-S)
Support LCD / CRT / Plasma / Projector
Easy to Use, Plug and Play No software or driver installation required

Installation Guide for TV Station 100
1. Package contents:
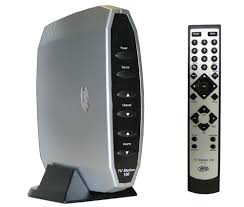
a. TV Station 100 unit
b. 6 ft. VGA to 8 pin Din cable
c. 6 ft. 3.5mm to 3.5mm Stereo link cable
d. Custom A/V cable for Component Out and A/V inputs
e. Remote Control
f. Power Adapter
q. User Guide
h. Base Stand
i. Batteries: 2 x AAA
Paketinhalt:
4. Connecting the TV Station to a PC
a. Locate the VGA Cable for your CRT or LCD monitor.
b. Unplug the VGA connector from the PC and connect it to the VGA Out (Blue) connector of the TV Station 100.
c. Connect the 8 pin Din connector of the 6 ft. VGA to 8 pin Din (item b) to the VGA In

connector of the TV Station 100, the other end will go to the VGA port of the PC.
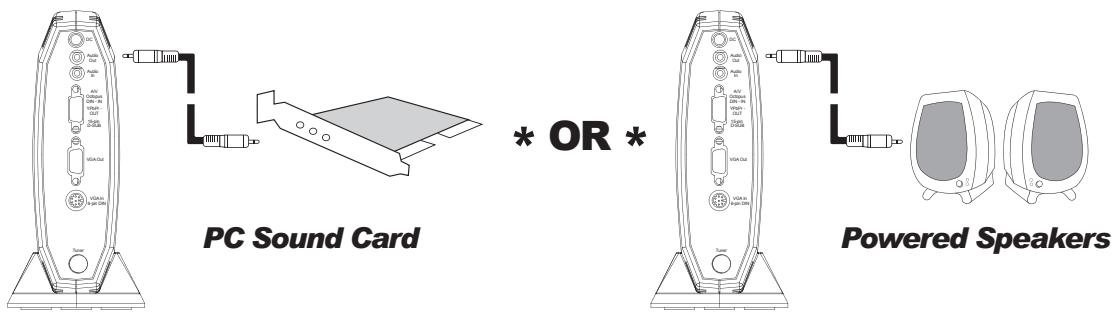
d. Plug one end of the 6 ft. 3.5mm to 3.5 Stereo Link cable to the Audio Out connector on the back of the TV Station 100, the other end should be connected to the Line In of your PC's Sound Card. You can also connect the Audio Out of the TV Station 100 directly to Powered PC Speakers.
e. Connect your TV Source to the RF (IEC for Europe) connector of the TV Station 100. You can use a regular indoor antenna (TV reception may not be optimal depending on your location), roof antenna or a Coaxial cable if you have Cable service.
f. Connect the power adapter to the DC connector on the back of the unit and then plug the power adapter to a working power outlet.
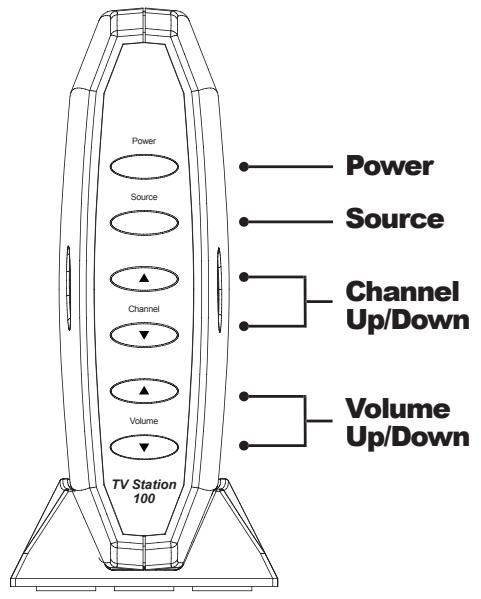
g. Use the Remote Control or press Power button to start your unit.
5. Connecting the TV Station 100 to a Projector or Plasma with Component cables.
a. Connect the Custom A/V cable for Component Out and A/V inputs (item d) if you want to use Component cables (not included) to connect to your Projector. Press the RGB/YPbPr button on the Remote Control to select the Video output option. The output from this connection is already 480p (Progressive).
b. You can also use a VGA cable (not included) to connect to a Projector if a VGA In connector is available. Be sure your display is compatible.
c. You will need to connect the Audio Out from the TV Station 100 to a Stereo System for the audio output.
- Connecting External Video Sources (VCR, DVD Players or Game Console) to the TV Station 100.
a. You can use the RCA (Red, White and Yellow) Video Out connectors from a VCR, DVD player or a Game Console to plug to the Custom A/V Cable.
b. You can also use an S-Video cable (not included) to connect to your External Video Sources.
c. Press the Source button on the Remote Control to toggle from TV/CATV, Video on S-Video Source.
a. Turn on your PC Monitor (PC does not need to be turned on).
b. Press the Power button on the Remote Control or Power button on the TV Station
100.
c. Press the PC/AV button to toggle from PC to TV Station 100.
d. Press the Menu button.
e. Select TV and press Ok.
f. Select System Setup and press Ok.
g. Set the TV System for your location (NTSC, PAL or SECAM), then press Ok.
9. TV Channel Setup (follow these steps for the best result)
a. Press the Menu button.
b. Select TV and press Ok.
c. Select Freq. Scan and press Ok.
d. Let scan complete, this may take a few minutes.
e. Press the Menu button.
f. Select TV and press Ok.
g. Select Channel Scan and press Ok.
h. Let the scan complete, this may take a few minutes.
Note: Freq. Scan will clear the channel list. There are differences in Cable and Local tuning frequencies. Freq. Scan will detect the proper tuning for your system area.
10. Add/Remove Channels
a. Use the Remote Control to select the Channel to add or remove.
b. Press the Add/Del CH button on the Remote to add or remove the channel.
11. Selecting Component Output
a. Follow the instructions on Step 5.
b. Press the button RGB/YPbPr on the Remote Control.
TV Station 100 allows output of 480P video format – be sure that our display is compatible.
11. Component Output wahlen
12. Select different Resolutions
a. Press the Menu button.
b. Select Resolution and press Ok.
c. Please make sure that your CRT, Plasma or LCD supports the Resolution selected.
d. Select the Resolution you want then press Ok.
e. If there is no Video on the CRT, LCD or Plasma, press the Default button to reset the Resolution to 1024 x 768 @ 60Hz.
13. Adjust the Video Settings (Brightness, Contrast, Saturation, Hue, Gamma, and Sharpness)
a. Press the Menu button.
b. Select Video and Press Ok.
c. Select the Video option to be adjusted and press Ok.
d. Use the Left/Right arrow buttons to adjust your option.
e. Press Ok to complete your settings.
a. Press the Menu button.
b. Select Audio and Press Ok.
c. Use the Up/Down arrow buttons to select your Audio option.
d. Use the Left/Right arrow buttons to adjust your Audio option.
e. Press the Menu button to exit this option.
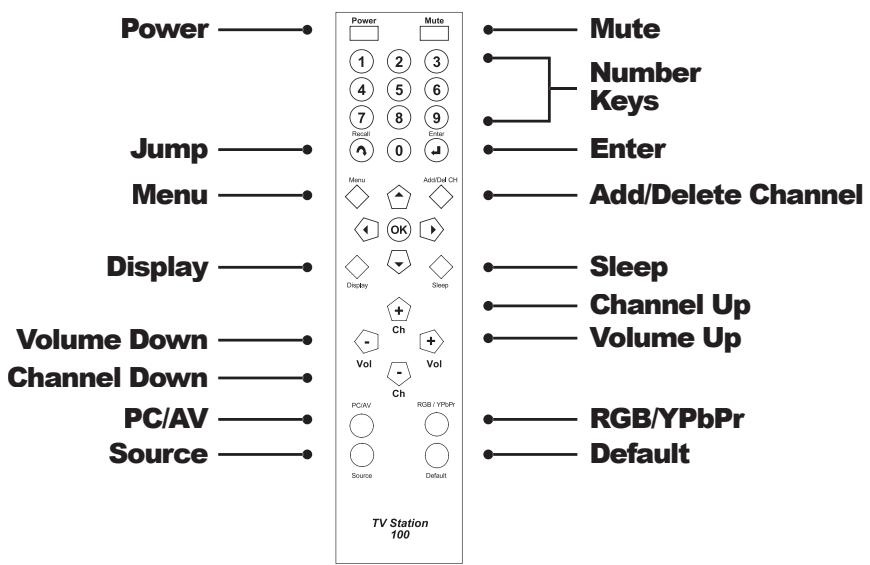
a. Press the Display button to show the channel you are watching.
15. Display-Taste
a. Press the Sleep button to activate the timer.
b. Press the Sleep button to set 30, 60, 90 or 120 minutes.
c. Press Sleep button until you see Sleep OFF to disable this feature.
a. Press to Mute the Audio output.
b. Press again to Un-mute.
17. Mute-Taste
a. Press to go back to previous channel.
18. Jump-Taste
Troubleshooting for the TV Station 100
Troubleshooting:
- Question: I changed the Resolution Output for the TV Station 100, but now I don't get any video.
Answer: You probably selected a Resolution that is not supported by your Display. Press the Default button on the Remote Control to bring reset the Resolution to 1024 x 768 @ 60Hz.
- Question: I am not getting any TV Signal, only snow.
Answer: Try adjusting the antenna if you are using a In-door antenna with the TV Station 100. If you are using Cable, make sure your Coaxial cable is working properly.
- Question: Do I need to install any software to make the TV Station work?
Answer: No, the TV Station 100 does not require any software or driver installation to work. Just follow the instructions provided on how to connect to a LCD or CRT to get your TV signal.
- Question: The TV Station 100 stopped responding to the Remote Control.
Answer: Press the Power button on the TV Station 100 unit to reset the device.
- Question: Can I use the Component (YPbPr) Output at the same time as the RCA/ S-Video output?
Answer: No, you will be switching between the Component (YPbPr) and the RCA/S-Video output, but not both at the same time.
- Question: I am not getting any Audio from the TV Station 100.
Answer: If you are not using the TV Station 100 with a PC, you need to connect the Audio Out to a Powered PC Speakers.
- Question: When I turned-off the PC, the audio stopped working.
Answer: The Audio will stop working if you have connected the Audio Out of the TV Station 100 to the Line In of your PC Sound Card, since the PC has been switched off. Connect the Audio Out to Powered PC Speakers to solve this problem.
- Question: I adjusted the Video Options, but now the image does not look good.
Answer: Please select the Reset option on the Video Menu. This will reset the adjustments to factory settings.
- Question: I am getting a lot of channels with bad signal after the channel scan.
Answer: You can use the ADD/DEL CH button on the Remote Control to clear any bad channels.
- Question: How do I select a Channel?
Answer: Press the channel you want on the Remote Control keypad, wait 2 seconds for the TV Station 100 to switch to that channel or just press the Enter button on the Remote to switch to your selection.
- Question: I have connected my DVD Player (VCR, or Game Console) to the Video Input connectors of the TV Station 100, how do I switch to that Video Source?
Answer: Press the Source button on the Remote Control to switch between TV, Video (RCA) or S-Video.
- What are the different types of TV Systems available?
| TV System | Country |
| NTSC | Argentina, Brazil, Korea, Taiwan, USA |
| NTSC-J | Japan |
| PAL-I | United Kingdom, Hong Kong |
| PAL-BG | Australia, Austria, Bangladesh, Belgium, Denmark, Egypt, Germany, Greece, India, Indonesia, Italy, Netherlands, Romania, Portugal, Singapore, Spain, Sweden, Switzerland, United Arab Emirates |
| PAL-DK | China, Czechoslovakia, Hungary, Poland, Slovakia |
| SECAM | France |
Troubleshooting:
- TO REDUCE RISK OF FIRE OR ELECTRICAL SHOCK, DO NOT EXPOSE THIS DEVICE TO WET LOCATIONS.
- CAUTION! RISK OF ELECTRICAL SHOCK - DO NOT OPEN
SAFEGUARDS:
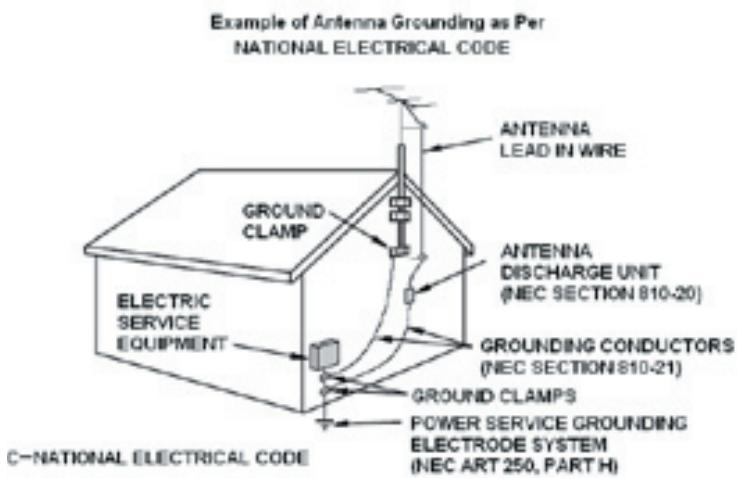
- If an outside antenna is connected to the equipment, be sure the antenna system is grounded so as to provide some protection against voltage surges and built-up static charges. Section 810 of the National Electrical Code provides information with respect to proper grounding of the mast and supporting structure, grounding of the lead-in wire to an antenna discharge unit, size of the grounding conductors, location of antenna-discharge unit, connections to grounding electrodes, and requirements for the grounding electrode. Please see figure below.
- For added protection for this electronic equipment during a lighting storm, or when it is left unattended and unused for long period of time, unplug it from the wall outlet and disconnect the antenna. This will prevent damage to the device due to lightning and power-line surges.
- An outside antenna system should not be located in the vicinity of overhead power lines or other electric light or power circuits, or where it can fall into such power lines or circuits. When installing an outside antenna system, extreme care should be taken to keep from touching such power lines or circuits as contact with them might be fatal.
Service and Warranty : TV Station 100
Service:
If you require assistance with the installation, operation, or application of your ADS Technologies, Inc. product there are several options available to you as described in the technical support section of this manual. The ADS Technologies technical support and customer service staff can aid in solving many problems. Our technical support department is available to repair any ADS Technologies product. You or your dealer must return products to our factory for repair or warranty replacement.
Return/Replacement:
Each individual computer store or dealer sets product returns policies for their customers.
ADS Technologies, Inc. cannot be responsible for the actions or policies set by our dealers. If you desire to return the product for a refund, you must get the refund from the dealer or store you purchased the product from. If you purchased the product directly from ADS please see the
"Terms and Conditions of Sale" on the reverse side of your sales invoice.
Returns to ADS Technologies, Inc. are for repair or warranty replacement only. If you need to return product to ADS Technologies, Inc. for repair or replacement you must follow these steps:
- Call our Technical Support department at (562) 926-4338 to obtain a Return Merchandise Authorization (RMA) number.
- The RMA number is valid for 30 days.
- Ship the product to the ADS factory with the RMA number marked on the inside and outside of the package. If there is no RMA number on the package or the RMA number has expired, the shipment will be refused. ADS will not be liable for lost or mis-shipped products.
- Replacement product cannot be shipped to you until the defective product has been received by ADS.
- Once the product is received at the factory it will be tested and then repaired or replaced.
- Turn around time is approximately one week. A repaired or replacement product will be shipped back to you.
Warranty:
This ADS Technologies, Inc. product comes with a One (1) year hardware warranty. ADS Technologies, Inc. (ADS) warrants this product against defects in material and workmanship for a period of One (1) year from the date of original purchase from ADS or an authorized ADS dealer. This warranty applies only to the original purchase of the product and is not transferable. This warranty does not cover any incompatibilities due to the user's computer, hardware, software or other related system configuration in which the product interfaces.
Proof of purchase will be required before any warranty consideration by ADS occurs.
This warranty does not cover any damage caused by negligence, non-authorized modifications, or parts installed without prior written permission from ADS.
This warranty does not apply if the product has been damaged by accident, abuse, or misapplication, nor as a result of service to the product by anyone other than ADS.
If your ADS product is not in working order, your only recourse is repair or warranty replacement, as described above. UNDER NO CIRCUMSTANCES will ADS Technologies, Inc. be liable for consequential damages, including but not limited to any lost savings, lost profits, or any other damages, caused by the use of any ADS Technologies, Inc. product or inability to use the product, even if the dealer or ADS Technologies, Inc. has been advised of such liability or other claims. This includes damage to property and, to the extent permitted by law, damages for personal injury. This warranty is in lieu of all other warranties including implied warranties of merchantability and fitness for a particular purpose.
FCC Information
Federal communications Commission Radio Frequency Interference Statement
Note: This equipment has been tested and found to comply with the limits for a class B digital device, pursuant to Part 15 of the FCC Rules. These limits are designed to provide reasonable protection against harmful interference when the equipment is operated in a residential installation. This equipment generates, uses and can radiate radio frequency energy and if not installed and used in accordance with the instruction manual may cause harmful interference to radio communications. However, there is no guarantee that interference will not occur in a particular installation. If this equipment does cause harmful interference to radio or television reception, which can be determined by turning the equipment off and on, the user is encouraged to try to correct the interference by one or more of the following measures:
- Reorient or relocate the receiving antenna.
- Increase the separation between the equipment and receiver.
- Connect the equipment into an outlet on a circuit different from that to which the receiver is connected.
- Consult the dealer or an experienced radio TV technician for help.
Notice:
(1) The changes or modifications not expressly approved by the party responsible for compliance could void the user's authority to operate the equipment.
(2) Shielded interface cables and AC power cord, if any, must be used in order comply with the emission limits.
TV Station 100
HardwareManual
North American Support Hours
Phone: 562-926-4338
M-F: 8:00 am - 5:00 pm, PST
www.adstech.com
Support: www.adstech.com/support/support.asp
ADS Tech
North American Office
Cerritos, CA 90703, USA
Phone. 562.926.1928
Support. 562.926.4338
Europe Office
Unit 1b, Shannon Industrial Estate
Shannon, County Clare, Ireland
Phone. +353.61.702042
Support. +353.61.702001
Southern Europe Office
51-55 rue Hoche
Phone. +33 1.43.90.19.20
Fax. +33 1.46.58.67.06