
900 PROJECTOR - Projector 3M - Free user manual and instructions
Find the device manual for free 900 PROJECTOR 3M in PDF.
| Product type | Overhead projector (transparency projector) |
| Brand | 3M |
| Model | 900 PROJECTOR (series 9000) |
| Classification | Projector |
| Use | Projection of transparencies and opaque documents (with optional LCD tablet) |
| Compatible lamp | ENX-82V/360W (models 9050, 9060, 9061, 9070, 9080, 9100); FXL-82V/410W (models 9075, 9076, 9085, 9200); EVD-36V/400W (model 9550) |
| Lamp changer | Built-in on models 9080, 9085, 9100, 9200, 9550 (quick swap) |
| Adjustments | Focus, color adjustment (blue/red corner compensation), brightness (high/low) |
| Safety lock | Lamp interlock switch (cuts power when changer door is opened) |
| Ventilation | Built-in fan; do not block vents |
| Power supply | Grounded power plug (voltage depends on country: 120V or 240V) |
| Power cord | Special, replace with same type from 3M |
| Dimensions (approx.) | Approximately 40 x 30 x 20 cm (estimated) |
| Weight (approx.) | Approximately 5 kg (estimated) |
| Maintenance | Clean the mirror with a soft brush; clean lenses with 3M 676 cleaner; do not clean inside Fresnel lenses |
| Precautions | Do not immerse in water, do not disassemble, unplug before cleaning, do not block ventilation, replace lamp with appropriate model |
| Technical support (US/Canada) | Contact 3M at 800-328-1371 or local distributor |
| Provided documents | User manual available in French, English, Spanish |
Frequently Asked Questions - 900 PROJECTOR 3M
User questions about 900 PROJECTOR 3M
0 question about this device. Answer the ones you know or ask your own.
Ask a new question about this device
Download the instructions for your Projector in PDF format for free! Find your manual 900 PROJECTOR - 3M and take your electronic device back in hand. On this page are published all the documents necessary for the use of your device. 900 PROJECTOR by 3M.
USER MANUAL 900 PROJECTOR 3M
When using your photographic equipment, basic safety precautions should always be followed, including the following:
- Read and understand all instructions before using. Pay particular attention to areas where this symbol is shown.
- Close supervision is necessary when any appliance is used by or near children. Do not leave appliance unattended while in use.
- Care must be taken as burns can occur from touching hot parts.
- Do not operate appliance with a damaged cord or if the appliance has been dropped or damaged — until it has been examined by a qualified serviceman.
5 . Position the cord so that it will not be tripped over, pulled or contact hot surfaces. - If an extension cord is necessary, a cord with a current rating at least equal to that of the appliance should be used. Cords rated for less amperage than the appliance may overheat.
- Always unplug appliance from electrical outlet before cleaning and servicing and when not in use. Never yank cord to pull plug from outlet. Grasp plug and pull to disconnect.
8 . Let appliance cool completely before putting away or when replacing lamp. Loop cord loosely around appliance when storing. - To reduce the risk of electric shock, do not immerse this appliance in water or other liquids.
- To reduce the risk of electric shock, do not disassemble this appliance, but take it to a qualified technician when service or repair work is required. Incorrect reassembly can cause electric shock when the appliance is used subsequently.
- The use of an accessory attachment not recommended by the manufacturer may cause a risk of fire, electric shock, or injury to persons.
- Connect this appliance to a grounded outlet.
- Disconnect this unit from its source of supply before replacing the projection lamp.
14 .This unit is equipped with optical lenses and should not be exposed to direct sunlight. - Keep ventilation openings free of any obstructions.
- This unit is assembled with a special power cable that, if damaged, must be replaced by the same type of cable. This power cable can be ordered from your local 3M Visual Systems Division Dealer and must be installed by a serviceman.
SAVE THESE INSTRUCTIONS
The information contained in this manual will help you operate and maintain your overhead projector.
PRECAUTIONS
Product Description/Features
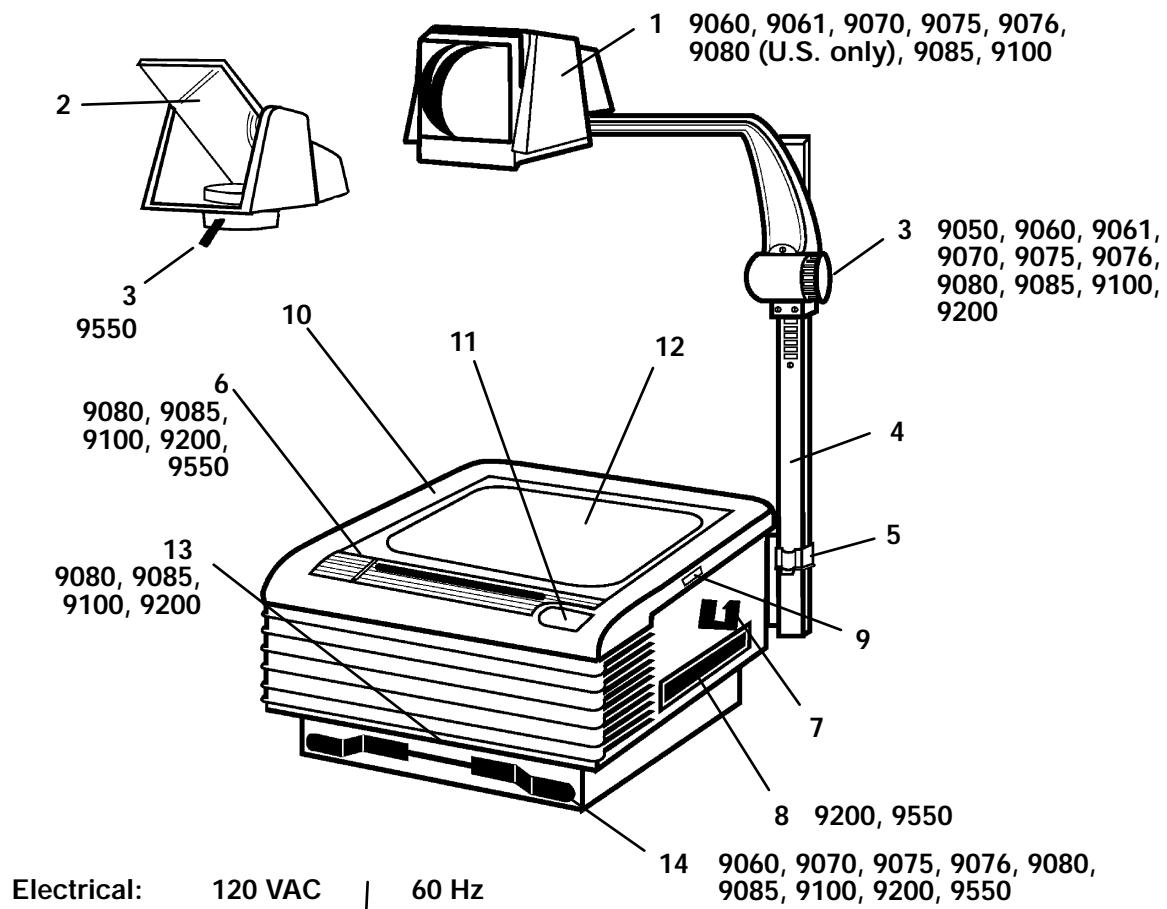
Front View
- Projection Head
- Projection Mirror
- Focus Knob
- Post Assembly
- Post Lock
- Control Panel
a. Lamp Changer
b. High/Low Lamp Switch*
c. Lamp Interlock Switch
- Post Cradle
- Carry Handle
- Top Cover Release
- Top Cover
- On/Off Switch
- Stage
- Color Tuning Dial
-
Cord Wrap
-
On some models, the switch is located inside the top cover.
Service Information
In the U.S. and Canada, please call us for
Product information
Technical assistance
Product assistance
Service locations
If you need product assistance or service, contact your dealer or:
800-328-1371
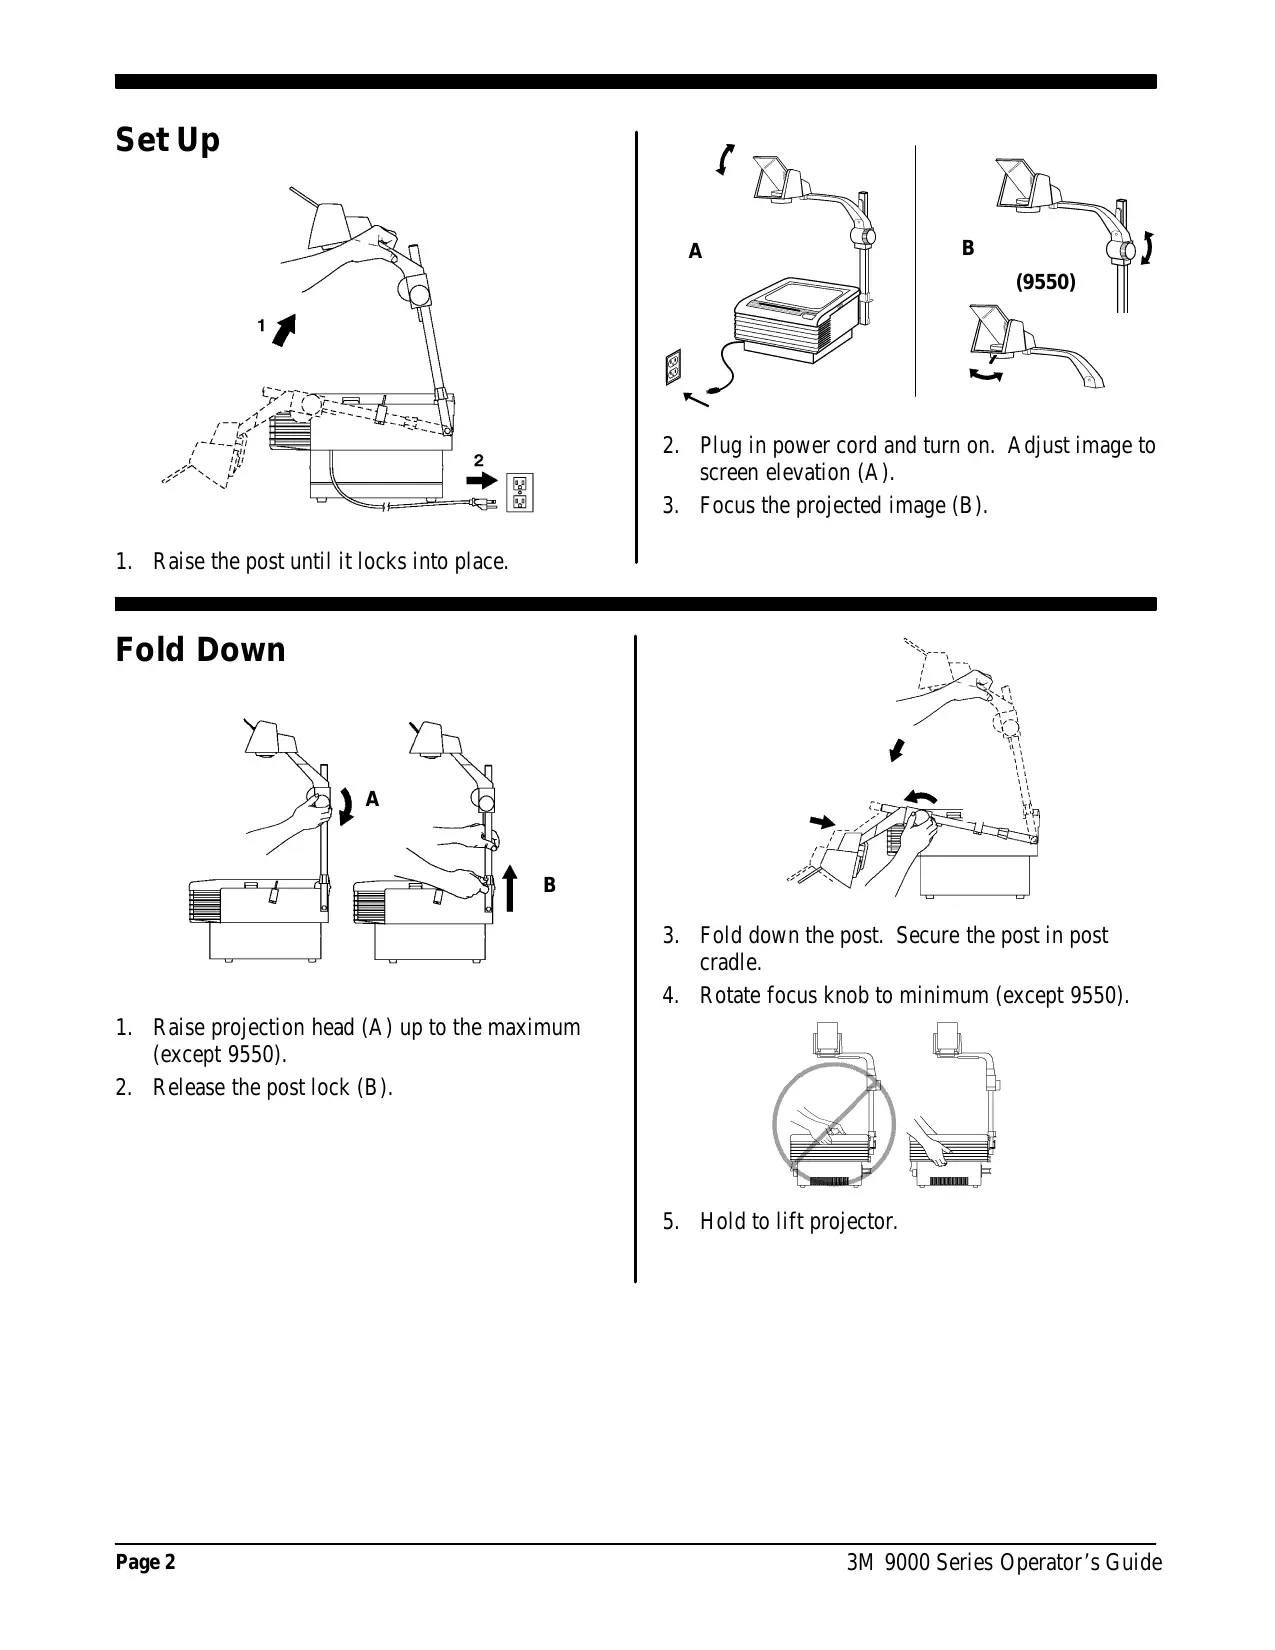
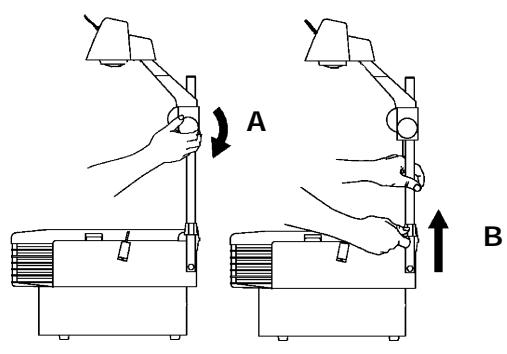
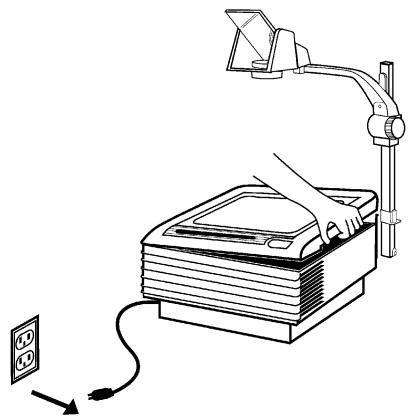
Set Up
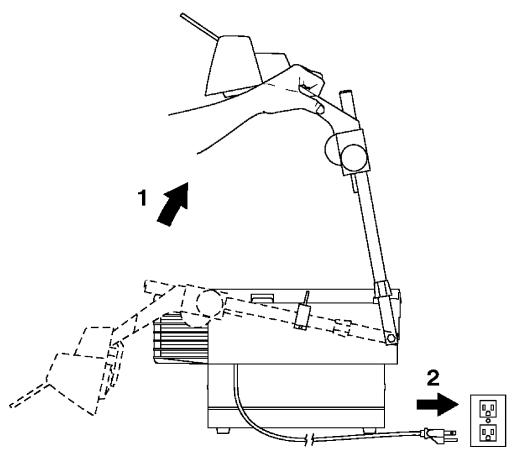
1. Raise the post until it locks into place.
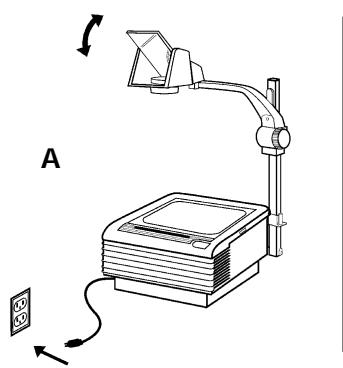
- Plug in power cord and turn on. Adjust image to screen elevation (A).
- Focus the projected image (B).
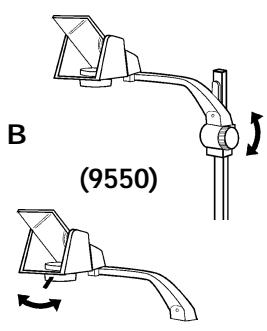
Fold Down
- Raise projection head (A) up to the maximum (except 9550).
- Release the post lock (B).
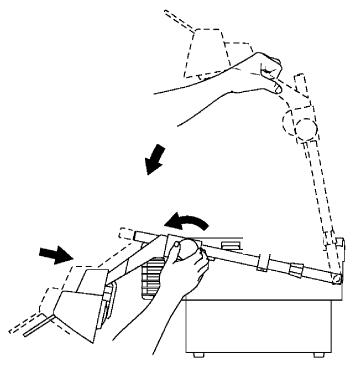
- Fold down the post. Secure the post in post cradle.
- Rotate focus knob to minimum (except 9550).
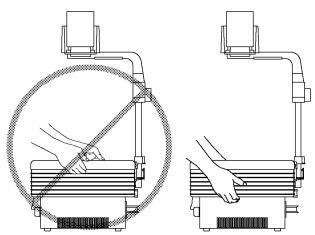
- Hold to lift projector.
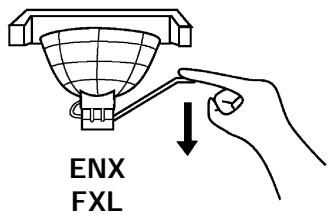
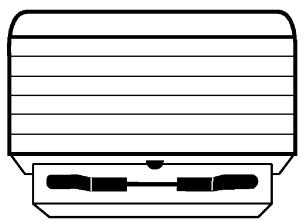
Lamp Replacement
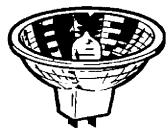
ENX-82V,360W
9050, 9060, 9061,
9070, 9080, 9100
FXL-82V,410W
9075, 9076,
9085, 9200

or
EVD-36V,400W
9550 only
WARNING
Lamp and adjacent metal parts are hot. Allow lamp to cool before replacing.
- Remove and discard the old lamp. See Illustration (A).
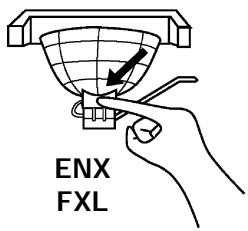
- Install new lamp.
- Push fully and squarely into socket. See Illustration (B).
A
B
- Close the top cover.
Lamp Changer/Indicator
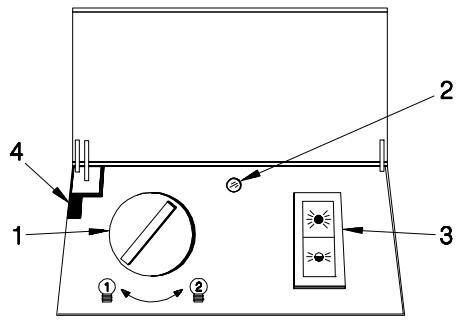
- The 9080, 9085, 9100, 9200 and 9550 have a lamp changer feature.
Note
9080/9085 only: To access the Lamp Changer Control, raise the Top Cover.
- To activate the second lamp, rotate the lamp changer knob (1).
- The 9550 has an indicator that lights up red (2). This visual reminder alerts the operator that one or both of the lamps are burned out or missing.
High/Low Lamp Switch (9070, 9075, 9085, 9100, 9200, 9550)
Note
Two lamps are provided with the 9200 and 9550.
- The High-Low lamp switch (3) * is located on the top front control panel.
- High is recommended for LCD projection panels. Low is recommended for normal use.
Note
Operating the OHP in the Low lamp setting will extend lamp life.
Note
Opening the lamp changer will deactivate the lamp (Lamp Interlock Switch (4)).
- On some models the switch is located inside the top cover.
Cleaning
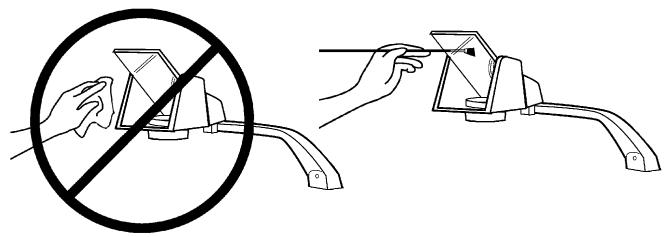
- The mirror in the open projection head is a front-surface mirror and must not be wiped clean.
- Remove any surface dirt with a soft brush to avoid scratching the mirror.
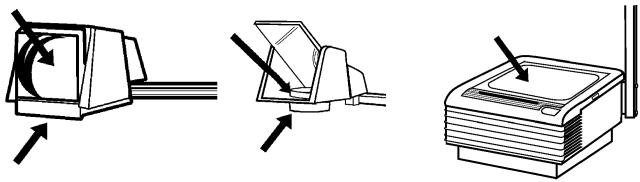
- Clean the outside surfaces of the projection lenses and the stage with 3Mt Overhead Cleaner 676 (70-0705-6877-2).
Note
Cleaning the underside of the stage glass or fresnel lens is not recommended. Improper cleaning or disassembly may damage the fresnel lens. If cleaning is required, contact your local 3M Visual Systems dealer for assistance.
Color Tuning
- To eliminate red or blue corners on the screen, rotate the Color Tuning Dial.
a. Blue corners - Rotate the dial to the left.
b. Red corners - Rotate the dial to the right.
Troubleshooting
| Problem | Probable Causes | Solution |
| Lamp does not come on - fan runs | $ Lamp is burned out $ Lamp is not seated in the socket Lamp changer door is open | Replace or change lamp $ Seat lamp all the way in socket Close door |
| New lamp lasts for more than one minute but less than 2-5 hours | Defective lamp | Replace lamp |
| New lamp burns out immediately after turning on | Defective lamp Electrical problem | Try one more lamp. If 2nd lamp blows, have machine checked |
| Fan doesn’t run, but lamp is on | Fan or motor is obstructed | Have machine serviced |
| Neither lamp nor fan comes on | $ Not plugged into power source $ No power at the wall outlet Top cover not down all the way | Plug into power source $ Check power supply Close top cover all the way |
| Projected image is wider at the top or on one side of the screen | Screen is not perpendicular to the projected image | Reposition the screen surface to be 90_ to the projected image |
| Corners of projected image appear red or blue or the bottom or sides of projected image are not in focus | Misaligned optical components Lamp not of the proper type | Have optical components adjusted by qualified technician $ Replace with proper type lamp |
3M Mexico S.A. DE C.V.
Calz. San Juan de Aragon No. 516
07070 Mexico D.F., Tel: 6260400
Accessories - Accessoires - Accessories
| Roller Attachment - 10 1/4" (260 mm) Attachment à roulettes Accessorio par el rodillo 78-6969-7214-6 HA5760 | Carry Handle Poinée pour porter Manja de transporte 78-6969-7968-7 HA5781 | Write-on Film Roll Rouseau de pellicule à écrire Rollo de Pelicula para Escribir 78-9020-1282-8 - 10 1/4" (260mm) AF4310 |
| Travel Cover Couvercle pour voyageur Cubierta par Viajes 78-6969-7969-5 HA5785 | Overhead Presenter's Cart Chariot pour rétroprojecteur Carro para Presentación del Proyector 78-6969-7217-9 HA5651 | Overhead Cleaner Nettoyant pour rétroprojecteur Limpiador de retroprojectores 70-0705-6877-2 |
| Dust Cover Couvercle anti-poussières Cubierta par Polvo 78-6969-7216-1 HA5792 | Lamp ENX - 9050, 9060, 9061, 9070, 9080, 9100 Lampe FXL - 9075, 9076, 9085, 9200 Bombilla ENX - 78-6969-8027-1 HA6000 FXL - 78-6969-7947-1 HA6005 | Lamp Lampe Bombilla EVD 78-6969-7970-3 HA6009 |
| Cord Wrap Crochets pour cordon d'alimentation Envoltura del Cordón 78-6969-7993-5 HA5786 | ||

Brand : 3M
Model : 900 PROJECTOR
Category : Projector