GIGA VU EXTREME - External hard drive JOBO - Free user manual and instructions
Find the device manual for free GIGA VU EXTREME JOBO in PDF.

| Product type | External multimedia hard drive with LCD screen |
| Storage capacity | 40, 80 or 120 GB |
| Screen | Color LCD 9.4 cm, 640 × 480 pixels RGB |
| Supported photo file format | JPEG, RAW, TIFF |
| Supported audio file format | MP3 |
| Supported video file format | MPEG2, MPEG4 |
| Interfaces | USB 2.0 high-speed (for PC), USB 2.0 OTG (for external devices), analog video output PAL/NTSC, digital video output, WiFi (optional) |
| Power supply | AC adapter, built-in rechargeable lithium-ion polymer battery |
| Battery life | Estimated depending on usage (full charge required before first use) |
| Main functions | Storage, viewing and selection of photos, music and video playback, sensor dust detection, slideshow, PictBridge printing, backup to external hard drive |
| Care and cleaning | Wipe the casing with a soft, absorbent cloth if in contact with water |
| Safety | Do not disassemble, do not expose to water, use only original JOBO cables, avoid strong magnetic fields |
| Included parts and accessories | GVX with rubber cover, AC adapter, USB cable, analog audio/video cable, earphones, remote control, user manual |
| Optional accessories | External PowerPack, car adapter (12 V), CompactFlash WiFi card, multi-card adapter (SD/MMC/xD/MemoryStick) |
| Repairability | Do not disassemble yourself; contact JOBO customer service or a qualified professional |
| Interface languages | English, French, German, Italian, Spanish, Swedish, Dutch |
| Operating temperature | 0°C to 55°C (for WiFi components) |
| General information | Designed and developed in Belgium, manufactured in the Philippines |
Frequently Asked Questions - GIGA VU EXTREME JOBO
User questions about GIGA VU EXTREME JOBO
0 question about this device. Answer the ones you know or ask your own.
Ask a new question about this device
Download the instructions for your External hard drive in PDF format for free! Find your manual GIGA VU EXTREME - JOBO and take your electronic device back in hand. On this page are published all the documents necessary for the use of your device. GIGA VU EXTREME by JOBO.
USER MANUAL GIGA VU EXTREME JOBO
New Features in Firmware update 2.0.4 55
1. J.D. Loupe 55
1.1. General 55
1.2. How to get to the JD Loupe 55
1.3. Working with the JD loupe 56
2. Incremental Backup 56
2.1. General 56
2.2. How to get to the Incremental Backup 56
2.3.Advices before you start the backup 56
2.4. Make your first (Incremental) Backup 56
2.5. Regular "Incremental Backup" 57
2.6. Remove Backup from External Disk 58
3. RAW Format compatibility 58
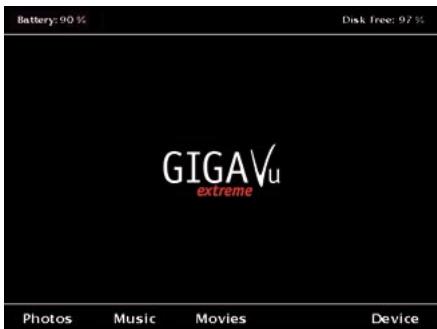
Fig. 4.1: Ecran "Home"
Connect Menu - USB to PC
You can now plug the USB cable in the PC. Use the upper USB connector on the right side of the device. Press Disconnect when you are done transferring files.
Disconnect
GVX Description Image
EXIF : Image : Description Image
GVX Commentaires
Firmware Update: www.jobo.com
12 Accessoires Disponibles
Jobo GigaVu Pro Evolution
Stockage
Brilliance ajustable.
Battery
Batterie haute qualite Li-Ion (2200 mAh)
rechargeable. Remplaçable.
Dimensions
145 × 107 × 38 mm
Poids
420g
Menu Langues
Nom, E-mail, telephone, notification copyright.
Interfaces
Carte mémoires
Accepte cartes CompactFlash (CF), Type I/II et Microdrives.
Plein zoom: approx. 3 s
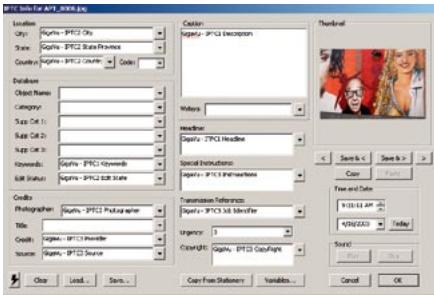
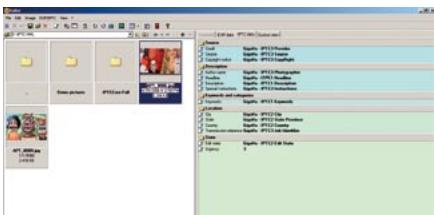
A new software upgrade of the GigaVU Pro Evolution allows you to add metadata and keywords in a more convenient way. With a new function you can enter metadata in a template that is stored inside the unit's flash memory. Goto Photo>Manage>Edit Metadata template. You can enter metadata in the following fields:
EXIF metadata
EXIF : Image description
EXIF : Artist
EXIF:Copyright
EXIF :User Comment
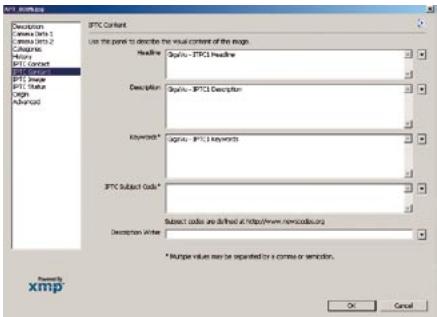
IPTC metadata
IPTC1:Headline
IPTC1 : Description
IPTC1 : Keywords
IPTC1 : Description Writer
IPTC2 : Location Name
IPTC2 : City
IPTC2 : State/Province
IPTC2 : Country
IPTC2 : Edit State
IPTC3 : Photographer (IPTC Artist
field)
IPTC3 : Photographer title
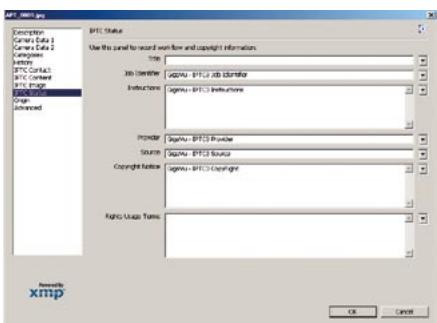
IPTC3:Job Identifier (IPTC
Transmission Reference field)
IPTC3 : Instructions
IPTC3 : Provider
IPTC3 : Source
IPTC3 : Copyright notice
Metadata can be added to photos in two ways.
-
When copying from memory cards to hard disk an option can be selected to automatically add the metadata template to all imported pictures.
-
For existing albums go to Photo > Manage > Add Metadata to Pictures. In this case you can select photos first and then launch a batch process to add the metadata
template to the selected pictures. Metadata is embedded in JPEG files only. For RAW files XMP sidecar files are generated. The meta data is added according to the IPTC standard.
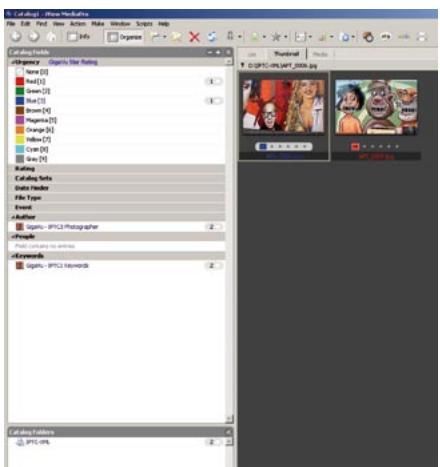
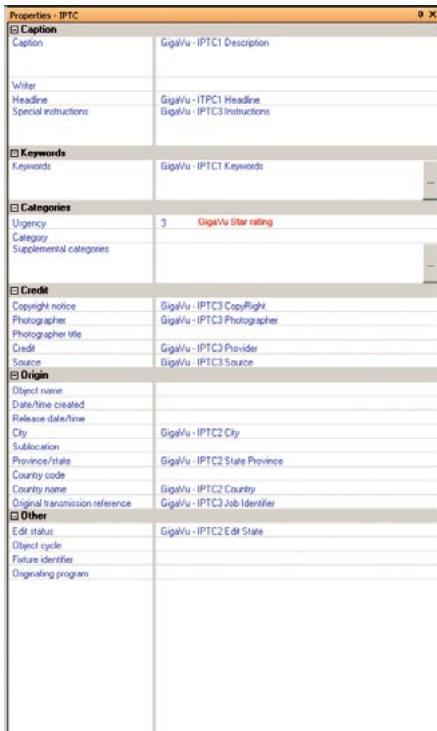
GigaVu also allows you to add a 'Star rating' to pictures. You can give each picture a one, two or three star rating while viewing them. Goto Photos and select an album. As view mode select 'View Pictures' to view pictures full screen. The soft keys are now labeled Zoom - Info - Chann - Levels - More. Press the More button twice. The soft keys now read 1 star - 2 stars - 3 stars - clear - more. Use soft key 1 to 3 to add a star rating . Use softkey 4 to remove any star rating.
Star ratings can be stored in the IPTC: Urgency field, in an IPTC:Keyword or in both. Use the 'Settings' button to tailor this to your needs.
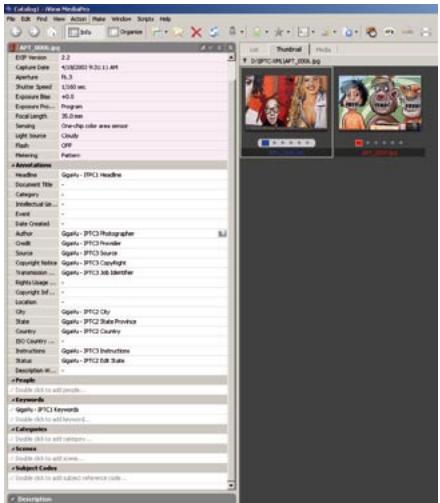
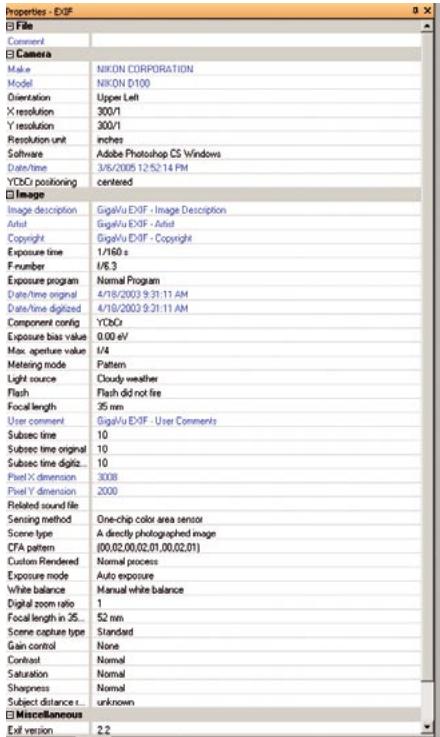
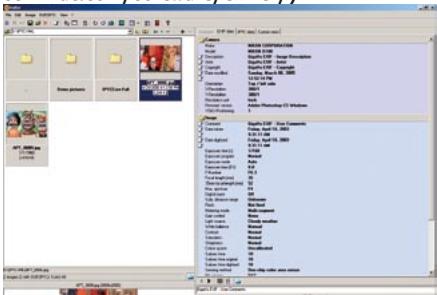
Where to look for the metadata you added? The metadata added by GigaVu will be accessible by most photo viewer/ browsers. However sometimes the info is somewhat buried in the user interface.
Here are some examples for frequently used programs.
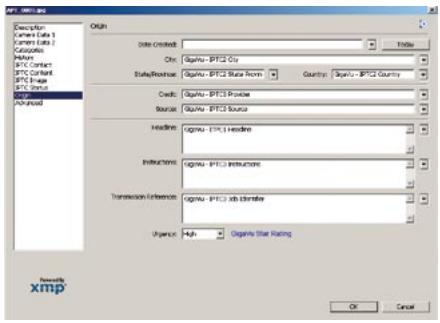
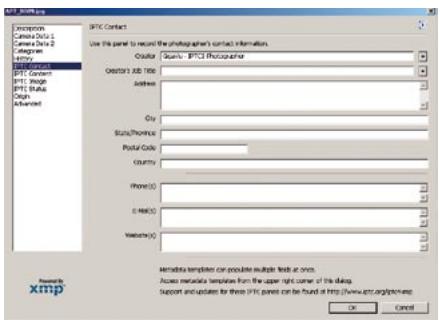
1. Photoshop
The IPTC organization provides custom XML file info templates that can be added to Photoshop. You can use these for maximum compatibility. You can download them for free here: http:// www.iptc.org/IPTC4XMP/
Please also read the accompanying documentation: http://www.iptc.org/std/Iptc4xmpCore/1.0/ documentation/Ipct4xmpCore_1.0-docANcs1panelShareFix_1.pdf


2. iView
3. Photo Mechanic
4. ACDSee
5. Exifier ( http://www.friedemann-schmidt.com/software/exifer/)
New Features in Firmware update
2.0.4
To use the following features you have to install the latest firmware update 2.0.4 on your GIGA Vu extreme.
To check if you have installed the latest firmware start your GIGA Vu extreme press the fifth soft key "Device", scroll down to "Device Info" with the joystick, press the joystick to enter this menu. On the lower right hand side you should see "Version: 2.0.4".
1. J.D. Loupe
1.1. General
The new J.D. Loupe (the brain child of National Geographic photographer and loyal GIGA Vu extreme user Jay Dickman) provides users of this mobile image storage device with a button in the unit's zoom menu that causes a magnified rectangular loupe to appear on the LCD screen so photographers can closely examine important details of their pictures.
1.2. How to get to the JD Loupe
- Start the device
- Press button "Photos"
- Select an album
- Select "View Pictures"
- Press the soft key "ZOOM" (first button)
- Press the soft key "Loupe" (third button)
The picture will be loaded into the cache, this can take depending on the selected file size (JPG/RAW) a couple seconds.
1.3. Working with the JD loupe
As soon as you have started the JD Loupe, two red squares will appear on the screen, the small one shows the area of the picture which is magnified in the large red square.
You can move the small square around in the picture by using the joystick. Pressing the joystick will return you to the plain image without the loupe.
You can zoom in by pressing the button "Loupe -" or zoom out by pressing "Loupe +"
Pressing the third button "FIT" will take you back to the previous menu.
The fourth button "FULL" will magnify the small red square to whole screen. Here again you have the option to use the JD loupe, with all possibilities described above.
- zoom in with button "Loupe -"
- zoom out by pressing "Loupe +"
- "FIT" will take you back to the plain picture without the loupe.
2. Incremental Backup
2.1. General
In addition there is a new easy-to-use one-touch-software-update called Incremental Backup (the brain child of wildlife photographer and loyal GIGA Vu extreme user Andy Rouse). This update allows users who transfer the data stored on their GIGA Vu extreme via Incremental Back-up to an external storage device such as the JOBO GIGA one, to automatically synchronize the data on both devices with just one touch. The new data will be added to the external device without deleting any already existing data on the device.
2.2. How to get to the Incremental Backup
- Start the device
- Press soft key button "Device"
- Scroll down to the second entry "USB Incremental Backup"
Now you have 2 options:
1.) Incremental Backup to External Disk This option will initialize the process of the incremental backup.
2.) Remove Backup from External Disk
Be careful: This option will remove the data form the external device
2.3. Advices before you start the backup
Before you start the (incremental) backup process we suggest to plug the AC power adapter to both units because the procedure will take a while. We also recommend to do the first full backup overnight.
2.4. Make your first (Incremental) Backup
We recommend to use a "GIGA One" as external backup device. If you chose to use an other device the requirements are: self-sufficient power supply (battery or AC adapter), formatted in FAT32, just one partition on the HDD.
Start the process as followed:
- Start the device
- Press soft key button "Device"
- Scroll down to the second entry "USB Incremental Backup"
- Press on option 1 "Incremental Backup to External Disk"
Before you continue turn off the external device.
Now you are asked to:
"connect an external disk on the lower USB connector on the right side of the device"
Use the special USB adapter you received with your "GIGA Vu extreme". As soon as you turn on the external device (such as the GIGA One) the process will start automatically.
The next screen will show:
Updating to "GVE_Backup" on external disk
Please wait...(999 files updated)
The device creates a folder in the root menu on the external device called "GVE_Backup". This is the folder in which you all data stored on your "GIGA Vu extreme".
Be patient, because depending on the amount of data stored on the HDD of your "GIGA Vu extreme" it can take a while to create the full first backup.
As soon as the complete backup is done you get a new screen:
Finished
Done updating 99999 files
Pressing the soft key "Done" lets you return to the menu where you can choose between the two options: "Incremental Backup to External Disk" or "Remove Backup from External Disk". You can now unplug both devices.
The first backup process is done and on both devices, the GIGA Vu extreme and on the external HDD you will find identical data.
2.5. Regular "Incremental Backup"
After your first successful basic backup of your data you can now proceed to download more images and files onto your GIGA Vu extreme.
The next time you use the "Incremental Backup" just the new data will be transferred to the external device.
Start the process as followed:
- Start the device
- Press soft key button "Device"
- Scroll down to the second entry "USB Incremental Backup"
- Press on option 1 "Incremental Backup to External Disk"
Before you continue turn off the external device.
Now you are asked to:
"connect an external disk on the lower USB connector on the right side of the device"
Use the special USB adapter you received with your "GIGA Vu extreme". As soon as you turn on the external device (such as the GIGA One) the process will start automatically.
The next screen will show:
Updating to "GVE_Backup" on external disk
Please wait...(999 files updated)
All data will be backed up to the previously created folder on the external device called: "GVE_Backup". The GIGA Vu extreme now verifies all existing data with the external device and just updates the changed data.
This speeds up the whole process because not all data have to be transferred again to the external device.
As soon as the complete backup is done you get a new screen:
Finished
Done updating 99999 files
Pressing the soft key "Done" lets you return to the menu where you can choose between the two options: "Incremental Backup to External
Disk" or "Remove Backup from External Disk". You can now unplug both devices.
The incremental backup process is done and on both devices, the GIGA Vu extreme and on the external HDD you will find identical data.
2.6. Remove Backup from External Disk
It is also possible to remove the backed up data if they are not needed anymore. To do so follow these instructions:
Start the process as followed:
- Start the device
- Press soft key button "Device"
- Scroll down to the second entry "USB Incremental Backup"
- Press on option 2 "Remove Backup from External Disk"
Before you continue turn off the external device.
Now you are asked to:
"connect an external disk on the lower USB connector on the right side of the device"
Use the special USB adapter you received with your "GIGA Vu extreme". As soon as you turn on the external device (such as the GIGA One) the process will start automatically.
After a couple seconds the next screen will show:
Finished
All files are now deleted on the external device!
Pressing the soft key "Done" lets you return to the menu where you can choose between the two options: "Incremental Backup to External Disk" or "Remove Backup from External Disk". You can now unplug both devices.
3. RAW Format compatibility
We are constantly updating the compatibility of RAW formats with the GIGA Vu extreme. This update allows you besides several other formats, to decode the LEICA M8 RAW format. You can find the latest compatibility list on our website: http://www.jobo.com/jobo_service/digital/files/giga_vu_pro_e/index.html