USER MANUAL BONITA GAGGIA
natural_image
Metallic coffee maker with 'Bonita GAGGIA' branding, no visible text or symbols on the device itself.
ISTRUZIONI PER L'USO
OPERATING INSTRUCTIONS
GEBRAUCHSANWEISUNG
MODE D'EMPLOI
INSTRUCCIONES DE USO
GEBRUIKSAANWIJZING
INSTRUÇÕES E MODO DE
EMPREGO
mod. Bonita
FIG.01
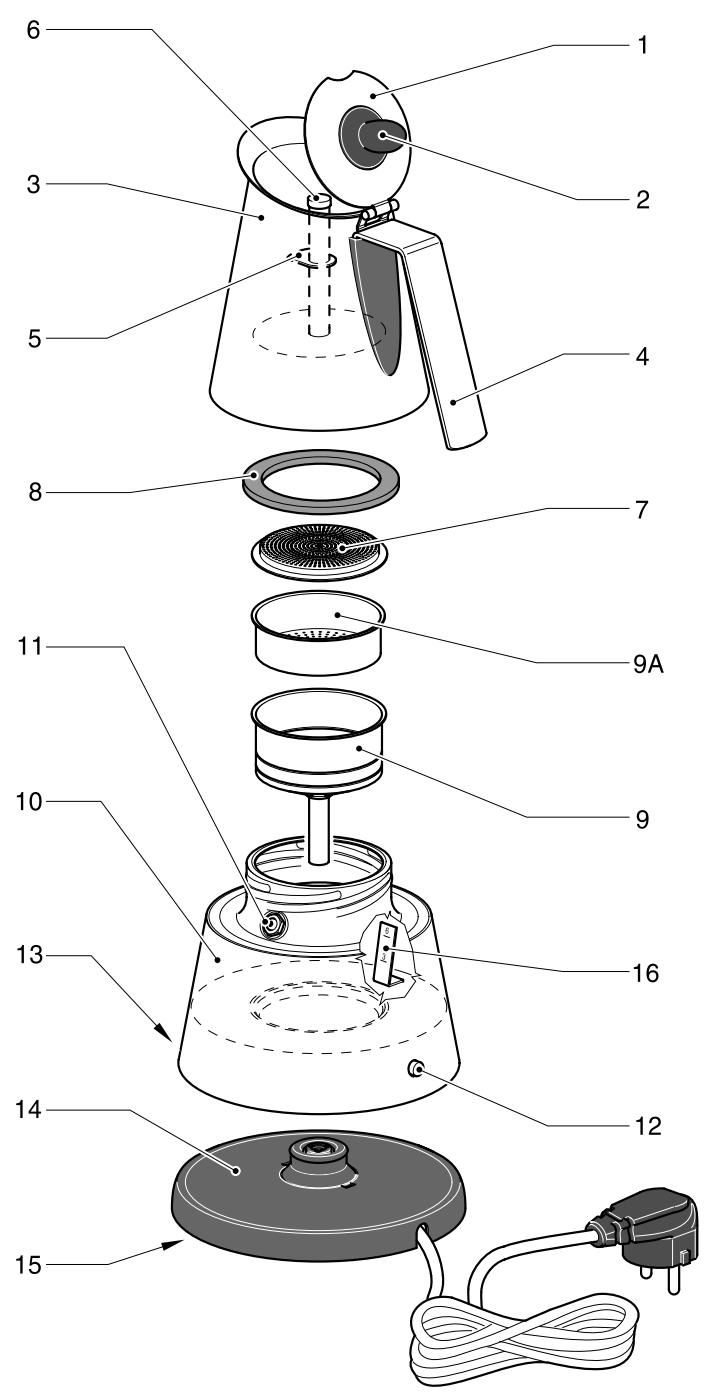
FIG.02
natural_image
Illustration of a hand using a tool to clean or wash a textured material, with a faucet and mechanical components visible (no text or symbols)
FIG.03
natural_image
Line drawing of two hands holding a circular object with a mesh pattern, no text or symbols present
FIG.04
natural_image
Line drawing of hands using a tool to adjust a circular component with a grid pattern (no text or symbols)
FIG.05
natural_image
Line drawing of a hand cleaning a cylindrical container with a lid (no text or symbols)
GAGGIA S.p.a. reserves the right to carry out all modifications which might be considered necessary.
IMPORTANT SAFETY MEASURES

Always follow basic safety precautions when using an appliance, including the following:
- Read all the instructions.
- Do not touch hot surfaces. Touch only the handles and knobs.
- To prevent fires, electrical shocks and other personal injuries, NEVER IMMERSE THE POWER CORD, THE PLUG OR THE BASE in water or other liquids.
- Closely supervise the use of the coffee maker by or near children.
- Unplug the appliance when not in use or before cleaning it. Let the appliance cool completely before attaching or detaching components and before cleaning it.
- Never use the appliance if the power cord or plug is damaged or if the appliance has shown any signs of malfunction or damage. Take the device to the nearest authorized service center for all inspections, adjustments or repairs.
-
Do not use outdoors.
-
Do not allow the power cord to hang from the edge of the table or counter or to come into contact with hot objects.
- Do not place the appliance above or near electric or gas burners and never put it in a hot oven.
- Fill the lower recipient with water, then tightly screw the top recipient onto the bottom recipient, then place the coffee maker on the base and only then insert the plug into the electrical outlet. To disconnect the coffee maker, remove it from the base and unplug it from the electrical outlet.
- Unplug the base after removing and emptying the coffee maker.
- Clean the coffee maker regularly to prevent malfunctions.
- Do not use the coffee maker for purposes other than that for which it was designed.
- To reduce risks of fire or electrical shock, do not remove the coffee maker from the base during the brew cycle.
EXCLUSIVELY FOR HOME USE! (KEEP THESE INSTRUCTIONS)
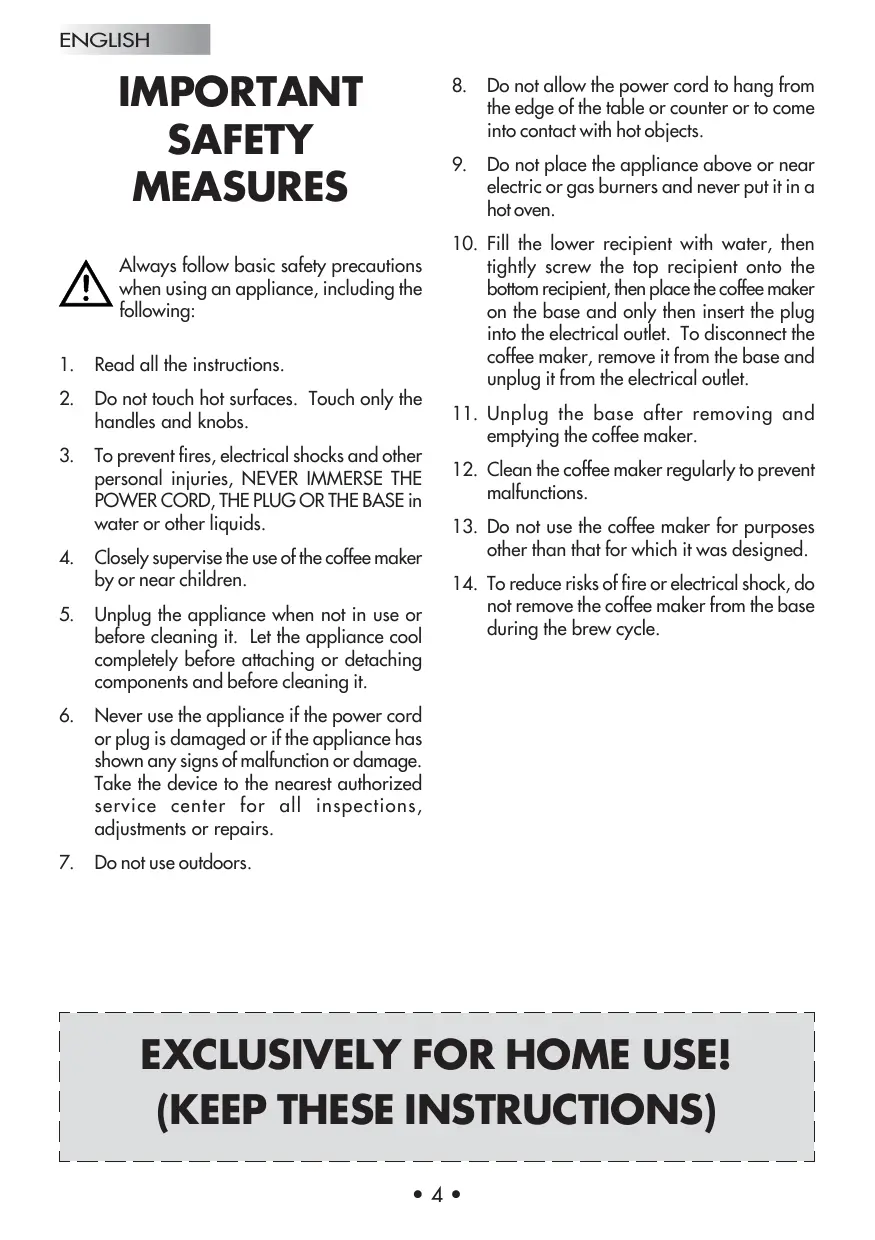
Features and advantages
- Stainless steel cover
- Plastic knob on cover
- Stainless steel upper coffee recipient with 3-6 cup capacity
- Ergonomic stainless steel handle
- Maximum water level plate
- Stainless steel tube
Conveys the coffee to the upper recipient.
- Upper filter plate
Prevents coffee grounds from entering the upper recipient.
- Gasket
Allows for tight seal between upper and lower recipients.
- Coffee basket
Maximum 6 cups (26 gm. of coffee).
9(a). 3-cup coffee filter
-
Stainless steel lower recipient Maximum 6 cups (300 ml of water).
-
Safety valve
Prevents explosion risks; the valve automatically discharges excess pressure if the pressure in the lower recipient exceeds 4 bars.
-
Indicator light with reset button
-
Non-heating base
Prevents damage to tables or counters
-
Power base
Remove the coffee maker from the power base to pour coffee or to serve it directly at the table with no interference from cords.
-
Power cord compartment
Located under the base, the compartment prevents clutter on the counter and is ideal when storing the appliance.
-
Water level indicator "3" and "6" cups volume marked on it.
SPECIAL INSTRUCTIONS FOR THE POWER CORD
The appliance has a short power cord in order to reduce the risks of it getting tangled or tripping someone. The power rating of any extension cord used must be at least equal to that of the appliance. The extension cord must be routed so that it does not hang from the counter and does not cause a risk of people tripping over it.
WARNING: the appliance is grounded; the extension cord must also have a ground wire (third wire). Never modify the coffee maker plug in any way. For any problems associated with the plug, consult a qualified electrician.
- Place the base on a flat and heat resistant surface near an electrical outlet and out of reach of children.
FIRST OPERATION
Before using the Mocha Maker for the first time, or if it's been out of use for a long time, fill it to the "6" mark and run it without using coffee. Discard the hot water, switch off, let it cool, then clean it.
- Before using the coffee maker for the first time, thoroughly wash all components (see the following cleaning and maintenance instructions).
-
To make 3 cups of coffee, unscrew the upper recipient, remove the 3-cup filter adapter and the 6-cup filter basket from the lower recipient, then fill the lower recipient to the 3-cup mark. Replace the 3-cup filter adaptor and the 6-cup filter basket and fill the 3-cup filter with coffee.
-
To make 6 cups of coffee, follow the above procedure but fill the lower recipient to the 6-cup mark and fill only the 6-cup filter with coffee (the 3-cup filter must be removed).
Do not compress the coffee. The use of espresso grind coffee is recommended.
- Screw together tightly the upper and lower recipients, place the coffee maker on the base and insert the plug into the electrical outlet. In just a few minutes the coffee will flow into the upper recipient.
- When the coffee is ready, the indicator light will go out.
- Unplug the base from the electrical outlet, pour the coffee and serve.

IMPORTANT: the cover must remain closed during brewing.

CAUTION: the stainless steel body may become very hot. Do not touch any potentially hot elements until they have cooled.

WARNING: never use the coffee maker without water.
CLEANING
Before cleaning the coffee maker, always remove it from the base and disconnect the plug. Make sure the appliance is resting on a flat surface.
Open the cover and with a soft cloth clean the upper recipient, the stainless steel tube and the cover under running water or in lukewarm soapy water. Wipe the upper recipient inside and out with a moist cloth and dry (Fig. 2).
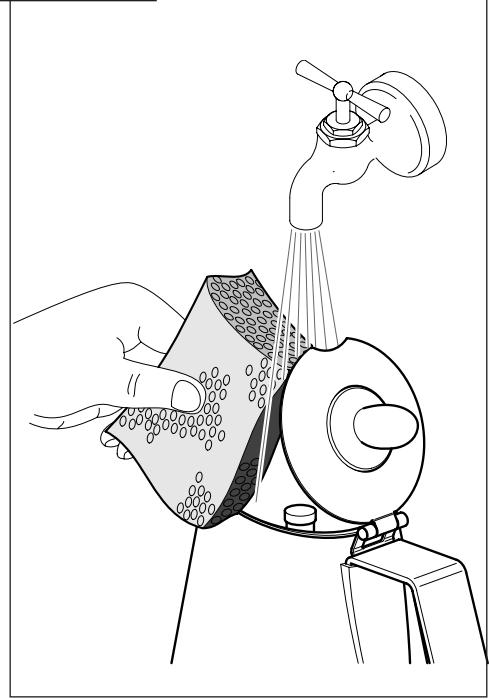
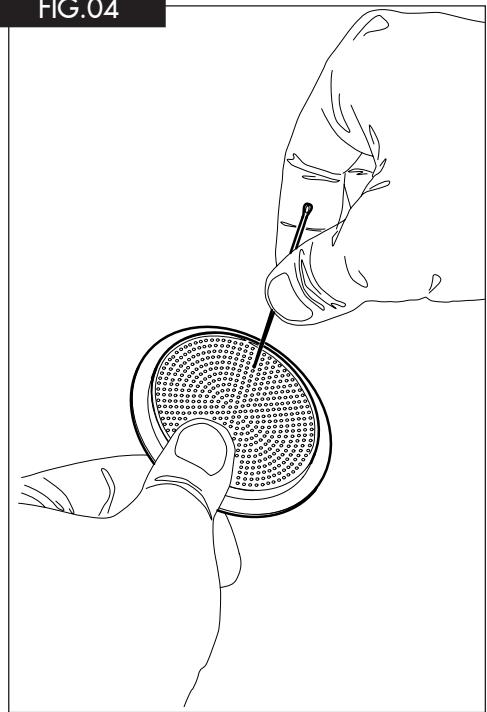
To clean the filter plate, remove the gasket and use a needle to dislodge any coffee grounds clogging the holes (Figs. 3 and 4).
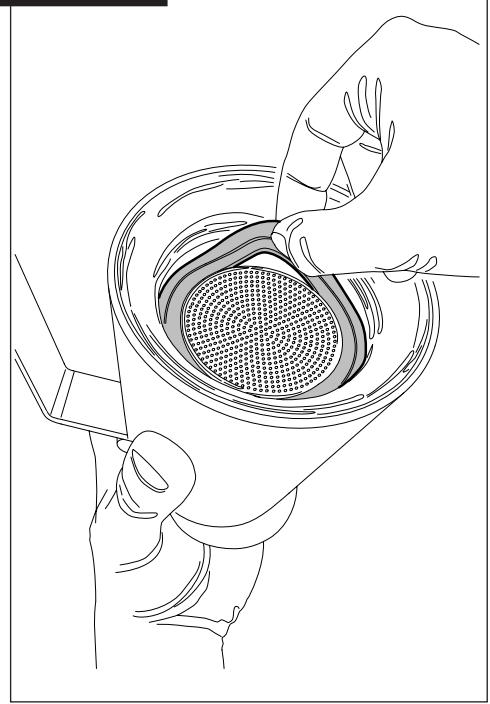
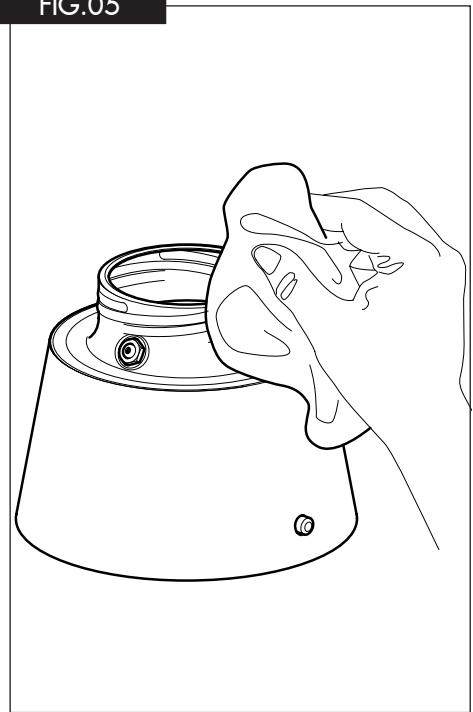
Clean the lower recipient with a soft cloth and dry it (Fig. 5).

WARNING: Never clean with strong detergents or abrasives. Never immer-se the lower part of the Moka and the base in water or other liquids.
Clean only with a soft, moist cloth and dry carefully.
STORAGE AND MAINTENANCE
- Store the coffee maker in a dry place when in use.
- Replace the gasket when it shows signs of wear or damage.
- When storing the coffee maker, remove the gasket and leave the upper and lower recipients only loosely screwed together.
Storage: The power cord is attached to the base. To minimize disorder, unroll only enough to safely reach the electrical outlet, leaving the rest coiled in the base.
Before storing the appliance, wind the power cord around the feet in the base.
Decalcification: After some time of use, calcium deposits may form on the metal parts of the appliance. In order to preserve optimal operation, the decalcification procedure should be carried out on a regular basis to clean the inside of the coffee maker. The frequency will depend on the hardness of the water in your house and how often you use the machine.
Pour two tablespoons of citric acid into the filter basket and fill the coffee maker with 300 ml of water. Make sure the coffee maker is properly assembled and that the cover is closed. Place the coffee maker on the base and insert the plug into the electrical outlet. Perform the normal coffee brewing cycle and dump the cleaning solution when finished.
After decalcifying, before using the coffee maker again, perform the normal coffee brewing cycle with clean, cold water.