
SR-L230I - Alarm clock radio TEAC - Free user manual and instructions
Find the device manual for free SR-L230I TEAC in PDF.


| Product type | Clock radio with iPod docking station |
| Brand | TEAC |
| Model | SR-L230I |
| Dimensions (W × H × D) | 310 × 196 × 101 mm |
| Net weight | 1.9 kg |
| Power supply | 120 V AC, 60 Hz |
| Power consumption | 23 W |
| FM frequency range | 87.50 – 108.00 MHz |
| AM frequency range | 530 – 1,710 kHz |
| Total output power | 3 W + 3 W |
| Speaker type | 2 × 60 mm, impedance 4 Ω |
| Main functions | FM/AM radio, iPod dock, dual alarm, snooze, sleep timer, treble and bass adjustment, sound neutralization, display dimming, headphone listening |
| iPod compatibility | iPod nano, iPod mini, iPod with click wheel, iPod with color display, iPod with video, iPod with dock connector (adapter included or optional) |
| Network access | No |
| Auxiliary inputs | 1 AUX IN jack (stereo mini-jack) |
| Outputs | 1 headphone jack (stereo mini-jack) |
| Remote control | Yes, infrared (range 5 m) |
| Backup battery | CR2032 (lithium battery for clock and memory) |
| Included accessories | Remote control, batteries, AM loop antenna, stereo cable, dock adapters, AC adapter, manual, warranty card |
| Care and cleaning | Wipe with a soft dry cloth; do not use solvents |
| Safety | Do not expose to water, do not block ventilation, unplug before cleaning, use provided AC adapter |
| General information | 64-page manual available for download; design and specifications subject to change without notice |
Frequently Asked Questions - SR-L230I TEAC
User questions about SR-L230I TEAC
0 question about this device. Answer the ones you know or ask your own.
Ask a new question about this device
Download the instructions for your Alarm clock radio in PDF format for free! Find your manual SR-L230I - TEAC and take your electronic device back in hand. On this page are published all the documents necessary for the use of your device. SR-L230I by TEAC.
USER MANUAL SR-L230I TEAC
Includes adapters for:
iPod nano
iPod with video
iPod mini
iPod with Click Wheel
iPod with color display
Adapters sold separately:
iPod with dock connector
The lightning flash with arrowhead symbol, within an equilateral triangle, is intended to alert the user to the presence of uninsulated
"dangerous voltage" within the product's enclosure that may be of sufficient magnitude to constitute a risk of electric shock to persons.

The exclamation point within an equilateral triangle is intended to alert the user to the presence of important operating and
maintenance (servicing) instructions in the literature accompanying the appliance.
IMPORTANT SAFETY INSTRUCTIONS
1) Read these instructions.
2) Keep these instructions.
3) Heed all warnings.
4) Follow all instructions.
5) Do not use this apparatus near water.
6) Clean only with dry cloth.
7) Do not block any ventilation openings. Install in accordance with the manufacturer's instructions.
8) Do not install near any heat sources such as radiators, heat registers, stoves, or other apparatus (including amplifiers) that produce heat.
9) Do not defeat the safety purpose of the polarized or grounding-type plug. A polarized plug has two blades with one wider than the other. A grounding type plug has two blades and a third grounding prong. The wide blade or the third prong are provided for your safety. If the provided plug does not fit into your outlet, consult an electrician for replacement of the obsolete outlet.
10) Protect the power cord from being walked on or pinched particularly at plugs, convenience receptacles, and the point where they exit from the apparatus.
11) Only use attachments/accessories specified by the manufacturer.
12) Use only with the cart, stand, tripod, bracket, or table specified by the manufacturer, or sold with the apparatus. When a cart is used, use caution when moving the cart/apparatus combination to tip-over.

13) Unplug this apparatus during lightning storms or when unused for long periods of time.
14) Refer all servicing to qualified service personnel. Servicing is required when the apparatus has been damaged in any way, such as power-supply cord or plug is damaged, liquid has been spilled or objects have fallen into the apparatus, the apparatus has been exposed to rain or moisture, does not operate normally, or has been dropped.
- Do not expose this apparatus to dripps or splashes.
- Do not place any objects filled with liquids, such as vases, on the apparatus.
- Do not install this apparatus in a confined space such as a book case or similar unit.
- The apparatus draws nominal non-operating power from the AC outlet with its STANDBY/ON switch in the standby position.
- The apparatus should be located close enough to the AC outlet so that you can easily grasp the power cord plug at any time.
- An apparatus with Class I construction shall be connected to an AC outlet with a protective grounding connection.
CAUTION
DO NOT REMOVE THE EXTERNAL CASES OR CABINETS TO EXPOSE THE ELECTRONICS. NO USER SERVICEABLE PARTS ARE WITHIN!
- IF YOU ARE EXPERIENCING PROBLEMS WITH THIS PRODUCT, CONTACT TEAC FOR A SERVICE REFERRAL. DO NOT USE THE PRODUCT UNTIL IT HAS BEEN REPAIRED.
WARNING: TO PREVENT FIRE OR SHOCK HAZARD, DO NOT EXPOSE THIS APPLIANCE TO RAIN OR MOISTURE.
For U.S.A.
This equipment has been tested and found to comply with the limits for a Class B digital device, pursuant to Part 15 of the FCC Rules. These limits are designed to provide reasonable protection against harmful interference in a residential installation. This equipment generates, uses, and can radiate radio frequency energy and, if not installed and used in accordance with the instructions, may cause harmful interference to radio communications. However, there is no guarantee that interference will not occur in a particular installation. If this equipment does cause harmful interference to radio or television reception, which can be determined by turning the equipment off and on, the user is encouraged to try to correct the interference by one or more of the following measures:
- Reorient or relocate the equipment and/or the receiving antenna.
- Increase the separation between the equipment and receiver.
- Connect the equipment into an outlet on a circuit different from that to which the receiver is connected.
- Consult the dealer or an experienced radio/TV technician for help.
CAUTION
Changes or modifications to this equipments not expressly approved by TEAC CORPORATION for compliance will void the user's warranty.
Contents
Thank you for choosing TEAC. Read this manual carefully to get the best performance from this unit.
Before Using the Unit 4
Remote Control Unit. 5
Connections 6
Unit Functions 8
Display 10
Getting Started. 10
Setting the Clock 12
Basic Operation 13
Listening to iPod 15
Operating iPod 16
Listening to an External Source 17
Listening to the Radio. 18
Preset Tuning 19
Timer 20
Specifications 22
Troubleshooting 23
Before Using the Unit
Read this before attempting any operations.
- As the unit may become warm during operation, always leave sufficient space around the unit for ventilation.
- The voltage supplied to the unit should match the voltage as printed on the rear panel. If you are in any doubt regarding this matter, consult an electrician.
- Choose the installation location of your unit carefully. Avoid placing it in direct sunlight or close to a source of heat. Also avoid locations subject to vibrations and excessive dust, heat, cold or moisture.
- Do not place the unit on an amplifier/receiver.
- Do not open the cabinet as this might result in damage to the circuitry or electrical shock. If a foreign object should get into the unit, contact your dealer or service company.
- When removing the power plug from the wall outlet, always pull directly on the plug, never yank the cord.
- Do not attempt to clean the unit with chemical solvents as this might damage the finish. Use a clean, dry cloth.
- Keep this manual in a safe place for future reference.
The provided remote control unit allows the unit to be operated from a distance.
When operating the remote control unit, point it towards the remote sensor on the front panel of the unit.
- Even if the remote control unit is operated within the effective range (5 m), remote control operation may be impossible if there are any obstacles between the unit and the remote control unit.
- If the remote control unit is operated near other products which generate infrared rays, or if other remote control devices using infrared rays are used near the unit, it may operate incorrectly. Conversely, the other products may operate incorrectly.
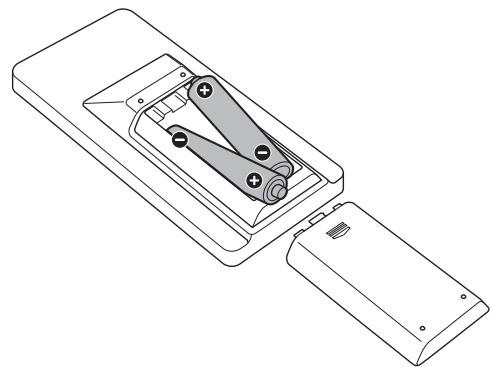
Battery installation
- Remove the battery compartment cover.
- Insert two "AAA" (R03 or UM-4) dry batteries. Make sure that the batteries are inserted with their positive “⊕” and negative “ ” polarities positioned correctly.
- Close the cover.
Battery replacement
If the distance required between the remote control unit and main unit decreases, the batteries are exhausted. In this case replace the batteries with new ones.
Precautions concerning batteries
- Be sure to insert the batteries with correct positive "⊕" and negative "⊗" polarities.
- Use batteries of the same type. Never use different types of batteries together.
- Rechargeable and non-rechargeable batteries can be used. Refer to the precautions on their labels.
- When the remote control unit is not to be used for a long time (more than a month), remove the batteries from the remote control unit to prevent them from leaking. If they leak, wipe away the liquid inside the battery compartment and replace the batteries with new ones.
- Do not heat or disassemble batteries and never dispose of old batteries by throwing them in a fire.
CAUTION:
- Switch off (standby) the power before making connections.
- Read the instructions of each component you intend to use with this unit.
- Be sure to insert each plug securely. To prevent hum and noise, do not bundle the connection cords.
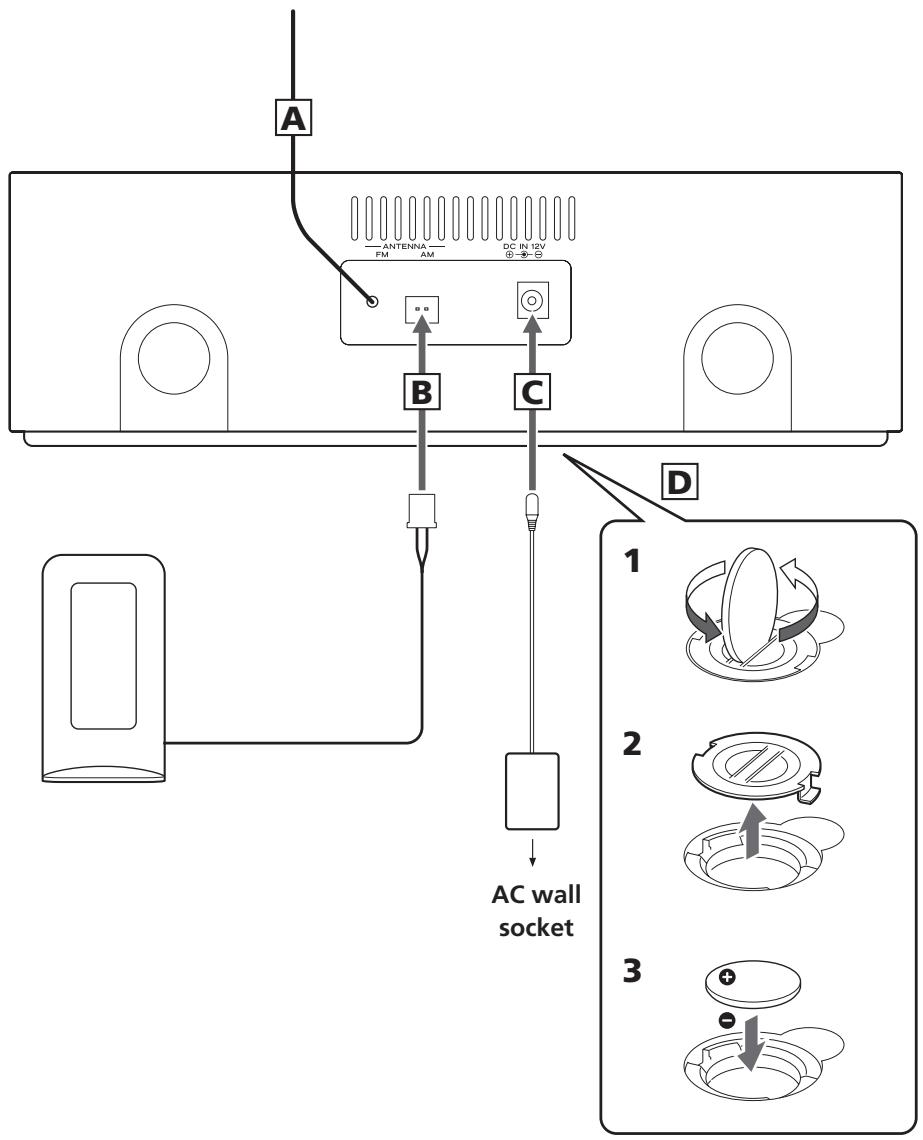
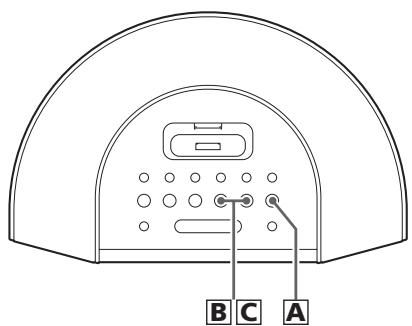
A FM antenna
While in FM mode, tune in an FM station and extend the lead to find the best position for the reception. This antenna may need to be repositioned if you move your unit to a new location.
B AM loop antenna
Connect the supplied AM loop antenna to the AM ANTENNA terminal.
Place the antenna in the direction which gives the best reception.
C DC IN jack
Connect the provided AC adapter to this jack. Then connect the AC adapter's plug to the AC wall socket.
- Do not use any AC adapters other than the one included with this unit to avoid fire, electric shock, etc. Be sure to connect the adapter to an AC outlet that supplies the correct voltage.
D Battery compartment
The battery supplies a backup power to the built-in clock and memory, when the unit is momentarily disconnected from the AC outlet.
Battery installation
- Loosen the lid using a coin, etc.
- Remove the lid.
3.Insert a CR2032 lithium-ion battery with it's positive face facing outer side. - Replace the lid.
Battery replacement
If the clock comes to indicate the wrong time, replace the battery with a new one.
Precautions concerning button-shaped battery
- Be sure to insert the battery with correct positive "⊕" and negative "Θ" polarities.
- Do not heat or disassemble battery and never dispose of old battery by throwing them in a fire.
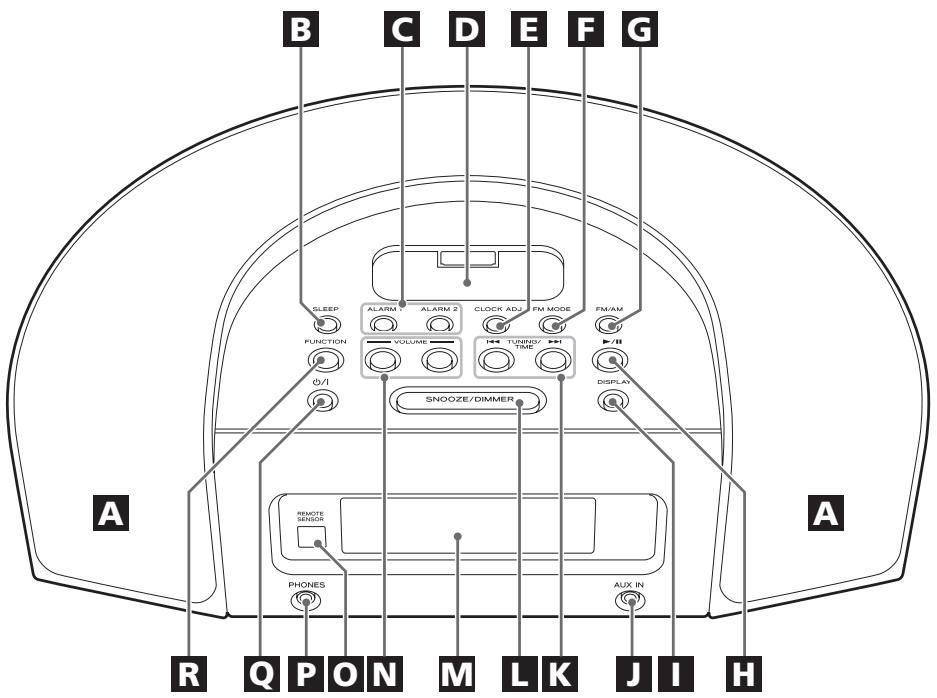
A Speakers (Stereo)
B SLEEP
Use this button to set sleep timer.
ALARM 1, ALARM 2
Hold down these buttons for more than 2 seconds to enter the timer setting mode.
Also these buttons are used to turn on or off the timer function.
D Dock connector
Before use, insert an appropriate Dock adapter in the Dock (see page 10).
Insert an iPod mobile digital device into this dock.
CLOCK ADJ
Use this button for clock adjustment.
FM MODE
In FM TUNER mode, use this button to select stereo or monaural.
FM/AM
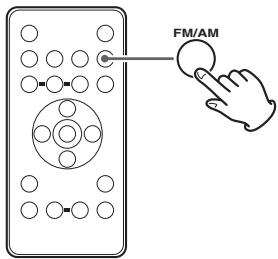
In TUNER mode, press this button to select FM or AM.
H Play/Pause (▶/II)
Use this button to start or pause playback of iPod.
DISPLAY
In standby mode, use this button to check the timer on/off time.
During the snooze function is working, use this button to display the current time.
AUX IN
You can connect a portable audio player to this jack.
See page 17 for details.
In TUNER mode, use these buttons to tune in stations.
In iPod mode, use these buttons to skip tracks. Hold down this button to search for a part of a track.
SNOOZE/DIMMER
After the TIMER ON time is reached, use this button to turn the unit off for 5 minutes.
This button is also used for display dimming.
Display
VOLUME
Press these buttons to adjust the volume level.
Remote sensor
When operating the remote control unit, point it towards here.
PHONES
For private listening, insert the headphones plug into this jack, and adjust the volume using the VOLUME button.
See page 14 for details.
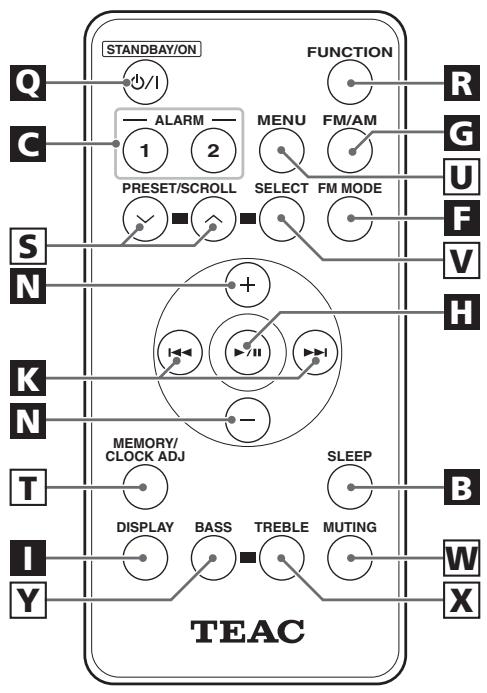
Q Standby/on (O/1)
Use this button to turn the unit on or standby.
FUNCTION
Use these buttons to select the source you want to listen to.
5 PRESET/SCROLL(√/∧)
In TUNER mode, use these buttons to select a preset station.
In iPod mode, use these buttons to scroll up and down the menu.
T MEMORY/CLOCK ADJ
In the TUNER mode, use this button to store preset channels into memory.
This button is also used for clock adjustment.
U MENU
Use this button to go back to the previous menu.
V SELECT
Use this button to confirm selection in menus.
W MUTING
Use this button to mute the sound.
TREBLE
Use this button to enter treble level adjustment mode.
Y BASS
Use this button to enter bass level adjustment mode.
Note:
To simplify explanations, instructions in this manual refer to the names of the buttons and controls on the front panel only. Associated controls on the remote control will also operate similarly.
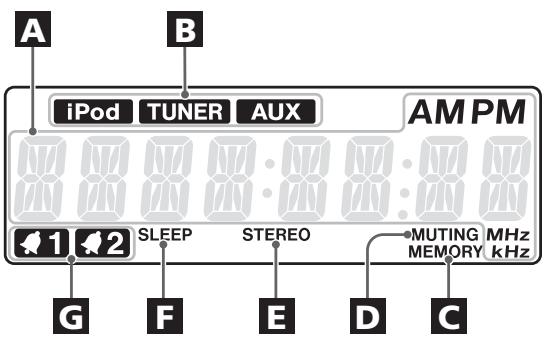
A Shows the digital clock, frequency, sleep time or preset channels.
B When the unit is on, one of these indicators lights to show the current source.
C Lights in preset tuning mode.
Lights during muting.
E Lights when an FM stereo broadcast is tuned.
F Lights when the sleep function is active.
Lights when the timer is on.
The SR-L230i comes mounted with an adapter "60GB (color) + Photo 40/60GB". To play your iPod through the SR-L230i, you have first to check if the factory mounted adapter fits your model of iPod. If it does not, you have to replace it with a correct one, as explained below.
- Remove the adapter from the Dock of the SR-L230i.
Hold the left and right sides of the adapter and gently pull it up.
- Choose the Dock adapter that fits your iPod mobile digital device.
"nano" for iPod nano.
"mini" for iPod mini.
"20GB (color) + Photo 30GB" for iPod with color display (20GB, 30GB, U2 Special Edition).
"60GB (color) + Photo 40GB/60GB" for iPod with Click Wheel (40 GB), iPod with color display (40 GB, 60 GB) and iPod with video (60 GB).
"20GB + U2" for iPod with Click Wheel (20 GB, U2 Special Edition) and iPod with video (30 GB).
- Use a commercially available adapter to play iPod with dock connector.
3. Insert the adapter into the Dock of the SR-L230i.
Fit the front edge of the adapter into the Dock, and then press the back edge of the adapter onto the Dock until a slight "click" is heard indicating the adapter is inserted correctly.
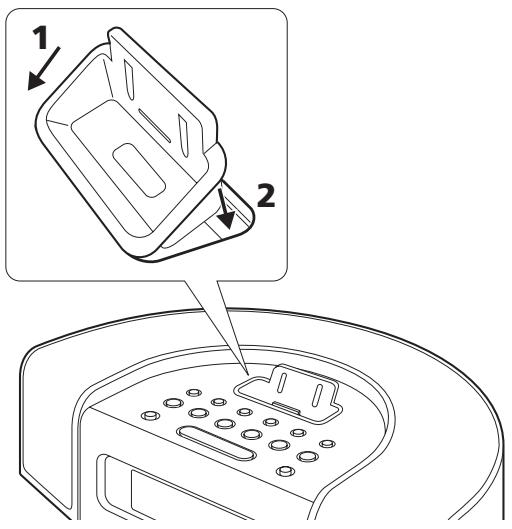
- When you need to remove the adapter, hold the left and right sides of the adapter and gently pull it up.
Compatible iPod Software
In case your iPod will not work with the SR-L230i or with the remote control unit, software update may solve the problem.
Visit the Apple website and download the latest iPod Software.
http://www.apple.com/ipod/download/
iPod is a trademark of Apple Computer, Inc., registered in the U.S. and other countries.
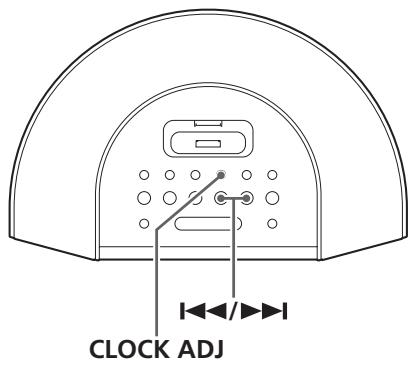
- You cannot set the clock when the source is "TUNER".
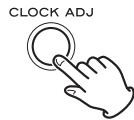
Press the CLOCK ADJ button to display the clock.
Press the CLOCK ADJ button again.
"12 HR" or "24 HR" blinks on the display. If you want to change the hour mode, press the 1 or 2 button.
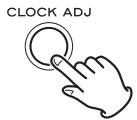
- When no button is pressed for 8 seconds, the timer setting mode will be cancelled.
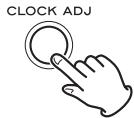
Press the CLOCK ADJ button again.
The "hour" value blinks.
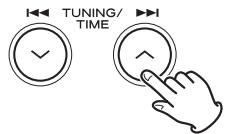
4 Press the skip button (I / ) to set the current hour.
Press the CLOCK ADJ button.
The "minute" value blinks.
6 Press the skip button ( / ) to set the current minute.
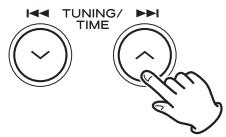
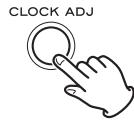
Press the CLOCK ADJ button.
The clock starts.
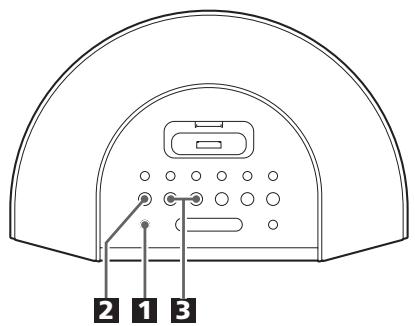
Press the /1 button to turn the unit on.
- The unit turns on with the source that was last selected. If the iPod that is in playback mode is inserted into the Dock, the SR-L230i will automatically turn on and start playback of the iPod.
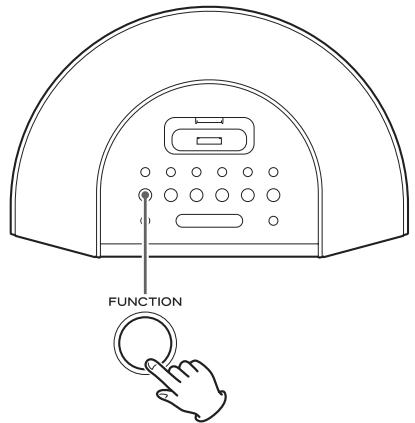
Press the FUNCTION button to select a source.
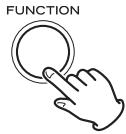
- To listen to an external source connected to the AUX IN jack, select AUX.
- If you select "iPod" when no iPod is docked, the iPod indicator on the display blinks.
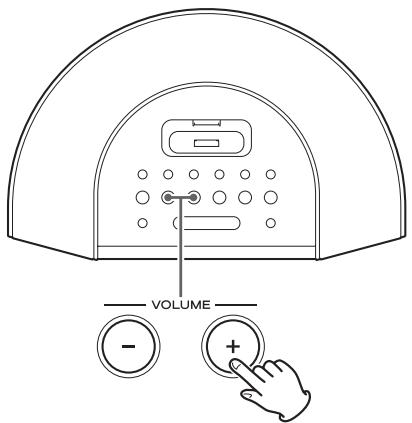
3 Play the source, and adjust the volume using the VOLUME buttons (- / + )
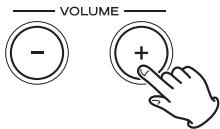
The volume is adjustable from MIN (0) to MAX (40). Hold down the VOLUME - or + button to turn down or up the volume continuously.
Dimmer

You can change the front panel's display brightness. Use the DIMMER button to change the brightness between three levels.
- This function will be cancelled when the button is pressed.
Muting
To mute the sound temporarily, press the MUTING button. Press the MUTING button again to restore the sound.
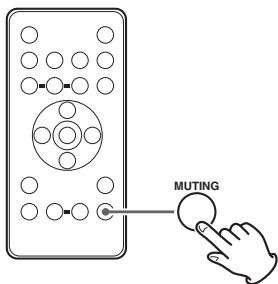
- The MUTING indicator lights on the display to indicate that the muting is engaged.
- If you change the volume or source during the muting, the muting will be canceled.
Adjusting the bass and treble sound
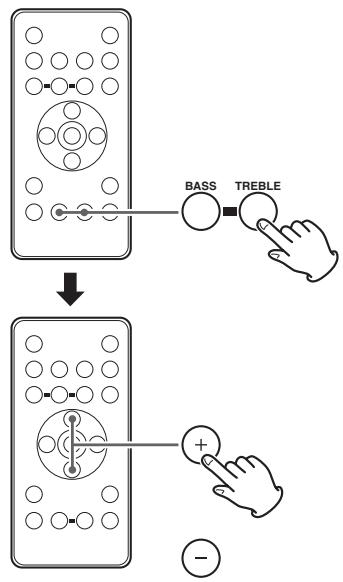
You can change the bass and treble sound between "−5" to "+"5".
Press the BASS or TREBLE button. And then press the VOLUME buttons (- / +) to adjust the sound level within 3 seconds.
Headphones
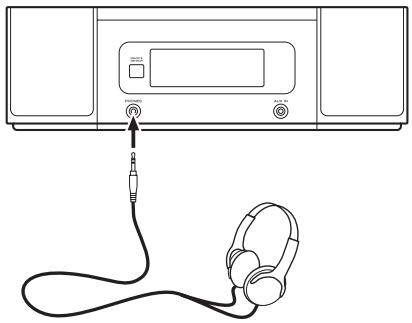
Insert the headphones plug into the PHONES jack, and adjust the volume.
CAUTION
Always lower the volume level prior to plugging in your headphones. TO AVOID DAMAGING YOUR HEARING - Do not place your headphones on your head until after you have plugged them in.
Sleep timer
Each press of the SLEEP button permits setting an interval (from 90 down to 10 minutes). The unit will automatically turn off and then into Standby mode.
Each press of the SLEEP button changes the time indication by 10 minutes.
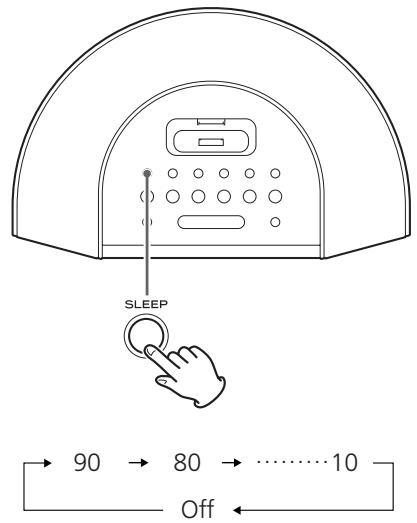
- When you want to check remaining time, press the SLEEP button once.
- If you press the SLEEP button twice, the sleep timer is cancelled.
Insert the iPod into the Dock of the SR-L230i.
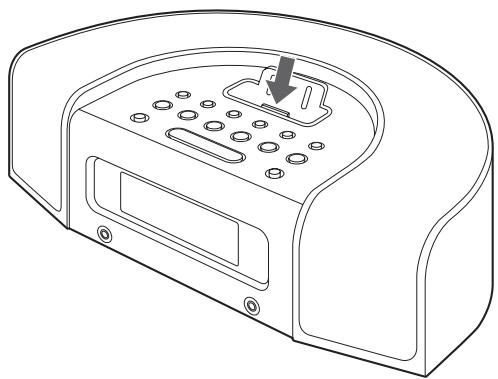
Then push the Play/Pause button ( / ) on the iPod or the SR-L230i. The SR-L230i will automatically turn on and start playback from the iPod's music list.
- Make sure to use an appropriate Dock adapter (see "Getting Started" on page 10).
- The battery of the iPod is recharged to the full whenever the iPod is docked and the SR-L230i is ON.
- When headphones are plugged into the iPod, sound comes from both the speakers of the SR-L230i and the headphones.
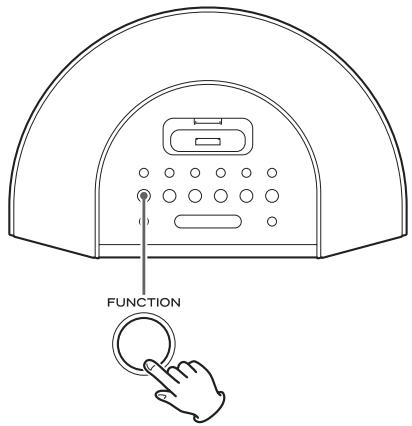
To select iPod mode
Select "iPod" using the FUNCTION button. If an iPod is already docked, playback will start.
When no iPod is docked, the iPod indicator on the display blinks.
- You can also use the Play/Pause button (▶/II) to select "iPod".
A To suspend playback temporarily (pause mode)
Press the Play/Pause button ( / ) during playback. Playback stops at the current position.
To resume playback, press the Play/Pause button ( / ) again.
Search for a part of a track
During playback, hold down the skip button (I or ) for more than 2 seconds and release it when the part you want to listen to is found.
C To skip to the next or a previous track
During playback, repeatedly press the skip button (1 or 1) until the desired track is found. The selected track will be played from the beginning.
- When the 1 button is pressed during playback, the track being played will be played from the beginning. To return to the beginning of the previous track, press the 1 button twice.
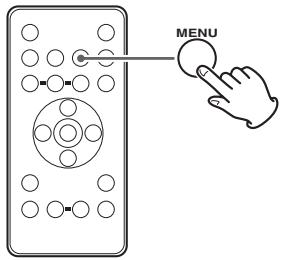
To go back to the previous menu
Press the MENU button. This button works with the same functions as its iPod counterpart.
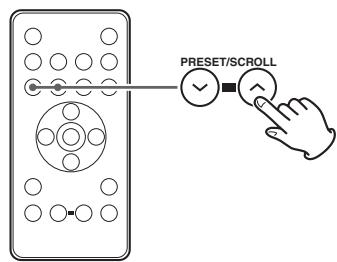
Select the menu item
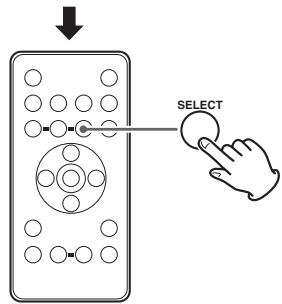
Press the SCROLL buttons ( /) to scroll to the menu item you want. And then press the SELECT button.
1 Connect the PHONES jack (audio output jack) of a portable audio player to the AUX IN jack of the SR-L230i using the supplied stereo mini plug cable.
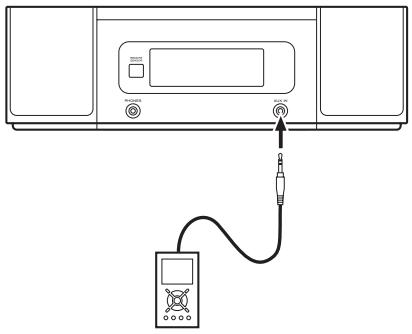
You can use this way of connection to listen to an iPod that has no Dock connector or that has, but an appropriate Dock adapter is not available.
2 Select "AUX" using the FUNCTION button.
3 Play the source, and adjust the volume of both the SR-L230i and the audio player.
When using the PHONES jack of your mini player, you must adjust the volume of the mini-player or you may hear no sound from your SR-L230i.
- Turning the volume of the mini player up too high may cause the sound from your SR-L230i to be distorted. If this is the case, reduce the volume of the mini player until the distortion stops and then adjust the volume level of the SR-L230i to a comfortable listening level.
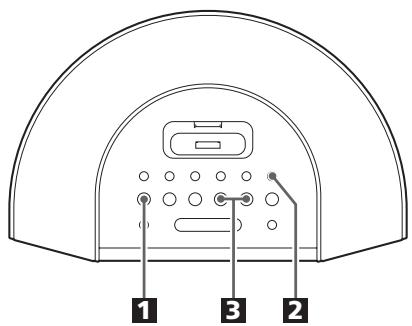
1 Select "TUNER" using the FUNCTION button.
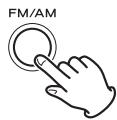
2 Select FM or AM using the FM/AM button.
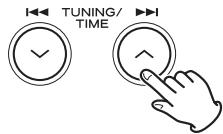
3 Select the station you want to listen to (auto selection).
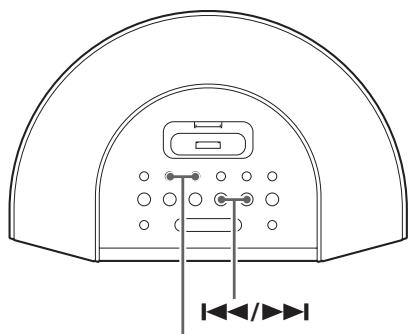
Hold down the skip button (I or ) for more than 2 seconds and release it when the frequency display begins to change.
When a station is tuned in, the tuning process will stop automatically.
- To stop the auto selection, press the skip button.
Selecting stations which cannot be tuned automatically (manual selection)
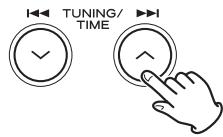
When the skip button (or ) is pressed momentarily the frequency changes by a fixed step. Press the skip button repeatedly until the station you want to listen to is found.
Checking the tuner frequency
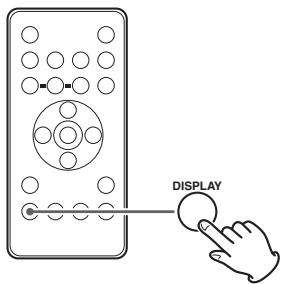
Press the DISPLAY button. The current band and frequency displays for 20 seconds.
If the reception is poor
For the best reception, rotate the FM or the AM antenna until you get stations clearly.
FM MODE Button
Pressing this button alternates between Stereo mode and Mono mode.
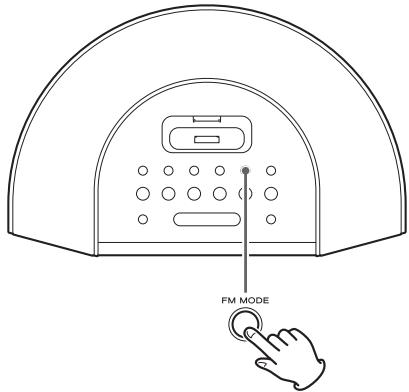
Stereo
FM stereo broadcasts are received in stereo and the "STEREO" indicator lights in the display.
- If the sound is distorted and the "STEREO" indicator flashes, the signal is not strong enough for good stereo reception. In this case, change to MONO mode.
Mono
To compensate for weak FM stereo reception, select this mode. Reception will now be forced monaural, reducing unwanted noise.
You can program 20 FM & 20 AM channel presets.
1 Tune in a station you want to listen to (see page 18).
Press the MEMORY button.
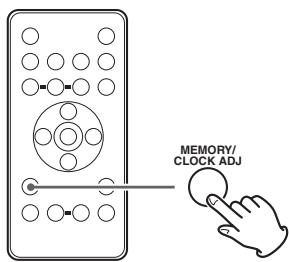
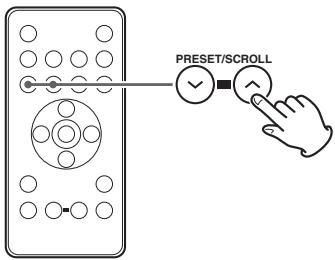
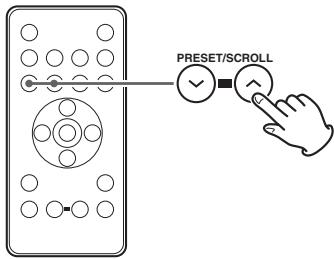
3 Within 10 seconds, select a preset channel to store the station using the PRESET ( / ) buttons.
4 Within 10 seconds, press the MEMORY button.
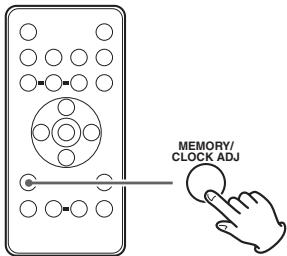
To store more stations, repeat steps 1 to 4.
How to select a preset station
To select FM or AM, press the FM/AM button.
Press the PRESET ( / ) buttons repeatedly until the desired preset station is found.
ALARM 1, ALARM 2
- The unit can be set two different timer settings separately.
- Adjust the clock before setting the timer (see page 12).
Setting the timer
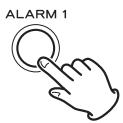
Press and hold the ALARM 1 or ALARM 2 button for more than 2 seconds to display "ON".
The clock and the Timer indicator (or 2) blinks on the display.
- If no button is pressed for about 8 seconds, the timer setting mode will be cancelled.
Press the skip buttons (I or ) to set the hour, and then press the ALARM 1 or ALARM 2 button.
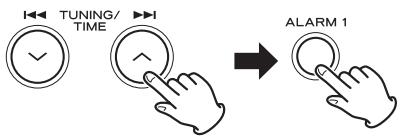
Press the skip buttons (i or ) to set the minute, and then press the ALARM 1 or ALARM 2 button.
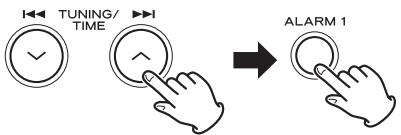
Now the on time is set.
"OFF" and the off time value blink.
4 Press the skip buttons (i or ) to set the hour, and then press the ALARM 1 or ALARM 2 button.
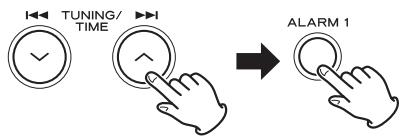
Press the skip buttons (i or ) to set the minute, and then press the ALARM 1 or ALARM 2 button.
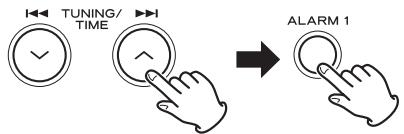
Now the off time is set.
"iPod" or "TUNER" blinks.
6 Select a source (iPod or TUNER) using the skip buttons (丨 / ) , and then press the ALARM 1 or ALARM 2 button.
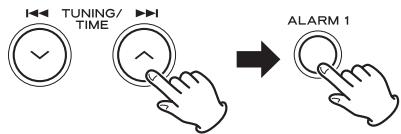
- You cannot select "AUX".
7 Set the volume using the skip buttons (丨 < 丨 /丨 >丨) , and then press the ALARM 1 or ALARM 2 button.

The volume for timer operation is adjustable from 10 to max.
Setting the timer is now completed.
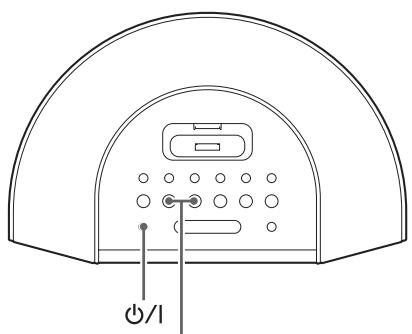
ALARM 1, ALARM 2
To turn on the timer
After setting the timer, press the ALARM 1 or ALARM 2 button to turn the timer on.
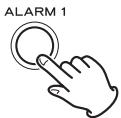
The Timer indicator (or 2) appears on the display.
Prepare the source.
When the source is set to "iPod", insert an iPod.
When the source is set to "TUNER", tune in a station.
Press the / button to turn the unit standby.
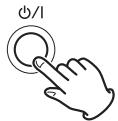
Don't forget to turn the unit standby, or the timer won't work.
If you turn the timer on when the unit is on, the unit will turn off when the timer reaches the off time.
- Playback volume will gradually increase up to your set volume when the unit is turned on by timer.
- If the source is set to "iPod" but no iPod is set, the unit will turn on into TUNER mode.
- When the source is set to "TUNER" and the unit turns on, it will tune in to the station you selected last time.
To turn off the timer
When you don't use the timer, press the ALARM 1 or ALARM 2 button to turn it off.
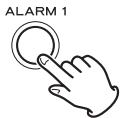
The Timer indicator (or) disappears from the display.
Press the ALARM 1 or ALARM 2 button again to turn it on.
How to use the snooze function
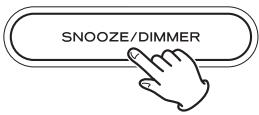
After the ON time is reached, press the SNOOZE button and the unit will turn off for 5 minutes then turn on again.
You can use this function repeatedly up to 10 times.
- If you want to know the current time after the SNOOZE button is pressed, press the DISPLAY button.
- During timer playback and snoozing, all the function cannot work except the following buttons:
ALARM 1, ALARM 2, SNOOZE, DISPLAY
TUNER Section
Frequency Range . . . FM: 87.5 MHz to 108.0 MHz
AM: 530 kHz to 1,710 kHz
SPEAKER SYSTEM Section
Type 60 mm x 2
Impedance. 4 ohms
GENERAL
Total Output Power 3 W + 3 W
Power Requirement. AC 120 V, 60 Hz
Power Consumption 23 W
Dimension (W× H× D) 123/16" x 7 11/16" x 4"
(310 × 196 × 101 ~mm)
Weight (Net). 43/16 lb (1.9 kg)
Standard Accessories
Remote Control Unit (RC-1151W or RC-1151B) x 1
Battery for Remote Control Unit (AAA) x 2
Battery for Memory Backup (CR2032) x 1
AM loop antenna x 1
Dock adapter x 5
(adapter "60GB (color) + Photo 40/60GB" premounted)
- Design and specifications are subject to change without notice.
- Weight and dimensions are approximate.
- Illustrations may differ slightly from production models.
If you have problems with your system, look through this chart and see if you can solve the problem yourself before calling your dealer or TEAC service center.
General
No power
Check the connection to the AC power supply. Check and make sure the AC source is not a switched outlet and that, if it is, the switch is turned on. Make sure there is power to the AC outlet by plugging another item such as a lamp or fan into the outlet.
No sound from speakers.
Select the source by pressing the FUNCTION button.
Adjust the volume.
Pull out the headphone's plug from the PHONES jack.
If the MUTING indicator lights on the display, press the MUTING button.
The sound is noisy.
The unit is too close to a TV or similar appliances. Install the unit apart from them, or turn them off.
Remote control doesn't work.
If the battery is exhausted, replace it with a new one (see page 5).
Use remote control unit within the range (5m) and point at the remote sensor on the front panel.
Clear obstacles between the remote control unit and the main unit.
If a strong light is near the unit, turn it off.
iPod Player
Cannot insert the iPod.
Check the dock adapter (see page 10).
Remove dust or obstacles from the Dock connector of the SR-L230i and the iPod, and insert the iPod again.
Will not play.
Remove the iPod from the dock, wait a few seconds, and insert it again.
Software update may solve the problem. Visit the Apple website and download the latest iPod Software (see page 11).
Cannot operate the iPod.
Set off the HOLD switch of the iPod.
Tuner
Cannot listen to any station, or signal is too weak.
Tune in the station properly.
Rotate the FM or the AM antenna until you get stations clearly.
If normal operation cannot be recovered, unplug the power cord from the outlet and plug it again.
Maintenance
If the surface of the unit gets dirty, wipe with a soft cloth or use a diluted mild liquid soap. Be sure to remove any excess liquid completely. Do not use thinner, benzine or alcohol as they may damage the surface of the unit. Allow the surface of the unit to dry completely before using.
Sommaire
H Lecture/Pause (▶/II)
http://www.apple.com/ipod/download/
ALARM 1, ALARM 2, SNOOZE, DISPLAY
Section SYNTONISEUR
ALARM 1, ALARM 2, SNOOZE, DISPLAY
Especificaciones
AM: 530 kHz-1,710 kHz
This appliance has a serial number located on the rear panel. Please record the model number and serial number and retain them for your records.
Model number
Serial number
- Includes adapters for:
- Adapters sold separately:
- IMPORTANT SAFETY INSTRUCTIONS
- CAUTION
- For U.S.A.
- Contents
- Thank you for choosing TEAC. Read this manual carefully to get the best performance from this unit.
- Before Using the Unit
- Read this before attempting any operations.
- Battery replacement
- Precautions concerning batteries
- CAUTION:
- A FM antenna
- B AM loop antenna
- C DC IN jack
- D Battery compartment
- Battery installation
- Precautions concerning button-shaped battery
- A Speakers (Stereo)
- B SLEEP
- ALARM 1, ALARM 2
- D Dock connector
- CLOCK ADJ
- FM MODE
- FM/AM
- H Play/Pause (▶/II)
- DISPLAY
- AUX IN
- SNOOZE/DIMMER
- VOLUME
- Remote sensor
- PHONES
- Q Standby/on (O/1)
- FUNCTION
- PRESET/SCROLL(√/∧)
- T MEMORY/CLOCK ADJ
- U MENU
- V SELECT
- W MUTING
- TREBLE
- Y BASS
- Note:
- Insert the adapter into the Dock of the SR-L230i.
- Compatible iPod Software
- Press the /1 button to turn the unit on.
- Press the FUNCTION button to select a source.
- Play the source, and adjust the volume using the VOLUME buttons (- / + )
- Dimmer
- Muting
- Adjusting the bass and treble sound
- Headphones
- Sleep timer
- Selecting stations which cannot be tuned automatically (manual selection)
- Checking the tuner frequency
- If the reception is poor
- FM MODE Button
- Stereo
- Mono
- How to select a preset station
- Setting the timer
- To turn on the timer
- To turn off the timer
- How to use the snooze function
- TUNER Section
- SPEAKER SYSTEM Section
- GENERAL
- Standard Accessories
- No power
- No sound from speakers.
- The sound is noisy.
- Remote control doesn't work.
- iPod Player
- Cannot insert the iPod.
- Will not play.
- Cannot operate the iPod.
- Tuner
- Maintenance
- Sommaire
- H Lecture/Pause (▶/II)
- Section SYNTONISEUR
- Especificaciones
Brand : TEAC
Model : SR-L230I
Category : Alarm clock radio