
GR-7I - Alarm clock radio TEAC - Free user manual and instructions
Find the device manual for free GR-7I TEAC in PDF.


| Product Type | Radio alarm clock with iPod dock |
| Brand | TEAC |
| Model | GR-7I |
| FM Frequency Range | 87.50 MHz to 108.00 MHz |
| AM Frequency Range | 520 kHz to 1,710 kHz |
| Speaker System | 2 x 50 mm, impedance 6 ohms |
| Output Power | 3 W + 3 W |
| Power Supply | 120 V AC, 60 Hz (AC adapter included) |
| Power Consumption | 25 W |
| Clock Backup Battery | 2 AA batteries (not included) |
| Remote Control Battery | Lithium CR2032, 3V |
| iPod Compatibility | iPod nano, iPod with video, iPod mini, iPod with Click Wheel, iPod with color display (adapters included) |
| USB Port for iPod shuffle | Yes (USB socket) |
| Auxiliary Input (AUX IN) | Stereo mini-jack |
| Headphone Output | PHONES jack (mini-jack) |
| FM Antenna | Wire |
| AM Antenna | Loop antenna supplied |
| Main Functions | Clock with date, dual alarm, sleep timer, snooze, display dimmer, sound off |
| Remote Control | Infrared, CR2032 battery |
| Dimensions (approx.) | 200 x 120 x 100 mm |
| Weight (approx.) | 1.0 kg |
| Included Accessories | 8 dock adapters, dock cover, stereo mini-jack cable, AC adapter, manual, warranty card |
| Care and Cleaning | Clean with a soft dry cloth; do not use solvents |
| Safety | Do not expose to water, do not open the casing, unplug if not used for a long time |
Frequently Asked Questions - GR-7I TEAC
User questions about GR-7I TEAC
0 question about this device. Answer the ones you know or ask your own.
Ask a new question about this device
Download the instructions for your Alarm clock radio in PDF format for free! Find your manual GR-7I - TEAC and take your electronic device back in hand. On this page are published all the documents necessary for the use of your device. GR-7I by TEAC.
USER MANUAL GR-7I TEAC
Includes adapters for:
iPod nano
iPod with video
iPod mini
iPod with Click Wheel
iPod with color display
Adapters sold separately:
iPod with dock connector
Hi-Fi Table Radio
OWNER'S MANUAL
MANUEL DU PROPRIÉTAIRE
MANUAL DEL USUARIO

Made for
iPod
The lightning flash with arrowhead symbol, within an equilateral triangle, is intended to alert the user
to the presence of uninsulated "dangerous voltage" within the product's enclosure that may be of sufficient magnitude to constitute a risk of electric shock to persons.

The exclamation point within anequilateral triangle is intended toalert the user to the presence of
important operating and maintenance (servicing) instructions in the literature accompanying the appliance.
IMPORTANT SAFETY INSTRUCTIONS
CAUTION
- Read all of these Instructions.
- Save these Instructions for later use.
- Follow allWarnings and Instructions marked on the audio equipment.
1) Read Instructions — All the safety and operating instructions should be read before the product is operated.
2) Retain Instructions - The safety and operating instructions should be retained for future reference.
3) HeedWarnings-All warnings on the product and in the operating instructions should be adhered to.
4) Follow Instructions — All operating and use instructions should be followed.
5) Cleaning — Unplug this product from the wall outlet before cleaning. Do not use liquid cleaners or aerosol cleaners. Use a damp cloth for cleaning.
6) Attachments — Do not use attachments not recommended by the product manufacturer as they may cause hazards.
7) Water and Moisture — Do not use this product near water — for example, near a bath tub, wash bowl, kitchen sink, or laundry tub; in a wet basement; or near a swimming pool; and the like.
8) Accessories — Do not place this product on an unstable cart, stand, tripod, bracket, or table. The product may fall, causing serious injury to a child or adult, and serious damage to the product. Use only with a cart, stand, tripod, bracket, or table recommended by the manufacturer, or sold with the product. Any mounting of the product should follow the manufacturer's instructions, and should use a mounting accessory recommended by the manufacturer.
9) A product and cart combination should be moved with care. Quick stops, excessive force, and uneven surfaces may cause the product and cart combination to overturn.

10) Ventilation — Slots and openings in the cabinet are provided for ventilation and to ensure reliable operation of the product and to protect it from overheating, and these openings must not be blocked or covered. The openings should never be blocked by placing the product on a bed, sofa, rug, or other similar surface. This product should not be placed in a built-in installation such as a bookcase or rack unless proper ventilation is provided or the manufacturer's instructions have been adhered to.
11) Power Sources — This product should be operated only from the type of power source indicated on the marking label. If you are not sure of the type of power supply to your home, consult your product dealer or local power company. For products intended to operate from battery power, or other sources, refer to the operating instructions.
12) Grounding or Polarization — This product may be equipped with a polarized alternating-current line plug (a plug having one blade wider than the other). This plug will fit into the power outlet only one way. This is a safety feature. If you are unable to insert the plug fully into the outlet, try reversing the plug. If the plug should still fail to fit, contact your electrician to replace your obsolete outlet. Do not defeat the safety purpose of the polarized plug.
13) Power-Cord Protection — Power-supply cords should be routed so that they are not likely to be walked on or pinched by items placed upon or against them, paying particular attention to cords at plugs, convenience receptacles, and the point where they exit from the product.
14) Outdoor Antenna Grounding — If an outside antenna or cable system is connected to the product, be sure the antenna or cable system is grounded so as to provide some protection against voltage surges and built-up static charges. Article 810 of the National Electrical Code, ANSI/NFPA 70, provides information with regard to proper grounding of the mast and supporting structure, grounding of the lead-in wire to an antenna
discharge unit, size of grounding conductors, location of antenna-discharge unit, connection to grounding electrodes, and requirements for the grounding electrode.
Note to CATV system installer:
This reminder is provided to call the CATV system installer's attention to Section 820-40 of the NEC which provides guidelines for proper grounding and, in particular, specifies that the cable ground shall be connected to the grounding system of the building, as close to the point of cable entry as practical.
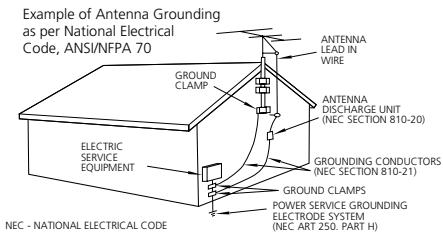
15) Lightning — For added protection for this product during a lightning storm, or when it is left unattended and unused for long periods of time, unplug it from the wall outlet and disconnect the antenna or cable system. This will prevent damage to the product due to lightning and power-line surges.
16) Power Lines — An outside antenna system should not be located in the vicinity of overhead power lines or other electric light or power circuits, or where it can fall into such power lines or circuits. When installing an outside antenna system, extreme care should be taken to keep from touching such power lines or circuits as contact with them might be fatal.
17) Overloading — Do not overload wall outlets, extension cords, or integral convenience receptacles as this can result in risk of fire or electric shock.
18) Object and Liquid Entry — Never push objects of any kind into this product through openings as they may touch dangerous voltage points or short-out parts that could result in a fire or electric shock. Never spill liquid of any kind on the product.
19) Servicing — Do not attempt to service this product yourself as opening or removing covers may expose you to dangerous voltage or other hazards. Refer all servicing to qualified service personnel.
20) Damage Requiring Service — Unplug this product from the wall outlet and refer servicing to qualified service personnel under the following conditions:
a) when the power-supply cord or plug is damaged.
b) if liquid has been spilled, or objects have fallen into the product.
c) if the product has been exposed to rain or water.
d) if the product does not operate normally by following the operating instructions. Adjust only those controls that are covered by the operating instructions as an improper adjustment of other controls may result in damage and will often require extensive work by a qualified technician to restore the product to its normal operation.
e) if the product has been dropped or damaged in any way.
f) when the product exhibits a distinct change in performance _ this indicates a need for service.
21) Replacement Parts - When replacement parts are required, be sure the service technician has used replacement parts specified by the manufacturer or have the same characteristics as the original part. Unauthorized substitutions may result in fire, electric shock, or other hazards.
22) Safety Check — Upon completion of any service or repairs to this product, ask the service technician to perform safety checks to determine that the product is in proper operating condition.
23) Wall or Ceiling Mounting - The product should be mounted to a wall or ceiling only as recommended by the manufacturer.
24) Heat — The product should be situated away from heat sources such as radiators, heat registers, stoves, or other products (including amplifiers) that produce heat.
WARNING: TO PREVENT FIRE OR SHOCK HAZARD, DO NOT EXPOSE THIS APPLIANCE TO RAIN OR MOISTURE.
CAUTION
DO NOT REMOVE THE EXTERNAL CASES OR CABINETS TO EXPOSE THE ELECTRONICS. NO USER SERVICEABLE PARTS ARE WITHIN!
- IF YOU ARE EXPERIENCING PROBLEMS WITH THIS PRODUCT, CONTACT TEAC FOR A SERVICE REFERRAL. DO NOT USE THE PRODUCT UNTIL IT HAS BEEN REPAIRED.
- USE OF CONTROLS OR ADJUSTMENTS OR PERFORMANCE OF PROCEDURES OTHER THAN THOSE SPECIFIED HEREIN MAY RESULT IN HAZARDOUS RADIATION EXPOSURE.
- Do not expose this apparatus to dripps or splashes.
- Do not place any objects filled with liquids, such as vases, on the apparatus.
- Do not install this apparatus in a confined space such as a book case or similar unit.
- The apparatus draws nominal non-operating power from the AC outlet with its STANDBY/ON switch in the off position.
- The apparatus should be located close enough to the AC outlet so that you can easily grasp the power cord plug at any time.
- An apparatus with Class I construction shall be connected to an AC outlet with a protective grounding connection.
For CANADA
AC POWER CORD CONNECTION
CAUTION:
TO PREVENT ELECTRIC SHOCK, MATCH WIDE BLADE OF PLUG TO WIDE SLOT, FULLY INSERT.
Pour le CANADA
CORDE DE ConnEXION CA
ATTENTION:
POUR ÉVITER LES CHOCS ÉLECTRIQUES, INTRODUIRE LA LAME LA PLUS LARGE DE LA FICHE DANS LA BORNE CORRESPONDANTE DE LA PRESE ET POUSSER JUSQU'AU FOND.
For U.S.A.
This equipment has been tested and found to comply with the limits for a Class B digital device, pursuant to Part 15 of the FCC Rules. These limits are designed to provide reasonable protection against harmful interference in a residential installation. This equipment generates, uses, and can radiate radio frequency energy and, if not installed and used in accordance with the instructions, may cause harmful interference to radio communications. However, there is no guarantee that interference will not occur in a particular installation. If this equipment does cause harmful interference to radio or television reception, which can be determined by turning the equipment off and on, the user is encouraged to try to correct the interference by one or more of the following measures:
- Reorient or relocate the equipment and/or the receiving antenna.
- Increase the separation between the equipment and receiver.
- Connect the equipment into an outlet on a circuit different from that to which the receiver is connected.
- Consult the dealer or an experienced radio/TV technician for help.
CAUTION
Changes or modifications to this equipments not expressly approved by TEAC CORPORATION for compliance will void the user's warranty.
Contents
Thank you for choosing TEAC. Read this manual carefully to get the best performance from this unit.
Before Using the Unit 6
Batteries 7
Connections 8
Unit Functions. 10
Display 12
Getting Started. 13
Setting the Clock 14
Basic Operation. 15
Listening to iPod 16
Listening to an External Source 19
Listening to the Radio 20
Preset Tuning 21
Timer 22
Sleep Timer. 24
Specifications 24
Troubleshooting 25
Before Using the Unit
Read this before attempting any operations.
- As the unit may become warm during operation, always leave sufficient space around the unit for ventilation.
- The voltage supplied to the unit should match the voltage as printed on the rear panel. If you are in any doubt regarding this matter, consult an electrician.
- Choose the installation location of your unit carefully. Avoid placing it in direct sunlight or close to a source of heat. Also avoid locations subject to vibrations and excessive dust, heat, cold or moisture.
- Do not place the unit on an amplifier/receiver.
- Do not open the cabinet as this might result in damage to the circuitry or electrical shock. If a foreign object should get into the unit, contact your dealer or service company.
- When removing the power plug from the wall outlet, always pull directly on the plug, never yank the cord.
- Do not attempt to clean the unit with chemical solvents as this might damage the finish. Use a clean, dry cloth.
- Keep this manual in a safe place for future reference.
Remote Control Unit
The provided Remote Control Unit allows the unit to be operated from a distance.
When operating the remote control unit, point it towards the remote sensor on the front panel of the unit.
- Even if the remote control unit is operated within the effective range, remote control operation may be impossible if there are any obstacles between the unit and the remote control.
- If the remote control unit is operated near other products which generate infrared rays, or if other remote control devices using infrared rays are used near the unit, it may operate incorrectly. Conversely, the other products may also operate incorrectly.
Battery Installation
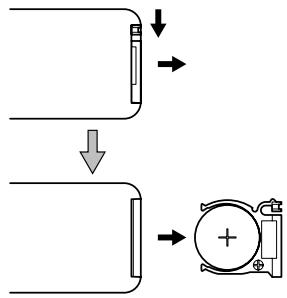
- Pull out the battery compartment tray.
- Place the lithium battery (CR2032, 3V) in the tray.
- Slide the tray back into the remote control unit until it clicks.
Battery Replacement
If the distance required between the remote control unit and main unit decreases, the battery is exhausted. In this case, replace the battery with a new one.
Main Unit
(Underside of the unit)
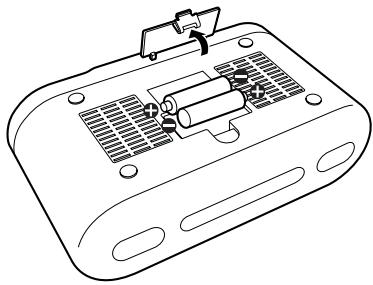
These batteries supply backup power to the built-in clock when the unit is momentarily disconnected from the AC power line.
- If the unit is disconnected from the power supply and the batteries have been completely exhausted for about an hour, clock and timer settings will be lost.
Precautions concerning batteries
- Be sure to insert the batteries with correct positive “⊕” and negative “ ” polarities.
- Use batteries of the same type. Never use different types of batteries together.
- Rechargeable and non-rechargeable batteries can be used. Refer to the precautions on their labels.
- When the remote control unit is not to be used for a long time (more than a month), remove the batteries from the remote control unit to prevent them from leaking. If they leak, wipe away the liquid inside the battery compartment and replace the batteries with new ones.
- Do not heat or disassemble batteries and never dispose of old batteries by throwing them in a fire.
CAUTION:
- Switch off the power before making connections.
- Read the instructions of each component you intend to use with this unit.
- Be sure to insert each plug securely. To prevent hum and noise, do not bundle the connection cords.
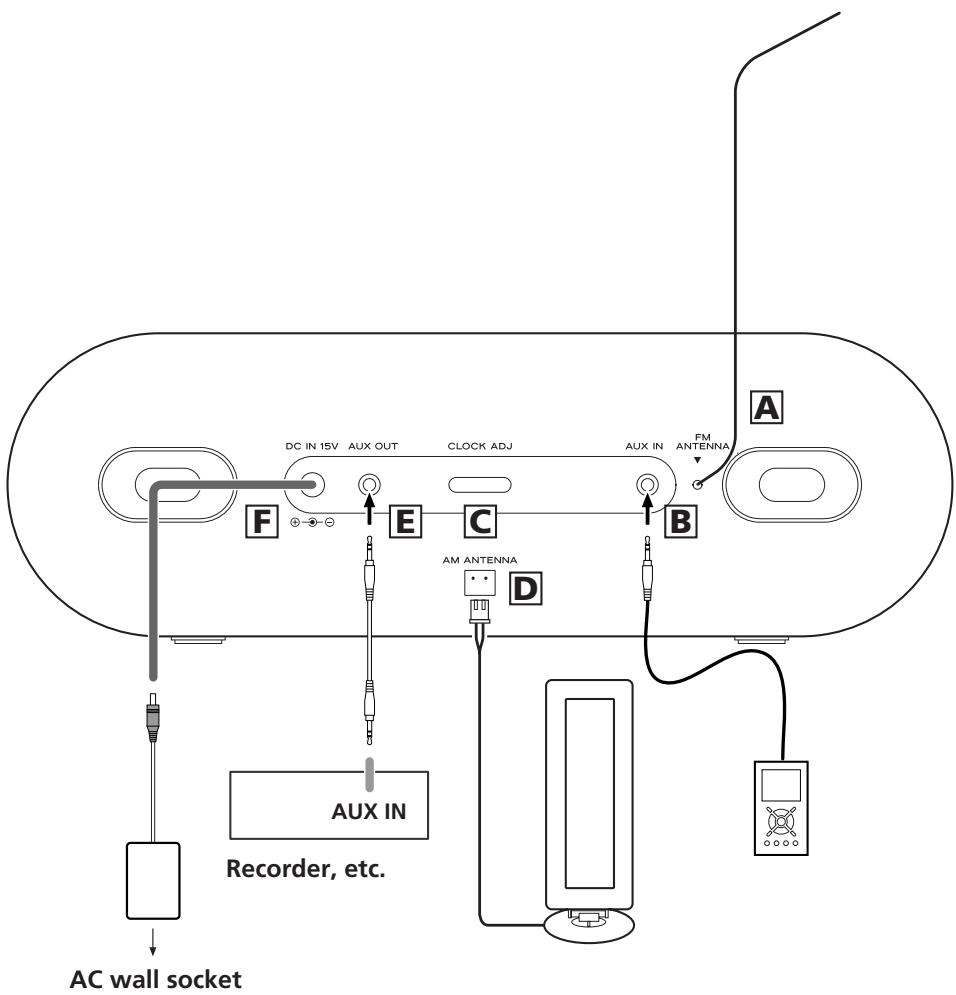
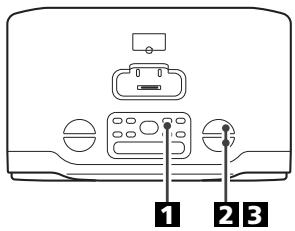
A FM ANTENNA
While in FM mode, tune in an FM station and extend the lead to find the best position for the reception. This antenna may need to be repositioned if you move your unit to a new location.
B AUX IN
You can connect a portable audio player to this jack.
See page 19 for details.
C CLOCK ADJ button
Hold down this button for more than 3 seconds to enter clock setting mode.
AM ANTENNA
Connect the supplied AM loop antenna to the AM ANTENNA terminal.
Place the antenna on a shelf or hang it on a window frame, etc., in the direction which gives the best reception.
If you want, you can hook the AM antenna on a wall as shown below:
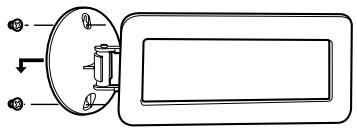
E AUX OUT
You can connect an amplifier or recording device through the AUX OUT jack located at the back of the unit.
F DC IN jack
Connect the provided AC adapter to this jack. Then connect the AC adapter's plug to the AC wall socket.
- Do not use any AC adapters other than the one included with this unit to avoid fire, electric shock, etc. Be sure to connect the adapter to an AC outlet that supplies the correct voltage.
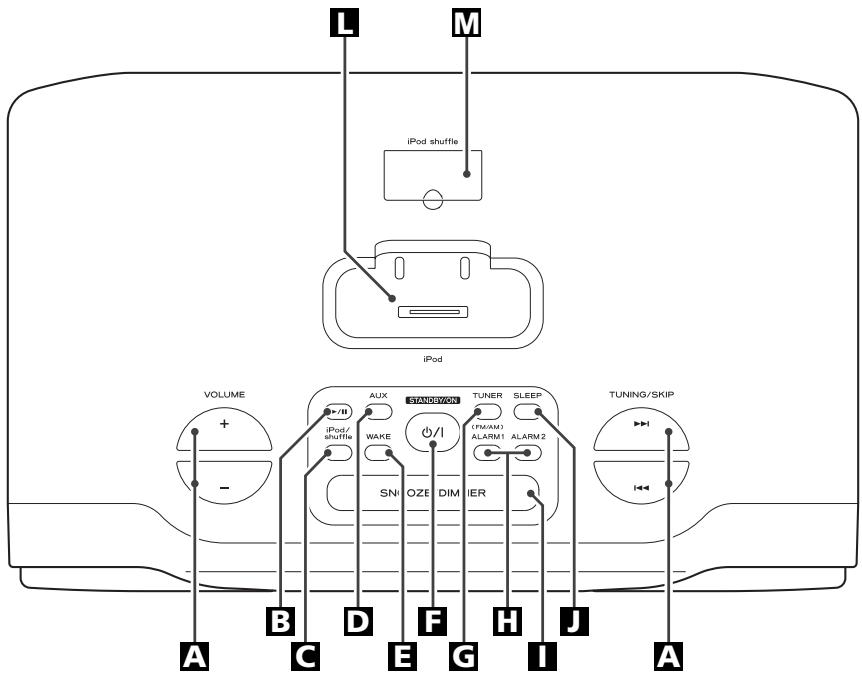
A VOLUME
Press these buttons to adjust the volume level.
3 Play/Pause (▶/III)
Use this button to start or pause playback of iPod.
iPod/shuffle
Use this button to select iPod or iPod Shuffle function. When an iPod or iPod Shuffle is docked, press this button to start playback.
D AUX
Use this button to listen to an external source connected to the AUX IN jack.
WAKE
Press this button to select iPod, radio or alarm buzzer hi or low to wake to.
F STANDBY/ON
Use this button to turn the unit on or standby.
The equipment draws a nominal amount of power from the AC outlet even in STANDBY.
TUNER (FM/AM)
Use this button to select tuner mode. In TUNER mode, press this button to select FM or AM.
ALARM 1/ALARM 2
Use these buttons to turn on or off the timer or set alarm time.
1 SNOOZE/DIMMER
When the unit is turned on by the timer, press this button to turn the unit standby for 10 minutes. You may repeat this cycle several times during the 1-hour alarm cycle. During normal operation, use this button to dim the display.
SLEEP
Use this button to set sleep timer.
K TUNING/SKIP (1<1/▶▶1)
In TUNER mode, use these buttons to tune in stations.
In iPod mode, use these buttons to skip tracks. Hold down this button to search for a part of a track.
Dock connector
Before use, insert an appropriate Dock adapter in the Dock (see page 16).
Insert an iPod mobile digital device into this dock.
USB Port for iPod Shuffle
Insert your iPod Shuffle into this port. Press the iPod/shuffle button to select the iPod Shuffle mode.
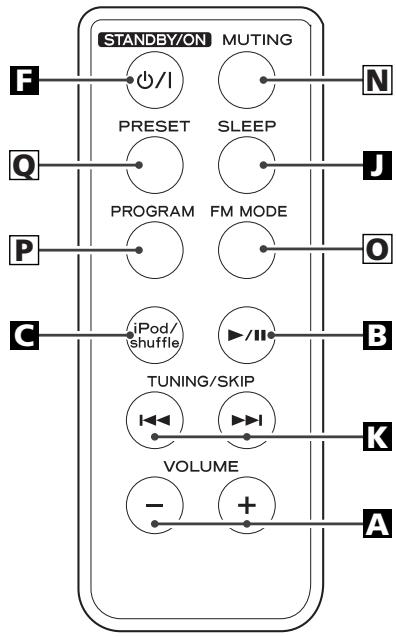
N MUTING
Use this button to mute the sound.
FM MODE
Pressing this button alternates between STEREO mode and MONO mode.
PROGRAM
In TUNER mode, use this button to preset stations.
Q PRESET
In TUNER mode, use this button to select a preset station.
Note:
To simplify explanations, instructions in this manual refer to the names of the buttons and controls on the front panel only. Associated controls on the remote control will also operate similarly.
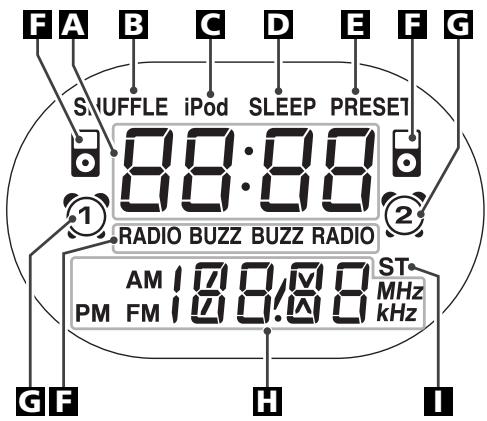
A Shows the digital clock, sleep time or preset channels.
Lights in iPod Shuffle mode.
C Lights in iPod mode.
Lights when the sleep function is active.
E Lights in preset tuning mode.
F Lights when the source is selected for the timer.
Lights when the alarm time is set.
H Shows frequency, volume, date, external source (AUX), etc.
1 Lights in FM Stereo mode.
The GR-7i comes mounted with an adapter "60GB (color) + Photo 40/60GB". To play your iPod through the GR-7i, you have first to check if the factory mounted adapter fits your model of iPod. If it does not, you have to replace it with a correct one, as explained below.
1. Remove the adapter from the Dock of the GR-7i.
Hold the left and right sides of the adapter and gently pull it up.
2. Choose the Dock adapter that fits your iPod mobile digital device.
"Video 30GB" for iPod with video (30 GB).
"Video 60GB" for iPod with video (60 GB).
"nano" for iPod nano.
"mini" for iPod mini.
"20GB (color) + Photo 30GB" for iPod with color display (20GB, 30GB, U2 Special Edition).
"60GB (color) + Photo 40GB/60GB" for iPod with color display (40GB, 60GB).
"20GB + U2" for iPod with Click Wheel (20 GB, U2 Special Edition).
"40GB" for iPod with Click Wheel (40 GB).
- Use a commercially available adapter to play iPod with dock connector.
3. Insert the adapter into the Dock of the GR-7i.
Fit the front edge of the adapter into the Dock, and then press the back edge of the adapter onto the Dock until a slight "click" is heard indicating the adapter is inserted correctly.
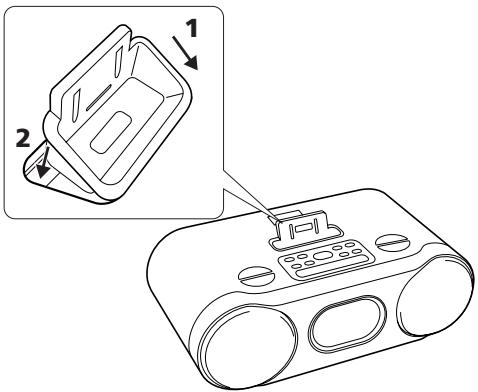
- When you need to remove the adapter, hold the left and right sides of the adapter and gently pull it up.
- When you don't use the Dock, use the supplied cover for the Dock to prevent dust from settling on the Dock.
Compatible iPod Software
In case your iPod will not work with the GR-7i or with the remote control unit, software update may solve the problem.
Visit the Apple website and download the latest iPod Software.
http://www.apple.com/ipod/download/
iPod is a trademark of Apple Computer, Inc., registered in the U.S. and other countries.
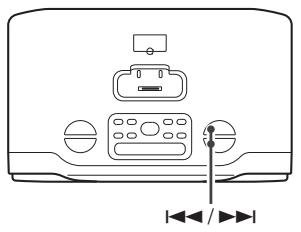
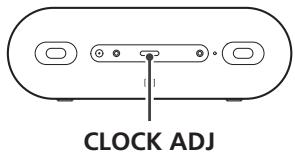
Press and hold the CLOCK ADJ button for more than 3 seconds and release it when the time display starts blinking.
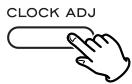
- If you leave the unit idle for about 1 minute, the clock setting mode will be canceled.
Press the TUNING/SKIP buttons (1 / 1) to select 12H or 24H, and then press the CLOCK ADJ button.
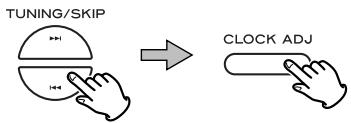
Press the TUNING/SKIP button (1) to select Hour, and press the TUNING/SKIP button ( 1) to select Minute, then press the CLOCK ADJ button.
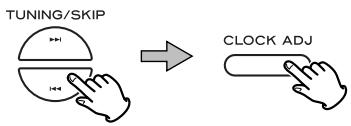
- Hold down the TUNING/SKIP button (I or I) to adjust the clock continuously.
4 Press the TUNING/SKIP buttons (1 / 1) to select Year, and then press the CLOCK ADJ button.
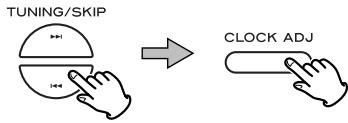
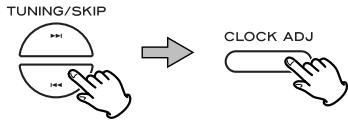
5 Press the TUNING/SKIP buttons (1 / 1) to select Date, and then press the CLOCK ADJ button.
The clock starts from 00 second.
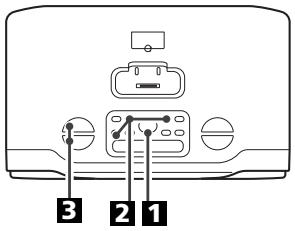
Press the STANDBY/ON button to turn the unit on.
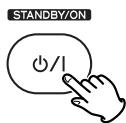
- The unit turns on with the source that was last selected. If the iPod that is in playback mode is inserted into the Dock, the GR-7i will automatically turn on and start playback of the iPod.
- You can also use the iPod/shuffle, AUX or TUNER (FM/AM) button or Play/Pause button ( / ) to turn the unit on.
Press the iPod/shuffle, AUX or TUNER (FM/AM) button to select a source.


- To listen to an external source connected to the AUX IN jack, press the AUX button.
- If you select "iPod" when no iPod is docked, the iPod indicator on the display blinks.
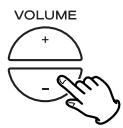
3 Play the source, and adjust the volume using the VOLUME buttons (- / + )
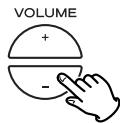
The volume is adjustable from MIN (00) to MAX (40). Hold down the VOLUME - or + button to turn down or up the volume continuously.
Basic Operation 2
Dimmer
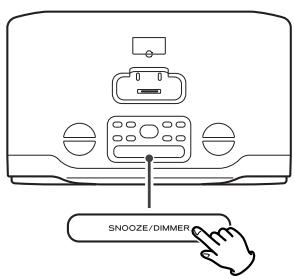
You can dim the front panel's display by pressing the SNOOZE/DIMMER button.
- This function will be canceled when the STANDBY/ON button is pressed.
- When you set the sleep timer, the display is dimmed automatically.
Muting
To mute the sound temporarily, press the MUTING button. Press the MUTING button again to restore the sound.
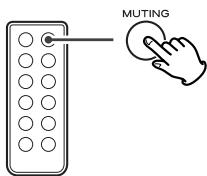
- If you change the volume or source during the muting, the muting will be canceled.
Listening to iPod 1
Insert the iPod into the Dock of the GR7i.
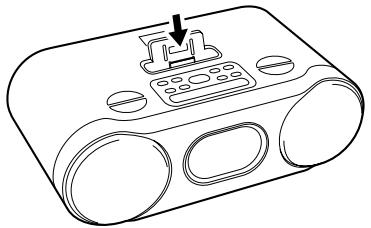
Then push the Play/Pause button ( /II) on the iPod or the GR-7i. The GR-7i will automatically turn on and start playback from the iPod's music list.
- Make sure to use an appropriate Dock adapter (see "Getting Started" on page 13).
- If you remove the iPod during playback, the GR-7i automatically turns standby.
- The battery of the iPod is recharged to the full whenever the iPod is docked and the GR-7i is connected to the AC power supply.
- When headphones are plugged into the iPod, sound comes from both the speakers of the GR-7i and the headphones.
To select iPod mode
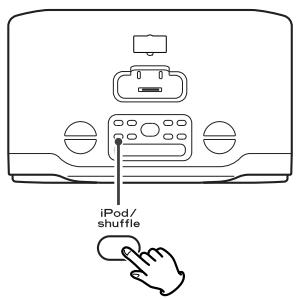
Select "iPod" using the iPod/shuffle button. If an iPod is already docked, playback will start.
When no iPod is docked, the iPod indicator on the display blinks.
- You can also use the Play/Pause button ( / ) to select "iPod".
Using an iPod Shuffle
Insert your iPod Shuffle into the USB port and select "iPod Shuffle" using the iPod/shuffle button.
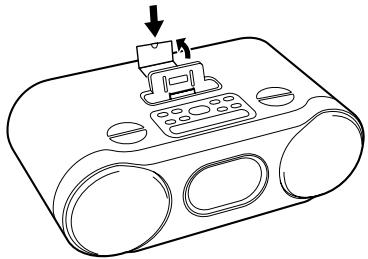
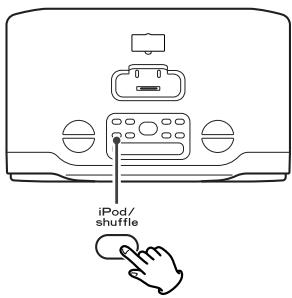
Then press the Play/Pause button ( / ) on the GR-7i. The GR-7i will automatically turn on and start playback from the iPod Shuffle's music list.
- If you remove the iPod Shuffle during playback, the GR-7i automatically turns standby.
- The battery of the iPod Shuffle is recharged to the full whenever the iPod Shuffle is inserted and the GR-7i is connected to the AC power supply.
- When headphones are plugged into the iPod Shuffle, sound comes from both the speakers of the GR-7i and the headphones.
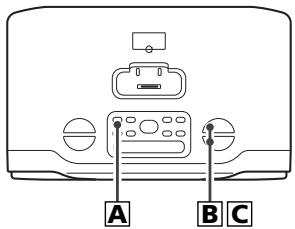
A To suspend playback temporarily (pause mode)
Press the Play/Pause button ( / ) during playback. Playback stops at the current position. To resume playback, press the Play/Pause button ( / ) again.
Search for a part of a track
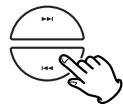
During playback, hold down the TUNING/SKIP button (I or ) for more than 2 seconds and release it when the part you want to listen to is found.
To skip to the next or a previous track
TUNING/SKIP
During playback, repeatedly press the TUNING/SKIP button (I or ) until the desired track is found. The selected track will be played from the beginning.
- When the 14 button is pressed during playback, the track being played will be played from the beginning. To return to the beginning of the previous track, press the 14 button twice.

1 Connect the PHONES jack (audio output jack) of a portable audio player to the AUX IN jack of the GR-7i using the supplied stereo mini plug cable.
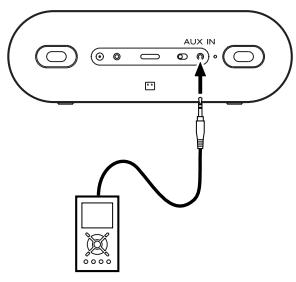
You can use this way of connection to listen to an iPod that has no Dock connector or that has, but an appropriate Dock adapter is not available.
2 Select "AUX" using the AUX button.

3 Play the source, and adjust the volume of both the GR-7i and the audio player.
When using the PHONES jack of your mini player, you must adjust the volume of the mini-player or you may hear no sound from your GR-7i.
- Turning the volume of the mini player up too high may cause the sound from your GR-7i to be distorted. If this is the case, reduce the volume of the mini player until the distortion stops and then adjust the volume level of the GR-7i to a comfortable listening level.
Press the TUNER (FM/AM) button.

To select FM or AM, press the TUNER (FM/AM) button again.

3 Select the station you want to listen to (auto selection).
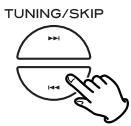
Hold down the TUNING/SKIP button (or for more than 2 seconds and release it when the frequency display begins to change.
When a station is tuned in, the tuning process will stop automatically.
- To stop the auto selection, press the TUNING/SKIP button.
Selecting stations which cannot be tuned automatically (manual selection)
When the TUNING/SKIP button (I or I) is pressed momentarily the frequency changes by a fixed step.
Press the TUNING/SKIP button repeatedly until the station you want to listen to is found.
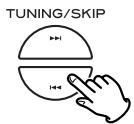
If the reception is poor
For the best reception, rotate the FM or the AM antenna until you get stations clearly.
FM mode
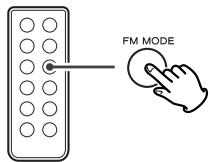
Pressing this button alternates between STEREO mode and MONO mode.
STEREO
FM stereo broadcasts are received in stereo and the "ST" indicator will light.
MONO
In weak FM stereo reception areas, select this mode. Reception will now be forced to monaural, reducing unwanted noise.
Preset Tuning
You can program 10 FM & 10 AM channel presets.
Tune in a station you want to listen to (see page 20).
Press the PROGRAM button.
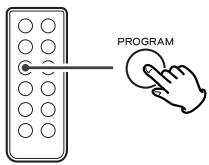
3 Within 5 seconds, select a preset channel to store the station using the PRESET button.
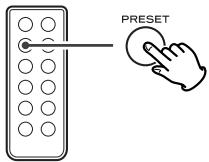
4 Within 5 seconds, press the PROGRAM button.
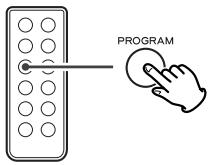
To store more stations, repeat steps 1 to 4.
How to select a preset station
To select FM or AM, press the TUNER (FM/AM) button.
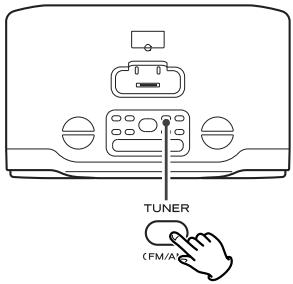
Press the PRESET button repeatedly until the desired preset station is found.
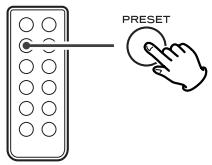
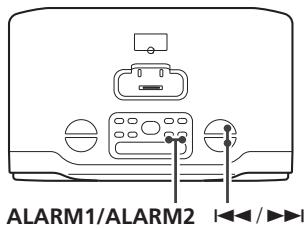
- The unit can be programmed to turn on at a specified time. The unit will turn off 60 minutes after reaching the specified time.
- Adjust the clock before setting the timer (see page 14).
Setting the timer
Press and hold the ALARM button (1 or 2) for more than 3 seconds.
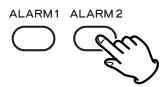
The clock blinks and the ALARM indicator (1 or 2) appears on the display.
- If no button is pressed for about 1 minute, the timer setting mode will be canceled.
Press the TUNING/SKIP button (I) to set the start hour, and press the TUNING/SKIP button ( I) to set the start minute.
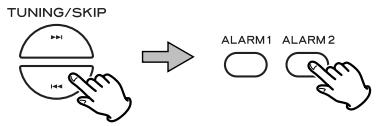
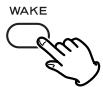
3 Select a source (iPod or RADIO) using the WAKE button.
- You cannot select "AUX".
4 Set the volume or select alarm high or low using the TUNING/SKIP buttons (1 / 1)
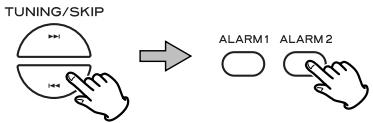
The volume for timer operation is adjustable from 10 to 40.
Press the ALARM button (1 or 2) to enter the timer setting.

ALARM1 ALARM2

Setting the timer is now completed.
To turn on the timer
1 After setting the timer, press the ALARM button (1 or 2) to turn the timer on.
The ALARM indicator ( 1 or 2) appears on the display.
Prepare the source.
When the source is set to "iPod" in step
3 on the previous page, insert an iPod.
When the source is set to "RADIO" in step 3 on the previous page, tune in a station.
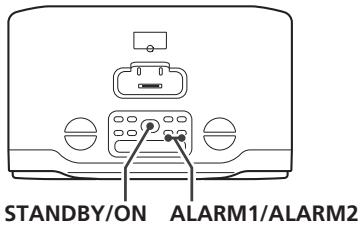
Press the STANDBY/ON button to turn the unit off (standby).
Don't forget to turn the unit off (standby), or the timer won't work.
-
Playback volume will gradually increase up to your set volume when the unit is turned on by timer.
-
If the source is set to "iPod" but no iPod is set, the unit will turn on into TUNER mode.
- When the source is set to "RADIO" and the unit turns on, it will tune in to the station you selected last time.
To turn off the timer
When you don't use the timer, press the ALARM button (1 or 2) to turn it off.
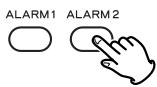
The ALARM indicator ( ① or ②) disappears from the display.
Press the ALARM button (1 or 2) again to turn it on.
SNOOZE function
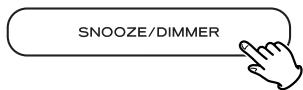
After the unit has been turned on by the timer, press the SNOOZE/DIMMER button, and the unit enters STANDBY mode. After 10 minutes, the unit will turn on again.
You can use this function repeatedly for up to 60 minutes.
- Press the STANDBY/ON button or the active ALARM button (1 or 2) once to stop this function.
Note that if you press the ALARM button twice, the timer is also turned off.
Sleep Timer
You can set a sleep timer so the unit turns itself off after a specified time.
Press the SLEEP button repeatedly until the desired time appears on the display.
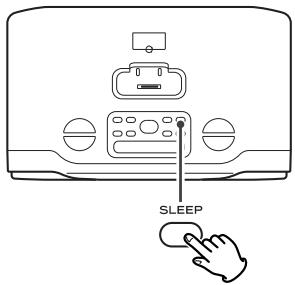
SLEEP 90, 60, 30 or 15:
The power will be switched off 90, 60, 30 or 15 minutes later.
- When you set the sleep timer, the display is dimmed automatically.
- If you want to check the remaining time, press the SLEEP button once. The remaining time will be displayed for a few seconds.
Specifications
TUNER Section
Frequency Range
FM: 87.5 MHz to 108.0 MHz
AM: 520 kHz to 1,710 kHz
SPEAKER SYSTEM Section
Type 50 mm x 2
Impedance 6 ohms
GENERAL
Total Output Power. 3 W + 3 W
Power Requirement . . . AC 120 V, 60 Hz
Power Consumption 25 W
Dimension (W× H× D)
265 × 85 × 160 ~mm
(107/16"×33/8"×65/16")
Weight (Net) 1.35 kg (3 lb)
Standard Accessories
Remote Control Unit x 1
AM loop antenna x 1
Dock adapter x 8
(adapter "60GB (color) + Photo
40/60GB"premounted)
Cover for the Dock x 1
- Design and specifications are subject to change without notice.
- Weight and dimensions are approximate.
- Illustrations may differ slightly from production models.
If you have problems with your system, look through this chart and see if you can solve the problem yourself before calling your dealer or TEAC service center.
General
No power
Check the connection to the AC power supply. Check and make sure the AC source is not a switched outlet and that, if it is, the switch is turned on. Make sure there is power to the AC outlet by plugging another item such as a lamp or fan into the outlet.
No sound from speakers.
Select the source by pressing the iPod/shuffle, AUX or TUNER (FM/AM) button.
Adjust the volume.
Pull out the headphone's plug from the PHONES jack.
Check if the sound is muted. If that is the case, press the MUTING button again.
The sound is noisy.
The unit is too close to a TV or similar appliances. Install the unit apart from them, or turn them off.
Remote control doesn't work.
Press the STANDBY/ON button to turn the unit on.
If the battery is exhausted, replace it with a new one.
Use remote control unit within the range (5 m) and point at the remote sensor on the front panel.
Clear obstacles between the remote control unit and the main unit.
If a strong light is near the unit, turn it off.
iPod Player
Cannot insert the iPod.
Check the dock adapter.
Remove dust or obstacles from the Dock connector of the GR-7i and the iPod, and insert the iPod again.
Will not play.
Remove the iPod from the dock, wait a few seconds, and insert it again.
Software update may solve the problem. Visit the Apple website and download the latest iPod Software.
Cannot operate the iPod.
Set the HOLD switch of the iPod to off.
Tuner
Cannot listen to any station, or signal is too weak.
Tune in the station properly.
Rotate the FM or the AM antenna until you get stations clearly.
If normal operation cannot be resumed, unplug the power cord from the outlet and plug it again.
Maintenance
If the surface of the unit gets dirty, wipe with a soft cloth or use a diluted mild liquid soap. Be sure to remove any excess liquid completely. Do not use thinner, benzine or alcohol as they may damage the surface of the unit. Allow the surface of the unit to dry completely before using.
Sommaire
3 Lecture/Pause (▶/II)
http://www.apple.com/ipod/download/
Prérglage de stations
Voupsouspez prerégler("programmer")10 stations FM et 10 stations AM.
Dimensions (L x H x P)
265 × 85 × 160 mm
Poids (net) 1,8 kg
Accessoires fournis
Télécommand x 1
Antenne cadre AM x 1
FM: 87.5 MHz-108.0 MHz
AM: 520 kHz-1,710 kHz
This appliance has a serial number located on the rear panel. Please record the model number and serial number and retain them for your records.
Model number
Serial number
- Includes adapters for:
- Adapters sold separately:
- Hi-Fi Table Radio
- OWNER'S MANUAL
- MANUEL DU PROPRIÉTAIRE
- MANUAL DEL USUARIO
- IMPORTANT SAFETY INSTRUCTIONS
- CAUTION
- Note to CATV system installer:
- For CANADA
- CAUTION:
- Pour le CANADA
- ATTENTION:
- For U.S.A.
- Contents
- Thank you for choosing TEAC. Read this manual carefully to get the best performance from this unit.
- Before Using the Unit
- Read this before attempting any operations.
- Remote Control Unit
- Battery Replacement
- Main Unit
- Precautions concerning batteries
- A FM ANTENNA
- B AUX IN
- C CLOCK ADJ button
- AM ANTENNA
- E AUX OUT
- F DC IN jack
- A VOLUME
- Play/Pause (▶/III)
- iPod/shuffle
- D AUX
- WAKE
- F STANDBY/ON
- TUNER (FM/AM)
- ALARM 1/ALARM 2
- SNOOZE/DIMMER
- SLEEP
- K TUNING/SKIP (1<1/▶▶1)
- Dock connector
- USB Port for iPod Shuffle
- N MUTING
- FM MODE
- PROGRAM
- Q PRESET
- Note:
- Remove the adapter from the Dock of the GR-7i.
- Choose the Dock adapter that fits your iPod mobile digital device.
- Insert the adapter into the Dock of the GR-7i.
- Compatible iPod Software
- Basic Operation 2
- Dimmer
- Muting
- Listening to iPod 1
- To select iPod mode
- Using an iPod Shuffle
- A To suspend playback temporarily (pause mode)
- Search for a part of a track
- To skip to the next or a previous track
- Selecting stations which cannot be tuned automatically (manual selection)
- If the reception is poor
- STEREO
- MONO
- Preset Tuning
- How to select a preset station
- Setting the timer
- To turn on the timer
- Prepare the source.
- To turn off the timer
- SNOOZE function
- Sleep Timer
- SLEEP 90, 60, 30 or 15:
- Specifications
- TUNER Section
- SPEAKER SYSTEM Section
- GENERAL
- Standard Accessories
- No power
- No sound from speakers.
- The sound is noisy.
- Remote control doesn't work.
- iPod Player
- Cannot insert the iPod.
- Will not play.
- Cannot operate the iPod.
- Tuner
- Cannot listen to any station, or signal is too weak.
- Maintenance
- Sommaire
- Lecture/Pause (▶/II)
- Prérglage de stations
- Accessoires fournis
Brand : TEAC
Model : GR-7I
Category : Alarm clock radio