
CT 3000 - Outdoor heating ALPATEC - Free user manual and instructions
Find the device manual for free CT 3000 ALPATEC in PDF.
User questions about CT 3000 ALPATEC
0 question about this device. Answer the ones you know or ask your own.
Ask a new question about this device
Download the instructions for your Outdoor heating in PDF format for free! Find your manual CT 3000 - ALPATEC and take your electronic device back in hand. On this page are published all the documents necessary for the use of your device. CT 3000 by ALPATEC.
USER MANUAL CT 3000 ALPATEC
ALPATEC thanks you for buying this product and hope you will be totally satisfy with it. For your comfort and security all the steps of the manufacturing have been checked and the product succeeded in all our quality tests.
ALPATEC's products : their design and facility of use make you like them.
CAUTION
Read all these instructions carefully before using this product.
- Make sure that the voltage rating on the type plate corresponds to your main voltage. If not, see your retailer and do not connect the appliance.
- Keep out of children or incompetent persons and do not allow them to operate this appliance.
- Only use the appliance for domestic purposes and in the way indicated in these instructions.
- From time to time, check the cord for damages. Never use the appliance if cord or appliance show any sign of damage.
- Make sure that the connection cord does not touch any hot surface.
- Keep combustible materials such as drapes, clothing, towels away from the appliance.
- Do not cover the appliance.
- Keep the appliance at least 1 meter away from walls and any other thing, to permit a good air circulation.
- Never immerse the product in water or any liquid for any reasons. Do not use it at less than 60~cm of a shower, a bath-tub or a swimming-pool.
- Do not use if you have wet hands.
- Never use the appliance on or near hot surfaces.
- Never move or range the appliance by pulling the cord.
- To avoid any risk of burn, never move the appliance when it is hot.
- Before tidying the appliance, make sure that it is unplugged from the power and that it is completely cooled.
- Unplug the appliance before cleaning.
- Do not clean the appliance with abrasive chemicals.
- Do introduce neither metallic objects, nor fingers inside the appliance in order to protect you from electrical shock.
- Never use accessories that are not recommended or supplied by the manufacturer. It could constitute a danger to the user and risk to damage the appliance.
- All interventions made by a non-qualified person can be dangerous; in this case guarantee conditions would cancel. As all electrical products, a competent electrician must repair it.
THE MANUFACTURER WILL NOT ASSUME ANY RESPONSIBILITY IN CASE OF NON ADHERENCE TO THIS RECOMMENDATION
SAVE THESE INSTRUCTIONS CAREFULLY
USERS CAUTIONS
- You can use this appliance either inside or outside. It will be useful in your patio when the temperatures are cooling down. It has been done to resist in wet atmosphere.
- Do not leave flammable items, such as paper, clothes, etc., close to the device.
- Do not touch the cover or protective grill of the heating unit when the device is on.
The temperature is high and you may burn yourself!
- When the device is turned on, it will take some time to start heating.
ASSEMBLY
CAUTION: For safety reasons, carefully assemble the device as set out below and make sure the heating element, tubes and base are tightly fitted, then bolted to each other.
1: Remove the soft foam from the heating elements
Remove the protective net from the head of the heater (remove the screw). Remove the soft foam gently as per the direction of the arrowhead. Be careful not to damage the heating tubes. Put the protective net back and tighten the screws.
Note: this operation MUST be done before plugging the appliance.
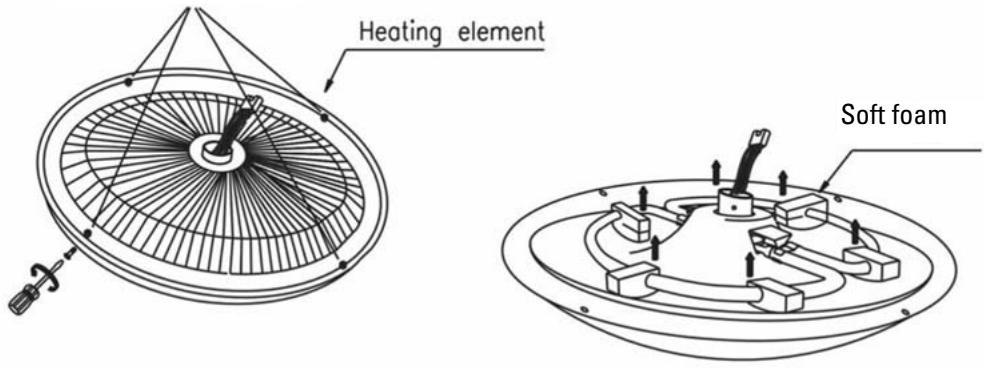
Take out the screws
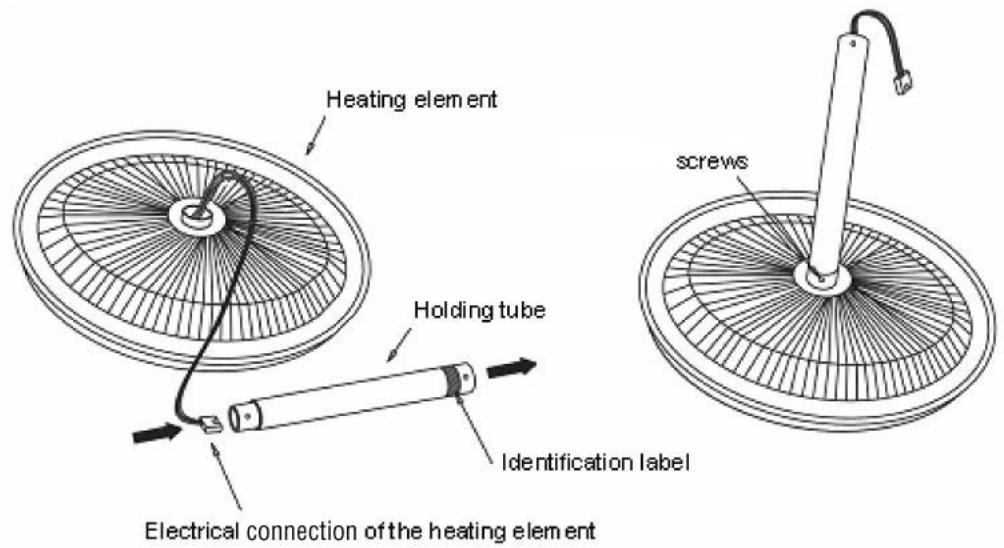
2: Assembly to the heating element
Remove all of the parts from the box and place them so that they are within reach during the assembly. (as shown below).
The electrical cable attached to the heating element must be inserted through the inside of the tube section corresponding to the heating element. The heating element must be turned over and remain stable. Gently turn the tube in its setting on the heating element without attaching it for the time being.
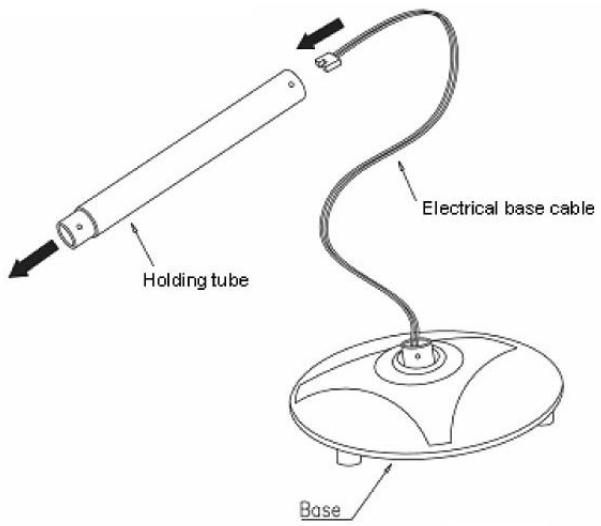
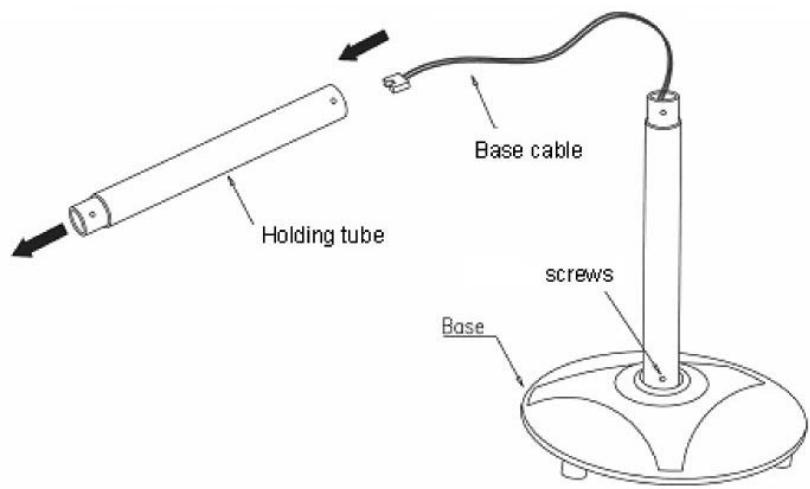
3:Base Assembly
As indicated in the figure below, pass the electrical cable from the base inside the tube section (corresponding to the base). Turn the base over. It must remain stable. Turn the tube in its setting. Tighten it, but do not attach it yet.
9
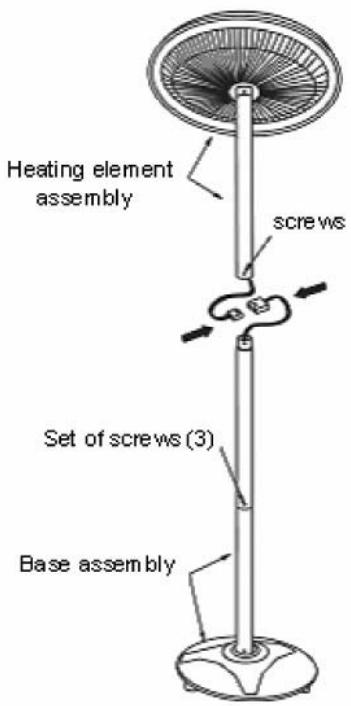
4: Assembly of the Third Section of the Tube
Pass the electrical cable coming from the base through the third section of the tube. Attach this section to the section already attached to the base, without screwing it on for the time being.
5: Complete Assembly and Attaching
The base is in a vertical position. Plug the two sections of the electrical cable together. Ensure that the device is stable. Tightly screw the sections together.

OPERATIONS
-
The switch is located under the base of the device:
-0....0ff
-1....On -
Assemble the device as described above.
- Plug it into a waterproof outlet after having verified that the voltage corresponds to the indicated voltage.
- Press the On button.
MAINTENANCE
- Turn the device off and unplug it. If the device was on before cleaning, wait until it has cooled down so you do not burn yourself.
- With a soft cloth, carefully clean the device. Never use alcohol, solvents or acids such as vinegar or abrasives.
TROUBLESHOOTING
| Issues | Potential causes | Solutions |
| The device will not turn on. | The device is not plugged in properly. | Remove the plug and plug it in again properly. |
| The plug is defective. | Have it replaced by an electrician. | |
| The device does not work, but the current passes through. | An object is preventing the On/Off button from working properly. | Place it on a flat and stable service. Look for the object to be removed. |
| The device functions, then suddenly stops functioning. | Verify your electrical power system/fuse/circuit breaker. | Have it checked by an electrician. |
SPECIFICATIONS
| Model | CT 3000 |
| Voltage | 230 V – 50 Hz |
| Power | 3000 W |
Instructions on environment protection
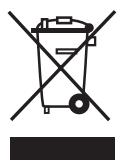
Do not dispose of this product in the usual household garbage at the end of its life cycle; hand it over a collection point for the recycling of electrical and electronic appliances. The symbol on the product, the instructions for use or the packing will inform about the methods of disposal. The materials are recyclable as mentioned in its marking. By recycling or others forms of re-utilization of old appliances, you are making an important contribution to protect our environment. Please inquire at the community administration for the authorized disposal location.
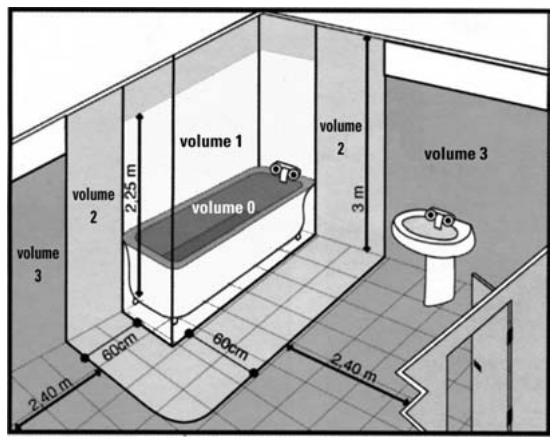
NORME DES APPAREILS DE SALLE DE BAIN
SOLUTIONS CLIMATIQUES
11/06
12

