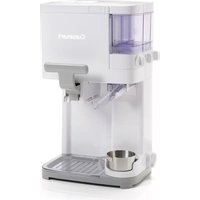
ICE30BCE - Ice machine CUISINART - Free user manual and instructions
Find the device manual for free ICE30BCE CUISINART in PDF.
| Product type | Ice cream maker |
| Brand | Cuisinart |
| Model | ICE30BCE |
| Dimensions (L x D x H) | 24 x 21.5 x 27 cm |
| Weight | 5 kg |
| Power supply | 230 V, 50 Hz, 150 W |
| Maximum capacity | 1.5 L of mixture |
| Bowl type | Double-walled cold accumulator bowl |
| Pre-cooling time | 12 hours minimum at -17 °C |
| Preparation time | 20 to 30 minutes |
| Main functions | Ice cream, sorbet, frozen drink |
| Control | On/off button |
| Base material | ABS plastic |
| Removable parts | Lid, mixing arm, accumulator bowl |
| Base maintenance | Damp cloth, do not immerse |
| Maintenance of detachable parts | Warm soapy water, do not put in dishwasher |
| Bowl storage | In the freezer, in a plastic bag |
| Power cord length | Approximately 90 cm |
| Safety device | Motor stops if lid is not locked? (not specified) |
| Repairability | Replacement parts available from the manufacturer |
Frequently Asked Questions - ICE30BCE CUISINART
User questions about ICE30BCE CUISINART
0 question about this device. Answer the ones you know or ask your own.
Ask a new question about this device
Download the instructions for your Ice machine in PDF format for free! Find your manual ICE30BCE - CUISINART and take your electronic device back in hand. On this page are published all the documents necessary for the use of your device. ICE30BCE by CUISINART.
USER MANUAL ICE30BCE CUISINART
A.Preparing the freezer bowl 9
B. Assembling the Ice Cream Maker 9
C. Making Frozen Desserts or Drinks 9
D. Dismantling the Ice Cream Maker 9
E.Hints & Tips 9
- Cleaning & Maintenance 10
- Safety Cautions 10
INHALTSVERZEICHNIS
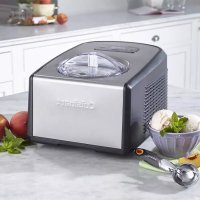
Congratulations on the purchase of your new Cuisinart Ice Cream.
For over 30 years Cuisinart's aim has been to produce the very finest kitchen equipment so that cooks at home as well as professional chefs have the tools to express their creativity.
All Cuisinart products are engineered for exceptionally long life, and designed to be easy to use as well as to give excellent performance day after day. That is why they have come to be regarded as the defining machines in their field by chefs across the world.
Whatever you cook, cook it better with Cuisinart.
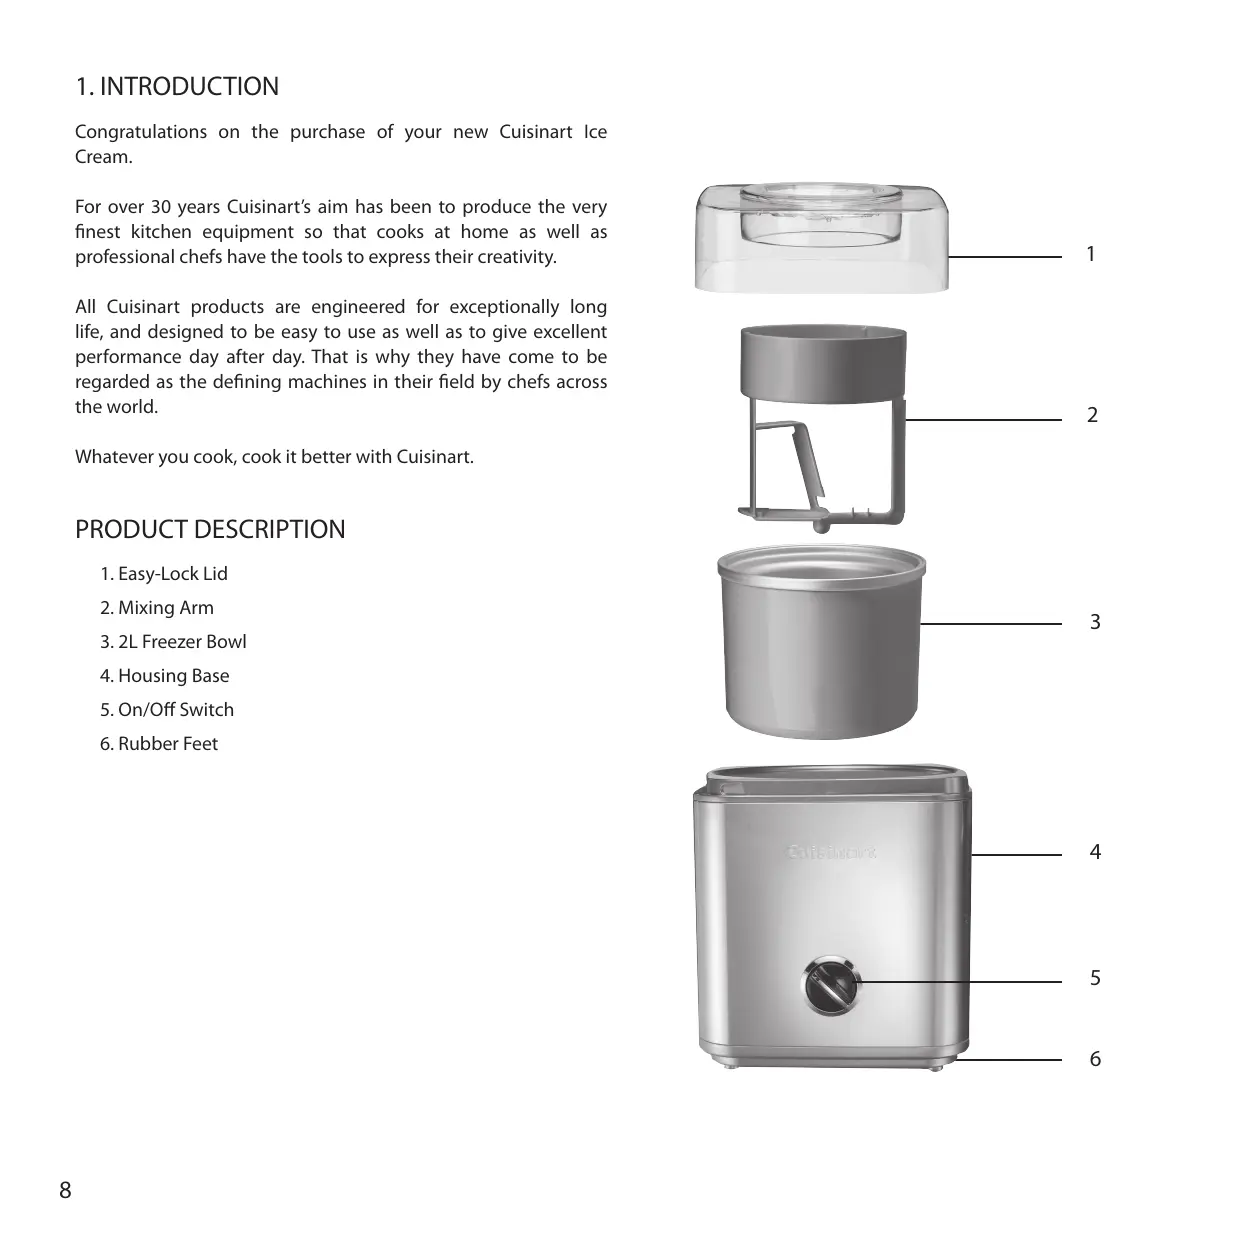
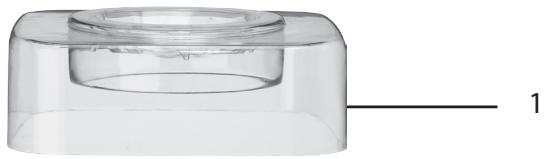
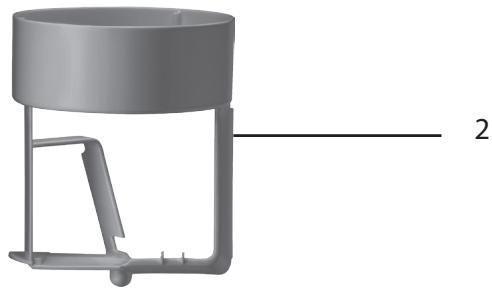
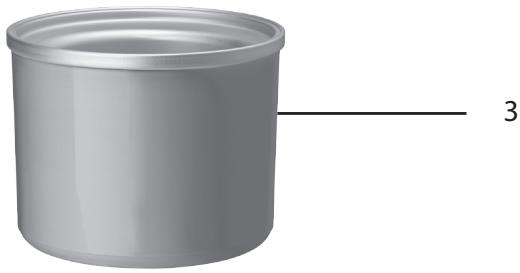
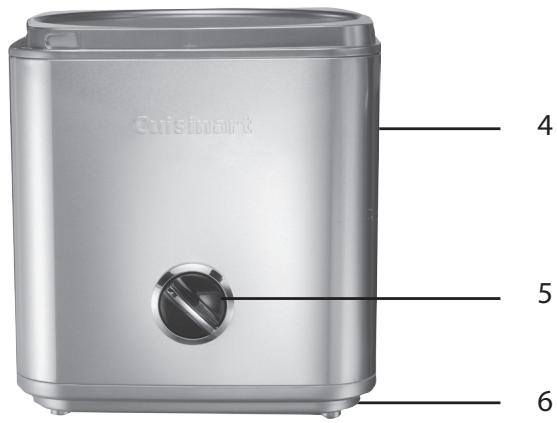
PRODUCT DESCRIPTION
- Easy-Lock Lid
- Mixing Arm
3.2L Freezer Bowl - Housing Base
- On/Off Switch
- Rubber Feet
Read all the instructions thoroughly before using the appliance and keep in a safe place for future reference.
3. INSTRUCTIONS FOR USE
A. Preparing the Freezer Bowl
- The freezer bowl must be completely frozen before you begin. Before freezing, wash and dry the bowl. Wrap it in a plastic bag to prevent freezer burn. The length of time required to freeze in the freezer, depends on the temperature of your freezer.
- In general, freezing time should be a minimum of 12 hours, with a freezer temperature of -17^ or cooler. To determine whether the bowl is completely frozen, shake it. If you do not hear liquid moving, the cooling liquid is frozen.
- We recommend that you place the freezer bowl in the back of your freezer where it is coldest. Place the freezer bowl on a flat surface in its upright position for even freezing. For convenience, leave your freezer bowl in the freezer at all times. You can take it out any time for immediate use.
B. Assembling the Ice Cream Maker
- Remove the freezer bowl from the freezer and remove the plastic bag. Place the freezer bowl into the centre of the base.
N.B. The bowl will begin to defrost rapidly after being removed from the freezer, therefore use immediately. Have your recipe prepared before assembling the ice cream maker. - Place the mixing arm in the freezer bowl.
N.B. The arm does not fit tightly, it just rests in the centre of the bowl, with the circle facing up. - Place lid onto the base, and twist to lock into place. The easy lock lid mechanism allows the lid to rest on the base in multiple positions.
C. Making Frozen Desserts or Drinks
- For best results, prepare the ingredients in a container from which it is easy to pour.
- Lift the switch to the ON position, the freezer bowl will begin to turn.
- Immediately pour ingredients through the lid. Do not fill the freezer bowl higher than 2cm from the top, as the ingredients will increase in volume during the freezing process.
- Frozen desserts or drinks will be ready in 20-30 minutes. The
time will depend on the recipe and volume of the dessert or drink you are making. If you desire a firmer consistency, transfer the dessert or the drink to an airtight container and store in the freezer for 2 or more hours.
N.B. If the ice cream is stuck on top of the mixing arm, stop the machine briefly and use a spatula to scoop the ice cream off the arm back into the freezer bowl
N.B. Do not store the frozen desserts or drinks in the freezer bowl. Desserts and drinks will stick to the side of the freezer bowl and may damage the bowl, always transfer to a plastic airtight container.
D. Dismantling the Ice Cream Maker
- Remove the lid from the housing by twisting slightly out of its locked position and lifting up.
- Carefully lift out the mixing arm, followed by the freezer bowl. Serve the ice cream, or, for a firmer texture, scoop into an airtight container and place in the freezer.
E. Hints & Tips
- Your recipe should be no more than 1.5 litres of liquid, as it will expand in volume.
- Processing time depends on the recipe, the amount of dessert being made and the temperature of the ingredients being used. All recipes take between 15 and 30 minutes.
- Some recipes use pre-cooked ingredients. For best results, the mixture should be chilled overnight before using.
- Prior to freezing, most mixed recipes may be stored in the refrigerator for up to 3 days (depending on the use by date of the ingredients being used)
- Your Ice Cream Deluxe makes ice cream using fresh natural ingredients, i.e. without the preservatives etc as found in commercial ice creams. Therefore it will not have the same hard consistency, for a firmer consistency, transfer the dessert to an airtight container and store it in the freezer for at least 2 hours before serving.
-
However, the higher the fat content the richer and creamier the result. Using lower fat substitutes may change the taste, consistency and texture of the dessert. When substituting ingredients, ensure you use the same quantity of the substitute as the original ingredient required.
-
You may also substitute artificial sweeteners for sugar. If the recipe is to be pre-cooked, add the sweetener after the heating process is complete (the ingredients have been cooked). Stir the mixture thoroughly to dissolve the sweetener.
- When making sorbet, test the ripeness and sweetness of the fruit before you begin. The freezing process reduces the sweetness of the fruit so that it will not taste as sweet as the recipe mixture. If the fruit tastes tart, add sugar to the recipe. If the fruit is very ripe or sweet, reduce the amount of sugar in the recipe.
- Do not fill the mixing bowl higher than 2cm away from the top. Take this into consideration if you wish to add extra ingredients through the lid.
- Well chilled ingredients require shorter mixing times.
- Mixing times suggestions can vary due to ingredients and type of recipe.
- Ingredients such as chocolate chips and nuts should be added about 5 minutes before the recipe is complete.
- Once the dessert or drink has begun to thicken, add the ingredients through the lid.
- Hazelnuts and other similar ingredients should be roughly chopped beforehand.
4. CLEANING & MAINTENANCE
- Always unplug the appliance before cleaning.
- To clean the base, wipe with a damp cloth and dry. Never use abrasive cleaners or immerse in water.
- To clean the freezer bowl, lid and mixing arm, wash by hand in warm soapy water and dry thoroughly before storing. Do not put in the dishwasher. Never use abrasive cleaners or utensils such as scouring pads as this will damage the bowl.
- Do not put the freezer bowl in the freezer if it is wet. Do not store the lid, mixing arm or base in the freezer. You may store the mixing bowl in the freezer, in its upright position for convenient, immediate use. Before freezing, wrap the bowl in a plastic bag to prevent freezer burn.
- Do not store frozen desserts in the freezer bowl. Transfer desserts to an airtight container for longer storage in the freezer.
N.B. The ice cream will lose its soft consistency and harden after it is stored in the freezer
5. SAFETY CAUTIONS
Always follow these safety cautions when using this appliance to avoid personal injury or damage to the appliance. This appliance should be used only as described within this instruction book.
- Do not immerse the housing base in water or any other liquid or put it in a dishwasher. Disconnect from the mains and clean using a damp cloth. Allow to dry thoroughly before re-use.
- Always disconnect the appliance immediately after use.
- Always unplug from the mains outlet when not in use, before putting on or taking off parts and before cleaning.
- Never disconnect the plug by pulling on the mains lead.
- Always ensure that your hands are dry before removing the plug from the mains outlet.
- Avoid contact with moving parts. Keep hands, hair, clothing and spatulas and other utensils away during operation to reduce the risk of injury and/or damage to the appliance.
- Never use a scourer to clean appliance. Wipe with a warm moist cloth.
- Do not allow the lead to overhang the edge of the table or work surface.
- Stop using the appliance immediately if the cord is damaged. The cord must be replaced by the manufacturer, its after sales service or a similarly qualified person to avoid risk of injury to the user.
- Do not use the appliance if it has fallen or shows signs of damage. Discontinue use immediately.
- Use this appliance only as described within these instructions for use. Retain these for future reference.
- For indoor use only.
- For domestic use only.
- This appliance should not be used by adults or children whose lack of experience, product knowledge or disability might cause a hazard, unless they have been correctly instructed and are adequately supervised.
- Children should always be supervised to ensure that they do not play with this product.
- This appliance complies with the basic requirements of Directives 04/108/EEC (Electromagnetic Compatibility) and 06/95/EEC (Safety of domestic electrical appliances) amended by Directive 93/68/EEC (CE Marking).
- Do not use any attachments other than those recommended or sold by Cuisinart.
-
WARNING: A cut off plug inserted into a 13 amp socket is a serious safety hazard. Ensure the cut off plug is disposed of safely.
-
WARNING: Polythene bags over the product or packaging may be dangerous. To avoid danger of suffocation, keep away from babies and children. These bags are not toys.
- Do not use any attachments other than those recommended
- Do not use the freezer bowl on flames, hot plates or ovens. Do not expose to heat source. Do not wash in dishwasher; doing so may cause risk of fire, electric shock or injury.

The symbol on the product or on its packaging indicates that this product may not be treated as household waste. Instead it should be handed over to the applicable collection point for the recycling of electrical and electronic equipment.
By ensuring this product is disposed of correctly, you will help prevent potential negative consequences for the environment and human health, which could otherwise be caused by inappropriate waste handling of this product. For more detailed information about the recycling of this product, please contact your local council office or your household waste disposal service.