Caruso - Hi-Fi System T+A - Free user manual and instructions
Find the device manual for free Caruso T+A in PDF.
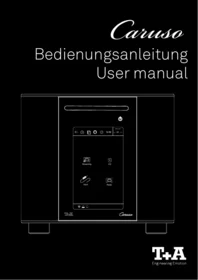


| Product type | T+A Caruso Multi-Source-System |
| Dimensions (W x H x D) | 29 x 26.5 x 29 cm (11.4 x 10.4 x 11.4 inches) |
| Weight | 12 kg (26.5 lbs) |
| Power supply | 220-240 V or 100-127 V, 50-60 Hz |
| Max. power consumption | 200 W |
| Standby power consumption | <0.5 W (Eco standby, Alexa off, network off); 6.5 W (WLAN active, Alexa off) |
| Disc drive formats | CD/DA, CD-R, CD-RW, CD-Text |
| Amplifier output (nominal) | 1 x 100 W (subwoofer/midrange) + 2 x 50 W (tweeter) |
| Peak output | 1 x 150 W (sub/mid) + 2 x 75 W (tweeter) |
| Frequency response | 10 Hz - 22 kHz (+0/-3 dB) |
| Streaming services | Spotify Connect, Tidal, Deezer, Qobuz, Amazon Alexa, Apple AirPlay |
| Supported network audio formats | MP3, WMA, AAC, OGG Vorbis, FLAC, WAV, ALAC; PCM 32-192 kHz, 16/32-bit |
| Wireless connectivity | WiFi 2.4/5 GHz (IEEE 802.11a/b/g/n/ac), Bluetooth 4.2 with aptX, AVRCP |
| Wired interfaces | LAN (x2), USB 2.0, 2 x RCA analog inputs, RCA analog output (Pre Out), subwoofer output, optical/coaxial digital inputs, headphone jack |
| Radio reception | FM (87.5-108 MHz), DAB/DAB+ (168-240 MHz), Internet radio (Airable, >11,000 stations) |
| Control options | Touchscreen, remote control, T+A Caruso Navigator app (Android/iOS) |
| Display | Integrated touch display with adjustable brightness and ambient lighting |
| Alarm and sleep timer | Five programmable alarms, sleep timer (1-60 minutes) |
| Cleaning and maintenance | Wipe the case with a soft, dry cloth only; never use solvent-based or abrasive cleaners |
| Safety protection | Class 1 laser product, CE compliant, robust all-metal case, protective earth connector |
| Included accessories | Remote control, 2 antennas (WLAN/Bluetooth), telescopic radio antenna, mains cord, quickstart guide |
| Repair and spare parts | Repairs and fuse replacements by authorised T+A specialist workshop only; internal battery replaced by T+A dealer |
| Environmental compliance | WEEE-Reg.-No.: DE 72473830W; contains software under GPL, source code available on request |
Frequently Asked Questions - Caruso T+A
User questions about Caruso T+A
0 question about this device. Answer the ones you know or ask your own.
Ask a new question about this device
Download the instructions for your Hi-Fi System in PDF format for free! Find your manual Caruso - T+A and take your electronic device back in hand. On this page are published all the documents necessary for the use of your device. Caruso by T+A.
USER MANUAL Caruso T+A
This product contains software in form of object code that is partially based on free software under different licenses, especially the GNU General Public License. You can find details on this in the License Information which you should have received with this product.
If you have not received a copy of the GNU General Public License, please see http://www.gnu.org/licenses/. For a period of three years after last distribution of this product or its firmware, T+A offer the right to any third party to obtain a complete machine-readable copy of the corresponding source code on physical storage medium (DVD-ROM or USB stick) for a charge of 20€. To obtain such copy of the source code, please write to the following address including information about product model and firmware version: T+A elektroakustik, Planckstr. 9-11, 32052 Herford, Germany.
The GPL license and further information about Licenses can be found on the internet under this link:
https://www.ta-hifi.de/support/licence-information-caruso/
deezer

TIDAL

Works with
Apple AirPlay

qobuz
airâble

Spotify®
Sicherheitshinweise
Class 1 LASER PRODUCT

Abb. 1
Wichtige Hinweise
Vorsicht
Streaming
Amazon Alexa

amazon alexa
Android

Apple iOS
DAB
Einstellungen
Sendersuche

We are delighted that you have decided to purchase a T+A product. Your new T+A Multi-Source-System is a Hi-Fi unit of the highest quality, designed and developed with a single aim as top priority: to satisfy the requirements of music lovers.
This unit is the embodiment of innovative thinking and solid quality, exploiting the finest materials and components available, and all these factors contribute to a machine which will satisfy you're most stringent demands and your most searching requirements for a period of many years.
Our production areas are supervised by highly qualified expert staff, and all final production units are checked comprehensively by a fully automated, computer-controlled system to ensure uniformly high quality. We guarantee that our products meet our own specifications to the full.
At all stages of production we avoid the use of substances which are environmentally unsound or po-
tentially hazardous to health, such as chlorine-based cleaning agents and CFCs.
We also aim to avoid the use of plastics in general, and PVC in particular, in the design of our products. Instead we rely upon metals and other non-hazardous materials; metal components are ideal for recycling, and also provide effective electrical screening.
Our robust all-metal cases exclude any possibility of external sources of interference affecting the quality of reproduction. From the opposite point of view our products' electro-magnetic radiation (electro-smog) is reduced to an absolute minimum by the outstandingly effective screening provided by the metal case.
We would like to take this opportunity to thank you for the faith you have shown in our company by purchasing this product, and wish you many hours of enjoyment and sheer listening pleasure with your Caruso.
Content
Scope of delivery 47
Caruso Multi-Source-System 47
Getting started 48
Safety notes 50
Installation and connection 52
Installation 52
Connection 52
WLAN - antenna 52
LAN 52
BLUETOOTH - antenna 52
RADIO - antenna 52
ANALOG IN 53
ANALOG OUT 53
DIGITAL IN 53
MAINS CONNECTION and SWITCH 53
Connection and wiring 54
Controls and functions 55
Disc drive 55
Switching on / off 55
Alarm clock 56
Navigation 56
Volume control 56
Source selection 56
Network Status | Eject CD | Paired Bluetooth devices 56
Remote control 57
Charging the remote control 58
Important information 58
Playback 59
Notes 59
Playback 59
General operation 60
Inserting and ejecting a disc 60
Input 61
Radio 61
Streaming 62
Amazon Alexa 62
Spotify Connect 62
Apple AirPlay 62
Bluetooth 63
Using the app....63
Settings 64
Call up the menu 64
Audio menu 64
Network menu 66
Status page 66
Network configuration (WiFi setup) 66
Set up WiFi automatically via WPS 67
iOS (Apple) users 67
LAN connection 67
Source menu 68
Bluetooth 68
FM 69
DAB 70
Internet Radio 71
CD 71
Hot buttons 71
Analog- / 72
Digital sources 72
Ambient- 72
Lighting 72
Streamingservices 73
Alarm 74
System menu 75
Alarm clock 76
Notes on Energy Saving 77
Software update 77
Trouble shooting 78
Technical specifications 80
Caruso Multi-Source-System
Infrared remote control handset Caruso
2 pcs. antenna for WLAN and Bluetooth
Telescopic antenna for radio reception
Mains cord
Quickstart guide
Caruso Multi-Source-System
The Caruso is a compact Multi-Source-System that provides access to all modern music sources:
• Streaming from the network or internet
• Spotify Connect, Tidal, Deezer, Qobuz, and Amazon Alexa
• CD, DAB+, and FM radio reception
• Bi-directional Bluetooth module and inputs for digital and analog sources such as TV devices
Due to its compact design, the Caruso can be integrated as a classic stereo system in almost any room. Optional shelf or floor-standing speakers are available for this purpose.
Operation is done via an integrated touch display, the supplied remote control, or through the T+A Caruso Navigator app for Android and iOS.
Getting started
General information
Carefully unpack the Caruso and store the original packing material carefully. The carton and packing are specially designed for the Caruso and will be needed again if you wish to move the equipment at any time. If you have to transport the Caruso, it must always be carried or sent in its original packaging in order to prevent damage and defects.
The information in these operating instructions are marked as follows:
Caution
Risk of injury
This symbol marks text passages that provide you with additional notes and background information and are intended to facilitate understanding.
Notice
Risk of damage of objects
Symbols and notes on the back of the Caruso

ATTENTION!
The device carries hazardous voltages inside the enclosure. Therefore the device must not be opened. There is a risk of fatal electric shock.
The device may only be opened by a qualified specialist. Repairs and the replacement of fuses must be carried out by an authorised specialist workshop. Apart from the procedures described in the operating instructions, no other work may be carried out on the unit by the user.

Attention high voltage!
This symbol indicates hazardous voltages.

Caution!
Instructions marked with this symbol must be strictly observed for trouble-free and safe operation of the device.

This symbol marks direct voltages (DC).
Only connect devices to sockets with this symbol that are suitable for the specified voltage.

This symbol marks alternating voltages (AC).
The AC voltage required for the device can be found on the printing at the mains input socket. Do not connect the device to other power supplies.

This symbol marks the protective earth connector (ground connection).
The unit is designed for operation at a protective earth conductor socket.
CE All the components we use meet the German and European safety norms and standards which are currently valid. This product complies with the EU directives. The declaration of conformity can be downloaded from www.ta-hifi.com/DoC.

The Spotify Software is subject to third party licenses found here: www.spotify.com/connect/third-party-licenses.

Qualcomm aptX is a product of Qualcomm Technologies, Inc. and/or its subsidiaries. Qualcomm is a trademark of Qualcomm Incorporated, registered in the United States and other countries. aptX is a trademark of Qualcomm Technologies International, Ltd., registered in the United States and other countries

The Bluetooth® word mark and logos are registered trademarks owned by Bluetooth SIG, Inc. and any use of such marks by T+A elektroakustik is under license. Other trademarks and trade names are those of their respective owners.

Amazon, Alexa and all related logos are trademarks of Amazon.com, Inc. or its affiliates."
This product contains software in form of object code that is partially based on free software under different licenses, especially the GNU General Public License. You can find details on this in the License Information which you should have received with this product.
If you have not received a copy of the GNU General Public License, please see http://www.gnu.org/licenses/.
For a period of three years after last distribution of this product or its firmware, T+A offer the right to any third party to obtain a complete machine-readable copy of the corresponding source code on physical storage medium (DVD-ROM or USB stick) for a charge of 20€. To obtain such copy of the source code, please write to the following address including information about product model and firmware version: T+A elektroakustik, Planckstr. 9-11, 32052 Herford, Germany.
The GPL license and further information about Licenses can be found on the internet under this link:
https://www.ta-hifi.de/support/licence-information-caruso/


Safety notes
For your own safety please consider it essential to read these operating instructions right through, and observe in particular the notes regarding setting up, operation and safety.
The operation instructions, the connection guidance and the safety notes are for your own good - please read them carefully and observe them at all times. The operating instructions are an integral part of this device. If you ever transfer the product to a new owner please be sure to pass them on to the purchaser to guard against incorrect operation and possible hazards.
The device is intended to be connected to a mains outlet with protective earth connector. Please connect it only with the mains cable supplied to properly installed mains outlets with protective earth connector. The power supply required for this unit is printed on the mains supply socket. The unit must never be connected to a power supply which does not meet these specifications.
This device is connected to the power supply as long as the power cord is connected.
Even if the device is switched off and the status indicators are dark, the device still carries mains voltage inside. To disconnect the device completely from mains power supply, the mains plugs must be withdrawn from the wall socket. Please make sure that the mains plugs are easily accessible. Even when the unit is in standby mode, it has a low power consumption. If the unit is not to be used for a long period disconnect it from the mains supply at the wall socket.

The device is designed to operate in a temperate climate and altitudes up to 2000 m above sea level. The range of permissible operating temperatures is +10 ... +35°C. This device is designed exclusively for reproducing sound and/or pictures in the domestic environment. It is to be used in a dry indoor room which meets all the recommendations stated in these instructions.

Where the equipment is to be used for other purposes, especially in the medical field or any field in which safety is an issue, it is essential to establish the unit's suitability for this purpose with the manufacturer, and to obtain prior written approval for this usage.
If the unit gets very cold (e.g. when being transported), condensation may form inside it. Please do not switch it on until it has had plenty of time to warm up to room temperature, so that any condensation evaporates completely.
Before placing the unit on sensitive lacquer or wood surfaces please check the compatibility of the surface and the unit's feet on a non-visible point and if necessary use an underlay. We recommend a surface of stone, glass, metal or the like.
Please consider the weight of the device. Never place the device on an unstable surface; the machine could fall off, causing serious or even fatal injury. Many injuries, especially to children, can be avoided if the following simple safety precautions are observed:
- Use only such items of furniture which can safely bear the weight of the device.
- Ensure that the device does not project beyond the edges of the supporting furniture.
- Do not place the device on tall furniture (e.g. bookshelves) without securely anchoring both items, i.e. furniture and device.
- Explain to children the hazards involved in climbing on furniture to reach the device or its controls.
The unit should be set up in a well ventilated dry site, out of direct sunlight and away from radiators. The unit must not be located close to heat producing objects or devices, or anything which is heat sensitive or highly flammable.
The ventilation openings must not be covered or closed. If the system components are to be stacked then the device must be the top unit. Do not place any object on the top cover.
When installing the unit on a shelf or in a cupboard it is essential to provide an adequate flow of cooling air, to ensure that the heat produced by the unit is dissipated effectively. Any heat build up will shorten the life of the unit and could be a source of danger. Be sure to leave free space of 10 cm around the unit for ventilation.
Liquid or particles must never be allowed to get inside the unit through the ventilation slots. Mains voltage is present inside the unit, and any electric shock could cause serious injury or death. Never exert undue force on mains connectors.
Protect the unit from drips and splashes of water; never place flower vases or fluid containers on the unit. Do not place naked flame sources, such as candle lights on the device.
Disconnect the mains plug at the wall socket before cleaning the case.
The surfaces of the case should be wiped clean with a soft, dry cloth only.
Never use solvent-based or abrasive cleaners!
Before switching the unit on again, check that there are no short-circuits at the connections, and that all cables are plugged in correctly.
If the device has been in storage, or has not been used for a protracted period (> two years), it is essential to have it checked by a specialist technician before re-use.

The terminals (marked with the ⚠ symbol) can carry high voltages.
Always avoid touching terminals and sockets and the conductors of cables connected to them. Unless ready-made cables are used, all cables connected to these terminals and sockets must always be deployed by a trained person.

In its original condition the unit meets all currently valid European regulations. It is approved for use as stipulated within the EC.
By attaching the CE symbol to the unit T+A declares its conformity the EC directives and the national laws based on those directives. The declaration of conformity can be downloaded from www.ta-hifi.com/DoC. The original, unaltered factory serial number must be present on the outside of the unit and must be clearly legible! The serial number is a constituent part of our conformity declaration and therefore of the approval for operation of the device. The serial numbers on the unit and in the original T+A documentation supplied with it (in particular the inspection and guarantee certificates), must not be removed or modified, and must correspond.
Infringing any of these conditions invalidates T+A conformity and approval, and the unit may not be operated within the EC. Improper use of the equipment makes the user liable to penalty under current EC and national laws.
Any modifications or repairs to the unit, or any other intervention by a workshop or other third party not authorised by T+A, invalidates the approval and operational permit for the equipment.
Only genuine T+A accessories may be connected to the unit, or such auxiliary devices which are themselves approved and fulfil all currently valid legal requirements.

The only permissible method of disposing of this product is to take it to your local collection centre for electrical waste.
Registration according to the EU directive "Waste Electrical and Electronic Equipment" WEEE-Reg.-No.: DE 72473830W
The case should only be opened by a qualified specialist technician. Repairs and fuse replacements should be entrusted to an authorised T+A specialist workshop. With the exception of the connections and measures described in these instructions, no work of any kind may be carried out on the device by unqualified persons.
If the unit is damaged, or if you suspect that it is not functioning correctly, immediately disconnect the mains plug at the wall socket, and ask an authorised T+A specialist workshop to check it.
The unit may be damaged by excess voltage in the power supply, the mains circuit or in aerial systems, as may occur during thunderstorms (lightning strikes) or due to static discharges.
Special power supply units and excess voltage protectors such as the T+A ,Power Bar' mains distribution panel offer some degree of protection from damage to equipment due to the hazards described above.
However, if you require absolute security from damage due to excess voltage, the only solution is to disconnect the unit from the mains power supply and any aerial systems.
To avoid the risk of damage by overvoltages we recommend to disconnect all cables from this device and your HiFi system during thunderstorms.
All mains power supply and aerial systems to which the unit is connected must meet all applicable safety regulations and must be installed by an approved electrical installer.
The device is not designed for use by children. The device must not be operated unsupervised. Make sure that it is out of reach of children.
Batteries shout not be exposed to excessive heat like sunshine, fire or the like.
Very loud continuous listening to program material via earphones, headphones and loudspeakers can lead to permanent loss of hearing. Prevent health risks and avoid permanent hearing at high volume.
If the device has to be stored, place it in its original packaging and store it in a dry, frost-free location. Storage temperature range 0...40 °C
Class 1 LASER PRODUCT
CAUTION This product is a class 1 laser product classified under the Safety of laser products IEC 60825-1:2014.
Installation and connection
Installation
Carefully unpack the unit and store the original packing material carefully. The carton and packing are specially designed for this unit and will be needed again if you wish to move the equipment at any time. Install the unit in a suitable location. Please observe all information on connection and installation in chapter „Safety notes“ on page 48.
Connection
Before you can use the Caruso with all its functions and sources, you first have to make some important connections and/or connect antennas. The connections of the Caruso are described in detail in the following.
Do not connect the Caruso and the other components to the mains until all necessary connections between the devices have been established.
① WLAN - antenna
To connect the Caruso to your network (router) via WLAN, connect one of the two supplied antennas to this socket. To ensure good reception, screw the antenna on tightly and position it as shown.
i Antenna is not required when the connection to the Internet is made through a cabled network (LAN).
② LAN
LAN 1 Connect the network cable for the connection to your network (router) here
When using the WLAN connection, this socket must remain free!
LAN 2 LAN output socket for other devices (TV, game console) Via this socket, the Caruso can provide other devices access to the Internet, if it is itself connected to your network router via socket 1.
③ BLUETOOTH - antenna
For audio transfer via Bluetooth, e.g. from a smartphone to the Caruso or from the Caruso to Bluetooth headphones, one of the two antennas must be connected to this socket. Screw the antenna tight and position it as shown for maximum range.
④ RADIO - antenna
Connection socket for the supplied FM/DAB radio antenna or for connection to an existing antenna installation.
For radio reception, the telescopic antenna supplied must be fully pulled out. For first-class reception, even of weak stations, a high-quality outdoor antenna installation is essential.
IN 1 / IN 2 Universal line inputs for connecting any stereo audio or TV set with Cinch output (RCA).
⑥ ANALOG OUT
ANALOG Analog audio output (Pre Out), for connecting e.g. active loudspeakers. The level of this output is variable.
SUB Output socket for an active subwoofer. The connection of a subwoofer is optional.
Headphones Socket for stereo headphones
⑦ DIGITAL IN
USB Connection socket for a USB memory stick or an external hard drive.
COAXIAL Input for digital source devices with electrical coaxial digital output.
OPT Input for digital source devices with optical TOSLINK digital output.
⑧ MAINS CONNECTION and SWITCH
The mains cable is plugged into this socket. The switch disconnects the device from the mains.
When the main power switch is turned off, the unit is not completely disconnected from the mains. To disconnect the unit completely from the mains, the mains plug must be withdrawn.


Controls and functions

① Disc drive
Feed slot for standard discs. Insert the disc with the label side facing up until the disc is automatically fed in.
Notice
The disc drive is made only for the playback of round 12 cm standard discs.
In order to prevent damaging the disc drive, do not insert 8 cm discs or those with unusual shapes.
② Switching on / off
• A short press on this button switches the Caruso on.
- Another button press switches the Caruso into Comfort-Standby. In this operating mode the time can be displayed and the Caruso can be switched on via the app
- To put the Caruso into ECO-standby-mode, the Comfort-standby-function must be deactivated in the settings, see „Comfort Standby“ on page 73. In the Eco-standby-mode, no comfort functions are active, and the device can only be turned back on either via remote control or directly on the device.
Displays the current time
④ Navigation

HOME
A short tap on this button calls up the start page (see previous page) for source selection

BACK
Tap this button to return to the previous page / menu level.

PLAYBACK
Swaps to play view during running playback.


ALEXA
Enables and disables the Amazon Alexa service.
Tap on the icon to deactivate the service.
When the microphone symbol is crossed out in red, the microphones on the top of the Caruso are switched off.
Tap on the microphone icon to switch the microphones on and activate the Amazon Alexa Service.


SETTINGS
With this button you can access the various menus for system, audio, network and source settings.
⑤ Volume control
Buttons for volume adjustment
Briefly touching the selected volume mutes playback. Tap again to switch the sound back on.
⑥ Source selection
Select the desired source by tapping here:
- Streaming
• CD - Input
- Radio

Under the source Network you will find all streaming sources that require an Internet connection and the source USB.
⑦ Network Status | Eject CD | Paired Bluetooth devices


LAN connection/ active WiFi

No network connection

Eject CD

Paired Bluetooth devices
Remote control
On and off/ Muting
For switching on/ off, press and hold the button until the display turns lightens up/ turns dark.
A short press during operation switches the sound off and on (muting).
Freely assignable shortcut buttons for often used sources.
Forward/Backward
Selection of the next or previous title / station during playback.
Cursor buttons for selection and playback control
Playback control/ Confirmation button
Back button
Pressing briefly returns to the previous selection screen.

Indicator LED
Flashes during operation and charging.
A brief press switches the Amazon Alexa service on and off.
Rocker switch for controlling the volume
Press „plus“ or „minus“ to adjust the volume in fine increments. If the button is pressed and held, the volume will be changed continuously.
HOME button
Press briefly to return to the home screen.
Displays the current playback screen (Playscreen).
A brief press opens the audio settings menu.
Opens the alarm settings and quits a currently active alarm.
Depending on the time of delivery, you may have received either a remote control with a replaceable battery or a remote control with an internal Li-ion battery.
If your remote control does not have a Micro-USB-connection, you can replace the battery with a battery of the same or equivalent type.
The remote control has an internal rechargeable battery (Li-Ion battery) that cannot be removed or replaced by the user.
The remote control battery is automatically charged when connected to the USB port on the back of the Caruso (Fig. 1).
The charging process is indicated by the red flashing LED on the remote control. As soon as the battery is fully charged, the LED lights permanently red.

Fig. 1
Important information

Caution
Risk of explosion of Li-Ion batteries
To avoid injury,
• Do not charge the remote control unattended
- Allow a very cold remote control to warm up to room temperature before charging
• Do not replace batteries yourself, but contact your T+A-dealer to replace the batteries
- Protect the remote control from moisture, cold, heat and dust
- Do not expose batteries to excessive heat such as sunshine, fire or the like
The remote control cannot be used to control the device when the battery is on charge.
The remote control is fitted with an internal rechargeable battery (Li-Ion battery), which cannot be removed or replaced by the user. If you eventually notice that the battery only retains a little of its original capacity, and the period you can use the remote control is greatly reduced, then it is time to contact your T+A dealer and ask him to fit a replacement battery
- The remote control contains a Li-Ion battery. Like any other electrical device, the remote control must not be discarded in the normal domestic waste. It must be taken to your local collection point for electrical scrap.
- Exhausted batteries must never be thrown into the household waste! They should be returned to the battery vendor (specialist dealer) or your local toxic waste collection point, so that they can be recycled or disposed in a proper way. Most local authorities provide collection centres for such waste, and some provide pick-up vehicles for old batteries.
Notes
In addition to operation via the touchscreen on the device and by remote control, the Caruso can also be controlled via the T+A Caruso NAVIGATOR App, (see „Using the app“ on page 61).
Regardless of how the device is operated, simultaneous or reciprocal operation via the app and directly on the device should be avoided. Otherwise, depending on the network structure, synchronisation errors may occur in some cases, and this may cause incorrect display content.
Playback


Repeat off
Tracks are not repeated

Repeat all
All tracks of a playlist/CD are repeated

Repeat Song
Only the current track is repeated
- If necessary, first reduce the volume.
- If you are not on the Home screen, tap the 📋 icon in the upper line of the screen first.
- Now select the desired source.
- After tapping the source, a new page opens with the content available for the selected source (presets, tracks on a disc, folders, sub sources, etc.)
- Select the desired title, station, etc.
- Playback starts shortly after tapping the source and the view automatically switches to the playback view.
- Press the ← button to return to the selection screen, where you can choose another station.
For FM or DAB radio playback, radio presets must be saved first, see or „DAB“ on page 68.
For the use of music streaming services, a paid subscription may be required.
The subscription user data must be entered and saved in the source settings in the system menu before first use, see „Streamingservices“ on page 71.
Inserting and ejecting a disc
- Select Disc Ⓞ as source.
- Insert the disc into the drive until the disc is automatically fed in (see illustration).
- To eject the disc, swap to playview if necessary. For this, touch the ⏻ symbol on the top line of the display.
- Briefly touch the ≅ button to eject the disc.
- Once the disc is ejected as shown below, it can be removed.
If ejecting the CD does not work as intended, you can activate the emergency eject function by pressing and holding △ on the bottom edge of the screen.
Notice
The CD will be fully ejected from the drive and may fall out of the device. Be sure to catch the CD with your fingers in time.

If the disc is not removed within 10 seconds, it is automatically fed in again to protect the disc.
The Input source offers a selection of analog inputs for connecting stereo audio or TV devices (RCA), for example, as well as inputs for digital source devices (TOSLINK and COAX).
A USB connection is also available.
The Bluetooth (BT) source enables playback from a connected Bluetooth device.

Radio
The Radio source provides FM, DAB and Internet radio reception.
Select the desired source to start playback (a station search must be carried out beforehand, see „FM“ on page 67, „DAB“ on page 68 or „Internet Radio“ on page 69

Streaming
The music streaming services Deezer, TIDAL, Qobuz and playback via a media server (UPNP) and podcasts are available via the Streaming source.
Furthermore, voice commands from Amazon Alexa can be processed.

Amazon Alexa

amazon alexa
To use Amazon Alexa, the Caruso must be registered at Amazon under http://alexa.amazon.com (see „For AMAZON ALEXA“ on page 71)
- If necessary, tap on the red 📋 symbol in the upper line of the display to activate the microphones for Alexa
- As soon as the O symbol is displayed, Alexa can be started with the trigger word ALEXA, regardless of the currently selected source.
- Depending on activated/installed skills and booked Amazon subscriptions, the range of functions of Alexa varies. To get more information please visit https://www.amazon.com
Spotify Connect
The Caruso supports playback via Spotify.
Use your phone, tablet or computer as a remote control for Spotify.
Go to https://connect.spotify.com to learn how
- Connect the Caruso and the Smartphone/Tablet to the same WiFi.
- Start the Spotify App and log in to Spotify.
- Start the playback via the Spotify App
- The Caruso appears in the app in the list of available devices.
- To start playback on the Caruso, select it by tapping on the Caruso.
- Playback now starts via the Caruso.
Apple AirPlay
• The Caruso supports playback via Apple AirPlay.
- To do this, connect the Caruso and the smartphone/tablet to the same WiFi.
- Start the desired AirPlay-compatible app (e.g. iTunes or similar).
- Start playback.
- Caruso appears in the app, in the list of available devices
- To start playback on the Caruso, select it from the list by tapping it.
- The source on the Caruso will automatically switch to AirPlay and playback will start on the Caruso.
You can find more information at: https://www.apple.com/airplay/

Spotify®


Works with
Apple AirPlay
- If necessary, first reduce the set volume.
- If you are not on the Home screen, tap on the 🎧 icon on the left side of the screen.
- Select the source Input
- Select the source BT ✗
- In order to play music from a Bluetooth capable device via the Caruso, the external device must first be connected see „Bluetooth“ on page 66.
- If there is no device connected to the Caruso yet (DISCONNECT display), you can start the search for Bluetooth devices on your mobile device.
- If the Caruso is found, connect it to your mobile device. If the connection is successfully established, the display changes to CONNECTED.
Bluetooth®
→ Now playback can be started on your mobile device.

Using the app
Two Apps are available for controlling the sound system using the Apple iOS and Android operating systems. Please download the appropriate version from the Appstore and install it on your tablet PC or smartphone.
You will find the App under the name "T+A CARUSO NAVIGATOR" in the Appstore.
Alternatively you can scan the QR code printed below.
i Simultaneous or alternating operation via app and directly on the device should be avoided. Otherwise, depending on the network structure, in rare cases synchronization errors may occur, causing incorrect messages on the displays.

Android

Apple iOS
You can find a detailed user manual of the T+A CARUSO NAVIGATOR in the settings menu of the App under Help and Support.
Settings
In the configuration menu all settings of the device can be made. The configuration menu is divided into four categories: Audio, Network, Sources and System. The individual menus are described in detail in the following chapter.
Call up the menu
- Tap on the ⏻ button to open the configuration menu.
- Select the desired menu category by tapping the corresponding tab.
- The selected category is marked in blue.
- To quit the menu, tap on the 🏠 button.
If the ∧ ∨ symbols are shown at the bottom of the display, the menu is divided into two pages. You can switch between the menu pages by tapping the symbols.

Audio menu
| Balance | This menu point allows you to alter the balance between the left and right loud-speakers in order to compensate an unfavourable listening position. |
| Loudness | The Caruso features a volume-dependent tone control (LOUDNESS) which compensates for the frequency-dependent sensitivity of the human ear, and therefore of human hearing, at very low volume levels.This set-up option is used to switch loudness on or off. |
| Tone control | This menu point can be used to disable (by-pass) the Carusos tone controls.When the tone controls are switched off, any adjustments you made to the following menu points “BASS”, „MIDRANGE“ and “TREBLE” have no effect. |
| Treble | This menu point allows you to alter the treble setting. |
| Midrange | This menu point allows you to alter the midrange setting. |
| Bass | This menu point allows you to alter the bass setting. |
| Contour Presence | The purpose of this menu point is to adjust the Contour filter for the Presence range.This option enables you to improve speech intelligibility in spoken word programmes,documentaries and sport transmissions. |
| Contour Fundamental | The purpose of this menu point is to adjust the Contour filter for the fundamental tone.If you prefer a warmer sound image, amplify the fundamental sound (+1 ... +3). For a cooler sound image, or to eliminate resonance effects, the fundamental tone should be reduced (-1 ... -2). |
| Subwoofer | This menu item enables and disables the subwoofer output for the connection of an external subwoofer. |
| Subwoofer-Crossover | In this menu point you can set the crossover frequency for your subwoofer. |
| Subwoofer-level | The volume of the subwoofer can be adjusted at this point. Adjust the volume of the subwoofer to suit the acoustic conditions of the listening room, and the volume of the other channels. |
| Max. volume level | Here you can set the maximum volume of the Caruso. |
| Speaker | The Caruso's integrated loudspeakers can be switched on and off under this menu item. |
| Analog out | In this menu item, the analog output ANALOG OUT can be switched on and off independently of the Caruso's loudspeakers, e.g. for the operation of active loudspeakers in an adjacent room. |
When headphones are connected, all menu items that have no effect on playback via headphones are not visible.
The tone control and contour settings have no effect on the analog output (Analog Out).
Status page

Depending on the bandwidth of your Internet and network connection, you can select the sound quality (bit rate) of the streamed content here.
Select the quality level in order to avoid dropouts during playback.
Network configuration (WiFi setup)
- Make sure that no LAN cable is connected to the LAN 1 socket and that the WiFi antenna is connected (see „Connection and wiring“ on page 52)
- Tap on enter Network configuration (see fig. status page above) to scan for available networks
- The list ① shows the detected WiFi networks.
- Select the desired WiFi by tapping it.
- The selected wireless network is displayed in the SSID field ②
- Now tap into the field for the WiFi password ③ to open the keyboard.
- Enter the WiFi password and confirm with Enter on the keyboard.
- Save the settings by tapping on confirm ④.
- Tap on cancel ⑤ in order to cancel the network configuration.
A properly working home network (cable network or WiFi network) with router and (DSL) Internet access must be installed. If you have any questions about installation, setup and the general configuration of your network, please contact your network administrator or a network specialist.

- Make sure that the WiFi antenna is connected correctly (see „Installation and connection“ on page 50)
- Open the settings by a tap on the ⚙ button.
- Select the Network Settings menu by tapping on □□□.
- Now start the WPS function on your router (or access point).
- After WPS is active on your router, you can also start the WPS configuration on your Caruso by tapping-on the confirm button right beside the WPS Configuration menu item.
- Wait until the device has automatically connected to the WiFi and the name of the network has been adopted in the SSID field.
- Exit the menu by a brief tap on the 📋 button.
iOS (Apple) users
The Caruso supports Wireless Accessory Configuration (WAC).
- Turn on the Caruso.
- Open the Settings/WiFi menu on your iOS mobile device.
- Once the device is started, you will find an entry under the Set Up New Airplay Speaker section starting with SET UP NEW AIRPLAY SPEAKER Caruso-xxxxxx (last 6 MAC digits)
• After selecting this entry, you can choose the network to which your Caruso will be connected. - After confirming the selection, the network configuration data will be automatically transferred to the device, and the Caruso will connect to the selected network.
LAN connection
If the Caruso is operated via a LAN connection and not via WiFi, connect the LAN socket (socket „1“) to an operational network (router) with Internet access.

When connecting to the router (network/internet), always use the LAN port „1“. The second port is used to connect other Internet-capable devices, e.g. TV, game console, etc.
Bluetooth
The Bluetooth function can be activated and deactivated under this menu item.
If a Bluetooth connection is established, the connection can be disconnected by tapping disconnect. Reset resets the Bluetooth interface.

Tap on Bluetooth Headphone Settings

Pairing Bluetooth headphones
- Turn on the headphones and bring them into pairing mode.
- Start searching for devices by tapping rescan.
• After a short while, the appropriate device (headphones) should appear in the lower list (Available devices). - Tap on the name of the headphone in the list to connect it to the Caruso.
- Once the connection is established, the headphones will appear in the upper list.
- If the headphones will be used in the future, they can be selected and connected directly from here.
- To disconnect the Bluetooth connection, you can simply turn off the headphones.
- Alternatively, the connection can be terminated by tapping Disconnect.
- Playback will then automatically return to the speakers.

Depending on the number of Bluetooth devices which are in the range of the Caruso, it is possible that the desired device is not displayed in the list of available devices. In this case, all Bluetooth devices that are not required should be deactivated and the search should be restarted.


i Up to 12 stations can be stored in the preset list. These can be called up comfortably afterwards via the FM radio source.
Station names are displayed after playing the station for a few seconds.
Save favorites
- Start playing the station you want to save as a favorite.
• To save the currently playing radio station as a favorite, tap on ♥
Call up favorites
- Tap on
• The favorites list opens - Select the desired station
→ Playback starts
The symbols ≡ and ♥ indicate the currently selected list type highlighted in blue: station list or favorites list.
The forward and back buttons accordingly allow selection of radio stations or favorites.
DAB


Internet Radio
airâble
- Select the Internet radio source
• The first radio station in the favorites list will be automatically played.
• If no favorites have been set, the last listened-to radio station will start automatically.
Delete favorites
- Start playback of the favorite to be deleted as described above.
- Tap on the ♥ on the Caruso play screen to remove the station from the favorites list.

CD
If this option is enabled, playback of the disc continues from the last heard part, even if another source such as radio has been listened to in the meantime.
CD
Resume enable

Hot buttons
In this menu item, the three quick selection buttons on the remote control can be assigned to frequently heard sources. In this way, they can be conveniently selected directly.

Analog-/Digital sources
Rename a source
Here you can assign an individual name to the analog and digital inputs. For example, television, game console or similar.
To apply the new source name, tap Enter on the keyboard.
Input level (analog)
The input sensitivity of the analog inputs Analog IN 1 and Analog IN 2 can be adjusted to the output level of the connected source devices. This ensures an even volume level for all sources

Ambient-Lighting
Here you can adjust the ambient lighting to your personal preferences.
For example, you can assign a different colour to each source.
First of all select the source you want to change the settings of in the Source selection list.
It is also possible to set the ambient lighting identically for all sources using the all source menu item.

Streamingservices
The login information for the music streaming services supported by the Caruso can be entered here.
After calling up this menu item, a list of the supported music services is displayed.
For DEEZER and QOBUZ
- Enter the access data (user name and passphrase)
- To do this, tap in the field you want to change and enter the data using the keyboard that appears. Confirm the entry with Enter
• Save the user data by tapping on confirm

For AMAZON ALEXA
- Select the entry O Amazon Alexa Login.
- In the next step select your preferred language and tap on the login button.
- A window opens with a verification code and the Internet address where the login will be carried out.
- Start an Internet browser on your smartphone, tablet PC or personal computer and enter the address shown on the Caruso display (https://amazon.com...).
- Log in with the user data of your Amazon account and enter the registration code.
- As soon as the registration has been successful, a corresponding message will appear on the Caruso display.
- Confirm the message and exit the menu by a brief tap on the button.
Tidal
Registration must be carried out via the Caruso Navigator app, see „Using the app“ on page 61


Spotify Connect
Registration must be carried out via the Spotify Connect app, see „Spotify Connect“ on page 60
The music streaming services supported by the Caruso require a subscription to the corresponding service provider.
To use the basic functions of the Alexa service, you need a free customer account with Amazon. A paid subscription (Amazon Prime) is required to use Amazon Music.
It is possible that the Alexa service does not work as desired after registering with Amazon. In this case, the Caruso must be restarted. Use the main power switch on the rear to turn the Caruso off and back on, then try again.
Alarm
Alarm clock functions can be set here, see „Alarm clock“ on page 74
| Display brightness | Here you can adjust the brightness of the display during normal operation to your personal preferences in several steps. |
| Temporary mode | Here you can set whether the display should be switched on permanently or temporarily.If the temporary mode is activated, the display is only switched on during operation and then automatically switched off again. |
| Clock brightness | Here you can set the brightness of the clock display in standby mode. |
| Sleep timer | The device can turn itself off automatically after a time between 1 and 60 minutes. To activate this function, move the slider to the desired time. Once the set time has been reached, the Caruso automatically switches to standby mode. |
| Time settings | The time of day can be set under this menu item. It is possible to set the time automatically via a radio source, the network or manually.You can change the time format from 24 to 12 hours.Choose the time zone according to the time zone of your country. |
| System settings | LanguageWith this menu item the system language for the the device display is set. The language of transmitted data, e.g. an Internet radio station, depends on the source device or radio station and cannot be set on the Caruso.Auto standbyThe device has an automatic shutdown function (Auto Power Down). If no music signal and no operation is detected for longer than the set time, the Caruso automatically switches to standby mode.To deactivate the Auto Power Down function, select the Off option.Device nameUnder this menu item you can give the Caruso an individual name. The device appears under this name when connected to a home network.Firmware MCU | Firmware BLUETOOTH | Firmware LIBRE | Firmware CDUnder these menu items, the installed software versions are displayed.System ResetBy calling up and confirming this menu item, all personal settings are deleted and the factory settings are restored. |
| Comfort Standby | If this function is activated, the time can be displayed after switching off in standby mode and the Caruso can be switched on via the app.If this function is deactivated, no comfort functions are active and the Caruso can only be switched on again using the remote control or directly on the touchscreen. |
A clock module (timer) is integrated into the device, which can switch on the Caruso with a selectable source or an alarm tone (alarm clock).
If the device is already in operation when the programmed alarm time is reached, the Caruso automatically switches to the set volume and source.
There are five programmable alarm times available.
- If you are not on the Home screen, first tap on 🏠
- Tap on
- Tap on ((o))
- Select Alarm Settings 📊
Programming the alarm clock
- A new page is displayed with an overview of the five programmable alarm clocks
- Select an alarm clock by tapping on the alarm time
| Volume | ||||||||
| √ 20 ^ | ||||||||
| Alarm | ||||||||
| 09:00 | M | T | W | T | F | S | S | |
| 09:00 | M | T | W | T | F | S | S | |
| 09:00 | M | T | W | T | F | S | S | |
| 09:00 | M | T | W | T | F | S | S | |
| 09:00 | M | T | W | T | F | S | S | |

Notes on Energy Saving
The Caruso satisfies the requirements of the latest directives concerning energy-saving measures (EuP directive). The modern design of the mains power supply makes an important contribution to this.
The internal micro-processor constantly ensures that sub-assemblies which are not currently required are automatically switched off.
The device also has an automatic shutdown function (Auto Power Down).
If no music signal and no operation is detected for more than 20, 30 or 60 minutes (depending on the setting in the system menu), the Caruso enters standby mode automatically.
In standby mode the power consumption depends on the still active functions of the Caruso. Please refer to the technical data for details.
In countries outside the EU, in which the EuP directive has no validity, the automatic power-down feature can be disabled if necessary.
Software update
General information
Software updates keep your Caruso up-to-date. They bring new optimisations like faster operation and new features which were not available at the time the device was produced.
Automatic update
If the device is connected to the Internet, the Caruso checks whether a new software version is available for the device after power-on. If an update is available, the Caruso starts the update automatically. The progress of the update is shown on the display. Wait until the process is completely finished. This may take a few minutes.
Only after switching on the device with the power switch on the rear panel or after switching on from Eco standby (no Alexa and no network active) a check for new software is performed.
Notice
In order to avoid problems after updating the software, do not disconnect the Caruso from the power supply during the update process.
Trouble shooting
Many problems have a simple cause and a correspondingly simple solution. The following section describes a few difficulties you may encounter, and the measures you need to take to cure them. If you find it impossible to solve a problem with the help of these notes please disconnect the unit from the mains and ask your authorised T+A specialist dealer for advice.
Device does not switch on
Cause 1:
Mains lead not plugged in correctly.
Remedy:
Check connection, push connector in firmly.
Cause 2:
Mains switch on the back panel not switched on.
Remedy:
Switch the mains switch on.
Device reacts correctly to operation directly on the device, but cannot be operated by remote control
Cause:
The battery of the remote control is completely discharged.
Remedy 1 - for remote control with replaceable battery:
Replace the battery with a new one, see „Charging the remote control“ on page 56
Remedy 2 - for remote control with integrated Li-Ion battery:
Fully charge the remote control using the USB cable supplied, see „Charging the remote control“ on page 56
Loud humming noise from the loudspeakers at the sources Analog 1 and 2
Cause:
Poor contact of the RCA plugs or a defective RCA cable.
Remedy:
Please check carefully all plug connections and connection cables.
No station logos are displayed during FM and DAB radio playback and no cover art is displayed during CD or USB playback
Cause:
The Caruso does not have a connection to the Internet to retrieve the logos and cover art.
Remedy:
Connect the Caruso to the Internet to use all comfort functions, see „Network menu“ on page 64
The USB source cannot be accessed
Cause:
The Caruso has no connection to the Internet.
Remedy:
The Streaming Client in the Caruso needs a connection to the Internet to start. Since the Streaming Client is also responsible for USB playback, a connection to the Internet is required for this purpose as well.
Cause:
The router must be connected via the LAN socket LAN1. The LAN2 socket is intended exclusively for connecting other Internet-compatible devices if the LAN1 socket is already connected to the Internet.
Remedy:
Connect the router's LAN cable (Internet connection) to the LAN1 socket.
The mobile device cannot be connected to the Caruso via Bluetooth
Cause 1:
The Bluetooth function is disabled in the system menu.
Remedy:
Switch on the Bluetooth function.
Cause 2:
There is already a mobile device connected to the Caruso.
Remedy:
Disconnect the existing connection before the new device can be paired.
The device does not respond to the trigger word Alexa.
Cause 1:
The device has just been switched on, it has not restored the network connection again yet
Remedy:
Wait until the network connection is established.
Cause 2:
The microphone needed for the Alexa service is switched off.
Remedy:
Switch the microphone on using the corresponding button in the menu bar at the top of the display.
Streamed content (Internet radio, Tidal, Deezer, Qobuz, Podcasts) is played back with dropouts
Cause:
The Internet and/or network connection does not have sufficient bandwidth.
Remedy 1:
Select a lower sound quality in the Network menu.
Remedy 2:
Connect the Caruso using a LAN cable if it is connected via WLAN.
Technical specifications
Streaming Client
| Formats | MP3, WMA, AAC, OGG Vorbis, FLAC, WAV, ALAC | |
| Data rates | PCM 32...192 kHz,16/32 Bit; MP3 bis 320 kBit; fixed and variable Bitrate | |
| Services | Tidal, Deezer, qobuz, Spotify (Subscription required), Apple AirPlay, Amazon Alexa | |
| Media server | UPnP AV, Media Player 10 (WMDRM10), DLNA compatible servers | |
| Interfaces | LAN | Fast Ethernet 10/100 Base-T |
| WLAN | 2.4 GHz and 5 GHz <20dBm(100mW), IEEE 802.11a/b/g/n/ac. | |
| WLAN frequency range 2.4 GHz: 2412 ... 2483 MHz | ||
| 5.0 GHz: 5150 ... 5250 MHz (Band I) | ||
| 5250 ... 5350 MHz (Band II) | ||
| 5470 ... 5725 MHz (Band III) | ||
| USB | USB 2.0 (5V max. 2,1 A)Formats: FAT, FAT 32 and NTFS | |
Bluetooth
| Supported audio formats | APT-X, MP3, AAC, SBC |
| Frequency band | 2,4 GHz: 2042Mhz ... 2480MhzMax. transmission power <10 dBm (EIRP) |
| RC protocol | AVRCP |
Radio
| Internetradio | Airable Internet Radio Service (> 11000 stations worldwide) |
| FM-Radio | Frequency range: 87,5 - 108 MHz Sensitivity 1 μV S/N > 65 dBA |
| DAB-, DAB+ Radio | Frequency range: 168 -240 MHz (Band III); Sensitivity 2,0 μV, S/N > 96 dBA |
Disc drive unit
| Formats | CD/DA,CD-R, CD-RW / CD-Text. |
| Frequency response | 2 Hz - 20 kHz/100 dB |
Amplifier
| Nominal output | Subwoofer/Midrange + Tweeter | 1 x 100 Watt / 2 x 50 Watts |
| Peak output | Subwoofer/ Midrange + Tweeter | 1 x 150 Watt / 2 x 75 Watts |
| Frequency response | (+0 -3dB) | 10 Hz - 22 kHz |
| Total harmonic distortion | < 0,04 % | |
| Signal-to-Noise ratio / Channel separation | 101 dBA / >90 dB | |
| Analog inputs | 2 x RCA | 1 Veff nom. 2 Veff max. / 20 kOhm |
| Digital inputs | 1 x TOSLINK opt. | PCM 44,1 ... 96 kSps |
| 1 x SP/DIF coax. | PCM 44,1 ... 192 kSps | |
| Outputs | 1 x RCA | PRE OUT 2 Veff / 50 Ohm; |
| 1x SUB OUT | 2 Veff max. | |
| 1x Headphones | 3,5 mm socket, >32 Ohm, 30 mW | |
| Mains in | 220-240 V oder 100-127 V, 50-60 Hz | |
| Max. Power consumption | 200 W | |
| Standby power consumption | Alexa active | No standby mode (The display is dark except for the time display and Alexa microphone indicator.) |
| Alexa deactivated + WLAN active | 6,5 Watts | |
| Alexa deactivated, Network not in use and Display off. | <0,5 Watt | |
| Automatic Power down function | The device automatically switches to standby mode after 20,30, or 60 minutes without signal and operation when the function is activated. (Except when the Alexa service is turned on) | |
| Dimensions (WxHxD) / Weight | 29 x 26,5 x 29 cm (11,4 x 10,4 x 11,4 inch) / 12 kg (26,5 lbs) |
T+A
32052 Herford | Germany
T +49 5221 76760
F +49 5221 767676
info@ta-hifi.com
www.ta-hifi.com


- SICHERHEITSHINWEISE
- CLASS 1 LASER PRODUCT
- WICHTIGE HINWEISE
- VORSICHT
- STREAMING
- AMAZON ALEXA
- DAB
- CONTENT
- USING THE APP
- SETTINGS
- NETWORK MENU
- SOURCE MENU
- ALARM CLOCK
- NOTES ON ENERGY SAVING
- SOFTWARE UPDATE
- TROUBLE SHOOTING
- TECHNICAL SPECIFICATIONS
- CARUSO MULTI-SOURCE-SYSTEM
- GETTING STARTED
- GENERAL INFORMATION
- CAUTION
- NOTICE
- SYMBOLS AND NOTES ON THE BACK OF THE CARUSO
- ATTENTION
- ATTENTION HIGH VOLTAGE
- SAFETY NOTES
- INSTALLATION AND CONNECTION
- INSTALLATION
- CONNECTION
- ⑥ ANALOG OUT
- ⑦ DIGITAL IN
- ⑧ MAINS CONNECTION AND SWITCH
- CONTROLS AND FUNCTIONS
- ① DISC DRIVE
- ② SWITCHING ON / OFF
- ④ NAVIGATION
- HOME
- BACK
- PLAYBACK
- ALEXA
- ⑤ VOLUME CONTROL
- ⑥ SOURCE SELECTION
- ⑦ NETWORK STATUS | EJECT CD | PAIRED BLUETOOTH DEVICES
- REMOTE CONTROL
- ON AND OFF/ MUTING
- FORWARD/BACKWARD
- BACK BUTTON
- INDICATOR LED
- ROCKER SWITCH FOR CONTROLLING THE VOLUME
- HOME BUTTON
- IMPORTANT INFORMATION
- NOTES
- INSERTING AND EJECTING A DISC
- RADIO
- SPOTIFY CONNECT
- APPLE AIRPLAY
- CALL UP THE MENU
- NETWORK CONFIGURATION (WIFI SETUP)
- IOS (APPLE) USERS
- LAN CONNECTION
- BLUETOOTH
- PAIRING BLUETOOTH HEADPHONES
- SAVE FAVORITES
- CALL UP FAVORITES
- INTERNET RADIO
- AIRÂBLE
- DELETE FAVORITES
- CD
- HOT BUTTONS
- ANALOG-/DIGITAL SOURCES
- RENAME A SOURCE
- INPUT LEVEL (ANALOG)
- AMBIENT-LIGHTING
- STREAMINGSERVICES
- FOR DEEZER AND QOBUZ
- FOR AMAZON ALEXA
- TIDAL
- ALARM
- PROGRAMMING THE ALARM CLOCK
- AUTOMATIC UPDATE
- DEVICE DOES NOT SWITCH ON
- DEVICE REACTS CORRECTLY TO OPERATION DIRECTLY ON THE DEVICE, BUT CANNOT BE OPERATED BY REMOTE CONTROL
- LOUD HUMMING NOISE FROM THE LOUDSPEAKERS AT THE SOURCES ANALOG 1 AND
- NO STATION LOGOS ARE DISPLAYED DURING FM AND DAB RADIO PLAYBACK AND NO COVER ART IS DISPLAYED DURING CD OR USB PLAYBACK
- THE USB SOURCE CANNOT BE ACCESSED
- THE MOBILE DEVICE CANNOT BE CONNECTED TO THE CARUSO VIA BLUETOOTH
- THE DEVICE DOES NOT RESPOND TO THE TRIGGER WORD ALEXA
- STREAMED CONTENT (INTERNET RADIO, TIDAL, DEEZER, QOBUZ, PODCASTS) IS PLAYED BACK WITH DROPOUTS
- T+A
Brand : T+A
Model : Caruso
Category : Hi-Fi System