
ENTHOO PRO II SERVER EDITION - Phanteks - Free user manual and instructions
Find the device manual for free ENTHOO PRO II SERVER EDITION Phanteks in PDF.



User questions about ENTHOO PRO II SERVER EDITION Phanteks
0 question about this device. Answer the ones you know or ask your own.
Ask a new question about this device
Download the instructions for your in PDF format for free! Find your manual ENTHOO PRO II SERVER EDITION - Phanteks and take your electronic device back in hand. On this page are published all the documents necessary for the use of your device. ENTHOO PRO II SERVER EDITION by Phanteks.
USER MANUAL ENTHOO PRO II SERVER EDITION Phanteks
ENTHOO PRO II
SERVER EDITION

Thank you
for choosing
PHANTEKS
1. WHAT'S INSIDE?
Introduction 3
Specifications 4
Exploded View 5
Accessories 6
Optional Upgrades 26
Installing the 5.25 inch bay 27
2. CHOOSE YOUR SETUP
Configure your Enthoo Pro 2 7
Getting started 8
Installing the Motherboard 10
Installing the Power Supply 11
Installing a Server Power Supply 12
Installing Fans 14
Repositioning fan bracket 15
Installing Drives 16
Installing Water Cooling 19
Installing Drain Port 21
Installing GPU Support Bracket 22
Connecting Front I/O 23
Cable Management 24
Dust Filters 25
3. SUPPORT
Contact Us 28
Warranty 29
Welcome to Phanteks!
The Enthoo Pro 2 has been designed with extreme performance in mind, featuring Phanteks' innovative 'High-Performance Fabric' that sets a new airflow performance standard in the PC enclosure industry. With an extremely spacious and versatile interior design and state-of-the-art features, the Pro 2 is ready to house any high-end configuration. From SSI-EEB motherboards to extreme water cooling to extensive storage capabilities, anything is possible. The Pro 2 Server Edition expands support for more PCIe devices, server grade hardware and direct cooling.
Phanteks believes that meaningful designs are created through the fusion of form and function.
The Phanteks team

CASE SPECIFICATIONS
| Dimension(WxDxH) | 240 mm x 580 mm x 560 mm(9.45 x 22.83 x 22.05 in) |
| Form Factor | Full Tower |
| Materials | Steel chassis, Tempered glass window** |
| MB Support | SSI-EEB, ATX, Micro-ATX, Mini-ITX, E-ATX,XL-ATX |
| Front I/O | Power button, 4x USB 3.0, Microphone,Headphone, Reset Button,USB 3.1 GEN 2 Type-C |
PCI SLOTS & DRIVE BAYS
| PCI slots | 11x | |
| Internal 3.5" | 10x | (4 included) |
| Internal 2.5" | 11x | (11 included) |
| FAN | 120 MM | 140 MM |
| Front | 4x | 3x |
| Top | 3x | 3x |
| Rear | 1x | - |
| Right Side | 4x | - |
| Left Side | 3x |
| RADIATOR | 120 MM | 140 MM |
| Front | Up to 480 | Up to 420 |
| Top | Up to 360 | Up to 280 |
| Rear | 120 | - |
| Side | Up to 480 | - |
INCLUDED ACCESSORIES
| 3.5" Stackable HDD Bracket | 4x |
| Accessory Bag | 1x |
| GPU Anti-Sag Bracket | 1x |
| PSU rubber pad | 1x |
| PSU rubber pad (high) | 1x |
CLEARANCE
| Max Motherboard size | 375 x 330 mm |
| 13.0 in(W) x 13.6 in(L) | |
| CPU Cooler Clearance | 195 mm (7.7 in) |
| GPU Clearance | 503 mm (19.95 in) |
SUPPORT
| Contact (International) | support@phanteks.com |
| Contact (America) | support@phanteksusa.com |
| Warranty | 5 Years |
- Chassis
- Front Panel
- Right Side Panel
- Left Side Panel*
- Server PSU Bracket
- SSD Cover
- Front Dust Filter
- Top Dust Filter
- Side Dust Filter
- Bottom Dust Filter
- HDD Bracket
- SSD Bracket

4* PH-ES620PC_BK version is not equipped with a tempered glass panel

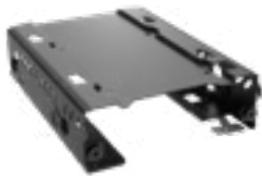
3.5" MODULAR HDD BRACKET
- 4 included in accessory box
- For 3.5" or 2.5" Drive
SERVER PSU BRACKET
- Included in accessory box
- Riser Cable is sold separately


GPU SUPPORT BRACKET
Supports up to 4 GPU's simultaneously
FAN BRACKET
Supports 3x 120 mm fans

TOOLBOX
M3x5 mm Motherboard / SSD screw

Fan screw

Motherboard Stand-off
+ tool

6-32x6 mm Hex screw
6-32x6 mm Thumb screw
6-32x9 mm HDD screw


PSU RUBBER PAD
Rubber pad included to protect your server grade PSU from scratches when installing with the bracket.

The Enthoo Pro 2 has a versatile chassis design, providing you with a myriad of options. With so many possibilities to pick from, you can use this overview to choose and plan the best configuration for your build.

WATERCOOLING - P19.
PREPARATIONS
The Enthoo Pro 2 case is designed to support installation in a standing position.
- Don't turn on the power to your system until installation is complete.
Discharge your body's static electric charge by touching a grounded surface before performing any hardware procedure.
■ Make sure to consult the manuals of your hardware before installation.

If you do not feel comfortable with performing the installation procedure, consult a qualified computer technician.
1. REMOVING FRONT PANEL

- REMOVING LEFT SIDE PANEL*

* Only PH-ES620PTG model is equipped with a Tempered Glass sidepanel
Use the motherboard screws from the toolbox to install your motherboard on the pre-installed stand-offs.


These stand-offs have a special collar to keep the motherboard in place when installing vertically.
REQUIRES:

SUPPORTS
ROG Dominus Extreme
C621 AORUS XTREME
STAND-OFF POSITIONING
ATX / E-ATX Pre-installed

Micro ATX/SSI-EEB/SSI-CEB

Install extra standoffs

Some motherboards require installation or repositioning of the stand-offs. Please consult your motherboard manual for the correct standoff positioning.

For repositioning standoffs
Install the rubber pad onto the chassis to support the power supply.
Secure the Power Supply with 4x PSU screws.
REQUIRES:


A server-grade power supply can be installed using the included rear bracket (A) and holding bracket (B).
First, install the rear bracket (A) with 4x PSU screws and place the power supply in its position.

REQUIRES:


Secondly, the server-grade power supply is secured with the holding bracket from the bottom with 2x PSU screws.
REQUIRES:


Configure your airflow-path with this overview. Some fan locations allow you to choose between storage or cooling to offer more flexibility.
The left-side fan bracket is removed by removing the 4x screws and lifting it out the chassis.
TOP
140 FAN


120 FAN


REAR

120
FAN

FRONT


140
FAN

120
FAN


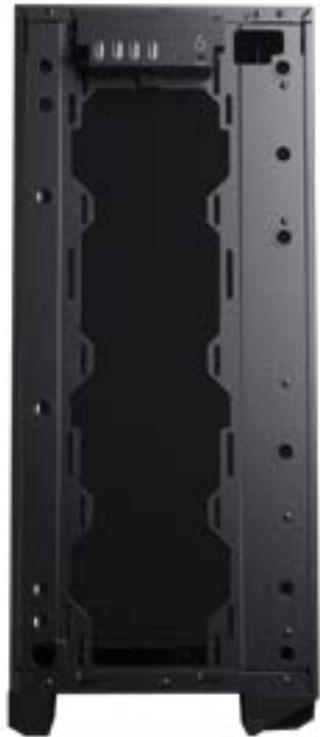
The left-side fan bracket can be installed in a secondary position to pull air from the front of the chassis. Secure the fan bracket with 5x screws as shown.
*This position will block the right side fan and HDD positions.

2.5" SSD INSTALLATION
Three SSDs can be installed on the 3x dedicated SSD bracket and two on each of the 4x SSD covers for a total of 11 SSD drives.
SSD Cover
One SSD can be installed on the front of the cover with 4x
SSD screws:


Another SSD can be placed without tools on the rear side of the cover. Press the SSD down on the bottom 2 pins and then place the SSD in the top 2 pins.

SSD Bracket
Install the SSD with 4x SSD screws and place it back on the 4x grommets.

REQUIRES:


MAIN COMPARTMENT
A total of 10 Stackable HDD brackets can be installed on the side fan positions. Before installation please remove the SSD Covers.
REQUIRES:


Stack 2 HDD brackets before mounting if you install more than 1x bracket.

- Mount the bracket in the chassis.

2. Secure with 2x thumb screws in the chassis.
left view

right view

3.5" HDD INSTALLATION
4x Phanteks Stackable 3.5" HDD Brackets are included.
Additional brackets are sold separately (PH-HDDKT_03).
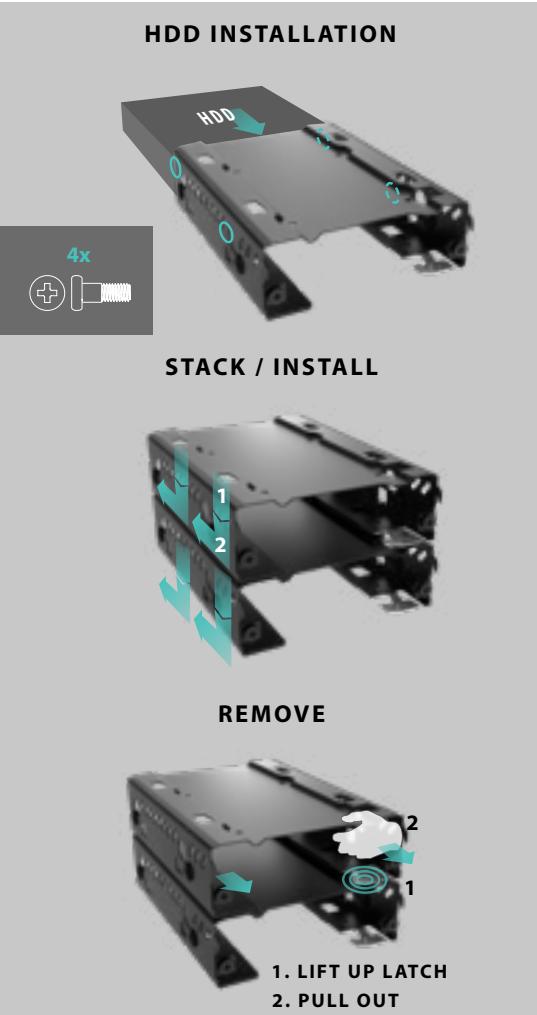
1. LIFT UP LATCH
2. PULL OUT
BOTTOM COMPARTMENT
2x HDD Brackets can be positioned in the bottom compartment.
REQUIRES:


The HDD bracket can also house
a 2.5" SSD instead of a 3.5" HDD.

This overview shows all possible radiator form-factors, locations and clearances.
TOP
120 FORM FACTOR
max 120x460mm
120
240
360
*max motherboard component height: 55mm
140 FORM FACTOR
140
280
REAR
120 FORM FACTOR
120

SIDE
120 FORM FACTOR
max 135x530x32mm
120
240
360
480
FRONT
120 FORM FACTOR
max 145x530mm
120
240
360
480
140 FORM FACTOR
max 145*x530mm
140
280
420
*160mm when SSD Covers rotated
RADIATOR CLEARANCE
Some radiator clearances depend on other hardware installed. Subtracting the radiator and fan thickness shows the remaining clearance for other radiators.
INTERNAL DIMENSIONS:
A :510mm
B :530mm

If the HDD trays are installed on the side fan locations no front radiator can be placed there.

We highly recommend installing a drain port if you plan to install a custom water-cooling configuration. This will ensure an easy maintenance in the future.
DRAIN PORT
The Drain Port is installed in the Front Panel using a Passthrough Fitting and a Stop Fitting / Ball Valve. The port diameter is 20.5mm.
Phanteks Passthrough fitting:
PH-PTF_BK/CR_G1/4
Phanteks Stop fitting:
PH-PG_BK/CR
Phanteks Ball-Valve fitting:
PH-BVA_BK/CR_G1/4

To prevent your GPU from tipping down you can install the GPU Support Bracket.
The bracket is adjustable to provide perfect support for different sized GPU's.
REQUIRES:


The GPU Support Bracket
has 2 available positions
if cables are in the way.

Hold the GPU in the correct position when tightening the thumbscrews.
Please consult the motherboard manual for additional instructions.

Please make sure to consult your motherboard manual before connecting the front I/O.

Use the double-loop Velcro ties to route your cables.
Zip ties are included in the accessory bag to manage any excess cables.


Use the double-loop Velcro ties to split the cables into 2 channels. Use the cable cover to hide all your excessive cables.
The Enthoo Pro 2 is equipped with a front, bottom, side, top and PSU filter. We recommend to clean these filters every month to keep your cooling performance optimized.


If cleaning the dust filters with water, make sure to properly dry them before placing them back.
PREMIUM T30-120 FAN
PH-F120T30_BG / PH-F120T30_BG_3P
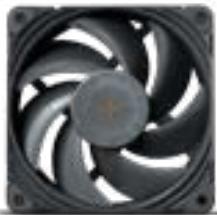
The T30-120 fan is the ultimate PC cooling fan. It features a built-in fan profile switch which makes it optimized for every scenario; silent, balanced, or extreme performance. Go for this fan if you are looking for the absolute best performance. Available in single and triple pack.
3.5" STACKABLE HDD BRACKETS
PH-HDDKT_03
For 3.5" or 2.5" Drive
Upgrade up to 6x additional 3,5" HDDs with the optional HDD brackets.
Contains 2x Stackable HDD Brackets.

UNIVERSAL FAN CONTROLLER
PH-PWHUB_02
Conveniently control both 4-pin PWM and 3-pin DC fans with a single controller. Control the speed with the manual remote (software-free) or synced to your motherboard.

DUAL 5.25" BAY
PH-ODDBAY_01
The Dual 5.25" Bay allows for 2x 5.25" devices to be installed.

M25 FANS
PH-F120M25_PWM_BBK01 / PH-F120M25_DRGB_PWM_BK01 / PH-F120M25_DRGB_PWM_WT01
PH-F140M25_PWM_BBK01 / PH-F140M25_DRGB_PWM_BK01 / PH-F140M25_DRGB_PWM_WT01
The M25-120 fan is designed and optimized to deliver high airflow performance and comes in black or with built-in D-RGB lighting. It is available in both 120 and 140mm size.


- INSTALL ANY 5.25" DEVICES INTO THE 5.25" BAY FIRST
- PLACE THE 5.25" BAY INTO THE CHASSIS AND SECURE WITH 3X PSU SCREWS


As a Phanteks customer, you are priority number one. We have a dedicated team of employees across the globe working hard every day to make sure we deliver the superior experience you deserve. We are here for you. If you have a question or a concern about our products, we have numerous ways you can reach us. Please choose one most convenient for you to connect with our team.
CUSTOMER CARE
RMA AND TECHNICAL SUPPORT INTERNATIONAL
Email : support@phanteks.com
Facebook : @Phanteks
RMA AND TECHNICAL SUPPORT AMERICAS
Hours : Monday-Friday 9:00-5:00 PST
Phone number : +1(909)598-2115
Email : support@phanteksusa.com
Facebook : @Phanteks

For up-to-date information please check www.Phanteks.com
PHANTEKS
FACEBOOK PAGE
PHANTEKS
INSTAGRAM PAGE


PHANTEKS warrants its products to be free from defects in material and workmanship during the warranty period; when given normal, proper and intended usage. If a product proves to be defective in material or workmanship during the warranty period, PHANTEKS will, at its sole option, repair or replace the product with same product or similar product. The replacement product assumes the remaining warranty of the original product or 30 days, whichever provides longer coverage for the customer.
DURATION OF WARRANTY:
- Fans - 5 years
- I/O Ports - 2 years
- LED Lighting - 2 years
- Buttons - 2 years
- Chassis - 5 years
- Front and Top Panels - 5 years
Please check www.phanteks.com/Warranty for more information.






- ENTHOO PRO II
- SERVER EDITION
- THANK YOU
- PHANTEKS
- WHAT'S INSIDE
- CHOOSE YOUR SETUP
- SUPPORT
- WELCOME TO PHANTEKS
- MODULAR HDD BRACKET
- SERVER PSU BRACKET
- GPU SUPPORT BRACKET
- FAN BRACKET
- TOOLBOX
- PSU RUBBER PAD
- PREPARATIONS
- REMOVING FRONT PANEL
- SUPPORTS
- STAND-OFF POSITIONING
- MICRO ATX/SSI-EEB/SSI-CEB
- TOP
- SSD INSTALLATION
- MAIN COMPARTMENT
- HDD INSTALLATION
- BOTTOM COMPARTMENT
- RADIATOR CLEARANCE
- INTERNAL DIMENSIONS
- PREMIUM T30-120 FAN
- STACKABLE HDD BRACKETS
- UNIVERSAL FAN CONTROLLER
- DUAL 5.25" BAY
- M25 FANS
- CUSTOMER CARE
- DURATION OF WARRANTY
Brand : Phanteks
Model : ENTHOO PRO II SERVER EDITION