
CP 100138 - Ceiling fan Orbegozo - Free user manual and instructions
Find the device manual for free CP 100138 Orbegozo in PDF.


| Product Type | Ceiling fan with remote control and LED light |
| Brand | Orbegozo |
| Model | CP 100138 |
| Installation Method | Fixed to ceiling via metal bracket and downrod |
| Minimum Ceiling Height | Blades must be at least 2.3 m above the floor |
| Minimum Wall Clearance | 0.6 m from any obstruction or wall |
| Ceiling Bracket Load Capacity | Must support a minimum weight of 50 kg |
| Number of Fan Speeds | 5 |
| Speed Settings | 1 (lowest) to 5 (highest airflow) |
| Reversible Motor | Yes – for forward and reverse rotation |
| Timer Function | 1, 4 or 8 hours automatic shut-off |
| Lighting Type | LED light panel |
| Remote Control Battery | A23 12V alkaline battery |
| Remote Control Range | Up to 8 m radius |
| Code Matching | Yes – allows one remote to control multiple fans |
| Power Supply | Household mains electrical supply (disconnect before installation) |
| Cleaning Instructions | Wipe with a soft dry cloth; avoid abrasive or chemical cleaners |
| Safety Compliance | Low Voltage Directive 2006/95/EC and EMC Directive 2004/108/EC |
| Usage | Household indoor use only |
| Available Manual Languages | English, French, Spanish, Portuguese |
Frequently Asked Questions - CP 100138 Orbegozo
User questions about CP 100138 Orbegozo
0 question about this device. Answer the ones you know or ask your own.
Ask a new question about this device
Download the instructions for your Ceiling fan in PDF format for free! Find your manual CP 100138 - Orbegozo and take your electronic device back in hand. On this page are published all the documents necessary for the use of your device. CP 100138 by Orbegozo.
USER MANUAL CP 100138 Orbegozo
CP 100138
Sonifer, S.A.
Read this manual carefully before running this appliance and save it for reference in order to obtain the best results and ensure safe use.
Llave inglesa
Destornillador plano
Destornillador estrella
Alicates
Escalera
Fig 2

Fig 3
Fig 4

Fig 5

Fig 6
Fig 7
Fig 8
Fig 9

Fig 10

Fig 11
Fig 12

Fig 13

Fig 14

Fig 15
Fig 14
C. FUNCIONES DEL MANDO A DISTANCIA

Dear Customer, If you follow the recommendations contained in this Instruction Manual, our appliance will give you constant high performance and will remain efficient for many years to come. Read the operating instructions carefully before putting the appliance into operation and keep the instructions including the warranty, the receipt and, if possible, the box with the internal packing. If you give this device to other people, please also pass on the operating instructions.
General Safety Instructions
-
This appliance can be used by children aged from 8 years and above and persons with reduced physical, sensory or mental capabilities or lack of experience and knowledge if they have been given supervision or instruction concerning use of the appliance in a safe way and understand the hazards involved. Children must never play with the appliance. Cleaning and user maintenance must never be carried out by children without supervision.
-
Children should be supervised to ensure that they do not play with the appliance.
-
Keep the appliance and the cable cord out of the reach of children less than 8 years old.
- WARNING: In order to ensure your children's safety, please keep all packaging (plastic bags, boxes, polystyrene etc.) out of their reach.
- Do not handle the appliance with wet hands.
- Never immerse the appliance in water or any other liquid.
- Make sure the appliance has been unplugged before cleaning.
- This appliance must be installed following the national regulations for electrical installations.
- This appliance is for household use only.
- In case that you need a copy of the instruction manual, you can ask for it writing an email to sonifer@sonifer.es.
- WARNING: In case of misuse, there is a risk of possible injury.
Other specific safeguards
-
Make sure that when the fan is fitted in the chosen position, there is no possibility of the rotating blades coming into contact with any object. Blades should be at least 2.30 m from floor when fan is hung.
-
If you are installing more than one ceiling fan make sure that you do not mix fan blade sets, even though they are from the same ceiling fan model.
- Before beginning, disconnect power by removing fuse or turning off circuit breaker.
- Once fan installation is completed make sure that all connections are secure to prevent fan from falling.
- Fan must be turned off and stopped before reversing fan direction.
- Check that the means of fitting the fan to the ceiling is capable of supporting the weight of the fan when in operation. (Minimum 50Kg.).
INSTALLATION OF CEILING FAN
A. TOOLS REQUIRED FOR INSTALLATION

10# Spanner Slotted screwdriver
Philips screwdriver
Plastic clamp
Ladder
B. INSTALLATION STEPS AND INSTRUCTIONS
1. Minimum space for installation (Fig 1)
Choose a location for mounting the fan where the blades are clear from all obstructions and maintain a minimum of 2.3 meters from the floor, 0.6 meter away from the wall.

Fig 1
2. Bracket installation
(1) For wooden ceiling, fix the bracket on the beam using 1.5 inches wooden threaded screws. (Fig 2)
(2) For cement ceiling, first use 8mm impact drilling bit to drill two holes to fit the expansion screws, then secure the bracket on the ceiling by tightening M6 expansion screws. (Fig 3)

Fig 2

Fig 3
Note: After the bracket is secured, make sure the selected ceiling location with the fixings is capable of bearing a minimum weight/gravity of 50 kg to ensure safety.
Note: Please select the appropriate type of screws to fix the bracket. Do not fix the bracket directly on plywood to avoid screw loosening that causes danger.
3. Downrod installation
(1) Put the downrod through the upper canopy and the lower canopy as shown in Fig 4. (Fig 4)
(2) Put the wires through the downrod. Then insert the downrod into the motor flange and match with the holes. Put the pin through the holes and fix the pin using the R clip. (Fig 5)
(3) Tighten the screw to secure the downrod. (Fig 6)

Fig 4

Fig 5

Fig 6
4. Blade installation
Secure all fan blades using M6 screws by Philip screwdriver until tightened. (Fig 7)

Fig 7
5. Fix the fan to the bracket
Place the ceiling fan to the bracket. Carefully lift and rotate the fan to make sure the groove of the hanger ball is locked on the pin from the metal bracket. (Fig 8)

Fig 8
6. Wire connection
Note: To connect the wires, hold the bare metal leads together and place a wire connector over them, then twist clockwise until tight.
(1) Match the same color wires from the fan and the receiver. Use the wire connectors to connect the same color wires separately. (Fig 9)
(2) Use the wire connectors to connect the ground wires, live wires and the neutral wires from the receiver and the ceiling. (Fig 9)
(3) Put the receiver into the bracket. Slide the upper canopy to the ceiling and tighten the screws. (Fig 10 & 11)

Fig 9

Fig 10

Fig 11
7. Light fixture installation
(1) Use the screwdriver to remove screws and detach the LED light panel. (Fig 12)
(2) Connect the male/female connect from the motor and the light panel. (Fig 13)

Fig 12

Fig 13
(3) Remove the screws from the flange, and then secure the light kit to the flange using the screws. (Fig 14)
(4) Secure the LED light panel back to the light kit. (Fig 15)

Fig 14

Fig 15
8. Light shade installation
Position the three grooves on the shade so they line up with the three fixing points of the light fixture, then carefully lift the shade up inside the light kit and rotate the shade clockwise until tight. (Fig 14)

Fig 14
C. REMOTE CONTROL FUNCTION

1. Venti on/off button
Switch on/off the fan by pressing this button. You will hear a "bi" sound, which means the receiver has got your instruction. (You can also hear a "bi" sound by pressing each button of remote controller. This notation will not repeat in the following instructions.)
2. Luz on/off button
Switch on/off the light independently by pressing this button.
3.

This button controls the blades to rotate forward or reverse.
4. 1/2/3/4/5 speed button
Speed 1 is the lowest in air flow. Speed 2/3/4 gradually increases in air flow. Speed 5 is the highest in air flow. This function is applicable on both forward and reverse mode.
5. 1H/4H/8H button
You can set a timer (1/4/8 hours) to turn off the fan automatically.
6. Codes detection
This function is designed for two circumstances.
(1) To control more than one ceiling fan installed within an area of radius 8m by only one remote control.
(2) When the controller is out of order, you have to replace a new one.
Code matching steps:
(a) Install batteries into the remote controller.
(b) Make sure the fan is disconnected to power before code matching.
(c) Press and hold the on/off button.
(d) Reconnect the fan to power supply.
(e) After reconnecting the fan to power supply for six seconds, you will hear a "bi" sound from the controlled ceiling fan, which means that instruction is received. Then you can control one or more ceiling fans by using this remote controller.
8. Operating Instructions of remote controller
(1) Battery specification of remote controller: A23/12V alkaline battery, other battery specification is inapplicable.
(2) Open the cover of battery compartment, install batteries according the polarity mark in the battery compartment. Attention: Battery polarities must be correctly installed.
(3) Fix the remote controller holder on to the wall using screws for keeping the remote control.
CLEANING
Clean with a soft, dry cloth. Never use scouring pads not abrasive or chemical cleaners. Do not allow condensation to come in contact with the electrical components.
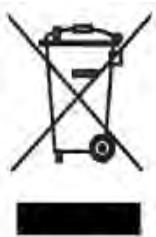
Disposal of old electrical appliances.
The European directive 2002/96/EC on Waste Electrical and Electronic Equipment (WEEE), requires that old household electrical appliances must not be disposed of in the normal unsorted municipal waste stream. Old appliances must be collected separately in order to optimize the recovery and recycling of the materials they contain, and reduce the impact on human health and the environment.
The crossed out “wheeled bin” symbol on the product reminds you of your obligation, that when you dispose of the appliance, it must be separately collected. Consumers should contact their local
authority or retailer for information concerning the correct disposal of their old appliance.
DECLARATION OF CONFORMITY:
This device complies with the requirements of the Low Voltage Directive 2006/95/EC and the requirements of the EMC directive 2004/108/EC.
CONSEILS DE SECURITE
Clef anglaise
Tournevis plat
Tournevis cruciforme
Pinces
Échelle
B. ÉTAPES ET INSTRUCTIONS POUR L'INSTALLATION
Fig. 2

Fig. 3
Fig. 4

Fig. 5

Fig. 6
Fig. 7
Fig. 8
Fig. 9

Fig. 10

Fig. 11
Fig. 12

Fig. 13

Fig. 14

Fig. 15
Fig. 14
C. FONCTIONS DE LA TÉLÉCOMMANDE

Chave inglesa Chave de parafusos plana Chave de parafusos de estrela Alicates Escada
B. PASSOS E INSTRUÇÕES PARA A INSTALAÇÃO
Fig. 2

Fig. 3
Fig. 4

Fig. 5

Fig. 6
Fig. 7
Fig. 8
Fig. 9

Fig. 10

Fig. 11
Fig. 12

Fig. 13

Fig. 14

Fig. 15
Fig. 14

- FUNCIONES DEL MANDO A DISTANCIA
- GENERAL SAFETY INSTRUCTIONS
- OTHER SPECIFIC SAFEGUARDS
- INSTALLATION OF CEILING FAN
- MINIMUM SPACE FOR INSTALLATION (FIG 1)
- BRACKET INSTALLATION
- DOWNROD INSTALLATION
- BLADE INSTALLATION
- FIX THE FAN TO THE BRACKET
- WIRE CONNECTION
- LIGHT FIXTURE INSTALLATION
- LIGHT SHADE INSTALLATION
- REMOTE CONTROL FUNCTION
- VENTI ON/OFF BUTTON
- LUZ ON/OFF BUTTON
- SPEED BUTTON
- H/4H/8H BUTTON
- CODES DETECTION
- OPERATING INSTRUCTIONS OF REMOTE CONTROLLER
- CLEANING
- DISPOSAL OF OLD ELECTRICAL APPLIANCES
- DECLARATION OF CONFORMITY
- CONSEILS DE SECURITE
- ÉTAPES ET INSTRUCTIONS POUR L'INSTALLATION
- FONCTIONS DE LA TÉLÉCOMMANDE
- PASSOS E INSTRUÇÕES PARA A INSTALAÇÃO
Brand : Orbegozo
Model : CP 100138
Category : Ceiling fan