
HA501 - Headphone amplifier TEAC - Free user manual and instructions
Find the device manual for free HA501 TEAC in PDF.


| Product type | Stereo headphone amplifier |
| Brand | TEAC |
| Model | HA501 |
| Dimensions (W × H × D) | 290 mm × 81,2 mm × 244 mm |
| Weight | 4,1 kg |
| Power supply | AC 220-240 V, 50 Hz |
| Power consumption | 22 W |
| Supported headphone impedance | 16 Ω to 600 Ω |
| Headphone output power (max) | 1400 mW + 1400 mW (into 32 Ω) |
| Total harmonic distortion | 0,01% or less (20 Hz - 20 kHz, into 32 Ω) |
| Signal-to-noise ratio | 110 dB (A-weighted) |
| Frequency response | 10 Hz - 100 kHz ±3 dB |
| Audio inputs | XLR (1 pair), RCA (2 pairs), AUX (3.5 mm stereo mini-jack) |
| Audio outputs | Headphone (6.35 mm stereo jack), LINE OUT (RCA 1 pair) |
| Damping Factor function | Adjustment to adapt sound to headphones (high: punchy, low: soft) |
| Automatic sound muting (Auto Mute) | Active when inserting/removing headphones; deactivates when lowering volume to -∞ dB |
| Energy saving (Auto Power Save) | Cuts power after 30-45 min without audio signal |
| Safety | Do not open the case, use only the supplied cord, avoid humidity |
| Maintenance | Wipe with a soft, dry cloth; unplug before cleaning; do not use solvents |
| Operating temperature | +5 °C to +35 °C |
| Supplied accessories | Power cord, instruction manual, warranty card |
Frequently Asked Questions - HA501 TEAC
User questions about HA501 TEAC
0 question about this device. Answer the ones you know or ask your own.
Ask a new question about this device
Download the instructions for your Headphone amplifier in PDF format for free! Find your manual HA501 - TEAC and take your electronic device back in hand. On this page are published all the documents necessary for the use of your device. HA501 by TEAC.
USER MANUAL HA501 TEAC
The lightning flash with arrowhead symbol, within an equilateral triangle, is intended to alert the user to the presence of uninsulated "dangerous voltage" within the product's enclosure that may be of sufficient magnitude to constitute a risk of electric shock to persons.

The exclamation point within an equilateral triangle is intended to alert the user to the presence of important operating and maintenance (servicing) instructions in the literature accompanying the appliance.
WARNING: TO PREVENT FIRE OR SHOCK HAZARD, DO NOT EXPOSE THIS APPLIANCE TO RAIN OR MOISTURE.
CAUTION
- DO NOT REMOVE THE EXTERNAL CASES OR CABINETS TO EXPOSE THE ELECTRONICS. NO USER SERVICEABLE PARTS ARE INSIDE.
- IF YOU ARE EXPERIENCING PROBLEMS WITH THIS PRODUCT, CONTACT TEAC FOR A SERVICE REFERRAL. DO NOT USE THE PRODUCT UNTIL IT HAS BEEN REPAIRED.
- USE OF CONTROLS OR ADJUSTMENTS OR PERFORMANCE OF PROCEDURES OTHER THAN THOSE SPECIFIED HEREIN MAY RESULT IN HAZARDOUS RADIATION EXPOSURE.
1) Read these instructions.
2) Keep these instructions.
3) Heed all warnings.
4) Follow all instructions.
5) Do not use this apparatus near water.
6) Clean only with dry cloth.
7) Do not block any ventilation openings. Install in accordance with the manufacturer's instructions.
8) Do not install near any heat sources such as radiators, heat registers, stoves, or other apparatus (including amplifiers) that produce heat.
9) Do not defeat the safety purpose of the polarized or grounding-type plug. A polarized plug has two blades with one wider than the other. A grounding type plug has two blades and a third grounding prong. The wide blade or the third prong are provided for your safety. If the provided plug does not fit into your outlet, consult an electrician for replacement of the obsolete outlet.
10) Protect the power cord from being walked on or pinched particularly at plugs, convenience receptacles, and the point where they exit from the apparatus.
11) Only use attachments/accessories specified by the manufacturer.
12) Use only with the cart, stand, tripod, bracket, or table specified by the manufacturer, or sold with the apparatus. When a cart is used, use caution when moving the cart/apparatus combination to avoid injury from tip-over.

13) Unplug this apparatus during lightning storms or when unused for long periods of time.
14) Refer all servicing to qualified service personnel. Servicing is required when the apparatus has been damaged in any way, such as power-supply cord or plug is damaged, liquid has been spilled or objects have fallen into the apparatus, the apparatus has been exposed to rain or moisture, does not operate normally, or has been dropped.
- The apparatus draws nominal non-operating power from the AC outlet with its POWER or STANDBY/ON switch not in the ON position.
- The mains plug is used as the disconnect device, the disconnect device shall remain readily operable.
- Caution should be taken when using earphones or headphones with the product because excessive sound pressure (volume) from earphones or headphones can cause hearing loss.
CAUTION
- Do not expose this apparatus to drips or splashes.
- Do not place any objects filled with liquids, such as vases, on the apparatus.
- Do not install this apparatus in a confined space such as a book case or similar unit.
- The apparatus should be located close enough to the AC outlet so that you can easily reach the power cord plug at any time.
- If the product uses batteries (including a battery pack or installed batteries), they should not be exposed to sunshine, fire or excessive heat.
- CAUTION for products that use replaceable lithium batteries: there is danger of explosion if a battery is replaced with an incorrect type of battery. Replace only with the same or equivalent type.
WARNING
Products with Class I construction are equipped with a power supply cord that has a grounding plug. The cord of such a product must be plugged into an AC outlet that has a protective grounding connection.
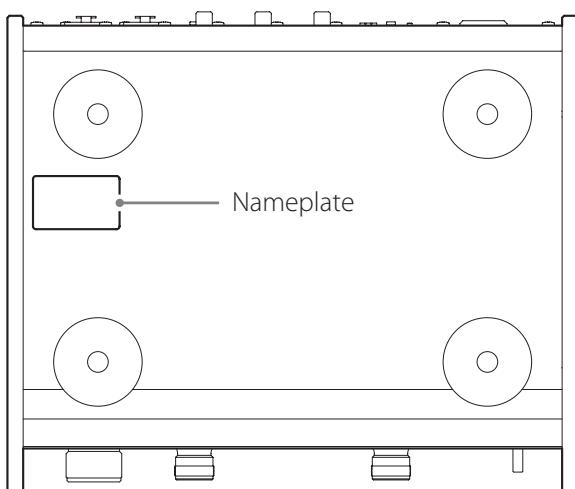
Front side
For European Customers
Disposal of electrical and electronic equipment
(a) All electrical and electronic equipment should be disposed of separately from the municipal waste stream via collection facilities designated by the government or local authorities.
(b) By disposing of electrical and electronic equipment correctly, you will help save valuable resources and prevent any potential negative effects on human health and the environment.
(c) Improper disposal of waste electrical and electronic equipment can have serious effects on the environment and human health because of the presence of hazardous substances in the equipment.
(d) The Waste Electrical and Electronic Equipment (WEEE) symbol, which shows a wheeled bin that has been crossed out, indicates that electrical and electronic equipment must be collected and disposed of separately from household waste.
(e) Return and collection systems are available to end users. For more detailed information about the disposal of old electrical and electronic equipment, please contact your city office, waste disposal service or the shop where you purchased the equipment.
Disposal of batteries and/or accumulators
(a) Waste batteries and/or accumulators should be disposed of separately from the municipal waste stream via collection facilities designated by the government or local authorities.
(b) By disposing of waste batteries and/or accumulators correctly, you will help save valuable resources and prevent any potential negative effects on human health and the environment.
(c) Improper disposal of waste batteries and/or accumulators can have serious effects on the environment and human health because of the presence of hazardous substances in them.
(d) The WEEE symbol, which shows a wheeled bin that has been crossed out, indicates that batteries and/or accumulators must be collected and disposed of separately from household waste.
If a battery or accumulator contains more than the specified values of lead (Pb), mercury (Hg), and/or cadmium (Cd) as defined in the Battery Directive (2006/66/EC), then the chemical symbols for those elements will be indicated beneath the WEEE symbol.
(e) Return and collection systems are available to end users. For more detailed information about the disposal of waste batteries and/or accumulators, please contact your city office, waste disposal service or the shop where you purchased them.
Contents
Thank you for choosing TEAC. Read this manual carefully to get the best performance from this unit.
Included items. 5
Before use. 6
Maintenance. 6
Names and functions of parts. 7
Connecting equipment. 8
Connecting headphones 10
Basic operation 11
Automatic muting 12
Troubleshooting 12
Specifications. 13
Included items
Check to be sure the box contains all the included items shown below.
Please contact the store where you purchased this unit if any of these items are missing or have been damaged during transportation.
Power cord × 1
Owner's manual (this document) × 1
- Keep this manual in a safe place for future reference.
Warranty card × 1

Placement precautions
- Do not put anything on top of the unit.
- Avoid placing the unit in direct sunlight or close to any source of heat, such as a radiator, heater, open fireplace or amplifier. Also avoid locations that are subject to vibrations or exposed to excessive dust, cold or moisture.
- Place the unit in a stable location near the audio system that you will use with it.
- Do not move the unit during use.
- The voltage supplied to the unit should match the voltage printed on the rear panel. If you are in any doubt regarding this matter, consult an electrician.
- As the unit could become warm during operation, always leave sufficient space around it for ventilation. When placing this unit, position it so that it is at least 3 cm (1.2") from walls and other devices in order to allow good heat dissipation. When installing it in a rack, leave at least 5 cm (2") open above the unit and 10 cm (4") open behind it.
- Do not open the body of the unit as this might result in damage to the circuitry or cause electric shock. If a foreign object should get into the unit, contact your dealer or TEAC customer service.
- When removing the power plug from the wall outlet, always pull directly on the plug; never yank on the cord.
- Depending on the electromagnetic waves of television broadcasts, interference might appear on television screens when this unit's power is on. This does not mean that this unit or the TV is malfunctioning. If this occurs, turn this unit's power off.

Use precaution
Listening to anything at a high volume for a long time could be harmful to your hearing. In order to protect your ears, be careful not to set the volume too high when listening with headphones for a long time.
Maintenance
If the surface of the unit becomes dirty, wipe it with a soft dry cloth. If the unit becomes very dirty, dampen a soft cloth slightly with a diluted neutral cleanser and thoroughly wring out any excess fluid before using the cloth to wipe the unit.

For your safety, disconnect the power cord from the socket before cleaning.
- Never spray liquid directly on the unit.
- Do not use thinner or alcohol as they could damage the surface of the unit.
- Avoid allowing rubber or plastic materials to touch this product for long periods of time, because they could damage the cabinet.
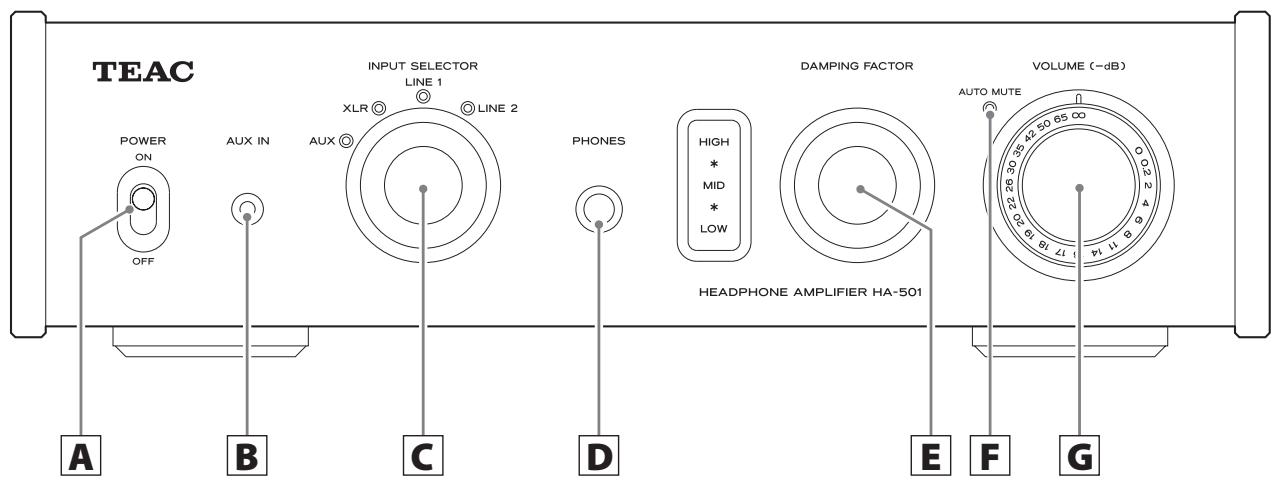
A POWER switch
Use to turn the power ON and OFF.
B Analog audio input jack (AUX IN)
This is a two-channel analog audio input jack.
Use a 3.5 mm (1/8") stereo mini plug to connect the audio output of a portable music player, for example, to this unit.
Use commercially available cables to make the connections.
C INPUT SELECTOR knob
Use to select the input source. The indicator lights next to the selected input source.
D PHONES jack
Connect headphones with a standard 6.3 mm (1/4") stereo plug here. (See page 10.)
DAMPING FACTOR knob
This setting will change the audio quality depending on the headphones you are using, the music you are listening to and other factors. Set it as you like. (See page 10.)
- Use caution because changing the damping factor can cause the volume to increase greatly.
This lights when automatic muting is active. (See page 12.)
- Even when automatic mating is active, audio is output from the LINE OUT outputs.
G VOLUME knob
Use to adjust the volume. Turn right to increase and left to decrease the volume.
- Minimizing the volume (- ~dB) ends automatic.
muting. (See page 12.)
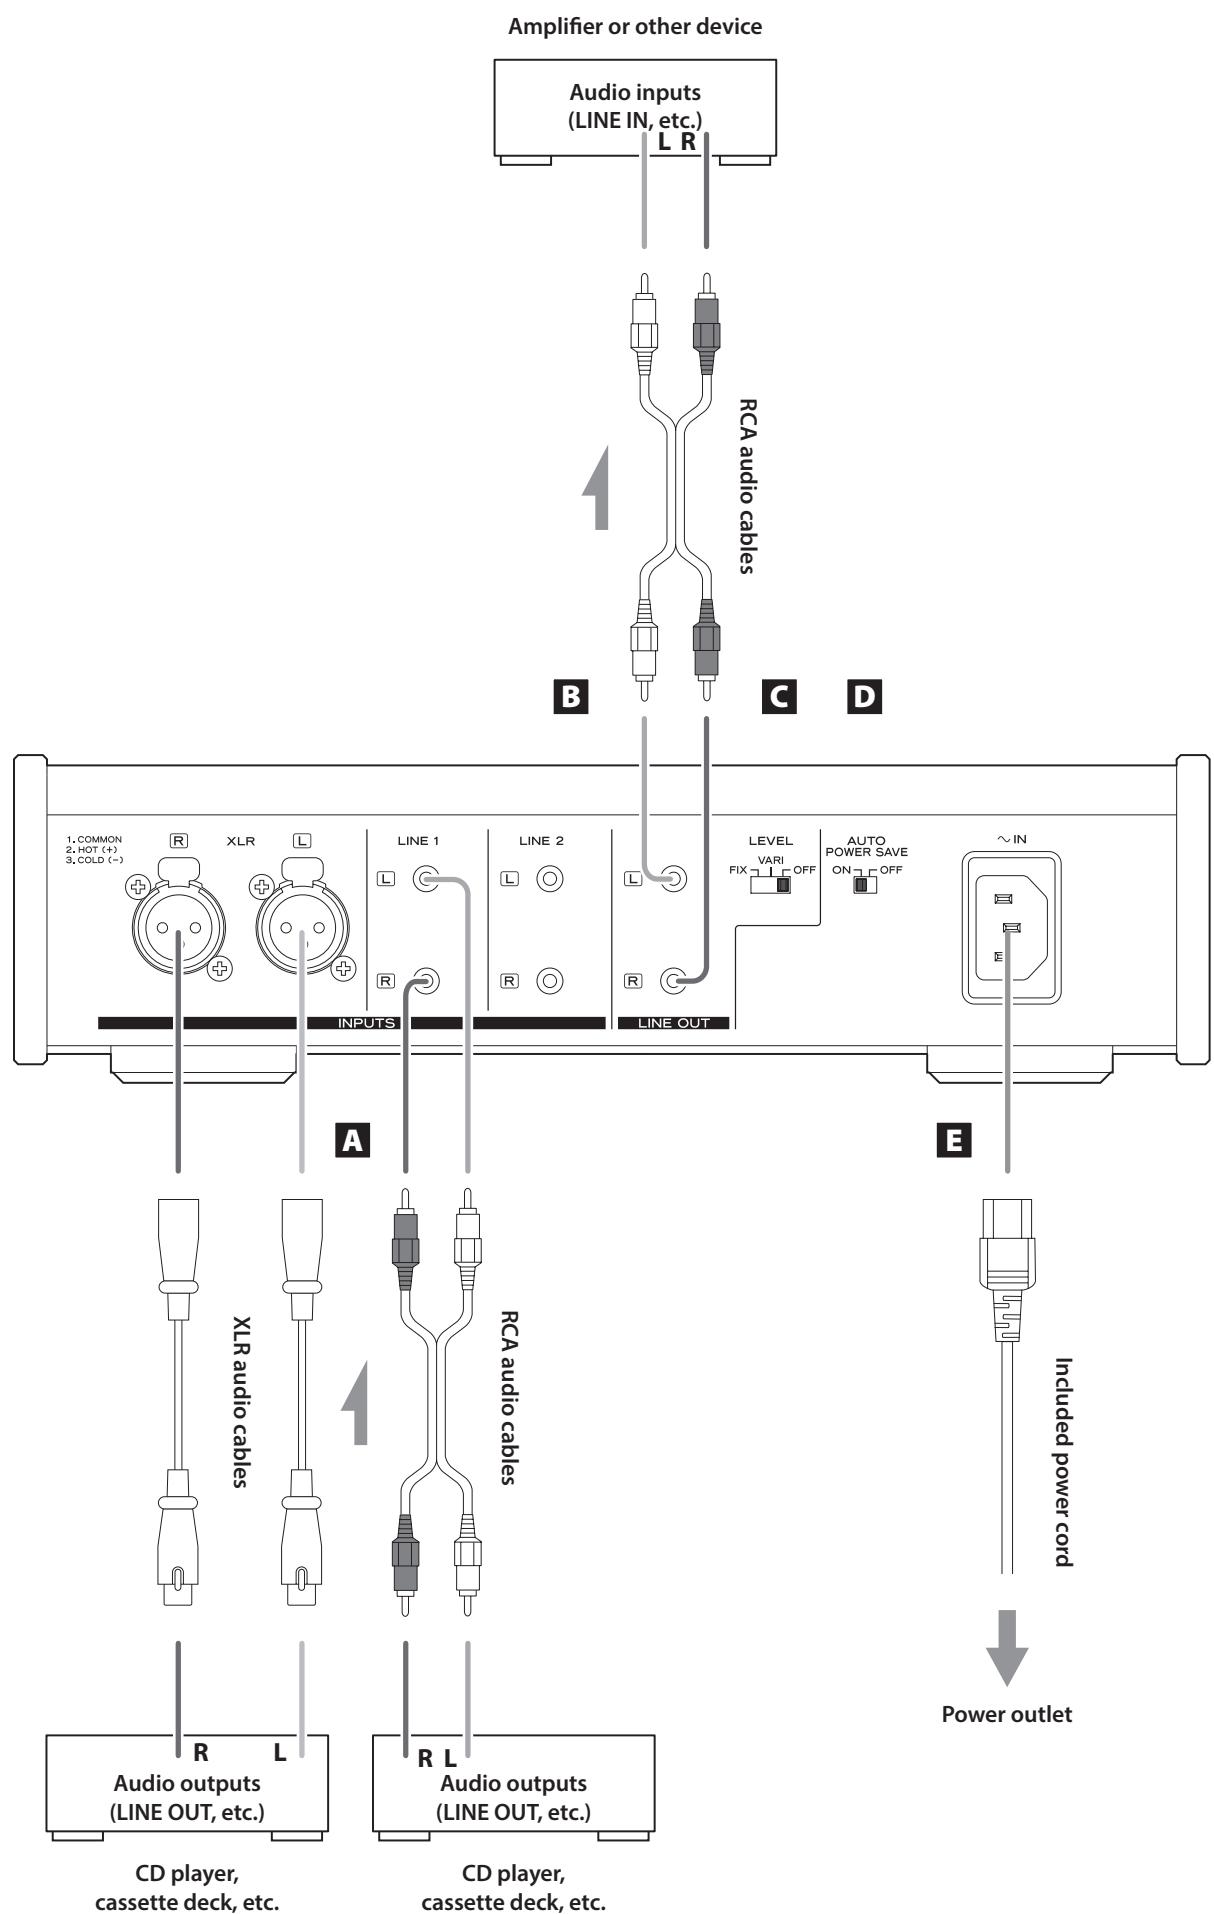
A Analog audio input connectors (INPUTS)
These are two-channel analog audio input pairs. Connect cassette decks, CD players and other devices that output audio.
Connect the L connectors of this unit with the L connectors of audio output devices. Connect the R connectors of this unit with the R connectors of audio output devices.
- This unit's XLR connectors are pin 2 "hot".
Use commercially available cables to make the connections.
XLR: Balanced XLR cables
LINE 1: RCA audio cable
LINE 2: RCA audio cable
LEVEL switch
Set the level of the audio output from the analog audio output connectors (LINE OUT).
FIX: Output the same level as input.
VARI: Output according to the VOLUME knob setting.
OFF: No output.
C Analog audio output jacks (LINE OUT)
These are a two-channel analog audio output pair. Connect these to an amplifier or other device with audio inputs.
Use commercially available cables to make the connections.

AUTO POWER SAVE switch
Use to turn the automatic power saving function ON and OFF. When set to ON, if there is no audio input for about 30 to 45 minutes, the power will turn off automatically. (The POWER switch will stay in the ON position when this occurs.)
- After the automatic power saving function has turned the power off, shift the POWER switch to OFF and then back to ON to turn the power on again.
Power inlet ( IN)
Insert the included power cord here. After completing all other connections, insert the power plug into a power outlet.
Unplug the cord from the outlet when not using the unit for a long time.
Use only the included power cord. Use of a different cord could cause fire or electric shock.
Do not turn the power on until after making all connections.
- Carefully read the manuals of the devices that you are connecting and follow their instructions when making connections.
- Do not bundle connecting cables with power cords. Doing so could cause noise.
- Connect all plugs completely.
1 Turn the VOLUME knob to its minimum value (- dB)
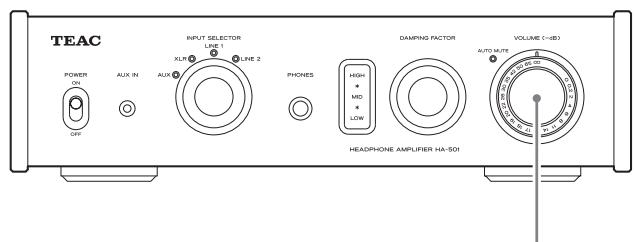
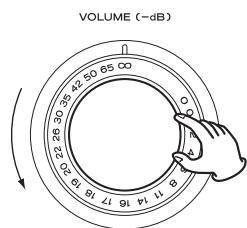
- dB: Minimum volume
0 dB: Maximum volume
2 Turn the power ON.
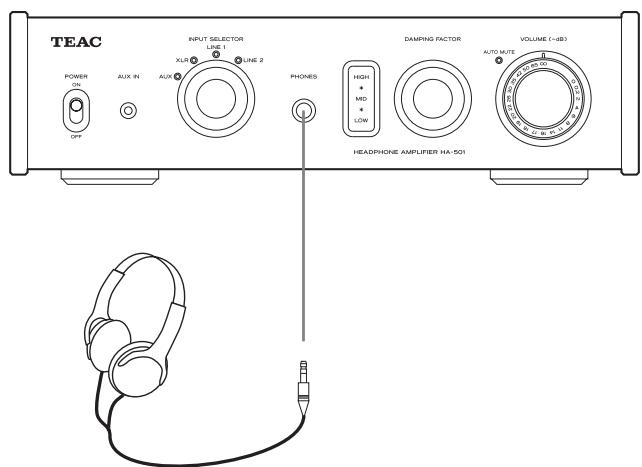
3 Insert the headphones' plug (standard 6.3 mm (1/4") stereo) into the PHONES jack.
4 Gradually adjust the VOLUME knob.
Do not connect or disconnect headphones or turn the power ON or OFF while wearing them.
Sudden loud noises could occur, which might cause hearing damage.
Always minimize the volume (- dB) before putting on headphones.
Using the DAMPING FACTOR knob
Impedance differs among models of headphones.
In order to allow you to enjoy optimal audio quality from a variety of headphones, this unit has a DAMPING FACTOR knob.
Adjust this setting as you like according to the headphones and music.
- When set to a high value, the sound will be crisp and livelier. When set to a low value, the sound will be calmer and softer.
- Use headphones with impedance ratings between 16 and 600 with this unit.
1 Turn the VOLUME knob to its minimum value (- dB)
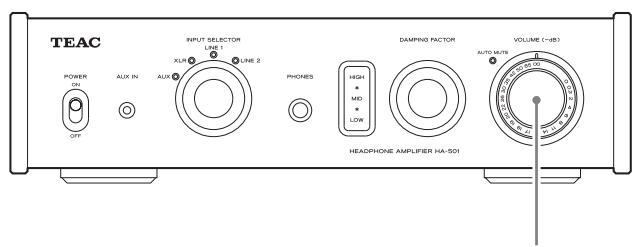
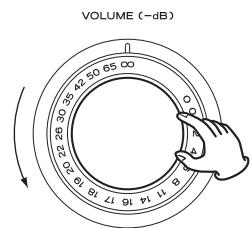
- dB: Minimum volume
0 dB: Maximum volume
Shift the POWER switch to its ON position.
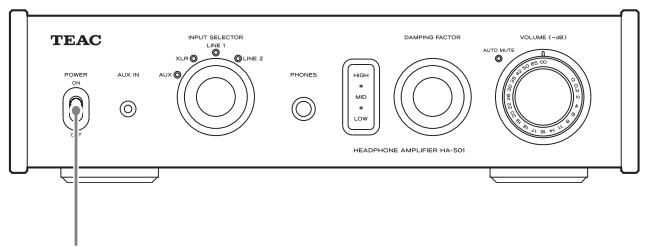

- After setting the POWER switch to ON, the output will stay muted for about ten seconds while the circuits stabilize.
End automatic muting after about ten seconds.
- If you turn the VOLUME knob to its minimum level (- dB) before setting the POWER switch to ON, automatic muting will end after about ten seconds and the AUTO MUTE indicator will become unlit.
3 Use the INPUT SELECTOR knob to set the input source.
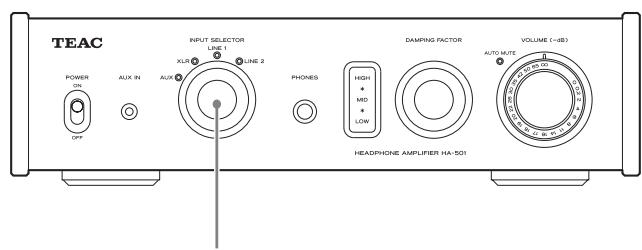
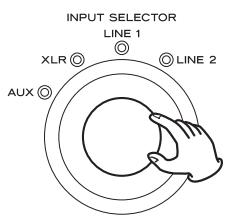
The indicator for the selected input source lights.
4 Operatetheplaybackdevice.
Refer to the operation manual of that device.
Adjust the volume.
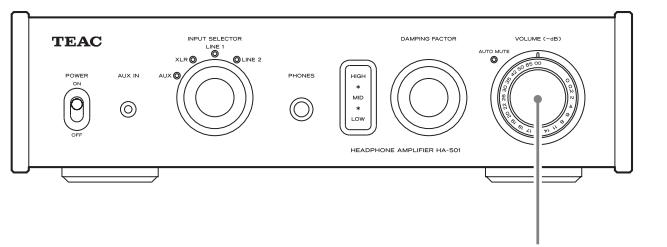
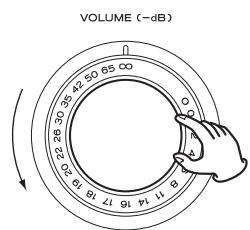
- dB: Minimum volume
0 dB: Maximum volume
Use the VOLUME knob to adjust the volume to its optimal level.
In order to protect your hearing from harm and headphones from damage caused by excessive volume, this unit has an automatic muting function. The following actions cause the unit to automatically mute regardless of the VOLUME knob setting. The AUTO MUTE indicator lights when this function is active.
- When the power is turned ON
- When a headphones plug is inserted into or removed from the PHONES jack
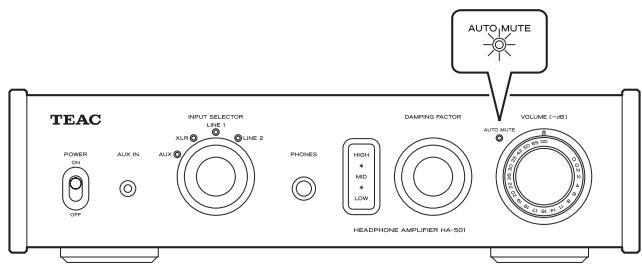
Ending automatic muting
Turn the VOLUME knob to the minimum value (- , dB) to end automatic muting. The AUTO MUTE indicator will become unlit.
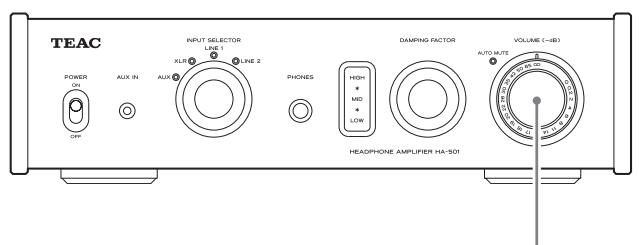
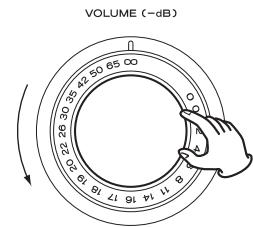
- dB: Minimum volume
0 dB: Maximum volume
Troubleshooting
If you experience a problem with this unit, please check the following items before requesting service. If it still does not operate correctly, contact the retailer where you purchased the unit or TEAC customer support (see the back cover for contact information).
The power will not turn on.
Check that the power cord is completely plugged into the power outlet. If the outlet is switched, confirm that the switch is in the ON position.
Connect a different electrical device to the outlet to confirm that it is supplying power.
If the automatic power saving function has turn the power off, shift the POWER switch to OFF and then back to ON to turn the power on again (page 9).
No sound is output.
If the AUTO MUTE indicator is lit, turn the VOLUME knob to the minimum value (- dB) , and then gradually increase the volume level.
Adjust the VOLUME knob.
Use the INPUT SELECTOR to select the input that is connected to the source that you want to hear.
Reconfirm the connections with other equipment.
There is a humming noise.
If a connecting cable is near a power cord, fluorescent light or similar cause of interference, increase the distance between them as much as possible.
There is no sound from one side of the headphones.
Confirm that the headphones plug is inserted completely.
Amplifier
Inputs
XLR connectors 1 pair (2: HOT)
Input impedance 20 kΩ
Input sensitivity 2 Vrms
RCA jacks 2 pairs (LINE 1, LINE 2)
Input impedance . . . . . . . . . . . . . . . . . . . . . . . . . . . . . . . . . . . . . . . . . . . . . . . . . . . . . . . . . . . . . . . . . . . . . . . . . . . . . . . Vrms
AUX Stereo 3.5 mm mini jack Input impedance 13 kΩ Input sensitivity .0.5 Vrms
Outputs
Headphones Stereo 6.3 mm standard jack Adjustable impedance range 16-600Ω Effective maximum output ·1400 mW + 1400 mW (into 32 impedance) 135~mW + 135~mW (into 600 impedance)
Rated output 600 mW + 600 mW (into 32 Ω impedance) 34 mW + 34 mW (into 600 Ω impedance)
Total harmonic distortion .01% or less (20 Hz - 20 kHz, into 32 Ω impedance)
S/N ratio 110 dB (A-weight, RCA input 2 Vrms, 1 kHz)
Frequency range 10 Hz - 100 kHz ±3 dB
RCA jacks 1 pair line Output impedance 100Ω Standard output voltage level 316 mV
General
Power supply AC 220 - 240 V, 50 Hz
Power consumption 22 W
Dimensions (W× H× D) (including protrusions) 290mm× 81.2mm× 244mm (113 / 8^ × 31 / 4^ × 95 / 8^ )
Weight 4.1 kg (9 lb)
Operating temperature range… +5°C to +35°C
Operating humidity range ···· 5 - 85% (no condensation)
Storage temperature range -20°C to +55°C
Included accessories
Power cord × 1 Owner's Manual (this document) × 1 Warranty card × 1
This device has a serial number located on its rear panel. Please record the serial number and retain it for your records.
Model name: HA-501
Serial number:
- CAUTION
- WARNING
- For European Customers
- Disposal of electrical and electronic equipment
- Disposal of batteries and/or accumulators
- Contents
- Included items
- Power cord × 1
- Owner's manual (this document) × 1
- Warranty card × 1
- Placement precautions
- Use precaution
- Maintenance
- For your safety, disconnect the power cord from the socket before cleaning.
- A POWER switch
- B Analog audio input jack (AUX IN)
- C INPUT SELECTOR knob
- D PHONES jack
- DAMPING FACTOR knob
- G VOLUME knob
- A Analog audio input connectors (INPUTS)
- LEVEL switch
- C Analog audio output jacks (LINE OUT)
- AUTO POWER SAVE switch
- Power inlet ( IN)
- Do not turn the power on until after making all connections.
- Using the DAMPING FACTOR knob
- Ending automatic muting
- Troubleshooting
- The power will not turn on.
- No sound is output.
- There is a humming noise.
- There is no sound from one side of the headphones.
- Amplifier
- Inputs
- Outputs
- General
- Included accessories
Brand : TEAC
Model : HA501
Category : Headphone amplifier