
CP7385 - Electric razor SOLAC - Free user manual and instructions
Find the device manual for free CP7385 SOLAC in PDF.
| Product type | Electric shaver |
| Brand | SOLAC |
| Model | CP7385 |
| Power source | Mains adapter, rechargeable |
| Charging time | Approximately 12 hours |
| Runtime | 50 minutes |
| Charge indicator | Red LED (charging), green (charged) |
| Main functions | Shaving and trimming with adjustable guide comb |
| Comb cutting positions | 3 positions: 2 mm, 4 mm, 6 mm |
| Blades | Cutting blade and telescopic blade |
| Use | On dry or slightly damp skin |
| Recommended use | Body hair (do not use on face or head) |
| Included accessories | Adapter, guide comb, cleaning brush, lubricating oil, ergonomic handle, trimmer head |
| Maintenance | Clean blades with brush after each use; oil regularly |
| Safety | Can be used in the shower (unplugged); keep out of reach of children; do not use with damaged blades |
| Battery type | Ni-MH (rechargeable) |
| Disposal | Do not throw in trash; recycle at designated point |
| Compliance | IEC safety standards |
| Warranty and repair | Any repair by an Authorized Technical Service |
Frequently Asked Questions - CP7385 SOLAC
User questions about CP7385 SOLAC
0 question about this device. Answer the ones you know or ask your own.
Ask a new question about this device
Download the instructions for your Electric razor in PDF format for free! Find your manual CP7385 - SOLAC and take your electronic device back in hand. On this page are published all the documents necessary for the use of your device. CP7385 by SOLAC.
USER MANUAL CP7385 SOLAC
Solac is a registered Trade Mark
11/06
5-8·ESPÁÑOL
9-12 • ENGLISH
13-17·FRANÇAIS
18-22 · DEUTsCH
23-27·PORTUGUES
28-32 · ITALIANO
33-37 • NEDERLANDS
38-42·CESKY
43-47 • POLSKA
48-52 • SLOVENSKY
53-58·MAGYAR
59-63·6bIrapck
64-67·HRVATSKA
68-73·ROMANA
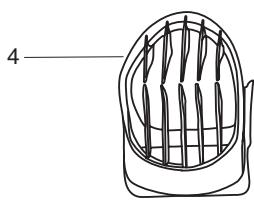
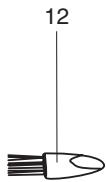
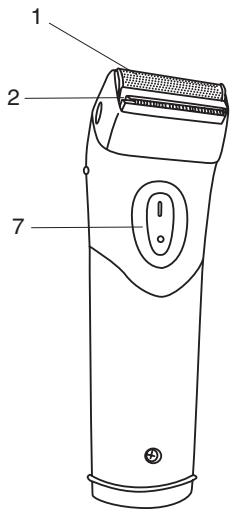
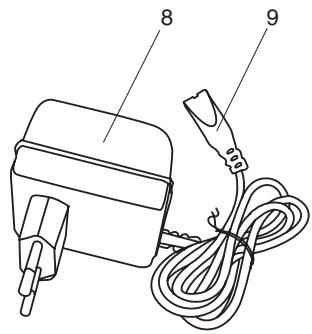
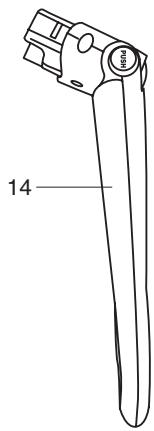

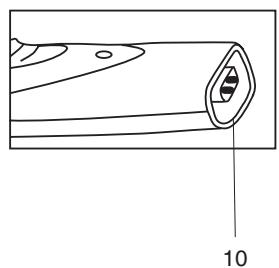
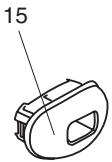
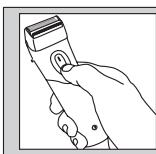
Fig.1
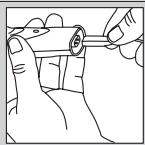
Fig.2
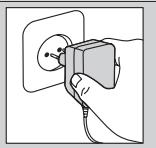
Fig.3
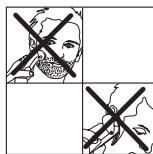
Fig.4
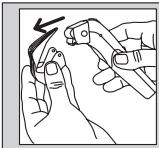
Fig.5
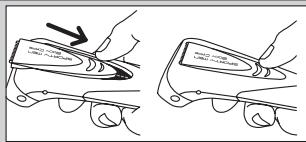
Fig.6
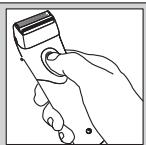
Fig.7
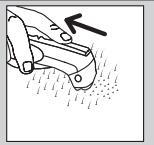
Fig.8
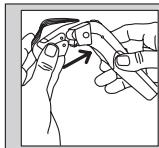
Fig.9
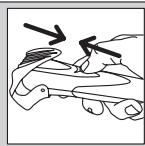
Fig.10
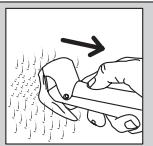
Fig.11
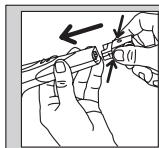
Fig.12
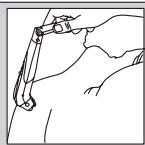
Fig.13
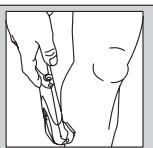
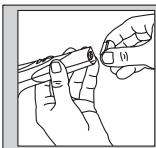
Fig.14
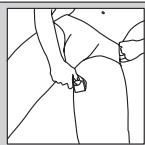
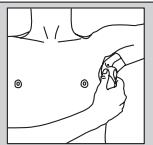
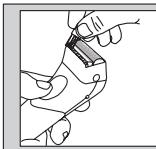
Fig.15
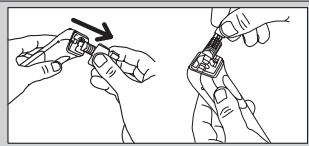
Fig.16
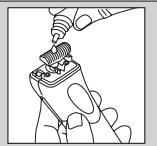
Fig.17
- ESPANOL
ATencion

Read these instructions carefully before using the appliance.
- Make sure that the mains supply coincides with the voltage shown on the appliance specifications plate.
- For proper operation, the blades should be quite clean, with no traces of hair. For this purpose, clean them before and after use with the attached brush (12).
- Keep out of the reach of children.
- Remove all elements from the inside or outside of the appliance used for protection during transport or for sales promotions, such as paper or plastic bags, plastic sheets, cardboard and stickers.
- Switch off the appliance when not in use, even if only for a moment.
- Do not use it with damaged or broken guide combs, or when blade teeth are missing.
- Never use any accessory not recommended by Solac, as they could damage the appliance.
- The grooming kit is designed for home use. It can not be used on a continuous, uninterrupted basis.
- Check the grooming kit frequently for signs of wear or damage. If these signs appear, or if the product has been used improperly, take it to an Authorised Service Centre.

The device complies with the IEC safety regulations approved internationally and can be safely used in the bath or shower.
- Do not use the device under the shower when it is connected to the power supply.
- Electrodométricos Solac, S.A. hereby disclaims all liability for injuries or damage that could be caused to persons, animals or property due to the failure to heed these warnings.
MAIN COMPONENTS FIG. 1
1.- Shaving blade
2.- Cutting blade
3.- telescopic cutting blade
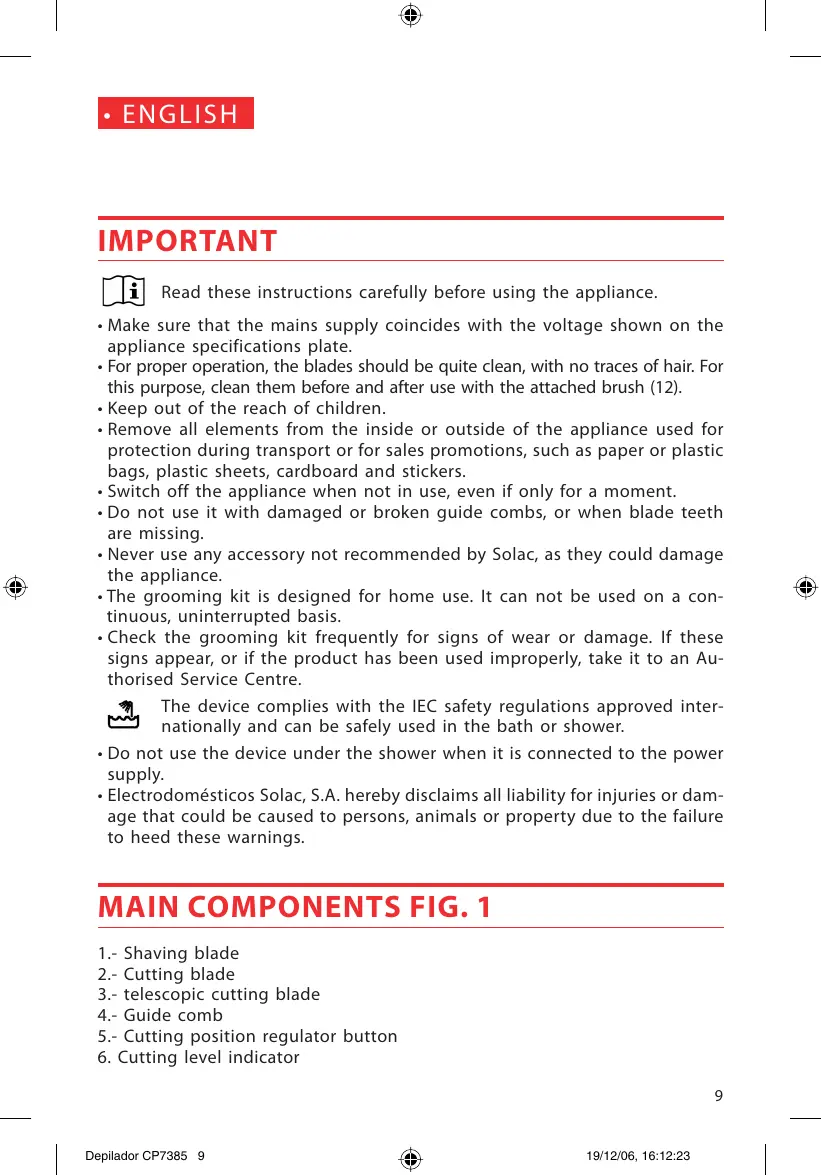
4.- Guide comb
5.- Cutting position regulator button
6. Cutting level indicator
- On/off switch
8.-Adapter
9.- Small socket adapter
10.- Connection base
11.- Pilot light - Cleaning brush
13.- Lubricating oil
14.- Ergonomic handle
15.- Trim
CHARGING BEFORE USE
- IMPORTANT: Set the device to the "0" or "off" position FIG. 1
- Connect the adapter (8) to the appliance. Connect the small socket (9) to the appliance (10). FIG.2
- Plug the adapter (8) into the mains socket. FIG.3
- The pilot light (11) will light up red during the charging operation.
- To charge the appliance you will need 12 hours and you will have 50 minutes for shaving and trimming.
- While the appliance is being charged, the pilot light (11) will light up in red and it will change to green once it is fully charged.
- When charging or recharging the hair clipper, the room temperature should not be below 15^ or above 35^ , as this may affect battery life.
- If the appliance is not used for a month, recharge it fully before use.
- For optimum battery life use the appliance until the battery is completely run down and then recharge it fully.
RECOMMENDATIONS
- The first time you use the device do it slowly and carefully until you acquire a perfect working knowledge on the functioning of the device. Follow this advice, especially when shaving sensitive areas of the body, since the skin also needs to adapt to the shaving process.
- This appliance is recommended for shaving body hair. Do not use it to shave or trim the hair on your face or head. FIG.4
- The appliance can be used on wet or dry skin.
SHAVING
- Body hair must be very short before shaving. If this is not the case, cut the hair to a short length with the cutting blades (2) or (3).
- Remove the guide comb (4) if it is inserted. Fig.5
-
Ensure that the telescopic cutting blade (3) is in the zero cutting position. Fig. 6.
-
Start the unit by pressing the on/off switch (7) Fig. 7
- Insert the body shaving head. During use, the shaving head must be in permanent contact with the skin.
-
Slide the shaver in the direction opposite to the direction in which hair grows, with a soft pressure. Fig. 8.
-
Recommendations: Pull your skin when moving the shaver on top of it and let the shaver move smoothly with the exact pressure.
TO START CUTTING
- The first time you use the appliance, cut a small amount of hair until you get used to the length of each position. We recommend that you begin with the maximum cutting length position (6 mm) and, in the event of wanting a shorter cut, change to lower positions (4 or 2 mm).
- Place the guide comb (4) on the head, attaching it to the two side sections Fig. 9.
- To change the position of the cutting process, press the adjustment button (5) up or down according to the desired position. Check the level selected on the viewer (6) Fig. 10.
- Turn the ON/OFF switch (7) to the ON position.
- Cut the hair by moving the appliance in the opposite direction to that in which the hair grows. Fig. 11.
Recommendations:
- To cut the hair EVENLY, let the clipper ADVANCE SMOOTHLY through the hair. Do not attempt to force it.
- Before trimming, check that the appliance is clean and that there are no traces of hair between the blades, as this could prevent it from working properly. For this purpose, after removing the comb, clean the blade (2/3) with the attached brush (12).
USE OF THE ERGONOMIC HANDLE
- Use the ergonomic handle (14) for those areas that are hared to reach or for smoother handling. Remove the trim (15) and insert the handle by pushing in the two side sections. Fig. 12.
- The handle can be extended, ideal for legs, or folded, for example, for use on the back. Fig. 13.
- To remove it, press the side sections and gently pull out. Insert the trim (15) again. Fig. 14
HAIR LENGTH WITH THE COMB ACCESSORY
The comb accessory (3) allows you to set 3 different hair lengths:
-
Position 1: 2 mm approximately
-
Position 2: 4 mm approximately
- Position 3: 6 mm approximately
RECOMMENDATIONS
- if the length of the hair is greater than 10mm , you can trim it first to make the shaving process easier.
- To achieve better results, the device must be in permanent contact with the skin.
- Trimming and shaving are easier when the skin and hair is dry.
CLEANING
- Before cleaning the appliance, check that it is switched off and unplugged. Remove the comb accessory (4).
- Wipe the outside with a dry cloth.
- Clean the blade with the brush included (12). Fig. 15
- Remove the head by gently pulling out and clean the blades with the brush (12) Fig. 16
MAINTENANCE:
- We recommend adding a few drops of lubricating oil (13) to the blades (2/3) after each use. Fig. 17.
IMPORTANT INFORMATION FOR DISPOSING OF THE NI-MH BATTERY
- Used batteries should not be disposed of with the normal refuse. Put them in the appropriate bins.
PRECAUTIONS
- The batteries should only be removed when they no longer work.
- All repairs and battery replacements should be carried out by an Authorized Service Shop.
IMPORTANT!! When you want to dispose of the appliance, NEVER throw it in the rubbish bin. Take it to your nearest RECYCLING POINT or the waste collection centre closest to your home for processing. You will thus be helping to take care of the environment.
ATTENTION

VOORZORGSGMAATREGELEN


- - ESPANOL
- ATencion
- MAIN COMPONENTS FIG. 1
- CHARGING BEFORE USE
- RECOMMENDATIONS
- SHAVING
- TO START CUTTING
- Recommendations:
- USE OF THE ERGONOMIC HANDLE
- HAIR LENGTH WITH THE COMB ACCESSORY
- CLEANING
- MAINTENANCE:
- IMPORTANT INFORMATION FOR DISPOSING OF THE NI-MH BATTERY
- PRECAUTIONS
- ATTENTION
- VOORZORGSGMAATREGELEN
Brand : SOLAC
Model : CP7385
Category : Electric razor