
ONE - Mobile Phone PALM - Free user manual and instructions
Find the device manual for free ONE PALM in PDF.


| Product Type | Mobile Phone |
| Brand | PALM |
| Model | ONE |
| Dimensions | 113 x 59 x 23 mm |
| Weight | 178 g |
| Screen | 2.5-inch TFT touchscreen, 320x320 pixels |
| Processor | Intel XScale 312 MHz |
| Memory | 32 MB RAM, 32 MB ROM |
| Operating System | Palm OS 5.4 Garnet |
| Power Supply | Lithium-ion battery 1800 mAh, removable |
| Talk Time | Up to 5 hours |
| Standby Time | Up to 300 hours |
| Main Functions | Phone, messaging, calendar, web browser, 0.3 MP camera |
| Connectivity | Bluetooth 1.2, infrared, USB |
| Network | Quad-band GSM (850/900/1800/1900 MHz) |
| Maintenance and Cleaning | Clean with a soft, dry cloth. Avoid solvents. |
| Security | PIN code lock, password |
| Spare Parts and Repairability | Battery and stylus replaceable. Other parts available through after-sales service. |
| General Information | User manual available for free download at notice-facile.com |
| Box Contents | Phone, battery, charger, stylus, case, CD-ROM |
| Warranty | 1 year (parts and labor) |
Frequently Asked Questions - ONE PALM
User questions about ONE PALM
0 question about this device. Answer the ones you know or ask your own.
Ask a new question about this device
Download the instructions for your Mobile Phone in PDF format for free! Find your manual ONE - PALM and take your electronic device back in hand. On this page are published all the documents necessary for the use of your device. ONE by PALM.
USER MANUAL ONE PALM
Copyright and Trademark
© 2005 palmOne, Inc. All rights reserved.
palmOne, Tungsten, the Tungsten logo, "T" (Stylized), Addit, Blazer, Graffiti, HotSync, the HotSync logo, Palm, Palm Powered, Palm OS, the Palm logo, and VersaMail are among the trademarks or registered trademarks owned by or licensed to palmOne, Inc. All other brand and product names are or may be trademarks of, and are used to identify products or services of, their respective owners.
palmOne, Inc. uses the Bluetooth wireless technology trademark under express license from Bluetooth SIG, Inc. RealPlayer is a trademark or registered trademark of RealNetworks, Inc. MPEG Layer-3 audio decoding technology is licensed from Fraunhofer IIS and Thomson. This product includes technology owned by Microsoft Corporation and cannot be used or distributed without a license from Microsoft Licensing, GP.
Disclaimer and Limitation of Liability
palmOne, Inc. assumes no responsibility for any damage or loss resulting from the use of this guide.
palmOne, Inc. assumes no responsibility for any loss or claims by third parties which may arise through the use of this software. palmOne, Inc. assumes no responsibility for any damage or loss caused by deletion of data as a result of malfunction, dead battery, or repairs. Be sure to make backup copies of all important data on other media to protect against data loss.
[!] IMPORTANT Please read the End User Software License Agreement with this product before using the accompanying software program(s). Using any part of the software indicates that you accept the terms of the End User Software License Agreement.
Software Download Available
Palm® Desktop software is supplied on a CD. If you do not have access to a CD drive for your computer, you can download Palm Desktop software from www.palmOne.com/support/
Table of Contents
About This Guide xix
Tips for viewing this guide. xix
What's in this guide? .xx
Step-by-step instructions. xx
Links. xx
Sidebars. .xxi
Chapter 1: Setting Up Your Handheld and Your Computer
What's in the box? 2
System requirements 2
Step 1: Charging your handheld. 4
What you should know about your handheld's battery. 5
Step 2: Turning on your handheld for the first time. 6
Step 3: Installing your software. 7
Step 4: Connecting your handheld to your computer .8
Switching to another desktop software application 10
Using user profiles. 11
Creating a user profile 12
Synchronizing with a user profile 14
Related topics 17
Chapter 2: Your Handheld. 18
What's on my handheld? 19
Front 19
Top 20
Back 21
What's on the screen? 22
Input area 22
Application controls 23
What software is on my handheld? 25
What's on the CD? 26
Related topics 30
Chapter 3: Moving Around in Applications 31
Opening applications 32
Using Favorites 32
Using Applications 33
Switching between applications 33
Using the 5-way navigator 34
Moving around with the 5-way 34
Moving around in Favorites View 35
Moving around in Applications View 36
Moving around in list screens and entry screens 36
Moving around in dialog boxes 37
Moving around in menus 37
Using menus 38
Using the Command stroke 39
Using the Command toolbar 39
Finding information 40
Related topics 41
Chapter 4: Entering Information on Your Handheld 42
How can I enter information on my handheld? 43
Entering information with Graffiti® 2 writing. 43
Writing in the Graffiti 2 input area 43
Using full-screen writing 44
Writing Graffiti 2 characters 45
Keys to success with Graffiti 2 writing 46
Graffiti 2 alphabet. 47
Graffiti 2 numbers 48
Graffiti 2 gestures 52
Writing Graffiti 2 symbols and other special characters 53
Graffiti 2 symbols and special characters 54
Writing Graffiti 2 ShortCuts 55
Graffiti 2 ShortCuts. 56
Entering information with the onscreen keyboard 57
Entering info from Contacts into another application 59
Editing information 61
Selecting information.. 61
Copying and pasting information 62
63
Related topics 64
Chapter 5: Moving Info Between Your Handheld and Your Computer 65
Why synchronize information? 66
What information is synchronized? 67
How to synchronize 68
When would I use each method? 69
Synchronizing with your computer 71
Synchronizing with a cable 71
Synchronizing using the IR port 73
Synchronizing over a network 77
Synchronizing by dialing in to a network 77
Synchronizing by connecting to a computer on the network 82
Customizing your synchronization settings 85
Choosing how your computer responds to synch requests 85
Setting synchronization options 87
Choosing whether application information is updated 89
Using Quick Install and the Send To Handheld droplet 94
Using Quick Install 94
Using the Send To Handheld droplet 95
Entering information with your computer 96
Importing information from other applications 100
Installing the additional software from the CD 103
Checking space and version numbers 105
Removing applications 107
Removing an application from your handheld 107
Removing Palm Desktop software from your computer 109
Restoring archived items on your computer 110
Related topics 111
Chapter 6: Managing Your Contacts 112
Adding a contact 113
Entering additional contact information 116
Selecting contact field types 117
Defining custom fields 118
Selecting a contact as your business card 119
Copying contact information into multiple contacts 120
Locating a contact on your list 121
Deleting a contact 122
Customizing the Contacts list 123
Making connections from Contacts. 125
Using Quick Connect 125
Customizing Quick Connect settings 127
Using Tap-to-Connect 128
Working with Contacts on your computer 130
Related topics 131
Chapter 7: Managing Your Calendar 132
Scheduling events 133
Scheduling an appointment 133
Scheduling an event without a start time 135
Scheduling a repeating event-standard interval 137
Scheduling a repeating event—unusual interval 138
Scheduling an event that is longer than a day 140
Entering a location or a note for an event 141
Scheduling an event with a time zone 143
Color-coding your schedule 144
Managing your color-codes 145
Assigning a color code to an event 147
Setting an alarm 148
Rescheduling an event 149
Deleting events 151
Deleting a specific event 151
Deleting all your old events 153
Checking your schedule 154
Viewing your appointments and tasks together 154
Viewing your daily schedule 156
Viewing your weekly schedule 158
Viewing your monthly schedule 159
Viewing a yearly calendar 160
Finding events that overlap 161
Customizing your calendar 161
Customizing display options for your calendar 162
Setting alarm and time options 165
Working with Calendar on your computer 167
Related topics 168
Chapter 8: Managing Your Office Files. 169
Creating and managing Office files. 170
Opening files from within Documents 171
Related topics 172
Chapter 9: Viewing Photos and Videos 173
Supported file types 174
Viewing media 175
Viewing a photo or video in the Thumbnail View 175
Viewing a photo or video in the List View. 178
Viewing a slide show 180
Rotating a photo 181
Viewing and editing photo or video details 182
Organizing photos and videos. 183
Organizing photos and videos in albums 183
Moving a photo or video within and between albums 185
Sorting photos and videos 187
Copying a photo or video 190
Deleting a photo or video 191
Sharing photos and videos 192
Working with palmOne™ Media on your computer. 193
Related topics 194
Chapter 10: Listening to Music 195
Transferring MP3 files to an expansion card 196
Transferring music from a CD to your handheld 201
Playing music on your handheld 205
Managing playlists 206
Creating a playlist 206
Playing songs from a playlist 208
Editing a playlist 209
Deleting a playlist 211
Viewing song info 212
Working with RealPlayer on your computer 213
Related topics 214
Chapter 11: Managing Your Tasks 215
Creating a task 216
Setting an alarm 217
Scheduling a repeating task-standard interval 218
Scheduling a repeating task—unusual interval 220
Organizing your tasks 222
Marking a task as complete 223
Deleting tasks 224
Deleting a specific task 224
Deleting all your completed tasks 225
Customizing your Tasks list 226
Working with Tasks on your computer 228
Related topics 229
Chapter 12: Writing Memos. 230
Creating a memo 231
Viewing and editing a memo 232
Moving memos in your memos list 233
Deleting a memo 234
Working with Memos on your computer 235
Related topics 236
Chapter 13: Writing Notes in Note Pad. 237
Creating a note 238
Choosing the pen and paper (background) colors 239
Setting an alarm 240
Viewing and editing a note 242
Deleting a note 243
Working with Note Pad on your computer 244
Related topics 245
Chapter 14: Making Bluetooth Wireless Connections ....246
What can I do with the built-in Bluetooth® wireless technology?……247
What types of connections can I make? 247
What is device discovery? 248
Entering basic Bluetooth settings 249
Setting up a Bluetooth phone connection 250
Accessing email and the web with Bluetooth 255
Setting up a connection for Bluetooth synchronization 257
Setting up a connection to a Bluetooth network 262
Creating trusted devices 264
Setting advanced Bluetooth features 266
Storing recently found device names 266
Allowing your handheld to wake up when it is turned off 267
Related topics 268
Chapter 15: Sending and Receiving Email Messages ....269
Upgrading an existing email account 270
About email accounts 271
Account and connection types 271
Using an email provider 271
Using a corporate email account 272
VPNs 273
Creating an account 274
Setting basic account options 275
Setting advanced mail options 279
Testing your new account 283
Managing email accounts 284
Editing an email account 284
Deleting an email account 285
Selecting a different service for an email account 286
Adding ESMTP to an account 288
Getting and reading email 290
Switching among email accounts 290
Getting email messages 291
Auto get mail with notification 293
Scheduling auto get mail 293
Auto get notifications 295
Setting notification options 296
Viewing and using the Reminders screen 297
Auto get mail retries 298
Resource issues with auto get mail 299
Inbox icons in the VersaMail application 299
Reading email messages 300
Selecting whether to receive messages as HTML or plain text.... 301
Customizing the font of messages you are reading 303
Sending an email message 304
Entering an address directly in the To field 306
Entering an address using Contacts 307
Entering an address using Smart Addressing 308
Attaching a personal signature 309
Send retry 310
Send retry notifications 310
Outbox icons in the VersaMail application 311
Working with email folders 312
Viewing another folder 312
Customizing the appearance of the message list 313
Moving messages between folders 315
Creating and editing mail folders 316
Working with email messages 318
Forwarding an email message 318
Deleting a message 320
Deleting old messages 321
Emptying the trash 323
Setting the trash to be emptied automatically 324
Marking messages as read or unread 325
Working with attachments 327
Downloading an attachment to your handheld 327
Working with a downloaded attachment 328
Downloading large attachments 331
Attaching files 332
Attaching photos and videos 334
Synchronizing email on your handheld with email on
your computer 335
Setting up an account on your handheld 336
Enabling synchronization on your computer 336
Setting synchronization options for your email account 338
Setting mail client synchronization options 340
Setting Microsoft Outlook as your default email program 342
Setting advanced email synchronization options 343
Account information screens 347
VersaMail conduit shortcuts 348
Excluding one or more accounts during synchronization 349
Synchronizing an account 349
Synchronizing multiple accounts 349
Using SSL with the conduit 350
Advanced VersaMail application features 350
Setting preferences for getting, sending, and deleting email ....351
Adding or updating a contact directly from a message 353
Creating and using filters 354
Turning filters on and off 356
Editing or deleting a filter 358
Managing settings for incoming and outgoing mail 359
Adding APOP to an account 368
Setting advanced account preferences 369
Changing email header details 371
Backing up mail databases 372
Synchronizing IMAP mail folders wirelessly. 374
Prerequisites for wireless IMAP folder synchronization 374
Turning IMAP folder synchronization on or off 375
Synchronizing handheld/email server IMAP folders from the Options menu 375
Working with root folders 376
Using Secure Sockets Layer (SSL) 376
rated topics 377
Chapter 16: Sending and Receiving Text Messages. 378
Creating and sending a text message 379
Receiving and viewing a text message 382
Editing a draft text message 384
Setting advanced messaging features 385
Related Topics 387
Chapter 17: Browsing the Web 388
Accessing a web page 389
Accessing a web page using the action bar 389
Accessing a web page using the address field 390
Using a password to access a web page 391
Finding information on a web page 392
Quickly jumping to a page 393
Following a link. 393
Returning to your home page or a page you recently visited..... 393
Changing how you view a page 394
Bookmarking your favorite pages 396
Adding a bookmark 396
Viewing a bookmarked or saved page 397
Editing information about a bookmark or saved page 398
Arranging the bookmark list 399
Disconnecting from and connecting to the Internet 401
Disconnecting from the Internet 401
Connecting to the Internet 402
Downloading files and pages 403
Downloading a file 403
Saving a web page 404
Viewing a saved file 405
Communicating with other users 406
Sending email by means of an Internet email account 406
Returning to a web page you recently visited 407
Changing your home and start pages. 408
Changing your home page 408
Changing your start page 410
Setting advanced browser options 411
Changing how images are downloaded 411
Setting whether to automatically complete web addresses and form fields 412
Allowing websites to remember personal information 413
Setting preferences for storing web pages 414
Setting preferences for using a proxy server 416
Setting whether to accept JavaScript 418
Related topics. 419
Chapter 18: Dialing Phone Numbers from
Your Handheld 420
Dialing a number 421
Entering a number 421
Redialing the most recently used number 422
Dialing a number from the Call History List 423
Using speed dial 424
Adding a speed-dial entry 424
Dialing a number using speed dial 425
Editing a speed-dial entry 426
Related topics. 427
Chapter 19: Sharing Information 428
Using the Send command 429
Sending information from within an application using Bluetooth technology 429
Sending a category using Bluetooth technology 431
Sending an application using Bluetooth technology 432
Using the Send command with the VersaMail® application 433
Using the Send command with SMS 433
Beaming 434
Beaming information from within an application 434
Beaming a category 436
Beaming an application 437
Other ways of sharing information 438
Related topics 439
Chapter 20: Managing Your Expenses 440
Adding an expense 441
Choosing currency options 443
Customizing the currency pick list 443
Preseting the currency symbol 444
Creating a currency symbol 445
Deleting expenses 447
Deleting an individual expense 447
Deleting an entire category of expenses 448
Customizing the expense list 449
Working with Expense on your computer 450
Related topics 451
Chapter 21: Performing Calculations 452
Calculator buttons. 453
Viewing recent calculations 454
Accessing different calculators 455
Related topics 456
Chapter 22: Keeping Your Information Private 457
Choosing a security level 458
Marking information as private 459
Setting the level of privacy 460
Hiding or masking private entries 460
Viewing an entry that is masked 461
Using a password 461
Creating a password 462
Changing a password 463
Deleting a password. 465
Deleting a forgotten password 466
Locking your handheld 467
Locking your handheld automatically 468
Locking your handheld manually 470
Using Quick Unlock 471
Creating a Quick Unlock combination 471
Deleting your Quick Unlock combination. 473
Encrypting your information 474
Limiting the number of password attempts 476
Related topics 479
Chapter 23: Using Categories to Organize Information ...480
Adding a category 481
Renaming a category 482
Deletingacategory 483
Placing information in a category 484
Placing an entry in a category 484
Placing an application in a category 486
Viewing information by category 487
Related topics 488
Chapter 24: Managing Clock Settings 489
Checking the current date and time 490
Setting the primary location 490
Setting the date and time for the primary location 491
Choosing secondary locations for other time zones 493
Modifying the locations list 494
Adding new locations 494
Deleting a location 496
Setting the alarm clock. 497
Responding to the alarm clock. 498
Changing the clock display 499
Related topics 500
Chapter 25: Customizing Your Handheld 501
Customizing Favorites View 502
Changing the background photo in Favorites View 502
Changing entries in Favorites 503
Customizing Applications View 504
Making the screen easier to read 506
Changing the screen fonts 506
Adjusting the brightness 508
Changing screen colors 509
Assigning a button to your frequently used applications 510
Setting the date and time 512
Selecting a location 512
Resetting the date and time 514
Selecting formats for dates, times, and numbers 515
Customizing the way you enter information 518
Choosing the input area 518
Using the full-screen writing area 519
Customizing Graffiti 2 strokes 520
Setting up ShortCuts 521
Changing ShortCuts 523
Correcting problems with tapping 524
Selecting sound settings 525
Entering your owner information 526
Conserving battery power 527
Preventing your handheld from turning on by accident 527
Selecting power-saving settings 528
Connecting your handheld to other devices 530
Changing the preset connection settings 530
Creating your own connection settings 532
Connecting your handheld to a mobile phone 535
Customizing network settings 536
Setting up a service profile 536
Connecting to your service 539
Adding details to a service profile 540
Deleting a service profile 542
Creating login scripts 543
Adding plug-in applications 547
Setting up a VPN 548
Related topics 549
Chapter 26: Expanding Your Handheld. 550
What type of expansion cards can I use? 551
How can expansion cards help me? 551
Removing an expansion card 552
Inserting an expansion card 553
Opening an application on an expansion card 554
Opening files on an expansion card 555
Viewing card information. 556
Renaming a card 557
Copying applications to an expansion card 558
Removing all information from a card 559
Related topics 560
Chapter 27: Maintaining Your Handheld 561
Handheld do's and don'ts 561
Handheld do's 561
Handheld don'ts 562
Resetting your handheld 562
Doing a soft reset 562
Doing a hard reset 564
Restoring your information after a hard reset. 565
Related topics 567
Chapter 28: Common Questions 568
Setup. 568
Handheld 570
Moving around 573
Entering information 573
Synchronizing 575
Calendar. 581
Memos 582
Note Pad 582
Media 582
RealPlayer 583
Tasks 583
Connecting wirelessly 584
The VersaMail® application. 585
Privacy 588
Sharing 589
Problems with incompatible applications 591
Chapter 29: Getting Help 594
Self-help resources 594
Technical support 595
Product Regulatory Information 596
Index 602
About This Guide
This guide tells you everything you need to know about your handheld: the things you'll do every day, the advanced features that let you get the most out of your handheld, and the things that make your handheld not only useful, but fun.
Tips for viewing this guide
Here are some helpful tips for making it easier to read and find information in this guide as you view it in Adobe Reader:
- To magnify the page, click the magnifying glass , move the cursor (which is now a magnifying glass) over the page, and click repeatedly. Click Previous View (or depending on your version of Reader) to return to the original view.
- Click an entry in the Table of Contents or Index to go directly to that section of the guide.
- If you click a link and go to a page in the guide, click Previous View (or depending on your version of Reader) to return to the page you were on before you clicked the link.
- If you click a link and go to a web page, the page may open in Adobe Reader instead of in your web browser. To specify whether pages open in Reader or in your web browser, go to the Edit menu in Reader, select Preferences, and then select Web Capture. In the Open Web Links dropdown list, select either In Acrobat or In Web Browser, and then click OK.
- When selecting the page(s) to print, be sure to use the file page number shown at the bottom of your computer screen, not the printed page number, if they are different.
What's in this guide?
The info in this guide includes step-by-step instructions, links to cross-references, and sidebars.
Step-by-step instructions
Here you'll find how-to information. Look for these cues in instructions:
Continued Cue that means the procedure continues on the next page.
Done Cue that signals the end of the procedure. You're done.
[!] IMPORTANT A step that you must follow; otherwise, you could experience an error or even lose information.
[ & ] OPTIONAL A step you might find useful.
NOTE Information that applies only in certain cases or that tells more about a procedure step.
WINDOWS ONLY A procedure or text that applies to one platform only. In most cases, if you see one heading, check the following or preceding sections for the other. Sometimes there is no Mac counterpart for a Windows procedure or text—this feature is not available to Mac users.
Links
Links appear as underlined words in sidebars and other places throughout this guide.
In this chapter Links on the first page of each chapter that send you to a specific section.
Related topics Links that send you to other topics in this guide to learn about more things you can do with an application or feature.
Sidebars
[!] Before You Begin
Things you must complete before you can do the steps described in a procedure or group of procedures.
\*Tip
A suggestion on how to use a feature more fully; a shortcut; a pointer to a related feature.
Did You Know?
An interesting fact about the topic being described; may include a link to more information.
Key Term
A technical term related to the topic being described. The term may appear in this guide or only on your handheld.
Tips & Tricks
A pointer to a website where you can obtain general information about your handheld and learn the latest tips, tricks, and more.
Support
A pointer to a website where you can find help if you experience problems with a specific feature or with your handheld.
Setting Up Your Handheld and Your Computer
In this chapter
What's in the box?
System requirements
Step 1: Charging your handheld
Step 2: Turning on your handheld for the first time
Step 3: Installing your software
Step 4: Connecting your handheld to your computer
Switching to another desktop software application
Using user profiles
Related topics
Congratulations on the purchase of your new Tungsten™ E2 handheld from palmOne! You're about to discover so many things about your handheld that will help you better manage your life and have fun, too. As you become more familiar with your handheld, you'll probably personalize the settings and add applications to make it uniquely yours.
While you're likely to get years of enjoyment from your handheld, it takes only four easy steps to get up and running.
Benefits
- Start using your handheld right away
- Establish a link between your handheld and your computer
- Set up your handheld for optimal use
CHAPTER 1
Setting Up Your Handheld and Your Computer
Key Term
Palm® Desktop software
The software that lets you enter, update, review, and synchronize information on your computer.
What's in the box?
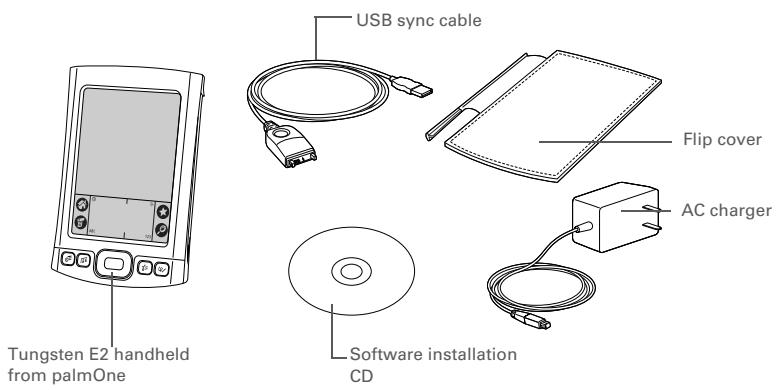
System requirements
The installation CD contains Palm® Desktop software and other applications you need to set up and use your handheld. To use Palm Desktop software, your desktop computer must meet these requirements:
WINDOWS ONLY
-
A PC with a Pentium II processor or later, and one of the following operating systems:
-
Windows 2000 (requires administrator rights to install Palm Desktop software)
-
Windows XP (requires administrator rights to install Palm Desktop software)
-
Internet Explorer 5.0 or later
- 32 megabyte (MB) available RAM (64MB recommended)
CHAPTER 1
Setting Up Your Handheld and Your Computer
170MB available hard disk space
- One available USB port
- USB sync cable (included with your handheld)
- CD or DVD drive for installing Palm Desktop software from the CD that came with your handheld
MAC ONLY
- Mac computer or compatible with a PowerPC processor
- Mac OS X, version 10.2 or 10.3 (requires administrator rights to install Palm Desktop software)
128MB total RAM
190MB available hard disk space
Monitor that supports screen resolution of 800 X 600 or better - One available USB port
- USB sync cable (included with your handheld)
- CD or DVD drive for installing Palm Desktop software from the CD that came with your handheld
CHAPTER 1
Setting Up Your Handheld and Your Computer
[!] Before You Begin
If you're upgrading from another Palm Powered™ device, synchronize your old handheld with your old desktop software.
![PALM ONE - [!] Before You Begin - 1](/content/2019/10/16572/images/16c6b44cd4c570af5df3ed044aad4d5f7b945b5776c50f3073a2cb96c309e1de.jpg)
Tip
On a laptop computer, the USB port may be located on the side.

Tip
After the initial charge, charge your handheld at least half an hour every day.
Step 1: Charging your handheld

Connect your handheld:
a. Plug the USB sync cable into your handheld and into a USB port on the back of your computer.
b. Plug the AC charger into the Multi-connector on your handheld and into an outlet.
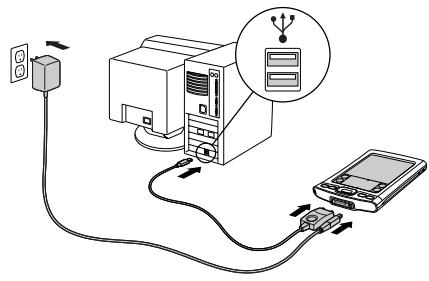

Charge your handheld for three hours. Be sure your handheld is fully charged before going on to Step 2.

Done
CHAPTER 1
Setting Up Your Handheld and Your Computer
What you should know about your handheld's battery
While your handheld is charging, take a minute to learn about the battery:
- Whenever you see an alert on the screen warning you that the battery is low, recharge your handheld. Also recharge your handheld if it doesn't turn on when you press the power button.
NOTE The memory on your handheld is designed to store your information even if the battery becomes drained to the point that you cannot turn on your handheld. When you recharge your handheld, all your existing information should appear.
-
Conserve battery life by doing any of the following:
-
Adjust the screen brightness.
- Reduce the Auto-off setting.
- Prevent your handheld from turning on by accident.
- Stop music or video playback when not in use.
- Respond to or cancel alerts promptly.
- Set the Bluetooth® functionality to off when not in use.
- Minimize use of the expansion card slot.
CHAPTER 1
Setting Up Your Handheld and Your Computer
[!] Before You Begin
Be sure to fully charge your handheld, as described in the preceding procedure.
![PALM ONE - [!] Before You Begin - 1](/content/2019/10/16572/images/0043f4520f8c84aea1588fac9c60248c577cf570cb39d342d5ec06046f86d66f.jpg)
Tip
After you set up your handheld, review the Quick Tour on your handheld and take the tutorial on the CD to learn the basics.
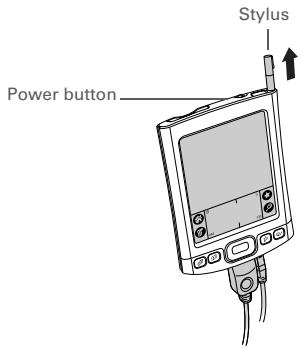
Step 2: Turning on your handheld for the first time
1
Press the power button.
2
Slide the stylus out of the slot.
3
Hold the stylus as you would hold a pen, and follow the onscreen instructions to set up your handheld.

Done
CHAPTER 1
Setting Up Your Handheld and Your Computer
+ Did You Know?
When you upgrade, there's no need to delete the old desktop software first. When you install the new Palm Desktop software, all of your information transfers automatically to the new software.
Did You Know?
IT managers can set up a profile if they want to install the same set of information on several handhelds.
Step 3: Installing your software
1 Insert the CD into your computer.
NOTE You need administrator rights to install Palm Desktop software on a computer running Windows 2000/XP or Mac OS X.
2 WINDOWS ONLY
Follow the onscreen instructions. If you're upgrading, select the username that you assigned to your old handheld.
MAC ONLY
Double-click the CD icon, and then double-click palmOneSoftware pkg.
Done During installation, you're asked to connect your computer to your handheld if it is not already connected. See Step 4.
CHAPTER 1
Setting Up Your Handheld and Your Computer

Tip
If the Select User dialog box appears during synchronization, select the username of the handheld you want to synchronize, and click OK.

Key Term
Third-party application A software program that runs on a Palm Powered device, but is not created or supported by palmOne, Inc.

Tip
If you have problems with your new handheld after you synchronize, you may need to update your third-party applications.
Step 4: Connecting your handheld to your computer
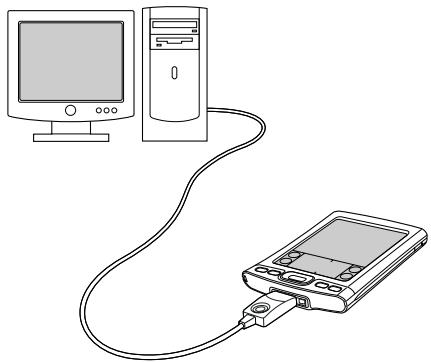
During installation, you connect your handheld to your computer if it is not already connected, and you synchronize for the first time. Synchronizing simply means that any information you enter in one place (your handheld or computer) is automatically updated in the other.
[!] IMPORTANT Be sure to synchronize the info in your handheld's program memory at least once a day so that you always have an up-to-date backup copy of this info on your computer.

[ & ] OPTIONAL Connect your handheld to your computer:
a. Plug the USB sync cable into a USB port on the back of your computer.
b. Plug the cable into your handheld.
Continued
CHAPTER 1
Setting Up Your Handheld and Your Computer
2
[ & ] OPTIONAL Press the power button to turn on your handheld if it is not already on.
3
Continue with the onscreen instructions. Synchronize your handheld with your computer by pressing the sync button on the USB sync cable.

Done
CHAPTER 1
Setting Up Your Handheld and Your Computer
[!] Before You Begin
You must have completed CD installation and chosen Palm Desktop software as your desktop application for synchronization in order to switch to Outlook. Note that you can choose Outlook as your synchronization software for Contacts, Calendar, Tasks, and Memos during CD installation.
Switching to another desktop software application
WINDOWS ONLY
During installation, you chose a desktop software application to synchronize with your handheld. You may have chosen Palm Desktop software at that time. But if Microsoft Outlook already contains all of your contacts, appointments, tasks, and notes, you can change your synchronization method so that your handheld synchronizes with Outlook instead. You can also change from Outlook to Palm Desktop software.
NOTE If you choose to synchronize the info on your handheld with Outlook, info in Contacts, Calendar, Tasks, and Memos is synchronized with info in Contacts, Calendar, Tasks, and Notes in Outlook. You can also set up the VersaMail® application to synchronize with Outlook. Other info, such as photos and notes, is synchronized with Palm Desktop software.
1 Insert the CD into your computer.
2 Select Change your synchronization method.
3 Follow the onscreen instructions for the desktop software you want to use. Done
CHAPTER 1
Setting Up Your Handheld and Your Computer
Using user profiles
[!] IMPORTANT Only IT managers may need to use user profiles for their company. If you are not an IT manager, you can skip this section.
Suppose your sales organization wants to distribute two dozen handhelds that all have a common company phone list, a set of memos, and several key applications. A user profile can be created to install this information before the handhelds are distributed to employees. When the employees synchronize for the first time, this common information becomes part of their user-specific information.
A user profile enables you to install the same information onto multiple handhelds before each handheld is individualized with a unique username and user-specific information. A handheld that has a user profile installed can be given to anyone, because the handheld is not yet identified by a unique username. When the new user synchronizes for the first time, he or she gives the handheld a unique username.
NOTE Handhelds that are synchronized with a user profile must be either new handhelds that have never been synchronized or handhelds that have had their usernames and information removed by a hard reset.
CHAPTER 1
Setting Up Your Handheld and Your Computer

Tip
Save time by importing to quickly add information to a profile.
Creating a user profile
WINDOWS ONLY
1
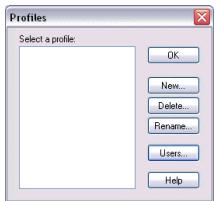
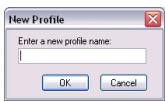
Open the New Profile screen:
a. Open Palm Desktop software.
b. From the Tools menu, select Users.
c. Click Profiles, and then click New.

2
Enter a unique name for the profile, and click OK twice.
3
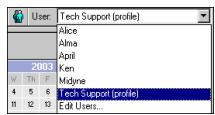
Select the profile from the User list, and create the info in Palm Desktop software for the profile.

Done
CHAPTER 1
Setting Up Your Handheld and Your Computer
MAC ONLY
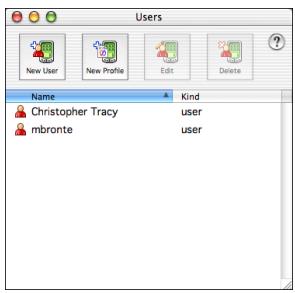
1 Open the New Profile screen:
a. Open Palm Desktop software.
b. From the User pop-up menu, select Edit Users.
c. Click New Profile.

2 Create the profile:
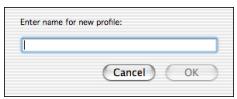
a. Enter a unique name for the profile, and click OK.
b. Close the Users window.
Continued
CHAPTER 1
Setting Up Your Handheld and Your Computer
3
Select the profile from the User pop-up menu, and create the info in Palm Desktop software for the profile.
4
Set the profile's conduit settings:
a. From the HotSync® menu, select Conduit Settings.
b. Select the conduit settings for the profile.

Done
Synchronizing with a user profile
WINDOWS ONLY
1
Begin synchronization:
a. Connect the USB sync cable to the USB port on the back of your computer, and then insert the other end into the Multi-connector on your handheld.
b. Press the sync button on the USB sync cable.

Continued
CHAPTER 1
Setting Up Your Handheld and Your Computer
2
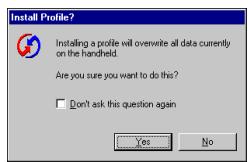
Transfer the profile information:
a. Click Profiles.
b. Select the profile you want to load on the handheld, and click OK.
c. Click Yes.
#
Done The next time you synchronize that handheld, Palm Desktop software prompts you to assign a username to the handheld.
CHAPTER 1
Setting Up Your Handheld and Your Computer
MAC ONLY
1 Begin synchronization:
a. Connect the USB sync cable to the USB port on the back of your computer, and then insert the other end into the Multi-connector on your handheld.
b. Press the sync button on the USB sync cable.
2 Select the profile you want to load on the handheld, and click OK.
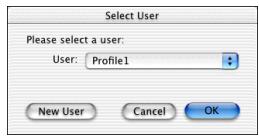
Done The next time you synchronize that handheld, Palm Desktop software prompts you to assign a username to the handheld.
CHAPTER 1
Setting Up Your Handheld and Your Computer
Tips & Tricks
Make your handheld uniquely yours. For great tips, software, accessories, and more, visit www.palmOne.com/ mytungstene2.
Support
If you're having problems with setup or anything else on your handheld, go to www.palmOne.com/support.
Related topics
Click a link below to learn about these related topics:
Moving Info
- Synchronizing your handheld with Palm Desktop software or Microsoft Outlook on your computer
- Synchronizing wirelessly using Bluetooth technology on your handheld
- Using your company's network to synchronize information
- Choosing whether or not to synchronize information for a specific application
- Adding applications to your handheld
- Installing additional software from the CD
- Deleting applications from your handheld
Viewing application information
Customizing
- Adjusting the screen display
- Reducing the Auto-off setting
- Keeping your handheld from turning on accidentally
Common Questions
Answers to frequently asked questions about setup
CHAPTER 2
Your Handheld
In this chapter
What's on my handheld?
What's on the screen?
What software is on my handheld?
What's on the CD?
Related topics
Like a good personal assistant, your handheld helps you keep track of your schedule, your business and personal contacts, your to-do list, even your Microsoft Office and multimedia files.
Stay productive by carrying more of your important files and documents. Get connected with wireless access to email, text messages, and the web. View digital photo and video albums directly on your handheld, or insert an expansion card (sold separately) to listen to your favorite music. And don't worry about losing your information—even if the battery drains completely, the information stays in your handheld's memory. Simply recharge to access it again.

Benefits
- Carry more of your important information, and work with it on the go
- Save time and stay organized
- Travel light
- Never lose important information
- Stay in touch with wireless connectivity
CHAPTER 2
Your Handheld
What's on my handheld?
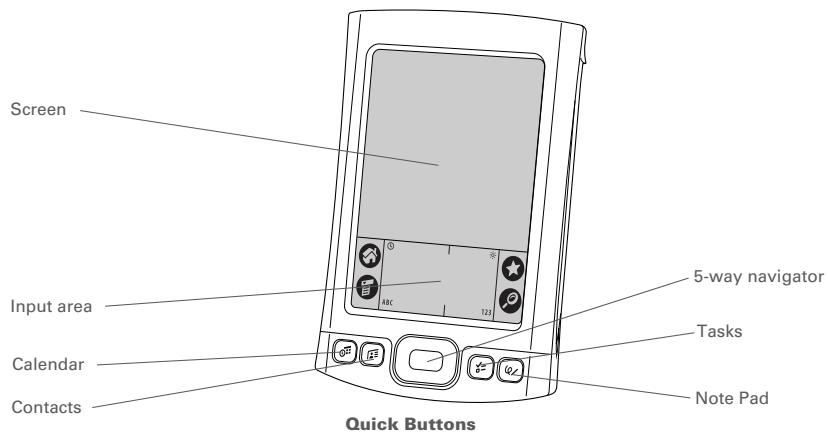
Front
Screen
Displays the applications and information on your handheld. The screen is touch-sensitive.
Input area
Lets you enter info with Graffiti® 2 writing or open the onscreen keyboard.
5-way navigator
Helps you move around and select info to display on the screen.
Quick buttons
Turn on your handheld and open Calendar, Contacts, Tasks, and Note Pad.
CHAPTER 2
Your Handheld
Key Term
IR Short for infrared. Beaming uses infrared technology to send information between two IR ports that are within a few feet of each other.
Did You Know?
Beaming lets you quickly share appointments, addresses, phone numbers, and more.
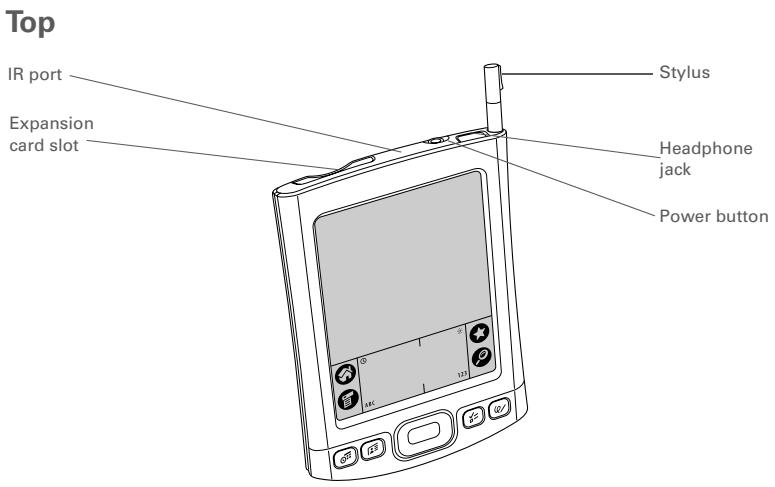
IR port
Beams information between handhelds and other devices that have an IR port.
Expansion card slot
Lets you insert an expansion card (sold separately) to play music, back up info, and add memory, applications, and accessories to your handheld.
Power button
Turns your handheld on or off and lets you turn Keylock on (if active).
Headphone jack
Lets you connect standard 3.5mm headphones (sold separately) to your handheld so you can listen to music and other audio applications.
Stylus
Lets you enter information on your handheld. To use the stylus, slide it out of the slot and hold it as you would a pen or pencil. Using your fingertip instead of the stylus is OK, but don't use your fingernail, a real pen, or any other sharp object to touch the screen.
CHAPTER 2
Your Handheld
Key Term
USB The type of connector or cable that's commonly used to connect accessories to a computer.
Back
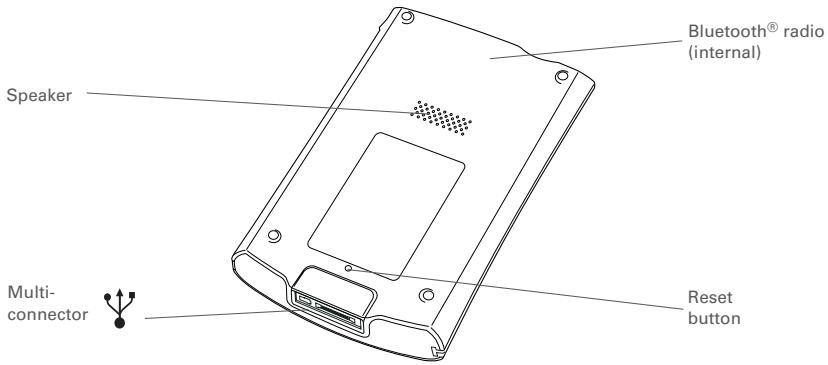
Speaker
Lets you listen to alarms, game and system sounds, and music.
Reset button
Resets your handheld if it freezes (stops responding).
Multi-connector
Lets you connect a sync cable (included) or a cradle (sold separately) to your computer so you can synchronize. Also lets you connect the AC charger to your handheld so you can charge it.
Bluetooth® radio (internal)
Enables your handheld to connect with other devices (sold separately) that use Bluetooth® wireless technology.
CHAPTER 2
Your Handheld

Tip
If you use another application frequently, customize the input area to display that application's icon. Tap and hold any of the four large icons, and select the new application you want from the list. The new application's icon replaces the icon you tapped.
What's on the screen?
Your handheld includes many features that make it easy to use. Among them are the input area and the common elements that appear on the screen in each of the applications. Once you learn how to use them in one application you can easily use them in all the others.
Input area
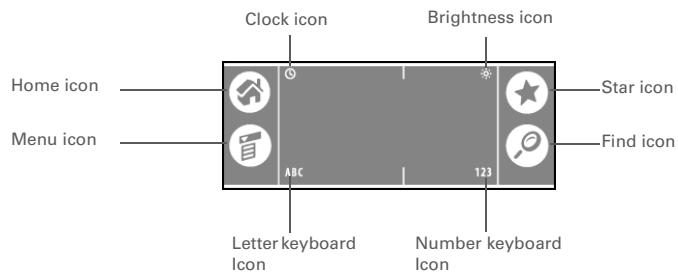
Tapping the icons in the input area does the following:
Clock icon
Displays the current time and date. The display closes automatically after two seconds. See Setting the date and time and Managing Clock Settings for more information.
Brightness icon
Opens the Adjust Display dialog box, where you can set the brightness of your handheld's display. See Adjusting the brightness for instructions.
Home icon
Displays Applications View, where you can open applications. See Opening applications for more information.
Menu icon
Opens the menus, where you can select items that provide access to other features. See Using menus for more information.
CHAPTER 2
Your Handheld
Key Term
Slider The solid area on the scroll bar. The slider moves to indicate the relative position within the entry or list.
\*Tip
You can also use the 5-way navigator to select an item from a pick list and to select some command buttons.
Star icon
Displays Favorites View, where you can open applications. See Opening applications for more information.
Find icon
Opens the Find dialog box, where you can search for information. See Finding information for more details.
Letter keyboard icon
Opens the alphabetic keyboard. See Entering information with the onscreen keyboard for details.
Number keyboard icon
Opens the numeric keyboard. See Entering information with the onscreen keyboard for details.

Application controls

Navigator Button Tips Use the Navigator button to your handheld and retrieve a phone number you want! Use your stylus or the onsc keyboards to create data.
Navigation basics:
- To go to Home anytime: Press and hold Select (the center button of the Navigator.)
Command button
Previous/next arrows
Select the left and right arrows to view the previous and next entry; where up and down arrows appear, select them to view the previous and next screens of information.
Scroll bar
Drag the slider, or tap the top or bottom arrow, to scroll the display one line at a time. To scroll to the previous screen, tap the scroll bar just above the slider. To scroll to the next screen, tap the scroll bar just below the slider.
CHAPTER 2
Your Handheld
Command button
Select a button, such as OK, Cancel, or Details, to perform a command or to open a dialog box. Command buttons appear at the bottom of dialog boxes and application screens.
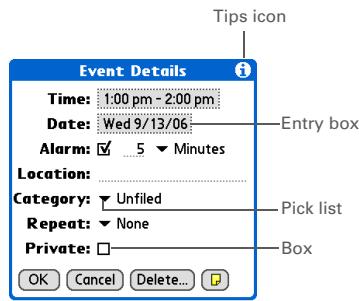
Tips icon
Tap the Tips icon to view shortcuts and other useful information for the screen where the icon is located. When you have finished viewing the tip, select Done.
Entry box
Tap an entry box to open a dialog box where you can enter info for that field.
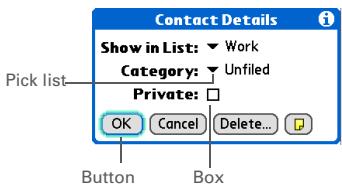
Pick list
Select the arrow to display a list of choices, and then select an item in the list.
Box
Check or uncheck a box to select or deselect it. When a box is checked, the corresponding option is selected and active. When a box is unchecked, the corresponding option is deselected and inactive.
CHAPTER 2
Your Handheld

Tip
Can't find some of these applications? Tap the category list in the upper-right corner of Applications View and select All.
What software is on my handheld?
Your handheld comes with many applications preinstalled and ready to use.

Favorites
Customize a list of your favorite applications and web pages so that you can locate and open them quickly.

Calendar
Manage your schedule from single entries, like lunch with a friend, to repeating and extended events, like weekly meetings and holidays. Even color-code your schedule by category.

Contacts
Store names and addresses, phone numbers, email and website addresses—even add a birthday alarm or a contact's photo.

Media
View and organize photos and videos.

RealPlayer®
Carry music on expansion cards (sold separately), create playlists, and listen to music on your handheld. This application has a companion desktop application that you can install from the CD (Windows only). Both Mac and Windows users can use RealPlayer on the handheld.

Bluetooth®
Set up wireless connections to a mobile phone, network, or computer for sending and receiving information.

Web
Browse your favorite sites on the web using the built-in Bluetooth technology on your handheld.

Tasks
Stay on top of your to-do list. Enter things you need to do, prioritize them, set alarms, and then monitor your deadlines.

Memos
Capture information such as meeting notes, lists of books to read, movies to see, recipes, and anything else you need to write down.

Note Pad
Write on the screen in your own handwriting or draw a quick sketch.

Calculator
Solve basic math calculations such as splitting restaurant bills and figuring tips.
CHAPTER 2
Your Handheld

Quick Tour
Learn about your handheld and how to enter information.

Expense
Track business or travel expenses and print expense reports after you synchronize.

HotSync®
Synchronize the info on your handheld with the info on your computer.

Prefs
Customize your handheld's sound levels, colors, security, and more.

Card Info
View information about an expansion card seated in the expansion card slot.

World Clock
Set the time in your home city and two other locations, and set an alarm to wake you up.
What's on the CD?
The Tungsten™ E2 software installation CD includes desktop software for your computer and additional software for your handheld.
The desktop software lets you use your computer to view, enter, and manage info for many of the applications on your handheld.
NOTE You must install Palm® Desktop software in order to synchronize your handheld with your computer. When you synchronize, information entered on either your computer or your handheld is instantly updated in the other location—no need to enter info twice. Synchronizing also creates a backup copy of the info on your handheld on your computer.
The additional software lets you do more things with your handheld. When you set up your handheld you may install some (or all) of these applications. You can install any of the applications at any time after you set up your handheld as well.
CHAPTER 2
Your Handheld
The software installation CD includes titles such as the following:

Palm® Desktop software
View, enter, manage, and back up info for Calendar, Contacts, Tasks, Media, Memos, and Expense on your computer (Expense and Media are Windows only). You can also view, manage, and back up info for Note Pad. When you synchronize your handheld with your computer, this info is updated in both places. Palm Desktop software is installed automatically during the initial CD installation process.
Palm Desktop includes HotSync Manager software, which allows you to customize the settings for synchronization. You can access HotSync Manager by selecting its icon in the task bar at the bottom of your computer screen.

HotSync Manager
NOTE During installation, you can choose to synchronize your handheld with Microsoft Outlook on your computer (Windows only). If you do, information in Contacts, Calendar, Tasks, and Memos is synchronized with information in Contacts, Calendar, Tasks, and Notes in Outlook. Information in Expense, Note Pad, and Media is still synchronized with information in Expense, Note Pad, and Media in Palm Desktop software.

Quick Install (Windows only)
Install applications and transfer files from your Windows computer to your handheld or to an expansion card that is seated in the expansion card slot for use on your handheld. Quick Install is installed automatically when you synchronize during the initial CD installation process.
CHAPTER 2
Your Handheld

Tip
After you install an app and discover how valuable it is, be sure to add it to Favorites.

Did You Know?
You can categorize applications. Some apps are automatically assigned to a category when you install them; others are assigned to the Unfiled category. All apps appear in the All category of Applications. Assign an application to a category in Applications by selecting Category in the App menu. Select the pick list next to the application's name; then select a category.

Send To Handheld droplet (Mac only)
Install applications and transfer files from your Mac computer to your handheld or to an expansion card that is seated in the expansion card slot for use on your handheld. The Send To Handheld droplet is installed automatically when you synchronize during the initial CD installation process.

Documents To Go
Create, view, and edit Microsoft Word and Excel files, and view and manage PowerPoint files, directly on your handheld. Includes companion desktop software that lets you move or copy Microsoft Word, Excel, and PowerPoint files to your handheld, as well as create and edit files.

VersaMail®
Send, receive, and manage email messages wirelessly using the built-in Bluetooth technology on your handheld or by synchronizing with your Windows computer.

SMS
Send and receive short text (SMS) messages using the built-in Bluetooth wireless technology on your handheld.

AudiblePlayer
Listen to newspapers, books, public radio, language instruction, and more (Windows only; download requires Internet connection, additional fees may apply).

RealPlayer® desktop application
Transfer MP3 music files from your computer to an expansion card (sold separately), and copy music from your CDs to your computer. This is the desktop companion for the music application on your handheld (Windows only).

Windows Media Player/ Direct X
Work with the Media desktop application. These applications are required for Media to prepare videos for playback on your handheld (Windows only).
CHAPTER 2
Your Handheld

QuickTime
Works with the palmOne Media desktop application. Required to prepare videos in certain formats for viewing on your handheld.

Manual
NOTE QuickTime is included on the CD for Windows computers only. For Mac computers, QuickTime is included in OS X.

Enterprise Software link
Install a version of the Getting Started guide on your handheld. On Windows, you can also access the full Acrobat version (PDF) of Getting Started from the Help menu of Palm Desktop software and from the Start Programs menu of your Windows desktop. On a Mac, access Getting Started from the Palm/Documentation folder.

Handmark Solitaire
Access the palmOne enterprise website, where you can download WebSphere Micro Environment (to run Java [J2ME] on your handheld), VPN connection software (additional fee required for purchase), security and management tools, and more (download requires Internet connection).

AdditTM
Enjoy hours of entertainment with this solitaire game.

Adobe Reader for Palm OS
Preview, try, and buy software for your handheld (Windows only and web access required).

Power by Hand eReader
View PDF files that are tailored to fit your handheld's screen.
Tutorial
Purchase and download eBooks from the web so you can read them when you want, where you want.
Learn to use the popular features of your handheld. The Tutorial includes a tour of your handheld and step-by-step instructions. Access it from the Discover your device screen on the software installation CD.
CHAPTER 2
Your Handheld
Tips & Tricks
Make your handheld uniquely yours. For great tips, software, accessories, and more, visit www.palmOne.com/ mytungstene2.
Support
If you're having problems with your handheld, go to www.palmOne.com/support.
Related topics
Click a link below to learn about these related topics:
Setup
Installing the desktop software from the CD
Entering Information
- Entering information with Graffiti 2 characters and shortcuts
Moving Around
- Entering information with the onscreen letter and number keyboards
Moving Info
-
Opening applications and using menus
-
Finding information
-
Synchronizing your handheld with your computer
-
Installing additional software from the CD
Sharing
-
Beaming information and applications to other Palm Powered™ devices
-
Sending information and applications to other Bluetooth devices by using Bluetooth technology on your handheld
WorldClock
Viewing the current date and time
Customizing
-
Setting the current date and time
-
Adjusting the brightness of the display
-
Preventing your handheld from turning on by accident
Maintaining
Caring for your handheld
- Resetting your handheld
Common Questions
Answers to frequently asked questions about your handheld
Moving Around in Applications
In this chapter
Opening applications
Using the 5-way navigator
Using menus
Finding information
Related topics
Have you ever been to a new city and felt a bit lost until you figured out that the numbered streets run north/south and the avenues run east/west?
Learning to move around on your handheld is similar. Most Palm OS® applications use the same set of application controls. So once you learn how to use these standard controls, you'll be driving all over town and you won't even need a map.

Benefits
Find and open applications quickly
- Access extra features with menus
- Move around in applications with one hand, using the 5-way navigator
- Locate information in any application with the Find feature
CHAPTER 3
Moving Around in Applications

Did You Know?
You can use a favorite photo as the background for your Favorites or Applications View.
Opening applications
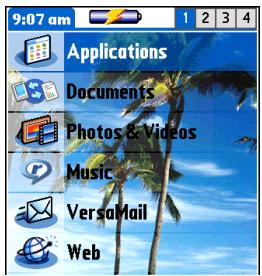
Your handheld lets you display two views to quickly see and open applications. Favorites lets you create a list of the items you want to quickly access, while Applications displays all applications on your handheld.
NOTE Some applications are listed differently in Favorites and Applications views. For example, the Photos & Videos entry in Favorites opens the Media application, which is listed as Media in Applications View. The application icons are similar in both Favorites and Applications.
Using Favorites
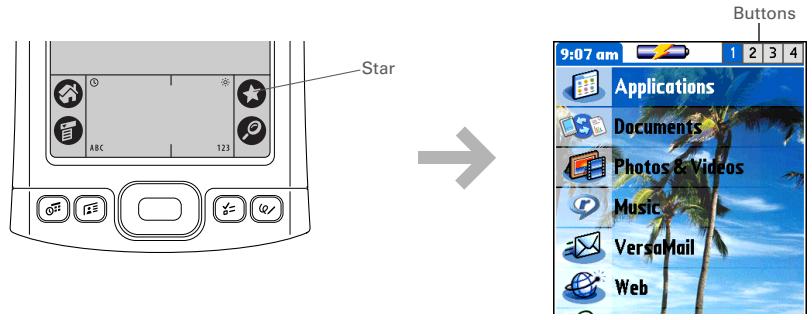
- Favorites View can include applications and links to the web. Certain items are included in Favorites by default, but you can customize the list to contain any items you want.
To access an item from Favorites, tap Star 念 and select from the list. Use the 5-way navigator or tap the buttons in the upper-right corner of the screen to move to another page of favorites.
CHAPTER 3
Moving Around in Applications
Did You Know?
You can also open applications using the quick buttons on the front of your handheld.
\*Tip
When no item is selected, press Right or Left on the 5-way to scroll through application categories.
+ Did You Know?
Applications View displays an icon for opening Favorites. Favorites View contains an entry for opening Applications.
Using Applications
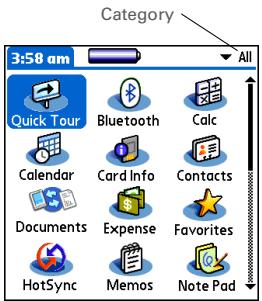
Applications View shows all of the applications on your handheld. Use the category pick list in the upper-right corner of the screen to view applications by category or to see all applications.
To access an item from Applications, tap Home and select an icon.
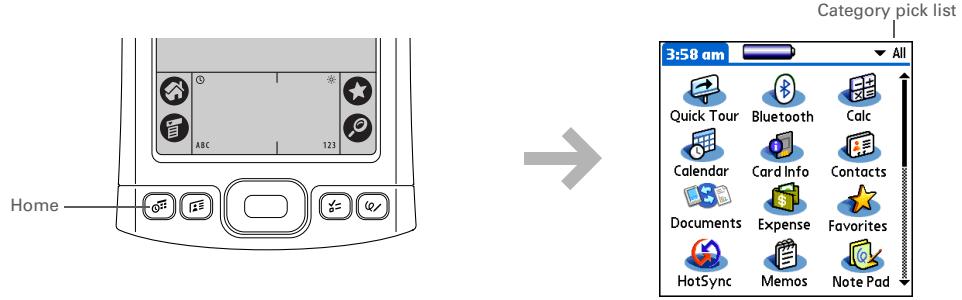
Switching between applications
You can switch between applications at any time. Just tap Home or Star and select an icon from Applications or Favorites, or press a quick button. Your handheld automatically saves your work in the current application and switches to the other application.
CHAPTER 3
Moving Around in Applications

Tip
To remove the selection highlight without making a selection, scroll to the first icon (in the upper-left corner) and then press Left on the 5-way, or enter the Backspace character using Graffiti® 2 writing.

Tip
When an entire screen is highlighted, only the top and bottom borders acquire the glow; the right and left borders do not show the highlight.
Using the 5-way navigator
The 5-way navigator lets you access information quickly with one hand and without the stylus. The 5-way does various things based on which type of screen is displayed. To use the 5-way, press Up, Down, Right, Left, or Center.
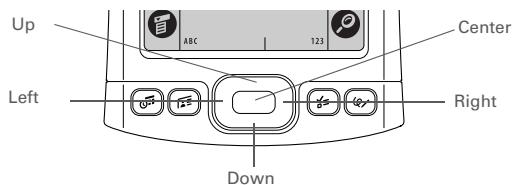
Moving around with the 5-way
On most screens, one item—a button, a list entry, or an entire screen—is highlighted by default. Use the 5-way to move the highlight around to different items on the screen so that you can open or activate them. To locate the highlight, look for the following.
NOTE Individual applications may contain application-specific elements that can also be highlighted by the 5-way. You can locate the highlight on these items by looking for either the glow or the reverse text described here.
-
These items acquire a glow around their border when highlighted:
-
An onscreen button (OK, Cancel, and so on)
- A pick list; this includes the category pick list in the upper-right corner of many screens
- An entire screen, such as a full list of contacts or memos
A check box - Arrows in the title bar of screens such as a list of memos or an email Inbox
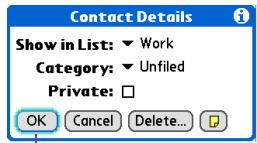
Button with highlight
CHAPTER 3
Moving Around in Applications

Tip
You must use the stylus to tap icons in the input area.
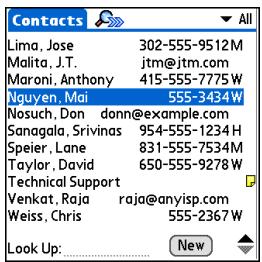
- These items appear as text in reverse type (light text on a dark background) when highlighted:
An entry on a list screen
- A phone number, email address, or web link on a web page or in a message
- When the highlight moves to a text entry field—a blank line at which you enter text—it changes to a blinking cursor. On some screens, you must tap with the stylus to place a cursor at the beginning of a text field.
Moving around in Favorites View
Right or Left
Displays the next or previous page of favorites.
Up or Down
Scrolls to the next favorite in the corresponding direction.
Center
Opens the selected item.
CHAPTER 3
Moving Around in Applications
Moving around in Applications View
Up or Down ScrolIe to display another screen of application icons.
Right or Left Scrolls to the next or previous application category.
Center Inserts the selection highlight. When the selection highlight is present:
Up, Down, Right, or Left Scrolls to the next item in the corresponding direction.
Center Opens the selected item.
Moving around in list screens and entry screens
In list screens, use the 5-way to select and move between entries such as notes, memos, contacts, or photos. In individual entry screens—such as a single photo or email message—use the 5-way to move among the items on the screen or to move to another entry.
The behavior of the 5-way for list screens and entry screens varies among each application. Follow the guidelines for moving around with the 5-way for general tips; as you become familiar with each application, learning the specific behavior of the 5-way is easy.
CHAPTER 3
Moving Around in Applications
Moving around in dialog boxes
Dialog boxes appear when you select a button or option that requires you to provide additional information. In dialog boxes, use the 5-way to select a button or to make a selection from items such as boxes and pick lists.
Up, Down,
Right, or Left
Highlights the next item in the dialog box (pick list, box, button) in the corresponding direction.
Center
- If highlight is on a box: Checks or unchecks the box.
- If highlight is on a pick list: Opens the pick list. When a pick list is open:
Up or Down Scrol1s to the previous or next entry.
Center Selects the highlighted entry.
- If highlight is on a button: Activates the button, and then closes the dialog box.
[!] IMPORTANT Read dialog boxes carefully. Selecting a button such as OK or Yes may cancel an action or delete information.
Moving around in menus
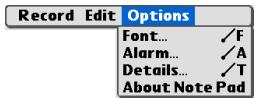
After you open the menus you can use the 5-way to move between and to select menu items:
Up or Down
Scrolls within the current menu list.
Right or Left
Scrolls to the next or previous menu on the menu bar.
Center
Selects the highlighted menu item.
CHAPTER 3
Moving Around in Applications

Tip
You can also open the handheld menus by tapping the application title in the upper-left corner of the screen.
When the menus are open, you can use the 5-way to select menus and menu items.
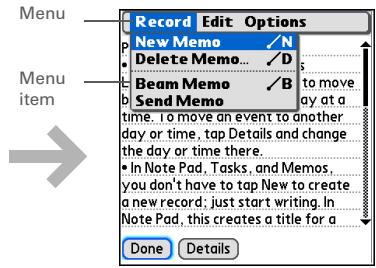
Using menus
Menu let you access additional features and settings. They are easy to use, and once you master them in one application, you know how to use them in all your applications.
1
Open an application.
2
Tap Menu to open the menus.
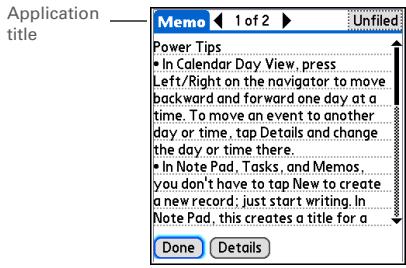
3
Select a menu title, and then select a menu item.

Done
CHAPTER 3
Moving Around in Applications

Tip
Command mode is active for just a few seconds, so write the menu shortcut or tap an icon on the Command toolbar quickly.
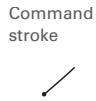
Using the Command stroke
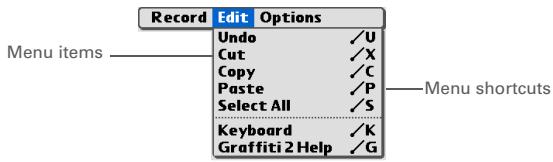
Most menu items also have a menu shortcut, which is similar to the keyboard shortcuts used on computers. The menu shortcut appears to the right of the menu item.
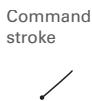
To use a menu shortcut, first write the Graffiti® 2 Command stroke on the left side of the input area or the full screen, and then write the shortcut letter. For example, to select Paste from the Edit menu, write the Command stroke, followed by the letter p . You do not have to open a menu to use the command stroke.
NOTE When you write the Command stroke, the Command toolbar appears. See the next section for info on using the Command toolbar.
Using the Command toolbar
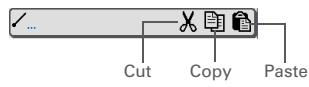
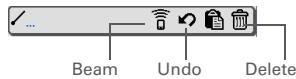
The Command toolbar displays different icons based on the active screen. For example, if you have text selected, the icons might be Cut, Copy, and Paste. If no text is selected, the icons might be Beam, Undo, and Delete.
To use the Command toolbar, write the Command stroke to display the Command toolbar, and then tap an icon to select its command.
CHAPTER 3
Moving Around in Applications

Tip
If you select text in an application before you tap Find, the selected text automatically appears in the Find dialog box.

Open an application before you tap Find to display results from that application at the top of the results list.

Tip
Want to stop searching? Select Stop at any time during a search. To continue the search, select Find More.
Finding information
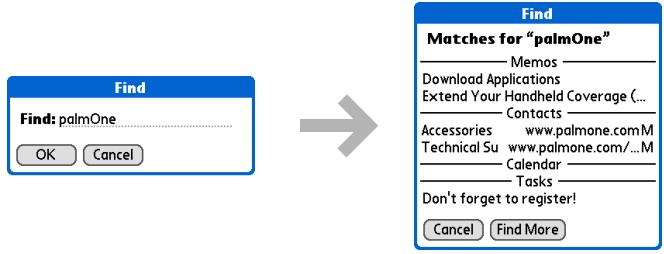
You can use Find to locate any word or phrase in any application on your handheld.
Find locates any words that begin with the text you enter, and it is not case-sensitive. For example, searching for "plane" finds "planet" but not "airplane." Searching for "bell" also finds "Bell."
1
Tap Find

2
Enter the text that you want to find, and then select OK.
3
Select the text that you want to review.

Done
CHAPTER 3
Moving Around in Applications
Tips & Tricks
Make your handheld uniquely yours. For great tips, software, accessories, and more, visit www.palmOne.com/ mytungstene2.
Support
If you're having problems with your handheld, go to www.palmOne.com/support.
Related topics
Click a link below to learn about these related topics:
Your Handheld
- Locating the controls on your handheld
- Discovering the built-in software on your handheld and the additional software on the CD
- Getting familiar with the input area and onscreen application controls
Entering Information
- Entering information with Graffiti 2 characters and shortcuts
- Entering contact information in other applications
Sharing
- Beaming information and applications to other Palm Powered™ devices
- Sending information and applications to other Bluetooth® devices by using Bluetooth technology on your handheld
Privacy
Keeping information private by turning on security options
Categories
Creating categories and organizing your applications and information
Synchronizing
- Adding and deleting applications on your handheld
Customizing
Viewing application information
Maintaining
- Displaying Applications View in list format
Common Questions
Answers to frequently asked questions about using your handheld and its applications
Entering Information on Your Handheld
In this chapter
How can I enter information on my handheld?
Entering information with Graffiti® 2 writing
Entering information with the onscreen keyboard
Entering info from Contacts into another application
Editing information
Related topics
Whether you're scheduling a meeting with your daughter's teacher or adding a new restaurant to your Contacts list, you need to get that information into your handheld. There are several ways to do this.
You may find that you prefer one method if you're entering a small amount of information, while another works best for large amounts. Choose the one that fits your situation.

Benefits
- Quickly enter important information
- Choose the method that works best for your situation
CHAPTER 4
Entering Information on Your Handheld

Tip
A blinking cursor on your handheld screen indicates where the information you enter will appear. Tap or use the 5-way to move the cursor to the location you want. In most cases, if you do not see a blinking cursor, you cannot enter information on that screen.
How can I enter information on my handheld?
- Graffiti® 2 writing
The onscreen keyboard
Phone Lookup
Note Pad - Purchase and use an accessory keyboard (sold separately); visit www.palmOne.com/mytungstene2 and click the Accessories link
The most popular methods are using Graffiti 2 writing and the onscreen keyboard.
NOTE You can also enter information on your computer and move and manage the information between your handheld and your computer. Or you can send and receive information from other devices using beaming or your handheld's built-in Bluetooth® wireless technology.
Entering information with Graffiti® 2 writing
You can enter info directly on your handheld with Graffiti 2 writing. Graffiti 2 writing includes any character you can type on a standard keyboard. Entering these characters on your handheld is very similar to the way you naturally write letters, numbers, and symbols. But instead of using a pen and paper, you use the stylus and the input area on your handheld. With only a few minutes of practice, you can learn to use Graffiti 2 writing.
Writing in the Graffiti 2 input area
You can write Graffiti 2 characters in the input area, or you can turn on full-screen writing and write anywhere on the screen.
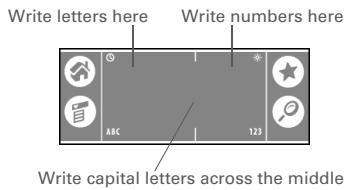
In the input area, write lowercase letters, uppercase letters, and numbers in the sections shown. If you write characters in the wrong area, they are not recognized correctly and an incorrect character is written.
CHAPTER 4
Entering Information on Your Handheld
Using full-screen writing
When full-screen writing is turned on, you can write anywhere on the screen. When full-screen writing is turned off, you must write character strokes in the Graffiti 2 input area for your handheld to recognize them.
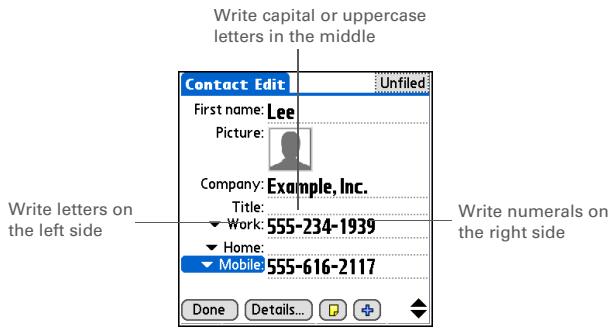
You can write letters or characters in the following areas:
Left side of the screen Write letters or characters that are assigned to the ABC input area.
Right side of the screen Write numbers or characters that are assigned to the 123 input area.
Middle of the screen straddling the imaginary dividing line between the left and right sides. Write uppercase letters.
NOTE For a brief period of time after writing a character, a quick tap on the screen is interpreted as a period character. Wait a second before you tap a button or move the cursor so that the action is not interpreted as a period character.
CHAPTER 4
Entering Information on Your Handheld

Did You Know?
Graffiti 2 writing automatically capitalizes the first letter of a sentence or a new entry.
Writing Graffiti 2 characters
1 Open an application you use to enter information, like Calendar.
2 Tap the screen where you want your character to appear.
3 Position the stylus in the correct part of the input area or in the correct part of the screen if full-screen writing is on.
4 Write the characters exactly as shown in the tables that follow these steps. Be sure to start each stroke at the heavy dot.
Continued
CHAPTER 4
Entering Information on Your Handheld
Did You Know?
Graffiti 2 characters made with two strokes are recognized after the second stroke. Make the second stroke quickly after the first so that the correct character is recognized.
Did You Know?
Write uppercase letters the same way you write lowercase ones. The only difference is where you write them.
\*Tip
Your handheld has tables displaying all of the Graffiti 2 characters, short cuts, and commands.
Customize your handheld
so you can display these characters by drawing a line from the bottom of the screen to the top.
5
Lift the stylus at the end of the stroke.
Done
When you lift the stylus from the screen, your handheld recognizes the stroke immediately and prints the character at the insertion point on the screen.
Keys to success with Graffiti 2 writing
Keep these guidelines in mind when using Graffiti 2 writing:
- Write the characters exactly as shown in the following tables. Don't write the dot. It's only there to show you where to begin writing the character.
- The Graffiti 2 writing area has two sections. Write lowercase letters on the left, numbers on the right, and capital letters across the middle.
- Write at a natural speed, and do not write on a slant.
Press firmly.
Write large characters.
If you're already familiar with Graffiti writing from an older Palm Powered™ device, Graffiti 2 writing will be easy to master. Characters are entered in exactly the same way, except for i , t , k , and the number 4. These letters are now made with two strokes, just the way you would write them if you were using a pen and paper.
Also, you no longer have to use the punctuation shift stroke for common punctuation like periods, commas, or @. Just write these characters on the correct side of the input area and your handheld immediately recognizes them.
CHAPTER 4
Entering Information on Your Handheld

Tip
You can select alternate
ways to write some
Graffiti 2 characters.
Choose the method that's
most natural for you.
Graffiti 2 alphabet
| Write lowercase letters on LEFT side, and capital letters across MIDDLE of input area | |||||||
| Letter | Stroke | Letter | Stroke | Letter | Stroke | Letter | Stroke |
| A | ʌ | B | B | C | C | D | D |
| E | ɛ | F | Γ | G | G | H | h |
| I | i | J | J | K | K | L | L |
| M | m | N | N | O | O | P | p |
| Q | q | R | R | S | S | T | † |
| U | U | V | V | W | W | X | X |
| Y | y | Z | Z | ||||
CHAPTER 4
Entering Information on Your Handheld
Graffiti 2 numbers
| Write numbers on RIGHT side of input area | |||
| Number | Stroke | Number | Stroke |
| 0 | ○ | 1 | 1 |
| 2 | 2 | 3 | 3 |
| 4 | 142 | 5 | 5 |
| 6 | 6 | 7 | 7 |
| 8 | 8 | 9 | 9 |
CHAPTER 4
Entering Information on Your Handheld
Graffiti 2 punctuation marks
Write these marks on LEFT side of input area
Mark
Stroke
Mark
Stroke
Period

Ampersand
&

Comma

Carriage
rn

Apostrophe

At
@

Space

Quotation mark
"

Question mark

Tab

Exclamation
point

13/14
CHAPTER 4
Entering Information on Your Handheld

Tip
Having trouble with the plus sign or asterisk? Use the punctuation shift first and then make the character.
Write these marks on RIGHT side of input area
| Mark | Stroke | Mark | Stroke |
| Period | · | Backslash | \ |
| Comma | - | Slash | / |
| Tilde | N | Left parenthesis | ( |
| Dash | - | Right parenthesis | ) |
| Plus | 21 | Equal sign | = |
| Asterisk | 12 |
CHAPTER 4
Entering Information on Your Handheld

Tip
Get help writing any of the Graffiti 2 characters in most applications. Open the Edit menu and select Graffiti 2 Help.
Graffiti 2 accented characters
For accented characters, write the letter on the left side of the input area, and then write the accent on the right side of the input area.
| Write these marks on RIGHT side of input area | |||
| Accent | Stroke | Accent | Stroke |
| Acute á | Dieresis ä | •• | |
| Grave à | Circumflex à | ▲ | |
| Tilde á | N | Ring à | ○ |
CHAPTER 4
Entering Information on Your Handheld
Graffiti 2 gestures
Write gestures on LEFT side, or across the middle of input area
Gesture
Stroke
Gesture
Stroke
Cut

Paste

Copy

Undo

CHAPTER 4
Entering Information on Your Handheld

Tip
If you accidentally enter the Punctuation Shift stroke, enter it again to cancel it, or wait a moment and it automatically disappears.

Did You Know?
Writing two Punctuation Shift strokes cancels the automatic capitalization of the first letter of a new entry or sentence.
Writing Graffiti 2 symbols and other special characters
Symbols and other special characters can be written on either side of the input area, using the Punctuation Shift stroke:
1
Enter the Punctuation Shift stroke.
When Punctuation Shift is active, an indicator appears in the lower-right corner of the screen.
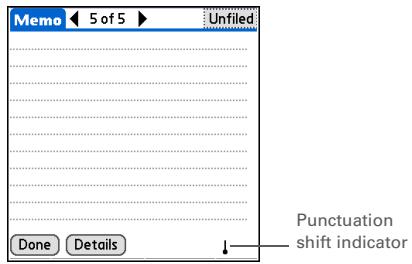
2
Write the symbol or other special character shown in the table that follows this procedure.
You can write a symbol or special character anywhere in the input area.
3
Enter another Punctuation Shift stroke to finish the character and to make it appear more quickly.
Done
Once the Punctuation Shift indicator disappears, you see the character.
CHAPTER 4
Entering Information on Your Handheld

Tip
There may be a delay after you write the Graffiti 2 strokes before the symbol or special character appears.
Graffiti 2 symbols and special characters
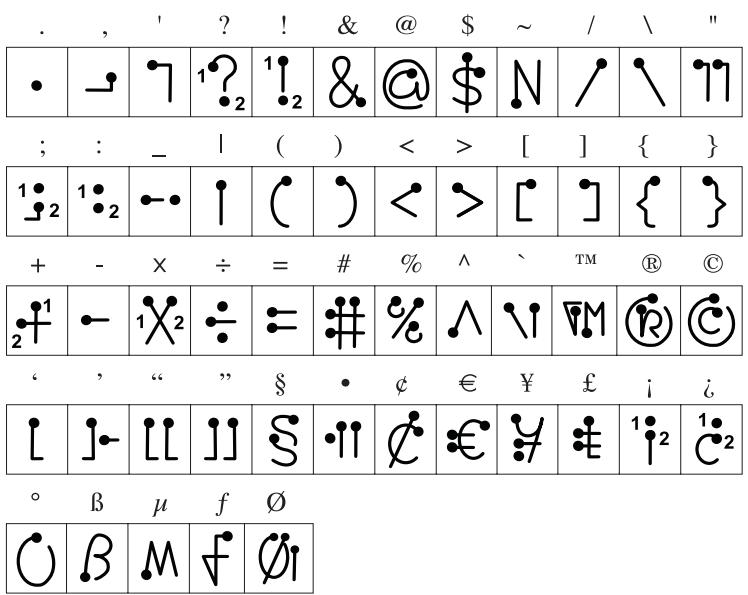
Write symbols on EITHER side of input area
CHAPTER 4
Entering Information on Your Handheld
Writing Graffiti 2 ShortCuts
Graffiti 2 contains several ShortCuts to make entering common information easier. For example, when you write the ShortCut stroke followed by dts , you automatically enter the current date and time. You can also create your own ShortCuts.
1
Write the ShortCut stroke. This stroke appears at the insertion point.

2
Write the ShortCut character from the table that follows this procedure.
You can write ShortCuts on the left side of the input area, or across the middle.

Done The ShortCut stroke is replaced by the text the character represents.
CHAPTER 4
Entering Information on Your Handheld
Graffiti 2 ShortCuts
Write ShortCuts on LEFT side, or across MIDDLE of input area
| Entry | ShortCut | Entry | ShortCut |
| Date stamp | ds | Time stamp | ts |
| Date/time stamp | dts | Meeting | me |
| Breakfast | br | Lunch | lu |
| Dinner | di |
CHAPTER 4
Entering Information on Your Handheld
Key Term
Entry An item in an application such as a contact in Contacts or an appointment in Calendar.
* Tip
You can enter text whenever you see a blinking cursor on the screen.
Entering information with the onscreen keyboard
You can use the onscreen keyboard in any application where you need to enter text, numbers, or symbols on your handheld.
1
Open an entry:
a. Open an application.
b. Select an entry or select New.
2
Tap one of the following to open an onscreen keyboard:
ABC Opens the letter keyboard.
123 Opens the number keyboard.

Continued
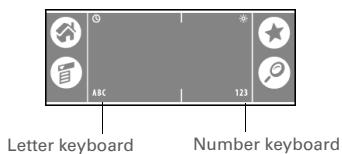
CHAPTER 4
Entering Information on Your Handheld

Tip
When a keyboard is open, you can tap abc, 123, or Int'l to open any of the other keyboards.
Tap the characters to enter text, numbers, and symbols, and then select Done.
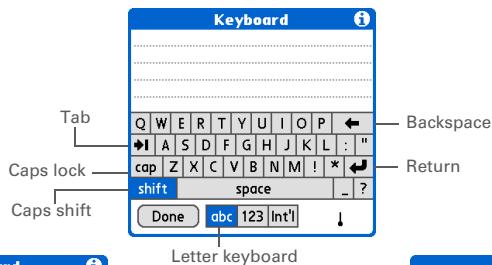
3
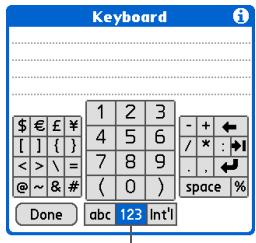
Number keyboard
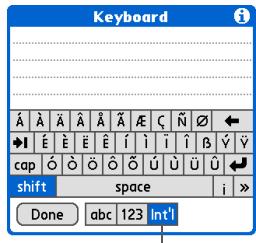
International keyboard

Done
CHAPTER 4
Entering Information on Your Handheld
Entering info from Contacts into another application
Having lunch with someone whose info you have in Contacts? Use Phone Lookup to quickly enter their name and primary contact info into the appointment you create in Calendar. This feature is available in Calendar, Memos, Tasks, and Expense.
1
Open an entry:
a. Open an application.
b. Select an entry or select New. In Expense only: Select Details, and then selectAttendees.
2
Add the contact from Phone Lookup:
a. Tap where you want to enter the contact.
b. Open the menus.
c. Select Options, and then select Phone Lookup.
Continued
CHAPTER 4
Entering Information on Your Handheld

Tip
You can also enter the first few letters of the contact's name, and the open Phone Lookup. The first contact name matching the letters you entered is highlighted.
Cont'd.
d. Select the contact, and then select Add.
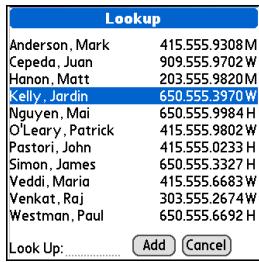

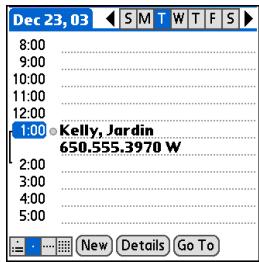

[ & ] OPTIONAL To add another contact, repeat step 2.

The name and phone number of the contact are automatically entered.
CHAPTER 4
Entering Information on Your Handheld

Tip
Drag the cursor up or down to select both text and any final return character or space. Drag the cursor left or right to select text only.
Editing information
Editing information on your handheld is similar to editing with word-processing applications on your computer. Select the information, and then apply the correct command.
Selecting information
There are several ways to select information that you want to edit or delete.
Selecting text
Place the cursor before or after the text you want to select, and drag the cursor over all the text you want to select.
Selecting a word
Tap twice on a word to select it.
Selecting a line
Tap three times anywhere in a line to select it. This selects the final return character or space as well as any text.
CHAPTER 4
Entering Information on Your Handheld

Tip
There are even faster ways to copy and paste information:
Use Graffiti 2 gestures.
- Use the Graffiti 2 Command stroke and the menu shortcut for cut, copy, or paste (/X, /C, /P) .
- Select the text, write the command stroke, and then tap the icon for cut or copy from the command toolbar that appears.
Copying and pasting information
Copying and pasting information on your handheld is similar to editing with word-processing applications on your computer.
1
Select the information you want to copy.
2
Copy the information:
a. Open the menus.
b. Select Edit, and then select Copy.
3
Tap where you want to paste the information.
4
Select Edit, and then select Paste.

Done
CHAPTER 4
Entering Information on Your Handheld

Tip
Delete information with Graffiti 2 writing. Select the information, and then draw a line from right to left in the input area.
Deleting information
Delete all or part of an entry with the Cut command.
1
Select the information you want to delete.
2
Delete the information:
a. Open the menus.
b. Select Edit, and then select Cut.

Done
CHAPTER 4
Entering Information on Your Handheld
Tips & Tricks
Make your handheld uniquely yours. For great tips, software, accessories, and more, visit www.palmOne.com/ mytungstene2.
Support
If you're having problems entering information or with anything else on your handheld, go to www.palmOne.com/support.
Related topics
Click a link below to learn about these related topics:
Moving Around
- Opening applications
Using menus
Sharing
Beaming or sending information to another Palm Powered™ device
Customizing
- Selecting alternate ways to write some Graffiti 2 characters
- Creating your own Graffiti 2 ShortCuts
Common
Answers to frequently asked questions about entering information
Questions
Moving Info Between Your Handheld and Your Computer
In this chapter
Why synchronize information?
Synchronizing with your computer
Synchronizing over a network
Customizing your synchronization settings
Using Quick Install and the Send To Handheld droplet
Entering information with your computer
Importing information from other applications
Installing the additional software from the CD
Removing applications
Related topics
You can use your handheld on its own to look up phone numbers, enter appointments, and so on. But you can do much more with your handheld if you synchronize it with your computer.
Synchronizing simply means that information that has been entered or updated in one place (your handheld or your computer) is automatically updated in the other. There's no need to enter information twice.

Benefits
- Quickly enter and update information on your computer and your handheld
Install applications - Protect your information
- Send photos and videos to your handheld from your desktop computer
CHAPTER 5
Moving Info Between Your Handheld and Your Computer

Tip
Use the Documents To Go application on your desktop to transfer Microsoft Word, PowerPoint, or Excel files from your computer and to your handheld during synchronization. View and edit them in the Documents application on your handheld at your convenience.
Why synchronize information?
Quickly enter and update information on your computer and handheld. Synchronizing updates information both on your handheld and in Palm® Desktop software on your computer. For example, you can quickly enter a contact list on your computer and then send it to your handheld instead of reentering the information.
NOTE During CD installation, you can choose to synchronize your handheld with Microsoft Outlook on your computer (Windows only).
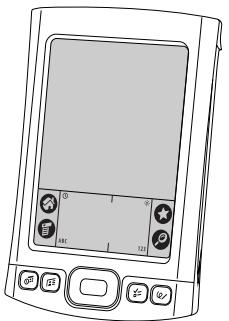

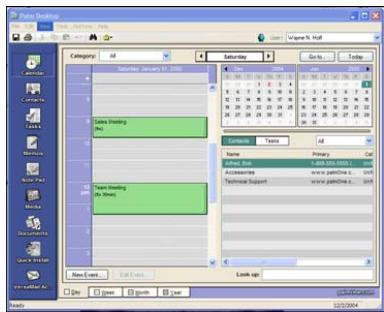
Install applications. With just a few clicks, you can use palmOne™ Quick Install to add files to certain applications on your handheld or to install additional software.
Protect your information. Nothing is worse than losing important information. When you synchronize information, you create a backup copy. If something happens to your handheld or your computer, the information is not lost; one tap restores it in both places.
[!] IMPORTANT Be sure to synchronize information at least once a day so that you always have an up-to-date backup copy of important information.
CHAPTER 5
Moving Info Between Your Handheld and Your Computer
[!] Before You Begin
Complete the following:
Perform initial handheld setup.
- Install Palm® Desktop software and additional software from the CD.
Key Term
Conduit The synchronization software that links an application on your computer with the same application on your handheld.
\*Tip
You can synchronize your handheld with your computer wirelessly using the built-in Bluetooth® wireless technology on your handheld.
What information is synchronized?
If you use the preset settings, information from all the following applications is transferred between your handheld and Palm Desktop software each time you synchronize your handheld with your computer:

Calendar

Contacts

Expense

Media

Memo No.

Note Pad

Tasks

Documents

VersaMail
NOTE
Information from Expense and VersaMail is synchronized on Windows computers only.
In addition, the preset settings back up system information from your handheld to your computer and install add-on applications from your computer to your handheld.
If you've installed applications from the CD, these applications may also be included in the presets for synchronization.
If you want to synchronize applications other than the ones using the preset settings, see the User Guide on the web.
During CD installation, you can choose to synchronize your handheld with Microsoft Outlook on your computer (Windows only). If you do, information in Contacts, Calendar, Tasks, and Memos is synchronized with information in Outlook. Information in Expense, Note Pad, and Media is still synchronized with information in Palm Desktop software. You can insert the CD at any time to choose synchronization with Outlook if you did not do so during the initial installation.
NOTE
You can also set up the VersaMail® application to synchronize with Outlook.
You can synchronize more than one handheld with your computer. For example, family members can synchronize their handhelds with the same copy of Palm Desktop software. Just make sure that each handheld has its own username; Palm Desktop software reads the username and recognizes the handheld during synchronization. Loss of data may occur from sharing the same username.
CHAPTER 5
Moving Info Between Your Handheld and Your Computer
Key Term
HotSync Technology that allows you to synchronize the information on your handheld with the information on your computer.
\*Tip
If the Select User dialog box appears during synchronization, select the username whose information you want to synchronize, and then click OK.
\*Tip
If you need help with synchronizing, see I can't synchronize my handheld with my computer.
How to synchronize
You can synchronize your handheld with your computer in the following ways:
- Wirelessly using Bluetooth® technology on your handheld
- Using the sync cable attached to your handheld and your computer
- Using your handheld's infrared (IR) port
- Connecting to your company's network, either wirelessly or using a cable (Windows only)
[!] IMPORTANT The first time you synchronize, you must use the sync cable or your handheld's IR port. If you followed the instructions to synchronize during initial setup, you've already covered this requirement.
To synchronize, HotSync Manager must be active. HotSync Manager was installed when you installed PalmDesktop software; if you didn't install Palm Desktop software, you don't have HotSync Manager on your computer.
On a Windows computer, you know HotSync Manager is active when its icon appears in the lower-right corner of your screen. If the icon is not there, turn it on by clicking Start, and then selecting Programs. Navigate to the palmOne folder, and select HotSync Manager.
On a Windows computer, Palm Desktop software includes both palmOne™ Media, which you can use to transfer photos and videos to your handheld, and palmOne Quick Install, which installs applications (PRC or PDB) for use on your handheld when you synchronize.
NOTE On a Mac computer, use the Send To Handheld droplet to transfer photos and videos and install applications on your handheld when you synchronize.
When you transfer a file to your handheld through synchronization, the file, such as a video, may be converted for best use on (optimized for) your handheld.
CHAPTER 5
Moving Info Between Your Handheld and Your Computer
When would I use each method?
The method you use to move info onto your handheld depends on the type of info it is. Here are the methods to use with the most common information types.
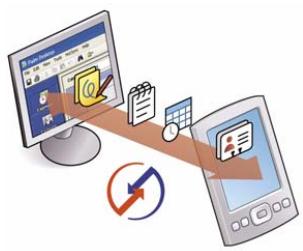
Information in Contacts, Calendar, Tasks, Memos, Note Pad (Windows only: Expense, VersaMail) Use Palm Desktop or Outlook (Windows) to enter information on your computer. Synchronize to transfer the new or updated information on your computer to your handheld.
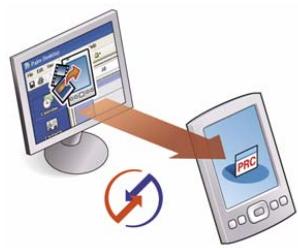
Applications (PRC or PDB file) Use Quick Install from within Palm Desktop (Windows) or drag the application to the Send To Handheld droplet icon on your desktop (Mac), and then synchronize to install the application on your handheld.
CHAPTER 5
Moving Info Between Your Handheld and Your Computer

Did You Know?
When you transfer photos and videos using the desktop Media application, the files may be converted for viewing on your handheld.
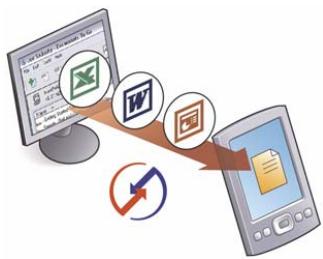
Word documents, Excel spreadsheets, PowerPoint presentations Use the Documents To Go application on your computer or the Documents application in Palm Desktop software (Windows only). Synchronize to transfer the files from your computer to your handheld.
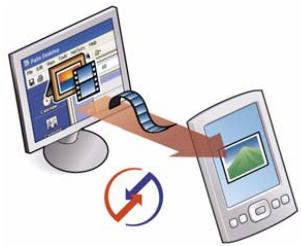
Photos and videos Use the desktop Media application from within Palm Desktop (Windows) or drag the files to the Send To Handheld droplet icon on your desktop (Mac). Synchronize to transfer the files from your computer to your handheld.
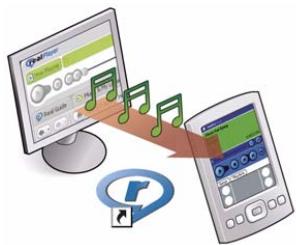
Music (MP3) files Use the RealPlayer® desktop application (Windows) to transfer the files to the Music folder on your handheld's expansion card, or drag the file to the Send To Handheld droplet icon on your desktop (Mac), and then synchronize to transfer the files from your computer to your handheld.
CHAPTER 5
Moving Info Between Your Handheld and Your Computer
Synchronizing with your computer
You can synchronize using a cable or your IR port.
Synchronizing with a cable
1
Connect the USB sync cable to the USB port on your computer, and then insert the other end into your handheld.

Continued
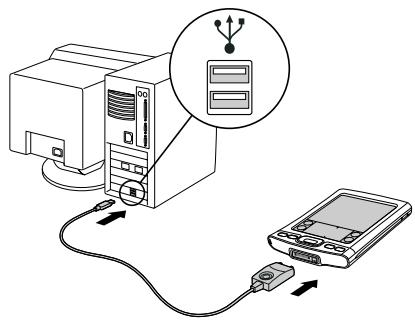
CHAPTER 5
Moving Info Between Your Handheld and Your Computer
\*Tip
If you need help with synchronizing, see I can't synchronize my handheld with my computer.
\*Tip
If any problems occurred during synchronization, a message appears on your computer screen asking if you want to view the log. View the HotSync log to see what applications were successfully synchronized and whether any problems occurred during synchronization. Go to Applications on your handheld and select HotSync, and then select Log; or click the HotSync Manager icon on your computer and then click View Log.
2
Synchronize your handheld with your computer:
a. Press the sync button on the USB sync cable.
b. When synchronization is complete, a message appears at the top of your handheld screen, and you can disconnect your handheld from the connector.
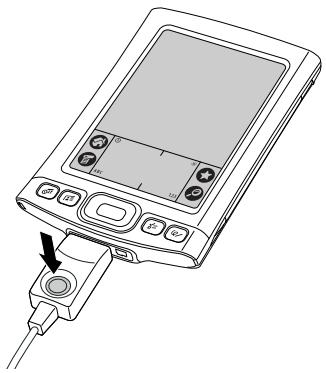

Done
CHAPTER 5
Moving Info Between Your Handheld and Your Computer
[!] Before You Begin
Your computer must have an enabled IR port and driver or have an IR device attached to it. Check your computer's documentation to see if it supports IR communication.
Synchronizing using the IR port
When you synchronize using your handheld's IR port, you don't need your cable. This is especially useful if you travel with an IR-enabled laptop.
WINDOWS ONLY
1 Prepare your computer for IR synchronization:
a. Click the HotSync Manager icon in the taskbar in the lower-right corner of your screen.
b. Make sure that Infrared is selected.
Continued
CHAPTER 5
Moving Info Between Your Handheld and Your Computer

Tip
You can continue to use the sync cable even if your computer is set up for IR synchronization. If you disconnect the cable after selecting Infrared on a Windows computer, be sure to click the HotSync Manager icon and select Local USB before reconnecting the cable.
2
Synchronize your handheld with your computer:
a. Go to Applications and then select HotSync
b. Tap Local.
c. Tap the pick list below the HotSync icon and select IR to a PC/Handheld.
d. Position the IR port of your handheld within a few inches of the IR port of your computer.
e. Tap the HotSync icon on your handheld.
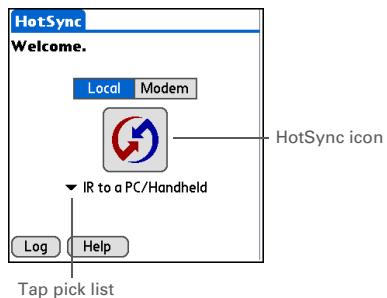

Done
When synchronization is complete, a message appears at the top of your handheld screen. Be patient; synchronization may take up to a few minutes.
CHAPTER 5
Moving Info Between Your Handheld and Your Computer
MAC ONLY
1
Prepare your computer for IR synchronization:
a. Double-click the HotSync Manager icon in the Palm folder.
b. In the HotSync Controls tab, select Enabled.
c. Click the Connection Settings tab.
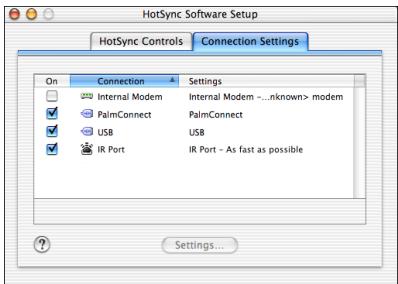
d. Select the On check box next to IR port.
e. Close the HotSync Software Setup window.

Continued
CHAPTER 5
Moving Info Between Your Handheld and Your Computer

Did You Know?
You can continue to use the sync cable even if your computer is set up for IR synchronization.

Tip
Mac To increase the speed of cable synchronization, turn off the IR port when you're not using it to increase the speed of cable synchronization.
2
Synchronize your handheld with your computer:
a. Go to Applications and select HotSync
b. Select Local.
c. Tap the pick list below the HotSync icon and select IR to a PC/Handheld.
d. Position the IR port of your handheld within a few inches of the IR port of your computer.
e. Tap the HotSync icon on your handheld.
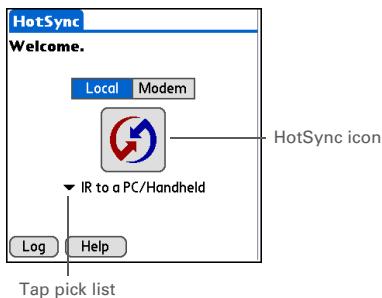

Done
When synchronization is complete, a message appears at the top of your handheld screen. Be patient; synchronization may take up to a few minutes.
CHAPTER 5
Moving Info Between Your Handheld and Your Computer
[!] Before You Begin
The following setup must be done before you can synchronize over a network:
- Your computer must have TCP/IP installed.
- Your company's network system and its remote access server must support TCP/IP.
- You must have a remote access account.
Check with your system administrator for assistance.
To synchronize by dialing in to a network, you must also have a mobile phone (sold separately) that you can use as a modem to dial in to the network, or an attachable modem accessory (sold separately).
Synchronizing over a network
WINDOWS ONLY
You can synchronize over your company's network in one of three ways:
- By using your handheld's built-in Bluetooth wireless technology to make a wireless connection to a network
- By dialing in to a network
- By connecting to any computer on the network using a cable or your handheld's IR port.
Use network synchronization if you are not close enough to your computer to synchronize directly using a cable or the IR port.
[!] IMPORTANT The first time you synchronize, you must use the cable or infrared communication. After that, you can synchronize over a network.
Synchronizing by dialing in to a network
1
Prepare your computer for network synchronization:
a. Turn on your computer.
b. Click the HotSync Manager icon in the taskbar in the lower-right corner of your screen, and then select Network.
c. Click the HotSync Manager icon again, and then select Setup.

Continued
CHAPTER 5
Moving Info Between Your Handheld and Your Computer

Tip
Click TCP/IP Settings to display the primary settings for your computer. Check that these settings are correct on your handheld by selecting the HotSync icon on the Applications View, and then selecting Primary PC Setup from the Options menu. If the settings do not match, restart your computer and synchronize your handheld with your computer using the cable or IR port before synchronizing by dialing in to a network.
Cont'd.
d. Click the Network tab and make sure your username has a checkmark next to it. If the checkmark is not there, check the box next to your username.
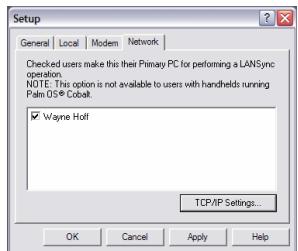
e. Click OK.
f. Tap the HotSync icon on your handheld to record your computer's network information on your handheld. You must use the cable or the IR port for this synchronization.

Continued
CHAPTER 5
Moving Info Between Your Handheld and Your Computer
2
Prepare your handheld for network synchronization:
a. Go to Applications and select HotSync
b. Open the menus.
c. Select Options, and then select Modem Sync Defaults.
d. Select Network, and then select OK.

Continued
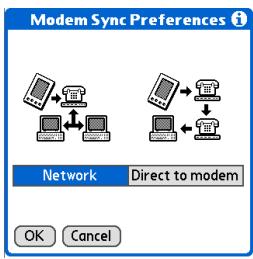
CHAPTER 5
Moving Info Between Your Handheld and Your Computer

Tip
Use Network Preferences to set up a service if you have not done so already. Check with your system administrator to obtain network service information.
3
Select a service:
a. Select Modem, and then tap Select Service.
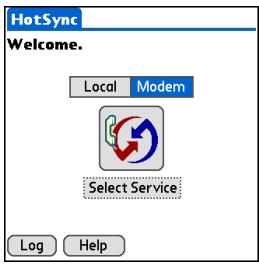

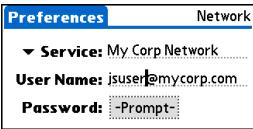
b. Tap the Service pick list and select the service you use to connect to your corporate network. Check with your system administrator if you do not know which service to use.
c. Select Done.

Continued
CHAPTER 5
Moving Info Between Your Handheld and Your Computer

Did You Know?
Only applications that have a conduit are included in synchronization. Other applications are not included, even if they appear on the Conduit Setup screen with a checkmark next to their name.

Tip
You can deselect applications, for example, to include a smaller number of applications during synchronization and thus make synchronization go faster. To synchronize the preset applications described in What information is synchronized?, skip step 4.

[&] OPTIONAL Select which applications to include during synchronization:
a. Open the menus.
b. Select Options, and then select Conduit Setup.
c. Uncheck the boxes for the files and applications that you do not want to synchronize during a modem HotSync operation.
d. Select OK.
Conduit Setup
Select the conduits to run during Modem HotSync.
Address
Applications
Bluetooth
Brightness
Calc
Calendar
Card Info
OK Cancel

Tap the Modem HotSync icon to synchronize your handheld with your computer.

Done
CHAPTER 5
Moving Info Between Your Handheld and Your Computer
[!] Before You Begin
In addition to the general requirements for network synchronization, you must meet the following requirements in order to synchronize by connecting with a computer on the network:
- To connect using your handheld's IR port, the computer to which you are connecting must be IR-compatible.
- The computer to which you are connecting must have a version of Palm Desktop software that is compatible with your handheld.
- The computer with which you want to synchronize (your own computer) must be turned on.
Synchronizing by connecting to a computer on the network
1
Prepare the computers for network synchronization:
a. Turn on your computer.
b. Click the HotSync Manager icon in the taskbar in the lower-right corner of the screen.
c. Select Network.
NOTE You must select Network on both the computer to which you are connecting and the computer with which you want to synchronize your handheld.

Continued
CHAPTER 5
Moving Info Between Your Handheld and Your Computer

Tip
Click TCP/IP Settings to display the primary settings for your computer. Check that these settings are correct on your handheld by selecting the HotSync icon on the Applications View, and then selecting Primary PC Setup from the Options menu. If the settings do not match, restart your computer and synchronize using the cable or IR port before synchronizing by connecting to a computer on the network.
2
On the computer with which you want to synchronize (your own computer) only, do the following:
a. Select Setup from the HotSync Manager menu.
b. Click the Network tab and make sure your username has a checkmark next to it. If the checkmark is not there, check the box next to your username.
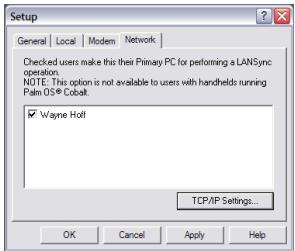
c. Click OK.
d. Tap the HotSync icon on your handheld to record your computer's network information on your handheld. You must use the cable or the IR port for this synchronization.

Continued
CHAPTER 5
Moving Info Between Your Handheld and Your Computer
3
Prepare your handheld for network synchronization:
a. Go to Applications and select HotSync
b. Open the menus.
c. Select Options, and then select LANSync Defaults.
d. Select LANSync, and then select OK.
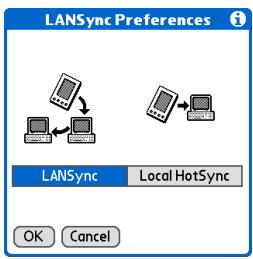
4
Synchronize over the network:
a. On the HotSync screen, select Local.
b. Tap the HotSync icon to synchronize your handheld with your computer.

CHAPTER 5
Moving Info Between Your Handheld and Your Computer
Customizing your synchronization settings
You can set the following options for synchronization:
- Choosing how your computer responds when you initiate synchronization on your handheld (Windows only)
- Enabling or disabling synchronization on your computer, setting whether synchronization is enabled automatically when you start your computer, and choosing how much information to include in the synchronization troubleshooting log (Mac only)
- Choosing how application information is updated during synchronization
Choosing how your computer responds to synch requests WINDOWS ONLY
In order for your computer to respond when you initiate synchronization on your handheld, HotSync Manager must be running. You can choose whether HotSync Manager always runs automatically, or whether you must perform some action to start HotSync Manager.
1
Open the synchronization options screen:
a. Click the HotSync Manager icon in the taskbar in the lower-right corner of your screen.
b. Select Setup.

Continued
CHAPTER 5
Moving Info Between Your Handheld and Your Computer

Tip
Use the default setting Always available if you're not sure which option you want.

Tip
If you select Manual, you must turn off HotSync Manager, which is always on by default. Click the HotSync Manager icon in the taskbar in the lower-right corner of your screen, and then click Exit. To start HotSync Manager when you want to synchronize, click Start, and then select Programs. Navigate to the palmOne program group, and select HotSync Manager.
Note that if you turn HotSync Manager on, it stays on until you turn off your computer.
2
Select how your computer responds when you initiate synchronization on your handheld:
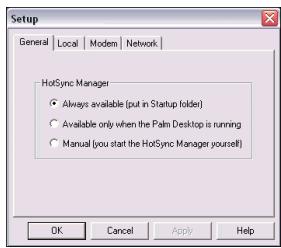
Always available HotSync Manager runs automatically every time you initiate synchronization on your handheld.
Available only when the Palm Desktop software is running You must open Palm Desktop software in order for HotSync Manager to run.
Manual You must manually turn HotSync Manager on each time you want your computer to respond to a synchronization request.
3
Click OK.

Done
CHAPTER 5
Moving Info Between Your Handheld and Your Computer
Setting synchronization options
MAC ONLY
1
Open the synchronization options screen:
a. Double-click the HotSync Manager icon in the Palm folder.
b. Click the HotSync Controls tab.
2
Select the synchronization options you want:
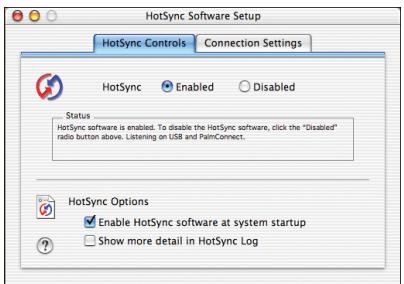

Continued
CHAPTER 5
Moving Info Between Your Handheld and Your Computer
Cont'd.
HotSync Enabled/Disabled Sets your computer to respond to synchronization requests from your handheld.
Enable HotSync software at system startup Sets your computer to automatically respond to synchronization requests each time you start your computer. If this option is not selected, you must open HotSync Manager and select the Enabled option before you can synchronize.
Show more detail in HotSync Log Includes more troubleshooting information in the log that is generated when you synchronize.
3
Close the HotSync Software Setup window.

Done
CHAPTER 5
Moving Info Between Your Handheld and Your Computer
Key Term
Conduit The
synchronization software that transfers information between an application on your computer and the same application on your handheld.
\*Tip
Windows For
information on choosing whether application information is updated if you are synchronizing your handheld with Outlook, see the online Outlook synchronization Help. Click the HotSync Manager icon in the taskbar in the lower-right corner of your screen, select Custom, and then view the applications that are syncing with Outlook from the list.
Choosing whether application information is updated
By default, when information in each application is updated in one place (your handheld or your computer), it is updated in the other. However, for an application included during synchronization, you can choose whether information that has been updated in one place is updated in the other during the next synchronization.
WINDOWS ONLY
1
Select the application you want to customize:
a. Click the HotSync Manager icon in the taskbar in the lower-right corner of your screen.
b. Select Custom.
c. Select the appropriate username from the drop-down list at the top of the screen.
d. Select the application you want, and then click Change.

Continued
CHAPTER 5
Moving Info Between Your Handheld and Your Computer

Tip
You should generally keep the default setting (Synchronize the files) for all applications. Choose an overwrite option only if you have a specific reason for sending updates only one way. Choose Do Nothing if you never use an application.
2
Choose how information is updated during the next synchronization:
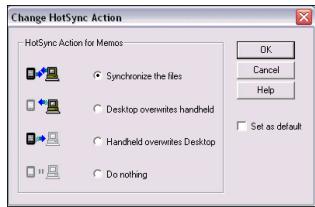
Synchronize the files Information that is changed in one place (your handheld or computer) is updated in the other during synchronization.
Desktop overwrites handheld Information that has been changed on your computer is updated on your handheld during synchronization. If information has been changed on your handheld, it will be replaced by the information from your computer, and you will lose the changes you made on your handheld.
Handheld overwrites Desktop Information that has been changed on your handheld is updated on your computer during synchronization. If information has been changed on your computer, it will be replaced by the information from your handheld, and you will lose the changes you made on your computer.
Do Nothing No synchronization occurs, so any changes made on either your handheld or your computer are not updated in the other location.
Continued
CHAPTER 5
Moving Info Between Your Handheld and Your Computer
3
To use the option you select on an ongoing basis, check the Set as default box. If you do not check this box, the option you select applies only the next time you synchronize. Thereafter, information is updated according to the default setting (Synchronize the files).
4
Click OK, and then click Done.

Done
MAC ONLY
1
Select the application you want to customize:
a. Double-click the Palm Desktop icon in the Palm folder.
b. From the HotSync menu, select Conduit Settings.
c. From the User pop-up menu, select the appropriate username.
d. Select an application.
e. Click Conduit Settings.

Continued
CHAPTER 5
Moving Info Between Your Handheld and Your Computer

Tip
You should generally keep the default setting (Synchronize the files) for all applications. Choose an overwrite option only if you have a specific reason for sending updates only one way. Choose Do Nothing if you never use an application.
2
Choose how information is updated during the next synchronization:
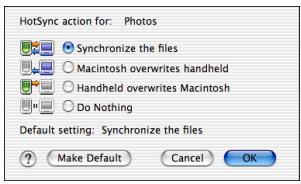
Synchronize the files Information that is changed in one place (your handheld or computer) is updated in the other during synchronization.
Desktop overwrites handheld Information that has been changed on your computer is updated on your handheld during synchronization. If information has been changed on your handheld, it will be replaced by the information from your computer, and you will lose the changes you made on your handheld.
Handheld overwrites Desktop Information that has been changed on your handheld is updated on your computer during synchronization. If information has been changed on your computer, it will be replaced by the information from your handheld, and you will lose the changes you made on your computer.
Do Nothing No synchronization occurs, so any changes made on either your handheld or your computer are not updated in the other location.

Continued
CHAPTER 5
Moving Info Between Your Handheld and Your Computer
3
To use the option you select on an ongoing basis, click Make Default. If you do not check this box, the option you select applies only the next time you synchronize. Thereafter, information is updated according to the default setting (Synchronize the files).
4
Click OK, and then close the Conduit Settings window.

Done
CHAPTER 5
Moving Info Between Your Handheld and Your Computer

Did You Know?
You can move multiple applications into the Quick Install window to have them ready for installation the next time you synchronize.
Using Quick Install and the Send To Handheld droplet
Use Quick Install (Windows) or the Send To Handheld droplet (Mac) to install applications on your handheld.
Using Quick Install
WINDOWS ONLY
1
Open your Palm Desktop software and click the Quick Install icon.
2
Copy the application:
a. You can choose which handheld will receive the items by selecting the username in the User dropdown box in the upper-right corner.
b. Drag and drop the application onto the Quick Install window. Which window you choose determines whether the application is installed on your handheld or on an expansion card (if present).

3
Synchronize to install the file to your handheld.

Done
CHAPTER 5
Moving Info Between Your Handheld and Your Computer

Tip
In Mac OS X, you can make the Send To Handheld droplet a permanent part of your desktop by dragging the droplet to the Dock. Then simply drag photos, and other files you want to transfer to your handheld, onto the Dock.
Using the Send To Handheld droplet
MAC ONLY
1
Select the applications or files you want to install:
a. Drag and drop the applications or files onto the Send To Handheld droplet in the Palm folder.
b. In the Send To Handheld dialog box, select your username and click OK.

2
Synchronize your computer with your handheld.

Done
CHAPTER 5
Moving Info Between Your Handheld and Your Computer
Entering information with your computer
Do you have a lot of information to enter on your handheld? Consider entering it in Palm Desktop software or Microsoft Outlook (Windows only) on your computer. When you synchronize your handheld with your computer, the information on your handheld is updated with the info you entered on your computer.
NOTE If you choose to synchronize your handheld with Microsoft Outlook (Windows only), info from Contacts, Calendar, Tasks, and Memos on your handheld is synchronized with info in Outlook. Other info on your handheld, such as photos and notes, is synchronized with info on Palm Desktop software.
CHAPTER 5
Moving Info Between Your Handheld and Your Computer

Tip
The Palm Desktop online Help has lots of info about how to use Palm Desktop software. Open the Help menu and select Palm Desktop Help.
WINDOWS ONLY
1
Open an application in Palm Desktop software:
a. Double-click the Palm Desktop icon on your computer desktop.
b. Click the icon in the launch bar to open the application.
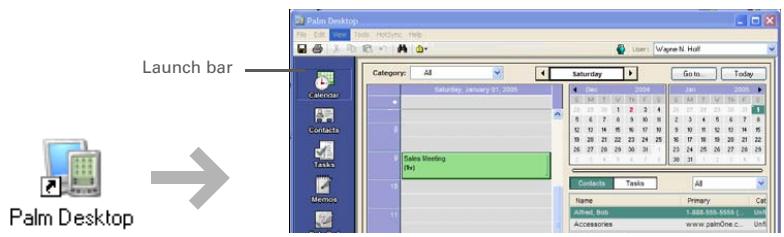
2
Do one of the following:
- Click New in the lower-left corner of the screen to create a new entry.
- Click an existing entry, and then click Edit in the lower-left corner of the screen.
3
Enter the information, and then click OK.
4
Synchronize your handheld with your computer.

Done
CHAPTER 5
Moving Info Between Your Handheld and Your Computer
MAC ONLY
1
Open an application:
a. Double-click the Palm Desktop icon in the Palm folder on your computer.
b. Click the icon in the toolbar to open the application.


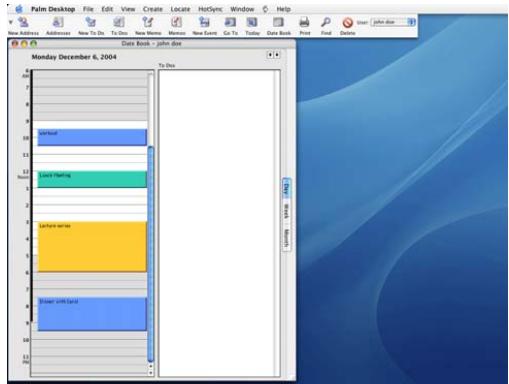

Continued
CHAPTER 5
Moving Info Between Your Handheld and Your Computer
2
Do one of the following:
- Click New in the upper-left corner of the screen to create a new entry.
- Click an existing entry, and then click Edit in the upper-left corner of the screen.
3
Enter the information, and then click OK.
4
Synchronize your handheld with your computer.

Done
CHAPTER 5
Moving Info Between Your Handheld and Your Computer

Tip
Palm Desktop Help has lots of information about importing from other applications, including step-by-step instructions. Open the Help menu in Palm Desktop software and select Palm Desktop Help for more details.
Importing information from other applications
Do you have information on your computer in spreadsheets or databases and want to transfer it to your handheld? Don't spend time retyping it. Instead, import the info into Palm Desktop software.
Palm Desktop software can import the following types of files:
Calendar vCal/iCal (VCS/ICS) and Calendar archive (DBA)
Contacts vCard (VCF), Contacts archive (ABA)
Memos Memos archive (MPA), Text (TXT)
Tasks Tasks archive (TDA)
WINDOWS ONLY
1
Save the file on your computer in one of the accepted formats.
2
Import the file into Palm Desktop software:
a. Double-click the Palm Desktop icon on your computer desktop.
b. Click the icon in the launch bar for the application you want to import the information into.

Continued
CHAPTER 5
Moving Info Between Your Handheld and Your Computer
Cont'd.
c. Click File, and then click Import.
d. Follow the onscreen instructions to map the fields in your file to the fields in Palm Desktop software, and import the file.
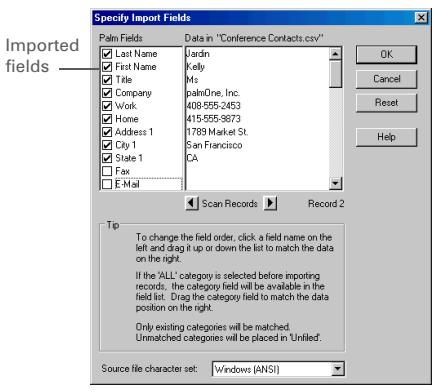
3
Synchronize your handheld with your computer.

Done
CHAPTER 5
Moving Info Between Your Handheld and Your Computer
MAC ONLY
1 Save the file on your computer in one of the accepted formats described in the introduction to this section.
2 Import the file into Palm Desktop software:
a. Double-click the Palm Desktop icon in the Palm folder on your computer.
b. Click the icon on the toolbar for the application into which you want to import information.
c. Click File, and then click Import.
d. Follow the onscreen instructions to import the file.
3 Synchronize your handheld with your computer.

CHAPTER 5
Moving Info Between Your Handheld and Your Computer
Installing the additional software from the CD
Your handheld comes with many applications that are already installed and ready to use. The CD that came with your handheld includes lots of other applications to make your handheld even more useful and more fun. You can install these applications at any time.
WINDOWS ONLY
1 Insert the CD into your computer.
2 On the Discover your device screen, click Add software to your handheld.
3 Follow the onscreen instructions to install the applications you want to install.
4 Synchronize your handheld with your computer.
CHAPTER 5
Moving Info Between Your Handheld and Your Computer
MAC ONLY
1 Insert the CD into your computer.
2 Double-click the Essential Software folder.
3 Install the applications you want to install.
4 Synchronize your handheld with your computer.

CHAPTER 5
Moving Info Between Your Handheld and Your Computer
Checking space and version numbers
Before you install a file or an application, it's important to make sure you have enough space for it. You may also want to check the version number of applications that are already on your handheld or expansion card, in case you're interested in upgrading them.
1
Open the Info dialog box:
a. Go to Applications.
b. Open the menus.
c. Select Info on the App menu.
2
View space info and version numbers:
a. Select the Device pick list and select one of these options:
Device Get information about applications stored on your handheld.
Expansion card name Get information about applications stored on your expansion card.

Continued
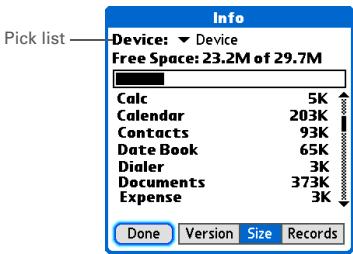
CHAPTER 5
Moving Info Between Your Handheld and Your Computer
Cont'd.
b. Select one of the following options, and then select Done:
Version Displays the version numbers of all of your applications.
Size Shows how much space each application occupies. The bar at the top shows the total space currently in use on your handheld or expansion card.
Records Shows the number of records in an application.

Done
CHAPTER 5
Moving Info Between Your Handheld and Your Computer
[!] Before You Begin
Verify that the application, extension, or patch that you are removing is not used by another application. If you delete a file that is shared by another application, the other application may not work.
Removing applications
You can remove applications from your handheld, and remove Palm Desktop software from your computer.
Removing an application from your handheld
If you run out of memory or decide that you no longer want some applications you installed, you can remove applications from your handheld or from an expansion card.
NOTE You can remove only add-on applications, patches, and extensions that you install. You cannot remove the applications that are part of the operating system of your handheld.
1 Go to Applications.
2 Open the Delete dialog box:
a. Open the menus.
b. Select Delete from the App menu.
Continued
CHAPTER 5
Moving Info Between Your Handheld and Your Computer
3
Delete the application:
a. Select the Delete From pick list, and then select Handheld or an expansion card.
b. Select the application that you want to remove, and then select Delete.
c. Select Yes, and then select Done.

Done
CHAPTER 5
Moving Info Between Your Handheld and Your Computer
Removing Palm Desktop software from your computer WINDOWS ONLY
[!] IMPORTANT If you remove Palm Desktop software, you also remove the synchronization software and can no longer synchronize your information. Even if you want to synchronize your handheld with another personal information manager, like Microsoft Outlook, you must leave Palm Desktop software installed on your computer.
This process removes only the application files. The information in your Users folder remains untouched.
NOTE Mac computers do not provide an option for uninstalling Palm Desktop software.
You may have to modify these steps to correspond with the operating system on your computer.
1 Open Add/Remove Programs:
a. From the Start menu, select Settings, and then select Control Panel.
b. Double-click the Add/Remove programs icon.
Continued
CHAPTER 5
Moving Info Between Your Handheld and Your Computer
2
Remove Palm Desktop software:
a. Click Change or Remove Programs.
b. Select Palm Desktop software, and then click Remove.
c. Click Yes in the Confirm File Deletion box.
d. Click OK, and then click Close.

ne
Change or Remove Programs
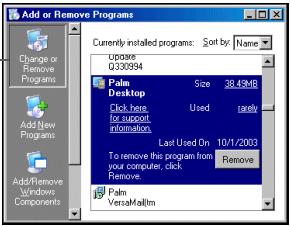
Restoring archived items on your computer
In many applications, you can save a copy of an item that you deleted from your handheld or desktop software to an archive folder on your computer. This frees up space on your handheld, while ensuring that the information is available if you need it in the future.
You can restore individual entries or an entire archive file to the related application in your desktop software. The Palm Desktop online Help and the Microsoft Outlook online Help have lots of info about how to restore archived files. Refer to these Help files for details.
CHAPTER 5
Moving Info Between Your Handheld and Your Computer
Tips & Tricks
Make your handheld uniquely yours. For great tips, software, accessories, and more, visit www.palmOne.com/ mytunstene2.
Support
If you're having problems with synchronization or with anything else on your handheld, go to www.palmOne.com/support.
Related topics
Click a link below to learn about these related topics:
Connecting
Synchronizing using Bluetooth wireless technology on your handheld
Common Questions
Answers to frequently asked questions about synchronization
Managing Your Contacts
In this chapter
Adding a contact
Copying contact information into multiple contacts
Locating a contact on your list
Deleting a contact
Customizing the Contacts list
Making connections from Contacts
Working with Contacts on your computer
Related topics
Say good-bye to a paper address book that you need to update manually every time someone moves, changes their email address, or gets a new work extension. With Contacts, not only is it easy to enter information such as names, addresses, and phone numbers, but it is just as quick to view, update, and organize contact information.
You can easily share info with other handhelds and dial phone numbers or send messages directly from a contact by using your handheld's built-in Bluetooth® wireless technology and a compatible mobile phone or by beaming. You can even add photos of your loved ones directly to their contact information.

Benefits of Contacts
- Carry all your business and personal contact information in your hand
- Keep track of who's who
- Keep in touch
CHAPTER 6
Managing Your Contacts
Did You Know?
If the first character you enter in the Last Name or Company field is an asterisk (*) or another symbol, that record always appears at the top of the Contacts list. That's useful for an entry like "If Found Call [your phone number]."
Adding a contact
1 Press the Contacts button.
2 Add your contact information:
a. Select New.
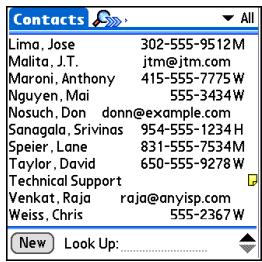

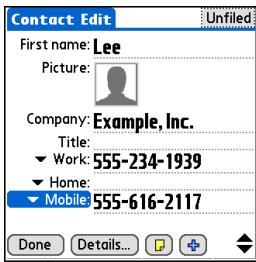
b. Select each field where you want to enter information, and enter it. Select the scroll arrows to view more fields.
Continued
CHAPTER 6
Managing Your Contacts

Tip
To learn how to transfer photos to your handheld, see palmOne™ Media.

Tip
If multiple contacts share information, such as a company name and address, you can enter the first contact, and then copy the information into other contacts.

Did You Know?
You can also enter one or more contacts on your desktop computer, and then copy them to your handheld by synchronizing
Cont'd.
The following fields contain features to help you enter information quickly:
All fields except numeric and email fields The first letter is automatically capitalized.
Title, Company, City, and State As you enter letters, a match appears if you have one on your Contacts list. For example, if you enter S, Sacramento might appear, and if you then enter a and n, San Francisco might replace Sacramento. When the word you want appears, select the next field.
Address You can enter up to three addresses, each containing five fields: Addr, City, State, Zip Code, and Country. You can designate an address as work (W), home (H), or other (O). By default, the first address is designated as work.

[ & ] OPTIONAL Add a photo:
a. Tap the Picture box.
b. Select and add a photo from palmOne™ Media.
Continued
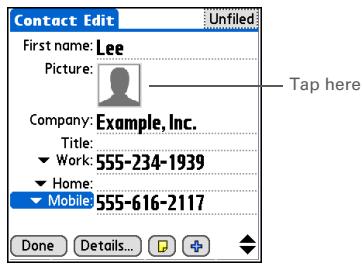
CHAPTER 6
Managing Your Contacts

Tip
If you want a reminder about a birthday, check the Reminder box, enter the number of days before the birthday that you want to see the reminder, and then select OK.

Did You Know?
Birthday you enter in Contacts appear as untimed events in Calendar. If you update the birthday in Contacts, it automatically updates in Calendar as well.
4
&]OPTIONAL Add a
birthday:
a. Select the Birthday box.
b. Use the left and right arrows to move to and select the birth year. Hold down either arrow to scroll quickly through the years.
c. Select the month and date.
![PALM ONE - &]OPTIONAL Add a - 1](/content/2019/10/16572/images/21ed2d4efc58fa3a9973248779a2ee1668e5aecc14a3f960051f9a96569826b1.jpg)
5
After you finish entering all the information you want, select Done.

Done That's it. Your handheld automatically saves the contact. Make sure you have a current backup. Synchronize often.
CHAPTER 6
Managing Your Contacts

Tip
Additional fields appear in a contact only if you enter info into them. If you leave a field blank, it does not appear the next time you open the Contact Edit screen. Also, additional fields apply only to the current contact; you can duplicate contact information if you need to apply the same fields to multiple contacts.

Did You Know?
Each field type can be displayed a certain number of times, up to a preset maximum. Once you reach this maximum, the field type no longer appears on the pop-up list. For example, you can display up to seven Phone/Email fields.

Tip
Select the Note icon next to the plus button to add a note to the contact.
Entering additional contact information
The Contact Edit screen displays certain fields by default. You can customize the Contact Edit screen to display additional fields.

Press the Contacts button.

Display additional contact fields:
a. Select the contact you want, and then select Edit.
b. Select the plus button in the lower-right corner of the Contact Edit screen.
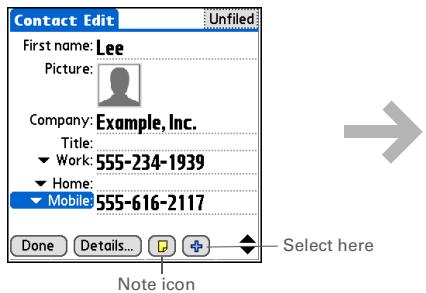
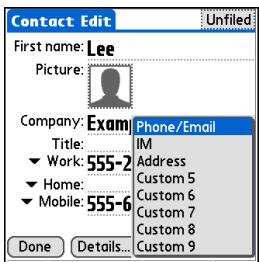
c. Select the field you want displayed from the list. The field appears in a preset location on the Contact Edit screen.

Done
CHAPTER 6
Managing Your Contacts

Tip
Any changes you make to field types apply only to the current contact. You can duplicate contact information if you need to apply the same contact fields to multiple contacts.

Did You Know?
The email address field type is located on the same pick list as the phone number fields. IM field types are located on a separate pick list.
Selecting contact field types
You can select the types of phone numbers (work, home, mobile, pager, and so on), as well as specify the instant messenger (IM) account, that you associate with a contact.
1
Press the Contacts button.
2
Customize the contact field type:
a. Select the contact you want, and then select Edit.
b. Select the pick list next to the field you want to change, and select the new field type you want. Available fields include phone number, email address, and instant messenger (IM) fields.
NOTE You must set up an instant messenger account with a service provider and download instant messaging software to use instant messaging on your handheld.
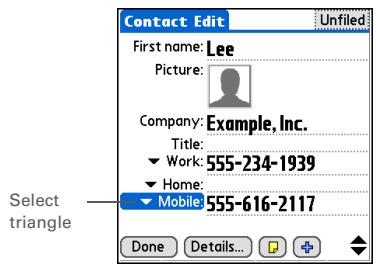

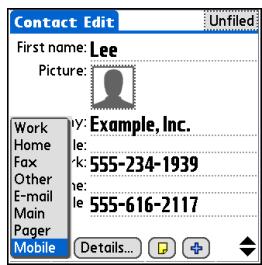

Done
CHAPTER 6
Managing Your Contacts
Defining custom fields
You can define the custom fields that appear at the end of the Contact Edit screen to display any additional contact information you want, such as spouse's or children's names, favorite color, or any other information. The new field is defined in all contacts, not just the current contact.
1
Press the Contacts button.
2
Define the custom fields:
a. Select the contact you want, and then select Edit.
b. Open the menus.
c. Select Options, and then select Rename Custom Fields.
d. Enter names for up to nine custom fields, and then select OK.

Done
Rename Custom Fields
To rename any custom field below, enter a new name:
Spouse Name Custom 5
Fav Color Custom 6
Hobby Custom 7
Custom 4 Custom 8
Custom 9

[Cancel]
CHAPTER 6
Managing Your Contacts
Selecting a contact as your business card
You can create a contact with your own information and select it as your business card by opening the Record Menu and selecting Business Card. You can then beam or send your business card to other handholds. To beam your business card quickly, press and hold the Contacts application button for approximately two seconds.
1 Press the Contacts button.
2 Create a business card:
a. Select the contact you want, or create a new contact with your own contact information.
b. Open the menus.
c. Select Business Card on the Record menu.
Done
CHAPTER 6
Managing Your Contacts

Tip
You can also duplicate a contact in the Contacts desktop application by highlighting a contact in the Contacts list, and then selecting Edit Copy. Create a new contact, select the Note icon, and then paste the info into a note. Then cut and paste the text into the correct field in the new contact.

Did You Know?
If you duplicate a contact and do not edit the name, the contact appears in the Contacts list as "
Copying contact information into multiple contacts
You can quickly make a copy of a contact so that you can edit only the fields you need to change. For example, if two of your contacts have the same work address or phone number, duplicating the first contact simplifies entering information in the second.
1
Press the Contacts button.
2
Duplicate a contact:
a. Select the contact you want, and then select Edit.
b. Open the menus.
c. Select Record, and then select Duplicate Contact.

Done
CHAPTER 6
Managing Your Contacts

Tip
You can also press Right on the 5-way navigator (or select the Quick Look Up icon at the top of the screen) to open the Quick Look Up line. Press Up and Down to select the letter of the name you want in each box, and press Right to move to the next box.

Did You Know?
The Phone Lookup feature lets you add contact information directly into certain other applications on your handheld. For example, you can add a name and phone number to a memo or task.
Locating a contact on your list

Press the Contacts button.

Search for the contact:
a. Select the Look Up line at the bottom of the screen and enter the first letter of the name you want to find.
b. Enter the second letter of the name, and so on, until you can easily scroll to the contact you want.
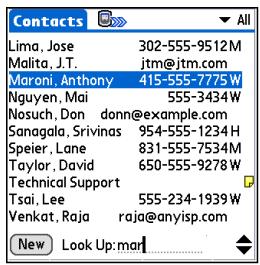

Select the contact to open it.

Done
CHAPTER 6
Managing Your Contacts

Tip
You never know when you're going to need to look up an old business associate. If you save an archive copy of your deleted contacts, you can refer to them later by importing them.
Deleting a contact
1 Press the Contacts button.
2 Open the Delete Contact dialog box:
a. Select the contact you want.
b. Open the menus.
c. Select Delete Contact on the Record menu.
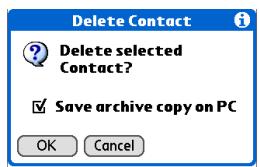
3 [ & ] OPTIONAL Check the box to save an archive copy of the contact on your computer.
4 Select OK.
Done
CHAPTER 6
Managing Your Contacts

Did You Know?
If you select Work, Home, Fax, Other, Main, Pager, or Mobile from the pick list, the first letter of your selection appears next to the contact in the Contacts list—for example, W for Work. If you select email, no letter appears next to the contact.

Tip
You can also use the Contact Details dialog box to assign a contact to a category or to mark a contact as private.
Customizing the Contacts list
By default, the Contacts list displays the work phone number for a contact; if no work phone number is entered, another entry is displayed. You can customize a contact's settings to display different information on the Contacts list. You can also customize the appearance of the list.
1
Press the Contacts button.
2
Open the Contact Details dialog box:
a. Select the contact you want.
b. Select Edit, and then select Details.
3
Specify the information displayed with a contact:
a. Select the Show in List pick list, and select the information that you want to appear in the Contacts list for this contact.
b. Select OK.

Continued
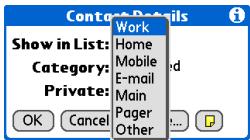
CHAPTER 6
Managing Your Contacts
4
Customize the appearance of the Contacts list:
a. From the Contacts list, open the menus.
b. Select Options, and then select Preferences.
c. Select the display options you want:
Remember last category Check the box if you want Contacts to display the last category shown when you return to it from another application. If the box is unchecked, Contacts opens to the All category.
List by Select whether to sort the Contacts list by last name and first name or by company and last name.

Done
CHAPTER 6
Managing Your Contacts
[!] Before You Begin
You must complete all the prerequisites for the email and messaging applications.
To use Quick Connect with your handheld's built-in Bluetooth® wireless technology, you must set up a phone connection. To use it with your handheld's IR port, run Phone Link Updater and then use the Phone Link application to set up a phone connection.
Making connections from Contacts
You can set up your contacts so that you can do tasks like dialing a phone number, creating an email or text message, accessing the web, or sending an instant message (requires additional software, sold separately) directly from a contact screen. Contacts give you two tools to perform these tasks:
Quick Connect Let's you select a connection type and opens the application for making that type of connection directly from a contact's information screen.
Tap-to-Connect Opens the application to perform a connection task directly by selecting the appropriate entry (phone number, email address, and so on) from a contact's information screen.
Using Quick Connect
If you have a compatible mobile phone (sold separately) that includes Bluetooth wireless technology, you can use Quick Connect to dial a phone number, address an email or a text message, go to a website, or send an instant message (requires additional software, sold separately) directly from a contact.
1 Press the Contacts button.
Continued
CHAPTER 6
Managing Your Contacts

Tip
You can also open Quick Connect from the Contact List view by highlighting the contact you want and then pressing right on the 5-way navigator.

Tip
If you want to close the Quick Connect dialog box without making a connection, press Left on the 5-way.
2
Make a connection using Quick Connect:
a. Select the contact you want.
b. In the Contact view, select the Quick Connect icon at the top of the screen to open the Quick Connect dialog box.
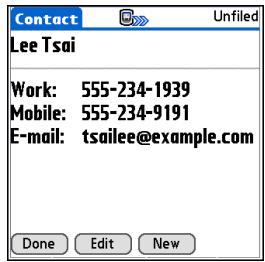

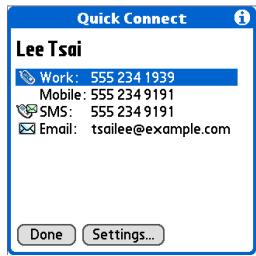
c. Select the type of connection you want. For example, select a phone number to dial the number on your mobile phone, or select an email address to open the email application to a new message containing that address in the To field.

Done
CHAPTER 6
Managing Your Contacts
Customizing Quick Connect settings
You can specify which application opens when you choose a Contacts record field, and whether to add a prefix to each phone number.
1 Press the Contacts button.
2 Customize Quick Connect settings:
a. Select the contact you want.
b. Select the Quick Connect icon at the top of the screen to open the Quick Connect dialog box.
c. Select Settings and enter the settings you want:
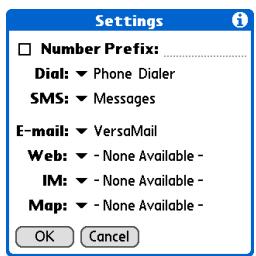
Number prefix Check the box and enter a prefix to add a prefix to all dialed phone numbers.
NOTE A prefix is not added to any number that begins with a "+" character.
All other fields Select each pick list and select the application you want to use to connect by that method.
d. Select OK.
Done
CHAPTER 6
Managing Your Contacts
[!] Before You Begin
You must have a compatible mobile phone (sold separately) that includes Bluetooth wireless technology, and you must complete all the prerequisites for the email and messaging applications.
To use Tap-to-Connect with your handheld's built-in Bluetooth wireless technology, you must set up a phone connection. To use it with your handheld's IR port, run Phone Link Updater and then use the Phone Link application to set up a phone connection.
Using Tap-to-Connect
With Tap-to-Connect, you can select a contact and dial a phone number or address an email or text message by selecting the appropriate entry on the contact screen. By default, Tap-to-Connect is not enabled.
1 Press the Contacts button.
2 Enable Tap-to-Connect:
a. From the Contacts list, open the menus.
b. Select Options, and then select Preferences.
c. Select Enable Tap-to-Connect, and then select OK.
Continued
CHAPTER 6
Managing Your Contacts
3
Make a connection with Tap-to-Connect:
a. Select the contact you want.
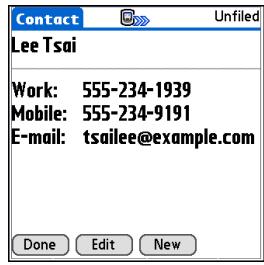
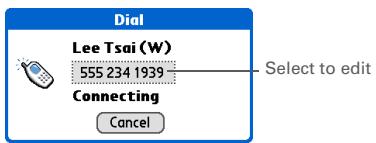
b. Select the entry you want to use to connect. For example, to dial a phone number, select the number you want to dial. To address an email message, select an email address.
c. Select the entry to edit it if necessary. For example, you might need to add an area code or country code to a phone number.

Done
CHAPTER 6
Managing Your Contacts

Tip
(Windows) If you chose to synchronize with
Microsoft Outlook, check out the online Help in Outlook to learn how to use Contacts on your computer.
Working with Contacts on your computer
Use Contacts on your computer to view and manage the contacts you create on your handheld. Check out the online Help in Palm® Desktop software to learn how to use Contacts on your computer. The online Help includes info about the following topics:
Viewing, copying, and deleting contacts
- Editing contact details
- Marking contacts private
- Showing, masking, and hiding private contacts
- Printing contacts
- Changing between the list, contact info, and Contact Edit views
- Adding notes to a contact
- Adding a date and time stamp to a contact
- Organizing contacts into categories
- Sharing contacts
WINDOWS ONLY
To open Contacts on your computer, double-click the Palm Desktop icon on the Windows desktop, and then click Contacts on the launch bar.
MAC ONLY
To open Contacts on your computer, launch Palm Desktop software from the Palm folder, and then click Addresses.
CHAPTER 6
Managing Your Contacts
Tips & Tricks
Make your handheld uniquely yours. For great tips, software, accessories, and more, visit www.palmOne.com/ mytunstene2.
Support
If you're having problems with Contacts or with anything else on your handheld, go to www.palmOne.com/support.
Related topics
Click a link below to learn about these related topics:
Moving. Around
- Opening applications
Using menus - Synchronizing with Palm Desktop software and Outlook
Categories
Organizing contacts by type and sorting them
Entering Information
Transferring contact information from other applications such as databases, spreadsheets, and other organizer software
Privacy
Keeping contacts private by turning on security options
Sharing
Sending contacts to other Bluetooth devices by using Bluetooth wireless technology on your handheld
VersaMail
Sending contacts as attachments to email messages
SMS
Sending contacts as part of a text message
Managing Your Calendar
In this chapter
Scheduling events
Color-coding your schedule
Setting an alarm
Rescheduling an event
Deleting events
Checking your schedule
Customizing your calendar
Working with Calendar on your computer
Related topics
Stay on top of your schedule by creating appointments, setting alarms, and spotting conflicts in Calendar. You can view your calendar by day, week, or month, or as an agenda list that combines your list of tasks and email notifications with your appointments. Schedule repeating meetings or block out a vacation by creating one event set to repeat at an interval you specify. Color-code your appointments by category and add notes with helpful information.

Benefits of Calendar
- Track current, future, and past appointments
- Stay on top of deadlines
- Set reminders for appointments
- Spot schedule conflicts
CHAPTER 7
Managing Your Calendar
Key Term
Event The name for an entry in the Calendar application, including appointments, birthdays, reminders, recurring meetings, and so on.
\*Tip
You can also scroll to a date by pressing Right or Left on the 5-way or by selecting the arrows at the top of the Day View screen.
+ Did You Know?
You can use more than one line to describe an appointment.
Scheduling events
Use Calendar to manage your schedule. You can enter appointments, events without a start time, events that repeat at regular intervals, and events that span a period of time.
Scheduling an appointment
1
Open Day View:
a. Press the Calendar button.
b. Select the Day View icon
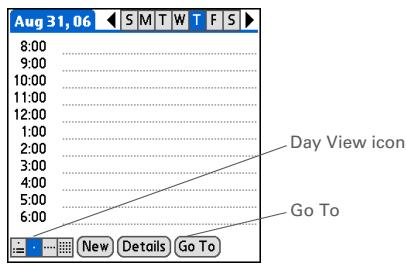
2
&]OPTIONAL If the
appointment is not for today, select the date of the appointment:
a. Tap Go To.
b. Select the year, month, and date.

Continued
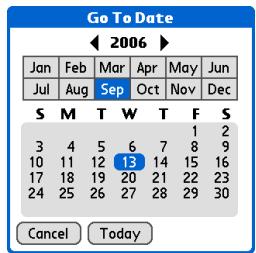
CHAPTER 7
Managing Your Calendar
Did You Know?
You can color-code your calendar to file events in categories. Each category has its own color. You can also mark events as private to hide them from prying eyes.
Did You Know?
If you are synchronizing with Outlook on your PC, you can select a time zone when creating a new event. Also, if you created appointments in Outlook that include more than one person, these person's names appear when you synchronize with your handheld. You cannot edit this information on your handheld.
3 Tap the line next to the time the appointment begins, and enter a description.
4 If the appointment is longer or shorter than an hour, set the duration:
a. In Day View, tap the start time.
b. In the Set Time dialog box, tap End Time.
c. Tap the hour and minute lists to select the time the appointment ends.
d. Select OK.
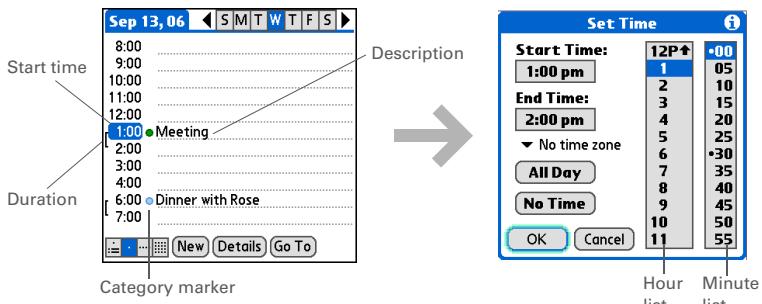
Done That's it. Your handheld automatically saves the appointment.
Make sure you have a current backup. Synchronize often.
CHAPTER 7
Managing Your Calendar

Did You Know?
If you need to reserve a date before you know the details of the appointment, you can schedule an event without a start time.
Scheduling an event without a start time
Keep track of events that take place on a particular date but not at a particular time. For example, you may want to enter holidays, anniversaries, and deadlines.

Open Day View:
a. Press Calendar

b. Select the Day View icon
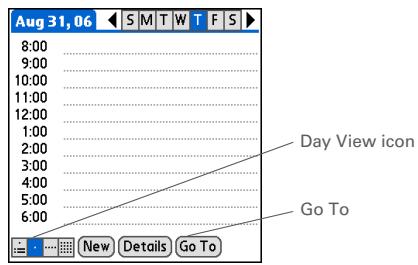

Select the date of the event:
a. Select Go To.
b. Select the arrows to select the year.
c. Select the month.
d. Select the date.

Continued
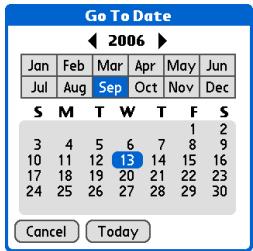
CHAPTER 7
Managing Your Calendar

Tip
You can change an event without a time to a scheduled appointment. Select the event description, select Details, select the Time box, and select the start and end times.

Add an unscheduled event line:
a. Select New.
b. Select No Time.
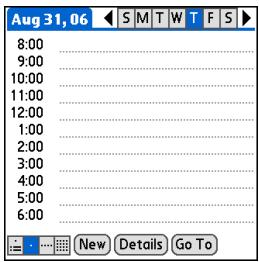

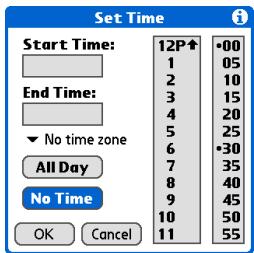

Enter a description on the line that appears at the top of the screen.
NOTE A diamond appears in the time column to show that the event doesn't start at a specific time.

Done
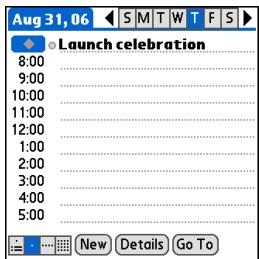
CHAPTER 7
Managing Your Calendar

Tip
To select intervals such as the 2nd Tuesday of every month or the 3rd Thursday in November of every year, see Scheduling a repeating event—unusual interval.
Scheduling a repeating event—standard interval
There's no need to re-enter events that take place on a regular basis. Just set up a repeating event. This is a great way to block out time for things like a daily walk with the dog, a weekly team meeting, a monthly game night with friends, and annual events like anniversaries and holidays.
1
Press Calendar

2
Enter the event you want to repeat, and then select the event description.
3
Set the repeat interval:
a. Select Details.
b. Select the Repeat pick list and select how often the event repeats: Daily until, Every week, Every other week, Every month, or Every year.
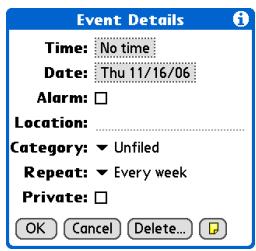

NOTE If you select Daily, a dialog box appears for you to select the end date.
c. Select OK.

Done
CHAPTER 7
Managing Your Calendar
Scheduling a repeating event—unusual interval
Some events don't fit neatly into the preset repeat intervals, so you need to set up your own repeat intervals. For example, set aside time for a trip to the gym every other day, schedule a class that meets on the 1st Wednesday of each month, or enter annual holidays that occur during a particular time of month such as the 1st Monday in September or the 3rd week of November.
1
Press Calendar

2
Enter the event you want to repeat, and then select the event description.
3
Open the Change Repeat dialog box:
a. Select Details.
b. Select the Repeat pick list and select Other.
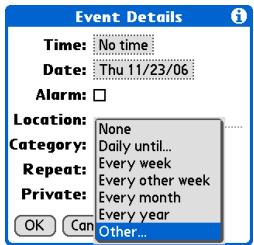

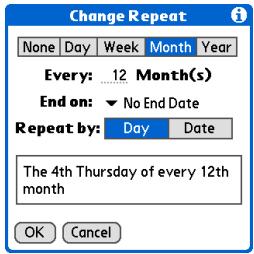

Continued
CHAPTER 7
Managing Your Calendar

Tip
To enter holidays such as Labor Day or Thanksgiving, select Month, enter 12 on the Every line, and then select Day as the Repeat By setting.
4
Set the repeat interval:
a. Select Day, Week, Month, or Year as the repeat unit.
b. Select the Every line and enter the frequency at which the event repeats.
c. Select the End on pick list and select an end date, if needed.
d. If you selected Week in step c, select the day of the week the event repeats. If you selected Month in step c, select Day to select the week within the month, such as the 4th Thursday, or select Date to select the same date within the month, such as the 15th.
e. Select OK.

Done
CHAPTER 7
Managing Your Calendar
Did You Know?
You can reserve a specific block of time during the day or use events without times to flag a series of dates. For example, you can reserve vacation time from 6/23-6/30 using a repeating event without a time, and then schedule a specific excursion from 9:00 to 3:00 on 6/24 and dinner with a friend at 6:00 on 6/25.
\*Tip
Need to enter an event that extends beyond midnight? Enter an end time that is earlier than the start time.
Scheduling an event that is longer than a day
Reserve a block of time for events that span several days, such as a vacation, conference, training class, or an extended project.
1
Press Calendar

2
Enter the event, and then select the event description.
3
Set the repeat interval:
a. Select Details.
b. Select the Repeat pick list and select Daily until.
c. Select the year, month, and date when the event ends.
d. Select OK.

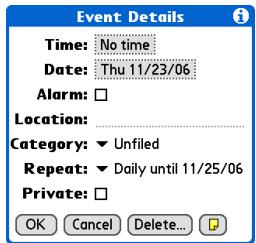
CHAPTER 7
Managing Your Calendar
Entering a location or a note for an event
Enter a description of the event's location such as a restaurant, a conference room, or your friend's house. Enter a note such as dial-in info for a conference call or directions to a location.
1
Press Calendar

2
Enter the event, and then select the event description.
3
[&]OPTIONAL
Enter the
location:
a. Select Details.
b. Select the Location field and enter a description of the location.

Continued
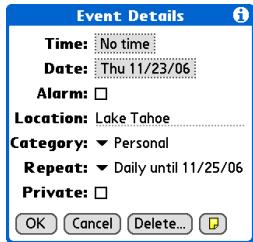
CHAPTER 7
Managing Your Calendar
4
[ & ] OPTIONAL Enter the note:
a. Select Note
b. Enter the note text.
c. Select Done.
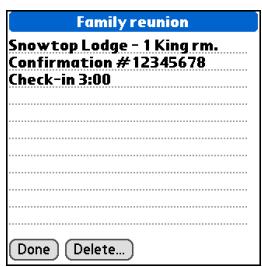
5
Select OK.
Done
The location name and a note icon appear next to the event description in Agenda View and in Day View.
CHAPTER 7
Managing Your Calendar

Did You Know?
You can also set a preference to automatically include a time zone whenever you create a new event. Open the Options menu and select Preferences. Select New events use time zones. Only new events created after the preference is set are affected.
Scheduling an event with a time zone
[!] IMPORTANT Do not use times zones if you are synchronizing with Palm® Desktop software. Time zones work only if you are synchronizing with Outlook or Exchange ActiveSync. Palm Desktop software does not recognize time zones.
Selecting a time zone when creating a new event allows you to travel and have your events automatically adjust to the time zone in your new location. When you schedule an event, set the time zone and the time the event occurs in the location of the event. The event automatically adjusts on your schedule based on the primary location you have set on your handheld.
When you travel, you can change the primary location on your handheld and the event automatically adjusts on your schedule to the correct time according to the time zone of the new primary location.
NOTE Only events that have a time zone setting adjust when you change the primary time zone on your handheld. Events that do not have a time zone setting remain at their set time.

Press Calendar
Continued
CHAPTER 7
Managing Your Calendar
2
Set the time and the time zone:
a. Enter the event.
b. Set the time for the event as it is scheduled at the location where it occurs.
c. Select the time zone pick list and select a city within the time zone where the event is located.
d. Select OK.

Done
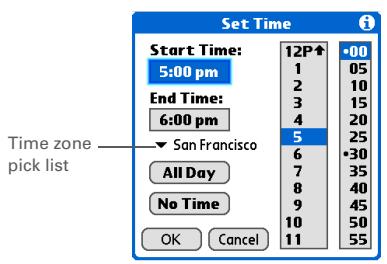
Color-coding your schedule
Use color-coding to quickly spot different types of events. For example, make all your family appointments green, your work appointments blue, and your appointments with friends yellow.
CHAPTER 7
Managing Your Calendar
Managing your color-codes
Each color code represents a category of events. You can assign each category a name and select which color you want to assign to it.
1
Open Day View:
a. Press Calendar
b. Select the Day View icon
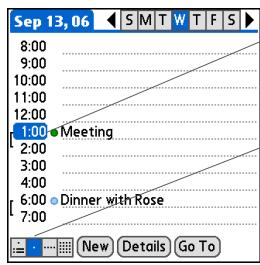
Category markerDay View icon
2
Open the Edit Categories dialog box:
a. From Day View, select the event description.
b. Select Details.
c. Select the Category pick list and select Edit Categories.
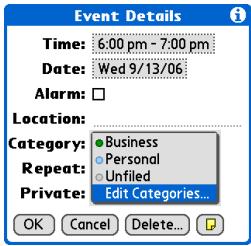
Continued
CHAPTER 7
Managing Your Calendar
Select the color code for the category:
a. Select New, or select a category, and then select Edit.
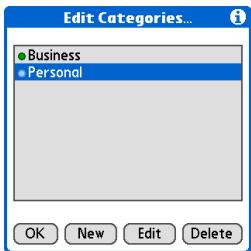
3

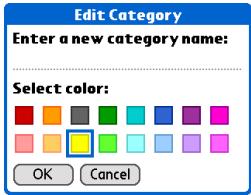
b. Enter or edit the category name.
c. Select the color you want to give this category.
d. Select OK, and then select OK two more times.

Done
The category name and its color-coded marker appear on the category list.
CHAPTER 7
Managing Your Calendar

Did You Know?
In Day View and Month View you can set the Display Options to show the category list so that you can view all your events or just the events for a single color-code.
Assigning a color code to an event
1
Press Calendar

2
Enter the event you want to color-code.
3
Select the category marker next to the description, and then select a category from the list.
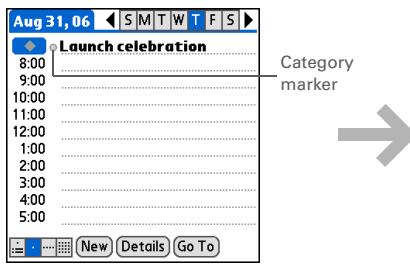
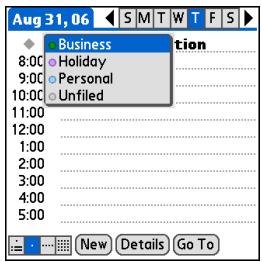

Done
In Agenda View and Day View the category marker next to the event is color-coded. In Week View and Month View the symbol for the event is color-coded.
CHAPTER 7
Managing Your Calendar

Tip
You can customize your alarm settings in the Calendar Preferences dialog box.

Did You Know?
If you set your alarms in World Clock instead of Calendar, you have different alarm sound choices. Keep in mind that since World Clock alarms aren't tied to a specific event, you won't see an event description when a World Clock alarm sounds.

Did You Know?
When you set an alarm, a little alarm clock appears to the right of the event description.
Setting an alarm
1
Press Calendar

2
Enter the event you want to assign an alarm to, and then select the event description.
3
Set the alarm:
a. Select Details.
b. Check the Alarm box.
c. Select the pick list and select Minutes, Hours, or Days.
d. Enter how many minutes, hours, or days before the event you want the alarm to sound, and then select OK.

Done
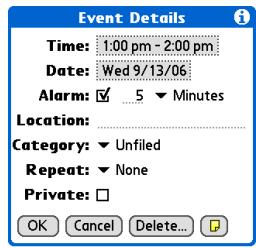
CHAPTER 7
Managing Your Calendar

Tip
You can also use the Event Details dialog box to change the alarm, location, category, repeat, and privacy settings.
Rescheduling an event
1
Press Calendar

2
Go to the event you want to reschedule:
a. From Day View, select Go To.
b. Select the year, month, and date of the event.
c. Select the event description, and edit it if necessary.
[!]IMPORTANT If you edit the description of a repeating event, the new description appears in all instances of the event.
3
Change the date and time:
a. Select Details.
b. Select the Time box and select the new start and end times.
c. Select the Date box and select the new date.
d. Select OK.

Continued
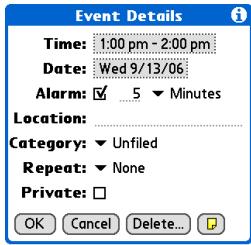
CHAPTER 7
Managing Your Calendar
4
If you're changing a repeating event, select one of the following to select the event(s) you want to apply the changes to:
Current Apply your changes to only the selected instance of the repeating event.
Repeating Event

the changes to:
Current record, & all Future records, currences?
Current
Future
All
Cancel
Future Apply your changes to the selected event and all instances of the repeating event that occur at a later date.
All Apply your changes to the selected event and all past and future instances of the repeating event.

Done
CHAPTER 7
Managing Your Calendar

Tip
You can also delete a specific event by selecting the event, selecting Details, and then selecting Delete.

Many people find it useful to refer to old events for tax purposes. If you save an archive copy of your deleted events, you can refer to them later by importing them.
Deleting events
If an appointment is canceled, you can delete it from your schedule. When deleting a repeating event, you can indicate you want to delete just the selected event, or to also delete other instances of the event. You can also delete all your old events that are before a selected time frame.
Deleting a specific event
1
Press Calendar

2
Go to the event you want to delete:
a. From Day View, select Go To.
b. Select the year, month, and date of the event.
c. Select the event description.
3
Open the Delete Event dialog box:
a. Open the menus.
b. Select Delete Event on the Record menu.

Continued
Delete Event

Delete selected event?

Save archive copy on PC

K Cancel
CHAPTER 7
Managing Your Calendar
4
[ & ] OPTIONAL Check the box to save an archive copy of the event on your computer.
5
Select OK.
6
If you're deleting a repeating event, select one of the following to select the event(s) you want to delete:
Current Delete only the selected instance of the repeating event.
Future Delete the selected event and all instances of the repeating event that occur at a later date.
All Delete the selected event and all past and future instances of the repeating event.

Done
CHAPTER 7
Managing Your Calendar
Deleting all your old events
When you need more space on your handheld, or you just want to do some "housekeeping," you can delete all your old events.
1
Press Calendar

2
Open the Purge dialog box:
a. Open the menus.
b. Select Purge on the Record menu.
Purge

Delete events older than: 1 week
Save archive copy on PC


3
Select the events to purge:
a. Select the Delete events older than pick list and select a time frame.
b. Check the Save archive copy on PC box if you want to place a copy of the deleted events in an archive file on your computer the next time you synchronize.
c. Select OK.

Done
CHAPTER 7
Managing Your Calendar

Tip
Press the Calendar button repeatedly to cycle through the four different views.

Did You Know?
Agenda View shows how many unread messages you have in the VersaMail® application.

Did You Know?
You can use a favorite photo as the background for your Agenda View.
Checking your schedule
Sometimes you want to look at your schedule for a particular date, while other times you want to see an overview of a week or month.
Viewing your appointments and tasks together
Agenda View shows your daily schedule and any items on your Tasks list that are overdue or due today. If there's room on the screen, Agenda View also shows your schedule for the next dates that have events scheduled on them.
1
Press Calendar

NOTE If Calendar is already open, select the Agenda View icon instead.
Continued
CHAPTER 7
Managing Your Calendar
2
Do one of the following to view your schedule:
- Select an appointment to go to it in Day View.
- Select a task to go to it in Tasks.
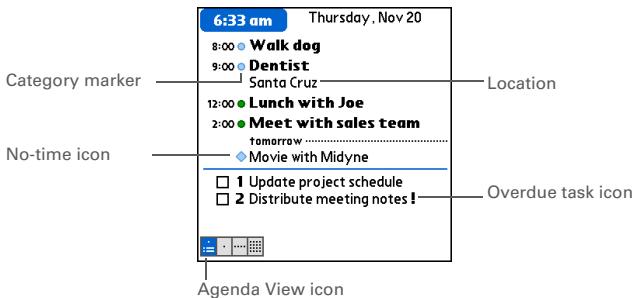

Done
CHAPTER 7
Managing Your Calendar
Viewing your daily schedule
Day View shows your daily schedule one day at a time. You can scroll between days in the current week or jump to any other date.
1
Open Day View:
a. Press Calendar
b. Select the Day View icon
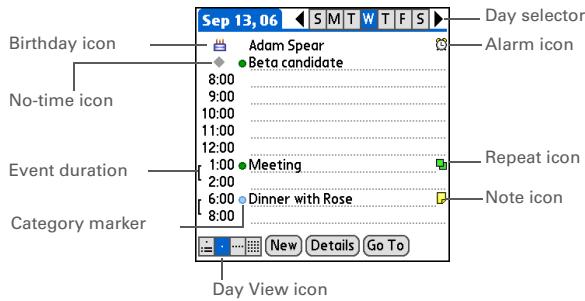

Continued
CHAPTER 7
Managing Your Calendar
2
Do any of the following to view your daily schedule:
- Select the day selector to view another day in the same week, select the arrows to scroll to the previous or next week, or select Go To to choose a specific date.
- Select the Repeat icon, the Alarm icon, or Details to open the Details dialog box.
- Select the Note icon to view the note text.
- Select the Birthday icon to view the birthday entry.
- Select the category marker to assign the event to a color-code.

Done
CHAPTER 7
Managing Your Calendar

Tip
You can also press Right and Left on the 5-way to scroll to the next or previous week. To go to Day View for a particular day, press Center on the 5-way to insert a highlight, press Right or Left to select a day, and then press Center on the 5-way again.
Viewing your weekly schedule
Week View shows your schedule for an entire week. The time frames that appear on the screen are based on the Start Time and End Time settings in Calendar Preferences.
1
Open Week View:
a. Press Calendar

b. Select the Week View icon

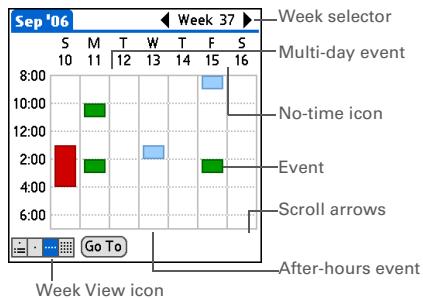
2
Do any of the following to view your weekly schedule:
- Select the week selector to scroll between weeks, or select Go To to choose a week.
- Select a date to go to that day in Day View.
- Select an event to view the event description and location.
- Select the scroll arrows to view events scheduled earlier or later in the day during the selected week.

Done
CHAPTER 7
Managing Your Calendar

Tip
You can also press Right and Left on the 5-way to scroll to the next or previous month. To go to Day View for a particular date, press Center on the 5-way to insert a highlight, press Right or Left to select a date, and then press Center on the 5-way again.
Viewing your monthly schedule
Month View shows your schedule for a whole month. You can scroll between months or jump to any other month.
1
Open Month View:
a. Press Calendar

b. Select the Month View
icon
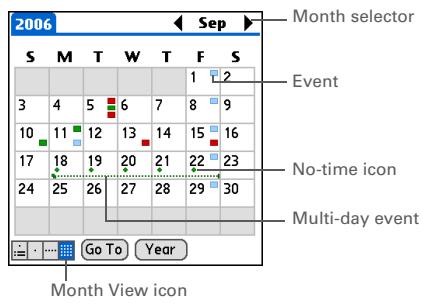
2
Do any of the following to view your monthly schedule:
- Select the month selector to scroll to the previous or next month, or select Go To to choose a specific month.
- Select a date to go to that day in Day View.

Done
CHAPTER 7
Managing Your Calendar

Tip
You can also press Right and Left on the 5-way to scroll to the next or previous month. To go to Day View for a particular date, press Center on the 5-way to insert a highlight, press Right or Left to select a date, and then press Center on the 5-way again.
Viewing a yearly calendar
Year View shows a calendar for an entire year. You can scroll between years or jump to any other year.
1
Open Year View:
a. Press Calendar

b. Select the Month View

c. Select Year.
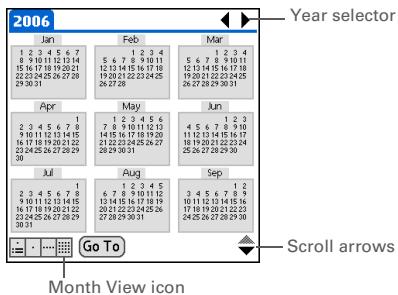
2
Do any of the following to view a yearly calendar:
- Select the year selector to scroll to the previous or next year, or select Go To to choose a specific year.
- Select the scroll arrows to see months that don't fit on the screen.
- Select a month to go to that month in Month View.

Done
CHAPTER 7
Managing Your Calendar
Finding events that overlap
When an event starts before a previous event finishes, the events overlap. You can spot events that overlap in Week View and in Day View.
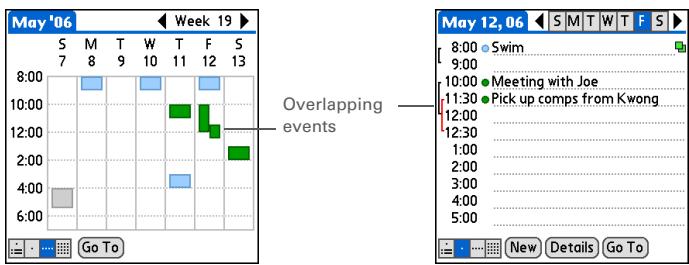
Customizing your calendar
Control the appearance of your Calendar screens. Select display options for the Agenda View, Day View, and Month View. The options you select for each view apply only to that view. You can also choose alarm and start and end time settings.
CHAPTER 7
Managing Your Calendar
Customizing display options for your calendar
1
Press Calendar

2
Open the Display Options dialog box:
a. Open the menus.
b. Select Options, and then select Display Options.
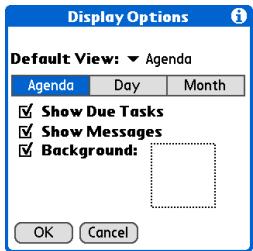
3
Select the Default View pick list and select the view you want to see when you open Calendar.

Continued
CHAPTER 7
Managing Your Calendar

Tip
If the text is difficult to see against your new background, select a different Color Theme to change the text color.

Tip
If you want to see the hours when you have nothing scheduled, as well as your appointments, deselect Compress Day View. But don't forget to scroll down to see the events at the end of your day, or hide the input area and display as much of Day View as possible.
4
Set any of the following Agenda View display options:
Show Due Tasks Display tasks that are due today and tasks that are overdue.
Show Messages Display the number of read and unread email messages.
Background Use your favorite photo as the Agenda View background. Check the Background box, select the photo thumbnail, and then select a photo. Adjust the fade setting so that the text is easy to read against the photo.
5
Select Day and set any of the following Day View options:
Show Category List Display the category pick list. By default, the Category pick list doesn't appear.
Show Time Bars Display the bars that show the duration of an event and event conflicts.
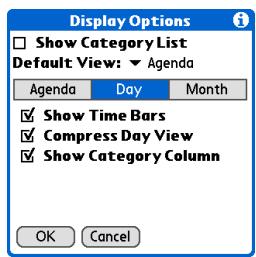
Compress Day View Avoid scrolling and display only the time period with scheduled events.
Show Category Column Display the category marker between the time and description. The color of the category marker indicates which category the event is filed under.

Continued
CHAPTER 7
Managing Your Calendar
6
Select Month and set any of the following Month View options:
Show Category List Display the category pick list. By default, the Category pick list doesn't appear.
Timed Events Show events that are scheduled for a specific time.
Untimed Events Show events
that are scheduled for a specific date, but not a specific time.
Daily Repeating Events Show events that repeat every day.
7
Select OK.

Done
CHAPTER 7
Managing Your Calendar

Tip
You can view and schedule events in time slots that are before or after the start or end time. You just need to scroll to those time slots.
Setting alarm and time options
1
Press Calendar

2
Open the Preferences dialog box:
a. Open the menus.
b. Select Options, and then select Preferences.
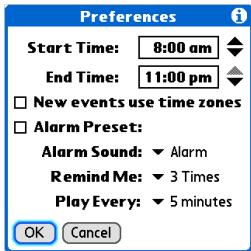
3
Select the start and end times of your typical day. This time frame appears in your Day View and Week View.

Continued
CHAPTER 7
Managing Your Calendar
4
Set any of the following alarm settings:
Alarm Preset Set an alarm for each new event. When you check this box, you also need to enter the default number of minutes, days, or hours before the event that the alarm sounds. For events without a time, the alarm settings are based on midnight of the date of the event. The Alarm Preset settings appear as defaults for each new event, but you can change these settings in the Details dialog box for individual events. If you don't want to use alarms for most of your events, don't check this box.
Alarm Sound Select the sound the alarm makes when it goes off.
Remind Me Select how many times the alarm sounds after the first time it goes off: Once, Twice, 3 Times, 5 Times, and 10 Times.
Play Every Select how often the alarm sounds: Minute, 5 minutes, 10 minutes, and 30 minutes.
5
Select OK.

Done
CHAPTER 7
Managing Your Calendar

Tip
(Windows) If you chose to synchronize with
Microsoft Outlook, check out the online Help in Outlook to learn how to use Calendar on your computer.

Did You Know?
Mac Check out the Holiday Files folder in the Palm folder. It contains various holidays that you can import into Palm Desktop software on your computer.
Working with Calendar on your computer
[!] IMPORTANT If you use Microsoft Exchange ActiveSync®, your email and calendar information synchronize directly with your info on your company's Exchange server. You must retrieve email and calendar updates from the VersaMail application; they do not update when you synchronize your handheld with your computer.
- Scheduling events
- Rescheduling events
- Setting alarms
- Deleting events
- Marking events as private and hiding them
- Printing your schedule
- Working with Day View, Week View, Month View, and Year View
WINDOWS ONLY
To open Calendar on your computer, double-click the Palm Desktop icon on the Windows desktop, and then click Calendar on the launch bar.
MAC ONLY
To open Calendar on your computer, double-click the Palm Desktop icon in the Palm folder, and then click Date Book.
CHAPTER 7
Managing Your Calendar
Tips & Tricks
Make your handheld uniquely yours. For great tips, software, accessories, and more, visit www.palmOne.com/ mytunstene2.
Support
If you're having problems with Calendar or with anything else on your handheld, go to www.palmOne.com/support.
Related topics
Click a link below to learn about these related topics:
Sharing
- Beaming events to other Palm Powered™ devices
- Sending events to other Bluetooth® devices by using Bluetooth wireless technology on your handheld
- Synchronizing with Palm Desktop software and Outlook
VersaMail
Sending events as attachments to email messages
Privacy
Keeping events private by turning on security options
Categories
- Editing and deleting categories
Viewing events by category
Common
Questions
Answers to frequently asked questions about Calendar
Managing Your Office Files
In this chapter
Creating and managing Office files
Opening files from within Documents
Related topics
With its ability to store important information, your handheld lets you take your office with you—including your Microsoft Office files. With the Documents application, you can carry, create, view, and edit Microsoft Word and Excel files directly on your handheld.
You can keep updated copies of the files on both your handheld and your computer so that you can work on them in the most convenient location any time.

Benefits
- Manage Word, Excel, and PowerPoint files on your handheld
- Improve productivity by taking important docs, spreadsheets, and presentations with you on the go
CHAPTER 8
Managing Your Office Files

Tip
The Documents
application has a companion application on your computer called Documents To Go. Use Documents To Go to move or copy files to your handheld when you synchronize.
For complete information on this application, click the Documents To Go icon on your computer and then click Help, or go to www.dataviz.com.
Creating and managing Office files
The Documents application provides powerful editing and file management features for Office files on your handheld. What's more, Documents makes it easy for you to share files between your computer and your handheld during synchronization.
Here are some of the capabilities of Documents:
View Word, Excel, or PowerPoint files in their native format (DOC, XLS, or PPT).
- Create or edit a Word document or Excel spreadsheet on your handheld and save it in their native format.
- Create or edit a PowerPoint-compatible presentation that is optimized for viewing on your handheld.
- Open Office files received as attachments to incoming email messages, and attach files to outgoing messages.
CHAPTER 8
Managing Your Office Files
[!] Before You Begin
You must install Documents To Go on your computer and handheld from the TungstenTM E2 software installation CD. Insert the CD and follow the onscreen instructions for installing extra software.
\*Tip
When you are working on a file, save it to your handheld or your expansion card by selecting Menu, selecting Save As from the File menu, and then selecting the location where you want to save the file.
\*Tip
Do you have a file you are always viewing? Add it to your Favorites list for easy access.
Opening files from within Documents
In the Documents application, you can view and open any Word, Excel, or PowerPoint file on your handheld.
1
Go to Applications and select Documents.
2
Select the file you want from the list.

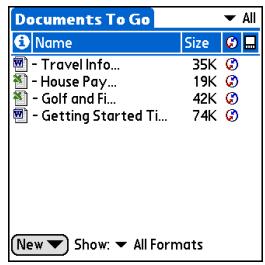
CHAPTER 8
Managing Your Office Files
Tips & Tricks
Make your handheld uniquely yours. For great tips, software, accessories, and more, visit www.palmOne.com/ mytunstene2.
Support
If you're having problems with Documents, click the Documents To Go icon on your computer, and then click Help, or go to www.dataviz.com.
Related topics
Click the link below to learn about these related topics:
VersaMail®
Sending and receiving Office files as attachments to email messages
Viewing Photos and Videos
In this chapter
Supported file types
Viewing media
Organizing photos and videos
Personalizing a photo
Copying a photo or video
Deleting a photo or video
Sharing photos and videos
Working with palmOne™ Media on your computer
Related topics
A picture may be worth a thousand words, but what happens when you have lots of pictures—or videos—that you are trying to keep organized? Or maybe just a few that are so meaningful that you want to have instant access to them at any time?
Solve both problems with palmOne™ Media. Media features easy viewing and organization of still photos and videos. You can keep your favorite photos right on your handheld; select photos as the background for your Favorites and Applications views and Agenda View in Calendar; even add a photo to a Contacts entry.

Benefits
- Never be far from your favorite people or places
- Simplify photo and video organization
- Store multiple videos and photos
CHAPTER 9
Viewing Photos and Videos
Did You Know?
If you view a photo in a popular format from an expansion card inserted into your handheld's expansion slot, the photo remains in its original format.
Supported file types
You can copy a photo or video from your computer and save it directly on your handheld or on an expansion card (sold separately) inserted into the expansion slot.
You can view photos in popular formats such as JPG, BMP, TIFF (uncompressed), and GIF on your handheld. On a Windows computer, when you copy a photo in a popular format to your handheld using the Media desktop application from within Palm® Desktop software, it is saved on your handheld in its original format. If you copy a photo in a different format, it is saved on your handheld in JPG format.
On a Mac computer, all photos you copy by dragging them onto the Send To Handheld droplet icon are saved on your handheld in JPG format.
To view a video on your handheld, on a Windows computer, open Media from within Palm Desktop software, add the video, and then synchronize to send the video to your handheld. On a Mac computer, drag the video to the Send To Handheld droplet, and then synchronize. The video is converted to a format your handheld can play and is optimized for viewing on the handheld.
Note that due to numerous video formats available for both Windows and Mac computers, not all formats can be converted to a format that's viewable on your handheld. If you can't open and view a video in the desktop Media application on a Windows computer, you won't be able to view the video on your handheld.
NOTE On a Windows computer, Windows Media Player, DirectX, or Apple QuickTime, is required for Media to play videos that have been prepared for playback on your handheld. If you do not have one of these applications on your computer, you can use the link on the software installation CD to download Windows Media Player. (Download requires Internet connection; additional fees may apply.)
CHAPTER 9
Viewing Photos and Videos
Viewing media
You can view photos and videos in the following ways:
Thumbsail View miniature preview versions of your photos and videos.
List View names and dates of photos and videos on your handheld or an expansion card.
Slide show View all photos and videos in an album, automatically one after another.
You can easily see a full-screen view of a photo or play a video by selecting the photo or video from the Thumbnail or ListView. You can also rotate the orientation of the photo, zoom in to view a magnified portion of a photo, and view or edit detailed information about a photo or video.
Viewing a photo or video in the Thumbnail View
1
Go to Favorites and select Photos & Videos
2
Select the pick list in the upperright corner and select the location on your handheld or an expansion card of the photo or video you want to view.

Continued
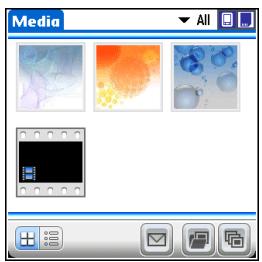
CHAPTER 9
Viewing Photos and Videos
\*Tip
Can't remember what album your photo or video is in? Select All.
\*Tip
Quickly switch between
thumbnails of photos on
your handheld and
photos on an expansion
card by selecting the
icons in the upper-right
corner of the screen. The
icons appear only if there
is an expansion card
inserted into the
expansion slot.
3
If the Thumbnail View is not displayed, select Thumbsnails in the lower-left corner of the screen.

4
To see a full-screen view of a photo or to play a video, select the photo or video from the thumbnails. A video automatically starts playing when you select it.

Continued
CHAPTER 9
Viewing Photos and Videos

Did You Know?
When a photo is zoomed out, the size of the photo appears above the Rotate and Send icons. You can also select Done in the zoomed-out view to return to the Thumbnail or ListView.

For photos, press Up or Down on the 5-way to zoom in or out. If you zoom out, icons appear for rotating or sending the photo.
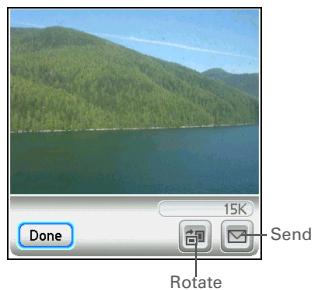

Press Center or tap anywhere in the photo or video to return to the Thumbnail View screen.

Done
CHAPTER 9
Viewing Photos and Videos
Viewing a photo or video in the List View
1
Go to Favorites and select Photos & Videos

2
Select the pick list in the upper-right corner and select the location on your handheld or an expansion card of the photo or video you want to view.
3
If the ListView is not displayed, select List in the lower-left corner of the screen.

Continued
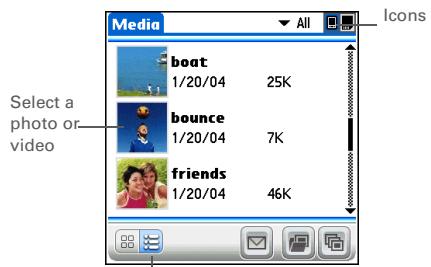
List
CHAPTER 9
Viewing Photos and Videos

Tip
If a photo is larger than your handheld's screen—either because of its original size or because you have zoomed in—tap and drag with the stylus to view different parts of the photo.
4
To see a full-screen view of the photo or to play a video, select the item from the list. A video automatically starts playing when you select it.
5
For photos, press Up or Down on the 5-way to zoom in or out. If you zoom out, icons appear for rotating or sending the photo.
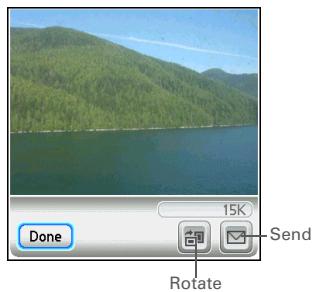
6
Press Center or tap anywhere in the photo or video to return to the List View screen.

Done
CHAPTER 9
Viewing Photos and Videos

Tip
You can set how long a photo is displayed in slide show mode before the next item appears by opening the Options menu, selecting Options, selecting Preferences, and then selecting a time interval from the Slide Show Delay pick list. The default is 3 seconds.

Did You Know?
In a slide show, videos play through in their entirety before the next item appears.
Viewing a slide show
By default, both photos and videos in an album are displayed during a slide show. To view photos only, select Preferences from the Options menu, and then uncheck the Show videos in Slide Show box.
1
Go to Favorites and select Photos & Videos
2
Select the pick list in the upper-right corner and select the location on your handheld or an expansion card of the photos or videos you want to view.
3
In the Thumbnail or ListView, select Slide Show
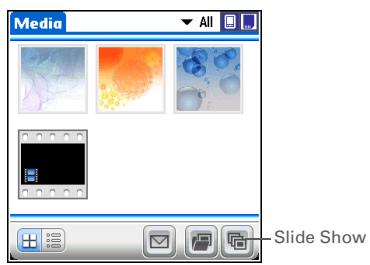
4
Press Center or tap a photo or video to stop the slide show and return to the Thumbnail or ListView.

Done
CHAPTER 9
Viewing Photos and Videos

Tip
You can also rotate a photo by pressing Down on the 5-way to zoom the photo out and then selecting Rotate at the bottom of the screen.

Tip
If you receive a message that the photo is too large to rotate on your handheld, synchronize, and then open and rotate the photo in Palm Desktop software. Synchronize again to send the rotated photo back to your handheld (Windows only).
Rotating a photo
1
Go to Favorites and select Photos & Videos

2
Select the pick list in the upper-right corner and select the location on your handheld or an expansion card of the photo you want to rotate.
3
Rotate the photo:
a. Select the photo you want in the Thumbnail or ListView.
b. Open the menus.
c. Select Rotate Picture from the Media menu.
d. Select the rotation you want.
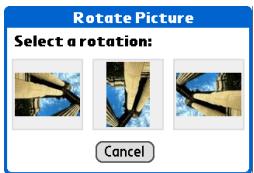
4
Tap anywhere in the photo to return to the Thumbnail or List View.

Done
CHAPTER 9
Viewing Photos and Videos

Tip
You can also view details for an entire album—including last date changed, number of items in the album, and size—by opening the Album menu and selecting Album Details.

Tip
Select the scroll arrows at the bottom of the Media Details screen to view other photos in the album.
Viewing and editing photo or video details
1
Go to Favorites and select Photos & Videos

2
Select the pick list in the upper-right corner and select the location on your handheld or an expansion card of the photo or video you want to view.
3
Select the photo or video whose details you want to view.
4
View photo or video details:
a. Open the menus.
b. Select Edit Details from the Media menu.
c. In addition to viewing photo or video details, you can do the following:
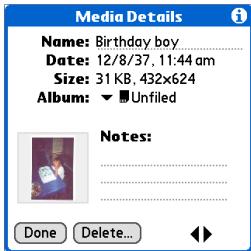
Change name Select the photo or video name and enter a new name.
Move to different album Select the Album pick list and select a new album location for the photo or video.
Add notes Select the Notes field and enter a note for the photo or video.
5
When finished viewing details, select Done.

Done
CHAPTER 9
Viewing Photos and Videos

Tip
If a photo is stored on your handheld, you can add it only to an album located on the handheld. Likewise, if a photo is stored on an expansion card, you can add it only to an album that is on the same card. Use the copy feature to move a photo from your handheld to a card and vice versa.

H
To rename or delete an album, open the Album menu and select Manage Albums. Select the album you want, and then select Rename or Delete, depending on what you want to do.
Organizing photos and videos
You can organize your photos and videos in the following ways:
- Create albums and place your photos and videos in those albums.
- Move photos and videos within or between albums.
- Sort photos and videos in the List View.
Organizing photos and videos in albums
1
Go to Favorites and select Photos & Videos
2
Open the Manage Albums screen:
a. Open the menus.
b. Select Album, and then select Manage Albums.
Continued
CHAPTER 9
Viewing Photos and Videos

Tip
Drag the stylus across multiple photos and/or videos to add or remove them all at once.

Did You Know?
If you remove a photo or video from an album, it is moved to the Unfiled category. The photo or video is not deleted from your handheld or the expansion card.

Create an album:
a. Select whether to create the album on your handheld (device) or on an expansion card inserted into the expansion slot.
b. Select New, enter the name of the new album, and select OK.
c. Select OK on the Manage Albums screen.
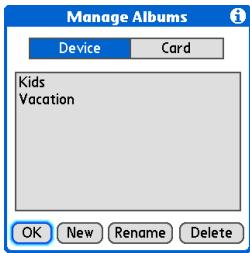

Do one of the following:
To add photos or videos to a new album Select the photos or videos you want on the Organize Album screen.
To add or remove photos or videos from an existing album From the Thumbnail or ListView, select the album you want from the pick list in
the upper-right corner, and then select Manage Albums. Select a photo or video without a plus sign to add it to the album; select a photo or video with a plus sign to remove it from the album.
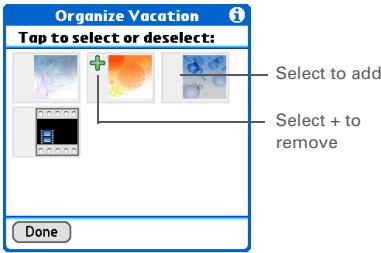

Select Done.

Done
CHAPTER 9
Viewing Photos and Videos

Tip
Move photos within
albums to easily put the
slide show of your child's
birthday party in the
sequence you want.
Moving a photo or video within and between albums
1
Go to Favorites and select Photos & Videos
2
Move a photo or video within an album:
a. Select the pick list in the upper-right corner and select the album containing the photo or video you want to move.
b. Use the stylus to drag the photo or video you want to its new position.

Continued
CHAPTER 9
Viewing Photos and Videos
3
Move a photo or video between albums:
a. Select the pick list in the upperright corner and select the album containing the photo or video you want to move.
b. Open the menus.
c. Select Edit Details from the Media menu, and then select the photo or video you want to move.
d. Select the Album pick list, and then select the new album for the photo.
e. Select Done.

Done
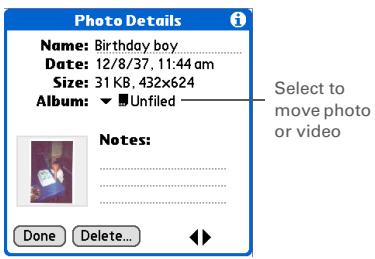
CHAPTER 9
Viewing Photos and Videos

Tip
You must be in an album to sort manually. If All is selected from the pick list, sorting does not work.
Sorting photos and videos
1
Go to Favorites and select Photos & Videos

2
Sort photos and videos:
a. Select the pick list in the upperright corner and select thealbum containing the photosand/or videos you want to sort.
b. Open the menus.
c. Select Album, and then select one of the following:
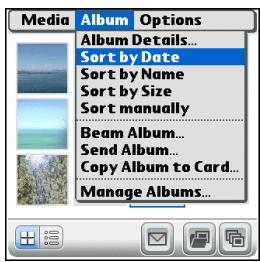
Sort by Date Lists photos and videos from earliest to most recent date. Select Sort by Date again to list items from most recent to earliest date.
Sort by Name Lists photos and videos by name in ascending (A-Z) order. Select Sort by Name again to list items by name in descending (Z-A) order.
Sort by Size Lists photos and videos from smallest to largest file size. Select Sort by Size again to list items from largest to smallest file size.
Sort manually Let's you tap a photo or video and drag the stylus to where you want the item to appear. A dotted black line indicates the position of the item.

Done
CHAPTER 9
Viewing Photos and Videos

Did You Know?
You can create multicolored art: Select a color and draw on a photo, and then select a different color and draw some more. Each drawing keeps its original color.

Tip
Select the drawing tool button to change line size. Select the text tool button to change font size.

Tip
Use the eraser selection on the drawing tool to erase drawings only; select Undo to delete text. You can use Undo only once to delete text for a given photo. If you need to delete text after using Undo, select Done and do not save the photo, and then open the photo and try again.
Personalizing a photo
Use the drawing tool to add a personal touch to a photo.
1
Go to Favorites and select Photos & Videos
2
Personalize a photo:
a. In the Thumbnail or List View, select the photo you want.
b. Open the menus.
c. Select Draw on Picture from the Media menu.
d. Draw on the photo using the following tools:
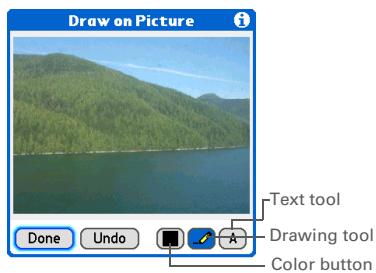
Drawing tool Draw anywhere on the photo using the stylus.
Text tool Enter text in the field. Tap anywhere on the screen to open a text field in a new location.
Color button Select a drawing color.
e. Select Done.

Continued
CHAPTER 9
Viewing Photos and Videos

Select one of the following to save or reject changes:
Replace Original Saves the photo with drawing in place of the original photo with no drawing; the original photo is lost.
Save as New Picture Saves both the photo with drawing and the
original photo with no drawing. You can enter a name for the new photo. You can also select the pick list to save the updated photo to a different album.
Don't Save Changes Saves only the original photo with no drawing.
Cancel Returns to Draw on Photo screen.

Done
CHAPTER 9
Viewing Photos and Videos

Tip
Copy an entire album by opening the Album menu, selecting Album, and then selecting Copy Album to Card or Copy Album to Handheld. Select the album you want, and then select Done when copying is complete.
Copying a photo or video
You can copy photos and videos from your handheld to an expansion card, and vice versa.
1
Go to Favorites and select Photos & Videos
2
Select a photo or video to copy:
a. Select the pick list in the upper-right corner and select the album containing the photo or video you want.
b. Select the photo or video.
3
Copy the photo:
a. Open the menus.
b. Select Copy to Card (for photos or videos on your handheld) or Copy to Handheld (for photos or videos on an expansion card) from the Media menu.

CHAPTER 9
Viewing Photos and Videos

Tip
Delete an entire album by opening the Album menu and selecting Album Details. Select the album you want, and then select Delete on the Album Details screen.

You can also delete a photo or video from the Media Details screen by selecting Delete on that screen.
Deleting a photo or video
1
Go to Favorites and select Photos & Videos
2
Select a photo or video to delete:
a. Select the pick list in the upper-right corner and select the album containing the photo or video you want.
b. Select the photo or video.
3
Delete the photo or video:
a. Open the menus.
b. Select Delete from the Media menu, and then select Delete again.

Done
CHAPTER 9
Viewing Photos and Videos
Did You Know?
You can also easily send photos and videos from the palmOne™ Media desktop application (Windows only). See Palm Desktop Help for information.
\*Tip
You can also beam or send an entire album by opening the Album menu and selecting Beam Album or Send Album.
Sharing photos and videos
You can easily share photos and videos with family and friends. Use your handheld's built-in Bluetooth® wireless technology to wirelessly send photos and videos to other Bluetooth devices within range.
You can also share photos and videos using any of the following methods:
- Attach a photo or video to an email message.
- Beam a photo or video to other Palm Powered™ devices.
- Copy a photo or video from your handheld to your desktop computer, or from computer to handheld, by synchronizing.
NOTE Sending a large number of photos or videos using Bluetooth technology or beaming can take a long time.
CHAPTER 9
Viewing Photos and Videos
Working with palmOne™ Media on your computer
WINDOWS ONLY
Use palmOne Media on your computer to view and manage photos and videos. Check out the online Help in Palm® Desktop software to learn how to use Media on your computer. The online Help includes info about the following topics:
- Learning about the parts of the Media window
- Using Photo Editor to view, crop, rotate, or enhance a photo
- Using Video Editor to create or trim a video clip
- Editing photo and video details and titles
- Adding notes to a photo or video
- Printing photos
- Rotating videos larger than 320 pixels wide
- Switching between the Thumbnail, List, and Details views
- Creating slide shows of photos and videos
- Sorting photos and videos
- Organizing your photos and videos into albums
To open Media on your computer, double-click the Palm Desktop icon on the Windows desktop, and then click Media on the launch bar.
NOTE There is no palmOne Media desktop application for Mac computers.
CHAPTER 9
Viewing Photos and Videos
Tips & Tricks
Make your handheld uniquely yours. For great tips, software, accessories, and more, visit
www.palmOne.com/ mytunstene2.
Support
If you're having problems with palmOne Media or with anything else on your handheld, go to www.palmOne.com/support.
Related topics
Click a link below to learn about these related topics:
Moving. Around
- Opening applications
Using menus - Beaming photos and videos to other Palm Powered devices
- Sending photos and videos to other Bluetooth wireless devices using the Bluetooth technology on your handheld
VersaMail
Sending photos and videos as attachments to email messages
Common Questions
Answers to frequently asked questions about palmOne Media
Listening to Music
In this chapter
Transferring MP3 files to an expansion card
Transferring music from a CD to your handheld
Playing music on your handheld
Managing playlists
Viewing song info
Working with RealPlayer on your computer
Related topics
Are you tired of listening to small talk during that long commute on the bus or train? Do you need something smaller than a CD player when you're out for a walk or at the gym?
RealPlayer® lets you play music on your handheld. Simply transfer songs onto an expansion card (sold separately) and then listen through the built-in speaker or stereo headphones (sold separately).
[!]IMPORTANT You need to purchase an SD or MultiMediaCard expansion card to save your music files and play them on your handheld.

Benefits
- Listen to songs in the popular MP3 format
- No separate MP3, CD, or mini-disc player required
- Carry tiny expansion cards instead of CDs
- Be your own DJ
CHAPTER 10
Listening to Music
[!] Before You Begin
(Windows only) Install RealPlayer® on your computer. Insert the Tungsten™ E2 software installation CD and follow the onscreen instructions for installing extra software.
You must install this software, even if you already have a version of RealPlayer installed on your computer. The version on the CD contains all of the components needed to transfer music files to your handheld.
Transferring MP3 files to an expansion card
The RealPlayer® software that comes with your handheld is compatible with the popular MP3 audio file format. If your MP3 files are already on your computer's hard drive, you need to transfer them to an expansion card to listen to them on your handheld.
WINDOWS ONLY
1
Prepare your handheld:
a. Connect your handheld and your computer to the USB sync cable.
b. Go to Favorites and then select RealPlayer
c. Insert an expansion card into your handheld.
[!]IMPORTANT Do not press the sync button on your cable.

Continued
CHAPTER 10
Listening to Music
2
Prepare RealPlayer on your computer:
a. Open the RealPlayer application.
b. Make sure palmOne Handheld (Card) is selected from the Current Burner/ Device drop-down list.


Continued
CHAPTER 10
Listening to Music

Tip
For tips on using RealPlayer on your computer, go to the Help menu in RealPlayer or visit www.real.com.

Tip
You can also use a card reader accessory (sold separately) to transfer MP3 files from your computer to your expansion card. Create an "SD_Audio" folder on the card, and store your MP3 files in this folder.

Select the songs you want to transfer:
a. In RealPlayer on your computer, click Burn/Transfer.
b. If necessary, select palmOne Handheld (Card) from the Current Burn/Transfer Device drop-down list.
c. Drag the song files you want from the My Library window on the left into the palmOne Handheld (Card) window on the right.


Continued
CHAPTER 10
Listening to Music
4
Transfer the selected songs to your handheld:
a. Be sure your handheld is on and that RealPlayer is open. If it is, a green Connected light appears in the lower-left corner of RealPlayer on your computer.
b. Click Start Transfer. When the transfer is complete, the tracks you selected should say "On Device." The files are transferred to the RN_Audio folder on your handheld's expansion card.
[!] IMPORTANT Do not press the sync button on your cable. RealPlayer is transferring the files, so there's no need to do anything.

Done
CHAPTER 10
Listening to Music

Tip
You can also use a card reader accessory (sold separately) to transfer MP3 files from your computer to your expansion card. Create an "SD_Audio" folder on the card, and store your MP3 files in this folder.

Tip
In Mac OS X, you can make the Send To Handheld droplet a permanent part of your desktop by dragging the droplet to the Dock. Then simply drag songs, and other files you want to transfer to your handheld, onto the droplet in the Dock.
MAC ONLY
1
Prepare your computer and your handheld:
a. Connect your handheld and your computer to the USB sync cable.
b. Insert an expansion card into your handheld.
2
Select the MP3 files you want to transfer:
a. Drag and drop the MP3 files onto the Send To Handheld droplet in the palmOne folder.
b. In the Send To Handheld dialog box, select your username and click OK.

3
Synchronize your handheld with your computer.
NOTE Be patient; transferring music to an expansion card can take several minutes.

Done
CHAPTER 10
Listening to Music
Transferring music from a CD to your handheld
If your songs are on a CD and you want to listen to them on your handheld, use RealPlayer on your computer to convert and transfer the files to your expansion card.
NOTE If you are a Mac user, use iTunes, included with Mac OS X, to transfer music from a CD to your computer. Then use the Send To Handheld droplet to transfer files to your expansion card. Music files should be imported in MP3 format.
WINDOWS ONLY
1
Access the music CD from RealPlayer on your computer:
a. Double-click the RealPlayer icon

on your computer desktop.
b. Insert the CD into your computer's CD drive.
c. If the track listing does not appear, click Music & My Library, and then click CD/DVD in the View menu.
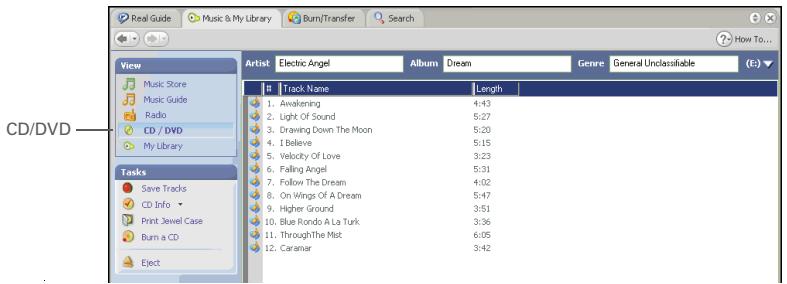

Continued
CHAPTER 10
Listening to Music

Tip
If you want to select only a few songs, click Deselect All and then check the box next to the songs you want to select.

Tip
If you want to download songs from the Real Music Store (U.S. only; additional fees may apply), you need to download and install a special version of RealPlayer that is compatible with Real Music Store files. Go to www.real.com for information.
2
Select the songs you want to add to your library:
a. Click Save Tracks.
b. Follow the onscreen instructions to select and copy tracks.
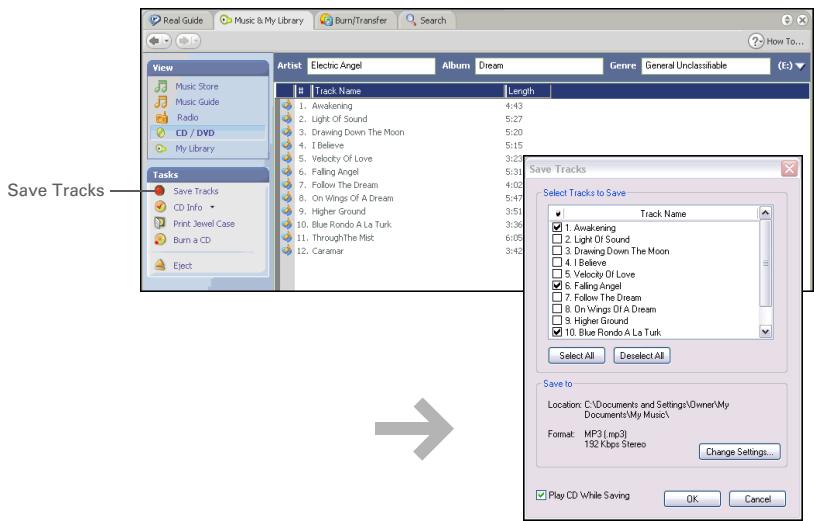

Continued
CHAPTER 10
Listening to Music

Tip
For tips on using RealPlayer on your computer, go to the Help menu in RealPlayer or visit www.real.com.
3
Prepare your handheld:
a. Go to Favorites and then select RealPlayer
b. Connect your handheld to your computer using the USB sync cable.
[!]IMPORTANT Do not press the sync button on your cable.
4
Select the songs you want to transfer:
a. In RealPlayer on your computer, click Burn/Transfer.
b. If necessary, select palmOne Handheld from the Current Burn/Transfer Device drop-down list.
c. Drag the song files you want from the My Library window on the left into the palmOne Handheld window on the right.
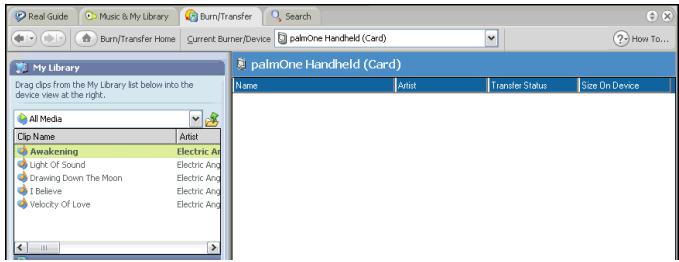

Continued
CHAPTER 10
Listening to Music

Tip
On your handheld, tap
Songs to view a list of the
songs available for you to
play. The songs you just
transferred are at the
bottom of the list.
5
Transfer the selected songs to your handheld:
a. Be sure your handheld is on and that RealPlayer is open. If it is, a green Connected light appears in the lower-left corner of RealPlayer on your computer.
b. Click Start Transfer. When the transfer is complete, the tracks you selected should say "On Device." The files are transferred to the RN_Audio folder on your handheld's expansion card.
[!] IMPORTANT Do not press the sync button on your cable. RealPlayer is transferring the files, so there's no need to do anything.

Done
CHAPTER 10
Listening to Music

Tip
If RealPlayer reaches the period of inactivity you set before you exit the application, the screen turns off and the music continues playing. To set the period of inactivity, open the Options menu and select Preferences. Select an option from the Auto-powersave after pick list, and then select OK. If you exit RealPlayer, it turns off when it reaches the period of inactivity defined in Power Preferences.

Tip
Want to stop playing music when you exit RealPlayer? Open the Options menu and select Preferences. Uncheck the Enable Background Playback box, and then select OK.
Playing music on your handheld
NOTE Listening to music while using other applications on your handheld can cause delays in the application's response.
1
On your handheld, go to Favorites and then select RealPlayer

2
Select a song to play:
- To play the current song, tap Play.
- To play a different song, tap Songs and select a song from the list.
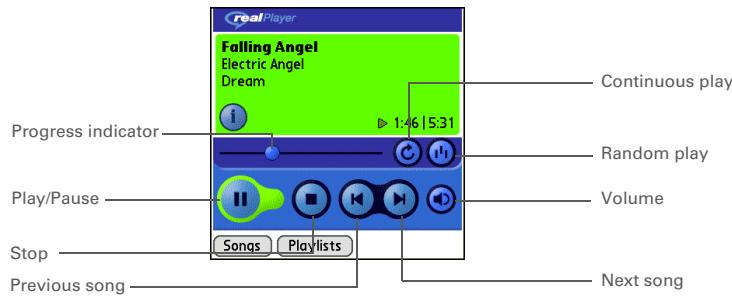

Done RealPlayer continues playing until it reaches the end of your list. It stops playing if you tap Stop or turn off your handheld.
CHAPTER 10
Listening to Music

Tip
For tips on using
RealPlayer, open the
Options menu and select
Help.
Managing playlists
You can create dozens of playlists with your favorite songs.
Creating a playlist
1
On your handheld, go to Favorites and then select RealPlayer

2
Open the Edit Playlist screen:
a. Tap Playlists.
b. Select New.
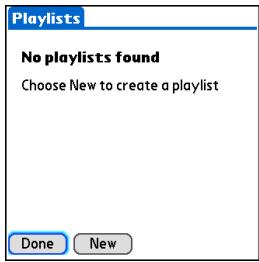

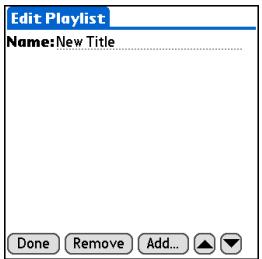
3
Enter a name for the playlist.
Continued
CHAPTER 10
Listening to Music

Tip
To quickly select all the songs in the list, select Select All. To quickly deselect all the songs, select Select None.
4
Add songs to the playlist:
a. Select Add.
b. Check the box next to the songs you want to include on the playlist.
c. Select Done.
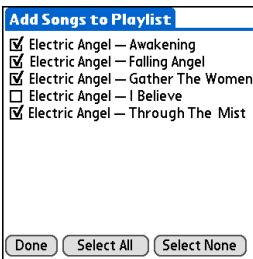
5
Put the songs in the order you want to hear them:
a. Select a song you want to move.
b. Tap the up or down arrow to move the song up or down one slot.
c. Repeat this process until the songs are in the right order.
d. Select Done.

6
Select Done, and then select Done again.

Done
CHAPTER 10
Listening to Music
Playing songs from a playlist
1
On your handheld, go to Favorites and then select RealPlayer

2
Select a song from a playlist:
a. Tap Playlists.
b. Select the playlist you want to play.
c. Select the first song you want to play.
Electric Angel
Electric Angel—Awakening
Electric Angel - Falling Angel
Electric Angel - Gather The Women
Electric Angel - Through The Mist
Done
Edit
Dele
List

Done
Your handheld plays the songs in the playlist beginning with the song you selected. After it plays the last song in the list, it stops.
CHAPTER 10
Listening to Music
Editing a playlist
1
On your handheld, go to Favorites and then select RealPlayer

2
Open the playlist you want to edit:
a. Tap Playlists.
b. Select the playlist you want to edit.
c. Select Edit.

Ambient Classic Rock
Electric Angel
Jazz


Electric Angel—Awakening
Electric Angel — Falling Angel
Electric Angel - Gather The Women
Electric Angel - Through The Mist
Done
Edit
DeleteList

Continued
CHAPTER 10
Listening to Music
3
Select Edit and do any of the following:
Delete a song Select a song and tap Remove to delete the song from the playlist.
Add a song Tap Add, check a song's box, and then tap Done.
Move a song Select a song and select the up or down arrow to move the song up or down one slot.
4
Select Done, and then select Done two more times.

Done
CHAPTER 10
Listening to Music
Deleting a playlist
1
On your handheld, go to Favorites and then select RealPlayer

2
Open the playlist you want to delete:
a. Tap Playlists.
b. Select the playlist you want to delete.
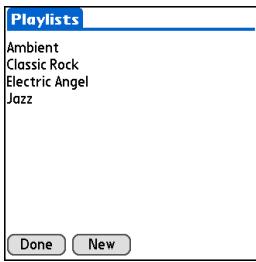

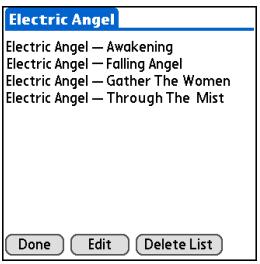
3
Delete the list:
a. Select Delete List.
b. Select Yes in the confirmation dialog box.
c. Select Done.

Done
CHAPTER 10
Listening to Music

Did You Know?
You can also view song details by opening the Music menu and selecting Song Details.
Viewing song info
You can view details for the song that is currently playing.
1
On your handheld, go to Favorites and then select RealPlayer

2
Select a song to play and view:
- To play and view the current song, tap Play.
- To play and view a different song, tap Songs and select a song from the list.
Information icon
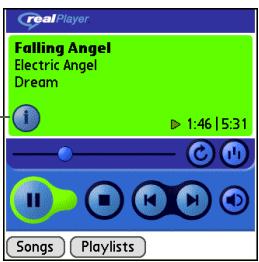
3
Open the Song Details dialog box:
a. Select the information icon on the song screen.
b. After you finish viewing the info, select Done.

Done
Song Details
Title: Falling Angel
Artist: Electric Angel
Album: Dream
Genre: AAA
Track#: 6
Format: MP3
Size: 2,632 KB
Filename: FallingAngel.MP3
Done
CHAPTER 10
Listening to Music
Working with RealPlayer on your computer
WINDOWS ONLY
Use RealPlayer on your computer to play and manage your songs. Check out the online Help in RealPlayer to learn how to use RealPlayer on your computer. The online Help includes info about the following topics:
- Learning about the parts of the RealPlayer window
- Finding media
- Playing media
- Saving and burning media
RealPlayer premium services - Preferences
- Troubleshooting
To open RealPlayer on your computer, double-click the RealPlayer icon on the Windows desktop.
CHAPTER 10
Listening to Music
Tips & Tricks
Make your handheld uniquely yours. For great tips, software, accessories, and more, visit www.palmOne.com/ mytunstene2.
Support
If you're having problems with Real Mobile Player or RealPlayer on your computer, go to www.real.com.
Related topics
Click the link below to learn about these related topics:
Expansion Cards
- Inserting and removing expansion cards
- Naming expansion cards
Viewing the contents of a card
Installing
Installing the RealPlayer software on your computer
Synchronizing
- Synchronizing your handheld with your computer
- Using the Send To Handheld droplet
Common Questions
Answers to frequently asked questions about RealPlayer
CHAPTER 11
Managing Your Tasks
In this chapter
Creating a task
Organizing your tasks
Marking a task as complete
Deleting tasks
Customizing your Tasks list
Working with Tasks on your computer
Related topics
Some of the most successful people in the world are also the busiest. When asked how they manage to do it all, busy people usually say, "I make lists." The Tasks application on your handheld is the perfect place to make a list of the things you need to do.

Benefits of Tasks
- Set priorities
- Track deadlines
- Stay focused
CHAPTER 11
Managing Your Tasks

Tip
If no task is currently selected, you can create a new task by writing Graffiti® 2 characters in the input area.

Add a note to a task. Select the Note button, enter the note text, and then select Done.

Did You Know?
You can organize your tasks by filing them into categories. You can also mark tasks as private to hide them from prying eyes.
Creating a task

Press the Tasks button.

Create a task:
a. Select New.
b. Enter a description of the task.
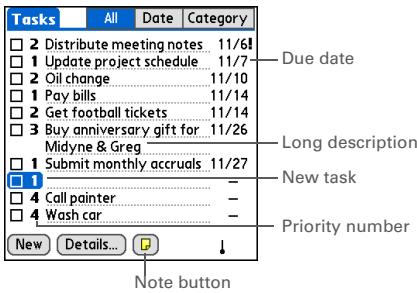

[ & ] OPTIONAL Assign a priority and due date:
a. Tap the priority number and select a number (1 is the most important).
a. Tap the due date and select a date from the list, or select Choose Date to select a date from the calendar.

Done That's it. Your handheld automatically saves the task. Make sure you have a current backup. Synchronize often.
CHAPTER 11
Managing Your Tasks
[!] Before You Begin
Create a task and assign it a due date. A task must have a due date before you can set an alarm.
\*Tip
You can customize the alarm sound for your tasks in the Tasks Preferences dialog box.
Did You Know?
When you set an alarm, a little alarm clock appears to the right of the task description.
Setting an alarm
1 Press the Tasks button.
2 Open the Set Alarm dialog box:
a. Select the task you want to assign an alarm to.
b. Select Details.
c. Select the Alarm box.
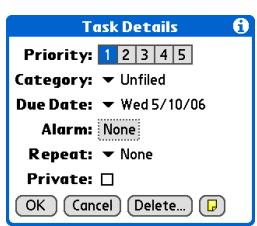

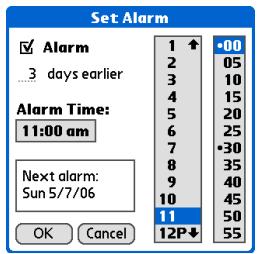
Continued
CHAPTER 11
Managing Your Tasks

Tip
To select intervals such as the 2nd Tuesday of every month or the 3rd Thursday in November of every year, see Scheduling a repeating task—unusual interval.
3
Set the alarm:
a. Check the Alarm box.
b. Enter how many days before the due date you want the alarm to sound.
c. Select the time columns to set the time the alarm sounds.
d. Select OK, and then select OK again.

Done
Scheduling a repeating task—standard interval
Repeating tasks are a great way to add tasks that happen over and over again, like taking out the trash every Thursday night or making monthly mortgage or rent payments.
1
Press the Tasks button.
2
Enter the task you want to repeat, and assign it a due date.

Continued
CHAPTER 11
Managing Your Tasks
3
Set the repeat interval:
a. Select the task description, and then select Details.
b. Select the Repeat pick list and select how often the task repeats: Daily until, Every week, Every other week, Every month, or Every year.
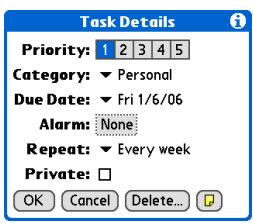
NOTE If you select Daily, a dialog box appears for you to select the end date.
c. Select OK.

Done
CHAPTER 11
Managing Your Tasks
Scheduling a repeating task—unusual interval
For tasks that don't fit neatly into the preset repeat intervals, you can set up your own repeat intervals. For example, enter tasks for paying a quarterly insurance bill or a credit card bill that is due every 28 days, or changing your smoke detector battery every six months.
1 Press the Tasks button.
2 Enter the task you want to repeat, and assign it a due date.
3 Open the Change Repeat dialog box:
a. Select Details.
b. Select the Repeat pick list and select Other.
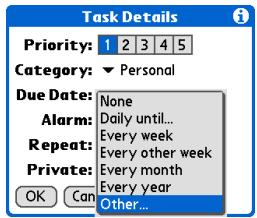

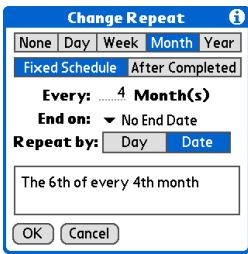
Continued
CHAPTER 11
Managing Your Tasks

Tip
To schedule an annual task, such as decorating for a holiday on the first Sunday of a particular month, select Month as the repeat unit, enter 12 on the Every line, and then select Day as the Repeat By setting.
4
Set the repeat interval:
a. Select Day, Week, Month, or Year as the repeat unit.
b. Select Fixed Schedule to base the due date on the due date of the current task, or select After Completed to base the due date on the date you complete this task. With this option if you complete this task early or late, the due date for the next task adjusts accordingly.
c. Select the Every line and enter the frequency at which the task repeats.
d. Select the End on pick list and select an end date, if needed.
e. If you selected Fixed Schedule in step b and Week in step a, select the day of the week the task repeats. If you selected Fixed Schedule in step b and Month in step a, select Day to select the week within the month, such as the 4th Thursday, or select Date to select the same date within the month, such as the 15th.
f. Select OK.

Done
CHAPTER 11
Managing Your Tasks
Did You Know?
Overdue tasks have an exclamation point (!) next to the due date.
\*Tip
Your Tasks Preferences settings control which tasks appear in the Tasks list, such as completed or due tasks. To change these settings, open the Options menu and select Preferences.
\*Tip
Create a new category for tasks by selecting Edit Categories in the Category pick list.
Organizing your tasks
Sometimes you want to look at all the things you need to do, while at other times you want to see only certain types of tasks.
1 Press the Tasks button.
2 In the Tasks list, select one of these options:
All Displays all your tasks.
Date Displays tasks that are due in a specific time frame. Select the pick list in the upper-right corner of the screen to select Due Today, Last 7 Days, Next 7 Days, or Past Due.
Category Displays tasks that are assigned to the selected category. Select the pick list in the upper-right corner to select a different category.
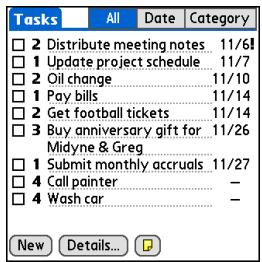
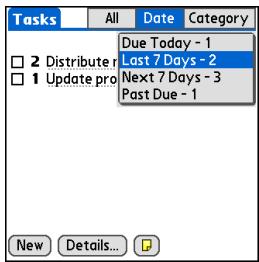
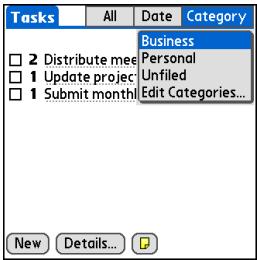

CHAPTER 11
Managing Your Tasks

Tip
You can set Tasks
Preferences to record the date that you finish your tasks, and you can show or hide finished tasks. To change these settings, open the Options menu and select Preferences.
Marking a task as complete
You can check off a task to indicate that you've completed it.
1 Press the Tasks button.
2 Check the box on the left side of the task.

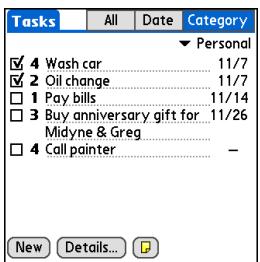
NOTE Palm Desktop software and Microsoft Outlook handle completed repeating tasks differently. Palm Desktop software checks off all overdue instances of the task, and Microsoft Outlook checks off only the oldest instance of the task.
CHAPTER 11
Managing Your Tasks

Tip
You can also delete a specific task by selecting the task, selecting Details, and then selecting Delete.

Tip
If you save an archive copy of your deleted tasks, you can refer to them later by importing them.
Deleting tasks
If a task is canceled, you can delete it from your Tasks list. When you delete a repeating task, you delete all instances of the task. You can also delete all your completed tasks.
Deleting a specific task
1
Press the Tasks button.
2
Select the task you want to delete.
3
Open the Delete Task dialog box:
a. Open the menus.
b. Select Delete Task on the Record menu.


Delete selected task?
Save archive copy on PC
Ok
Cancel
4
[ & ] OPTIONAL Check the box to save an archive copy of the task on your computer.
5
Select OK.

Done
CHAPTER 11
Managing Your Tasks

Tip
Many people find it useful to refer to old tasks for tax purposes. If you save an archive copy of your deleted tasks, you can refer to them later by importing them.
Deleting all your completed tasks
1 Press the Tasks button.
2 Open the Purge dialog box:
a. Open the menus.
b. Select Purge on the Record menu.
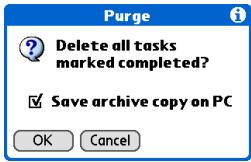
3 [ & ] OPTIONAL Check the box to save an archive copy of your completed tasks on your computer.
4 Select OK.

CHAPTER 11
Managing Your Tasks

Did You Know?
Calendar's Agenda View also displays your tasks.
Customizing your Tasks list
Control which tasks show up in the Tasks list and how they are sorted. These settings also affect tasks in Calendar's Agenda View. You can also choose the alarm sound for your tasks.
1
Press the Tasks button.
2
Open the Preferences dialog box:
a. Open the menus.
b. Select Options, and then select Preferences.
Continued
Preferences
Sort by: Due Date, Priority
Show Completed Tasks
Record Completion Date
Show Due Dates
Show Priorities
Show Categories
Alarm Sound: Alarm
OK Cancel
CHAPTER 11
Managing Your Tasks
3
Change any of the following settings, and then select OK:
Sort by Select the order in which the tasks appear in the Tasks list.
Show Completed Tasks Display your finished tasks in the Tasks list. If you turn off this setting, your finished tasks disappear from the list when you check them off, but they stay in your handheld's memory until you purge them.
Record Completion Date Replace the due date you assign to a task with the date you really complete and check off the task. If you don't assign a due date to a task, the completion date still records when you complete the task.
Show Due Dates Display each task's due date in the list (if you assigned one), and display an exclamation point next to each task that is overdue.
Show Priorities Show the priority setting for each task in the list.
Show Categories Show the category for each task in the list.
Alarm Sound Select a sound for the alarms you assign to your tasks.

Done
CHAPTER 11
Managing Your Tasks

Tip
(Windows) If you chose to synchronize with Microsoft Outlook, check out the online Help in Outlook to learn how to use Tasks on your computer.
Working with Tasks on your computer
Use Tasks on your computer to view and manage your tasks. Check out the online Help in Palm Desktop software to learn how to use Tasks on your computer. The online Help includes info about the following topics:
- Learning about the parts of the Tasks window
- Entering, editing, and deleting tasks
- Creating repeating tasks
- Marking tasks as private
- Showing, masking, and hiding private tasks
- Assigning tasks to categories
- Printing your task list
- Selecting how to view tasks
- Sorting tasks by due date, priority level, or categories
WINDOWS ONLY
To open Tasks on your computer, double-click the Palm Desktop icon on the Windows desktop, and then click Tasks on the launch bar.
MAC ONLY
To open Tasks on your computer, double-click the Palm Desktop icon in the Palm folder, and then click To Dos.
CHAPTER 11
Managing Your Tasks
Tips & Tricks
Make your handheld uniquely yours. For great tips, software, accessories, and more, visit www.palmOne.com/ mytunstene2.
Support
If you're having problems with Tasks or with anything else on your handheld, go to www.palmOne.com/support.
Related topics
Click a link below to learn about these related topics:
VersaMail
Sending tasks as attachments to email messages
Sharing
- Beaming tasks to other Palm Powered™ devices
- Sending tasks to other Bluetooth® devices by using Bluetooth wireless technology on your handheld
- Synchronizing with Palm Desktop software and Outlook
Privacy
Keeping tasks private by turning on security options
Categories
Organizing tasks by type
Common Questions
Answers to frequently asked questions about Tasks
CHAPTER 12
Writing Memos
In this chapter
Creating a memo
Viewing and editing a memo
Moving memos in your memos list
Deleting a memo
Working with Memos on your computer
Related topics
Your handheld contains applications for storing the most common types of information: contact names and numbers, appointments, and so on. Memos is the tool to use for capturing information that is meaningful to you but does not fall into one of these categories. From meeting notes to recipes and favorite quotations, Memos provides a quick and easy way to enter, store, and share your important information.

Benefits of Memos
- Store essential but hard-to-remember information
- Send memos to colleagues wirelessly
- Synchronize your information to back it up on your computer
CHAPTER 12
Writing Memos

Tip
In the Memos list, you can also just start writing to create a new memo. The first letter is automatically capitalized.

Use Phone Lookup to quickly add a name and phone number to a memo.
Creating a memo

Go to Applications and select Memos


Create a memo:
a. Select New.
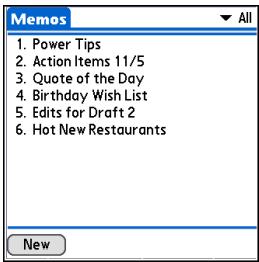

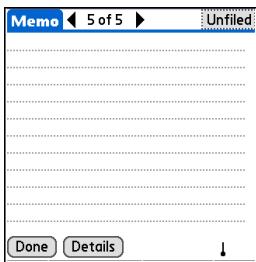
b. Enter your memo. Tap Enter on the onscreen keyboard or draw the Graffiti® 2 writing Return stroke / to move to a new line in the memo.
c. Select Done.

Done
That's it. Your handheld automatically saves the memo. Make sure you have a current backup. Synchronize often.
CHAPTER 12
Writing Memos

Tip
The Memos list shows the first line of each memo, so make sure that first line is something you will recognize.

Did You Know?
You can connect your handheld to a portable keyboard and type your memos on the go without carrying around a heavy laptop. You can purchase a variety of portable keyboards. Visit www.palmOne.com/ mytunstene2 and click the Accessories link.

Tip
You can change the size of the text in Memos to enhance readability.
Viewing and editing a memo

Go to Applications and select Memos


View or edit the memo:
a. In the Memos list, select the memo you want.
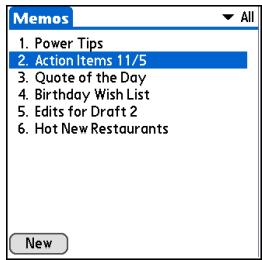

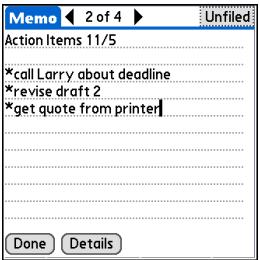
b. Read or edit the memo, and then select Done.

Done
CHAPTER 12
Writing Memos

Did You Know?
If you use Palm® Desktop software for synchronizing, you can send a memo to your computer by synchronizing, and then open the memo on your computer in an application such as Microsoft Word for further editing, formatting, and so on. Right-click the memo on your computer, click Send To, and then select the application to which you want to send the memo.
Moving memos in your memos list
You can move memos up or down in your memos list. For example, you might want to keep all memos on a certain topic grouped together.
1
Go to Applications and select Memos

2
Move a memo:
a. Locate the memo you want.
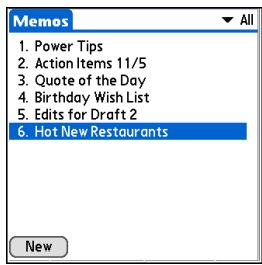

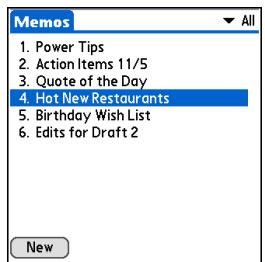
b. Move the memo up or down by dragging the stylus across the screen. A black dotted line appears to represent the memo you are moving.
c. When the line is in the location you want for your memo, lift the stylus.

Done
CHAPTER 12
Writing Memos

Tip
Need to retrieve that holiday recipe you stored? If you save an archive copy of your deleted memos, you can refer to them later by importing them.
Deleting a memo
1
Go to Applications and select Memos

2
Open the Delete Memo dialog box:
a. Locate the memo you want.
b. Open the menus.
c. Select Delete Memo on the Record menu.
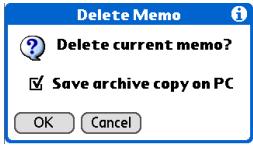
3
[ & ] OPTIONAL Check the box to save an archive copy of the memo on your computer.
4
Select OK.

Done
CHAPTER 12
Writing Memos

Tip
(Windows) If you chose to synchronize with
Microsoft Outlook, check out the online Help in Outlook to learn how to use Notes on your computer.

Tip
You can copy the text of a memo and paste it into a new Word file in
Documents on your handheld. Edit the text in Documents, save it as a Microsoft Word file, and then send the file to your computer by synchronizing so you can view and edit it in Word.
Working with Memos on your computer
Use Memos on your computer to view and manage the memos you create on your handheld. Check out the online Help in Palm® Desktop software to learn how to use Memos on your computer. The online Help includes info about the following topics:
Viewing, copying, and deleting memos
- Editing memo details
- Marking memos as private
- Showing, masking, and hiding private memos
- Printing memos
- Changing between the list and single memo views
- Adding a date and time stamp to a memo
- Organizing memos into categories
- Sorting memos
- Sharing memos
WINDOWS ONLY
To open Memos on your computer, double-click the Palm Desktop icon on the Windows desktop, and then click Memos on the launch bar.
MAC ONLY
To open Memos on your computer, launch Palm Desktop software from the Palm folder, and then select Memos.
CHAPTER 12
Writing Memos
Tips & Tricks
Make your handheld uniquely yours. For great tips, software, accessories, and more, visit www.palmOne.com/ mytunstene2.
Support
If you're having problems with Memos or with anything else on your handheld, go to www.palmOne.com/support.
Related topics
Click a link below to learn about these related topics:
Moving Around
- Opening applications
Using menus
Entering Information
Adding a phone number or other contact information to a memo using Phone Lookup
Categories
Organizing memos by arranging them into categories and sorting them
Privacy
Keeping memos private by turning on security options
Sharing
- Beaming memos to other Palm Powered™ devices
- Sending memos to other Bluetooth® devices using the Bluetooth wireless technology on your handheld
- Synchronizing with Palm Desktop software and Outlook
VersaMail®
Sending memos as attachments to email messages
SMS
Sending memos as part of a text message
Common Questions
Answers to frequently asked questions about Memos
Writing Notes in Note Pad
In this chapter
Creating a note
Viewing and editing a note
Deleting a note
Working with Note Pad on your computer
Related topics
Need to jot down a phone number or a reminder to yourself? Avoid fumbling for scraps of paper, and write important reminders in Note Pad. You can use Note Pad to do everything you might do with a piece of paper and a pencil, such as drawing a quick sketch. Note Pad gives you a place to draw freehand and take notes in your personal handwriting, which is even faster and more flexible than creating a memo on your handheld.

Benefits of Note Pad
- Capture information in the moment
- A picture is worth a thousand words
- See reminders when you set alarms
- Send notes to colleagues wirelessly
CHAPTER 13
Writing Notes in Note Pad
[!] Before You Begin
Make sure full-screen writing is turned off. You cannot create or edit notes in Note Pad when full-screen writing is on.
\*Tip
Select the pen selector to change the pen width or to select the eraser. To clear the screen completely, select the note (anywhere but the title), open the Edit menu, and select Clear Note.
+ Did You Know?
Prevent others from viewing your notes by marking them as private.
Creating a note
1 Press the Note Pad button.
2
Create a note:
a. Use the stylus to write your note directly on the handheld screen.
b. Select the time at the top of the screen and enter a title using Graffiti® 2 writing or the onscreen keyboard.
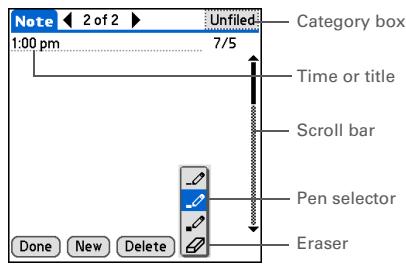
3 [ & ] OPTIONAL Assign the note to a category by selecting the Category box in the upper-right corner, and then selecting a category.
4 Select Done.
Done That's it. Your handheld automatically saves the note. Make sure you have a current backup. Synchronize often.
CHAPTER 13
Writing Notes in Note Pad
Choosing the pen and paper (background) colors
1
Press the Note Pad button.
2
Open the Select Colors dialog box:
a. Select Done to display the Note Pad list.
b. Open the menus.
c. Select Options, and then select Preferences.
d. Select Color.
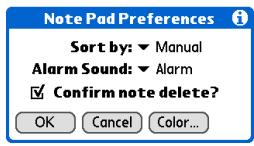

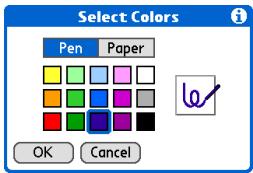
3
Select the pen and paper colors:
a. Select Pen, and then select the ink color you want to use.
b. Select Paper, and then select the background color you want to use.
c. Select OK, and then select OK again.

Done
CHAPTER 13
Writing Notes in Note Pad

Tip
Change the alarm sound by opening the Options menu, selecting
Preferences, and then selecting a sound from the Alarm Sound pick list.
Setting an alarm
To use a note as a reminder, set an alarm for that note.
1
Press the Note Pad button.
2
Open the note:
a. Select Done to display the Note Pad list.
b. Select the note you want to set an alarm for.
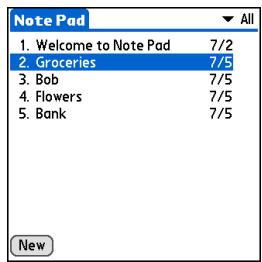

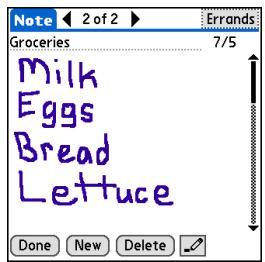

Continued
CHAPTER 13
Writing Notes in Note Pad

Tip
You can also open the Set Alarm dialog box by selecting a note and tapping the right edge of the screen next to the note title.

Set the alarm:
a. Open the menus.
b. Select Options, and then select Alarm.
c. Select the Date box, and then select the year, month, and date you want the alarm to sound.
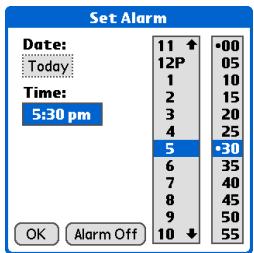

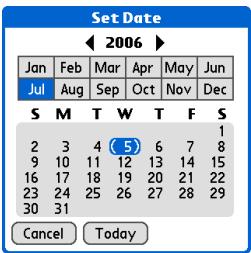
d. Select the time you want the alarm to sound.
e. Select OK.

Done
CHAPTER 13
Writing Notes in Note Pad

Tip
Sort the Note Pad list alphabetically, by date, or manually. Open the Options menu. select Preferences, and then select the Sort by pick list.
If you sort manually, you can rearrange the list by dragging notes to another position in the list.
Viewing and editing a note

Press the Note Pad button.

Open the note:
a. Select Done to display the Note Pad list.
b. Select the note you want to view or edit.
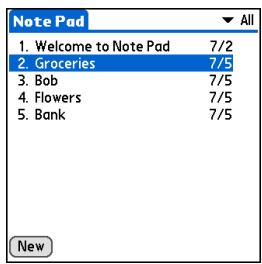

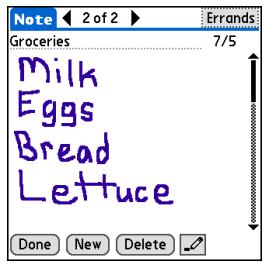

Read or edit the note, and then select Done.

Done
CHAPTER 13
Writing Notes in Note Pad

Tip
You can also delete a note by opening the Record menu and selecting Delete Note.

Tip
Want to get rid of those deletion confirmation messages? Open the Options menu, select Preferences, and then uncheck the Confirm note delete box.
Deleting a note

Press the Note Pad button.

Open the note:
a. Select Done to display the Note Pad list.
b. Select the note you want to delete.
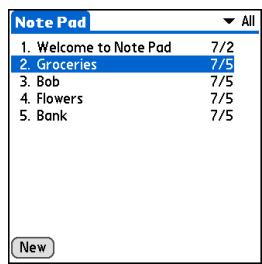

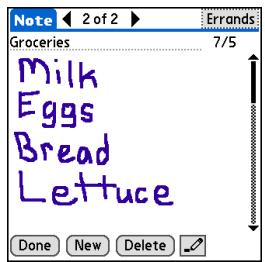

Select Delete, and then select OK to confirm deletion.

Done
CHAPTER 13
Writing Notes in Note Pad
Working with Note Pad on your computer
Use Note Pad on your computer to view and manage the handwritten notes you create on your handheld. Check out the online Help in Palm® Desktop software to learn how to use Note Pad on your computer. The online Help includes info about the following topics:
- Learning about the parts of the Note Pad window
Viewing, copying, and deleting notes - Editing note details and titles
- Setting an alarm for a note
- Marking notes as private
- Showing, masking, and hiding private notes
- Printing notes
- Changing between the List and Preview views
- Sorting notes
- Sharing notes
WINDOWS ONLY
To open Note Pad on your computer, double-click the Palm Desktop icon on the Windows desktop, and then click Note Pad on the launch bar.
MAC ONLY
To open Note Pad on your computer, double-click the Note Pad icon in the Palm folder.
CHAPTER 13
Writing Notes in Note Pad
Tips & Tricks
Make your handheld uniquely yours. For great tips, software, accessories, and more, visit www.palmOne.com/ mytunstene2.
Support
If you're having problems with Note Pad or with anything else on your handheld, go to www.palmOne.com/support.
Related topics
Click a link below to learn about these related topics:
Moving Around
- Opening applications
Using menus
Sharing
-
Beaming notes to other Palm Powered™ devices
-
Sending notes to other Bluetooth® devices by using Bluetooth wireless technology on your handheld
VersaMail®
Sending notes as attachments to email messages
Privacy
Keeping notes private by turning on security options
Categories
Creating categories so you can organize notes
Common Questions
Answers to frequently asked questions about Note Pad
Making Bluetooth Wireless Connections
In this chapter
What can I do with the built-in Bluetooth® wireless technology?
Entering basic Bluetooth settings
Setting up a Bluetooth phone connection
Accessing email and the web with Bluetooth
Setting up a connection for Bluetooth synchronization
Setting up a connection to a Bluetooth network
Creating trusted devices
Setting advanced Bluetooth features
Related topics
Your handheld helps keep your world organized by storing contact information and documents, recording appointments, and so on. Now your handheld can actually connect you to the world—wirelessly, using Bluetooth® wireless technology. Need to make a phone call? Tap the number in Contacts, and your mobile phone begins dialing. How about browsing the web or sending an email message from your handheld—without a cable? Your handheld's built-in Bluetooth functionality helps you easily set up wireless connections to a number of devices so you can enjoy the convenience of cable-free connectivity.

Benefits of your handheld's Bluetooth wireless technology
- Connect to your Bluetooth phone to send text or email messages or to access the web
- Reduce cable clutter by synchronizing wirelessly
- Connect to other devices to share files wirelessly
CHAPTER 14
Making Bluetooth Wireless Connections
Key Term
Bluetooth® Technology that enables devices such as handhelds, mobile phones, and computers to connect wirelessly to each other.
[!] Before You Begin
Any device you connect to must also be a Bluetooth device with Bluetooth features enabled. Check the user guide that came with the device for information on how to enable the Bluetooth features.
What can I do with the built-in Bluetooth® wireless technology?
Connect to your Bluetooth phone to send text or email messages or to access the web.
Whether you access the Internet or send text or email messages once a week or constantly throughout the day, wireless connectivity means that you can go online anytime by connecting by means of your mobile phone or your laptop connected to the Internet. For a list of compatible phones, go to http://www.palmOne.com/us/support/downloads/phonelink.html.
Reduce cable clutter by synchronizing wirelessly. Imagine your desk and workstation without cable clutter. Bluetooth wireless technology on your handheld replaces many of the connecting cables with a wireless connection for tasks such as synchronizing.
Connect to other devices to share files wirelessly. Wouldn't it be great if you could send files such as photos wirelessly or print wirelessly on a Bluetooth printer? Use the built-in Bluetooth wireless technology to set up connections to devices within approximately 30 feet of your handheld.
What types of connections can I make?
With Bluetooth wireless technology, you can make connections using the following types of devices:
- To browse the Internet or access your email account, link through your desktop computer's network connection or establish a connection to a Bluetooth LAN Access Point.
- To access the Internet or an email account, connect to your mobile phone. To use a mobile phone, you must dial your ISP or sign up for an account with a high-speed wireless carrier.
- To send and receive text messages, connect to your mobile phone.
- To synchronize your handheld with your computer wirelessly, connect to your computer.
- To share files with another Bluetooth device such as a handheld or printer, form a trusted pair with that device.
CHAPTER 14
Making Bluetooth Wireless Connections
What is device discovery?
Discovery is the process in which your handheld searches for other Bluetooth devices within its range (approximately thirty feet). As each device is discovered, it shows up in your Discovery Results. After you find the devices you are looking for, you can select the devices with which you want to connect.
The Bluetooth application on your handheld can be turned on and off, and the application has a Discoverable setting that can also be turned on and off. The following is a description of setting combinations and the resulting discovery states:
Bluetooth Off: When the Bluetooth setting is off, other users cannot discover your handheld. This is similar to locking your door with a dead bolt and a security chain, and disabling the doorbell. When Bluetooth is off, you cannot access the Discoverable setting.
Bluetooth On and Discoverable No: When your handheld and Bluetooth are on and the Discoverable setting is set to No, you can receive connections only from devices with which you have previously formed a trusted pair. This is similar to locking your door with a dead bolt and disabling the doorbell, but any friends who already have the key can enter. By default, the Discoverable setting is enabled when Bluetooth is on.
Bluetooth On and Discoverable Yes: When your handheld is on, Bluetooth is on, and the Discoverable setting is set to Yes, you can receive connections from any Bluetooth device. You are automatically connected with devices with which you have previously communicated, but you can refuse invitations to connect with unrecognized devices. This is similar to locking your front door with a dead bolt and enabling the doorbell. Friends who already have the key can enter freely, and if someone without a key rings the bell to request a connection, you can choose to open the door or ignore the request.
CHAPTER 14
Making Bluetooth Wireless Connections
Key Term
Discoverable Setting that allows other devices to find and connect with your handheld using Bluetooth wireless technology. If your handheld is not discoverable, other devices cannot find it to make a connection. Your handheld must be on in order to be discoverable.
Entering basic Bluetooth settings
1
Go to Favorites and select Bluetooth

2
Enter the basic Bluetooth settings:
a. Select On.
b. Tap the Device Name field and enter a name for your handheld. This is the name that other Bluetooth devices see when they connect to your handheld. By default it is the username you use during synchronization, but you can change it.
c. Select the Discoverable pick list and select Yes or No.
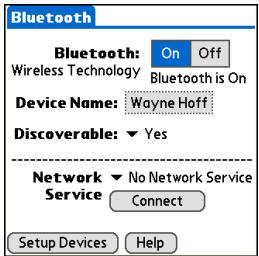

Done
CHAPTER 14
Making Bluetooth Wireless Connections
[!] Before You Begin
If you have an IR phone, you must download the Phone Link application from the web. Go to http:// www.palmOne.com/us/ support/downloads/ phonelink.html to download the software.
Key Term
Trusted pair Two devices—for example, your handheld and your mobile phone—that can connect to each other because each device can find the same passkey on the other device. Once you form a trusted pair with a device, you do not need to enter a passkey to connect with that device again.
Setting up a Bluetooth phone connection
[!] IMPORTANT To set up a phone connection, you must have a GSM or GPRS mobile phone enabled with data services.
You can form a trusted pair between your handheld and your mobile phone. Once you have set up the trusted pair connection, you automatically connect to your phone when you want a Bluetooth connection.
1
Go to Favorites and select Bluetooth

2
Open the Phone Setup dialog box.
a. Select Setup Devices.
b. Select Phone Setup.
c. Select Phone Connection.
d. Select Next.

Continued
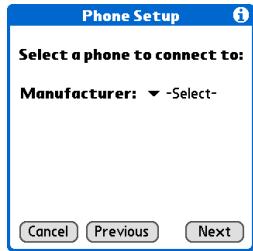
CHAPTER 14
Making Bluetooth Wireless Connections

Tip
If you receive a message that your phone is not ready to accept a connection, check to make sure that your phone is prepared to make a Bluetooth connection. See the instructions included with your phone.

Select the phone you want to connect to:
a. Select the Manufacturer and Model pick lists, select the correct entries for your phone, and then select Next.
If the phone does not appear on the list, check for phone compatibility at http://www.palmOne.com/us/support/downloads/phonelink.html.
b. The Connection Setup screen displays all Bluetooth phones within range.
If your phone is not listed on the discovery results, check whether your phone is discoverable using Bluetooth wireless technology. Select Find More to search again.
c. Select the phone you want, select OK, and then select Next.

NOTE Not all features are available if your specific phone model is not included in the pick list.
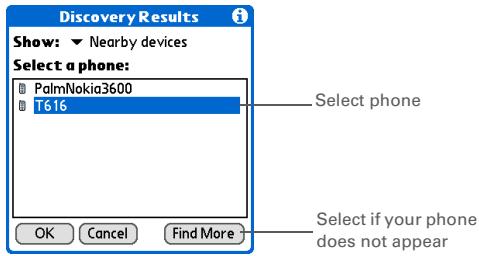

Continued
CHAPTER 14
Making Bluetooth Wireless Connections
Key Term
Passkey Like a password, the passkey is a security measure. Connections can happen only between your handheld and a device that has the same passkey. For example, to connect to your mobile phone, you need to enter the same passkey on your handheld and on your phone.
4
Enter a passkey:
a. Enter a passkey number. This can be any number you choose; it does not, for example, have to be a password you use to access a network or an email account.
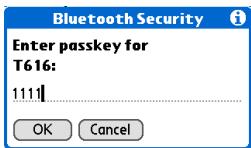
[!]IMPORTANT You must enter the same passkey on your handheld and your mobile phone in order to connect to your phone.
b. Select OK.
5
Select Done to finish phone connection setup.

Continued
CHAPTER 14
Making Bluetooth Wireless Connections
Key Term
GPRS Acronym for General Packet Radio Service, a method of sending information wirelessly at high speeds. Select Yes in step 6 only if you have a GPRS account for your mobile phone.
6
Determine if you want to be set up with a network:
- Select Yes to begin network setup. Go to step 7.
- Select No if you want to use your phone connection only to dial phone numbers from your handheld or send text messages. You have finished setup.
Network Service

Do you want to setup your handheld to connect to the Internet and send e-mail?
Yes
No
7
Begin network setup:
a. If you select Yes, go to step 8.
b. If you select No, go to step 9.
c. Select Next.
Network Service Setup

Do you subscribe to high speed data service (GPRS) from your carrier?
Yes
Cancel
Previous
Next
CHAPTER 14
Making Bluetooth Wireless Connections

Tip
Contact your ISP (for example, AOL or Earthlink) if you are not sure about one or more of the items to enter in step 8.
8
If you selected Yes in step 7:
a. Select the pick lists and select the correct information for your cellular carrier.
b. Select Next, and then select Done.
Network Service Setup
Select the area where your phone service is registered:
USA
Select your carrier:
your carrier
Cancel
Previous
Next
9
If you selected No in step 7:
a. Select Next.
b. Enter the phone number you use to dial in to your ISP and the username for your dial-up account.
c. Select the Password box, enter your account password, and select OK. This is the password you use to access your dial-up account.
d. Select Next, and then select Done.

Done
You now have set up your phone connection to browse the web and send and receive email messages.
CHAPTER 14
Making Bluetooth Wireless Connections
Accessing email and the web with Bluetooth
After you set up a connection with a mobile phone, you can send and receive email or browse the web wirelessly using this connection.
NOTE Bluetooth functionality must be turned on if you want to use wireless features. You must also set up an email account on your handheld before you can send or receive email messages.
1 Open the email application or the web browser.
2 Verify Bluetooth status:
a. Go to Favorites and select
Bluetooth
b. Make sure On is selected.
Continued
Bluetooth
Bluetooth:
Wireless Technology
Device Name: Wayne Hoff
Discoverable: Yes
Network
Service
No Network Service
Connect
Setup Devices
Help
CHAPTER 14
Making Bluetooth Wireless Connections
Key Term
Service Way of connecting to a mobile phone to send information wirelessly, for example, through a high-speed (GPRS) carrier or a dial-up account with an Internet service provider (ISP).
* Tip
When you enter a URL in the web browser or select Get and Send in the VersaMail® application, a connection is automatically initiated with the last used service.
3
Connect to your phone:
a. Select the Network Service pick list and select the service that you want to use to connect to the Internet. If you set up a phone connection, the name of the service you configured is listed.
b. Select Connect.
Done
You are now ready to send and receive email messages or to browse the web.
CHAPTER 14
Making Bluetooth Wireless Connections

Tip
After the first time you set up a connection and wirelessly synchronize with a computer, you can synchronize with that computer at any time by choosing its device name from the Service pick list and tapping Connect.
Setting up a connection for Bluetooth synchronization WINDOWS ONLY
1
Go to Favorites and select Bluetooth

2
Open the PC Setup dialog box:
a. Select Setup Devices.
b. Select PC Setup.
c. Select Bluetooth HotSync.
d. Select Next.
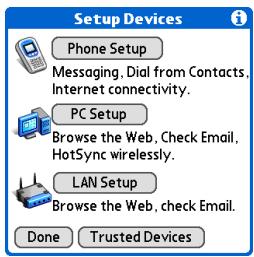

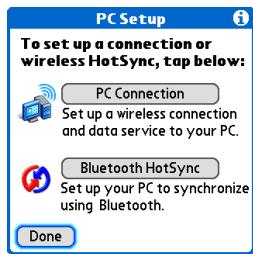

Continued
CHAPTER 14
Making Bluetooth Wireless Connections

Tip
To open HotSync Manager on your computer in the onscreen instructions (see step 4 in this procedure), click the HotSync Manager icon on the taskbar in the lower-right corner of your computer screen.

Tip
Remember that Bluetooth devices generally must be within 30 feet of each other to communicate.
3
Select a computer and select OK.
The Discovery icon appears to indicate that the discovery process is active.
If your computer did not show up on the discovery results, select Find More to search again.
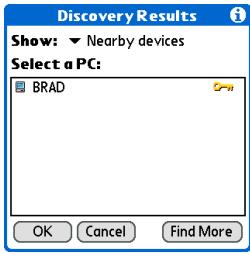
4
Set up a connection for wireless synchronization:
a. Follow the onscreen instructions for steps 1-3, selecting Next after each step.
b. Select Launch HotSync Manager in step 4.
c. Select HotSync to synchronize your handheld with your computer.

Done
Now you can easily synchronize your handheld with your computer wirelessly.
CHAPTER 14
Making Bluetooth Wireless Connections
MAC ONLY
1
Go to Applications and select Defaults

2
Open the Edit Connection screen:
a. From the Communications Preferences list, select Connection.
b. Select New.
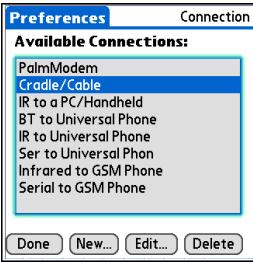
3
Set up the connection to your computer:
a. Enter a name for the connection, such as BT to Mac.
b. Select the Connect to pick list and select PC.
c. Select the Via pick list and select Bluetooth.

Continued
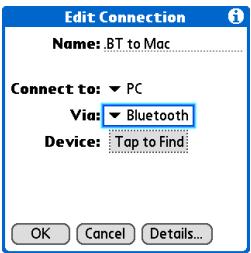
CHAPTER 14
Making Bluetooth Wireless Connections

Tip
Just as it is safer to use different personal identification numbers (PINs) for different bank accounts, your passkeys are more secure if you use a different passkey for each device with which you want to connect—one passkey for a connection to a phone, a different one for a connection to a computer, and so on. Just remember that you must enter the same passkey on your handheld and on the device with which you want to connect.
Cont'd.
d. Make sure the computer is ready to accept a Bluetooth connection.
NOTE See the documentation included with the computer for information on how to prepare it to accept a Bluetooth connection. The documentation might refer to a Bluetooth connection as a Bluetooth pairing or a Bluetooth link.
e. Select the Device box.
4
Select the computer:
a. When the Discovery Results screen appears, select your computer. If your computer does not appear on the list, select Find More.
b. Select OK.
5
[ & ] OPTIONAL If prompted, enter a passkey:
a. Enter a passkey number. This can be any number you choose; it does not have to be, for example, a password you use to access a network or an email account.
[!] IMPORTANT You must enter the same passkey on your handheld and your computer in order to wirelessly synchronize with your computer.
b. Select OK.

Continued
CHAPTER 14
Making Bluetooth Wireless Connections

Synchronize your handheld with your computer:
a. Go to Applications and select HotSync
b. Make sure that Local is selected, and select the connection you created in step 3 from the pick list.
c. Select HotSync

Done Now you can easily synchronize with your computer wirelessly.
CHAPTER 14
Making Bluetooth Wireless Connections
[!] Before You Begin
You must get the passkey, username, and password for the LAN from the system administrator.
Key Term
LAN Acronym for local area network. LAN refers to a local network that connects computers located in your home or business.
Setting up a connection to a Bluetooth network
1
Go to Favorites and select Bluetooth

2
Open the PC Setup dialog box:
a. Select Setup Devices.
b. Select LAN Setup.
c. Select Next.
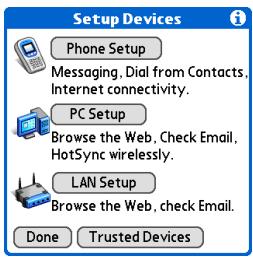
3
Select a LAN and select OK.
The Discovery icon

appears to indicate that the discovery process is active.
If the LAN did not show up on the discovery results, select Find More to search again.
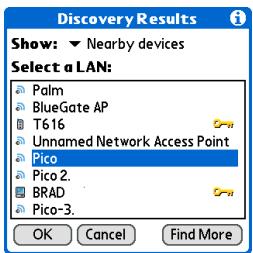

Continued
CHAPTER 14
Making Bluetooth Wireless Connections
4
Create a trusted connection.
a. Select Yes to add the LAN as a trusted device.
b. Select Next.
c. Enter the passkey number for the LAN and select OK.
Bluetooth Security
Enter passkey for Pico
12345
OK Cancel
5
Enter the username and password for the LAN and select Next.
LAN Setup
Enter the username and password for your LAN.
Username: bh
Password: -Assigned-
Service Name:
Pico
Cancel Pre
IS
T
6
Select Done.

ne
CHAPTER 14
Making Bluetooth Wireless Connections

Did You Know?
When your handheld and Bluetooth are on and the Discoverable setting is set to No, you can receive connections only from devices with which you have previously communicated.
Creating trusted devices
After you have set up your phone and computer as trusted devices, you may want to set up other trusted devices, such as a friend's handheld. When your handheld recognizes a trusted device, your handheld automatically accepts communication, bypassing the discovery and authentication process.
1
Go to Favorites and select Bluetooth

2
Begin the discovery process:
a. Select Setup Devices.
b. Select Trusted Devices.
c. Select Add Device.
d. Select Trusted Devices to begin the discovery process. The Discovery icon

)
appears to indicate that the discovery process is active.
3
Select the device you want to add as a trusted device, and then select OK.
If the device you want to add does not appear on the discovery results list, select Find More to search again.

Continued
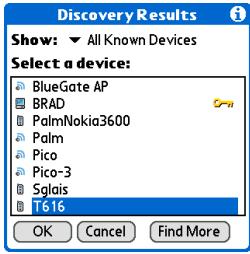
CHAPTER 14
Making Bluetooth Wireless Connections

Tip
You can delete a trusted device or view the details about a trusted device, such as the device address and your most recent connection. In Bluetooth Manager, select Setup Devices, and then select Trusted Devices. Select the appropriate device and select Details.

Enter the same passkey on your handheld and the other device and select OK.
[!]IMPORTANT Some Bluetooth devices have a built-in passkey; others enable you to choose the passkey; see the documentation included with your Bluetooth device for information. In either case you must use the same passkey on both the device and your handheld.
Many phones also require you to put the phone into a mode where it can accept a key exchange for bonding in a trusted pair. See the documentation included with your phone for information.
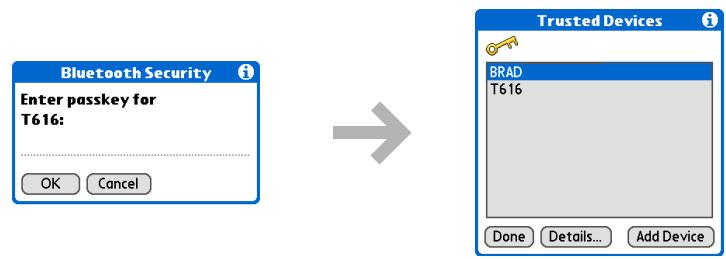

Select Done.

Done
CHAPTER 14
Making Bluetooth Wireless Connections

Tip
If the remote device name has changed, disabling and then enabling the device name cache forces your handheld to retrieve the new device name.
Setting advanced Bluetooth features
These advanced settings are used in special circumstances.
Storing recently found device names
When you enable or disable the device name cache you control whether or not your handheld retrieves the names of remote devices each time the discovery process takes place. By default, the device name cache is enabled, which means the names of devices that are found are stored in cache. The next time the device is discovered, the name appears very quickly.
1
Go to Favorites and select Bluetooth

2
Open the menus.
3
Select Options, and then select Disable device name cache.
The selection on the Options menu toggles to Enable device name cache. This indicates that the cache is disabled.

Done
Allowing your handheld to wake up when it is turned off
You can set your handheld to receive information through Bluetooth connections when your handheld is turned off. The radio remains on, but your device is not discoverable. For another Bluetooth device or application to wake up your handheld, it must know your device name. This limits the connections to devices that are trusted or that have connected with you before.
1
Go to Favorites and select Bluetooth

2
Open the menus.
3
Select Options, and then select Allow wakeup.
The selection on the Options menu toggles to Do not allow wakeup indicating that Allow Wakeup is enabled.
[!] IMPORTANT Enabling the Allow Wakeup setting uses battery power even when your handheld is turned off. Be sure to monitor your battery level.

Done
CHAPTER 14
Making Bluetooth Wireless Connections
Tips & Tricks
Make your handheld uniquely yours. For great tips, software, accessories, and more, visit www.palmOne.com/ mytunstene2.
Support
If you're having problems with your handheld's wireless capabilities or with anything else on your handheld, go to
www.palmOne.com/support
Related topics
Click a link below to learn about these related topics:
Moving Around
- Opening applications
Synchronizing
Using menus
Contacts
Connecting to telephone numbers in your list of contacts
VersaMail
Sending and receiving email messages wirelessly using your handheld's Bluetooth technology
SMS
Sending and receiving text messages wirelessly using your handheld's Bluetooth technology
Common Questions
Answers to frequently asked questions about Bluetooth wireless technology
Sending and Receiving Email Messages
In this chapter
Upgrading an existing email account
About email accounts
Creating an account
Managing email accounts
Getting and reading email
Sending an email message
Working with email folders
Working with email messages
Working with attachments
Synchronizing email on your handheld with email on your computer
Advanced VersaMail application features
Related topics
You already know how efficient email is for staying in touch with personal and business contacts. Now the VersaMail® application brings you a new level of convenience: email on the go. Enjoy the ease and speed of communicating with friends, family, and colleagues anywhere you can make an Internet connection.
You can email photos to your friends and family. Or use Documents on your handheld to create Microsoft Word or Excel files, and send them to your colleagues. You can also receive any of these file types as attachments to view and edit at your convenience. You can also synchronize email messages on your handheld with email on your Windows computer.

Benefits
- Access email on the go
- Send and receive photos, sound files, Word and Excel files, and more
- Save messages from your computer to view at a convenient time
CHAPTER 15
Sending and Receiving Email Messages
Upgrading an existing email account
If you have already used the VersaMail application on a different handheld and have kept your old username, you can upgrade your existing email account for use on your new handheld.
1
Synchronize your new handheld with your computer. Select the username associated with your old handheld; this contains your existing account information.
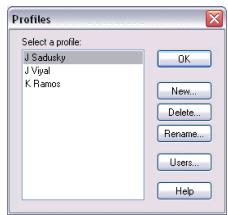
2
On your handheld, go to Favorites and select VersaMail

3
Select Yes to accept the upgrade.

Done
CHAPTER 15
Sending and Receiving Email Messages
[!] Before You Begin
Before you can set up an email account on your handheld, you must do the following:
- Install the VersaMail® application from the installation CD onto your handheld.
If you don't already have one, establish an account with an Internet service provider such as Earthlink or a wireless carrier such as Cingular. You can also use a corporate email account. - For wireless accounts only: Have active service with a wireless carrier and a mobile phone equipped with Bluetooth® wireless technology. You must also set up a phone connection on your handheld. (Not required if you want to access email over your company's Bluetooth network.)
About email accounts
The VersaMail application is software that lets you access email on your handheld from an account with an email provider (such as Earthlink or Yahoo!) or from your corporate email account. For each email account you want to access, you must set up an account on your handheld. For example, if you have an Earthlink account and a corporate account, set up one account for each. You can create up to eight email accounts on your handheld.
[!] IMPORTANT You must have an account with an email provider or a corporate account. The VersaMail application works with these accounts to transfer messages to your handheld. The application is not an email service provider.
Account and connection types
You can set up two types of email accounts on your handheld:
Wireless Send and receive email directly to and from your handheld using the built-in Bluetooth® technology or by positioning the IR port on your handheld so that it can beam to the IR port on your mobile phone.
Synchronize Only (Windows computers only) Transfer messages from the email application on your computer (such as Microsoft Outlook) to your handheld by synchronizing. You can't send and receive messages wirelessly for this type of account.
Using an email provider
If you are setting up a new email account and have a well-known email provider (Internet service provider, or ISP) such as Earthlink or Yahoo!, many of the required settings during the account setup are automatically configured.
For other ISPs, you need the following information:
- The protocol used for incoming mail, such as Post Office Protocol (POP) or Internet Message Access Protocol (IMAP)
The name of the incoming mail server
CHAPTER 15
Sending and Receiving Email Messages
Key Term
Firewall A system setup to protect against unauthorized access into a private network.
- The name of the outgoing mail (Simple Mail Transfer Protocol, or SMTP) server
- Your account's security feature (if it has one), such as Secure Sockets Layer (SSL), Authenticated Post Office Protocol (APOP), or Extended Simple Mail Transfer Protocol (ESMTP)
- Your email address and password
Go to your email provider's website or contact their customer support to obtain this information.
Using a corporate email account
If you want to access email on your handheld using your corporate email account, you create this account on your handheld in exactly the same way as any other account, with one exception: for a corporate email account, you may need to set up a virtual private network (VPN).
If your company has a Bluetooth network located behind the corporate firewall, or if you are using an 802.11b (also called Wi-Fi) SDIO card (go to www.palmOne.com to check on the availability of these cards) in your handheld and your company has an 802.11b network located behind the corporate firewall, you may not need to set up a VPN to access your corporate email account. See the following section for details.
Before you set up a corporate email account, check with your company's system administrator to get the following information:
Username and password This might be your Windows username and password, your Lotus Notes ID username and password, or something else. The VersaMail application provides strong 128-bit AES encryption for your password.
Protocol Many corporate mail servers use the IMAP protocol for retrieving mail. In rare cases, your company server may use the POP protocol.
NOTE Some corporate mail servers do not use either protocol. If so, you cannot send and receive email wirelessly from your handheld. You can synchronize email on your handheld with email in Microsoft Outlook or Lotus Notes on your computer (Windows only).
CHAPTER 15
Sending and Receiving Email Messages
Incoming and outgoing mail server settings Check with your company's system administrator to obtain these settings.
With a corporate email account, you may be able to access the following types of mail servers, among others:
- Microsoft Exchange
- IBM Lotus Domino
Sun iPlanet
VPNs
If you want to access email on your handheld using your corporate email account, you may need to set up a virtual private network (VPN) on your handheld. A VPN enables you to log in to your corporate mail server through the company's firewall (security layer). Without a VPN, you cannot pass through the firewall to gain access to the mail server.
You need to set up a VPN to access corporate email in either of the following situations:
- Your company's wireless local area network (LAN) is located outside the firewall.
- Your company's wireless LAN is located inside the firewall, but you are trying to access the network from outside the firewall (for example, from a public location or at home).
Check with your company's system administrator to see if a VPN is required to access the corporate network.
The auto get mail with notification feature in the VersaMail application may not work with a VPN connection. Also, you cannot use scheduled sending retry of email with accounts that use a VPN connection.
CHAPTER 15
Sending and Receiving Email Messages
Creating an account
The steps for creating an account are different depending on how you plan to send and receive email:
Wireless only If you plan only to send and receive email wirelessly from your handheld, set up the account on your handheld by following the procedures presented later in this chapter.
Synchronize only (Windows only) If you plan only to synchronize email on your handheld with email on your computer, and never to send and receive email wirelessly from your handheld, do not set up the account on your handheld. Instead, follow the steps for setting synchronization options on your computer later in this chapter. When you have finished, synchronize to transfer the account settings to your handheld.
Both wireless and synchronize (Windows only) If you plan both to send and receive email wirelessly and to synchronize email on your handheld with email on your computer, you must set up the account on your handheld and follow the steps for setting synchronization options on your computer. If you do not set up the account in both places, synchronizing email does not work.
[!] IMPORTANT If you plan to synchronize your new handheld with an existing username from another handheld, you must do so before you enter your email account information in the VersaMail application. If you enter the email account information first and then synchronize your handheld to an existing username, the email account information you entered is overwritten.
CHAPTER 15
Sending and Receiving Email Messages
Setting basic account options
1
Go to Favorites and select VersaMail

2
Open the Account Setup screen:
a. Open the menus.
b. Select Accounts, and then select Account Setup.
c. Select New.

Continued
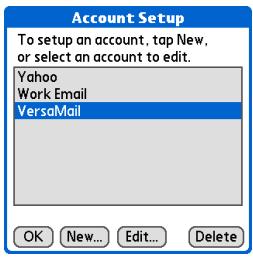
CHAPTER 15
Sending and Receiving Email Messages
Key Term
Protocol Settings your email provider uses to receive email messages. Most providers use the Post Office Protocol (POP); a few use the Internet Message Access Protocol (IMAP).
\*Tip
If your email provider appears on the Mail Service pick list, you don't need to select a protocol. The correct protocol is automatically displayed.
3
Enter the basic account information:
a. In the Account Name field, enter a descriptive name.
b. Select the Mail Service pick list, and then select your email provider. Select Other if your provider is not listed.
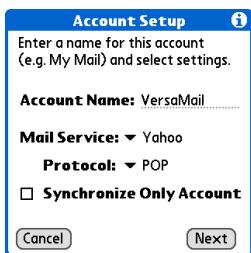
c. If you chose Other, select the Protocol pick list, and then select POP or IMAP.
[!]IMPORTANT Do not check the Synchronize Only Account box. If you plan only to synchronize email on your handheld with email on your computer, do not set up the account on your handheld. Instead, follow the steps for setting synchronization options on your computer later in this chapter.
d. Select Next.

Continued
CHAPTER 15
Sending and Receiving Email Messages

Tip
Your username is usually the part of your email address appearing before the @ symbol, not your entire email address. Check with your ISP if you are not sure what username to enter.

Did You Know?
Your incoming mail server is also called your POP or IMAP server; your outgoing mail server is also called your SMTP server.
4
Enter the account username and password:
a. Enter the username you use to access your email.
b. Select the Password box, enter your email account password, and then select OK.
c. Select Next.

5
If you chose a common email provider from the Mail Services pick list on the Account Setup screen, this screen is already filled in. If not, enter the names of the incoming and outgoing mail servers:
a. Enter your email address.
b. Enter the names of your mail servers.
c. Select Next.

Continued
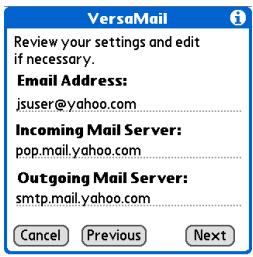
CHAPTER 15
Sending and Receiving Email Messages

Do one of the following:
Finish setup Select Done to finish setup and go to the Inbox of the account you set up, where you can begin getting and sending email.
Set additional mail options Select Next to set advanced mail options.

Done
VersaMail
Your VersaMail account is completed. To exit, tap done.
To set additional mail options, top next.
Done
Previous
Next
CHAPTER 15
Sending and Receiving Email Messages

Did You Know?
The POP protocol does not support retrieval of unread mail only from the server. If you have a POP email account, the VersaMail application downloads all messages from the server regardless of whether you have read them (for example, on your desktop or on the web), and regardless of whether this box is checked.

Tip
If you choose to leave mail on the server and, for example, read messages from your Yahoo! account on your handheld, the messages are still visible the next time you check your Inbox on Yahoo.com.
Setting advanced mail options

Set mail retrieval server options for a POP or IMAP account:
POP accounts
VersaMail

Incoming Mail Options:
Get unread mail ONLY.
□Delete messages on th
□Send messages on all servers when they are
Server when they are
deleled in versail.
Leave mail on server (e.g
to view on desktop later.)
Port Number:110
Use Secure Connection (SSL).
Maximum Message Size: 5 KB
Cancel Previous
Next
IMAP accounts
Work Email
Incoming Mail Options:
Getupregd mailONLY.
□Delete messages on the
server when they are
self. When they aredeleted in VersoMail
Port Number: 143
Use Secure Connection (SSL).
Maximum Message Size: 5 KB
Cancel Previous
Next
a. Select any of the following:
Get unread mail (IMAP account only) Select Get unread mail ONLY to download only unread mail to your handheld. If you don't choose this option and you select Get & Send, all of your messages on your provider's mail server are downloaded to your Inbox, including messages you have already read.
Delete messages on server To delete messages on your provider's mail server when they are deleted in the VersaMail application, check the Delete messages on the server when they are deleted in VersaMail box.
Leave mail on server (POP account only) To get email on your handheld but leave it on the server so you can view it later on your computer, check the Leave mail on server box.

Continued
CHAPTER 15
Sending and Receiving Email Messages
Cont'd.
Port Number The port number setting defaults to 110 for POP and to 143 for IMAP servers. You may need to change the port number if you choose to retrieve incoming mail over a secure connection (see the next item). If you are not sure about the correct port number, check with your system administrator.
Use Secure Connection To retrieve incoming mail over a secure (Secure Sockets Layer, or SSL) connection, check the Use Secure Connection box. If you check the box, the port number for incoming mail changes to 995. You may need to change the port number; check with your system administrator.
Maximum Message Size To limit the maximum size of an incoming email message, enter the size in kilobytes (KB) for Maximum Message Size. The maximum size of an incoming message is 5KB by default, but you can enter any size up to 2048KB (approximately 2 megabytes, or 2MB), including attachments. The maximum message size that you can retrieve is 60KB for the body text and approximately 5MB of total data for any attachments. Because downloading large messages can consume handheld resources, the VersaMail application displays the size of the message and asks if you want to continue downloading any message that exceeds your maximum message size, up to a total size of 2MB.
b. Select Next.
Continued
CHAPTER 15
Sending and Receiving Email Messages
2
Set outgoing mail options:
a. Select any of the following:
Display Name Enter the name you want to appear on your outgoing messages, such as "Joe Smith."
Reply To Address Enter the email address that you want recipients to see and reply to on your email

messages, only if this is different from the email address from which you are sending the message. For example, if you are sending a message from me@yahoo.com but you want recipients to reply to me@earthlink.net, enter the reply-to address here. Reply To Address makes it look as though the email came from the address you entered.
BCC Check the BCC box to send a blind copy of any email message you send to another email address. The blind copy email address is not seen by the other recipients of the message. For example, if you want a copy of all messages you send from your handheld to be sent to your corporate email account, enter that email address.
b. Select Next.

Continued
CHAPTER 15
Sending and Receiving Email Messages

Tip
Use a signature to add your name and phone number to all outgoing messages.
3
Add a signature:
a. Check the Attach Signature to messages box, and then enter the text of the signature.
b. Select Next.

Continued
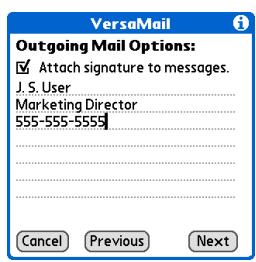
CHAPTER 15
Sending and Receiving Email Messages

Tip
If you need to enter new authentication information, enter your username, tap the Password box, enter a password, and then select OK. Check with your email service provider for authentication username and password information.

Set additional outgoing mail options:
a. Select any of the following:
Port Number The default is 25, the port number most SMTP servers use. If you are not sure about the correct port number, check with your system administrator.
Use Secure Connection To send outgoing mail over a secure (Secure Sockets Layer, or SSL) connection, check the Use Secure Connection box.
Authentication Check the box if the outgoing server (SMTP) requires ESMTP authentication. Check with your system administrator before selecting this option. If you select this option, username and password fields appear. These fields are already filled in based on the account information you entered. In most cases, the information displayed is correct; however, occasionally your authentication username and/or password is different from your account username or password.
b. Select Done.

Done
Testing your new account
After you finish setting up a new email account, the Inbox of the account you just created is displayed. You can test whether the email account is set up and working properly by getting messages. If you want to synchronize email on your handheld with email on your computer, you need to configure this account on your computer.
CHAPTER 15
Sending and Receiving Email Messages
Managing email accounts
After you create an account, you can edit or delete it, or customize the account by adding ESMTP authentication, selecting a specific service to connect to your network, and more.
Editing an email account
1
Select the account you want to edit:
a. Open the menus.
b. Select Accounts, and then select Account Setup.
c. Select the name of the account to edit, and then select Edit.
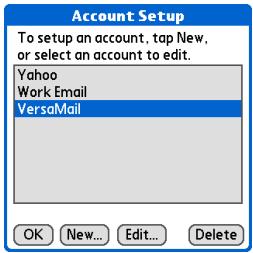
2
The same series of screens appears for editing an account as for creating an account. Go through the screens by selecting Next, and change the entries you want to edit on the appropriate screens.

Done
CHAPTER 15
Sending and Receiving Email Messages

Tip
Synchronize your handheld with your computer to free up the memory associated with an account after you delete it.
Deleting an email account
When you delete an account in the VersaMail application, the account is removed from your handheld. The account still exists on the server. For example, deleting your Yahoo! account from the VersaMail application deletes the account only from your handheld. Your email account still exists at Yahoo.com.
You can delete all but one of your email accounts; you must have at least one account.

Select the account you want to delete:
a. Open the menus.
b. Select Accounts, and then select Account Setup.
c. Select the name of the account to delete, and then select Delete.
Account Setup
To setup an account, tap New, or select an account to edit.
Yahoo
Work Email VersaMail
OK
Jew...
Edit...
Delete

Delete the account:
a. Select Yes in the Delete Account dialog box to delete the account and all associated email messages.
b. Select OK.
Delete Account

Are you sure you want to permanently remove the Work Email account?
Yes
No

Done
CHAPTER 15
Sending and Receiving Email Messages
Selecting a different service for an email account
When you set up a phone connection on your handheld, you pair each connection with a network service. You also select one of these services to be the default for all network activity on your handheld, including sending and receiving email.
For any given email account, however, you can switch to a different service for that account only. For example, the default service you have selected for your handheld may be called Bluetooth and may use your handheld's built-in Bluetooth functionality to make a connection to your corporate mail server. However, for your Earthlink account, you may want to switch to the service called IR, which uses your handheld's IR port to make a connection to your email service provider through your mobile phone.
When you exit the VersaMail application, the service disconnects (unless you are using the default service for your handheld). When you reopen the application, the email account you selected (Earthlink in this example) continues to connect using the new connection (IR in this example) until you either select a new service or uncheck the Always connect using box. If you uncheck the Always connect using box, the email account (Earthlink) connects using the default handheld service (Bluetooth in this example).
The Always connect using box changes the connection service for the selected email account only. You must follow the procedure for each email account whose connection you want to switch from the default connection on your handheld.
CHAPTER 15
Sending and Receiving Email Messages

Tip
If there is an existing service connection, it is disconnected and the new connection is initiated. The VersaMail application sends and checks for any new email using the new connection.
1
Open the Account Details dialog box:
a. From the Inbox of the account you want to switch, select Get Mail.
b. Select Details.
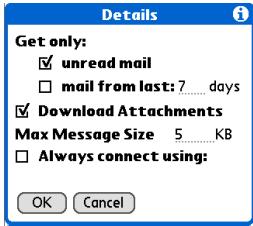
2
Select the new service:
a. Check the Always connect using box. A pick list of available services appears. The currently used connection is displayed by default.
b. Select the connection you want to switch to from the Service pick list.
c. Select OK, and then select OK again.

Done
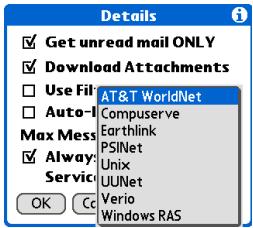
CHAPTER 15
Sending and Receiving Email Messages
Adding ESMTP to an account
Some services require ESMTP authentication to validate your username and password on an SMTP server. If you aren't sure if your ISP or web email provider supports ESMTP, check with your email provider.
1
Select the account to which you want to add ESMTP:
a. In your Inbox or on another folder screen, open the menus.
b. Select Options, and then select Mail Servers.
c. Select the Account pick list, and then select Edit Accounts.
d. Select the name of the account you want to change, and then select OK.

Continued
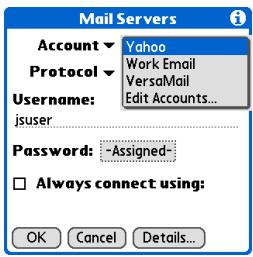
CHAPTER 15
Sending and Receiving Email Messages

Tip
If you need to enter new authentication information, enter your username, tap the Password box, enter a password, and then select OK. Check with your email service provider for authentication username and password information.
2
Add ESMTP:
a. On the Mail Servers screen (see step 1), select Details.
b. Select the Options pick list, and then select Advanced Outgoing.
c. Check the box.
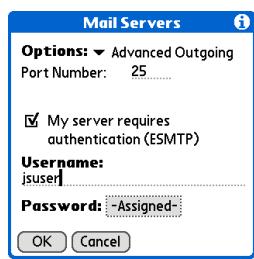
NOTE Check with your system
administrator before selecting this option. If you select this option, username and password fields appear. These fields are already filled in based on the account information you entered. In most cases, the information displayed is correct; however, occasionally your authentication username and/or password is different from your account username or password.
d. Select OK.

Done
CHAPTER 15
Sending and Receiving Email Messages

Did You Know?
You can set up your handheld to automatically check for and download new email messages.
Getting and reading email
You can choose to see only the subject of your email (which includes message size, sender, and subject), so that you can decide if you want to download the entire message. Or you can choose to get the entire message for all of your incoming email. If you choose to get the entire message, the body text of the message is downloaded up to the maximum message size you select.
Switching among email accounts
To view the email in an account, you must switch to that account and then get the email.
1
Go to Favorites and select VersaMail

2
Select the account for which you want to get email:
a. In your Inbox or on another folder screen, open the menus.
b. Select Accounts, and then select the name of the account you want.
3
Select the folders pick list, and then select Inbox if the Inbox is not displayed.
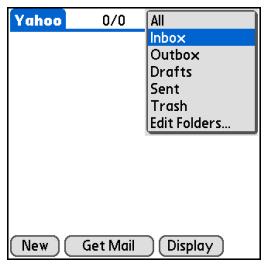

Done
CHAPTER 15
Sending and Receiving Email Messages

Tip
If you have set up the account to synchronize email on your handheld with email on your computer only, you must synchronize your handheld with your computer to download messages to your handheld.

Did You Know?
You can deactivate the Get Mail Options dialog box by using VersaMail Preferences.

Tip
If you select Messages, the first 5KB of each message is downloaded. You can change the maximum size for downloaded messages in VersaMail Preferences.
Getting email messages
1
Go to Favorites and select VersaMail

2
Choose whether to get message subjects only or full messages:
a. Open the menus.
b. Select Accounts, and then select the account you want.
c. Select Get Mail or Get & Send.
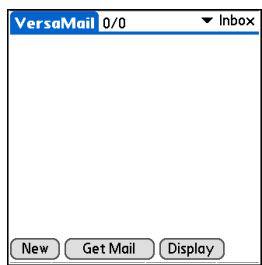

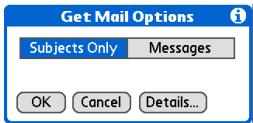
d. In the Get Mail Options dialog box, select Subjects Only to download subjects only, or select Messages to download entire messages.

Continued
CHAPTER 15
Sending and Receiving Email Messages

Tip
For IMAP accounts, you have the option of synchronizing IMAP folders from the Get Mail Options dialog box. With wireless IMAP folder synchronization, you can synchronize email messages between a folder in an email account on your handheld and a folder with the same name on your email provider's mail server.
3
[ & ] OPTIONAL Select advanced options for getting email:
a. Select Details, and then select any of the following:
Get only unread mail (IMAP accounts only)
Get mail from last X days (number of days you specify; default is 7)
Download Attachments
- Set Max (maximum) Message Size (default is 5KB)
- Set the default connection type for this account.
b. Select OK to return to the Get Mail Options dialog box.
4
Select OK.
5
[ & ] OPTIONAL If you are retrieving mail using a VPN connection, you may be asked to enter the username and password you use to log in to the VPN.
6
Select OK.

Done A list of your messages appears in the Inbox.
CHAPTER 15
Sending and Receiving Email Messages

Did You Know?
If more than one scheduled auto get happens at the same time (for example, for two separate email accounts), auto get retrieves messages in the following order:
- Any past-due auto get (for example, a retry of an earlier failed auto get).
- Current retrievals according to the order of email accounts (#1, #2, and so on).
Auto get mail with notification
You can set up the VersaMail application to automatically get new email messages and download them to your handheld with the auto get feature.
If auto get downloads any new messages, your handheld lets you know with a blinking light or a beep. And a list with the number of new messages retrieved appears on the Reminders screen.
The auto get feature downloads only the first 3KB of each message. You can select the More button on the message screen to download the entire message.
Auto get recognizes any filter criteria you set up for downloading messages. Messages that don't meet these filter criteria are not downloaded during an auto get. You need to turn off all filters and manually retrieve these messages.
NOTE In order for auto get mail to work, your handheld must be able to make periodic connections to the Internet through your Bluetooth wireless technology-enabled mobile phone or a Bluetooth access point. If your handheld is not within range of a Bluetooth device that allows it to connect to the Internet, auto get mail does not take place.
Scheduling auto get mail
You can set up different schedules for each of your email accounts, but you can set up only one schedule for each account. For example, if you set up a schedule to get mail on weekdays for your Yahoo! account, you can't set up a separate schedule for weekends for that account.
The auto get feature may not work with your specific VPN connection. It doesn't work for SSL connections, nor does it work if your security preferences include encrypting databases on your handheld.
CHAPTER 15
Sending and Receiving Email Messages

Tip
You should perform a manual get mail after setting up a scheduled auto get. Then only new messages are retrieved during auto get.
Or if you have configured an email account to synchronize messages on your handheld with messages on your computer, you can synchronize after setting up a scheduled auto get to make sure that only new messages will be retrieved.

Select Auto Get Mail for a given account:
a. From the Inbox or on another folder screen, open the menus.
b. Select Options, and then select Auto Get Mail.
c. Check the Get mail automatically box.
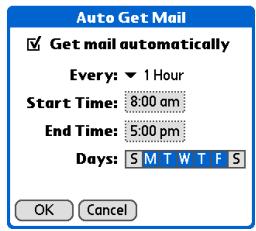

Set schedule options:
Interval Select the Every pick list and select the time interval, from 15 minutes to 12 hours. Note that if you set a more frequent interval, you may need to recharge your handheld's battery more often.
Start/End Time Tap the Start and End Time boxes, and then select the hour, the minute, and AM or PM to enter the time for the first and last auto get mail to take place. Select OK.
Days Select the days you want the schedule to be active. You can choose any number of days, but you can set up only one schedule for each email account.

Select OK.
Continued
CHAPTER 15
Sending and Receiving Email Messages

[&]OPTIONAL Select Get Mail.

Auto get notifications
The auto get mail feature provides three types of alerts when and after it gets messages:
Status messages Depending on the connection type, a series of status messages may appear during the auto get connection and mail retrieval process.
Notifications You can choose to have your handheld alert you with a beep or alert sound, or with a blinking light, when a new message arrives in your account.
Reminders screen If auto get discovers and downloads new messages for an email account, a notification appears on the Reminders screen, telling you the account name and the number of new messages. If auto get is scheduled for more than one account, a separate notification appears for each account.
CHAPTER 15
Sending and Receiving Email Messages
+ Did You Know?
Any custom sound you install on your handheld appears on the Notify Sound pick list.
\*Tip
You can follow these steps to change the notification sound at any time.
\*Tip
You can also adjust the volume of the notification sound.
Setting notification options
You can choose a sound—such as a bird, a phone, or an alarm—to let you know when new email arrives.
1 Turn on notification:
a. In the Inbox or on another folder screen, open the menus.
b. Select Options, and then select Notification.
c. Check the Notify me of new mail box.
2 Select notification options:
a. Select the Notify Sound pick list, and then select a sound. The handheld plays a brief demo of the sound.
b. To receive notifications of successful auto get mail and automatic send retries only, uncheck the Notify me of Auto Get and Send failures box. Leave the box checked if you want to receive notifications of both successful and failed auto get mail and automatic send retries.
c. Select OK.
Done
CHAPTER 15
Sending and Receiving Email Messages
Viewing and using the Reminders screen
The Reminders screen on your handheld shows info about new email messages. It also shows alerts from other applications, such as Calendar appointments.
To view the Reminders screen, tap the blinking asterisk when it appears in the upper-left corner of any screen.
If you set up a scheduled auto get mail and you receive new email messages, they are downloaded into the Inbox. If you are working with email messages in the Inbox, the Reminders screen doesn't display a reminder for new messages, because they are already displayed in the Inbox.
A broken envelope icon appears next to a notification when an auto get mail fails.
You can do any of the following:
- Check the box to clear a reminder from the list.
- Select the reminder (either the mail icon or the text description) to go to the Inbox of that account or to read a detailed error message.
- Select Done to close the Reminders screen and return to whatever you were doing on your handheld before the Reminders screen appeared.
- Select Clear All to delete all reminders on the Reminders screen.
When a notification appears on the Reminders screen, select the notification to go to the Inbox of that account, or launch the VersaMail application and go to that account.
CHAPTER 15
Sending and Receiving Email Messages
If auto get discovers new messages but then fails for any reason, the Reminders screen shows the account name and an error message. You can select the error message or open the VersaMail application for that account for more detailed information on the failed auto get.
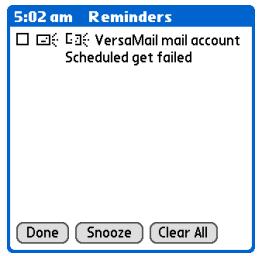

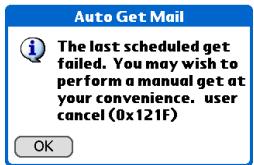
You can choose to disable notifications for auto get mail failures.
Auto get mail retries
If the interval for a scheduled auto get is set at "Every 1 hour" or less frequently, and an auto get fails for any reason, the VersaMail application tries to retrieve email every 30 minutes until either the next scheduled auto get occurs or the end time for scheduled email retrieval is reached. If the interval is set for more frequently than "Every 1 hour," the VersaMail application waits until the next scheduled auto get.
CHAPTER 15
Sending and Receiving Email Messages
Resource issues with auto get mail
The auto get mail feature can cause the following resource constraints:
Decreased battery life If you set the auto get interval for more often than once per hour, your handheld's battery charge may drain more quickly, and you may need to recharge the battery more frequently.
Increased monthly charges Some wireless providers, such as Cingular or T-Mobile, charge a fee for data transactions. If you use one of these providers, using the auto get feature can substantially add to your monthly charges. This is especially true for POP accounts, because POP messages take longer to download than IMAP messages.
If you primarily retrieve messages over your company's network (Bluetooth or 802.11b network), monthly charges should not be an issue.
If you are concerned about resource issues, set your interval for email auto get to retrieve messages no more frequently than once per hour.
Inbox icons in the VersaMail application
The icons to the left of a message in the Inbox tell you the message's status.

Only the subject header information is downloaded.

Part or all of the message text is downloaded.

Part or all of the message text and attachment information is downloaded.
CHAPTER 15
Sending and Receiving Email Messages

Tip
If you use the 5-way navigator to select and open a message, press Center after reading the message to close it and return to the folder where you started.

Highlight a message and press Right on the 5-way to open a menu of message commands such as forward, reply, and delete.
Reading email messages
To read email, select the email message in the Inbox or the folder where the message is located.
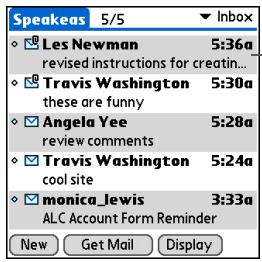
Select to read
If you chose to get messages by subjects only, select the More button to view the body of the email message, plus any attachments, up to the maximum message size you select. If the downloaded message exceeds your maximum message size, only a partial message is displayed. Select the More button to view the entire message.
If you chose to get entire messages, the body of the message is displayed. However, if the downloaded message exceeds your maximum message size, only part of the message is displayed. Select the More button to view the entire message.
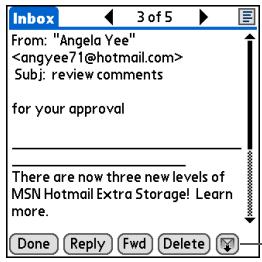
Select More to view the entire message
CHAPTER 15
Sending and Receiving Email Messages
Selecting whether to receive messages as HTML or plain text
By default, the VersaMail application is set to receive mail in HTML format. This means that any email messages sent as HTML are displayed on your handheld with basic HTML formatting intact, including the following:
- Bold
- Italics
Underlining - Colored words
- Bullet lists
- Numbered lists
- Line breaks
For certain types of graphics (for example, JPEG or GIF files), the graphic may be displayed as a URL in the body of the email message. In some cases, you can select the URL to open the graphic.
Messages sent as plain text are displayed as plain text only, and any text stripped of its HTML formatting is displayed as plain text as well. You can set the application to receive all messages as plain text only, regardless of the format in which they were sent. If you choose this option, only the text of any messages sent in HTML format is displayed.
NOTE The VersaMail application sends all messages as plain text only, with all HTML tags stripped, even if you are forwarding or replying to a message that was originally received as HTML.
CHAPTER 15
Sending and Receiving Email Messages
1
Open VersaMail Preferences:
a. Open the menus.
b. Select Options, and then select Preferences.
2
Select message format:
a. Select the Receive Format pick list, and then select HTML or Plain Text. The default is HTML.
b. Select OK.

Done
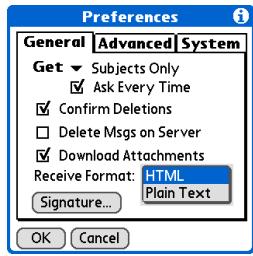
CHAPTER 15
Sending and Receiving Email Messages

Did You Know?
The font settings you choose apply to all incoming messages, not just the current one.
Customizing the font of messages you are reading
You can change the font, size, or style of incoming messages to make them easier to read.
1
Open the Select Font dialog box:
a. On the message screen, open the menus.
b. Select Options, and then select Font.
2
Customize the font:
a. Select each pick list (Font, Size, Style) and select the option you want.
b. Select OK.

Done
Select Font
Font: Palm
Size: 9
Style: Plain
Sample:
This is a sample.

Cancel
CHAPTER 15
Sending and Receiving Email Messages

Tip
If you set up the account to synchronize email on your handheld with email on your computer only, you must synchronize so that messages you compose on your handheld can be sent out through your computer's email application.

Did You Know?
You can set up your
handheld to
automatically try
resending any messages
that are not sent correctly
the first time.

Did You Know?
When you put addresses in the copies (cc:) field, they are visible to all other recipients.
Addresses in the blind copies (bcc:) field are hidden from all other recipients.
Sending an email message

Go to Favorites and select VersaMail


Open a new message:
a. Open the menus.
b. Select Accounts, select the account you want, and then select New.
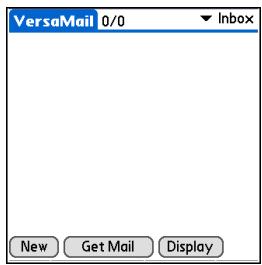

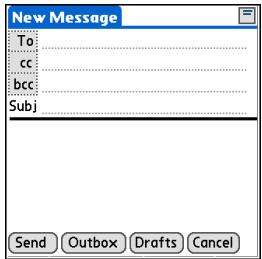

Continued
CHAPTER 15
Sending and Receiving Email Messages

Tip
Subjects longer than one line are shown on a single line with an ellipsis symbol to the right of the subject line. Select the subject to see the full subject.

Did You Know?
You can open the Edit menu to access the editing features available for a message you are composing.

Tip
If you open another application while you're working on a message, the message is automatically saved as a draft.
3
Address and compose your message:
a. Enter the recipient's email address by entering it directly, entering it from Contacts, or using Smart Addressing.
b. In the Subject field, enter the subject of your email.
c. In the area below the Subject line, enter the text of your email.
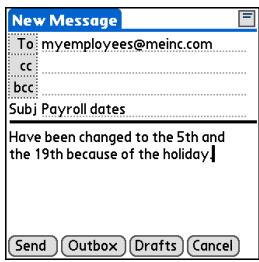
4
[ & ] OPTIONAL Attach one or more files to send with your message.
5
Select one of the following options for sending your message:
Send Sends the email immediately.
Outbox Stores email so you can compose email offline and then send it all during one connection with the server. To send your email, select Get & Send.
Drafts Saves your message so you can work on it at another time.

Done
CHAPTER 15
Sending and Receiving Email Messages

Tip
You can't see the whole list of addresses in a field if the list is longer than two lines. To see the whole list, tap the word To, cc, or bcc.

Tip
It's OK to enter commas instead of semicolons between addresses, because they're changed to semicolons. But you can't use other punctuation or no punctuation between addresses.
Entering an address directly in the To field
1
On the New Message screen, tap or navigate to the To field.
2
Enter an address using one of the following methods:
Single address in To field Enter the address, and then select Done.
Multiple addresses in To field Enter a semicolon (·) and then a space between recipient names.
Single address on Recipient
List Tap To and enter the address on the Recipient List screen, and then select Done. Use the shortcut buttons at the bottom of the screen for quick address entry.
Multiple addresses on Recipient List Enter a semicolon (·) and then a space between recipient names.

Done
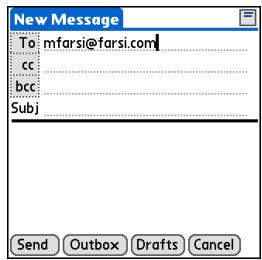
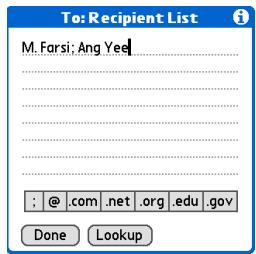
CHAPTER 15
Sending and Receiving Email Messages
+ Did You Know?
Addresses longer than one line are shown on a single line with an ellipsis symbol to the right of the address line. To view or edit the address, tap the To field to display the full address.
Entering an address using Contacts
You can enter a recipient's address by using the Lookup screen to select the address. The names and addresses on the Lookup screen come from Contacts.
1 Open the Lookup screen:
a. On the New Message screen, select the word To.
b. On the Recipient List screen, select Lookup.
2 Enter the address:
a. On the Address Lookup screen, select the address you want, and then select Add.
b. Select Lookup and repeat step a for each address you want to add.
Done
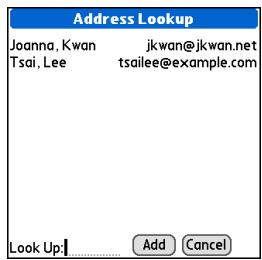
CHAPTER 15
Sending and Receiving Email Messages

Tip
Smart Addressing is turned on by default. To turn off Smart Addressing, open the Options menu, select Preferences, and then check the Advanced tab. Deselect the Enable Smart Addressing box.
Entering an address using Smart Addressing
Smart Addressing completes a recognized email address. Smart Addressing automatically fills in fields when the recipient's name and email address are in your Contacts list.
1
On the New Message screen, tap in the To field.
2
Start entering the person's name, such as Joe Smith. Once the name is recognized from your Contacts list, the name and email address are automatically completed on the recipient list. For example, if you have a Joe Smith and a Joan Smith in Contacts (and no other names starting with J), once you type "Joe," the entry "Joe Smith" is completed with the correct email address.
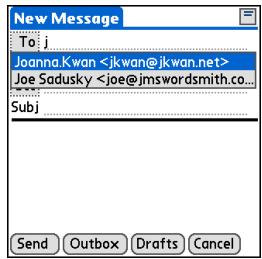
3
Select the name when it appears.

Done
CHAPTER 15
Sending and Receiving Email Messages
Attaching a personal signature
You can attach a personal signature, with info like your company's address and fax and telephone numbers, to the bottom of all messages you send.
1
Open the VersaMail Preferences:
a. From the Inbox or on another folder screen, open the menus.
b. Select Options, and then select Preferences.
Preferences
General Advanced System
Get Subjects Only
Ask Every Time
Confirm Deletions
DeleteMsgsonServer
Download Attachments
Receive Format:
Signature..
at: HTML
Plain Text
OK Canc
Cancel
2
Add a signature:
a. Select Signature.
b. Check the Attach Signature box.
c. Enter your signature information, and then select OK.

Signature
Attach Signature:
J.S.Use
Marketing Director
555-555-5559

Cancel
CHAPTER 15
Sending and Receiving Email Messages

Did You Know?
Send retry doesn't work for VPN or SSL connections, or for accounts for which your ISP requires you to log in to the mail server before sending mail. It also doesn't work if you have configured the security preferences on your handheld to encrypt databases on the handheld.

Tip
Select the notification to view a detailed error message. Viewing the error message deletes the notification from the Reminders screen.
Send retry
If a send attempt fails for any reason after you select Send (for example, your handheld is out of range, or the application cannot connect to the mail server), you can choose to have the application move the message to the Outbox and keep trying to send the message every 30 minutes, a maximum of three times.
If you put a message in the Outbox, you must select Send to send the message on the first try. The VersaMail application attempts automatic send retry only after the first send attempt fails. Keep in mind the following regarding automatic send retry:
- Automatic send retry occurs only if you select Send to send the message manually. It doesn't work if you select Get & Send.
- To select automatic send retry, select Yes in the dialog box notifying you that manual send has failed.
- If automatic send retry succeeds, the message is moved to the Sent folder.
- If automatic send retry fails after the third try, you have to send the message manually.
Send retry notifications
If automatic send retry fails after the third try, a notification appears on the Reminders screen. Send retry notification features include the following:
- A broken envelope icon [ ] shows that automatic send retry has failed. A separate notification appears for each email account.
- You can choose to disable notifications for send retry failures.
- The Reminders screen shows only the most recent notification for an email account, no matter how many automatic send retries have been attempted for that account.
CHAPTER 15
Sending and Receiving Email Messages

Tip
If you perform a soft reset or synchronize during send retry, the retry cancels. You must manually send any messages in the Outbox.
Outbox icons in the VersaMail application
The icons to the left of a message in the Outbox show the message's status.
Message is waiting either to be manually sent or to be sent during the next send retry. You can edit, move, or delete a message in this state.
Send retry is currently in process; you cannot edit, move, or delete a message in this state.
A Third automatic send retry has failed. You must manually send a message in this state by selecting Get & Send.
CHAPTER 15
Sending and Receiving Email Messages
Working with email folders
By default, the VersaMail application displays the messages in a given account's Inbox folder. You can easily view the messages in a different folder. You can also customize the appearance of the message list in your email folders, move messages between folders, and create and edit folders.
Viewing another folder
1
In the Inbox or on another folder screen, select the folders pick list in the upper-right corner of the screen.
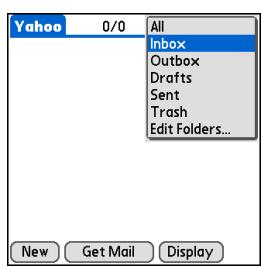
2
Select the folder you want to view.

Done
CHAPTER 15
Sending and Receiving Email Messages

Tip
The customization options you choose apply to all email folders, not just the one you are currently viewing.
Customizing the appearance of the message list
You can change display options on the message list, as well as the size of columns in the list.
NOTE You can change column size for one-line message view only.
1
In the Inbox or on another folder screen, select Display Options.
2
Customize any of the following:
Sort by Select the Sort by pick list, and then select the column name. Default is Date.
Sort order Select Descend or Ascend. Default is Descend.
One- or two-line summary view
Select the Show pick list, and then select one-line or two-line view. Default is two-line.
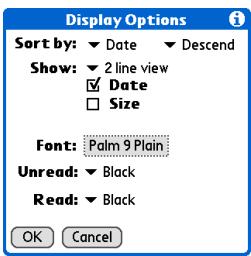
Columns shown Check the box under the Show pick list for each column you want to show. The column options change depending on whether you choose a one-line or a two-line view. Defaults are Sender, Date, and Subject.
Font Tap the Font field. Select each pick list in the Select Font dialog box (Font, Size, Style) and select the option you want. Default is Palm 9 Plain.
Read and unread message color Select the Read and Unread pick lists, and then select the color you want for each type of message. Default for both is black.

Continued
CHAPTER 15
Sending and Receiving Email Messages
3
Select OK.
4
If you selected one-line summary view in step 2, change the size of columns in the message list:
a. Tap the column divider.
b. Drag the column divider to change the width of the column.

Done
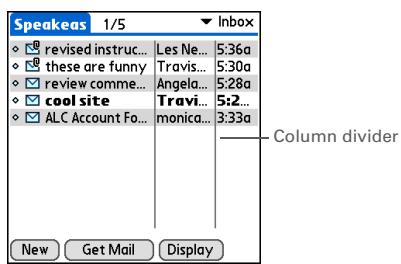
CHAPTER 15
Sending and Receiving Email Messages

Tip
You can use the 5-way to move a single message. Select the message you want to move, press Right to open the Message menu, and then select Move To. Then select the folder you want on the destination list.

Tip
To select a group of adjacent messages, drag the stylus to the left of the message icons.

Tip
You can also open the Message menu and select Move To.
Moving messages between folders
You can move one or more email messages between folders.
1
In the Inbox or on another folder screen, select the folder pick list in the upper-right corner and select the folder containing the message(s) you want to move.
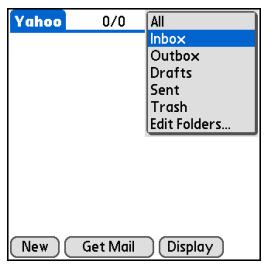
2
Move a single message:
a. Tap the envelope icon to the left of the message you want to move, and then select Move To from the list.
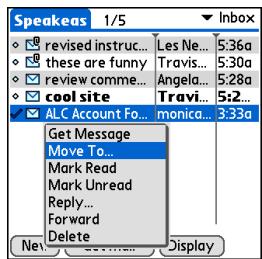

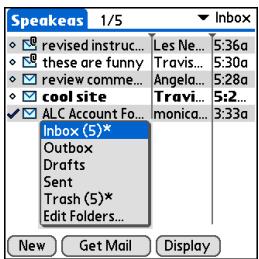
b. On the folders list, select the destination folder you want.

Continued
CHAPTER 15
Sending and Receiving Email Messages
3
Move multiple messages:
a. Tap to the left of the icon for each message you want to move. A checkmark appears next to each selected message.
b. Tap a message icon next to a selected message, and then select Move To on the list.
c. On the folders list, select the destination folder you want.
4
Select OK.

ne
Creating and editing mail folders
The VersaMail application has certain preset folders, such as Inbox, Outbox, Drafts, and Trash. You can create new folders so that you can store email messages by subject, person, or project.
1
In the Inbox or on another folder screen, select the folder pick list in the upper-right corner, and then select Edit Folders.

Continued
CHAPTER 15
Sending and Receiving Email Messages
2
Select any of the following:
a. To create a new folder, select New, and then enter the new folder name.
b. To rename a folder, select the folder name from the list on the screen, select Rename, and then enter the new folder name.
c. To delete a folder, select the folder name from the list on the screen, and then select Delete.
NOTE For IMAP accounts only, check the box if you want the change (create, rename, delete) to take place on the server as well as on your handheld.
3
Select OK.

Done
CHAPTER 15
Sending and Receiving Email Messages
Did You Know?
You can forward email messages from any folder other than the Outbox folder.
+ Did You Know?
Forwarded messages are always sent as text only, even if you received the original message in HTML format.
Working with email messages
When you receive an email message, you can reply to it or forward it to someone else. You can also open web addresses (URLs) within messages.
Forwarding an email message
1 On a folder screen, select the folder pick list in the upper-right corner, and then select the folder that contains the message you want to forward.
2 Select the message to forward:
a. Select the email message to open it.
b. Select Forward (Fwd).
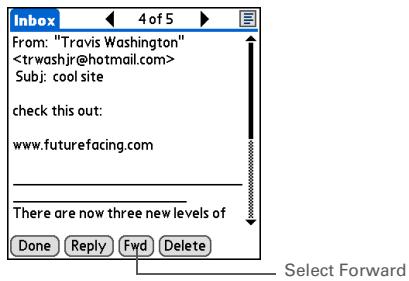
3 Address and send the message.

CHAPTER 15
Sending and Receiving Email Messages

Did You Know?
Replies are always sent as text only, even if you received the original message in HTML format.

Tip
From the message screen, you can also select Reply from the Options menu.

Tip
To reply to a message from the message list, tap the envelope icon next to the message you want, and then select Reply on the list. Or open the Options menu and select Reply.
Replying to an email message
You can reply to an email message as you are reading it, or you can start the reply when you are viewing messages in the message list.
1
Create the reply:
a. Select the message you want to reply to.
b. Select Reply.
2
Select reply options and send your reply:
a. In the Reply Options dialog box, select options for replying to the sender only or to all email recipients; for including original message text with your reply; and for inserting a >'' cha original message included with y
b. Select OK.
c. Enter a reply.
d. Select Send to send the reply now, Outbox to send it later, or Drafts to work on it later.

Done
CHAPTER 15
Sending and Receiving Email Messages

Did You Know?
Email addresses appear in the form "username@ mailservice.com" (or other three-letter extension such as .net, .org, and so on).
Working with URLs
You can tap a URL in a received message to view the web page or file associated with the URL. Tapping the URL opens your handheld's web browser to view the page or file.
You can also tap an embedded email address to open a new message screen with the address in the To field.
Depending on whether the received message is displayed in HTML or plain text format, URLs and email addresses appear in slightly different forms, as follows:
HTML URLs and email addresses appear as blue underlined text.
Plain text Most URLs begin with "http://" or "www." Simply tap to view these types of URLs. To view a page or file associated with a URL that does not begin with "http://" or "www.", select the URL, copy it, and paste it into the address bar in the web browser.
Deleting a message
You can delete email messages from any folder. For example, you can delete old messages in the Inbox or messages that you were working on in the Drafts folder. When you delete a message, it is placed in the Trash folder.
1
In the Inbox or another folder screen, select the folders pick list, and then select the folder that contains the message you want to delete.
2
Tap the bullet next to the icon of each message that you want to delete. To select adjacent messages, drag the stylus so it hits the bullet to the left of each message. Lift the stylus and drag again to select more adjacent messages.
Continued
CHAPTER 15
Sending and Receiving Email Messages

Tip
To delete messages on the server when you empty the trash on your handheld, select the
Delete Messages on Server setting in the VersaMail
Preferences. Many email providers have size restrictions for mail storage. If your mailbox on the server becomes full, messages are returned to the senders

Tip
You can also tap the message icon next to a selected email message and then select Delete.
3
Delete the message or messages:
a. Open the menus.
b. Select Delete from the Message menu.
c. Select Also delete message(s) on server, if you want to delete the messages from the server now.
[!] IMPORTANT If you delete a message on the server, you cannot retrieve it and view it again later.
d. Select OK.

Done
Deleting old messages
1
Open the Delete Old Messages dialog box:
a. Open the menus.
b. Select Delete Old from the Message menu.

Continued
CHAPTER 15
Sending and Receiving Email Messages

Tip
Messages you delete from a folder move to theTrash folder and remain there until you empty the trash.
2
Choose settings for deleting old messages:
a. Select the Folder pick list, and then select the folder that contains the messages you want to delete.
b. Select the Older than pick list, and then select One Week, One Month, or Choose Date. If you select Choose Date, select a date from the calendar.
Delete Old Messages
Delete all messages in the
Folder: Inbox
Older than: One Week
Delete Cancel
3
Delete messages:
a. Select Delete.
b. Select Also delete message(s) on server if you want to delete the messages from the server now.
Delete Confirmation

Delete message(s) from the handheld?

to delete message(s) server.

Cancel
[!]IMPORTANT If you delete a message on the server, you cannot retrieve it and view it again later.
c. Select OK.

Done
CHAPTER 15
Sending and Receiving Email Messages

Tip
You can set a preference to automatically empty the trash.

Did You Know?
Many email providers, such as Yahoo!, have size restrictions for mail storage. If your mailbox on the server becomes full, messages are returned to the senders.
Emptying the trash
When you delete a message, it moves to the Trash folder. Deleted email accumulates in the Trash folder and takes up space on your handheld. To increase memory, you should empty the trash regularly.
1
Open the Emptytrash dialog box:
a. Open the menus.
b. Select EmptyTrash from the Message menu.
NOTE If Auto-Empty Mail from Trash is selected in VersaMail Preferences, a message asks if you want to delete the trash.
2
[&] OPTIONAL Select Details to see how many messages are in the trash and whether the messages are set to be deleted on the server.
3
Select one of the following options for emptying the trash:
To delete messages from your handheld as well as from the server Select Both. Select Yes if you want to update the server now.
To delete the message from only your handheld now Select Handheld.

Done
CHAPTER 15
Sending and Receiving Email Messages

Did You Know?
By default, Auto-Empty Mail from Trash is selected, and the time interval is set at Older Than 1 Week.
Setting the trash to be emptied automatically
1
Open the VersaMail Preferences:
a. Open the menus.
b. Select Options, and then select Preferences.
2
Select the settings for automatically emptying the trash:
a. Select the Advanced tab.
b. Check the Auto Empty box if it is not selected.
c. Select the pick list, and then select one of the following:
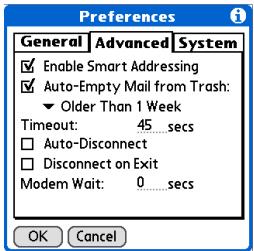
- Email messages are automatically emptied from the trash immediately when they are deleted from a folder.
- Messages are automatically emptied from the trash after the time interval you specify: one day, three days, one week, or one month.
d. Select OK.

Done
CHAPTER 15
Sending and Receiving Email Messages
+ Did You Know?
In one-line view, read messages appear in plain text in the message list; unread messages appear in bold text.
+ Did You Know?
POP mail servers do not support the read or unread message feature. For POP accounts, messages that you mark appear in plain or bold text on your handheld, but the difference is not recognized on the server.
Marking messages as read or unread
When you select a message to read it, it is automatically marked as read. You can also manually mark messages as read or unread.
1 Select the message or messages to mark:
a. In the Inbox or on another folders screen, select the folders pick list, and then select the folder containing the message you want to mark.
b. Tap the icon next to the message you want to mark. To mark multiple messages, tap the bullets next to the messages you want to mark.
2 Do one of the following to mark the message or messages:
Single message Select Mark Read or Mark Unread on the list.
Multiple messages Open the menus, select Message, and then select Mark Read or Mark Unread.
Continued
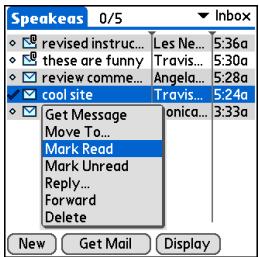
CHAPTER 15
Sending and Receiving Email Messages

Tip
Selecting Both and then OK also processes any other pending actions on the server, such as deleting messages not yet deleted.

For IMAP accounts only, select one of the following:
To mark the messages as read or unread on your handheld only Select Handheld.
Mark Read

Would you like to mark the selected messages read on both the handheld and server, or on just the handheld?
Both
Handheld
Cancel
To mark the messages on both your handheld and the server and have the messages marked on the server immediately Select Both, and then select OK on the confirmation screen.
To mark the messages on both the handheld and the server and have the messages marked on the server the next time you synchronize or connect to the server Select Both, and then select Cancel on the confirmation screen.

NOTE If you set up an IMAP account as synchronize only, this screen does not appear.

Done
CHAPTER 15
Sending and Receiving Email Messages

Tip
You can also save downloaded files to an expansion card.

Tip
The maximum message size you can download is 60KB for the body text and approximately 5MB total, including attachments. If an attachment is too large, it cannot be downloaded to the handheld. You can download a maximum of 10 attachments for any received messages, regardless of message size.
Working with attachments
You can easily download, view, and send attachments with email messages.
Downloading an attachment to your handheld
Email may contain attached files, such as Microsoft Word or text files, that you want to view or install on your handheld. When you receive a message that has an attachment, the VersaMail application scans your handheld to see if you have an application that can open the attachment. If so, you can open the attachment with the application.
Here are the kinds of attached files you can work with:
vCard (VCF) This is contact information. Open these files in the Contacts application on your handheld.
vCal/iCal (VCS or ICS) This is usually a calendar appointment or a task. Open these files in the Calendar or Tasks application on your handheld.
Text (TXT) This is usually a memo or another plain text file. Open these files in the Memos application on your handheld.
HTML (HTML or HTM) This is usually a web page or a formatted text file. Open these files in the web browser on your handheld. Your handheld displays HTML attachments with full formatting intact.
Microsoft Word (DOC), Excel (XLS), and PowerPoint (PPT) files Open these files in the Documents application on your handheld.
Graphics files (JPG, BMP, TIF, GIF) Open these files in the palmOne™ Media application on your handheld.
Other application files For other types of application files, your handheld may contain a viewer that allows other applications to pass it a file for viewing. If your handheld contains such a viewer, you can open the attachment; if not, you can't view the attachment.
CHAPTER 15
Sending and Receiving Email Messages

Tip
Because downloading large messages can consume handheld resources, the VersaMail application displays the size and asks if you want to continue downloading any message that exceeds your maximum message size, up to a total size of 5MB.
PRC (PRC) This is a Palm OS® application that you can install and run on your handheld.
PDB (PDB) This is a file that works with specific Palm OS applications.
ZIP (ZIP) These are compressed files that contain other types of files, for example, text files or Word documents. You can download and uncompress ("unzip") a Zip file and then view the contents on your handheld.
Working with a downloaded attachment
In the message list, a paper clip on a message's envelope icon indicates that the message has an attachment that has been downloaded. You can view, edit, or install an attached file, depending on the file type.

In the Inbox, select the message with the attachment.
Paper clip
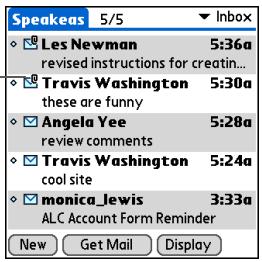

[ & ] OPTIONAL If you choose to get messages by subject only, select More for each downloaded message to view the body of the email message plus any attachments, up to the maximum message size.
Continued
CHAPTER 15
Sending and Receiving Email Messages

Did You Know?
You can save any type of attached file, regardless of file type.

After viewing an attachment, you can save it to an expansion card.
3
Tap the red paper clip icon in the upper-right corner. If the attachment is not downloaded, a paper clip icon doesn't appear even though the message was sent with an attachment. You must download the attachment for the paper clip icon to appear.
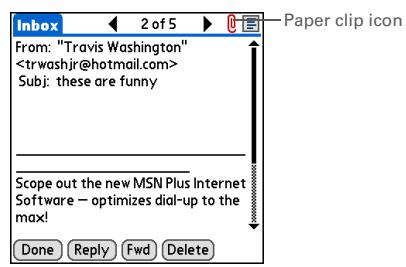
4
Select Save to save the attachment to an expansion card, or do one of the following, depending on the attachment file type:
Viewable file: text, Word document, Excel spreadsheet, PowerPoint presentation, task, HTML, graphic, and so on Select the name of the attachment you want to view, and then select View. If there are multiple viewers registered on your handheld for the attachment file type, either use the default viewer shown, or select a viewer from the list. For example, if you have two photo-viewing applications on your handheld and you select a photo attachment, the Viewer pick list appears containing the names of the photoviewing applications. Select the pick list, and then select the application you want to use to view the photo attachment.
If there is only one viewer registered for the attachment file type, the viewer is shown without a list.

Continued
CHAPTER 15
Sending and Receiving Email Messages
Cont'd.
Palm OS application or database file (PRC or PDB) Select the name of the attachment you want, and then select Install. The file is installed automatically.
Compressed Zip file Select the name of the attachment you want, and then select Unzip. The file uncompresses, and the files it contains are listed. Select the name of the file you want to view or install, and then select View or Install.
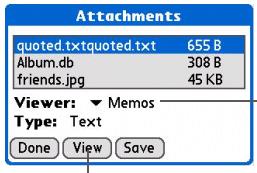
Viewer pick list
Button displays View, Install, or Unzip, depending on the attachment file type
5
When you finish with the attachment, do one of the following:
Done button appears on screen Select Done. This returns you to the Attachments dialog box, where you can select another attachment.
No Done button appears Go to Favorites and select VersaMail to return to the Inbox of the account you were viewing.

Done
CHAPTER 15
Sending and Receiving Email Messages

Tip
When you see both a red paper clip icon and the More button in the Message screen, that means that some attachments to this message were downloaded, but others remain to be downloaded.
Downloading large attachments
Downloading and viewing a message with a single attachment that exceeds your maximum message size, or a message with multiple attachments whose total size exceeds your maximum message size, requires some extra steps.
1
To download a single attachment that exceeds the maximum message size:
a. On the message screen, select More.
b. Select Yes to continue downloading the entire message with attachment.
c. When downloading is complete, the red paper clip icon appears and More is no longer displayed. Save view or install the attachment.

Continued
CHAPTER 15
Sending and Receiving Email Messages

Tip
If you open a message from the Drafts folder, you must first select Edit before you can add an attachment.
2
To download multiple attachments whose total size exceeds the maximum message size:
a. On the message screen, tap the red paper clip icon.
b. Select one of the following:
To view any downloaded attachments without downloading additional attachments Select No. Save, view, or install the downloaded attachments.
To continue downloading all attachments Select Yes. When downloading is complete, the Attachments dialog box appears, showing all downloaded attachments. Save, view, or install the downloaded attachments.

Done
Attaching files
You can attach files on your handheld to email messages you send. For example, you can attach photos or videos; Word, Excel, and PowerPoint files; and entries from Contacts, Calendar, Memos, and Tasks.
You can also attach files from an expansion card inserted into your handheld's expansion card slot.
The maximum size message you can send is 60KB for the body text and approximately 5MB of total data for any attachments. The maximum number of attachments for any email message is ten, regardless of the attachments' total size.
You can attach a file to forwarded messages and replies as well as to messages you create.
NOTE The procedure for attaching photos and videos is slightly different from the procedure for attaching other types of files.
CHAPTER 15
Sending and Receiving Email Messages
+ Did You Know?
You can attach any file type from an expansion card.
+ Did You Know?
If you select Files on Card, the VersaMail application displays all file types on the card. You can select a particular file type, or select All Files to view all files on the card.

Tip
To remove an attachment from an email message, select the attached file in the Attachments box, and then select Delete.
1 Open the Attachments screen:
a. On the message screen, open the menus.
b. Select Options, and then select Attachment.

Attach the file:
a. Select the Type pick list, and then select the file type. The VersaMail application displays all file types on your handheld that you can attach to an email message. Or select to browse files on an expansion card.
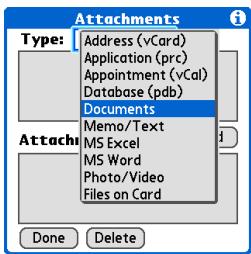

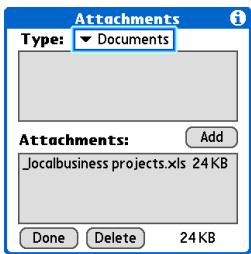
b. Select the file that you want to attach, and then select Add or Attach. The selected file appears in the Attachments box.
NOTE For some file types—for example, addresses or memos—the files to attach appear in the box at the top of the Attachments screen. For others—for example, Excel or Word files—a new screen appears from which you can select the file to attach.
c. Repeat steps a and b for each attachment you want to add, and then select Done.

CHAPTER 15
Sending and Receiving Email Messages

Tip
To attach a photo or video from an expansion card, select the card name from the Album pick list.

Tip
To select adjacent items, drag the stylus across each item.
Attaching photos and videos
1
Open the Attachments screen:
a. On the message screen, open the menus.
b. Select Options, and then select Attachment.
2
Attach the photo or video:
a. Select the Type pick list, and then select Photo/Video.
b. On the Select Media screen, select the Album pick list to go to the album containing the photo or video you want, and then check the box to the left of the photo or video.
c. Select Done.

Done
CHAPTER 15
Sending and Receiving Email Messages

Tip
If you are synchronizing an account with Microsoft Outlook on your computer, you must also set Outlook as your default email program.

Tip
If you intend both to synchronize email on your handheld with email on your computer and to send and receive email messages wirelessly from your handheld for a given account, leave the Synchronize Only Account box unchecked on the Account Setup screen.
Synchronizing email on your handheld with email on your computer
WINDOWS ONLY
To manage your email on your computer as well as on your handheld, you can synchronize an email account on the handheld with an email application on the desktop. You can use many popular email applications, called clients, such as Microsoft Outlook, Eudora, Lotus Notes, Outlook Express, or any other email clients that use MAPI.
When you synchronize an account, messages from your computer are downloaded to your handheld only. Messages from your handheld are not transferred to your computer during synchronization.
[!] IMPORTANT You must have a Windows computer to synchronize email on your handheld with email on your computer. On a Windows computer, the VersaMail conduit is installed automatically when you install Palm® Desktop software.
To synchronize email for a given account, do the following:
- If you plan both to send and receive email wirelessly from your handheld and to synchronize email on your handheld with email on your computer, you must set up the email account on your handheld with the correct settings. If you plan only to synchronize email on your handheld with email on your computer, you do not need to set up the account on your handheld.
- Enable synchronization on your computer.
- Select the synchronization options for the email account.
CHAPTER 15
Sending and Receiving Email Messages
Setting up an account on your handheld
If you plan both to send and receive email wirelessly from your handheld and to synchronize email on your handheld with email on your computer, you must set up the email account on your handheld. If you do this, note the following on the Account Setup screen for each email application or connection type:
Microsoft Exchange account Select IMAP in the Protocol pick list.
Lotus Notes If you want to synchronize to a local mail file instead of a server mail file, select POP in the Protocol pick list. If you are synchronizing your corporate email and your corporate mail server does not use IMAP, select POP. If neither of the above is true, select IMAP.
Direct connection to Internet (POP) mail server Select the correct protocol in the Protocol pick list. Most email providers use the POP protocol, although some, notably AOL, CompuServe, and .Mac, use the IMAP protocol.
Direct connection to IMAP mail server Select IMAP in the Protocol pick list.
Enabling synchronization on your computer
1
Open the VersaMail conduit configuration screen:
a. Click the HotSync® Manager icon on the taskbar in the lower-right corner of your computer screen.
b. Select Custom.
c. Select VersaMail from the list, and then click Change.

Continued
CHAPTER 15
Sending and Receiving Email Messages

Did You Know?
An active account is an account you've set up for synchronization.

Tip
Check the box Enable Informational Logging if you want the HotSync® log to record information, such as errors encountered, about the conduit during synchronization.
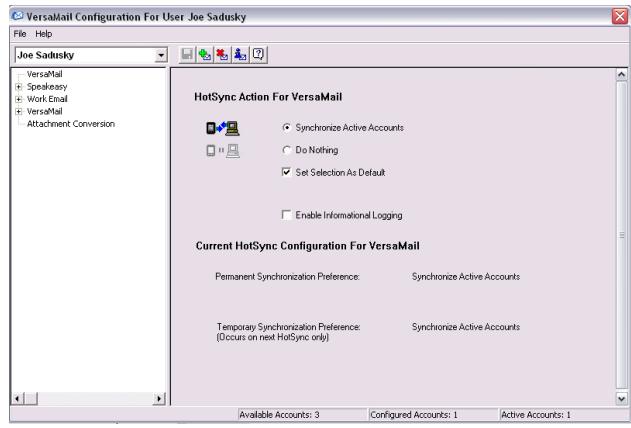
2
Select Synchronize Active Accounts.

[ & ] OPTIONAL If you want to include active email accounts every time you synchronize, check the box Set Selection As Default. Otherwise, active accounts are included only the next time you synchronize.

Done Your computer is now set up to synchronize email. Use the next procedure to set options for each email account you want to synchronize.
CHAPTER 15
Sending and Receiving Email Messages

Tip
Read the Setup Notes box for helpful setup information or error messages.

Tip
You can set advanced synchronization options such as how many days' worth of messages to synchronize, whether to download attachments, and whether to synchronize email folders.
Setting synchronization options for your email account
NOTE If you have already set up an account on your handheld and have synchronized your handheld with your computer, many of the synchronization options are already filled in.

Open the synchronization options screen:
a. On the VersaMail Configuration For User screen, click the plus sign to the left of the account you want to configure.
b. Under the account name, click Mail Client Sync Setup.
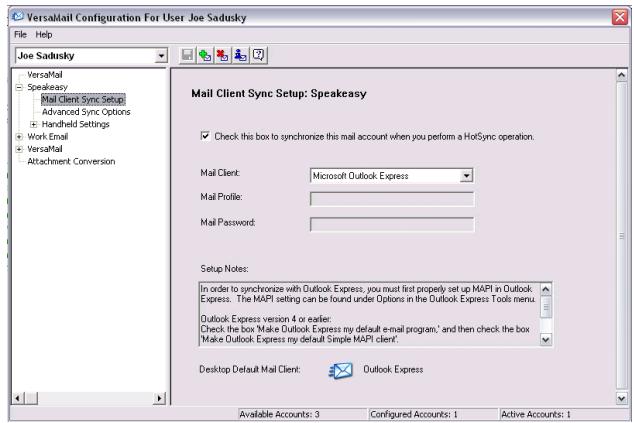

Continued
CHAPTER 15
Sending and Receiving Email Messages
2
Select synchronization options:
a. Check the box to include this account when you synchronize.
[!]IMPORTANT You must check this box; otherwise, the account cannot be synchronized.
b. Select your mail client synchronization options.
3
Click Save on the toolbar to save the settings for this account.

ne
CHAPTER 15
Sending and Receiving Email Messages

Tip
If you select Direct IMAP for Lotus Notes synchronization, you must be connected to the Internet during synchronization; otherwise, it will fail. If you will not be connected to the Internet during synchronization, select POP from the Protocol pick list and select Lotus Notes from the Mail Client pick list to synchronize with the local copy of Lotus Notes on your computer.

Tip
If you are synchronizing with an account with Microsoft Outlook on your computer, you must also set Outlook as your default email program.
Setting mail client synchronization options
Select the mail client to use for synchronization based on the type of account, mail client, or connection you use. Use the following criteria to determine which client to select.
NOTE The mail client you select in the pick list may not be the one you use on your computer. For example, depending on your account, you might use Microsoft Outlook as the mail client on your computer, but need to select Microsoft Exchange or Direct IMAP from the list.
Microsoft Exchange account on your handheld with Microsoft Outlook on your computer If you plan only to synchronize email on your handheld with email on your computer, select Microsoft Exchange in the Mail Client pick list. Otherwise, select Direct IMAP.
If the Mail Profile field displays only one profile, do nothing. If the field displays a pick list, click the list and select your Exchange server profile.
Tap the Mail Password box and enter your Outlook password. This might be your Windows login password or a different password.
Any account other than a Microsoft Exchange account on your handheld with Microsoft Outlook or Outlook Express on your computer If you plan only to synchronize email on your handheld with email on your computer, select Microsoft Outlook or Microsoft Outlook Express in the Mail Client pick list, depending on your mail client.
If you plan both to synchronize email and to send and receive email wirelessly from your handheld, select Microsoft Outlook or Microsoft Outlook Express if your email account uses the POP protocol. If your email account uses the IMAP protocol, select Direct IMAP.
Any account with Lotus Notes If your account uses the POP protocol, select Lotus Notes in the Mail Client pick list. If your account uses the IMAP protocol, select Direct IMAP.
In the next two fields, enter your Lotus Notes ID and password. Click Browse if you need to locate your Notes ID.
CHAPTER 15
Sending and Receiving Email Messages

Tip
The conduit does not support SSL for accounts set up as Direct POP or Direct IMAP.
If you want to synchronize to a local mail file instead of a server mail file, check the Synchronize to local (replicated) mail file box. You must do all of the following to synchronize to a local mail file:
- Replicate the server mail file to the desktop.
- Make sure the replicated mail file is in the Notes data directory.
- If you have performed a custom Notes installation and have replicated the server mail file to another directory on your desktop, make sure that it is the path found in the notes.ini file.
Any account with Eudora on your computer If you are using Eudora as your email application, you must set up MAPI in Eudora. Select Options from the Eudora Tool menu, and then do one of the following:
- If Eudora is the only email application that you use, select Always as the MAPI setting.
- If you use more than one email application, select When Eudora is running as the MAPI setting.
Make sure that your username and password are set up correctly within Eudora. This information is needed to log in to Eudora to retrieve and synchronize your email.
Eudora must be running for you to synchronize. The VersaMail application synchronizes with your Dominant Personality in Eudora 5.1 or later.
Internet-based account on your handheld with your Internet mail server In the Mail Client pick list, select Direct POP to server.
Any account with your IMAP mail server In the Mail Client pick list, select Direct IMAP to server.
Other email applications Select Microsoft Exchange 5.0 or later as a choice for the Mail Client option if your email application is compatible with extended MAPI. If your email application is compatible with SMAPI, select Microsoft Outlook Express as a choice for the Mail Client option.
CHAPTER 15
Sending and Receiving Email Messages

Tip
Make sure your username and password are set up correctly within Outlook.
Setting Microsoft Outlook as your default email program
To synchronize Microsoft Outlook 97/98/2000/XP with a VersaMail email account, you must set Microsoft Outlook as the default email handler. You must check your username and password.
1
On your computer, open the Internet Options screen:
a. Click Start, navigate to Settings, and click Control Panel.
b. In the Control Panel, click Internet Options.

NOTE For Windows XP, click Network and Internet Connections, and then click Internet Options.
2
Set the default email program:
a. Click the Programs tab.
b. Select Microsoft Outlook as the default email program.
c. Click OK.

Done
CHAPTER 15
Sending and Receiving Email Messages
Setting advanced email synchronization options
For each email account you set up on your handheld, you can set options for synchronizing email on your handheld with email on your computer. You can also synchronize email folders on your handheld with folders on your computer.
1
On your computer, open the VersaMail configuration screen:
a. Click the HotSync Manager icon on the taskbar in the lower-right corner of your computer screen.
b. Select Custom.
c. Select VersaMail from the list, and then click Change.
2
Enter the advanced synchronization options:
a. On the VersaMail Configuration For User screen, click the plus sign to the left of the account you want.
b. Under the account name, click Advanced Sync Options.
Continued
CHAPTER 15
Sending and Receiving Email Messages
Cont'd.
c. Enter the synchronization options you want:
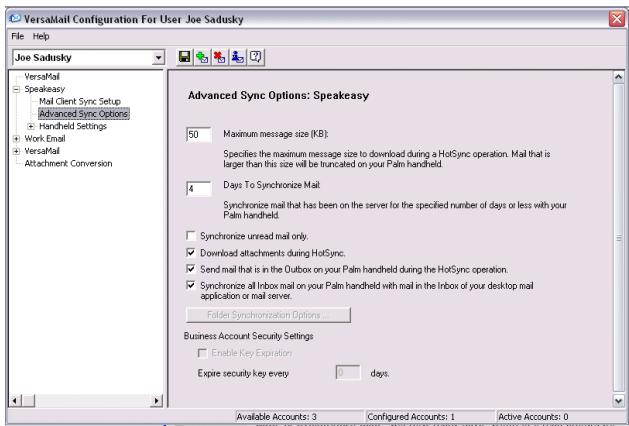
Maximum message size (KB) Enter the maximum message size that can be synchronized from your computer to your handheld—from 1 to 5000KB (5MB). The smaller the maximum size, the faster the synchronization, but any messages over that size are cut. On the other hand, choosing a larger size means that more messages can be completely synchronized without being cut, but synchronization takes longer.
Continued
CHAPTER 15
Sending and Receiving Email Messages

Did You Know?
You can synchronize your Outbox, Sent, Trash, and any other folders you create.
Cont'd.
Days To Synchronize Mail Set how many days' worth of email should be synchronized. Select 0 to synchronize all email in the Inbox during the next synchronization. Select another number if you want to synchronize email for today and some days before today. For example, if you enter 2, email is synchronized for today and yesterday; if you enter 3, email is synchronized for today, yesterday, and the day before; and so on. If you select 0, you may get very long synchronization times. If you select a low number such as 1 or 2, not all of your messages may be synchronized. The default is 7 days.
Synchronize unread mail only Select whether to synchronize all email between your computer and your handheld, or unread email only. By default, the box is unchecked, meaning that all email is synchronized.
Download attachments Select whether to download attachments during synchronization. By default, the box is checked; if you uncheck it, only the body text of any message containing an attachment is downloaded to your handheld during synchronization.
Send email from Outbox Check the box to synchronize messages in your handheld's Outbox with messages on your computer during the next synchronization. If the box is unchecked, your Outbox is not included when you synchronize messages.
Synchronize incoming email Check the box to synchronize messages in your handheld's Inbox with messages on your computer during the next synchronization. The box is checked by default; if the box is unchecked, your Inbox is not included when you synchronize messages.

Continued
CHAPTER 15
Sending and Receiving Email Messages
3
[ & ] OPTIONAL You can synchronize email folders. This means that any changes you make to a folder on your handheld—for example, creating a new folder or moving messages between folders—are automatically updated in the mail client on your computer, and vice versa.
a. Click Folder Synchronization Options.
b. Click the name of the folder you want.
c. Click the Synchronize column to the right of the folder name.
d. Click the arrow to open the drop-down list, and then click Yes.
e. Click OK.
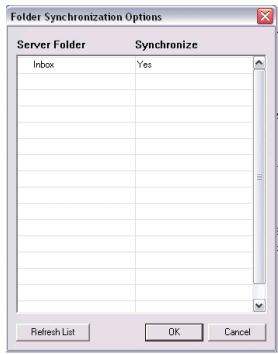
4
Click Save on the toolbar to save the settings for this account.

Done
CHAPTER 15
Sending and Receiving Email Messages
Account information screens
Two screens in the VersaMail conduit provide summary information on your accounts:
Account Overview The Account Overview screen indicates whether the account is active; whether the account has been synchronized and, if so, the last synchronization date; the mail client for this account; and whether the mail client and/or the incoming mail server has been changed since the last synchronization.
To view the Account Overview screen, click the selected account name.
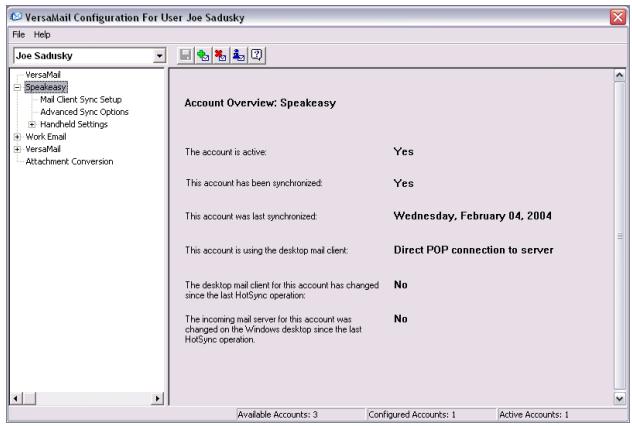
Handheld Settings Overview The Handheld Settings Overview screen lists the server protocol, display name, email address, incoming and outgoing mail server addresses, and whether APOP or ESMTP authentication is required.
CHAPTER 15
Sending and Receiving Email Messages
To view the Handheld Settings Overview screen, under the selected account name, click Handheld Settings.
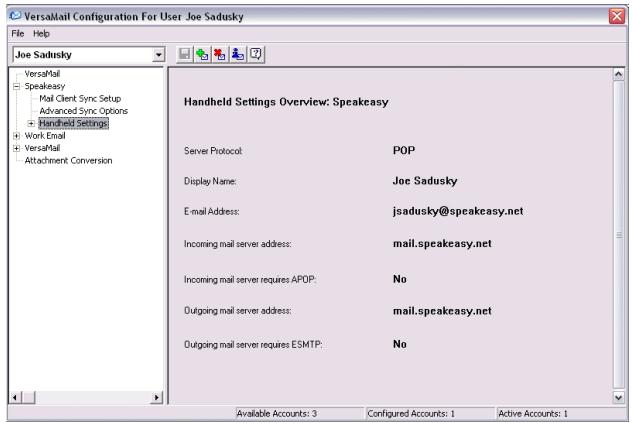
VersaMail conduit shortcuts
You can use the icons on the toolbar to perform certain tasks quickly, such as saving account configuration settings.
Save account settings Saves any changes you make to an account.
Add a new account You are prompted to enter the account name and protocol.
Delete an account You are prompted to select the account to delete from a drop-down list.
Quick account reference Lists all accounts and shows whether they are active and the date they were last synchronized.
Help Displays the Help window with complete online help.
CHAPTER 15
Sending and Receiving Email Messages

Tip
Select Set Selection As Default to apply the options you selected each subsequent time you synchronize. Otherwise, the settings apply only the next time you synchronize.
Excluding one or more accounts during synchronization
By default, HotSync Manager is set to synchronize all accounts you configure in the conduit each time you synchronize. You can choose to exclude a specific account from synchronization, or to exclude all email accounts.
To exclude a specific account Uncheck the box Select this check box to synchronize this email account when you perform a HotSync operation on the VersaMail configuration screen.
To exclude all email accounts from synchronization Click the HotSync Manager icon in the taskbar in the lower-right corner of your computer screen, select Custom, select VersaMail, and then click Change. Select Do Nothing.
Synchronizing an account
After you set basic and advanced synchronization options and exclude any accounts, if desired, you can synchronize your handheld with your computer.
Synchronizing multiple accounts
You can include more than one account when synchronizing. The maximum number of accounts you can synchronize is as follows:
- 1 Simple MAPI account (for example, an account set up using Outlook Express or Eudora)
- 1 Extended MAPI account (for example, an account set up using Outlook)
1 Lotus Notes account - 5 combined direct POP or direct IMAP accounts
If you try to synchronize more than the limit for a particular type of account, an alert prompts you to deactivate any accounts over the allowed number.
CHAPTER 15
Sending and Receiving Email Messages
Using SSL with the conduit
When you set up an email account, you can choose to use a secure connection (Secure Sockets Layer, or SSL) for sending and receiving email messages. The VersaMail conduit supports SSL when synchronizing with an email account only if that account uses Outlook, Outlook Express, or Eudora.
The conduit does not support SSL for accounts set up as direct POP or direct IMAP or for Microsoft Exchange or Lotus Notes accounts.
Advanced VersaMail application features
You can choose from among the following features to customize and optimize your experience using the VersaMail application:
- Setting preferences for getting, sending, and deleting email
- Updating a contact directly from an email message
- Creating and using filters to determine the types of email messages that get downloaded to your handheld
- Managing settings for incoming and outgoing mail
- Adding APOP to an account
- Setting advanced account preferences
- Changing email header details
- Backing up mail databases
- Synchronizing IMAP mail folders wirelessly
- Working with root folders
- Using Secure Sockets Layer (SSL)
CHAPTER 15
Sending and Receiving Email Messages

Tip
Because mailboxes on the server usually have size restrictions, it is a good idea to delete messages on the server regularly.
Setting preferences for getting, sending, and deleting email
1
Open the VersaMail Preferences:
a. In the Inbox or on another folder screen, open the menus.
b. Select Options, and then select Preferences.
2
Select preferences:
Get Select whether to get message subjects only or entire messages.
Ask Every Time Displays a dialog box for choosing subjects only or entire messages each time you retrieve email. If it is unchecked, messages are retrieved according to the option you select in the Get pick list.
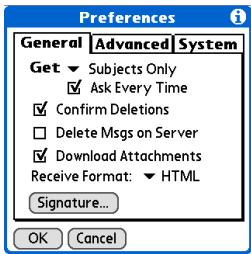
Confirm Deletions Displays a confirmation dialog box before deleting email.
Delete Messages on Server If this is checked, messages that you delete on your handheld are automatically deleted on the server. If it is unchecked, you are asked each time you delete messages on your handheld whether you want to also delete them on the server.

Continued
CHAPTER 15
Sending and Receiving Email Messages
Cont'd.
Download Attachments Causes files attached to email to be automatically downloaded to your handheld. Attachments that exceed the maximum message size cannot be downloaded.
Receive Format Lets you retrieve messages in HTML or plain text format. If you choose HTML, any messages sent to you in HTML format are displayed with basic HTML formatting intact. Other messages are displayed as plain text. If you choose Plain Text, all messages are displayed as plain text, regardless of the format in which they were sent. Default setting is HTML.
Signature Enables you to attach a default signature to all your outgoing messages.

CHAPTER 15
Sending and Receiving Email Messages

Tip
You can also update an existing Contacts record with a new email address, or create a second Contacts record for a name that has an existing record. The procedure is the same as for adding a new Contacts record. If you select Add to Contacts from the body of an email message and a record already exists for the recipient name, you are prompted to either update the email address for the recipient or create a new record for the recipient.
Adding or updating a contact directly from a message
You can add an email address in Contacts directly from the body of a received email message.
1
Open the Add Contact dialog box:
a. Open the message you want.
b. On the message screen, open the menus.
c. Select Options, and then select Add to Contacts.
2
[ & ] OPTIONAL If a Display Name exists for this Contacts record, the dialog box displays the name in the Last name and First name fields.
If the Last name and First name fields are blank, enter the first and last name associated with the "From" email address.
3
Select OK to add the email address to Contacts, and then select OK in the confirmation dialog box.

Done
CHAPTER 15
Sending and Receiving Email Messages

Tip
Create a filter, for example, so that whenever you receive email about sales meetings, it goes immediately into a folder you create called Sales. Or create a filter so that stock quotes sent to you by your online brokerage service go to a folder you create called Finance.
Creating and using filters
Filters provide efficient ways to manage email retrieval and storage. When you select Get Mail or Get & Send, filters determine which email messages are downloaded to your handheld and in which folder the downloaded messages are stored.
[! ] IMPORTANT If you create a filter, only messages that meet the filter criteria are downloaded to your handheld. You don't see any other messages that have been sent to you, even in your Inbox. To avoid this, you must set up two filters. For example, suppose you create a filter to have all messages with "onlinebroker" in the From field moved to your Finance folder. You must then create a second filter, specifying that all mail NOT containing "onlinebroker" in the From field should be moved to the Inbox (or other folder you designate). If you don't create this second filter, only messages containing "onlinebroker" in the From field are downloaded to your handheld.
1
Go to Favorites and select VersaMail

2
Open the Filters dialog box:
a. In the Inbox or on another folder screen, open the menus.
b. Select Options, and then select Filters.
c. Select New.

Continued
CHAPTER 15
Sending and Receiving Email Messages

Did You Know?
Filters you create on your handheld also apply when you synchronize email on your handheld with email on your computer.
3
Enter the filter information:
a. Enter a short description of the filter in the Name field.
b. Enter filter criteria:
To pick list Select the message header field with the information contained in the edit line: To, From, Subject, cc, Size.
For example, you might select From to download only messages from a particular sender.
Contains pick list Select a filter action: Contains, Starts with, Does NOT Contain.
Edit line Enter the text that must be found in the header field. For example, if you want to sort email with the subject Sales, enter "Sales." If you enter more than one criteria, separate each with a comma—for example, Sales, New York.
Then get mail and move to pick list Select the folder or mailbox into which you want your filtered email to go. You can also create a new folder for storing the incoming email. Select Edit Folders, and then create a new folder or delete or rename existing ones.
c. Select OK. The filter appears in the Filters list.

Done
CHAPTER 15
Sending and Receiving Email Messages

Tip
Filters that are turned on execute in the order in which they appear on the Filters list. Move filters up and down the list to ensure that they execute in the correct order by selecting the pick list to the left of the filter name.

Tip
If you don't want a filter to apply to any downloads at all, be sure to uncheck the filter under both Connected and Synchronize.
Turning filters on and off
A filter that is turned on applies to all subsequent downloads of email until you deselect it. More than one filter can be in effect at once. Before you download email, be sure to turn on the filters you want and turn off those you don't want.

Open the Filters dialog box:
a. In the Inbox or on another folder screen, open the menus.
b. Select Options, and then select Filters. The Filters dialog box appears with the filters you created.
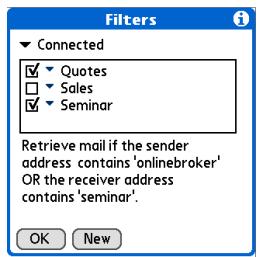

Continued
CHAPTER 15
Sending and Receiving Email Messages
2
Turn filters on or off:
a. Select the pick list in the upper-left corner and select one of the following:
Connected Applies a filter to messages downloaded to your handheld over a network connection.
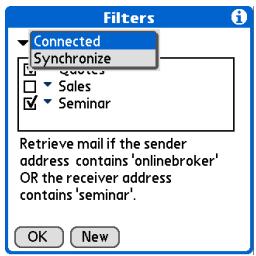
Synchronize Applies a filter to messages downloaded to your handheld when you synchronize.
b. Check or uncheck the filter boxes to select the filters you do and don't want to use for subsequent email transactions.
c. Select OK.

Done
CHAPTER 15
Sending and Receiving Email Messages

Tip
Edit a filter to change either its name or any of its criteria.
Editing or deleting a filter
1
Select the folder to edit or delete:
a. In the Inbox or on another folder screen, open the menus.
b. Select Options, and then select Filters.
c. Select the name of the filter.
2
Do one of the following:
Edit Revise your entry in the Name field, your selections in the pick lists, and/or the text in the edit line. Select OK.
Delete Select Delete, select Yes to confirm the deletion, and then select OK.
3
Select OK.

Done
CHAPTER 15
Sending and Receiving Email Messages
Managing settings for incoming and outgoing mail
You can configure advanced mail settings such as server information, incoming and outgoing mail server options, and more, for each email account.
1
Select the account whose settings you want to manage:
a. In the Inbox or on another folder screen, open the menus.
b. Select Options, and then select Mail Servers.
c. Select the Account pick list, and then select Edit Accounts.
d. Select the name of the account whose settings you want to manage, and then select OK.

Continued
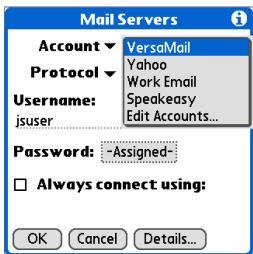
CHAPTER 15
Sending and Receiving Email Messages

Tip
Your username is typically the first part of your email address, which appears before the @ symbol.

Did You Know?
The VersaMail application provides strong 128-bit AES encryption for your password.

Tip
Select a service for this account only if you want it to be different from the default service you use to connect to a network for your handheld.
2
On the Mail Servers screen, do any of the following:
Protocol Select the Protocol pick list, and then select POP or IMAP.
Username Enter a new username.
Password Tap the Password box, and enter a new password in the Password Entry dialog box.
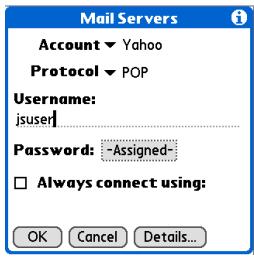
Service for this account Check the Always connect using box, select the Service pick list, and then select the connection type you want.

CHAPTER 15
Sending and Receiving Email Messages
3
Manage address and server settings:
a. On the Mail Servers screen, select Details.
b. Select the Options pick list, and then select Address/Servers.
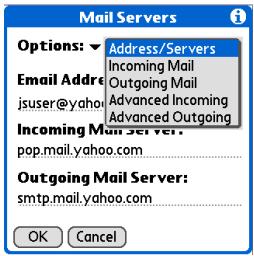

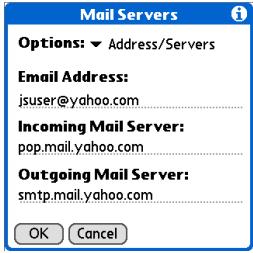
c. Do any of the following:
Email Address Enter the email address of the account you are accessing, such as exemplename@yahoo.com.
Incoming Mail Server Enter the name of your incoming (POP) mail server, such as pop.mail.yahoo.com.
Outgoing Mail Server Enter the name of your outgoing (SMTP) mail server, such assmtp.mail.yahoo.com.
d. Select OK.

Continued
CHAPTER 15
Sending and Receiving Email Messages

Did You Know?
The POP protocol does not support retrieval of unread mail only from the server. If you have a POP email account, the VersaMail application downloads all messages from the server regardless of whether you have read them (for example, on your desktop or on the web), and regardless of whether this box is checked.

Manage incoming mail server settings:
a. On the Mail Servers screen, select Details.
b. Select the Options pick list, and then select Incoming Mail.
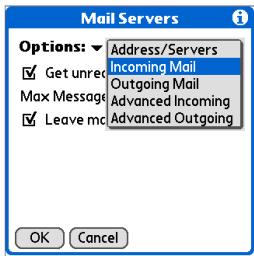

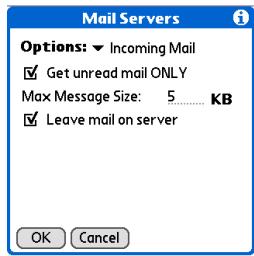
c. Do any of the following:
Get unread mail ONLY For IMAP accounts, retrieves unread email only. To get all email and not just unread email, deselect Get unread mail ONLY.
Maximum Message Size Enter the maximum message size that you can receive.
Leave mail on server (POP only) Leaves email that you receive on the handheld on the server also.
d. Select OK.

Continued
CHAPTER 15
Sending and Receiving Email Messages

Tip
Advanced incoming mail options are different depending on the connection type you selected and the server protocol: POP or IMAP.

Tip
The Deleted Mail and Sent Mail fields are case sensitive, and the folder name should be spelled exactly as it appears on the server.
5
Manage advanced incoming mail server settings:
a. On the Mail Servers screen, select Details.
b. Select the Options pick list, and then select Advanced Incoming.
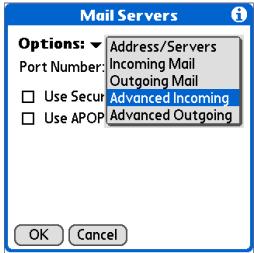

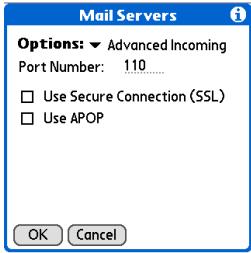
c. Do any of the following:
Port Number Usually 110 for POP and 143 for IMAP servers. If you are not sure about the correct port number, check with your mail server administrator.
Use Secure Connection To retrieve incoming mail over a secure (Secure Sockets Layer, or SSL) connection, check the Use Secure Connection box.
Use APOP (POP only) Encrypted your username and password when they travel over the network. Some services require APOP to work properly, while others do not work properly if APOP is used. If you aren't sure if your ISP or web email provider supports APOP, check with your email provider.
Root Folders (IMAP only) Defines the root folder on your IMAP server.
Continued
CHAPTER 15
Sending and Receiving Email Messages

Tip
If you are using the VersaMail conduit and have an IMAP account, you must configure the outgoing mail settings to send mail.
Cont'd.
Deleted Mail (IMAP only) Stores deleted email in the folder you specify on the server.
Sent Mail (IMAP only) Shows the name of your Sent Mail folder on the server.
d. Select OK.

Manage outgoing mail server (SMTP) settings:
a. On the Mail Servers screen, select Details.
b. Select the Options pick list, and then select Outgoing Mail.
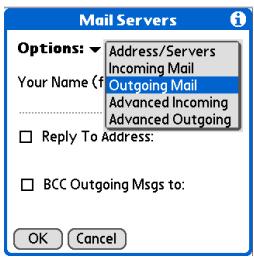

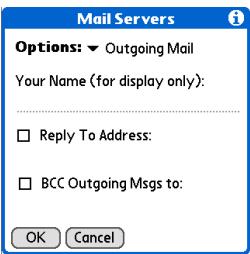

Continued
CHAPTER 15
Sending and Receiving Email Messages
Cont'd. c. Do any of the following:
Display Name Enter the name you want to appear on your outgoing messages, such as "Joe Smith."
Reply To Address Enter the email address that you want recipients to see and reply to on your email messages, only if it is different from the email address from which you are sending the message. For example, if you are sending a message from me@yahoo.com but you want recipients to reply to me@earthlink.net, enter the reply-to address here. Reply To Address makes it look as if the email came from the address you entered.
BCC Check the BCC box to send a blind copy of any email message you send to another email address. The blind copy email address is not seen by the other recipients of the message. For example, if you want a copy of all messages you send from your handheld to be sent to your desktop email account, enter that email address.
d. Select OK.
Continued
CHAPTER 15
Sending and Receiving Email Messages

Tip
If you need to enter new authentication information, enter your username, tap the Password box, enter a password, and then select OK. Check with your email service provider for authentication username and password information.
7
Manage advanced outgoing mail server (SMTP) settings:
a. On the Mail Servers screen, select Details.
b. Select the Options pick list, and then select Advanced Outgoing.
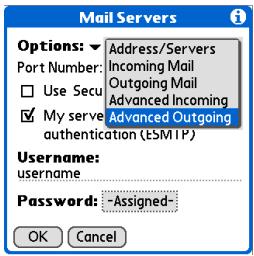

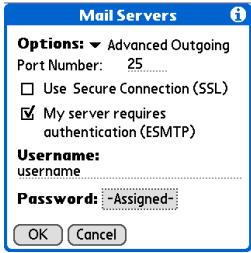
c. Do any of the following:
Port Number The default is 25, the port number most SMTP servers use. If you are not sure about the correct port number, check with your mail server administrator.
Use Secure Connection To send outgoing mail over a secure (Secure Sockets Layer, or SSL) connection, check the Use Secure Connection box.

Continued
CHAPTER 15
Sending and Receiving Email Messages
Cont'd.
My server requires authentication (ESMTP) Check this box if the outgoing server (SMTP) requires ESMTP authentication. Check with your system administrator before selecting this option. If you select this option, username and password fields appear. These fields are already filled in based on the account information you entered previously. In most cases, the information displayed is correct; however, occasionally your authentication username and/or password is different from your account username or password.
d. Select OK twice.

Done
CHAPTER 15
Sending and Receiving Email Messages

Tip
If you aren't sure if your ISP or web email provider supports APOP, check with your email provider.
Adding APOP to an account
To encrypt your username and password when they travel over the network, some services require APOP to work properly, while others do not work properly if APOP is used. APOP works only with accounts that use the POP protocol.
1
Select the account to which you want to add APOP:
a. In the Inbox or on another folder screen, open the menus.
b. Select Options, and then select Mail Servers.
c. Select the Account pick list, and then select Edit Accounts.
d. Select the name of the account, and then select OK.
2
Add APOP:
a. On the Mail Servers screen, select Details.
b. Select the Options pick list, and then select Advanced Incoming.
c. Check the Use APOP box, and then select OK.
3
Select OK.

Done
CHAPTER 15
Sending and Receiving Email Messages

Tip
Any advanced preferences you set are account-specific; they apply only to the account you are currently viewing.
Setting advanced account preferences
1
Open the Advanced Preferences screen:
a. In the Inbox or on another folder screen, open the menus.
b. Select Options, and then select Preferences.
c. Select the Advanced tab.
2
Select any of the following preferences:
Enable Smart Addressing
Displays a list of addresses that match the letters you enter in the To field. You can select the address you want from the list.
Auto-Empty Mail from Trash
Determines how often email messages in the trash are automatically deleted.
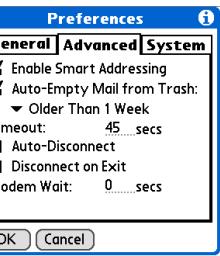
Timeout Sets the number of seconds to try to connect before timing out. To change, tap the Timeout field and enter a new value.

Continued
CHAPTER 15
Sending and Receiving Email Messages

Tip
The default Timeout setting is 45 seconds. It can be any number greater than 0 seconds; however, if you set the number too low, your connection attempt may time out before you make a connection with the email service provider.
Cont'd.
Auto-Disconnect Automatically disconnects your remote connections after each command. Each command you perform initiates a new call to your ISP. This setting is not recommended if you plan to perform multiple email transactions in a short amount of time.
Disconnect on Exit Disconnects from the network only after you leave the VersaMail application. This feature is an alternative to Auto-Disconnect. This option keeps your connection active while you perform multiple transactions in the VersaMail application, but automatically disconnects when you move on to a different application on your handheld. If this option is not selected, you must manually disconnect from your ISP.
Modem Wait Displays the number of seconds that the modem uses to initialize itself. If you have a modem, select and enter a number of seconds for the wait. The typical setting for a wireless modem is 3, and the typical setting for most normal modems is 0.

Done
CHAPTER 15
Sending and Receiving Email Messages
Changing email header details
When viewing a message in any folder, you can change the view of the message header. The email header options are as follows:
- Short header: Shows sender's name or address (From field) and subject line (Subj field).
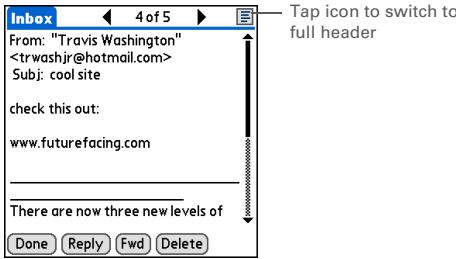
Full header: Shows the following:
- Sender's name or email address (From field)
- Subject line (Subj field)
- Date message was composed, sent, or received (Date field)
- Size of message including any attachments (Size field)
- Recipient's name or email address (To field)
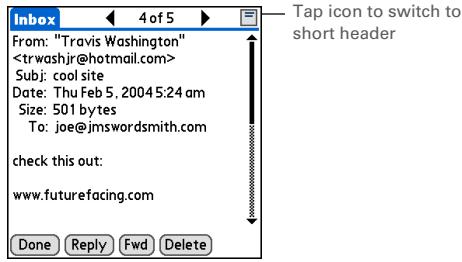
CHAPTER 15
Sending and Receiving Email Messages
You can also switch between a short header and a full header for a message you are composing. Short header shows the To and Subject fields only; full header shows the To, cc, bcc, and Subject fields.
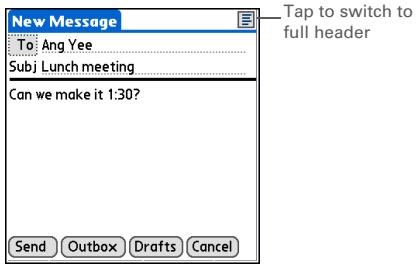
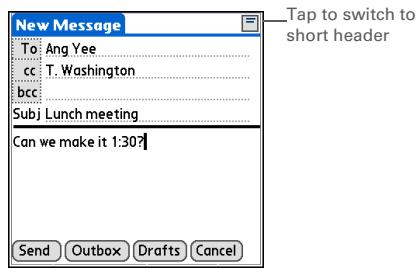
To switch between short and full headers on either a folder screen or a message screen, tap the header icon in the upper-right corner of the screen.
Backing up mail databases
If you want to make sure you have a backup copy of all your email, you can back up all the email databases from the handheld. This is useful if you download messages directly from a mail server to your handheld. The backup copy is stored in the Backup folder on your computer.
CHAPTER 15
Sending and Receiving Email Messages

Tip
In most cases your email is on your server, so you do not need to back up your email database from your handheld.

Tip
Uncheck the Backup ALL Databases box to make synchronizing go faster.
By default, your handheld is set to back up mail databases.
1
Open the System Preferences screen:
a. In the Inbox or on another folder screen, open the menus.
b. Select Options, and then select Preferences.
c. Select the System tab.
2
Check the Backup ALL Databases box, and then select OK.

Done
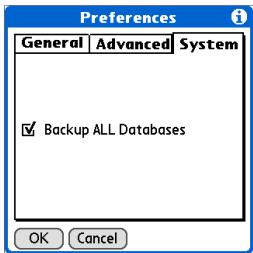
CHAPTER 15
Sending and Receiving Email Messages

Did You Know?
You can synchronize folders whose names are up to 16 characters in length. You can synchronize up to 11 custom folders you create, in addition to the default folders Inbox, Outbox, Drafts, Sent, and Trash.

Tip
If you have a folder on your handheld that matches a folder on the mail server, you do not need to do anything before synchronizing wirelessly.
Synchronizing IMAP mail folders wirelessly
If you create an IMAP folder in an account on your handheld that matches a folder on the mail server, you can wirelessly synchronize email messages that you either move into or out of the IMAP folder or delete in the folder.
When you synchronize a folder, any email messages in the selected folder on the mail server are downloaded to the same folder on your handheld. Any messages moved out of the selected folder on your handheld or deleted on your handheld are moved or deleted in the folder on the mail server.
Prerequisites for wireless IMAP folder synchronization
Depending on how you have set up IMAP folders on your handheld and/or the mail server, you may have to do some steps before you can wirelessly synchronize email messages between your handheld and the server, as follows:
- If you need to create a folder on both your handheld and the server, create the folder on your handheld and check the Also create on server box.
- If there is a folder on the mail server but you need to create it on your handheld, you do not need to check the Also create on server box.
You can turn folder synchronization on or off during a Get Mail operation, and set synchronization options from a menu.
CHAPTER 15
Sending and Receiving Email Messages

Did You Know?
After you select the folders to synchronize, a connection is made to your email service provider to update the server with changes from your handheld, and to have your handheld updated with changes from the server.
Turning IMAP folder synchronization on or off
1
From within an IMAP email account, select Get Mail.
2
Check or uncheck the Sync IMAP Folders box, and then select OK.

Done
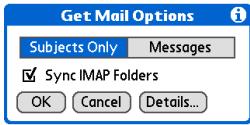
Synchronizing handheld/email server IMAP folders from the Options menu
1
Open the Sync IMAP Folders screen:
a. In the Inbox or on another folder screen of an IMAP account, open the menus.
b. Select Options, and then select Sync IMAP Folders.
2
Select the folder or folders you want to synchronize from the pick list.

Done
CHAPTER 15
Sending and Receiving Email Messages
Working with root folders
For IMAP accounts, if you want to synchronize email messages on your handheld with messages on the mail server folder, you need to enter the root folder for the account on your handheld. Depending on your email provider, the root folder could be a single folder, or it could be a subfolder of the Inbox. If the root folder is a subfolder, you need to enter "inbox.
Check with your email provider to find out the root folder for your IMAP account.
Using Secure Sockets Layer (SSL)
Secure Sockets Layer (SSL) is a protocol designed to ensure that information you send or receive over a network or the Internet is secure and authentic. The VersaMail application uses SSL to help guarantee the secure transmission of email messages that you send or receive. When you set up an account in the VersaMail application, you are given the option of selecting SSL for incoming and outgoing mail.
[!] IMPORTANT For most email providers that support SSL, you must select SSL for both incoming and outgoing mail. If you select just one or the other, your messages cannot be sent or received successfully.
Keep the following in mind regarding SSL:
- If you set up an account that uses an SSL connection on Outlook, Outlook Express, or Eudora, then SSL is supported in the VersaMail conduit when you synchronize with that account as well.
- You cannot use auto get mail with notification or scheduled sending retry of email with accounts that use an SSL connection.
CHAPTER 15
Sending and Receiving Email Messages
Tips & Tricks
Make your handheld uniquely yours. For great tips, software, accessories, and more, visit www.palmOne.com/ mytungstene2.
Support
If you're having problems with the VersaMail application or with anything else on your handheld, go to www.palmOne.com/support.
Related topics
Click a link below to learn about these related topics:
Moving Around
Using the Graffiti 2 command stroke in email messages
Entering Info
Cutting, copying, and pasting text from an email message
Moving Info
Downloading email messages from your computer to your handheld
Connecting
Setting up a phone connection for sending and receiving email wirelessly
Customizing
Setting preferences for connecting to a network
Common Questions
Answers to frequently asked questions about the VersaMail application
Sending and Receiving Text Messages
In this chapter
Creating and sending a text message
Receiving and viewing a text message
Editing a draft text message
Setting advanced messaging features
Related Topics
If you need to get a short message to a friend or co-worker fast, send a text message from your handheld by means of your mobile phone (GSM phone with IR or Bluetooth® wireless technology required; sold separately) to their mobile phone. Messaging is a popular way for people to stay connected using the text messaging features of their mobile phone.

Benefits
- Enjoy quick communication
- Use text messaging to chat with friends
CHAPTER 16
Sending and Receiving Text Messages
[!] Before You Begin
Before you can send and receive text messages:
- You must install SMS on your computer and handheld from the Tungsten™ E2 software installation CD. Insert the CD and follow the onscreen instructions for installing extra software.
- You must set up a phone connection on your handheld to send and receive information wirelessly.
Key Term
SMS More commonly known as text messages, Short Message Service messages can be received by most mobile phones.
Creating and sending a text message
[!] IMPORTANT Many SMS service providers charge per text message or part of a text message. Each message or part is 160 characters. If you create a text message under 161 characters, you are charged for one message. If you create a message that is 161 to 320 characters, you may be charged for two messages, and so forth. A counter appears at the top of the page to indicate the number of characters. Even though a message has more than 160 characters, the message appears as one message to the person receiving the message.
1
Go to Applications and select SMS

2
Select New.
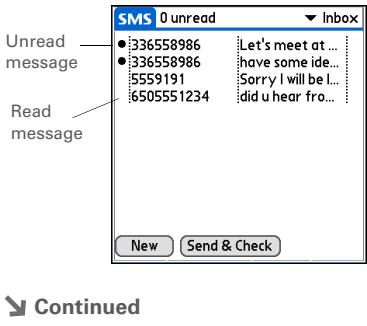


CHAPTER 16
Sending and Receiving Text Messages

Tip
If you are concerned about the length of your messages, you can have a warning appear when multipart messages exceed the specified number of parts. Open the Options menu and select Preferences. Select Details and then select the number of parts from the Warn over pick list.

Did You Know?
You can create a signature that you use to sign your messages by opening the Options
menu and selecting
Preferences. Enter a
signature on the lines.
You can add your
signature to your
message by opening the
Options menu and
selecting Add Signature.
3
Enter the recipient's address using one of the following methods:
Select To Select the recipient's name on the Mobile Number Lookup list, and then select Add.
Enter directly Enter the recipient's mobile phone number on the To line.
4
In the area below the To line, enter the text of your message.
Number of characters
New Message Length: 20
To: 8319119119
See you at 8 at Joes
Send
Outbox
Cancel
5
[ & ] OPTIONAL You can store your message in your Draft category and work on it later:
a. Open the menus.
b. Select Draft on the Message menu.
Continued
CHAPTER 16
Sending and Receiving Text Messages
6
Send your message:
Select Send Sends the current message now. Selecting Send does not send any of the other messages in your Outbox.
Select Outbox Sends your message to the Outbox to be sent later.

Done
CHAPTER 16
Sending and Receiving Text Messages

Tip
If you want to check your messages but you don't want to send the messages stored in your Outbox, open the Messages menu and select Check.

You can also send all the messages in your Outbox by opening the Messages menu and selecting Send.

Did You Know?
You can set an alert that lets you know a new message has arrived. Open the Preferences menu and check the Alert sound box. Select the Alarm pick list to choose a sound.
Receiving and viewing a text message

Go to Applications and select SMS


Select Send & Check.

Select the message to open and read it.
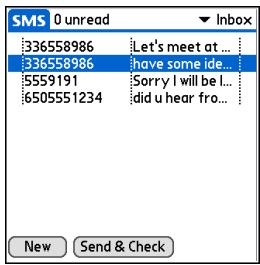


Continued
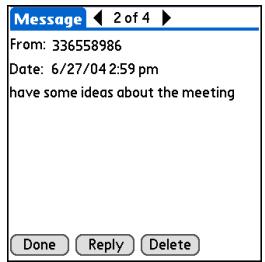
CHAPTER 16
Sending and Receiving Text Messages

Did You Know?
You can change how your messages are listed. You can sort the messages in order of one of the following: Alphabetic, Date, Phone Number, and Status. You can also choose to display the date the message was received. Open the Options menu and select Preferences. Select from the Sort by pick list and select Show date.
4
Store, delete, or reply to the message:
Select Done The message is kept in the Inbox.
Select Reply A new message is created with the sender's phone number in the To line. Any selected text is copied into the new message.
Select Delete The message is sent to the Trash category.
Archive the message You can store your message in the Archive category:
a. Open the menus.
b. Select Archive on the Message menu.

Done
CHAPTER 16
Sending and Receiving Text Messages

Did You Know?
You can store your message in your Draft folder and work on it later by opening the Message menu and selecting Draft.
Editing a draft text message
1
Go to Applications and select SMS

2
Edit the message:
a. Select Draft from the categories pick list.
b. Select the message you want to edit.
c. In the message view, select Edit and edit your message.
3
Send or store the draft message:
Select Send Sends the current message now. Selecting Send does not send any of the other messages in your Outbox.
Select Outbox Sends your message to the Outbox to be sent later.
Select Cancel Opens a dialog box that asks if you want to save the message in the Draft category. Select Yes to keep your changes and return the message to the Draft category. Select No to discard your changes and return the message to the Draft category.

Done
CHAPTER 16
Sending and Receiving Text Messages
Setting advanced messaging features
1
Go to Applications and select SMS

2
Go to the Preferences menu:
a. Open the menus.
b. Select Options, and then select Preferences.
3
[ & ] OPTIONAL Set the following parameters:
Confirm Deleted Message Indicates whether a confirmation message appears each time you delete a message or you select the EmptyTrash option from the Message menu. To display confirmation messages, check this box.
Delete After Transfer Indicates whether data messages are deleted after you accept the data in the appropriate application. To keep data messages after you transfer them to the application, uncheck this box.

Continued
CHAPTER 16
Sending and Receiving Text Messages

Did You Know?
Outgoing SMS message settings may depend on the service offered by your SMS carrier.
4
[ & ] OPTIONAL Select Details and set the following parameters:
Leave Messages on Phone Indicates whether messages are deleted from your phone after you download them to your handheld. To keep messages on your phone after you transfer them to your handheld, select this box.
Return Receipt Determines whether you receive receipt confirmation notices. To receive receipt confirmation notices, select Requested.
Expires Indicates how long unsent messages remain in your Outbox. Select from the following options: 4 Hours, 1 Day, 1 Week, 2 Weeks, 1 Month, and Max. Time.
Message Center Indicates whether your handheld obtains your mobile phone service provider's Message Center number directly from the phone, or whether you need to enter the number manually. If your phone is already configured to use SMS, you do not need to change this setting.
5
Select OK twice.

Done
CHAPTER 16
Sending and Receiving Text Messages
Tips & Tricks
Make your handheld uniquely yours. For great tips, software, accessories, and more, visit www.palmOne.com/ mytunstene2.
Support
If you're having problems with SMS or with anything else on your handheld, go to www.palmOne.com/support.
Related Topics
Click the link below to learn about these related topics:
Moving Around
- Opening applications
- Using menus
Categories
Organizing messages by arranging them into categories and sorting them
Privacy
Keeping messages private by turning on security options
Sharing
- Exchanging messages with other palmOne™ handheld users by beaming them
- Sending messages to other Bluetooth® devices by using Bluetooth wireless technology on your handheld
Connecting
Setting up a phone connection using the Bluetooth technology on your handheld to send and receive messages wirelessly
Browsing the Web
In this chapter
Accessing a web page
Quickly jumping to a page
Changing how you view a page
Bookmarking your favorite pages
Disconnecting from and connecting to the Internet
Downloading files and pages
Communicating with other users
Returning to a web page you recently visited
Changing your home and start pages
Setting advanced browser options
Related topics
You use the web for so many things: checking email, finding driving directions, getting news, buying gifts. Now you can take the web with you almost anywhere you go. Use your handheld to make an Internet connection through your mobile phone, and the web browser opens the entire web to you.

Benefits of the web browser
- Carry the web with you
View web pages in handheld-friendly format - Store pages for offline viewing
CHAPTER 17
Browsing the Web
[!] Before You Begin
To browse the web, you must set up a connection to the Internet from your handheld.
If you are accessing a VPN network, you need to install VPN software and set up VPN access. You can turn on VPN from the web browser by opening the Options menu and selecting Turn VPN On.
Key Term
URL Stands for uniform resource locator, the technical name for a web address. For example, the URL for palmOne is http://www.palmone.com.
Accessing a web page
You can open web pages, navigate the pages, and do the same things you can do with a desktop browser.
Accessing a web page using the action bar
1 Go to Favorites and select Web
2 Go to the web page you want to view:
a. Select Go to Web Page
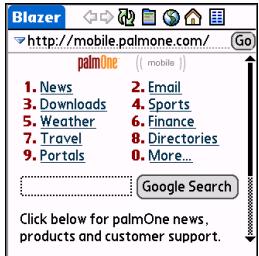

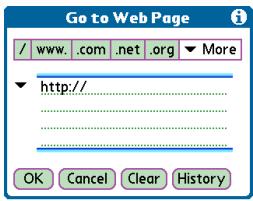
b. Enter the address of the web page you want to visit. Use the buttons in the Go to Web Page dialog box for quick entry of characters commonly used in web addresses. If the web browser recognizes the address that you are entering due to a previous entry and autofill is enabled, autofill automatically completes the address.
c. Select OK.

CHAPTER 17
Browsing the Web

Tip
You can also hide the address field to show more of the web page.
Open the Options menu and select Preferences.
Uncheck the Show Address Bar box.
Accessing a web page using the address field
1
Go to Favorites and select Web
2
Go to the web page you want to view:
a. Enter the address of the web page in the address field.
b. Select Go.

Done
Address field
CHAPTER 17
Browsing the Web

Tip
Some websites allow you to check a box to have your sign-in name automatically entered each time you visit a particular web page.
Using a password to access a web page
Some websites require you to use a password to gain access to information.
1
Go to Favorites and select Web
2
Go to the web page where you must enter the password.
3
Enter your password to access the web page:
a. Enter your sign-in name in the appropriate field.
b. Tap in the password box, enter your password, and then select OK.
c. Select the button that lets you view the page (Sign In, Enter, Go, and so on).
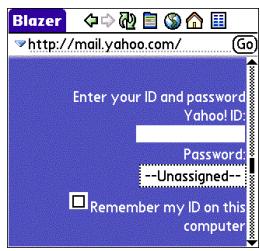

Done

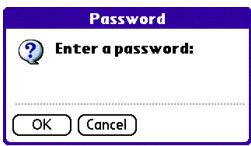
CHAPTER 17
Browsing the Web

Did You Know?
Find locates any text, whether it is letters or numbers. Find is not case-sensitive.

Tip
Because of the limited space on the handheld screen, sometimes the current web address (URL) is not fully visible. Use the Page Properties dialog box to view the full URL. Open the Page menu, select Page, and then select Page Info.
Finding information on a web page
1
Go to Favorites and select Web
2
Open the Find field:
a. Go to the web page you want to search.
b. Open the menus.
c. Select Page, and then select Find Text on Page.
3
Search the web page:
a. Type the text you want to find.
b. Select Find.

Done
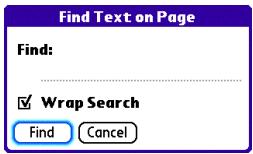
CHAPTER 17
Browsing the Web
Quickly jumping to a page
The action bar icons allow you to quickly move from page to page.
Following a link
Many web pages contain underlined links, which are text or pictures that, when selected, take you to another web page or to another part of the same page.
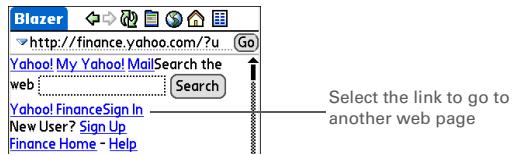
Returning to your home page or a page you recently visited
No matter where you navigate on the Internet, you can always return to your home page quickly or return to a page you have recently visited.
Select the back and forward arrows to go to previous pages
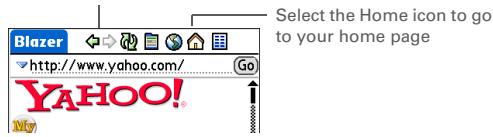
CHAPTER 17
Browsing the Web

Tip
You can change your font size for easier viewing.

Did You Know?
In the Optimized mode, use the navigator to browse the web page. Press Left or Right to jump to the previous or next link. When a link is highlighted, press Center to go to the link. Press Up and Down to scroll through the web page.
Changing how you view a page
You can change how you view web pages by selecting different display views and dragging the screen to view different parts.
1
Go to Favorites and select Web
2
Go to the web page you want to view.
3
Select the Display View icon in the action bar.
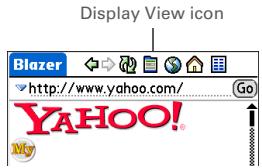

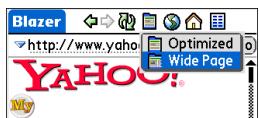
4
Select from one of the following views:
Optimized Displays a modified version of the web page so that it is optimized for handheld viewing.
Wide Page Displays the web page as it would appear in a desktop computer web browser.

Continued
CHAPTER 17
Browsing the Web
5
[ & ] OPTIONAL If the web page is larger than your screen, you can tap and drag the stylus to move the web page in any direction to view different parts of the web page.
To activate the Tap and Drag scrolling, you must set the Tap and Drag setting in the General Preferences tab under the Options menu.
This feature is disabled when you turn on Writing Area Preferences and use the full screen for Graffiti 2 writing.

Done
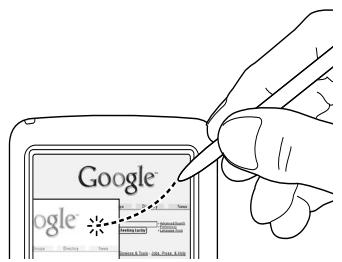
CHAPTER 17
Browsing the Web
Key Term
Bookmark A pointer to a web page. The actual page is not stored, only the URL. Also called a Favorite in some browsers.
\*Tip
You can set your bookmark list as your start page.
Bookmarking your favorite pages
Bookmarking your favorite web pages allows you to quickly return to those pages.
Adding a bookmark
1 Go to Favorites and select Web
2 Go to the web page that you want to bookmark.
3 Open theBookmark Page dialog box:
a. Open the menus.
b. Select Page, and then select AddBookmark.
4 [ & ] OPTIONAL Change the bookmark name, description, or URL.
Continued
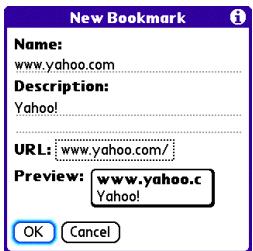
CHAPTER 17
Browsing the Web

Tip
You can also view your list of bookmarks by selecting View Bookmarks from the Page menu.

Did You Know?
A saved page is displayed like a bookmarked page, except that at the top of the page appears the text "Page saved on date - size k."
5
Select OK.

Done
Viewing a bookmarked or saved page
Bookmarks and saved pages both appear in the Bookmarks View. Saved pages are indicated by a small triangle in the upper-right corner of the bookmark.
1
Go to Favorites and select Web
2
Select theBookmark icon.
3
Select the name of the bookmarked or saved page you want to visit.
On the bottom right of the screen are five icons representing the first five Bookmarks pages. Select a Bookmarks page icon to display the page. You can also tap the arrow to go to the next page.

Done
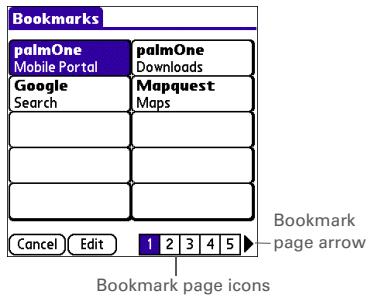
CHAPTER 17
Browsing the Web

Tip
You can clean up your bookmark list by deleting old bookmarks or saved pages you no longer use. Select the bookmark, select Edit, and then select Delete.
Editing information about a bookmark or saved page
You can edit or delete any bookmark or saved page that does not have a lock icon next to it.
1
Go to Favorites and select Web
2
Select theBookmark icon
3
Go to the Edit Bookmarks List dialog box:
a. Open the menus.
b. Select Bookmarks, and then select Edit Bookmarks.
4
Edit the bookmark information:
a. Select the name of the bookmarked or saved page that you want to edit.
b. Change the bookmark or saved page name, description, or address (URL) by selecting the appropriate option.
5
Select OK.

Done
CHAPTER 17
Browsing the Web
Arranging the bookmark list
The web browser includes ten pages so that you can arrange bookmarks and saved pages in a logical fashion. For example, you can store travel links on one page, stock links on another, and business links on a third page.
1
Go to Favorites and select Web
2
Go to the Edit Bookmarks List dialog box:
a. Select theBookmark icon
b. Open the menus.
c. Select Edit Bookmarks in the Bookmarks menu.
Continued
CHAPTER 17
Browsing the Web
3
Arrange the bookmarks:
a. Use the stylus to drag and drop bookmarks into different slots on the current page to organize them.
b. Move a bookmark to a different page by dragging and dropping it onto the Page icon. Ten page icons at the bottom of the dialog box represent the pages on each of which you can add ten bookmarks.
EditBookmark List
| palmOne | palmOne |
| Mapquest | |
| www.yahoo.co | |
4
Select OK.

Done
CHAPTER 17
Browsing the Web

Did You Know?
Generally, if you are using a GPRS service, you are charged only for the data sent. If you are using a GSM service, you are charged for the time you are connected.

When you are in another application and you tap a URL, the web browser connects to the Internet and displays the page. The web browser also opens when you select an HTML file that you receive as an email attachment.
Disconnecting from and connecting to the Internet
While you're working with stored information in the web browser, such as saved pages, stored versions of pages, and so forth, you can disconnect from the Internet to reduce usage charges. You can connect to the Internet again when you need access.
Disconnecting from the Internet
1
Go to Favorites and select Web
2
Disconnect from the Internet:
a. Open the menus.
b. Select Page, and then select Disconnect.

Done
CHAPTER 17
Browsing the Web

Tip
If the connection is not established, do one of the following:
Select Cancel to stop the connection process.
Select Change Network to select a different service to connect to.
Connecting to the Internet
1
Go to Favorites and select Web
2
Connect to the Internet:
a. Open the menus.
b. Select Page, and then select Connect.
Alternately, you can enter a URL on the address line and select Go.

Done
CHAPTER 17
Browsing the Web

Tip
If you decide that the download process is taking too long, you can stop it. To stop a web page from downloading, select the Stop icon in the action bar. To stop a file from downloading, select Cancel in the Download dialog box.

Did You Know?
The maximum file size you can download through the web browser is 2MB.
Downloading files and pages
You can download files or save files for viewing when you are not connected to the Internet.
Downloading a file
1
Go to Favorites and select Web
2
Go to the web page you want to view.
3
Select the link of the file you want to download.
4
Select a download option:
Application name Downloads the file to an application. For example, if you are downloading a Word document, the file downloads into Documents To Go.
Card If you have an expansion card installed, the file downloads onto the card.
5
Select Save, and then select OK.

Done
CHAPTER 17
Browsing the Web

Did You Know?
Saved pages are listed with the bookmarks in the Bookmark List. The saved pages have an orange corner.

Did You Know?
The web browser also functions as a viewer, enabling you to quickly view certain files while working in other applications. For example, if you read an email message that has a file attached in HTML format, select the file and the web browser opens so that you can view the file.

Saving a web page on your handheld allows you to view a web page without being online.
Saving a web page
If you want to save a web page (such as a travel itinerary or Internet order receipt) indefinitely, you can create a saved page. The copy is stored on the handheld until you delete it.
1
Go to Favorites and select Web
2
Go to the web page you want to save.
3
Go to the Save Page dialog box:
a. Open the menus.
b. Select Page, and then select Save Page.
4
Save the web page:
a. Change the page name or description if you want.
b. Select OK.

Done
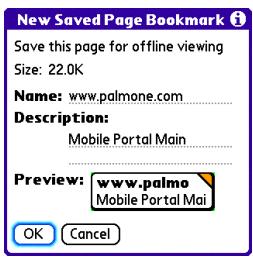
CHAPTER 17
Browsing the Web

Tip
Suppose you have an HTML file on your desktop computer that you want to carry with you. Download the file onto the expansion card and use the web browser to view the page on your handheld.
Viewing a saved file
You can use the web browser to view web pages or image files that are on an expansion card. The types of files that can be viewed include HTML, HTM, GIF, and JPG.
1
Go to Favorites and select Web
2
Insert an expansion card into your handheld.
3
Enter the file name using the format file://

Done
CHAPTER 17
Browsing the Web
Communicating with other users
You can communicate with others by means of email or beaming.
Sending email by means of an Internet email account
You can use your Internet email account to send an email message and attachments.
1
Go to Favorites and select Web
2
Log in to your Internet email account.
3
Compose your email message.
4
Send or save the email message.

CHAPTER 17
Browsing the Web

Tip
You can delete all pages saved in the History list by selecting Clear All.

Tip
Create a bookmark to save the location, or create a saved page to save the content of a web page indefinitely.
Returning to a web page you recently visited
Using the Back and Forward icons to browse through the pages you recently visited, one page at a time, can be tedious. Instead, open the History list to go to a page you recently visited. You can go back to a page you remember visiting but did not bookmark. Use the History list to jump directly to that page. Items in the History list are sorted chronologically.

Go to Favorites and select Web

Open the History dialog box:
a. Open the menus.
b. Select Page, and then select History.

Select the web page you recently visited.

Done
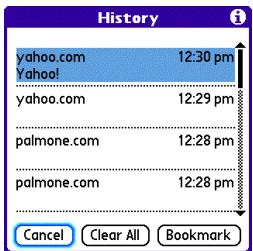
CHAPTER 17
Browsing the Web
Changing your home and start pages
You can change the page that your Home Page icon goes to, or change the page that the web browser starts with when it is first opened.
Changing your home page
You can choose a home page from any web address.
1 Go to Favorites and select Web
2 Open the Preferences Page dialog box:
a. Open the menus.
b. Select Options, and then select Preferences.
c. Select the Page tab.
Continued
CHAPTER 17
Browsing the Web
3
Select the Home Page box.
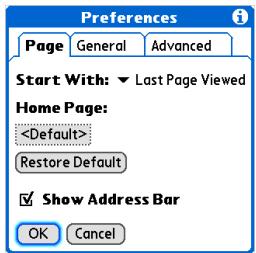
Previously Viewed pick list

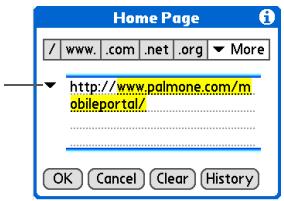
4
Enter the URL you want as your home page by doing one of the following:
- To select one of the last five pages you viewed, select the Previously Viewed pick list and select a URL.
- Enter a URL on the Address line.
5
Select OK twice.

Done
CHAPTER 17
Browsing the Web
Changing your start page
You can select the start page you want your handheld to open to when you first open the web browser.
1 Go to Favorites and select Web
2 Open the Preferences Page dialog box:
a. Open the menus.
b. Select Options, and then select Preferences.
c. Select Page tab.
3 Select the Start with pick list, and select the page you want to start with when you first open the web browser:
Home Page The page you have set as your home page.
Last Page Viewed The last page you viewed before exiting the web browser.
Bookmarks The Bookmarks dialog box opens. The web browser does not connect to the Internet.
Blank Page An empty page with no URL or dialog box
4 Select OK.
Done
CHAPTER 17
Browsing the Web
Setting advanced browser options
You can change options on your handheld to improve the speed, ease of use, and security of your browsing experience.
Changing how images are downloaded
Images in web pages can be very large. You can set an option to make web pages download faster by removing images altogether.
1 Go to Favorites and select Web
2 Open the General Preferences dialog box:
a. Open the menus.
b. Select Options, and then select Preferences.
c. Select General tab.
Continued
3 Check or uncheck the Disable Images box to disable or enable images.
4 Select OK.
Done
CHAPTER 17
Browsing the Web

Tip
Filling out an order form or application on the web usually requires entering several pieces of information: your name, address, phone number, and so on. When you enable autofill, your handheld stores the information you entered in these fields. The next time you use that order form and type the first few letters in a field, your handheld remembers the last item you entered in that field that started with those letters, and fills in the field.
Setting whether to automatically complete web addresses and form fields
Your handheld can store information, such as web addresses and form fields. If autofill is enabled, when you enter the first few letters of a URL you've entered before in the URL Entry field, your handheld completes the URL for you. Also, when you are filling out forms and applications, your handheld can complete the information for you.
1
Go to Favorites and select Web
2
Open the General Preferences dialog box:
a. Open the menus.
b. Select Options, and then select Preferences.
c. Select General tab.
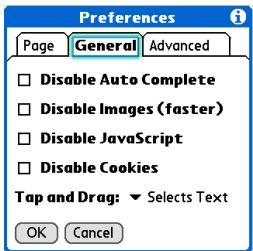
3
Check or uncheck the Disable Auto Complete box to enable or disable autofocus.
4
Select OK.

CHAPTER 17
Browsing the Web
Key Term
Cookie Some websites store information in a small text file, called a cookie, that is saved on your handheld. A cookie usually stores information about you and your preferences for that website. A site can use this information to customize the pages you see the next time you visit. Allowing a website to create a cookie does not give the site access to the rest of your handheld. A cookie stores only the information you provide while visiting the website.
Allowing websites to remember personal information
By default, your handheld saves the cookies it receives. If you want more privacy, you can tell your handheld not to accept cookies.
1 Go to Favorites and select Web
2 Open the General Preferences dialog box:
a. Open the menus.
b. Select Options, and then select Preferences.
c. Select General tab.
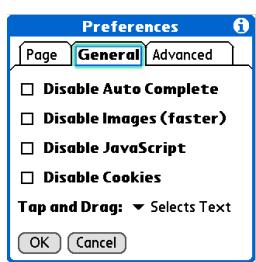
3 Check or uncheck the Disable Cookies box.
4 Select OK.
Done
CHAPTER 17
Browsing the Web
Key Term
Cache The cache in your handheld is a block of memory that stores web pages so you can view them again without accessing the Internet. Cached web pages are saved, thereby saving the content you've viewed even when you exit the web browser.
\*Tip
Remember that your handheld has a limited amount of memory. Choose a cache size that lets you store at least a few pages but still leaves room on your handheld for other data and applications. A value of at least 1MB is recommended.
Setting preferences for storing web pages
Your handheld stores web pages automatically in the cache.
1
Go to Favorites and select Web
2
Open the Advanced Preferences dialog box:
a. Open the menus.
b. Select Options, and then select Preferences.
c. Select Advanced tab.
Continued
CHAPTER 17
Browsing the Web
3
Change the size and content of the cache by using the following options:
Set memory limit for storing pages Sets the amount of memory used for your cache. Pages are cached so they load faster the next time you view them.
Cookies Indicates how much memory is being used by cookies.
Clear Cache Clears the cache immediately and frees the memory.
Clear cache on exit Check the box to clear the cache each time you exit the web browser. Uncheck the box to keep the cache from session to session.
4
Select OK.

Done
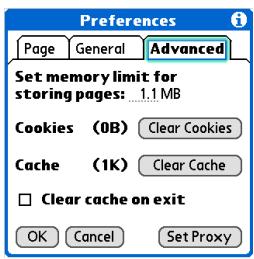
CHAPTER 17
Browsing the Web
Key Term
Proxy server A server that provides access to files from other servers by retrieving them either from its local cache or from the remote server.
Setting preferences for using a proxy server
Your handheld comes with the proxy server turned off. You can turn the proxy server on and configure a proxy server.
1 Go to Favorites and select Web
2 Open the Advanced Preferences dialog box:
a. Open the menus.
b. Select Options, and then select Preferences.
c. Select Advanced tab.
Continued
CHAPTER 17
Browsing the Web
3
Set your proxy server preferences:
a. Select Set Proxy.
b. Check or uncheck the Use Proxy box to use or not use a proxy server.
c. If you want to use a proxy server, select the Use Proxy box and enter the appropriate server address and port number.
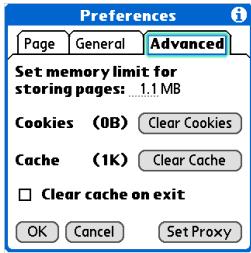

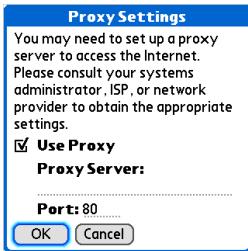
d. Select OK.
4
Select OK.

Done
CHAPTER 17
Browsing the Web
Setting whether to accept JavaScript
You can choose to bypass JavaScript elements on the web pages you view. JavaScript is often used on web pages for interactive content.
1 Go to Favorites and select Web
2 Open the General Preferences dialog box:
a. Open the menus.
b. Select Options, and then select Preferences.
c. Select General tab.
3 Check or uncheck the Disable JavaScript box to enable or disable JavaScript.
4 Select OK.

CHAPTER 17
Browsing the Web
Tips & Tricks
Make your handheld uniquely yours. For great tips, software, accessories, and more, visit www.palmOne.com/ mytunstene2.
Support
If you're having problems with the web browser or with anything else on your handheld, go to www.palmOne.com/support.
Related topics
Click a link below to learn about these related topics:
Moving Around
- Opening applications
Using menus
Categories
Organizing messages by arranging them into categories and sorting them
Connecting
Setting up a phone connection using the Bluetooth® wireless technology on your handheld
VersaMail®
Sending email messages using a link from a web page.
Dialing Phone Numbers from Your Handheld
In this chapter
Dialing a number
Using speed dial
Related topics
Need to dial a number? You can dial phone numbers directly from a contact using Quick Connect. If you don't have the number listed as a contact, you can tap out the number on the Dialer keypad, tap Dial, and your mobile phone begins dialing (GSM phone required; sold separately). Your call history stays on your handheld for easy access later.
Benefits of Dialer
- Easily dial numbers that are not in Contacts by using the keypad on your device screen
- Keep your call history on your handheld
- Quickly dial numbers using speed dial
CHAPTER 18
Dialing Phone Numbers from Your Handheld
[!] Before You Begin
Before you can dial a number, you must set up a phone connection on your handheld.
Dialing a number
Tapping out a number on your handheld is sometimes easier than using your mobile phone.
Entering a number
1
Go to Applications and select Dialer

2
Tap the telephone number on the keypad.
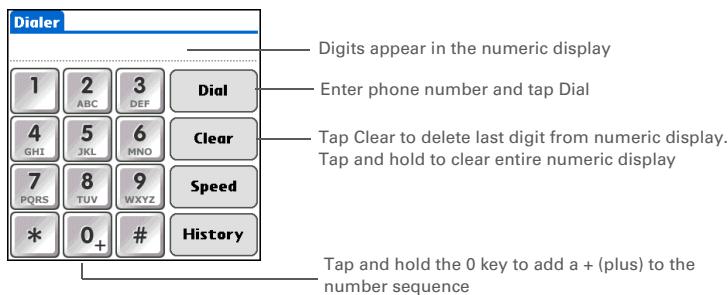
3
Tap Dial.

Done
CHAPTER 18
Dialing Phone Numbers from Your Handheld
Redialing the most recently used number
1
Go to Applications and select Dialer

2
Dial the most recently used number:
a. Tap Dial to display the most recently used number.
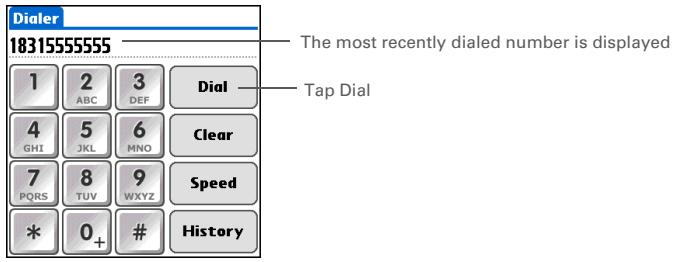
b. Tap Dial again to dial the number.

Done
CHAPTER 18
Dialing Phone Numbers from Your Handheld
Did You Know?
Dialer keeps a list of 11 of the most recently dialed numbers.
Did You Know?
If the number is a speeddial entry, the name from the speed dial entry appears in the Call History list.
Dialing a number from the Call History List
1
Go to Applications and select Dialer

2
Dial the number from the list:
a. Tap History.
b. Tap an entry from the History list.
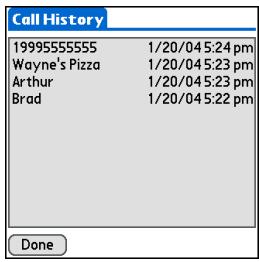
- Tap entry to enter number on Dialer view
c. Tap Dial.

Done
CHAPTER 18
Dialing Phone Numbers from Your Handheld
Using speed dial
Speed dial allows you to store ten of your most commonly used numbers and to dial one with a single tap.
Adding a speed-dial entry
1
Go to Applications and select Dialer

2
Add a speed-dial entry:
a. Tap Speed.
b. Tap an empty speed-dial button.
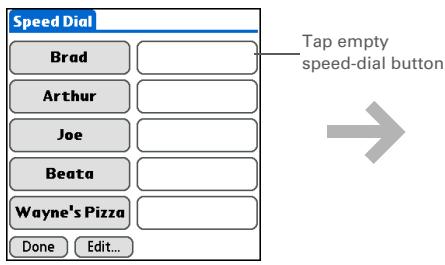
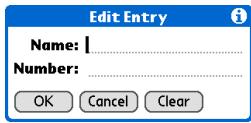
c. Enter a name and telephone number.
d. Tap OK.

Done
CHAPTER 18
Dialing Phone Numbers from Your Handheld
Dialing a number using speed dial
1
Go to Applications and select Dialer

2
Dial the number:
a. Tap Speed.
b. Tap one of the named speed-dial buttons.
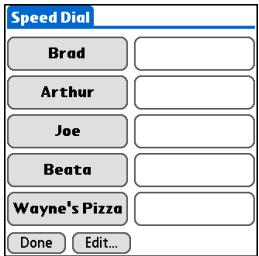

Done
CHAPTER 18
Dialing Phone Numbers from Your Handheld

Tip
You can go directly to the Edit Entry dialog box by tapping and holding a speed dial button.
Editing a speed-dial entry
1
Go to Applications and select Dialer

2
Edit an entry:
a. Tap Speed.
b. Tap Edit.
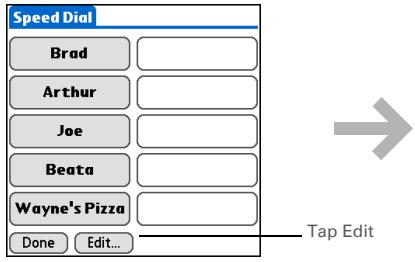
c. Tap an entry.
d. Edit the entry.
e. Tap OK, and then tap Done.

Done
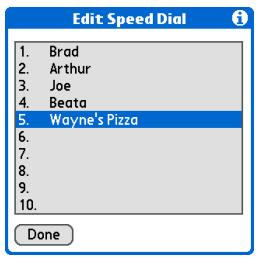
CHAPTER 18
Dialing Phone Numbers from Your Handheld
Tips & Tricks
Make your handheld uniquely yours. For great tips, software, accessories, and more, visit www.palmOne.com/ mytunstene2.
Support
If you're having problems with Dialer or with anything else on your handheld, go to www.palmOne.com/support/tungstent5.
Related topics
Click a link below to learn about these related topics:
Moving Around
Opening applications
Connecting
Connecting your handheld to a mobile phone
Contacts
Using Quick Connect and Tap-to-Connect in Contacts to dial phone numbers
Sharing Information
In this chapter
Using the Send command
Beaming
Other ways of sharing information
Related topics
You have to get this memo to your boss—now. Or the photo of the grandkids in their Halloween costumes to your mom. After you've used your handheld to create or capture that important business and personal information, it's time to share it with others.
Your handheld comes equipped with a variety of options for sharing information, so that you can choose the quickest, most convenient way of sending your info.
Benefits of sharing
- Keep others up-to-date with meaningful business and personal information
- Choose the most convenient sharing method from a variety of options
- Create an informal backup copy of important info
CHAPTER 19
Sharing Information
[!] Before You Begin
You must complete all the prerequisites for the messaging application.
To use your handheld's built-in Bluetooth wireless technology, you must set up a phone connection. To use it with your handheld's IR port, run Phone Link Updater, and then use the Phone Link application to set up a phone connection.
+ Did You Know?
You can also easily send information from the desktop component of many applications. For example, you can send photos from the palmOne™ Media desktop application. See the online desktop help for information.
\*Tip
If you are unable to send information to another device, try moving closer to the receiving device.
Using the Send command
You can send information from within an application—such as a photo or video, a contact, or an appointment—to other Palm OS® handheld users. You can also send a category of information or even an entire application.
You can use the Send command in many applications to send information wirelessly using one of the following methods:
- Using the built-in Bluetooth® wireless technology on your handheld
- As an attachment to an e-mail message
As part of a text message
Sending information from within an application using Bluetooth technology
You can use your handheld's built-in Bluetooth technology to send information directly to another device that includes Bluetooth technology. You must be within range of the receiving device to send information using Bluetooth technology. The maximum range is approximately 25-30 feet (8-10 meters); however, the shorter the range, the more quickly and accurately you can send information.
CHAPTER 19
Sharing Information

Did You Know?
In most applications, the leftmost menu is named Record.
1
Select the information you want to send:
a. Open an application.
b. Select the entry you want.
2
Select a sending method:
a. Open the menus.
b. Select the Send menu item in the leftmost menu. In most applications, the leftmost menu is named Record.
c. Select Bluetooth, and then select OK.
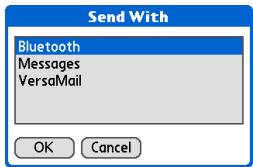
3
Select the receiving device on the Discovery Results screen, and then select OK.

Done The information is sent to the receiving device.
CHAPTER 19
Sharing Information

Tip
Create a category of Calendar events such as your child's soccer schedule, and then send the entire category to your spouse's handheld.

Tip
When you send a category, the individual entries within the category (contacts, memos, photos, and so on) appear as unfiled items on the receiving device.
Sending a category using Bluetooth technology
1
Select the category you want to send:
a. Open an application.
b. From the list view, select the pick list in the upper-right corner and select the category you want. This takes you to the list view within the selected category.
2
Send the category:
a. Open the menus.
b. Select the Send Category menu item in the leftmost menu.
c. Select Bluetooth, and then select OK.
3
Select the receiving device on the Discovery Results screen, and then select OK.

Done The information is sent to the receiving device.
CHAPTER 19
Sharing Information

Tip
Select the Send From pick list to send an application from an expansion card inserted into the expansion slot.
Sending an application using Bluetooth technology
1
Select the application you want to send:
a. Go to Applications.
b. Open the menus.
c. Select Send on the App menu.
d. Select the application you want to send.
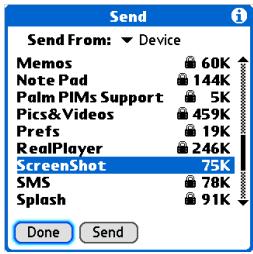
NOTE You cannot send an application that has a lock icon next to the application size.
2
Send the application:
a. Select Send.
b. Select Bluetooth, and then select OK.
3
Select the receiving device on the Discovery Results screen, and then select OK.

Done The information is sent to the receiving device.
CHAPTER 19
Sharing Information
Using the Send command with the VersaMail® application
You can send information as an attachment to an email message using the Send command. Follow the procedures for sending information, a category, or an application. Select VersaMail in the Send With dialog box. The VersaMail® application opens, displaying a blank message with the information you want to send as an attachment. Address the message, enter a subject line, and then select Send or Get & Send.
Using the Send command with SMS
NOTE You cannot send a category or an application with SMS.
You can send information as part of a text message using the Send command. Follow the procedure for sending information. Select SMS in the Send With dialog box. The SMS application opens, displaying a new text message with the information you want to send as the body of the message. Address the message, and then select Send.
CHAPTER 19
Sharing Information

Tip
For best results when beaming, the handhelds should be between 4 and 39 inches (10 centimeters and one meter) apart, and there should be a clear path between them.

Tip
Beaming works best for smaller items. If you have larger items, you can use Bluetooth® wireless technology. Expansion cards are convenient for sharing very large items.
Beaming
Using the IR port on your handheld, you can beam information from within an application, such as a photo or video, a contact, an appointment, or a task, to other Palm Powered™ devices. You can also beam a category of information or even an entire application.
NOTE The receiving handheld must be turned on. Depending on the receiving handheld model, not all information may be sent correctly.
Beaming information from within an application

Select the information you want to beam:
a. Open an application.
b. Select the entry you want.

Continued
CHAPTER 19
Sharing Information

Tip
The leftmost menu in most applications is named Record.

Tip
In Contacts, you can create a contact with your own information and select it as your business card by opening the
Record Menu and selecting Business Card. Beam your business card to other handhelds by holding down the Contacts Quick button until the Beam dialog box appears.
2
Beam the information:
a. Open the menus.
b. Select the Beam menu item in the leftmost menu. The leftmost menu in most applications is named Record.
c. When the Beam dialog box appears, point your handheld's IR port directly at the IR port of the other handheld.
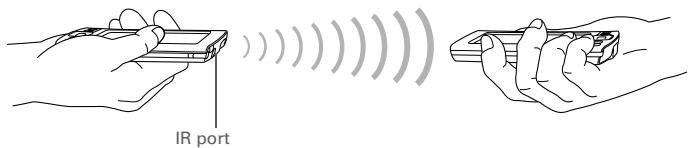
3
Wait for the Beam dialog box to indicate that beaming is complete.

Done
CHAPTER 19
Sharing Information

Tip
Create a category of Calendar events such as your meeting schedule, and then beam the entire category to your business partner's handheld.

Tip
When you receive a beamed item, you can file the item in a category using the Receive dialog box.
Beaming a category
1
Select the category you want to beam:
a. Open an application.
b. From the list view, select the pick list in the upper-right corner and select the category you want. This takes you to the list view within the selected category.
2
Beam the category:
a. Open the menus.
b. Select the Beam Category menu item in the leftmost menu.
c. When the Beam dialog box appears, point your handheld's IR port directly at the IR port of the other handheld.
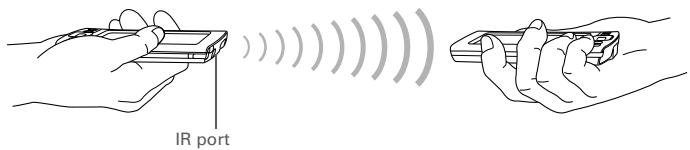
3
Wait for the Beam dialog box to indicate that beaming is complete.

CHAPTER 19
Sharing Information

Tip
Select the Beam From pick list to beam an application from an expansion card inserted into the expansion slot.
Beaming an application
1
Select the application you want to beam:
a. Go to Applications.
b. Open the menus.
c. Select Beam in the App menu.
d. Select the location of the app from the Beam From pick list.
e. Select the application you want to beam.
NOTE You cannot beam an application that has a lock icon next to the application size.
Continued
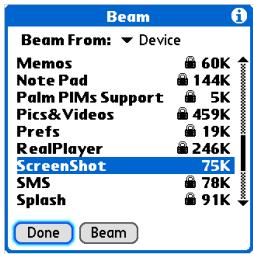
CHAPTER 19
Sharing Information
2
Beam the application:
a. Select Beam.
b. When the Beam dialog box appears, point your handheld's IR port directly at the IR port of the other handheld.
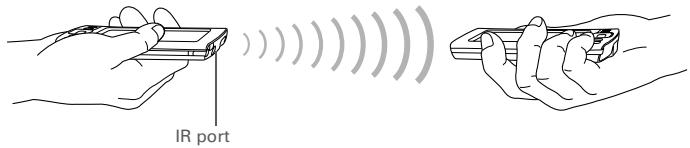
3
Wait for the Beam dialog box to indicate that beaming is complete.

Done
Other ways of sharing information
Here are some other ways of sharing information:
- Copy information or an application onto an expansion card inserted into the expansion slot, and view the information by inserting the card into the slot on another Palm Powered device.
- Copy information such as a photo or video from your handheld to your computer, or from your computer to your handheld by synchronizing.
CHAPTER 19
Sharing Information
Tips & Tricks
Make your handheld uniquely yours. For great tips, software, accessories, and more, visit www.palmOne.com/ mytunstene2.
Support
If you're having problems with sharing information or with anything else on your handheld, go to www.palmOne.com/support.
Related topics
Click a link below to learn about these related topics:
Moving Info Sharing information by synchronizing your handheld with your computer
Expansion Sharing information by saving it to an expansion card that can be viewed from another handheld
Connecting Setting up a connection with a phone to share information wirelessly
VersaMail Sending information as an attachment to an email message.
SMS Sending information as part of a text message
Common Answers to frequently asked questions about sharing information
Managing Your Expenses
In this chapter
Adding an expense
Choosing currency options
Deleting expenses
Customizing the expense list
Working with Expense on your computer
Related topics
Tired of trying to re-create your business trip when you return? Expense makes it easy to keep track of what you paid for that dinner in New York with your new sales group.
You can track costs for meals, lodging, transportation, entertainment, and more, and save all of the information in one convenient place. You can even transfer the information to a spreadsheet on your computer.

Benefits of Expense
- Monitor your business and personal expenses
- Easily retrieve expense information
- Create expense reports faster
CHAPTER 20
Managing Your Expenses

Did You Know?
Expense is not just for business. Use it to help plan your budget by figuring out how much you spend each month on things like entertainment and dining out.

Add an expense simply by entering the first letter of the expense type. For example, entering D opens a dinner item with today's date.
To enable this feature on your handheld, open the Options menu and select Preferences. Check the automatic fill box.

Tip
Change the date of an expense by selecting the date of the item.
Adding an expense
1
Go to Applications and select Expense

2
Enter the expense:
a. Tap New.
b. Enter the amount of the expense.
c. Tap the Expense type pick list and select a type.

NOTE You must select an Expense type if you want to save the item.
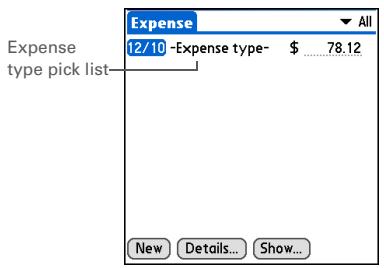

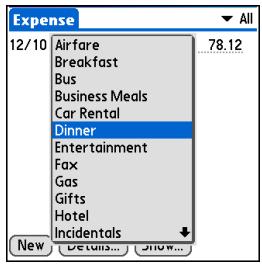

Continued
CHAPTER 20
Managing Your Expenses

Tip
Add extra information to your expense items. Select the item and select Details. Then select Note and enter the information.

Tip
Select Lookup in the Attendees list to pull names from Contacts.

Did You Know?
After you synchronize, you can send your expense information to a spreadsheet on your computer.
3
Enter the details of the expense:
a. Tap Details.
b. Select each field where you want to enter information, and enter it.
Category Select a category to sort your expenses.
Type Enter the expense type.
Payment Select how you paid for the expense.
Currency Select the currency used to pay the expense. You can preset this symbol.
Vendor and City Enter the vendor and city associated with the expense. For example, a business lunch might be at Rosie's Cafe in San Francisco.
Attendees Enter the people associated with the expense.
c. Select OK.

Done
That's it. Your handheld automatically saves the expense. Make sure you have a current backup. Synchronize often.
CHAPTER 20
Managing Your Expenses

Tip
If you travel a lot, update the currency pick list, so that you can quickly get to the symbols you need.

Did You Know?
Use separate categories for related expenses. For example, create a London category for a trip to London. After you file your expense report for the London trip, you can easily delete the related expenses with the Purge command.
Choosing currency options
Expense is even easier to use when you customize the currency list. You can choose what currencies appear in the pick list, and what symbol automatically appears in new expenses, and you can even create your own currency symbol.
Customizing the currency pick list
Place the currency symbols that you use most often in the currency pick list.
1
Go to Applications and select Expense

2
Open the Receipt Details dialog box:
a. Tap an expense item.
b. Tap Details.
3
Select the currency symbol(s) that you want to see in the pick list:
a. Select the Currency pick list, and then select Edit currencies.

Continued
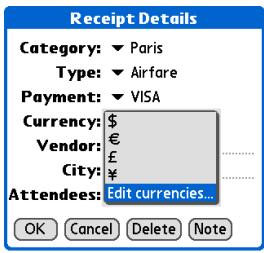
CHAPTER 20
Managing Your Expenses

Tip
If you're entering several expenses that all use the same currency, change the preset currency to that symbol to save time.
When you're finished with those expenses, change it again to the next one you'll use.
Cont'd.
b. Select one of the Currency pick lists and select the name of the country whose currency symbol you want to display.
c. Select OK, and then select OK again.
Select Currencies
Select the currencies that display in currency list.
Currency 1: United States
Currency 2: EU (Euro)
Currency 3: United Kingdom
Currency 4:Japan
Currency5: None
OK Cancel
Currency pick list

Done The expense list now displays the currencies you selected.
Presetting the currency symbol
Choose which currency symbols appear when you add a new expense.
1
Go to Applications and select Expense

2
Open Expense Preferences dialog box:
a. Open the menus.
b. Select Options, and then select Preferences.
Continued
CHAPTER 20
Managing Your Expenses
3
Choose the default currency:
a. Select the Default Currency pick list.
b. Select the symbol you want to appear when you add new expenses.
c. Select OK.

Done
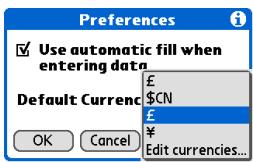
Creating a currency symbol
If the currency you want to use is not in the pick list of countries, you can create your own symbol.
1
Go to Applications and select Expense

2
Open the Custom Currencies dialog box:
a. Open the menus.
b. Select Options, and then select Custom Currencies.

Continued
CHAPTER 20
Managing Your Expenses
3
Create the custom symbol:
a. Select a Country box.
b. Enter the name of the country and the symbol that you want.
c. Select OK, and then select OK again.

Done
Custom Currencies
Create your own custom currencies by tapping on the country name below:
Country 1
Country 3
Country 4

Cancel
CHAPTER 20
Managing Your Expenses
Deleting expenses
Delete individual expenses, or an entire category of expenses at once.
Deleting an individual expense
1
Go to Applications and select Expense

2
Tap the expense you want to delete.
3
Delete the item:
a. Open the menus.
b. Select Delete Item in the Record menu.
4
[ & ] OPTIONAL Check the box to save an archive copy of the expense on your computer.
5
Select OK.

Done
CHAPTER 20
Managing Your Expenses

Tip
To combine expenses from different categories, rename one category to match the other category's name.

Did You Know?
There is another way to delete a category. Select the Category pick list and select Edit Categories. Select the Delete command to delete the selected category and move all of its entries to the Unfiled category.
Deleting an entire category of expenses
1
Go to Applications and select Expense

2
Open the Purge Categories dialog box:
a. Open the menus.
b. Select Purge on the Record menu.
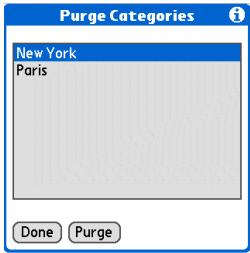
3
Delete the category and all of its items:
a. Select the category you want to delete.
b. Select Purge.
c. Select Done.

Done
CHAPTER 20
Managing Your Expenses

Did You Know?
Customizing the expense list makes it easy to see how much you spent on each type of expense. For example, to see how much you spent on taxis, sort your expenses by type so that all your taxi expenses appear together in the list.
Use categories to further refine your list.
Customizing the expense list
You can change the appearance of the expense list.
1
Go to Applications and select Expense

2
Select Show.
3
Select the pick lists to change any of the following items, and then select OK:
Sort by Sort expenses by date or type.
Distance Show distance in miles or kilometers.
Show currency Show or hide the currency symbol in the expense list.
Show Options
Sortby: Date
Distance: Miles
Show currency
OK Cancel

Done
CHAPTER 20
Managing Your Expenses
Working with Expense on your computer
WINDOWS ONLY
Use Expense on your computer to view and manage the expenses you create on your handheld. Check out the online Help in Palm® Desktop software to learn how to use Expense on your computer. The online Help includes info about the following topics:
- Adding, editing and deleting expense items
- Organizing your expenses by date, type, amount, notes, or category
Viewing expense items as a list, large icons, or small icons - Converting a list of expenses to a single currency
- Printing expense reports
- Transferring expense information to other applications, such as Microsoft Excel, using the Send or Export command in Palm Desktop software
To open Expense on your computer, double-click the Palm Desktop icon on the Windows desktop, and then click Expense on the Launch bar.
CHAPTER 20
Managing Your Expenses
Tips & Tricks
Make your handheld uniquely yours. For great tips, software, accessories, and more, visit www.palmOne.com/ mytunstene2.
Support
If you're having problems with Expense or anything else on your handheld, go to www.palmOne.com/support.
Related topics
Click a link below to learn about these related topics:
Moving Around
- Opening applications
Entering Information
Using menus
Calculator
- Adding contacts to the attendees list with Lookup
- Entering information with Graffiti® 2 characters and ShortCuts
Performing basic math calculations associated with your expenses
Categories
- Creating and editing categories
- Organizing expenses by type and sorting them
Customizing
Setting number formats
CHAPTER 21
Performing Calculations
In this chapter
Calculator buttons
Viewing recent calculations
Related topics
Whether you're figuring the tip on a restaurant bill or balancing your checkbook, it's always nice to have a calculator on hand. And because it's part of your handheld, there's no need to carry a separate calculator.

Benefits of Calculator
Always have a calculator with you
- Store calculations for later use
CHAPTER 21
Performing Calculations

Tip
Use the memory buttons to store and recall a number you enter in multiple calculations.

Tip
If you make a mistake entering a number in the middle of a calculation, use the CE button to re-enter the number without starting the calculation over.

Tip
Open the Options menu and select Advanced Mode to display a scientific calculator.
Calculator buttons

Clear any value in the Calculator memory.

Recall the stored value from the memory and enter it into the current calculation.

Place the current number into memory. The current number is added to the total that is already in the memory. Tapping this button does not affect the current calculation; it just places the value in memory.

Clear the last number you entered.

Clear the entire calculation so that you can start over.

Enter a number, and then select this button to change it to a percentage.

Enter a number, and then select this button to calculate the square root of the number.

Enter a number, and then select this button to make it negative.
CHAPTER 21
Performing Calculations
+ Did You Know?
Viewing recent calculations is helpful when double-checking the math in your checkbook register.
+ Did You Know?
Calculator History also has these functions:
Clear Select to clear the calculator's history.
Copy Select to copy the history of calculations. Then paste them into another application by opening the Edit menu and selecting Paste in the other application.
Viewing recent calculations
View recent calculations to confirm that you entered everything correctly.
1 Go to Applications and select Calculator
2 Open the History dialog box:
a. Open the menus.
b. Select Edit, and then select Show History.
c. Select OK.

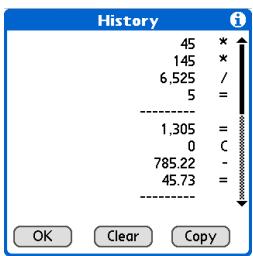
CHAPTER 21
Performing Calculations
Accessing different calculators
Do you need a scientific or financial calculator? Your calculator has a variety of modes that can help you calculate formulas in a number of different areas.
1
Go to Applications and select Calculator

2
Access the advanced mode calculators:
a. Open the menus.
b. Select Options, and then select Advanced Mode. You can now use the scientific calculator.
c. If you want to use other calculators, such as finance, logic, statistics, or area, open the menus, select Options, and then select a mode from the list.

Done
CHAPTER 21
Performing Calculations
Tips & Tricks
Make your handheld uniquely yours. For great tips, software, accessories, and more, visit www.palmOne.com/ mytunstene2.
Support
If you're having problems with Calculator or anything else on your handheld, go to www.palmOne.com/support.
Related topics
Click the links below to learn about these related topics:
Moving Around
- Opening applications
Using menus
Entering Information
Entering numbers with Graffiti® 2 characters
Keeping Your Information Private
In this chapter
Choosing a security level
Marking information as private
Setting the level of privacy
Using a password
Locking your handheld
Using Quick Unlock
Encrypting your information
Limiting the number of password attempts
Related topics
You probably wouldn't leave your door unlocked at night, so why should it be any different with your handheld?
When you think about the amount of personal and private information stored there, you'll definitely want to protect it.

Benefits of privacy
- Protect information if your handheld is misplaced
- Hide private information
- Unlock your handheld using only one hand
CHAPTER 22
Keeping Your Information Private
Choosing a security level
There are a variety of security levels available for your handheld. Choose the level that provides the best mix of security and convenience.
Activating no security features All entries are accessible to anyone who has your handheld. This includes entries that are marked private but are not masked or hidden.
Masking private entries without creating a password Masked entries are displayed when selected. This provides some degree of privacy for private entries, but anyone can view the info by simply selecting it.
Hiding private entries and creating a password Private entries are displayed when the password is entered. This is the basic level of security.
Encrypted entries (requires assigning a password) Entries are scrambled whenever your handheld locks, and are only displayed when the password is entered. Choose to encrypt all information, or just private entries. This feature provides better security than hiding private entries and assigning a password.
Limiting the number of password attempts Selected information is deleted after a specified number of incorrect password attempts. Use this feature along with encryption for the highest level of security.
CHAPTER 22
Keeping Your Information Private
Marking information as private
Marking an entry as private is the first step in protecting your info.
1 Open an application.
2 Create a new entry, or select the entry that you want to make private.
3 Mark it as private:
a. For existing Contacts, select Edit.
b. Select Details.
c. Check the Private box.
d. Select OK.
e. In Contacts and Memos, select Done.
Done
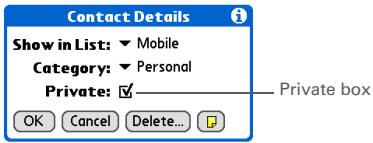
CHAPTER 22
Keeping Your Information Private

Tip
You can also set the level of privacy from within certain applications.
Open the Options menu,
select Security, and then select the level of privacy from the Privacy pick list.
Setting the level of privacy
Add further protection to your private entries by setting the privacy level (hidden/masked).
Hiding or masking private entries
1
Open Security:
a. Go to Applications, and then select Defaults
b. Select Security.
2
Select the display option for private entries:
a. Select the Private Records pick list.
b. Select one of these options, and then select Done.
Show Display private entries.
Mask Cover entries with a gray mask; you can see the mask onscreen, but you can't see the content of the entry.
Hide Make private entries invisible.
Continued
CHAPTER 22
Keeping Your Information Private

Tip
Use a password to protect confidential work or personal information. If your handheld is lost or stolen, this information will be safe.
Cont'd.
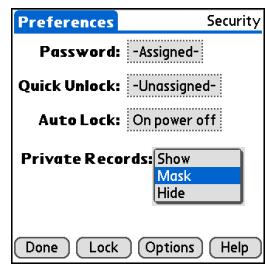
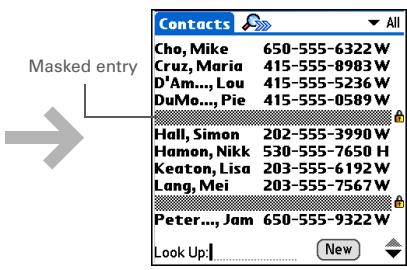

Done
Viewing an entry that is masked
To open a masked entry, select the entry. If you have a password, enter it in the Show Private Records dialog box, and then select OK. When you close a masked entry, it remains masked.
Using a password
Further protect your hidden or masked entries by creating a password, which is needed to display the contents of hidden/masked entries.
CHAPTER 22
Keeping Your Information Private

Tip
The best passwords consist of a mix of letters, characters, and numbers. Longer passwords are better than short ones. Any password you create is case-sensitive.
Creating a password
1
Open Security:
a. Go to Applications, and then
selectPrefs
b. Select Security.
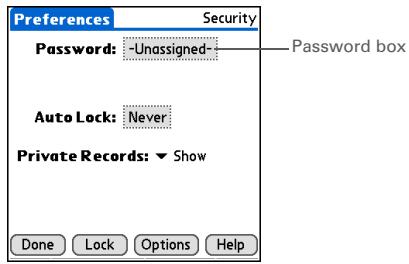
2
Create a password:
a. Select the Password box.
b. Enter a password with Graffiti® 2 writing, the numeric keypad, or the onscreen keyboard.
c. Select OK.

Continued
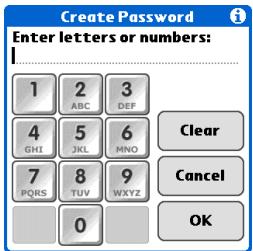
CHAPTER 22
Keeping Your Information Private

Tip
In Palm® Desktop software, you can require password entry for private info to display. Open the Tools menu and click Options, and then click Security. The password is the same one used by your handheld.
3
Confirm the password and enter a hint:
a. Enter the password again, and then select OK.
b. Enter a hint to help you remember the password if you forget it, and then select Done.
4
Select Done.

Done
Changing a password
You can change your password at any time. You must enter the current password before you can change it.
1
Open Security:
a. Go to Applications, and then
selectPrefs
b. Select Security.

Continued
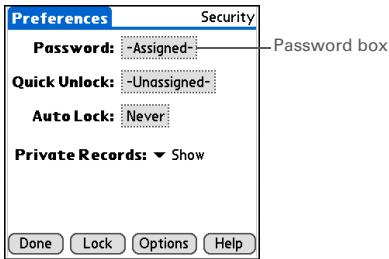
CHAPTER 22
Keeping Your Information Private
2
Enter your current password:
a. Select the Password box.
b. Enter the current password, and then select OK.
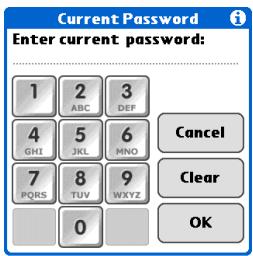
3
Change your password:
a. Select OK.
b. Enter a new password, and then select OK.
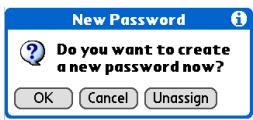
4
Confirm the password and enter a hint:
a. Enter the password again, and then select OK.
b. Enter a hint to help you remember the password if you forget it, and then select Done.
5
Select Done.

CHAPTER 22
Keeping Your Information Private
Deleting a password
You can delete your password at any time. You must enter the current password before you can delete it.
1
Enter your password:
a. Select the Password box.
b. Enter the current password, and then select OK.
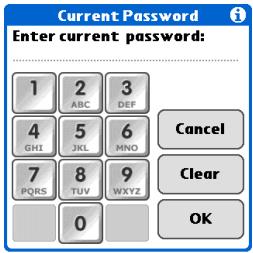
2
Delete your password:
a. Select Unassign.
b. Select Done.

Done
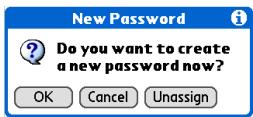
CHAPTER 22
Keeping Your Information Private
Deleting a forgotten password
If you forget your password, your handheld displays the password hint (if you entered one) to help you remember the password. If you still can't remember the password, you can delete it from your handheld. Deleting a forgotten password also deletes all entries marked as private.
[!] IMPORTANT Be sure to synchronize your handheld with your computer before and after this procedure, so you can restore any private entries that were deleted along with the password.
1
Open Security:
a. Go to Applications, and then
select Prefs
b. Select Security.
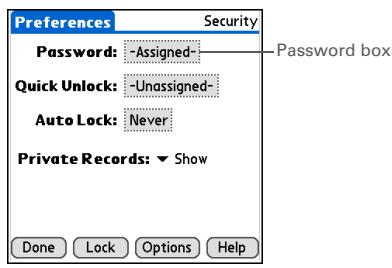
2
Open the Incorrect Password dialog box:
a. Select the Password box.
b. Tap any number on the keypad, and then select OK.
Continued
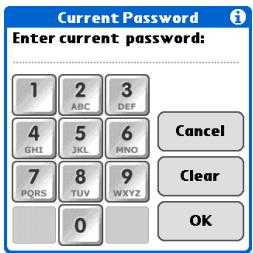
CHAPTER 22
Keeping Your Information Private
[!] Before You Begin
To use the locking feature, you must first create a password for your handheld.
![PALM ONE - [!] Before You Begin - 1](/content/2019/10/16572/images/453025b4375ec1701cba94bcc51b6193d6fff02c2148b3f6d40b36931abed43a.jpg)
Tip
To start your handheld when it is locked, turn it on. Enter your password, and then select Done.
3
Delete the forgotten password:
a. Select Lost Password.
b. Select Delete Password.
Incorrect Password

This is not the correct password.
To try again, tap OK.
Hint:
Lost Password
4
Synchronize your handheld with your computer to restore any private entries that were deleted.
5
[ & ] OPTIONAL Create a new password.

Done
Locking your handheld
Protect the entire contents of your handheld, whether marked private or not, by using your password to lock your handheld. You can set your handheld to lock automatically, or you can lock it manually.
[!] IMPORTANT If you lock your handheld, you must enter the exact password to unlock it. If you forget the password, your handheld will show you the hint you entered to help you remember the password. If you still cannot remember the password, you must do a hard reset to resume using your handheld. A hard reset deletes all of the information on your handheld, including your password. You can restore the information by synchronizing your handheld with your computer.
CHAPTER 22
Keeping Your Information Private
Locking your handheld automatically
1
Open Security:
a. Go to Applications, and then
selectPrefs
b. Select Security.
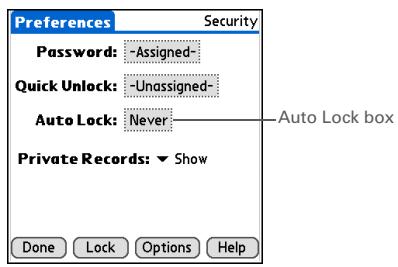
2
Open the Lock Handheld dialog box:
a. Select the Auto Lock box.
b. If necessary, enter your password, and then select OK.
Continued
CHAPTER 22
Keeping Your Information Private
3
Select one of these lock options:
Never Always leave your handheld unlocked.
When power is off
Automatically lock your
handheld whenever you turn it
off.
At a preset time Set a time when your handheld will automatically lock.
After a preset delay Set a period of inactivity after which your handheld will automatically lock.
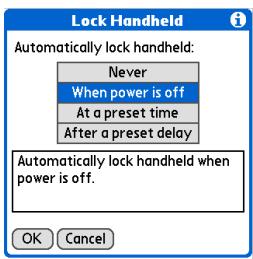
4
Select OK, and then select Done.

Done
CHAPTER 22
Keeping Your Information Private
Locking your handheld manually
1
Open Security:
a. Go to Applications, and then
selectPrefs
b. Select Security.
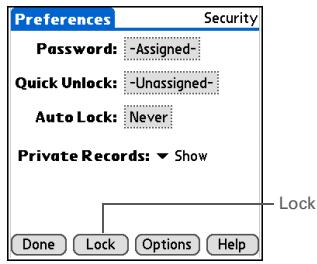
2
Select Lock.
3
Select Lock Device.

Done
Lock
This feature locks your handheld and prevents others from using it without the password.
To unlock your handheld, you must enter your password.
Lock Device Canc

CHAPTER 22
Keeping Your Information Private
[!] Before You Begin
To use Quick Unlock, you must first create a password for your handheld.
\*Tip
You can change a Quick Unlock combination at any time. Follow the same steps you used to create the combination.
Using Quick Unlock
You can unlock your handheld by creating a special combination sequence with the 5-way navigator—similar to the combination you use to open a padlock. Use this sequence in place of your password to quickly unlock your handheld. Quick Unlock works only with your first three attempts to unlock your handheld. After three attempts, you must use your password to unlock your handheld.
Creating a Quick Unlock combination
1
Open Security:
a. Go to Applications, and then
select Prefix
b. Select Security.
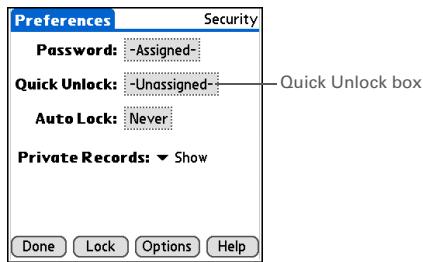
2
Open the Quick Unlock dialog box:
a. Select the Quick Unlock box.
b. If necessary, enter your password, and then select OK.
Continued
CHAPTER 22
Keeping Your Information Private
3
Create a Quick Unlock combination sequence:
a. Use the 5-way or tap the onscreen navigator to create a combination.
For example, you might choose Left-Right-Left as a combination.
b. Select OK.
Create Quick Unlock
Use navigator or tap screen to create a combination:

Quick Unlock is optional, and works only on the first three entry attempts.
OK Cancel
Clear
4
Select Done.
#
Done
When your handheld is locked, you can now unlock it by using the Quick Unlock combination. If you forget your combination, you are asked to enter your password.
CHAPTER 22
Keeping Your Information Private
Deleting your Quick Unlock combination
1
Open Security:
a. Go to Applications, and then
selectPrefs
b. Select Security.
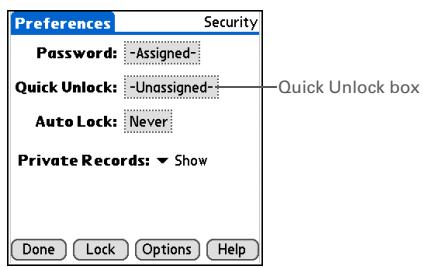
2
Open the Quick Unlock dialog box:
a. Select the Quick Unlock box.
b. If necessary, enter your password, and then select OK.
3
Delete the Quick Unlock combination:
a. Select Unassign.
b. Select Done.

Done
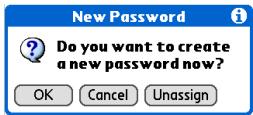
CHAPTER 22
Keeping Your Information Private
[!] Before You Begin
To use encryption, you must first create a password for your handheld.
Encrypting your information
You can encrypt selected information whenever your handheld locks. This means that your information is scrambled so that it cannot be read. When you unlock your handheld and enter your password or Quick Unlock combination, the encrypted information is unscrambled.
[!] IMPORTANT If you have a large number of contacts and calendar entries or an application with a large number of records, encrypting the data can take a very long time. The more information you select for encryption, the longer your handheld takes to scramble (and unscramble) the information. Also, applications that use large files, such as palmOne™ Media, take a long time to encrypt. In these cases, consider the trade-off between security and convenience.
1
Open Security:
a. Go to Applications, and then
select Prefs
b. Select Security.
Continued
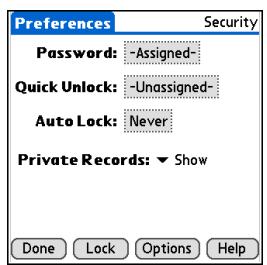
CHAPTER 22
Keeping Your Information Private
2
Open the Encrypt Data dialog box:
a. Select Options.
b. Check the Encrypt data when locked box.
c. Select Choose Applications.
Security Options
Encrypt data when locked Choose Applications...
- Encrypt private records only
- Encryption type:
- RC4
Intrusion Protection:
-Disabled-
OK Cancel
3
Select the applications you want to encrypt, and then select OK.

Continued
Encrypt Data
Select applications to encrypt:
□ Favorites
Calc
Calendar
□ Contacts
Dialer
expense
Memo No. 10
Note Pad
Cancel
0
CHAPTER 22
Keeping Your Information Private

Tip
Synchronize your handheld with your computer frequently to prevent loss of information if intrusion protection is triggered.

Did You Know?
Incorrect Quick Unlock attempts are not included in the intrusion protection counter.
4
[ & ] OPTIONAL To encrypt only the private entries in the applications you selected, check the Encrypt private records only box.
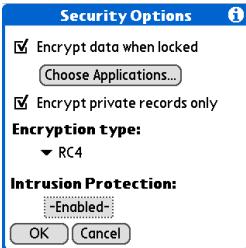
5
Select OK, and then select Done.

Limiting the number of password attempts
You can set the number of incorrect password attempts that are allowed before selected information is deleted from your handheld. This feature, called intrusion protection, protects sensitive information from an intruder who uses an automated means to try every possible combination until the password is found. Use intrusion protection if you keep highly confidential information on your handheld.
[!] IMPORTANT If you limit the number of password attempts, be sure to use Keylock to prevent accidental password attempts while your handheld is in a purse or pocket.
CHAPTER 22
Keeping Your Information Private
1
Open Security:
a. Go to Applications, and then
selectPrefs

b. Select Security.
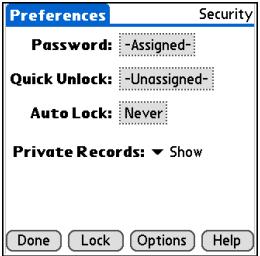
2
Set the number of password attempts:
a. Select Options.
b. If necessary, enter your password, and then select OK.
c. Select the Intrusion Protection box.
d. Enter the number of password attempts that are allowed before selected information on your handheld is deleted.
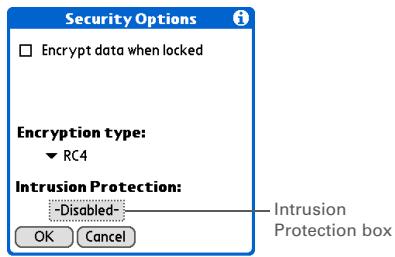

Continued
CHAPTER 22
Keeping Your Information Private

Tip
The number of password attempts must be between 5 and 99.
3
Select the information that is deleted after the set number of failed attempts:
a. Select the Delete pick list and select one of these options:
No Data No information is deleted after the set number of failed attempts.
Private Records All entries marked private are deleted after the set number of failed attempts.
All Data All information you entered and all applications you installed on your handheld are deleted after the set number of failed attempts.
b. Select OK.
4
Select OK two more times, and then select Done.

Done
CHAPTER 22
Keeping Your Information Private
Tips & Tricks
Make your handheld uniquely yours. For great tips, software, accessories, and more, visit www.palmOne.com/ mytunstene2.
Support
If you're having problems with private entries or anything else on your handheld, go to www.palmOne.com/support.
Related topics
Click a link below to learn about these related topics:
Moving Around
- Opening applications
Using menus
Managing Info
Creating a backup of your information
Customizing
Entering your owner information in case your handheld is lost or stolen
Maintaining
Doing a hard reset
Common
Answers to frequently asked questions about privacy
Using Categories to Organize Information
In this chapter
Adding a category
Renaming a category
Deleting a category
Placing information in a category
Viewing information by category
Related topics
If you're like most people, you use your handheld to manage your work life and your personal life. Yet these two areas contain so many details: your children's after-school activities, your conference schedule, your shopping list for the week, and entertainment.
Categories help you organize different aspects of your life, no matter how you choose to group them.
Benefits of categories
- Better organize your information
- Easily retrieve the information you need
CHAPTER 23
Using Categories to Organize Information
+ Did You Know?
You can have up to 15 categories in an application.
\*Tip
Colors make it easy to find the info you need in Calendar.
\*Tip
Add a category in Contacts that contains all of your medical numbers for quick access.
Other useful categories in Contacts are Emergency, for fire, ambulance, and police; Children, for your children's school and friends; and Entertainment, for restaurants or theaters that you visit often.
Adding a category
You can add categories in many applications: Contacts, Expense, Memos, Note Pad, Tasks, and palmOne™ Media. (In palmOne Media, categories are called albums.) Place individual entries in these categories to easily get to a group of related items.
In addition to putting individual entries into a category, you can also put entire applications into categories. For instance, you may find it convenient to put Expense and Calculator into a category called Money.
1 Do one of the following:
- To add a category for individual entries in one of the applications above, open that application.
- To add a category for applications, go to Applications.
2 Add a new category:
a. Select the pick list in the upper-right corner, and then select Edit Categories.
b. Select New and enter the name of the new category.
c. Select OK, and then select OK again.

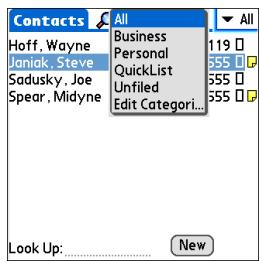
CHAPTER 23
Using Categories to Organize Information

Tip
If you want to combine items in different categories, rename one category to the other category name.

Did You Know?
Some categories, like All and Unfiled, come with your handheld and cannot be changed.
Renaming a category
1
Do one of the following:
- To rename a category within an application, open that application.
- To rename a category for applications, go to Applications.
2
Rename the category:
a. Select the pick list in the upper-right corner, and then select Edit Categories.
b. Select the name of the category you want to change, and then select Rename.
c. Enter a new category name, and then select OK.
d. Select OK again.

Done
CHAPTER 23
Using Categories to Organize Information

Tip
In Expense, you can delete a category, including its contents, with the Purge command.

Tip
To display the category pick list in Calendar Day View, open the Options menu, select Display Options, tap Day, and then check the Show Category List box.
Deleting a category
If you delete a category, the items in that category will move to the Unfiled category.
1
Do one of the following:
- To delete a category within an application, open that application.
- To delete a category for applications, go to Applications.
2
Go to the Edit Categories dialog box:
Calendar Select an event, select Details, select the Category pick list, and then select Edit Categories.
All other applications Select the pick list in the upper-right corner, and then select Edit Categories.
3
Delete the category:
a. Select the name of the category you want to delete.
b. Select Delete.
c. Select Yes
d. Select OK.

Done
CHAPTER 23
Using Categories to Organize Information

Tip
You can also enter new information into a category by opening the application, and then selecting the category from the upper-right corner. Select New and enter the information.
Placing information in a category
You can place individual entries into categories within an application. For example, you may want to place some of your contacts in a category called Medical.
You may also find it convenient to view applications in groups. You may want all of your games in one category, or all of your multimedia applications in another. Then you can go right to the group of applications you need.
NOTE An entry or application cannot be placed in more than one category.
Placing an entry in a category
1 Open an application that contains a category option. In Calendar, go to Day View.
2 Open an entry.
3 In Note Pad only: skip to step 5.
4 Open the Details dialog box:
Contacts Select Edit, and then select Details.
All other applications Select Details.
Continued
CHAPTER 23
Using Categories to Organize Information

Tip
To place an entry in a different category, simply select a different category from the Category pick list.

Place the entry in a category:
a. Select a category from the Category pick list.
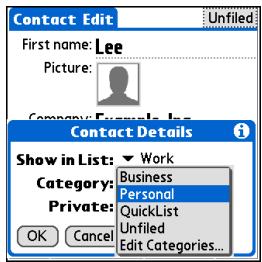

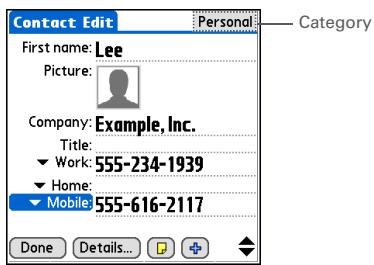
b. If necessary, select OK.
c. If necessary, select Done.

Done
CHAPTER 23
Using Categories to Organize Information
Placing an application in a category
1 Go to Applications.
2 Open the Category dialog box:
a. Open the menus.
b. Select Category in the App menu.
3 Place the application in a category:
a. Select the pick list next to the application you want to place in a category.
b. Select a category, and then select Done.
Done
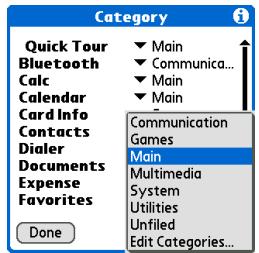
CHAPTER 23
Using Categories to Organize Information

Tip
In Applications view, scroll through the categories by pressing Right or Left on the 5-way navigator. To view all of the applications on your handheld, select the All category.

Tip
Scroll through the categories in Contacts by repeatedly pressing the Contacts button.
Viewing information by category

Do one of the following:
- To view entries by category, open an application that contains categories.
- To view applications by category, go to Applications.

Display the category you want to view:
Calendar Select Show Category List, and then select the category you want to view from the pick list.
All other applications Select the category you want to view from the pick list in the upper-right corner.
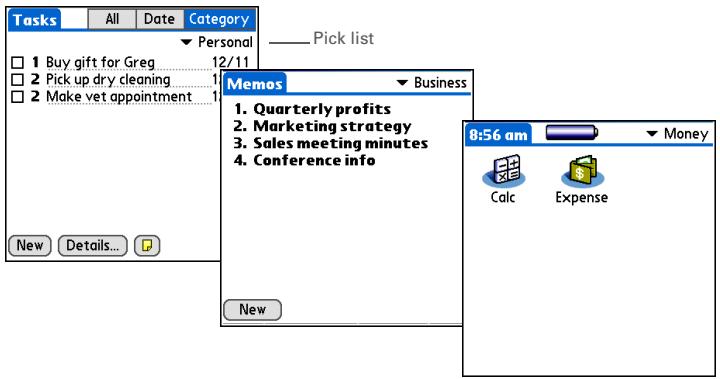

Done
CHAPTER 23
Using Categories to Organize Information
Tips & Tricks
Make your handheld uniquely yours. For great tips, software, accessories, and more, visit www.palmOne.com/ mytunstene2.
Support
If you're having problems with categories or anything else on your handheld, go to www.palmOne.com/support.
Related topics
Click a link below to learn about these related topics:
Moving Around
- Opening applications
Using menus
Calendar
Color-coding your events in Calendar
Media
Organizing photos or videos into albums
Sharing
Beaming a category to another Palm Powered™ device
Managing Clock Settings
In this chapter
Checking the current date and time
Setting the primary location
Choosing secondary locations for other time zones
Modifying the locations list
Setting the alarm clock
Changing the clock display
Related topics
Forget your watch? Or just forget to reset it when you landed in Toronto? Neither matters, as long as you have your handheld. Not only can you rely on it for the correct time, but you can even set an alarm so you don't miss that early flight back home.

Benefits of World Clock
Always have the correct time, no matter where you are
- No need to carry a separate alarm clock
CHAPTER 24
Managing Clock Settings
Key Term
Primary location
Typically a city in the time zone in which you live.
Checking the current date and time
You can easily check the current date and time:
a. Go to Applications and select World Clock
b. Press the Calendar button, and select the Agenda View icon
Setting the primary location
In World Clock, you can set the location, date, and time for a primary location. The settings for this primary location are used by all of the applications on your handheld.
1
Go to Applications and select World Clock
2
Select the primary location:
a. Select the primary location pick list.
b. Select the location you want to be the primary location.
If you need more choices, modify the locations list.

Done
Primary location pick list
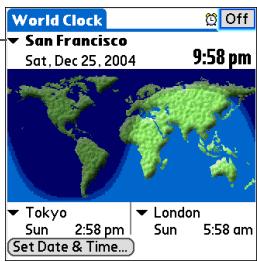
CHAPTER 24
Managing Clock Settings

Did You Know?
When the Daylight Savings settings are active, the time changes according to the rule for the primary location. For example, in North America, the time changes at 2:00 a.m.; in Europe, it changes at 1:00 a.m.
Setting the date and time for the primary location
You can set the date and time in Preferences, as you did during the initial setup of your handheld, or in World Clock. When you change the date and time in one application, it is automatically changed in the other.
1
Go to Applications and select World Clock

2
Select Set Date & Time.
3
Set the date:
a. Select the Set Date box.
b. Select the arrows to select the current year.
c. Select the current month.
d. Select the current day.

Continued
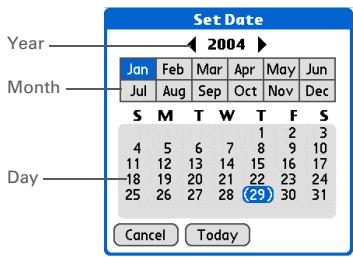
CHAPTER 24
Managing Clock Settings

Tip
Selecting a time zone when creating a new event in Calendar allows you to travel and have your events automatically adjust to the time zone in your new location. Time zones in Calendar work only if you are synchronizing with Outlook or Exchange ActiveSync.
4
Set the time:
a. Select the Set Time box.
b. Select the hour and minute boxes, and then select the arrows to change them.
c. Select AM or PM, and then select OK.
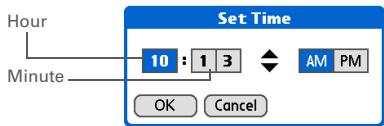
5
Select Done.

CHAPTER 24
Managing Clock Settings

Tip
If you have friends, family, or colleagues in another time zone, select a city in their zone as your secondary location. When you need to contact them, you can easily check to see what time it is where they are.
Choosing secondary locations for other time zones
Set World Clock to display the date and time for two other locations.
1
Go to Applications and select World Clock

2
Select the pick list next to one of the secondary locations.
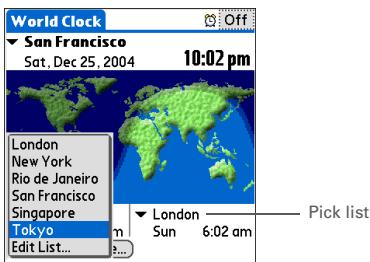
3
Select the location you want to use as the new secondary location.
If you need more choices, modify the locations list.

Done
CHAPTER 24
Managing Clock Settings

Tip
If you know what you're looking for in a long pick list, use Graffiti® 2 writing to find it faster. Enter the first letter of the word, and then locate your item.
Modifying the locations list
You can edit the locations list so that the locations you use most often are easy to find.
Adding new locations
1
Go to Applications and select World Clock

2
Open the Edit List dialog box:
a. Select a location pick list.
b. Select Edit List.
3
Add the new location:
a. Select Add.
b. Scroll through the list to select a location that is in the same time zone as the city you want to add.
c. Select OK.

Continued
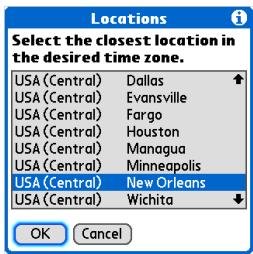
CHAPTER 24
Managing Clock Settings
4
[ & ] OPTIONAL Select each setting you want to change.
Name Enter the name of the location.
Time Zone Select the time zone for the location.
Daylight Saving Time box Check for your handheld to automatically adjust the date and time for Daylight Saving Time in this location.
Start and End dates Select the boxes to change the start and end dates of Daylight Saving Time, if necessary.
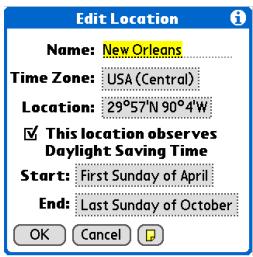
5
Select OK, and then select Done.

Done
CHAPTER 24
Managing Clock Settings
Deleting a location
1
Go to Applications and select World Clock

2
Select the location you want to delete:
a. Select a location pick list.
b. Select Edit List.
c. Select a location, and then select Remove.
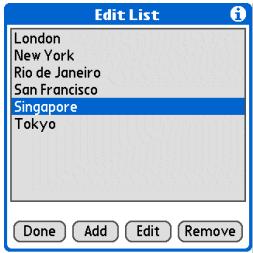
3
Select OK, and then select Done.

Done
CHAPTER 24
Managing Clock Settings
+ Did You Know?
Use World Clock to set an alarm within the next 24 hours. Set alarms outside of this time frame in Calendar.
+ Did You Know?
Remember to put your handheld on local time. If you travel from San Francisco to London, make London your primary location so that all your alarms ring on time, instead of eight hours late.
\*Tip
Set an alarm while you're working to remind you when to leave to get to your appointment on time.
Setting the alarm clock
1
Go to Applications and select World Clock

2
Set the alarm:
a. Select the Alarm box.
b. Select the time columns to set the hour and minute, and then select OK.

NOTE Alarms set in World Clock use the time set for the primary location.
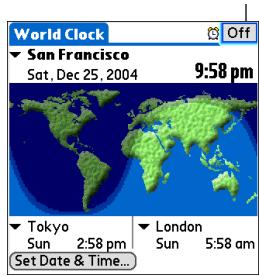
Alarm box
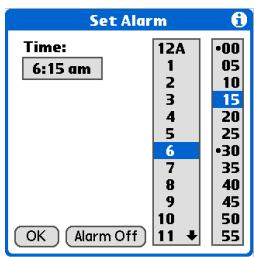

Continued
CHAPTER 24
Managing Clock Settings

Tip
To turn off an alarm before it sounds, select the Alarm box, and then select Alarm Off.
3
[ & ] OPTIONAL Select the alarm sound and volume:
a. Open the menus.
b. Select Options, and then select Alarm Preferences.
c. Select the pick lists to select the alarm sound and volume.
NOTE This volume setting does not affect the other sounds on your handheld, including the alarms you set in Calendar. You can change the volume of these other sounds in Preferences.
d. Select OK.

Done
Responding to the alarm clock
When the World Clock alarm sounds, select one of these three options:
OK Cancel the reminder message and return to the current screen.
Snoopze Close the alarm reminder message and return to the current screen. The message appears again in five minutes. In the meantime, an indicator blinks in the upper-left corner of the screen to remind you of the upcoming alarm.
Go To Cancel the reminder message and open World Clock.
CHAPTER 24
Managing Clock Settings
Changing the clock display
1 Go to Applications and select World Clock
2 Open the Display Options dialog box:
a. Open the menus.
b. Select Options, and then select Display Options.
3 Select any of the following options, and then select OK:
Show Multiple Locations Display the secondary locations. Uncheck it to display only the primary location.
Show Date Display the date in World Clock.

CHAPTER 24
Managing Clock Settings
Tips & Tricks
Make your handheld uniquely yours. For great tips, software, accessories, and more, visit www.palmOne.com/ mytunstene2.
Support
If you're having problems with World Clock or anything else on your handheld, go to www.palmOne.com/support.
Related topics
Click a link below to learn about these related topics:
Moving Around
- Opening applications
Using menus
Calendar
Setting an alarm outside of the next 24 hours
Customizing
Changing the volume of other system sounds
Customizing Your Handheld
In this chapter
Customizing Favorites View
Customizing Applications View
Making the screen easier to read
Assigning a button to your frequently used applications
Setting the date and time
Customizing the way you enter information
Selecting sound settings
Entering your owner information
Conserving battery power
Connecting your handheld to other devices
Customizing network settings
Setting up a VPN
Related topics
Although customizing your handheld is optional, it's like changing the preset radio stations in your car. Since you're probably not driving around with the dealer's preset radio stations, why not personalize your handheld, too?
You can easily customize the sound levels, fonts, and screen colors on your handheld by using preferences and menus. And preference settings can help extend the life of your handheld's battery.

Benefits of customizing
- Access applications quickly
- Conserve power
- Enjoy your handheld more
Make your screen easy to read
CHAPTER 25
Customizing Your Handheld
Customizing Favorites View
You can personalize Favorites View by changing the background image to your favorite photo. You can also change the entries to those you use most often.
Changing the background photo in Favorites View
1 Go to Favorites.
2 Open the Display Options dialog box:
a. Open the menus.
b. Select Options, and then select Display Options.
3 Select a photo for the background:
a. Check the Background box.
b. Select the picture box.
c. Select a picture.
d. Select Done.
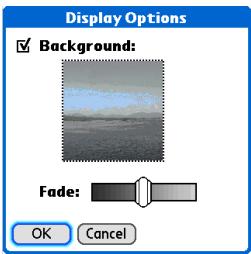
4 Adjust the fade setting so that the text is easy to read against the photo, and select OK.

CHAPTER 25
Customizing Your Handheld

Tip
You can also tap and hold on the favorite you want to change.

Did You Know?
You can move a favorite to a different location on the Favorites list by opening the Favorite menu, and then selecting Rearrange Favorites. Drag the favorite you want to the new location.
Changing entries in Favorites
Change the entries in Favorites View to include the applications or web links you use most often.
1
Go to Favorites.
2
Open the Edit Favorites dialog box:
a. Using the 5-way, highlight the favorite you want to change.
b. Open the menus.
c. Select Edit Favorite.
3
Change the favorite:
a. Select the favorite type from the Type pick list: application or web link.
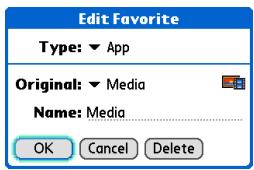
b. Select the application from the Original pick list, or select to enter the web address you want.
c. Enter a name for your new favorite and select OK.

Done
CHAPTER 25
Customizing Your Handheld
Customizing Applications View
Use your favorite photo as the background in Applications View. You can also display your application icons in list format with small icons so that you can see more applications without scrolling.
1 Go to Applications.
2 Open the Display Options dialog box:
a. Open the menus.
b. Select Options, and then select Display Options.
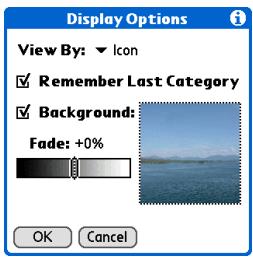
3 Select the View By pick list and select List or Icon as the display format.
4 If you want the last category you viewed to reappear the next time you visit the Applications screen, check the Remember Last Category box.
Continued
CHAPTER 25
Customizing Your Handheld
5
Select a photo for the background:
a. Check the Background box.
b. Select the picture box.
c. Select a picture.
d. Select Done.
e. Adjust the fade setting so that the text is easy to read against the photo.
f. Select OK.

Done
CHAPTER 25
Customizing Your Handheld
Making the screen easier to read
In many applications, you can change the font style to make text easier to read. There are four font styles available.
In certain lighting conditions, you may also need to adjust the brightness to read the information on the screen.
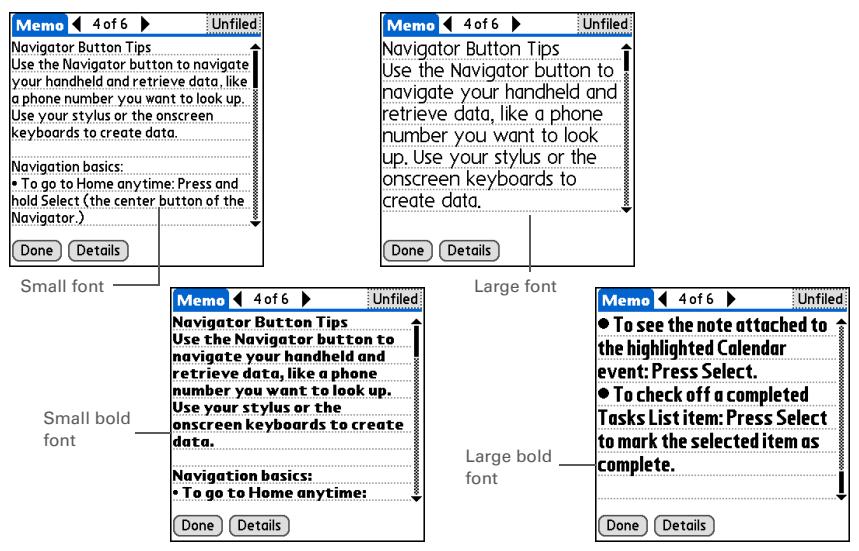
Changing the screen fonts
CHAPTER 25
Customizing Your Handheld
1
Open the Select Font dialog box:
a. Go to Applications.
b. Open the menus.
c. Select Options, and then select Font.
2
Select the font style you want to use, and then select OK.


Done
CHAPTER 25
Customizing Your Handheld
Adjusting the brightness
1 Tap the Brightness icon to open the Adjust Brightness dialog box.
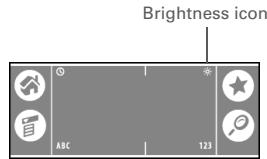

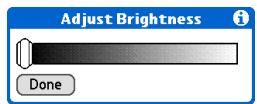
Drag the slider to adjust the contrast level, and then select Done.

CHAPTER 25
Customizing Your Handheld
Changing screen colors
Choose a new set of text and background colors for all your applications.
1
Open Color Theme Preferences:
a. Go to Applications.
b. Select Prefix
c. Select Color Theme.
Preferences
Color Theme
Select a Color Theme:
Autumn
Balloons
Basic
Blue
blcine canyon
Carnival
Chocolate
Clouds
Done
2
Select a theme, and then select Done.

Done
CHAPTER 25
Customizing Your Handheld

Tip
To restore all the buttons to the original palmOne™ settings, select Default.
Assigning a button to your frequently used applications
Tired of going to Applications View to open an application you use frequently? Use the Buttons Preferences screen to reassign the applications associated with the quick buttons on your handheld and the Star icon.
For example, if you use Memos often, you can assign Memos to a button so that you don't have to scroll through Applications View whenever you want to use that application.
1
Open Buttons Preferences:
a. Go to Applications.
b. Select Defaults
c. Select Buttons.
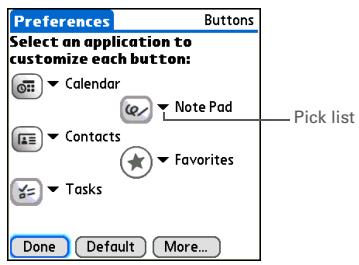
2
Select the pick list next to the button you want to reassign, and select the application that you want to assign to that button.

Continued
CHAPTER 25
Customizing Your Handheld
Key Term
Full-screen pen stroke
A stroke that is drawn from the bottom of the input area to the top of the screen. You can use this stroke as a quick way to do a selected task, such as opening the Graffiti® 2 Help screen.
3
Assign the full-screen pen stroke:
a. Select More.
b. Select the pick list and select the action you want to assign to the full-screen pen stroke.
c. Select OK.
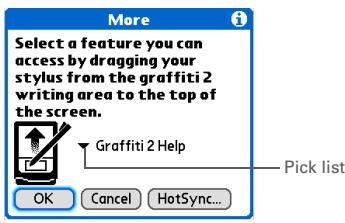
4
Select Done.

Done
CHAPTER 25
Customizing Your Handheld
Did You Know?
The location you select also appears as the primary location in World Clock.

Tip
If you are synchronizing with Outlook on your PC, you can also select a time zone when creating a new event in Calendar.
Setting the date and time
You can set the date, time, and location for all the applications on your handheld that require this information. You can also select the format in which the date, time, and numbers appear.
Selecting a location
You can set the current date and time based on your location. When you travel to a new time zone, change the Location setting to quickly reset the date and time. Your appointments stay at the time you entered them—no adjustments for time zones. So always enter your schedule based on the time zone you will be in on the day of the event.
1
Open Date & Time Preferences:
a. Go to Applications
b. Select Props

c. Select Date & Time.

Continued
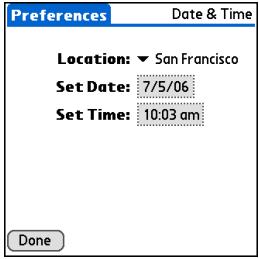
CHAPTER 25
Customizing Your Handheld

Tip
You can rename the location to the city where you live. Select the Name field, and then modify the location name.
2
Select the location:
a. Select the Location pick list, and select a city in your time zone. If you found a city in the list, go to step 3.
No nearby city? Select Edit List, and do steps b through e.
b. Select Add.
c. Select a city in your time zone, and then select OK.
d. Select OK again, and then select Done.
e. Select the Location pick list, and select the city you just added.
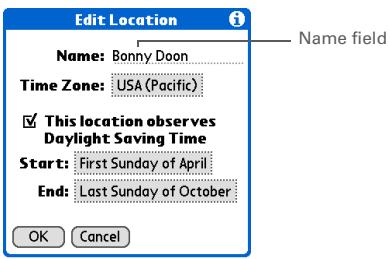
3
Select Done.

Done
CHAPTER 25
Customizing Your Handheld
Resetting the date and time
In most cases you won't need to reset the date and time. However, you may need to do this if you do a hard reset on your handheld.
1
Open Date & Time Preferences:
a. Go to Applications.
b. SelectPrefs

c. Select Date & Time.
Preferences
Date & Time
Location: San Francisco
Set Date: 7/5/06
Set Time: 10:03 am
2
Select the location.
3
Set the date:
a. Select the Set Date box.
b. Select the arrows to select the current year.
c. Select the current month.
d. Select the current date.
Continued
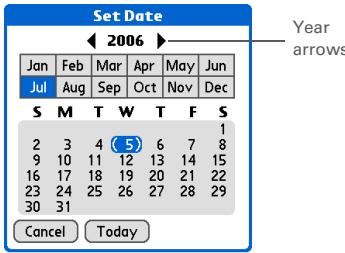
CHAPTER 25
Customizing Your Handheld
4
Set the time:
a. Select the Set Time box.
b. Select the hour and minute boxes, and then select the arrows to change them.
c. Select AM or PM, and then select OK.
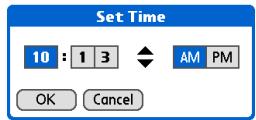
NOTE If you're using a 24-hour clock format, you won't see the AM and PM options.
5
Select Done.

Done
Selecting formats for dates, times, and numbers
Would you rather see the time displayed in a 24-hour format, or dates that begin with the month or year? Use the Formats Preferences screen to change these settings and to apply them to all the applications on your handheld.
You can quickly choose the preset formats based on geographic regions where you might use your handheld. For example, in the United Kingdom, time often is expressed using a 24-hour clock. In the United States, time is expressed using a 12-hour clock with an AM or PM suffix. You can use the original preset formats or change them based on your personal preferences.
CHAPTER 25
Customizing Your Handheld

Tip
The country setting changes only the way the date and time look. It doesn't change your handheld's time to that country's time. To do that, go to Date & Time Preferences or to World Clock.
1
Open Formats Preferences:
a. Go to Applications
b. SelectPrefs
c. Select Formats.
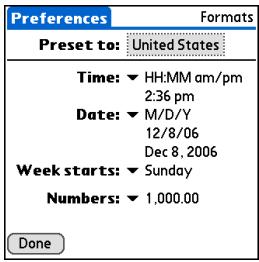
2
Select a country:
a. Select the Preset to box to open the Set Country dialog box.
b. Select a country.
c. Select OK.

Continued
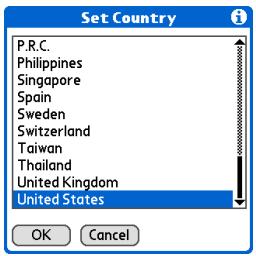
CHAPTER 25
Customizing Your Handheld
3
[ & ] OPTIONAL Customize any of the following preset formats:
Time Controls whether the time is displayed in 12-hour or 24-hour format and which symbol separates the numbers.
Date Controls the sequence in which the day, month, and year appear and which symbol separates the segments.
Week starts Controls whether applications treat Sunday or Monday as the first day of the week.
Numbers Controls the decimal and thousands separator symbols.
4
Select Done.

Done
CHAPTER 25
Customizing Your Handheld

Tip
You can't use Note Pad when full-screen writing is turned on.
Customizing the way you enter information
Your handheld lets you choose how you enter information. You can choose the writing area, choose Graffiti® 2 strokes, and create ShortCuts to make entering information faster.
Choosing the input area
You can write Graffiti 2 characters in the input area, or you can turn on Writing Area Preferences and use the full screen for Graffiti 2 writing; you do not have to write in the input area.
1
Open Writing Area Preferences:
a. Go to Applications.
b. Select Prefix

c. Select Writing Area.
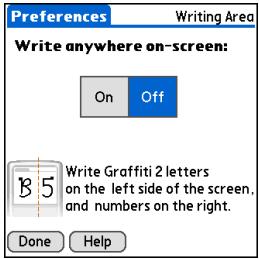
2
Tap one of the following, and then select Done:
On Turns on the full-screen writing area. When you select this option, a box appears for you to check if you want to see your strokes as you write.
Off Turns off the full-screen writing area. When you select this option you must use the input area for Graffiti 2 writing.

Done
CHAPTER 25
Customizing Your Handheld
[!] Before You Begin
Turn on Writing Area Preferences as described in the previous section.
![PALM ONE - [!] Before You Begin - 1](/content/2019/10/16572/images/91c8184a49ffaa00dfe5ad00a8c5aec2ffffa74c34181de83f0042e03fda79cf.jpg)
Tip
Right after you write a character, your handheld interprets a quick tap on the screen as a period character. If you want to tap a button, either wait a few seconds or temporarily turn off full-screen writing by tapping the shaded box in the lower-right corner. The shaded box changes to a box outline when Writing Area Preferences are off.
Using the full-screen writing area
1
Open the entry where you want to enter information:
a. Open an application.
b. Select a record or tap New.
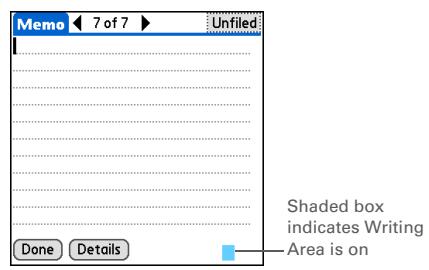
2
Position the cursor where you want the characters to appear, and do any of the following:
- Write lowercase Graffiti 2 letters anywhere on the left side of the screen.
- Write numbers anywhere on the right side of the screen.
- Write uppercase letters in the middle of the screen.
- Write the Punctuation Shift stroke before writing symbols and other special characters.
- Use buttons and other controls that appear on the screen by tapping and holding the button or control until it activates.

Done
CHAPTER 25
Customizing Your Handheld
Customizing Graffiti 2 strokes
There is more than one way to write certain Graffiti 2 characters. Use the Graffiti 2 Preferences screen to select an alternate stroke shape for these characters.
1
Open Graffiti 2 Preferences:
a. Go to Applications
b. Select Defaults
c. Select Graffiti 2.
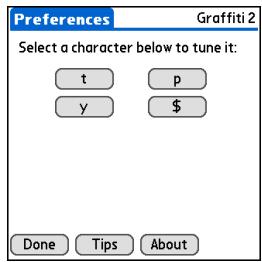
2
Select alternate strokes:
a. Tap a character to view its alternate stroke.
b. Check the box to use the alternate stroke, and then select Done.
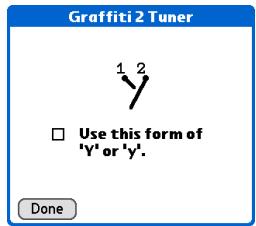
3
Repeat step 2 for each stroke you want to reassign, and then select Done.

Done
CHAPTER 25
Customizing Your Handheld

Tip
You may want to add a space character after the last word in your ShortCut text. This way, a space automatically follows the ShortCut text.

Tip
To learn how to use ShortCuts while entering information, see Writing Graffiti 2 ShortCuts.

Did You Know?
Your ShortCuts are backed up on your computer when you synchronize.
Setting up ShortCuts
Are you looking for a quicker way to enter information on your handheld? Use ShortCuts to define abbreviations for any words, letters, or numbers that you enter often. You can use your ShortCuts anywhere you enter info with Graffiti 2 writing.

Open ShortCuts Preferences:
a. Go to Applications.
b. SelectPrefs
c. Select ShortCuts.
Continued
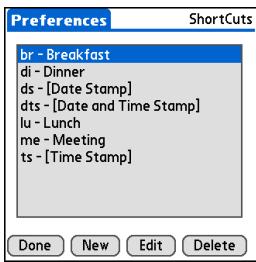
CHAPTER 25
Customizing Your Handheld

Tip
The ShortCut Text can be 45 characters long. That's long enough for a name whose spelling you always forget or a complex email address.
2
Create a ShortCut:
a. Select New.
b. On the ShortCut Name line, enter the abbreviation.
c. On the ShortCut Text line(s), enter the text you want to insert when you write the abbreviation.
d. Select OK, and then select Done.

Done
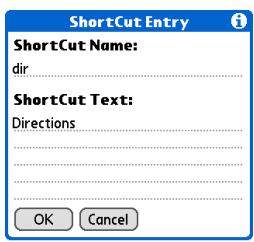
CHAPTER 25
Customizing Your Handheld

Tip
To delete a ShortCut, open ShortCuts
Preferences and select the ShortCut. Select Delete, select Yes, and then select Done.
Changing ShortCuts
After you create a ShortCut, you can modify it at any time.
1
Open ShortCuts Preferences:
a. Go to Applications.
b. SelectPrefs
c. Select Shortcuts.
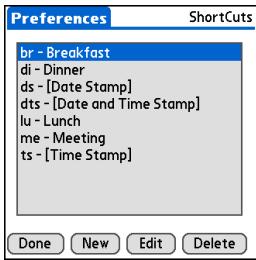
2
Edit the ShortCut:
a. Select the ShortCut you want to change.
b. Select Edit.
c. Make your changes.
d. Select OK, and then select Done.

Done
CHAPTER 25
Customizing Your Handheld
Key Term
Touchscreen Another name for your handheld's screen and the internal circuitry that enables it to respond appropriately to taps.
\*Tip
If your screen is not responding to taps, use the 5-way navigator to open Touchscreen Preferences.
Key Term
Calibration The process of aligning your handheld's touch-sensitive screen so that when you tap an element on the screen, your handheld detects exactly what you want it to do.
Correcting problems with tapping
Is your screen not responding to taps? Are you getting unexpected results when you tap? For example, when you tap the number keyboard icon, does the Find dialog box open instead? If this happens, it's time to align the screen.
1
Open Touchscreen Preferences:
a. Go to Applications
b. SelectPrefs
c. Select Touchscreen.
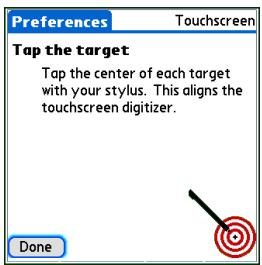
2
Tap the targets on the screen as precisely as possible, and then select Done.
NOTE You need to tap at least three targets—maybe more if you don't tap carefully.

CHAPTER 25
Customizing Your Handheld

Tip
You can choose different types of sounds for Calendar, Tasks, and World Clock. Go to the application, open the Options menu, and then select Preferences.

Did You Know?
When you connect headphones to your handheld, the external speaker is automatically silenced, the Sounds & Alerts settings are maintained, and all volume levels are automatically adjusted for use with headphones.
Selecting sound settings
Are sounds too soft or too loud? Set the volume levels for the system, game, and alarm tones, or turn sounds off altogether with the Silent profile.
1
Open Sounds & Alerts Preferences:
a. Go to Applications.
b. SelectPrefs
c. Select Sounds & Alerts.
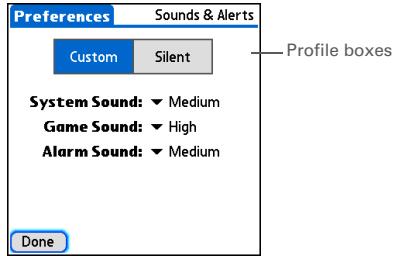
2
Select Custom or Silent.
3
If you selected Silent in step 2, select Done.
If you selected Custom in step 2, select the System Sound, Game Sound, and Alarm Sound pick lists and select the volume level for each sound; then select Done.

Done
CHAPTER 25
Customizing Your Handheld

Tip
In addition to entering owner information, you can assign a name to your handheld for Bluetooth® communication.

Did You Know?
If you use Security Preferences to turn off and lock your handheld with a password, your owner info appears when you select the Owner button the next time you turn on your handheld.

Tip
If you assigned a password in Security Preferences, you must select Unlock and enter your password to change your owner info.
Entering your owner information
It's a good idea to enter information that could help someone contact you if you ever lose your handheld (if there's enough battery power to turn it on). By default, the Owner Preferences screen contains the information you entered when you installed the CD and set up your handheld, but you can update or add to this information. Owner information does not include your username or passwords.

Open Owner Preferences:
a. Go to Applications.
b. Select Defaults
c. Select Owner.
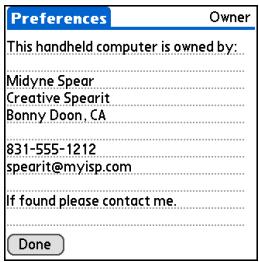

Modify or enter the text, and then select Done.

CHAPTER 25
Customizing Your Handheld

Tip
When Keylock is on, your handheld does not respond when you press the quick buttons. To use your handheld again, press the power button, and then select Deactivate Keylock.
Conserving battery power
You can save battery power by preventing your handheld from turning on accidentally and by adjusting the Power Preferences settings.
Preventing your handheld from turning on by accident
Does your handheld turn itself on accidentally in your briefcase, pocket, or purse? You can lock the buttons on the front of your handheld to prevent this from happening and to prevent the battery from draining.
1
Open Keylock Preferences:
a. Go to Applications.
b. Select Defaults

c. Select Keylock.

Continued
Preferences
Keylock
Keylock Activation:
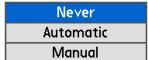
Keylock prevents your handheld from turning on if a button or key is pressed accidentally.

CHAPTER 25
Customizing Your Handheld
2
Select one of these settings, and then select Done.
Never Keylock always remains off.
Automatic Keylock turns on automatically when you turn off your handheld or when your handheld goes to sleep.
Manual Keylock turns on when you press and hold the power button until the system sound confirms that Keylock is on.

Done
Selecting power-saving settings
The Power Preferences screen enables you to set power consumption options.
1
Open Power Preferences:
a. Go to Applications
b. Select Defaults

c. Select Power.

Continued
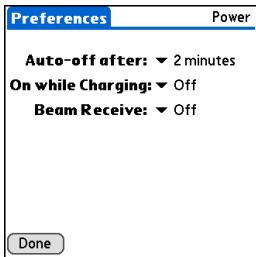
CHAPTER 25
Customizing Your Handheld
2
Select the pick lists to change any of the following settings, and then select Done.
Auto-off after Select how quickly your handheld automatically turns off after a period of inactivity: 30 seconds, 1 minute, 2 minutes, or 3 minutes.
On while charging Select whether your handheld stays on continuously when it is connected to the AC charger. When this option is off, you can still turn on your handheld to view your info while your handheld charges, but it turns off automatically after a period of inactivity.
Beam Receive Select whether you can receive beamed information on your handheld. Turn this setting on to receive beamed info, or turn it off to prevent receiving beamed info.

Done
CHAPTER 25
Customizing Your Handheld

Tip
You can use your handheld's built-in Bluetooth wireless technology to connect to other devices without using Connection Preferences.

Key Term
ISP Acronym for Internet service provider. This is the service you use to connect to the Internet, such as AOL, CompuServe, or Earthlink.

Did You Know?
You cannot rename or delete the preset connection settings.
Connecting your handheld to other devices
Connection Preferences let you connect your handheld to other devices. You can use preset connection settings, modify the preset settings, or create your own connection settings from scratch. The list of preset connections varies depending on the applications you've added to your handheld.
For example, you can create a connection between the IR port of your handheld and a modem so that you can dial in to your ISP or corporate network. The modem can be attached to or within a mobile phone or other device containing an IR port. (Some infrared phones can act as modems. To set up a phone connection, you must have a GSM or GPRS mobile phone enabled with data services and a driver for your phone. Check www.palmOne.com for available phone drivers or contact the phone manufacturer.)
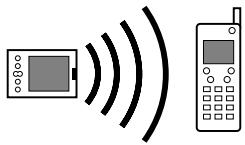
Changing the preset connection settings
The following steps show you how to adjust the communication speed in the preset IR to a PC/Handheld connection setting. You can similarly edit other connections or settings.

Preferences
Connection
Available Connections:
Crdle/Cable IR to a PC Handheld
( x - 2x) t - xy^2 = ( x - 2x) f^ t
Done
New
Edit
Delete
Open Connection Preferences:
a. Go to Applications
b. Select Defaults
c. Select Connection.
Continued
CHAPTER 25
Customizing Your Handheld
2
Open the Edit Connection dialog box:
a. Select the IR to a PC/Handheld connection.
b. Select Edit.
Edit Connection
Name: IR to a PC/Handheld
Connect to: PC
Via: Cradle/Cable
OK
Cancel
Details..
3
Change the speed setting:
a. Select Details.
b. Select the Speed pick list and select the appropriate speed.
c. Select OK.
d. Select OK again, and then select Done.
Details
Speed: 57,600 bps
Flow Ctl: Automatic

Done.
CHAPTER 25
Customizing Your Handheld

Tip
To delete a connection that you created, select it on the Connection Preferences screen, and then select Delete.
Creating your own connection settings
If none of the preset connection settings are close to what you need, or if you're already using all the connections as they are, you can create a new connection.
From the Connection Preferences screen, select New.
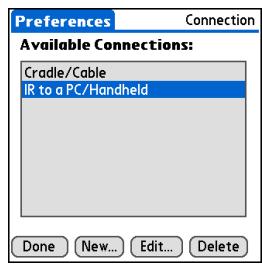
1

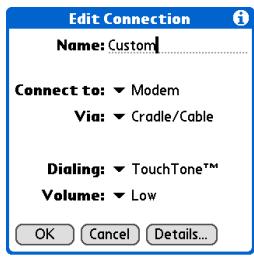

Continued
CHAPTER 25
Customizing Your Handheld

Tip
You can also customize Bluetooth connection settings.
2
Enter the basic settings:
Name Enter a name for your connection settings. This name will appear on the Connection Preferences screen so that you can select your connection later.
Connect to Select the type of device you want to connect to: PC, Modem, or Local Area Network.
Via Select the method you want to use to connect to the device you selected: Bluetooth—the Bluetooth® radio on your handheld; Cradle/Cable—the USB sync cable that came with your handheld; Infrared—the IR port on your handheld.
NOTE The Dialing and Volume settings appear only if you select Modem as the Connect to setting.
Dialing Select whether your modem uses TouchTone or Rotary dialing.
Volume Select the volume level for your modem's speaker: Off, Low, Medium, or High.
Continued
CHAPTER 25
Customizing Your Handheld
3
Enter the details settings:
a. Select Details.
b. Select the Speed pick list and select the appropriate speed.
c. Select the Flow Ctl pick list and select whether the connection uses flow control:
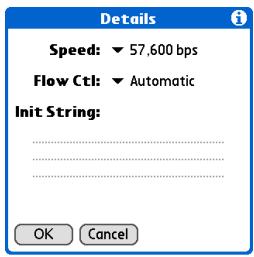
Automatic Your handheld determines when to use flow control.
On Flow control is always on.
Off Flow control is always off.
d. For a modem connection, enter the initialization string.
e. Select OK.
4
Select OK, and then select Done.

Done
CHAPTER 25
Customizing Your Handheld

Tip
If your phone doesn't appear on the list, you need to install the phone settings for your phone onto your handheld.
Connecting your handheld to a mobile phone
Phone Preferences let you configure your handheld to exchange messages and dial phone numbers when your handheld is connected to a GSM mobile phone (sold separately). The GSM mobile phone account must also include data services.
1
Open Phone Preferences:
a. Go to Applications
b. SelectPrefs
c. Select Phone.
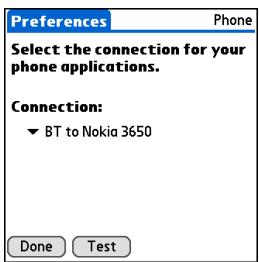
2
Select the connection:
a. Select the Connection pick list and select your mobile phone from the list.
b. Select Test to make sure the settings work with your phone.
c. Select Done.

Done
CHAPTER 25
Customizing Your Handheld
[!] Before You Begin
You need the following:
- A mobile phone with a Bluetooth radio or an IR port (sold separately)
- A wireless service provider account that includes high-speed data services or that supports dial-up connections (additional fees may apply)
- An ISP account or a corporate remote access account (additional fees may apply)
- Connection Preferences settings for your mobile phone enabled with IR or Bluetooth wireless technology
Customizing network settings
Your handheld includes software that lets you connect your handheld to your Internet service provider (ISP) or to a dial-in (remote access) server using a mobile phone. After you configure your network settings, you can establish a connection either by using the menus from the Network Preferences screen or by using a third-party application.
Setting up a service profile
Service profiles store the network settings for your ISP or dial-in server. You can create, save, and reuse service profiles. You can create additional service profiles from scratch or by duplicating an existing profile and editing the information.
1
Open Network Preferences:
a. Go to Applications.
b. Select Defaults
c. Select Network.
Continued
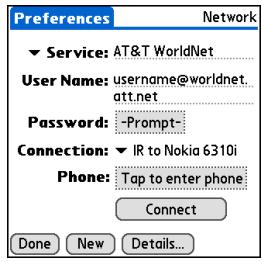
CHAPTER 25
Customizing Your Handheld

Tip
Instead of creating a new profile, you can copy an existing profile and change the settings. Select the profile you want to copy, and then open the Service menu and select Duplicate.

Did You Know?
Most dial-in servers do not accept spaces in the username.

Tip
If you're concerned about security, don't enter a password. Just leave the word "Prompt" in the Password box and your handheld will ask you to enter a password each time you log in.
2
Enter the basic settings:
Service Select the Service pick list and select your ISP or your dial-in server type from the list. If your ISP or server type isn't on the list, select New and enter a name for the service profile.
```java User Name Enter your username. This is the part of your email address that's before the @ sign and it's the name that you use when you log in to your ISP or your dial-in server. This field can contain multiple lines of text, but only two lines appear onscreen.
Password Enter the password you use to log in to your ISP or dial-in server, and then select OK. The word "Assigned" appears in this box and you don't need to enter a password when you log in.
Connection Select the Connection pick list and select the method you want to use to connect to your ISP or to a dial-in server. See Connecting your handheld to other devices for info on creating and configuring connection settings.
3
If you're using a phone or modem connection, enter the phone settings:
a. Select the Phone box.

Continued
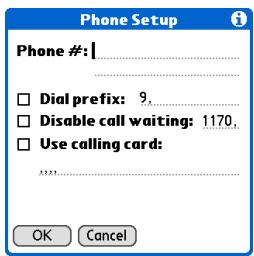
CHAPTER 25
Customizing Your Handheld

Tip
It's a good idea to add at least three commas before your calling card number to allow for the cue delay. Each comma delays transmission of your calling card number for two seconds.
Cont'd.
b. Enter any of the following settings, and then select OK:
Phone # Enter the phone number for your ISP or dial-in server.
Dial prefix Check the Dial prefix box, and then enter the number that you dial before the telephone number to access an outside line. For example, many offices require that you first dial 9 to dial a number outside the building.
Disable call waiting If your phone has Call Waiting, check the Disable call waiting box, and then enter the code to disable Call Waiting. Call Waiting can cause your session to end if you receive a call while you are connected. Contact your local phone company for the code that is appropriate for you.
Use calling card If you want to use your calling card when dialing your ISP or dial-in server, check the Use calling box to select it. Enter your calling card number on the Use calling card line.
[!]IMPORTANT Because MCI works differently, enter the MCI calling card number in the Phone # field and the phone number in the Use calling card field.

Select Done.

Done
CHAPTER 25
Customizing Your Handheld

Tip
To see expanded Service Connection Progress messages, press Down on the 5-way. To see more information, open the Options menu and select View Log.
Connecting to your service
After you set up your Connection and Network Preferences, establishing a connection to your ISP or your company's network (dial-in server) is easy.
1 Open Network Preferences:
a. Go to Applications.
b. SelectPrefs
c. Select Network.
2 Make the connection:
a. Make sure the service profile you want to use appears in the Service field. If not, select it.
b. Select Connect.
3 End the connection when you've finished using it:
a. Select Disconnect.
b. Select Done.

CHAPTER 25
Customizing Your Handheld
Adding details to a service profile
If you're using one of the predefined service profiles, you probably need to enter only your username, password, and telephone number. If you're creating a new service profile, you may need to use the Details dialog box to add more information to your service profile.
1
Open Network Preferences:
a. Go to Applications
b. SelectPrefs
c. Select Network.
2
Open the Details dialog box:
a. Select the Service pick list and select the service you want to add details to.
b. Select Details.
Continued
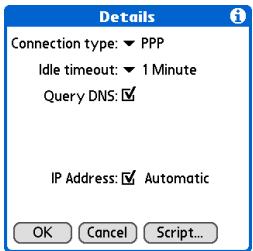
CHAPTER 25
Customizing Your Handheld
Key Term
DNS Domain name system. The Internet uses this system to translate the names of host computers into IP addresses. A DNS number identifies the server that handles the translation.
Each IP address has four numbers (from 0 to 255) that are separated by periods.
Key Term
IP Internet protocol. Everyone who logs in to the Internet needs a unique identifier (an IP address). Some networks dynamically assign a temporary IP address upon login while others assign a permanent IP address.
3
Adjust any of the following settings:
NOTE Ask your ISP or system administrator if you need information on any of these settings.
Connection type Select the pick list and choose the communication protocol for this service: PPP, SLIP, or CSLIP. Most email applications use the PPP or SLIP protocol.
Idle timeout Select the pick list and select how long your handheld waits before dropping the connection with your ISP or dial-in server when you switch out of an application that requires a connection: 1 Minute, 2 Minutes, 3 Minutes, or Never.
Query DNS Check the Query DNS box if you're not sure whether you need to enter DNS addresses. Many systems do not require that you enter DNS addresses. If you do need DNS addresses, uncheck the DNS box, tap the space to the left of each period in the Primary and Secondary DNS fields, and then enter the appropriate sections of each address.
IP Address Check the IP Address box to use a temporary IP address. Uncheck the IP Address box to enter a permanently assigned address.
4
Select OK, and then select Done.

Done
CHAPTER 25
Customizing Your Handheld
Deleting a service profile
1
Open Network Preferences:
a. Go to Applications
b. SelectPrefs
c. Select Network.
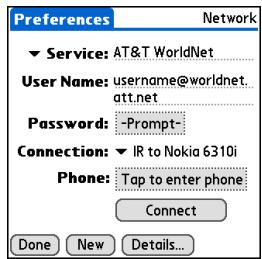
2
Delete the service you want to delete:
a. Select the Service pick list and select the service you want to delete.
b. Open the menus.
c. Select Delete in the Service menu.
d. Select OK, and then select Done.

Done
CHAPTER 25
Customizing Your Handheld

Tip
Windows You can also create login scripts with a text editor on your desktop computer. Create a file with the extension PNC, and then install the file on your handheld using palmOne™ Quick Install.

Did You Know?
Your login scripts can also use non-ASCII and literal characters.
Creating login scripts
A login script is a series of commands that automates logging in to a network server—for example, your corporate network or your ISP. A login script is associated with a specific service profile created in Network Preferences.
A login script is something that you are likely to receive from your system administrator if you log in to the corporate servers from your handheld using a phone/modem or network connection. The script is generally prepared by the system administrator and distributed to users who need it. It automates the events that must take place to establish a connection between your handheld and the corporate servers.
You can create login scripts by selecting commands from the Command pick list in the Login Script dialog box. Some commands, such as Send, require you to supply additional information. If the command requires additional info, a field appears to the right of the command where you can enter the info.

Open Network Preferences:
a. Go to Applications
b. Select Defaults

c. Select Network.
Continued
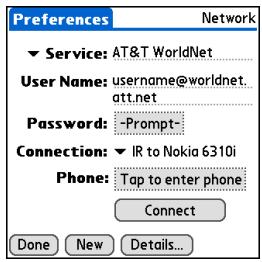
CHAPTER 25
Customizing Your Handheld
2
Open the Login Script dialog box:
a. Select the Service pick list and select the service you want to add a script to.
b. Select Details.
c. Select Script.
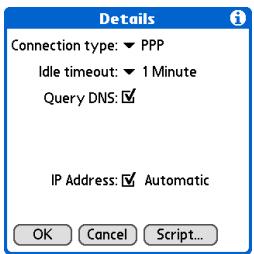

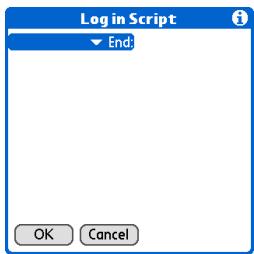
3
Select the End pick list and select one of the following commands from the list:
Wait For Tells your handheld to wait for specific characters from the server before executing the next command.
Wait For Prompt Detects a challenge-response prompt coming from the server, and then displays the dynamically generated challenge value. You then enter the challenge value into your token card, which in turn generates a response value for you to enter on your handheld. This is a two-part command that is separated by a vertical bar (|) on the input line.

Continued
CHAPTER 25
Customizing Your Handheld
Cont'd.
Send Transmits specific characters to the server that you're connecting to.
Send CR Transmits a carriage return or line feed (LF) character to the server.
Send User ID Transmits the User Name field from Network Preferences.
Send Password Transmits the Password field from Network Preferences. If you didn't enter a password, this command prompts you to enter one. The Password command is usually followed by a Send CR command.
Delay Tells your handheld to wait a specific number of seconds before going to the next command in the login script.
Get IP Reads an IP address and uses it as the IP address for your handheld. This command is used with SLIP connections.
Prompt Opens a dialog box and prompts you to enter certain text (for example, a password or a security code).
End Identifies the last line in the login script.
GPRS 1 through 10 Identifies the settings for your data services (GPRS) provider. Contact your provider to obtain these settings.

CHAPTER 25
Customizing Your Handheld
4
Complete the script:
a. Repeat step 3 until the login script is complete.
b. Select OK, and then select OK again.
c. Select Done.

Done
CHAPTER 25
Customizing Your Handheld

Tip
For more info on creating plug-in applications, contact Developer Support at PalmSource.
Adding plug-in applications
You can create plug-in applications containing script commands that extend the functionality of the built-in script commands. A plug-in application is a standard PRC application that you install on your handheld just like any other application. After you install the plug-in application, you can use the new script commands in a login script.
For example, you might use a plug-in application in the following situations:
- You need the login script to properly respond to different connection scenarios defined by the authentication server.
- You want to perform conditional tests and branching as part of the login process.
Plug-in applications have the following characteristics:
Written in C language
- Compiled into a device executable
- Called properly from a login script
- Able to return control to a login script after it terminates
- Created using a development environment that supports Palm OS® software, such as Metrowerks CodeWarrior tools.
CHAPTER 25
Customizing Your Handheld
[!] Before You Begin
You must purchase and install a compatible VPN client onto your handheld. You also need the VPN settings from your corporate system administrator.
+ Did You Know?
Once you have installed and set up a VPN, you can connect or disconnect it from within the web browser.
Setting up a VPN
If you want to use your handheld to access your corporate email account or other files on your corporate server, you may need to set up a virtual private network (VPN) on your handheld. A VPN enables you to log in to your corporate server through the company's firewall (security layer). Without a VPN, you cannot pass through the firewall to gain access to the server. You need to set up a VPN to access a corporate server in either of the following situations:
- Your company's wireless local area network (LAN) is located outside the firewall.
- Your company's wireless LAN is located inside the firewall, but you are trying to access the network from outside the firewall (for example, from a public location or at home).
Check with your company's system administrator to see if a VPN is required to access the corporate network. If you need a VPN, you must purchase and install a third-party VPN client to use this feature.
CHAPTER 25
Customizing Your Handheld
Tips & Tricks
Make your handheld uniquely yours. For great tips, software, accessories, and more, visit www.palmOne.com/ mytungstene2.
Support
If you're having problems with customization or with anything else on your handheld, go to www.palmOne.com/support.
Related topics
Click a link below to learn about these related topics:
Your Locating the input area and other controls on your handheld Handheld
Moving - Opening applications Around
Entering Information Using Graffiti 2 writing to enter information Using ShortCuts to quickly enter text phrase
Bluetooth Customizing Bluetooth communication settings Privacy Keeping information private by locking your har
Categories Creating categories so you can organize your applications and information World Clock Viewing the date and time in other cities
Expanding Your Handheld
In this chapter
What type of expansion cards can I use?
How can expansion cards help me?
Removing an expansion card
Inserting an expansion card
Opening an application on an expansion card
Opening files on an expansion card
Viewing card information
Renaming a card
Copying applications to an expansion card
Removing all information from a card
Related topics
A Chinese proverb says, "Life just gives you time and space; it's up to you to fill it." But doesn't it always seem that no matter how much space you have, you still need more?
Expansion cards (sold separately) provide a compact and limitless answer to the storage dilemma. When one card becomes full, simply use another card. To enjoy some aspects of your handheld, such as listening to music, you need to use expansion cards. Also use expansion cards to install and run cool games and other types of software, from dictionaries to travel guides, on your handheld.

Benefits of expansion cards
- Listen to music
- Back up info
- Add more games and other software
- Add accessories
- Store, carry, and exchange info
CHAPTER 26
Expanding Your Handheld
Key Term
SDIO An acronym for Secure Digital input/output.
\*Tip
Looking for a handy way to carry your expansion cards? You can purchase a variety of carrying cases. Visit www.palmOne.com/ mytungstene2 and click the Accessories link.
What type of expansion cards can I use?
Your handheld is compatible with SDIO, SD, and MultiMediaCard expansion cards. SDIO expansion cards let you add accessories to your handheld. SD and MultiMediaCard expansion cards let you store information and applications.
How can expansion cards help me?
Listen to music. Store songs on expansion cards and use the included RealPlayer software to listen to music on your handheld.
Back up info. Make a copy of your important information for safekeeping in case your handheld becomes damaged or is stolen.
Add games and other software. Purchase popular games, dictionaries, travel guides, and more. To check out the variety of expansion cards available for your handheld, visit www.palmOne.com/ mytungstene2 and click the Accessories link.
Add accessories. Attach SDIO accessories, such as a presentation module, to your handheld.
Store all your info. Never worry about running out of space on your handheld. Purchase as many expansion cards as you need to store your music, photos, videos, and other information. Expansion cards come in a variety of capacities, and they're very small, easy to store, and affordably priced.
CHAPTER 26
Expanding Your Handheld

Tip
To prevent damaging the card and the info on it, always wait for your handheld to finish writing to the expansion card before you remove the card from the slot.
Removing an expansion card
NOTE Your handheld comes with a dummy card inserted into the expansion card slot. You must remove this card before you can put a real card into the slot.
Push lightly against the card with your thumb until you hear the confirmation tone.
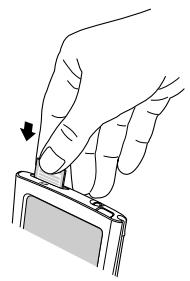
1
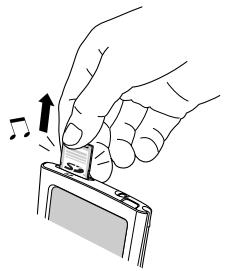
2
Slide the card out of the expansion slot.

Done
CHAPTER 26
Expanding Your Handheld
Inserting an expansion card
1
Insert the card into the expansion slot with the label side facing the front of the handheld.
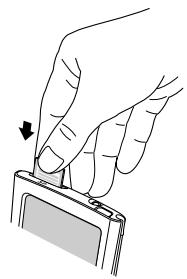
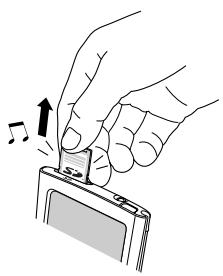
2
Push the card in with your thumb until you feel the card "click" in place and hear the confirmation tone.
NOTE No confirmation tone? Check the Sounds & Alerts Preferences to make sure the System Sound setting is turned on.

CHAPTER 26
Expanding Your Handheld

Did You Know?
You can install applications and other files to an expansion card during synchronization.

Tip
When the highlight on Applications View is not active, you can press and hold the Select button to open the category pick list.
Opening an application on an expansion card
When you insert an expansion card into the expansion slot, your handheld adds the expansion card to the category list in the upper-right corner of Applications View. You can easily switch between applications installed on your handheld and on the expansion card.
NOTE Some applications may not run correctly when you install them on an expansion card. Try installing these applications on your handheld instead. If you still have problems, contact the developer.
1
Insert the expansion card.
2
Go to Applications and select the expansion card from the category pick list.
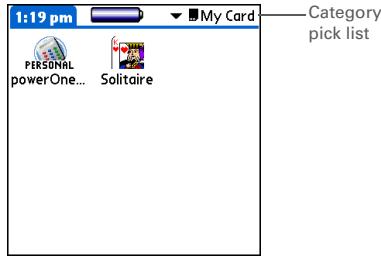
3
Select an application icon to open that application.

CHAPTER 26
Expanding Your Handheld
Opening files on an expansion card
Some applications, such as RealPlayer, require you to store your files on an expansion card instead of on your handheld. In other applications, such as palmOne™ Media, storing files on expansion cards is optional. You can open files on an expansion card when you insert the card into the expansion slot.
1 Open the application associated with the files you want to open.
2 Insert the expansion card.
3 Select the entry you want to view. Done
CHAPTER 26
Expanding Your Handheld

Tip
Reading and writing info on an expansion card uses more battery power than doing the same task on your handheld. If you have enough space on your handheld, consider copying the info to your handheld.

Tip
If your handheld's battery is very low, access to the expansion card may be disabled. If this occurs, recharge your handheld as soon as possible.
Viewing card information
It's easy to forget which files you put on a particular expansion card. Use the Card Info application to view the card name and type, available storage space, and a summary of its contents.
Go to Applications and select Card Info

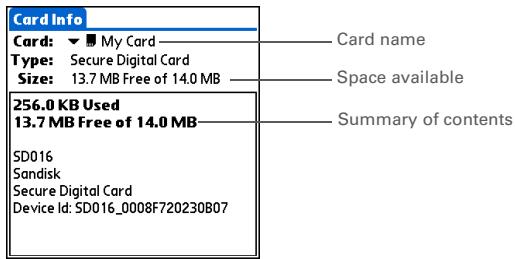
CHAPTER 26
Expanding Your Handheld
Renaming a card
The expansion card name appears in the category pick list and in other lists that let you choose where to store your info. When you buy a new card, give it a name that helps you remember what's on the card. You can rename the card later if you decide to store different info on the card.
1
Go to Applications and select Card Info

2
Open the Rename Card dialog box:
a. Open the menus.
b. Select Rename Card on the Card menu.
Rename Card
New Card Name:
My Games Card
Rename
Cancel
3
Enter the new name for the card, and then select Rename.

Done
CHAPTER 26
Expanding Your Handheld

Tip
If you use a card reader to view your card on a computer, the file names may differ from the names you see on your handheld.

Did You Know?
Some applications, such as Media, let you copy or move info between your handheld and an expansion card. See the information on each application for details.
Copying applications to an expansion card

Insert the expansion card, and then go to Applications.

Open the Copy dialog box:
a. Open the menus.
b. Select Copy on the App menu.
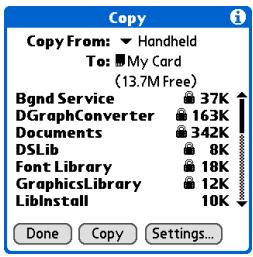

Select the application to copy:
NOTE A lock appears next to applications that are copy-protected. You cannot copy or beam these applications.
a. Select the Copy From pick list and select Handheld.
b. Select the application you want to copy.
c. Select Copy.
d. Select Done.

Done
CHAPTER 26
Expanding Your Handheld
Removing all information from a card
Formatting a card removes all of its info and prepares it to accept new applications and files.
[!] IMPORTANT We do not recommend formatting backup cards. Formatting removes the backup application and turns the card into a blank memory card.
1 Insert an expansion card.
2 Go to Applications and select Card Info
3 Format the card:
a. Open the menus.
b. Select Format Card on the Card menu.
c. When asked if you want to format the card, select OK.
Done
Format Card

attting this card destroy all its data.
Do you want to format this card?

Cancel
CHAPTER 26
Expanding Your Handheld
Tips & Tricks
Make your handheld uniquely yours. For great tips, software, accessories, and more, visit www.palmOne.com/ mytungstene2.
Support
If you're having problems with expansion cards or with anything else on your handheld, go to www.palmOne.com/support.
Related topics
Click a link below to learn about these related topics:
Sharing
- Exchanging applications and information with other Palm Powered™ devices by exchanging cards or beaming items between handhelds
- Sending applications and information to other Bluetooth® devices by using Bluetooth wireless technology on your handheld
Maintaining Your Handheld
Your handheld is designed to be rugged and reliable and to provide you with years of trouble-free service. Taking care of your handheld helps keep it working properly and ensures that it's available when you need it.
Handheld do's and don'ts
To protect your handheld from damage and ensure reliable performance, follow these guidelines.
Handheld do's
- Be sure to get rid of any static electricity buildup before you connect your handheld to any cable or accessory.
- Use the carrying case that came with your handheld. It provides protection if your handheld is accidentally dropped.
- Use only the stylus to tap the screen—no pens, pencils, paper clips, or other sharp objects.
- Use only the supplied AC charger to charge your handheld.
- Keep the battery charged.
- Keep the screen free of dust (or anything else that could make it dirty).
- For general cleaning, use a soft, damp cloth. If the screen becomes dirty, use a soft cloth moistened with a diluted window-cleaning solution.
- Use only 3.5mm stereo headphones in your handheld's headphone jack.
CHAPTER 27
Maintaining Your Handheld
Handheld don'ts
- Do not drop, bang, or otherwise cause a strong impact to your handheld.
- Do not carry your handheld in your back pocket; you might sit on it by mistake.
- Do not let your handheld get wet; don't even leave it in a damp location.
- Do not expose your handheld to very hot or cold temperatures, including placing it near a heater, leaving it in a car, or setting it by a window in direct sunlight.
Resetting your handheld
On rare occasions your handheld may not respond when you press a button or tap the screen. In this case, you need to reset your handheld.
Doing a soft reset
A soft reset tells your handheld to stop what it's doing and start over again. None of your information will be lost. After a soft reset, a screen appears that lets you reset the date and time, if needed.
CHAPTER 27
Maintaining Your Handheld
To do a soft reset, use the tip of the stylus to gently press the reset button inside the hole on the back panel of your handheld.
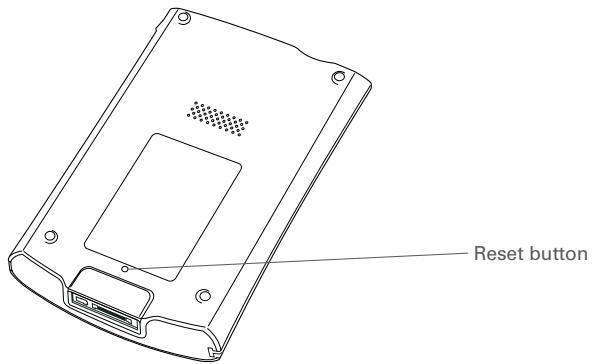
If your handheld does not respond after a soft reset, you need to do a hard reset.
CHAPTER 27
Maintaining Your Handheld
Doing a hard reset
Only do a hard reset if a soft reset doesn't solve your problem, or if you want to clear all of your information from your handheld.
[!] IMPORTANT A hard reset deletes all records and entries stored on your handheld, including the username that identifies the handheld. This is another reason why it's important to synchronize often, so you have an up-to-date backup available. Before you do a hard reset, be sure to synchronize.
1 Press and hold the power button.
2 While holding the power button, use the tip of the stylus (or a similar object without a sharp tip) to gently press and release the reset button inside the hole on the back of your handheld.
3 Wait for the Palm Powered ^TM logo to appear, and then release the power button.
4 When you see the message that warns you about erasing all of the info on your handheld, do one of the following:
- Press Up on the 5-way navigator to finish the reset and show the touchscreen.
- Press any other button to do a soft reset.
Done
CHAPTER 27
Maintaining Your Handheld
Restoring your information after a hard reset
If you synchronized before doing a hard reset, you can now put that information back on your handheld. However, you may need to re-enter some of your personal settings, as well as your color-coded categories in Calendar.
WINDOWS ONLY
1 Open the Custom menu in the HotSync® application:
a. Click the HotSync Manager icon in the taskbar in the lower-right corner of the screen.
b. Click Custom.
2 Select the correct username from the list at the top of the box.
Continued
CHAPTER 27
Maintaining Your Handheld
3
Set the transfer options:
a. Select an application in the Conduit list, and then click Change.
b. Select Desktop overwrites handheld.
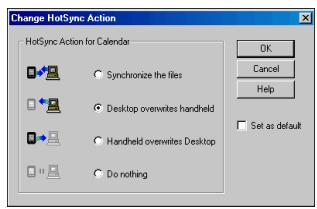
NOTE This change applies only to the next synchronization.
c. Click OK.
4
Repeat step 3 for the other applications in the list that you want to restore, and then click Done.
5
Synchronize your handheld with your computer.

Done
CHAPTER 27
Maintaining Your Handheld
Tips & Tricks
Make your handheld uniquely yours. For great tips, software, accessories, and more, visit www.palmOne.com/ mytunstene2.
Related topics
Click a link below to learn about these related topics:
Managing Info
Creating a backup of your information
Customizing
Customizing your handheld again after doing a hard reset
Support
If you're having problems with resets or with anything else on your handheld, go to www.palmOne.com/support.
CHAPTER 28
Common Questions
Although we can't anticipate all the questions you might have, this chapter provides answers to some of the most commonly asked questions.
Setup
Nothing happens when I insert the CD. WINDOWS ONLY
- Click Start on your computer, and then select Run.
- Click Browse and navigate to your CD-ROM drive.
- Select Autorun, click Open, and then click OK.
I cannot install Palm® Desktop software. WINDOWS ONLY
- Disable any virus-scanning software on your computer.
- Close any open applications.
- Make sure your computer has at least 170MB of disk space available.
- Delete all temporary files.
CHAPTER 28
Common Questions
- Run ScanDisk (or another disk verification tool) on your computer.
- Install the latest Windows software updates to your computer.
- If you are upgrading from an older Palm Powered™ device, remove any previous version(s) of Palm® Desktop software by clicking Start, navigating to Settings, and clicking Control Panel. Click Add or Remove Programs.
- Uninstall and then reinstall the current version of Palm Desktop software.
MAC ONLY
- Disable any virus-scanning software on your computer.
- Quit any open applications.
- Make sure your computer has at least 190MB of disk space available.
Install the latest Mac software updates to your computer. - If you are upgrading from an older Palm Powered device, remove any previous version(s) of Palm Desktop software.
- Uninstall and then reinstall the current version of Palm Desktop software.
CHAPTER 28
Common Questions
Handheld
[!] IMPORTANT Do not open your handheld; there are no serviceable parts inside. Opening your handheld voids the warranty and is not recommended under any circumstances.
I want to see how much battery life I have left.
A battery icon appears at the top of Favorites and Applications View. Check the icon periodically to see if your handheld needs to be recharged. If the battery becomes low, a message appears on the screen prompting you to recharge the battery.
I'm not sure when I need to recharge my handheld.
We recommend that you recharge your handheld for at least half an hour every day. Ideally, connect your handheld to a power source every night and recharge it while you sleep.
My battery is drained.
The memory on your handheld is designed to store your information even if the battery becomes drained completely. When you recharge your handheld, all of your existing information, both in program memory and on the internal drive, should appear.
My battery drains too quickly.
You can conserve battery life by doing any of the following:
- Reduce the brightness of the display.
- Reduce the Auto-off after interval.
- Use Keylock Preferences to prevent your handheld from being turned on accidentally.
- Minimize use of the expansion card slot.
- Turn the Bluetooth® feature off when you're not using it, or turn the discoverable setting to off.
CHAPTER 28
Common Questions

Tip
After a soft reset, the Preferences screen appears with the Date & Time option highlighted so you can reset the date and time if necessary.
When I connect my handheld to the AC charger, it does not charge.
- Confirm that your handheld is firmly connected to the AC charger.
- Confirm that your AC charger is plugged into an AC outlet that has power.
A lightning bolt over the battery icon indicates that your handheld is charging. If your battery is completely drained, you'll need to charge it for a few minutes before you can turn it on and see the battery icon.
My handheld is not responding.
On rare occasions your handheld may not respond when you press a button or tap the screen. If this happens, first check that Keylock is not turned on.
If Keylock is off and your handheld is still not responding, you need to reset your handheld. A soft reset tells your handheld to stop and start over again. This does not affect any of the information or applications on your handheld.
NOTE If you had a network connection that was cut off, your handheld may not respond for up to 30 seconds. Wait 30 seconds before performing a soft reset.
If your handheld does not respond after a soft reset, you need to perform a hard reset.
If your handheld still does not respond after a reset, check your third-party applications for incompatible applications.
I don't see anything on my handheld's screen.
- Press an application button to ensure that your handheld is turned on.
- If your handheld was exposed to cold, make sure it is at room temperature.
- Charge your handheld.
- Perform a soft reset. If your handheld still doesn't turn on, perform a hard reset.
CHAPTER 28
Common Questions

Tip
When you purge or delete items, you are given the option to save an archive copy on your computer the next time you synchronize.
I get a warning message telling me my handheld memory is full.
If you get a message saying that your handheld's memory is full, go to the Applications view, open the menus and go to Info in the App menu. Check the amount of memory that is available.
If there is less than 2M of free space available, try the following:
- If you have installed additional applications on your handheld, remove them to recover memory.
- Purge items from Calendar and Tasks. This deletes Tasks items and past Calendar events from the memory of your handheld.
- Delete unused memos, photos, and other items, or save them to an expansion card.
If there is more than 2M of free space available, the problem may be caused by too many files. Your handheld has a 500 file limit that can be reached by storing a large number of small files on your handheld. Try the following:
- Check the number of documents and other files you have stored on your handheld. If there are a large number, transfer some of the files to an expansion card or your computer.
- Check the number of files created by any third-party application you have installed on your handheld. Some third-party applications create a large number of small files to store data. Remove the third-party application or remove some of the data files in the application. For more information, go to www.palmOne.com/support.
My handheld keeps turning itself off.
Your handheld is designed to turn itself off after a period of inactivity. This period can be set at 30 seconds or at one, two, or three minutes. Check the Auto-off after setting on the Power Preferences screen.
My handheld is not making any sounds.
Check the System, Alarm, and Game Sound settings.
CHAPTER 28
Common Questions
The current date and time are incorrect.
The current date and time are tied to the Location setting. If you change the date and time without changing the Location setting, the current date and time may be incorrect for your location.
Moving around
I can't find the icon I want in Applications View.
- Select the category pick list in the upper-right corner of Applications View and select All. You may need to scroll down a bit, but you should now see an icon for each of the applications on your handheld.
- Some of the applications that come with your handheld are not preinstalled. You need to install these extra applications from the software installation CD.
- If you have an expansion card inserted in the expansion slot on your handheld, the application you want may be installed on the card instead of on your handheld. To view the applications installed on the card, select the pick list in the upper-right corner of Applications View and select the expansion card's name from the list.
Entering information
My handheld doesn't respond to taps correctly.
If your handheld is not responding to taps correctly, you need to align the screen.
When I tap the Menu icon in the input area nothing happens.
- Tap the upper-left corner of the screen to try and open the menus.
- Align the screen and try tapping Menu again.
- If nothing happens, you may be in an application or screen that does not use menus. Switch to a different application and try tapping Menu. If it works in the second application, then the first does not use menus.
CHAPTER 28
Common Questions
- If tapping Menu does not work in the second application, try aligning the screen again.
I can't get my handheld to recognize my handwriting.
For your handheld to recognize handwriting input with the stylus, you need to use Graffiti® 2 writing. Use the Graffiti 2 help to learn how to write characters.
NOTE Your handheld recognizes strokes entered with the stylus other than Graffiti 2 strokes in the Note Pad application only.
- Make the Graffiti 2 character strokes in the Graffiti 2 input area, not on the display part of the screen. If you want to write on the display part of the screen, turn full-screen writing on.
- Write Graffiti 2 strokes for lowercase letters in the left side, strokes for capital letters in the middle, and strokes for numbers in the right side of the Graffiti 2 writing area.
- Make sure that Graffiti 2 is not in shift mode.
- Make sure that Graffiti 2 is not in Punctuation Shift mode.
The info I entered does not appear in an application.
- Check the Categories pick list in the upper-right corner of Applications View. Select All to display all the records for the application.
- Did you set private records to be hidden? Check Security Preferences to see that Private Records is set to Show private records.
- Open the Options menu and select Preferences. Make sure Show Completed Tasks is selected.
I don't know how to save the info I entered in an application.
Each time you complete an entry such as a contact, memo, or note, your handheld automatically saves the information you entered. You don't have to do anything special to save your info. To protect your info and create a backup of your info, synchronize the information on your handheld with your computer often.
CHAPTER 28
Common Questions

Tip
Need more help with synchronizing your handheld? Open Palm Desktop software, go to the Help menu, and select HotSync Online Troubleshooting Guide.
Synchronizing
I can't synchronize my handheld with my computer.
NOTE You must install the software installation CD before you can synchronize.
- Make sure the USB sync cable is connected securely.
- Make sure the date on your computer matches the date on your handheld.
- Read the HotSync log for the user account for which you are synchronizing.
WINDOWS ONLY
Click the HotSync Manager icon in the Windows taskbar in the lower-right corner of your screen. Make sure Local USB has a checkmark next to it. If not, click it.
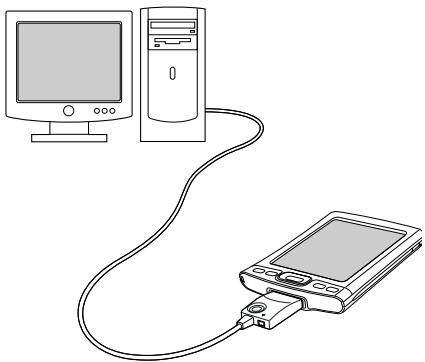


2:37PM
NOTE If you don't see the HotSync Manager icon, click Start in the Windows taskbar, and then select Programs. Go to the palmOne™ program group and select HotSync Manager.
MAC ONLY
- Make sure HotSync Manager is enabled: Open the Palm folder and double-click the HotSync Manager icon. On the HotSync Controls tab, be sure Enabled is selected. If it is not, click it.
- Disconnect the USB sync cable from your computer, and then reconnect the cable and restart your computer.
CHAPTER 28
Common Questions
[!] Before You Begin
You must have completed CD installation and chosen Palm Desktop software as your desktop application for synchronization in order to switch to Outlook. Note that you can choose Outlook as your synchronization software for Contacts, Calendar, Tasks, and Memos during CD installation.
When I synchronize, nothing happens on Palm® Desktop software, and my handheld times out.
- Perform a soft reset.
- Make sure that HotSync Manager is running on your computer.
- Make a copy of the folder containing your information. This folder is named with either your full username or a shortened version of the name. Uninstall and then reinstall Palm Desktop software.
- Turn on your handheld, and go to Applications. Select HotSync , and then select Local.
I want to change from synchronizing my handheld with Palm Desktop software to synchronizing with Outlook.
WINDOWS ONLY
During CD installation, you chose a desktop software application to synchronize with your handheld. You may have chosen Palm Desktop software at that time. But if Microsoft Outlook already contains all of your contacts, appointments, tasks, and notes, you can change your synchronization method so that your handheld synchronizes with Outlook instead. You can also change from Outlook to Palm Desktop software.
NOTE If you choose to synchronize with Outlook, info from Contacts, Calendar, Tasks, and Memos is synchronized with info in Outlook. You can also set up the VersaMail® application to synchronize with Outlook. Other info, such as photos and notes, is synchronized with info in Palm Desktop software.
- Insert the CD into your computer.
- Select Change your synchronization method.
- Follow the onscreen instructions for the desktop software you want to use.
CHAPTER 28
Common Questions
I can't synchronize my handheld with Microsoft Outlook. WINDOWS ONLY
NOTE If you choose to synchronize your handheld with Outlook, information from Contacts, Calendar, Tasks, and Memos is synchronized with info in Outlook. Other information, such as photos, videos, voice memos, and notes, is synchronized with info in Palm Desktop software.
-
Click the HotSync Manager icon and select Custom. Check the following:
-
Make sure that you have the correct username selected from the drop-down list.
- Make sure that the applications you want are set to synchronize the files. If not, select each application, click Change, and then choose Synchronize the files.
- Make sure that the correct application name is selected. For example, the older version of Calendar was called Date Book. If you have upgraded from an older handheld, make sure that Calendar is set to Synchronize the files, and Date Book is set to Do Nothing.
- If you synchronize your handheld with more than one computer, click Settings and select Enable synchronization to multiple PCs for each application you want to synchronize. This helps avoid duplicating the same information on a single computer.
NOTE Check the Set as default box to use this setting each time you synchronize. Otherwise, it applies during the next synchronization only.
- Be sure that the application you want is installed. Reinstall the HotSync Manager and make sure that the application is selected.
- Reinstall Palm Desktop software and select the option to synchronize your handheld with Microsoft Outlook.
I can't synchronize wirelessly using my handheld's Bluetooth® technology.
- Make sure that the HotSync Manager is running on your desktop computer. The HotSync Manager icon must appear in the taskbar in the lower-right corner of your screen.
- Click the HotSync Manager icon and verify that there is a checkmark next to Local.
CHAPTER 28
Common Questions
- Your handheld may not be able to recognize the virtual serial port on your Windows computer. Try validating the virtual serial port you're using, or create a different virtual port and change the HotSync Manager settings to use the new virtual port. To change the virtual serial port, click the HotSync Manager icon. Select Setup, and then select the Local tab. Select a port from the Serial port pick list.
When you synchronize wirelessly, your handheld attempts to connect to a Bluetooth virtual serial port on your computer. First it looks for a Bluetooth serial HotSync port. If it cannot find that port, it then looks for a generic Bluetooth serial port. However, some generic Bluetooth serial ports do not support synchronization. Refer to the documentation that came with your computer operating system for instructions on creating/changing the virtual port for serial communication.
If the virtual serial port you want to use is used by other applications, exit those applications before setting up your computer for wireless synchronization.
Some of my applications do not synchronize.
If you have synchronized successfully but you can't find the information from your handheld on your computer, check to see that you have the correct username selected for viewing information.
NOTE If you upgraded from a previous handheld, go to www.palmOne.com/intl/support, select your country, select the Tungsten™ E2 handheld from the main page, and click the Upgrade link.
WINDOWS ONLY
Click the HotSync Manager icon in the lower-right corner of your screen, and then select Custom. Check that the application is set to synchronize the files. If it is not, select the application, click Change, and then choose Synchronize the files. Check the Set as default box to use this setting each time you synchronize. Otherwise, it applies during the next synchronization only.
MAC ONLY
Double-click the HotSync Manager icon in the Palm folder. From the HotSync menu, select Conduit Settings. Select your username from the User pop-up menu, and be sure that the application is set to synchronize.
CHAPTER 28
Common Questions
I can't open the HotSync® Manager.
On a Windows computer, install Palm Desktop software from your computer, and then reinstall the software from the software installation CD.
On a Mac computer, just reinstall Palm Desktop software.
When I synchronize, I receive the 8009 error message: An application has failed to respond to a HotSync notification.
WINDOWS ONLY
The 8009 error indicates that the Windows registry is corrupt. You need to rebuild the HotSync Manager registry entries. For information on rebuilding the registry entries, go to www.palmOne.com/intl/support and search the palmOne Knowledge Library for "error 8009."
My files didn't install during synchronization.
-
If files do not install after you synchronize, the file type was not recognized. On your handheld, open the application associated with those files. Then synchronize again. If the files remain in the palmOne™ Quick Install list on your computer (Windows only), they are not associated with an application on your handheld and cannot be installed by synchronizing.
-
If you are trying to install files to an expansion card, make sure that a card is inserted into your handheld's expansion slot before you synchronize.
I can't add more files to the palmOne™ Quick Install list.
Make sure the dialog box that confirms where the files will be installed is closed. You cannot add more files to the list when the confirmation dialog box is open.
CHAPTER 28
Common Questions
When I add a zipped file (ZIP) to Quick Install, some of the files don't appear in the Quick Install list.
Unzip the file with a file compression utility, such as WinZip, and then add the unzipped files to Quick Install.
I receive an authentication error when I try to synchronize wirelessly through a LAN access point.
Make sure you entered the correct username and password for the selected network service profile in the Network Preferences screen.
When I try to synchronize wirelessly through a LAN access point, it connects, but nothing happens.
- Make sure that Network is selected in the HotSync Manager menu on your computer.
- Contact your system administrator to make sure your network computer is properly set up.
I want to synchronize my computer with more than one handheld.
If the computer running Palm Desktop software synchronizes with more than one handheld, each handheld should have a unique name. Synchronizing more than one handheld with the same username causes unpredictable results and, potentially, loss of your personal information. Assign a username to your handheld the first time you synchronize.
If you are synchronizing with Outlook, make sure the right profile is selected for the applications you want to synchronize in HotSync Manager. From the Palm Desktop home screen, click the HotSync Manager, and then select Custom.
All handhelds that synchronize to the same computer must use the same synchronization conduits, that is, either Palm Desktop software or Outlook.
CHAPTER 28
Common Questions
Calendar
I selected the Today button, but it does not show the correct date.
Make sure the Set Date box on the Date & Time Preferences screen displays the current date.
I created an event, but it doesn't appear in Week View.
- If scroll arrows appear on the right of your screen, scroll down to see if the event appears farther down the screen.
- If you have two or more events with the same start time, the events appear as multiple bars starting at the same time in Week View. To see the overlapping events, select the individual bars, or select Day View. For more information, see Finding events that overlap.
- If you marked the event as private, check Security Preferences to see that Private Records is set to Show private records.
Time zones don't appear in my Palm Desktop software.
Palm Desktop software does not recognize time zones. Only Outlook recognizes times zones.
I set the global time zone preference, but only some of my events are responding to my time zone change.
Only new events created after the preference is set are affected. The events you created earlier without time zones do not have the time zone set. You can edit the earlier events to include a time zone.
I created my event with a time zone, but only that event is responding to my time zone change.
When you create an event with a time zone setting, only that event is affected. To have all events automatically include a time zone setting, set the New events include time zones preference.
CHAPTER 28
Common Questions
Memo No.
I'm having problems listing memos the way I want to see them.
If you cannot manually arrange the order of memos on the list screen, open the Options menu and select Preferences. Make sure that Sort by is set to Manual.
If you choose to view your memos alphabetically on Palm Desktop software and then synchronize, the memos on your handheld still appear in the order defined in the Preferences setting. In other words, the sort settings you use with Palm Desktop software are not transferred to your handheld.
Note Pad
I'm having problems listing notes the way I want to see them.
If you cannot manually arrange the order of notes on the list screen, select Preferences from the Options menu and make sure that Sort by is set to Manual.
If you choose to view your notes alphabetically on Palm Desktop software and then synchronize, the notes on your handheld still appear in the order defined in the Preferences setting. In other words, the sort settings you use with Palm Desktop software are not transferred to your handheld.
Media
I can't find the Media icon in Applications.
Select the pick list in the upper-right corner of Applications View and select Multimedia. You should now see an icon for the Media application.
In Favorites View, the entry associated with the Media application is called Photos & Videos. You can edit the Favorites list to change this to Media, as well as to create or change any other favorite file, folder, web link, or application.
CHAPTER 28
Common Questions
RealPlayer®
I would like better-quality sound during playback.
You can save music files in either MP3 or RMJ format. RMJ is a proprietary format used by the RealPlayer® desktop. In either case, saving at a lower bit rate creates a smaller file size, but also gives a lower playback quality. Increase the bit rate to improve playback sound quality, but remember that this increases file size.
When I save songs from a CD, I do not see the song title or artist name.
When capturing songs from a CD, you must have an active Internet connection to obtain song title and artist information. If the GraceNote server on the web has information about the CD, the info appears in the RealPlayer desktop application.
Tasks
The info I entered does not appear in an application.
- Open the Options menu and select Preferences. If Show Completed Tasks is selected, deselect it to display the missing tasks.
- If you marked the task as private, check Security Preferences to see that Private Records is set to Show private records.
CHAPTER 28
Common Questions
Connecting wirelessly
My passkey is rejected when I attempt to form a trusted pair with my mobile phone.
Some mobile phones require that you enter the passkey within a specific time frame. Make sure you have a passkey in mind and that you enter it immediately when prompted.
If your passkey is rejected, your phone may have a preassigned passkey; see the documentation included with your phone for information. The documentation might refer to a Bluetooth connection as a Bluetooth pair, Bluetooth link, or bonded pair.
My handheld cannot connect to my mobile phone.
Use the following steps to test the connection:
- Go to Favorites and select Bluetooth
- Make sure On is selected.
- Select the Service pick list and select the service that you want to use to connect to your phone.
- Select Connect.
If the connection is successful, open the application that requires the connection and complete the desired task.
If the connection is not successful, try the following steps:
- Make sure that your phone is equipped with Bluetooth technology, that Bluetooth is enabled, and that the power is on.
- You may need to set up a connection with your phone. See the documentation included with your phone for assistance with completing the connection setup process.
CHAPTER 28
Common Questions
My phone connection drops before I finish using it.
You need to increase the Idle timeout setting on the Network Preferences Details screen.
I get an error message when I try to dial a phone number using my handheld.
- Make sure that the proper phone driver is installed on your handheld.
- You may need to set up a connection with your phone. See the documentation included with your phone for assistance with completing the connection setup process.
- Check the Phone Preferences screen and make sure the correct phone connection is selected.
The VersaMail® application
I am having problems accessing my account.
Occasionally you may experience problems using an email account after you set it up. If you followed the account setup procedure and are experiencing problems using the account, verify that the account complies with your email provider's requirements by following these steps:
- Verify both your password and your username for your email account.
- If you are connecting using a mobile phone through the built-in Bluetooth technology on your handheld, a cable, or the IR port on your handheld, verify that you have either a data-enabled GSM or a high-speed GPRS account with your wireless service provider.
- Some wireless service providers require you to be on their network to use your email account. If this is the case, be sure to use your provider's network as the connection type for the account.
CHAPTER 28
Common Questions
- Some wireless service providers have other requirements specific to their service. For example, Yahoo! requires you to pay for a POP account in order to download email messages from your Yahoo! account to your handheld. Check with your service provider to see if any provider-specific requirements exist.
- Service provider settings frequently change. If your email account was working but you are currently experiencing problems, check with your service provider to see if any of the account settings have changed.
I am having problems sending and receiving email.
- Short periods of time when email is unavailable are common due to server problems or poor wireless coverage. If you have problems sending or receiving mail for an extended period of time, check with your ISP or email service provider to verify that the service is working properly.
- Make sure your ISP or email provider allows you to send and receive email on a wireless handheld. Several providers, like Hotmail, do not offer this option at all.
My auto get mail is not working.
- If auto get is occurring and you turn your handheld off or the connection to your email service provider is disconnected, the auto get fails.
- If you are attempting an auto get over a network, you must be in range of a network access point for the auto get to work.
- The auto get feature may not work with your specific VPN connection. It doesn't work for SSL connections, or if you have set up the security preferences on your handheld to encrypt databases on the handheld.
- Your handheld must be able to make periodic connections to the Internet through your Bluetooth mobile phone or a Bluetooth access point. If your handheld is not within range of a Bluetooth device that allows it to connect to the Internet, auto get mail does not take place.
CHAPTER 28
Common Questions
I can receive email fine, but am having problems sending email.
If you are able to receive email messages but cannot send them, try these steps, in turn:
- Make sure your ISP or email provider allows you to access email on a wireless handheld. Several providers do not offer this option at all; other providers require an upgrade to access email on a wireless handheld.
- Turn on ESMTP. Many services require authenticated access to use their SMTP servers, or ESMTP.
- Enter the name of a different outgoing mail server for sending mail. Many ISPs, such as cable companies, require that you have an Internet connection to their network to send email through their servers. In this case, you receive email from these accounts from the incoming mail server, but if you want to send email, you must send it through a different outgoing mail server.
I can't download any messages.
If the program memory on your handheld fills up, you cannot download any more messages to your handheld. Delete some messages to free up program memory, and try downloading again.
I am unable to synchronize messages.
Make sure you have chosen the same settings for the account on both your handheld and your computer. For example, if the account is set up on your handheld to use the POP protocol, check the HotSync Manager on your computer to make sure that POP is selected as the protocol for that account.
CHAPTER 28
Common Questions
My vCard or vCal email attachment isn't forwarding correctly. WINDOWS ONLY
Palm Desktop software provides several features that work with email client software on a Windows computer. For these features to work correctly, the email client software must be properly set up. Follow these steps to check the settings:
- Click Start on your computer, and then select Settings.
- Click Control Panel.
- Click Internet Options, and then click the Programs tab.
- Make sure that the email field is set to the correct email client software.
- Click OK.
- Start the email client software and make sure it is configured as the default MAPI client. Consult the documentation for your desktop email application for more information.
Privacy
I've made records private, but I can't remember my password to display them.
First, use the password hint to try to remember the password. If this doesn't help or if you do not have a password hint, you can use Security Preferences to delete the password, but your handheld deletes all entries marked as private. However, if you synchronize before you delete the password, the synchronization process backs up all entries, whether or not they are marked private. Then you can follow these steps to restore your private entries:
- In Security Preferences, tap in the password box and enter a guess at the password.
- In the dialog box that appears, select Lost Password.
CHAPTER 28
Common Questions
- Select Delete Password to remove the password and delete all private records.
- Synchronize your handheld with your computer again.
I forgot the password, and my handheld is locked.
First, use the password hint to try to remember the password. If this doesn't help or if you do not have a password hint, you must perform a hard reset to continue using your handheld. Performing a hard reset deletes all of the information on your handheld. To protect your info and create a backup of your info, synchronize the information in your handheld's program memory with your computer.
Sharing
I can't beam information to another handheld or other device.
NOTE Depending on the receiving handheld model, not all information may be sent correctly.
- If you are beaming to another Palm Powered device, confirm that your handheld and the other handheld are 4 to 39 inches (approximately ten centimeters to one meter) apart and that the path between the two handhelds is clear of obstacles. Beaming distances to other devices with an IR port may be different.
- Move your handheld closer to the receiving device.
- Make sure the receiving device has beam receive enabled.
- Perform a soft reset on both your handheld and the receiving device.
- Avoid beaming in bright sunlight or fluorescent light. These produce infrared noise that can make beaming go slower or, in some cases, prevent it from working at all.
CHAPTER 28
Common Questions
When someone beams information to my handheld, it doesn't receive the info.
- If you are receiving info from another Palm Powered device, confirm that your handheld and the other handheld are 4 to 39 inches (approximately ten centimeters to one meter) apart and that the path between the two handhelds is clear of obstacles. Beaming distances to other devices with an IR port may be different.
- Move your handheld closer to the sending device.
- Make sure your handheld has beam receive enabled.
- Perform a soft reset on both your handheld and the receiving device.
When someone beams information to my handheld, I get a message telling me it is out of memory.
- Your handheld requires at least twice the amount of memory available as the info you are receiving. For example, if you are receiving a 30KB application, you must have at least 60KB free.
- Purge old Calendar events and delete unused or unnecessary applications.
I cannot send information to another Bluetooth device.
- Make sure that Bluetooth communication is enabled on both your handheld and the other device.
- Make sure that the receiving device has a compatible Bluetooth application installed.
- The receiving device must be within range of your handheld, approximately 25 to 30 feet (8 to 10 meters).
CHAPTER 28
Common Questions
Other Bluetooth devices cannot find my handheld.
- Go to Favorites and select Bluetooth to open the Bluetooth settings screen and make sure that Bluetooth is turned on.
- Make sure the Discoverable setting is set to Yes.
Problems with incompatible applications
palmOne, Inc. works with developers of third-party add-on applications to ensure the compatibility of these applications with your handheld. Some third-party applications, however, may not have been upgraded to be compatible with your handheld.
Possible symptoms of incompatible applications include:
- Fatal errors needing resets
- Nonresponsive handheld requiring a reset
Slow performance - Abnormal screen display or uneven sound quality
- Problems using Bluetooth technology or other features
- Problems opening an application
- Problems synchronizing
You can determine whether an incompatible application is causing problems by deleting the application and then operating your handheld.
After you have deleted the application, try to replicate the operation that created the error. If removing the application solves your problem, contact the application developer for a solution. Also, go to www.palmOne.com/us/support/contact/incompatibleApps.html to provide feedback to palmOne on the application.
CHAPTER 28
Common Questions
Finding a third-party application that is causing a problem
If you have multiple third-party applications installed on your handheld or have upgraded from an earlier model of a Palm Powered device, perform the following procedure to remove all third-party applications from your handheld. Once you have removed all of the third-party applications, you can install one application at a time to determine which application is causing the problem.
The following procedures erase all information from your handheld. Before removing the applications, synchronize the information in your handheld's program memory with your computer.
- On a Windows computer, open the palmOne folder on your computer, and then open the user folder for your handheld. User folder names are often abbreviated as last name, first initial. On a Mac computer, locate the folder Home/ Documents/Palm/Users/
/Backups. - Select and drag the Backup folder to the desktop. Make sure you see the Backup folder on the desktop.
- On a Windows computer, close the palmOne folder.
- Perform a hard reset. Synchronize your handheld with your computer to restore info to your handheld.
- Operate your handheld and try to replicate problem operations.
-
Do one of the following:
-
If your handheld still has problems, review this Common Questions section for solutions to the problem. Fix the problem before reinstalling the third-party applications.
-
If your handheld no longer has problems, install the third-party applications one application at a time using the following procedure:
a. Open the Backup folder you moved to the desktop in step 2.
CHAPTER 28
Common Questions
b. Double-click a PRC file. On a Windows computer, the palmOne Quick Install window opens with the PRC file listed. On a Mac computer, the HotSync Manager window opens with the PRC file listed.
NOTE Alternatively, on a Mac computer, you can drag the PRC file to the Send To Handheld droplet instead of double-clicking it.
c. Click Done.
d. Synchronize your handheld with your computer.
e. Operate your handheld and try to replicate problem operations.
f. Do one of the following:
-
If installing the application re-creates your problem, remove the application and contact the application developer for a solution. Continue to reinstall your applications one application at a time to make sure another application is not creating a problem.
-
If installing the application does not cause a problem, go to step a and reinstall another application.
g. Go to www.palmOne.com/us/support/contact/incompatibleApps.html to provide feedback to palmOne on the application.
NOTE Some applications use more than one PRC file. You should continue to check each PRC file even if you identify one associated with an application that is causing a problem on your handheld, since that application may use other PRC files.
CHAPTER 29
Getting Help
This guide is meant to tell you everything you need to know to set up, customize, and use your handheld. However, you may occasionally run into an issue that is not addressed in this guide. Here are some resources to help you if that happens.
Self-help resources
If you run into a problem with your handheld, be sure to check these resources first:
- Answers to common questions about your handheld and its features
- The Palm® Desktop online Help
- The Palm Desktop Software for the Macintosh User's Guide located in the Documentation folder on your installation CD
The Knowledge Library, accessible at www.palmOne.com/support - The most recent Tungsten™ E2 handheld HelpNotes on your regional website
CHAPTER 29
Getting Help
Technical support
If, after reviewing the self-help resources, you cannot solve your problem, go to www.palmOne.com/support or send an email to your regional Technical Support office.
Before requesting technical support, please experiment a bit to reproduce and isolate the problem. When you do contact Technical Support, please provide the following information:
- The name and version of the desktop operating system you are using
- The actual error message or state you are experiencing
- The steps you take to reproduce the problem
- The version of handheld software you are using and available memory
To find version and memory information, follow these steps:
- Go to Applications
- Open the menus.
- Select Info from the App menu.
- Select Version for version info, and Size for memory info.
Product Regulatory Information
FCC Statement
This device complies with part 15 of the FCC rules. Operation is subject to the following two conditions: (1) This device may not cause harmful interference, and (2) this device must accept any interference received, including interference that may cause undesired operation.
This equipment has been tested and found to comply with the limits for a Class B digital device, pursuant to Part 15 of the FCC rules. These limits are designed to provide reasonable protection against harmful interference in a residential installation. This equipment generates, uses, and can radiate radio frequency energy and, if not installed and used in accordance with the instructions, may cause harmful interference to radio communications. However, there is no guarantee that interference will not occur in a particular installation. If this equipment does cause harmful interference to radio or television reception, which can be determined by turning the equipment off and on, the user is encouraged to try to correct the interference by one or more of the following measures:
- Reorient or relocate the receiving antenna.
- Increase the separation between the equipment and receiver.
- Connect the equipment into an outlet on a circuit different from that to which the receiver is connected.
- Consult the dealer or an experienced radio/TV technician for help.
The use of shielded I/O cables is required when connecting this equipment to any and all optional peripheral or host devices. Failure to do so may violate FCC rules.
[!]IMPORTANT Changes or modifications not covered in this manual must be approved in writing by the manufacturer's Regulatory Engineering Department. Changes or modifications made without written approval may void the user's authority to operate this equipment.
In August 1996, the FCC of the United States with its action in Report and Order FCC 96-326 adopted an updated safety standard for human exposure to radio frequency electromagnetic energy emitted by FCC regulated transmitters. Those guidelines are consistent with the safety standard previously set by both U.S. and international standards bodies. The design of this product complies with the FCC guidelines and these international standards.
Exposure to radio frequency energy (SAR)
In order to comply with FCC RF exposure safety guidelines, this device and its antenna must not be collocated or operating in conjunction with any other antenna or transmitter. The user of this device should ensure that the operation of this device is in compliance with these provisions.
FCC ID: O8FLEO
Responsible Party:
palmOne, Inc.
400 N. McCarthy Blvd.
Milpitas, California 95035
United States of America
(408) 503-7500
Tungsten™ Product Family

Tested to Comply With FCC Standards
FOR HOME OR OFFICE USE
Industry Canada
The term "IC:" before the certification/registration number only signifies that the Industry Canada technical specifications were met.
IC:3905A-LEO
Canadian Wireless Regulatory Notice
This Class B digital apparatus meets all the requirements of the Canadian Interference Causing Equipment Regulations. Operation is subject to the following two conditions: a) this device may not cause any interference, and b) this device must accept any interference, including interference that may cause undesired operation of the device. To prevent radio interference to the licensed service, this device is intended to be operated indoors, and away from windows to prevent maximum shielding. Equipment (or its transmit antenna) that is installed outdoors is subject to licensing.
C
CE Declaration of Conformity
palmOne, Inc., Declares the Product:
Handheld PDA & HotSync® cable
Model Name/Number:
Tungsten E2
Manufacturer's Name:
palmOne
Manufacturer's Address:
400 N. McCarthy Blvd.
Milpitas, 95035-5112
Meets the following European Council Directives:
89/336/EEC (EMC Directive)
99/5/EC (R&TTE Directive)
73/23/EEC (Low Voltage Directive).
Conforms with the following specifications:
EN 55024:1998 (Emissions & Immunity)
EN55022:1998, CISPR 22 1997, Class B Radiated and Conducted Emissions
- IEC 61000-4-2, A1 1998-01, ESD Immunity, 4kV Contact, and 8kV Air Discharge
- IEC 61000-4-3: 1995 RF Immunity, 80-1000MHz, 3V/M, 1kHz, 80% A.M.
ENV 50204:1996, RF Immunity, 895-905MHz, 3V/m, 200Hz, 50% AM
- IEC 61000-4-4: 1995 EFT Immunity, 1kV on AC port, 5/50nSec, 5kHz Rep. Freq.
- IEC 61000-4-5: 1995 Surge Immunity, 1.2/50uSec, 2kV(peak), Common Mode, 1kV(peak) Differential Mode
EN61000-4-6:1996, Conducted Immunity, 150kHz-80MHz, 3V RMS, 1kHz, 80% AM
- IEC 61000-4-11: 1994, 100% Voltage Dip 0.5 period, 30% Dip 25 periods and >100% Dip 250 periods
Authorized palmOne Representative:
David Waitt
palmOne Compliance Engineer
Date:
April 18, 2005
Battery Warning
Do not mutilate, puncture, or dispose of batteries in fire. The batteries can burst or explode, releasing hazardous chemicals. Discard used batteries according to the manufacturer's instructions and in accordance with your local regulations.
Varning
Intrinsic Safety Warning
Warning - Explosion Hazard
- Substitution of components may impair suitability for Class I, Division 2;
- When in hazardous location, turn off power before replacing or wiring modules, and,
- Do not disconnect equipment unless power has been switched off or the area is known to be non-hazardous.
Wireless Notices—Usage Cautions
In some situations, the user of the wireless device may be restricted. Such restrictions may apply aboard an airplane, in hospitals, near explosive environment, in hazardous locations etc. If you are not certain of the policy that applies to the use of this device, please ask for authorization prior to turning on the device.
Static Electricity, ESD, and Your palmOne™ Handheld
Electrostatic discharge (ESD) can cause damage to electronic devices if discharged into the device, so you should take steps to avoid such an occurrence.
Description of ESD
Static electricity is an electrical charge caused by the buildup of excess electrons on the surface of a material. To most people, static electricity and ESD are nothing more than annoyance. For example, after walking over a carpet while scuffing your feet, building up electrons on your body, you may get a shock -- the discharge event -- when you touch a metal doorknob. This little shock discharges the built-up static electricity.
ESD-susceptible equipment
Even a small amount of ESD can harm circuitry, so when working with electronic devices, take measures to help protect your electronic devices, including your palmOne™ handheld, from ESD harm. While palmOne has built protections against ESD into its products, ESD unfortunately exists and, unless neutralized, could build up to levels that could harm your equipment. Any electronic device that contains an external entry point for plugging in anything from cables to docking stations is susceptible to entry of ESD. Devices that you carry with you, such as your handheld, build up ESD in a unique way because the static electricity that may have built up on your body is automatically passed to the device. Then, when the device is connected to another device such as a docking station, a discharge event can occur.
Precautions against ESD
Make sure to discharge any built-up static electricity from yourself and your electronic devices before touching an electronic device or connecting one device to another. The recommendation from palmOne is that you take this precaution before connecting your handheld to your computer, placing the handheld in a cradle, or connecting it to any other device. You can do this in many ways, including the following:
- Ground yourself when you're holding your mobile device by simultaneously touching a metal surface that is at earth ground.
- For example, if your computer has a metal case and is plugged into a standard three-prong grounded outlet, touching the case should discharge the ESD on your body.
- Increase the relative humidity of your environment.
- Install ESD-specific prevention items, such as grounding mats.
Conditions that enhance ESD occurrences
Conditions that can contribute to the buildup of static electricity in the environment include the following:
-
Low relative humidity.
-
Material type (The type of material gathering the charge. For example, synthetics are more prone to static buildup than natural fibers like cotton.)
- The rapidity with which you touch, connect or disconnect electronic devices.
While you should always take appropriate precautions to discharge static electricity, if you are in an environment where you notice ESD events, you may want to take extra precautions to protect your electronic equipment against ESD.
INDEX
SYMBOLS
! (exclamation point) in Tasks list 227
* (asterisk) characters 113
. (period) character 44, 519
NUMERICS
12-hour clock. See clock
12-hour formats 517
123 characters on screen 57
123 input area (Graffiti 2 writing) 44
24-hour clock 515
24-hour formats 515, 517
5-way navigator
described 19
overview 34-37
scrolling application categories with 33
selecting command buttons with 23
selecting items on pick lists with 23
A
ABA files 100
abbreviations 521, 522
ABC characters on screen 57
ABC input area (Graffiti 2 writing) 44
AC charger
connection 21
troubleshooting 571
accented characters 51
Accept cookies check box 413
accessories 17, 111, 131, 168, 172, 194, 214,
229, 236, 245, 268, 387, 419, 427,
439, 451, 456, 479, 488, 500, 551,
561,567
Account Details dialog box 287
Account Overview screen 347
Account Setup screen 275, 284, 285, 336
accounts (email)
accessing from Internet 406
changing 284, 288, 359
connection types and 271
creating 279,336
deleting 285
displaying summary information for
347
excluding from synchronization 349
managing 284
scheduling auto get for 293, 298
selecting 286, 290
setting up secure connections for 350
synchronizing multiple 349
synchronizing with client 340, 342
testing 283
upgrading 270
Accounts command 284, 285, 291
Acrobat Reader. See Adobe Acrobat Reader
action bar (Web Pro) 389, 393
actions (pen stroke) 511
Add Contact dialog box 353
Add Songs to Playlist dialog box 207
add-on applications 67, 107, 591
adding See creating
Addit software 29
additional software 103
address field (Web Pro) 390
address fields (email) 117
Address Lookup screen 307
addresses 114, 353, 541
See also contacts
addressing
email 306, 307, 308, 369, 522
text messages 380
Adjust Display dialog box 22
adjusting
alarm volume 498, 525
brightness 22, 506, 570
modem volume 533
speaker volume 525
Adobe Acrobat Reader 29
agenda lists 132
See also Calendar application
Agenda View
customizing Tasks lists and 226
described 154
opening 154, 490
setting display options for 161, 163
Agenda View icon 154, 490
Alarm check box 148, 217
alarm clock 148, 217, 489, 497
See also alarms; clock
Alarmicon156
Alarm Preferences command 498
Alarm Preset settings 166
AlarmSoundpicklist240,525
alarm tones 148, 166, 227, 240, 498
alarms
See also alerts; reminders
adjusting volume 498, 525
attaching to notes 240
changing 149
entering preferences for 165, 166, 217
responding to world clock 498
selecting sounds for 148, 227, 240, 498
setting 148, 217, 241, 497
specifying duration of 166
turning off 498
albums
arranging photos in 185, 187
creating 183
moving photos to other 186
removing photos 191
scrolling through 182
selecting 184
errors 5, 295
See also alarms; reminders
aligning screen 524
All category 482
Allow wakeup command 267
alphabet (Graffiti 2 writing) 47
alphabetickeyboard23
alternate stroke shapes 520
Always connect check box 286
anniversaries 135, 137
annual events 137
annual tasks 219, 221
APOP setting 368
application buttons. See quick buttons
application controls 23-24, 31
application files 68, 69
application groups 484, 487
application icons 504, 573
See also quick buttons
application screens 24
application title 38
applications
accessing 573
adding 67, 94, 103, 547
adding contact information to 121, 131
adding files for 66
assigning to buttons 510
beaming 437-438
beaming information in 434
categorizing 481, 486
categorizing information in 481, 484
changing locations list for 494
checking version numbers for 105, 106
copying 94, 438, 558
customizing 91
delayed responses and 205
deleting 107, 559
displaying 487
displaying categories in 487
displaying information about 17, 105
displaying list of 25, 504
downloading 327
entering information in 45, 57
exchanging 30, 560
finding information in 23, 40
importing information from external 100
incompatible 591
installation prerequisites for 105
installing 26, 66, 94, 554
marking private entries in 459
moving around in 31
not finding 573
opening 32,97,98,510,554
organizing 41, 481
related topics for 41
removing categories in 483
removing connections for 532
renamingcategories482
restoring archived files for 110
selecting for synchronization 81
setting preferences for 509, 512
setting primary location for 490
setting secondary locations for 493
setting synchronization options for 89, 91
soft resets and 571
specifying connections for 530
switching between 10, 33, 554, 576
synchronizing 69, 72, 89, 578
synchronizing information for 67, 69, 96
transferring information among 59
transferring information from 67
transferring to handheld 27, 69
uninstalling 572
updating information for 89
updating third-party 8
upgrading 105
Applications View 22
displaying application list for 25
displaying icons on 573, 582
moving around in 36
opening applications from 32, 33
appointments
See also Calendar application; events
adding to calendar 133
adjusting for location 512
color-coding 144
combining tasks with 132
displaying 157, 158, 159
entering from Outlook 10, 576
removing from calendar 151
saving 134
scheduling 133-134
setting alarms for 497
setting duration of 134
setting timeframes for 165
viewing duration of 163
viewing unscheduled time slots for 163
writing Graffiti 2 ShortCuts for 56
archive folders 110
archived information
importing 100
archived items 110, 151, 225
archiving information 110
ASFmediafiles174
assigned passwords 537
asterisk (^*) characters 113
Attach Signature check box 282, 309
attachments
See also email
adding 332, 333
downloading 327, 328, 331
reading 332, 404
sending events as 131, 168
sending files as 332, 333
sendingmemosas236,439
sending multimedia as 194
sending notes as 245
sending photos and videos as 334
sending tasks as 229
Attachments screen 333
Audible Player software 28
audio applications 20, 195
audio files 196
audio formats 196, 201
authentication 264
authentication information 289
authentication option (ESMTP) 283, 288, 367
authentication servers 288, 547
Auto Empty check box 324
auto get mail feature
constraints 273, 299
failing 297
retying 298
scheduling 293, 294
setting notification options for 295
Auto Lock Handheld option 468
Auto-Disconnect option 370
Auto-Empty Mail fromTrash option 369
auto-off after interval 570
auto-off delay 529, 572
* 412
automatically locking handhelds 467, 468
available storage space 556
B
back panel controls 21
backgrounds
adding photos as 163, 502, 505
customizing 163, 502, 505
selecting color of 239, 509
backing up information 26, 66, 551
See also synchronizing; archiving
backing up mail databases 372
Backspace key 58
Backup ALL Databases check box 373
backup cards 559
Backup folder 372
basics 6, 568
battery
cautions for 598
charging 4, 529, 561, 571
checking 267, 570
conserving power for 5, 527, 570
extending life of 501, 570
overview 5
recharging 4, 5, 529, 570
battery gauge 570
BCC option 281, 365
Beam Category command 436
Beam command 435, 437
Beam Contact command 431
Beam dialog box 435, 436, 438
Beam From pick list 437
Beam icon 39
Beam Receive preference 529
beaming 406, 434-438
troubleshooting 589, 590
beaming port 20
Birthdayicon156
bolidays 115, 133
bitmap files 174, 327
blank screen 571
Blazer application. See web browser
blinking asterisk 297
blinking cursor 57
blocking information 460
Bluetooth application
entering basic settings for 249
features 247, 248
opening 249, 584
setting up phone connections with 250- 254
Bluetooth devices
assigning names to 266, 267, 526
built-in software for 28
connecting to 247, 533
discovering 248, 264, 266
entering information from 43
entering passkeys for 265
related topics for 268
sending applications to 560
sending events to 168
sending memos to 236
sending notes to 245
sending photos and videos to 192, 194
sending tasks to 229
setting up 249, 266
sharing information with 30
synchronizing with 17, 77
turning off 570
verifying status of 255
waking up handhelds from 267
Bluetooth HotSync option 257
Bluetooth icon 25
Bluetooth LAN Access Point connections 247
Bluetooth radio (internal) 21
Bluetooth setting 533
Bluetooth technology 247
BMP files 174, 327
bold fonts 507
bonding trusted pairs 265
Bookmark icon 397, 398
Bookmark Page dialog box 396
bookmarks
adding 396, 407
changing 398, 399
displaying list of 397
Bookmarks dialog box 410
Bookmarks option 410
bottom arrow controls 23
brightness 22, 506, 570
brightness icon 22
broken envelope icon 297
browsing options 411, 412, 413, 418
browsing the web 25, 255, 389, 407
budgets 441
built-in applications 107
Burn/Transfer tab 198, 203
Business Card command 435
business cards 119, 435
business expenses 442
See also Expense application
buttons
activating 37, 519
assigning to applications 510
back panel 21
calculator 453
locking 527
navigator 34
not responding 519, 527, 562, 571
Opening applications from 33
reassigning application 510
restoring defaults for 510
selecting dialog box 37
tapping command 24
Buttons Preferences screen 510
C
cables 561
cache 266, 414, 415
cache size 414, 415
cached web pages 414
Calculator application
benefits of 452
buttons described 453
categorizing with Expense 481
copying and pasting from 454
displaying calculation history 454
re-entering numbers 453
related topics for 456
troubleshooting 456
Calculator icon 25
calculators 452
calendar
adding appointments to 133
changing events on 149
changing repeat intervals for 149
color-coding appointments 134, 144
customizing 161, 162, 517
displaying appointments for 154, 157, 158, 159
displaying conflicting events in 163
finding overlapping events on 161
opening 167
removing appointments from 151
reserving dates 135
scrolling through 158, 159
selecting dates on 133
setting repeat intervals for 138, 139, 140
Calendar application
applying color-coding options 145
categorizing information in 484
checking schedules in 156, 158, 159
defining repeating events 137, 138
deleting categories 483
deleting events 151
displaying categories in 487
entering birthdays for 115
entering event locations from 141
importing information for 100
opening 25, 132, 133, 490
related topics for 168
rescheduling events 149
saving information for 134, 151, 153
scheduling events 133, 135, 140
selecting dates on 216
setting alarms from 166, 498
setting display options 161, 162-166
synchronizing information for 69, 96
transferring information to 59
troubleshooting 168, 581
updating information in 67
Calendar files 100
Calendar icon 25
Calendar Preferences dialog box 148, 165
calendar views 156, 158, 159, 160
calibration 524
Call History List 423
Call Waiting 538
calling card numbers 538
canceled actions 37
canceled appointments 151
canceled tasks 224
canceling capitalization 53
capitalization 45, 53, 231
Caps lock key 58
Caps shift key 58
card files 100
Card Info application 26, 556
card readers 198, 200, 558
carrying cases 551
categories
adding 481
beaming 436
benefits of 480
changing 149
color-coding 145
deleting 483
displaying 487, 504
placing information in different 485
related topics for 488
renaming 482
scrolling through 487
selecting 436
categorizing
applications 481, 486
contacts 123, 131, 481, 484
events 134, 168, 436
expenses 442, 448, 449
information 480, 484
memos 236
notes 238, 245
tasks 216, 222, 227
Category command 486
Category dialog box 486
category lists 147, 163, 485, 554
category marker 155, 163
Category pick list 483, 485
cautions 562, 570
CD/DVD command 201
CDs 201
cellular carriers 254
challenge-response prompts 544
Change HotSync Action dialog box 90
Change Repeat dialog box 138, 220
Change your synchronization option 10, 576
changing
alarms 149
bookmarks 396, 398, 399
cache size 415
calendar events 149
category names 482
date and time settings 491
email accounts 284, 288, 359
email filters 358
fonts 303, 313
Graffiti 2 ShortCut strokes 523
home pages 408, 410
information 61, 90, 92
locations 494, 495
owner information 526
passwords 360,463
pen widths 238
playlists 209
preset connections 530
preset formats 515
privacy settings 149
repeating events 150
screen colors 509
screen fonts 506-507
server profiles 537
speed-dial entries 426
textcolors163
time zones 495
untimed events 136
URLs 396, 398
WorldClock499
character entry 113
character searches 40
characters
backward compatibility for Graffiti 246
canceling capitalization of 53
entering accented 51
entering from keyboard 58
entering special 53
not recognized 43, 44
writing area for Graffiti 2 44
writing uppercase 44, 45, 46
charging battery 4, 529, 561, 571
check boxes 24
checking for email 290
checking space on handheld 105
checking the battery 267, 570
Choose Date command 216
Choose File dialog box 407
city preferences 513
cleaning your handheld 561
clear button (Calculator) 453
Clear cache on exit option 415
Clear Cache option 415
clear entry button (Calculator) 453
Clear Note command 238
clearing
calculators 453
History lists 407
Note Pad screens 238
clock
See also World Clock
displaying 22
resetting 514
setting 148, 497, 512
Clock icon 22
Color Theme Preferences screen 503, 509
color-coding 134, 144, 147
colors
applying to annotations 188
applying to email 313
applying to events 134, 144, 147
applying to notes 239
changing screen 509
changing text 163
setting background 239, 509
column widths 314
command buttons 23, 24
command letters 39
Command mode 39
command shortcuts 39, 52
command strokes (Graffiti 2) 39, 52
Command toolbar 39
commands 37, 38, 39
See also menus
communication speed 530, 531, 534
communications protocols 272, 360, 541
compact discs 201
company phone lists and memos 11
completed tasks 223, 224, 225, 227
components (handheld) 2
Compress Day View check box 163
compressed files 328
computers
connecting to 8, 82, 247
copying information to 438
customizing connections for 533
displaying primary settings for 83
entering information with 43, 96
entering network information for 78
managing schedules from 167
overwriting information on 90, 92
preinstalled software for 26
removing Palm Desktop software 109
synchronization options for 85, 87
synchronizing with 67, 68, 71, 257, 580
transferring music from 196, 201
troubleshooting synchronization
problems 575
updating information on 66, 89
conduit configuration screen 336
Conduit Settings command 14, 91
conference calls 141
conferences 140
Confirm note delete check box 243
confirmation messages 243
confirmation tones 553
conflicting events 163
conformity declaration 597
Connect to setting 533
connecting
headsets to handheld 525
to AC charger 21
to Bluetooth devices 247, 533
to dial-in servers 537
to mobile phones 256
to networks 80, 82, 536, 539
to other devices 246, 530
to personal computers 247
to power adapter 529, 570
to power sources 571
to the Internet 247, 402, 537
Connection pick list 537
Connection Preferences screen 530, 532
connection types 247, 271
connections
See also connecting
adding login scripts for 543
adding trusted 263
authentication servers and 547
automatically stopping remote 370
closing Internet 401
closing network 539
creating 532, 533
deleting 532
disconnecting sync cable 74
dropping 541
losing 571
omitting passkeys for 250
pairing with network services 286
precautions for 561, 600
preset setting for 530-535
restricting 248
retying Internet 402
selecting 537
setting flow control for 534
settingtimeoutintervalsfor369
setting up network 253, 262, 539
setting up phone 250-254
setting up secure 350, 366, 376
setting up wireless 246, 258
synchronizing from 68, 77, 82
unable to establish 249
conserving power 5, 527, 570
Contact Details dialog box 123
Contact Edit screen 116, 118
contacting ISPs 254
contacts
See also Contacts application
adding 59, 113, 116, 121, 353
archiving 122
categorizing 123, 131, 481, 484
copying information for 114, 116, 120
customizing details for 123
deleting 122
displaying information for 118, 123
duplicating information for 116, 120
entering from Outlook 10, 576
entering in memos 231
entering notes for 116
keeping private 123, 131, 459
locating 121
managing 112
saving 115, 122
selecting 36
transferring from other applications 131
transferring to other applications 59
Contacts application
See also contacts
adding contact information 113-115
addressing email from 307
archiving information in 122, 224
beaming from 435
benefits of 112
categorizing information in 481, 484
creating business cards 119
customizing fields in 118
displaying additional fields for 116
duplicating information 120
importing information for 100, 131
marking entries as private 459
opening 25, 113
related topics for 131
saving information in 115, 122
searching from 121
selecting field types for 117
setting display options for 124
synchronizing information for 69, 96
transferring information from 59
troubleshooting 131
updating information in 67
viewing online help for 130
Contacts files 100
Contacts icon 25
Contacts list 123
continuous events See repeating events
controls
activating 519
application 23-24, 31
locating 41
cookies 413
Copy command 62, 558
Copy dialog box 558
Copy icon 39
copy-protected applications 558
copying
applications 94, 438, 558
calculations 454
contacts 114, 116, 120
information 62
photos 190, 192, 438
service profiles 537
videos 192,438
copying and pasting 62
corporate email accounts 271, 272, 273
country information 516
CPUs
connecting to 8, 247
copying information to 438
customizing connections for 533
displaying primary settings for 83
entering information with 43
entering network information for 78
overwriting information on 90, 92
preinstalled software for 26
removing Palm Desktop software 109
synchronization options for 85, 87
synchronizing with 68, 580
troubleshooting synchronization problems 575
Cradle/Cable setting 533
creating
appointments 133
backups 66
bookmarks 396, 407
business cards 119
categories 481
company-specific information 11
connections 532, 533
contacts 59, 113, 116, 121, 353
email accounts 274, 279, 336
email messages 305, 406
Excel spreadsheets 269
expense records 441, 443, 444
filters 354
login scripts 543
memos 231
multiday events 140
music files 196, 201
new time zone locations 494
notes 238
owner information 526
passwords 460, 461, 462, 467
personal calendars 133
personal signatures 282, 309
photo albums 183
playlists 202, 206-207
plug-in applications 547
reminders 115, 237
repeating events 137, 138
repeating tasks 218, 220
service profiles 536, 537, 540
ShortCut strokes 522
To Do lists 216, 218
trusted pairs 250, 264
unscheduled events 136
untimed events 135, 140
user profiles 12
Word documents 269
currency 442, 443, 445
Currency pick list 443
currency symbols 443, 444, 445, 449
Current Burn/Transfer Device drop-down
list 203
Current Burner/Device drop-down list 197
current date and time
See also calendar; clock
checking 490
displaying 22
entering 55, 512, 514
current song 212
cursor 57, 61
Custom Currencies dialog box 445
customer support 17, 172, 387, 595
customizing
applications 91
backgrounds 163, 502, 505
calendar 161, 162
contact information 118, 123
currency symbols 445
data entry 518
expense lists 449
fonts 303
Graffiti 2 writing 520
handhelds 11, 501
network settings 536-547
preset formats 517
synchronization settings 85-93
Tasks list 226
Cut command 63
Cut icon 39
cutting text 62
cycling through calendar views 154
D
daily events 133, 137
daily schedules 156, 157, 161
daily tasks 219, 221
data entry
See also information
accessing onscreen keyboards for 57
caution for 20
customizing 518
defined 57
Graffiti 2 writing and 45-46
input areas for 43, 44
methods for 42, 43
personal computers and 96
shortcuts for 55, 66
data services 401
databases 100, 372
Date & Time Preferences screen 512, 514
date formats 515, 517
date stamps 56
dates
assigning to appointments 133, 137
assigning to repeating tasks 220, 221
changing 149, 441, 491
checking 490
displaying current 22, 493
displaying due 227
displaying in World Clock 499
entering current 55, 512, 514
flagging series of 140
incorrect 573
recording completion 227
reserving in calendar 135
resetting 512, 514
scheduling reminders for 115
selecting on calendar 133, 216
setting alarms for specific 148, 218, 241
setting location-specific 491, 512
setting repeat intervals for 138, 139, 140, 149
setting sequence 517
sorting by 242
viewing scheduled 154, 157, 158, 159
viewing specific 158
Day View
displaying overlapping events in 161
scheduling events for 133, 135
selecting 133, 156
setting display options for 147, 161, 163
setting timeframes for 165
Day View icon 133
Daylight Savings settings 491, 495
Days To Synchronize Mail option 345
DBA files 100
Deactivate Keylock button 527
deadlines 135
decimal separators 517
Default Currency pick list 445
default settings
overwriting 90, 92
restoring 510
selecting 86
Default View pick list 162
defaults 67
Delay command 545
delays 205,469,529
Delete command 107
Delete Contact dialog box 122
Delete dialog box 107
Delete Event command 151
Delete Event dialog box 151
Delete From pick list 108
Delete icon 39
Delete Item command 447
Delete Memo command 234
Delete Memo dialog box 234
Delete messages on server option 279
Delete Note command 243
Delete Old Messages dialog box 321
Delete Task command 224
Delete Task dialog box 224
deleting
applications 107, 559
appointments 151
bookmarks 398
categories 483
connections 530, 532
contacts 122
desktop software 7
email 279,320,321,323
email accounts 285
email filters 358
events 151-153
expense records 447, 448
files from handheld 110
Graffiti 2 ShortCut strokes 523
information 63, 110, 467, 559, 572
locations 496
mail folders 317
memos 234
notes 243
Palm Desktop software 109
passwords 466
photos 184, 191
playlists 211
private entries 466
service profiles 542
songs 210
tasks 224-225
description fields 133, 134
deselecting options 24
Desktop overwrites handheld option 90, 92
desktop software
See also Palm Desktop software
archiving information in 110
downloading 17
installing 26
overwriting information in 90, 92
removing old 7
updating handheld from 90, 92
Details dialog box 484, 534, 540
device name cache 266
Device name field 249
device names 266, 267, 526
Device pick list 105
devices 73,248,530
See also Bluetooth devices
Dial prefix check box 538
dial-in connections 530
dial-in servers 536, 537, 539
dial-up accounts 254, 256
dial-up connections 533, 536
Dialer application
benefits of 420
dialing from 421, 422
related topics for 427
troubleshooting 427
Dialericon421
Dialer keypad 421
dialing from handheld 420, 421, 422, 423, 425
dialing in to networks 77, 530
dialing preferences 533
Dialing setting (connections) 533
dialog boxes 24, 37
See also specific
dictionaries 551
digitizer (defined) 524
Disable device name cache command 266
disabling options 24
Disconnect command (Web Pro) 401
Disconnect on Exit option 370
disconnecting from Internet 401
disconnecting sync cable 74, 575
Discover your device screen 103
Discoverable setting 248, 249, 264
discovering Bluetooth devices 248, 264, 266
Discovery icon 264
Discovery Results screen 248, 264
disk space requirements 3
Display Name option 281,365
Display Options command 162, 502, 504
Display Options dialog box
Applications View 502, 504
calendar 162
clock 499
email 313
display preferences 504, 506, 508, 509
Display View icon 394
display. See screen
displaying
application groups 484
application icons 573, 582
application information 105
applications 487
appointments 154, 157, 158, 159
bookmarks 397
Category pick list 163, 164
contact information 118, 123
current date and time 490, 493
email attachments 332, 404
events 147, 164, 165
Excel spreadsheets 170
expenses 449
hidden or masked entries 461
HotSync log 72
images 174, 405
information 487
memos 232
notes 242
personal calendars 132
photos 174
PowerPoint files 170
schedules 154, 156, 158, 159
slide shows 180
song information 212
song lists 204
space information 105, 106
tasks 154, 163, 222, 226, 227
unread messages 154, 163
URLs 392
version information 106
web pages 394, 403, 405
Word documents 170
WorldClock499
DNS (defined) 541
DNS addresses 541
Do not allow wakeup command 267
Do Nothing option (synchronization) 90, 92
do's and don'ts 561
DOC files 170
Documents application
benefits of 169
companion application for 170
opening files from 171
overview 170
updating information in 67
Documents To Go application 28, 66, 170
See also Documents application
domain name system.(DNS) 541
down arrow controls 23
Download attachments option 292, 345
Download dialog box 403
download options 329
downloading
additional software 17, 29
applications 327
attachments 327, 328, 331
eBooks 29
email 279, 290, 291, 372
files 327,403
images 327, 329, 411
large messages 328, 331
multiple attachments 332
photos 114
web pages 403
drafts 305
dragging applications 94, 95
dragging song files 198, 200, 203
dragging to select text 61
drained batteries 570
drawing freehand 188, 237
drawing tools 188
drivers 530
drop-down lists See lists
droplets 200
due dates 216, 217, 221, 227
dummy expansion card 552
Duplicate Contact command 120
duplicating contact information 116, 120
duration 134
E
eBooks 29
Edit Accounts option 359
Edit Categories command 222
Edit Categories dialog box 145, 146, 481, 483
Edit Connection dialog box 531
Edit currencies command 443
Edit List dialog box 494, 496
Edit Playlist screen 206
editing 61, 232, 238, 242
See also changing
electrostatic discharge 561, 600-601
See also email accounts
accessing 252, 255, 260, 271
adding addresses to contacts 353
adding attachments to 332, 333
adding signatures 282, 309
addressing 117, 306, 307, 308, 369, 522
attaching events to 131, 168
attachingmemosto236,439
attaching notes to 245
attaching photos to 194
attaching tasks to 229
automatically checking for 290
automatically emptying trash 369
automatically receiving 297
changing fonts 303, 313
changing header information for 371
changing Inbox folders for 312
changing maximum size 291
composing 305, 406
connecting to Internet from 401
creating folders for 316
deleting 279, 320, 321, 323
downloading 279, 290, 291, 372
downloading attachments 327, 328, 331
emptyingTrash folder for 323,324,369
filtering 293, 354, 356, 358
forwarding 318
logging in to accounts for 406
managing 28
manually marking 325
moving messages 315
reading 300
reading files attached to 332, 404
receiving 255, 290, 291
related topics for 377
replying to 319
sending 255, 301, 304, 305, 406
setting display options 313
setting maximum size 280, 344
setting notification options for 296, 310
setting preferences for 351
setting retry intervals for 310
setting up 271, 274-278, 336, 537
specifying default programs for 342
switching to different service for 286, 287
synchronizing 335, 336, 338, 340, 343
tapping URLs in 320
viewing status of 299
viewing unread messages for 154, 163
wireless connections for 377
email accounts
accessing from Internet 406
changing 284, 288, 359
connection types and 271
creating 279,336
deleting 285
displaying summary information for 347
excluding from synchronization 349
managing 284
scheduling auto get for 293, 298
selecting 286, 290
setting up secure connections for 350
synchronizing multiple 349
synchronizing with client 340, 342
testing 283
upgrading 270
Email address option 361
email applications 335, 341, 541
email folders 312
email providers 271, 277
emergency information 481
empty screen 571
EmptyTrashdialogbox323
emptyingTrash folder 323,324,369
Enable Background Playback check box 205
Enable device name cache command 266
Enable Smart Addressing option 369
enabling buttons and controls 519
encryption 272,368
End command 545
entering
accented characters 51
current date and time 55, 512, 514
Graffiti 2 ShortCuts 55-56, 521
information 20,42,43,57,96,518
shortcuts for 55, 66
owner information 526
passkeys 252, 265
passwords 254, 277, 537, 540
phone numbers 421, 423, 425, 540
special characters or symbols 53, 58
URLs 389
Enterprise Software link 29
entry
box 23, 24
definition 57
deleting expense 447
entering information in 114
getting number of 106
hard resets and 564
setting privacy levels for 460
sorting 131, 236, 449
specifying as first 113
eraser 238
error messages 579
ESD (electrostatic discharge) 600-601
ESMTP authentication option 283, 288, 367
Essential Software folder 104
Eudora accounts 341
Event Details dialog box 149
events
See also appointments
adjusting for location 512
archiving 151, 152, 153
beaming 436
categorizing 134, 168, 436
changing descriptions 149
changing untimed 136
color-coding 134, 144, 147
conflicting 163
contact information and 115
creating multiday 140
creating untimed 135, 140
defined 133
defining repeating 137, 138
deleting 151-153
displaying 147, 164, 165
entering notes for 141, 142
extending beyond midnight 140
finding overlapping 161
marking as private 134, 168
rescheduling 149-150
scheduling 133, 135, 165
setting alarms for 148, 166
types of 133
viewing free time for 163
viewing specific time for 164
writing Graffiti 2 ShortCuts for 56
Excel spreadsheets
attaching to email 332
creating 269
displaying 170
downloading 329
importing information from 100
managing files for 28, 169
opening 171,327
sending information to 442
transferring to handheld 66, 70
exclamation point (!) in Tasks list 227
expansion card slot 20, 570
expansion cards
adding applications to 27, 94, 105
battery life and 570
beaming from 437
benefits of 551
copying applications to 438, 558
deleting information on 559
displaying information about 556
dummy card for 552
formatting 559
getting applications on 105
inserting 20, 553
limitations 556
opening applications on 554
opening files on 555
overview 550
playing music from 195
preventing damage to 552
related topics for 560
removing 552
removing applications on 107
renaming 557
saving multimedia files on 174
transferring music files to 70
transferring music to 196, 200, 201
types of 551
viewing information on 405
Expense application
archiving information in 447
benefits of 440
categorizing information in 481
categorizing with Calculator 481
changing information 441
choosing currency options 443
deleting categories 483
deleting information in 447-448
entering expenses in 441-442
getting help with 450
opening 441, 450
related topics for 451
saving information in 442
synchronizing information for 69
transferring information to 59
troubleshooting 451
updating information in 67
Expense icon 26
Expense Preferences dialog box 441, 444
expense records
See also Expense application
categorizing 442, 448, 449
deleting 447, 448
entering information in 441, 444
organizing related expenses in 443
viewing information in 449
expense reports 443, 448, 449
Expense type pick list 441
extendingbattery501,570
external devices 530
external speaker 525
F
fade setting 163, 502, 505
FAQs 568
Favorite View
changing entries 503
defined 25
displaying 23
moving around 35
using the 5-way 35
FCC Statement 596
fields 24, 116, 117, 118
file names 558
file types 100, 174, 196
files
accessing 416
adding 66
attaching to email 194,332,333
displaying contents 404
displaying on expansion cards 556
downloading 327, 329, 403
installation prerequisites for 105
managing 170
opening Office 171, 327
opening on expansion cards 555
opening text 327
removing 110, 559
restoring archived 110
saving 403
selecting for synchronization 81
sharing 247
transferring Office 66
transferring to handheld 68, 69, 100,
403
troubleshooting uninstalled 579
filing events 134
filtering email 293, 354, 356, 358
Filters dialog box 354, 356
finances 440, 481
See also Expense application
Find dialog box 23, 40
Findicon23,40
Find More button 40
Find on Page command 392
finding
contacts 121
information 23, 40
overlapping events 161
firewalls 273
flow control (connections) 534
Flow Ctl pick list 534
Folder Synchronization Options setting 346
folders 315, 316, 346, 576
font styles 507
fonts 303, 313, 394, 506-507
forgetting passwords 466
form fields (web pages) 412
Format Card command 559
formatst
email messages 301
information-specific 515
multimedia file types 174
Formats Preferences screen 515, 516
formatting expansion cards 559
forwarding email 318
freehand drawing 188, 237
freeing up space 107, 110, 153, 572
frequently asked questions 568
frozen screen 21, 562, 571
Full header option 371
full-screen pen stroke 511
full-screen writing 44, 238, 518, 519
G
Game Sound pick list 525
games 484, 525, 551
General Packet Radio Service (GPRS) 253
gestures (Graffiti 2 writing) 52
Get IP command 545
Get Mail Options dialog box 291
Get unread email only option 292
Get unread mail option 279
getting started 6
GIF files 327, 405
Go To Date dialog box 133, 135
Go to Web Page dialog box 389
Go to Web Page icon 389
going online 247
GPRS data services 401
GPRS mobile phones 250, 253, 262, 530
Graffiti 2 alphabet 47
Graffiti 2 command strokes 39
Graffiti 2 gestures 52
Graffiti 2 Preferences screen 520
Graffiti 2 strokes 44, 45, 46
Graffiti 2 writing
backward compatibility for 46
caution for 43, 44
changing strokes for 523
choosing input area for 518
copying and pasting with 62
creating tasks with 216
deleting information with 63
deleting ShortCuts 523
entering accented characters with 51
entering commands with 52
entering information with 45-54
entering punctuation marks with 49
entering ShortCuts with 55-56, 521
entering special characters with 53, 54
getting help with 51
input area for 19, 44, 45
overview 43
setting alternate stroke shapes for 520
setting preferences for 519-523
tips for 46
troubleshooting problems with 574
graphics files 174, 327, 405
downloading 327, 329, 411
GSM mobile phones 250, 530
H
Handheld overwrites Desktop option 90, 92
Handheld Settings Overview screen 348
Handheld view (Web Pro) 394
handhelds
beaming to. See beaming
charging battery for 4, 529, 561
connecting to AC charger 21
connecting to other devices 530
connecting to PCs 8
connecting to power adapter 529, 570
controls described 19-21
disconnecting from sync cable 74, 575
do's and don'ts 561
locking 467-470, 526
maintenance information for 561
not responding 562, 571
protecting 248, 252
recharging battery 4, 5, 529, 570
reconnecting sync cable 74
resetting 21, 467, 562, 571
setting power preferences for 527-529
troubleshooting 568
turning itself off 572
turning on and off 6, 20, 527
handwriting
can't recognize 574
Note Pad 238
See also Graffiti 2 writing
hard resets 467, 564, 565, 571
header options (email) 371
headphone jack 20, 561
headphones 561
headsets 20, 525, 561
help 17, 24, 51, 110, 466, 594
Help menu 575
hiding
address fields 390
currency symbols 449
private entries 458, 460
high-speed connections 256
high-speed data services 536
high-speed wireless carrier 247
highlighting menu commands 37
See also selection highlight
hits 24, 466
See also help
History dialog box 454
History list 407
Holiday Files folder 167
holidays 135, 137, 139
Home icon 22
home page 393,408,410
Home Page check box 409
Home Page icon 408
Home Page option 410
Home screen. See Applications View
hosts 541
HotSync Controls tab 75, 87
HotSync icon 26
HotSync log 72,88
HotSync Manager
See also synchronizing
installing 68
not responding 579
opening on PCs 258
restoring information from 565
running automatically 86
starting 86
synchronization options for 86, 88
turning off 86
HotSync Manager icon 68, 575
HotSync Online Troubleshooting Guide 575
HotSync screen 74, 76, 79
HotSync Software Setup window 87
HotSync technology 68
HTM files 327, 405
HTML files 327, 401, 404, 405
downloading 329
HTML messages 301, 302, 320
hyperlinks 393
See also URLs
icons
application 504, 510
Command toolbar 39
input area 22
missing 573
VersaMail application 299, 311, 348
ICS files 100,327
idle timeouts 541
image files 174, 327, 405
downloading 327, 329, 411
IMAP accounts 279, 326
IMAP mail folders 374, 375, 376
IMAP mail servers 277,336,341
IMAP protocol 272, 276
import fields 101
importing
contacts 131
information 12, 100-102
Inbox 283, 297, 312
Inbox icons 299
incoming mail options 279, 362, 363
Incoming mail server option 361
incoming mail servers 271, 277
incompatible applications 591
incorrect characters 43, 44
incorrect dates and time 573
Info command 105
Info dialog box 105
infrared port. See IR port
Infrared setting 533
initialization strings (modems) 370, 534
input area
entering accented characters on 51
entering commands on 52
entering special characters on 53, 54
for Graffiti 2 characters 19, 43, 518
icons 22
writing Graffiti 2 ShortCuts on 55
inserting expansion cards 20, 553
installation CD 2, 26, 103, 568
installation prerequisites 105
installing
additional software 26, 66, 103
applications 26, 66, 94, 554
HotSync Manager 68
PalmDesktop software 3,7,26
related topics for 17
instant messenger (IM) accounts 117
instant messenger (IM) field 117
Int'l button 58
international keyboard 58
Internet
See also websites
accessing 247, 271
browsing 247
connecting to 247, 402, 537
disconnecting from 401
email accounts and 406
retying connections for 402
selecting service provider for 256
setting up network connections for 254
Internet Explorer 2
See also web browsers
Internet mail servers 341
Internet Message Access Protocol (IMAP)
276
Internet protocol (IP) 541
Internet Service Providers (ISPs) 247, 271,
277,536
invalidating warranty 570
IP Address check box 541
IP addresses 541
IR devices 73
IR port
beaming from 434, 435, 436
connecting to networks from 82
creating connections for 530
disabling 76
location 20
setting up connections for 533
synchronizing from 68, 73, 75, 83
IR to a PC/Handheld connection 530, 531
IR-enabled laptop 73
ISPs 247, 271, 277, 536
iTunes application 201
J
J2ME files 29
Java files 29
JPG files 174,327,405
K
keeping track of expenses 440
key exchange 265
keyboard icons 23
keyboards
adding additional 43
connecting to portable 232
entering information with 57
Graffiti 2 writing and 43
opening built-in 23, 58
Keylock 527, 528
Keylock Preferences screen 527, 570
L
LAN Setup option 262
LANs See networks
LANSyncPrefs dialog box 84
laptops 73, 247
large fonts 507
large images 411
Last Page Viewed option 410
Leave mail on server option 279
left arrow controls 23
letter keyboard 57
letterkeyboardicon22,23
lightning bolt icon 571
line selection 61
links (web pages) 393
Listicon178
list screens 36
List view (Media) 175, 178
listening to music 195, 196, 550
caution for 205
lists
See also song lists
clearing History 407
creating company phone 11
creating To Do 215, 218
customizing expense 449
customizing Tasks 226
displaying applications icons in 504
displaying bookmarks in 397
displaying pick 24
finding items in 494
moving between items in 36
opening category 147, 163, 554
opening History 407
ordering memos in 233
rearranging items in 233
selecting items in 23, 24, 36
loading user profiles 15, 16
Local Area Networks See networks
locating
contacts 121
controls 41
information 23, 40
overlapping events 161
Location field 141
Location pick list 494, 513
location settings (World Clock) 490, 493, 495
location-specific preferences 512-517
locations, deleting 496
Lock Handheld dialog box 468
lockicons437,558
lock options 469
locking
handheld buttons 527
handhelds 467-470, 526
log files 72
logging in to email accounts 273, 406
logging in to network servers 543
Login Script dialog box 543, 544
login scripts 543-546
Look Up line (Contacts) 121
Lookup screen 307
losing
information 37, 66, 67
passwords 466, 467
Lotus Notes 336, 340
low batteries 5, 570
lowercase letters 46, 519
M
Mac information
creating contacts 130
creating notes 244
creating user profiles 13
displaying tasks 228
displaying videos 174
entering information 98
handheld system requirements 3
importing 102
installing applications 68, 95
installing handheld software 7, 104
opening calendars 167
synchronizinghandheld68,75,87,91
synchronizing with user profiles 16
transferring music files 200, 201
troubleshooting problems 569
turning off IR port 76
writing memos 235
Mail Client pick list 341
mail databases 372
mail folders 315, 316, 346
mail servers 273, 277
Mail Servers command 288, 359
Mail Servers screen 289, 360, 361, 362
Mail Service pick list 276
Mail Services pick list 277
mail. See email
maintenance information 561
Make Default check box 93
management tools 29
Manual application 29
Manual synchronization option 86
manually locking handhelds 467, 470
marking information as private 459
masking private entries 458, 460, 461
math calculators 452
Maximum Message Size option 280, 344
MCI connections 538
Media application
adding photo to contact 114
backing up information in 27
benefits of 173
companion applications for 28, 29
copying photos or videos 190
deleting photos or videos 191
displaying photos or videos 175
moving photos or videos 185
opening 193
organizing photos and videos 183
overview 173, 193
personalizing photos 188
related topics for 194
sorting photos and videos 187
transferring information to 70
troubleshooting 194
updating information in 67
Media icon 25
memory 107, 414, 572
memory button (Calculator) 453
memory cards 181, 195, 559
memory clear button (Calculator) 453
memory recall button (Calculator) 453
memos
See also notes; Memos application
adding contact information to 121, 231
backing up 27
categorizing 236
creating 231
deleting 234
displaying 232
editing 232, 233
keeping private 236, 459
organizing 233, 236
saving 231, 234
selecting 36
sending as attachments 236
transferring to PCs 233
Memos application
categorizing information in 481
getting help with 235
importing information for 100
marking entries as private 459
opening 231, 510
overview 230
related topics for 236
reordering memos lists 233
selectingmemos232
synchronizing information for 69, 96
transferring information to 59
troubleshooting 236, 582
updating information in 67
writing memos with 231
Memos files 100
Memosicon25
Memos list 231, 232, 233
menu bar 38
Menuicon22,38,573
menu shortcuts 39, 62
menus 22,37,38
messages
See also email; text messages
automatically resending 304
connection types for 247
displaying unread 154, 163
downloading large 328, 331
receiving 247, 379
removing confirmation 243
sending plain text 301, 302
setting alarms for 498
Messages option 291
Microsoft Excel spreadsheets
attaching to email 332
creating 269
displaying 170
downloading 329
importing information from 100
managing files for 28, 169
opening 171, 327
sending information to 442
transferring to handheld 66, 70
Microsoft Exchange accounts 336, 340
Microsoft Internet Explorer See Internet Explorer
Microsoft Outlook See Outlook
Microsoft Windows systems See Windows information
Microsoft Word application 233
Microsoft Word documents
attaching to email 332
creating 269
displaying 170
downloading 329
managing files for 28, 169
opening 171, 327
transferring to handheld 66, 70
Mini-USB connector icon 21
missing applications 25, 573
missing icons 573
mobile devices 117, 123
mobile phones
accessing email accounts from 286
accessing Internet with 247
attachingmodems to 530
beaming to 271
compatibility 251
connecting to 247, 256, 535, 584
connecting to Internet from 256
creating trusted pairs for 250, 584
dialing 125, 126, 420
dialing in to networks from 77
key exchanges and 265
passkeys and 252, 584
requirements for 128
setting up connection 250
Modem Sync Prefix dialog box 79
Modem Wait option 370
modems
connecting to IR port from 530
dialing in to networks with 77
entering initialization strings for 370, 534
setting up connections for 533, 537
Money category 481
money. See currency
Month View 147, 159, 161, 164
Month View icon 159
month, setting 491, 514
monthly events 137
monthly schedules 159
monthly tasks 219, 221
More button 331
moving
information 65
photos 185
songs on playlists 207, 210
web pages 395
moving around dialog boxes 37
moving the slider 23
moving through websites 393, 396
MP3 files 70, 196
MPA files 100
multiday events 140
multiline descriptions 133
multimedia applications 484
multimedia file types 174
multimedia files 334
MultiMediaCard expansion cards 195, 551
See also expansion cards
multiple recipients (email) 306
multiple users 67
music
See also RealPlayer
application 195
changing playlists for 209
creating playlists for 202, 206-207
deleting playlists for 211
files 70, 195, 196, 201
listening to 195, 196, 550
caution for 205
playing 195, 205, 208, 583
related topics for 214
removing from playlists 210
selecting 205, 207, 212
stopping 205
storing 551
transferring to expansion cards 196, 200, 201
transferring to handheld 70
viewing details for 212
Music & My Library tab 201
Music folder 204
Musicicon25,196,205
N
names. See usernames; contacts
naming
connections 533
email accounts 276
expansion cards 557
handhelds 249, 526
mail folders 317
photo albums 184
playlists 206
user profiles 12, 13
navigating through websites 393, 396
navigational controls 23
navigator 19,23,34-37
negative numbers 453
Network Preferences dialog box 80
Network Preferences screen 536, 539, 540, 542, 543
network services 286
network settings 536-547
Network Setup screen 78, 83
networks
accessing accounts for 252
accessing corporate 273
accessing email from 247
closing connections for 539
connecting to 80, 82, 536, 539
corporate email accounts and 272, 273
creating login scripts for 543-546
customizing connections for 533
deleting service profiles for 542
dialing in to 77, 530
losing connections to 571
selecting communications protocol for 541
setting IP addresses for 541
setting service for 80
setting up connections for 253, 262, 539
setting up service profiles for 536, 537
specifying as trusted device 263
synchronizing over 68, 77-84
new lines 231
New Profile screen 12, 13
next arrow icon 23
No-time icon 155
Normal view (Web Pro) 394
Note Pad
See also notes
backing up information in 27
categorizing information in 481, 485
clearing 238
creating notes from 238
deleting notes in 243
displaying notes in 242
getting help with 244, 245
overview 237
related topics for 245
selecting pens 239
setting color preferences 239
synchronizing information for 69
troubleshooting 582
updating information on 67
Note Pad icon 25
notes
See also memos; Note Pad
attaching alarms to 240
attaching to email 245
backing up 27
categorizing 238, 245
creating 238
deleting 243
editing 238, 242
marking as private 238, 245
saving 238
selecting 36, 242
setting background colors for 239
sorting 242
synchronizing 96
notification options (email) 296, 310
Notify Sound pick list 296
number formats 451, 515, 517
number keyboard 23, 57
number keyboard icon 22, 23
numbers
backward compatibility for Graffiti 246
entering from keyboard 58
entering on calculator 453
Graffiti 2 writing and 44, 48, 519
0
off-line viewing 403, 404
Office files 169-171
See also specific program files
omitting passkeys 250
omitting passwords 537
Online Troubleshooting Guide 575
onscreen keyboards See keyboards
operating systems 2
options 24,85
order forms 412
organizing
applications 41, 481
information 41, 480
Outbox 305, 310
Outbox icons 311
outgoing mail options 281, 283, 364, 366
Outgoing mail server option 361
outgoing mail servers 272, 277
Outlook
entering information from 96
marking completed tasks and 223
setting as default mail program 342
synchronizing with 10,67,89,96,576
requirements for 109
time zones in Calendar 143
troubleshooting 577
Overdue task icon 155
overdue tasks 154, 163, 222, 227
overlapping events 161
overwriting information 90, 92
owner information 526
Owner Preferences screen 526
P
pager 117
Palm Desktop Installer icon 7
Palm Desktop software
completing repeated tasks and 223
creating user profiles from 12, 13
described 2, 27
entering information in 96, 97, 99
importing information to 100, 102
installing 3, 7, 26
online help for 97
opening applications from 97, 98
requiring password entry for 463
restoring archived items to 110
synchronizing with 10,67,96,576
system requirements for 2
troubleshooting 568
uninstalling 109
updating information in 66
upgrading handhelds and 7
Palm Dialer software. See Dialer application
Palm OS applications 31
Palm OS handhelds
beaming to 168
exchangingmemoswith236
exchanging messages with 387
exchanging photos and videos with 194
sharing notes with 245
sharing tasks with 229
upgrading from 4
palmOne Quick Install software 66, 579
palmOne technical support 17
palmOne website 29
paper clip icon 328, 329, 331
parts (handheld) 2
passkeys 252, 260, 263, 265, 584
Password check box 277
passwords
Bluetooth 260
changing 360,463
creating 460, 462, 467
deleting 466
email accounts and 272
encrypting 368
entering 254, 277, 537, 540
forgetting 466
locking handhelds with 467, 526
losing 467
network connections and 263
omitting 537
opening web pages and 391
overview 461
passkeys and 252
requiring 463
security options for 458
troubleshooting 588
validating 288
Paste command 62
Paste icon 39
pasting information 62, 454
patches 107
PC Setup dialog box 257, 262
PCs See personal computers
PCs. See computers
PDB files 68, 69
PDF files 29
pen 239
Pen selector 238
pen stroke 511
pen widths 238
percentage button (Calculator) 453
performance 561
period.)character44,519
peripheral devices. See external devices
personal information 413, 461
personalizing contact information 118
personalizing handheld
See also customizing
phone connections 250-254
phone drivers 530
Phone Link Updater application 250
PhoneLookup59,121
phone number fields 117
phone numbers
adding speed dial entries for 424
entering 421, 423, 425, 540
getting from contacts 59, 117, 121
organizing emergency 481
redialing 422
temporary storage for 237
phone settings 537
Phone Setup dialog box 250
Phone Setup option 250
phones 265, 530, 533
See also conference calls; mobile phones
photo albums
arranging photos in 185, 187
creating 183
moving photos to other 186
removing photos 191
scrolling through 182
selecting 184
Photo Details screen 182
photos
adding notes to 182
adding to albums 184
adding to contacts 114
adjusting fade setting for 502, 505
attaching to email 334
copying 190, 192, 438
deleting 184, 191
finding 176
moving 185
reviewing 175
saving 174
selecting 36
selecting as backgrounds 163, 502, 505
sending 194
setting slide show delay option 180
sharing 192
sorting 187
storing 551, 555
synchronizing 96
transferring to handheld 68, 70
viewing details of 182
Photos application. See Media application
Photosicon582
pick lists 23, 24
Picture box 114
plain text messages 301, 302, 320
playing back video clips 176
playing music 195, 196, 205, 208, 583
playlists
See also music
adding songs to 207
creating 202, 206-207
deleting songs on 210
displaying 204
editing 209
naming 206
removing 211
selecting 208
selecting music from 205, 208, 212
song lists
adding songs to 210
troubleshooting 583
Playlists dialog box 206
plug-in applications 547
POP protocol 276
POP servers 272, 277, 279, 325, 336
Port Number option 280, 283
portable keyboards 232
Post Office Protocol (POP) 276
See also POP servers
poweradapter561,571
Power button 20
Power by Hand eReader 29
power consumption options 528
power preferences 527-529
Power Preferences screen 528
power-saving settings 528, 529
PowerPoint files
attaching to email 332
displaying 170
downloading 329
managing 28
opening 171, 327
transferring to handheld 66, 70
PPT files 170
PRC applications 547
PRC files 68, 69
precautions 562, 570, 600
predefined service profiles 540
preferences 172,387,501,549
See also customizing
Preferences command 165
Prefs icon 26
preinstalled applications 107
preset connections 530, 532
preset delays 469
preset formats 515
preset settings 67
previous arrow icon 23
Previously Viewed pick list 409
primary location 490, 491, 496, 499
Primary PC Setup command 78, 83
prioritizing tasks 216, 227
privacy FAQs 588
privacy levels 460
privacy settings
applications 41
calendar 149, 168
contacts 131
information 458
memos 236
notes 245
tasks 229
voice memos 387
web pages 413
Private check box 459
profiles 11-16
programs. See software
Prompt command 545
prompts 544
protecting handheld 248, 561
protecting information 457, 459, 467, 551
protocol (defined) 276
Protocol pick list 276
proxy servers 416, 417
punctuation marks 46, 49
Punctuation Shift indicator 53
Punctuation Shift stroke 46, 53, 519
Purge Categories dialog box 448
Purge command 153, 225, 448
Purge dialog box 153, 225
purging items 572
0
quarterly tasks 220
Query DNS check box 541
questions and answers 568
quick buttons
location of 19
not responding 527
reassigning 510
restoring defaults for 510
Quick Install icon 94
Quick Install software 27, 66, 94, 579
Quick Look Up icon 121
Quick Look Up line 121
Quick Tour 6, 26
QuickTime software 29
B
radio 21
range (peripheral connections) 248
Read pick list 313
reading
email 300
text messages 382, 384
Real Music Store 202
RealPlayer application
adding song lists 206
benefits of 195
compatible formats for 196
converting songs on CDs with 201
deleting playlists 211
displaying song information 212
editing playlists 209
getting help with 206, 213
installing 28
integration with PCs 198
opening 25, 213
opening files for 555
playing music 205
playing songs from 208
related topics for 214
setting period of inactivity for 205
transferring music and 197, 201
troubleshooting 214, 583
turning off 205
RealPlayer Connected light 199
RealPlayericon25,196,205
reassigning quick buttons 510
reheels See resetting handheld
Receipt Details dialog box 443
Receive Format pick list 302
receiving email 255, 290, 291
receiving messages 247, 379
recently visited web pages 393
recharging battery 4, 5, 529, 570
recipes 234
Recipient List screen 306, 307
reconnecting sync cable 74
Record menu 435
record. See entry
recovering memory 572
recurring events 133
redialing phone numbers 422
related items, categorizing 481
Remember Last Category check box 504
reminders
See also alarms
canceling 498
creating 237
scheduling 115, 133
setting alarms as 497
specifying notes as 240
Reminders screen 297, 310
remote access accounts 536
remote connections 370
remote devices 266
remote servers 77, 416, 536
removing
applications 107, 559
appointments 151
bookmarks 398
categories 483
confirmation messages 243
connections 530, 532
contacts 122
desktop software 7
email 279,320,321,323
email accounts 285
email filters 358
events 151-153
expansion cards 552
expense records 447, 448
files from handheld 110
Graffiti 2 ShortCut strokes 523
information 63, 110, 467, 559, 572
locations 496
mail folders 317
memos 234
notes 243
Palm Desktop software 109
passwords 466
photos 184, 191
playlists 211
private entries 466
repeating tasks 224
selectionhighlight34
service profiles 542
songs 210
tasks 224-225
Rename Card dialog box 557
Rename Custom Fields dialog box 118
renaming
categories 482
expansion cards 557
mail folders 317
preset connections 530
web pages 404
reordering songs 207, 210
Repeat icon 156
repeat intervals
calendar 137, 140
tasks 219, 221
repeating events
changing 150
deleting 151, 152
displaying 164
scheduling 137, 138
repeating tasks 218, 220, 223, 224
Reply Options dialog box 319
Reply To Address option 281,365
replying to email 319
rescheduling events 149-150
resending messages 304
reserving dates 135
reset button 21, 563, 564
resetting
clock 491, 514
Graffiti 2 ShortCut strokes 523
handheld 467, 562, 571
local preferences 512, 514
passwords 463
preset connections 530
preset formats 515
quick buttons 510
server profiles 537
resizing text 232
restarting handheld. See resets
restoring
archived items 110
defaults 510
information 466, 467, 565
restricting handheld connections 248
restrictions 562, 570
retrying
auto get mail setting 298
email delivery 310
Internet connections 402
Return key 58
right arrow controls 23
rotary dialing 533
running out of memory 107
running out of space 551
s
Save Page dialog box 404
Save Tracks dialog box 202
saving
appointments 134
battery power 527
contacts 115, 122
files 403
information 33, 110, 574
memos 231, 234
music files 195
notes 238
photos 174
synchronization settings 91, 93
tasks 216, 224, 225
web cookies 413
web pages 404, 414
scheduled sending retry (email) 273
schedules 132, 154, 163, 512
See also appointments; calendar
scheduling
appointments 133-134
auto get mail 293, 294, 298
backup and synchronization 8
events 133, 135, 140, 165
reminders 115, 133
repeating tasks 218, 220
untimed events 136
scheduling conflicts 132
screen
adding photos as backgrounds 163, 502, 505
adjusting brightness 22, 506, 570
aligning 524
blank 571
caring for 561
changing colors of 509
changing fonts for 506-507
clearing 238
described 19
frozen 21, 562, 571
maintaining 561
navigational controls for 23
not responding 21, 527, 562, 571
overview 22
scrolling through 23
setting input area for 518
tapping elements on 22, 519, 524, 561
writing area on 19
scripts 547
scroll bar 23
scrolling 36, 37
from screen-to-screen 23
menus 37
to dates 133
SD memory cards 195, 551
SD_Audio folder 199
SDIO accessories
SDIO cards 272, 551
searching for information 23, 40, 121
searching web pages 392
secondary locations 493, 496, 499
secure connections 280, 283, 350, 366, 376
Secure Digital input/output (SDIO) 551
Secure Socket Layer 280, 283, 350, 376
security 537
security and management tools 29
security levels 458
security options
applications 41
calendar 168
contacts 131
handheld 252,458
memos 236
notes 245
tasks 229
voice memos 387
Security Preferences dialog box
changing passwords 463
creating passwords 462
locking handhelds 526
masking private entries 460
Select a Color Theme dialog box 503, 509
Select button (navigator) 37
Select Colors dialog box 239
Select Font dialog box 303, 313, 507
Select Media screen 334
Select Service button (networks) 80
Select User dialog box 8, 68
selecting
alarm sounds 498
alternate stroke shapes 520
backgroundcolors239,509
clock display options 499
command buttons 23
communications protocol 541
connections 537
currency options 443, 444, 445
home pages 408, 410
information 61
Internet Service Providers (ISPs) 537
items in lists 23, 24, 36
menu commands 37, 38, 39
music 205, 207, 212
options in dialog boxes 37
security levels 458
selectionhighlight34,36
self-help resources 594
Send command 545
Send CR command 545
Send email from Outbox option 345
Send Password command 545
send retry failures 310
Send To Handheld dialog box 200
Send To Handheld droplet 28, 68, 95, 200
Send User ID command 545
sending
email 255,301,304,305,406
text messages 247, 378, 379
servers 416
service (defined) 256
Service Connection Progress messages 539
Service pick list 256, 537, 540
service profiles
deleting 542
selecting 539
setting up 536, 537, 540
service templates 536
services 256, 530, 544
Set Alarm dialog box 217, 241
Set as default check box 91
Set Country dialog box 516
Set Date & Time button 491
Set Date dialog box 491, 514
Set the default connection type option 292
Set Time dialog box 134, 492, 515
setting up email accounts 271
setting up wireless connections 246
settings See preferences
setup 568
Setup Devices option 257
Setup dialog box 86
sharing
files 247
information 114, 230, 428, 438, 560
photos 192
usernames 67
videos 192
sharing FAQs 589
sharing information 20
Short header option 371
Short Message Service (SMS) 379
short messages 378
ShortCut strokes (Graffiti 2 writing)
backing up 521
changing 523
deleting 523
described 55-56
setting up 521
ShortCut Text line 522
shortcuts 24, 39, 62, 511
ShortCuts Preferences screen 521, 523
Show History command 454
Show Multiple Locations setting 499
Show Private Records dialog box 461
Show videos in Slide Show option 180
signatures 282, 309
Silent profile 525
Simple Mail Transfer Protocol. See SMTP
servers
sketching 237
Slide Show Delay pick list 180
slide shows 175, 180, 185
slider 23
small fonts 507
small icons 504
Smart Addressing feature 308, 369
SMS application
additional information for 387
benefits of 378
installing 28
messaging 28
opening 379
sending text messages 379
SMS messages 379
SMTP servers 277, 288
Snoopze setting 498
soft resets 562, 571
software
See also applications
accessing additional 17
adding 551
adding additional 103
downloading additional 29
included on handheld 25
installing 7, 26, 66, 103
third-party applications and 8
Solitaire 29
Song Details dialog box 212
song lists
adding songs to 207
creating 202, 206-207
deleting 211
displaying 204
editing 209
naming 206
removing items on 210
selecting 208
selecting items 205, 208, 212
selecting music from 205
troubleshooting 583
songs 195, 207, 210, 212
See also music; song lists
Sort by date option 187
Sort by name option 187
Sort by option 313
Sort by pick list 242
Sort by type option 187
Sort manually option 187
Sort order option 313
sorting
contacts 131
expenses 449
memos 236
notes 242
photos 187
videos 187
sound files. See audio files; music files
sounds
See also music; voice memos
changing alarm 240
settingalarm148,166,227,498
setting preferences for 525
Sounds & Alerts screen 525
space characters 521, 537
space information (handheld) 105, 106
speaker 21, 525
special characters 46, 53, 54, 519
Specific Import Fields dialog box 101
specifications 598
speed (communications) 530, 531, 534
Speed Dial screen 424, 426
Speed pick list 531, 534
speed-dial buttons 424
spreadsheets
attaching to email 332
creating 269
displaying 170
downloading 329
importing information from 100
managing files for 28, 169
opening 171, 327
sending information to 442
transferring to handheld 66, 70
square root button (Calculator) 453
SSL connections 280, 283, 350, 376
Staricon23
start pages. See Home page
Start with pick list 410
starting
HotSync Manager 86
locked handhelds 467
Outlook applications 89
static electricity 561, 600-601
stopping
downloading operations 403
information searches 40
Internet connections 402
playback 205
storage 550, 551
storing
device names 266
web pages 414
stylus6,20,45,46,188,561
Subject fields 305
subject lines (email) 290, 305
Subjects Only option 291
summary view (email) 314
supported file types 174
switching between applications 10, 33, 554, 576
symbols 113
entering 53, 54, 58, 519
sync cable
connecting to PCs with 8
disconnecting 74, 575
reconnecting 74
synchronizing with 68, 71, 78
Sync IMAP Folders screen 375
synchronization defaults 67
synchronization methods 68, 69
synchronization options
applications 89, 91
email 338, 340, 343
handheld 10,85-93,576
synchronization software 67, 89, 109
synchronize (defined) 8
Synchronize Active Accounts option 337
Synchronize incoming email option 345
Synchronize the files option 90, 92
Synchronize to local check box 341
Synchronize unread mail only option 345
synchronizing
See also HotSync Manager
add-on software 67
applications 69, 72, 89, 578
benefits of 65
caution for 109
defined 65
email 335, 336, 338, 340, 343
handhelds 71-84, 466
IMAP mail folders 374, 375, 376
information 66-69,575
multiple email accounts 349
over networks 68, 77-84
prerequisites for 77
related topics for 17
requirements for 68
third-party applications and 8
troubleshooting problems 72, 575-580
upgrades and 4
wirelessly 247, 257
with IR port 68, 73, 75, 83
with Microsoft Outlook 10, 67, 89, 96, 576
requirements for 109
with Palm Desktop software 67, 96
with sync cable 71, 78
with user profiles 11, 14, 16
system information 67
System Preferences screen 373
system requirements 2
System Sound pick list 525
T
Tab key 58
tapping
application titles 38
arrow icons 23
check boxes 24
command buttons 24
entry boxes 24
Graffiti 2 writing and 44
menu items 38
moving songs with 207, 210
problems with 562, 571, 573
screen elements 22, 519, 524, 561
selecting text with 61
URLs 401
Task Preferences dialog box 217, 226 tasks
See also Tasks application
adding contact information to 121
adding notes to 216
adding to Tasks list 226
archiving 224, 225
assigning due dates to 216, 217, 221
attaching to email 229
categorizing 216, 222, 227
combining with appointments 132
completing 223
creating 216
deleting 224-225
displaying 154, 163, 222, 226, 227
downloading 329
entering from Outlook 10, 576
managing 215
marking as private 216
organizing 222
prioritizing 216, 227
reordering 227
saving 216, 224, 225
scheduling repeating 218, 220
setting alarms for 217, 227
setting repeat intervals for 219, 221
viewing due dates for 227
viewing overdue 227
Tasks application
adding tasks 216, 218, 220
additional information for 229
categorizing information in 481
getting help with 228
icon 25
importing information for 100
marking completed tasks 223
opening 216
overview 215
saving information for 225
saving information in 216
securing contents 229
setting display options for 222
setting preferences for 226-227
synchronizing information for 69, 96
transferring information to 59
troubleshooting 229, 583
updating information in 67
Tasks files 100
Tasks list 154, 222, 224, 226
TCP/IP Settings button 83
TDA files 100
technical assistance 17, 172, 387, 595
Technical Support office 595
telephone numbers See phone numbers
testing email accounts 283
text
adjusting fade setting for 502, 505
changing color of 163, 509
changing screen fonts for 506
copying and pasting 62
entering 43, 55, 58
entering abbreviations for 521, 522
formatting email 301
resizing 232
searching for 40
selecting 40, 61
viewing against photos 163
text files 327
downloading 329
text messages
managing 28
opening 382
sending 247, 378, 379
viewing 382, 383, 384, 386
third-party applications 8, 571, 591, 592
thousands separator 517
Thumbnail icon 176
Thumbnail view (Media) 175, 176
thumbnails (photos) 163, 502, 505
TIF files 327
TIFF files 174
time
See also clock
blocking out periods of 137, 140
changing 491
checking 490
displaying current 22, 493
displaying free 163
displaying specific periods of 163
entering current 55
entering display options for 165
incorrect 573
resetting 149, 512, 514
scheduling 134
scheduling periods of 134
setting current 515
setting for alarms 148, 218, 241, 497
setting location-specific 491, 512
unscheduled events and 136
time bars 163
time formats 515, 517
time stamps 56
time zones 143, 493, 495, 512, 513
timed events 164
timeout intervals 369
Timeout option 369
tips 17, 24
Tipsicon23,24
To Do lists 215, 218
See also tasks
toolbars 39
top arrow controls 23
Touchscreen Preferences screen 524
touchscreen See screen
TouchTone dialing 533
tracking expenses 440
transfer options 566
transferring
application
files 68, 100, 403
information 59, 67, 69, 100
music 196, 200, 201
Office files 66
wirelessly 247
Trash folder 323, 324, 369
travel expenses 449
travel guides 551
troubleshooting 8, 72, 524, 568
See also help
trusted connections 263
Trusted Devices option 264
trusted pairs 247, 248, 250, 264
Tungsten handheld. See handhelds
turninghandheldonandoff20,527,529
turning off alarms 498
turning off full-screen writing 44
turning off HotSync Manager 86
turning sounds off 525
Tutorial 29
U
underlined links 393
Undo icon 39
Unfiled category 482
unfreezinghandheld562,564
uniform resource locators. See URLs
uninstalling
applications 572
Palm Desktop software 109
unread email messages 154, 163, 325
Unread pick list 313
unrecognized characters 43, 44
unrecognized devices 248
unscheduled events 136
unscheduled time slots 163
untimed events 115, 135, 136, 140, 164
up arrow controls 23
update options 90, 92
updating
information 65, 66, 89
owner information 526
third-party applications 8
upgrades 4, 7, 105, 270
uppercase letters 44, 45, 46
URLs
accessing web pages with 389, 392
changing 396, 398
connecting to Internet from 401, 402
email and 320
setting auto-completion option for 412
specifying Home page 409
tapping from other applications 401
USB port 8
USB sync cable 71
Use APOP check box 368
Use calling card check box 538
Use proxy server check box 417
Use Secure Connection option 280, 283
user profiles 11-16
user-specific information 11
User's Guide 594
usernames
assigning to handhelds 11
dial-up accounts and 254
email accounts and 270, 272
email addresses and 537
encrypting 368
finding in email addresses 277
hard resets and 564
network connections and 263
searching for 121
service profiles and 540
sharing 67
synchronizing and 67, 68, 274
upgrades and 7
validating 288
Users folder 109
V
vacations 140
validating usernames and passwords 288
VCF files 100,327
VCS files 100,327
VersaMail application
accessing email with 271
adding attachments 333, 334
addressing email 306
backing up mail databases 373
changing default folders 312
changing display options
changing email accounts 284, 359
creating mail folders 316-317
creating personal signatures 309
deleting accounts 285
deleting email 320, 321
disconnecting from network services 286, 287
displaying account information 347
downloading attachments 327, 328, 331
emptyingTrash folder 323,324
filtering messages with 354, 356, 358
forwarding messages 318
getting email 293, 294
icons for 299, 311, 348
installing 28
marking message status 325
moving messages 315, 316
opening 270, 275
related topics for 377
replying to email 319
secure connections and 376
sending email 301, 304, 307
setting mail formats for 301
settingmessagepreferences302,361 362,364,368,369
setting notification options 296, 310
setting preferences for 350, 351
setting up authentication servers 288
setting up email accounts 275-283, 342
switching email accounts 290
synchronizing email 336, 338, 340, 343
synchronizing information for 69
synchronizing with Outlook 67
troubleshooting 377
updating information in 67
upgrading -mail accounts for 270
upgrading email accounts for 275
version numbers 105, 106
videos
adding notes to 182
attaching to email 334
copying 192,438
deleting 191
finding 176
playing 176
reviewing 175
sharing 192
sorting 187
transferring to handheld 68, 70
viewing details of 182
View Bookmarks command 397
View By pick list 504
View Log command 72
viewer 404
views (Calendar) 156, 158, 159, 160
views (multimedia files) 175
virtual private networks 272, 273
virus-scanning software 568
volume
adjustingalarm498,525
adjustingmodem533
disabling speaker 525
Volume setting (connections) 533
VPN connection software 29
VPNs 272, 273
W
Wait For command 544
Wait For Prompt command 544
warnings 572, 598
warranty 570
web addresses 389, 412
See also URLs
Web browser application
saving web pages 404, 405
setting browser options 411
web browsers 411
web pages
accessing 389, 390, 391
bookmarking favorites 396, 407
caching 414
changingbookmarksfor396,398,399
clearing cache for 415
displaying 405
downloading 403
finding information on 392
hiding address fields for 390
loading from email 320
loading last viewed 410
moving 395
moving through 393
opening 407, 411
removing from History list 407
renaming saved 404
returning to recently visited 393
saving 404, 414
setting autofill option for 412
setting display options for 394
specifying as Home 408
storing 414
viewing off-line 403, 404
viewing recently visited 407
viewing URLs for 392
Web Pro application
accessing web pages 389, 390
action bar icons for 393
as viewer 404
displaying bookmarked pages 397, 398
displaying saved pages 405
opening 401
setting browser options 411, 412, 413, 414, 416, 418
setting storage preferences 414, 416
setting up proxy servers 417
troubleshooting 419
web services 530
websites
accessing 247, 255, 388
accessing palmOne 29
as additional resources 17
browsing 25, 255, 389, 407
navigating 393, 396
palmOne technical support 17
related topics for 419
saving personal information for 413
setting browsing options for 411, 412, 413, 418
WebSphere Micro Environment software 29
week days 517
Week View 158, 161, 165
Week View icon 158
weekly events 137
weekly schedules 158, 161
weekly tasks 219, 221
Windows information
accessing email 271
creating contacts 130
creating login scripts 543
creating notes 244
creating user profiles 12
displaying photos 193
displaying tasks 228
displaying videos 174, 193
entering expense reports 450
entering information 97
handheld system requirements 2
importing 100
installing applications 94
installing handheld software 7, 27, 103
opening calendars 167
playing music 213
restoring information 565
sync cable connections 74
synchronization options for 10,85,89, 576
synchronizinghandheld68,73,77
synchronizing with user profiles 14
transferring music files 196, 201
troubleshooting problems 568
uninstalling Palm One software 109
writing memos 235
Windows Media Player 28
wireless carriers 247, 271
wireless connections 246, 247, 379
wireless email accounts 271
wireless features 255
wireless service providers 536
wireless synchronization 68, 247, 257, 374
Word documents
attaching to email 332
creating 269
displaying 170
downloading 329
managing files for 28, 169
opening 171, 327
transferring to handheld 66, 70
word searches 40
word selection 61
WorldClock
benefits of 489
changing display for 499
icon 26
selecting primary location for 512
setting alarms for 497
setting alarms with 148, 497
WorldClockicon490
World Wide Web. See web pages; websites
writing area
entering accented characters in 51
entering commands in 52
entering special characters in 53, 54
for Graffiti 2 characters 19, 43, 518
icons 22
writing Graffiti 2 ShortCuts in 55
Writing Area Preferences screen 518
writing in your own handwriting 237
writing tool 561
writing with Graffiti 243,55,519
X
XLS files 170
Y
Year View 160
year,selecting491,514
yearly events 137
yearly tasks 219, 221
Z
ZIP files 328, 580
- Copyright and Trademark
- Disclaimer and Limitation of Liability
- Software Download Available
- Table of Contents
- About This Guide xix
- Chapter 1: Setting Up Your Handheld and Your Computer
- Chapter 2: Your Handheld. 18
- Chapter 3: Moving Around in Applications 31
- Chapter 4: Entering Information on Your Handheld 42
- Chapter 5: Moving Info Between Your Handheld and Your Computer 65
- Chapter 6: Managing Your Contacts 112
- Chapter 7: Managing Your Calendar 132
- Chapter 16: Sending and Receiving Text Messages. 378
- Chapter 17: Browsing the Web 388
- Chapter 18: Dialing Phone Numbers from
- Chapter 19: Sharing Information 428
- Chapter 20: Managing Your Expenses 440
- Chapter 21: Performing Calculations 452
- Chapter 22: Keeping Your Information Private 457
- Chapter 23: Using Categories to Organize Information ...480
- Chapter 24: Managing Clock Settings 489
- Chapter 26: Expanding Your Handheld. 550
- Chapter 27: Maintaining Your Handheld 561
- Chapter 28: Common Questions 568
- Chapter 29: Getting Help 594
- Product Regulatory Information 596
- About This Guide
- Tips for viewing this guide
- What's in this guide?
- Step-by-step instructions
- Links
- Sidebars
- [!] Before You Begin
- \*Tip
- Did You Know?
- Key Term
- Tips & Tricks
- Support
- Setting Up Your Handheld and Your Computer
- Benefits
- CHAPTER 1
- What's in the box?
- System requirements
- WINDOWS ONLY
- MAC ONLY
- Tip
- Step 1: Charging your handheld
- What you should know about your handheld's battery
- Step 2: Turning on your handheld for the first time
- + Did You Know?
- Step 3: Installing your software
- Step 4: Connecting your handheld to your computer
- 2
- 3
- Switching to another desktop software application
- Using user profiles
- Creating a user profile
- 1
- 4
- Synchronizing with a user profile
- #
- Related topics
- Moving Info
- Customizing
- Common Questions
- CHAPTER 2
- Your Handheld
- Screen
- Input area
- 5-way navigator
- Quick buttons
- IR port
- Expansion card slot
- Power button
- Headphone jack
- Stylus
- Back
- Speaker
- Reset button
- Multi-connector
- Bluetooth® radio (internal)
- What's on the screen?
- Clock icon
- Brightness icon
- Home icon
- Menu icon
- Star icon
- Find icon
- Letter keyboard icon
- Number keyboard icon
- Previous/next arrows
- Scroll bar
- Command button
- Tips icon
- Entry box
- Pick list
- Box
- What software is on my handheld?
- Favorites
- Calendar
- Contacts
- Media
- RealPlayer®
- Bluetooth®
- Web
- Tasks
- Memos
- Note Pad
- Calculator
- What's on the CD?
- Palm® Desktop software
- Quick Install (Windows only)
- Send To Handheld droplet (Mac only)
- Documents To Go
- VersaMail®
- SMS
- AudiblePlayer
- RealPlayer® desktop application
- Windows Media Player/ Direct X
- Setup
- Entering Information
- Moving Around
- Sharing
- WorldClock
- Maintaining
- Moving Around in Applications
- CHAPTER 3
- Opening applications
- Using Favorites
- Using Applications
- Switching between applications
- Using the 5-way navigator
- Moving around with the 5-way
- Moving around in Favorites View
- Moving around in Applications View
- Moving around in list screens and entry screens
- Moving around in dialog boxes
- Moving around in menus
- Using menus
- Using the Command stroke
- Using the Command toolbar
- Finding information
- Privacy
- Categories
- Synchronizing
- Entering Information on Your Handheld
- CHAPTER 4
- How can I enter information on my handheld?
- Entering information with Graffiti® 2 writing
- Writing in the Graffiti 2 input area
- Using full-screen writing
- Writing Graffiti 2 characters
- Customize your handheld
- 5
- Done
- Keys to success with Graffiti 2 writing
- Graffiti 2 numbers
- Graffiti 2 punctuation marks
- Graffiti 2 accented characters
- Graffiti 2 gestures
- Writing Graffiti 2 symbols and other special characters
- Graffiti 2 symbols and special characters
- Writing Graffiti 2 ShortCuts
- Graffiti 2 ShortCuts
- * Tip
- Entering information with the onscreen keyboard
- Entering info from Contacts into another application
- Cont'd.
- Editing information
- Selecting information
- Copying and pasting information
- Deleting information
- Common
- Questions
- Moving Info Between Your Handheld and Your Computer
- CHAPTER 5
- Why synchronize information?
- What information is synchronized?
- NOTE
- How to synchronize
- When would I use each method?
- Synchronizing with your computer
- Synchronizing with a cable
- Synchronizing using the IR port
- Synchronizing over a network
- Synchronizing by dialing in to a network
- a. Open the menus.
- Conduit Setup
- Synchronizing by connecting to a computer on the network
- Customizing your synchronization settings
- Choosing how your computer responds to synch requests WINDOWS ONLY
- Setting synchronization options
- Conduit The
- Windows For
- Choosing whether application information is updated
- Continued
- Choose how information is updated during the next synchronization:
- Using Quick Install and the Send To Handheld droplet
- Using Quick Install
- Using the Send To Handheld droplet
- Entering information with your computer
- Importing information from other applications
- Installing the additional software from the CD
- Checking space and version numbers
- Removing applications
- Removing an application from your handheld
- Removing Palm Desktop software from your computer WINDOWS ONLY
- Restoring archived items on your computer
- Connecting
- Managing Your Contacts
- Benefits of Contacts
- CHAPTER 6
- Adding a contact
- &]OPTIONAL Add a
- Entering additional contact information
- Selecting contact field types
- Defining custom fields
- Rename Custom Fields
- Selecting a contact as your business card
- Copying contact information into multiple contacts
- Locating a contact on your list
- Search for the contact:
- Deleting a contact
- Customizing the Contacts list
- Making connections from Contacts
- Using Quick Connect
- Customizing Quick Connect settings
- Using Tap-to-Connect
- Working with Contacts on your computer
- Moving. Around
- VersaMail
- Managing Your Calendar
- Benefits of Calendar
- CHAPTER 7
- Scheduling events
- Scheduling an appointment
- Scheduling an event without a start time
- Scheduling a repeating event—standard interval
- Scheduling a repeating event—unusual interval
- Scheduling an event that is longer than a day
- Entering a location or a note for an event
- Scheduling an event with a time zone
- Color-coding your schedule
- Managing your color-codes
- Assigning a color code to an event
- Setting an alarm
- Set the alarm:
- Rescheduling an event
- Repeating Event
- Deleting events
- Deleting a specific event
- Delete Event
- 6
- Deleting all your old events
- Purge
- Checking your schedule
- Viewing your appointments and tasks together
- Viewing your daily schedule
- Viewing your weekly schedule
- Viewing your monthly schedule
- Viewing a yearly calendar
- Finding events that overlap
- Customizing your calendar
- Customizing display options for your calendar
- 7
- Setting alarm and time options
- Working with Calendar on your computer
- Managing Your Office Files
- CHAPTER 8
- Creating and managing Office files
- Opening files from within Documents
- Viewing Photos and Videos
- CHAPTER 9
- Supported file types
- Viewing media
- Viewing a photo or video in the Thumbnail View
- Viewing a photo or video in the List View
- Viewing a slide show
- Rotating a photo
- Viewing and editing photo or video details
- H
- Organizing photos and videos
- Organizing photos and videos in albums
- Create an album:
- Do one of the following:
- Select Done.
- Moving a photo or video within and between albums
- Sorting photos and videos
- Personalizing a photo
- Copying a photo or video
- Deleting a photo or video
- Sharing photos and videos
- Working with palmOne™ Media on your computer
- Listening to Music
- CHAPTER 10
- Transferring MP3 files to an expansion card
- Transferring music from a CD to your handheld
- Playing music on your handheld
- Managing playlists
- Creating a playlist
- Playing songs from a playlist
- Electric Angel
- Editing a playlist
- Deleting a playlist
- Viewing song info
- Song Details
- Working with RealPlayer on your computer
- Expansion Cards
- Installing
- CHAPTER 11
- Managing Your Tasks
- Benefits of Tasks
- Creating a task
- Scheduling a repeating task—standard interval
- Scheduling a repeating task—unusual interval
- Organizing your tasks
- In the Tasks list, select one of these options:
- Marking a task as complete
- Deleting tasks
- Deleting a specific task
- Deleting all your completed tasks
- Customizing your Tasks list
- Preferences
- Working with Tasks on your computer
- CHAPTER 12
- Writing Memos
- Benefits of Memos
- Creating a memo
- Viewing and editing a memo
- Moving memos in your memos list
- Deleting a memo
- Working with Memos on your computer
- Writing Notes in Note Pad
- Benefits of Note Pad
- CHAPTER 13
- Creating a note
- Choosing the pen and paper (background) colors
- Viewing and editing a note
- Deleting a note
- Working with Note Pad on your computer
- Making Bluetooth Wireless Connections
- Benefits of your handheld's Bluetooth wireless technology
- CHAPTER 14
- What can I do with the built-in Bluetooth® wireless technology?
- What types of connections can I make?
- What is device discovery?
- Entering basic Bluetooth settings
- Setting up a Bluetooth phone connection
- Network Service
- Network Service Setup
- 8
- 9
- Accessing email and the web with Bluetooth
- Bluetooth
- Done
- Setting up a connection for Bluetooth synchronization WINDOWS ONLY
- Setting up a connection to a Bluetooth network
- Bluetooth Security
- LAN Setup
- Creating trusted devices
- Setting advanced Bluetooth features
- Storing recently found device names
- Allowing your handheld to wake up when it is turned off
- Sending and Receiving Email Messages
- CHAPTER 15
- Upgrading an existing email account
- About email accounts
- Account and connection types
- Using an email provider
- Using a corporate email account
- VPNs
- Creating an account
- Setting basic account options
- Setting advanced mail options
- Set mail retrieval server options for a POP or IMAP account:
- Incoming Mail Options:
- Work Email
- a. Select any of the following:
- Set additional outgoing mail options:
- Testing your new account
- Managing email accounts
- Editing an email account
- Deleting an email account
- Account Setup
- Delete Account
- Selecting a different service for an email account
- Adding ESMTP to an account
- Add ESMTP:
- Getting and reading email
- Switching among email accounts
- Getting email messages
- Auto get mail with notification
- Scheduling auto get mail
- Auto get notifications
- Setting notification options
- Viewing and using the Reminders screen
- Auto get mail retries
- Resource issues with auto get mail
- Inbox icons in the VersaMail application
- Reading email messages
- Selecting whether to receive messages as HTML or plain text
- Customizing the font of messages you are reading
- Select Font
- Sending an email message
- Entering an address directly in the To field
- Entering an address using Contacts
- Entering an address using Smart Addressing
- Attaching a personal signature
- General Advanced System
- Signature
- V Attach Signature:
- Send retry
- Send retry notifications
- Outbox icons in the VersaMail application
- Working with email folders
- Viewing another folder
- Customizing the appearance of the message list
- Moving messages between folders
- Creating and editing mail folders
- Working with email messages
- Forwarding an email message
- Select the message to forward:
- Replying to an email message
- Working with URLs
- Deleting a message
- Deleting old messages
- Delete Old Messages
- Delete Confirmation
- Emptying the trash
- Setting the trash to be emptied automatically
- Marking messages as read or unread
- Select the message or messages to mark:
- Do one of the following to mark the message or messages:
- Mark Read
- Working with attachments
- Downloading an attachment to your handheld
- Working with a downloaded attachment
- Downloading large attachments
- Attaching files
- Open the Attachments screen:
- Attach the file:
- Attaching photos and videos
- Synchronizing email on your handheld with email on your computer
- Setting up an account on your handheld
- Enabling synchronization on your computer
- Setting synchronization options for your email account
- Setting mail client synchronization options
- Setting Microsoft Outlook as your default email program
- Setting advanced email synchronization options
- c. Enter the synchronization options you want:
- Account information screens
- VersaMail conduit shortcuts
- Excluding one or more accounts during synchronization
- Synchronizing an account
- Synchronizing multiple accounts
- Using SSL with the conduit
- Advanced VersaMail application features
- Setting preferences for getting, sending, and deleting email
- Select preferences:
- Adding or updating a contact directly from a message
- Creating and using filters
- Enter the filter information:
- Turning filters on and off
- Editing or deleting a filter
- Managing settings for incoming and outgoing mail
- Cont'd. c. Do any of the following:
- Adding APOP to an account
- Setting advanced account preferences
- Changing email header details
- Backing up mail databases
- Synchronizing IMAP mail folders wirelessly
- Prerequisites for wireless IMAP folder synchronization
- Turning IMAP folder synchronization on or off
- Synchronizing handheld/email server IMAP folders from the Options menu
- Working with root folders
- Using Secure Sockets Layer (SSL)
- Entering Info
- Sending and Receiving Text Messages
- CHAPTER 16
- Creating and sending a text message
- Receiving and viewing a text message
- Select the message to open and read it.
- Editing a draft text message
- Setting advanced messaging features
- Browsing the Web
- In this chapter
- Benefits of the web browser
- CHAPTER 17
- Accessing a web page
- Accessing a web page using the action bar
- Go to Favorites and select Web
- Go to the web page you want to view:
- Accessing a web page using the address field
- Using a password to access a web page
- Finding information on a web page
- Quickly jumping to a page
- Following a link
- Returning to your home page or a page you recently visited
- Changing how you view a page
- Select from one of the following views:
- Bookmarking your favorite pages
- Adding a bookmark
- Viewing a bookmarked or saved page
- Editing information about a bookmark or saved page
- Arranging the bookmark list
- Disconnecting from and connecting to the Internet
- Disconnecting from the Internet
- Connecting to the Internet
- Downloading files and pages
- Downloading a file
- Saving a web page
- Save the web page:
- Viewing a saved file
- Communicating with other users
- Sending email by means of an Internet email account
- Returning to a web page you recently visited
- Changing your home and start pages
- Changing your home page
- Changing your start page
- Setting advanced browser options
- Changing how images are downloaded
- Setting whether to automatically complete web addresses and form fields
- Allowing websites to remember personal information
- Setting preferences for storing web pages
- Setting preferences for using a proxy server
- Setting whether to accept JavaScript
- Dialing Phone Numbers from Your Handheld
- Benefits of Dialer
- CHAPTER 18
- Dialing a number
- Entering a number
- Redialing the most recently used number
- Dialing a number from the Call History List
- Using speed dial
- Adding a speed-dial entry
- Dialing a number using speed dial
- Editing a speed-dial entry
- Sharing Information
- Benefits of sharing
- CHAPTER 19
- Using the Send command
- Sending information from within an application using Bluetooth technology
- Sending a category using Bluetooth technology
- Sending an application using Bluetooth technology
- Using the Send command with the VersaMail® application
- Using the Send command with SMS
- Beaming
- Beaming information from within an application
- Beaming a category
- Beaming an application
- Other ways of sharing information
- Managing Your Expenses
- Benefits of Expense
- CHAPTER 20
- Adding an expense
- Choosing currency options
- Customizing the currency pick list
- Select Currencies
- Presetting the currency symbol
- Creating a currency symbol
- Custom Currencies
- Deleting expenses
- Deleting an individual expense
- Deleting an entire category of expenses
- Customizing the expense list
- Working with Expense on your computer
- CHAPTER 21
- Performing Calculations
- Benefits of Calculator
- Calculator buttons
- Viewing recent calculations
- Accessing different calculators
- Keeping Your Information Private
- Benefits of privacy
- CHAPTER 22
- Choosing a security level
- Marking information as private
- Open the Options menu,
- Setting the level of privacy
- Hiding or masking private entries
- Viewing an entry that is masked
- Using a password
- Creating a password
- Changing a password
- Deleting a password
- Deleting a forgotten password
- Incorrect Password
- Locking your handheld
- Locking your handheld automatically
- Locking your handheld manually
- Lock
- Using Quick Unlock
- Creating a Quick Unlock combination
- Create Quick Unlock
- Deleting your Quick Unlock combination
- Encrypting your information
- Security Options
- Encrypt Data
- Limiting the number of password attempts
- Managing Info
- Using Categories to Organize Information
- Benefits of categories
- CHAPTER 23
- Adding a category
- Do one of the following:
- Add a new category:
- Renaming a category
- Deleting a category
- Placing information in a category
- Placing an entry in a category
- Placing an application in a category
- Viewing information by category
- Managing Clock Settings
- Benefits of World Clock
- CHAPTER 24
- Primary location
- Checking the current date and time
- Setting the primary location
- Setting the date and time for the primary location
- Choosing secondary locations for other time zones
- Modifying the locations list
- Adding new locations
- Deleting a location
- Setting the alarm clock
- Responding to the alarm clock
- Changing the clock display
- Customizing Your Handheld
- Benefits of customizing
- CHAPTER 25
- Customizing Favorites View
- Changing the background photo in Favorites View
- Go to Favorites.
- Open the Display Options dialog box:
- Select a photo for the background:
- Adjust the fade setting so that the text is easy to read against the photo, and select OK.
- Changing entries in Favorites
- Go to Favorites.
- Customizing Applications View
- Go to Applications.
- Select the View By pick list and select List or Icon as the display format.
- If you want the last category you viewed to reappear the next time you visit the Applications screen, check the Remember Last Category box.
- Making the screen easier to read
- Adjusting the brightness
- Changing screen colors
- Color Theme
- Select a Color Theme:
- Assigning a button to your frequently used applications
- Setting the date and time
- Selecting a location
- Select the location:
- Resetting the date and time
- Date & Time
- Selecting formats for dates, times, and numbers
- Customizing the way you enter information
- Choosing the input area
- Using the full-screen writing area
- Customizing Graffiti 2 strokes
- Setting up ShortCuts
- Changing ShortCuts
- Correcting problems with tapping
- Selecting sound settings
- Entering your owner information
- Conserving battery power
- Preventing your handheld from turning on by accident
- Keylock
- Keylock Activation:
- Selecting power-saving settings
- Connecting your handheld to other devices
- Changing the preset connection settings
- Edit Connection
- Details
- Creating your own connection settings
- Enter the basic settings:
- Connecting your handheld to a mobile phone
- Customizing network settings
- Setting up a service profile
- Connecting to your service
- Open Network Preferences:
- Make the connection:
- End the connection when you've finished using it:
- Adding details to a service profile
- Deleting a service profile
- Creating login scripts
- Adding plug-in applications
- Setting up a VPN
- Expanding Your Handheld
- Benefits of expansion cards
- CHAPTER 26
- What type of expansion cards can I use?
- How can expansion cards help me?
- Removing an expansion card
- Inserting an expansion card
- Opening an application on an expansion card
- Insert the expansion card.
- Opening files on an expansion card
- Viewing card information
- Go to Applications and select Card Info
- Renaming a card
- Rename Card
- Copying applications to an expansion card
- Removing all information from a card
- Format Card
- Maintaining Your Handheld
- Handheld do's and don'ts
- Handheld do's
- CHAPTER 27
- Handheld don'ts
- Resetting your handheld
- Doing a soft reset
- Doing a hard reset
- Restoring your information after a hard reset
- CHAPTER 28
- Nothing happens when I insert the CD. WINDOWS ONLY
- I cannot install Palm® Desktop software. WINDOWS ONLY
- Handheld
- I want to see how much battery life I have left.
- I'm not sure when I need to recharge my handheld.
- My battery is drained.
- My battery drains too quickly.
- When I connect my handheld to the AC charger, it does not charge.
- My handheld is not responding.
- I don't see anything on my handheld's screen.
- I get a warning message telling me my handheld memory is full.
- My handheld keeps turning itself off.
- My handheld is not making any sounds.
- The current date and time are incorrect.
- I can't find the icon I want in Applications View.
- My handheld doesn't respond to taps correctly.
- When I tap the Menu icon in the input area nothing happens.
- I can't get my handheld to recognize my handwriting.
- The info I entered does not appear in an application.
- I don't know how to save the info I entered in an application.
- I can't synchronize my handheld with my computer.
- When I synchronize, nothing happens on Palm® Desktop software, and my handheld times out.
- I want to change from synchronizing my handheld with Palm Desktop software to synchronizing with Outlook.
- I can't synchronize my handheld with Microsoft Outlook. WINDOWS ONLY
- I can't synchronize wirelessly using my handheld's Bluetooth® technology.
- Some of my applications do not synchronize.
- I can't open the HotSync® Manager.
- When I synchronize, I receive the 8009 error message: An application has failed to respond to a HotSync notification.
- My files didn't install during synchronization.
- I can't add more files to the palmOne™ Quick Install list.
- I selected the Today button, but it does not show the correct date.
- I created an event, but it doesn't appear in Week View.
- Time zones don't appear in my Palm Desktop software.
- I set the global time zone preference, but only some of my events are responding to my time zone change.
- I created my event with a time zone, but only that event is responding to my time zone change.
- Memo No.
- I'm having problems listing memos the way I want to see them.
- I'm having problems listing notes the way I want to see them.
- I can't find the Media icon in Applications.
- I would like better-quality sound during playback.
- When I save songs from a CD, I do not see the song title or artist name.
- Connecting wirelessly
- My passkey is rejected when I attempt to form a trusted pair with my mobile phone.
- My handheld cannot connect to my mobile phone.
- My phone connection drops before I finish using it.
- I get an error message when I try to dial a phone number using my handheld.
- The VersaMail® application
- I am having problems accessing my account.
- I am having problems sending and receiving email.
- My auto get mail is not working.
- I can receive email fine, but am having problems sending email.
- I can't download any messages.
- I am unable to synchronize messages.
- My vCard or vCal email attachment isn't forwarding correctly. WINDOWS ONLY
- I've made records private, but I can't remember my password to display them.
- I forgot the password, and my handheld is locked.
- I can't beam information to another handheld or other device.
- When someone beams information to my handheld, it doesn't receive the info.
- When someone beams information to my handheld, I get a message telling me it is out of memory.
- I cannot send information to another Bluetooth device.
- Other Bluetooth devices cannot find my handheld.
- Problems with incompatible applications
- Finding a third-party application that is causing a problem
- CHAPTER 29
- Getting Help
- Self-help resources
- Technical support
- Product Regulatory Information
- FCC Statement
- Exposure to radio frequency energy (SAR)
- Industry Canada
- Canadian Wireless Regulatory Notice
- C
- CE Declaration of Conformity
- Authorized palmOne Representative:
- Battery Warning
- Varning
- Intrinsic Safety Warning
- Warning - Explosion Hazard
- Wireless Notices—Usage Cautions
- Static Electricity, ESD, and Your palmOne™ Handheld
- Description of ESD
- ESD-susceptible equipment
- Precautions against ESD
- Conditions that enhance ESD occurrences
- INDEX
- SYMBOLS
- NUMERICS
- A
- albums
- * 412
- B
- D
- E
- G
- N
- 0
- Outlook
- requirements for 109
- P
- s
- T
- U
- V
- W
- X
- Y
- Z
Brand : PALM
Model : ONE
Category : Mobile Phone