
Treo 755p - Mobile Phone PALM - Free user manual and instructions
Find the device manual for free Treo 755p PALM in PDF.


| Product Type | Smartphone |
| Brand | Palm |
| Model | Treo 755p |
| Dimensions | 113 x 58 x 21 mm |
| Weight | 155 g |
| Operating System | Palm OS |
| Processor | Intel XScale 312 MHz |
| Display | 2.5-inch TFT touchscreen, 320x320 pixels |
| Keyboard | QWERTY physical keyboard |
| Camera | 1.3 MP with LED flash |
| Memory | 64 MB RAM, 128 MB ROM |
| Expandable Storage | microSD slot up to 2 GB |
| Battery | Removable Li-Ion 1200 mAh |
| Talk Time | Up to 4.5 hours |
| Standby Time | Up to 250 hours |
| Connectivity | GSM/GPRS, Bluetooth 1.2, IrDA |
| Main Functions | Phone, email, web browsing, organizer, multimedia |
| Repairability | Modular design; replaceable battery, antenna |
| Maintenance | Clean with soft, dry cloth; avoid moisture |
| Safety | Turn off near medical devices; use only approved accessories |
Frequently Asked Questions - Treo 755p PALM
User questions about Treo 755p PALM
0 question about this device. Answer the ones you know or ask your own.
Ask a new question about this device
Download the instructions for your Mobile Phone in PDF format for free! Find your manual Treo 755p - PALM and take your electronic device back in hand. On this page are published all the documents necessary for the use of your device. Treo 755p by PALM.
USER MANUAL Treo 755p PALM
natural_image
Abstract yellow graphic with flowing curved lines and the letters 'TM' below (no text or symbols in the graphic itself)Sprint® Service
Sprint Power Vision SM Smart Device Treo TM 755 by Palm
www.sprint.com
© Sprint Nextel. All rights reserved. No reproduction in whole or in part without prior written approval. SPRINT and other trademarks are trademarks of Sprint Nextel.
PN: 406-11072-00
v. 1.0
Intellectual Property Notices
© 2005–2007 Palm, Inc. All rights reserved. Blazer, HotSync, Palm, Palm Desktop, Palm OS, Treo, VersaMail, and the Palm and Treo logos are among the trademarks or registered trademarks owned by or licensed to Palm, Inc. Documents To Go is a trademark or registered trademark of DataViz, Inc. © 2001-2007 Good, Good Technology, the Good logo, Good Mobile Messaging, GoodLink, and Powered by Good are trademarks of Good Technology, Inc. Microsoft, Word, Excel, PowerPoint, Outlook and ActiveSync are either registered trademarks or trademarks of Microsoft Corporation in the United States and/or other countries. All other brand and product names are or may be trademarks of, and are used to identify products or services of, their respective owners.
This product is protected by one or more of the following United States patents:
6,976,226; 6,975,304; 6,965,375; 6,961,567; 6,961,029; 6,957,397; 6,952,571; 6,950,988; 6,947,975; 6,947,017; 6,943,667; 6,940,490; 6,924,752; 6,907,233; 6,906,701; 6,906,741; 6,901,276; 6,850,780; 6,845,408; 6,842,628; 6,842,335; 6,831,662; 6,819,552; 6,804,699; 6,795,710; 6,788,285; 6,781,824; 6,781,575; 6,766,490; 6,745,047; 6,744,451; 6,738,852; 6,732,105; 6,724,720; 6,721,892; 6,712,638; 6,708,280; 6,697,639; 6,687,839; 6,685,328; 6,665,803; 6,618,044; 6,590,588; 6,539,476; 6,532,148; 6,523,124; 6,519,141; 6,516,202; 6,490,155; 6,480,146; 6,457,134; 6,456,247; 6,442,637; 6,441,824; 6,437,543; 6,429,625; 6,425,087; 6,389,572; 6,388,877; 6,381,650; 6,363,082; 6,344,848; 6,317,085; 6,241,537; 6,222,857; 6,185,423; 6,147,314; 6,115,248; 6,064,342; D421,251; D429,252; D466,128; D478,091. Patent pending.
This product also is licensed under United States patent 6,058,304.
This product is protected by certain intellectual property rights of Microsoft Corporation. Use or distribution of such technology outside this product is prohibited without a license from Microsoft or an authorized Microsoft subsidiary.
All rights reserved.
This product contains ACCESS Co., Ltd.'s NetFront 3.0 Internet browser software. © 1996-2007 ACCESS Co., Ltd. and ACCESS Systems America, Inc. NetFront is the trademark or registered trademark of ACCESS Co., Ltd. in Japan and in other countries except the United States of America. NetFront is a registered trademark of NetFront Communications, Inc. in the United States of America and is used under a license. A portion of this software includes software modules developed by the Independent JPEG group.
Disclaimer and Limitation of Liability
Palm, Inc. and its suppliers assume no responsibility for any damage or loss resulting from the use of this guide. Palm, Inc. and its suppliers assume no responsibility for any loss or claims by third parties that may arise through the use of this software. Palm, Inc. and its suppliers assume no responsibility for any damage or loss caused by deletion of data as a result of malfunction, dead battery, or repairs. Be sure to make backup copies of all important data on other media to protect against data loss.
Table of Contents
Welcome to Sprint 1
How to Use This Guide .... 2
Section 1: Setting Up Your Smart Device and Your Computer .... 5
1A. Setting Up Your Treo™ 755P Smart Device by Palm 7
What You Need 8
Your New Treo 755 P Smart Device by Palm 10
Inserting the Battery 15
Charging the Battery 16
1B. Setting Up Service 21
Making Your First Call 22
Setting Up Your Voicemail 25
Creating Sprint Account Passwords 26
1C. Connecting to Your Computer 27
Why Connect My Device to My Computer? 28
Upgrading From Another Palm OS ® Device 29
Installing the Desktop Synchronization Software 32
Connecting Your Treo Device to Your Computer 34
Synchronizing Information—The Basics 35
Section 2: Your Treo™ 755P Smart Device by Palm.... 39
2A. Moving Around on Your Smart Device 41
Moving Around the Device Screen 42
Using the Keyboard 46
Opening Applications 51
2B. Using Your Device's Phone Features ....53
Turning Your Device On and Off 54
Opening the Phone Application 56
Making Calls 57
Receiving Calls 61
Using Voicemail 63
What Can I Do When I'm On a Call? 65
Using Sprint Voice Command 73
Defining Favorite Buttons 74
Using a Phone Headset 78
Customizing Phone Settings 84
Controlling Your Roaming Experience 93
Checking Signal Strength and Phone Status 95
Section 3: Using Sprint Vision and Other Wireless Connections.... 99
3A. Sprint Vision—The Basics .....101
Getting Started With Sprint Vision 102
Sprint Vision Features ....103
Accessing Sprint Vision 104
3B. Sprint Power Vision ....105
Getting to Know Sprint Power Vision 106
Personalizing Your Service With On Demand 107
Using Your Device's Phone as a Modem 110
3C. Using Email 113
What Email Applications Can I Use on My Smart Device? 114
The VersaMail Application ....115
Using Good Mobile Messaging ....131
3D. Messaging ....133
Creating and Sending Messages 134
Receiving Messages ....139
Using Messaging to Chat 141
Managing Your Messages 142
Customizing Your Messaging Settings 143
Using Online Services 145
3E. Browsing the Web .....147
Viewing a Web Page 148
Working With Web Pages 151
Working With Bookmarks and Saved Pages 155
Customizing Your Web Browser Settings 157
3F. Using Bluetooth® Wireless Technology and Dial-Up Networking .....159
Connecting to Devices With Bluetooth Wireless Technology 160
Using Your Device as a Wireless Modem 164
Section 4: Your Portable Media Device 169
4A. Working With Your Pictures and Videos .....171
Taking Pictures and Videos 172
Customizing Your Camera Settings 176
Viewing Pictures and Videos 177
Organizing Pictures and Videos 179
Using Your Online Album 183
Viewing Pictures and Videos on Your Computer 184
4B. Listening to Music ....185
Setting Up Windows Media Player for MP3 186
Transferring MP3 Files From Your Computer 188
Transferring Music From a CD to Your Device 190
Listening to Music on Your Treo Device 191
4C. Watching Sprint TV ....195
Accessing Streamed Media 196
Viewing Streamed Media 197
Section 5: Your Mobile Organizer.... 199
5A. Using Your Device's Organizer Features ....201
Contacts 202
Calendar 206
Tasks 215
Memos 219
5B. Increasing Your Productivity ....221
Using the Documents Application to Work With Your Office Files 222
Voice Memo 224
World Clock....226
Calculator 228
Section 6: Managing Your Information and Settings 231
6A. Managing Files and Applications .....233
Using Find 234
Installing Applications 235
Removing Applications ....238
Viewing Application Information 240
Sending Information Using Bluetooth® Wireless Technology 241
Beaming Information 243
Synchronizing Information—Advanced 246
Using Expansion Cards ....253
6B. Customizing Your Device ....259
Setting System Sounds 260
Adjusting the Display and Appearance 262
Changing the Applications Settings....265
Customizing Device Buttons 267
Setting the Date and Time 269
Optimizing Power Settings 271
Locking Your Device and Information 272
Using Connection Settings 280
Purchasing Accessories for Your Device 281
Section 7: Resources 283
7A. Help....285
Trouble Upgrading? 286
Resetting Your Treo Device 288
Replacing the Battery 291
Troubleshooting 292
Making Room on Your Treo Device 313
Third-Party Applications 314
Errors 316
Where to Learn More 317
7B. Glossary ....321
Section 8: Safety and Specifications .... 325
8A. Important Safety Information ....327
General Precautions 328
Maintaining Safe Use of and Access to Your Device 329
Using Your Phone With a Hearing Aid Device 332
Caring for the Battery 335
Radiofrequency (RF) Energy 337
Static Electricity, ESD, and Your Device 339
Owner's Record 341
User's Guide Proprietary Notice 342
8B. Specifications ....343
Specifications 344
Index 347
Welcome to Sprint
The Power to Do More.
Sprint and Nextel have come together offering you more choice and flexibility to do whatever you want, whenever you want.
This powerful combination brings you access to more products, more services, and more of what you need to do more of what you want. With Sprint, the power is back in your hands. Sprint. Power Up.
Welcome and thank you for choosing Sprint.
We know you're eager to start using your device right away, and the sections of this guide are designed to help you do just that.
Section 1: Setting Up Your Smart Device and Your Computer guides you through the process of setting up your new Sprint Power Vision SM Smart Device Treo TM 755 P by Palm, your Sprint Service, and your computer.
Section 2: Your Treo™ 755p Smart Device by Palm shows you the basics of your device and service with quick, easy-to-follow instructions. This section also describes the features of your device's phone and shows you how to use Sprint service features such as voicemail, call waiting, and call forwarding.
Section 3: Using Sprint Vision and Other Wireless Connections shows you how to use Sprint Vision features, including Web browsing, messaging, and email. It also describes other types of wireless connections such as Bluetooth® wireless technology.
Section 4: Your Portable Media Device shows you how to use your device's camera (camera version only)—including how to use the Sprint Picture Mail application—and how to transfer and listen to music files on your device.
Section 5: Your Mobile Organizer guides you through the process of using the built-in, full-featured, Palm OS® organizer that gives you instant access to your Contacts, Calendar, Tasks, Memos, Calculator, and more.
Section 6: Managing Your Information and Settings describes the tools for managing files and applications and the preferences that enable you to customize your device.
Section 7: Resources answers frequently asked questions and shows you what to do if something goes wrong. It also includes a helpful glossary of terms.
Section 8: Safety and Specifications outlines recommended safety and maintenance guidelines and displays the technical specifications for your Treo device.
WARNING:
Please refer to “Important Safety Information” on page 327 to learn about information that helps you safely use your phone. Failure to read and follow the Important Safety Information in this phone guide may result in serious bodily injury, death, or property damage.
Setting Up Your Smart Device and Your Computer
Sprint

Setting Up Your Treo™ 755P Smart Device by Palm
In This Section
What You Need
Your New Treo 755 P Smart Device by Palm
- Inserting the Battery
- Charging the Battery
What You Need
Your Treo™ 755 P smart device by Palm box contains the following:
Hardware
- Treo device.
- Rechargeable battery.
- AC charger.
•USB sync cable. - Stereo headset.
- Sprint charger adapter.
Documentation
- Read This First setup poster.
- Welcome to Sprint brochure.
• Getting Started Guide. - Setting Up Email booklet.
• Experience Sprint Power Vision guide. - Terms & Conditions.
Warranty. - Software License Agreement.
8 Section 1A: Device Setup
Software
- Palm Software Installation CD (includes desktop synchronization software and links to bonus software for your device).
You'll also need the following items to complete the installation and activation:
●An activated Sprint service plan.
●A location with wireless coverage for your device.
• An electrical outlet.
The computer with which you want to synchronize your personal information.
Your New Treo 755 P Smart Device by Palm
Your Device's Features: Front View

- Indicator Light provides status information for your device based on the color of the light and the blink state. The indicator is visible only when the light is on.
- Earpiece serves as the speaker on your device when you are not using the speakerphone feature or a headset.
10 Section 1A: Device Setup
- 5-way Navigator gives you one-handed access to moving around the device screen and selecting options. See “Moving Around the Device Screen” on page 42 for instructions.
- Power/End turns the device's phone on and off, wakes up and turns off the screen, and hangs up calls.
- Applications opens Applications view.
- Menu opens the application menus.
- Messaging opens the Messaging application.
- Option activates the secondary function of a key or button. See "Using the Keyboard" on page 46 for details.
- Calendar opens the Calendar application.
- Phone opens the Phone application.
- Talk dials when a phone number is selected or entered, and answers an incoming phone call.
- Side Button records voice memos by default, and performs context-sensitive actions when an application is open, such as playing or pausing MP3 files in the Pocket Tunes™ application. You can also reassign this button to open your favorite application.
- Volume Button adjusts the earpiece, speaker, and ringer volume levels.
Your Device's Features: Back View
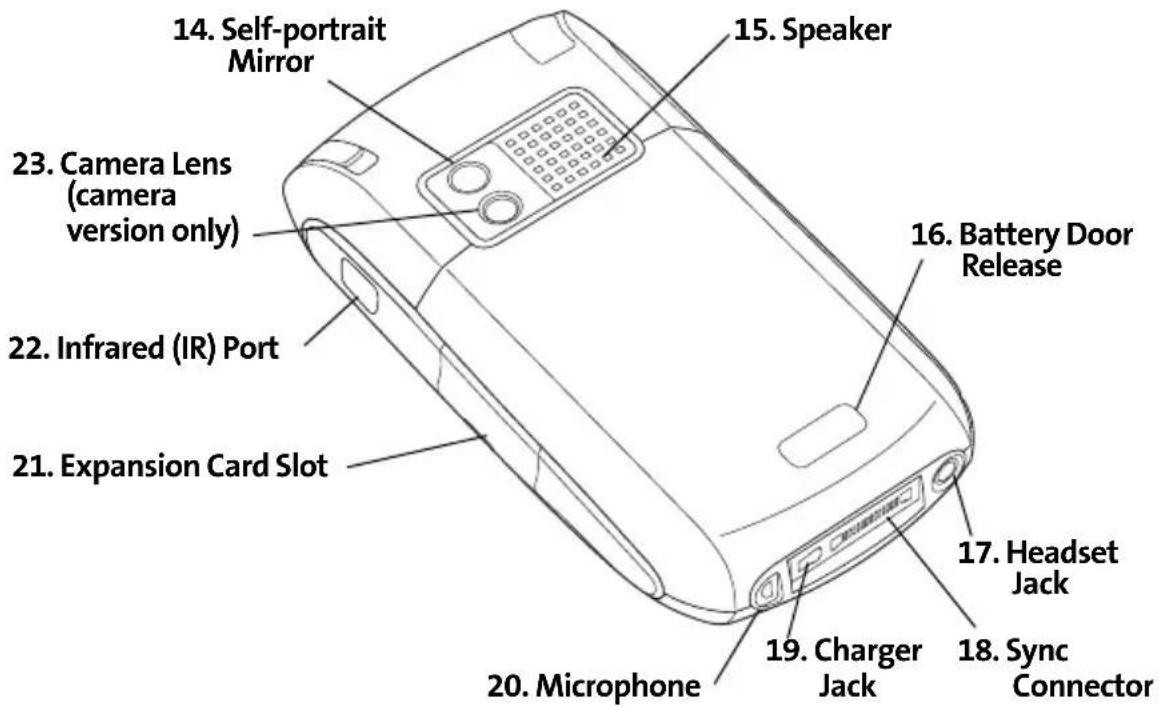
- Self-portrait Mirror enables you to take a picture of yourself (if your device includes a camera).
- Speaker plays ringtones and alarms, and serves as the speaker for the speakerphone feature.
- Battery Door Release opens the battery compartment.
- Headset Jack enables you to connect a hands-free headset. Use only headsets that are compatible with your device.
- Sync Connector enables you to attach the USB sync cable to your device.
- Charger Jack enables you to attach the AC charger to your device.
- Microphone serves as the mouthpiece on your device's phone.
12 Section 1A: Device Setup
- Expansion Card Slot allows you to expand the capabilities of your device using a miniSD card. See “Using Expansion Cards” on page 253.
- Infrared (IR) Port uses infrared technology to transmit information to and receive information from other infrared-enabled devices that use compatible software.
- Camera Lens enables you to take pictures using the built-in camera (if included). There are two models of the Treo 755p smart device by Palm: One comes with a camera and the other does not. The packaging for your device identifies whether a camera is included.
| Note: | Your device’s speaker includes a large magnet, so be sure to keep your device away from credit cards or other items that could become demagnetized. |
Your Device's Features: Top View
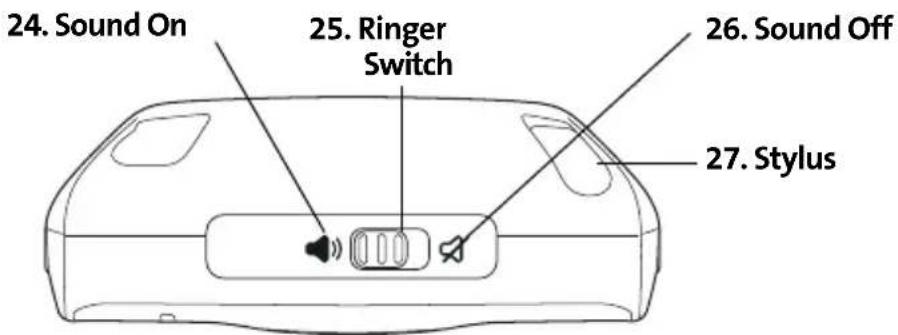
- Sound On turns on the ringer and all other sounds, including alarms and music, when the Ringer switch is set to this position.
- Ringer Switch controls the ringer setting. See "Setting System Sounds" on page 260 for details on changing the settings.
- Sound Off silences the ringer and turns off all other sounds, including alarms and music, when the Ringer switch is set to this position.
- Stylus allows you to tap options on your device's screen. To use the stylus, slide it out of the slot and hold it as you would a pen or pencil.
14 Section 1A: Device Setup
Inserting the Battery
| WARNING: | Use only Sprint-approved or manufacturer-approved batteries and chargers with your device. The failure to use a Sprint-approved or manufacturer-approved battery and charger may increase the risk of your device overheating, catching fire, or exploding, which may result in serious bodily injury, death, or property damage. |
- Use one hand to press the Battery Door Release, and use your other hand to slide the battery door downward to remove it from your device.


- Align the battery contacts with the battery compartment contacts.
- Insert the battery into the compartment at a 45-degree angle, and then press it into place.
- Slide the battery door onto the back of the device until it clicks into place.
- Follow the onscreen instructions to set up your device.
| Tip: | Buy an extra battery as a spare for long trips or heavy data use. Visit www.palm.com/mypalm/755psprint to purchase batteries that are approved by Sprint and that are compatible with your device. |
Section 1A: Device Setup 15
Charging the Battery
The battery comes with a sufficient charge to complete the setup process and activate your phone. After activation, we recommend charging your device for three and a half hours to give it a full charge. See “Maximizing Battery Life” on page 19 for tips on maximizing the life of your device’s battery.
- Plug the AC charger into a wall outlet.
- Connect the charger cable to the charger jack on the bottom of the device. Make sure the arrow on the connector is facing up, toward your device's screen.
- To confirm that your device is charging, check the indicator light.
Red indicates that your device is charging.
Green indicates that your device is fully charged.
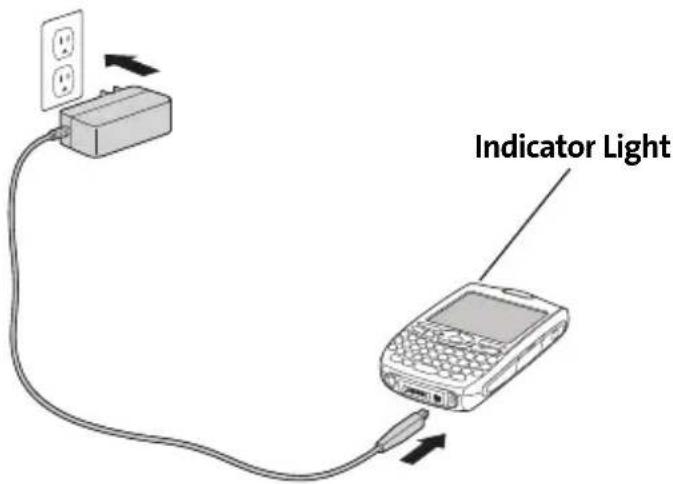
If the battery is fully drained, it may take a few moments for the indicator light to turn on while the battery is charging.
16 Section 1A: Device Setup
| Tip: | You can also charge your device by connecting it to your computer with the sync cable. You can do this with or without using the charger cable (see “Connecting Your Treo Device to Your Computer” on page 34). Keep in mind that it takes longer to charge the battery using the sync cable, and if your laptop isn’t plugged into a power source, it can drain the laptop’s battery. |
The onscreen battery icon displays the power status:
Full battery ☐: Battery is not connected to a wall outlet and is fully charged.
- Partial battery ⚙: Battery is not connected to a wall outlet and has some power but is not fully charged.
- Almost-empty battery with red at the bottom ⚙: Battery needs to be charged immediately.
| Note: | Your device’s indicator light blinks red when the battery needs to be charged. |
- Red lightning bolt: Battery is connected to a wall outlet and is charging.
- Green lightning bolt 2: Battery is connected to a wall outlet and is fully charged.
| Tip: | To see exactly how much power is left in your battery, tap the onscreen battery icon. |
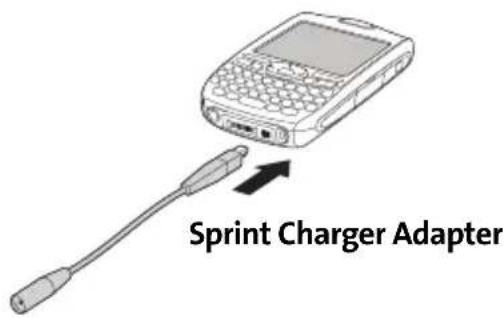
Using a Sprint Charger Adapter
If the connector on your Sprint-approved 1 Amp AC charger or vehicle charger doesn't fit into the connector on the bottom of your device, use the included Sprint charger adapter.
WARNING:
Use only with 1 Amp AC chargers distributed by Sprint for your device. Using any unapproved AC charger may destroy the AC charger and cause a fire.
- Plug the AC charger into a power source.
- Connect the Sprint charger adapter to the charger jack on bottom of the device.
- Connect the charger cable to the Sprint charger adapter.
- Charge your device as described earlier.
Battery Life
Battery life depends on individual use. Consumption factors include signal strength, speakerphone use, and use of wireless features.
If the battery drains to the point where your device doesn't turn on, the device stores your information safely until you recharge the battery. To avoid draining the battery, we recommend that you charge and synchronize your device every day, especially if you use the wireless features of your phone often.
Note:
Using your device's phone has an effect on the battery life. You can extend the battery life by turning off your device's phone while using the organizer features. In any case, regular charging is recommended for optimal performance.
18 Section 1A: Device Setup
Maximizing Battery Life
You can increase the life of your device's battery by following a few easy guidelines. Remember that battery life depends on how you use your device.
- Charge your device whenever you're at your desk, or charge it overnight each day. The Lithium-ion (Li-ion) battery has a much longer useful life when it is topped off frequently, versus charging it after it is fully drained.
- Your device's wireless features (phone, email, messaging, Web, and any applications that use a Sprint Power Vision connection, such as Sprint TV) and media features (camera, media players, eBooks, and games) consume more power than its organizer features. If you spend a lot of time using the wireless and media features, keep an eye on the battery icon and charge when necessary.
- If you don’t plan to use the wireless features on your device for awhile, turn off your phone (see “Turning Your Device’s Phone On and Off” on page 55). You can forward calls to a different number or let all calls be picked up by voicemail (see “Call Forwarding” on page 71).
- As with any mobile phone, if you are in an area with no wireless coverage, your device searches for a signal, which consumes power. If you cannot move to an area of better coverage, you may want to temporarily turn off your phone. While your phone is off, you can continue to use your device's nonwireless features.
- Turn down the screen brightness (see "Adjusting the Brightness" on page 262).
- Decrease the settings in Power Preferences and turn off Beam Receive (see “Optimizing Power Settings” on page 271).
- Turn off the Bluetooth feature if you are not using it (see “Connecting to a Bluetooth Hands-Free Device” on page 79).
Tip:
You can buy an extra battery as a spare for long airplane trips or periods of heavy use. To purchase batteries that are compatible with your smart device, go to www.palm.com/mypalm/755psprint.
Setting Up Service
In This Section
Making Your First Call
Setting Up Your Voicemail
- Creating Sprint Account Passwords
Setting up service on your new Treo™ 755p smart device by Palm is quick and easy. This section walks you through the necessary steps to unlock your device, set up your voicemail, establish passwords, and contact Sprint for assistance with your Sprint Service.
Determining If Your Device's Phone Is Already Activated
If you received your device in the mail or purchased it at a Sprint Store, it probably has already been activated. All you need to do is unlock it.
If your phone is not activated, please call Sprint at 1-888-211-4727.
Unlocking Your Device
- If the screen is off, press and release Power/End 📋 to wake up the screen.
- Press Center ☐ on the 5-way 🔍 to turn off Keyguard (see "Moving Around the Device Screen" on page 42 for information on the 5-way 🔍).
- Enter your four-digit lock code. (For security purposes, the code is not visible as you type.)
Note:
If you can't recall your lock code, try using the last four digits of either your Social Security number or wireless phone number, or try 0000. If none of these works, call Sprint Customer Service at 1-888-211-4727. See “Where to Learn More” on page 317 for other ways to get help from Sprint if you are having trouble with your service.
Making a Call
- Press Phone

-
Press Center ☐ on the 5-way 🔍 to turn off Keyguard (see "Locking Your Keyboard (Keyguard)" on page 272 for information on Keyguard).
-
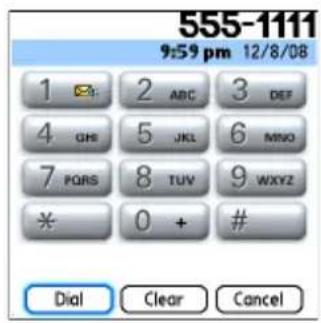
Tap the onscreen Dial Pad or press the number keys on the keyboard to enter the number you want to call.
-
Press Talk

- After you finish the call, press Power/End to end the call.
Adjusting Call Volume
While a call is in progress, press the Volume button on the side of your device to adjust the call volume.
• To increase the volume, press the upper half of the Volume button.
• To decrease the volume, press the lower half of the Volume button.

Section 1B: Setting Up Service 23
What's My Phone Number?
-
Make sure your phone is on (see "Turning Your Device's Phone On and Off" on page 55 for information).
-
Press Phone

- Press Menu

- Select Options, and then select Phone Info.

Look Here for Your Phone Number
Setting Up Your Voicemail
All unanswered calls to your device's phone are automatically transferred to your voicemail, even if your phone is in use or turned off.
To set up your voicemail:
1. Press Phone

2. Press and hold 1.
3. Follow the system prompts to:
- Create your password.
- Record your name announcement.
- Record your greeting.
- Choose whether or not to activate Skip Pass Code (a feature that lets you access your voicemail simply by pressing and holding 1, bypassing the need for you to enter your password). If you do not activate Skip Pass Code, your device uses the Voicemail Pass Code feature, which requires you to enter your password each time you want to access your voicemail.
Note:
If you are concerned about unauthorized access to your voicemail account, we recommend that you use the Voicemail Pass Code.
For more information about using your voicemail, see "Using Voicemail" on page 63.
Creating Sprint Account Passwords
As a Sprint customer, you enjoy unlimited access to your personal account information, your voicemail account, and your Sprint Vision or Sprint Power Vision account. To ensure that no one else has access to your information, you need to create passwords to protect your privacy.
Account Password
If you are the account owner, you'll have an account password to sign on to www.sprint.com and to use when calling Sprint Customer Service. Your default account password is the last four digits of your Social Security number. If you are not the account owner (if someone else pays for your Sprint Service), you can get a sub-account password at www.sprint.com
Voicemail Password
You'll create your voicemail password when you set up your voicemail. See "Setting Up Your Voicemail" on page 25.
Sprint Power Vision Password
With your Treo device, you may elect to set up a Sprint Power Vision password. This optional password can be used to authorize the purchase of Premium Services content and to protect personal information on multi-phone accounts.
For more information or to change your passwords, sign on to www.sprint.com or call Sprint Customer Service at 1-888-211-4727.
Section 1C
Connecting to Your Computer
In This Section
Why Connect My Device to My Computer?
♦ Upgrading From Another Palm OS® Device
- Installing the Desktop Synchronization Software
- Connecting Your Treo Device to Your Computer
♦ Synchronizing Information—The Basics
Why Connect My Device to My Computer?
You need to install the desktop software and connect the sync cable so that you can synchronize the information on your computer with the information on your device. You can use either Palm® Desktop software (included) or Microsoft Outlook for Windows (sold separately) as your synchronization software.
Synchronization means you can enter or change information on your device or on your computer and then synchronize to automatically update the information in both places. There's no need to enter the information twice. We strongly recommend that you synchronize your device and your computer frequently to keep your information up-to-date (and backed up) in both locations.
System Requirements
Windows computers
●Windows 2000, XP Service Pack 2, or Windows Media Center Edition
- 32MB of available memory (RAM)
•170MB of free hard disk space
CD drive
• Available USB port
Mac computers
• Mac OS X version 10.2 or later
•128MB of total memory (RAM)
- 190MB of free hard disk space
CD drive
• Available USB port
28 Section 1C: Computer Connection
Upgrading From Another Palm OS ® Device
Note:
If you are setting up your first Palm OS ® device, skip ahead to "Connecting Your Treo Device to Your Computer" on page 34.
You can transfer all compatible applications and information from your previous Palm OS device to your new Treo™ 755p smart device by Palm. This includes your calendar events, contacts, memos, and tasks, as well as your application settings and any compatible third-party applications and files.
When you install Palm Desktop software, some third-party applications may be quarantined because they are not compatible with the Palm OS software version 5.4.9 on your new Treo device. Quarantined files are not installed on your device, nor are they deleted; these files are placed in a new folder on your computer: C:\Program Files\Palm\
Note:
Some third-party utilities allow you to back up your old device's information onto an expansion card and then transfer the information to your Treo device. We do not recommend this method because any incompatible applications are also transferred.
- Calculate how much space your applications and information occupy on your previous Palm OS device:
■ From Applications view, press Menu 📄.
- Select Info on the App menu.
- At the bottom of the screen, select Size.
- Look at the numbers on the Free Space line and subtract the number on the left from the number on the right to calculate the space used. For example, on the device shown here, 22.4 - 17.5 = 4.9. This means that 4.9MB of space is occupied on this device.
- If the space occupied on your old device is 60MB or less, go to step 3. If the space occupied is greater than 60MB, then do any of the following to free up some space before you go to the next step:

- Delete any third-party applications that you no longer use.
■ Move large files, such as eBooks and images, to an expansion card.
■Move third-party applications to an expansion card. -
Purge old information in applications such as Calendar (Date Book), Tasks (To Do), and email. Refer to the documentation that came with your old device for instructions on these items.
-
Synchronize your old device with your old desktop software to back up your information one last time.
- Connect your new smart device to your computer (see “Connecting Your Treo Device to Your Computer” on page 34).
- Install the new desktop synchronization software from the Palm Software Installation CD (see "Installing the Desktop Synchronization Software" on page 32).
Important:
Do not synchronize your new Treo 755 P smart device by Palm with any previous versions of Palm Desktop software.
- During the installation process, synchronize your new Treo device with your new desktop synchronization software as instructed. When prompted, do the following:
- Connect your new device to your computer (see “Connecting Your Treo Device to Your Computer” on page 34).
30 Section 1C: Computer Connection
- Indicate whether you want to sync all applications or only PIM (personal information management) applications.
-
Select a device name for your new device; be sure to select the same name that you used for your old device. (This is the name that appears in the User list in Palm Desktop software.)
-
(Mac users only) If you have pictures on your old device, copy them from your old device to an expansion card or beam them to your new Treo device.
- If you plan to continue using your old device, perform a hard reset to remove its associated device name. (See the documentation that came with your old device for instructions on performing a hard reset.) Each device you synchronize with your computer must have a unique name. The next time you synchronize your old device with your computer, be sure to assign it a new name.
If any third-party applications are quarantined during the installation, do not manually install any of the quarantined files. Contact the third-party developer for software updates and information about compatibility with your new device.
Installing the Desktop Synchronization Software
Even if you already own a Palm OS device and have installed a previous version of the desktop software, you must install the software from the Palm Software Installation CD that comes with your Treo 755 smart device by Palm.
| Note: | If you are installing the software on a computer at work, make sure your company allows you to install new software. Contact your company’s IT department for help. |
Windows Vista Users: Before inserting the Palm Software Installation CD, go to www.palm.com/windowsvistato find information about installing Palm Desktop software on Windows Vista.
- Close any applications that are currently running on your computer, including those that are minimized. Your computer must have all its resources available to install the software.
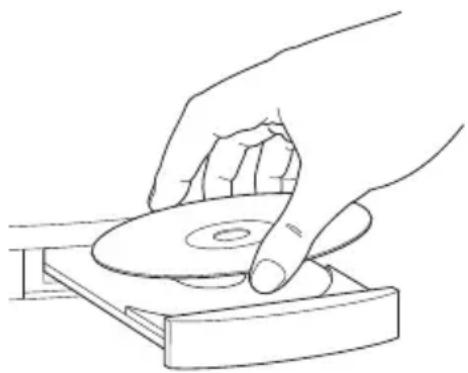
- Insert the Palm Software Installation CD into the CD drive on your computer.
natural_image
Line drawing of a hand pressing down on a CD into a tray (no text or symbols)- If you are installing the software on a Mac, double-click the CD icon on the desktop, and then double-click the PalmSoftware.pkg icon.
32 Section 1C: Computer Connection
- When the installation wizard opens, follow the onscreen instructions. Please note these important points about the installation process:
- (Windows only) You can choose which desktop software you want to use for synchronization: Palm Desktop software or Microsoft Outlook. (Microsoft Outlook desktop software sold separately. Microsoft Outlook synchronization conduit included.)
Note:
If you use Microsoft Outlook as your desktop email application, select Microsoft Outlook as your desktop synchronization software. If you select Microsoft Outlook, Palm Desktop software is still installed on your computer. When you enter information on your computer, be sure to enter your information in Microsoft Outlook, not in Palm Desktop software.
- When the install process prompts you to connect your device to your computer, go to “Connecting Your Treo Device to Your Computer” on page 34.
Tip:
If you want to sync information with applications other than Palm Desktop or Microsoft Outlook, you need to purchase additional third-party sync software. This sync software is sometimes called a conduit.
Connecting Your Treo Device to Your Computer
- Plug the AC charger into a wall outlet.
- Plug the USB sync cable into an available USB port or a powered USB hub on your computer.
- With the sync button facing up, connect the sync cable to the bottom of your device. Do not press the sync button until you are instructed to do so.
- Connect the charger cable to the charger jack.
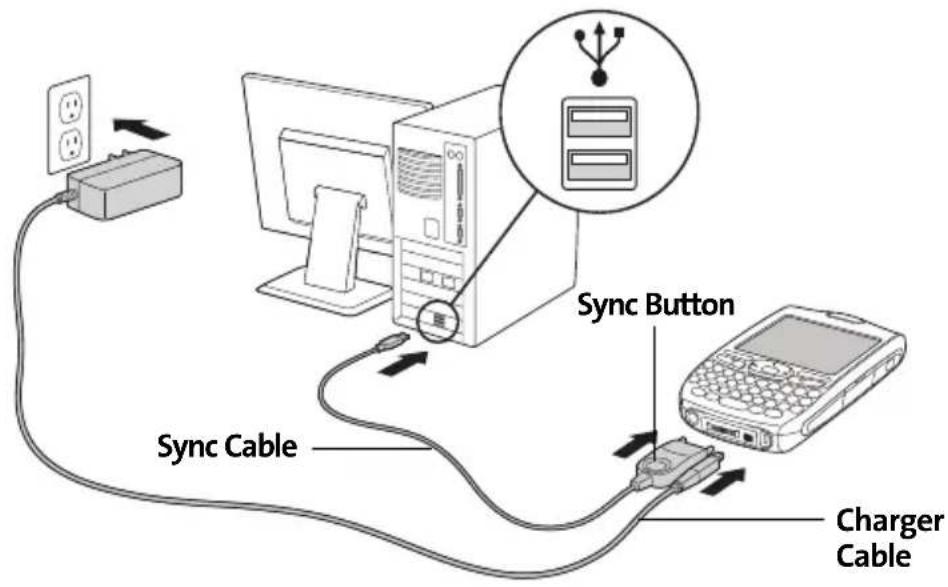
You are now ready to synchronize. Go to “Synchronizing Information—The Basics” on page 35.
34 Section 1C: Computer Connection
Synchronizing Information—The Basics
Synchronizing means that information that is entered or updated in one place (your device or your computer) is automatically updated in the other, so there's no need to enter the information twice. We strongly recommend that you synchronize your Treo device with your computer or corporate server frequently to keep your information up-to-date (and backed up) in both locations.
| Important: | To sync your information, you must install the software from the Palm Software Installation CD that came with your Treo 755P smart device by Palm—even if you sync with Outlook or another third-party application. See “Installing the Desktop Synchronization Software” on page 32 for instructions. |
Information from all the following applications is updated by default each time you synchronize your device with your desktop software:

Calendar

Contacts

Memos

Pics&Videos

Tasks
Tip:
You can also set up the VersaMail® application to synchronize email on your device with email on your computer. See the User Guide for the VersaMail Application at www.palm.com/mypalm/755psprint for information.
How each application syncs depends on your computer type and the desktop software you are using, as follows:
| Computer Desktop What Syncs and Where | ||
| Windows Outlook | ●Calendar, Contacts, Memos, and Tasks sync with Outlook.●Pics&Videos syncs with Palm Desktop software. | |
| Windows Palm | lm Desktop software All applications sync with Palm Desktop. | |
| Mac Palm Desktop | desktop software All applications sync with Palm Desktop. | |
| Tip: | You can download a trial version of Microsoft Outlook and learn about discount offers by visiting:www.palm.com/mypalm/755psprint-bonus. |
| Tip: | For information on locating your pictures and videos on your computer, see “Viewing Pictures and Videos on Your Computer” on page 184. |
- Connect your Treo device to your computer as described in “Connecting Your Treo Device to Your Computer” on page 34.
| Note: | If you’re performing initial setup, your device should already be connected to your computer. |
- Press the sync button on the sync cable.

A message indicates that synchronization is in progress.
- Wait for a message that indicates that the process is complete before you disconnect the sync cable.
| Tip: | If you have any problems synchronizing, see “Synchronization” on page 294 for troubleshooting suggestions. |
If you're finishing your initial setup, you now have the option to install bonus software from www.palm.com/mypalm/755psprint-bonus. If you choose to install some of the bonus software, you need to sync again to install the software on your device. To install bonus software later, see “Installing Applications” on page 235.
| Note: | For more synchronization options, including customizing which applications sync, see “Synchronizing Information—Advanced” on page 246. |
Your Treo™ 755P Smart Device by Palm
Sprint

Moving Around on Your Smart Device
In This Section
- Moving Around the Device Screen
Using the Keyboard - Opening Applications
Moving Around the Device Screen
To move around the screen on your Treo™ 755p smart device by Palm, you can use the 5-way navigator 📋 for one-handed navigation, or you can tap items on the screen with the stylus. With use, you can find your own favorite way to scroll, highlight, and select menu items.
Note:
Some third-party applications may not work with the 5-way, and you must use the stylus instead. In this guide, arrow icons are used to indicate directions on the 5-way. These arrows are different from any onscreen scroll arrows or pick-list arrows.
The 5-way includes Right ▶, Left ◀, Up ▲, Down ▼, and Center ○ buttons.

Scrolling Through Screens
As on a computer, you scroll on the Treo device to move from field to field or page to page, or in some cases to highlight an item or option in a list.
42 Section 2A: Moving Around
The behavior of the 5-way 📋 for list screens and entry screens varies by application. Here are some general scrolling tips that apply to most applications:
- Press Right ▶, Left ◀, Up ▲, and Down ▼ on the 5-way 🔒 to move to the next field, button, or action in that direction.
In list screens, press and hold Up ▲ or Down ▼ to scroll one screen at a time. - Press Option □ and Up ▲ or Down ▼ to scroll to the next page of information within the current record (see "Using the Keyboard" on page 46).
- When inside a text field, press Right ▶ or Left ◀ to scroll to the next character or word, and press Up ▲ or Down ▼ to scroll between lines.
You can also scroll using the stylus. Tap an onscreen scroll arrow, or drag the slider of an onscreen scroll bar.

Highlighting and Selecting Items
On most screens, one item—a button, a list entry, or a check box—is highlighted by default. The highlight identifies which item is affected by your next action. Use the 5-way 🔒 to move the highlight from one item to another before opening or selecting it.
The highlight can take one of two forms, depending on what is highlighted:
- Border glow: When an onscreen button (OK, Cancel, etc.) or pick list is highlighted, the button acquires a glow around its border.
Colored background: When a phone number, text, an email address, or a Web link is highlighted, the item appears as white text against a colored background.
After highlighting an item, you can select or activate it by pressing Center or by tapping the item with the stylus.

Highlighting Text
You can use the stylus to highlight text on the screen.
Tap and drag the stylus across the text you want to highlight.
• To highlight a word, double-tap it.
• To highlight a paragraph, triple-tap it.
Accessing Command Buttons
In most applications, command buttons such as New, OK, and Details appear at the bottom of the screen. In many cases, you can jump directly to these buttons instead of scrolling to them. The 5-way controls vary according to the application, but here are some general rules that apply to most applications:
- From a list screen, such as the Contacts list or Memos list, press Right ▶ or Down ▼ to jump to the first button.
- From a screen where you create or edit entries, such as Edit Contacts, press Center to jump to the first button.
- From a dialog box, such as Edit Categories, press Up ▲, Down ▼, Right ▶, or Left ◀ to scroll to the buttons.
Selecting Menu Items
Many applications have menus to provide access to additional features. These menus are usually hidden from view, but they appear when you press Menu. To get the most out of your device, it's a good idea to familiarize yourself with the additional features available through the various application menus.
- Press Menu to open an application's menus.
- Press Right ▶ and Left ◀ to switch between menus.
- Press Up ▲ and Down ▼ to highlight a menu item.

Menu Shortcut
44 Section 2A: Moving Around
- Press Center ☐ to select the menu item, or press Menu ☑ to close the menus and cancel your selection.
| Tip: | Most menu items have menu shortcuts listed in the menu. To use a menu shortcut, press Menu plus the shortcut letter. You don’t have to see the menu item to use the menu shortcut. For example, when you’re in Calendar, you can press Menu + N to create a new event. |
Selecting Options in a Pick List
A range of options is often presented in a type of menu called a pick list, which can be identified by a downward-pointing arrow. Pick lists are different from the application menus previously described. The application menus give you access to additional features, and pick lists enable you to select the contents for a particular field.
You can select an option from a pick list with the 5-way or the stylus:
- Use the 5-way 🔒 to highlight the pick list, and then press Center 🔒 to display the items in the list. Press Up ▲ and Down ▼ to highlight the item you want, and then press Center 🔒 to select the highlighted item. To exit the pick list without making a selection, press Left ◀ or Right ▶.
- Use your stylus to tap the pick list, and then tap the item you want from the list. To exit the pick list without making a selection, tap outside the list.
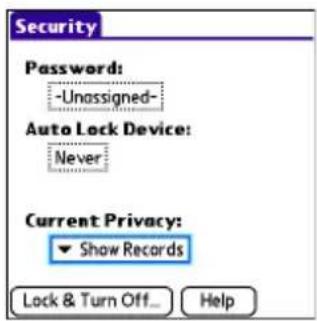

Using the Keyboard
When using the keyboard, most people find it easiest to hold the device with two hands and use the tips of both thumbs to press the keys.

The Backspace, Return, Space, and Shift keys, as well as the letter keys, work in the same way as do those found on any computer keyboard. In addition, your device offers several special function keys.
| Key Function | |
| Option | When pressed in conjunction with a second key, gives that key an alternate function. For example:• Option +enters the symbol or number displayed at the top of the key.• Option +opens a secondary application (see “Using the Quick Buttons” on page 51).• Option + Shift/Find opens the Find feature (see “Using Find” on page 234).• Option + Menu dims the device screen. |
| Alt | When pressed in conjunction with a second key, displays a variety of alternate characters that can be entered using that key. See “Entering Other Symbols and Accented Characters” on page 49 for details. |
| Menu | Opens application menus. See “Selecting Menu Items” on page 44 for details. |
| Tip: | The Treo 755 P smart device by Palm includes a keyboard backlight that turns on and off when the screen turns on or off. PressOption+ Pto adjust screen and keyboard backlight brightness. The backlight also dims when an active call lasts longer than a specified period of time. See “Optimizing Power Settings” on page 271 to adjust the automatic shut-off and dimming intervals. |
Entering Lowercase and Uppercase Letters
• To enter lowercase letters, press the desired keys.
- To enter an uppercase letter, press Shift/Find +p , and then press a letter key. You don't need to press and hold Shift/Find +p while entering uppercase letters. When Shift is active, an up arrow appears in the lower-right corner of the screen.
- To turn Caps Lock on, press Shift/Find twice. To turn it off, press Shift/Find once. When Caps Lock is on, an underlined up arrow appears in the lower-right corner of the screen.
Entering Numbers, Punctuation, and Symbols
Numbers, punctuation, and symbols appear above the letters on the keys. To enter these characters, do one of the following:
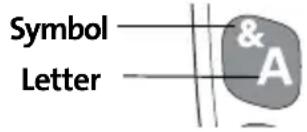
- Press Option 📄, and then press the key with the desired character shown above the letter. You don’t need to press and
hold Option ☐ while pressing the second key. When Option is active, the symbol ● appears in the lower-right corner of the screen.
- To turn Option Lock on, press Option twice. To turn it off, press Option once. When Option Lock is on, the symbol appears in the lower-right corner of the screen.
Tip:
Some application views automatically default to Option Lock, such as the Dial Pad view of the Phone application, or the Calculator. In this case, you do not need to press Option to enter numbers.
Entering Other Symbols and Accented Characters
Symbols and accented characters that do not appear on the keyboard are sometimes called alternate characters because you use the Alt 🔊 key to enter them.
- Enter the character that corresponds to the symbol or accented character you want. (See the table on the next page.)
- Press Alt
- Press Up ▲, Down ▼, Right ▶, or Left ◀ to highlight the desired character.
- Press Center ☐ to insert the character.
Tip:
To see a list of additional alternate characters, position the cursor at the beginning of the line or after a space, and then press Alt. The alternate characters are grouped by their similarity to the base key. For example, the alternate characters available for the e key are é, è, è, and ê.
Symbols and Accented Characters
| Press ... | Then press to select ... |
| a á à ä ã ã æ S | |
| A Á À Ä Ä Å Å Æ t or TTM | |
| b or B β u ú ù ù û | |
| c ç ç © U ù Ú Ù Ù | |
| C | Ç ç © |
| e è é ë ê | y |
| E Ê É ë Ê | Y |
| i | ì í î î |
| l | ì í î î |
| l or L | £ |
| n | ñ |
| N | Ñ |
| o | ò ó õ ô œ õ |
| O | Ò Ó Õ Õ Æ Õ |
| p or P ¶ | |
| r or R | ® |
| s | ß š 1 |
| Press ... | Then press to select ... |
| B S S | |
| x or X | × R |
| ý ÿ | |
| Ý ÿ | |
| 0 1 2 3 4 5 67 8 9 . , “ @+ - * / # ( or ) | ; _ • \ % = ° ÷ € £ ¥ ¢ [ ]{} < > « » © ® TM ∧ ∅ | x |
| ! i | |
| ? | ¿ |
| : | ; :-) :- ( ;- ) |
| $ £ ¥ ¢ | € |
Opening Applications
When you open an application using either a quick button or Applications view, you automatically close the application you were previously using.
Using the Quick Buttons
The front of the Treo device has three buttons that you can use to open applications. The fourth button opens Applications view, which allows you to open all the applications on your device (see "Using Applications View" on page 52).

Each of the three application quick buttons can be used to open two applications. To open a button's primary application—as indicated by the graphic on the button—simply press the button. To open a button's secondary application, press Option ☐, and then press the quick button.
| Note: | Pressing any of the quick buttons or theApplicationsbutton automatically wakes up your device screen. See “Waking Up the Screen” on page 54. |
| Button Primary Application Secondary Application | ||
 | Phone |  W e b W e b |
 | Calendar |  W o r l d W o r l d |
 | Messaging |  E m a i l E m a i l |
Section 2A: Moving Around 51
Tip:
You can also customize the buttons. See "Customizing Device Buttons" on page 267 for details.
Using Applications View
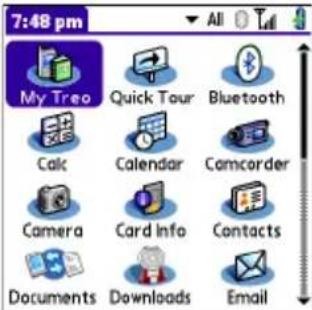
You can access all available applications through Applications view.
- Press Applications .
- Use the 5-way 🔒 to highlight the application you want to open.
- Press Center ☐ to open the selected application.
In Applications view, you can also do any of the following:
- Press Applications 📁 repeatedly to cycle through various categories of applications. See “Changing the Applications Settings” on page 265 for more information on categories.
- Enter the first few letters of the application's name to highlight it. For example, if you enter "p," it highlights Phone; if you then enter "r," it highlights Prefs. If you pause and then enter "r," it highlights the first application that starts with "r."
Tip:
You can also press and hold Applications from any screen on your device to select from a list of your most recently used applications.
52 Section 2A: Moving Around
Using Your Device's Phone Features
In This Section
- Turning Your Device On and Off
- Opening the Phone Application
Making Calls - Receiving Calls
Using Voicemail
What Can I Do When I'm On a Call?
◆ Using Sprint Voice Command
♦ Defining Favorite Buttons
Using a Phone Headset - Customizing Phone Settings
- Controlling Your Roaming Experience
- Checking Signal Strength and Phone Status
Turning Your Device On and Off
Note:
Throughout this guide the term device is used to describe your Treo smart device and its physical attributes. The term phone is used to describe the feature of your smart device that enables you to connect to the Sprint National Network.
You can turn on your device screen and your phone independently. For example, the device screen can be off while the phone is on, or the device screen can be on while the phone is off. You can also have both the device screen and the phone turned on or off at the same time.
Waking Up the Screen
When your device screen is off, you need to wake up the screen.
- Press and release Power/End 📄 to wake up the screen.

- Press Center ☐ to turn off Keyguard. For more information about turning Keyguard on and off, see "Locking Your Keyboard (Keyguard)" on page 272.
- Press and release Power/End to turn off the screen.
Note:
You can also press any of the application quick buttons on the front of your device to wake up the screen and to go directly to the application associated with that button.
54 Section 2B: Phone Features
Turning Your Device's Phone On and Off
When your phone is on, it is connected to the Sprint National Network (provided you are in a coverage area), so that you can make and receive phone calls and use wireless services, such as email, messaging, and the Web browser. During initial setup, your phone is on by default, so you can use wireless services right away.
If you turn off your phone, you can still use the organizer features such as Contacts and Calendar, as well as the media features such as the Pocket Tunes™ music application and Pics&Videos. This is sometimes referred to as flight mode and is ideal for using your device on airplanes and for maximizing battery life.
- Wake up the screen.
- Press and hold Power/End 📄. (You hear a series of ascending tones and see a "Welcome" screen. When your device locates a signal, "Sprint" and the signal-strength 🔊 icon appear at the top of the Phone application screen, indicating that you can use the phone and Internet features, if they are supported by the local network.)
- Press and hold Power/End 📋 again to turn off your phone. (You hear a series of descending tones and see a "Powering off" screen. When your phone is off, "Phone Off" appears at the top of the Phone application screen. You can still use the nonwireless features of your device, such as Contacts, Calendar, Tasks, and Memos.)
Opening the Phone Application
- Press Phone 📄 to open the Main view of the Phone application.

Making Calls
Your Treo™ 755p smart device by Palm offers several options for making phone calls. As you become familiar with your device, you'll discover which method you prefer.
Dialing Using the Onscreen Dial Pad
1. Press Phone

- Enter the phone numbers by tapping the onscreen Dial Pad with the stylus.
- Tap Dial, press Talk ☐, or press Center ☐ to dial.

| Note: | If you changed the wallpaper in theMainview of thePhoneapplication(see “Customizing the Main View in the Phone Application” on page 84),you can still access theDial Pad.From theMainview of thePhoneapplication, pressTalkand then selectDial Pad. |
| Tip: | You can paste numbers directly intoMainview. Copy a number from another application, and then pressPhoneto switch toMainview. Open theEditmenu, and then selectPaste. PressTalkto dial. |
Dialing From the Keyboard
- Press Phone

-
Press the numbered keys to enter the phone number. (You don't need to press Option ☐.)
-
Press Talk to dial.
Dialing by Contact Name

Before you can dial a call by contact name, you must create some contacts (see “Adding a Contact” on page 202), or import them by synchronizing (see “Synchronizing Information—The Basics” on page 35).
- Press Phone

- Select the Contacts favorite button.
- Using the keyboard, start entering one of the following for the contact you want to call:
First name (JOH for John).
- Last name (SMI for Smith).
First initial and last name (JSM for John Smith).
For example, entering SM might display Smila Anderson, John Smith, and Sally Martin. Entering JSM finds only John Smith.
Characters you enter
appear here

- Select the number you want to call, and press Talk to dial.
Tip:
To see more information for a contact, highlight the name and press Center on the 5-way. To restart your search, press Backspace to delete letters you've entered, or select Cancel to return to Main view.
58 Section 2B: Phone Features
Dialing With a Speed-Dial Favorite Button
Your device comes with a few predefined speed-dial favorite buttons, but you can also create your own favorites. See “Creating a Speed-Dial Favorite Button” on page 75.
- Press Phone

- Press Down ▼ to access your favorite buttons.
- Use the 5-way 📋 to highlight the desired speed-dial favorite button. (Speed-dial favorite buttons are indicated by
the icon

- Press Center or tap the speed-dial favorite button to dial the number associated with the selected button.
Tip:
To view more favorite buttons, press Right or Down on the 5-way. If the highlighted favorite was added from Contacts, press Space to view all numbers associated with that contact.
Dialing From a Web Page or Message
Your device recognizes most phone numbers that appear on Web pages or in text, email, or Sprint Picture Mail messages. If you can't use the 5-way or stylus to highlight and dial a phone number on a Web page or in a message, it means that your device doesn't recognize the number as a phone number.
- Select the phone number on the Web page or in the message.
- Press Center to open the Dial Number dialog box.
- Select Dial to dial the number.

Redialing a Recently Called Number
- From the Main view in the Phone application, press and hold Talk ☐ to dial the last number you called.
-or-
To select from your most recently dialed numbers, from the Main view in the Phone application, press Talk to open the Redial list, select the number you want to call, and then press Talk again to dial.
-or-
To select from a chronological list of calls, select the Call Log favorite button. You can also access the Call Log from the Main view in the Phone application by pressing Talk and selecting Call Log from the Redial list.


Receiving Calls
To receive calls, your device's phone must be on. This is different from having only the screen turned on (see “Turning Your Device’s Phone On and Off” on page 55). When your phone is off, your calls go to voicemail.
Answering Calls
- Press Talk

-or-
Using the 5-way 📋, select the onscreen Answer button.
-or-
If the headset is attached, press the headset button.
Tip:
To prevent calls from accidentally being answered while the device is in a pocket or briefcase, you can disable the screen's touch-sensitive feature when an incoming call arrives (see “Locking Your Screen” on page 274).
Sending Calls to Voicemail
- Press Power/End

-or-
Using the 5-way 📋, select the onscreen Ignore button.
- Using the 5-way 📋, select the onscreen Ignore with Text button. This option sends the call to voicemail and opens a text message addressed to the caller.
Tip:
Do not press Power/End to ignore a call-waiting alert; this hangs up your current call (the call-waiting alert then changes to an incoming call alert). Use the 5-way method instead.
Silencing the Ring of an Incoming Call
- Press any key on your device except Talk ☐, Power/End ☐, or Center ☐. —or—
To immediately silence all system sounds including the ringer, slide the Ringer switch to
Sound Off (see "Silencing Sounds" on page 260).
If music is playing and a call arrives, the phone rings softly and the music automatically pauses. The music resumes if you ignore the call or, if you answer the call, the music resumes when you hang up.
Using Voicemail
Setting Up Your Voicemail
Your voicemail number is preset when you activate your device. The first time you call voicemail, you are prompted to enter your voicemail password. If necessary, please contact Sprint for your password and enter it as prompted.
-
Make sure your phone is turned on (see "Turning Your Device's Phone On and Off" on page 55).
-
Press Phone

-
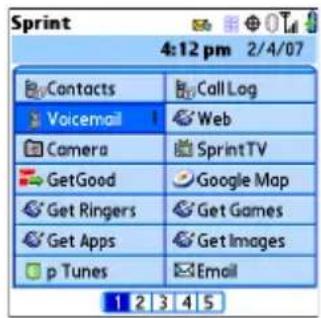
Select the Voicemail favorite button to dial the automated voicemail system.
-
Follow the voice prompts to set up your voicemail.
Tip:
You can also press and hold 1 to dial voicemail from the Dial Pad and Favorites.
Voicemail Notification
When you have a new voicemail message, you are notified with an Alert screen. To respond to the Alert screen, select OK to dismiss the alert or select Listen to play the message. When you have messages that you have not listened to, the Voicemail 📋 icon also appears in the title bar at the top of the Main view in the Phone application.

Retrieving Your Voicemail Messages
1. Press Phone

- Press and hold 1 to dial the voicemail system, or select the Voicemail favorite button.
- Enter your voicemail password by using the keyboard, or select Extra Digits if you defined this option (see "Defining Favorite Buttons" on page 74 for details on defining extra digits). Remember that you do not need to press Option ☐ to enter numbers, an asterisk (*), or a pound sign (#) during a call.
Tip:
If the Voicemail icon appears in the title bar of the Main view of the Phone application, you can select this icon to retrieve your voicemail.
Accessing Your Voicemail From Another Phone
- Dial your wireless phone number.
- Press * when your voicemail answers.
- Enter your password, and then press #.
Displaying Numeric Pages
If an incoming call goes to voicemail, the caller can choose to enter their phone number as a numeric page instead of leaving a voicemail message. When someone pages you, the page is displayed on the Alert screen. If there is just one alert, the page 📋 icon is a phone with a bubble on it. If there are multiple alerts, the messaging 📋ion appears instead.
- From the Alert screen, highlight an item with an alert icon.
- Select Go To to view the page in the Messaging application. The page displays the caller's phone number.
What Can I Do When I'm On a Call?
When you make or receive a call, Active Call view appears. Use the 5-way 🔒 to access the onscreen buttons in this view.

The onscreen buttons in Active Call view perform the following functions:
 | Ends the call immediately. You can also press the headset button (if the headset is attached). |
 | Turns on the speakerphone. When the speakerphone is on, you can take the device away from your ear and use other features during a call. For example, you can check your calendar or look up contact information. |
 | Turns off the speakerphone when it is on. |
 | Replaces the Spkr-phone button when a Bluetooth® hands-free device such as a headset or car kit is attached. Select this button to transfer the call from the Bluetooth hands-free device to the built-in earpiece. |
 | Places the current call on hold. |
 | Enables you to place another call while the first call is on hold. For information on handling a second outgoing call, see “Making a Second Call” on page 69. |
 | Opens the Dial Pad so you can manually dial additional numbers, such as an extension or a response to a voice prompt. |
 | Dials any extra digits (such as a password or an extension) that you assigned to a favorite button. This button replaces the Dial Pad button during outgoing calls to numbers that include predefined extra digits. See “Defining Favorite Buttons” on page 74 for information on defining extra digits. |
 | Mutes the microphone so that you cannot be heard. |
| Tip: | To avoid accidentally pressing onscreen buttons while holding the device to your ear, you can disable the screen’s touch-sensitive feature during your calls (see “Locking Your Screen” on page 274). |
Ending a Call
Do one of the following to end a call:
- Press Power/End
Select Hang Up All. - Press the button on the headset (if the headset is attached).

66 Section 2B: Phone Features
Tip:
When a call lasts longer than two minutes, the screen dims. Press any key except Power/End to wake up the screen, and then press Power/End to hang up the call. Be careful not to press Power/End to wake up the screen because this accidentally ends the call.
Switching Applications During a Call
You can use many other applications on your device while holding a phone conversation, including the organizer and text messaging features. You cannot, however, make a data connection while on a call. This means that you cannot browse the Web or send and receive email or Picture Mail messages while on a call.
- Do one of the following:
Select Hold.
- Select Spkr-phone to continue the conversation while you view the other application.
- Connect a headset (see "Using a Phone Headset" on page 78).
- Press Applications

- Select the icon for the application you want to open.
- Complete the task in the application.
- Press Phone 📄 to return to Active Call view.
Tip:
If you'd like to continue talking while viewing another application, select Spkr-phone before you switch to the other application. If you're using a headset, you can skip this step.
Saving Phone Numbers
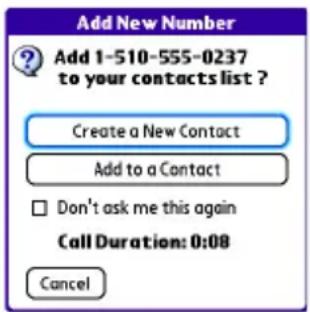
After you complete an outgoing call to a number that is not in your Contacts list, you are prompted to add the number to your Contacts list. You are also prompted to add new numbers from incoming calls with caller ID.
- To create a new contact entry for this number, select Create a New Contact, and enter the contact's information.
- To add this number to an existing contact entry, select Add to a Contact, and then select the contact. The number is pasted into the first available phone number field for that contact.
• To decline adding this number, select Cancel. - To disable the Add New Number prompt, check the Don't ask me this again box.
Tip:
You can re-enable the Add New Number prompt if you've disabled it. In the Phone application, press Menu and select Phone Preferences. Check the Ask to add unknown phone numbers after calls box.
Add New Number

Add 1-510-555-0237 to your contacts list?
Create a New Contact
Add to a Contact
□ Don't ask me this again Call Duration: 0:08
Cancel
If you don't add a number right away, follow these steps to add it later:

- In the Call Log (see "Redialing a Recently Called Number" on page 60), highlight the number you want to save.
- Press Menu
- Select Add Contact.
- Enter the information for the entry.
- Select Done.
Making a Second Call
You can make a second call while your first call is still active.
- Dial the first number and wait until the person answers.
- Use the 5-way 🔒 to select Hold.
- Use the 5-way ☐ to select Add Call.
- Dial the second number using any of the methods described in "Making Calls" on page 57.
- When the Dial another call? prompt appears, select Yes.
Tip:
Active Call view now includes two status lines, each representing one of the calls. You can join the two calls in a conference call by selecting Conf, or finish the second call and return to the first call, but you cannot switch between the two calls.
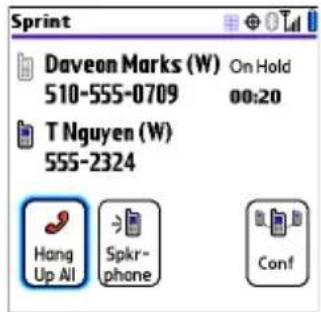
- Press Power/End 📄 to end both calls. To return to the first call, wait for the second call to hang up.
Answering a Second Call (Call Waiting)
When you are on a call, you can receive a second call. When the second call comes in, you hear a call-waiting tone and the Call Waiting dialog box appears. You can do any of the following to handle the second call:
- To place the current call on hold and answer the new call, press Talk or use the 5-way to select Answer.
• To send the new call to voicemail, use the 5-way 🔒 to select Ignore. - To send the new call to voicemail and send the caller a text message, use the 5-way to select Ignore with Text.
- To hang up the current call and answer the new call, press Power/End 📄. When the incoming call message reappears, select Answer or press Talk 📄.
| Tip: | Once you have answered a second call, to switch back and forth between the original call and the call you answered, use the 5-way to select Swap. |
| Note: | When you answer a second call and then select the Hang Up All button, it ends both calls. In this situation, if the first caller has not yet hung up the phone, the Sprint National Network automatically redials your number from the first caller's number and you see an incoming call alert. You can answer to continue your call with the first caller. |
Making a Conference Call Using Three-Way Calling
You can join two calls in a conference session by using three-way calling. Normal airtime rates apply for each of the two calls.
- When your first call is active, place a second call (see "Making a Second Call" on page 69). (You cannot initiate a three-way call if the second call is an incoming call.)
- When you're connected to the second party, use the 5-way 🔒 to select Conf to begin your three-way call.


70 Section 2B: Phone Features
| Note: | If one of the people you called hangs up, you and the remaining caller stay connected. The screen does not change to indicate that one of the callers has hung up. If you initiated the call and are the first to hang up, all three callers are disconnected. |
- To end the three-way call, press Power/End or select Hang Up All.
Call Forwarding
You can forward calls to another number. You can still make calls from your device while call forwarding is activated. There is an additional per-call charge for this service. When call forwarding is active, an 📌 icon appears in the title bar of the Phone application's Main view.
- Press Phone

- Press Menu

- Select Options, and then select Phone Preferences.
-
Select the Call forwarding pick list.
-
If the forwarding number appears in the pick list, select the number.
-
If the forwarding number does not appear in the pick list, select Edit numbers, and then select New. Enter a 10-digit forwarding number without spaces, and select OK. Then select the number from the Call forwarding pick list.
-
Select OK.
-
Call your Treo device to confirm that call forwarding is active.

Using Flash Mode
Flash mode provides an alternate way to manage your calls while one or more calls are active. For example, you can dial another call, swap between calls, or join two calls in a conference session with the press of a button while in Flash mode.
- Press Talk from Active Call view.
- If the Do you want to switch to Flash mode? prompt appears, select Yes.
- While in Flash mode, do any of the following:
If you have one call in progress and you answer an incoming second call, press Talk to swap between the calls.
If you have one call in progress, to make an outgoing second call, dial the number using any of the methods described in “Making Calls” on page 57.
If you have one call in progress and you place an outgoing second call, press Talk after establishing a connection with the second party to set up a conference session using three-way calling.
- If you have two calls in conference, press Talk to hang up one of the calls; you can then dial another number and include the new caller in the conference session.
Note:
Pressing Talk during a conference call usually hangs up the second call. However, depending on your network connection, you may occasionally hang up the first call.
- To exit Flash mode and end all the calls, press Power/End
72 Section 2B: Phone Features

Using Sprint Voice Command
If you subscribe to the Sprint Voice Commandservice, you can call a number by just saying a name. (There is a monthly charge for this service.)
To activate Sprint Voice Command, you must speak to a Sprint Customer Service representative:
- Make sure your phone is turned on (see “Turning Your Device’s Phone On and Off” on page 55).
- Press Phone
- Press *, press 2, and then press Talk to contact Sprint Customer Service and sign up.
Setting Up Your Personal Address Book
To use Sprint Voice Command, you must first set up your personal address book.
- From the Main view of the Phone application, press *, and then press Talk . Follow the system prompts. (You'll hear a tone, followed by the prompt "Ready.")
- Say "Add Name" to begin setting up your Personal Address Book, and then follow the voice prompts.
Making a Call With Sprint Voice Command
- From the Main view of the Phone application, press *, and then press Talk (You'll hear a tone followed by the prompt "Ready.")
- After the prompt, say "Call" and the name you've assigned to the number you want to call. (Your request repeats and you are asked to verify it.)
- Say "Yes" to dial the call. Say "No" to cancel.
Defining Favorite Buttons
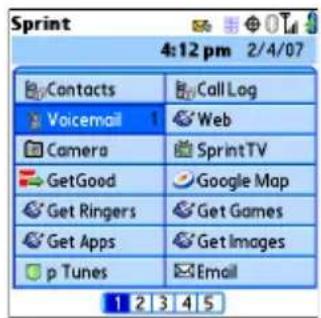
Your device provides 70 favorite buttons (69 programmable) for quick access to the following common tasks:
• Dialing a phone number (speed dial)
- Accessing your Call Log
- Accessing the onscreen Dial Pad
- Opening an application
- Accessing a Web page
- Addressing a text, email, or Picture Mail message
- Accessing voicemail (preset on your device)
Sprint presets favorite buttons on your device so that you can easily access your device's wireless features. You can customize all favorite buttons except Voicemail—either delete and reassign existing favorite buttons or create new ones—to perform any of the supported tasks.
For each favorite button, you can also set up a Quick Key that gives you instant access to the phone number or corresponding screen. Quick Keys are optional and can be letters only, except for the Voicemail Quick Key, which is preprogrammed as 1. The letter equivalent for that key is E, so you cannot assign E as a Quick Key to another favorite button.
| Tip: | If you’re upgrading from a previous Treo device, your favorites might be transferred along with your other information. However, you may need to rearrange the order in which your favorite buttons appear by pressing Menu, selecting Record, and then selecting Edit Favorites Pages. |
74 Section 2B: Phone Features
Creating a Speed-Dial Favorite Button
1. Press Phone

2. Use the 5-way 🔍 to select a blank favorite button.
Tip:
If there are no blank favorite buttons on the current Favorites page, press Right on the 5-way to scroll through the other pages. If you run out of blank favorite buttons, you can delete some existing favorites to make room for new ones (see “Editing or Deleting an Existing Favorite Button” on page 76).
3. Enter a label for the favorite.
- If the entry is for an existing contact, select Lookup. Start entering the contact's last name, and then select the number you want for the contact when it appears in the lookup list.
- If the entry is for a new contact, enter the Label, press Down, and enter the Number.

- (Optional) Enter a Quick Key, a letter that you can press and hold from the Main, Dial Pad, or Favorites view of the Phone application, to dial this speed-dial number.
- (Optional) Select More, and then select advanced options:
- Extra Digits lets you define additional digits to dial, such as a password or extension. To enter a one-second pause, insert a comma between digits. To add a longer pause, enter more commas.
- Dial Extra Digits automatically dials predefined extra digits immediately after dialing the phone number, when checked.
- Select OK.
Creating Other Types of Favorite Buttons
- Press Phone

- Use the 5-way 🔒 to select a blank favorite button.
- Select the Type pick list and select Call Log, Dial Pad, Contacts, Application, Message, Email, or Web Link.
- Enter a label for the favorite and enter any other necessary information on the screen.
Tip:
When creating a Message or Email favorite you can enter multiple addresses; simply separate each address with a comma. This is an easy way to send messages to a group of people.
- (Optional) Enter a Quick Key, a letter that you can press and hold from the Main, Dial Pad, or Favorites view of the Phone application, to open the favorite.
- Select OK.
Editing or Deleting an Existing Favorite Button
You can edit or delete most favorite buttons. You cannot edit or delete the preset Voicemail button, but you can add extra digits or move the Voicemail button to a different position.
- Press Phone


- Use the 5-way to access Favorites.
- Highlight the favorite button you want to edit or delete.
- Press Menu
- Select Edit Favorites Button on the Record menu.
- To edit the entry, make the desired changes. (For example, you can add a Quick Key shortcut to any favorite.) To delete the entry, select Delete.
- Select OK.
76 Section 2B: Phone Features
Tip:
You can also organize your favorite buttons on different pages. Open the Record menu, and then select Edit Favorites Pages. To arrange your favorites, drag and drop the buttons into a new slot. To move a favorite to another page, drag the button onto the page icon at the bottom of the screen.
Using a Phone Headset
You can connect a phone headset for hands-free operation. If you need to use your device while driving and this is permitted in your area, we recommend using a phone headset (wired headset included) or a hands-free car kit (sold separately).
In addition to the stereo headset included with your Treo device, your device is compatible with the following types of headsets that are sold separately:
● Wired headsets with a 2.5mm connector (3-pin or 4-pin).
- Wireless headsets and car kits enabled with Bluetooth 1.1 or 1.2 wireless technology.
Note:
For a list of compatible hands-free devices, go to www.palm.com/treo755psprint-support.
Check the specifications for your headset or car kit to confirm compatibility. Please note that you cannot use stereo headphones with Bluetooth wireless technology to listen to music files.
Using a Wired Headset
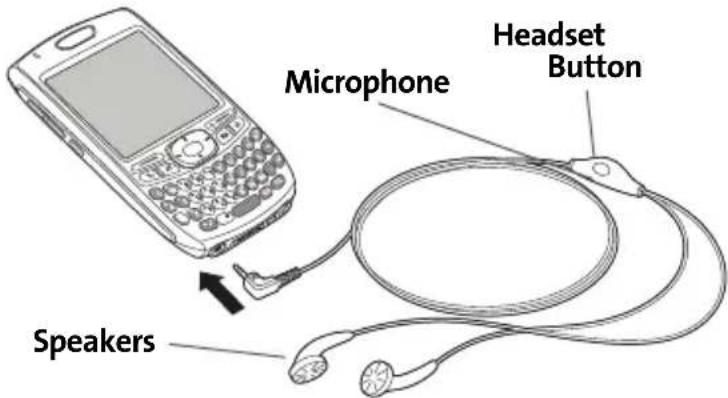
78 Section 2B: Phone Features
When using the headset that is included with your device, you can press the headset button to perform any of the following tasks:
- Answer an incoming call or a call waiting call.
- Pick up a call that is on hold.
- Switch between two calls (if the second call is incoming).
- Join two calls in a conference (if the second call is outgoing).
- Hang up a single call.
Note:
The headset designed for Treo™ 180, 270, and 300 devices is not compatible with your Treo 755p smart device by Palm. Standard headsets sold with other Sprint phones are compatible with your device. If you hear a headset buzz or experience poor microphone performance, your headset may be incompatible with your device.
Connecting to a Bluetooth Hands-Free Device
Once you set up a partnership with a Bluetooth hands-free device such as a headset or car kit, you can communicate with that device whenever it is turned on and within range. Bluetooth range is up to 30 feet in optimum environmental conditions. Performance and range may be affected by physical obstacles, radio interference from nearby electronic equipment, and other factors.
Note:
In the documentation for the other device, a partnership might be referred to by a term such as trusted pair, trusted device, or pairing.
- Press Applications 📋 and select Bluetooth 🔊, or tap the Bluetooth 🔊 icon in the title bar.
- Select Bluetooth On.
- (Optional) Enter a device name that identifies your device when it is discovered by other Bluetooth devices.

Note:
Use the same device name for all your Bluetooth connections. If you change the device name, you need to recreate any partnerships you have already created.
- Prepare your hands-free device to accept a connection from another Bluetooth device. (For instructions, see the documentation that came with your hands-free device.)
- Select Setup Devices.
- Select Hands-free Setup.
- Follow the onscreen instructions to create a partnership with the specific hands-free device. When prompted, enter a passkey.

Important:
Some hands-free devices have a predefined passkey. If your device has a predefined passkey, you can find the passkey in the documentation for that device. Other devices provide a screen where you enter a passkey that you make up. In either case, you must use the same passkey on both your Treo device and your hands-free device. We recommend that, where possible, you make up a passkey of 16 alphanumeric characters (letters and numerals only) to improve the security of your device. The longer the passkey, the more difficult it is for the passkey to be deciphered.
80 Section 2B: Phone Features
- After you finish setting up the device, select Done to return to Trusted Devices view.
| Note: | For some car kits, you need to initiate a Bluetooth connection from your Treo device to complete the partnership process. To do this, highlight the car kit in Trusted Devices view, press Menu, and then select Connect. |
- (Optional) Enable advanced hands-free features by pressing the multifunction button (MFB) on the hands-free device.
You know that the connection is successful when you see a headset 🔊 icon in the title bar of the Phone application. You can now use your device with the Bluetooth hands-free device such as a headset or car kit.
Using a Bluetooth Hands-Free Device
After you create a partnership with your Bluetooth hands-free device and you turn it on within range (up to 30 feet), your Treo device automatically routes all calls to the hands-free device instead of to the earpiece on your Treo device. When a call comes in, your Treo device rings and the hands-free device beeps. Even if you answer the call on your Treo device, the call goes to the hands-free device. If you prefer to route calls to the earpiece on your Treo device, you can change the settings on your device to do this (see “Customizing Advanced Settings for Your Hands-Free Device” on page 83).
The features available on your hands-free device vary by model. Check the documentation for your hands-free device for details on the supported features and how to use those features. Your Treo device can support the following features, provided that your hands-free device also supports them:
- Answer an incoming call.
- Hang up a call and answer a call-waiting call.
- Place a call on hold and answer a call-waiting call.
-
Hang up a single call.
Transfer a call from the device's earpiece to the hands-free device. -
Ignore an incoming call.
- Redial the last number you called from the hands-free device.
- View a log of recently received, missed, and dialed calls, and dial numbers for these calls directly from the hands-free device.
Transfer speed-dial favorites and Contacts entries containing phone numbers from your device to the hands-free device phone book, up to the maximum number of entries allowed in your hands-free device's phone book.
Tip:
Your device transfers speed-dial favorites first, and then contacts in alphabetical order up to the maximum number of entries allowed in your hands-free device's phone book. So if you have important numbers that you want to show up in your hands-free device's phone book, be sure to create speed-dial favorites for them before you transfer the numbers.
Customizing Advanced Settings for Your Hands-Free Device
You can set whether your Bluetooth hands-free device automatically answers incoming calls, provided the device supports this feature.
- Press Applications 📄 and select Prefs 📋.
- Select Hands-Free.
-
Do one of the following:
-
To send all calls to the hands-free device: Check the Always route calls to Hands-Free box. Select the Auto answer pick list and select whether you want your hands-free device to automatically answer incoming calls and how quickly it answers.
-
To choose between the earpiece on your device and your hands-free device on a call-by-call basis: Uncheck the Always route calls to Hands-Free box. When the phone rings, you can answer the call with your hands-free device by pressing the multifunction button on your hands-free device, or you can answer the call with your device's earpiece (see “Receiving Calls” on page 61).
-
Select Done.
Customizing Phone Settings
Customizing the Main View in the Phone Application
Phone Display Options let you customize the appearance and text entry mode of the Main view in the Phone application.
- Press Phone

- Press Menu

- Select Options, and then select Phone Display Options.
-
Set any of the following options:
-
Show ... sets whether the Dial Pad or wallpaper appears in the Main view of the Phone application. If you select Show Wallpaper, select the thumbnail image and then select an image to use as wallpaper.
- Typing ... sets whether typing enters numbers in the Dial Pad or starts a contact search.
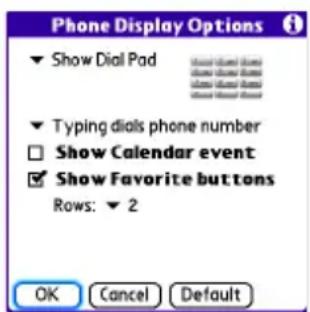
Tip:
If you choose to have typing start a contact search, you need to press Option to enter a number when dialing from the Dial Pad.
- Show Calendar event sets whether the current event from the Calendar application appears in the Main view of the Phone application. When this option is enabled, you can then select this event to jump to the Calendar application.
- Show Favorite buttons sets whether Favorites appear in the Main view of the Phone application.
-
Rows sets the number of favorite button rows that appear in the Main view of the Phone application.
-
Select OK.
84 Section 2B: Phone Features
Selecting Ringtones
You can set various tones for various types of incoming phone calls.
| Tip: | You can download any compatible ringtone directly to your device (see “Downloading Files From a Web Page” on page 151). You can also download ringtones to your computer and then email them to your device. |
- Press Phone

- Press Menu

- Select Options, and then select Sound Preferences.
- Select the Application pick list, and then select Ring Tones.
- Select the Volume pick list, and then select the volume level.
- Select the Vibrate pick list, and then select when you want the vibrate option to turn on.
- (Optional) Check the Escalate ring tone volume box if you want the ring to play softly and then increase to full volume the longer it rings.
-
Select ringtones from the following pick lists:
-
Known Caller for an incoming call from someone in your Contacts or Favorites.
-
Unknown Caller for an incoming call from someone identified by caller ID who is not in your Contacts or Favorites.
Roaming for incoming calls when you're outside the Sprint National Network. -
Select Done.
| Tip: | You can also preview, delete, and send sounds on your device. Press Applications, select Sounds, and then select Manage. To play a sound, select it, and then press Center on the 5-way. To delete a sound, select it, and then press Backspace. To send a sound, select it, and then select Talk. |

Selecting Phone Alert Tones
You can set various tones for various types of alerts.
- Press Phone

- Press Menu

- Select Options, and then select Sound Preferences.
- Select the Application pick list, and then select Phone Alerts.
- Select the Volume pick list, and then select the volume level.
- Select the Vibrate pick list, and then select when you want the vibrate option to turn on.
-
Select options for when an alert should sound:
-
Voicemail Alert to indicate when a new voicemail message has arrived.
- Coverage in/out to indicate if you've moved in or out of a coverage area.
-
Signal faded to indicate if the network signal lost strength or disappeared and a call was dropped.
-
Select Done.

Adjusting Call Volume
- While a call is in progress, press the Volume button on the side of your device to adjust the call volume.

Adjusting Ringer Volume
- When you are not on a call, press the Volume button on the side of your device to adjust the ringer volume, and then press the Side button to confirm the change.
Assigning a Caller ID Ringtone
Caller ID ringtones can let you know who is calling before you even look at your device. This is a great way to keep track of calls from important people in your life and to screen calls you'd prefer not to answer.
- Press Phone

-
Select the Contacts favorite button.
-
Open the contact entry to which you want to assign a caller ID ringtone, and then select Edit.
-
Select the Ringtone pick list and select a ringtone for this contact.
-
Select Done.

Tip:
You can assign a ringtone to an entire category of contacts. For example, use a special ringtone for categories such as Family, Work, or Golf Buddies. Select the category pick list in the upper-right corner, select Edit Categories, and then select the category. Select the ringtone on the Edit Category screen.
Assigning a Caller ID Picture
- Press Phone

- Select the Contacts favorite button.
- Open the contact entry to which you want to assign a caller ID picture, and then select Edit.
-
Select the Picture box and do one of the following:
-
Select Camera to take a picture and add it to this contact entry when you save the picture (if your device includes a camera).
-
Select Photos and select an existing picture that you want to assign to this contact.
-
Select Done.

88 Section 2B: Phone Features
Setting Your Dialing Preferences
Dialing preferences let you add a prefix to your phone numbers. For example, you can automatically dial a 1 before all 10-digit phone numbers you enter from Contacts. You can also add a different prefix based on the length of the phone number.
- Press Phone

- Press Menu

- Select Options, and then select Dial Preferences.
- Set any one or more of the following options:
■ Dialing from North America formats phone numbers using North American conventions (XXX-XXX-XXXX).
■ Always dial 1 in front of the area code adds a 1 in front of
10-digit phone numbers you dial from Contacts (see “Dialing by Contact Name” on page 58). A 1 is not automatically entered if you dial using the keyboard or the Dial Pad. This option is available only when Dialing from North America is enabled.
- International Prefix adds the specified prefix in front of international phone numbers; in the U.S. and Canada, this prefix is 011. When you dial, the plus symbol (+) preceding the phone number is replaced by this prefix.
- To 7 digit numbers adds a prefix to 7-digit numbers. For example, enter your own area code to automatically add your area when you dial local numbers.
-
To 6/5/4 digit numbers adds a prefix to numbers with the specified number of digits. For example, if all the phone numbers in your office begin with 555, followed by a 4-digit extension, you can select 4 and enter 555 as the prefix. When you want to call a colleague, simply enter the colleague's 4-digit extension. Your device automatically dials 555 plus the 4-digit extension. You can also create contact entries with just the extension number and then dial the number from your Contacts list.
-
Select OK.

Setting Phone Preferences
- Press Phone

- Press Menu

- Select Options, and then select Phone Preferences.
-
Select any one or more of the following preferences:
-
Call forwarding lets you forward calls to another number. See “Call Forwarding” on page 71 for details.
- Location ON allows the Sprint National Network to determine your longitude and latitude position at any time in order to provide location-specific services. 911 Only restricts your location information to emergency services only.
Note:
Your device is equipped with a location feature for use in connection with location-based services that may be available in the future. Currently the location information is used to help identify your longitude and latitude position during an emergency call in areas where E-911 service is available. For your safety, your location information is always provided during a 911 emergency call regardless of whether you select this setting.
- Short DTMF Tones lets you choose to send DTMF tones (a certain type of touch-tone dialing tone) stored as Extra Digits as rapid tones (see “Defining Favorite Buttons” on page 74 for information on defining extra digits).
Note:
Some older answering machines may not recognize short tones.
- Clear Voicemail Icon lets you manually reset the Voicemail icon if it continues to appear in the Phone application title bar even after you have listened to all your voicemail.
90 Section 2B: Phone Features

- TTY/TDD enables you to use your device's phone if you are hearing impaired. Select Default Mode to send and receive text. Select VCO Mode (Voice Carry Over) to send voice and receive text. Select HCO Mode (Hearing Carry Over) to send text and receive voice. See the following section, "TTY Use With Sprint Service," for more information.
- Ask to add unknown phone numbers after calls displays a prompt asking whether you would like to add the unknown phone number to your Contacts list when you complete a call.
- Hearing Aid Compatibility sends the audio from your phone calls to the telecoil rather than to the microphone of your hearing aid. See “Turning on the HAC Setting” on page 333 for more information on this setting.
Caution:
Do not turn on the Hearing Aid Compatibility setting unless you use a hearing aid with a telecoil. Using this setting without a hearing aid or with a hearing aid without a telecoil may be harmful to your hearing.
5. Select OK.

TTY Use With Sprint Service
A TTY (also known as a TDD or Text Telephone) is a telecommunications device that allows people who are deaf or hard of hearing, or who have speech or language disabilities, to communicate by telephone.
Your device is compatible with select TTY devices. You can connect a TTY/TDD machine, headset, or hands-free kit to your device through the headset jack while this mode is enabled. Please check with the manufacturer of your TTY device for connectivity information and to ensure that the TTY device supports digital wireless transmission.
When establishing your Sprint Service, please call Sprint Customer Service via the state Telecommunications Relay Service (TRS) by first pressing 711, and then pressing Talk. Then provide the state TRS with this number: 866-727-4889.
WARNING:
911 Emergency Calling
Sprint recommends that TTY users make emergency calls by other means, including Telecommunications Relay Services (TRS), analog cellular, and landline communications. Wireless TTY calls to 911 may be corrupted when received by public safety answering points (PSAPs), rendering some communications unintelligible. The problem encountered appears related to TTY equipment or software used by PSAPs. This matter has been brought to the attention of the FCC, and the wireless industry and PSAP community are currently working to resolve this.
Controlling Your Roaming Experience
Your device is digital dual-band, which means you can make and receive calls while on the Sprint National Network and you can also roam on other digital networks where Sprint has implemented roaming agreements with other carriers.
When you roam outside the Sprint National Network, the Roaming Rcon appears at the top of the screen. Additional charges may apply if you use your Treo device while roaming.
To learn more about roaming, visit www.sprint.com
Feature Availability
- You can make and receive calls while roaming.
- You can access voicemail while roaming.
- Other features that are standard on the Sprint National Network, such as call waiting, Sprint Voice Command, and Sprint Vision or Sprint Power Vision, may be available depending upon your roaming network.
Setting Roaming Preferences
Use Roaming Preferences to set specific options for using your phone while roaming on another network. For example, you can set options to be notified that you are roaming before placing a call or making a data connection, so that you are aware that you might incur extra charges.
- Press Phone

- Press Menu

-
Select Options, and then select Roaming Preferences.
-
Select the Network Selection pick list and select the networks with which you want to allow your phone to make a connection:
-
Allow roaming enables your Treo device to determine the best network—either Sprint or roaming—with which to connect.
-
Home networks only allows your phone to connect only to the Sprint National Network.
■ Roaming networks only allows your phone to connect to roaming networks only. -
Select the Before outgoing calls pick list to set whether roaming warnings appear when you attempt to dial an outgoing call:
- Automatic enables your Treo device to determine whether it is best to warn you when you make an outgoing call while roaming.

- Always causes an alert to appear each time you make an outgoing call while roaming.
-
Never suppresses alerts when you make an outgoing call while roaming.
-
Select the Before data connections pick list to set whether roaming warnings appear when you attempt to make a data connection, for example, to browse the Web:
-
Automatic enables your Treo device to determine whether it is best to warn you when you make a data connection while roaming.
- Always causes an alert to appear each time you make a data connection while roaming.
-
Never suppresses alerts when you make a data connection while roaming.
-
Select OK.
Checking Signal Strength and Phone Status
You can monitor the status of your device's signal strength and several other items, using icons in the title bar of the Phone application.
| Sprint | Your phone is on and you’re inside the Sprint National Network. If you are outside a coverage area, No Service or Roaming appears instead. No Service means that there is no coverage at all and Roaming means that another wireless service provider’s network is available. When you turn off your phone, Phone Off appears. |
 | Your phone is on and is connected to the Sprint Vision (1xRTT) data network. When the arrows are green, data is being transferred (for example, when you are opening a Web page) and you cannot receive calls. When the arrows are gray, you are connected to the network but data is not currently being transferred (for example, when you are viewing a Web page that is completely open), and you can receive calls. |
 or[KA49] or[KA49] | Your phone is on and is connected to the high-speed Sprint Power Vision data network. When the triangles are blue, data is being transferred (for example, when you are opening a Web page); when the triangles are gray, you are connected to the network but data is not currently being transferred (for example, when you are viewing a Web page that is completely open). In either state, you can receive incoming calls. |
 | Your phone is on and you are within range of a Sprint Vision or high-speed Sprint Power Vision data network, but you do not have an active data connection. You can receive incoming calls. |
 | The Location ON option has been selected. The icon appears with a red slash when the 911 only option has been selected. See “Setting Phone Preferences” on page 90 for information. |
Section 2B: Phone Features 95
| [see] | Appears when call forwarding is active. |
| [see] | TTY/TDD mode is active. Use this mode to communicate by telephone if you are deaf or hard of hearing or if you have speech or language disabilities. |
| [see] | You have new voicemail messages. You can select this icon to retrieve your messages. |
 | You have a new alert, such as a Calendar alarm or a new text message. To view the alert, press and hold Center or select the icon. See “Viewing and Using the Alert Screen” on page 98 for more information. |
| R | Roaming is active. |
| [7440] | Bluetooth wireless technology is off. The icon appears in blue when Bluetooth wireless technology is on and appears in reverse blue when your device is communicating with other devices using Bluetooth wireless technology. To quickly access the Bluetooth Preferences screen, tap the Bluetooth icon. |
 | Your device is connected to a headset that is enabled with Bluetooth wireless technology. This icon replaces the Bluetooth icon; it appears in light blue when you are not on a call and in dark blue when you are on a call. |
| [WBSK] | Replaces the Bluetooth icon when a dial-up networking connection using Bluetooth wireless technology is active. |
| [27-41] | Your battery is partially drained. When the battery drains to 20% of its capacity, the icon changes from blue to red. At 10% of its capacity, you begin to receive warning messages, and at 5% of its capacity, the device beeps (if the Ringer switch is set to Sound On) and the icon changes from red to clear. |
| [1C36] | Your battery is charging. The lightning bolt turns from red to green when the battery is fully charged and your device remains connected to the AC charger. |
 | Your battery is fully charged, and your device is not connected to the charger. |
 | You have new text or Picture Mail messages. The number next to the icon indicates the number of unread messages in your Inbox. Select this icon to view your messages. |
 | Displays the current (or next) event from the Calendar application. If you have an event conflict during the current time period, a red bar appears next to the event description. To jump to the current event in the Calendar application, select the Calendar status line (see “Displaying Your Calendar” on page 206 for details). |
| Tip: | To display the remaining battery power, tap the battery icon at the top of the screen. |
Viewing and Using the Alert Screen
The Alert screen on your device shows information about incoming items such as new email messages and Calendar events. The Alert screen also notifies you if you miss a phone call.
- To view the Alert screen, select the blinking bell when it appears in the upper-left corner of any screen, or press and hold Center when the blinking bell appears.
Note:
Your device's indicator light blinks green when you have a new alert. This way, you can be aware of new alerts even if the screen is off.
You can do any of the following:
- Check the box to clear an alert from the list.
- Select the alert to open the corresponding application and view the alert item (message, event, missed call, and so on).
- Select Done to close the Alert screen and return to whatever you were doing on your device before you opened the Alert screen. The bell continues to blink in the upper-left corner of the screen.
- Select Snooze to temporarily close the Alert screen and return to whatever you were doing on your device before you opened the
Alert screen. The screen reappears every five minutes until you select one of the other options.
- Select Clear All to delete all alerts on the Alert screen.

Using Sprint Vision and Other Wireless Connections
Sprint

Section 3A
Sprint Vision—The Basics
In This Section
◆ Getting Started With Sprint Vision
♦ Sprint Vision Features
- Accessing Sprint Vision
Section 3A: Sprint Vision 101
Getting Started With Sprint Vision
Sprint Vision provides wireless access to the Internet anywhere on the Sprint National Network. To sign up for Sprint Vision services or to access complete instructions, visit www.sprint.com For information on charges associated with features that use a Sprint Vision connection, refer to your Sprint Service Plan.
Enabling Sprint Vision
- Make sure your device's phone is turned on, as described in "Turning Your Device's Phone On and Off" on page 55.
- Press Option ☐, and then press Phone ☐.
- When the Connect to the Internet dialog box appears, select Yes to open your device's Web browser and make a Sprint Vision connection.
- If you have not already done so, select Now when the Preparing Vision Services dialog box appears. This initiates a one-time process to configure your Sprint Vision services. At the end of this two-minute process, your device connects to the Sprint Vision home page.
■ If you want to cancel the connection, select No.
Tip:
To bypass the Connect to the Internet dialog box in the future, check the Don't ask me again box.
- Use the 5-way 📋 to scroll around and select from a variety of online services.
- Press Applications 📁 to exit the browser and end your session.
Sprint Vision Features
With Sprint Vision services, you have access to additional features, better performance, faster Web connections, and a wider variety of online services. Features such as Web access and sending/receiving digital images are available on your Treo™ 755 smart device by Palm through the Sprint National Network.
- Sprint Picture Mail enables you to instantly shoot, share, and print sharp, high-resolution digital pictures, and take and send short video clips with your device. (Camera devices only.)
- Messaging enables you to send and receive email, text, and multimedia messages, or to chat.
- SprintTV SM enables you to watch live Mobile Digital TV (MDTV) on the go with full-motion video and vivid sound.
Web gives you the experience of full-color graphic versions of popular Web sites. - On Demand enables you to set and then receive customized, up-to-date information on sports, weather, news, money, and more, on demand—the way you want it.
Accessing Sprint Vision
Once your device is activated, you are signed in and ready to connect to Sprint Vision services at any time.
Sprint Vision User Name
Your Sprint Vision User Name is automatically assigned to you. Your user name is used with Sprint Mail and Messaging services. Your Sprint Vision User Name is simply an additional address that identifies your Sprint Account. When your device is enabled with Sprint Vision services, your user name automatically appears on the Phone Info screen.
To find your user name:
- Press Phone

- Press Menu

- Select Options, and then select Phone Info.
Sprint Vision Symbols on Your Screen
When you are connected to Sprint Vision services, a data connection icon appears at the top of the Main view in the Phone application. See “Checking Signal Strength and Phone Status” on page 95 for a description of the various data connection icons.
Sprint Vision Billing Information
See your service plan for details on Sprint Vision billing.
Sprint Power Vision
In This Section
- Getting to Know Sprint Power Vision
Personalizing Your Service With On Demand - Using Your Device’s Phone as a Modem
Getting to Know Sprint Power Vision
Sprint Power Vision combines unmatched visual and sound clarity with broadband-like speeds on your wireless phone. Utilizing the fastest commercially available wireless network technology (1xEV-DO) and leveraging continued investment in handset and application development, Sprint Power Vision offers the ultimate in wireless entertainment, real imaging solutions, instant communication, and personalized information at broadband-like speeds. Your Treo™ 755 smart device by Palm is equipped with the latest in multimedia, imaging, and processing technology, and offers exclusive services, such as On Demand.
Note:
The Treo device's data services work anywhere on the Sprint National Network. These services perform at enhanced speeds with improved quality in areas with high-speed data coverage. Go to www.sprint.com or see our coverage map for details and more information.
Enabling Sprint Power Vision
Since Sprint Power Vision is an enhancement to your device's Sprint Vision capabilities, you don't need to take any extra action to make Sprint Power Vision available. As long as your device's Sprint Vision setting is enabled (see “Enabling Sprint Vision” on page 102), your device is ready to access Sprint Power Vision services where available.
When your device has a Sprint Power Vision connection, a Power Vision status icon (Tor 1) is displayed at the top of the screen. (For details, see “Checking Signal Strength and Phone Status” on page 95.)
Personalizing Your Service With On Demand
With Sprint Power Vision's exclusive On Demand feature, you can personalize your device's data services to suit your needs. The On Demand feature makes it easier than ever to retrieve the most popular Web information and categories instantly. On Demand uses the ZIP code you provide to customize the content you receive, so you can get the information you want, when you want it.
On Demand acts like a computer browser's customized home page, displaying a variety of top categories such as News, Sports, Weather, Money, Movies, and more. This information is updated throughout the day, so you'll always be up-to-date. In addition to presenting a number of fixed categories, On Demand also offers optional categories (for an additional monthly charge) that allow faster access to even more information.
Initializing Your On Demand Service
- Press Applications 📄 and select On Demand 🔒.
- Enter your preferred ZIP code and select Next. (The On Demand service customizes itself to your location, and the On Demand menu screen appears.)

Accessing On Demand Information
Finding the information you're looking for with On Demand is as easy as navigating a Web browser on your computer. (The following examples illustrate how to access News and Movies information.)
To Access News Information Using On Demand:
- Press Applications 📋 and select On Demand ⚙. (The On Demand menu screen appears.)
- From the On Demand menu screen, highlight News (the button name changes to Late Breaking News & Photos), and then press Center ☐.
- Depending on which category you select, you see a menu with additional options (for this example, you can select from subcategories such as "Top Stories," "US News," "World News," and "Politics").
- Select a subcategory, and then select an article you would like to view. (The article appears.)
-
Navigate the content as follows:
-
Press Up ▲ or Down ▼ to scroll through the article.
- Press Right ▶ to access the options at the bottom of the screen.
To Access Movies Information Using On Demand:
- Press Applications 📋 and select On Demand ⚙ . (The On Demand menu screen appears.)
- From the On Demand menu screen, highlight Showbiz (the button name changes to Hollywood News & Showtimes), and press Center ☐.
- Select Movie Showtimes & Reviews and press Center (A list of current movie titles appears.)
- Select a movie title.

- From the Movie Title display, select an option and follow the onscreen instructions. Options available may include:
Shows for Date to select a date for the movie.
Details to view the movie's details, which may include cast, running time, plot synopsis, MPAA rating, reviews, and so on.

Additional fixed On Demand categories such as Money (which features a customizable stock ticker [delayed 20 minutes]), Weather, and Sports (which allows you to select your top teams), along with optional categories such as Maps and TV Guide, bring the information you want right to your screen—all without having to go through a traditional Web search.
Using Your Device's Phone as a Modem
Your device's data capabilities enable you to use your device's phone as a modem for your laptop computer anywhere on the Sprint advanced wireless high-speed data network. You'll be able to send and receive email, browse the Internet, and access your company's network anywhere on the Sprint National Network.
Note:
To use this service, you are required to sign up on a Sprint Power Vision with Phone as Modem plan. Go to www.sprint.com or visit a Sprint Store for Phone as Modem plan details and more information.
Setting Up a Data Connection With Your Computer
In order to use your phone as a modem, you'll first need to load the Sprint Connection Manager software on your computer, and then use the sync cable to connect your device to your computer.
Tip:
If your computer is enabled with Bluetooth® wireless technology, you can also use your device as a wireless modem. See “Using Your Device as a Wireless Modem” on page 164.
To set up your phone-to-computer data connection:
- On your computer, go to www.palm.com/mypalm/755psprint-bonus.
- Select the link to download and install the Sprint Connection Manager software and drivers.
-
After you install the software, connect your device to your computer using the sync cable. (When your computer detects the connection, the icon appears in the taskbar in the lower-right corner of your computer screen.)
-
Make sure your device's phone is turned on (see "Turning Your Device's Phone On and Off" on page 55) and that one of the Power Vision icons (Tor) appears at the top of the screen.
| Note: | If neither icon appears, you cannot use your device as a modem with Sprint Connection Manager. |
- On your computer, open the Sprint Connection Manager software, select your device name, and then click Connect.
- Once the connection is established, launch an Internet session, check your email, or do anything else you would do using a traditional Internet connection.
- When you're ready to terminate the Internet connection, double-click the Sprint Connection Manager 📋 icon in the taskbar in the lower-right corner of your computer screen, and then click Disconnect to end the session.
| Note: | While your Power Vision data connection is active, you can receive incoming calls and place outgoing calls; however, doing either of these suspends the data connection until you hang up the call.Sprint Vision services are available on the Sprint National Network. Sprint Power Vision services work anywhere on the network, but broadband-like download speeds are available only in areas with high-speed data coverage. |
Section 3C
Using Email
In This Section
What Email Applications Can I Use on My Smart Device?
The VersaMail Application
- Using Good Mobile Messaging
What Email Applications Can I Use on My Smart Device?
If you've activated Sprint Vision, you're ready to set up an email application on your Treo™ 755 P smart device by Palm. You can use an email application with your Sprint email account, as well as with other email accounts, such as AOL or Earthlink. You can also use an email application with a corporate account.
Your device includes two email application options:
•The VersaMail® application.
Good Mobile Messaging ™ (for corporate accounts that use Good server software).
You can also access Web-based email, such as Hotmail, Gmail, or Yahoo! from your device's Web browser.
Note:
An email application is not an email provider. It works with an account from a provider—your Sprint account, for example—or a corporate account to transfer messages to your device.
The VersaMail Application
VersaMail enables you to access up to eight email accounts—personal or corporate. You can view attachments through the Documents application on your device and interface with your corporate Global Address List (GAL). VersaMail also offers real-time push synchronization of email and personal information; as messages are received on the server, they are automatically downloaded to your device.
Before you can use VersaMail, you need to enter your email account settings. If you have multiple email accounts, you must enter settings for each account.
This guide includes basic information on sending and receiving email messages. For additional information on using and customizing Versamail, see the User Guide for the VersaMail Application at www.palm.com/mypalm/755psprint.
How Do I Get Started?
- If you're entering settings for an email account on a Microsoft Exchange server, a Lotus Notes server, or a Microsoft MAPI server, see the User Guide for the VersaMail Application at www.palm.com/mypalm/755psprint for setup steps.
- If your email provider is included in the following list, skip to "Setting Up VersaMail to Work With Common Providers" on page 117.
Tip:
Your email provider is the service you use to send and receive email. Your email provider's name appears between the @ symbol and the dot symbol in your email address.
| AOL | Concentric | NetZero |
| Apple.Mac | Covad | RCN |
| AT&T Global | Cox Central | SBC/PacBell |
| AT&T Worldnet | Cox East | SBC/Prodigy |
| Bell South | Cox West | Speakeasy |
| Cablevision | EarthLink | USA.net |
| Charter | Gmail | Verizon DSL |
| Comcast | Juno | Yahoo! (fee-based accounts only) |
| CompuServe | Mail.com |
- If your email provider's name is not listed, you need to obtain the following information from your system administrator or ISP, and then skip to "Setting Up VersaMail to Work With Other Providers" on page 118.
Mail protocol: POP or IMAP.
- Incoming and outgoing mail server names, such as mail.myisp.com.
- Incoming and outgoing mail server port numbers, such as 110 (incoming POP), 143 (incoming IMAP), or 25 (outgoing POP or IMAP).
(If necessary) Security settings: APOP, ESMTP, SSL.
Note:
The correct protocol, server, and security settings are required for VersaMail to be able to send and receive email for your account. Your email provider can easily provide these settings.
Setting Up VersaMail to Work With Common Providers
- Press Applications 📋 and select Email ✉ to open the VersaMail application.
| Tip: | The first time you set upVersaMail, you are asked if you want to continue with account setup after you open the application. SelectContinueand go to step 3. |
- Press Menu ☐, select Accounts, select Account Setup, and then select New.
- In the Account Name field, enter a descriptive name, such as Work Email.
- Select the Mail Service pick list, and then select your email provider, such as Earthlink. Select Next.
- Enter the username for your email account. Your username appears before the @ symbol in your email address.
- Select the Password box, enter your email account password, select OK, and then select Next.
- Select Next, and then select Done.
| Tip: | To set more options for incoming and outgoing messages, select Advanced on the Account setup complete screen. |

- On the Account Setup screen, select OK to go to the Inbox of this account.
Setting Up VersaMail to Work With Other Providers
- Press Applications 📋 and select Email 📧 to open the VersaMail application.
| Tip: | The first time you set up VersaMail, you are asked if you want to continue with account setup after you open the application. Select Continue and go to step 3. |
-
Press Menu ☐, select Accounts, select Account Setup, and then select New.
-
In the Account Name field, enter a descriptive name, such as Work Email.
-
Select the Mail Service pick list, and then select Other.
-
Select the Protocol pick list, and then select POP or IMAP (based on the information you obtained from your system administrator or ISP). Select Next.
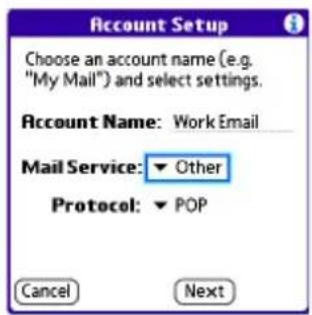
-
Enter the username for your email account. Your username appears before the @ symbol in your email address.
-
Select the Password box, enter your email account password, select OK, and then select Next.
-
Enter your email address and the names of the incoming and outgoing mail servers, and then select Next.
-
If your system administrator or ISP provided port numbers or security settings, select Advanced, and then enter those settings.
-
Select Done.
-
On the Account Setup screen, select OK to go to the Inbox of this account.
118 Section 3C: Email
Receiving and Viewing Messages
- Make sure your phone is turned on (see "Turning Your Device's Phone On and Off" on page 55).
- Press Applications 📋 and select Email ✉ to open the VersaMail application.
- From any mailbox, select Get or Get & Send.
- From the Inbox, select the message you want to view.
- If a large incoming message is truncated, select More ☑.
- Select Done.

Managing Your Messages
The status icons that appear next to each message in your Inbox indicate the following:
Only the subject header information is downloaded.
Part or all of the message text is downloaded.
The message includes an attachment.
This message is high priority.
You can rearrange the VersaMail list to make it easier to find and view messages.
In the Inbox, select Sort, and then select one of the following: By Subject, By Sender, By Size, or By Date.
- To quickly switch between folders (for example, the Inbox folder and the Sent folder), select the folder pick list at the top of the screen and select the desired folder.
Replying to Messages
- From the Inbox or another folder, open the message to which you want to respond.
- From Message view, select Reply. (Select whether to reply to just the sender or reply to both the sender and all other addressees on the message.)
- Enter your reply, and then select Send.

Tip:
When you respond to messages, you can select whether to include the original text (see "Setting Email Preferences" on page 126).
Creating and Sending Messages
- Press Applications 📋 and select Email ✉ to open the VersaMail application.
- From the Inbox, select New.
- Begin entering the addressee's email address, first name, or last name. (If the information matches one or more entries in Contacts, VersaMail displays the matching contacts. To accept a suggestion, select the correct contact. To send to a different address, keep entering the email address or name.)
Tip:
To send a copy or blind copy, select Cc or Bcc, select those lines, and enter the address(es) in those fields. See “Setting Email Preferences” on page 126 for details on displaying the Bcc field. For multiple recipients in any field, enter a semicolon and then a space before entering the next recipient name or address.
120 Section 3C: Email
- Enter the subject and message text. (To move between fields, press Up ▲ or Down.)
Tip:
You can mark outgoing messages as high priority. Open the Options menu and select Set Priority To High.
-
Select one of the following buttons:
-
Send connects and sends all messages immediately. (If you select Send and the message cannot be sent for any reason, the message is stored in your Outbox. VersaMail makes up to five attempts to automatically send the message; if automatic send is not successful, an alert message appears and you must try to manually send the message again.)
- Outbox puts the message in the Outbox to send later.
Drafts saves the message so that you can continue working on it at another time.
Tip:
If you are composing a message and need to switch to another application—for example, to answer a phone call—when you return to the VersaMail application, you are returned to the message you were composing.
Attaching Pictures and Videos
- Create the message to which you want to attach the picture or video.
- On the New Message screen, select the paper clip ⏻ icon in the upper-right corner of the screen.
- Select Photo/Video from the Type pick list.

-
On the Select Media screen, select the Album pick list to go to the album containing the picture or video you want, and then check the box to the left of the picture or video.
-
Select Done.
Tip:
Repeat steps 3 and 4 to attach more than one picture or video to a message. To remove an attachment, select the file in the Attachments box, and then select Delete.
Attaching Voice Memos
- Create the message to which you want to attach the voice memo.
- On the New Message screen, select the paper clip ⏻ icon in the upper-right corner of the screen.
- Select Voice Memo or Voice Memo (wav) from the Type pick list.
- Select the voice memo you want, and then select OK. If you selected Voice Memo (wav), select the voice memo you want in the Type box, and then select Add.
- Select Done.
Attaching Word, Excel, and PowerPoint Files
- Create the message to which you want to attach the item.
- On the New Message screen, select the paper clip ⏻ icon in the upper-right corner of the screen.
- Select Documents from the Type pick list.
- Select the file you want on the Documents screen.
- Select Done.
122 Section 3C: Email
Tip:
Repeat steps 3 and 4 to attach more than one file to a message. To remove an attachment, select the file in the Attachments box, and then select Delete.
Attaching Other Types of Files
-
Create the message to which you want to attach the item.
-
On the New Message screen, select the paper clip ⏻ icon in the upper-right corner of the screen.
-
Select the type of file to attach—for example, Address, Appointment, or Memo/Text—from the Type pick list. To attach a ringtone, select Sounds.
-
Select the file you want from the list in the Type box, and then select Add. If you selected Sounds, select the ringtone from the Manage Sound list, and then select Insert.
-
Select Done.
Tip:
Repeat steps 2 and 3 to attach more than one file to a message. To remove an attachment, select the file in the Attachments box, and then select Delete.
Viewing Attachments
You can open a number of attachment types (for example, Microsoft Word, Excel, and PowerPoint files; PDF files; sound files; and photos) with the built-in software on your device.
- From any folder, open the message with the attachment you want to view. (Messages with downloaded attachments are indicated by a paper clip icon to the left of the message icon.)
- Select the attachment name to view it in the default viewer on your device. -or-
Section 3C: Email 123
| Note: | If an attachment is not downloaded because it is larger than your maximum message size, the paper clip icon does not appear, and the attachment is not displayed at the bottom of the message screen. Select More to download and display any attachments. |
Select the folder icon to the left of the attachment name to open a menu of tasks you can do with the attachment, including View, Install, or Unzip, depending on the attachment file type; Save to save the attachment to your device or to an expansion card; or Select Viewer to select the application you want to use to view the attachment.
- When you have finished with the attachment, select Done to return to the Attachments dialog box. (If there is no Done button, press Applications 📄 and select Email ✉ to return to the Inbox of the account you were using in the VersaMail application.)
Deleting a Single Message
When you delete a message, it moves to the Trash folder.
- To delete a message from the Inbox or another message screen, highlight the message, and then press Backspace ⏻. (To delete a message you are reading or composing while the message is open, just press Backspace ⏻.)
- Select OK to confirm the deletion.
| Tip: | To delete a single message, you can also highlight it, pressRighton the 5-way, and then selectDelete. |
Deleting Multiple Messages
-
On the Inbox or another folder screen, select the bullet next to the icon of each message that you want to delete. To select adjacent messages, drag the stylus so that it touches the bullet to the left of each message. Lift the stylus and drag it again to select more adjacent messages.
-
Press Menu

- Select Delete on the Message menu.
- If a confirmation message appears, select OK to confirm deletion.
| Tip: | When you delete a message in Message view, by default you return to the Inbox. You can change the setting so that you go to the next message instead. From the Options menu, select Preferences, select Deletion, and then select Go to Next Message from the After deleting a message pick list. |
Deleting Messages by Date
You can quickly delete a group of messages by selecting a range of dates.
- From the Inbox or any folder, press Menu ☑.
- Select Delete Old on the Message menu.
- Select the folder and a date range for the messages you want to delete.
- Select OK. (If a confirmation dialog box appears, select OK to confirm deletion.)
| Tip: | To empty (or purge) the Trash folder, open theMessagemenu and select Empty Trash. |
Switching Between Accounts
You can switch between different email accounts—for example, between your work and your personal account.
- From any mailbox screen, press Menu ☐.
- Select Accounts, and then select an account.
Setting Email Preferences
You can customize the VersaMail settings for each individual email account on your Treo device. The preferences you set apply only to the email account you are currently viewing. If you have multiple accounts, configure each account separately.
You can customize the display of your mailbox screens, how and when to get new messages, alert sounds, reply options, and more. For complete instructions on customizing your email settings, see the User Guide for the VersaMail Application at www.palm.com/mypalm/755psprint.
Downloading New Email Messages Automatically
You can set up VersaMail to automatically download new email messages to your device.
- From any mailbox screen, press Menu 📄.
- Select Options, and then select Preferences.
-
Select Auto Sync.
-
Check the Mail box next to the Auto-sync option.
-
Select the Every pick list and select the time interval, from 5 minutes to 12 hours. (If you set a more frequent interval, you may need to recharge your device's battery more often.)
-
Select the Start Time and End Time boxes, and then select the hour, the minute, and AM or PM to enter the time for the first and last Auto Sync to take place. Select OK.

- Select the days you want the schedule to be active. You can choose any number of days, but you can set up only one schedule for each email account.
- Select OK, and then select Get or Get & Send. (Doing this ensures that only new messages are retrieved during your next Auto Sync retrieval.)
Playing Sounds When New Email Arrives
When new email messages arrive, an alert appears on the Alert screen (see “Viewing and Using the Alert Screen” on page 98 for information). In addition, when you schedule Auto Sync for a given account, you can choose a sound—such as a bird, a phone, or an alarm—to let you know when new email arrives.
- From any mailbox screen, press Menu ☐.
- Select Options, and then select Preferences.
- Select Alerts.
- Check the Alert me of new mail box.
- Select the Alert Sound pick list, and then select a sound. The device plays a brief demo of the sound.
- Select OK.
Note:
To receive notifications of successful Auto Sync retrievals only, uncheck the Alert me of failures box. Leave the box checked if you want to receive notifications of both successful and failed Auto Sync retrievals.
Setting Options for Receiving Messages
- From any mailbox screen, press Menu ☐.
- Select Options, and then select Preferences.
-
Select Incoming.
-
Set any of the following preferences:
- Get indicates whether to get message subjects only or entire messages.
- Ask Every Time indicates whether you want to see a dialog box for choosing subjects only or entire messages each time you retrieve email. If the box is unchecked, messages are retrieved according to the option you select in the Get pick list.
- Unread messages downloads only unread mail to your device (IMAP accounts only). If you don’t choose this option and you select Get & Send, all your messages on your provider’s mail server are downloaded to your Inbox, including messages you have already read.
Note:
The POP protocol does not support retrieval of unread mail only from the server. If you have a POP email account, the Unread messages box does not appear on the Incoming preferences screen, and VersaMail downloads all messages regardless of whether you have read them.
- Mail from last gets messages sent within the number of days you specify (default is 3).
- Download attachments allows files attached to email to be automatically downloaded to your device. Attachments that exceed the maximum message size cannot be downloaded.
- Maximum message size sets the maximum size limit, in kilobytes (KB), for how much of an incoming email message is downloaded. The maximum size of an incoming message is 5KB by default (that is, the first 5KB of all incoming email messages is downloaded), but you can enter any size up to 2,048KB (approximately 2 megabytes, or 2MB), including attachments.

| Note: | The maximum message size that you can retrieve is 60KB for the body text and approximately 5MB of total data for any attachments. To view a message whose total size is greater than the maximum message size you select but is less than 5MB, you need to select More on the message screen to fully download the message. |
- Message Format sets the format in which you retrieve messages. If you choose HTML, any messages sent in HTML format appear with basic HTML formatting intact. Other messages appear as plain text. If you choose Text, all messages appear as plain text, regardless of the format in which they were sent.
| Note: | VersaMail sends all messages as plain text only, with all HTML tags stripped, even if you are forwarding or replying to a message that was originally received as HTML. |
5. Select OK.
Attaching a Signature to a Message
You can attach a personal signature, with information such as your company's address and its fax and telephone numbers, to the bottom of all messages you send.
- From any mailbox screen, press Menu ☑.
- Select Options, and then select Preferences.
- Select Signature.
- Check the Attach Signature box.
- Enter your signature information, and then select OK.
Getting Messages From Your Corporate Microsoft Exchange Server Onto Your Device
Microsoft Exchange ActiveSync works with the Calendar, Contacts, and VersaMail applications on your device to directly access corporate groupware information on a Microsoft Exchange 2003 or 2007 server. Information in these applications is pushed directly from the server to your device or wirelessly synchronizes directly with the server from your device without using a desktop computer.
A Microsoft Exchange ActiveSync account interacts with your desktop software as follows:
- Microsoft Outlook: Information in Calendar, Contacts, and VersaMail on your device is pushed or syncs with the server; it does not sync directly with Outlook on your desktop. However, if the server pushes information to or syncs with Outlook on your desktop, any information you enter in these applications on your device also appears in Outlook after the next server push or sync.
Note:
Push is a feature provided by Microsoft Exchange ActiveSync that pushes email messages, Calendar events, meeting invitations, and updated contact information it receives onto your device.
- Palm® Desktop software: Information in Calendar, Contacts, and VersaMail on your device does not sync with and does not appear in Palm Desktop software on your computer.
Information in other applications on your device, such as Tasks and Memos, continues to sync with and appear in the desktop software on your computer (Outlook or Palm Desktop).
For complete information on using a Microsoft Exchange ActiveSync account, see the User Guide for the VersaMail Application at www.palm.com/mypalm/755psprint.
Using Good Mobile Messaging
You can install the optional Good Mobile Messaging software for secure, real-time access to your Microsoft Outlook email, calendar, contacts, tasks, and notes. Good Mobile
Messaging offers real-time push synchronization of email and personal information; as messages are received on the server, they are automatically downloaded to your device.
Good Mobile Messaging also offers attachment viewing through the Documents application on your device and integration with your corporate Global Address List (GAL).
To use Good Mobile Messaging on your Treo device, your corporate email server must use Good Mobile Messaging for Microsoft Exchange or IBM Lotus Domino. Contact your system administrator for information about setting up and using Good Mobile Messaging. For more information, visit www.good.com.
- Press Applications 📋 and select Get Good
- Follow the onscreen instructions to download and install the software.
Section 3D
Messaging
In This Section
- Creating and Sending Messages
- Receiving Messages
- Using Messaging to Chat
Managing Your Messages - Customizing Your Messaging Settings
Using Online Services
Section 3D: Messaging 133
Creating and Sending Messages
You can exchange brief text messages with other wireless phones that have text messaging capability. You can also send Sprint Picture Mail messages (including images, videos, voice memos, and text) to other users. Both text messages and Sprint Picture Mail messages can also be sent to email addresses. Before you use your Treo™ 755p smart device by Palm to send or receive messages, please verify pricing and availability with Sprint.
Before you use Messaging, make sure your phone is turned on, as described in “Turning Your Device’s Phone On and Off” on page 55.
Creating and Sending a Text Message
You can exchange text messages of up to 160 characters.
Note:
If you send a text message to an email address, the email address is deducted from the 160-character count.
1. Press Messaging

2. Select New.
3. Select the To field to address the message:
- Press Center ☐. If the recipient's name appears in the list of recent addresses, select it from the list.
If the recipient is in your Contacts list, enter the first initial and last name (no spaces), and then select the recipient's
phone number or email address, depending on where you want to send the message.
If the recipient's name isn't in the list of recent addresses or your Contacts list, enter the phone number or email address.

134 Section 3D: Messaging
| Tip: | If you see numbers when you expect to see letters (or the other way around), you need to turnOption Lockon by pressingOptiontwice or turn it off by pressingOptiononce. |
- Press Down ▼ to jump to the body of the message.
- Enter your message or select QuickText 📋 to insert predefined phrases. To insert emoticons, select 🔒
| Tip: | Some symbols can’t be used in text messages. The Messaging application automatically replaces invalid characters. |
- (Optional) Press Menu ☑, and then select High Priority or Normal Priority on the Compose menu to set an urgency level for the message.
- Select Send.
If you are out of a coverage area or if your device is off, outgoing messages go into the Outbox folder. When you return to a coverage area, your pending messages are sent automatically and are transferred to the Sent folder.
Creating and Sending a Sprint Picture Mail Message
Sprint Picture Mail messages consist of pictures, videos, text, and sounds. You can include pictures and videos you captured with the built-in camera (if included) as well as any of the following items:
Pictures
Videos
• Text messages
• Voice memos
The first time you share a picture or video, you are prompted to establish a Sprint Picture Mail account and password. Enter a four- to eight-digit, alphanumeric password and press Center ☐. Once you receive confirmation, you can continue to send or upload pictures and videos.
Note:
For information about the terms of your Sprint Picture Mail service, please visit http://pictures.sprint.com/tos.do.
1. Press Messaging

2. Select New.
3. Select the To field to address the message:
- Press Center ☐. If the recipient's name appears in the list of recent addresses, select it from the list.
If the recipient is in your Contacts list, enter the first initial and last name (no spaces), and then select the recipient's phone number or email address, depending on where you want to send the message.
If the recipient's name is not in the list of recent addresses or your Contacts list, enter the mobile number or email address.
Tip:
You may need to press Option to enter letters or numbers. The Option Lock setting defaults to the setting you used the last time you addressed a message.
4. Select Add media.
136 Section 3D: Messaging
-
Select the Media icon and select one of the following:
-
Attach from device lets you attach a picture or video from your device.
- Attach from Online lets you attach a picture or video from your online album. See “Using Your Online Album” on page 183 for information.
Take new picture prompts you to take a new picture with the built-in camera and attach it to the message.
Take new video prompts you to capture a new video with the built-in camcorder and attach it to the message.

-
(Optional) Repeat step 5 for each item you want to attach.
-
Enter your message or select QuickText ☐ to insert predefined phrases. To insert emoticons, select 🔒
-
Select Send.
Your device uploads the pictures or videos to the Sprint Picture Mail Web site (www.sprint.com/picturemai), creates a private Guest Book for the recipient on the Sprint Picture Mail Web site, and sends your message to the recipient. The recipient can then use a Web browser to access this private Guest Book to view the pictures or videos and to enter comments. You can view the comments later from the Sprint Picture Mail Web site.
If you are outside a coverage area or if your phone is off, outgoing messages go into the Drafts folder. When you return to a coverage area, you can open the message in the Drafts folder and send it.
Messaging Tips
- You can address messages to multiple recipients by separating the addresses with a comma.
- When entering message text, you can insert emotive symbols by pressing and holding Center and selecting emoticons, or insert predefined QuickText phrases by selecting QuickText and then selecting a phrase. To add a new phrase, select Edit QuickText from the list.
- Not all the symbols that are available on your device can be used in your messages. The Messaging application automatically replaces invalid characters before it sends messages.
- You can send and receive text messages (but not Picture Mail messages) even while you are on a phone call. This is easiest when using the hands-free headset or speakerphone.
Receiving Messages
When your phone is on and is in an area of wireless coverage, you automatically receive new text messages. You can also configure your device to notify you when a message arrives (see “Selecting Messaging Alert Tones” on page 144).
The new message alert may include any of the following buttons:
- OK dismisses the alert and places the message in your Inbox.
- Reply opens Chat view, where you can reply with a text message. To send a multimedia message reply, select Add from Chat view.
- Call Back dials the sender's phone number.
- Go To Msg opens the message so you can view its full contents.
- Go To URL opens the Web browser so you can view the full contents of the message in your online Sprint Picture Mail account. See “Working With Your Online Picture Mail Album” on page 183 for details.
- Delete deletes the received message directly from the message alert.

Tip:
If you have multiple alerts, the Alert screen displays all your pending alerts. Select an alert to jump to that item, or check the box to clear that alert. To view all your pending alerts from any screen on your device, press and hold Center on the 5-way.
Using Links in Messages
When you receive a message that contains a telephone number, email address, or URL, you can dial the number, send an email message, or go directly to the Web page.
- Press Messaging
- Select the message that contains the link you want to use.
- Select the phone number, email address, or URL (appears as underlined blue text).
Section 3D: Messaging 139
Your device automatically opens the appropriate application from the link.
Arranging Your Messages
You can rearrange the messages in any folder by using the
Sort command.
- Press Messaging
- Select the folder list in the title bar, and then select the folder you want to sort.
- Press Menu
- Select View, and then select Sort by Name or Sort by Date.


Deleting Messages
You can delete several messages at once from any folder by using the Purge command.
- Press Messaging
- Select the folder list in the title bar, and then select the folder that contains the messages you want to delete.
- Press Menu
- Select Purge from the Message menu.
- Select the Purge pick list, and then select an option.
- Select OK.

Using Messaging to Chat
When you exchange more than one message with a single contact, the messages you exchange with that person are grouped into a chat session. When you select a chat session from your message list, the upper part of Chat view displays all text messages you've exchanged with this contact, and the lower part provides an entry area. You can carry on multiple chats at the same time and easily switch between them, using the pick list at the top of the screen.
- Press Messaging

- Do one of the following:
To start a new chat, select a message and reply to it.
To continue an existing chat, select a message with the chat 🎨 icon.
-
Enter your message.
-
Select Send.

To find a chat you had with someone, open your Messaging Inbox and select a chat session.
Tip:
To add pictures, sounds, or videos to your message, select Add.
Section 3D: Messaging 141
Managing Your Messages
The message descriptions in the Inbox, Outbox, and Sent folders show the message status:
• Unread messages appear in bold.
- Read messages appear in plain text.
• Urgent messages appear with a red exclamation point (!).
The following icons show the message type and additional status information:

A text message

A Picture Mail message

A voicemail page

A chat session

A text message with an error

A Picture Mail message with an error
Customizing Your Messaging Settings
- Press Messaging

- Press Menu

- Select Options, and then select Preferences.
-
On the Messages tab, set any of the following preferences for your individual messages:
-
New message indicates whether you default to a text message or a Sprint Picture Mail message when you create a new message.
- Confirm message deletions indicates whether deletion confirmation prompts appear.
-
Privacy Mode (hide text) indicates whether the body text appears in the alert when you receive a new message.
-
Select the Chat tab and set any of the following preferences for chat sessions:
-
Create chats from messages indicates when you want to group text messages from the same person into a chat.
- Show timestamps in chats displays next to each message the local date and time the message was sent.
- Display my name in chat window as indicates the text label for your messages in Chat view.
- Label color sets a color to differentiate your messages from the sender's messages in Chat view.
-
Use color for indicates whether both your name and message appear in a different color, or only your name.
-
Select OK.
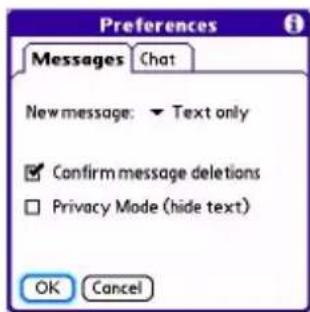

Selecting Messaging Alert Tones
- Press Messaging

- Press Menu

-
Select Options, and then select Alerts.
-
Select the Application pick list, and then select Messaging.
-
Select the Volume pick list, and then select the volume level.
-
Select the Vibrate pick list, and then select when you want the vibrate option to turn on.
-
Select the Message Tone pick list, and then select a tone for incoming message alerts.
-
Check the Show Message Alerts box if you want to see an onscreen alert when a new message arrives.
-
Select Done.
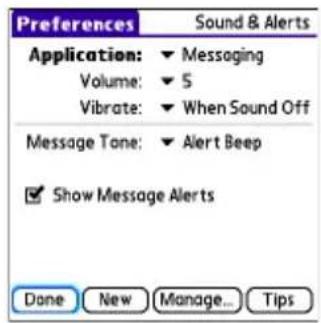
Using Online Services
Sprint Picture Mail Online Services let you access printing and other services for photos and videos when you compose and send a Picture Mail message from your Treo device. For example, if you send a message containing a picture, you can select an online printing service to print and deliver a copy of the picture to you. Additional fees may be required to use Online Services.
Accessing Online Services
- Press Messaging

- Select Online Services in the lower-right corner of the screen.
- If prompted, enter or create a password.
- If the Welcome! screen appears, select Continue.
- Select the service you want to use.
- Create your Picture Mail message as described in “Creating and Sending a Sprint Picture Mail Message” on page 135. The media you include with the message is sent to the service you select for processing.
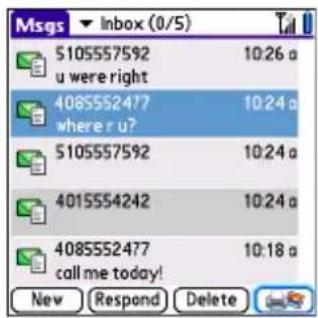
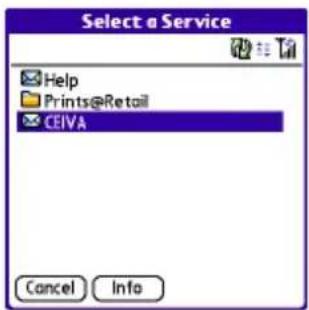
Section 3D: Messaging 145
Browsing the Web
In This Section
- Viewing a Web Page
- Working With Web Pages
◆ Working With Bookmarks and Saved Pages - Customizing Your Web Browser Settings
The Web browser on your Treo™ 755p smart device by Palm provides quick and easy access to Web pages. You can view most of the sites you use on your computer, including those with security and advanced features such as JavaScript and frames. To browse the Web, you must activate Sprint Vision data services. See “Enabling Sprint Vision” on page 102.
Viewing a Web Page
The Web browser uses patent-pending technology to optimize Web pages for your device. By default, the browser reformats Web pages into a single column and resizes images on your screen. That way, you can see most of the content without scrolling left or right.
- Make sure your phone is turned on (see "Turning Your Device's Phone On and Off" on page 55).
- Press Applications 📋 and confirm that data services are available. You should see either the 📋 or the 📋 icon.
Note:
If you do not see either of the above icons, data services are not available in your current location and you cannot connect to the Internet.
3. Select Web

- Enter a Web page address (URL) in the address bar and select Go. If you browse to a secure Web page, a lock 🔍 appears in the address bar.
-
Do any of the following to navigate within the Web page:
-
View a page in wide layout format (as on your computer): Press Menu ☐, select Options, and then select Wide Page Mode.
- Scroll through the page: In Optimized Mode (the default
format, which is optimized for your device screen), press Up ▲ or Down ▼. In Wide Page Mode, press Up ▲, Down ▼, Left ◀, or Right ▶ to scroll in all directions.

- Follow a link to another Web page: In Optimized Mode, highlight the link by pressing Up ▲, Down ▼, Left ◀, or Right ▶, and then press Center ○ to go to the selected page.
Tip:
In Wide Page Mode, use the stylus to tap a link.
- Submit a form: Enter the information and then select the onscreen button to submit the form. If the form doesn't have an onscreen button, press Return 🔒.
- Use the 5-way to access any of the following icons in the title bar:
Tip:
To quickly jump to the title bar from anywhere on a Web page, press Space to go to the address bar, and then press Up on the 5-way.
 | Goes to the previous Web page. |
 | Goes to the next Web page. |
 | Refreshes the page with the latest content from the Internet. |
 | Opens a list where you can selectFast Mode(no images or style sheets) orNormal Mode(with images and style sheets). |
 | Opens a dialog box where you can enter a Web address you want to go to or view a list of recently viewed Web pages. |
| [GDSH] | Goes to your home page. |
 | Displays a list of your bookmarks and saved pages. |
Tip:
The navigation bar shows status information while a page is loading. You don't have to wait for a page to fully load to navigate within the page or to select a link to another page. However, if you select a link while a page is loading and you receive a message saying that JavaScript is not ready, wait for the page to finish loading and then select the link again.
Working With Web Pages
Downloading Files From a Web Page
The Web browser lets you download files that are recognized by one of the applications on your device. When you download a file, you can open it in the application that recognizes the file. For example, if you download a picture, you can view it later in the Pics&Videos application. If a file is not recognized by any of the applications on your device, you can download the file to an expansion card, but you cannot open it on your device.
You can download files such as new applications, and choose to play or save music and video files in many popular formats—provided that the Web site permits the downloading of files.
| Item Supported File Types |
| Pictures JPEG, BMP, WBMP, GIF, PNG |
| Videos MP4, 3G2, ASF |
| Ringtones MIDI, QCELP, AAC, AAC+ |
| Music MP3 |
- Go to the page that contains the link to the file you want to download.
- Press Left ◀ or Right ▶ to highlight the link to the file, and then press Center ☐.
- If prompted, select what you want to do with the file: Play, Save To Device, or Save To Card.
- Select Yes.
Tip:
You can also save an image from a Web page by tapping and holding it with the stylus. In addition, you can access software and other downloads using the Downloads bookmark.
Section 3E: Browsing the Web 151
Streaming Files From a Web Page
The Web browser lets you stream files that are recognized by one of the applications on your device. For example, you can choose to play music and video files in many popular formats, such as MP3, WMA, and WMV.
- When the Web browser recognizes streamed content on a Web page, it displays a Play icon. To view or listen to the streamed content, tap Play.
-
Once streaming begins, playback starts automatically. Use the following controls when viewing or listening:
-
Select to return to the original Web page.
- Select 📄 or press Center 🔔 to pause playback.
- Select or press Center to resume playback after pausing.
A few seconds after playback begins, the toolbar is hidden and you can view the content on the full screen. Press Up
▲ or Down ▼ to display the toolbar; press Up ▲ or
Down again to hide the toolbar again.
- Press the Volume button on the side of your device to adjust the volume.

natural_image
Close-up of pink water lilies with green leaves, no visible text or symbolsNote:
If the Web browser recognizes streamed content that is not supported by any application on your device, a “Media type not supported” message appears.
152 Section 3E: Browsing the Web
Copying Text From a Web Page
You can copy text from a Web page and paste it into other applications.
- Use the stylus to highlight the text you want to copy.
- Press Menu
- Select Edit, and then select Copy.
- Go to the application in which you want to paste the text, and then use the 5-way 📋 or the stylus to position the cursor where you want to paste the text.
- Press Menu
- Select Edit, and then select Paste.
Returning to Recently Viewed Pages
The History list stores the addresses of the last one hundred pages you visited. Items in the History list are sorted chronologically.
- From Page view, press Menu 📄.
- Select History from the Page menu.
- Press Down ▼ to navigate through the list.
- Select the Web page you want to load.
Tip:
To clear all items from the History list, select Clear All. To bookmark any page on the list, highlight the page and then select Bookmark. If you clear all History list items, the Web browser does not suggest any entries when you begin entering a Web address, even if you have the
Auto-complete feature turned on (see "Customizing Your Web Browser Settings" on page 157 for information on Auto-complete).
Finding Text on a Web Page
- From Page view, press Menu ☐.
- Select Find Text on Page on the Page menu.
-
Enter the text you want to find.
-
Check or uncheck the Wrap Search box to indicate whether you want the search to wrap from the end of the page to the beginning when the search reaches the end of the page.
-
Select Find to start the search.
Working With Bookmarks and Saved Pages
Creating a Bookmark
With bookmarks, you can quickly access a Web page without entering the address every time. The Web browser can store up to one hundred bookmarks or saved pages, allowing you to open your favorite Web pages quickly. Note that a bookmark is different from a favorite button (see “Defining Favorite Buttons” on page 74).
- Go to the page you want to bookmark.
- Press Menu
- Select Add Bookmark from the Page menu.
- (Optional) Change the entries in the Name and Description fields.
- Select OK, and then select OK again.

Saving a Page
You can use the Web browser to save a page for offline viewing, so that you don't need an Internet connection to view it later.
- Go to the page you want to save.
- Press Menu
- Select Save Page from the Page menu.
- Select OK, and then select OK again.
Viewing Bookmarks or Saved Pages
Bookmarks and saved pages appear in Bookmarks view. Saved pages are indicated by a small triangle in the upper-right corner of the bookmark.
- Select the Bookmarks view 📁 icon.
- Select the bookmark or saved page you want to view.
Editing or Deleting a Bookmark or Saved Page
- From Bookmarks view, press Menu ☐.
- Select Edit Bookmarks from the Bookmarks menu.
- Select the bookmark or saved page you want to edit or delete.
- Enter the desired changes.
- Select OK.

Arranging Bookmarks and Saved Pages
Bookmarks view includes ten pages of bookmarks, so that you can arrange bookmarks and saved pages in a logical fashion. For example, you can store travel links on one page, stock links on another, and business links on a third page.
- From Bookmarks view, press Menu ☐.
- Select Edit Bookmarks on the Bookmarks menu.
- Enter a title for this page of bookmarks.
- Use the stylus to drag and drop a bookmark into another slot on the current page of bookmarks. To move a bookmark to a different page, drag and drop it onto the Bookmark Page 📄 icon.
- Select OK.

156 Section 3E: Browsing the Web
Customizing Your Web Browser Settings
1. Press Menu

- Select Options, and then select Preferences.
-
Select Page and set any of the following preferences:
-
Start With indicates which view is displayed every time you open the Web browser.
- Home Page indicates which Web page appears when you select 🔒.
- Restore Default resets the home page to the original Sprint Vision home page if you changed it.
-
Show Address Bar indicates whether the Web address appears in Page view. When the address bar is visible, you can select the pick list next to it to go to a previously viewed page, or enter a URL directly from Page view.
-
Select General and set any of the following preferences:
-
Auto-complete indicates whether the Web browser suggests text, based on your previous entries, when you enter information.
- Disable cookies indicates whether Web sites can store personalized information on your Treo device. Some sites do not work properly if you select this option.
- Disable Javascript bypasses JavaScript elements on the Web pages you view.
- Tap and Drag indicates whether dragging the stylus selects text or scrolls through the content of the page.


- Normal mode/Fast mode indicates whether you want to hide selected items so that Web pages load faster. When you select Fast Mode, you can set the following options:
- Disable cascading style sheets indicates whether style sheets are applied when you load a Web page. When style sheets are disabled, pages download faster, but you may lose some of the formatting.
-
Don't download images! indicates whether images appear when you load a Web page. If you select not to view images, you can still see any image by tapping and holding the placeholder box on the Web page with the stylus.
-
Select Advanced and set any of the following preferences:
-
Set memory limit for storing pages sets the amount of memory used for your cache. Pages are cached so that they load faster the next time you view them.
- Cookies indicates how much memory is being used by cookies. To free up this memory, select Clear Cookies.
- Cache indicates how much memory is being used by your cache to store recent pages and history. To free up this memory, select Clear Cache.
- Clear cache on exit indicates whether the cache clears each time you exit the Web browser.
-
Set Proxy sets up a proxy server to access the Internet. If your connection requires a proxy server, please contact your Internet service provider or IT administrator for this information.
-
Select OK.
| Note: | Setting a proxy server may prevent you from accessing some Sprint Vision Web pages. |
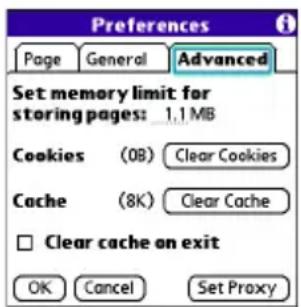
158 Section 3E: Browsing the Web
Using Bluetooth® Wireless Technology and Dial-Up Networking
In This Section
Connecting to Devices With Bluetooth Wireless Technology
- Using Your Device as a Wireless Modem
Connecting to Devices With Bluetooth Wireless Technology
With your Treo™ 755p smart device by Palm's built-in Bluetooth® wireless technology, you can connect to a number of devices enabled with Bluetooth wireless technology, such as a headset, car kit, printer, or GPS receiver, as well as to other phones and handhelds that are enabled with Bluetooth wireless technology. When you connect to another device, you create a partnership (also referred to by terms such as trusted pair, trusted device, or pairing) with that device. If your computer is enabled with Bluetooth wireless technology, you can also synchronize wirelessly or use your phone as a wireless modem.
You can create a list of Bluetooth devices that you trust to communicate with your Treo device. When communicating with trusted devices, your Treo device skips the discovery process and creates a secure link as long as the device is within range. Bluetooth range is up to 30 feet (10 meters) in ideal conditions. Performance and range are affected by physical obstacles, radio interference from nearby electronic equipment, and other factors.
When you configure a headset (see “Connecting to a Bluetooth Hands-Free Device” on page 79), the headset is automatically added to your trusted device list. Follow the steps in this section to add other devices to your trusted device list, such as your computer or GPS device enabled with Bluetooth technology.
Entering Basic Bluetooth Settings
To use your Treo device's Bluetooth functionality, you need to turn the Bluetooth feature on, and you may need to make your device either temporarily or permanently visible. You can also enter a name for your device.
-
Press Applications 📁 and select Bluetooth 🌿.
-
Select Bluetooth On.
-
(Optional) Enter a device name that identifies your Treo device when it is discovered by other Bluetooth devices.
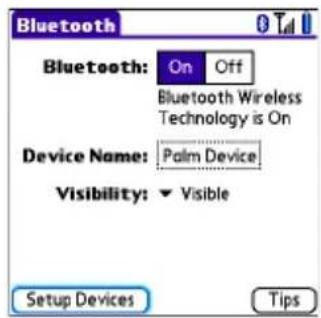
Note:
Use the same device name for all your Bluetooth connections. If you change the device name, you need to re-create any partnerships you have already created.
-
Select the Visibility pick list and select one of the following:
-
Visible enables Bluetooth devices that are not on your Trusted Device list to request a connection with your device. Your device remains accessible to other devices until you turn this option off.
- Temporary enables Bluetooth devices that are not on your Trusted Device list to request a connection with your device during the next two minutes. Your device reverts to the Hidden setting and becomes inaccessible to other devices after two minutes.
Important:
For your Treo device to be visible to other Bluetooth devices, the Bluetooth setting must be set to On, and visibility must be set to Visible or Temporary. Your Treo device screen does not need to be turned on. If you are requesting a connection with another device, or if you are accepting a request from a trusted device, your Treo device can be set to any of the Visibility options.
- Hidden allows only devices with which you have previously formed a partnership to request a connection with your Treo device. New devices cannot request a connection.
Section 3F: Bluetooth/DUN 161
Requesting a Connection With Another Bluetooth Device
- Press Applications 📋 and select Bluetooth ✿.
- If you have not already done so, enter the basic Bluetooth settings as described in "Entering Basic Bluetooth Settings" on page 160.
- Select Setup Devices.
- Select Trusted Devices.
- Select Add Device. (The Discovery icon appears, indicating that the discovery process is active.)
- Select the Show pick list and select Nearby devices.
- Select the device you want to connect with from the Discovery Results list, and then select OK.

Note:
If the device you're adding isn't in the Discovery Results list, make sure the device is ready to connect (see the device's documentation), and then select Find More on your Treo device to search again.
- Enter the same passkey on your Treo device and on the Bluetooth device, and then select OK.
Important:
Some Bluetooth devices have a predefined passkey. If your device has a predefined passkey, you can find the passkey in the documentation for that device. Other Bluetooth devices provide a screen where you enter a passkey that you make up. In either case, you must use the same passkey on both your Treo device and your Bluetooth device. We recommend that, where possible, you make up a passkey of 16 alphanumeric characters (letters and numerals only) to improve the security of your Treo device. The longer the passkey, the more difficult it is for the passkey to be deciphered.
- Select Done, and then select Done again to return to the Bluetooth screen.
162 Section 3F: Bluetooth/DUN
Accepting a Connection From Another Bluetooth Device
- To prepare your Treo device to be able to accept a connection from a requesting device, enter the basic Bluetooth settings as described in “Entering Basic Bluetooth Settings” on page 160.
- Enter the same passkey on your Treo device and on the Bluetooth device.
- If you want to form a partnership with the requesting device, check the Add to trusted device list box.
- Select OK.
| Note: | Make sure you close theBluetoothapplication after you set up devices and partnerships. |
Using Your Device as a Wireless Modem
Dial-up networking (DUN) is the feature that converts the phone on your Treo device into a modem so that you can access the Internet from your computer. You can set up DUN in one of two ways:
- If you have signed up on a Sprint Power Vision with Phone as Modem plan, you can use the Sprint Connection Manager software on your computer and connect your Treo device to your computer using the USB sync cable; see “Using Your Device’s Phone as a Modem” on page 110 for information.
- If your computer is enabled with Bluetooth wireless technology, you can set up your Treo device as a wireless modem using the built-in Bluetooth technology.
This section describes the process of setting up your device as a wireless modem using the built-in Bluetooth technology.
Creating a DUN Connection Using Bluetooth Technology
To configure DUN using Bluetooth technology, complete the following procedures:
- “Creating a Partnership Between Your Device and Your Computer” on page 165.
- “Setting Up Your Computer for a Bluetooth DUN Connection” on page 166.
- “Accessing the Internet Using a Bluetooth DUN Connection” on page 166.
Creating a Partnership Between Your Device and Your Computer
| Note: | If your computer is not enabled with Bluetooth wireless technology, you may be able to purchase a wireless Bluetooth adapter accessory for your computer. |
- Make sure that your computer's Bluetooth setting is on and that your computer is ready to create a Bluetooth partnership. Check the documentation that came with your computer to find and change these settings.
- On your device, press Applications 📄 and select Bluetooth 🔒.
- Select Bluetooth On if it is not selected, and then select Setup Devices.
- Select Trusted Devices.
- Select Add Device. The discovery icon appears, indicating that the discovery process is active.
- Select your computer from the Trusted Devices list, and then select OK.
- Enter a passkey on the Bluetooth Security screen, and then select OK. The passkey can be any number of up to 16 characters.
- Enter the same passkey number on your computer when prompted.
- Select Done, and then select Done again to return to the Bluetooth screen.
| Note: | You must enter the same passkey on your device and your computer. We recommend that you use a passkey of 16 digits, where possible, to improve the security of your Treo device. The longer the passkey, the more difficult it is for the passkey to be deciphered. |


Section 3F: Bluetooth/DUN 165
Setting Up Your Computer for a Bluetooth DUN Connection
Dial-up networking must be enabled or installed on your computer. Follow the instructions from the manufacturer of your Bluetooth adapter to enable DUN. Your wireless service provider may provide customized software programs that walk you through the DUN setup process. Check with your wireless service provider to see if such a program is available.
Accessing the Internet Using a Bluetooth DUN Connection
The steps for accessing the Internet on your computer may vary depending on your operating system and how Bluetooth wireless technology is set up on your computer—for example, if it is built-in versus if you are using a wireless Bluetooth adapter. If the following procedure does not work with your computer, check your computer's documentation for how to set up Bluetooth technology to access the Internet using a DUN connection.
Note:
You may need to use a virtual private network (VPN) to access corporate email. Check with your system administrator for more information.
Before you begin, verify that DUN is enabled on both your computer and your device.
- Open the Bluetooth screen on your computer and look for the option for paired devices. Check your computer's documentation for how to open this screen and for the name of the paired devices option.
- Double-click the icon or option representing your device. Your computer connects to your device and shows that DUN services are available.
- Double-click the DUN icon.
-
Enter the following in the Dial field: #777. You do not need to enter anything in the User Name or Password field.
-
Click Dial. Once the connection is successfully established, you can browse the Internet on your computer or download your email.
![Connect BluetoothConnection User name: user@canics.com Password: [To change the saved/password, click here] Save this user name and password for the following users: No only Everyone who uses this computer Dial: 8777 Dial Cancel Properties Help](/content/2026/05/999196/images/5e2d51f3a47b47669d1e2e93170d1eb4f791c8886f923e63c4351aae4d5814fb.jpg)
| Tip: | You may be asked if you want to remember this dial text for this connection. We recommend that you choose to remember the dial text to avoid errors and the inconvenience of entering it for every session. |
To verify that you are connected, look for a network connection icon in the taskbar at the bottom of your computer screen. To check the status of the connection, right-click the Bluetooth network icon.
| Note: | When a Bluetooth DUN connection is active, you cannot form a partnership with another device or discover another device. You also cannot send or receive information wirelessly directly from your device, browse the Web, or send or receive email messages, and any scheduled automatic email retrievals do not take place. Incoming calls are automatically sent to voicemail. You can make outgoing calls, but the DUN session terminates when you place the call. |
Terminating a Bluetooth DUN Internet Session
- On your computer, right-click the icon or option representing your device, and then click Disconnect.
Your Portable Media Device
Sprint

Working With Your Pictures and Videos
In This Section
Taking Pictures and Videos
- Customizing Your Camera Settings
- Viewing Pictures and Videos
Organizing Pictures and Videos
Using Your Online Album
- Viewing Pictures and Videos on Your Computer
Taking Pictures and Videos
The camera version of the Treo™ 755p smart device by Palm comes with an easy-to-use, built-in, 1.3-megapixel camera with 2x digital zoom. You can use the camera to take and view pictures and videos and send them to your friends and family. To add a personal touch to your device, use your pictures as your wallpaper in the Main view of the Phone application, and as caller ID images.
If your Treo device doesn't have a built-in camera, the sections in this chapter about taking photos and videos don't apply to you. But you can still receive and view photos and videos, send photos and videos to other people as attachments or as Sprint Picture Mail, and use photos to personalize your device (such as wallpaper or photo caller ID; see “Assigning a Caller ID Picture” on page 88 for details).
You can also upload pictures and videos to albums on the Sprint Picture Mail Web site (www.sprint.com/picturemail), move them to an expansion card, and copy them to your Windows computer by synchronizing your device with your computer.
Additional fees may apply for Sprint Picture Mail service. Contact Sprint for additional information.
| Note: | The camera defaults to 1.3 megapixel (1280 x 1024) resolution. The camera also supports VGA (640 x 480) and QVGA (320 x 240) resolution. The camcorder defaults to CIF (352 x 288) resolution and also supports QCIF (176 x 144) resolution. See “Customizing Your Camera Settings” on page 176 for information on accessing camera and camcorder settings. |
Taking a Picture
- Press Applications 📄 and select Camera 📋.
- By default, the Camera application stores pictures you take in the Palm album on your device. If you have an expansion card inserted in your device's expansion card slot, the Camera application creates a Palm album on the card and stores pictures there. To
172 Section 4A: Pictures & Videos
store the picture in a different location, select the album pick list in the lower-right corner of the screen, and then do one of the following:
- Select
to store the picture in the selected album. The storage location is based on the location of the album (device or expansion card). -
Select New Albums to open a dialog box where you can enter an album name and select the storage location (device or expansion card).
-
(Optional) Adjust the zoom setting by pressing Up ▲ to select 2x or pressing Down ▼ to select 1x.
- Point the lens on the back of your device at the subject you want to photograph.
- Press Center ☐ to take the picture.
- Select one of the following buttons:

Saves the picture in the location you selected in step 2.

Deletes the picture.

Lets you add a voice caption.

Opens a list of options for sending the picture:

natural_image
Close-up photo of a smiling child wearing a pink hat, with no visible text or symbols in the main image area.Album Pick List

natural_image
Close-up photo of a smiling child wearing a pink hat, with no visible text or symbols in the main image area.- Select Send with PictureMail to send the picture as part of a Picture Mail message (see “Creating and Sending a Sprint Picture Mail Message” on page 135).
- Select Send with Online Services to send the picture using one of the available Sprint Vision Online Services (see “Using Online Services” on page 145).
- Select Upload to Online Albums to upload the picture to your online album (see "Using Your Online Album" on page 183).
Recording a Video
- Press Applications 📁 and select Camcorder 🌐.
-
By default, the Camcorder application stores videos you record in the Palm album on your device. If you have an expansion card inserted in your device's expansion card slot, the Camcorder application creates a Palm album on the card and stores videos there. To store the video in a different location, select the album pick list in the lower-right corner of the screen, and then do one of the following:
-
Select
to store the video in the selected album. The storage location is based on the location of the album (device or expansion card). -
Select New Albums to open a dialog box where you can enter an album name and select the storage location (device or expansion card).
-
Adjust the position of your device until you see the subject you want to record on the screen.
-
Press Center ☐ to start recording.
- After you finish recording, press Center ☐ again to stop.
- Select one of the following buttons:

Begins playback.

Saves the video in the location you selected in step 2.

Deletes the video.

Opens a dialog box where you can adjust the volume during playback.
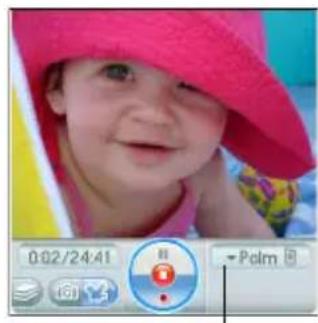
natural_image
Close-up photo of a smiling child wearing a pink hat, with no visible text or symbols in the main image area.Album Pick List

natural_image
Close-up photo of a smiling child wearing a pink hat (no visible text or symbols)174 Section 4A: Pictures & Videos

Opens a list of options for sending the video:
- Select Send with PictureMail to send the video as part of a Picture Mail message (see “Creating and Sending a Sprint Picture Mail Message” on page 135).
- Select Send with Online Services to send the video using one of the available Sprint Vision Online Services (see “Using Online Services” on page 145).
- Select Upload to Online Albums to upload the video to your online album (see "Using Your Online Album" on page 183).
Note:
The video recording screen displays the approximate recording time you have left, based on the space available on your device or expansion card. Actual recording time may vary depending on how fast you are moving, how many colors you are recording, and so on.
Customizing Your Camera Settings
You can customize the built-in camera's settings for your Treo device.
- Open Camera or Camcorder, and then press Menu ☑. If you are in Camera view, the Photo Settings screen appears. If you are in Camcorder view, the Video Settings screen appears.
-
Adjust any of the following settings:
-
Effects sets the color palette for the current picture or video. You can't change an item's palette after you take the picture or video.
- Prompt sound (Pictures only) sets the sound that plays before you take the picture.
- Shutter sound indicates whether a sound is played when you take a picture.
- Microphone (Videos only) turns the microphone on and off so that you can record videos with or without sound.
- Resolution sets the default size for newly captured pictures or videos.
- Date stamp (Photos only) indicates whether the date the picture is taken appears on your pictures.
- Review photos/videos indicates whether you can review pictures or videos before saving them and how quickly they are automatically saved.
-
Auto naming assigns a name to a series of pictures to be captured, such as Seattle001, Seattle002, and so on.
-
Select Done.


Viewing Pictures and Videos
Viewing a Picture
In addition to viewing the pictures you capture with the built-in camera, you can view pictures captured on many popular digital cameras or downloaded from the Internet. Your device supports the following picture formats:
JPG
BMP
TIF
GIF
- Press Applications 📋 and select Pics&Videos 🕒.
- Select the album that contains the picture you want to see.
- Select the picture you want to view.
- Press Right ▶ or Left ◀ to scroll to the next item in the album.
- If the picture has a voice caption, select to hear it.
- Tap the photo or press Center ☐ to return to Thumbnail view.
Tip:
You can also send a photo or video from Thumbnail view. Select the photo or video, select the Send icon in the lower-right corner of the screen, and then select the sending option you want.
Viewing a Video
In addition to viewing the videos you capture with the built-in camcorder, you can view videos captured on many popular digital video cameras.
- Press Applications and select Pics&Videos
- Select the album that contains the video you want to see.
- Select the video you want to view. Playback begins automatically.
- Hold down Right ▶ or Left ◀ to seek within the current video, or press Right ▶ or Left to scroll to the next item in the album.
- Tap the video or press Center ☐ to return to Thumbnail view.
Viewing a Slide Show
- Press Applications 📋 and select Pics&Videos 🕒.
- Highlight or select the album you want to view.
- (Optional) Press Menu ☐, select Options, and then select Auto-hide Toolbar On.
- Press Space ☐ to start the slide show.
- Tap the screen to return to the previous view.
Tip:
To set slide show options such as background music and transitions, open the Album menu and select Slideshow Setting. Keep in mind that background music overrides audio captions when you're running a slide show. Background music for a slide show also overrides any music that is playing using the Pocket Tunes™ application on your device if you start a slide show.
Organizing Pictures and Videos
After you take pictures and record videos, you can organize them into albums on your device or use your online album (see “Using Your Online Album” on page 183).
Creating Albums on Your Device

- Press Applications 📁 and select Pics&Videos
- Select Create New Album.
- Enter an album name, and then select OK.
Tip:
If you have an expansion card inserted into your device's expansion card slot, you can choose to create the album on the card.
Arranging Albums
After you create an album, you can add items to or remove items from that album.
- Press Applications 📋 and select Pics&Videos

- Select the album you want to organize.
Tip:
From Thumbnail view, select the List/Thumbnail icon to the right of the Camera icon in the lower-left corner of the screen to display the list of albums.
- Do one of the following:
■To add pictures or videos to an album, select
- To remove pictures or videos from an album, press Menu ☐, select Album, and then select Remove from album.

-
Select the pictures or videos that you want to add or remove, or select Select All to add or remove the entire album. (A plus sign [+] indicates that you want to add the item; an X indicates that you want to remove the item.)
-
Select Add or Remove.
Copying Pictures and Videos
You can copy pictures and videos into another album. You can also copy pictures and videos between your device and an expansion card.
| Tip: | Install the Palm® Files application from to easily browse and manage pictures and videos on an expansion card. Press Applications, select My Treo, select the Bonus tab, and then select Files. |
-
Press Applications 📁 and select Pics&Videos 🕒.
-
Select the album that contains the picture(s) or video(s) you want to copy.
| Tip: | From Camera view or Camcorder view, select the icon in the lower-left corner of the screen to display the list of albums. |
-
Press Menu
-
Select Copy to from the Photo (or Video) menu.
-
Select the pictures or videos that you want to copy, or select Select All to copy the entire album. (A plus sign [+] appears next to selected items.)
-
Select Copy.
Plus Sign (+) Indicates That an Item Is Selected

- Select the Copy items to pick list and select whether you want to copy the selected items to your device or to an expansion card.
- Select the Into album pick list and select the album you want to copy the selected items to.
- Select Copy.
| Tip: | You can also move pictures and videos between albums. Open the Photo (or Video) menu and selectMove to. The remaining steps are the same as those for copying pictures, but the command names displayMove instead ofCopy. |
Saving a Picture as Wallpaper
You can select a picture to use as wallpaper for the Main view in the Phone application.
- Open the picture you want to save as wallpaper.
- Press Menu
- Select Options, and then select Save as Wallpaper.
- When the confirmation message appears, confirm by selecting Yes, or decline by selecting No.
| Tip: | Press Phone to view the new wallpaper in the Phone application. |
Adding a Picture to a Contact Entry
- Open the picture you want to add to a contact.
- Press Menu
- Select Options, and then select Save as Contact.
- Select the contact you want to add this picture to.
Section 4A: Pictures & Videos 181
Rotating a Picture
- Open the picture you want to rotate.
- Press Menu
- Select Rotate from the Photo menu.
- Select the orientation.
Deleting a Picture or Video
- Open the album that contains the picture(s) or video(s) you want to delete.
- Press Menu
- Select Delete from the Photo (or Video) menu.
- Select the pictures or videos that you want to delete, or select Select All to delete the entire album. (An X appears next to the selected items.)
- Select Delete.
- Select Delete to confirm the deletion.
Tip:
You can also highlight a picture or video in Thumbnail view, and then press Backspace on your device keyboard to delete the highlighted item.
Using Your Online Album
Uploading Pictures to Your Online Album
Your Sprint Picture Mail account includes an online album on the Sprint Picture Mail Web site. You can use your online album to store and view pictures from your device or from a computer with Internet access.
| Note: | If you have not previously accessed your online album or used Sprint Picture Mail Online Services, you are prompted to create a password. |
- Press Applications 📋 and select Pics&Videos 🕒.
- Select the album that contains the picture(s) or video(s) you want to upload.
- Select 📋, and then select Upload to Online Albums.
- Select the picture(s) or video(s) you want to upload.
- Select Upload.
Working With Your Online Picture Mail Album
- Press Applications and select Pics&Videos
- Select the album pick list in the upper-right corner of the screen, and then select Online.
- Select the online album you want to view.
- Follow the steps described in "Viewing a Picture" on page 177 or "Viewing a Video" on page 178 to view a picture or video.


| Tip: | You can also download and play videos from your online album, and you can listen to voice captions that are attached to pictures, too. |
Section 4A: Pictures & Videos 183
Viewing Pictures and Videos on Your Computer
When you synchronize your smart device, your pictures and videos are copied to your desktop computer. You can view pictures in JPEG format and videos in MPEG-4 format (.3G2 file extension). You can email them to friends using your desktop email application.
On a Windows computer, you can view and edit synchronized pictures and videos in the Palm Media desktop application. Open Palm® Desktop software and click the Media icon. You can refer to the Palm Desktop Online Help for information about using the Palm Media desktop application.
Tip:
You can also view, download, and manage your pictures and videos from your computer at www.sprint.com/picturemail.
Listening to Music
In This Section
Setting Up Windows Media Player for MP3
◆ Transferring MP3 Files From Your Computer
- Transferring Music From a CD to Your Device
- Listening to Music on Your Treo Device
You can listen to music through the speaker on the back of your Treo™ 755p smart device by Palm, or through the included stereo headphones. To listen to music on your device, you need to convert the music files into MP3 format using Windows Media Player (Windows computers) or iTunes (Mac computers), and then transfer the music files to your device or to an expansion card. After you transfer the music files, you can play them using the Pocket Tunes™ application on your device.
| Important: | Mac users must transfer music files to an expansion card (sold separately). |
Setting Up Windows Media Player for MP3
On a Windows computer, you need to set Windows Media Player settings to save your music files in MP3 format in order for the files to be compatible with Pocket Tunes.
- Connect your device to your computer with the sync cable.
- On your device, press Applications and select pTunes.
- On your computer, open Windows Media Player, and then click the full-screen icon in the upper-right corner to maximize the window.
- Click Tools, and then click Options.
- Click the Rip Music tab, click the Format pick list, and then select mp3. Click OK.
- Click Tools, and then click Options.
- Click the Devices tab, select your Treo device from the Devices list, and then click Properties.

- Click the Quality tab and uncheck the Convert files as required by this handheld (recommended) box. Click Apply.
- Click OK, and then click OK again.
Setting Up iTunes for MP3
On a Mac, use iTunes (included with OS X) to convert music from a CD to MP3 format. For more information on using the iTunes software, see the documentation that came with your Mac.
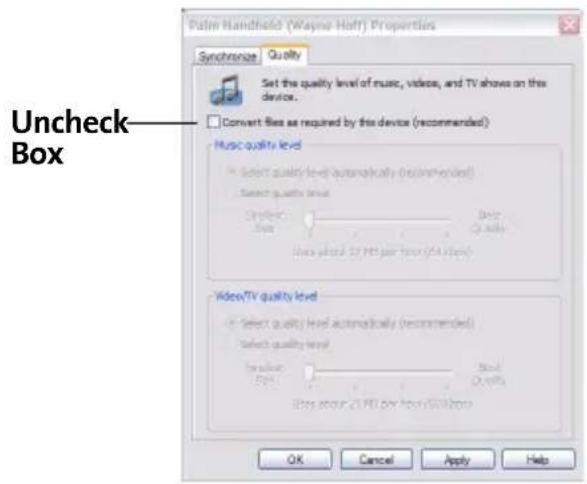
- On your Mac, open iTunes.
- Select Preferences.
- Click the Advanced button at the top of the window, and then click Importing.
- Click the Import Using pop-up menu and select MP3 Encoder.
- (Optional) Click the Setting pop-up menu and select Good Quality.
Transferring MP3 Files From Your Computer
The Pocket Tunes software that comes with your device is compatible with the popular MP3 audio file format. If your MP3 files are already on your computer's hard drive, you need to transfer them to your device to listen to them on your device.
If an expansion card is inserted into the device, on a Windows computer, Windows Media Player copies the MP3 files to the expansion card. If you don't have an expansion card inserted, the MP3 files are copied to device memory.
If you are transferring MP3 files from a Mac computer, you must insert an expansion card into the device. You cannot transfer MP3 files to device memory from a Mac.
Important:
You must synchronize your device with your computer at least once before you can transfer MP3 files from your computer.
- Connect your Treo device to your computer with the USB sync cable.
- On your device, press Applications 📋 and select pTunes 🔒.
- If you are transferring from a Mac computer, insert an expansion card into your device. This step is optional for Windows users.
- Do one of the following:
- Windows. Open Windows Media Player on your computer. Select the Sync tab, and then select Palm Handheld from the drop-down list.
Select Start Sync. The files are transferred to your device or to an expansion card automatically; do not press the sync button on the sync cable.
- Mac. Drag and drop the MP3 files onto the Send To Handheld droplet in the Palm folder. Select your device name (username), the file name, and the destination (card). Click OK. Synchronize your device with your computer. Be patient; transferring music to an expansion card can take several minutes.

| Tip: | You can also use a card reader accessory (sold separately) to transfer MP3 files from your computer to your expansion card. Create a “Music” folder in the root directory of the card, and store your MP3 files in this folder. |
| Note: | There may be restrictions that prevent you from downloading, viewing, and/or copying a video or music file (for example, DVD, CD, or MP3 file). You may also be prohibited from providing copies of the video or music file to any third person. It is your responsibility to ensure that you have obtained the legal right to use the video or music file for personal use and to honor any restrictions imposed by the original content providers. |
Transferring Music From a CD to Your Device
If your songs are on a CD and you want to listen to them on your device, you need to convert them to MP3 format on your computer before you transfer the files to your device.
On a Windows computer:
- Open the Windows Media Player application.
- Insert the music CD into your computer's CD drive.
- Select the Rip tab.
- Select the tracks you want to rip from the CD.
- Select Rip Music.
- Transfer the MP3 files to your device as described in "Transferring MP3 Files From Your Computer" on page 188.
On a Mac computer:
- Open iTunes.
- Insert the music CD into your computer's CD drive.
- Check the boxes next to the tracks that you want to convert to MP3.
- Click the Import button in the upper-right corner of the iTunes window.
- After the songs are imported, click the Eject Disk button in the lower-right corner of the iTunes window.
- Transfer the MP3 files to your device as described in "Transferring MP3 Files From Your Computer" on page 188.
190 Section 4B: Music
Listening to Music on Your Treo Device
- Press Applications 📋 and select pTunes 🔒.
-
Do any of the following:
-
To play the current song, select Play or press Space.
- To play the next song, select Next Song 📄.
- To play the previous song, select Previous Song Ⓜ.
- To play a different song, select Choose Songs and select a song from the list.
- To adjust the volume during playback, press the Volume button on the side of your device.
■ To pause playback, select Pause
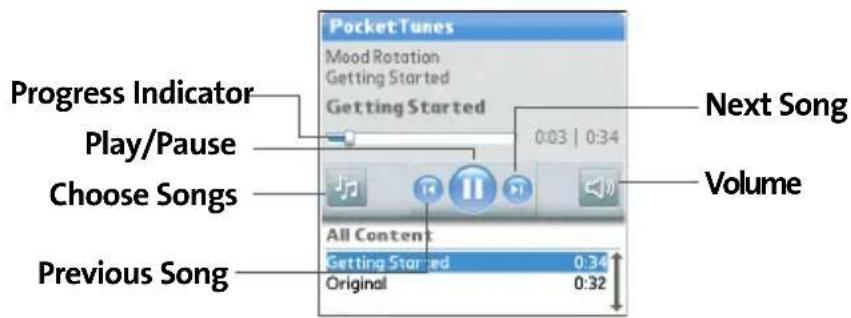
Tip:
You can also use the 5-way to navigate among songs, pause and resume playback, and adjust the volume during playback.
Pocket Tunes continues playing until it reaches the end of your list or until you select Pause 📄. Music continues to play even if you switch to another application or turn off your
Section 4B: Music 191
screen. If you want to stop playing music when you exit Pocket Tunes, open the Background Prefs menu, uncheck the Enable Background Playback box, and then select OK.
Tip:
If you don't hear anything when you play a song, make sure the Ringer switch is set to Sound On. See "Silencing Sounds" on page 260 for more information.
Creating a Playlist
If you want to play a group of songs in a particular order, you can create a playlist.
- Press Applications 📋 and select pTunes 🔒.
- Press Menu
- Select Actions, and then select Manage Playlists.
- Select New, and then enter a name for the playlist.
- Select Add Song. Select the songs you want to include on the playlist.
- Select Save List.
To play songs from a playlist, open Pocket Tunes, select Choose Songs, and then select Playlists. Select the playlist you want to play, and then select All.
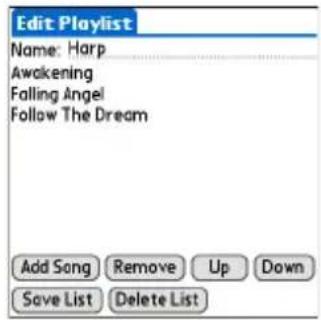
Editing a Playlist
- Press Applications 📋 and select pTunes 🔒.
- Press Menu
- Select Actions, and then select Manage Playlists.
- Highlight the playlist you want to edit, and then select Edit.
- Do any of the following:
- To delete a song from the playlist, select the song and then select Remove.
192 Section 4B: Music
- To add a song, select Add Song, check a song's box, and then select Done.
- To move a song up or down one slot, select a song and then select the up or down arrow.
6. Select Save List.
| Tip: | To delete a playlist, select Playlists, select Manage Playlists from the Actions menu, select the playlist, and then select Delete List. Select Yes to confirm the deletion. |
Section 4C
Watching Sprint TV
In This Section
- Accessing Streamed Media
- Viewing Streamed Media
Section 4C: Sprint TV 195
Accessing Streamed Media
The Sprint TV application enables you to view streamed audio and video media from various channels on your Treo™ 755 smart device by Palm. You can choose from a list of provided channels, or purchase additional channels so that you can download and view the programs you want.
- Press Applications 📋 and select Sprint TV
- Navigate to the channel list you want as follows:
• To go back one channel screen, select Back.
Note:
The Back option does not appear on the default channel screen.
- To go back to the main channel list, select Home.
- To stream audio or video content, select a channel. The icon indicates audio content; the icon indicates video content. The icon indicates that the channel contains multiple content items. Select the channel to view all items.

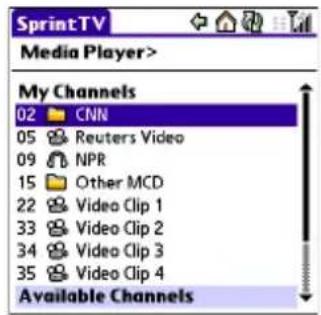
Note:
To view information about the selected channel or program, select Info.
After you finish viewing the information, select Done.
- (Optional) Select Stop ☐ or press Center ☐ to pause the server connection before streaming begins. Select Play ☑ or press Center ☐ again to resume streaming.
Tip:
From a channel or folder screen, you can also use the keyboard to enter a channel number, and then select OK to go to that channel.
196 Section 4C: Sprint TV
Viewing Streamed Media
Once you connect to the server, playback begins immediately. Use the following controls when viewing or listening to streaming media:
- Select to return to the channel list.
- Select 📄 or press Center 🔔 to pause playback of nonlive content such as videos on demand.
- Select or press Center to stop playback of live content.
- Select 📋 or press Center 🔔 to resume playback after pausing or to begin viewing again after stopping.
- Select 📄 or press Left ◀ to view the channel list with the first channel highlighted.
- Select 📋 or press Right ▶ to view the channel list with the last channel highlighted.
A few seconds after playback begins, the toolbar is hidden and you can view the content on the full screen. Press Up ▲ or Down ▼ to display the toolbar; press Up ▲ or Down ▼ again to hide the toolbar again.
- Press the Volume button on the side of your device to adjust the volume.
natural_image
Close-up of pink water lilies with green leaves, no visible text or symbolsYour Mobile Organizer
Sprint

Using Your Device's Organizer Features
In This Section
- Contacts
◆ Calendar
Tasks
♦ Memos
Contacts
Contacts is where you enter information about people you know. You can access this information from the Phone application to dial phone numbers and create favorites, and from the Messaging and email applications to send messages. When you create a contact, you can also assign a caller ID picture or ringtone to that contact, so that you know when that person is calling.
If you have several contacts to enter, it's more efficient to use Palm® Desktop software or MicrosoftOutlook on your computer and then synchronize information between your Treo™ 755 P smart device by Palm and your computer. For more information, see "Synchronizing Information—The Basics" on page 35.
| Note: | If you use Microsoft Exchange ActiveSync®, your contacts information (as well as email and calendar information) is pushed from or synchronizes directly with your company’s Exchange server. Push is a feature provided by Microsoft ActiveSync that pushes email messages, Calendar events, meeting invitations, and updated contact information it receives onto your device. You retrieve contacts (and email and calendar) updates from the server; they are not updated when you synchronize directly with your computer. For additional information, see “Getting Messages From Your Corporate Microsoft Exchange Server Onto Your Device” on page 130 (VersaMail® application users), or “Using Good Mobile Messaging” on page 131 (Good Mobile Messaging users). |
Adding a Contact
- Press Phone

- Select the Contacts favorite button.
Tip:
You can also open Contacts from Applications view.
202 Section 5A: Organizer Features
- Select New Contact.
- Use the 5-way 🔒 to move between fields as you enter information.
- (Optional) Do any of the following:
- Add a caller ID photo: Select the Picture box, and then do one of the following:
I Select Camera to take a picture and add it to this contact when you save the picture.
I Select Photos to add an existing picture to this contact.

- Add a caller ID ringtone: Select the Ringtone pick list and select a ringtone from the list to give incoming calls from this contact a distinctive ring.
- Place the entry in a category or mark it private: Select Details (see “Working With Private Entries” on page 277 for more information).
- Add a note to an entry: Select Note 📋.
- Display additional fields for this contact: Select Plus
Tip:
You can assign a ringtone to an entire category of contacts. For example, use a special ringtone for categories such as Family, Work, or Golf Buddies. Select the category pick list in the upper-right corner, select Edit Categories, and then select the category. Select a ringtone on the Edit Category screen.
- After you enter all the information, select Done.
Tip:
If you make an outgoing call or receive an incoming call that has caller ID and the phone number is not associated with a contact in your Contacts list, you can either create a new contact for that number or add the number to an existing contact. See “Saving Phone Numbers” on page 68 for details.
Viewing or Changing Contact Information
- In the Contacts list, begin entering one of the following for the contact you want to view or edit:
■ First name (JOH for John).
- Last name (SMI for Smith).
■First initial and last name (JSM for John Smith).
-
Select the name of the entry you want to open.
-
Select Edit, make changes to the entry as necessary, and then select Done.
Viewing Directions to a Contact's Address
- Make sure your phone is turned on and that you are inside a coverage area (see "Turning Your Device's Phone On and Off" on page 55).
- In the Contacts list, begin entering one of the following for the contact you want to view directions for:
■First name (JOH for John).
■Last name (SMI for Smith).
■First initial and last name (JSM for John Smith).
- Select the name of the entry you want.
- Select Map and wait for Google Maps to locate matching items.
- Select To or From depending on whether you want directions to or from the contact's address.
- Do one of the following and then select OK:
In the From location field, enter or select your starting location.
In the To location field, enter or select your destination.
-
When the route summary appears, select OK to view the first step in the directions.
-
Tap the forward and back buttons at the bottom of the screen to view the next or previous step in the directions.
204 Section 5A: Organizer Features
Deleting a Contact
- Open the contact you want to delete.
- Press Menu
- Select Delete Contact on the Record menu.
- Select OK.
Defining Your Business Card
- Create a new contact with your own business card information.
- Open the contact entry containing your business information.
- Press Menu
- Select Select Business Card on the Record menu.
After you define your business card, you can beam it to other Palm OS ® devices. In Contacts or in any Phone view, press Menu ☎ and select Beam Business Card on the Record menu.
Calendar
Calendar is a powerful organizer application that helps you manage your schedule. You can view your calendar by day, week, or month, or as an agenda list that combines your list of tasks and email notifications with your appointments. Schedule repeating meetings or block out a vacation by creating one event set to repeat at an interval you specify. Color-code your appointments by category and add notes with helpful information.
If you have several appointments to enter, it's more efficient to use Palm Desktop software or MicrosoftOutlook on your computer and then synchronize information between the Treo device and your computer. For more information, see “Synchronizing Information—The Basics” on page 35.
Note:
If you use Microsoft Exchange ActiveSync, your calendar information (as well as email and contacts information) is pushed from or synchronizes directly with your company's Exchange server. Push is a feature provided by Microsoft ActiveSync that pushes email messages, Calendar events, meeting invitations, and updated contact information it receives onto your device. You retrieve calendar (and email and contacts) updates from the server; they are not updated when you synchronize directly with your computer. For additional information, see “Getting Messages From Your Corporate Microsoft Exchange Server Onto Your Device” on page 130 (VersaMail users), or “Using Good Mobile Messaging” on page 131 (Good Mobile Messaging users).
Displaying Your Calendar
- Press Calendar repeatedly to cycle through the various views:
- Agenda view shows your daily schedule and any items on your Tasks list that are overdue or due today. If there's room, Agenda view also shows your schedule for the next dates that have events scheduled.

206 Section 5A: Organizer Features
Day view shows your daily schedule one day at a time.
- Week view shows your schedule for an entire week. The time frames are based on the Start Time and End Time settings in Calendar Preferences.
• Month view shows your schedule for a whole month.
- From any Calendar view, open the Options menu and select Year view to view a calendar for an entire year.
- From any Calendar view (except Agenda view), use the 5-way 📋 or stylus to move to another day, week, month, or year (based on the current view).
- From any Calendar view (except Agenda view), select Go To, and then select a date from the calendar.
Tip:
You can customize your phone to display the most current Calendar event on the Main view in the Phone application. Press Phone, open the Options menu, and then select Phone Display Options. Check the Show Calendar event box.
Creating an Event
- Press Calendar until Day view appears.
- Press Left ◀ or Right ▶ to select the desired day.

- Select New.
Section 5A: Organizer Features 207
-
Using the keyboard, enter a starting hour and minute for the event. (For example, enter 545 for 5:45.)
-
Select the End Time box, and then select the ending hour and minute for the event.
-
(Optional) To assign a time zone to the event, select the Time Zone pick list and select a city in the time zone you want.
-
Select OK.
-
Enter a description for the event.
Time Zones and Events
Here are some important points to keep in mind when assigning a time zone to an event:
- Palm Desktop software does not recognize time zones. If you sync with Palm Desktop software, you can add time zones to your events, but the start and end times do not change in Palm Desktop if you go to a different time zone.
- If you use Microsoft Outlook, you can use the time zone feature, but you must install the conduit that came with your Treo 755 smart device by Palm (that is, you must install the desktop software from the Palm Software Installation CD and select to sync with Outlook) on all the computers you synchronize your device with. Chapura PocketMirror and other earlier Microsoft Outlook conduits do not support time zones.
- To automatically assign a time zone to your events, open the Options menu, select Preferences, and check the New events use time zones box. All your new events are assigned to your local time zone, and you can change this setting for individual events. In addition, if you sync with Outlook and you select the time zone option on the Calendar conduit sync screen, then time zones sync for any new events you create in Outlook. Time zone settings are not added to any events that you created before you set these time zone settings.
- If you want your events with time zones to stay at the same time in Calendar, regardless of the time zone you are in, go to Date & Time Preferences, select the Automatically set pick list, and then select either Nothing or Date & Time. If you select Date, time and
time zone from the Automatically set pick list, the event time shifts if you travel to a different time zone. See “Setting the Date and Time” on page 269 for information.
Adding an Alarm to an Event
- In Calendar, select the event.
- Select Details.

- Check the Alarm box, and then select the number of minutes, hours, or days before the event you would like to receive the alarm.
| Note: | The alarm for untimed events (see “Creating an Untimed Event” on page 209) is defined by minutes, days, or hours before midnight of the date of the event. |
- Select OK.
When an alarm goes off, an alert is also displayed on the Alert screen. Select an alert's description to jump to that item, or check the box to clear that alert. See "Viewing and Using the Alert Screen" on page 98 for more information.
Creating an Untimed Event
An untimed event is an event that does not occur at a particular time of day—for example, a holiday or anniversary.
- Press Calendar 📁 until you are in Day view.
- Press Left ◀ or Right ▶ to go to the date of the event.
- Make sure that no times are highlighted.
- Enter a description for the event. A diamond appears next to the description of an untimed event.
Scheduling a Repeating Event
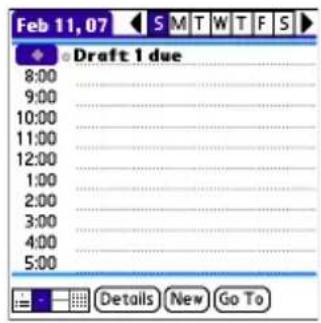
- Create an event, and then select it.
- Select Details.
- Select the Repeat pick list, and then select a repeat interval. (If the interval you need doesn't appear on the list, select Other to define a custom interval.)
- For weekly events, select the day(s) the event is repeated; for monthly events, select Day or Date to indicate the repeating method.
- If the event has an ending date, select the End on pick list, select Choose Date, and then select the ending date.
- Select OK.
Tip:
To enter a birthday or anniversary, add the information to the person's Contacts entry and it automatically appears in your Calendar.

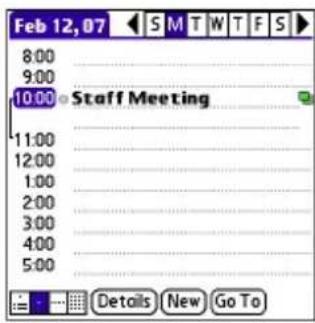
This Icon Indicates a Repeating Event
210 Section 5A: Organizer Features
Color-Coding Your Schedule
Use color-coding to quickly spot various types of events. For example, make your appointments with family green, coworkers blue, and friends red. Follow these steps to create a category and assign it a color code:
- From Day view, select the event description or select an empty time slot.
- Select Details.
- Select the Category pick list, and then select Edit Categories.
-
Do one of the following:
-
To create a new category, select New and then enter a category name.
-
To add a color to an existing category, select a category, and then select Edit.
-
Select the color you want to give this category, and then select OK.
- (Optional) Repeat steps 4 and 5 to add or edit more categories.
- Select OK two more times.
Now that the category is set up, you can assign a specific event to this category. See the next section for details.
Editing or Deleting an Event
Tip:
To save memory, you can purge your old events. Open the Record menu and select Purge. Select the Delete Events Older Than pick list and select a time frame. Select OK.
- Select the event you want to edit or delete.
- Select Details.
- In addition to the settings covered earlier in this chapter, you can also change any of the following settings:
- Date and Time indicate when the event takes place. Change these settings to reschedule the event.
Section 5A: Organizer Features 211
- Location provides space for you to enter a description of where the event takes place.
Category sets the color-coded category for this event.
Note ☐ provides space for you to enter additional text. - Delete removes the event from your Calendar.
4. Select OK.
| Tip: | If you synchronize with Microsoft Outlook and your events include other people, aWithfieldappears in theDetailsdialog box and your attendee information appears in this field after you synchronize. |
Customizing Display Options for Your Calendar
1. Press Menu

- Select Options, and then select Display Options.
- Select the Default View pick list, and then select the view you want to see when you open Calendar.
- Select the Agenda box and set any of the following Agenda view options:
■ Show Due Tasks displays tasks that are due today and tasks that are overdue.
- Show Messages displays the number of read and unread email messages.
■ Background displays a favorite picture as the Agenda view background. Check the Background box, select the picture
thumbnail, and then select a picture. Adjust the fade setting so that the text is easy to read against the picture.
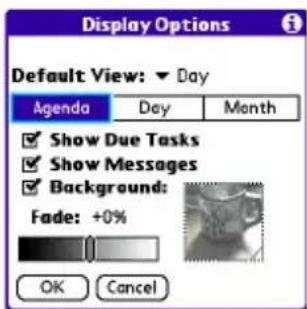
212 Section 5A: Organizer Features
- Select the Day box and set any of the following Day view options:
• Show Category List displays the category pick list.
- Show Time Bars activates the time bars that appear in Day view. The time bars show the duration of an event and illustrate event conflicts.
- Compress Day View controls how times appear in Day view. When Compress Day View is unchecked, all time slots

are displayed on the screen. When it is checked, start and end times are displayed for each event, but blank time slots toward the bottom of the screen disappear to minimize scrolling.
- Show Category Column displays the color-coded category marker between the time and the description to indicate which category the event is filed under.
- Select the Month box and set any of the following Month view options:
■ Show Category List displays the category pick list.
- Timed Events displays events that are scheduled for a specific time.
- Untimed Events displays events that are scheduled for a specific date but not a specific time.
- Daily Repeating Events displays events that are repeated every day.

- Select OK.
Selecting Alarm Tones
- Press Menu
- Select Options, and then select Sound Preferences.
- Select the Application pick list, and then select Calendar.

- Select the Volume pick list, and then select the volume level.
- Select the Vibrate pick list, and then select how you want your device to vibrate for an event alarm.
-
Select any of the following:
-
Alarm Sound sets the tone played the first time your alarm goes off.
- Reminder Sound sets the tone played if an alarm is not acknowledged and the alarm repeats itself.
- Repeat indicates how many times the alarm repeats itself if it is not acknowledged.
- Default Alarm sets the default number of minutes, hours, or days before an event that the alarm goes off.

7. Select Done.
| Tip: | You can also preview, delete, and send sounds that you use as alarms. From the Sounds & Alerts Preferences screen, select Manage. To play a sound, select it and press Center on the 5-way. To delete a sound, select it and press Backspace, and to send a sound, select it and then select Send. |
214 Section 5A: Organizer Features
Tasks
You can use the Tasks application to keep track of tasks you need to complete and to keep a record of completed tasks.
Adding a Task
- Press Applications 📁 and select Tasks 📄.
- Select New to create a new task.
- Enter a description of the task. (The text can be longer than one line.)
Setting Task Priority, Due Date, and Other Details
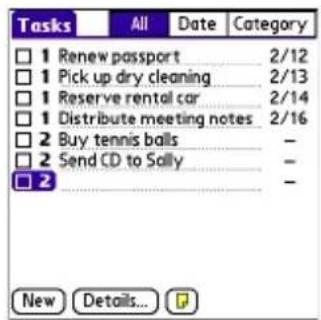
The Details dialog box enables you to assign a priority level, due date, category, privacy flag, and note to each task.
- Select the task to which you want to assign details.
- Select Details.
-
Set any of the following:
-
Priority sets the Priority number for this task (1 is the most important). You can arrange your tasks based on the importance of each task.
Category assigns the task to a specific category. - Due Date sets the due date for the task. Select the Due Date pick list and select a due date.
Alarm sets an alarm for this task. -
Repeat indicates whether the task occurs at regular intervals and how often it repeats. When you check off a repeating task, the next instance of this task automatically appears in your task list.
-
Private indicates whether the task is private. Check this box to mark this task private. See “Working With Private Entries” on page 277 for additional information.
- stores additional text you want to associate with the task.
4. Select OK.
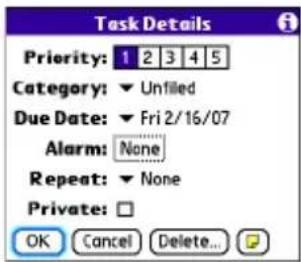

Tip:
You can also set the priority by tapping the Priority number next to a task in the Tasks list and then selecting a priority level from the list.
Checking Off a Task
- Select the task you want to check off, and then press
Center.
Organizing Your Tasks
In the Tasks list, select one of these options:
• All displays all your tasks.
- Date displays tasks that are due in a specific time frame. You can select Due Today, Last 7 Days, Next 7 Days, or Past Due.
Category displays tasks that are assigned to the selected category. Select the Category pick list to select a different category.
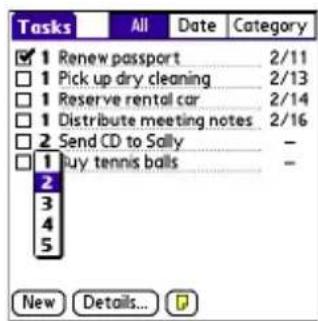
216 Section 5A: Organizer Features
Tip:
Overdue tasks have an exclamation point (!) next to the due date.
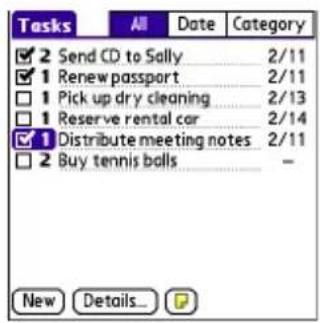


Deleting a Task
- Select the task you want to delete.
- Press Menu
- Select Delete Task on the Record menu.
- Select OK.
Tip:
To save memory, you can purge all completed tasks. Open the Record menu, select Purge, and then select OK.
Customizing Tasks
The Tasks Preferences screen enables you to control the appearance of the Tasks list screen.
- In the Tasks list screen, press Menu ☐.
-
Select Options, and then select Preferences.
-
Set any of the following preferences:
-
Sort by indicates the order in which your tasks appear in the list.
- Show Completed Tasks displays tasks that you've checked off.
- Record Completion Date replaces the due date with the completion date when you check off a task.
- Show Due Dates displays task due dates and inserts an exclamation point (!) next to overdue tasks.
- Show Priorities displays the priority setting for each task.
■ Show Categories displays the category for each task. - Alarm Sound sets the sound for the alarms you assign to your tasks.

- Select OK.
Memos
Memos are a great way to store notes on your Treo device. Each memo can include 4,096 characters of text.
Creating a Memo
- Press Applications 📋 and select Memos 📋.
- Enter the text that you want to appear in the memo. (Press
Return (to move down to new lines in the memo.) - Select Done.

Tip:
You can assign categories to your memos. Open the memo you want to change, select the category pick list at the top of the screen, and then select a category.
Deleting a Memo
- Select the memo you want to delete.
- Press Menu
- Select Delete Memo on the Record menu.
- Select OK.
Increasing Your Productivity
In This Section
Using the Documents Application to Work With Your Office Files
Voice Memo
World Clock
Calculator
Using the Documents Application to Work With Your Office Files
With the Documents application, you can take your important office information with you. You can create, view, and edit Microsoft Word and Excel files directly on your device. You can also view and manage PowerPoint and PDF files. For example, you can open email attachments, files you download with the Web browser, and files stored on an expansion card—as long as the files are in a supported format.
| Note: | The version of Documents To Go® that comes with your device does not support Microsoft Office 2007. To access Office 2007 files on your device, you must save the files in Office 2003 format. For information about an upgrade that supports Office 2007, go towww.dataviz.com/office2007(additional fees may apply). |
If you install the Documents To Go desktop software (from www.palm.com/mypalm/755psprint-bonus), you can use Documents To Go to transfer files to your device when you synchronize.
| Note: | For complete information on the Documents To Go application, install it fromwww.palm.com/mypalm/755psprint-bonus, click the Documents To Goicon on your computer, and then clickHelp; or go towww.dataviz.com. |
| Tip: | Install the Palm® Files application to easily browse and manage files on an expansion card. Press Applications, select My Treo, select the Bonus tab, and then select Files. |
Here are a few more examples of what you can do with Documents:
- Send and receive email attachments in Word, Excel, PowerPoint, and Acrobat file formats (DOC, XLS, PPT, and PDF).
•View Word, Excel, PowerPoint, and Acrobat files (DOC, XLS, PPT, and PDF). - Create or edit a Word-compatible document or Excel-compatible spreadsheet on your device, and then save it in the native DOC or XLS format.
- Create a PowerPoint presentation on your computer, use the Documents To Go desktop application to optimize the file for your device, and then sync the file onto your device. View or edit the file on your device, and then sync again to transfer the changes to the original PowerPoint file on your computer.
Note:
The Documents application does not support some editing functions, such as multiple font sizes and spell check.
Opening a Document
In the Documents application, you can open and view compatible Word, Excel, PowerPoint, or Acrobat (PDF) files on your device or on an expansion card that is inserted into the expansion card slot.
-
Press Applications 📋 and select Documents 🌐.
-
Select the document you want from the list.

Tip:
When you are working on a file on your device, save it to your device or your expansion card by opening the menus, selecting Save As from the File menu, and then selecting the location where you want to save the file.
Voice Memo
Voice Memo provides a place for you to record and play back notes and other important thoughts directly on your device.
Note:
Voice memos are not updated or backed up during synchronization.
Creating a Voice Memo
- Press and hold the Side button on your device. Face your device and begin speaking.
Note:
Your recording pauses automatically when you receive a call. If you answer the call, recording stops and saves the voice memo. If you have not finished recording, rerecord your memo after hanging up from the call. If you ignore the call, select Record to resume recording.
-
After you finish recording, release the Side button. The memo is automatically saved to your device.
-
(Optional) Enter a title for the memo.
Tip:
Alternately, open the Voice Memo application, press the Side button to begin recording, and then press it again when you have finished recording. If you are recording a long voice memo, you can begin recording by opening Voice Memo and selecting New. Using this method, you can press and hold Center on the 5-way to pause recording, and release Center to resume recording.
Listening to a Voice Memo
- Press Applications 📋 and select Voice Memo 🔒.
- In the Voice Memo list, navigate to the voice memo title and then press Center to select it. The voice memo begins to play.
- To set the volume level, press the Volume button on the side of your device or press Up ▲ or Down ▼ on the 5-way 📋.
- Press Center ☐ to pause or stop playback.

| Note: | To change a voice memo title, open the Voice Memo menu and select Rename Memo. |
| Tip: | You can send a voice memo in an email message (see “Attaching Voice Memos” on page 122). You can also use Bluetooth® wireless technology to send a voice memo to a nearby Bluetooth device (see “Sending Entries Over a Bluetooth Wireless Connection” on page 241).You can also use a voice memo as a ringtone. Select a voice memo, press Menu, and select Copy to Ringtone from the Voice Memo menu. To assign the ringtone, see “Selecting Ringtones” on page 85 or “Assigning a Caller ID Ringtone” on page 87. |
World Clock
World Clock displays the day and time in three cities anywhere around the globe. Whether you're traveling or staying at home, it's easy to keep track of the best times to reach your business associates, friends, and family in faraway places.
Setting Cities
World Clock shows the system date and time above the world map. If you selected the option to get the date and time from the mobile network (see “Setting the Date and Time” on page 269), the Sprint National Network automatically updates the time display to match the local time when you travel.
Below the world map you can view the time in two other cities. If you travel a lot, you may want to select your home city as one of these two cities, so that you always know what time it is at home.
-
Press Applications 📁 and select World Clock
-
Select a city pick list, and then select a city in the same time zone.
Adding Cities

If the city you want to display is not in the predefined list, you can add it.
- Select a city pick list, and then select Edit List.
- Select Add.
- Select a location in the same time zone as the city you want to add, and then select OK.
- Enter the name of the city.
- Select Location, select Map, select the location of the city, and then select OK.
226 Section 5B: Productivity
-
If the city is not on Daylight Saving Time, uncheck this box. If Daylight Saving Time is observed, enter Start and End dates.
-
Select OK.
Setting an Alarm
The next time you travel, don't rely on a hotel alarm clock to get you to that important meeting; use your device instead. World Clock includes a built-in alarm feature that you can use as a travel alarm.
Tip:
Make sure the Ringer switch is set to Sound On, so that you can hear the alarm.
-
Select Off in the upper-right corner.
-
Select the time you want the alarm to sound.
-
Select OK.
Tip:
To customize the alarm sound and volume, open the Options menu and select Alarm Preferences.
World Clock Tips
- Run your stylus over the map to see the time in other cities.
- The shadow over the map represents nighttime moving across the globe.
Calculator
The Calculator application includes a basic calculator, plus an advanced calculator with scientific, financial, and conversion functions
Switching Between Basic and Advanced Calculator Modes
- Press Applications 📁 and select Calc 📄.
- Press Menu
- Select Options, and then select Advanced Mode or Basic Mode.

Basic Mode Advanced Mode

Tip:
In Basic Mode, you can also press Right on the 5-way to switch to Advanced Mode. In Advanced Mode, press Right on the 5-way to cycle between functions, and press Left on the 5-way to return to Basic Mode.
Selecting Functions in Advanced Calculator Mode
- Switch to Advanced Calculator Mode (see the preceding procedure).
- Press Menu
- Select Options, and then select the function you want to use:
228 Section 5B: Productivity
- Math provides advanced mathematical functions such as exponents, roots, and logarithms.
- Trig provides trigonometric functions such as sine, cosine, tangent, and variants.
■ Finance provides financial calculator functions such as APR and amortization. - Logic displays hexadecimal characters on the keypad, plus logic functions such as And, Not, Or, and Xor.
■ Statistics provides statistical functions such as sum, factorial, and random number generator. - Weight/Temp provides weight and temperature conversions for metric and English values.
■ Length provides length conversions for metric and English values.
■ Area provides area conversions for metric, traditional, and English values.
■ Volume provides volume conversions for metric and English values.
4. Press Menu

- Select Pref, and then select the decimal display format: Float, Fixed (x), Sci (x), or Eng (x).
6. Press Menu

- Select Pref, and then select the number display format: Degrees, Radians, or Grads.
Tip:
To access a list of mathematical constants, such as Avogadro's number or the speed of light, select Con.
Storing and Recalling Numbers in Advanced Mode
• To store a number in one of ten memory slots, select Sto.
• To recall a stored number, select Rcl.
Managing Your Information and Settings
Sprint

Managing Files and Applications
In This Section
Using Find
- Installing Applications
- Removing Applications
- Viewing Application Information
Sending Information Using Bluetooth® Wireless Technology
- Beaming Information
♦ Synchronizing Information—Advanced
Using Expansion Cards
Using Find
The Find feature locates any text in the built-in applications and databases and in some third-party applications. The Find feature searches for the group of characters you specify, including characters that are part of a word. Find is not case-sensitive, and it locates any word that begins with the text you enter. For example, entering plan finds planet but not airplane.
When your phone is turned on and you are in an area where data services are available, Find also includes Google Maps links that help you find a location, business, or directions to the word you're searching for. For example, to find a nearby pizza place, enter pizza followed by a space and your zip code, such as "pizza 95060."
- On any screen press Option + Shift/Find to open the Find dialog box.
- Enter the text you want to find.
- Select OK to start the search.
- In the search results, select the text you want to review, or select Find More to continue the search.
| Find | |
| Matches for "birthday" | |
| Calendar | |
| Mom's birthday | Yearly |
| Ed's birthday | Yearly |
| Yuko's birthday | Yearly |
| Dad's birthday | Yearly |
| Ashok's birthday | Yearly |
| Debasmita's birthday | Yearly |
| Dylan's birthday | Yearly |
| Yukari's birthday | Yearly |
Installing Applications
Your Treo™ 755p smart device by Palm comes with several built-in and ready-to-use applications. You can also install free bonus software applications, such as business software, games, and more. You can install the bonus software wirelessly using the My Treo application on your device or by downloading the bonus software from
www.palm.com/mypalm/755psprint-bonus to your computer and then synchronize to install it on your device. You can also use the Web browser on your device or your computer to purchase and install other third-party Palm OS® applications. To learn about applications you can purchase for your device, go to www.palm.com/mypalm/755psprint.
The instructions in this section tell you how to install basic PRC (Palm OS application) and PDB (Palm OS database) files on your Treo device. Some Palm OS software uses an installer or wizard to guide you through the process. For details, consult the documentation that came with the software.
Installing Bonus Software From My Treo on Your Device
My Treo lets you download and install bonus software that you can use on your device. If the bonus software has a desktop component in addition to a device component, you need to download the software to your computer first. See “Installing Bonus Software From My Palm on Your Computer” on page 236 for information on installing software that includes a desktop component.
- Press Applications 📋 and select My Treo 📋.
- Select the Bonus tab.
- Select the Install link below the name of the application you want to install.
- Repeat step 3 to install additional applications.
Installing Applications From the Internet
You can use the Web browser on your device to install Palm OS files (PRC or PDB) directly from the Internet. When you download a PRC or PDB file, it is automatically installed on your device. If a file is compressed (ZIP or SIT files), you need to download it to your computer and expand the file before installing it on your device.
- Open the Web browser (see "Viewing a Web Page" on page 148).
-
Go to the page that contains the link to the application you want to download.
-
Press Left ◀ or Right ▶ to highlight the link to the file, and then press Center ○ to initiate the download process.
-
Follow the onscreen instructions to accept and install the application.
Installing Bonus Software From My Palm on Your Computer
Some bonus software applications require the installation of a desktop component. To install these applications, you must first install Palm® Desktop software from the Palm Software Installation CD that came with your device, and then download the applications to your computer.
Windows Vista Users: Before inserting the Palm Software Installation CD, go to www.palm.com/windowsvistato find information about installing Palm Desktop software on Windows Vista.
- On your computer, go to www.palm.com/mypalm/755psprint-bonus.
- Follow the onscreen instructions to download the applications you want to install.
- Synchronize your device with your computer to install the application(s) on your device.
Installing Other Third-Party Applications From a Computer
To install other third-party applications from a computer, you must first install Palm Desktop software from the Palm Software Installation CD that came with your device.
When you download an application to your computer, it is probably in a compressed format such as a ZIP or SIT file. If the file is compressed, you need to use a decompression utility on your computer, such as WinZip or Allume StuffIt Expander, before you install the application on your device.
- On a Windows computer, drag and drop the application file(s) onto the Palm™ Quick Install icon on the Windows desktop.
On a Mac computer, drag and drop the application file(s) onto the Send To Handheld droplet in the Palm folder.
- Select your device name from the User list, and then click OK.
- Synchronize your device with your computer to install the application(s) on your device.
Tip:
You can open a window that lets you select whether to install files on your device or on an expansion card. On a Windows computer, double-click the Palm Quick Install icon. On a Mac computer, open the HotSync menu and select Install Handheld files.
Getting Help With Third-Party Applications
If you encounter a problem with a third-party application (such as an error message), contact the application's author or vendor. For general troubleshooting of third-party applications, see “Third-Party Applications” on page 314.
Removing Applications
If you decide that you no longer need an application or you want to free up memory, you can remove applications from your device or from an expansion card. You can remove only applications, patches, and extensions that you install; you cannot remove the built-in applications that reside in the ROM portion of your Treo device. These applications appear with a lock 🔒 icon next to them.
-
Press Applications .
-
If you want to remove an application from an expansion card, insert the card into your device.
-
Press Menu
-
Select Delete on the App menu.
-
Select the Delete From pick list and select the location of the application you want to remove: Phone or Card.
-
Select the application that you want to remove.
-
Select Delete.
-
Synchronize to remove the application from the Backup folder on your computer.
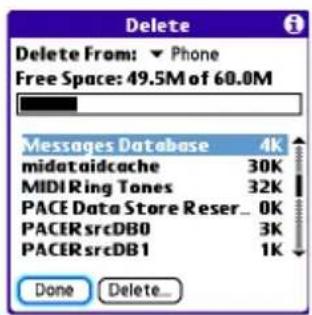
| Tip: | Applications deleted from your device are kept on your computer in the Archive folder of your user folder. If you’re having trouble locating your user folder, see “I Can’t Find My User Folder” on page 294. |
Manually Deleting Applications From Your Computer
If an application you delete reappears on your device, you may need to manually delete it from your computer.
- Locate your Backup folder on your computer.
Windows: C:\Program Files\Palm\
Mac: Mac HD/Users/
- If you upgraded from a previous version of Palm Desktop, your backup folder may be located in the palmOne or Handspring folder.
- If you find a PRC or PDB file for the application you just removed, delete the file from the Backup folder.
- Delete the file from your device again.
Viewing Application Information
The Info screens display basic statistics about the applications on your Treo device.
- Press Applications .
- Press Menu
- Select Info on the App menu.
- At the bottom of the screen, select the type of information you want to view:
■ Version displays the version numbers of your applications.
- Size displays the size (in kilobytes) of your applications and information.
- Records displays the number of entries in your applications.
-
Scroll to the application you want to see information about.
-
Select Done.

Sending Information Using Bluetooth® Wireless Technology
Sending Entries Over a Bluetooth Wireless Connection
In most applications you can send an individual entry or item such as a contact or a picture. You can also send all the entries in a category, such as all contacts in the Business category.
- Press Applications 📄 and select Bluetooth ⓣ.
- Select Bluetooth On.
- Press Applications 📄 and open the application containing the information you want to send.
- Select the entry or category you want to send.
- Press Menu
- Select Send from the leftmost menu.
- Select Bluetooth, and then select OK.
- Select the receiving device(s) on the Discovery Results screen, and then select OK.
Sending an Application Over a Bluetooth Wireless Connection
- Press Applications 📁 and select Bluetooth 🔒.
- Select Bluetooth On.
- Press Applications
- Press Menu
- Select Send from the App menu.
- Select the Send From pick list and select whether the application you want to send is located on your device or on an expansion card.
- Select the application you want to transfer. You cannot send an item that has a lock next to it.
Section 6A: Managing Files 241
-
Select Send.
-
Select Bluetooth, and then select OK.
-
Select the receiving device(s) on the Discovery Results screen, and then select OK.
Receiving Information Over a Bluetooth Wireless Connection
- Press Applications 📄 and select Bluetooth ⚙️.
- Select Bluetooth On.
-
Select the Visibility pick list and select one of the following:
-
Visible: Enables Bluetooth® devices that are not on your Trusted Device list to request a connection with your device. Your device remains accessible to other devices until you turn this option off.
-
Temporary: Enables Bluetooth devices that are not on your Trusted Device list to request a connection with your device during the next two minutes. Your device reverts to the Hidden setting and becomes inaccessible to other devices after two minutes.
-
Use the other device to discover your Treo device and send information to it:
-
See the other device's documentation to learn how to discover and send information over a Bluetooth wireless connection.
-
If the Ringer switch is set to Sound On 📁, your Treo device beeps to notify you of the connection and then prompts you to accept the information. Select a category or expansion card to file the item. If you don’t select a category, the item goes into the Unfiled category.
-
Select Yes to receive the information or No to refuse it.
Tip:
As a security measure, your Treo device does not accept any information unless you select Yes to receive the information. To protect your information, do not accept any information from an unknown sender.
242 Section 6A: Managing Files
Beaming Information
Your Treo device is equipped with an IR (infrared) port that enables you to beam information to another Palm OS device with an IR port. The IR port is located on the side of your device, above the expansion card slot door, behind the small dark shield.

For best results, the path between the two devices must be clear of obstacles, and both devices must be kept stationary. If you have difficulty beaming, shorten the distance and avoid bright sunlight.
Tip:
If you beam a bookmark or a saved page from the Web browser, it beams the URL, not the contents of that page.
Beaming an Entry
You can beam an individual entry or item such as a contact or a picture. You can also beam all the entries in the selected category, such as all the contacts in the Business or Family category.
-
Select the entry or category you want to beam. (You cannot beam an item that has a lock next to it.)
-
Press Menu
Section 6A: Managing Files 243
- Select one of the following on the Record menu:
Beam sends an individual entry.
- Beam Category sends all entries in the current category.
- When the Beam Status dialog box appears, point the IR port on your Treo device directly at the IR port of the receiving device.

natural_image
Illustration of two mobile phones with a signal wave between them, no text or symbols present- Wait for the Beam Status dialog box to indicate that the transfer is complete before you continue using your Treo device.
| Tip: | You can beam your business card. From the Main view in the Phone application, press Menu, and then press M. |
Beaming an Application
Not all applications can be beamed. A lock 🔒 icon appears on the Beam screen next to applications that cannot be beamed.
-
Press Applications .
-
Press Menu
-
Select Beam on the App menu.
244 Section 6A: Managing Files
- Select the Beam From pick list and select whether the application you want to beam is located on your Treo device or on an expansion card.
- Select the application you want to transfer, and then select Beam.
- When the Beam Status dialog box appears, point the IR port on your Treo device directly at the IR port of the receiving device.
- Wait for the Beam Status dialog box to indicate that the transfer is complete before you continue using your Treo device.
| Note: | Please note that there may be restrictions that prevent you from transferring copies of an application to a third party. It is your responsibility to ensure that you have obtained the legal right to provide a copy to the third party and to honor any restrictions imposed by the software licensors. |
Receiving Beamed Information
- Turn on your screen.
- Select the beam command on the transmitting device.
- Point the IR port on your Treo device directly at the IR port of the transmitting device to open the Beam Status dialog box.
- When the Beam Status dialog box appears, select a category or expansion card. (If you don't select a category, the item goes into the Unfiled category.)
- Select Yes to receive the information or No to refuse it.
Synchronizing Information—Advanced
Changing Which Applications Sync
By default, information from Calendar, Contacts, Memos, Pics&Videos, and Tasks is updated each time you sync your device with Palm Desktop software or Microsoft Outlook. You can change which applications sync. For example, if you don't use the Memos application and you want to speed up synchronization, you can turn off synchronization for Memos.
Tip:
Windows: If you set up your device to sync with Outlook, see the online Outlook synchronization Help to learn how to change which applications synchronize. Click the HotSync® manager icon in the taskbar in the lower-right corner of your computer screen, and then select Custom to view the list of applications that sync with Outlook.
On a Windows computer:
- Click the HotSync manager 📋 icon in the taskbar in the lower-right corner of your screen.
- Select Custom.
- Select your device name from the drop-down list at the top of the screen.
- Select the application for which you want to turn synchronization on or off, and then click Change.
- Do one of the following:
- Select Synchronize the files to turn on synchronization for an application.
- Select Do nothing to turn off synchronization for an application that currently synchronizes (for example, to turn off synchronization for Memos if you do not use that application).
246 Section 6A: Managing Files

Tip:
Select one of the two overwrite options if you want the information in one location (device or computer) to completely replace the information in the other location for that application. For example, if the Calendar information on your device is accurate but the information on your computer has become corrupted, select Handheld overwrites desktop for the Calendar application to have your device information replace your computer information. Note that “handheld” refers to your device and “desktop” refers to your computer.
- (Optional) Repeat steps 4 and 5 for each application for which you want to turn synchronization on or off.
- (Optional) To keep this synchronization setting on an ongoing basis, check the Set as default box. If you do not check this box, the option you select applies only the next time you synchronize. Thereafter, information is updated according to the default setting for that application.
- Click OK, and then click Done.
On a Mac computer:
- Double-click the Palm Desktop 📋 icon in the Palm folder.
- From the HotSync menu, select Conduit Settings.
Section 6A: Managing Files 247
- From the User pop-up menu, select your device name.
- Select the application for which you want to turn synchronization on or off, and then click Conduit Settings.
-
Do one of the following:
-
Select Synchronize the files to turn on synchronization for an application.
- Select Do nothing to turn off synchronization for an application that currently synchronizes (for example, to turn off synchronization for Memos if you do not use that application).
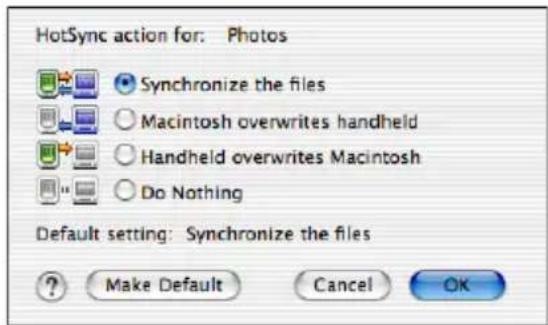
Tip:
Select one of the two overwrite options if you want the information in one location (device or computer) to completely replace the information in the other location for that application. For example, if the Calendar information on your device is accurate but the information on your computer has become corrupted, select Handheld overwrites Macintosh for the Calendar application to have your device information replace your computer information. Note that “handheld” refers to your device.
- (Optional) Repeat steps 4 and 5 for each application for which you want to turn synchronization on or off.
- (Optional) To keep this synchronization setting on an ongoing basis, click Make Default. If you do not select this button, the option you select applies only the next
time you synchronize. Thereafter, information is updated according to the default setting for the application.
- Click OK, and then close the Conduit Settings screen.
Setting Up a Bluetooth Connection for Synchronization
If your computer is enabled with Bluetooth wireless technology, you can synchronize wirelessly over a Bluetooth connection. When you synchronize using your device's Bluetooth wireless feature, you don't need your cable. This is especially useful if you travel with a laptop enabled with Bluetooth wireless technology.
- Press Applications 📋 and select Bluetooth Ⓜ.
- Select On.
- Enter a device name for your Treo device. This is the name that appears on the other Bluetooth device's screen when it connects to your Treo device.
- Select Setup Devices.
- Select HotSync Setup.
- Follow the onscreen instructions to create a partnership between your Treo device and your computer. In some cases you may need to perform setup steps on your computer before you can complete this step. Check your computer's documentation for specific setup instructions.
- After you finish the HotSync Setup, select Done to return to Applications view.
You're now ready to sync your Treo device with your Bluetooth computer.


Synchronizing Over a Bluetooth Connection
-
Press Applications 📄 and select HotSync 📃.
-
Select Local.
-
Select the pick list below the HotSync icon, and then select the name of the PC you set up for Bluetooth synchronization (see "Setting Up a Bluetooth Connection for Synchronization" on page 249).
-
Select the HotSync icon on your device.

When synchronization is complete, a message appears at the top of your device screen. Be patient; synchronization may take a few minutes.
Synchronizing Over an Infrared Connection
When you synchronize using your device's IR port, you don't need your cable. This is especially useful if you travel with an IR-enabled laptop.
To synchronize over an infrared connection, you must first do the following:
Turn on your computer's built-in IR port or external IR device. Check your computer's documentation to see if the computer supports IR communication and to find out how to enable this feature.
• Make sure HotSync manager is active. On a Windows computer, you know HotSync manager is active when its icon 🔗 appears in the lower-right corner of your screen.
On a Windows computer:
- On your computer, click the HotSync manager 🔒 icon in the taskbar in the lower-right corner of your screen. Make sure that Infrared is selected.
- On your device, press Applications 📋 and select HotSync 🔒.
- Select Local.
- Select the pick list below the HotSync icon and select IR to a PC/Handheld.
- Position the IR port of your device within a few inches or centimeters of the IR port of your computer.
- Select the HotSync icon on your device.
When synchronization is complete, a message appears at the top of your device screen. Be patient; synchronization may take a few minutes.
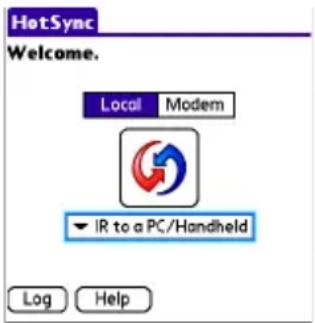
On a Mac computer:
- Double-click the HotSync manager 🎨 icon in the Palm folder.
- From the HotSync Controls tab, select Enabled.
- Click the Connection Settings tab, and then check the On box next to IR port.
- Close the HotSync Software Setup screen.
- On your device, press Applications 📋 and select HotSync 🔒.
- Select Local.
- Select the pick list below the HotSync icon, and select IR to a PC/Handheld.
- Position the IR port of your device within a few inches or centimeters of the IR port of your computer.
- Select the HotSync icon on your device.
Section 6A: Managing Files 251
When synchronization is complete, a message appears at the top of your device screen. Be patient; synchronization may take a few minutes.
| Note: | If you use Microsoft Exchange ActiveSync®, your email, contacts, and calendar information synchronize directly with your company’s Exchange server. This information synchronizes wirelessly with the server; it is not updated when you synchronize directly with your computer. See “Getting Messages From Your Corporate Microsoft Exchange Server Onto Your Device” on page 130. Your tasks and memos continue to synchronize with Palm Desktop software or Microsoft Outlook, depending on which desktop application you use. |
Using Expansion Cards
The expansion card slot on your Treo device enables you to add miniSD cards (sold separately) to extend the storage capacity of your device. For example, miniSD cards can store the following:
Pictures
•MP3 audio files
- Email attachments
•Games
eBooks
• Microsoft Office files
- Adobe Acrobat files
Applications
Databases
Note:
Your Treo device is compatible with miniSD cards with up to 4GB of storage space.
Inserting an Expansion Card
- Open the door of the expansion card slot.
- Hold your device with the screen facing you, and hold the card with the label facing you. (The notch on the card should be in the lower-left corner next to the keyboard.)
- Insert the card into the expansion card slot until you feel the card lock into place.
- Close the door of the expansion card slot.
Removing an Expansion Card
- Open the door of the expansion card slot.
- Press the card into the expansion card slot to release it from the slot.
- After you feel the expansion card slot eject the card, remove it from the slot.
- Close the door of the expansion card slot.
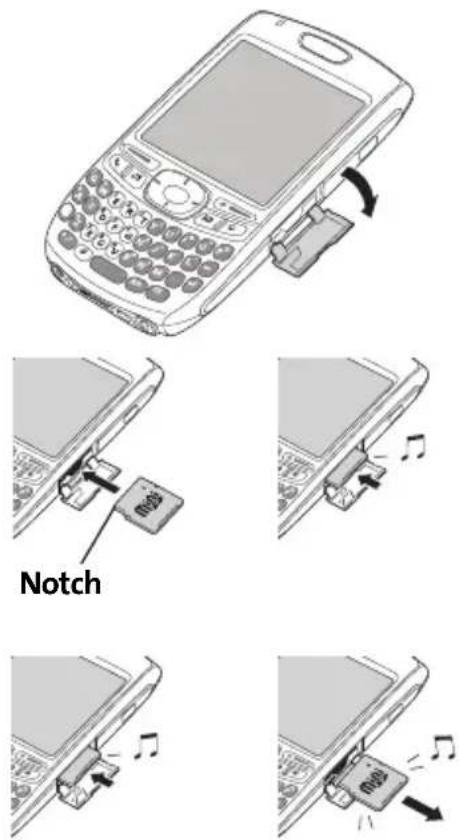
Tip:
Your device has a push-push mechanism: push in gently to insert a card; push in gently to remove it.
If the Ringer switch is set to Sound On, you hear a confirmation tone when you insert or remove an expansion card.
254 Section 6A: Managing Files
Opening Applications on an Expansion Card
After you insert an expansion card into the expansion card slot, you can open any of the applications stored on the expansion card.
- Insert the expansion card into the expansion card slot. (Applications view automatically appears.)
- Select the icon for the application you want to open.
- Press Center ☐ to open the application.
Accessing Items Stored on an Expansion Card
When an expansion card contains items such as pictures or songs, you can access those items directly from the card.
- Insert the expansion card into the expansion card slot. (Applications view automatically appears.)
- Select the category pick list in the title bar, and then select All.
- Select the icon for the application in which you want to open the item. For example, to view a picture, select Pics&Videos.
Tip:
Install the Palm® Files application to easily browse and manage files on an expansion card. Press Applications, select My Treo, select the Bonus tab, and then select Files.
Copying Applications Between an Expansion Card and Your Device
You can copy applications between your Treo device and your expansion card.
Tip:
Before you copy an application to an expansion card, make sure that it is compatible with Palm OS software version 5.4.5 or later. Some applications do not work with expansion cards and do not allow you to store files in a location that is separate from the application.
- Make sure the card is not write-protected. (For details, see the instructions that came with your card.)
- Press Applications .
- Press Menu
- Select Copy on the App menu.
- Select the Copy To pick list and select the destination:
or Phone. - Select the From pick list and select the location of the application you want to copy:
or Phone. - Highlight the application you want to copy.
- Select Copy.
Tip: You can install an application directly to an expansion card instead of copying it from your device's main memory. See “Installing Applications” on page 235 for details.
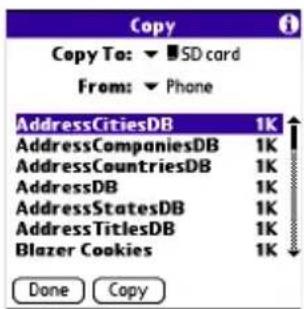
Viewing Expansion Card Information
The Card Info application displays general information about the expansion card that is currently in the expansion card slot, and it enables you to rename and format a card.
- Press Applications 📋 and select Card Info
Renaming an Expansion Card
If you change the contents of an expansion card, you may at some point want to rename the card to better match its contents.

- Make sure the card is not write-protected. (For details, see the instructions that came with your card.)
- Insert the expansion card into the expansion card slot. Applications view automatically appears.
-
Select the category pick list at the top of the screen, and then select All.
-
Select Card Info

- Press Menu

- Select Rename Card on the Card menu.
- Enter a new name for the card.
- Select Rename.
Formatting an Expansion Card
Formatting an expansion card is similar to formatting a disk on a computer. When you format an expansion card, you erase all the information stored on the card and return it to a blank state.
- Make sure the card is not write-protected. (For details, see the instructions that came with your card.)
- Insert the card into the expansion card slot. Applications view automatically appears.
-
Select the category pick list at the top of the screen, and then select All.
-
Select Card Info

- Press Menu

-
Select Format Card on the Card menu.
-
Select OK.
Customizing Your Device
In This Section
Setting System Sounds
- Adjusting the Display and Appearance
- Changing the Applications Settings
- Customizing Device Buttons
Setting the Date and Time
- Optimizing Power Settings
- Locking Your Device and Information
Using Connection Settings
♦ Purchasing Accessories for Your Device
Setting System Sounds
Silencing Sounds
You can immediately silence all alerts, ringtones, music that plays through the built-in speaker, and system sounds by sliding the Ringer switch to Sound Off. This does not, however, mute the audio during a phone call.
- Slide the Ringer switch to Sound Off ☑. (Your device vibrates once to let you know that you've turned sounds off.)
- To hear all sounds again, slide the Ringer switch to Sound On.
When you slide the Ringer switch back to Sound On 📄, it restores the previous sound settings.

Tip:
Your device includes a silent alarm that can vibrate even when the Ringer switch is set to Sound Off. For information on setting the vibrate option, see the section on setting alert tones in the chapters that describe the individual applications.
Setting System Volume Levels
You can set the volume level for system sounds, such as the tone that plays when you synchronize.
Tip:
If the Ringer switch is set to Sound Off, the ringer setting overrides the sound settings and all sounds are turned off.
- Press Applications 📋 and select Sounds 🎨.
- Select the Application pick list, and then select System.
- Select the System Volume and Game Volume pick lists, and then select the volume levels.
- Select Done.

Adjusting the Display and Appearance
Adjusting the Brightness
Depending on the lighting conditions in which you're using your device, you may need to adjust the brightness of the screen and keyboard backlight.
- Press Option ☐, and then press Backlight Ⓟ.

- Press Left ◀ and Right ▶ to adjust the brightness.
- Select Done.
Tip:
To automatically set the brightness to the low setting, press Option, and then press Menu.
Changing the Screen Font
You can change the screen font in Calendar, Contacts, Memos, Sprint Picture Mail, Tasks, and the Web browser. The font styles may vary between applications, and some applications may offer fewer choices.
262 Section 6B: Customizing
- Open the application in which you want to change the font.
- Press Menu
- Select Options, and then select Font.
- Select a font style. (In the Web browser, select the Font size pick list and select Large or Small.)
- Select OK.
Tip:
You can also change the text size in the VersaMail® application. See the User Guide for the VersaMail Application at www.palm.com/mypalm/755psprint.
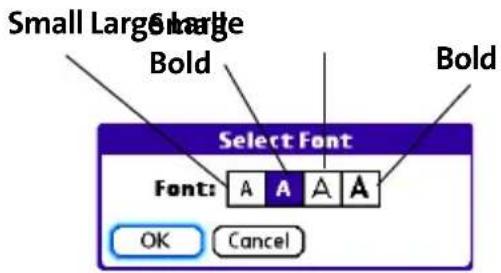
Setting Display Formats
Formats Preferences enable you to select number conventions based on geographic regions. For example, in the United Kingdom, time often is expressed using a 24-hour clock. In the United States, time is expressed using a 12-hour clock with an AM or PM suffix. Many of the built-in applications on your Treo™ 755 smart device by Palm use the Formats Preferences settings.
- Press Applications 📄 and select Prefs 📋.
- Select Formats.
- Set any of the following preferences:
- Preset to sets the standard number conventions for your country. When you select a country, the other Formats Preferences are automatically set to that country's conventions. You can also edit each option individually.
Time sets the time format. Select HH:MM to display a 24-hour clock.
Date sets the date format.

Section 6B: Customizing 263
- Week starts sets the first day of the week (usually Sunday or Monday).
Numbers sets the format for numbers with decimal points and commas.
4. Select Done.
Aligning the Screen
Occasionally, your device screen may need to be readjusted. If this occurs, you may see the wrong feature being activated when you tap the screen. To fix the problem, you can realign the screen any time.
- Press Applications 📄 and select Prefs 📋.
- Select Touchscreen.
- Follow the onscreen instructions to tap the screen where indicated.
- Select Done.
Changing the System Color Scheme
- Press Applications 📄 and select Prefs 📋.
- Select Color Theme.
- Select a color scheme from the list.
- Select Done.

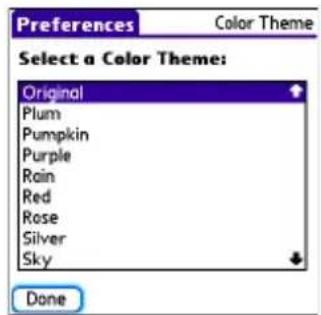
| Tip: | You can also set the wallpaper for theMainview in thePhoneapplication (see “Customizing the Main View in the Phone Application” on page 84) and the background forAgendaview inCalendar(see “Customizing Display Options for Your Calendar” on page 212). |
264 Section 6B: Customizing
Changing the Applications Settings
You can change the Applications settings on your device so that you can easily access the applications you use most often. You can arrange and display your applications by category, reassign the buttons on your device, and select default applications for specific tasks.
Arranging Applications by Category
You can assign an application to a category and then display a specific category of applications in Applications view.
- Press Applications.
- Press Menu
- Select Category on the App menu.
- Select the pick list next to each application and select a category.
- Select Done.
Tip:
To create a new category, select the category pick list and select Edit Categories. Select New, and then enter the category name. Select OK to close the dialog box, and then select OK again.
Displaying Applications by Category
Do one of the following:
- Press Applications 📁 repeatedly to cycle through all your categories.
- Select the category pick list at the top of the screen and select the category you want to display. Select All to display all of your applications.
Selecting the Applications Display
By default, Applications view displays each application as an icon. As an alternative, you can view a list of applications. The list view is particularly useful when you have so many applications in a category that the applications fill up more than one screen.
-
Press Applications .
-
Press Menu
-
Select Options, and then select Preferences.
-
Select the View By pick list, and then select List.
-
Select OK.
Customizing Device Buttons
Reassigning Buttons
With Buttons Preferences you can select which applications are associated with the quick buttons and the Side button on your device. You can assign a primary and secondary application to each of the three quick buttons that open an application.
| Tip: | We recommend that you keep the primary button assignments on the factory settings until you become comfortable with the features of your device. If you do change the primary button assignments, remember that the instructions in this guide and in the other help features refer to the original button settings. |
- Press Applications 📄 and select Prefs 📋.
- Select Buttons.
-
Do any of the following:
-
Select the pick list next to the icon of the button you want to reassign, and then select an application
- Select the pick list next to the Option + Button combination you want to reassign, and then select an application.
-
Select the Press + Hold Side button pick list, and then select an application.
-
Select Done.

| Tip: | You can also select HotSync to choose an application to open with the sync button on the sync cable. To restore all of the buttons and key combinations to their factory settings, select Default. |
Changing Default Applications
Sometimes one application looks for another application to handle information (for example, a mail application might open a browser when you select a link in an email message). Your device comes with a set of predefined applications to handle email, messaging, and browser requests from other applications. If you have more than one application to handle these requests on your device, you can specify which application you want to use for each function.
-
Press Applications 📄 and select Prefs 📋.
-
Select Default apps.
-
Select each pick list, and then select the application you want to associate with that function.
-
Select Done.

Setting the Date and Time
By default, your device synchronizes the date, time, and time zone with the Sprint National Network when your device is on and you are inside a coverage area. Date & Time Preferences let you manually set the date, time, and time zone for your device.
| Note: | You can also add time zones to events you create in Calendar. See “Creating an Event” on page 207 for information. |
- Press Applications 📄 and select Prefs 📋.
- Select Date & Time.
-
Select the Automatically set pick list and select one of the following settings:
-
Nothing acquires no information from the Sprint network. You must set the date, time, and time zone yourself.
- Date & time acquires the date and time from the Sprint network. You must set the time zone yourself.
- Date, time, and time zone: The date, time, and time zone are acquired from the Sprint network. You cannot change any of the settings.
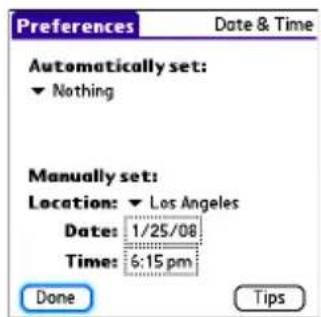
| Note: | The options that appear on the screen in the remaining steps vary based on the setting you selected in this step. |
- If the Location pick list appears, select it and then select a city in your time zone.
| Note: | If you don’t see a city in your time zone, select Edit List, select Add, select a city in your time zone, and then select OK. If necessary, modify any of the settings in the Edit Location dialog box, and then select OK. |
-
If the Date and Time fields appear, select the Date field and select the date, and then select the Time field and select the time.
-
Select Done.
Optimizing Power Settings
Power Preferences enable you to adjust settings to maximize your device's battery performance.
- Press Applications 📄 and select Prefs 📋.
- Select Power.
-
Set any of the following preferences:
-
Brightness sets the intensity of the screen and keyboard backlights. Drag the slider or press Left ◀ and Right ▶ to adjust the brightness level.
- Auto-off after indicates how long your screen stays on during a period of inactivity. When there is no interaction with the keyboard or screen for the specified time period, your screen turns off automatically.
- On a call, dim backlight after indicates how long the backlight stays on at normal intensity during a phone call. After the specified time period, the backlight dims to conserve power during a long phone call.
-
Beam Receive indicates whether your Treo device is ready to receive information over an infrared beam. If you leave this option off, you must return to this screen to turn on this option the next time you want to receive beamed information.
-
Select Done.

Locking Your Device and Information
Your Treo device includes several features that help protect your device from inadvertent use and keep your information private. You can lock any of the following features on your device:
- Keyboard (Keyguard): You can use the Keyguard feature to disable the keyboard and all buttons in case they are accidentally pressed in your bag or pocket.
Screen: You can disable the screen's touch-sensitive feature during an active call or call alert. - Phone (Phone Lock): You can use the Phone Lock features to set your phone to require a password before a call is made. The built-in security software lets you call emergency services even if your phone is locked.
- Device: You can set your device to require a password for you to see any information on the device.
- Entries: You can mask or hide entries marked as private and set your device to require a password for viewing them.
Locking Your Keyboard (Keyguard)
The Keyguard feature locks the keyboard so buttons aren't accidentally pressed or items on the screen aren't activated while your device is in a pocket or bag.
By default, Keyguard turns on whenever the screen is off. Each time you wake up the screen, you must turn off Keyguard to unlock the keyboard and use your device.
To turn off Keyguard, do the following:
- If the screen is off, press Power/End 📋 to wake up the screen.
- Press Center ☐ to turn off Keyguard.
• To turn on Keyguard, press Option and then press
Power/End
You can change how quickly Keyguard turns on, or you can disable the feature altogether. To change the Keyguard settings, do the following:

- Press Applications 📄 and select Prefs 📋.
- Select Keyguard.
-
Select the Auto-Keyguard pick list, and then do one of the following:
-
Select how quickly you want Keyguard to turn on: When power is turned off, 5 seconds after power off, or 30 seconds after power off.
-
Select Disabled to completely disable the Keyguard feature until you turn it on again.
-
Select Done.
| Note: | If you disabled Keyguard, you can turn Keyguard on manually by pressing Option + Power/End when the screen is on. If you use this method, Keyguard stays on only until you press Center to turn it off; it does not come back on. To permanently re-enable Keyguard, follow the preceding procedure and select one of the options from the Auto-Keyguard list. |
Locking Your Screen
You can set your device to automatically lock the screen's touch-sensitive features in certain situations.
- Press Applications 📄 and select Prefs 📋.
- Select Keyguard.
- Check one or both of the following boxes:
- Incoming calls received: Disables the screen when the phone rings. You must use the 5-way 🔒 to select the onscreen Answer and Ignore buttons, or press Talk to answer the call or Power/End to ignore the call.
- On a call: Disables the screen after you answer a call. You must use the 5-way to select the onscreen buttons during the call. Use this setting to avoid accidentally pressing onscreen buttons while you're holding your device near your ear to speak.
- Select Done.
Locking Your Phone (Phone Lock)
You can lock your phone to prevent unauthorized calls and use of other wireless features. When your phone is locked, you must enter the correct code to unlock it. You can still call emergency services when your phone is locked, however.
- Press Phone
- Press Menu
- Select Options, and then select Phone Lock.
- (Optional) Select Advanced, enter up to three numbers that you can dial when your phone is locked, and then select OK. You do not need to enter 911 as one of the three numbers, because this number is always available.
274 Section 6B: Customizing
-
Select one of the following Phone Lock options:
-
On phone power off locks your phone each time you turn it off. When this setting is active, you must enter your lock code each time you turn your phone on again.
- Immediately locks your phone when you select OK. The next time you dial a number, you must enter your lock code to unlock your phone. After that, you can continue to make calls without entering your lock code, unless you select one of the phone lock options.
- When prompted, enter the lock code, and then select OK. (Unless you changed your lock code, it is the last four digits of your phone number.)
- If you want to change the lock code, select Change Lock Code, enter a new lock code, and then select OK. Repeat this step to verify the new lock code.
- Select OK. If you selected Immediately in step 5, your phone locks right away. If you selected On phone power off, your phone locks the next time you press and hold Power/End to turn off your phone.
To disable the current Phone Lock settings:
- Press Phone

- Press Menu

- Select Options, and then select Phone Lock.
- Uncheck the On phone power off box and enter your lock code to change this setting.
- Select OK twice.
Locking Your Device
To protect your personal information, you can lock the device so that you need to enter your password to access any of your information or use any features of your device, including the phone. You can still call emergency services when your device is locked.
| Important: | If you lock your device, you must enter the exact password to unlock it. If you forget the password, you need to perform a hard reset to resume using your device (see “Hard Reset” on page 289). Performing a hard reset deletes all the entries in your device. However, you can restore all previously synchronized information the next time you synchronize your device with your computer (see “Synchronizing Information—The Basics” on page 35). |
- Press Applications 📋 and select Security 🔒.
- Select the Password box.
- Assign a password and a password hint.
- Select the Auto Lock Device box.
- When prompted, enter your password, and then select OK.
-
Select one of the following options:
-
Never prevents your device from locking automatically. You can still lock your system manually by selecting Lock & Turn Off and then selecting Off & Lock.
- On power off locks your device when you turn off the screen, or when it shuts off with the Auto-off feature.
- At a preset time locks your device at a specific time of day.
- After a preset delay locks your device after a period of inactivity.
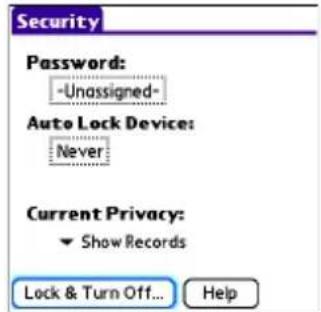

- Select OK.
-
Do one of the following:
-
Select Lock & Turn Off to lock your device immediately.
- Press Applications 📄 to accept your settings and continue using your device.
276 Section 6B: Customizing
Working With Private Entries
In most applications, you can mark individual entries as private. All private entries remain visible and accessible until you select the Security setting. You have two Security setting options:
- Hide Records prevents private entries from appearing anywhere in the application.
- Mask Records replaces private entries with a visual placeholder where the entry would normally appear.
After you enable the mask or hide settings, any entries marked as private are immediately hidden or masked. If you define a password, you must enter it to display private entries. If you do not define a password, you (or anyone else) can reveal private entries without a password.
- Display the entry that you want to mark private.
- Select Details.
- Check the Private box.
- Select OK.
Hiding or Masking All Private Entries
- Make sure the entries you want to hide or mask are marked private, as described in the preceding procedure.
- Press Applications 📄 and select Security 🔒.
- Select the Current Privacy pick list, and then select either Hide Records or Mask Records.
- If prompted for your password, enter it and select OK.
Viewing All Private Entries
You can reveal all of the entries you've hidden or masked.
- Press Applications 📋 and select Security 🔒.
- Select the Current Privacy pick list, and then select Show Records.
- If prompted for your password, enter it and then select OK.
Viewing Private Entries in a Specific Application
- Open the application that contains the private entries you want to see.
- Press Menu
- Select Options, and then select Security.
- Select the Current Privacy pick list, and then select Show Records.
- Select OK.
- If prompted for your password, enter it and then select OK.
Security and Palm® Desktop Software (Windows)
The Windows version of Palm® Desktop software observes the security password for your Treo device. If you forget your password, you cannot view your information in Palm Desktop software. If your device is unlocked, you can change your password on your device, but all entries marked as private are deleted. You can restore your private entries the next time you sync.
Follow these steps to recover a lost password:
- Press Applications 📋 and select Security
- Select the Password box.
- Select the Lost Password box.
- Select Yes.

278 Section 6B: Customizing
Entering Owner Information
You can use Owner Preferences to record information that you want to associate with your Treo device, such as your name, company name, and home phone number. If you lock your device (see “Locking Your Device” on page 275), the Owner Preferences information appears on the screen that requests your password to unlock it, and you must also enter your password to change the Owner Preferences information.
-
Press Applications 📋 and select Prefs 📋.
-
Select Owner.
-
If you assigned a password with the Security application, select Unlock, enter your password, and then select OK.
-
Enter the text that you want to appear on the Owner Preferences screen.
-
Select Done.

Using Connection Settings
Connecting to a Virtual Private Network
If you want to use your Treo device to access your corporate email account or other files on your corporate server, you may need to set up a virtual private network (VPN) on your device. A VPN enables you to log in to your corporate server through the company's firewall (security layer). You need a VPN on your device if your device and your company's server are located on opposite sides of the firewall.
Check with your company's system administrator to see if a VPN is required for accessing the corporate server. If a VPN is necessary, you must purchase and install a third-party VPN client on your device to use this feature.
| Note: | For information about third-party VPN client software, visitwww.palm.com/mypalm/755psprint. |
- Install your third-party VPN client. See “Installing Applications” on page 235 for details.
- Press Applications 📋 and select Prefs 📋.
- Select VPN.
- Enter the settings provided by your corporate system administrator.
Purchasing Accessories for Your Device
These and other accessories are available from your local Sprint Store or at www.palm.com/mypalm/755psprint. For more information, you can also call the Sprint Accessory Hotline at 800-974-2221 or visit www.sprint.com. Next-day delivery is available in select areas.
• Vehicle Power Charger
Charges your device in your vehicle using the car lighter socket.
- Replacement Battery
Serves as a backup battery if your primary battery becomes drained, is charging, or has reached the end of its useful life.
USB Sync Cable
Provides an extra cable (your device comes with one USB sync cable).
USB Docking Cradle
Provides a convenient and elegant desktop solution for synchronizing information, charging your device with any USB-enabled PC or Mac computer, and charging a second battery.
Extra AC Charger
Provides an extra 100–240 volt AC charger for your device.
• International Travel Adapters
Provides snap-on adapters for continental Europe, the United Kingdom, and Australia. For use with the Extra AC Charger only.
• Leather Side Case With Belt Clip
Clips to your belt or bag for quick access and protection for your device.
Stylus
Provides a replacement or spare stylus for your device.
Resources
Sprint

Section 7A
Help
In This Section
Trouble Upgrading?
- Resetting Your Treo Device
- Replacing the Battery
Troubleshooting
Making Room on Your Treo Device
Third-Party Applications
Errors
Where to Learn More
Section 7A: Help 285
Trouble Upgrading?
If you experience problems with your Treo™ 755p smart device by Palm after performing the upgrade steps described in “Upgrading From Another Palm OS® Device” on page 29, you may have incompatible applications or settings that were not quarantined during the installation process. These files reside in the Backup subfolder of your user folder.
Incompatible applications or settings can lead to numerous issues, including system resets and freezes. If you experience problems after upgrading, follow these steps to correct the problem:
- Locate your user folder on your computer:
- Windows: If your device name is one word, your user folder name is the first six characters of your device name. If your device name is two words, your user folder name consists of the first six characters of the second word of your device name, followed by the first letter of the first word. For example, if your device name is John Smith, your user folder is named SmithJ. Your user folder is usually located inside one of the following folders:
C:\Program Files\Palm\
C:\Program Files\palmOne\
C:\Program Files\Handspring\
- Mac: Your user folder name is the same as your device name and is usually found in this location:
-
Make a copy of your user folder and store it in a safe place.
-
Windows: Copy the folder, and then paste it to your Windows desktop.
-
Mac: Select the folder, press and hold the Option key, and then drag the folder to your Mac desktop.
-
Confirm that the copy of your user folder includes a subfolder named Backup, and that all the files in the original Backup subfolder are also in the copy of the Backup subfolder.
-
Delete all files from the original Backup subfolder.
- Perform a hard reset on your device. See “Resetting Your Treo Device” on page 288 for instructions.
- Sync your Treo 755 P smart device by Palm with your new desktop software; be sure to select your existing device name from the User list.
- Reinstall third-party applications from the copy of your Backup subfolder (see "Installing Applications" on page 235 for instructions). We recommend that you install one application at a time to help you identify the application that caused the problem. We also recommend that you do not install any applications that do any of the following:
■ Modify phone functions, such as ringtones, dialing, or caller ID.
- Replace organizer applications, such as Contacts or Calendar.
- Set data connection features, such as activating or ending data connections.
■Provide Web-clipping applications or files, such as PQA files.
■Provide instant messaging features.
If you want to continue using these types of applications, please contact the third-party developer for software updates and information about compatibility with your Treo 755 smart device by Palm.
Soft Reset
Performing a soft reset is similar to restarting a computer. If your Treo device is not responding or you're having trouble synchronizing with your computer, a soft reset may help. All your information is retained when you perform a soft reset.
- Remove the battery from your device, and then reinsert it. (See “Replacing the Battery” on page 291 for details.)
| Note: | The reset begins when you insert the battery and ends when the Date & Time Preferences screen appears. |
- Select Done.
System Reset
A system reset, also called a safe or warm reset, can be useful if your device loops or freezes during a soft reset. Performing a system reset allows you to get out of the loop and restores limited functionality to your device in order to uninstall a third-party application that's causing the problem. Note that after a system reset, you must perform a soft reset to restore full functionality, including the wireless features, to your device.
- Remove the battery from your device.
- Press and hold Up ▲ on the 5-way ☐ while reinserting the battery. (See “Replacing the Battery” on page 291 for details.)
- When Date & Time Preferences appears, then release Up ▲.
- Delete the third-party application that you suspect is causing the problem.
- Perform a soft reset. (The wireless features of your device are not available until you complete this step.)
Hard Reset
A hard reset erases all information and third-party software on your Treo device. Never perform a hard reset without first trying a soft and a system reset. You can restore previously synchronized information the next time you synchronize.
Note:
Your device might not re-establish a Sprint Vision session after a hard reset. To manually establish a new Sprint Vision session, open the Web browser to access a Web site.
A hard reset can tell you if a problem stems from your Treo device or from an application installed on it. If you do not experience the problem after you perform a hard reset, the problem is related to software you installed. See “Third-Party Applications” on page 314 for suggestions on diagnosing third-party software issues.
Important:
If you set a password on your device, performing a hard reset reformats your device. This is a more severe form of a hard reset, which removes all your information, and restores your formats, preferences, and other settings to the factory default settings.
Note:
Some third-party applications do not create a backup on your computer when you synchronize. If you perform a hard reset, you may lose data in these applications and you need to reinstall these applications after the hard reset. Please contact the developer to find out which information is backed up during synchronization.
- Remove the battery from your device.
- Press and hold Power/End ☐ while reinserting the battery. (See “Replacing the Battery” on page 291 for details.)
- When the Access Powered logo appears, release Power/End
- When the "Erase all data?" prompt appears, press Up ▲ to confirm the hard reset.
Section 7A: Help 289
- If a “Reformatting in progress” message appears, do not touch your device until the process is complete. This may take up to ten minutes.
- Follow the onscreen instructions to align the screen and set the date and time.
- (Optional) If you want to confirm that the hard reset was successful, press
Applications 📋 and select HotSync Ⓗ. (If you see your device name in the upper-right corner, the hard reset was not successful. If you do not see your device name, then the reset was successful.)
- Sync to restore any previously synchronized information.
Replacing the Battery
Your Treo device comes with a replaceable battery. Be sure to use a battery that is approved by Sprint and that is compatible with your device. Failure to use the proper battery may result in personal injury or product damage, and it voids your device warranty.
-
Press Power/End to turn off the screen.
-
Press the Battery Door Release and slide the battery door downward to remove it from your device.
-
Place a finger in the notch next to the battery and lift the battery up at a 45-degree angle to remove it from the compartment.
-
Align the metal contacts on the new battery with the contacts inside the battery compartment.

-
Insert the new battery into the compartment at a 45-degree angle, pressing it into place. Slide the battery door onto the back of the device until it clicks into place.
-
Connect your device to the charger or sync cable.
-
Wait for your device to turn on, and then enable the network time or set the date and time when prompted.
Note:
Be sure to dispose of your old battery properly. In some areas, disposal in household or business trash is prohibited.
Section 7A: Help 291
Troubleshooting
Desktop Software Installation
If you are having trouble installing the desktop software, you may have the wrong version of the software or some of your computer's resources may be unavailable. Follow these steps to retry the installation:
| Note: | The Palm Software Installation CD installs software that enables you to synchronize using Palm® Desktop software or Microsoft Outlook for Windows. If you want to synchronize using a different personal information manager (PIM), you must install a third-party solution. Contact the PIM’s author or vendor to learn whether desktop software is available for your new Treo device. |
- Make sure your computer profile includes administrator rights to install software. In large organizations, these are usually granted by the system administrator.
- Restart your computer.
- Quit any active applications, including virus scanners and Internet security applications.
- Make sure you're installing the software from the Palm Software Installation CD that came with your new Treo 755 smart device by Palm. (Other versions of the desktop software may not work with this device.)
- Insert the Palm Software Installation CD to restart the installation.
| Important: | Always use the same language for your Treo device, your operating system, and your desktop software. Otherwise, you may lose information or have difficulty with synchronization. Support is not provided for mismatched language setups. |
292 Section 7A: Help
Screen
The Screen Appears Blank
- When a call lasts longer than the limit specified in Power Preferences, the screen dims automatically. In certain lighting conditions, the screen may appear blank when this occurs. Press any key except Power/End 📋 to restore the screen to normal brightness. (Pressing Power/End hangs up the call.)
- When a period of inactivity lasts longer than the limit specified in Power Preferences, the screen turns off. When you are not on a call, press and release Power/End to wake up the screen. When you are on a call, press any key except Power/End to wake up the screen.
- Look closely at the screen. If you can see a dim image, try adjusting the screen brightness (see “Adjusting the Brightness” on page 262).
- If the screen is still blank, perform a soft reset (see "Soft Reset" on page 288).
- If the problem persists, connect the Treo device to the AC charger (see “Charging the Battery” on page 16) and perform a soft reset again.
- If that doesn't work, perform a hard reset (see "Hard Reset" on page 289).
The Screen Doesn't Respond Accurately to Taps or It Activates Wrong Features
- Press Applications 📋 and use the 5-way 🔍 to select Prefs 🔔.
- Use the 5-way ☐ to select Touchscreen.
- Follow the onscreen instructions to align the screen.
- Select Done.
- If the problem persists, check for material trapped between the screen and the edge of the device.
- If you're using a screen protector, make sure that it is properly installed.
There's a Blinking Bell at the Upper-Left Corner of the Screen
The blinking bell 🔒 in the upper-left corner of the screen is the Alert Manager symbol. It appears when you have alarms or messages that you haven't acknowledged.
- Press and hold Center or tap the Alert Manager symbol with your stylus.
- When the list of pending alerts appears, do either of the following:
- Select the alert text to view the item and keep it in the list.
- Check the box next to an alert to clear it from the list, and then select Done.
Synchronization
Synchronization backs up the information from your device onto your computer and vice versa. If you ever need to perform a hard reset or otherwise need to erase all your information on your device, you can synchronize your device with your computer to restore the information. Similarly, if your computer crashes and your Palm Desktop software information is damaged, you can recover your information by synchronizing with your device. To make sure you always have an up-to-date backup of your information, synchronize frequently.
This section describes synchronization between your Treo device and a desktop computer running Palm Desktop software. You can also synchronize the information on your device using third-party applications. See the separate documentation for other applications for information on features and configuration.
Before you attempt to synchronize, make sure you've installed the desktop synchronization software from the Palm Software Installation CD.
I Can't Find My User Folder
Windows: If your device name is one word, your user folder name is the first six characters of your device name. If your device name is two words, your user folder name consists of the first six characters of the second word of your device name followed by the first letter of the first word. For example, if your device name is John Smith, your user folder is named
294 Section 7A: Help
SmithJ. Your user folder is usually located inside one of the following folders:
C:\Program Files\Palm\
C:\Program Files\palmOne\
C:\Program Files\Handspring\
Mac: Your user folder name is the same as your device name and is usually found in this location:
Palm Desktop Software Does Not Respond to a Synchronization Attempt
- Make sure that the USB sync cable is securely connected to the USB port on your computer and on the bottom of your device (see “Connecting Your Treo Device to Your Computer” on page 34).
- Make sure that HotSync® manager is running:
- Windows: Right-click the HotSync manager 🎨 icon in the taskbar in the lower-right corner of your computer screen and make sure Local USB is checked. If you don’t see the HotSync manager 🔊 icon, click Start, select Programs, select Palm, and then select HotSync Manager.

- Mac: Find the Palm folder on your Mac hard drive. Double-click the HotSync manager 📍 icon in the Palm folder. In the Connection Settings panel, set Local Setup Port to Palm USB.
- Synchronize. If the synchronization is successful, you do not need to complete the remaining steps.
- Perform a soft reset (see "Soft Reset" on page 288).
-
Synchronize. If the synchronization is successful, you do not need to complete the remaining steps.
-
If problems persist and you're synchronizing through a USB hub, try connecting the sync cable to a different USB port, or directly to your computer's built-in USB port.
- Synchronize. If the synchronization is successful, you do not need to complete the remaining steps.
- (Windows only) Uninstall Palm Desktop software. Click Start, select Settings, select Control Panel, select Add or Remove Programs, select Palm Desktop software, and then click Change/Remove.
| Note: | Palm Desktop software for Mac computers does not provide an automated uninstall option. For information on uninstalling Palm Desktop software on a Mac, go towww.palm.com/treo755psprint-supportor contact Palm Technical Support for Mac computers. |
-
Reboot your computer.
-
Reinstall the synchronization software from the Palm Software Installation CD that came with your device.
Synchronization Starts But Stops Without Finishing
If you upgraded from a previous Palm OS ® device or received a system error, such as Sys0505, there may be conflicts with software on your device.
- Locate your Backup folder and rename the folder (for example, BackupOld). Note that "Palm" in the following locations might be "Handspring" or "palmOne," based on the device you're upgrading from:
Windows: C:\Program Files\Palm\
■ Mac: Mac HD\Applications\Palm\Users\
-
Synchronize.
-
Manually reinstall any third-party applications you want on your device. If necessary, use the items in the old Backup folder you renamed.
-
(Windows only) If the Windows New Hardware Wizard appears, the synchronization process may be timing out before the wizard completes its job. Follow all instructions in the New Hardware Wizard, and then sync again.
- (Windows only) Uninstall Palm Desktop software. Click Start, select Settings, select Control Panel, select Add or Remove Programs, select Palm Desktop software, and then click Change/Remove.
| Note: | Palm Desktop software for Mac computers does not provide an automated uninstall option. For information on uninstalling Palm Desktop software on a Mac, go towww.palm.com/treo755psprint-supportor contact Palm Technical Support for Mac computers. |
- Reboot your computer.
- Reinstall the synchronization software from the Palm Software Installation CD that came with your device.
| Tip: | The HotSync Log can tell you when and why synchronization stopped. Right-click the HotSync manager icon in the taskbar in the lower-right corner of your computer screen, and then select View Log. |
Synchronization Finishes But Information Does Not Appear Where It Should
- Make sure you're synchronizing with the intended desktop personal information manager (PIM). The Palm Software Installation CD enables you to choose whether to synchronize with Palm Desktop software or Microsoft Outlook for Windows. Reinsert the installation CD and select Change your sync method if necessary. If you use a different PIM, you need to install third-party software to synchronize. For more information, consult the company that makes the PIM.
- If multiple Palm OS devices are synchronizing with your computer, make sure you are synchronizing with the correct device name. If information is not appearing in
Palm Desktop software, make sure the correct device name is selected in the User list on the toolbar of Palm Desktop software.
- Open HotSync manager on your computer, and make sure the necessary conduits are set to Synchronize the files.
- (Windows only) Uninstall Palm Desktop software. Click Start, select Settings, select Control Panel, select Add or Remove Programs, select Palm Desktop software, and then click Change/Remove.
Note:
Palm Desktop software for Mac computers does not provide an
automated uninstall option. For information on uninstalling
Palm Desktop software on a Mac, go to
www.palm.com/treo755psprint-support or contact Palm Technical
Support for Mac computers.
- Reboot your computer.
- Reinstall Palm Desktop software from the Palm Software Installation CD that came with your device.
- If you're using Microsoft Outlook, consider the following:
- With the included software, you can synchronize your Treo device with the Contacts, Calendar, Tasks, and Notes folders on your computer. If you want to synchronize your information with a global Exchange Address Book, you must copy the addresses to your local Contacts list in Outlook (right-click the addresses, and then select Add to Personal Address Book).
- Outlook subfolders and public folders are not accessible with the included software. You may want to use a third-party solution instead.
- If you're trying to synchronize offline, be sure to set your Outlook Calendar, Contacts, Notes, and Tasks to be available offline.
Tip:
For more information on Outlook conduits, click the HotSync manager icon in the taskbar, select Custom, select an application with Outlook in its name, and then select Help.
I Have Duplicate Entries in Microsoft Outlook After I Synchronize
- Open Microsoft Outlook and delete the duplicate entries.
- On your computer, go to the application with duplicate entries and manually enter any information you've added to your device since the last time you synchronized.
- Click the HotSync manager 📋 icon in the taskbar, and select Custom.
- Select an application that has duplicate entries that also has Outlook in its name.
- Click Change.
- Select Desktop overwrites handheld, and then click OK.
- If more than one application has duplicate entries, then repeat steps 4 through 6 for each application with duplicates.
- Click Done.
- Synchronize your device and your computer.
My Appointments Show Up in the Wrong Time Slot After I Sync
If you create an appointment in the wrong time zone (for example, your desktop was set to the wrong time zone), it shows up in the wrong time zone on your device after you sync. To be safe, enable local network time (see “Setting the Date and Time” on page 269) and avoid assigning time zones to your appointments (see “Creating an Event” on page 207).
If you're using Microsoft Outlook:
-
Make sure that you installed the Microsoft Outlook conduit that came with your Treo 755 P smart device by Palm. If you're not sure whether this software is installed, reinstall it.
-
Open Microsoft Outlook and correct the wrong entries.
-
On your computer, manually enter any Calendar information you added to your device since the last time you synchronized.
- Click the HotSync manager 📋 icon in the taskbar, and select Custom.
- Select an application that has both Calendar and Outlook in its name.
- Click Change.
- Select Desktop overwrites handheld, and then click OK.
- Synchronize your device and your computer.
- Repeat steps 7 through 9 to open the Calendar Change HotSync Action dialog box.
- Select Synchronize the files, and then click OK.
If you're using Palm Desktop software:
-
On your device, press Calendar 📄.
-
Press Menu
-
Select Options, and then select Preferences.
-
Uncheck the New events use time zones box (if it's checked).
-
On your computer, open Palm Desktop software and correct the wrong entries.
-
On your computer, manually enter any Calendar information you added to your device since the last time you synchronized.
-
Click the HotSync manager 📋 icon in the taskbar, and select Custom.
-
Select an application that has both Calendar and Outlook in its name.
-
Click Change.
-
Select Desktop overwrites handheld, and then click OK.
-
Synchronize your device and your computer.
-
Repeat steps 7 through 9 to open the Calendar Change HotSync Action dialog box.
-
Select Synchronize the files, and then click OK.
300 Section 7A: Help
To avoid this problem in the future, do not assign time zones to your events. Palm Desktop software does not support time zones.
Phone
Signal Strength Is Weak
Become familiar with low coverage areas where you live, commute, work, and play. Then you know when to expect signal strength issues.
- If you're standing, move about 10 feet (3 meters) in any direction.
- In a building, move near a window. Open any metal blinds.
- In a building, move outdoors or to a more open area.
- Outdoors, move away from large buildings, trees, or electrical wires.
In a vehicle, move your device so that it's level with a window.
My Treo Device Won't Connect to the Mobile Network
- Try the suggestions in the preceding section for weak signals.
- Turn off your phone and turn it on again (see “Turning Your Device’s Phone On and Off” on page 55).
- Perform a soft reset (see "Soft Reset" on page 288).
- If you have an active DUN session (that is, you are using your device's phone as a modem), terminate the session (see “Using Your Device’s Phone as a Modem” on page 110 or “Using Your Device as a Wireless Modem” on page 164).
The Other Person Hears an Echo
- Try decreasing the volume on your device to avoid coupling or feedback on the other person's end. This applies to both the speakerphone and the earpiece.
- Position the earpiece closer to your ear to prevent sound leaking back into the microphone. Keep your hand away from the microphone hole, which is on the bottom right side of the phone.
- If you're using the speakerphone feature with your device lying on a flat surface, try turning the device face down (screen facing the surface).
Section 7A: Help 301
I Hear My Own Voice Echo
Ask the person on the other end of the call to turn down the volume on his or her phone or to hold the phone closer to his or her ear.
My Voice Is Too Quiet on the Other End
- Be sure to position the bottom of the Treo device, or the hands-free microphone, close to your mouth.
- Check the signal-strength indicator. If the signal is weak, try to find an area with better coverage.
I Hear Static or Interference
Check the signal-strength indicator. If the signal is weak, try to find an area with better coverage.
If you're using a hands-free device enabled with Bluetooth® wireless technology, try the following:
- Move your Treo device closer to the hands-free device. Audio quality degrades as the distance between your Treo device and hands-free device increases. The effective range for a hands-free device varies among manufacturers.
- Confirm that no obstructions, including your body, are between the Treo device and your hands-free device. For example, move your Treo device to the same side of your body as your hands-free device.
My Device Hangs Up When I Hold It to My Ear
You may be accidentally pressing the onscreen Hang Up All button with your cheek. Try holding the device so that your face doesn't press against the screen. If this is not convenient, you may want to disable the screen's touch-sensitive feature during active calls (see “Locking Your Screen” on page 274).
My Device Seems to Turn Off by Itself
If a system error and reset occur, the Treo device automatically turns the phone on if it was on before the reset. However, if the device can't determine if your phone was on before the reset, the phone does not automatically turn on (see “Turning Your Device’s Phone On and
302 Section 7A: Help
Off" on page 55). If the problem persists and you're using third-party applications, see "Third-Party Applications" on page 314 for additional suggestions.
My Device Makes or Answers Calls When It's in a Bag or Pocket
Items in your bag or pocket may be pressing the onscreen Answer button or otherwise activating screen items. If this happens, be sure to press Power/End 📄 to turn off the screen before placing it in your briefcase or pocket. You may also want to disable the screen's touch-sensitive feature during incoming calls (see "Locking Your Screen" on page 274).
If you are using a Bluetooth hands-free device with your Treo device, you may have turned the auto-answer feature on in Handsfree Preferences. For information, see “Customizing Advanced Settings for Your Hands-Free Device” on page 83.
Hands-Free Devices
I Can't Make or Receive Calls Using a Bluetooth Hands-Free Device
Confirm all of the following:
- The device with Bluetooth wireless technology is compatible with your Treo device. Go to www.palm.com/treo755psprint-support for a list of compatible devices.
- Press Applications 📋 and select Bluetooth ⚙. Make sure the Bluetooth setting is turned on in the Bluetooth application.
- You have already formed a partnership between your Treo device and your hands-free device, and the hands-free device appears in the Trusted Devices list (see “Connecting to a Bluetooth Hands-Free Device” on page 79).
- Your hands-free device is charged and turned on.
- Your Treo device is within range of the hands-free device.
Note:
Bluetooth range is up to 30 feet (10 meters) in optimum environmental conditions. Performance and range can be affected by physical obstacles, radio interference from nearby electronic equipment, and other factors.
Section 7A: Help 303
I Hear Static or Interference When Using My Hands-Free Device
- Try moving your Treo device closer to the hands-free device. Audio quality degrades as the distance between your Treo device and hands-free device increases. The effective range for a hands-free device varies among manufacturers.
- Confirm that no obstructions, including your body, are between the Treo device and your hands-free device.
Some Features of My Hands-Free Device Don't Work With My Treo Device
- Check the Palm compatibility list at www.palm.com/treo755psprint-support to ensure that your device is compatible.
- Not all hands-free features work with every hands-free device. Check the documentation that came with your hands-free device or the manufacturer's Web site for feature-compatibility information specific to your device.
Note:
The following troubleshooting tips apply to the VersaMail® application only. If you are using Good Mobile Messaging™ as your email application, refer to the documentation included with that application for troubleshooting tips.
I Have Problems Using My Account
Occasionally you may experience problems using an email account after you set it up. If you followed the account setup procedure and are experiencing problems using the account, verify that the account complies with your email provider's requirements by following these steps:
- Verify both your password and your username for your email account.
- Some wireless service providers require you to be on their network to use your email account. If this is the case, be sure to use your provider's network as the connection type for the account.
304 Section 7A: Help
- Some email service providers have other requirements specific to their service. For example, Yahoo! requires you to pay for a POP account in order to download email messages from your Yahoo! account to your device. Check with your service provider to see if any provider-specific requirements exist.
- Service provider settings change frequently. If your email account was working but you are currently experiencing problems, check with your wireless or email service provider to see if any of the account settings have changed.
I Have Problems Sending and Receiving Email
Short periods of time when email is unavailable are common due to server problems or poor wireless coverage. If you have problems sending or receiving mail for an extended period of time, check with your ISP or email service provider to verify that the service is working properly, and check with Sprint Customer Service for outage information in your area.
Push or Auto Sync Is Not Working
If server push or an Auto Sync operation is occurring and you turn your device's phone off or the connection to your email service provider is disconnected, the push or Auto Sync operation fails. If push or a scheduled Auto Sync doesn't take place or starts but does not finish, make sure your device's phone is on and that your data connection to your mail server or email service provider has not been interrupted.
I Have Problems Sending Email
If you are able to receive email messages but cannot send them, try these steps, in turn:
- Make sure your ISP or email provider allows you to access email on a wireless device. Several providers, like Hotmail, do not offer this option at all; other providers require an upgrade to access email on a wireless device.
- Turn on ESMTP. Many services require authenticated access, or ESMTP, to use their SMTP servers. See the User Guide for the VersaMail Application at www.palm.com/mypalm/755psprint for information on turning ESMTP on.
- Enter the name of a different outgoing mail server for sending mail. Many ISPs, such as cable companies, require that you have an Internet connection to their network to send email through their servers. In this case, you can almost always receive email from these accounts, but if you want to send email, you must send it through another server. Check with your email service provider for the correct outgoing mail server name.
I Have Problems Synchronizing Messages on My Device With Messages on My Computer
Make sure you have chosen the same settings for the account on both your device and your computer. For example, if the account is set up on your device to use the POP protocol, check HotSync manager on your computer to make sure that POP is selected as the protocol for that account.
My vCard or vCal Email Attachment Isn't Forwarding Correctly
Palm Desktop software provides several features that work with email client software on a Windows computer. For these features to work correctly, the email client software must be properly set up. Follow these steps to check the settings:
- Click Start on your computer, and then select Settings.
- Select Control Panel.
- Select Internet Options, and then click the Programs tab.
- Make sure that the email field is set to the correct email client software.
- Click OK.
- Start the email client software and make sure it is configured as the default MAPI client. (Consult the documentation for your desktop email application for more information.)
After I Get Messages, Either Manually or Through Auto Sync, Messages Disappear From My Inbox
If you have an account that uses Microsoft Exchange ActiveSync ® , when server push takes place or you perform an Auto Sync, the last three days' worth of email messages are downloaded from your mail server to your Inbox. All messages older than three days are deleted from your Inbox; they are not deleted on the server, however.
306 Section 7A: Help
You can change the setting in VersaMail preferences to download fewer than three days' worth of messages (in which case, more-recent messages are deleted from your Inbox), or to download all messages regardless of the date (in which case all messages continue to appear in your Inbox).
I Am Using Microsoft Exchange ActiveSync, But Email Messages, Calendar Events, and Contacts Information Are Not Downloading to My Device
Check with your system administrator to obtain the name of the mail server that offers you wireless access to the corporate mail system. If you cannot obtain the name of this server (some companies do not give it out, because they do not want wireless access to their servers), server push or wireless synchronization of email messages, Calendar events, and Contacts information using Microsoft Exchange ActiveSync cannot take place.
Messaging
I Can't Tell If Data Services Are Available
When your phone is on, icons appear in the title bar in the Main view of the Phone application to indicate whether data services are available and whether a data connection is active. See “Checking Signal Strength and Phone Status” on page 95 for a description of the icons that indicate that data services are available.
If your phone is on and you do not see any of the data icons, then data services are not available in your current location.
I Can't Send or Receive SMS Text Messages
- Make sure your phone is turned on (see “Turning Your Device’s Phone On and Off” on page 55).
- Contact Sprint to verify that your plan includes SMS messaging services, that these services have been correctly activated, and that they are available at your location. Sprint should be able to tell you if messaging services have been experiencing transmission delays. Delays can also occur between the time that a message is sent and the time it is received.
- Verify with the recipient that the receiving device can handle text messages.
Section 7A: Help 307
- If a text message arrives but does not display an alert, perform a soft reset (see “Soft Reset” on page 288).
I Can't Send or Receive Sprint Picture Mail Messages
- Make sure your phone is turned on (see “Turning Your Device’s Phone On and Off” on page 55).
- Contact Sprint to verify that your plan includes Sprint Picture Mail messaging services, that these services have been correctly activated, and that they are available at your location. Sprint should be able to tell you if messaging services have been experiencing transmission delays. Delays can also occur between the time that a message is sent and the time it is received.
Make sure that the Sprint Vision icon or Sprint Power Vision SM icon appears in the title bar of the Main view of the Phone application. If you do not see one of these icons, data services are not available in your current location and you cannot exchange Picture Mail messages.
- Verify with the recipient that the receiving device can handle Picture Mail messages.
- If you have an active DUN session (that is, you are using your device's phone as a modem), terminate the session (see “Using Your Device’s Phone as a Modem” on page 110 or “Using Your Device as a Wireless Modem” on page 164).
- If a Picture Mail message arrives but does not display an alert, perform a soft reset (see "Soft Reset" on page 288).
Web
I Can't Tell If Data Services Are Available
When your phone is on, icons appear in the title bar in the Main view of the Phone application to indicate whether data services are available and whether a data connection is active. See “Checking Signal Strength and Phone Status” on page 95 for a description of the icons that indicate that data services are available.
If your phone is on and you do not see any of the data icons, then data services are not available in your current location.
308 Section 7A: Help
The Device Won't Connect to the Internet
Your Treo 755p smart device by Palm supports Sprint Vision and Sprint Power Vision, two ways to connect to the Internet that are persistent and are faster and more reliable than a regular dial-up connection. All Sprint customers can connect to the Internet, but to avoid high per-minute charges, we recommend that you subscribe to a Sprint Vision plan. Contact Sprint to verify that your subscription plan includes Sprint Vision services and that these services have been correctly activated, and to confirm your username and password. Sprint should also be able to tell you if there are any outages in your area.
- Press and hold Power/End to turn off your phone. Then press and hold Power/End again to turn your phone back on.
- Press Phone 📄 and look for either the Sprint Vision 🔊 icon or Sprint Power Vision 🔔 or 🔊 icon in the title bar of the Main view.
- If you see one of these icons, you are in a data coverage area. Try connecting to the Internet again. If you do not see one of these icons, press Applications 📄, select Prefs 📋, and continue with the following steps.
- Select Network.
- Select the Service pick list and select Power Vision. (If Power Vision does not appear in the list, call Sprint for assistance.)
- Select Connect.
- If the connection is successful, go to the Web browser. If you still can't make a connection, perform a soft reset (see "Soft Reset" on page 288).
- If your phone did not turn on automatically, press and hold Power/End 📄 to turn on your phone, and try connecting to the Internet.
- Contact Sprint to verify the following:
- Your subscription plan includes high-speed data services.
■Data services have been activated on your account.
- Data coverage is available in your location.
■There are no data service outages in your location.
I Can't Access a Web Page
First, make sure you have Internet access: Open the Web browser to see if you can view a Web page you've successfully viewed before. To ensure that you're viewing the page directly from the Internet, press Menu ☎, select Go, and then select Refresh.
If you can view the page after you refresh it but you still can't access the page you were originally trying to view, the page may contain elements that are not supported by the Web browser. These include Flash, Shockwave, VBScript, WMLScript, and other plug-ins.
Some Web sites use a redirector to their true home page. If the Web browser on your device can't follow the redirect, try using a desktop browser to see the landing page of the redirector, and then enter that address in the Web browser on your device.
It Takes a Long Time for a Web Page to Load
If it is taking longer than usual to load Web pages, you may have traveled from a high-speed Sprint Power Vision service area to a Sprint Vision service area. Although Sprint Vision data service is considered a high-speed data service, it can seem slow if you are used to Sprint Power Vision speed.
-
Press Phone 📁 and look for the Sprint Vision 🔊 icon or Sprint Power Vision 🔔 or 🔊 icon in the title bar of the Main view.
-
If you see the Sprint Power Vision 🔊 or 🔒 icon, there may be a problem with the Web site you are trying to access. Try opening a different Web page to see if the problem persists.
-
If you see the Sprint Vision icon, you may be experiencing the difference in performance between the two types of data networks.
310 Section 7A: Help
-
To be sure there is not a problem with your connection to the Sprint network, press and hold Power/End 📋 to turn off your phone. Then press and hold the same button to turn it back on again.
-
Try opening the Web page again to see if it loads faster.
An Image or Map Is Displayed Too Small on the Device Screen
The Web browser has two modes: Optimized and Wide Page. Optimized mode resizes all images and page elements to make them fit in a single vertical column on the Treo device screen. Switch to Wide Page mode to see the image in its original, full-size form (see "Viewing a Web Page" on page 148).
You may also be able to save the image to your device or to an expansion card and then view the image later on your computer (see “Downloading Files From a Web Page” on page 151 for information).
A Secure Site Refuses to Permit a Transaction
Some Web sites don't support certain browsers for transactions. Please contact the site's Webmaster to make sure the site allows transactions using your device's Web browser.
Dial-Up Networking Using Bluetooth Technology
My Computer Does Not Appear on the Trusted Devices Screen
- If you select Add Device and your computer does not appear on the list, make sure that the computer's Bluetooth setting is on and that the computer is discoverable. Check with your computer manufacturer for help with locating and changing these settings.
- Select Find More on the Trusted Devices screen again.
I Get a Message That There Is an Error Creating a DUN Connection With My Treo Device
- Re-create the partnership between your Treo device and your computer (see “Accepting a Connection From Another Bluetooth Device” on page 163).
Camera
Here are some tips for taking good pictures with the built-in camera:
Clean the camera's lens with a soft, lint-free cloth.
Take pictures in brighter lighting conditions. Low-light images may be grainy, due to the sensitivity of the camera.
- Hold the device as still as possible. Try supporting your picture-taking arm up against your body or a stationary object (such as a wall).
- Keep the subject of the pictures still. Exposure time is longer with lower light levels, so you may see a blur.
- For best results, verify that you have the brightest light source coming from behind you, lighting the subject's face. Avoid taking indoor pictures with the subject in front of a window or light.
- Make sure the subject is at least 18 inches (45 centimeters) away from the camera to ensure good focus.
Remember that when you synchronize your device with your computer, your photos and videos are stored on your hard drive (see “Viewing Pictures and Videos on Your Computer” on page 184).
Making Room on Your Treo Device
Keep in mind that your Treo device includes an expansion card slot, and that you can store applications and information on expansion cards (sold separately). However, you still need free memory on the device itself to run applications from an expansion card.
If you store a large number of entries or install many third-party applications, the internal memory on your Treo device may fill up. Here are some common ways to clear space on your device:
- Email. Messages that have large attachments can quickly consume memory on your device. Delete emails with large attachments. If you have hundreds of messages with or without attachments, you may want to delete older messages to make room (see the User Guide for the VersaMail Application at www.palm.com/mypalm/755psprint.)
- Pics&Videos Pictures can consume excessive memory. Move your pictures to an expansion card, synchronize them to your computer (see “Viewing Pictures and Videos on Your Computer” on page 184), or upload them to your account on the Sprint Picture Mail Web site, and then delete large files from your Treo device (see “Deleting a Picture or Video” on page 182).
- Music. Music files often consume excessive memory. Move music files to an expansion card, or delete large files from your device.
- Internet. If you have set a large Web browser cache, you may want to clear the cache (see “Customizing Your Web Browser Settings” on page 157).
- Third-party applications. You can delete infrequently used applications (see “Removing Applications” on page 238) or move them to an expansion card (see “Using Expansion Cards” on page 253).
Third-Party Applications
Some third-party applications can cause conflicts with your Treo device. Third-party applications that modify the wireless features of your device may require extra troubleshooting. If you recently installed an application and your Treo device seems to be stuck, try the following:
- Perform a soft reset (see "Soft Reset" on page 288).
- If the problem persists, perform a system reset (see "System Reset" on page 288).
- Delete the most recently installed application from your Treo device (see "Removing Applications" on page 238).
- If the problem persists, perform another system reset.
- If possible, synchronize your device with your computer to back up your most recent information.
- If you're unable to perform the steps above or the problem persists, locate your Backup folder on your computer and rename the folder (for example, BackupOld). Note that "Palm" in the following locations might be "Handspring" or "palmOne," based on the device you're upgrading from:
Windows: C:\Program Files\Palm\device name.
Mac: Mac HD/Users/
-
Perform a hard reset (see "Hard Reset" on page 289).
-
Synchronize to restore your Contacts, Calendar, Tasks, Memos, and Pics&Videos information. You may need to manually restore information in other applications.
-
If the problem is resolved, begin reinstalling your third-party applications one at a time by double-clicking a single file in the original Backup folder that you renamed, and sync after each application you install.
-
If the problem recurs, delete the last application you installed and report the problem to its developer.
314 Section 7A: Help
Remember that not all third-party applications were written with the Treo 755p smart device by Palm in mind. You may encounter strange behavior or errors in these applications if you use the keyboard and 5-way.
Getting More Help
Contact the author or vendor of any third-party software if you require further assistance. Sprint does not provide technical support for applications that are not built into your Treo device.
Errors
Your Treo device is designed to minimize interruptions when a system error occurs. If your device encounters a system error, it automatically resets itself and resumes functioning as normal. If possible, it even turns the phone back on if it was on before the error occurred.
Sometimes you might want to know more about an error. The Treo 755 smart device by Palm uses a special interface to show error messages in greater detail.
- Press Phone

- Enter ##377, and then press Talk
- Review the screen with details about the conditions that led up to the most recent automatic reset.
- Select OK.
Please note that third-party developers create their own error messages. If you do not understand an error message, please contact the developer of the application for help.
Fixing an Error 67 Message
- Press Phone

-
From the Dial Pad, enter ##data.
-
Press Menu

-
Select Update Vision Profile from the Options menu.
-
Select Now.
Where to Learn More
For a Quick Introduction
- Quick Tour: The Quick Tour introduces you to many of your Treo device's features. It is already installed on your device, and you can open it any time. Press Applications 📄, and then select Quick Tour 📋.
While Using Your Device
- On-device User Guide: A copy of this guide that is specially formatted for your device screen. To view the on-device guide, press Applications 📄, select My Treo 📋, select the Support tab, and then select User Guide.
- Tips: Many of the built-in applications include helpful tips for getting the most out of your device. To view these tips, open an application, press Menu ☐, select Options, and then select Tips.
- Information: Many screens have a Tips 📄 icon in the upper-right corner. Select the Tips icon to learn about the tasks you can perform in that dialog box.
- Online support from Palm: For up-to-date downloads, troubleshooting, and support information, go to www.palm.com/treo755psprint-support
- Setup help: If you need help with setup, call 1-866-750-PALM (7256). This service is FREE within 90 days of purchase. Our support staff can help you set up your device and get you up and running. We can best assist you if your device is fully charged and you call from a phone other than your Treo device.
If You Need More Information
- Vista users: For information on using your device and desktop software with Windows Vista, visit www.palm.com/windowsvista.
Books: Many books on Palm OS devices are available in local or online book retailers (look in the computers section), or visit www.palm.com. - Online forums: Consult online Treo device user discussion groups to swap information and learn about topics you may find nowhere else. Visit www.palm.com for details.
Visiting the Sprint Web Site
You can get up-to-date information on Sprint services and options by signing onto the Sprint Web site at www.sprint.com
When you visit Sprint online, you can:
- Review coverage maps.
- Learn how to use voicemail.
- Access your account information.
• Purchase accessories. - Add options to your service plan.
- Check out frequently asked questions.
And more.
Reaching Sprint Customer Service
You can reach Sprint Customer Service many different ways:
- On your Treo device, press Phone ; enter *2, and then press Talk
• Sign on to your account at www.sprint.com. - Call toll-free at 1-888-211-4727 (Consumer customers), -or-
1-888-788-4727 (Business customers).
●Write to Sprint Customer Service, P.O. Box 8077, London, KY 40742.
318 Section 7A: Help
Receiving Automated Invoicing Information
For your convenience, your phone gives you access to invoicing information on your Sprint Account. This information includes balance due, payment received, invoicing cycle, and the number of minutes used since your last invoicing cycle. (Normal airtime usage applies.)
- Press Phone 📄, enter *4, and then press Talk 📋.
Note:
This service may not be available in all Affiliate areas.
Sprint 411
You have access to a variety of services and information through Sprint 411, including residential, business, and government listings; assistance with local or long-distance calls; movie listings; and hotel, restaurant, shopping, and major local event information. There is a per-call charge in addition to normal airtime rates.
- Press Phone 📄, enter 411, and then press Talk 📋.
Sprint Operator Services
Sprint Operator Services provide assistance when you place collect calls or calls billed to a local telephone calling card or third party.
- Press Phone ⚠, enter 0, and then press Talk
For more information or to see the latest in products and services, visit Sprint online at www.sprint.com
Glossary
1xEV-DO (Evolution Data Optimized): A wireless broadband technology (also known as EVDO) that is designed for very high-speed data transfer with average download speeds of 400 to 700Kbps and that is capable of reaching speeds up to a theoretical maximum of 2.4Mb/s, and upload speeds up to 156Kb/s. The Sprint Power Vision network uses 1xEV-DO technology.
1xRTT: A standard of Mobile Internet connectivity that allows for persistent data connections as long as you are actively using your data connection. The average data transmission rate is around 70Kb/s, although theoretical limits are 153.6Kb/s. With Sprint Vision plans, you pay a monthly rate for unlimited data transfer and you don't pay for connection time.
Alt (alternative) Alt: A keyboard key. Enter a letter on the keyboard, and then press Alt Alt to access variations such as international characters and symbols.
Applications 📄: The screen on your Treo™ 755 smart device by Palm from which you can open all applications.
Auto-off interval: The time of inactivity that passes before the screen on your Treo device turns off. The wireless features on your device are unaffected by this setting.
Beam: To send or receive an entry or application using the infrared port on your Treo device.
Bluetooth® wireless technology: Technology that enables devices such as smart devices, mobile phones, and computers to connect wirelessly to each other so that they can exchange information over short distances.
Device name: The name associated with your Treo device that distinguishes it from other Palm OS ® devices. When you first synchronize your device, you are asked to give it a device name. This name appears in the User list in Palm ® Desktop software.
Dial-up networking: Wireless technology that enables you to convert your device into a wireless modem so that you can access the Internet from your computer.
Dialog box: A set of options and command buttons that is enclosed by a border and that enables you to carry out a specific task.
Favorite: A button that provides quick access to a phone number (speed dial) or commonly used application (Contacts, Web, Messaging, and so on). You can define up to 70 favorite buttons in the Phone application.
Good Mobile Messaging™ application: An optional secure wireless messaging application allowing real-time push synchronization with your Microsoft Outlook server.
HotSync® technology: The technology that synchronizes your Treo device and your computer with the simple press of a button.
HotSync manager: The computer application that manages the synchronization with your Treo device.
Infrared (IR): A way of transmitting information using light waves. The IR port on your Treo device enables you to transfer information between other IR devices within a short radius.
Lithium-ion (Li-ion): The rechargeable battery technology used in Treo devices.
On Demand: A Sprint Power Vision network feature that allows you to personalize your device's data features.
Option key: The keyboard button that enables you to access the number, symbol, or feature that appears above the letter on each key.
Palm Desktop software: A PIM application for computers that helps you manage your personal information and keep it synchronized with your Treo device.
Palm OS: The operating system of your Treo device. Palm OS is known for its simplicity of use and for the large number of compatible third-party applications that can be added to your Treo device.
Palm™ Quick Install: The component on your Windows computer that enables you to install Palm OS applications and other information on your Treo device.
Partnership: Two Bluetooth devices—for example, your device and a hands-free device—that can connect because each device finds the same passkey on the other device. Once you form a partnership with a device, you don’t need to enter a passkey to connect with that device. Partnership is also known as paired relationship, pairing, trusted device, or trusted pair on some devices.
Phone 📄: The application on your Treo device that enables you to make and receive phone calls.
Phone as Modem: Feature that enables your device (when connected to the Sprint Power Vision network) to be used as a high-speed modem for your computer, using a wired (USB sync cable) connection.
PIM (personal information management): A genre of software that includes applications such as Palm Desktop software, Microsoft Outlook, Lotus Notes, and ACT!. PIMs generally store contacts, schedules, tasks, and memos.
SMS: The service that enables devices to exchange short text messages almost instantly. Text messages are typically exchanged between mobile phones. These messages can usually include up to 160 characters. Your device can send and receive SMS messages while you are on a voice call.
Sprint Picture Mail: An enhanced Sprint Vision messaging service that enables you to instantly share pictures and videos with friends and family. You can also manage your pictures and videos online.
Sprint Vision: The next generation of Mobile Internet access that enables you to check your email, browse the Web, and share pictures and videos with Sprint Picture Mail.
Sprint Power Vision network: An advanced mobile data network using the fastest commercially available wireless network technology (EVDO) to deliver broadband-like transfer speeds for your data connections.
Sprint TV: A Sprint Power Vision network service that allows you to view live Mobile Digital TV (MDTV) on your Treo device.
Streaming: Technology that enables you to access media content—for example, to watch video or listen to an audio program—directly from the Internet on your device without needing to download a file that you save on your device.
User folder: The folder on your computer that contains both the information you enter in Palm Desktop software and the information you enter on your device and synchronize with Palm Desktop software.
Safety and Specifications
Sprint

Important Safety Information
In This Section
General Precautions
- Maintaining Safe Use of and Access to Your Device
◆ Using Your Phone With a Hearing Aid Device
♦ Caring for the Battery
Radiofrequency (RF) Energy
Static Electricity, ESD, and Your Device
Owner's Record
User's Guide Proprietary Notice
This guide contains important operational and safety information to help you safely use your Treo™ 755p smart device by Palm. Failure to read and follow the information provided in this guide may result in serious bodily injury, death, or property damage.
General Precautions
There are several simple guidelines to operating your device properly and maintaining safe, satisfactory service.
- Speak directly into the microphone.
- Avoid exposing your device and accessories to rain or liquid spills. If your device does get wet, immediately turn the power off and remove the battery.
Although your device is quite sturdy, it is a complex piece of equipment and can be broken. Avoid dropping, hitting, or bending it, or sitting on it. - Any changes or modifications to your device not expressly approved in this document could void your warranty for this equipment and void your authority to operate this equipment.
| Note: | For the best care of your device, only Sprint authorized personnel should service your device and accessories. Failure to do so may be dangerous and void your warranty. |
Maintaining Safe Use of and Access to Your Device
Do Not Rely on Your Device's Phone for Emergency Calls
Wireless phones such as the one on your Treo device operate using radio signals, which cannot guarantee connection in all conditions. Therefore you should never rely solely upon any wireless phone for essential communication (for example, medical emergencies). Emergency calls may not be possible on all cellular networks or when certain network services and/or phone features are in use. Check with your local service provider for details.
Using Your Phone While Driving
Talking on your phone while driving (or operating the phone without a hands-free device) is prohibited in some jurisdictions. Laws vary as to specific restrictions. Remember that safety always comes first.
Tip:
Purchase an optional hands-free accessory at your local Sprint Store, or call the Sprint Accessory Hotline at 1-800-974-2221 or by entering #222 on your Treo device.
Following Safety Guidelines
To operate your device safely and efficiently, always follow any special regulations in a given area. Turn your device's phone off in areas where use is forbidden or when it may cause interference or danger.
Using Your Device's Phone Near Other Electronic Devices
Most modern electronic equipment is shielded from radiofrequency (RF) signals. However, RF signals from wireless phones may affect inadequately shielded electronic equipment.
RF signals may affect improperly installed or inadequately shielded electronic operating systems and/or entertainment systems in motor vehicles. Check with the manufacturer or their representative to determine if these systems are adequately shielded from external
RF signals. Also check with the manufacturer regarding any equipment that has been added to your vehicle.
Consult the manufacturer of any personal medical devices, such as pacemakers and hearing aids, to determine if they are adequately shielded from external RF signals.
Note:
Always turn off the phone in health care facilities and request permission before using the phone near medical equipment.
Turning Off Your Phone Before Flying
Turn off your phone before boarding any aircraft. To prevent possible interference with aircraft systems, the U.S. Federal Aviation Administration (FAA) regulations require you to have permission from a crew member to use your phone while the plane is on the ground. To prevent any risk of interference, FCC regulations prohibit using your phone while the plane is in the air.
Turning Off Your Phone in Dangerous Areas
To avoid interfering with blasting operations, turn your phone off when in a blasting area or in other areas with signs indicating two-way radios should be turned off. Construction crews often use remote-control RF devices to set off explosives.
Turn your phone off when you're in any area that has a potentially explosive atmosphere. Although it's rare, your phone and accessories could generate sparks. Sparks can cause an explosion or fire, resulting in bodily injury or even death. These areas are often, but not always, clearly marked. They include:
- Fueling areas such as gas stations.
Below deck on boats.
● Fuel or chemical transfer or storage facilities. - Areas where the air contains chemicals or particles such as grain, dust, or metal powders.
- Any other area where you would normally be advised to turn off your vehicle's engine.
330 Section 8A: Safety
| Note: | Never transport or store flammable gas, flammable liquid, or explosives in the compartment of your vehicle that contains your phone or accessories. |
Restricting Children's Access to Your Device
Your Treo device is not a toy. Do not allow children to play with it as they could hurt themselves and others, damage the device and/or its phone, or make calls that increase your Sprint Invoice.
Using Your Phone With a Hearing Aid Device
Your Sprint Power Vision SM smart device Treo TM 755 P by Palm is compliant with the FCC Hearing Aid Compatibility (HAC) requirements. For additional HAC information, including the HAC rating of this product, please refer to www.palm.com/treoHAC
Your device has been tested for hearing aid device compatibility. When some wireless phones are used near some hearing devices (hearing aids and cochlear implants), users may detect a buzzing, humming, or whining noise. Some hearing devices are more immune than others to this interference noise, and phones also vary in the amount of interference they generate.
The wireless telephone industry has developed ratings for some of their mobile phones, to assist hearing-device users in finding phones that may be compatible with their hearing devices. Not all phones have been rated. Phones that have been rated have a label on the box. Your Treo 755 smart device by Palm phone has an M3 and T3 rating.
These ratings are not guarantees. Results will vary, depending on the level of immunity of your hearing device and the degree of your hearing loss. If your hearing device happens to be vulnerable to interference, you may not be able to use a rated phone successfully. Trying out the phone with your hearing device is the best way to evaluate it for your personal needs.
M-Ratings: Phones rated M3 or M4 meet FCC requirements and are likely to generate less interference with hearing devices than phones that are not labeled. M4 is the better/higher of the two ratings.
T-Ratings: Phones rated T3 or T4 meet FCC requirements and are likely to be more usable with a hearing device's telecoil ("T Switch" or "Telephone Switch") than unrated phones. T4 is the better/higher of the two ratings. (Note that not all hearing devices contain telecoils.)
The more immune your hearing aid device is, the less likely you are to experience interference noise from your wireless phone. Hearing aid devices should have ratings similar to those of phones. Ask your hearing health-care professional for the rating of your
332 Section 8A: Safety
hearing aid. Add the rating of your hearing aid and your phone to determine probable usability:
- Any combined rating equal to or greater than six offers best use.
• Any combined rating equal to five is considered normal use. - Any combined rating equal to four is considered usable.
Thus, if you pair an M3 hearing aid with an M3 phone, you will have a combined rating of six for “best use.” This is synonymous for T ratings.
Sprint Nextel further suggests that you experiment with multiple phones (even those not labeled M3/T3 or M4/T4) while in the store to find the one that works best with your hearing aid device. If you experience interference or find the quality of service
unsatisfactory after purchasing your device, promptly return it to the store within 30 days of purchase. With the Sprint 30-day Risk-Free Guarantee, you may return the device within 30 days of purchase for a full refund, and you will only be responsible for charges based on your actual usage.
Getting the Best Hearing Device Experience With Your Device
To further minimize interference:
- There is usually less interference on the microphone setting than on the telecoil setting.
- Set the phone's screen and keyboard backlight settings to ensure the minimum time interval.
- Move the phone around to find the point with the least interference.
- If your hearing aid is equipped with a telecoil, turn on the HAC setting on your device.
Turning on the HAC Setting
When the HAC setting is on, your device sends the audio from your phone calls to the telecoil rather than to the microphone of your hearing aid. You are likely to hear calls much better because volume is increased and background noise and feedback are diminished. The HAC setting improves only the calls you listen to through the earpiece. It does not affect calls heard on the speakerphone or with a car kit or headset. HAC requires extra battery power, so watch your battery consumption when it's turned on.
Section 8A: Safety 333
Caution:
Do not turn on the HAC setting unless you use a hearing aid with a telecoil. Using this setting without a hearing aid or with a hearing aid without a telecoil may be harmful to your hearing.
-
Make sure your phone is turned on (see “Turning Your Device’s Phone On and Off” on page 55).
-
Press Phone

- Press Menu

-
Select Options and then select Phone Preferences.
-
Check the Hearing Aid Compatibility box.
-
Select OK.
Caring for the Battery
Protecting Your Battery
The guidelines listed below help you get the most out of your battery's performance.
- Recently there have been some public reports of wireless phone batteries overheating, catching fire, or exploding. It appears that many, if not all, of these reports involve counterfeit or inexpensive, aftermarket-brand batteries with unknown or questionable manufacturing standards. Sprint is not aware of similar problems with Treo devices resulting from the proper use of batteries and accessories approved by Sprint or the manufacturer of your phone. Use only Sprint or manufacturer-approved batteries and accessories found at Sprint Stores or through your device's manufacturer, or call 1-866-343-1114 to order. They're also available at www.sprint.com—click Accessories under the Shop & Browse menu. Buying the right batteries and accessories is the best way to ensure they're genuine and safe.
- In order to avoid damage, charge the battery only in temperatures that range from 32ircF to 113ircF ( 0ircC to 45ircC ).
- Don’t use the battery charger in direct sunlight or in high humidity areas, such as the bathroom.
- Never dispose of the battery by incineration.
- Keep the metal contacts on top of the battery clean.
- Don’t attempt to disassemble or short-circuit the battery.
- The battery may need recharging if it has not been used for a long period of time.
It's best to replace the battery when it no longer provides acceptable performance. It can be recharged hundreds of times before it needs replacing. - Don’t store the battery in high temperature areas for long periods of time. It’s best to follow these storage rules:
■Less than one month: -4irc F to 140irc F ( -20irc C to 60irc C)
- More than one month: -4irc F to 113irc F (-20° C to 45° C)
Battery Safety Information
- Do not disassemble or open, crush, bend or deform, puncture or shred.
- Do not modify or remanufacture, attempt to insert foreign objects into the battery, immerse or expose to water or other liquids, expose to fire, explosion or other hazard.
- Only use the battery for the system for which it is specified.
- Only use the battery with a charging system that has been qualified with the system per this standard. Use of an unqualified battery or charger may present a risk of fire, explosion, leakage, or other hazard.
- Do not short circuit a battery or allow metallic conductive objects to contact battery terminals.
- Replace the battery only with another battery that has been qualified with the system per this standard, IEEE-Std-1725-200x. Use of an unqualified battery may present a risk of fire, explosion, leakage or other hazard.
- Promptly dispose of used batteries in accordance with local regulations.
●Battery usage by children should be supervised. - Avoid dropping the phone or battery. If the phone or battery is dropped, especially on a hard surface, and the user suspects damage, take it to a service center for inspection.
- Improper battery use may result in a fire, explosion or other hazard.
Disposal of Lithium-Ion (Li-Ion) Batteries
Do not handle a damaged or leaking li-ion battery as you can be burned.
For safe disposal options of your li-ion batteries, contact your nearest Sprint authorized service center.
Special Note: Be sure to dispose of your battery properly. In some areas, the disposal of batteries in household or business trash may be prohibited.
Radiofrequency (RF) Energy
Understanding How Your Phone Operates
Your phone is basically a radio transmitter and receiver. When it's turned on, it receives and transmits radiofrequency (RF) signals. When you use your phone, the system handling your call controls the power level. This power can range from 0.006 watts to 0.2 watts in digital mode.
Knowing Radiofrequency Safety
The design of your Treo 755 P smart device by Palm complies with updated NCRP standards described below.
In 1991-92, the Institute of Electrical and Electronics Engineers (IEEE) and the American National Standards Institute (ANSI) joined in updating ANSI's 1982 standard for safety levels with respect to human exposure to RF signals. More than 120 scientists, engineers and physicians from universities, government health agencies and industries developed this updated standard after reviewing the available body of research. In 1993, the Federal Communications Commission (FCC) adopted this updated standard in a regulation. In August 1996, the FCC adopted hybrid standard consisting of the existing ANSI/IEEE standard and the guidelines published by the National Council of Radiation Protection and Measurements (NCRP).
Body-Worn Operation
To maintain compliance with FCC RF exposure guidelines, if you wear a handset on your body, use the Sprint-supplied or -approved carrying case, holster, or other body-worn accessory. Use of non-Sprint-approved accessories may violate FCC RF exposure guidelines.
For more information about RF exposure, visit the FCC Web site at www.fcc.gov.
Specific Absorption Rate (SAR) for Wireless Phones
The SAR is a value that corresponds to the relative amount of RF energy absorbed in the head of a user of a wireless handset.
Section 8A: Safety 337
The SAR value of a phone is the result of an extensive testing, measuring, and calculation process. It does not represent how much RF the phone emits. All phone models are tested at their highest value in strict laboratory settings. But when in operation, the SAR of a phone can be substantially less than the level reported to the FCC. This is because of a variety of factors including its proximity to a base station antenna, phone design, and other factors. What is important to remember is that each phone meets strict federal guidelines. Variations in SARs do not represent a variation in safety.
All phones must meet the federal standard, which incorporates a substantial margin of safety. As stated above, variations in SAR values between different model phones do not mean variations in safety. SAR values at or below the federal standard of 1.6 W/kg are considered safe for use by the public.
The highest reported (FCC) SAR values of the Treo 755p smart device by Palm are:
| Maximum SAR Values CDMA Cellular CDMA PCS | |
| Held to Ear 1.07(W/1Kg) 1.46 (W/1Kg) | |
| Body-Worn .89 (W/1Kg) .33 (W/1Kg) |
The highest reported (FCC) SAR values of the Treo 755p smart device by Palm on the Sprint Power Vision network (EVDO mode) are:
| Maximum SAR Values EVDO Cellular EVDO PCS | |
| Body-Worn 0.887 (W/1Kg) 0.303 (W/1Kg) |
FCC Radiofrequency Emission
This phone meets the FCC Radiofrequency Emission Guidelines and is certified with the FCC as:
FCC ID number: 08F-895.
More information on the phone's SAR can be found from the following FCC Web site: https://gullfoss2.fcc.gov/prod/oet/cf/eas/reports/GenericSearch.cfm
338 Section 8A: Safety
Static Electricity, ESD, and Your Device
Electrostatic discharge (ESD) can cause damage to electronic devices if discharged into the device, so you should take steps to avoid such an occurrence.
Description of ESD
Static electricity is an electrical charge caused by the buildup of excess electrons on the surface of a material. To most people, static electricity and ESD are nothing more than annoyances. For example, after walking over a carpet while scuffing your feet, building up electrons on your body, you may get a shock—the discharge event—when you touch a metal doorknob. This little shock discharges the built-up static electricity.
ESD-Susceptible Equipment
Even a small amount of ESD can harm circuitry, so when working with electronic devices, take measures to help protect your electronic devices, including your Palm® device, from ESD harm. While Palm has built protections against ESD into its products, ESD unfortunately exists and, unless neutralized, could build up to levels that could harm your equipment. Any electronic device that contains an external entry point for plugging in anything from cables to docking stations is susceptible to entry of ESD. Devices that you carry with you, such as your device, build up ESD in a unique way because the static electricity that may have built up on your body is automatically passed to the device. Then, when the device is connected to another device such as a docking station, a discharge event can occur.
Precautions Against ESD
Make sure to discharge any built-up static electricity from yourself and your electronic devices before touching an electronic device or connecting one device to another. The recommendation from Palm is that you take this precaution before connecting your device to your computer, placing the device in a cradle, or connecting it to any other device. You can do this in many ways, including the following:
- Ground yourself when you're holding your mobile device by simultaneously touching a metal surface that is at earth ground. For example, if your computer has a metal case and is plugged into a standard three-prong grounded outlet, touching the case should discharge the ESD on your body.
- Increase the relative humidity of your environment.
• Install ESD-specific prevention items, such as grounding mats.
Conditions That Enhance ESD Occurrences
Conditions that can contribute to the buildup of static electricity in the environment include the following:
- Low relative humidity.
Material type (The type of material gathering the charge. For example, synthetics are more prone to static buildup than natural fibers like cotton.) - The rapidity with which you touch, connect, or disconnect electronic devices.
While you should always take appropriate precautions to discharge static electricity, if you are in an environment where you notice ESD events, you may want to take extra precautions to protect your electronic equipment against ESD.
Owner's Record
The model number, regulatory number, and serial number are located on a nameplate inside the battery compartment. Record the serial number in the space provided below. This will be helpful if you need to contact us about your phone in the future.
Model: Sprint Power Vision SM Smart Device Treo TM 755 P by Palm
Serial No.:
User's Guide Proprietary Notice
CDMA Technology is licensed by QUALCOMM Incorporated under one or more of the following patents:
4,901,307 5,109,390 5,267,262 5,416,797
5,506,865 5,544,196 5,657,420 5,101,501
5,267,261 5,414,796 5,504,773 5,535,239
5,600,754 5,778,338 5,228,054 5,337,338
5,710,784 5,056,109 5,568,483 5,659,569
5,490,165 5,511,073
User's Guide template version 5B (October 2005)
Specifications
In This Section
Specifications
Specifications
| Radio CDMA 1900/800 MHz digital dual-band EVDO and 1xRTT | ||
| Phone features Personal speakerphoneHands-free headset jack(2.5mm, 3-barrel connector) | Microphone mute optionTTY/TDD compatibility3-way calling | |
| Processor technology Intel XScaleTM processor, 312MHz | ||
| Expansion miniSD card slot | ||
| Battery Rechargeable Lithium-ionRemovable for replacement | 3.5 hours full charge time | |
| Palm OS® version Palm OS 5.4.9 | ||
| Camera (not included on all models) | Still image capture resolution (1280 x 1024), 1.3 megapixel2x digital zoomVideo capture resolution (352 x 288)Automatic light balance | |
| Size/weight 4.4" x 2.3" x 0.8"(117 mm x 58.4 mm x 20.3 mm)5.6 ounces (159 g) | ||
| Connectivity Bluetooth® wireless technology(1.2 compliant) | IR | |
| Display Touch-sensitive | LCD screen (includes stylus)65,536 colors (16-bit color)User-adjustable brightness | |
| Keyboard Built-in QW | ERTY keyboard plus 5-way navigatorBacklight for low lighting conditions | |
| Included software Phone | (includes Palm OS Favorites and Dial Pad)CameraCamcorderPics&VideosWeb browser (Internet)Google MapsOn DemandVersaMail® (email)CalendarContactsTasksSMS (text messages) | Sprint Picture Mail (multimedia messages)IM (instant messaging)Calculator (basic/advanced)MemosWorld ClockVoice MemoDocuments To Go®Palm® Desktop software/HotSync® managerSprint TVPocket TunesTM (music) |
| System requirements | Windows 2000, XP Service Pack 2, or Windows Media Center Edition 2005 with USB portMac OS 10.2–10.3.x with USB portLater versions may also be supported | |
| Operating and storage temperature range | 32°F to 104°F (0°C to 40°C) 5% to | 90% Relative Humidity (RH) |
Index
Numerics
1xEV-DO (EVDO) technology 321
1xRTT connections 95
1XRTT protocol 321
24-hour clock 263
5-way navigator 11, 42, 274
911 phone calls 90, 92, 274
A
AC charger 12, 16, 18, 281
accented characters 49,50
accessing
Alert screen 98
alternate characters 49
applications 52
calculator 228
command buttons 44
common tasks 74
corporate accounts 280
Dial Pad 57,66
email 131
Guest Book 137
On Demand information 107
online album 183
Palm online support 317
personal accounts 26,318
personal information 26, 275
Phone Book 202
Sprint Vision services 104
Sprint Web site 318
streamed media channels 196
VersaMail 119
voicemail 25,64
voicemail messages 25
Web pages 139, 147
World Clock 226
accessories 281
Account Name field 118
account passwords 26
Account Setup command 117
Account setup complete screen 117
accounts 25, 26, 114
See also Sprint Vision accounts; Sprint Power
Vision accounts
Accounts command 117, 126
Accounts Setup dialog box 117 , 118
actions 11, 43, 74
activating Treo smart device 9 , 22
Active Call view 65 , 67, 69
active calls 65 , 72
See also phone; phone calls
ActiveSync servers 115 , 130
adapters 281
Add Bookmark command 155
Add Call button 66, 69
Add Contact command 68
Add Favorite dialog box 75
Add New Number dialog box 68
Add Songs to Playlist screen 192
Add to a Contact button 68
adding
accessories 281
alerts 127, 209
backgrounds 212
Bluetooth devices 162
bookmarks 155 –156
caller ID pictures 203
categories 265
cities to World Clock 226
contacts 68, 202
emoticons 135 , 137
events 207 , 209, 210
favorite buttons 74 –76
memos 219
multimedia messages 135 -137
partnerships 80, 249
passwords 25 , 26, 277
phone numbers 68,71
QuickText phrases 138
signatures 129
songs to playlists 192, 193
speed-dial buttons 75
tasks 215
text messages 134, 138
voice captions 173
wallpaper 84
Address Book 73
addresses
adding multiple 76
creating links for 139
entering multimedia message 136
entering text messaging 134
highlighting 43
multiple recipients and 138
selecting 43
adjusting screen brightness 19 , 262
adjusting volume
alert tones 86
device ringer 11 , 85, 87
music 191
phone calls 23 , 87
Advanced Encryption Standard 131
Advanced Mode (calculator) 228, 229
AES (Advanced Encryption Standard) 131
After deleting a message pick list 125
Agenda view 206, 212
See also Calendar application
alarm 14,85,86,96
See also alerts
alarm clock 227
Alarm Preset check box 214
Alarm Sound pick list 214 , 218
alarm tones 213
album pick list 183
albums (Pics&Videos) 179–181, 183
alert icon (device) 96
alert icon (voicemail) 64
Alert Manager symbol 294
Alert me of failures check box 127
Alert me of new mail check box 127
alert preferences 86
Alert screen 63, 98, 139, 209
Alert Sound pick list 127
alert tones 86,144
alerts
adding 127,209
assigning to tasks 218
caution for incoming calls and 61
customizing 86
deleting 98
displaying 96, 98, 209
receiving messages and 139, 144
selecting 98
untimed events and 209
voicemail and 63, 64
Alerts command 127 , 144
aligning screen 264
Alt key 47,321
alternate characters 49,50
anniversaries 209
Answer button 61, 69
answering phone 25 , 61, 62, 69, 83
answering service. See voicemail
application buttons 11, 51, 76, 267
application preferences 29, 265–266, 268
application settings. See application preferences
applications
accessing available 52
arranging 265
associating with buttons 76,267
beaming 244
composing email messages and 121
copying 255
customizing 265
cycling through 52
displaying information about 240
displaying list of 266
displaying menus for 44, 47
displaying private entries in 278
downloading 151 , 237
expansion cards and 255
5-way navigator and third-party 42
getting help with 317
highlighting 52
installing 235 -237, 313, 314
making phone calls and 67
opening 51 –52, 255
recently used 52
removing 238, 239
searching 234
selecting synchronization 33, 36
sending over Bluetooth connections 241
setting default 268
synchronizing 35, 36
transferring 29
troubleshooting 314
uninstalling 288
updating information in 35
Applications button 52
Applications view 51, 52, 266, 321
appointments. See Calendar application; events
Archive folder 238
area conversions (calculator) 229
arrow icons (documentation) 42
Ask to add unknown phone numbers after calls check box 68
assistance 26,317,319
Attach from device option 137
Attach from Online option 137
Attach Signature check box 129
attachments
displaying 115, 123, 131
document files and 122
downloading 124
pictures and videos and 121
removing 122
ringtones and 123
storing large 313
voice memos and 122, 225
Attachments dialog box 121, 122
attendees (events) 212
audio 78
See also music
audio captions 173 , 177, 178, 183
audio files 188
audio formats 188
audio player. See Pocket Tunes
Auto answer pick list 83
Auto Lock Device box 276
Auto naming pick list 176
Auto Sync command 126
Auto Sync dialog box 126
Auto-Keyguard preference 273
automated invoicing information 319
automatic resets 316
automatic shut-off 271
Auto-off after pick list 271
auto-off interval 271, 321
B
back view (device) 12
Background check box 212
background music 178
backgrounds 212
backing up information 35
backlight (keyboard) 47
Backspace key 58
Backup folder 238, 239
Basic Mode (calculator) 228
basics 2, 22, 35, 317
battery
charging 16 –17, 18
conserving power for 18 –19
disposing of 336
inserting 15
recharging 18
replacing 15, 19, 281, 291
specifications for 344
viewing status of 16 , 17, 97
battery door release 12, 15
battery icon 17, 19, 97
battery-charge indicators 16, 97
battery-ready indicator 16, 17
Bcc option (email) 120
beam (defined) 321
Beam Business Card command 205
Beam Category command 244
Beam command 244
Beam Receive pick list 271
Beam Receive, disabling 19
Beam Status dialog box 244, 245
beaming information 243 –245, 321
beeps 55,81
See also alerts
bell 98,294
belt clip 281
billing information 104
birthdays 209
blank favorite buttons 75, 76
blank screens 293
blinking bell 98,294
blinking indicator light 17,98
Bluetooth application
device connections and 161 , 162
hands-free devices and 80 –81
partnerships and 165
synchronizing and 249
Bluetooth button 80
Bluetooth devices
connecting to 79, 160–163
routing phone calls to 81 , 82
setting preferences for 83
temporarily disabling 19
transferring calls from 65
troubleshooting 303
viewing status of 96
Bluetooth icon 80, 96
Bluetooth Preferences screen 96
Bluetooth technology 160,321
bookmarks 155 –156, 243
Bookmarks view 156
Bookmarks view icon 156
border glow (highlight) 43
brightness (screen) 19 , 262
broadband connections 111
browser. See Web browser
built-in applications 235, 238, 317, 345
built-in camera. See camera
built-in security software 272
business cards 205, 244
buttons
accessing command 44
accidentally pressing 66
assigning Quick Keys to 74, 75, 76
changing favorite 76
creating favorite 74 –76
disabling onscreen 274
enabling dialog box 44
5-way navigator 42
highlighting 43
opening applications and 51
reassigning 11,267
restoring factory defaults for 267
selecting 43
setting preferences for 267
waking up screen with 54
buzz (headset) 79
C
cache 158 , 313
cache preferences 158
calculating disk space 29 -30
calculator 228 -229
Calculator icon 228
calendar
See also Calendar application; events
accessing 131
adding alerts to 209
adding backgrounds to 212
customizing 212 -213
displaying 51
moving through 207
setting default view for 212
setting first day of week for 264
transferring to smart device 29
Calendar application
See also calendar
changing screen fonts for 262
color-coding events with 211
defining custom intervals for 210
displaying current event in 84, 97
managing events with 206 –212
opening 11, 51, 84
selecting views 206
setting display options in 212
setting sound preferences 213
updating information in 35, 36
viewing event status for 97
Calendar button 11 , 206
call forwarding 71
call forwarding icon 96
Call forwarding pick list 71
call lists 60
Call Log button 60 , 76
Call Log dialog box 60, 68
call waiting 69 , 93
Call Waiting dialog box 69
caller ID 68
caller ID pictures 88, 172
caller ID preferences 85 , 88
caller ID ringtones 87
calling cards 319
calling Sprint Customer Service 26 , 318
calls. See phone calls
call-waiting alerts 61
Camcorder application 174, 176, 180
Camcorder icon 174
camera
customizing 176
location of built-in 13
power consumption and 19
specifications for 344
taking pictures 172 –173
Camera application 172, 176, 180
Camera icon 172
Cancel button (Active Call) 65
Cancel Spkr button 65
Caps Lock 48
Card Info application 256
Card Info button 256
card readers 189
categories 203, 242, 265
Category command 265
Category pick list
applications 265
contacts 88
events 211 , 213
memos 219
tasks 215 , 216
cautions 3 , 13
Cc option (email) 120
CDs 190
Center button 45
Change Lock Code setting 275
changing
bookmarks 156
color scheme 264
contact information 204
default settings 259
events 211
favorite buttons 76
information 28
passwords 26, 278
playlists 192
screen fonts 262
channel icon 196
characters
accessing international 321
defining Quick Keys and 74
displaying alternate 49
displaying hexadecimal 229
entering alternate 49
entering from keyboard 48
maximum in notes 219
maximum in text messages 134
messages and invalid 135 , 138
searching on 234
charge indicator icon 97
charge indicator light 16, 17
charger adapter 18
charger cable 16, 18, 34
charger jack 12, 16, 18
chargers (optional) 281
charging connector 12, 16, 18
charging the battery 16 –17, 18
charging, smart device 17
chat preferences 143
Chat screen 141 , 143
chat session icon 142
chat sessions 103 , 141
City pick list 226
Clear Cache preferences 158
Clear Voicemail Icon button 90
clock 226, 263
clock preferences 269
closing Internet connections 111
collect calls 319
color palette 176
color preferences 264
color-coded category marker 213
color-coding events 211
colored backgrounds 43
Colors Theme screen 264
command buttons 44
command shortcuts (menus) 45
common tasks 74
compact discs 190
company names 279
completed tasks 218
completion dates 218
Compose dialog box 134, 137
Compress Day View check box 213
compressed files 237
computers. See CPUs
conduit software 33
Conf button 70
conference calls 69, 70, 72
configuring Sprint Vision services 102
Confirm message deletions check box 143
Connect to the Internet dialog box 102
connecting smart device 34
connecting to power sources 16
connection icons 95, 104
Connection Manager 110
connections
accessing Internet and 55, 110, 322
Bluetooth devices 79, 160–163
closing 111
overview 28
PCs and 34, 110
power consumption and 19
precautions for 340
receiving information over Bluetooth 242
sending information over Bluetooth 241
Sprint Power Vision services 106
Sprint Vision services 104
troubleshooting 301 , 304, 309
TTY devices and 91
viewing status of 95 , 307, 308
connectivity 344
constants 229
Contact Edit dialog box 88, 203
contacts
adding 202
assigning pictures to 88, 274, 275
changing information for 204
creating 68
deleting 205
dialing by 58
entering multiple 202, 206
entering phone numbers for 68 , 89
marking as private 203
searching for 58 , 84
selecting caller ID ringtones for 88
sending email to 120
synchronizing 35, 36
text messaging to 134
transferring to smart device 29
viewing phone numbers for 59
Contacts application
adding contacts and 202
changing contact information and 204
changing screen fonts for 262
creating business cards and 205
mapping contact address 204
opening 202
updating information in 35, 36
Contacts buttons 76 , 202
Contacts list 58, 134, 204
context-sensitive actions 11
conversion functions 229
cookies 157
coprocessing units. See CPUs
copying
applications 255
multimedia files 184
phone numbers 57
pictures 180
text 153
video clips 180
corporate accounts 114, 130, 280
corporate address lists 115, 131
coverage area 19, 95, 301
Coverage in/out pick list 86
coverage maps 318
CPUs
connecting to 34, 110
interactions with 28
removing applications from 239
transferring music from 188
updating information on 35
Create a New Contact button 68
Create chats from messages pick list 143
creating
alerts 127, 209
backgrounds 212
bookmarks 155 –156
categories 265
contacts 68, 202
email messages 120
events 207, 209, 210
favorite buttons 74 –76
memos 219
passwords 25 , 26, 277
playlists 192 –193
QuickText phrases 138
signatures 129
speed-dial buttons 75
tasks 215
text messages 134 , 138
voice captions 173
wallpaper 84
current event 84, 97
Current Privacy pick list 277
Customer Service (Sprint) 26,318
customer support (Palm) 317
customizing
alerts 86
application buttons 267
applications 265 -266
calendar 212 -213
camera 176
favorite buttons 74
messages 143
phone 84 -91
screen 262 -264
tasks 217
Treo smart device 259
VersaMail 126
Web browser 157 –158
D
Daily Repeating Events check box 213
data connection icons 95, 104
data networks. See network connections
data service icons 307 , 308
data services 106,307,308
Date & Time Preferences screen 269
date formats 263
Date pick list 263
Date stamp pick list 176
dates. See calendar
Day view 207, 213
Daylight Savings Time 269
decimal display formats 229, 264
decreasing phone volume 23
Default Apps preferences 268
default password 26
Default View pick list 212
defaults, restoring 267
Delete command 125
Delete Contact command 205
Delete From pick list 238
Delete Item command 217, 219
Delete Old command 125
deleting
alerts 98
applications 238, 239
attachments 122
bookmarks 156
contacts 205
device names 31
email 124,313
events 212
favorite buttons 76
groups of messages 125
memos 219
photos 173
playlists 193
private entries 278
tasks 217
text messages 140
videos 174
desktop software 28, 33, 36
See also Palm Desktop software
Details button 44
Device Name field 80, 161, 249
device names
defined 322
deleting 31
hands-free devices and 80, 161
synchronizing and 249
device resets 31, 276, 288–289
device, charging 17
devices
See also Bluetooth devices; Palm OS devices;
Treo smart device
electrostatic discharge and 339
naming 31, 80, 161, 249
physically-impaired disabilities and 91
upgrades and 31
Dial another call? prompt 69
Dial button 59
Dial Extra Digits Automatically option 75
Dial Number dialog box 59
Dial Pad 56, 57, 66, 84
Dial Pad buttons 76
Dial Preferences command 89
Dial Preferences dialog box 89
dial tones 90
dialing 57 –59, 66, 75, 89
dialing preferences 89
dialing shortcuts 75
dialog boxes 44, 317, 322
dial-up networking 322
dial-up networking icon 96
digital movies 103
digital networks 93
digital pictures 103
directions 204
Directory Assistance 319
Disable Cookies check box 157
Disable Images check box 158
Disable JavaScript check box 157
disabling
onscreen buttons 274
Treo smart device 19
Discovery icon 162
discovery results list 162
Discovery Results screen 241
disk space 29 -30, 313
Display my name in chat window as
option 143
display options (calendar) 212
Display Options command 212
display. See screen
displaying
alerts 96, 98
alternate characters 49
applications 265
attachments 115, 123, 131
calendar 51
connection status 95 , 307, 308
contact information 204
current event 97
decimal values 229, 264
directions, for contact address 204
email messages 97 , 119
events 84, 213
favorite button assignments 75
items in pick lists 45
menu items 44, 47
numeric pages 64
on-device guide 317
pending alerts 209
phone numbers 59
pictures 177, 183, 184
private entries 277 , 278
recently dialed numbers 60
recording time 175
status information 10, 95
streamed media 196 , 197
tasks 212 , 216, 218
tips 317
unread messages 212
video clips 178 , 184
Web pages 148 , 153, 155
docking cradle 281
documentation 2 , 8, 42, 317
Documents application 115 , 131, 222, 223
Domino mail servers 115 , 131
downloading
applications 151, 237
attachments 124
email messages 126
files 128, 151
from the Web 151
ringtones 85
songs 188
Sprint Connection Manager 110
downward-pointing arrows 45
Drafts button 121
Drafts folder 137
draining the battery 17
DTMF tones 90
Due Date pick list 215
E-911 service feature 90
earpiece 10, 11, 65
eBooks 19
Edit Bookmarks command 156
Edit Category dialog box 88
Edit Favorites Button command 76
Edit Favorites Pages command 74 , 77
Edit QuickText option 138
editing. See changing
Effects pick list 176
electrostatic discharge 339–340
accessing 131,280
active phone calls and 67
adding attachments to 121 -123
adding links to 139
adding signatures to 129
addressing 76
attaching voice memos to 225
checking status of 119
checking unread messages for 212
configuring for VersaMail 117 -118
copying to multiple recipients 120
creating 120
deleting 124, 313
getting messages 119 , 126, 127, 130
highlighting addresses 43
marking priority for 121
maximum message size for 129
power consumption for 19
removing attachments from 122
responding to 120
saving drafts 121
sending 121
setting alerts for 127
setting default browser for 268
sorting 119
switching accounts for 126
synchronizing 115, 130, 131
troubleshooting 304 -307
viewing attachments in 115, 123, 131
viewing messages 97, 119
email accounts 114 , 115
email applications 33 , 51, 114
Email buttons 76
Email icon 117 , 119
email preferences 126 –129
email providers 114 , 115, 116
emergency phone calls 90 , 92, 274
emoticons icon 135 , 137
emotive symbols 138
Empty battery icon 17
Empty Trash command 125
Enable Background Playback check box 192
Enable Local Network Time box 269
entering
information 28,35,48
passkeys 162, 163
passwords. See passwords
phone numbers 57, 58, 84
errors 316
Escalate ring tone volume check box 85
ESD (electrostatic discharge) 339–340
EVDO technology 321
event conflicts 97 , 213
event icon 97
events
See also calendar; Calendar application
adding alerts for 209
adding notes to 212
assigning time zones to 208
changing 211
checking status of 97
color-coding 211
creating 207, 209, 210
deleting 212
displaying 84,213
purging 211
rescheduling 211
scheduling 208
synchronizing 35, 36
transferring to smart device 29
viewing duration of 213
Excel files 122, 123, 222, 223
Exchange mail servers 115 , 130
exiting pick lists 45
expansion card slot 13 , 253, 344
expansion cards
copying applications to 255
downloading to 151, 152
formatting 256 , 257
moving pictures to 180
opening applications on 255
overview 253
removing applications from 238
storing information on 313
transferring music to 188
viewing information about 256
extending battery life 19
extensions (phone number) 66 , 75, 89
Extra Digits button 64, 66
Extra Digits option 75
F
fade setting 212
FAQs 318
favorite buttons
changing 76
creating 74 –76
defined 322
deleting 76
dialing with 59, 75
displaying in Phone application 84
locating blank 75
naming 75
upgrading and 74
Favorites pages 75 , 77
features 44 , 103
fields 43 , 45
files
attaching to email 123
downloading 128, 151
installing quarantined 31
location of quarantined 29
opening 223
streaming from Web pages 152
transferring 29
financial calculator 229
financial information 109
Find dialog box 234
Find Text on Page command 154
finding
blank favorite buttons 75
contacts 58 , 84
Sprint Vision user names 104
text 154 , 234
5-way navigator 274
Flash mode 72
flight mode 55
folder icon 124
folder pick list 119
folders 119, 324
Font command 263
fonts 262
forgetting passwords 276, 278
formats (email) 129
Formats command 263
Formats Preferences screen 263
formatting
date and time 263
expansion cards 256 , 257
numbers 264
forwarding phone calls 71 , 96
Free Space information 30
freeing memory 158 , 217, 238, 313
frequently asked questions 318
front view (device) 10
Full battery icon 17
full charge (battery) 16
function keys 47
functions 229
G
Game Volume pick list 261
games 19
Get Good icon 131
getting started 2 , 22, 35, 317
Glossary 321
Go to Next Message option 125
Good Mobile Messaging application 114, 131, 322
Google Maps
locating contact address in 204
using with Find feature 234
graphics. See images
green lightning bolt 17
Guest Book 137
H
HAC setting 333
handset speaker 10, 11
hands-free car kit 78 , 79
hands-free devices
compatible headsets for 78
connecting to 12, 79–82
features described 81
setting preferences for 83
troubleshooting 303–304
Handsfree Preferences screen 83
Hands-free Setup button 80
Hang Up All button 65, 66, 70
hard resets 276 , 289
hardware 8
headphones 78
headset button 79
headset icon 96
headset jack 12
headsets 12 , 66, 78, 79
hearing-impaired services 91
help 26 , 237, 315, 318
hexadecimal characters 229
Hide Records setting 277
hiding private entries 277
highlighting
applications 52
items on screen 43
menu items 44
phone numbers 59
pick lists 45
text 44
Web links 43 , 149
high-speed connections 95 , 111
hints 276
History command 153
History list 153
Hold button 66 , 69
holidays 209
home city 226
home pages 157
HotSync button 34 , 37
HotSync cable 34, 37, 281
HotSync connector 12
HotSync cradle 281
HotSync manager 322
HotSync operations 30, 37, 322
See also synchronization
HTML formats 129
hyperlinks. See Web links
icons 95 , 103, 266
Ignore button 61 , 69
Ignore with Text button 61 , 69
images
creating wallpaper from 84
disabling Web page 158
saving 151
setting preferences for 176
troubleshooting 311
inactive data connections 95
inactive devices 276
Inbox
displaying messages in 97,119
message descriptions in 142
selecting chat sessions from 141
sorting messages in 119
Inbox folder 119
Inbox icons 119
Incoming command 127
Incoming dialog box 127
incoming message icon 142
incompatible applications 29
increasing phone volume 23
indicator light 10 , 16, 17, 98
Info command 29
Info screen 29 , 240
information
accessing 26,275
backing up 35
beaming 243 –245, 321
changing 28
entering 28,35,48
locking 272
losing 257, 276, 289
marking as private 277
protecting 26, 277
receiving automated invoicing 319
receiving over Bluetooth connections 242
recharging battery and 18
restoring 276
sending over Bluetooth connections 241
setting owner preferences for 279
storing 313
synchronizing 18, 28, 33, 35
transferring 29
updating 28,35
information screens 43
Infrared port. See IR port
infrared-enabled devices 13
inserting battery 15
Installation CD 9,32
installation wizard 33
installer 235
installing
applications 235 -237, 313, 314
bonus software 235
Palm desktop software 9,32
quarantined files 31
Sprint Connection Manager 110
synchronization software 32
third-party applications 292
interference 302, 304
international characters 321
international clock 226 , 263
international phone numbers 89
international travel adapters 281
Internet connections
accessing 110,322
closing 111
installing from 236
setting up proxy server for 158
troubleshooting 309
viewing online album from 183
Internet features 55
invalid characters 138
invoicing information 319
IR devices 322
IR port 13,243,322
items on screen 43
iTunes 187
K
key presses 46
keyboard
accessing alternate characters on 49
dialing with 58
locking 272, 274
overview 46 –49
restoring factory defaults for 267
selecting menu items from 45
setting timed events with 208
setting up Quick Keys for 74 , 75, 76
silencing ringer from 62
keyboard backlight 47
keyboard shortcuts 267
Keyguard 54,272
Keyguard preferences 273 , 274
Known Caller pick list 85
L
Label color pick list 143
labeling favorite buttons 75
language settings 292
language-impaired services 91
large attachments 313
Late Breaking News & Photos selection 108
launching applications 51–52, 255
LED display 10
length conversions 229
lens (camera) 13
letters. See characters
liability ii
light. See indicator light
lightning bolts 17
Li-ion battery. See battery
Li-ion technology 19,322
links. See Web links
list screens 43, 44
list view 266
List/Thumbnail icon 179
listening to music 78, 185–193
listening to voice captions 177 , 183
lists 45
Lithium-ion technology 322
loading Web pages 310
locating
blank favorite buttons 75
contacts 58, 84
Sprint Vision user names 104
text 154 , 234
location information 90
Location ON option 90, 95
location privacy icon 95
location-based services 90
locations, transmitting 90
lock codes 22, 275
Lock Device screen 276
lock icon 238 , 243, 244
Lock Phone options 275
locking smart device 275 -276
locking the keyboard 272 , 274
logic functions (calculator) 229
losing information 257, 276, 289
Lost Password box 278
Lotus Notes servers 115
lowercase letters 48
low-lighting conditions 47
M
Mac operating systems
removing applications and 239
requirements for 28
synchronizing with 32, 36
transferring music from 188
transferring pictures from 31
mail. See email
mail servers 115
Mail Service pick list 117 , 118
Main View 264
Manage Sound list 123
Map button 204
MAPI servers 115
mapping, contact addresses 204
maps 109, 204, 318
marking private contacts 203
Mask Records setting 277
masking private entries 277
mathematical constants 229
mathematical functions 229
maximizing battery life 19
Maximum message size option 128
MDTV (Mobile Digital TV) 103
media features 19
media formats 188
media players 19
memory
freeing 158 , 238, 313
purging events and conserving 211
setting cache 158
memory consumption 313
memos
See also voice memos
synchronizing 35 , 36
transferring to smart device 29
Memos application
changing screen font for 262
creating memos and 219
opening 219
updating information in 35, 36
Memos icon 219
Menu button 44
menu button 11
Menu key 47
menus 44, 47
message alerts 139, 144
Message buttons 76
Message Format pick list 129
message preferences 143
Message view (Inbox) 120, 124
messages
See also email; multimedia messages; text messages
adding Web links to 139
addressing 76
chat sessions and 141
checking status of 96, 97, 212
customizing 143
dialing from 59
drafting 121
inserting emotive symbols in 138
listening to voicemail 63
removing groups of 125
retrieving 64,96
setting maximum size for 128
sorting 119, 140
truncated 119
Messaging application 134, 138, 143
Messaging button 11 , 103
messaging icon (voicemail) 64
metric conversions 229
microphone 12, 66, 79
Microphone sounds pick list 176
Microsoft Excel spreadsheets See Excel files
Microsoft Exchange ActiveSync accounts 202, 206, 252
Microsoft Exchange ActiveSync servers 115, 130
Microsoft MAPI servers 115
Microsoft Office Manager See Documents application
Microsoft Outlook. See Outlook
Microsoft Windows. See Windows
Microsoft Word documents 222 , 223
migrating to Treo smart device 29
military time 263
miniSD 13
miniSD cards 253
mirror 12
Mobile Digital TV 103
mobile networks 301
mobile phone. See phone; Treo smart device
model numbers 341
modems 110 -111, 322, 323
Money selection 109
monitoring signal strength 95
Month view 207, 213
mouthpiece 12
MP3 files 188
MPEG-4 formats 184
multimedia message icon 142
multimedia messages
addressing 136
attaching to email 121
attaching voice memos to 225
character restrictions for 138
creating 135 -137
inserting predefined phrases in 137
online services for 145
sending 137
sending and receiving 103
viewing status of 142
multi-phone accounts 26
multiple recipients 76 , 120, 138
music
adjusting volume 191
answering phone calls and 62
changing playlists for 192
downloading 188
listening to 78, 185–193
memory consumption and 313
pausing 191
setting background playback for 192
transferring from CDs 190
music files 188
Mute button 66
N
name preferences 279
names
email accounts and user 117 , 118
sorting on 140
Sprint Vision accounts and 104
synchronizing devices and 31
naming
Bluetooth devices 249
email accounts 117
expansion cards 256
favorite buttons 75
picture albums 179
smart device 31, 80, 161, 249
navigation bar (Web browser) 150
navigator 11, 42
navigator buttons 42
network connections 93, 95, 301–304
Network Selection pick list 94
New Bookmark screen 155
New button 44
New events use time zones box 208
new lines 219
New Message screen 120
news information 108
No Service message 95
nonwireless features 55
Note button 203
notes 203, 212, 216
See also messages
notifications 63, 64, 127
See also alerts
number display formats 229
numbers
displaying as decimals 229 , 264
entering 48
formatting 264
storing in calculator 229
Numbers pick list 264
numeric pages 64
O
offline viewing 155
OK button 44
On Demand categories 109
On Demand feature 107 –109, 322
On Demand icon 103, 107
On Demand screen 108
On Demand Service 107
On phone power off check box 275
one-touch message access 25
online forums 318
online photo album 183
online services 102, 145
opening
Alert screen 98
application menus 47
applications 51 –52, 255
calculator 228
Dial Pad 57, 66
email attachments 115 , 123, 131
files 223
text messages 61
Web pages 149,310
World Clock 226
operating systems 323
Operator Services 319
Optimized mode 311
Option key 47, 48, 51, 322
Option Lock 48
optional passwords 26
options 45, 318
organizer features 19
organizer information 130
Outbox 121, 142
Outbox button 121
outgoing message icon 142
outgoing messages 135
Outlook
accessing 131
calendar events and 212
corporate accounts and 130
entering information with 28
multiple contacts and 202
synchronizing information and 33, 36, 212, 246
time zone information and 208
overdue tasks 212 , 217
Owner Preferences screen 279
P
page icon 142
Page view 154
pages 64
paired relationships. See partnerships
Palm Desktop software
corporate accounts and 130
defined 322
entering contacts and 202
entering information with 28
installing 9,32
security password and 278
synchronizing from 33, 36
Palm Media application 184
Palm online support 317
Palm OS (defined) 323
Palm OS applications 235
See also applications
Palm OS database files 235
Palm OS devices
beaming information to 243
calculating disk space on 29 -30
installing synchronization software for 32
transferring information from 29
Palm OS software 29
Palm OS version 344
Palm Powered devices 318
Palm Software Installation CD 9,32
PalmOS5 Incompatible Apps directory 29
PalmSoftware.pkg icon 32
paper clip icon 121, 123
Partial battery icon 17
partnerships
communicating with 160
creating 80,249
defined 323
hands-free devices and 79
passkeys 80, 162, 163
Password box 276
password hints 276
passwords
accessing voicemail and 25
adding to phone numbers 66 , 75
assigning system 275
changing 26,278
creating 25, 26, 277
email accounts and 117 , 118
entering voicemail 63 , 64
forgetting 278
online photo album and 183
Paste command 153
pasting phone numbers 57
pasting text 153
patches 238
Pause button 191
pausing
music 191
voice memos 225
PCs
connecting to 34 , 110
interactions with 28
removing applications from 239
transferring music from 188
updating information on 35
PDF files 123
pending alerts 139 , 209
pending messages 135
performance 18 , 79
personal accounts 26 , 318, 319
personal address book 73
personal computers. See PCs
personal information 26, 275, 279
See also private entries
personal information managers 292
See also PIM software
phone
See also phone calls; phone numbers
accessing directory assistance for 319
accessing operator assistance for 319
adding speed-dial buttons for 75
adjusting ringer volume for 87
answering 25, 61, 62, 69, 83
customizing 84 –91
dialing 57 -59, 66, 75, 89
enabling as modem 110 –111
getting started with 23
hands-free devices and 78,79
hanging up 11, 65, 66, 70
Internet connections and 111
locking 274
not activated 22
opening applications and 67
power consumption and 19
redialing 60
roaming and 93 –94
selecting alert tones for 86
selecting ringtones for 85 , 87
setting dialing preferences for 89
setting up call waiting for 69
specifications for 344
temporarily disabling 19
text messaging and 138
three-way calling and 70
TTY devices for 91
turning on and off 11 , 18, 19, 54, 55
Phone application
accessing Dial Pad from 57
customizing appearance of 84
defined 323
displaying calendar in 207
displaying current events in 84
managing active calls with 65 –72
monitoring device status from 95
opening 11, 51, 56
selecting wallpaper for 84 , 181
setting caller ID preferences and 88
setting dialing preferences and 89
setting phone preferences and 90
setting roaming preferences and 93
setting sound preferences and 85 , 86
phone as modem features 323
phone book 82
See also Address Book
Phone button 11 , 56
phone calls
See also phone; phone numbers
adding a second 69
adjusting volume for 23 , 87
emergency services for 90 , 92
ending 65, 66, 70, 71
forwarding 71, 96
making 23,57–60,67,70,73
managing 65,72
placing on hold 66, 69
receiving 25, 61–62, 69
routing to Bluetooth devices 81, 82
screening 87
sending to voicemail 61 , 69
switching to a second 70
transmitting location during 90
Phone Display Options command 84
Phone Display Options dialog box 84
phone headsets 12 , 66, 78, 79
Phone Info command 24 , 104
Phone Info screen 24,104
Phone Lock command 274, 275
phone numbers
adding emergency 274
adding links for 139
adding prefixes to 89
adding to Call forwarding list 71
adding to Contacts list 68
assigning Quick Keys to 74, 75, 76
copying and pasting 57
dialing extra digits for 66 , 75, 89
displaying recently dialed 60
entering 57, 58, 84
getting device 24
highlighting 43,59
selecting 59, 60, 71
setting owner preferences for 279
viewing 59
Phone Off message 95
phone preferences 71 , 90
Phone Preferences command 90
Phone Preferences screen 71 , 90
Phone screen. See Phone application
phone-to-computer connections 110
photo albums. See albums
Photo Settings screen 176
photos
See also pictures
adding voice captions 173
backing up 184
creating wallpaper with 84 , 181
deleting 173
email attachments and 121 , 123
printing 145
saving 173 , 174
pick lists 43 , 45
Pics&Videos application
copying albums and 180
creating albums and 179
opening 177
playing videos and 178
updating information in 35 , 36
viewing pictures and 177
viewing slide shows and 178
Pics&Videos button 177
Picture box 88
picture formats 177 , 184
Picture Mail
accessing online album for 183
active phone calls and 67
creating messages and 135
defined 323
opening 103
sending messages and 134
setting up Web account for 136
troubleshooting 307 , 308
Picture Mail icon 103
Picture Mail message icon 97
Picture Mail service 172
Picture Mail Web site 183
picture thumbnails 212
pictures
See also photos; multimedia messages
adding as backgrounds 212
adding caller ID 88 , 172, 203
adding to albums 179
adding to messages 137
assigning to contacts 88, 181
attaching to email 121
copying 180
displaying 177, 183, 184
removing from albums 179, 182
rotating 182
selecting 88
synchronizing 35, 36
taking 13,88,172
transferring to smart device 31
uploading 183
PIM software 323
PIMs 292
plain text messages 129
playback 191, 225
playing
music 185 –193
streamed media files 197
voice captions 177 , 183
playlists 192 –193
Pocket Tunes 188
POP email accounts 128
POP protocol 128
ports 13,34
power adapter 12, 16, 18, 281
power consumption 18, 19
Power Preferences screen 19, 271
power settings 19, 271
power sources 16
Power Vision accounts. See Sprint Power Vision accounts
Power/End button 11, 54, 66
caution for pressing 61, 67
Powering off screen 55
PowerPoint files 122, 123, 223
precautions 3, 13, 340
preferences
alerts 86
buttons 267
chat sessions 143
dialing 89
email 126 –129
hands-free devices 83
messages 143
phone 71, 90
roaming 93
Preferences dialog box 217
prefixes (phone numbers) 89
Premium Services 26
Preparing Vision Services dialog box 102
preset buttons 74
preset delays 276
pressing onscreen buttons 274
primary application 51
printing 145
prioritizing tasks 215, 218
priority settings
email 121
tasks 215
text messages 135
privacy flag 216
Privacy Mode check box 143
privacy settings 272
privacy status icon 95
Private box 277
private contacts 203
private entries 277 -278
processor 344
programmable buttons 74
Prompt sound pick list 176
protecting personal information 26 , 277
protecting Treo smart device 272
Protocol pick list 118
proxy servers 158
PSAPs (public safety answering points) 92
public safety answering points 92
punctuation 48
purchasing accessories 281
purchasing batteries 15
purchasing Premium Services 26
Purge command 140, 211, 217
Purge pick list 140
purging. See deleting
push synchronization 115, 131
Q
quarantined applications 29, 31
quarantined files 29 , 31
quick buttons 51, 54
Quick Install 323
Quick Install icon 237
Quick Keys 74, 75, 76
Quick Tour 317
QuickText icon 135
R
radio 344
random number generator 229
range (Bluetooth devices) 79, 303
readjusting screen 264
reassigning buttons 11, 267
receiving phone calls 25, 61–62
rechargeable battery. See battery
recharging the battery 18
Record Completion Date check box 218
recording time 175
recording video clips 174, 176
recurring events. See repeating events
red lightning bolt 17
Redial list 60
redialing phone numbers 60
regulatory numbers 341
Reminder Sound pick list 214
reminders. See alerts
Remove from album command 179
removing. See deleting
Rename Card command 257
renaming expansion cards 256
Repeat Alarm pick list 214
repeat intervals (calendar) 210
Repeat pick list 210
repeating events 210, 213
repeating tasks 215
replacement stylus 281
replacing batteries 15, 19, 281, 291
Reply button 120
rescheduling events 211
resets 31, 276, 288–289
resetting smart device 288 -289
resolution 173
Resolution pick list 176
restoring defaults 267
restoring information 276
restoring private entries 278
restricting location information 90
retrieving voicemail messages 96
Review photos/videos pick list 176
ringer
adjusting volume 11 , 87
silencing 62
ringer switch 14,62,260
ringer switch icon 97
Ringtone pick list 88
ringtones
assigning to caller IDs 87 , 203
assigning to contacts 88
attaching to email 123
downloading 85
selecting 85
roaming 93 –94
Roaming icon 93, 96
Roaming message 95
Roaming pick list 85
Roaming Preferences command 93
Roaming Preferences screen 93, 94
roaming status 96
Rotate command 182
rotating pictures 182
Rows pick list 84
S
safe resets 288
safety guidelines 327
safety information 3
Save as Wallpaper command 181
Save Page command 155
saving
email attachments 124
images 151
notes 219
phone numbers 68
photos 173 , 174
Web pages 155
schedules. See Calendar application
scheduling events 208
screen
activating items on 43
adjusting brightness 19 , 262
automatically turning off 271
customizing 262 -264
dimming 47
disabling items on 272
highlighting items on 43
moving around on 42
realigning 264
selecting items on 43
specifications for 345
troubleshooting problems with 293
turning on and off 11, 54, 271, 276
waking up 51, 54, 67
screen fonts 262
screening phone calls 87
screens, scrolling through 42
scroll arrows 43
scrolling 42
SD cards 13,253
searching for contacts 58, 84
searching for signal 19
secondary application 51
secure connections 160
Secure Digital cards 13,253
secure Web sites 311
security features 272
Security icon 276, 277, 278
security software 272
Select Media screen 122
selecting
applications 52, 255
chat sessions 141
menu items 45
options in pick lists 45
Web links 149
self-portrait mirror 12
sending
applications over Bluetooth 241
email 121
information over Bluetooth 241
multimedia messages 137
text messages 69 , 135
voice memos 225
Sent folder 119, 142
serial numbers 341
servers 115
service plans. See Sprint Vision accounts; Sprint
Power Vision accounts
Setup Devices screen 80, 162
Shift/Find key 48
Short DTMF Tones check box 90
Short Messaging Service (SMS) 323
shortcuts (menus) 45
Show Calendar event check box 84, 207
Show Categories check box 218
Show Category Column check box 213
Show Category List check box 213
Show Completed Items check box 218
Show Due Dates check box 218
Show Due Tasks check box 212
Show Favorite buttons check box 84
Show Messages check box 212
Show Priorities check box 218
Show Records setting 278
Show Time Bars check box 213
Show timestamps check box 143
Show Wallpaper option 84
Shutter sound pick list 176
Side button 11,87
signal
locating 55
low coverage areas and 301
monitoring strength 95
searching for 19
Signal faded pick list 86
signal strength 18
signal-ready indicator 55
signal-strength icon 55
Signature command 129
signatures 129
silent alarm 260
sit files 237
Size button 29
Skip Pass Code feature 25
slide shows 178
sliders 43
smart device, charging 17
smartphone. See Treo smart device
SMS (defined) 323
SMS messaging services 307, 308
Snooze button 98
soft resets 288
software 9, 28, 235, 236, 345
See also applications
Software Installation CD 9, 32
software versions 29
Sort by Date command 140
Sort by Name command 140
Sort by pick list 218
sorting messages 119, 140
sorting tasks 218
Sound & Alerts screen 85, 86, 261
sound clips 135
sound files 123
Sound Mode icons 260
Sound Off 14
Sound Off icon 62
Sound On 14
sound preferences 85 , 260
Sound Preferences command 85, 86, 213
sound settings. See sound preferences
sounds 85
spare battery 15
speaker 10, 12
speakerphone 12 , 18, 65
speakers 11
special characters 48, 49, 50
specifications 344
speech-impaired services 91
speed-dial buttons 59, 75
speed-dial icon 59
Spkr-phone button 65 , 67
Sports selection 109
spreadsheets 222, 223
Sprint 411 319
Sprint Accessory Hotline 281
Sprint Connection Manager 110
Sprint Customer Service 26
Sprint National Network 93,103
Sprint Operator Services 319
Sprint Picture Mail Online Services 145
Sprint Power Vision accounts 26, 93, 106
Sprint Power Vision connections 106
Sprint Power Vision network 324
Sprint Power Vision Smart Device. See Treo smart device
Sprint Service 21
Sprint Service Plan 102
Sprint status message 95
Sprint TV application 103, 196–197, 324
Sprint TV icon 103
Sprint Vision 310,323
Sprint Vision accounts 26, 93, 102
Sprint Vision data services 147
Sprint Vision home page 102
Sprint Vision Service 103, 104
Sprint Vision sessions 289
Sprint Vision Smart Device. See Treo smart device
Sprint Vision symbols 103
Sprint Vision user names 104
Sprint Voice Command service 73,93
Sprint Web page 318
Start With pick list 157
starting Sprint Vision sessions 289
static 302, 304, 339–340
statistical functions 229
status icons (Inbox) 119
status icons (phone) 56, 95
status information 10, 95, 150
stereo adapters 185
stereo headphones 78,185
stereo headsets 12 , 66, 78, 79
stock ticker 109
storage capacity 253
storing
information 313
music files 189
notes 219
numbers 229
pictures 172, 183
video clips 172
streaming 196,324
stylus 14, 42, 43, 281
sub-account passwords 26
suggestions (VersaMail) 120
support 26,317,318
Swap button 70
symbols 48, 49, 50, 138, 321
sync button 34, 37
sync cable 17, 28, 34, 37
Sync connector 12
sync connector 12
synchronization
Bluetooth devices and 249
corporate accounts and 130
defined 35
deleting private entries and 278
desktop software and 36
installing third-party applications for 292
recommendations for 18,35
removing applications and 238
restrictions for 30
troubleshooting 294–298
upgrades and 30
synchronization applications 33, 36, 294
synchronization complete message 37
synchronization software 28, 30, 32, 33, 292
synchronization-in-progress message 37
synchronizing email 115, 130, 131
synchronizing information 28, 33, 35
See also synchronization
system errors 316
system passwords 275
system requirements 28,345
system resets 288
System Volume pick list 261
T
Take new picture option 137
Take new video option 137
taking pictures 13 , 88, 172
Talk button 11
Tap and Drag pick list 157
tapping 14, 42
Task Details screen 215
tasks
accessing common 74
adding 215
completing 216,218
customizing 217
deleting 217
displaying 212, 216, 218
prioritizing 215 , 218
setting alerts for 218
sorting 218
synchronizing 35, 36
transferring to smart device 29
Tasks application
changing screen fonts for 262
managing tasks with 215 –217
setting display options for 216
setting preferences for 217 –218
updating information in 35, 36
Tasks icon 215
Tasks list screen 216 , 217
TDD devices 91
technical support 26,318
telecommunications devices 91
telephone. See phone
temperature 346
temperature conversions 229
text
changing screen font for 262
copying 153
entering 48 , 219, 279
highlighting 44
searching for 154,234
viewing against pictures 212
text fields 43
text message icon 97, 142
text messages
See also messages; multimedia messages
addressing 134
character limit for 134
character restrictions for 135
creating 134 , 138
deleting 140
dialing from 59
inserting predefined phrases in 135
online services for 145
opening 61
receiving 139
sending 69,135
viewing status of 96, 97, 142
text messaging 19, 76, 103, 134, 141
Text Telephone devices 91
third-party applications
getting help with 237
installing 235,313
navigator and 42
searching 234
transferring information from 29, 31
troubleshooting 314
uninstalling 288
third-party phone calls 319
third-party utilities 29
three-way calling 70
thumbnail images 84 , 212
Thumbnail view 179, 182
time 175 , 208, 227
See also clock
time bars 213
time formats 263
time intervals (calendar) 210
Time pick list 263
time stamps 143
Time Zone pick list 208
time zones 208 , 269
timed events 208 , 209, 213
Timed Events check box 213
tips 317
Tips command 317
Tips icon 317
To Do lists. See tasks
top view (device) 14
touchscreen. See screen
Touchscreen command 264
touch-sensitive actions 11
touch-tone dialing 90
transferring calls to voicemail 25
transmitting location information 90
Trash folder 124
travel adapters 281
Treo smart device
activating 9,22
as wireless modem 322
compatible hands-free devices for 78
components on 10, 12, 14, 42
components shipped 8
connecting to PCs 28
connecting to power sources 16, 18
customizing 259
entering passwords for 275
extending storage capacity 253
getting additional information about 318
getting phone number for 24
installing applications on 237
locking 275 -276
monitoring status of 95 –97
naming 80, 161, 249
not turning on 18
removing applications from 238 , 239
resetting 31, 276, 288–289
setting up service for 21, 26
specifications for 344
synchronizing with 30, 35
temporarily disabling 19
third-party applications and 31
troubleshooting 317
unlocking 22, 276, 279
upgrading to 29 –31
trigonometric functions 229
troubleshooting 292 , 317
truncated messages 119
Trusted Devices button 162
trusted devices. See partnerships
trusted pairs. See partnerships
TTY devices 91, 92
TTY/TDD mode icon 96
TTY/TDD preferences 91
turning backlight on and off 47
turning off beeps and alarms 14
turning phone on and off 54 , 55
turning screen on and off 54 , 271
TV Guide 109
U
unanswered calls 25
unauthorized calls 274
unauthorized users 25 , 272
uninstalling applications 288
Unknown Caller pick list 85
unlocking Treo smart device 22, 276, 279
unread messages 97, 128, 142, 212
Unread messages check box 128
untimed events 209 , 213
Untimed Events check box 213
Update Vision Profile command 316
updates (smart device) 318
updating
information 28,35
World Clock 269
upgrades 29 –31
Upload icon 183
Upload to Online Albums option 183
uploading pictures 183
uppercase letters 48
urgency levels. See priority settings
urgent messages 142
URLs 139, 157, 243
USB docking cradle 281
USB hub 34
USB port 34
USB sync cable 12, 34, 37, 281
Use color for pick list 143
User folder 324
User Guide 317
user names
email accounts and 117 , 118
Sprint Vision accounts and 104
V
vehicle charger 18
vehicle power adapter 281
VersaMail
creating and sending messages and 120
customizing 126
deleting messages and 125
downloading attachments and 124
opening 119
retrieving messages and 119
setting priority options and 121
setting up accounts for 115, 117–118
version information 28, 29, 240
VGA resolution 344
Vibrate pick list 85 , 86
vibrating alarm 85, 86, 260
video clips
See also multimedia messages
adding to messages 137
attaching to email 121
backing up 184
copying 180
deleting 174
displaying 178, 184
online services for 145
recording 174 , 176
removing from albums 179 , 182
streaming 196, 197
synchronizing 35, 36
video formats 184
video icon 196
video recording screen 175
View By pick list 266
viewing
alerts 96, 98
alternate characters 49
applications 265
attachments 115, 123, 131
calendar 51
connection status 95 , 307, 308
contact information 204
current event 97
decimal values 229, 264
directions, for contact address 204
email messages 97 , 119
events 84,213
favorite button assignments 75
items in pick lists 45
menu items 44, 47
numeric pages 64
on-device guide 317
pending alerts 209
phone numbers 59
pictures 177, 183, 184
private entries 277 , 278
recently dialed numbers 60
recording time 175
status information 10,95
streamed media 196, 197
tasks 212, 216, 218
tips 317
unread messages 212
video clips 178, 184
Web pages 148, 153, 155
virtual private networks 280
Vista 318
voice captions 173, 177, 178, 183
Voice Command service. See Sprint Voice
Command service
Voice Memo application 224–225
voice memos 122 , 135
voicemail
accessing 25,64
checking status of 96
entering passwords for 25, 63, 64
getting help with 318
playing messages in 63
retrieving messages from 64, 96
roaming and 93
sending calls to 61, 69
setting up 25,63
viewing numeric pages for 64
voicemail account 25, 26
Voicemail Alert pick list 86
Voicemail button 63, 64, 76
Voicemail icon 63, 90, 96
voicemail number 63
voicemail page icon 142
Voicemail Pass Code feature 25
Voicemail Quick Key 74
Voicemail screen 63 , 64
volume
alert tones 86
device ringer 11, 85, 87
music 191
phone calls 23 , 87
Volume button 11, 23, 87
volume conversions (calculator) 229
Volume pick list 85 , 86
VPN clients 280
VPNs (virtual private networks) 280
W
waking up screen 51 , 54, 67
wallpaper 84 , 172, 181, 264
warm resets 288
warnings 3 , 13
Weather selection 109
Web browser
accessing Guest Book from 137
beaming from 243
connecting to Sprint Vision home page from 102
customizing 157 –158
downloading files with 151 , 152
enabling offline viewing in 155
finding text with 154
installing applications from 236
opening 51
overview 147
setting bookmarks for 155 –156
setting default 268
troubleshooting 311
viewing Web pages from 148 –149
Web browsing 19, 67, 147
Web icon 103
Web Link buttons 76
Web links 43, 139, 149
Web pages
accessing 139, 147
beaming 243
caching 158
copying text in 153
deleting saved 156
dialing from 59
displaying 148,153
downloading files from 151 , 152
enabling wide layouts for 148
loading 310
locating text in 154
saving 155
saving images on 151
setting default browser for 268
setting default view for 157
setting home page for 157
setting preferences for 157 –158
signing onto Sprint 318
troubleshooting 310
turning off images in 150
viewing offline 155
viewing status for 150
Web sites 103, 147
Web-based email 114
See also Internet connections
Week starts pick list 264
Week view 207
weights 229
Welcome screen 55
Wide Page Mode 148 , 311
Windows 318
Windows operating systems
entering passwords and 278
installing applications from 237
removing applications and 239
requirements for 28
synchronizing with 36
transferring music from 188
Windows Vista 318
wired headsets 78, 79
wireless connections 106
wireless coverage 19
wireless features 19
wireless headsets 78 , 79
wireless modems 322
wireless synchronization 130
Word documents 222, 223
Word files 122, 123, 223
World Clock 226 -227, 263
World Clock application, opening 51
World Clock icon 226
World Wide Web. See Web
Wrap Search box 154
Y
Year view 207
Z
ZIP codes 107
zip files 237
zoom settings 173
- Sprint® Service
- Intellectual Property Notices
- Disclaimer and Limitation of Liability
- Table of Contents
- Welcome to Sprint 1
- How to Use This Guide .... 2
- Section 1: Setting Up Your Smart Device and Your Computer .... 5
- 1A. Setting Up Your Treo™ 755P Smart Device by Palm 7
- 1B. Setting Up Service 21
- 1C. Connecting to Your Computer 27
- Section 2: Your Treo™ 755P Smart Device by Palm.... 39
- 2A. Moving Around on Your Smart Device 41
- 2B. Using Your Device's Phone Features ....53
- Section 3: Using Sprint Vision and Other Wireless Connections.... 99
- 3A. Sprint Vision—The Basics .....101
- 3B. Sprint Power Vision ....105
- 3C. Using Email 113
- 3D. Messaging ....133
- 3E. Browsing the Web .....147
- 3F. Using Bluetooth® Wireless Technology and Dial-Up Networking .....159
- Section 4: Your Portable Media Device 169
- 4A. Working With Your Pictures and Videos .....171
- 4B. Listening to Music ....185
- 4C. Watching Sprint TV ....195
- Section 5: Your Mobile Organizer.... 199
- 5A. Using Your Device's Organizer Features ....201
- 5B. Increasing Your Productivity ....221
- Section 6: Managing Your Information and Settings 231
- 6A. Managing Files and Applications .....233
- 6B. Customizing Your Device ....259
- Section 7: Resources 283
- 7A. Help....285
- 7B. Glossary ....321
- Section 8: Safety and Specifications .... 325
- 8A. Important Safety Information ....327
- 8B. Specifications ....343
- Index 347
- Welcome to Sprint
- The Power to Do More.
- WARNING:
- Setting Up Your Smart Device and Your Computer
- Setting Up Your Treo™ 755P Smart Device by Palm
- In This Section
- What You Need
- Hardware
- Documentation
- Software
- Your New Treo 755 P Smart Device by Palm
- Your Device's Features: Back View
- Section 1A: Device Setup
- Your Device's Features: Top View
- Inserting the Battery
- Charging the Battery
- Section 1A: Device Setup
- Using a Sprint Charger Adapter
- Battery Life
- Note:
- Section 1A: Device Setup
- Maximizing Battery Life
- Tip:
- Setting Up Service
- Determining If Your Device's Phone Is Already Activated
- Unlocking Your Device
- Making a Call
- Adjusting Call Volume
- What's My Phone Number?
- Setting Up Your Voicemail
- To set up your voicemail:
- Press Phone
- Press and hold 1.
- Follow the system prompts to:
- Creating Sprint Account Passwords
- Account Password
- Voicemail Password
- Sprint Power Vision Password
- Section 1C
- Connecting to Your Computer
- Why Connect My Device to My Computer?
- System Requirements
- Windows computers
- Mac computers
- Section 1C: Computer Connection
- Upgrading From Another Palm OS ® Device
- Important:
- Section 1C: Computer Connection
- Installing the Desktop Synchronization Software
- Section 1C: Computer Connection
- Connecting Your Treo Device to Your Computer
- Section 1C: Computer Connection
- Synchronizing Information—The Basics
- Your Treo™ 755P Smart Device by Palm
- Moving Around on Your Smart Device
- Moving Around the Device Screen
- Scrolling Through Screens
- Section 2A: Moving Around
- Highlighting and Selecting Items
- Highlighting Text
- Accessing Command Buttons
- Selecting Menu Items
- Section 2A: Moving Around
- Selecting Options in a Pick List
- Using the Keyboard
- Entering Lowercase and Uppercase Letters
- Entering Numbers, Punctuation, and Symbols
- Entering Other Symbols and Accented Characters
- Opening Applications
- Using the Quick Buttons
- Using Applications View
- Section 2A: Moving Around
- Using Your Device's Phone Features
- Turning Your Device On and Off
- Waking Up the Screen
- Section 2B: Phone Features
- Turning Your Device's Phone On and Off
- Opening the Phone Application
- Making Calls
- Dialing Using the Onscreen Dial Pad
- Dialing From the Keyboard
- Dialing by Contact Name
- Section 2B: Phone Features
- Dialing With a Speed-Dial Favorite Button
- Dialing From a Web Page or Message
- Redialing a Recently Called Number
- Receiving Calls
- Answering Calls
- - Press Talk
- Sending Calls to Voicemail
- - Press Power/End
- Silencing the Ring of an Incoming Call
- Using Voicemail
- Voicemail Notification
- Retrieving Your Voicemail Messages
- Accessing Your Voicemail From Another Phone
- Displaying Numeric Pages
- What Can I Do When I'm On a Call?
- Ending a Call
- Section 2B: Phone Features
- Switching Applications During a Call
- Saving Phone Numbers
- Add New Number
- Making a Second Call
- Answering a Second Call (Call Waiting)
- Making a Conference Call Using Three-Way Calling
- Section 2B: Phone Features
- Call Forwarding
- Using Flash Mode
- Section 2B: Phone Features
- Using Sprint Voice Command
- Setting Up Your Personal Address Book
- Making a Call With Sprint Voice Command
- Defining Favorite Buttons
- Section 2B: Phone Features
- Creating a Speed-Dial Favorite Button
- Use the 5-way 🔍 to select a blank favorite button.
- Enter a label for the favorite.
- Creating Other Types of Favorite Buttons
- Editing or Deleting an Existing Favorite Button
- Section 2B: Phone Features
- Using a Phone Headset
- Using a Wired Headset
- Section 2B: Phone Features
- Connecting to a Bluetooth Hands-Free Device
- Section 2B: Phone Features
- Using a Bluetooth Hands-Free Device
- Customizing Advanced Settings for Your Hands-Free Device
- Customizing Phone Settings
- Customizing the Main View in the Phone Application
- Section 2B: Phone Features
- Selecting Ringtones
- Selecting Phone Alert Tones
- Adjusting Ringer Volume
- Assigning a Caller ID Ringtone
- Assigning a Caller ID Picture
- Section 2B: Phone Features
- Setting Your Dialing Preferences
- Setting Phone Preferences
- Section 2B: Phone Features
- Caution:
- Select OK.
- TTY Use With Sprint Service
- Emergency Calling
- Controlling Your Roaming Experience
- Feature Availability
- Setting Roaming Preferences
- Checking Signal Strength and Phone Status
- Viewing and Using the Alert Screen
- Using Sprint Vision and Other Wireless Connections
- Section 3A
- Sprint Vision—The Basics
- Getting Started With Sprint Vision
- Enabling Sprint Vision
- Sprint Vision Features
- Accessing Sprint Vision
- Sprint Vision User Name
- Sprint Vision Symbols on Your Screen
- Sprint Vision Billing Information
- Sprint Power Vision
- Getting to Know Sprint Power Vision
- Enabling Sprint Power Vision
- Personalizing Your Service With On Demand
- Initializing Your On Demand Service
- Accessing On Demand Information
- Using Your Device's Phone as a Modem
- Setting Up a Data Connection With Your Computer
- To set up your phone-to-computer data connection:
- Section 3C
- Using Email
- What Email Applications Can I Use on My Smart Device?
- The VersaMail Application
- How Do I Get Started?
- Setting Up VersaMail to Work With Common Providers
- Setting Up VersaMail to Work With Other Providers
- Section 3C: Email
- Receiving and Viewing Messages
- Managing Your Messages
- Replying to Messages
- Creating and Sending Messages
- Section 3C: Email
- Attaching Pictures and Videos
- Attaching Voice Memos
- Attaching Word, Excel, and PowerPoint Files
- Section 3C: Email
- Attaching Other Types of Files
- Viewing Attachments
- Deleting a Single Message
- Deleting Multiple Messages
- Deleting Messages by Date
- Switching Between Accounts
- Setting Email Preferences
- Downloading New Email Messages Automatically
- Playing Sounds When New Email Arrives
- Setting Options for Receiving Messages
- Attaching a Signature to a Message
- Getting Messages From Your Corporate Microsoft Exchange Server Onto Your Device
- Using Good Mobile Messaging
- Section 3D
- Messaging
- Creating and Sending a Text Message
- Press Messaging
- Select New.
- Select the To field to address the message:
- Section 3D: Messaging
- Creating and Sending a Sprint Picture Mail Message
- Select Add media.
- Section 3D: Messaging
- Messaging Tips
- Receiving Messages
- Using Links in Messages
- Arranging Your Messages
- Deleting Messages
- Using Messaging to Chat
- Customizing Your Messaging Settings
- Selecting Messaging Alert Tones
- Using Online Services
- Accessing Online Services
- Browsing the Web
- Viewing a Web Page
- Select Web
- Working With Web Pages
- Downloading Files From a Web Page
- Streaming Files From a Web Page
- Section 3E: Browsing the Web
- Copying Text From a Web Page
- Returning to Recently Viewed Pages
- Finding Text on a Web Page
- Working With Bookmarks and Saved Pages
- Creating a Bookmark
- Saving a Page
- Viewing Bookmarks or Saved Pages
- Editing or Deleting a Bookmark or Saved Page
- Arranging Bookmarks and Saved Pages
- Section 3E: Browsing the Web
- Customizing Your Web Browser Settings
- Press Menu
- Section 3E: Browsing the Web
- Using Bluetooth® Wireless Technology and Dial-Up Networking
- Connecting to Devices With Bluetooth Wireless Technology
- Entering Basic Bluetooth Settings
- Section 3F: Bluetooth/DUN 161
- Requesting a Connection With Another Bluetooth Device
- Section 3F: Bluetooth/DUN
- Accepting a Connection From Another Bluetooth Device
- Using Your Device as a Wireless Modem
- Creating a DUN Connection Using Bluetooth Technology
- Creating a Partnership Between Your Device and Your Computer
- Setting Up Your Computer for a Bluetooth DUN Connection
- Accessing the Internet Using a Bluetooth DUN Connection
- Terminating a Bluetooth DUN Internet Session
- Your Portable Media Device
- Working With Your Pictures and Videos
- Taking Pictures and Videos
- Taking a Picture
- Section 4A: Pictures & Videos
- Recording a Video
- Section 4A: Pictures & Videos
- Customizing Your Camera Settings
- Viewing Pictures and Videos
- Viewing a Picture
- Viewing a Video
- Viewing a Slide Show
- Organizing Pictures and Videos
- Creating Albums on Your Device
- Arranging Albums
- Copying Pictures and Videos
- Saving a Picture as Wallpaper
- Adding a Picture to a Contact Entry
- Rotating a Picture
- Deleting a Picture or Video
- Using Your Online Album
- Uploading Pictures to Your Online Album
- Working With Your Online Picture Mail Album
- Viewing Pictures and Videos on Your Computer
- Listening to Music
- Setting Up Windows Media Player for MP3
- Setting Up iTunes for MP3
- Transferring MP3 Files From Your Computer
- Transferring Music From a CD to Your Device
- On a Windows computer:
- On a Mac computer:
- Section 4B: Music
- Listening to Music on Your Treo Device
- Creating a Playlist
- Editing a Playlist
- Section 4B: Music
- Select Save List.
- Section 4C
- Watching Sprint TV
- Accessing Streamed Media
- Section 4C: Sprint TV
- Viewing Streamed Media
- Your Mobile Organizer
- Using Your Device's Organizer Features
- Contacts
- Adding a Contact
- Viewing or Changing Contact Information
- Viewing Directions to a Contact's Address
- Section 5A: Organizer Features
- Deleting a Contact
- Defining Your Business Card
- Calendar
- Displaying Your Calendar
- Section 5A: Organizer Features
- Creating an Event
- Time Zones and Events
- Adding an Alarm to an Event
- Creating an Untimed Event
- Scheduling a Repeating Event
- Section 5A: Organizer Features
- Color-Coding Your Schedule
- Editing or Deleting an Event
- Section 5A: Organizer Features 211
- Select OK.
- Customizing Display Options for Your Calendar
- Section 5A: Organizer Features
- Selecting Alarm Tones
- Select Done.
- Section 5A: Organizer Features
- Tasks
- Adding a Task
- Setting Task Priority, Due Date, and Other Details
- Checking Off a Task
- Center.
- Organizing Your Tasks
- Section 5A: Organizer Features
- Deleting a Task
- Customizing Tasks
- Memos
- Creating a Memo
- Deleting a Memo
- Increasing Your Productivity
- Using the Documents Application to Work With Your Office Files
- Opening a Document
- Voice Memo
- Creating a Voice Memo
- Listening to a Voice Memo
- World Clock
- Setting Cities
- Adding Cities
- Section 5B: Productivity
- Setting an Alarm
- World Clock Tips
- Calculator
- Switching Between Basic and Advanced Calculator Modes
- Selecting Functions in Advanced Calculator Mode
- Press Menu
- Press Menu
- Storing and Recalling Numbers in Advanced Mode
- Managing Your Information and Settings
- Managing Files and Applications
- Using Find
- Installing Applications
- Installing Bonus Software From My Treo on Your Device
- Installing Applications From the Internet
- Installing Bonus Software From My Palm on Your Computer
- Installing Other Third-Party Applications From a Computer
- Getting Help With Third-Party Applications
- Removing Applications
- Manually Deleting Applications From Your Computer
- Viewing Application Information
- Sending Information Using Bluetooth® Wireless Technology
- Sending Entries Over a Bluetooth Wireless Connection
- Sending an Application Over a Bluetooth Wireless Connection
- Receiving Information Over a Bluetooth Wireless Connection
- Section 6A: Managing Files
- Beaming Information
- Beaming an Entry
- Beaming an Application
- Section 6A: Managing Files
- Receiving Beamed Information
- Synchronizing Information—Advanced
- Changing Which Applications Sync
- Section 6A: Managing Files
- Setting Up a Bluetooth Connection for Synchronization
- Synchronizing Over a Bluetooth Connection
- Synchronizing Over an Infrared Connection
- Using Expansion Cards
- Inserting an Expansion Card
- Removing an Expansion Card
- Section 6A: Managing Files
- Opening Applications on an Expansion Card
- Accessing Items Stored on an Expansion Card
- Copying Applications Between an Expansion Card and Your Device
- Viewing Expansion Card Information
- Renaming an Expansion Card
- Formatting an Expansion Card
- Customizing Your Device
- Setting System Sounds
- Silencing Sounds
- Setting System Volume Levels
- Adjusting the Display and Appearance
- Adjusting the Brightness
- Changing the Screen Font
- Setting Display Formats
- Select Done.
- Aligning the Screen
- Changing the System Color Scheme
- Section 6B: Customizing
- Changing the Applications Settings
- Arranging Applications by Category
- Displaying Applications by Category
- Selecting the Applications Display
- Customizing Device Buttons
- Reassigning Buttons
- Changing Default Applications
- Setting the Date and Time
- Optimizing Power Settings
- Locking Your Device and Information
- Locking Your Keyboard (Keyguard)
- Locking Your Screen
- Locking Your Phone (Phone Lock)
- Section 6B: Customizing
- Locking Your Device
- Section 6B: Customizing
- Working With Private Entries
- Hiding or Masking All Private Entries
- Viewing All Private Entries
- Viewing Private Entries in a Specific Application
- Security and Palm® Desktop Software (Windows)
- Section 6B: Customizing
- Entering Owner Information
- Using Connection Settings
- Connecting to a Virtual Private Network
- Purchasing Accessories for Your Device
- • Vehicle Power Charger
- - Replacement Battery
- USB Sync Cable
- USB Docking Cradle
- Extra AC Charger
- • International Travel Adapters
- • Leather Side Case With Belt Clip
- Stylus
- Resources
- Section 7A
- Help
- Trouble Upgrading?
- Soft Reset
- System Reset
- Hard Reset
- Replacing the Battery
- Troubleshooting
- Desktop Software Installation
- Section 7A: Help
- Screen
- The Screen Appears Blank
- The Screen Doesn't Respond Accurately to Taps or It Activates Wrong Features
- There's a Blinking Bell at the Upper-Left Corner of the Screen
- Synchronization
- I Can't Find My User Folder
- Section 7A: Help
- Palm Desktop Software Does Not Respond to a Synchronization Attempt
- Synchronization Starts But Stops Without Finishing
- Synchronization Finishes But Information Does Not Appear Where It Should
- I Have Duplicate Entries in Microsoft Outlook After I Synchronize
- My Appointments Show Up in the Wrong Time Slot After I Sync
- If you're using Microsoft Outlook:
- Phone
- Signal Strength Is Weak
- My Treo Device Won't Connect to the Mobile Network
- The Other Person Hears an Echo
- I Hear My Own Voice Echo
- My Voice Is Too Quiet on the Other End
- I Hear Static or Interference
- Check the signal-strength indicator. If the signal is weak, try to find an area with better coverage.
- My Device Hangs Up When I Hold It to My Ear
- My Device Seems to Turn Off by Itself
- Section 7A: Help
- My Device Makes or Answers Calls When It's in a Bag or Pocket
- Hands-Free Devices
- I Can't Make or Receive Calls Using a Bluetooth Hands-Free Device
- I Hear Static or Interference When Using My Hands-Free Device
- Some Features of My Hands-Free Device Don't Work With My Treo Device
- I Have Problems Using My Account
- Section 7A: Help
- I Have Problems Sending and Receiving Email
- Push or Auto Sync Is Not Working
- I Have Problems Sending Email
- I Have Problems Synchronizing Messages on My Device With Messages on My Computer
- My vCard or vCal Email Attachment Isn't Forwarding Correctly
- After I Get Messages, Either Manually or Through Auto Sync, Messages Disappear From My Inbox
- Section 7A: Help
- I Am Using Microsoft Exchange ActiveSync, But Email Messages, Calendar Events, and Contacts Information Are Not Downloading to My Device
- I Can't Tell If Data Services Are Available
- I Can't Send or Receive SMS Text Messages
- I Can't Send or Receive Sprint Picture Mail Messages
- Web
- Section 7A: Help
- The Device Won't Connect to the Internet
- I Can't Access a Web Page
- It Takes a Long Time for a Web Page to Load
- Section 7A: Help
- An Image or Map Is Displayed Too Small on the Device Screen
- A Secure Site Refuses to Permit a Transaction
- Dial-Up Networking Using Bluetooth Technology
- My Computer Does Not Appear on the Trusted Devices Screen
- I Get a Message That There Is an Error Creating a DUN Connection With My Treo Device
- Camera
- Making Room on Your Treo Device
- Third-Party Applications
- Section 7A: Help
- Getting More Help
- Errors
- Fixing an Error 67 Message
- Where to Learn More
- For a Quick Introduction
- While Using Your Device
- If You Need More Information
- Visiting the Sprint Web Site
- Reaching Sprint Customer Service
- Section 7A: Help
- Receiving Automated Invoicing Information
- Sprint 411
- Sprint Operator Services
- Glossary
- Safety and Specifications
- Important Safety Information
- General Precautions
- Maintaining Safe Use of and Access to Your Device
- Do Not Rely on Your Device's Phone for Emergency Calls
- Using Your Phone While Driving
- Following Safety Guidelines
- Using Your Device's Phone Near Other Electronic Devices
- Turning Off Your Phone Before Flying
- Turning Off Your Phone in Dangerous Areas
- Section 8A: Safety
- Restricting Children's Access to Your Device
- Using Your Phone With a Hearing Aid Device
- Section 8A: Safety
- Getting the Best Hearing Device Experience With Your Device
- Turning on the HAC Setting
- Caring for the Battery
- Protecting Your Battery
- Battery Safety Information
- Disposal of Lithium-Ion (Li-Ion) Batteries
- Radiofrequency (RF) Energy
- Understanding How Your Phone Operates
- Knowing Radiofrequency Safety
- Body-Worn Operation
- Specific Absorption Rate (SAR) for Wireless Phones
- FCC Radiofrequency Emission
- FCC ID number: 08F-895.
- Section 8A: Safety
- Static Electricity, ESD, and Your Device
- Description of ESD
- ESD-Susceptible Equipment
- Precautions Against ESD
- Conditions That Enhance ESD Occurrences
- Owner's Record
- User's Guide Proprietary Notice
- Specifications
- Index
- Numerics
- A
- B
- C
- D
- G
- H
- K
- L
- M
- N
- O
- P
- S
- T
- U
- V
- W
- Y
- Z
Brand : PALM
Model : Treo 755p
Category : Mobile Phone