
Treo 300 - Mobile Phone PALM - Free user manual and instructions
Find the device manual for free Treo 300 PALM in PDF.


| Product Type | Mobile Phone (PCS Phone) with Palm OS handheld |
| Brand | Palm (manufactured by Handspring) |
| Model | Treo 300 |
| Dimensions | 4.6 x 2.7 x 0.9 inches (approx) |
| Weight | 6.3 oz (approx) |
| Battery Type | Lithium-ion rechargeable |
| Talk Time | Up to 2.5 hours (wireless mode on) |
| Standby Time | Up to 150 hours (wireless mode on); approx 1 week in handheld mode |
| Charging Time | Approximately 2 hours |
| Display | 160 x 160 pixels, 16-bit color TFT |
| Operating System | Palm OS |
| Processor | 33 MHz Motorola Dragonball VZ |
| Memory | 16 MB RAM (approx) |
| Keyboard | QWERTY keyboard with backlight |
| Stylus | Included |
| Connectivity | USB/serial HotSync cable, IR port (115 kbps) |
| Wireless | CDMA (PCS) 1900 MHz |
| Main Applications | PhoneBook, Date Book Plus, Blazer web browser, Memo Pad, SMS, To Do List, CityTime, Calculator, Expense |
| Speakerphone | Yes, built-in |
| Headset Jack | 2.5mm (not compatible with 3-pin headsets) |
| Ringer | Switchable with vibrate mode |
| LED Indicators | Charging (red/green), wireless status (green/red), low battery (double-blink red) |
| Security | Password protection, private records masking/hiding |
| Warranty | See user manual for details |
| Maintenance | Clean with dry cloth, avoid liquids, do not expose to extreme temperatures |
Frequently Asked Questions - Treo 300 PALM
User questions about Treo 300 PALM
0 question about this device. Answer the ones you know or ask your own.
Ask a new question about this device
Download the instructions for your Mobile Phone in PDF format for free! Find your manual Treo 300 - PALM and take your electronic device back in hand. On this page are published all the documents necessary for the use of your device. Treo 300 by PALM.
USER MANUAL Treo 300 PALM
natural_image
Abstract red geometric logo with horizontal lines, no text or symbols presentSprint®
Online User's Guide
PCS Phone
Handspring® Treo™ 300
User Guide

natural_image
Abstract black-and-white graphic symbol resembling a stylized eye or abstract curved form (no text or symbols)handspring™
Copyright
Copyright © 2002 Sprint Spectrum L.P. All rights reserved. No reproduction in whole or in part without prior written approval. Sprint, and the diamond logo are trademarks of Sprint Communications Company L.P. All other trademarks are property of their respective owners. Portions copyright © 2002 Handspring, Inc. All Rights Reserved. Handspring, Treo, and the Treo logo are trademarks of Handspring, Inc. and may be registered in some jurisdictions. Blazer and the Handspring logo are trademarks of Handspring Inc., are registered trademarks in the U.S.A., and may be registered in other jurisdictions. Portions copyright © 1998-2002 Palm, Inc. or its subsidiaries. All rights reserved. Palm OS and HotSync are registered trademarks and Palm and the Palm Powered logo are trademarks of Palm, Inc. and are used by Handspring under license. All other trademarks and trade names are the property of their respective owners.
Disclaimer and limitation of liability
Handspring, Inc. and its suppliers assume no responsibility for any damage or loss resulting from the use of this handbook.
Handspring, Inc. and its suppliers assume no responsibility for any loss or claims by third parties that may arise through the use of this software. Handspring, Inc. and its suppliers assume no responsibility for any damage or loss caused by deletion of data as a result of malfunction, dead battery, or repairs. Be sure to make backup copies of all important data on other media to protect against data loss.
Warranty and License Agreement
For warranty information and a copy of the End User License Agreement applicable to your Handspring product, please see the Handspring web site at http://support.handspring.com/esupport/forms/hsFileList.jsp?type=Warranties.
If you would like a copy of these materials mailed to you, or if you have any questions, please contact Handspring Customer Support.
The information included on this web site sets forth Handspring's sole and complete warranty and software licensing obligations with respect to your Handspring product. Use of the product indicates your acceptance of the terms of the warranty and the End User License Agreement.
Software download available
Wireless setup and desktop synchronization software are supplied on the Handspring CD-ROM disc. If you do not have access to a CD-ROM drive for your computer, you can download this software from www.sprintpcs.com.
Contents
1. Introduction to Your PCS Phone Handspring Treo TM 300 .... . . . . . . . 1
What is a PCS Treo 300?......2
System requirements 2
Minimum requirements 2
Upgrade information .... 3
PCS Treo 300 components .... 5
Charging the battery 9
Turning your PCS Treo 300 on and off 10
Using the keyboard backlight....10
Adjusting the display 11
Using the stylus to get things done 12
Elements of the phone interface 13
Moving around the screen 14
Displaying online tips 15
Customizing your phone 15
Using the headset 18
Connecting the HotSync cable 19
Using desktop software 20
Using your phone with Palm Desktop software 21
Using your phone with Microsoft Outlook 22
Using your phone with another PIM 22
Using an e-mail application with your phone 22
2. Entering Data in Your Phone 23
Using the PCS Treo 300 keyboard 24
Typing capital letters 24
Typing numbers and symbols 25
Typing accented characters 26
Typing extended characters 26
Navigation keystrokes 28
Using menus 28
Using text ShortCuts 30
Using the onscreen keyboard 31
Using your computer keyboard 32
Importing data 32
3. Managing Your Applications .... 35
Using the Applications Launcher 36
Opening applications 36
Switching between applications 37
Categorizing applications 37
Changing the Applications Launcher display 38
Choosing preferences 39
Installing and removing applications 39
Installing add-on applications 39
Removing applications 42
Removing Palm Desktop software 43
Security 43
Assigning a password 44
Changing or deleting a password 45
Recovering from a forgotten password 46
4. Applications Overview 47
PhoneBook 48
Date Book Plus 49
5. Common Tasks ...... 57
Creating records 58
Editing records 59
Entering text 59
Edit menu 59
Deleting records 60
Other ways to delete records 61
Purging records 61
Categorizing records 62
System-defined and user-defined categories 62
Finding records 66
Looking up Contacts records in PhoneBook 66
Using Find 67
Using Phone Number Lookup 68
Sorting lists of records 71
Making records private 72
Hiding and masking private records 72
Attaching notes 7/4
Choosing fonts 75
Exchanging and updating data: HotSync operations 76
Performing a HotSync operation for the first time 76
Beaming information 78
6. Application-Specific Tasks 81
PhoneBook 82
Using the Speed Dial view 84
Using the Dial Pad view 89
Using the Contacts view 89
Using the Call History view 94
Using the Active Call view 97
Checking voicemail 103
Forwarding calls 104
Other ways to make a call 104
PhoneBook menus 106
Date Book Plus 113
Working in Day View 113
Scheduling an event 114
Rescheduling an event 116
Setting an alarm for an event 117
Scheduling repeating or continuous events 118
Changing the Date Book Plus view 121
Working in Week View 122
Working in Week View with Text 123
Working in Month View 124
Working in Year View 125
Working in List View 125
Spotting event conflicts 126
Working with floating events 127
Working with To Do items 128
Using the Daily Journal 129
Using templates 129
Date Book Plus menus 130
Blazer....139
Viewing web pages 139
Working with bookmarks 140
Blazer menus 145
Memo Pad 149
Reviewing memos 149
Memo Pad menus 150
SMS 151
Receiving text messages 151
Viewing text messages 152
Responding to text messages 153
Copying text messages 154
Sorting messages 155
Deleting messages 155
SMS menus 156
To Do List 158
Setting priority 158
Setting your home city 163
Selecting remote cities 163
Adding cities 164
City'Time menus 164
Calculator 166
Selecting the Calculator mode ..... 166
Using the Basic Calculator buttons 166
Displaying Recent Calculations ...... 167
Using the Advanced Calculator mode ..... 167
Using the Advanced Calculator buttons 168
Creating a custom view 176
Calculator menus ....177
Expense 178
Changing the date of an Expense item 179
Entering receipt details 179
Customizing the Currency pick list 180
Show Options 182
Transferring your data to Microsoft Excel 182
Expense menus 186
7. Setting Preferences for Your Phone .... 189
Viewing Preferences ...... 190
Buttons Preferences 190
HotSync Buttons Preferences 191
Connection Preferences 191
Predefined configurations 192
Connection Methods 192
Setting an infrared to modem configuration 193
Digitizer Preferences 194
Formats Preferences....195
Country default 195
Time, date, week start, and numbers formats .... 195
General Preferences 196
Auto-off delay 196
System, alarm, and game sounds 197
Network Preferences 197
Connecting automatically 198
Creating a new packet data configuration 198
Connecting to your service 202
Adding detailed information to a Mobile IP service template ..... 202
Adding detailed information to a Simple IP service template ..... 205
Deleting a service template 208
Network Preferences menu commands 209
Troubleshooting network connections 209
Owner Preferences 210
Ringer Preferences 211
ShortCuts Preferences....213
Creating a ShortCut 213
Editing a ShortCut 214
Deleting a ShortCut 214
8. Advanced HotSync Operations ..... 215
Selecting HotSync setup options 216
Customizing HotSync application settings 218
IR HotSync operations 219
Preparing your computer for infrared communication 220
Configuring HotSync Manager for infrared communication 222
Performing an IR HotSync operation 223
Returning to serial cable HotSync operations 224
Conducting a HotSync operation via a network 225
Performing a network HotSync operation via a LAN 227
Using File Link 227
Creating a user profile 228
9. Maintaining Your Phone 231
Caring for your phone 232
Battery considerations 232
Resetting your phone 233
Performing a soft reset 233
Performing a warm (or safe) reset 234
Performing a hard reset 235
10. Troubleshooting Tips 239
Software installation problems 240
Operating problems 241
Tapping and keyboard problems 241
Wireless communication problems 242
Application problems 245
HotSync problems 246
Beaming problems 247
Password problems 248
Technical support 249
11. Other Product Information ...... 251
Performance and Safety 251
Important Information About Your Phone and Service 251
Maintaining Safe Use of and Access to Your Phone 252
Caring for and Protecting Your Phone Battery 253
Acknowledging Special Precautions and the FCC Notice 253
User Guide Proprietary Notice 254
Handspring Product Warranty 254
Handspring, Inc. End User Software License Agreement 255
GNU Library General Public License 257
Acknowledgments 264
Introduction to Your PCS Phone Handspring® Treo™ 300
This chapter explains the physical buttons and controls on your PCS Phone Handspring ® Treo TM 300, how to use your phone for the first time, and how to install Palm TM Desktop software and the HotSync ®
Manager synchronization software so you can synchronize your phone and your computer.
What is a PCS Treo 300?
Your PCS Treo 300 combines the power of a full-featured mobile phone, a Palm OS® handheld, and the Internet in one compact and indispensable device. With your PCS Treo 300, you can do everything you can do with your existing mobile phone with greater speed and ease. You can store thousands of numbers in your PhoneBook and up to 50 speed dial entries, and dial any of them with just a few keystrokes. You can even set up a 3-way conference call by initiating and joining two calls and use the personal speakerphone for hands-free use without a headset attachment.
Lighten your load. Everything you need is in one compact device. Your PCS Treo 300 helps you stay in touch. With instant access to your e-mail, you can send and receive e-mail from anywhere, and receive text messages from other PCS phones. The award-winning Blazer® web browser gives you access to any site on the Internet—not just a few optimized for mobile access; now you can download directions, confirm flight reservations, find a restaurant, and check stock prices wherever you are. Everything you need to stay organized is close at hand on your phone, including popular Palm OS applications such as Date Book Plus, PhoneBook, To Do List, Memo Pad and more.
To make sure you don't lose any of this important information, you can synchronize your data with desktop software on your computer so you always have a backup copy.
System requirements
To install and operate Palm Desktop software and the HotSync Manager synchronization software, your computer system must meet the following requirements:
Minimum requirements
▶ Windows 98, Windows Me, Windows 2000, or Windows XP with USB port, (for USB HotSync® cable) --or-- Windows 95, Windows 98, Windows Me, Windows 2000, Windows XP, or Windows NT 4.0 with serial port (for optional serial HotSync cable — sold separately)
▶ 32 MB RAM (memory)
Section 1
▶ 25 MB available hard disk space
▶ VGA monitor or better
▶ CD-ROM drive (you can also download Palm Desktop software from www.sprintpcs.com)
▶ Internet Explorer 5.01 or higher (recommended)
Upgrade information
If you already own a Palm OS® handheld, you still must install the version of Palm Desktop software that comes with your PCS Treo 300 into the same folder as your current Palm Desktop software. When you install the new version in the same folder as the previous version, all your data is preserved. If you use another personal information manager (PIM), you still need to install Palm Desktop software in order to update the HotSync Manager on your computer. You perform HotSync operations in exactly the same way, so you can quickly synchronize your old data with your new phone.
To upgrade:
- Synchronize your old handheld with your old Palm Desktop software. This ensures that the latest information from your handheld is on your desktop computer.
- (Optional) To ensure against any data loss, go to the folder that stores Palm Desktop software (this is usually the Handspring or Palm folder), copy (do not move) your user name folder, and store the copy outside the Palm Desktop software folder.
- Follow the installation instructions that begin on page 21. Be sure to install the new software in the same folder as the old software.
- Connect your new PCS Treo 300 to the HotSync cable and press the HotSync button on the cable. If the Select User dialog box appears, select your user name.
- Compare the applications on your old handheld and your PCS Treo 300.
-
Beam any third party applications that did not transfer from your old handheld to your PCS Treo 300, or install them from the original files.
-
If any data for your third party applications did not transfer, beam it from your old handheld to your PCS Treo 300.
-
If you created a password on your old handheld, enter it on your PCS Treo 300.
Note: Records you previously marked Private remain marked Private, but you need to reenter a password on your PCS Treo 300.
- If you had any important settings on your old handheld, such as Network Preferences, manually copy them from your old handheld to your PCS Treo 300.
Each device must have a unique name
After you complete the upgrade process described above, you have two devices with the same name. This is an undesirable situation. Each device must have a unique name in order to prevent unexpected results during HotSync operations and other complications.
We strongly recommend that you perform a hard reset on your old handheld. See page 235 for details.
A hard reset not only erases all data from the old handheld; it also erases the name and makes that handheld a clean slate, ready to receive a new name. The next time you perform a HotSync operation with this old handheld, you are asked to give it a name. Be sure to give it a unique name.
PCS Treo 300 components
Locating front panel controls
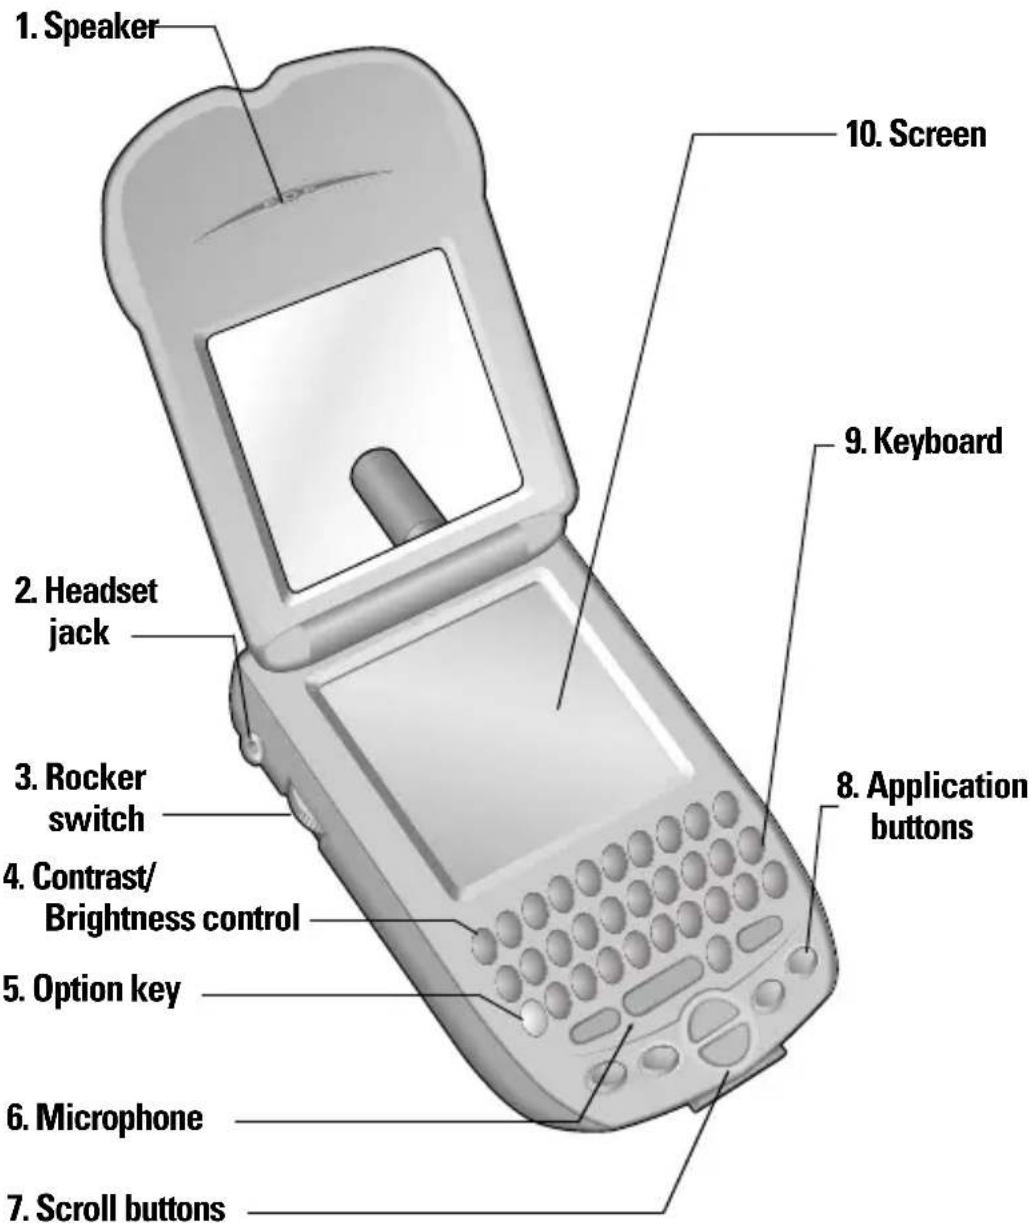

- Speaker: Functions as the earpiece on your PCS Treo 300.
- Headset jack: Enables you to connect a hands-free headset for use with the wireless features. Use only headsets that are compatible with your PCS Treo 300. See page 18 for details.
- Rocker switch: Enables you to navigate on your phone with just one hand. You can use the rocker switch as an alternate method to perform a variety of tasks, such as adjusting the call volume level on your phone. The rocker switch functions change based on whether your phone's wireless mode is on or off and which application you are using.
To use the rocker switch, roll the dial up or down, press it in and release it, or press and hold it.
-
Contrast/Brightness control: Opens the Adjust Display dialog box where you can adjust the appearance of your phone screen for the clearest screen display. The contrast/brightness control is activated by the Option key. See page 11 for instructions.
-
Option key: Types the number/symbol, or activates the function, that appears in blue on the key.
-
Microphone: Functions as the mouthpiece when you use the wireless phone features of your PCS Treo 300.
-
Scroll buttons: Displays text and other information that extends beyond the area of the phone screen. Pressing the bottom scroll button scrolls down to view information below the viewing area, and pressing the top scroll button scrolls up to view the information above the viewing area. The scroll buttons also enable you to navigate between records in an application and to adjust the volume during a call.
-
Application buttons: Activates the applications that correspond to the icons on the buttons: PhoneBook, Date Book Plus, Blazer, and Memo. See page 190 for details on reassigning these buttons to activate any application on your phone. You can also use these buttons in combination with Option to activate other applications. See Section 4 in this guide for details.
Tip: If your phone screen is turned off, pressing any application button turns on and opens the corresponding application.
- Keyboard: Enables: you to type letters, numbers and symbols on your phone. See Section 2 to learn how to enter information.
- Phone screen: Displays the applications and information stored in your phone. It is touch-sensitive and responds to the stylus.
Locating top panel controls
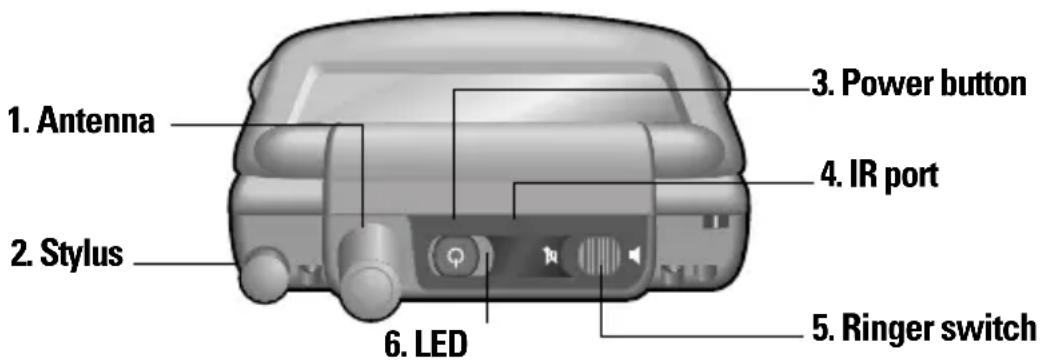
- Antenna: Receives and sends wireless communication signals. The antenna does not telescope out of your phone.
- Stylus: Serves as the instrument used to tap options on your phone screen. To use the stylus, slide the stylus out of the slot, and hold it as you would a pen or pencil.
- Power button : Turns your PCS Treo 300 and wireless mode on and off, and controls the keyboard backlight. See page 10 for details.
- IR port: Uses infrared technology to transmit data to and receive data from other Palm OS devices. See the section that begins on page 78 for details. You can also use the IR port to update the information between your phone and computer using HotSync technology. See the section that begins on page 219 for details.
- Ringer switch : Controls the ringer setting. See page 211 for details on changing the settings.
Note: Silencing the ringer turns off all system sounds, including alarms. When you silence the ringer, Date Book Plus alarms vibrate.
- LED: Provides status information for your PCS Treo 300 based on the color of the light and the blink state.
No light: Wireless mode off
Solid: Connected to travel charger
Green = Fully charged
Red = Charging
Blinking: Wireless mode on
Green = In coverage area
Red = Out of coverage area
Double-blink red: Low battery
Locating back panel components

-
Electronic Serial Number (ESN): Uniquely identifies your phone to the PCS network. During the activation process, you are prompted to provide this number.
-
Reset button: Under normal use, you should not have to use the reset button. See Section 9 for information about when and how to use the reset button.
-
Charger and USB/serial connector: The connector that connects your phone to the travel charger and HotSync cable. The HotSync cable connects to a USB port or serial port on your computer and enables you to synchronize the information between your phone and computer using HotSync technology.
Charging the battery
To use your phone, you must connect the travel charger or the HotSync cable and charge the battery. When you're near your computer, connect your phone to the HotSync cable with the travel charger connected to a wall outlet as shown in the section that begins on page 19. When travelling, connect the travel charger cable directly to your phone as shown in this section.
When wireless mode is on, a fully charged battery provides approximately 2.5 hours of talk time or 150 hours of standby time. When wireless mode is off, a fully charged battery provides approximately one week of use in handheld mode.
If the battery drains to the point where your phone does not turn on, it stores your data safely for about three days. Therefore, we recommend that you charge the battery daily to avoid potential data loss. See Section 9 for tips on extending the life of the battery.
To charge the battery with the travel charger:
- Plug the travel charger into a wall outlet.
- With the word "UP" facing up (as shown), connect the travel charger cable to the charger connector on the bottom of your phone.

Tip: The LED is solid red while your phone charges. When the LED turns solid green, your phone is charged. It takes approximately 2 hours to charge a fully drained battery.
Turning your PCS Treo 300 on and off
Your PCS Treo 300 has two operating modes: a handheld mode and a wireless mode. You can turn the handheld mode and the wireless mode on and off independent of each other. When you turn on the handheld mode, you can use organizer applications such as Date Book Plus and To Do List. When you turn on the wireless mode, you can make or receive calls. You can also turn both modes on at the same time. When both the handheld and wireless modes are on, you can use the organizer applications as well as send and receive calls.
To turn handheld mode on and off, do any of the following:
▶ Open the lid to turn it on, or close the lid to turn it off.
▶ Press the power button.
▶ Press and release the rocker switch.
▶ Press any application button on the front of your phone.
To turn wireless mode on and off:
▶ Press and hold the power button until you hear the confirmation tones and the Sprint banner appears. The ascending tone indicates wireless mode is now on and the descending tone indicates wireless mode is now off.
Using the keyboard backlight
If you have difficulty seeing your phone keyboard in dark environments, you can use the backlight to illuminate the keyboard.
Note: When you turn on the keyboard backlight, the screen brightness automatically dims to conserve battery power. If you have difficulty seeing the screen in well-lit environments, be sure the keyboard backlight is off and adjust the display settings. See page 5 for details.
To turn the keyboard backlight on and off:
▶ Press the power button twice in quick succession.
Backlight tips:
The backlight dims when a call is in progress and you do not press any buttons or tap your phone screen for more than 30 seconds.
The backlight also turns off automatically (after a period of inactivity) with the Auto-off feature. See page 196 for details.
Adjusting the display
Depending on the lighting conditions or temperature of the environment where you use your phone, you may need to adjust the brightness and color saturation of the display.
The Adjust Display dialog box contains two sliders. The upper slider adjusts color saturation and the lower slider adjusts brightness. The display usually looks best at maximum brightness but you may want to decrease the brightness to conserve battery power.
To adjust the display:
-
Press Option .
-
Type the letter Q.

-
Press the scroll buttons, or drag the top slider, to adjust the color saturation until you can see the three shapes as distinctly as possible.
-
Hold Option and press the scroll buttons, or drag the bottom slider, to adjust the screen brightness
Tip: You can also tap to the left or right of the sliders to fine tune the display settings.
- Press Space to finish.
Using the stylus to get things done
Like using a mouse to click elements on a computer screen, using the stylus to tap elements on your phone screen is a way to get things done on your phone.
The first time you start your phone, setup instructions appear on the screen. These instructions include a calibration screen, or digitizer.
Calibration aligns the internal circuitry of your phone with its touch-sensitive screen so that when you tap an element on the screen, the phone can detect exactly which task you want to perform.
Important: Always use the point of the stylus for tapping the phone screen. Never use an actual pen, pencil, or other sharp object to tap the phone screen.
With your phone turned on, you can tap the phone screen to perform many operations, such as the following:
▶ Open applications
▶ Choose menu commands
▶ Select options in dialog boxes
Just as you can drag the mouse to select text or move objects on your computer, you can also drag the stylus to select text. You can also use the stylus to drag the slider of any scroll bar.
Elements of the phone interface


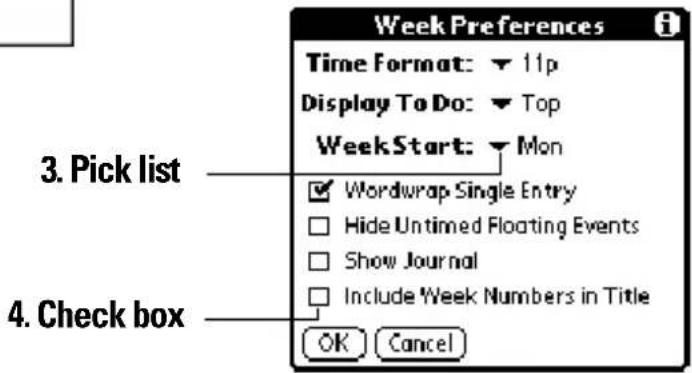
- Menu bar: A set of commands that are specific to the application. Not all applications have a menu bar.
- Command buttons: Tap a button to perform a command. Command buttons appear in dialog boxes and at the bottom of application screens.
- Pick list: Tap the arrow to display a list of choices, and then tap an item in the list to select it.
- Check box: When a check mark appears in a check box, the corresponding option is active. If a check box is empty, tapping it inserts a check mark. If a check box is checked, tapping it removes the check mark.

-
Previous/next arrows: Tap the up and down arrows to display the previous and next page of information; tap the left and right arrows to display the previous and next record.
-
Scroll bar: Roll the rocker switch or press the scroll buttons on the front panel of your phone to scroll to the previous and next pages. To scroll the display one line at a time, tap the top or bottom arrow.
You can also scroll by dragging the slider or by tapping the scroll bar just above or below the slider to scroll to the previous or next page.
Moving around the screen
You can move between entry fields, pick lists, check boxes, and other options by using the stylus, the scroll buttons, or the rocker switch.
To move around the screen do one of the following:
▶ Tap an item with the stylus.
▶ Press the scroll buttons to scroll through the items on the screen.
▶ Roll the rocker switch up or down to scroll through the items on the screen.
Tip: To learn how to move around the screen using the PCS Treo 300 keyboard, see page 28.
Displaying online tips
Many of the dialog boxes that appear on your phone contain an online Tips icon in the upper-right corner. Online tips anticipate questions you have in a dialog box, provide shortcuts for using the dialog box, or give you other useful information.
To display an online tip:
- Tap the Tips icon . ⓘ
- After you review the tip, hold Option and press Return to finish.

Customizing your phone
You can customize your phone by using the Preferences application. You can enter personal information such as your name and address; change the time and date; view different date and time formats when you travel; turn off sounds; configure your phone to work with a modem or network, and select ringer settings. See Section 7 for more information on customizing your phone.
To open the Preferences screens:

- Press Option and then press Menu to access the Applications Launcher.
- Tap the Preferences icon
- Tap the category pick list in the upper-right corner of the screen.
- Tap the Preferences category you want to view.
The following procedures for setting the time and date give you an example of how to customize your phone. You make changes to the time and date in General preferences.
To automatically set the current date and time:
- Turn on wireless mode. See page 10 for details.
- Tap the Set Time box.

- Tap the Automatic Network Time check box to use the PCS network date and time.
Note: Your phone synchronizes the date and time when wireless mode is on and you are inside a coverage area. You can also display time based on a 24-hour clock. See page 195 for details.
- Hold Option and press Return to finish.
To manually set the current time:
- Tap the Set Time box.
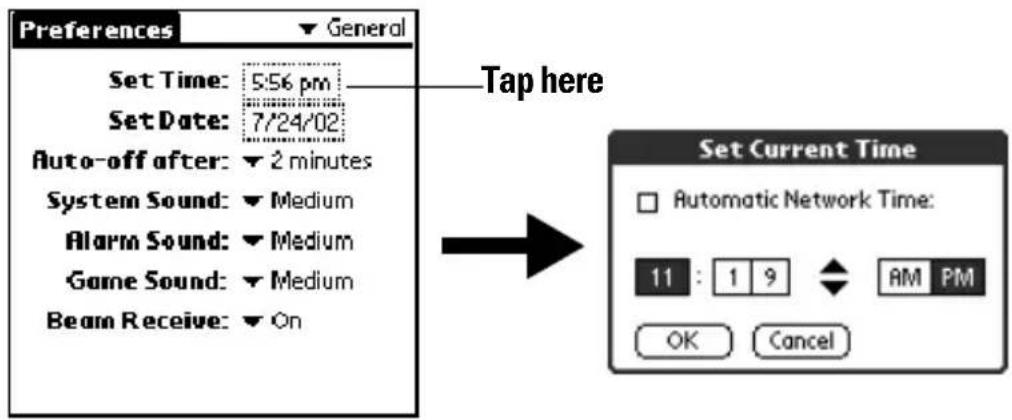

- Tap the up or down arrows to change the hour.
- Tap each minute number, and then tap the arrows to change them.
- Tap AM or PM.
Note: Your phone can also display time based on a 24-hour clock. See page 195 for details.
- Hold Option and press Return to finish.
To manually set the current date:
- Tap the Set Date box.
- Hold Option and press a scroll button to scroll to the current year.
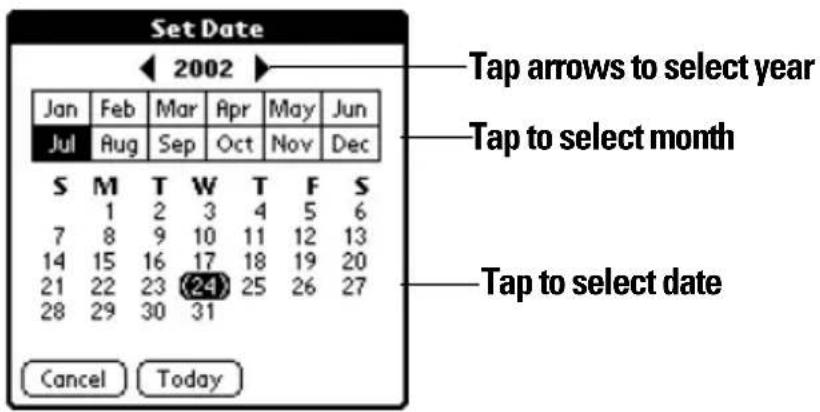
- Hold Shift and press a scroll button to scroll to the current month.
- Type the number for the current date.
- Press Space to select the date.
Tip: You can also select the date by tapping the screen as shown above.
Using the headset
You can connect a headset for hands-free operation. Your PCS Treo 300 is compatible with the included headset and other headsets listed at www.sprintpcs.com. If you need to use your phone while driving and this is permitted in your area, we recommend using a headset.
Note: PCS Treo 300 is not compatible with three-pin (also called three-pole) style headsets. You can determine whether a headset is a three-pin headset by counting the number of silver rings on the headset pin. A three-pin headset has two rings.
To use the headset:
- Connect the headset plug to the headset jack on the side of your phone.

- Place the speaker in your ear.
- Press the headset button to perform any of the following functions:
■Answer an incoming call (including an incoming call waiting call).
■ Switch between two active calls.
■ Place the second call on hold when you have two active calls.
■ Hang up an active call.
Connecting the HotSync cable
The HotSync cable that comes with your PCS Treo 300 enables you to charge your phone battery and to synchronize the information on your phone using HotSync technology.
Note: If your computer does not have a USB port, or it uses Windows 95 or Windows NT, you need a serial HotSync cable to connect to your computer. You can purchase a serial HotSync cable from www.sprintpcs.com.
To connect the HotSync cable:
- Connect the travel charger cable to the short end of the Hotsync cable. Be sure to match the sides of the connectors labeled "UP."
- Connect the USB HotSync cable to a USB port on your computer, or connect the Serial HotSync cable to a Serial port on your computer.
- Connect the long end of the HotSync cable to your phone with the button facing up.


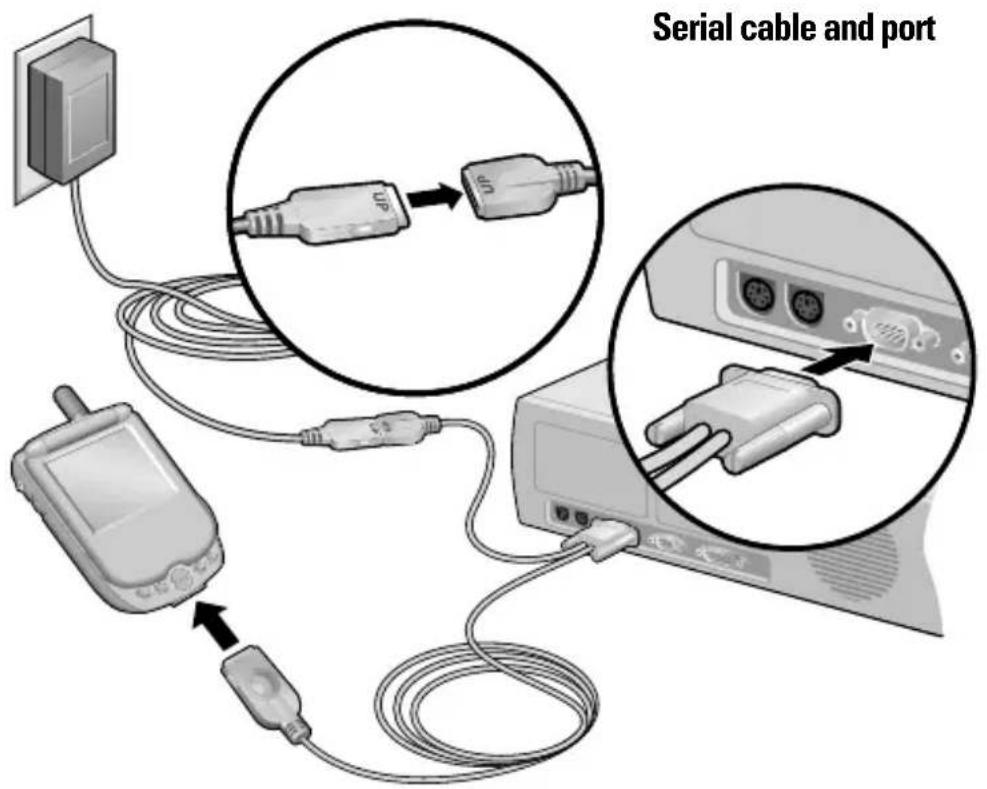
Note: If you are unsure about the exact location of the USB port or serial port on your computer, refer to the manual supplied with the computer.
- Plug the travel charger into a wall outlet.
Tip: The travel charger does not need to be plugged into a wall outlet to perform a HotSync operation. However, if you want to use the HotSync cable to charge your phone, you must plug the travel charger into a wall outlet.
Using desktop software
When you use desktop software with HotSync technology, you can do any of the following:
▶ Work with your phone applications on your computer. Most desktop software applications duplicate many of the applications on your phone, so you can view, enter, and modify most of the data stored on your phone.
▶ Back up and synchronize data between your phone and your computer. Synchronization is a one-step procedure that ensures that changes you make on your phone or desktop software appear in both places. See the section that begins on page 76 for details.
▶ Import and export data, so you can easily transfer data from other desktop applications into many of your applications. See the section that begins on page 32 for details.
▶ Print data from your desktop software on any printer.
Using your phone with Palm Desktop software
Your phone comes with Palm Desktop software. Palm Desktop software includes many of the same applications as your phone: Date Book, Address (the Contacts view in PhoneBook), To Do List, Memo Pad, Expense, and desktop e-mail connectivity.
The following instructions guide you through installing Palm Desktop software. After installation, refer to the online Help in Palm Desktop software for information about how to use the software.
Note: You must install the software that comes with your PCS Treo 300 even if you already installed Palm Desktop software for a previous Palm OS handheld.
To ensure a safe and uninterrupted installation of Palm Desktop software, please do not simply copy the Palm Desktop software files to your computer's hard disk. You must use the installer to place the files in their proper locations and to decompress the files.
To install Palm Desktop software:
- Connect the HotSync cable. See page 19 for instructions.
- Exit any open programs, including those that run at startup such as Microsoft Office, and disable any virus-scanning software.
- Insert the Handspring CD-ROM into the computer's CD-ROM drive.
- If the language selection screen appears, click the same language you selected on your phone. Choosing a different language may result in loss of data.
- If the model selection screen appears, click the name of the product you purchased.
- Follow the onscreen instructions to complete the installation.
When the set up process is done, the installation screen closes automatically.
Using your phone with Microsoft Outlook
The software that comes with your PCS Treo 300 includes everything you need to synchronize your phone with Microsoft Outlook. If you already have Microsoft Outlook installed on your computer, the installation program prompts you to choose the Microsoft Outlook synchronization option.
Using your phone with another PIM
If you prefer to use another personal information manager (PIM), such as Lotus Notes, you can use it if third-party connection software, called a conduit, is available for your PIM. You must install the software that came with your PCS Treo 300 along with the conduit for your PIM to synchronize the data between your phone and your PIM. For information on conduit software, go to this web site: www.sprintpcs.com.
Using an e-mail application with your phone
Your phone comes with the Palm Mail e-mail application. Palm Mail is a synchronization based e-mail application. Each time you synchronize with your computer, Palm Mail retrieves new messages from your desktop e-mail application and sends any new messages you created on your phone.
To install Palm Mail:
▶ Select Mail Setup under Programs/Handspring (or Palm) on the Windows Start menu.
Entering Data in Your Phone
This chapter explains how to enter data into your PCS Phone Handspring® Treo™ 300 using each of the following methods:
▶ Using the PCS Treo 300 keyboard
▶ Using the onscreen keyboard
▶ Using your computer keyboard
▶ Importing data
Using the PCS Treo 300 keyboard
The PCS Treo 300 keyboard is the primary method you'll use to enter data into your phone. Each letter key on the keyboard has three functions:
▶ Normal: Types a lowercase letter.
▶ Shift: Types an uppercase letter.
▶ Option: Types the number/symbol, or activates the function, that appears in blue on the key.

Typing capital letters
To type capital letters, you must first “shift” to caps and then type the character.
Note: Your phone includes a feature that automatically capitalizes the first letter when you create a new sentence or a new record (by tapping New or a blank line).
To type a single capital letter (Caps Shift):
- Press
Shift :
When Caps Shift is active, an “up arrow” symbol appears in the lower-right corner of the PCS Treo 300 screen. If you accidentally activate Caps Shift, press Shift twice to cancel it, or if you do nothing for five seconds, it reverts to lowercase.
Details ↑ Caps Shift
- Type the letter you want to capitalize.
To enter only capital letters (Caps Lock):
1. Press Shift twice.
When Caps Lock is active, an underlined “up arrow” symbol appears in the lower-right corner of the phone screen.

- Type the text you want to capitalize.
- Press Shift to turn off Caps Lock.
Typing numbers and symbols
Typing numbers and symbols with your phone is similar to typing symbols on a computer keyboard. You must first “shift” to option mode and then type the number or symbol strokes.
To enter a single number or symbol (Option Shift):
1. Press Option .
When Option Shift is active, a dot appears in the lower-right corner of the PCS Treo 300 screen. If you accidentally activate Option Shift, press Backspace to cancel it.

- Press the key where the number or symbol appears in blue.
To enter only numbers or symbols (Option Lock):
- Press Option twice.
- Press the keys where the numbers or symbols appear in blue.
When Option Lock is active, an underlined dot appears in the lower-right corner of the PCS Treo 300 screen.

- Press Option to turn off Option Lock.
Typing accented characters
The ListType feature enables you to enter accented characters. You can enter the following accented letters:
To enter accented characters:
- Type the letter (uppercase or lowercase) to which you want to add an accent.
- Press ListType .
- Use the scroll buttons to select the accent you want to apply.
- Press Space to insert the accented character.
Tip: You can also select the accented character you want to insert by repeatedly pressing ListType
Typing extended characters
The ListType feature also enables you to enter many extended characters that are not on the keyboard, such as currency symbols and emoticons. Extended characters are often found under related characters. For example, the £ symbol is located under \$.
To enter extended characters:
- Position the cursor where you want to insert the extended character.
- Type the base character associated with the extended character you want to insert:
Tip: To view a list of available accented and symbol characters, press Menu and under Edit select Keyboard Help (/G).
Base character Symbols Base character Symbols
| a | æ | T | ~TM † ‡ |
| A | Æ | x | × |
| b | ß | X | × |
| B | ß | y | ¥ |
| c | ¢ © ^ ^ | Y | ¥ |
| C | ¢ © ^ ^ | 0 | ‰° |
| d | † ‡ | 1 | 11412 |
| D | † ÷ D | 2 | 2 |
| e | € | 3 | 3 |
| E | € | . | ?! ... |
| f | f | , | ,, |
| F | f | ! | i |
| I | £ | ? | ¿ |
| L | £ | : | ;:-):-(;-):-D |
| m | μ | ' | ‘<>~` |
| M | μ | " | “”«» |
| o | ø | $ | €¥ |
| O | ∅ | + | & |
| p | ¶ | - | ~•-- |
| P | ¶ | / | \÷| |
| r | ® | % | ‰ |
| R | ® | # | = |
| s | ß š § | ( | <[{< |
| S | ß š § | ) | >]}> |
| t | ~TM † ‡ |

- Press ListType
- Use the scroll buttons to select the extended symbol you want to insert.
- Press Space to insert the extended character.
Navigation keystrokes
In addition to character symbols, your phone includes special keystrokes that you can use to navigate within text or fields in your applications.
Note: Some applications may not support these navigation keystrokes.
| Command Keystrokes | |
| Move cursor right | Hold Option while pressing the bottom scroll button. |
| Move cursor left | Hold Option while pressing the top scroll button. |
| Previous field Press the top scroll button. | |
| Next field Press the bottom scroll button. | |
| Affirm an action | Hold Option and press Return . Use these keys instead of tapping the following onscreen buttons: OK, Done, Yes, Next, Accept, Send, and Dial. |
| Annul an action | Hold Option and press Backspace . Use these keys instead of tapping the following onscreen buttons: Cancel, No, Previous, and Reject. |
| Open or dial the selected item | Press Space or press Return . |
Using menus
Menus on your phone are easy to use. Once you have mastered them in one application, you can use them the same way in all other applications.
The menus and menu commands that are available depend on the application. Also, the menus and menu commands vary depending on which part of the application you're using. For example, in Memo Pad, the menus are different for the Memo list screen and the Memo edit screen.
The menus of each application are illustrated in the section on that application in Section Chapter 6. The Edit menu is described in the section that begins on page 59.
To use the menu bar:
- Open an application (such as Memo Pad).
- Press Menu to open the menu bar.
Tip: You can also open the menu bar by tapping the inverted tab at the top of any application's screen (except Calculator).
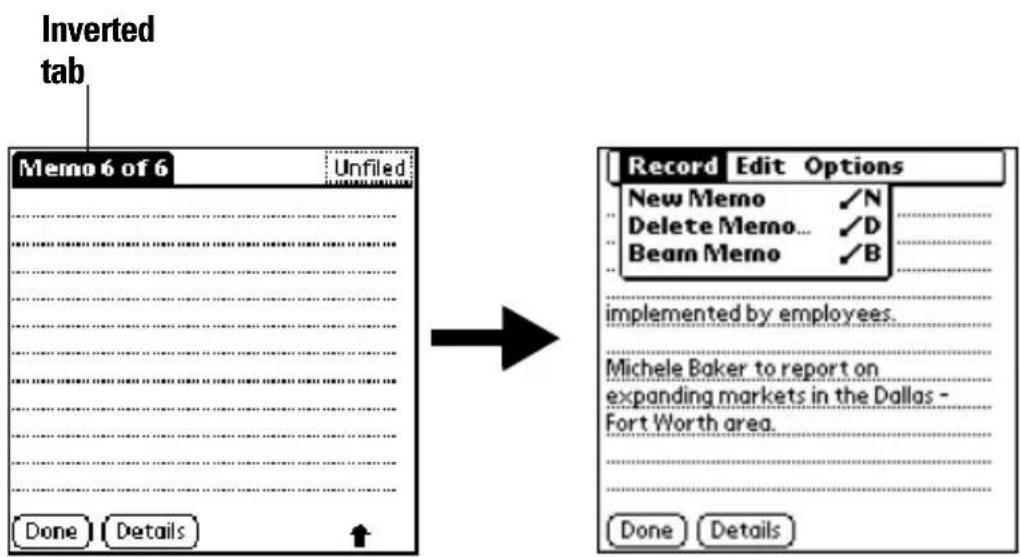
In this example, three menus are available: Record, Edit, and Options. The Record menu is selected and contains the commands New Memo, Delete Memo, and Beam Memo.
- Press the top scroll button to switch between menus.
- Press the bottom scroll button to select a command within a menu.
- Press Space to run the selected command.
Tip: To close the menus without running a command, press Menu again.

Keyboard shortcut menu commands
Most menu commands have an equivalent keyboard shortcut. The shortcut letters appear to the right of the menu command names. Throughout this guide, the shortcut letters appear in parentheses (/C) next to menu selection instructions.
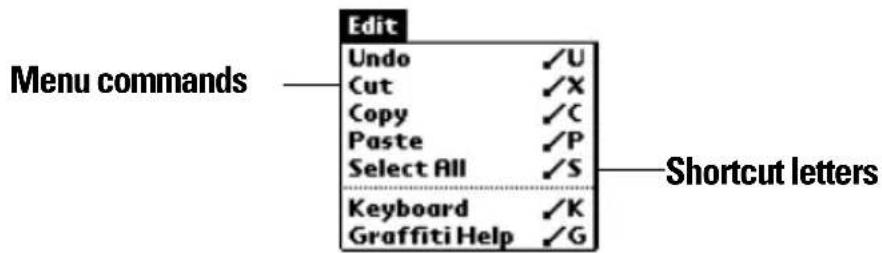
To use keyboard shortcuts for menu commands:
- Press Menu to open the menu bar.
- Type the menu command shortcut letter.
For example, to choose Copy in the Edit menu, press Menu followed by the letter "c."

Tip: When the menu bar is open, you can enter a shortcut letter for any menu item in the current application view, not just the ones that appear on the current menu.
Using text ShortCuts
ShortCuts make entering commonly used words or phrases quick and easy. ShortCuts are similar to the Glossary or Autotext features of some word processors.
Your phone comes with several predefined ShortCuts, and you can also create your own. Each ShortCut can represent up to 45 characters. For example, you might create a ShortCut for your name, or for the header of a memo. See the section that begins on page 213 to learn about creating your own ShortCuts.
Your phone includes the following predefined ShortCuts:
| Entry ShortCut | |
| Date stamp ds | |
| Time stamp ts | |
| Date / time stamp dts | |
| Meeting me | |
| Breakfast br | |
| Lunch lu | |
| Dinner di |
To use a ShortCut:
- Type the letter s.
- Press ListType .
- Use the scroll buttons to select the ShortCut symbol .
Note: The ShortCut symbol appears by the cursor to show that you are in ShortCut mode.
- Type the ShortCut characters.
Using the onscreen keyboard
You can open the onscreen keyboard anytime you need to enter text or numbers on your phone. When used in conjunction with the backlight, the onscreen keyboard is especially useful for typing in the dark.
To use the onscreen keyboard:
- Open a record in an application that requires you to enter data (such as Memo Pad).
- Press Menu .
- Under Edit, select Keyboard (/K).
- Tap the characters to enter text, numbers, and international characters.

![1 2 3 $ € £ ¥ [ ] { } < > \ = @ ~ & # Done abc 123 Int'l Tap here to display numeric keyboard](/content/2026/05/998374/images/1229114d47ce5befb41fbf459784078d76ccb253d39a6e7552d1a52f92ecafcc.jpg)

Note: The onscreen keyboard also includes a dialog box for international characters. You can switch among the three dialogs at any time to enter the exact text you need.
- After you finish, tap Done to close the onscreen keyboard and place the text in the record.
Using your computer keyboard
Many of the applications on your phone are available in Palm Desktop software and in most Personal Information Manager (PIM) applications. If you have a lot of data to enter, or prefer to use the computer keyboard, you can use Palm™ Desktop software, or any supported PIM such as Microsoft Outlook, to enter information. You can then perform a HotSync® operation to synchronize the information on your computer with the information on your phone. See the section that begins on page 76 for details on HotSync operations.
Refer to Palm Desktop online Help or the documentation that came with your PIM software for more information on entering data on your computer.
Importing data
If you have data stored in computer applications such as spreadsheets and databases, or if you want to import data from another Palm OS® handheld, you can transfer the data to your phone without having to key it in manually. Save the data in one of the file formats listed below, import it into Palm Desktop software, and then perform a HotSync operation to transfer the data to your phone.
Palm Desktop software can import data in the following file formats:
▶ Comma delimited (.csv, .txt): Address and Memo Pad only
▶ Tab delimited (.tab, .tsv, .txt): Address and Memo Pad only
▶ CSV (Lotus Organizer 2.x/97 Mapping): Address only
▶ vCal (.vcs) Date Book only
▶ vCard (.vcf) Address only
▶ Date Book archive (.dba)
▶ Address archive (.aba)
▶ To Do List archive (.tda)
▶ Memo Pad archive (.mpa)
Archive formats can only be used with Palm Desktop software. Use the archive file formats to share information with other people who use Palm OS handhelds or to create a copy of your important Palm Desktop information.
To import data:
- Open Palm Desktop software.
- Click the application into which you want to import data.
-
If you are importing records containing a field with category names, select All in the Category box.
Be sure that the same categories that appear in the imported file also exist in the application. If the categories do not exist, create them now; otherwise, the records are imported into the Unfiled category. -
From the File menu, select Import.
- Select the file you want to import.
- Click Open.
- To import data into the correct Palm Desktop fields, drag fields in the left-hand column so that they are opposite the corresponding imported field on the right.
- If you do not want to import a field, deselect the check box for that field.
- Click OK.
The imported data is highlighted in the application.
- To add the imported data to your phone, perform a HotSync operation.
See Palm Desktop online Help for more information on importing and exporting data.
Managing Your Applications
This chapter explains how to switch between applications on your PCS Phone Handspring ® Treo TM 300, how to change application settings so they are personalized to your work methods, and how to categorize applications so you view them in related groups.
Using the Applications Launcher
Your phone is equipped with a variety of applications. All the applications installed on your phone appear in the Applications Launcher.
Opening applications
You can use the Applications Launcher to open any application installed on your phone. You can also open the four main applications — PhoneBook, Date Book Plus, Blazer®, and Memo Pad— with the application buttons on the front panel of your phone.
Tip: When you press an application button on the front panel of your phone, you have instant access to the selected application. You don't even need to turn on your phone first.
In addition to providing a way for you to open applications, the Applications Launcher displays the current time, battery level, wireless signal status, and application category.
To open an application:
- Press Option and then press Menu to access the Applications Launcher.

- Tap the icon of the application that you want to open. To see additional applications, press the scroll buttons.
Tip: To find an application quickly, you can type the first letter of its name. The Applications Launcher scrolls to the first application with a name that begins with that letter. You can also create categories and organize your applications by category. See page 37 for details.
Switching between applications
When working in any application, press Option and then press Menu , or press an application button on the front panel of your phone to switch to another application. Your phone automatically saves your work in the current application and displays it when you return to that application.
Categorizing applications
The category feature enables you to manage the number of application icons that appear onscreen in the Applications Launcher. You can assign an application to a category and then display a single category or all your applications.
To categorize an application:
- Press Option and then press Menu to access the Applications Launcher.
- Press Menu again to open the menus.
- Under App, select Category (/Y).
- Tap the pick list next to each application to select a category.
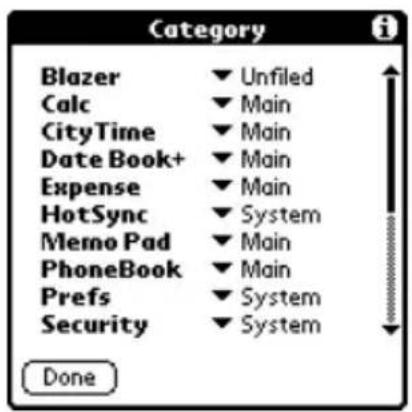
Tip: To create a new category, tap Edit Categories from the pick list. Tap New, enter the category name. Hold Option and press Return twice to add the category.
- Hold Option and press Return to finish.

To display applications by category:
- Press Option and then press Menu to access the Applications Launcher.
- Do one of the following:
- Hold Option and press Menu repeatedly to cycle through all your categories.
- Tap the pick list in the upper-right corner of the screen and select the category you want to display.
Changing the Applications Launcher display
By default, the Applications Launcher displays each application as an icon. As an alternative, you can choose to show a list of applications. You can also choose to view the same category of applications each time you open the Applications Launcher.
To change the Applications Launcher display:
- Press Option and then press Menu to access the Applications Launcher.
- Press Menu again to open the menus.
- Under Options, select Preferences(/R).
- Tap the View By pick list and select List.
- Hold Option and press Return to finish.
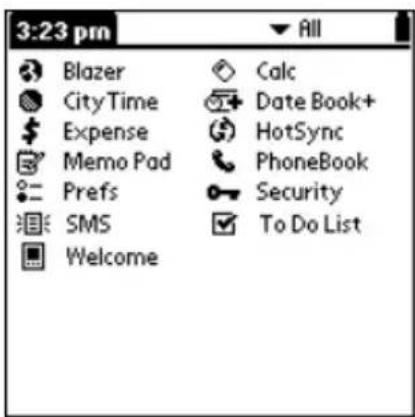
To open the Applications Launcher to the last opened category:
- Press Option and then press Menu to access the Applications Launcher.
- Press Menu again to open the menus.
-
Under Options, select Preferences (/R).
-
Tap the Remember Last Category check box to select it.
- Hold Option and press Return to finish.
Choosing preferences
You can set options that affect an entire application in the application's Preferences dialog box.
To change preferences for an application:
- Open an application.
- Press Menu .
- Under Options, select Preferences (/R).
Note: Not all applications have a Preferences command.
- Make changes to the settings.
- Hold Option and press Return to finish.
Installing and removing applications
This section explains how to install and remove applications on your phone and how to remove Palm TM Desktop software from your computer.
Installing add-on applications
Your phone comes with the PhoneBook, Date Book Plus, Blazer, Memo Pad, To Do List, SMS, Expense, Calculator, and CityTime applications installed and ready to use.
You can also install additional applications on your phone, such as business applications, games, and other software. The Install Tool makes it easy to install software on your phone during a HotSync® operation. There are a variety of third-party applications available for devices that use Palm OS software. To learn more about these applications, go to the web site: www.sprintpcs.com.
When you download an add-on application from the Internet, it is probably in a compressed format such as a .zip or .sit file. If you have a decompression utility on your computer, use it to decompress the .prc and .pdb files inside the compressed file. If you do not have a
decompression utility, search the Internet using phrases like 'zip decompression' or 'how to unzip'. This will lead you to various third-party utilities that you can use to decompress any kind of compressed or downloaded file--not just add-ons for your phone. After you install the utility, you are ready to decompress the add-on application files that you downloaded.
Note: Any applications that you install on your phone resides in RAM memory; you can delete them at any time.
To install add-on software on your phone:
- Copy or download the application you want to install into the add-on folder in your Handspring (or Palm) directory on your computer.
Note: If the software you download is compressed, you need to decompress it into this folder. If you prefer to place the application into another folder, you need to navigate to that folder before you complete step 5.
- Double-click the Palm Desktop icon on your desktop.

- Click Install.
Section 3
40 Managing Your Applications
Tip: You can also access the Install Tool dialog box by selecting Install Tool under Sprint on the Start menu, or by double-clicking any file with a PRC file extension.

- In the User drop-down list, select the name that corresponds to your phone.
- Click Add.

- Select the application(s) that you want to install on your phone.
- Click Open.
Note: Review the list of applications you selected in the Install Tool dialog box. If you do not want to install an application, select it, and then click Remove. (This does not remove the application from your computer; it simply removes it from the list of applications to install.)
- Click Done.
- Perform a HotSync operation to install the application(s) you selected in step 6. See the section that begins on page 76 for details.
Tip: You can also install an application by simply double-clicking the application's icon.
Removing applications
In the event that you run out of memory or decide that you no longer need an application you installed, you can remove applications from your phone. You can remove only add-on applications, patches, and extensions that you install; you cannot remove the applications that reside in the ROM portion of your phone.
To remove an add-on application:
- Press Option and then press Menu to access the Applications Launcher.
- Press Menu again to open the menus.
- Under App, select Delete (/D).
- Tap the application that you want to remove.

- Tap Delete.
- Hold Option and press Return twice to finish.
- Check the Backup folder (under your user name folder in the Handspring or Palm folder) on your computer. If you find a PRC file for the application you just removed, delete the PRC file from the Backup folder.
Tip: If you installed Palm Desktop software for the first time when you purchased your PCS Treo 300, the Palm Desktop software is located in the Handspring folder. If you upgraded from a previous version of Palm Desktop software, these files are most likely located in the Palm folder.
Removing Palm Desktop software
Removing Palm Desktop software also removes HotSync Manager. If you remove this software from your computer, you cannot synchronize your data. So, we highly recommend leaving Palm Desktop software on your computer.
To remove Palm Desktop software:
- From the Windows Start menu, choose Programs, Handspring (or Palm) and then Uninstall.
- Click Yes to uninstall the software.
Security
Your phone comes with a Security application so that unauthorized users cannot view the entries you wish to protect. To access the Security application, you must first select either the All or System category from the Applications Launcher.
Note: The Security Preferences screen in the PhoneBook application provides a separate lock for the wireless mode features. The wireless mode lock prevents accidental initiation of voice or data calls. When wireless mode is locked, you can still use the handheld mode features without unlocking wireless mode. See page 111 for information on locking wireless mode.
In Security, you can do the following:
▶ Mask or hide entries you define as private. The Mask option displays a gray bar over private records, and the Hide option completely removes (hides) private records. See the section that begins on page 72 for more information.
▶ Assign a password to the Security viewing options. Assigning a password requires you to enter a password to view masked or hidden private entries; not assigning a password enables you (or anyone else) to view individual masked private entries by tapping them, and to view all hidden or masked private entries by selecting Show Records in the Security dialog box.
Assigning a password
You can assign a password to protect your private records and to lock your phone.
To assign a password:
- Press Option and then press Menu to access the Applications Launcher.
- Tap the Security icon
- Tap the Password box.
- Enter a password.
- Hold Option and press Return .
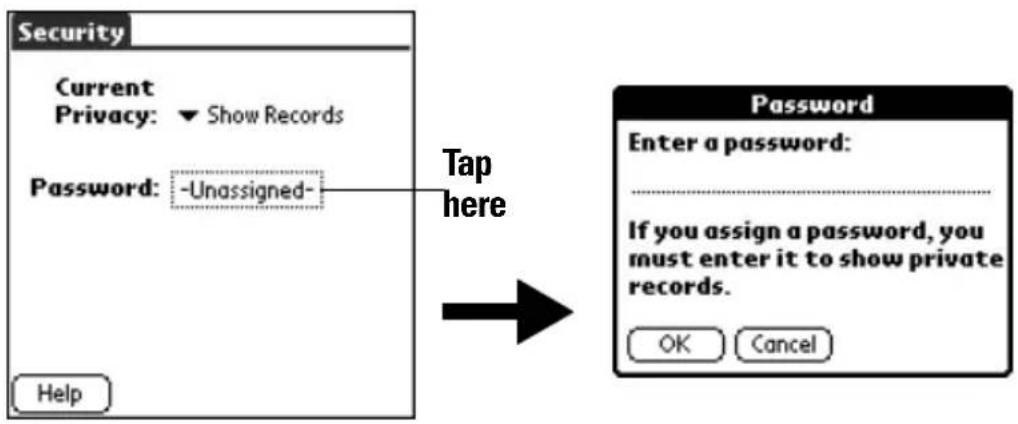
- Enter the same password a second time.
- Hold Option and press Return to finish.
Changing or deleting a password
Once you define a password for your phone, you can change or delete it at any time. You must enter the current password before you can change or delete it.
To change or delete your password:
- Tap the Password box.
- Enter the current password.

- Hold Option and press Return .
- Do one of the following:
■ To change the password, enter the new password, and hold Option and press Return .
■ To delete the password, tap Delete.


Recovering from a forgotten password
If you did not lock your phone and you forget your password, you can delete the password from your phone. Deleting a forgotten password also deletes all entries and files marked as Private.
Important: If you synchronize with your computer before deleting a forgotten password, your phone restores your private entries the next time you perform a HotSync operation, but it does not restore the password.
To delete a forgotten password:
- Tap the Password box.
- Tap Lost Password.

- Hold Option and press Return for Yes.
Applications Overview
This chapter briefly describes each application and how to open it. Your PCS Phone Handspring® Treo™ 300 comes with these applications already installed:
▶ PhoneBook
▶ Date Book Plus
▶ Blazer ®
▶ Memo Pad
▶ SMS
▶ To Do List
CityTime
▶ Calculator
▶ Expense

PhoneBook

PhoneBook enables you to make and receive telephone calls, and to keep names, addresses, phone numbers, and other information about your personal or business contacts.
In PhoneBook, you can do the following:
▶ Store thousands of names, addresses, phone numbers, e-mail addresses, and more, in your Contacts list.
▶ Create up to 50 speed dial entries.
▶ Dial numbers from the Dial Pad, your Speed Dial list, your Contacts list, or the Call History list on your phone.
▶ Quickly look up, enter, or duplicate names, addresses, phone numbers, and other information.
▶ Enter up to five phone numbers (home, work, fax, mobile, etc.) or e-mail addresses for each name.
▶ Attach a note to each Contacts entry, in which you can enter additional information about the entry.
▶ Assign Contacts entries to categories so that you can organize and view them in logical groups.
▶ Display a history list of your incoming and outgoing calls.
To open PhoneBook:
▶ Press PhoneBook . PhoneBook opens and the Speed Dial view appears.

Tip: Press PhoneBook repeatedly to cycle through the Speed Dial, Dial Pad, Contacts, and Call History views. Press and hold PhoneBook to redial the last number you called.
Date Book Plus

Date Book Plus lets you quickly and easily schedule appointments or any kind of activity associated with a date and/or a time.
In Date Book Plus, you can do the following:
▶ Enter a description of your appointment and assign it to a specific time and date.
▶ Display a chart of your appointments for an entire week to easily spot available times and any potential scheduling overlaps or conflicts, or display descriptions of your appointments for one or two weeks.
▶ Display a monthly calendar to quickly spot days where you have morning, lunch, or afternoon appointments, or display a calendar for an entire year.
▶ Display a list of both your appointments and your To Do items.
▶ Create unscheduled events or To Do items that float from one day to the next until you complete them.
▶ Create a Daily Journal to track events with automatic time stamps.
▶ Set an alarm to sound prior to the scheduled activity, and create reminders for events that are based on a particular date, rather than time of day, such as birthdays and anniversaries.
▶ Attach notes to individual events for a description or clarification of the entry in your Date Book.
To open Date Book Plus:
▶ Press Date Book Plus . Date Book Plus opens to today's schedule.
Date Book Plus button

Tip: Press Date Book Plus repeatedly to cycle through the Day, Week, Week with Text, Month, Year, and List views.

Blazer Web Browser

Blazer is a wireless Internet browser that lets you browse your favorite web sites while you're on the go.
Note: To use Blazer, your service plan must include PCS Vision.
In Blazer, you can do the following:
▶ Access the World Wide Web and display Internet content.
▶ Create up to 100 bookmarks for quick and convenient access to your favorite web sites.
▶ Navigate between web pages with familiar toolbar icons.
To open Blazer:
▶ Press Blazer . Blazer opens and the Page view appears.
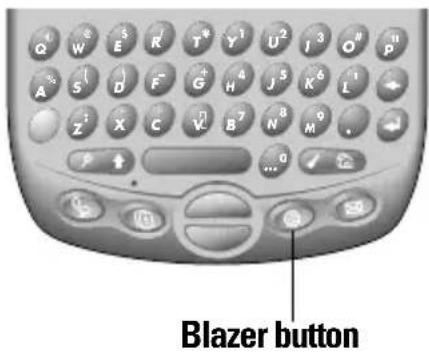
Tip: Press Blazer repeatedly to toggle between the Page and Bookmark views.
Memo Pad

Memo Pad provides a place to take notes that are not associated with records in other applications such as Date Book Plus, PhoneBook, or To Do List.
In Memo Pad, you can do the following:
▶ Take notes or any kind of message on your phone.
Drag and drop memos into popular computer applications like Microsoft Word when you synchronize using Palm™ Desktop software and HotSync® technology.
▶ Assign memos to categories so that you can organize and view them in logical groups.
▶ Take down phone numbers and other types of information. Later, you can copy and paste this information to other applications.
To open Memo Pad:
▶ Press Memo Pad . Memo Pad displays the category of memos you last viewed.

Tip: Press Memo Pad repeatedly to cycle through the various categories.

SMS

SMS provides a way for you to receive short text messages from other people who use mobile phones and subscribe to PCS Vision services.
In SMS, you can do the following:
▶ Receive short text messages.
Read incoming messages directly from the Inbox.
▶ File messages you receive and arrange them by category.
To open SMS:
- Press Option .
- Press PhoneBook


SMS.opens and the Inbox view appears.
Tip: You can also open SMS by tapping the SMS icon in the Applications Launcher.

To Do List

To Do List is a convenient place to create reminders and prioritize the things that you have to do.
In To Do List, you can do the following:
▶ Make a quick and convenient list of things to do.
▶ Assign a priority level to each task.
▶ Assign a due date for any or all of your To Do items.
▶ Assign To Do items to categories so that you can organize and view them in logical groups.
▶ Sort your To Do items either by due date, priority level, or category.
▶ Attach notes to individual To Do items for a description or clarification of the task.
To open To Do List:
- Press Option
- Press Date Book Plus .
Tip: You can also open To Do List by tapping the To Do List icon 📄 in the Applications Launcher.

To Do List displays the category of items you last viewed.

CityTime

CityTime helps you keep track of the time anywhere around the globe.
In CityTime, you can do the following:
▶ Select a home city as a point of reference.
▶ Display the day and time in four other cities simultaneously.
- Add a definition for any city that isn't in the default list.
▶ Display sunrise and sunset information for your home city.
To open CityTime:
- Press Option .
- Press Blazer


Tip: You can also open CityTime by tapping the CityTime icon 📄 in the Applications Launcher.

Calculator

Calculator enables you to perform addition, subtraction, multiplication, division and a variety of advanced math and scientific calculations.
In Calculator, you can do the following:
▶ Select a view to perform specific types of calculations including: math, trigonometry, finance, logic, statistics, weight/temp, length, area, and volume.
▶ Store and retrieve values.
▶ Display the last series of calculations, which is useful for confirming a series of “chain” calculations.
▶ Create a custom view with the buttons you use most often.
▶ Switch to basic mode to perform simple calculations.
To open Calculator:
- Press Option .
- Press Memo Pad .
Tip: You can also open Calculator by tapping the Calculator icon 📞 in the Applications Launcher.

Tip: Hold Option and press Memo Pad repeatedly to toggle between Basic and Advanced mode.
Expense

Expense lets you keep track of your expenses and then transfer the information to a spreadsheet on your computer.
In Expense, you can do the following:
▶ Record dates, types of expenses, amount spent, payment method, and other details associated with any money that you spend.
▶ Assign expense items to categories so that you can organize and view them in logical groups.
▶ Keep track of vendors (companies) and people involved with each particular expense.
▶ Log miles traveled for a particular date or expense category.
▶ Sort your expenses by date or expense type.
▶ Transfer your expense information to a Microsoft Excel spreadsheet (version 5.0 or later) on your computer. (Microsoft Excel is not included in the PCS Treo 300 package.)
To open Expense:
- Press Option .
- Press Menu .


- Tap the Expense icon


Common Tasks
In addition to the wireless communication applications, your PCS Phone Handspring ® Treo TM 300 also includes a full suite of personal information manager (PIM) applications: Date Book Plus, the Contacts view in PhoneBook, To Do List, Memo Pad, and Expense. This chapter provides instructions on how to do tasks that are common to several applications. It’s easy to transfer what you learn in one application to the other applications because the structure and behavior of all these applications are quite similar.
Throughout this chapter, the term “record” is used to refer to an individual item in any of the PIM applications: a single Date Book Plus event, Contacts entry in PhoneBook, To Do List item, Memo Pad memo, or Expense item.
Creating records
You can use the following procedure to create a new record in Date Book Plus, the Contacts view in PhoneBook, To Do List, Memo Pad, and Expense.
To create a record:
-
Open the application in which you want to create a record.
-
Do one of the following:
■ Start entering data (your phone automatically creates a new record).
Tip: To create another new record, press the bottom scroll button and begin entering data.
- In Date Book Plus and Contacts view in PhoneBook only: Press Menu and under Record, select New... (/N).
Tap New.
-
In Date Book Plus only: Select start and end times for your event, and then hold Option and press Return.
-
Enter text for the record.
Note: You do not have to press Shift to capitalize the first letter of the field. Your phone automatically capitalizes the first letter of each field (except numeric and e-mail fields).
-
Use the scroll buttons, roll the rocker switch or tap a field directly to move between fields.
-
(Optional) Tap Details to select attributes for the record.
-
In Contacts view in PhoneBook only: Hold Option and press Return to finish.
There's no need to save the record because your phone saves it automatically.
Editing records
After you create a record, you can change, delete, or enter new text at any time. Two screen features tell you when your phone is in editing mode:
▶ A blinking cursor
▶ One or more edit lines
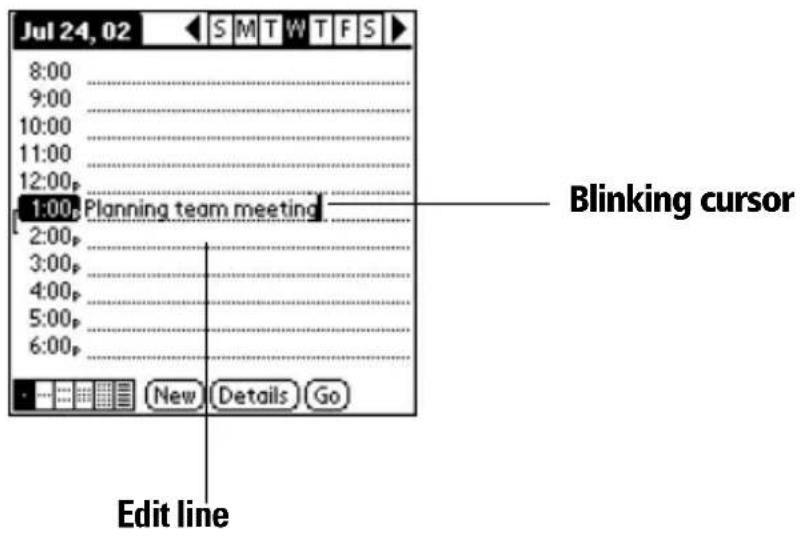
Entering text
For information on how to enter text using the keyboard on your phone, the onscreen keyboard, or the keyboard attached to your computer, see Section 2.
Edit menu
The Edit menu is available with any screen where you enter or edit text. In general, commands available in the Edit menu apply to text that you select (or highlight) in an application.
To select text in an application:
- Tap the beginning of the text that you want to select.
- Drag the stylus over the text to highlight it. You can drag across the text to select additional words, or drag down to select a group of lines.
Tip: To select a word, double-tap the word. To select a whole line, triple-tap the line.
The following commands may appear in an Edit menu:
| Undo | Reverses the action of the last edit command. Forexample, if you used Cut to remove text, Undo restores the text you removed. Undo also reverses deletions done by using backspace. |
| Cut | Removes the selected text and stores it temporarily in the memory of your phone. You can paste the text you cut into another area of the current application or into a different application. |
| Copy | Copies the selected text and stores it temporarily in the memory of your phone. You can paste the text that you copy into another area of the current application or into a different application. |
| Paste | Inserts the text that you cut or copied at the selected point in a record. The text you paste replaces any selected text. If you did not previously cut or copy text, Paste does nothing. |
| Select All | Selects all of the text in the current record or screen. This enables you to cut or copy all of the text and paste it elsewhere. |
| Keyboard | Opens the onscreen keyboard. When you finish with the onscreen keyboard, hold Option and press Return to finish. |
| Keyboard Help | Opens screens that show many keyboard shortcuts and the base characters associated with symbols and other extended characters. Use this command anytime you need forget how to do something with the keyboard. |
Deleting records
To delete a record in any of the PIM applications:
- Select the record you want to delete.
- Press Menu .
- Under Record, select the Delete command (/D):
Date Book Plus: Delete Item
Contacts view in PhoneBook: Delete Contact
To Do List: Delete Item
Memo Pad: Delete Memo
Expense: Delete Item
A confirmation dialog box appears. If you want to save a copy of the deleted item to an archive file in Palm Desktop software, be sure that the check box is checked. If you don't want to save a copy, tap the check box to remove the check.
4. Hold Option and press Return to finish.
If you choose to save a copy of the selected item, your phone transfers it to the archive file on your desktop the next time you perform a HotSync operation.
Other ways to delete records
You can also delete records in the following ways:
In the Details dialog box of the application, tap Delete, and then hold Option and press Return to finish.
▶ Delete the text of the record.
Note: In Date Book Plus, if you delete the text of a repeating event, you delete all instances of that event.
Purging records
Over time, as you use Date Book Plus, To Do List, and Expense, you'll accumulate records in these applications that have outlived their usefulness. For example, events that occurred months ago remain in the Date Book Plus, and To Do items that you marked as completed remain in the list, as do Expense items.
All these outdated records take up memory on your phone, so it's a good idea to remove them by using Purge. If you think Date Book Plus or To Do List records might prove useful later, you can purge them from your phone and save them in an archive file.
Purging is not available in the Contacts view in PhoneBook or in Memo Pad. So you need to delete outdated records from these applications individually.
To purge records:
-
Open the application.
-
Press Menu .
-
Under Record, select Purge (/E).
A confirmation dialog box appears.
Date Book Plus: Tap the pick list and select how old a record must be to be purged. Purge deletes repeating events if the last of the series ends before the date that you purge records.
Date Book Plus, To Do List: If you want to save a copy of the purged records to an archive file on your desktop, be sure that the check box is checked. If you don't want to save a copy, tap the check box to remove the check box.
- Hold Option and press Return to finish.
If you chose to save a copy of the purged records, your phone transfers them to an archive file on your desktop the next time you perform a HotSync operation.
Note: Purging does not happen automatically. You must use the Purge command to make it happen.
Categorizing records
Categorize records in the Contacts view in PhoneBook, To Do List, Memo Pad, SMS, and Expense applications so that they are grouped logically and are easy to review. (You can also categorize applications. See page 36 for details.)
When you create a record, your phone automatically places it in the category that is currently displayed. If the category is All, your phone assigns it to the Unfiled category. You can leave an entry as Unfiled or assign it to a category at any time.
System-defined and user-defined categories
By default, your phone includes system-defined categories, such as All and Unfiled, and user-defined categories, such as Business and Personal.
You cannot modify the system-defined categories, but you can rename and delete the user-defined categories. In addition, you can create your own user-defined categories. You can have a maximum of 15 user-defined categories in each application.
The Contacts view in PhoneBook contains the QuickList user-defined category, in which you can store the names, addresses, and phone numbers you might need in emergencies (doctor, fire department, lawyer, etc.).
Expense contains two user-defined categories, New York and Paris, to show how you might sort your expenses for different business trips.
Note: The illustrations in this section come from Memo Pad, but you can use these procedures in all the applications in which categories are available. Categories are not available in Date Book Plus.
To move a record into a category:
- Open the record you want to categorize.
- In Contacts view in PhoneBook only: Press Menu, and under Record, select Edit Contact (/E).
- In the record view, tap the category list to display the list of available categories.

- Select the category for the record.
Tip: You can also assign a record to a category by tapping the Details button, selecting a category from the category pick list in the Details dialog box, and then holding Option and pressing Return to finish.
To display a category of records:
- Tap the category pick list in the upper-right corner of the list screen.

- Select the category you want to view.
The list screen now displays only the records assigned to that category.
To define a new category:
- Tap the category pick list in the upper-right corner of the screen.
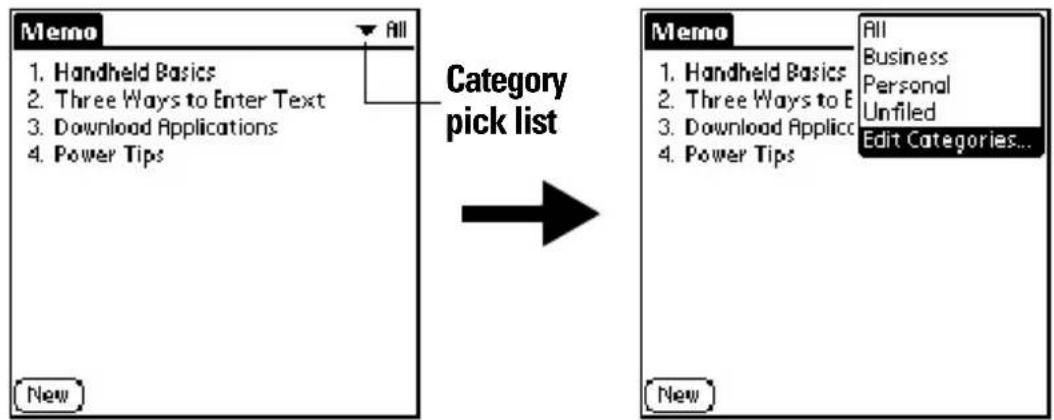
-
Tap Edit Categories.
-
Tap New.

- Enter the name of the new category.
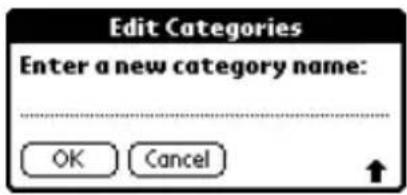
- Hold Option and press Return twice to finish.
You can assign any of your records to the new category.
To rename a category:
- Tap the category pick list in the upper-right corner of the screen.
- Tap Edit Categories.
- Select the category that you want to rename, and then tap Rename.
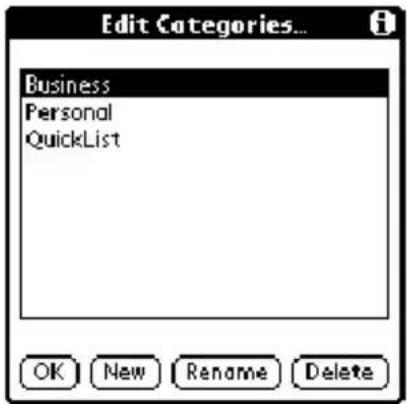
- Enter the new name for the category.

- Hold Option and press Return twice to finish.
Tip: You can group the records in two or more categories into one category by giving the categories the same name. For example, if you change the name of the Personal category to Business, all records formerly in the Personal category appear in the Business category.
Finding records
Your phone offers several ways to find information quickly:
All applications: The Find utility locates any text that you specify, always starting with the current application.
Date Book Plus, To Do List, Memo Pad: The Phone Number
Lookup feature displays the Contacts view in PhoneBook and shows names and phone numbers for entries that have phone numbers. You can add the information that appears in this list to a record.
▶ PhoneBook: The Instant Lookup feature lets you scroll immediately to a Contacts record in PhoneBook by entering the first few letters of a first or last name, or the first name initial and the first few letters of a last name.
▶ Expense: The Lookup feature displays the Contacts in PhoneBook that have data in the Company field. You can add these names to a list of attendees associated with an Expense record.
Looking up Contacts records in PhoneBook
When working with the Contacts view in PhoneBook, the buttons on your phone make it easy to navigate among your Contacts entries.
In the Contacts list screen, the scroll buttons move the highlight. Holding Shift and using the scroll buttons moves up or down an entire screen of records. If you press and hold a scroll button, you accelerate the scrolling and display every third screen.
In the Contact View screen, the scroll buttons move to the previous or next Contacts record.
You can also use the Instant Lookup feature, from any of the PhoneBook views, to quickly scroll to any of your Contacts entries.
To use Instant Lookup to find a Contacts record:
- From the Speed Dial, Contacts, or Call History views in PhoneBook, enter one of the following for the name you want to find:
■ First name initial and last name.
- First name
- Last name

For example, entering a “ca” displays “Chris Cadwell,” “David Cagle,” and “Carolyn Malestic” as shown above. Entering “cmal” finds only “Carolyn Malestic.”
- Use the scroll buttons to select the contact name.
- Press Return to view the contents of the record.
Using Find
You can use Find to locate any text that you specify, in any application.
To use Find:
- Press Option and then press Shift to open the Find dialog box.
Tip: If you select text in an application before you opening the Find dialog box, the selected text automatically appears in the Find dialog box.
- Enter the text that you want to find.
Find is not case-sensitive. For example, searching for the name “davidson” also finds “Davidson.”
Find locates any word that begin with the text you enter. For example, searching for “plan” finds “planet,” but not “airplane.”
- Hold Option and press Return to start the search.
Find searches for the text in all records and all notes.
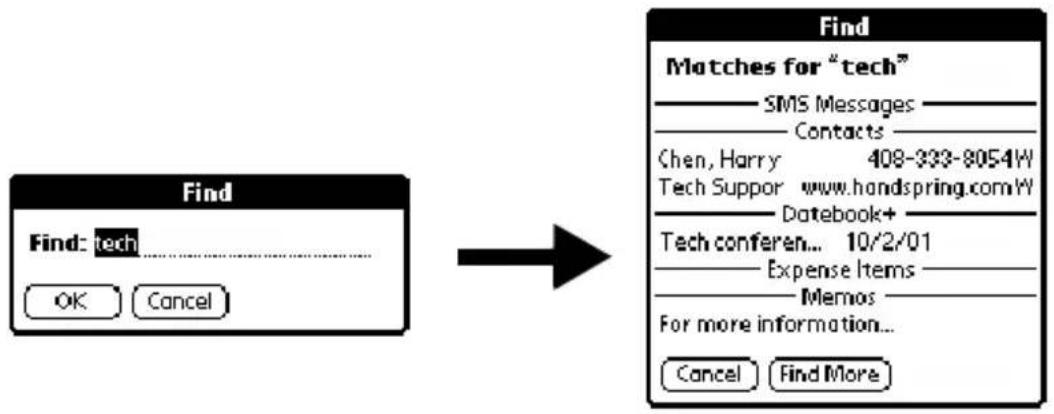
flowchart
graph LR
    A["Find"] --> B["Find: tech"]
    B --> C["OK"] & D["Cancel"]
    E["Find"] --> F["Matches for "tech""]
    F --> G["SMS Messages"]
    F --> H["Contacts"]
    F --> I["Chen, Harry 408-333-8054W"]
    F --> J["Tech Suppor www.handspring.com/W"]
    F --> K["Datebook+"]
    F --> L["Tech conferen... 10/2/01"]
    F --> M["Expense Items"]
    F --> N["Memos"]
    F --> O["For more information..."]
    F --> P["Cancel"] & Q["Find More"]
As your phone searches for the text, you can tap Stop at any time. You may want to do this if the entry you want appears before your phone finishes the search. To continue the search after you tap Stop, tap Find More.
- Tap the text that you want to review.
Using Phone Number Lookup
Phone Number Lookup displays the information you entered in the Contacts view in PhoneBook, and it lets you add this information to a record.
To use Phone Number Lookup:
-
Display the record in which you want to insert a phone number. The record can be in Date Book Plus, To Do List, or Memo Pad.
-
Press Menu .
-
Under Options, select Phone Lookup (/L).
-
If your Contacts view in PhoneBook is sorted by last name, begin to spell the last name. If your Contacts are sorted by first name, begin to spell the first name.
Note: The first initial and last name search in the PhoneBook Instant Lookup feature is not available in the Phone Number Lookup feature.
Phone Number Lookup displays records that begin with the letters you enter based on the sort method in your Contacts view in PhoneBook. For example, if your Contacts are sorted by last name and you enter “su,” the list displays “John Sung” and “Mario
Suarez.” If your Contacts are sorted by first name, and your enter “su,” the list displays “Susan Smith” and “Suki Sakimoto.”
- Continue to spell the name you're looking for, or when you see the name, scroll to it.
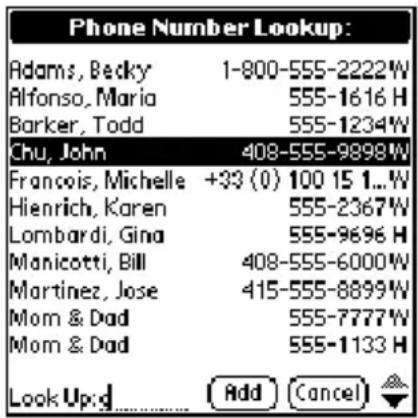
6. Press Space or Return .

The name you selected, along with the other information associated with it, is pasted into the record you selected in step 1.
Phone Number Lookup tips
You can also enter the keyboard shortcut (/L) to activate the Phone Number Lookup feature in the following circumstances:
While entering text: For example, if your Contacts view in PhoneBook is sorted by last name and you want to insert the full name and phone number for someone with the last name “Williams,” enter “Wi” and then the Phone Number Lookup keyboard shortcut (/L). Assuming you have only one Contacts record with a last name that begins with “Wi,” your phone inserts the full name “Fred Williams” (and its associated information). If you have more than one name that begins with “Wi,” the Phone Number Lookup screen appears and highlights the first record that begins with “Wi.”
For selected text: Drag to highlight the text, and then enter the Phone Number Lookup keyboard shortcut (/L). Your phone replaces the selected text and adds the name and its associated information.
Looking up names to add to expense records
In Expense, Lookup displays the names of Contacts entries in Phonebook that have data in the Company field. You can add these names to a list of attendees associated with an Expense record.
To add names to an Expense record:
-
Open the Expense record to which you want to add names.
-
Tap Details.

- Tap Who.
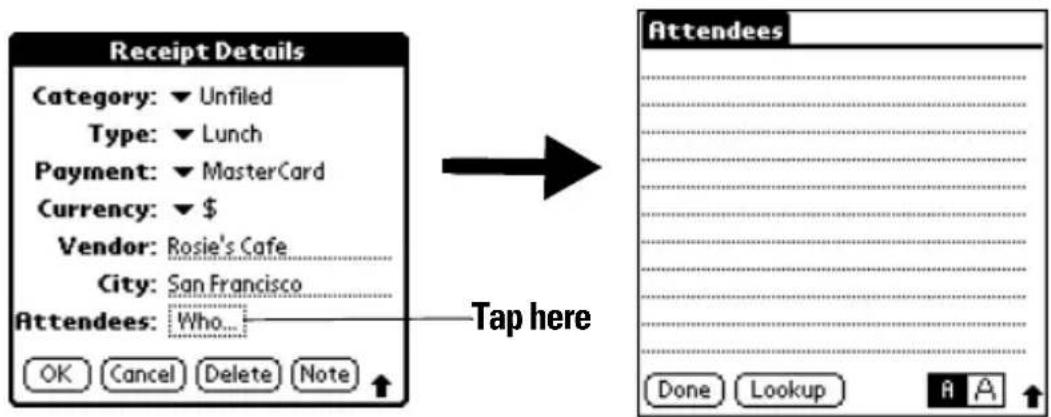
- Tap Lookup.
The Attendees Lookup screen displays all the names of Contacts entries in Phonebook that have data in the Company field.
-
Use the scroll buttons to select the name you want to add.
-
Press Space or Return .
The name appears in the Attendees screen.
-
Repeat steps 4 through 6 to add more names.
-
Hold Option and press Return twice to finish.
Sorting lists of records
You can sort lists of records in various ways, depending on the application. Sorting is available in applications that have list screens: Contacts view in PhoneBook, To Do List, Memo Pad, and Expense.
Note: You can also assign records to categories. See page 62 for details.
To sort records in To Do List and Expense:
- Open the application to display the list screen.
- Tap Show.
- Tap the Sort by pick list and select an option.
- Hold Option and press Return to finish.
To sort records in Contacts view in PhoneBook and Memo Pad:
- Open the application to display the list screen.
- Press Menu .
- Under Options, select Preferences (/R).

Contacts

Memo Pad
- Do one of the following:
Contacts view in PhoneBook: Tap the setting you want.
Memo Pad: Tap the Sort by pick list and select Alphabetic or Manual.
- Hold Option and press Return to finish.
To sort the Memo list manually, tap and drag a memo to a new location in the list.
Note: To make the list of your memos appear in Palm Desktop software as you manually sorted it on your phone, open Memo in Palm Desktop software, click Sort by, and then select Order on Handheld.
Making records private
In all PIM applications, except Expense, you can make individual records private. Private records remain visible and accessible, however, until you select the Security setting to hide or mask all private records. See the section that begins on page 43 for details.
Hiding and masking private records
You can hide records that you mark as private. When you hide records, they do not appear anywhere in the application. When you mask records, a visual placeholder appears where the record would normally appear. If you define a password, you must enter it to display private records.
Note: As a security measure, masked Contacts records are temporarily hidden when you search for records. So you will not see a placeholder for these records when viewing the results of a Lookup or Find request.
To make a record private:
- Display the entry that you want to make private.
- Tap Details.
- Tap the Private check box to select it.
- Hold Option and press Return to finish.
To hide or mask all private records:
- Make sure the records you want to mask are marked private.
- Press Option and then press Menu to access the Applications Launcher.
- Tap the Security icon
- Tap the Current Privacy pick list.
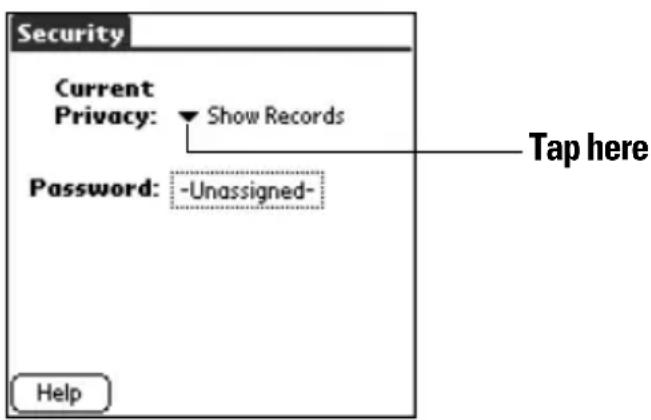
- Tap either Hide Records or Mask Records.
- Hold Option and press Return to confirm that you want to change the security setting.
To display all private records:
-
Press Option and then press Menu to access the Applications Launcher.
-
Tap the Security icon
- Tap the Current Privacy pick list.

- Tap Show Records.
If you do not have a password, private records become visible. If you have a password, the Show Private Records dialog box appears. Enter your password in this dialog box, and then hold Option and press Return to finish.
To display a specific masked record:
- Open the application that contains the record you want to view.
- Tap the shaded bar that masks the record.

To display all private records in a specific application:
- Open the application in which you want to display the records.
- Press Menu .
- Under Options, select Security (/H).
- Tap the Current Privacy pick list.

-
Tap Show Records.
-
Hold Option and press Return to finish.
Attaching notes
In all PIM applications except Memo Pad, you can attach a note to a record. A note can be up to several thousand characters long. For example, for an appointment in Date Book Plus, you can attach a note with directions to the location.
To attach a note to a record:
- Display the entry to which you want to add a note.
- In Contacts view in PhoneBook only: Press Menu, and under Record, select Edit Contact (/E).
- Tap Details.
- Tap Note.
- Enter your note.
- Hold Option and press Return to finish.
A small note icon appears at the right side of any item that has a note.
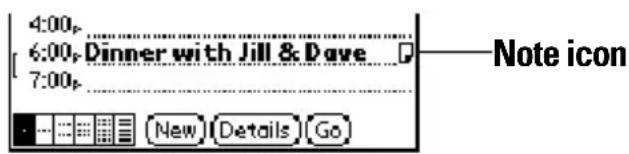
To review or edit a note:
- Tap the Note icon .
To delete a note:
- Tap the Note icon
- Tap Delete.
- Hold Option and press Return for Yes.
Choosing fonts
In all PIM applications except Expense, you can change the font style to make text easier to read. You can choose a different font style for each application.
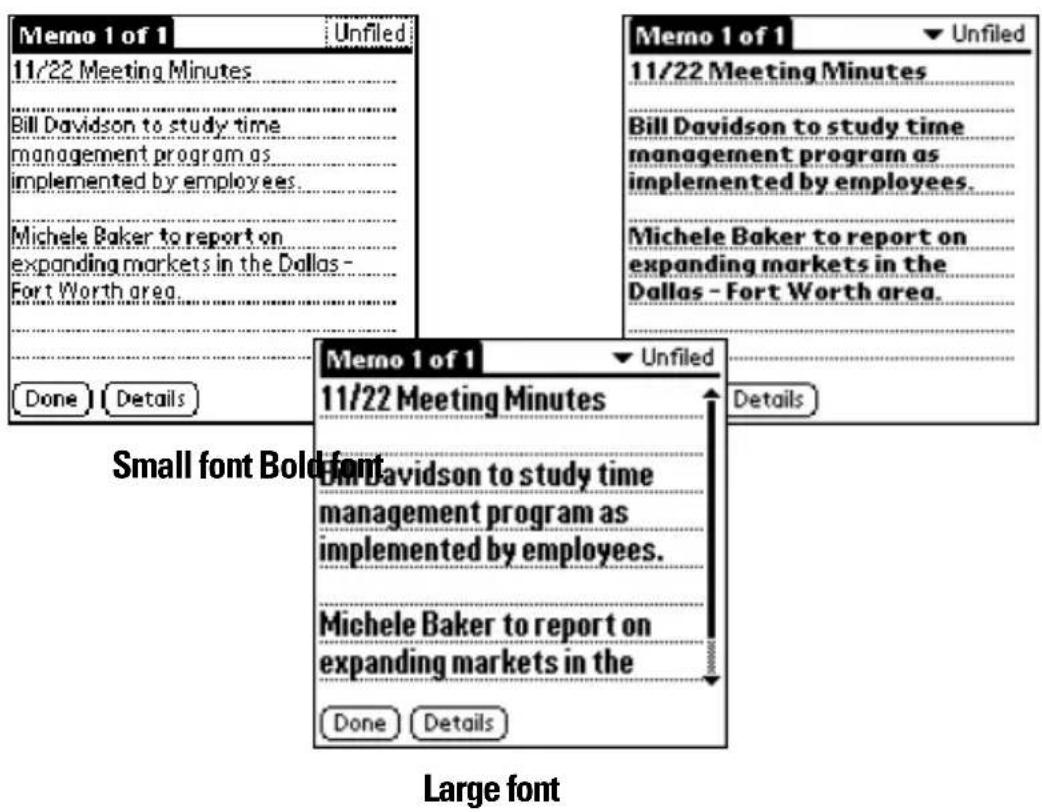
To change the font style:
- Open an application.
- Press Menu .
- Under Options, select Font (/F).
- Use the scroll buttons to select the font style you want to use.

- Hold Option and press Return to finish.
Exchanging and updating data: HotSync operations
The HotSync process automatically synchronizes — that is, exchanges and updates — data between your phone and desktop software. Changes you make on your phone or desktop software appear in both places after a HotSync operation. HotSync technology synchronizes only the needed portions of files, thus reducing synchronization time. You can synchronize your data directly by connecting your phone to your computer with the HotSync cable or by beaming the data from the IR port on your phone to the IR port on your computer or indirectly with a network. See Section 8 for information about performing HotSync operations via the IR port or a network.
Performing a HotSync operation for the first time
The first time you synchronize your data, you need to enter user information on both the phone and Palm Desktop software. After you enter this information and synchronize, the HotSync Manager recognizes your phone and doesn't ask for this information again.
If you are a System Administrator preparing several phones for a group of users, you may want to create a user profile. See the section that begins on page 228 before performing the following steps.
Important: You must use the HotSync cable for your first HotSync operation.
The following steps assume that you have already installed the Palm Desktop software. If you have not installed this software, see page 20 for instructions.
To perform a local HotSync operation:
-
Connect your phone to the HotSync cable. See the section that begins on page 19 for details.
-
If the HotSync Manager is not running, start it: On the Windows desktop, click Start, and then choose Programs. Navigate to the Sprint (or Palm) program group and choose HotSync Manager. Alternatively, you can start the Palm Desktop software which automatically opens the HotSync Manager.
-
Press the HotSync button on the cable.

Important: The first time you perform a HotSync operation, you must enter a user name in the New User dialog box and click OK. Every phone should have a unique name. To prevent loss of a user's records, never try to synchronize more than one phone to the same user name.
- From the Select User dialog box, choose the user name you assigned to your phone.
The HotSync Progress dialog box appears and synchronization begins.
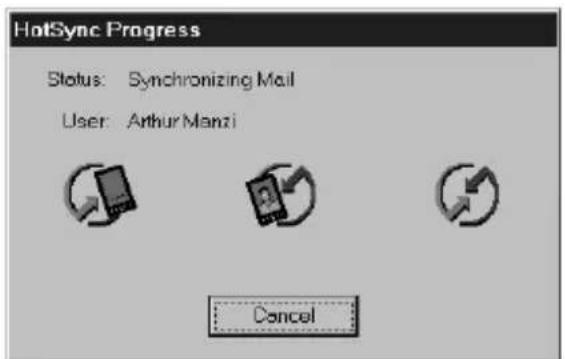
- Wait for a message on your phone indicating that the process is done.
After the HotSync process is complete, you can remove your phone from the cable.
Beaming information
Your phone is equipped with an IR (infrared) port that you can use to beam information to another Palm OS device that's close by and also has an IR port. The IR port is located on the top of your phone, between the power button and the ringer switch, behind the small dark shield.
You can beam the following information between Palm OS devices:
The record currently displayed in Date Book Plus, the Contacts view in PhoneBook, To Do List, or Memo Pad
▶ All records of the category currently displayed in the Contacts view in PhoneBook, To Do List, or Memo Pad
▶ A special record in the Contacts view of PhoneBook that you designate as your personal business card, containing information you want to exchange with business contacts
▶ An application installed in RAM memory
You can also use the infrared port to perform HotSync operations. See the section that begins on page 219 for details.
To select a business card:
- In the Contacts view in PhoneBook, create an entry that contains the information you want on your personal business card.
- Press Menu .
- Under Record, select Select Business Card.
- Hold Option and press Return for Yes.
To beam a record, business card, or category of records:
- Locate the record, business card, or category you want to beam.
- Press Menu .
- Under Record, select one of the following: The Beam command for an individual record (/B) In the Contacts view in PhoneBook only: Beam Business Card (/M) Beam Category (/Y)
- When the Beam Status dialog box appears, point the IR port directly at the IR port of the receiving phone.
Tip: For best results, the path between the two devices must be clear of obstacles. If you have difficulty beaming information, see the troubleshooting tips that begin on page 247.
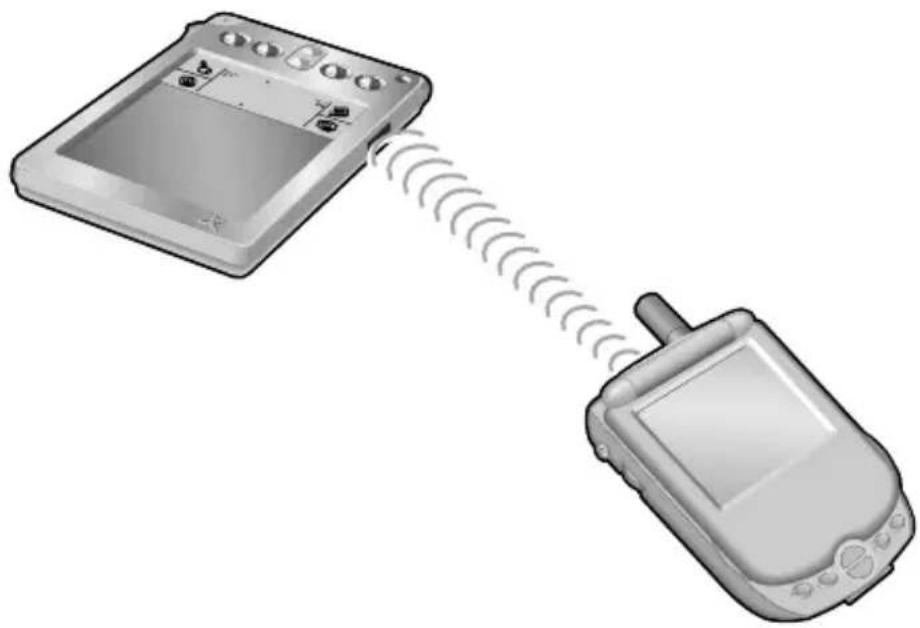
natural_image
Illustration of two electronic devices with a signal transmission line between them (no text or symbols)- Wait for the Beam Status dialog box to indicate that the transfer is complete before you continue working on your phone.
To beam an application:
-
Press Option and then press Menu to access the Applications Launcher.
-
Press Menu .
-
Under App, select Beam (/B).
-
Tap the application you want to transfer.
Note: Some applications are copy-protected and cannot be beamed. These are listed with a lock icon next to them.
-
Tap Beam.
-
When the Beam Status dialog box appears, point the IR port directly at the IR port of the receiving phone.
-
Wait for the Beam Status dialog box to indicate that the transfer is complete before you continue working on your phone.
To receive beamed information:
- Turn on your phone.
- Point the IR port directly at the IR port of the transmitting phone to open the Beam Status dialog box.
- When the Beam dialog box appears, select a category for the entry.
Tip: If you do not select a category the entry is placed in the Unfiled category.
- Hold Option and press Return for Yes.
Tip: When you receive beamed information with the lid closed, you don't need to respond to the Beam dialog box; simply press the top scroll button for Yes, or the bottom scroll button for No.
Chapter 6
Application-Specific Tasks
This chapter is organized by application and gives instructions on how to do tasks that are specific to each of the following
applications:
▶ PhoneBook
▶ Date Book Plus
▶ Blazer ®
▶ Memo Pad
▶ SMS
▶ To Do List
CityTime
▶ Calculator
▶ Expense
PhoneBook
PhoneBook is the application where you store name and address information about people or businesses, and where you place and receive telephone calls.
PhoneBook has five main views. You can place and receive calls from within any view, and you can also receive calls when the screen is off (but wireless mode must be on). The sections that follow explain how to use each of these views.
To change the PhoneBook view, do one of the following:
▶ Repeatedly press PhoneBook to cycle through the views.
▶ Tap the icons in the lower-left corner of the PhoneBook screen.
Note: The Active Call icon and view appear only after you place an outgoing call or receive an incoming call.
When your phone is connected to the PCS Vision data network, the signal strength bars will include gray arrows. When you send and receive data, the arrows turn green and your calls are automatically sent to voicemail.
Speed Dial view

Dial Pad view
View icons

Contacts view

Call History view

Active Call view

At the top of each view, many of the following common icons appear to provide wireless mode status information for your phone:
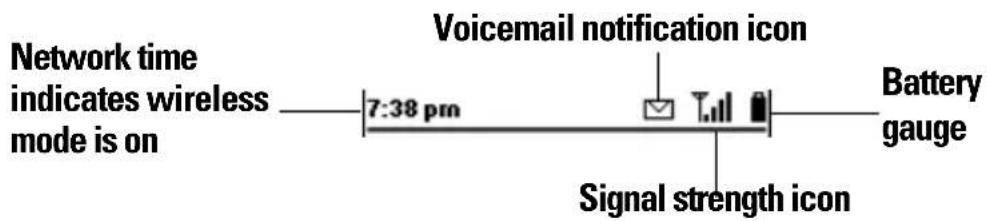
Using the Speed Dial view
You can store up to 50 phone numbers in the Speed Dial list. There are five pages of numbers that hold ten numbers per page.
Tip: You can keep your Speed Dial list organized by storing different types of numbers on different pages. For example, create separate pages for family, business, friends, and emergency numbers.
Defining a Speed Dial button
For each Speed Dial button you can assign a name, phone number, and extra digits such as an extension. By default, the first slot on the first Speed Dial page is reserved for your PCS voicemail number. You cannot delete this entry or change the phone number, but you can move the voicemail entry to another button and add Extra digits.
To define a Speed Dial button:
- Open the lid or press PhoneBook if you are in another application.
- Tap a blank Speed Dial button.

- Enter the Name you want to assign to the button.
- Press the bottom scroll button to move to the Number field and enter the phone number associated with the button.
- Press the bottom scroll button to move to the Extra Digits field and enter an extension number or other additional digits if needed.
Tip: To insert a pause between Extra digits when dialing, enter a comma (,). Each comma represents a one second pause.
- Tap the Dial Extra Digits Automatically check box to automatically dial these digits each time you select this speed dial entry.
Tip: When you enable the Dial Extra Digits Automatically option, your phone inserts a two second pause before dialing the extra digits.
- Tap the Enable unique ringer check box to assign a unique ring tone to incoming calls from the number in this speed dial entry, and then tap the pick list to select the ring tone.
- Hold Option and press Return to finish.
Adding Contacts list entries to your Speed Dial list
To save time while creating your Speed Dial list, you can add entries from your Contacts list.
To add an entry from your Contacts list to your Speed Dial list:
- Tap a blank Speed Dial button.
- Tap Lookup.
Tip: You can also use the Phone Number Lookup feature to locate the entry you want to add. See the section that begins on page 68 for details.

- If your Contacts list is sorted by last name, begin entering the person's last name. If your Contacts list is sorted by first name, begin entering the person's first name.
Tip: You can edit the entry by tapping the number or name in the Edit Entry dialog.
- In the Edit Entry dialog, tap the Dial Extra Digits automatically check box to automatically dial these digits each time you select this speed dial entry.
- Press the bottom scroll button to move to the Enable unique ringer check box, press Space to assign a unique ring tone to incoming calls from the number in this speed dial entry, and then tap the pick list to select the ring tone.
- Hold Option and press Return to finish.
Calling a Speed Dial number
Speed dialing enables you to quickly place a call without entering the number. This is particularly useful for numbers you call often, such as your home or office. You can also call a number in your Speed Dial list using the hands-free headset.
To dial a number from the Speed Dial view:
- Make sure wireless mode is on. See page 10 for details.
- Press PhoneBook .
- Use the scroll buttons to select the Speed Dial button for the number you want to call.
Tip: To jump to the next page of Speed Dial buttons, select the first button on the page and press the top scroll button.
- Press Space to dial.
Tip: You can also tap the Speed Dial button for the number you want to call, or roll the rocker switch to select the button and then press the rocker switch or Return to dial the number.
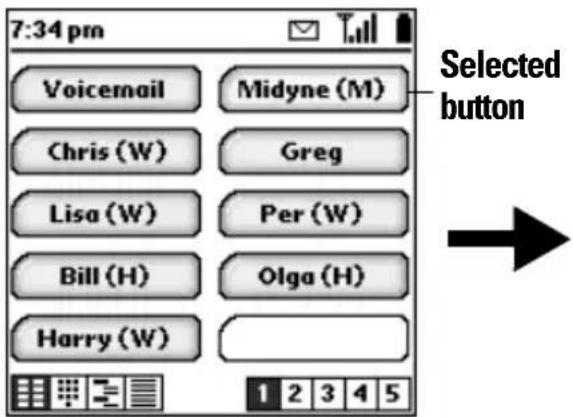


Tip: During a call, if you are prompted to enter a menu selection, use the keyboard, or go to the Dial Pad view and tap the numbers. If you defined Extra Digits, such as an extension, and did not enable automatic dialing of Extra Digits, tap Extra Digits.
- Close the lid to end the call.
Changing a Speed Dial entry
You can change any of the information associated with a Speed Dial button.
Note: You cannot change the phone number for your PCS voicemail service, but you can add Extra Digits to this voicemail entry.
To change a Speed Dial entry:
- From the Speed Dial view, highlight the entry you want to change.
- Press Menu .
- Under Edit, select Edit Speed Dial (/E).
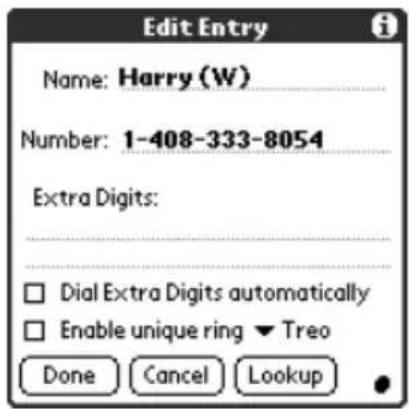
- In the Edit Entry dialog, enter the new information.
- Hold Option and press Return twice to save the new information.
Deleting Speed Dial entries
If your Speed Dial list becomes full, or you no longer need an entry, you can delete it.
Note: You cannot delete the Speed Dial button for your PCS voicemail service.
To delete a Speed Dial entry:
- From the Speed Dial view, highlight the entry you want to delete.
- Press Menu .
- Under Edit, select Edit Speed Dial (/E).
- In the Edit Entry dialog, tap Delete.
- Hold Option and press Return twice to confirm deletion.
Arranging the Speed Dial list
As your Speed Dial list grows, you may want to rearrange the entries. For example you might want to store different types of numbers on different pages, or arrange the list alphabetically.
To arrange the Speed Dial list:
- From the Speed Dial view, press Menu .
- Under Edit, select Edit Speed Dial Pages (/F).
- Drag the entries to the slot where you want them to appear.
Drag an entry to another slot or page

Tip: If the new slot is full, the other entries in the column move down one slot, and overflow from the left column moves to the top of the right column. If you drag an entry to a page icon, the entry moves to the first available slot on that page. You cannot drag an entry to a full page.
- Hold Option and press Return to finish.
Section 6
Using the Dial Pad view
The Dial Pad view provides access to a more traditional phone interface. You can use this view to dial numbers that are not in your Speed Dial or Contacts list.
To dial a number with the Dial Pad:
-
Make sure wireless mode is on. See page 10 for details.
-
Press PhoneBook to access the Dial Pad view.
-
Enter the number you want to dial.
Tip: You don't need to press before entering the number.

Tip: To display the last ten numbers dialed, press the scroll buttons or roll the rocker switch and then press the rocker switch to dial the selected number.
-
Press Space to dial.
-
Close the lid to end the call.
Using the Contacts view
The Contacts view is where you store name and address information about people, businesses, and more.
Creating a Contacts entry
You can create Contacts entries on your phone, or you can use your desktop software to create entries on your computer and then download the entries to your phone with your next HotSync operation.
Many desktop software applications also have data import capabilities that enable you to load database files into your Contacts list on your phone. See the section that begins on page 32 and the online Help for your desktop software for more information.
To create a new Contacts entry:
- Press PhoneBook repeatedly to access the Contacts view .

-
Press Menu .
-
Under Record, select New Contact (/N).
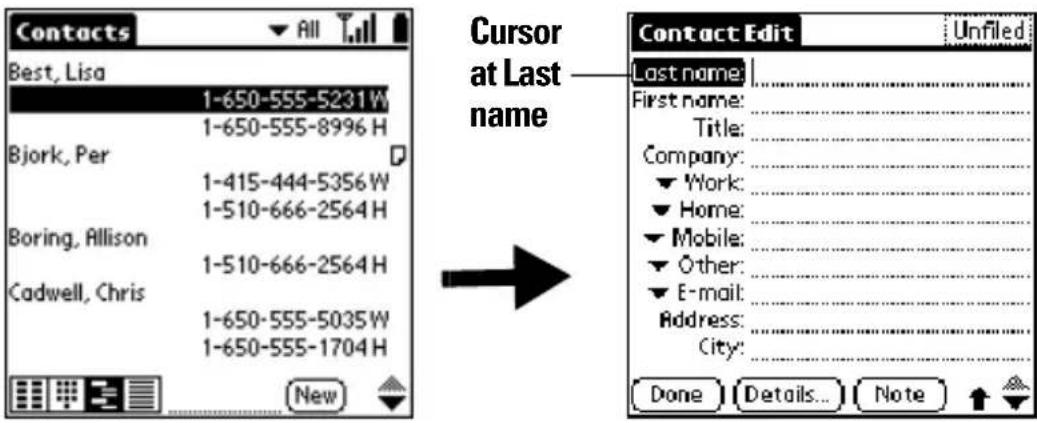
- Enter the last name of the person you want to add to your Contacts list.
- Press the bottom scroll button to move to the First Name field and then enter the person's first name.
- Press the bottom scroll button to move to other fields and then enter the other information that you want to include in this entry.
Tip: Hold Shift and use the scroll buttons to scroll the page up or down.
- After you finish entering information, hold Option and press Return to finish.

Tip: To create an entry that always appears at the top of the Contacts list, begin the Last name or Company field with a symbol, as in *If Found Call*. This entry can contain contact information in case you lose your phone.
Duplicating a Contacts entry
You can duplicate existing entries, which can be helpful when you want to enter multiple people from a single organization. When you duplicate an entry, the word Copy appears next to the name in the First Name field.
To duplicate an entry:
- From the Contacts view, select the name you want to duplicate.
- Press Menu .
- Under Record, and select Duplicate Contact (/T).
- Edit the entry as necessary.
- Hold Option and press Return to finish.
Calling a number in your Contacts list
You can dial any number that you've entered in your Contacts list.
To dial a number in your Contacts list:
- Make sure wireless mode is on. See page 10 for details.
- From the Contacts view, use the Instant Lookup feature to select the number you want to call. See the section that begins on page 66 for details.
- Press Space to dial.
Tip: You can also roll the rocker switch to scroll to the number you want to call, and then press the rocker switch to dial the number.
If you need to prepend digits, such as *67 to block caller ID or *70 to disable call waiting, tap the Contact entry to access the Dial dialog box, enter the digits, and then hold Option and press Return to dial.

- Close the lid to end the call.
Selecting types of phone numbers
You can select the types of phone numbers or e-mail addresses that you associate with a Contacts entry. Any changes you make apply only to the current entry.
To select other types of phone numbers in an entry:
- Select the contact name for the entry that you want to change.
- Press Space to open the entry.
- Press Menu .
- Under Record, select Edit Contact (/E).
- Tap the pick list next to the label you want to change.


- Select a new label.
- Hold Option and press Return to finish.
Changing Contact entry details
The Contact Entry Details dialog box provides a variety of options that you can associate with an entry.
To open the Contact Entry Details dialog box:
- Select the name for the entry whose details you want to change.
- Press Space to open the entry.
- Press Menu .
- Under Record, select Edit Contact (/E).
- Press Menu .
- Under Record, select Details (/E).

- Select any of the following settings:
Category
Assign the entry to a category.
Private
Hide this entry when Security is turned on.
- Hold Option and press Return to finish.
Using the Call History view
The Call History view provides quick access to the previous 1,000 incoming and outgoing calls.
If you miss a call when your PCS Treo 300 is on and you remain in a coverage area, your missed calls appear in the Call History list and you receive a missed call alert message. When your phone is off or you travel outside a coverage area, your missed calls are forwarded to voicemail and they do not appear in the Call History list. Similarly, when your phone is off or you travel outside a coverage area, the PCS network stores your text messages until you turn on your phone or return to a coverage area.
Reviewing Call History
Each item in the Call History view appears with an icon next to it indicating whether it is a Missed call, an incoming call, or an outgoing call. You can display all your calls or one category at a time.
To review Call History:
- Press PhoneBook repeatedly to access the Call History view

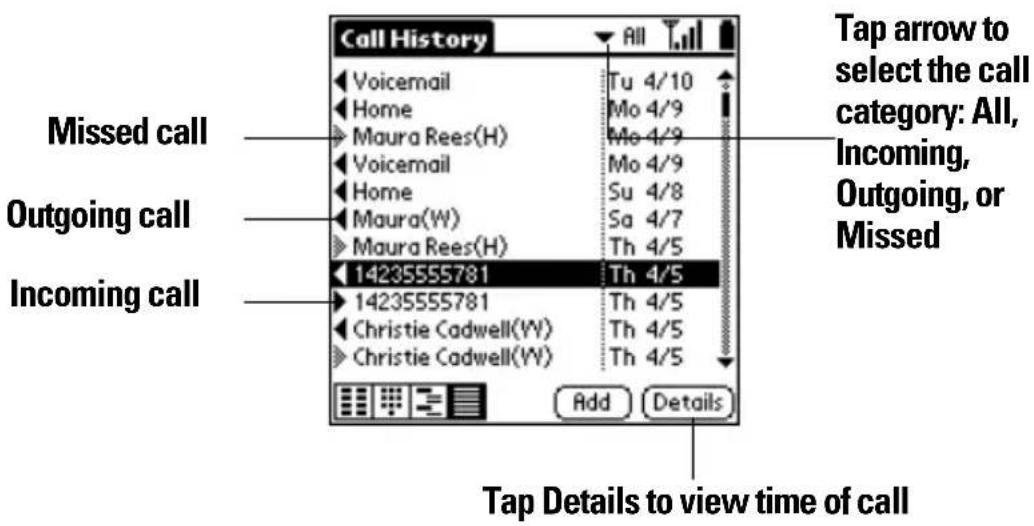
- Tap the pick list at the top of the screen to display a specific type of call: Missed, Incoming, or Outgoing.
Tip: To temporarily store a number in your phone's memory, press Menu ✅, under Record, select Details (/E), tap Copy Phone #, and then hold Option and press Return to finish. You can now Paste this number into any application on your phone.
Calling a number in your Call History list
In addition to viewing a list of your incoming, outgoing, and missed calls, you can use the Call History view to dial any number that appears on this view.
To dial a number from the Call History view:
- Make sure wireless mode is on. See page 10 for details.
- Use the scroll buttons to select the number you want to call.
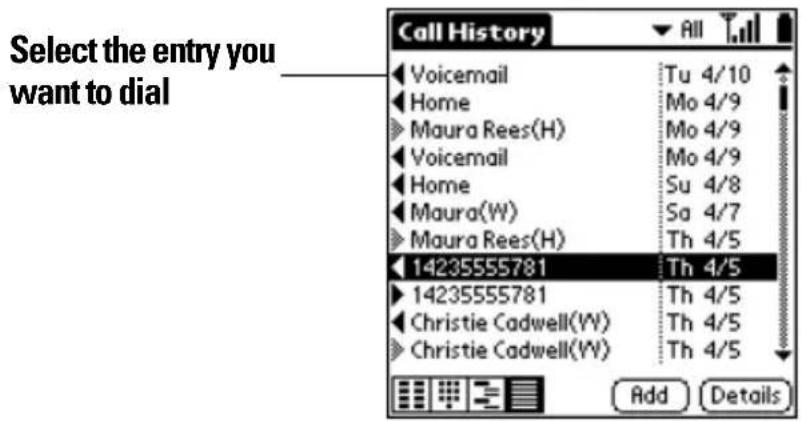
- Press Space to dial.
Tip: If you need to prepend digits, such as an area code, *67 to block caller ID, or *70 to disable call waiting, tap the Call History entry to access the Dial dialog box, enter the digits, and then hold Option and press Return to dial.
Adding a Call History entry to your Contacts list
If you receive a call from someone with caller ID information who is not in your Contacts list, you can use the Call History view to add the caller to your Contacts list.
To add a Call History entry to your Contacts list:
- Use the scroll buttons to select the number you want to add.

- Press Menu .
- Under Record, select Add (/N).
- In the Contact Edit screen, enter any additional information.
- Hold Option and press Return to finish.
Tip: To add a number to your Speed Dial list, press Menu, under Record, select Details (/E), tap Copy Phone #, go to the Speed Dial view, open the Edit Speed Dial screen for the entry where you want to add the number, scroll to the Number field, and then press Menu, under Edit, select Paste (/P) to insert the number.
Purging Call History
Your PCS Treo 300 continues accumulating Call History information for up to 1,000 calls until you purge the Call History list. To conserve storage space, we recommend that you purge this list periodically.
Note: Using the Purge function permanently removes the calls from your phone. You cannot undo this process to restore the information.
To purge entries in Call History view:
- From the Call History view, press Menu .

- Under Record, select Purge.
Tip: To delete a specific item, select the item from the Call History view and select Delete Item from the Record menu instead of Purge.
- Select the purge option you want to use.
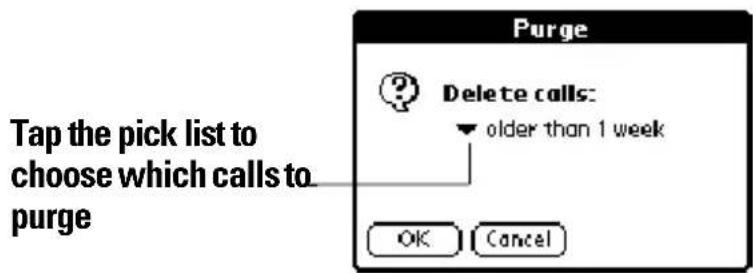
- Hold Option and press Return to finish.
Using the Active Call view
After you dial and establish a connection, or receive an incoming call, the Active Call view icon appears in the lower left corner of the PhoneBook screen, and the Active Call view appears:
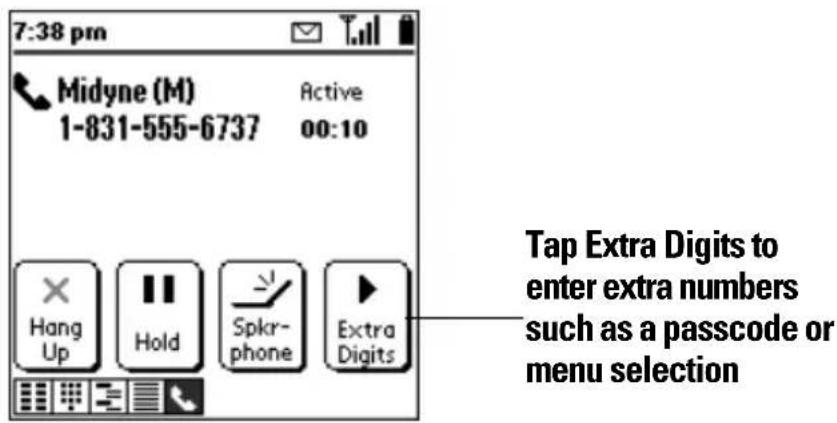
Note: If you dialed an entry that includes predefined Extra Digits and you did not enable automatic dialing of Extra Digits, the Mute button changes to an Extra Digits button. Tap Extra Digits to dial the additional predefined numbers, such as an extension.
If you did not define Extra Digits and need to enter additional numbers, use the keyboard to enter the numbers.
Receiving Calls
Whenever your phone's wireless mode is on and you are within a coverage area, you can receive incoming calls. An incoming call turns on your phone's screen if it is off and displays the following alert:
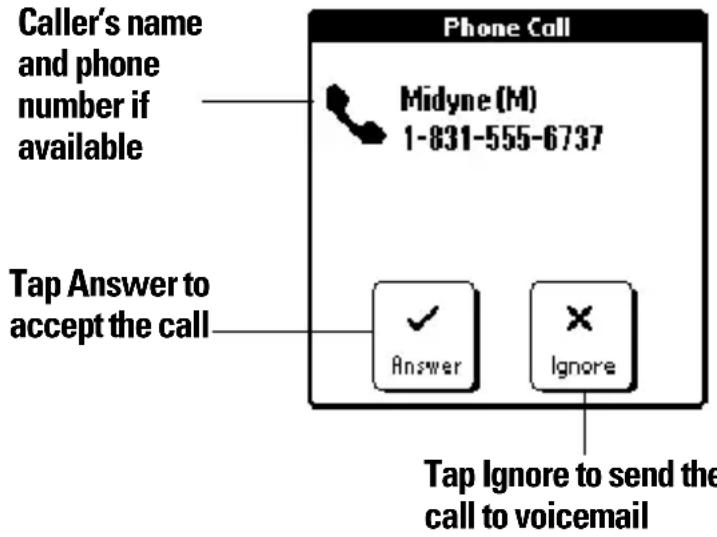
To answer a call while it is ringing, do any of the following:
▶ Open the lid if it is closed.
Tap Answer if the lid is open.
▶ Press the button on the headset (if it is attached).
To ignore a call and send it directly to voicemail, do any of the following:
▶ Close the lid if it is open.
▶ Press the top scroll button.
Note: It takes approximately 30 seconds to send the call to voicemail. During this interval you can receive another incoming call, but you cannot initiate another call.
To silence the ring, do any of the following:
▶ Press any application button or the power button on your phone.
▶ Slide the ringer switch to the silent position .
Note: Placing the ringer switch in the silent position turns off all system sounds, including alarms. When you silence the ringer, Date Book Plus alarms vibrate.
To end a call, do any of the following:
▶ Close the lid (if the headset is not attached).
▶ Press Backspace .
▶ Press the button on the headset (if it is attached).
▶ Tap Hang Up.
Note: Pressing the power button while a call is active puts your phone into sleep mode. It does not end the call.
Adjusting call volume
You can adjust the volume level from the Active Call view when a call is in progress.
To adjust the call volume, do one of the following:
▶ Roll the rocker switch up, or press the top scroll button, to increase the volume.
▶ Roll the rocker switch down, or press the bottom scroll button, to decrease the volume.
Muting the microphone
You can mute the microphone from the Active Call view when a call is in progress. When mute is enabled, the person on the other end of the phone call cannot hear you. This is particularly useful if you need to cough, sneeze, or say something you don't want the other person to hear.
To toggle mute on and off, do one of the following:
▶ Press Return .
Tap Mute.

Using the speakerphone
The speakerphone button enables you to view your phone screen and use other applications while you're talking on the phone.
Note: The speakerphone feature is optimized for one or two people that are reasonably close to the phone. It is not designed for a conference room or large group. This feature is not available when a headset is attached to your phone.
To use the speakerphone:
- Place a call.
- From the Active Call screen, tap Spkrphone.

- Tap Cancel Spkr to turn off the speakerphone.
Tip: You can also press Space to toggle the speakerphone on and off.
Placing calls on hold
You can place an active call on hold while you use other applications on your phone or complete another task.
To place a call on hold:
- Place or answer a call.

flowchart
graph LR
    A["7:38 pm Midyne (M) 1-831-555-6737"] --> B["Call status indicator"]
    B --> C["7:38 pm Midyne (M) 1-831-555-6737"]
    C --> D["On Hold 04:38"]
    C --> E["Off Hold 2nd Call"]
    F["Tap Hold"] --> G["Hang Up"]
    F --> H["Hold"]
    F --> I["Spkr-phone"]
    F --> J["Mute"]
    K["Tap Off Hold"] --> L["Off Hold"]
    K --> M["Call"]
- Tap Hold to place the call on hold.
- Tap Off Hold to return to the call.
Handling Multiple Calls
You can use the Active Call view to handle a variety of situations that involve multiple calls. During an active call, you can receive or place another call, switch between two active calls, and create a 3-way conference call. For example, when you're talking to a friend, you can place another call to a restaurant to make dinner reservations, and return to your friend to confirm the time and place. You can also facilitate 3-way conference calls when you're on the go, and use call waiting to receive an important incoming call while you're already on the phone.
To respond to call waiting, do one of the following:
Tap Hold & Answer to place the first call on hold and answer the second call.
Tap Ignore to send the second call to voicemail.
▶ Press the button on the headset (if it is attached) to place the first call on hold and to answer the second call.
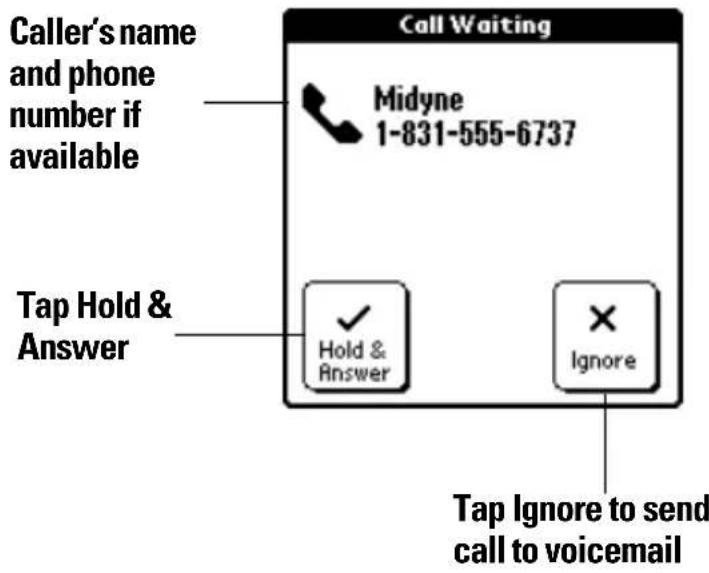
Tip: You can switch between two active calls by tapping Swap or by pressing the button on the headset (if it is attached). The Swap button appears only when the second call is an incoming call.
To dial another number while a call is in progress:
- Place the first call on hold.
- From the Active Call view, repeatedly press PhoneBook to access the view you want to use.
Tip: You can also tap the Speed Dial, Dial Pad, Contacts, or Call History view icons.
- Dial the number.
- When the confirmation message appears, hold Option and press Return for Yes.
To use 3-way calling:
- Place two calls.
Note: You cannot initiate a 3-way call if the second call is an incoming call.
- Tap 3-way Call, or press the button on the headset (if it is attached), to join the two calls.

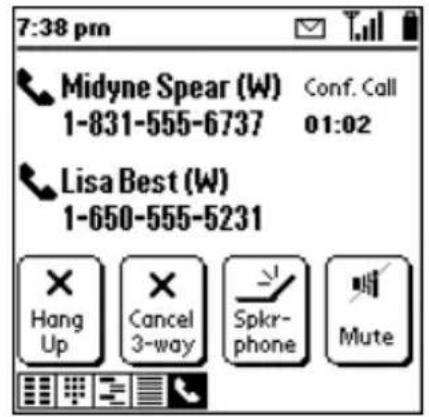
- Tap Cancel 3-way to end the second call and to return to the first call you placed, or tap Hang Up to end both calls.
Note: If the headset is attached, you can also press the button on the headset to end the second call and return to the first call.
Checking voicemail
There are several ways to access your voicemail mailbox.
To check voicemail:
- Make sure wireless mode is on. See page 10 for details.
- Do one of the following:
■ From the Dial Pad view, tap and hold the 1 button for two seconds.
■ From the Dial Pad or Speed Dial view, press and hold the 1 key for two seconds.
■ From the Speed Dial view, tap the Voicemail button.
■ From the Dial Pad or Speed Dial view, tap the voicemail icon in the title bar.

- Close the lid to end the call.
Forwarding calls
If you need to turn off the wireless mode or know you will be traveling outside a coverage area, you can forward your calls to another number. Keep in mind that airtime charges still apply to your forwarded calls.
Note: Because call forwarding information is stored by the network, it's a good idea to check the current network settings both before and after you change the call forwarding option.
To forward calls to another number:
- From the Speed Dial, Dial Pad, or Call History view, press Menu

-
Under Options, select Call Preferences (/A).
-
Select the call forwarding option you want to use.

Tip: You can define multiple forwarding numbers. Select Edit numbers from the list to add, change, or delete a 10-digit forwarding number.
-
Hold Option and press Return to finish.
-
Listen for a confirmation tone. If you do not hear a tone, try calling yourself to see if the call forwards to the correct number.
Other ways to make a call
In addition to using the Speed Dial, Contacts, Dial Pad, and Call History views, you can also place calls in the following ways:
▶ Redialing the last number
▶ Returning a missed call
▶ Dialing an emergency number
Section 6
104 Application-Specific Tasks
Redialing the last number
You can redial the last number you called.
To redial the last number, do one of the following:
▶ Press and hold PhoneBook for at least one second.
▶ From PhoneBook, press and hold the rocker switch.
Returning a missed call
When your PCS Treo 300 is on and you remain in a coverage area, any calls you miss appear in the Call History list and you receive a missed call alert message. When your phone is off or you travel outside a coverage area, your calls are forwarded to voicemail and they do not appear in the Call History list.
▶ If you miss multiple calls, a message appears indicating the number of calls you missed. Tap View List to jump to the Call History view. See page 95 for instructions on calling a number in your Call History list.
▶ If you miss a single call, the following screen appears:

Note: If the caller's phone number is not available, the Call Back button does not appear on the Missed Call screen.
Calling an emergency number
If your phone is locked, you don't need to unlock your phone to call an emergency number. Simply dial 911 from the Dial Pad view.
To call an emergency number:
- Make sure wireless mode is on. See page 10 for details.
-
Press PhoneBook .
-
From the Unlock Wireless Mode screen or Unlock Communicator screen, tap Make Emergency Call to access the Dial Pad view.
- Dial 911, *2 (Sprint Customer Care), or any of the three emergency numbers you defined in Security Preferences. See page 111 for information on entering emergency numbers.
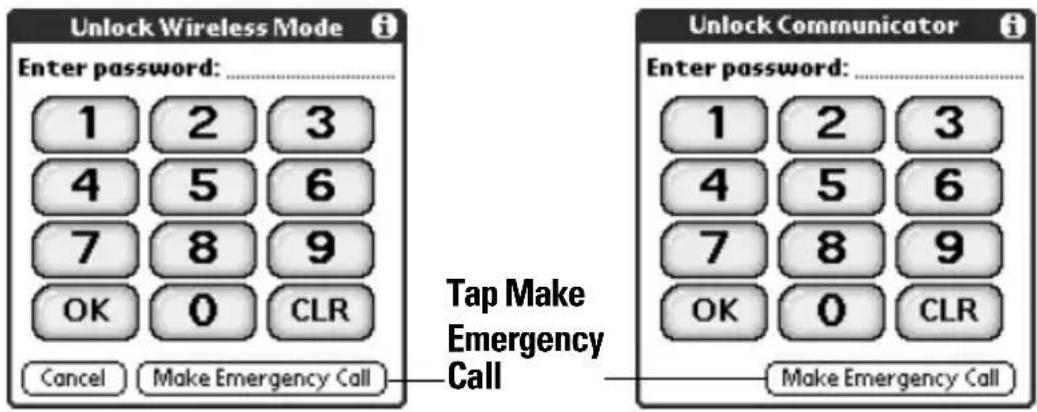
- When the E911 Callback Mode dialog appears, tap Exit Mode to return to your phone to normal operations, or tap Call Back 911 to redial the 911 operator.
PhoneBook menus
PhoneBook menus are shown here for your reference, and PhoneBook features that are not explained elsewhere in this guide are described here. See page 28 for information about choosing menu commands. The Record and Options menus differ depending on which view is active.
Record menus
| Record Edit Options | |
| New Contact | √N |
| Open Contact | √O |
| Duplicate Contact | √T |
| Beam Contact | √B |
| Beam Category | √Y |
| Beam Business Card | √M |
Contacts list view
| Record Edit Options | |
| Details... | √E |
| Delete Contact... | √D |
| Duplicate Contact | √T |
| Beam Contact | √B |
| Attach Note | √A |
| Delete Note... | √O |
| Select Business Card... | |
| Beam Business Card | √M |
Contacts edit view
| Record Options | |
| Edit Contact... | heckmark E |
| New Contact... | heckmark N |
| Delete Contact... | heckmark D |
| Duplicate Contact | heckmark T |
| Beam Contact | heckmark B |
| Attach Note | heckmark A |
| Delete Note... | heckmark O |
| Select Business Card... | |
| Beam Business Card | heckmark M |
Contacts record view
Options menus
| Record | Options |
| Dial | √1 |
| Details | √T |
| Delete Item | √D |
| Purge... |
Call History view
| Edit Options | |
| Ringer Preferences... | √R |
| Call Preferences... | √A |
| Security Preferences... | √Y |
| Phone Info | √I |
| About PhoneBook | |
Dial Pad & Speed Dial views
| Record Edit Options | |
| Font... | √F |
| Preferences... | √R |
| Dial Preferences... | √Z |
| Rename Custom Fields... | |
| Security... | √H |
| About PhoneBook | |
Contacts view
| Record | Options |
| Font... | √F |
| Ringer Preferences... | √R |
| Call Preferences... | √A |
| Security Preferences... | √Y |
| Phone Info | √I |
| About PhoneBook |
Call History view
| Record Edit Options | |
| Font... √FRename Custom Fields...About PhoneBook. | |
Contacts record & edit views
Preferences

Remember last category. Determines how the Contacts list appears when you return to it from another application. If you select this check box, the Contacts list shows the last category you selected. If you clear it, the Contacts list displays the All category.
List By. Determines how the Contact entries are sorted in the Contacts view, and also controls the PhoneBook Instant Lookup feature.
Call Preferences
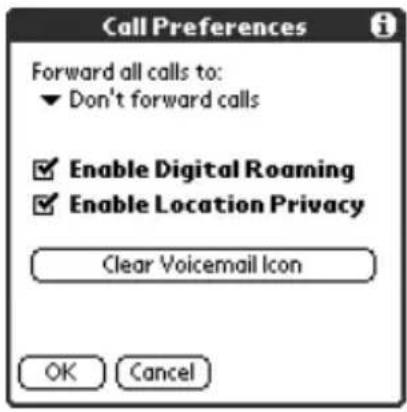

▶ Enable Digital Roaming. Enables you to access wireless service from any 1900Mhz network when you are outside a PCS coverage area. If you place calls while roaming outside a PCS coverage area, you will incur roaming charges (if applicable to your service plan).
▶ Enable Location Privacy. Prevents applications on your phone from using information about your location. For instance, a wireless directory application might use your location information to provide you with a listing for a store that is closest to you without requiring you to enter your city, state, or zip code. For safety reasons, 911 calls always include location information even if you enable this privacy option.
Clear Voicemail Icon. Enables you to clear the voicemail icon when it persists after you've checked all your messages. Before using this option, first make sure that you've listened to all your voicemail messages, next try turning wireless mode on and off, if the icon still appears, then use this option.
Dial Preferences
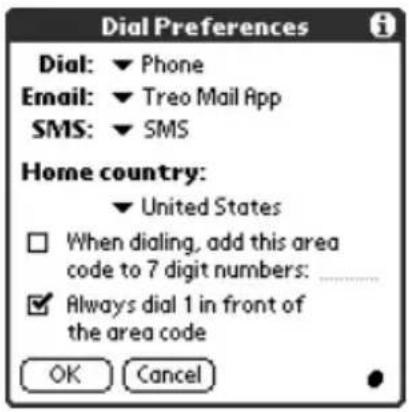
Dial, Email, SMS. Provides other applications access to PhoneBook's dialing functions. In most cases you do not need to change these settings.
Home country. Determines if North American hyphenation conventions are automatically applied to phone numbers, and whether the following two options are available:
When dialing, add this area code to 7 digit numbers. Inserts the area code you specify in front of 7-digit numbers before dialing.
■ Always dial 1 in front of the area code. Inserts a 1 in front of 10-digit numbers before dialing. If you select a country other than United States or Canada, numbers are formatted exactly as they appear in the Contact record.
Rename Custom Fields

These custom fields appear at the end of the Contact Edit screen. Rename them to identify the kind of information you enter in them. The names you give the custom fields appear in all Contacts records.
Security Prefs
Enables you to lock your phone and define emergency numbers.

Wireless Mode Lock: Locks your phone and requires you to enter a password to make outgoing calls (other than emergency numbers). The default password is the last four digits of your phone number. You can still receive incoming calls and view your data in handheld mode.
On Power Off. Locks wireless mode each time you turn off your phone.
▶ Immediately. Locks wireless mode upon exiting this dialog box.
Communicator Lock: Locks your phone upon exiting this dialog box. When Communicator Lock is on, you must enter a password to view your data in handheld mode and to make outgoing calls (other than emergency numbers). You can still receive incoming calls. The default password is the last four digits of your phone number.
Important: If you use Communicator Lock to lock your phone, you must enter the exact password to reactivate your phone. If you forget the password, you need to perform a hard reset to resume using your phone. Performing a hard reset deletes all the records in your phone; however, you can restore all previously synchronized data at the next HotSync operation. See page 235 for details. Note that performing a hard reset provides access only to handheld mode. To resume using wireless mode, you must contact Sprint to obtain the unlock code.
Custom Emergency Numbers. Enables you to define three numbers that you can dial manually when your phone is locked.
Change Password. Enables you to change the default password.
Phone Info
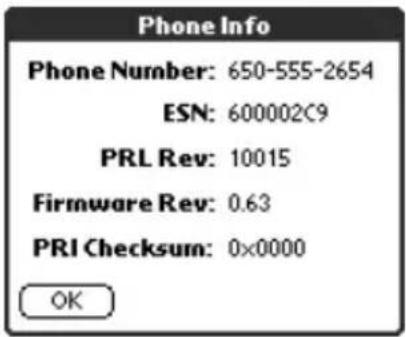
▶ Phone Number: Displays your phone number.
ESN: Displays your phone's Electronic Serial Number which uniquely identifies your phone to the PCS network.
PRL: Displays the version number of the Preferred Roaming List.
▶ Firmware Rev: Displays the version number for the mobile communication software on your phone.
▶ PRI Checksum: Displays information intended for Sprint support.
About PhoneBook Shows version information for PhoneBook.
Date Book Plus
When you open Date Book Plus, the screen shows the current date and a list of times for a normal business day.
Working in Day View
Day View shows an hourly calendar for a particular date. If there are events scheduled on that date, they appear in the appropriate time slot.
To view or select a date, do one of the following:
- Use the scroll buttons or roll the rocker switch to move forward or backward one day at a time.
Note: By default, Date Book Plus scrolls through all the events in the selected day before moving to the next day. You can change this option in the Day Options dialog box. See page 133 for details.
- Press Shift and then a scroll button to scroll by weeks.
- Tap the day of the week that you want in the date bar at the top of the screen. If necessary, tap the Previous week or Next week scroll arrows to move to another week.

- Press Menu and under Options select Go to Day (/O). To scroll by days, press a scroll button. To scroll by months, hold Shift and press a scroll button. To scroll by years hold Option and press a scroll button. After you scroll to the date, press Space to select it. You can also type the number of the day or tap the screen to select a date from the calendar.
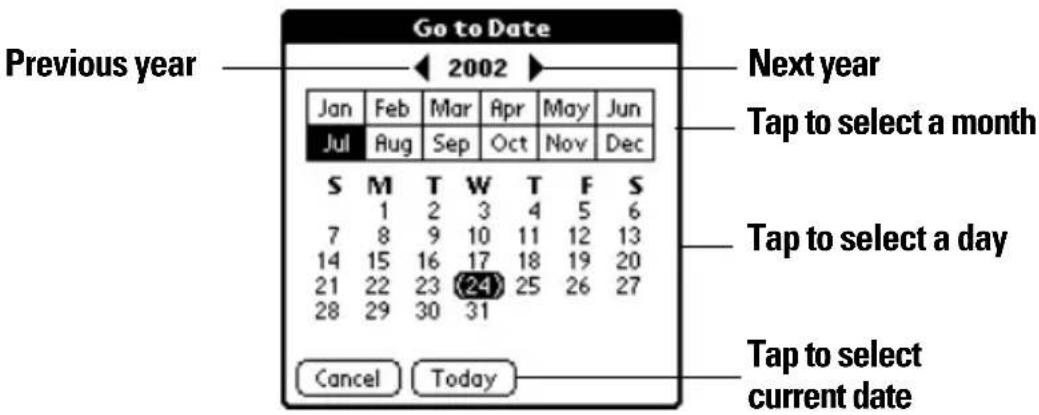
Scheduling an event
A record in Date Book Plus is called an “event.” An event can be any kind of activity that you associate with a day. You can enter a new event on any of the available time lines. When you schedule an event, its description appears on the time line, and its duration is automatically set to one hour. You can easily change the start time and duration for any event.
Note: It's possible to schedule events that overlap, but Date Book Plus makes it easy to find such conflicts. See page 126 for details.
You can also schedule events that occur on a particular date but have no specific start or end times, such as birthdays, holidays, and anniversaries. These are referred to as “untimed events.” Untimed events appear at the top of the list of times, marked with a diamond. You can have more than one untimed event on a particular date.
You can also schedule a repeating event, such as a weekly meeting, and continuous events, such as a three-day conference or a vacation.
To schedule an event:
- Select the date on which you want to schedule the event as described in the previous section.
- Type the time the event begins to open the Set Time dialog box. For example, type 4 for 4:00.

- If the event is longer than an hour, press the bottom scroll button and type the end time.
- Hold Option and press Return to finish.
- Enter a description of the event. You can enter up to 255 characters.

- Tap a blank area of the screen to deselect the event. A vertical line appears next to the time, indicating the duration of the event.
To schedule an untimed event:
- Select the date on which you want to schedule the event. See page 113 for details.
- Press Menu .
- Under Record, select New Appointment (/N).
- Hold Option and press Return so that no start or end times are defined for the new event.

Tip: You can also create a new untimed event by making sure no event is selected and then entering a description.
- Enter a description of the event.

- Tap a blank area on the screen to deselect the untimed event.
Note: If you create an event and decide later that there is no particular start or end time, you can easily change it to an untimed event. Tap the time of the event in the Date Book Plus screen, tap No Time, and then hold Option and press Return to finish.
Rescheduling an event
You can easily make changes to your schedule with your phone.
To reschedule an event:
- Tap the event you want to reschedule.
- Tap Details.
- To change the time, tap the Time box and select a new time.
- To change the date, tap the Date box and select a new date.
- Hold Option and press Return to finish.
Setting an alarm for an event
The Alarm setting enables you to set an audible alarm for events in Date Book Plus. You can set an alarm to sound minutes, hours, or days before an event. The default Alarm setting is 5 minutes before the time of the event, but you can change this to any number of minutes, hours, or days.
When you set an alarm, this icon appears to the far right of the event with the alarm. When the alarm tone sounds, a reminder message also appears onscreen.
Note: Make sure the ringer is on. Silencing the ringer turns off all system sounds, including alarms. When you silence the ringer, Date Book Plus alarms vibrate.
To set an alarm for an event:
- Tap the event to which you want to assign an alarm.
- Tap Details.
- Tap the Alarm check box to select it.
- Tap the pick list to select Minutes, Hours, or Days.
- Select the 5 and enter any number from 0 to 99 (inclusive) as the number of time units.

- Hold Option and press Return to finish.
Alarm for untimed events: You can set a silent alarm for an untimed event. In this case, the alarm triggers at the specified period of minutes, hours, or days before midnight (beginning) of the day of the untimed event. No audible alarm sounds for an untimed event; instead, the reminder message appears onscreen.
For example, you set an alarm for an untimed event that occurs on February 4th. If the alarm is set for 5 minutes, the reminder message appears at 11:55 PM on the night of February 3rd. The reminder remains onscreen until you
turn on your phone and hold Option and press Return to dismiss it.
To dismiss the alarm reminder, do one of the following:
Tap 5 min, 10 min, 30 min, or Other to reset the alarm to notify you in a specified period of time.
▶ Press the top scroll button.

Scheduling repeating or continuous events
The Repeat function lets you schedule events that recur at regular intervals or extend over a period of consecutive days. A birthday is a good example of an event that repeats annually. Another example is a weekly guitar lesson that falls on the same day of the week and the same time of day.
Typically, a continuous event is an untimed event such as a business trip or a vacation that continues for several days but doesn't occur at a particular time of day.
To schedule a repeating or continuous event:
- Tap the event.
- Tap Details.
- Tap the Repeat box to open the Change Repeat dialog box.


- Tap Day, Week, Month, or Year to set how often event repeats.
For a continuous event, tap Day.
- Enter a number that corresponds to how often you want the event to repeat on the Every line.
For example, if you select Month and enter the number 2, the event repeats every other month.
-
To specify an end date for the repeating or continuous event, tap the End on pick list and tap Choose Date. Use the date picker to select an end date.
-
Hold Option and press Return to finish.
After you schedule a repeating or continuous event, this icon appears to the far right of the event.
Changing and deleting repeating or continuous events
If you change or delete a repeating or continuous event you can apply the action to only the current event, to all instances of the event, or to the current event and instances that follow.
To change or delete repeating events:
- Select the record you want to change or delete.
- Tap Details.
- Enter the change.
- Hold Option and press Return to accept the change, or tap Delete.
- Tap one of the following:

Current. Changes or deletes only the current instance of the repeating event.
All. Changes or deletes all past, current, and future occurrences of this event.
Following. Changes or deletes the current event and all future occurrences of this event.
Considerations for repeating or continuous events
Keep the following points in mind:
If you change the start date of a repeating event, your phone calculates the number of days you moved the event. Your phone then automatically changes the end date to maintain the duration of the repeating event.
▶ If you change the repeat interval (e.g., daily to weekly) of a repeating event, past occurrences (prior to the day on which you change the setting) are not changed, and your phone creates a new repeating event.
If you change the date of an occurrence of a repeating event (e.g., from January 14th to January 15th) and apply the change to All occurrences, the new date becomes the start date of the repeating event. Your phone adjusts the end date to maintain the duration of the event. If you apply the change to Current or Future occurrences, past occurrences (prior to the day on which you change the setting) are not changed.
If you change other repeat settings (e.g., time, alarm, private) of a repeating event and apply the change to Future occurrences, your phone creates a new event. The start date of this new event is the day on which the setting is changed. Past occurrences (prior to the day of the change) are not changed.
▶ If you apply a change to a single occurrence of a repeating event (e.g., time), that occurrence no longer shows the Repeat icon
Changing the Date Book Plus view
In addition to displaying the calendar for a specific day, you can also display a whole week in graph or text format, a month, a year, or a list of your appointments, as well as the current time.
To cycle through Day, Week, Week with Text, Month, Year, and List views:
▶ Repeatedly press Date Book Plus to display the next view.
To display the current time:
- Tap and hold the stylus on the date in the date bar to display the current time.
Tap and hold the date Current time displays

- Drag the stylus below the date bar and then lift it.
Note: If you lift the stylus while it is still on the date bar, the menu bar appears.
Working in Week View
Week View shows the calendar of your events for an entire week. This view lets you quickly review your appointments and available time slots. In addition, the graphical display helps you spot overlaps and conflicts in your schedule.


Tips for using Week View
Keep the following points in mind:
▶ Tap an event to show details for the event.
▶ Use the scroll buttons or rocker switch to move forward or backward a week at a time.
▶ To reschedule an event, tap and drag the event to a different time or day.
▶ Tap a blank time on any day to move to that day and have the time selected for a new event.
▶ Tap any day or date that appears at the top of the Week View to move directly to that day without selecting an event.
The Week View shows the time span defined by the Start Time and End Time in the Date Book Plus Preferences settings. If you have an event before or after this time span, a bar appears at the top or bottom of that day's column. Use the onscreen scroll arrows to scroll to the event.
Working in Week View with Text
The Week View with Text shows an entire week with a description of each scheduled event. This view can display one or two weeks at a time and can include To Do items that are due on the dates shown.
![Toggle between 1 and 2 weeks Scroll to more events Jul 02 10:00p Staff meeti 12:00p Lunch with L Invite John to dinner M 22 Th25 5:00p Conference call with Japan 7:00p Yoga class 10:00p Marketing 12:00p Lunch with C 2:00p Review draft 6:00p Pick u Fr 26 Tu23 1:00p Planning team meeting [1]Buy wedding gift Su27 Box indicates To Do item W 24 Su28 Week View with Text icon](/content/2026/05/998374/images/1c337a934b48e8cce18134bff395268d27ed091735240870a036da854bed806e.jpg)
Tips for using Week View with Text
Keep the following points in mind:
▶ Tap a day to display that day in the Day View.
▶ Use the scroll buttons or rocker switch to move between weeks. You can also tap the scroll arrows in the upper-right corner to move forward or backward a week.
Press Menu 📋, and under Options, select Go to Week (/O). Tap a number to select a different week.
Tap Go to open the date selector use the scroll buttons to select a week and then hold Option and press Return to finish.
▶ Tap the number of weeks to toggle between a one week view and a two week view.
Working in Month View
The Month View screen shows which days have events scheduled. Dots and lines in the Month View indicate events, repeating events, and untimed events.

You can control the dots and lines that appear in the Month View. See page 131 for details.
Tips for using Month View
Keep the following points in mind:
▶ Tap a day in the Month View to display that day in the Day View.
▶ Use the scroll buttons or rocker switch to move between months. You can also tap the scroll arrows in the upper-right corner to move forward or backward a month.
Press Menu 📋, and under Options, select Go to Month (/O) to open the date selector and select a different month.
Working in Year View
The Year View shows an overview of your calendar for an entire year.

Tips for using Year View
Keep the following points in mind:
▶ Tap a day to display the date and events for that day in the title bar. A minus sign indicates only one event is scheduled on that day. A plus sign indicates multiple events are scheduled on that day.
▶ Use the scroll buttons or rocker switch to move between days. You can also tap the scroll arrows in the lower-right corner to move forward or backward a day.
▶ Tap the scroll arrows in the upper-right corner to move forward or backward a year.
Press Menu 📋, and under Options select Year Preferences (/Y) to set display options.
Working in List View
The List View is a text oriented view that is integrated with To Do List. It displays a list of events and To Do items for the selected week(s).
Selected week's dates
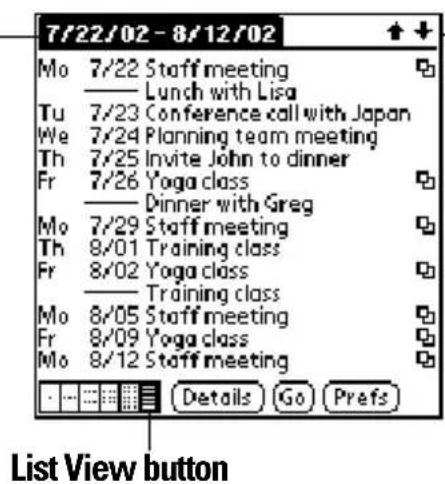
Scroll to other weeks
Tips for using List View
Keep the following points in mind:
Tap a line to select it. The start and end time display briefly in the title bar. To redisplay the event details, tap to the left of the description.
▶ Tap the description of the selected line to display the event in Day View.
▶ Use the scroll buttons or rocker switch to select specific items on the screen. You can also tap the up scroll arrow in the upper-right corner to jump forward by one of the following: 1 Day, 1 Week, 1 Month, or Pick (a specific date). Then tap the scroll arrows to move forward or backward a week.
Press Menu 📋, and under Options, select Go to Date (/O) to open the date selector and select a different date.
Press Menu 📋, and under Options, select List View Preferences (/L) to set display options.
Spotting event conflicts
With the ability to define specific start and end times for any event, it's possible to schedule events that overlap (an event that starts before a previous event finishes).
An event conflict (time overlap) appears in the Week View as overlapping bars. The Day View displays overlapping brackets to the left of the conflicting times.
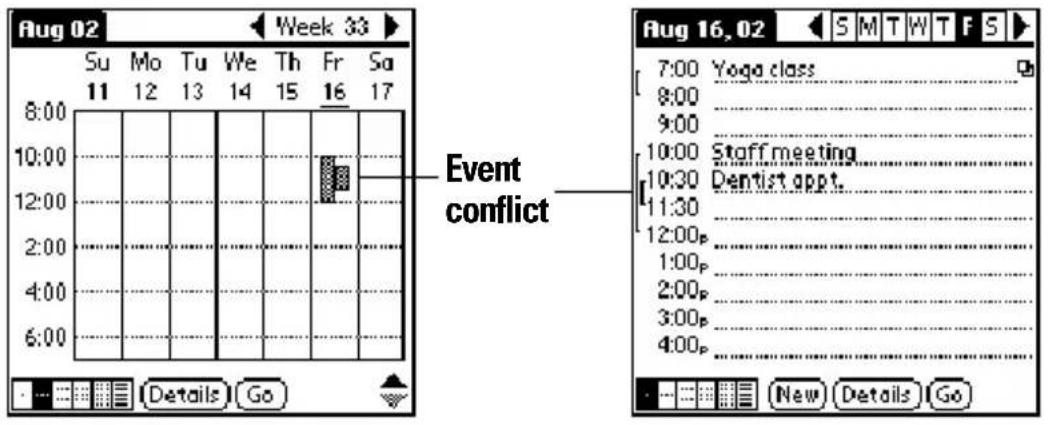

Working with floating events
Date Book Plus can include events that are a combination of a To Do item and a Date Book event. These events are called “floating events.”
Floating events are not assigned to a specific date, but can still be timed or untimed, can have alarms, and can repeat. If a floating event is not completed by midnight, it automatically advances to the next day until you mark it complete.
You can distinguish a floating event from an integrated To Do item by the circle that appears next to the floating event (in place of the To Do item priority number and check box). Floating events appear in alphabetical order at the top of the Day View screen between any integrated To Do items and untimed events.
To create a floating event:
- From the Day View, press Menu
- Under Record, select New Floating Event.
- Enter a description of the event.
- Tap a blank area on the screen to deselect the floating event.
To mark a floating event complete:
▶ Tap the circle to the right or left of the event.
Tips for using floating events:
▶ To prioritize floating events, enter a number followed by a space or dash as the first few characters of the description.
▶ To convert an existing event to a floating event, select the event, tap Details, tap Float as the Type, and then hold Option ● and press Return to finish.
▶ When you complete a repeating floating event, it marks only the current occurrence of the event as complete.
▶ Avoid scheduling a floating event that repeats daily. These events can accumulate quickly unless you complete them each day.
When viewing a floating event in a desktop application, the Note field will contain a series of characters: ##f@@@@@ for an incomplete event and ##c@@@@@ for a complete event. Do not remove or edit these characters.
Working with To Do items
Date Book Plus can create and display To Do items. To Do items appear in priority order at the top of the Day View screen.
To create To Do items in Date Book Plus:
- From the Day View, press Menu .
- Under Record, select New To Do (/T).
- Enter a description of the To Do item.
- Tap a blank area on the screen to deselect the item.
To mark a To Do item complete:
▶ Tap the check box next to the item.
Tips for using To Do items:
When you create a To Do item in Date Book Plus, the priority and category are based on the settings in the Create Options dialog box. See the section that begins on page 135 for details.
▶ If a To Do item does not appear in Date Book Plus, confirm that the category assigned to the item is selected. See the section that begins on page 135 for details.
▶ If you do not complete a To Do item on or before the due date, then an ! (exclamation mark) appears next to the item as a reminder that it is overdue.
Using the Daily Journal
You can use the Daily Journal feature to record events as they occur. Events are recorded with automatic time-stamping as Date Book Plus Notes so they do not clutter your schedule. The Daily Journal is especially useful for tracking activities such as sales calls, start and end times for consulting or other work, or keeping a record of how you spend your time at the office.
To create a Daily Journal entry:
- From the Day View, press Menu .

- Under Record, select New Journal Entry (/J).
Date Book Plus creates an untimed event, opens a Note for this event, and inserts the current time. If you've already started a journal for the current day, Date Book Plus opens the existing journal and inserts a new entry.
- Enter a description for the journal entry.
- Hold Option and press Return to finish.
Using templates
You can use templates to create a list of standard events. You can then select an event from this list and add it to your calendar. Since Date Book Plus saves all the event attributes, including alarms and notes, templates can really save you time when entering reminder notices or events that recur on different days and times.
To create a template:
- Select the event you want to save as a template.
- Press Menu .
- Under Record, select tap Create Template (/V).
- Hold Option and press Return to finish.
To schedule a template event:
- Select the date on which you want to schedule the event.
- From the Day View, tap the time line that corresponds to the beginning of the event.
- Tap New and select Template from the list.

- Select the event from the Appointment Templates list.
- Hold Option and press Return to finish.
Date Book Plus menus
Date Book Plus menus are shown here for your reference, and Date Book Plus features that are not explained elsewhere in this guide are described here.
See page 28 for information about choosing menu commands.
Record menu
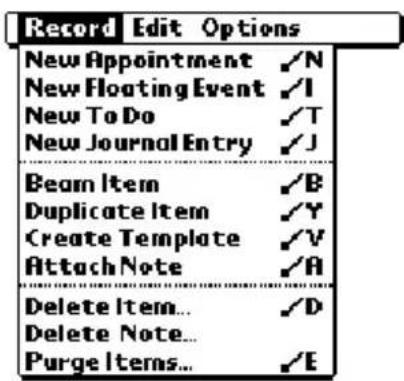

List View
Day View
New To Do Creates a new To Do item and adds it to your Date Book Plus and To Do List database.
Duplicate Item Creates a copy of the selected event and opens the Details dialog box for the new event.
Options menu

Day View

Week View

Week View with Text

Month View
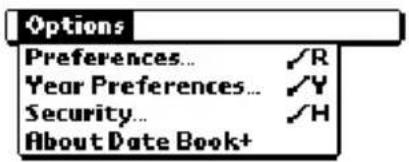
Year View
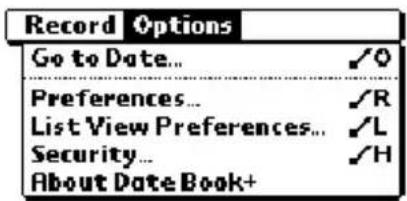
List View
Preferences (Day View)
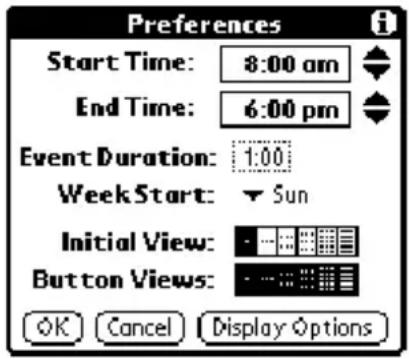
▶ Start/End Time. Defines the start and end times for Date Book Plus screens. If the time slots you select do not fit on one screen, you can tap the scroll arrows 📋 to scroll up and down.
▶ Event Duration. Defines the default duration for new events.
▶ Week Start. Defines the first day of the week. This setting overrides the System Preferences setting for all Date Book Plus views.
▶ Initial View. Defines the view that appears when you start Date Book Plus.
▶ Button Views. Defines which views display when you repeatedly press the Date Book Plus button. By default, all views appear.
▶ Display Options. Opens the Display Options dialog box where you can define the following options:

Show Time Bars. Activates the time bars that appear in the Day View. The time bars show the duration of an event and illustrate event conflicts
▶ Compress Day View. Controls how times appear in the Day View. When Compress Day View is off, all time slots display. When it is on, start and end times display for each event, but blank time slots toward the bottom of the screen disappear to minimize scrolling.
Show PM Label. Displays a "p" after PM times.
Show End Times. Displays all time bars and time slots for end times of an event.
▶ Scroll Before Day Move. Determines whether the front panel scroll buttons will scroll up and down within the current day before scrolling to the previous or next day.
▶ Auto-scroll Time. Displays events based on the time of day when the Day View contains more than one screen of information.
▶ Float Advance at Midnight. Advances floating events to the next day at midnight of the current day.
▶ Show Completed Floating Events. Displays completed floating events.
Alarm Preferences

▶ Alarm Sound. Sets the tone of the alarm.
▶ Snooze Sound. Sets the tone of the snooze alarm.
▶ Remind Sound. Sets the tone of the reminder alarm. The reminder alarm sounds when the snooze alarm is not acknowledged.
Play Sound. Defines how many tones the alarm emits before it stops. The choices are Once, Twice, 3 Times, 5 Times, and 10 Times.
Repeat Alarm. Defines how many times the alarm repeats when it is not acknowledged. The choices are Once, Twice, 3 Times, 5 Times, 10 Times, and 100 Times.
Every. Defines how often the alarm sound repeats. The choices are Minute, 5 minutes, 10 minutes, and 30 minutes.
▶ Alarm Preset. Automatically sets an alarm for each new event. The silent alarm for untimed events is defined by minutes, days, or hours before midnight of the date of the event.

Show Categories. Displays the To Do items in the categories you select.
▶ Priorities Displayed. Displays To Do items with the selected priority level. The choices are 1 only, 1-2, 1-3, 1-4, and 1-5.
Show Priority. Displays the priority level for To Do items.
Show Completed Items. Displays completed To Do items.
Show Undated Items. Shows all To Do items that have not been assigned a due date.
Show Dated Items. Shows all To Do items that have been assigned a due date.
Days before Due Date. Defines the number of days before the due date that an item will appear in Day View as a To Do item.
▶ Create Options. Opens the Create Options dialog box where you can select the default priority and category for To Do Items you create in Date Book Plus.
UnDelete from Archive
Restores the last event you deleted from Date Book Plus (provided it was stored in the Archive file). You can select this command repeatedly to restore additional events.
Go to Week
Enables you to jump to a specific week by tapping the week number in the current year.
Week Preferences

▶ Time Format. Defines the format of the time display. The choices are No Time, 11p, 11:30p, 23, 23:30.
▶ Display To Do. Defines where To Do items will appear on the Date Book Plus screen. The choices are Top, Bottom, and Hide.
▶ Week Start. Defines the first day of the week for Week View with Text.
Wordwrap Single Entry. Wraps text in cells that contain a single event to display as much text as will fit in the cell.
▶ Hide Untimed Floating Events. Removes untimed floating events from the Week View with Text display.
Show Journal. Displays a Daily Journal entry.
▶ Include Week Numbers in Title. Displays the selected week number in the title bar.
Month
Preferences
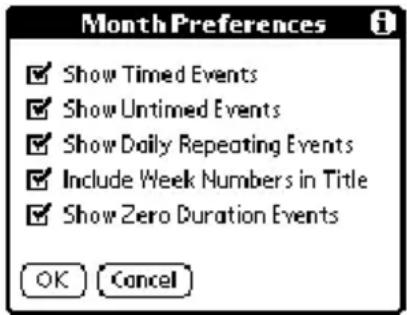
Show Timed Events. Displays events that you assigned to a specific time.
Show Untimed Events. Displays events that you assigned to a date, but did not assign to a specific time.
▶ Show Daily Repeating Events. Displays events that repeat each day.
▶ Include Week Numbers in Title. Displays week numbers in the title bar for the first and last weeks in the month.
Show Zero Duration Events. Displays events that have no duration in the Month View display.
Year
Preferences

▶ Hide Floating and Done Items. Removes floating events and completed To Do items from the Year View display.
▶ Hide Untimed Events. Removes untimed events from the Year View display.
▶ Hide Zero Duration Events. Removes events without a duration from the Year View display.
▶ Hide Events <. Removes events that are shorter than the time you specify from the Year View display. The choices are 0.5, 1, 2, 4, 8, and 12.
▶ Hide Daily Repeating Events. Removes events that repeat daily from the Year View display.
List View Preferences

Date Book. Determines which type of events appear in the List View display. The choices are: Appt, Float, Done, Alarms Only, and Repeat events only appear once.
To Do. Determines which type of To Do items appear in the List View display. The choices are All, Not Complete, Complete, and None. If you choose either Not Complete or Complete, you also have the following choices: Dated & Undated, Dated only, and Undated only.
Filter by Text. Displays events that contain the text you enter in this field and hides events that do not contain this text.
Show. Determines the type of information that will appear for each event. The choices are Day Name and Time.
About Date Book+
Shows version information for Date Book Plus.
Blazer
If you can't hold the world in the palm of your hand, at least you can hold the World Wide Web when you use Blazer to browse the Internet on your phone's screen. To use Blazer, your service plan must include PCS Vision.
Viewing web pages
You can view web pages whenever you are inside a coverage area. If you are outside a coverage area, you can view web pages that are stored temporarily on your phone in an area called the “cache.” However, if a page stored in the cache has an expiration date and it is past that date, you need to establish an Internet connection to view that page.
Tip: You can tell whether you are inside a coverage area by looking at the signal strength indicator in the lower right corner of the screen.
To view a web page:
- Make sure wireless mode is on. See page 10 for details.
- Press Blazer
- Press Menu
- Under Go, select Go to Web Page (/G).
Tip: You can also tap the Folder icon to open the Go to Web Page dialog box.

-
Enter the URL you want to view.
-
Hold Option and press Return to finish.
While a page is loading, a Progress icon 📋 appears in the lower right corner of the screen. You can tap links to other pages as soon as they appear. You don’t need to wait until a page fully loads. To stop loading a page, tap the Stop icon 📋 the lower left corner of the screen.

- Navigate within a web site, by doing any of the following:
■ To scroll through a page, use the scroll buttons or tap the onscreen arrows or scroll bar (if one appears).
■ To move between elements on a page, such as fields, icons, or buttons, roll the rocker switch or hold Shift and use the scroll buttons.
- To select an element on a page, move to the element and press the rocker switch or tap the element on the screen.
- To move to between pages when no elements are highlighted, press Return to move to the next page or Backspace to move to the previous page.
Tip: To view a list of web sites that are optimized for your phone, go to the home page, and then tap Web Portals.
Working with bookmarks
The Bookmark view makes it easy for you to get to web sites you visit often.
Viewing bookmarked pages
Your phone may come with a few bookmarks already in place. You can jump directly to any of the predefined bookmarks, or to any pages for which you've created a bookmark.
To view a bookmark:
-
Make sure wireless mode is on. See page 10 for details.
-
Press Blazer twice to access the Bookmark view.

- Tap the bookmark you want to view.

Tip: You can also press the scroll buttons to scroll to other pages, and roll the rocker switch to scroll through the current page. To view the selected page, press the rocker switch.
Adding bookmarks
You can store up to 100 bookmarks and group them in categories by placing similar links on the same bookmark page. See page 144 for information on creating page categories.
To bookmark the current page:
- From the Page view, go to the page you want to bookmark.
- Press Menu .
- Under Page, select Add Bookmark (/A).
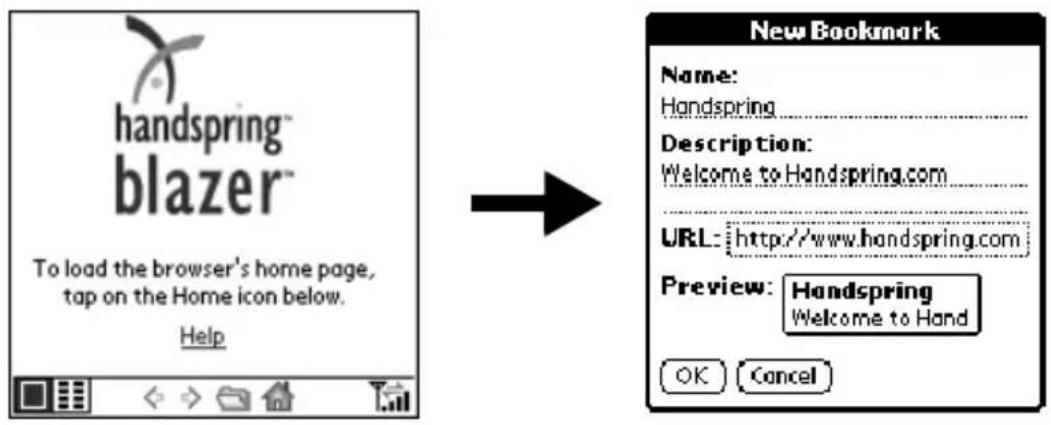
- Hold Option and press Return to finish.
Tip: You can also add a bookmark by tapping an empty bookmark slot in the Bookmark view and entering a Name, Description, and URL for the page you want to bookmark.
To define a bookmark:
- From the Bookmark view, press Menu
- Under Bookmark, select Add Bookmark (/A).

Tip: You can also open the New Bookmark dialog box by tapping an empty bookmark slot.
- Enter a Name, Description, and URL for the page you want to bookmark.
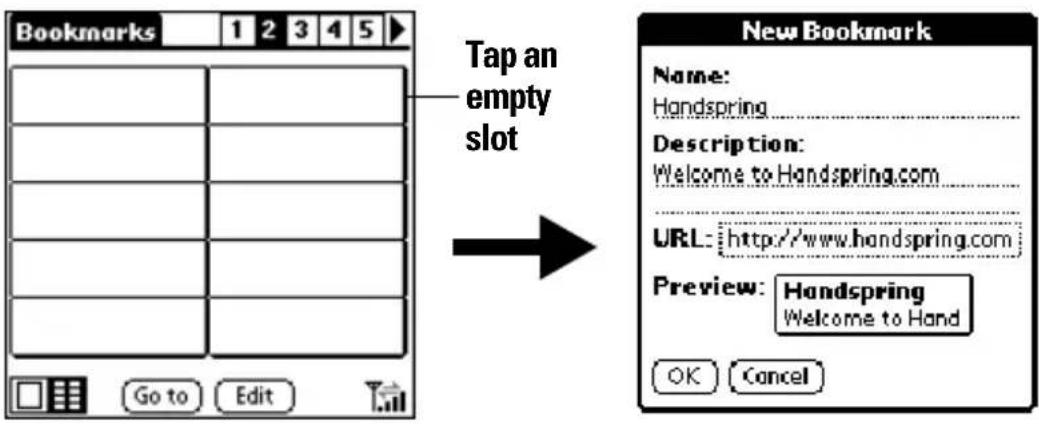
- Hold Option and press Return to finish.
Editing bookmarks
You can change the title, description, or URL associated with any of your bookmarks.
To edit a bookmark:
- From the Bookmark view, press Menu
- Under Bookmark, select Edit Bookmark (/E).


- Tap the page icons to navigate to the page containing the bookmark you want to change.
Tip: You can enter or change the Title for any bookmark page. Use the page Title to create bookmark categories. For example, if you want to create a page with links to various investments, you might name the page Assets.
- Tap the bookmark you want to change.
- Enter the changes.
- Hold Option and press Return to finish.
Deleting bookmarks
If your bookmark list becomes full, or you no longer need an entry, you can delete it.
To delete a bookmark:
- From the Bookmark view, press Menu
- Under Bookmark, select Edit Bookmark (/E).
- Tap the entry you want to delete.
- In the Edit Bookmark dialog, tap Delete.
- Hold Option and press Return twice to confirm deletion.

Arranging your bookmarks
As your bookmark list grows, you may want to rearrange the entries or move entire pages. You can assign a title to each bookmark page and arrange the entries by category. For example, if you want to create a page with links to various sports scores, you might name the page Scores.
To assign page category titles:
- From the Bookmark view, press Menu .
- Under Bookmark, select Edit Bookmark (/E).
- Tap the page icon to which you want to assign a title.
- Enter the title.
- Hold Option and press Return to finish.

To rearrange bookmark entries:
- From the Bookmark view, press Menu .
- Under Bookmark, select Edit Bookmark (/E).
- Drag the entries to the slot where you want them to appear.


Tip: If the new slot is full, the other entries move down one slot as the rows fill from top to bottom. If you drag an entry to a page icon, the entry moves to the first available slot on that page.
- Hold Option and press Return to finish.
To rearrange bookmark pages:
- From the Bookmark view, press Menu .
- Under Bookmark, select Edit Bookmark (/E).
- Drag the page to the slot where you want it to appear.

A grey line appears next to the page when it is in drag mode. When dropping a page on the top row, the grey line appears to the left of the slot where the page will appear. When dropping a page on the bottom row, the grey line appears to the right of the slot where the page will appear.
Drag a page to another slot

- Hold Option and press Return to finish.
Blazer menus
Blazer menus are shown here for your reference, and Blazer features that are not explained elsewhere in this guide are described here.
See page 28 for information about choosing menu commands.
The Go and Options menus differ depending on whether you're displaying the Page view or the Bookmark view.
Page menu

Page view
Refresh Enables you to update the current web page with the most up-to-date information.
Stop Cancels the process of loading a page. loading
Properties Displays the Page Properties dialog box where you can view the Page Name, URL, Size (Bytes) and whether the page was loaded from the cache.

Bookmarks menu

Bookmark view
Go menus

Bookmark view

Page view
Options menu

Bookmark view

Page view
Preferences
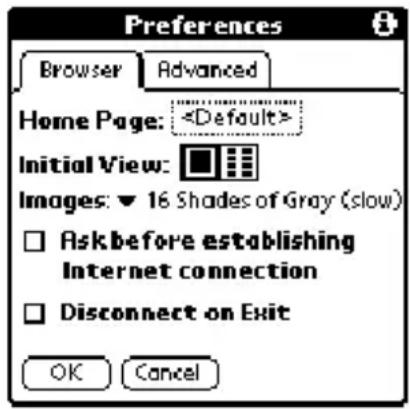
Browser tab:
Home page. Displays the URL of the current home page selection. Tap this option to open the Set Home Page dialog box and select a different home page. To restore the factory default Home Page setting, tap Restore in the Set Home Page dialog box.
Note: Some service providers may not support the default Home Page setting.
Preferences (continued)
Initial view. Determines whether the Page view or Bookmark view appears when you start the Blazer application. The default option is Page view.
Images. Determines depth of color used to display graphic images. You can also choose to not display images at all. The options are: No Images (fastest), Black & White (faster), 4 Shades of Gray (fast), 16 Shades of Gray (slow), 256 Colors (slower), High Color (slowest). The default setting is 256 Colors (slower).
▶ Ask before establishing Internet connection. Displays a confirmation dialog each time you begin an Internet session. The default setting for this option is on.
▶ Disconnect On Exit. Determines whether the Internet connection automatically closes when you exit the Blazer application. Leaving this option off enables you to switch to another application and then return to Blazer while you are still connected to the Internet. The default setting for this option is off.

Advanced tab:
▶ Cache Size (K). Displays the amount of memory that Blazer reserves to store recently viewed pages. The amount of free memory available on your phone appears below this option.
Clear. Erases all the pages stored in the cache. You cannot cancel or undo this action.
Accept Cookies. Enables the receipt of Internet cookies. The default setting for this option is on.
▶ Clear Cookies. Erases all the cookies stored on your phone. You cannot cancel or undo this action.
Set Proxy. Opens the Set Proxy dialog box where you can enter advanced HTTP proxy server settings. If your network requires you to go through a proxy server when you connect to the Internet, use this dialog box to enter the proxy server settings. Contact your system administrator for details.
Disconnect Terminates your connection to the Internet.
About Blazer Displays version information for Blazer.
Memo Pad
A memo can contain up to 4,000 characters. The number of memos you can store is dependent only on the memory available on your phone. A record in Memo Pad is called a “memo.”
To create a new memo:
-
Press
-
Enter the text you want to appear in the memo. Press Return to move down to new lines in the memo.
Tip: The first letter of your memo is automatically capitalized.
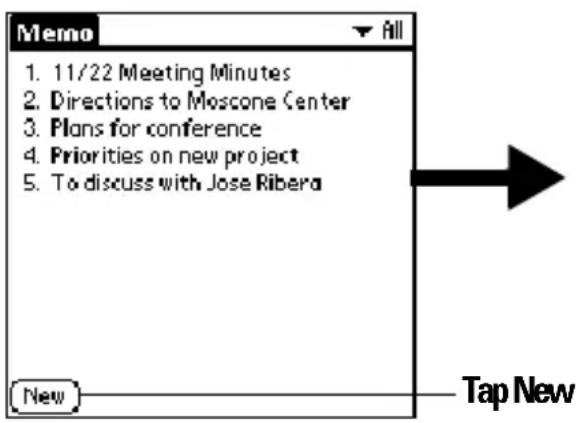

- Hold Option and press Return to finish.
Reviewing memos
The first line of a memo appears in the Memo list. This makes it easy to locate and review your memos.
To review a memo:
- In the Memo list, tap the text of the memo.


- Review or edit the text in the memo.
- Hold Option and press Return to finish.
Memo Pad menus
Memo Pad menus are shown here for your reference, and Memo Pad features that are not explained elsewhere in this guide are described here. See page 28 for information about choosing menu commands.
The Record and Options menus differ depending on whether you're displaying the Memo list or an individual memo.
Record menus
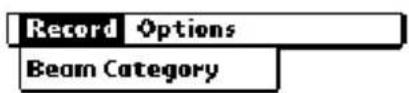
Memo list

Memo screen
Options menus
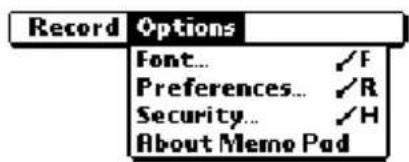
Memo list

Memo screen
Preferences Displays the Memo Preferences dialog box, where you define the sort order for memos.
About Memo Pad Shows version information for Memo Pad.
SMS
When you subscribe to PCS Vision Services, you can use your PCS Treo 300 to receive and store short text messages. These text messages are similar to e-mail messages that you receive on your computer, but are typically no more than 160 characters in length. These messages can originate from any of the following sources:
The PCS voicemail paging system
The PCS messaging website
▶ An email message addressed to your mobile phone number@messaging.sprintpcs.com.
Receiving text messages
When you receive text messages, the New Messages alert appears. The buttons that appear in the alert dialog box are based on the source and content of the message.

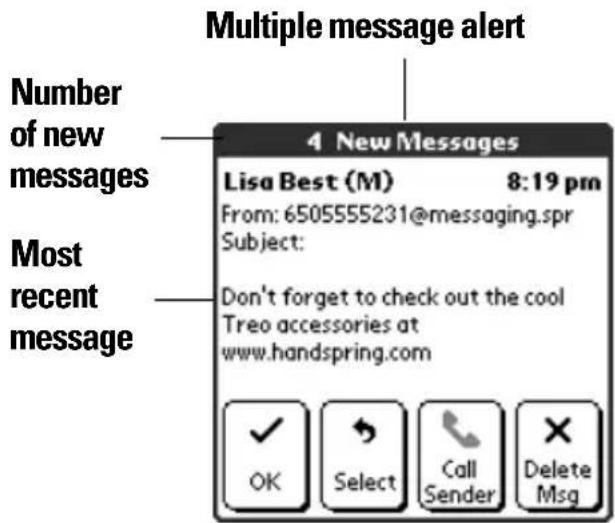
In the New Messages alert dialog box, you can save or respond to the first message by tapping any of the following buttons:
OK
Saves the message in the All category, dismisses the alert dialog box, and returns you to the previous application.
Select
Opens a dialog box where you can choose how to respond to the message. The options available change based on the content of the message. See page 153 for details.
| Call Sender | Dials the number of the person who sent you the message. If the message was sent from an e-mail address or without a call back number, this option is not available. |
| Delete Msg. | Deletes the current message, dismisses the alert dialog box, and returns you to the previous application. |
Tips:
▶ To view additional incoming messages, press Option and the press PhoneBook.
▶ You can also dismiss the alert dialog box by pressing the rocker switch or the top scroll button.
Viewing text messages
SMS enables you to quickly view your incoming and saved messages.
To view text messages in the List view:
Hold Option and press PhoneBook repeatedly to access the message category you want to view: All, Personal, Business, or any other category you've defined.

To view one message at a time:
- Use the scroll buttons or rocker switch to select the header of the message you want to view.
- Open the selected message by doing one of the following:
- Press Space .

- Press
Return - Press the rocker switch.
Section 6
152 Application-Specific Tasks


- Use the scroll buttons or rocker switch to scroll within the current message.
- Press Option and use the scroll buttons to next or previous message.
Responding to text messages
There are several ways you can respond to a message depending on its origin and content. You can respond to messages from the Message list or while viewing an individual message.
Calling the sender
When a call back number is available, you can call the person who sent you a message. When a call back number is not available, this option is disabled.
To call the sender:
- Select or open a message from the person you want to call.
- Press Menu .
- Under Message, select Call Sender (/A).
Selecting other ways to respond to text messages
When a text message contains a telephone number, an e-mail address, or a URL for a web site, you can select these items inside the text message and launch the appropriate application to respond to that item.
To select other the response method:
- Open the message to which you want to respond.
- Press the scroll buttons or roll the rocker switch to scroll through the selectable items and highlight the item to which you want to
respond.

- Press Space to open the application associated with the selected item.
Copying text messages
You can save time by copying text from your messages.
To copy an entire message:
- From the Messages list, tap the text of the message you want to copy.
- Press Menu .
- Under Edit, select Copy Message (/C).
- Open the application where you want to insert the text.
- Press Menu .
- Under Edit, select Paste (/P).
To copy specific text within a message:
- Open the message containing the text you want to copy.
- Highlight the text you want to copy
- Press Menu .
- Under Edit, select Copy (/C).
- Open the application where you want to insert the text.
- Press Menu .
- Under Edit, select Paste (/P).
Sorting messages
- From any SMS list view, press Menu
- Under Options, select Sort.
- Tap the Sort by pick list to select the sort method you want to use.


Date Places the most recent messages at the top of the list. This is the default sort method.
Name Places mobile phone numbers at the top of the list in numerical order, followed by e-mail addresses and names in alphabetical order.
- Hold Option and press Return to finish.
Deleting messages
You can delete a single message or a group of messages from a particular category.
To delete a single message:
- From any SMS list view, select the message you want to delete.
- Press Menu .
- Under Message, select Delete (/D).
- If prompted, hold Option and press Return to confirm deletion.
Tip: You can also delete a message by selecting it and pressing Backspace 🔒.
To delete a group of messages:
- From any SMS list view, select the category containing the messages you want to delete.
- Press Menu .
- Under Message, select Purge Messages.
- Select the deletion method you want to use.

| Older than 1 week | Deletes all messages in the current category with a date earlier than 1 week prior to the current date. |
| Older than 1 month | Deletes all messages in the current category with a date earlier than 1 month prior to the current date. |
| Except last 10 | Keeps only the 10 most recent messages and deletes all other messages in the current category. |
| All | Deletes all messages in the current category. |
- Hold Option and press Return twice to confirm deletion.
SMS menus
SMS menus are shown here for your reference, and SMS features that are not explained elsewhere in this guide are described here.
See page 28 for information about choosing menu commands.
The Message menu differ depending on which SMS view is on the screen and the type of data selected. The Options menu is the same in all views.
Message menus
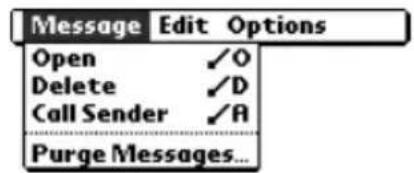
List view

flowchart
graph TD
    A["Message Edit Options"] --> B["Delete ✓D"]
    A --> C["Call Sender ✓A"]
    A --> D["Call ✓P"]
    E["Message Edit Options"] --> F["Delete ✓D"]
    E --> G["Call Sender ✓A"]
    E --> H["Browse ✓B"]
    I["Message Edit Options"] --> J["Delete ✓D"]
    I --> K["Call Sender ✓A"]
    I --> L["Email ✓E"]
Message view
Open
Displays the selected message in single message view.
Options menus
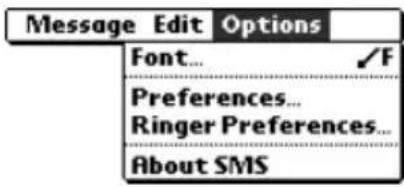
Preferences

Determines whether a confirmation dialog box appears when you delete messages.
About SMS Shows version information for SMS.
To Do List
To Do reminds you of tasks you have to complete. A record in To Do List is called an “item.”
To create a To Do item:
- Press Option and then press Date Book Plus .

Tip: You can also access To Do List by tapping the To Do List icon in the Applications Launcher.
- Enter the text of the To Do item. The text can be longer than one line.
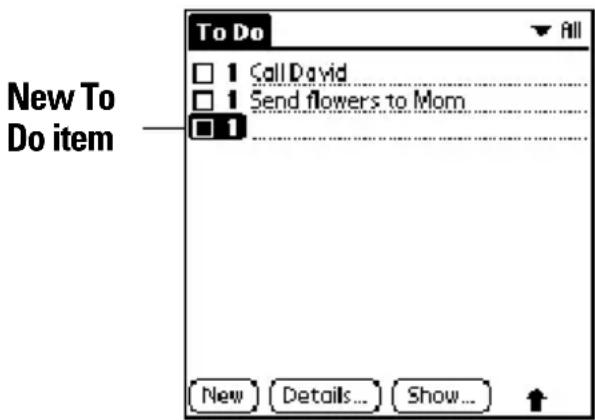
- Press a scroll button to deselect the To Do item.
Setting priority
The priority setting for items lets you arrange your To Do items according to their importance or urgency. The default setting is to arrange To Do items by priority and due date, with priority 1 items at the top. If you have a number of items in your list, changing an item's priority setting may move its position in the list.
Note: When you create a new To Do item, its priority is automatically set to level 1, the highest (most important) level. If you select another item first, however, the item you create appears beneath the selected item and is given the same priority as the selected item.
To set the priority of a To Do item:
- Tap the Priority number on the left side of the To Do item.

- Tap the Priority number that you want to set (1 is most important).
Setting a due date
You can associate a due date with any To Do item. You can also sort the items that appear in the list based on their due date.
To set a due date for a To Do item:
- Tap the text of the item whose details you want to change.
- Tap Details.
- Tap the Due Date pick list.

- Tap the date that you want to assign the item:
| Today | Assigns the current date. |
| Tomorrow | Assigns tomorrow's date. |
| One week later | Assigns the date exactly one week from the current date. |
| No Date | Removes the due date from the item. |
| Choose date | Opens the date selector, where you can choose any date that you want for the item. |
- Hold Option and press Return to finish.
Tip: If you turn on the Show Due Dates option in the To Do Show options dialog, you can tap directly on the due date in the To Do list to open the pick list shown in step 4.
Assigning a category
You can associate any To Do item with a category. You can also sort the items that appear in the list based on their category.
To assign a category for a To Do item:
- Tap the text of the item whose details you want to change.
- Tap Details.
- Tap the Category pick list.

- Tap the category that you want to assign the item.
- Hold Option and press Return to finish.
Tip: If you turn on the Show Categories option in the To Do Show options dialog, you can tap directly on the category in the To Do list to assign categories.
Checking off a To Do item
You can check off a To Do item to indicate that you've completed it. You can set To Do List to record the date that you completed the To Do item, and you can choose to show or hide completed items as described on page 161.
To check off a To Do item:
▶ Tap the check box on the left side of the item.


To Do Show Options
The Show Options dialog box enables you to control the appearance of the To Do list screen.
To change the Show Options settings:
- In To Do list screen, tap Show.

- Select any of the following settings:
| Show Completed Items | Displays your completed items in the To Do list screen. If you turn off this setting, your To Do items disappear from the list when you complete (check) them.Items that no longer appear on the list because you turn off this setting have not been deleted. They are still in the memory of your phone. Purge completed items to remove them from memory. |
| Show Only Due Items | Shows only the items that are currently due, past due, or have no due date specified. When this setting is active, items that are not yet due do not appear in the list until their due date. |
| Record Completion Date | Replaces the due date with the actual date when you complete (check) the item. If you do not assign a due date to an item, the completion date still records when you complete the item. |
| Show Due Dates | Displays the due dates associated with To Do items and displays an exclamation mark next to items that remain incomplete after the due date passes. |
| Show Priorities | Shows the priority setting for each item. |
| Show Categories | Shows the category for each item. |
- Hold Option and press Return to finish.
To Do List menus
To Do List menus are shown here for your reference, and To Do List features that are not explained elsewhere in this guide are described here. See page 28 for information about choosing menu commands.
Record menu
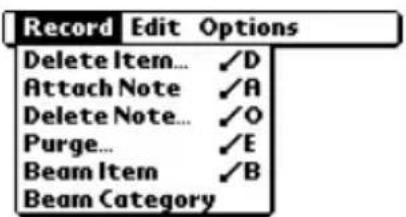
Options menu

About To Do List Shows version information for To Do List.
CityTime
CityTime enables you to display the day and time in your home city and in four other cities around the globe. Whether you're travelling or at home, now it's easy to keep track of the best time to reach your business associates, friends, and family in far away places.
Note: CityTime does not automatically update the current time for Daylight Savings Time.
Setting your home city
The home city serves as a point of reference for your other city selections. The information displayed for all the other cities is based on the day and time in your home city. When you use CityTime for the first time (or when you travel or move to another city), make sure you set your home city location. Setting your home city location ensures that CityTime displays accurate information for the other cities you select.
To set your home city:
- Press Option and then press Blazer.

Tip: You can also access CityTime by tapping the CityTime icon 📋 in the Applications Launcher.
- Press Menu .
- Under Options, select Select Home City (/H).
- Tap the Home City pick list and select the city closest to where you are located.
Tip: If a nearby city isn't in the list, you can use the Edit Cities command to add a new city to the list. See page 164 for details.
- Hold Option and press Return to finish.
Selecting remote cities
In addition to your home city, you can display the day and time for four other cities anywhere around the globe. These other cities are called remote cities.
To set your remote cities:
- Tap a pick list in the lower part of the CityTime screen and select the city closest to the city you want to display.
Tap to select a remote city

Tip: If a nearby city isn't in the list, you can use the Edit Cities command to add a new city to the list. See the next section for details.
- Tap the remaining pick lists and select the other three cities you want to display.
Tip: You can temporarily display the day and time for any other city by tapping the city's location on the map display.
Adding cities
If the city you want to display is not in the predefined list, you can use the Edit Cities command to add it.
To add a city to the list:
- Press Menu
- Under Options, select Edit Cities (/E).
- Tap New.
- Enter the city name and other information.
- Hold Option and press Return to finish.

CityTime menus
CityTime menus are shown here for your reference, and CityTime features that are not explained elsewhere in this guide are described here. See page 28 for information about choosing menu commands.
Options menu

About CityTime Shows version information for CityTime.
Help Displays online help for the CityTime screens.
Utilities menu

Change Location Opens the Change Location dialog box where you can select the city to which you are moving or travelling. Changing the location updates the system time and date.
Sun Rise/Set Opens the Sun Rise/Set dialog box where you can view sunrise and sunset information for your home city. To view this information for another city, tap the City pick list and select the city from the list. To view this information for another date, tap the scroll arrows next to the date box.
Calculator
Calculator includes two operating modes: Basic and Advanced. In Basic mode you can perform simple mathematical calculations. In Advanced mode you can access scientific functions and perform sophisticated math calculations. This section explains how to select the operating mode and use the buttons and menu options available in each mode.
Selecting the Calculator mode
The Toggle Mode command enables you to choose whether you want to work in Basic Calculator mode or Advanced Calculator mode. You can change modes at any time.
To select the Calculator mode:
- Press Option and then press Memo Pad.

Tip: You can also access Calculator by tapping the Calculator icon in the Applications Launcher.
-
Press Menu .
-
Under Options, select Toggle Mode (/M).
Tip: You can also toggle between Basic and Advanced mode by holding Option and repeatedly press Memo Pad.
Using the Basic Calculator buttons
The Basic Calculator includes the following buttons.

Clears the last number you entered. Use this button if you make a mistake while entering a number in the middle of a calculation. This button enables you to re-enter the number without starting the calculation over.

Clears the entire calculation and enables you to begin a fresh calculation.

Toggles the current number between a negative and positive value. If you want to enter a negative number, enter the number first and then press the +/- button.

Places the current number in memory. Each new number you enter with the M+ button is added to the total already stored in memory. You can add either a calculated value or a number you enter by pressing the number buttons. Pressing this button has no effect on the current calculation (or series of calculations); it merely places the value into memory until it is recalled.

Recalls the stored value from memory and inserts it in the current calculation.

Clears any value that is stored in the Calculator memory.
Displaying Recent Calculations
The Basic Calculator's Recent Calculations command enables you to review the last series of calculations and is particularly useful for confirming a series of “chain” calculations.
To display recent calculations:
- Press Menu
- Under Options, select Recent Calculations (/I).


- After you finish reviewing the calculations, hold Option and press Return to finish.
Using the Advanced Calculator mode
The Advanced Calculator screen consists of three regions. Each region performs a different function to help you perform a variety of calculations.

Using the Advanced Calculator buttons
In addition to most of the Basic Calculator buttons, the Primary buttons are available in all the Advanced Calculator views. The remaining buttons are available only in specific views. The information that follows provides an overview of the Advanced Calculator functions. For more detailed information and instructions, visit the website: www.radiks.net/\~rhuebner/parendoc.html
Primary buttons

Clears the entire calculation and enables you to begin a fresh calculation.

Clears the last digit you entered. Use this button if you make a mistake while entering a number in the middle of a calculation. This button enables you to re-enter the number without starting the calculation over.

Enters an exponent symbol in the calculation.

Opens the Constants dialog box where you can select a constant to include in the calculation.

Opens the Store in which memory dialog box where you can select the memory bank in which you want to store the current value. Advanced Calculator has ten memory banks.

Opens the Recall which memory dialog box where you can select the memory bank from which you want to recall a value.
Math buttons

Squares the current value.

Calculates the value of x raised to the y power.

Calculates the value of a common (base 10) antilogarithm.

Calculates the value of a natural (base e) antilogarithm.

Calculates the reciprocal of the current number.

Displays the integer portion of a decimal value.

Calculates the square root of the current number.

Calculates the inverse of x to the y power.

Calculates the common (base 10) logarithm.

Calculates the natural (base e) logarithm.

Displays the remainder of x/y.

Displays the decimal portion of a decimal value.
Trigonometry buttons

Calculates the sine of the current number.

Calculates the cosine of the current number.

Calculates the tangent of the current number.

Calculates the hyperbolic sine of the current number.

Calculates the hyperbolic cosine of the current number.

Calculates the hyperbolic tangent of the current number.

Calculates the arc (inverse) sine of the current number.

Calculates the arc (inverse) cosine of the current number.

Calculates the arc (inverse) tangent of the current number.

Calculates the arc (inverse) hyperbolic sine of the current number.

Calculates the arc (inverse) hyperbolic cosine of the current number.

Calculates the arc (inverse) hyperbolic tangent of the current number.
Finance buttons
Finance buttons enable you to find an unknown variable value based on a group of known variable values. For example, to calculate the monthly payment for a 30-year home loan of \$100,000 with an annual interest rate of 8%, you would enter the following variables:
▶ Payments/year = 12
▶ N = 360 (30 years x 12 months)
▶ APR = 8
▶ PV = 100,000
▶ FV = 0
Using these variables, the answer would be -733.76 per month.
To solve this example:
- Enter a value and then tap the corresponding variable button.
Repeat this process until you've entered the following four variables:
N = 360 (30 years x 12 months)
■APR = 8
■ PV = 100,000
FV = 0
- Enter 12 and tap the P/Yr button to enter the number of payments per year.
- Tap Edit.
- Tap the Pmt line and erase all values on the line including zero.
- Tap Solve.
- Hold Option and press Return to finish.
You can use a similar process to solve other financial equations by entering four of the variables to find the value of the fifth variable.

Stores the current number as the total number of payments over the life of the loan.

Stores the current number as the annual percentage rate of interest.

Stores the current number as the number of payments per year.

Stores the current number as the initial loan amount.

Stores the current number as the payment amount.

Stores the current number as the compounded loan amount including interest.

Opens the Time Value of Money dialog box where you can modify values and solve the equation.

Stores the remaining balance, interest, and principal (amortization) based on the supplied values.

Calculates a given percentage of a value. To use this button, enter a value, tap this button, enter the percent, and then tap the equal sign button.

Calculates the change in a value by a given percentage. To use this button, enter a value, tap this button, enter the percent, and then tap the equal sign button.

Calculates the percentage of one number relative to another number. To use this button, enter the first number, tap this button, enter the second number, and then tap the equal sign button.

Calculates the percentage required to get to one value from another value. To use this button, enter the result number, tap this button, enter the starting number, and then tap the equal sign button.
Logic buttons

Shifts the value to the left and fills the new places with zeros.

Enters D in a hexadecimal calculation.

Enters E in a hexadecimal calculation.

Enters F in a hexadecimal calculation.

Calculates bit-by-bit commonalities between two arguments.

Calculates bit-by-bit unique occurrences in two arguments.

Shifts the sign bit to the right in signed mode.

Enters A in a hexadecimal calculation.

Enters B in a hexadecimal calculation.

Enters C in a hexadecimal calculation.

Calculates the inverse of each bit of the argument.

Calculates the exclusive OR between two arguments.
Statistics buttons

Adds the current value to the end of the statistics memory list. You can store up to 200 values.

Calculates the mean of the values in the statistics memory list.

Calculates the standard deviation based on a population of n .

Calculates the standard deviation based on a population of n-1.

Calculates the sum of the values in the statistics memory list.

Calculates the square of the sum of the values in the statistics memory list.

Opens the Statistical Data dialog box where you can view, edit, delete, and clear values in the statistics memory list.

Displays the number of values in the statistics memory list.

Calculates the factorial of any integral from 0 to 170.

Generates a random number between 0 and 32767 and then divides this number by 32768 to generate a random fraction between 0 and .99997.

Returns the number of combinations of n items taken m at a time.

Returns the number of permutations of n items taken m at a time.
Weight/Temp buttons

Indicates the current value is entered in ounces. When you tap this button after tapping another unit of measure, it converts the value to ounces.

Indicates the current value is entered in pounds. When you tap this button after tapping another unit of measure, it converts the value to pounds.

Indicates the current value is entered in US tons. When you tap this button after tapping another unit of measure, it converts the value to US tons.

Indicates the current value is entered in UK tons. When you tap this button after tapping another unit of measure, it converts the value to UK tons.

Indicates the current value is entered in milligrams. When you tap this button after tapping another unit of measure, it converts the value to milligrams.

Indicates the current value is entered in grams. When you tap this button after tapping another unit of measure, it converts the value to grams.

Indicates the current value is entered in kilograms. When you tap this button after tapping another unit of measure, it converts the value to kilograms.

Indicates the current value is entered in metric tons. When you tap this button after tapping another unit of measure, it converts the value to metric tons.

Indicates the current value is entered in degrees Fahrenheit. When you tap this button after tapping another unit of measure, it converts the value to degrees Fahrenheit.

Indicates the current value is entered in degrees Kelvin. When you tap this button after tapping another unit of measure, it converts the value to degrees Kelvin.

Indicates the current value is entered in degrees Celsius. When you tap this button after tapping another unit of measure, it converts the value to degrees Celsius.
Length buttons

Indicates the current value is entered in inches. When you tap this button after tapping another unit of measure, it converts the value to inches.

Indicates the current value is entered in feet. When you tap this button after tapping another unit of measure, it converts the value to feet.

Indicates the current value is entered in yards. When you tap this button after tapping another unit of measure, it converts the value to yards.

Indicates the current value is entered in miles. When you tap this button after tapping another unit of measure, it converts the value to miles.

Indicates the current value is entered in nautical miles. When you tap this button after tapping another unit of measure, it converts the value to nautical miles.

Indicates the current value is entered in millimeters. When you tap this button after tapping another unit of measure, it converts the value to millimeters.

Indicates the current value is entered in centimeters. When you tap this button after tapping another unit of measure, it converts the value to centimeters.

Indicates the current value is entered in meters. When you tap this button after tapping another unit of measure, it converts the value to meters.

Indicates the current value is entered in kilometers. When you tap this button after tapping another unit of measure, it converts the value to kilometers.
Area buttons

Indicates the current value is entered in square inches. When you tap this button after tapping another unit of measure, it converts the value to square inches.

Indicates the current value is entered in square feet. When you tap this button after tapping another unit of measure, it converts the value to square feet.

Indicates the current value is entered in square yards. When you tap this button after tapping another unit of measure, it converts the value to square yards.

Indicates the current value is entered in acres. When you tap this button after tapping another unit of measure, it converts the value to acres.

Indicates the current value is entered in square miles. When you tap this button after tapping another unit of measure, it converts the value to square miles.

Indicates the current value is entered in square millimeters. When you tap this button after tapping another unit of measure, it converts the value to square millimeters.

Indicates the current value is entered in square centimeters. When you tap this button after tapping another unit of measure, it converts the value to square centimeters.

Indicates the current value is entered in square meters. When you tap this button after tapping another unit of measure, it converts the value to square meters.

Indicates the current value is entered in hectares. When you tap this button after tapping another unit of measure, it converts the value to hectares.

Indicates the current value is entered in square kilometers. When you tap this button after tapping another unit of measure, it converts the value to square kilometers.
Volume buttons

Indicates the current value is entered in teaspoons. When you tap this button after tapping another unit of measure, it converts the value to teaspoons.

Indicates the current value is entered in fluid ounces. When you tap this button after tapping another unit of measure, it converts the value to fluid ounces.

Indicates the current value is entered in cups. When you tap this button after tapping another unit of measure, it converts the value to cups.

Indicates the current value is entered in pints. When you tap this button after tapping another unit of measure, it converts the value to pints.

Indicates the current value is entered in quarts. When you tap this button after tapping another unit of measure, it converts the value to quarts.

Indicates the current value is entered in gallons. When you tap this button after tapping another unit of measure, it converts the value to gallons.

Indicates the current value is entered in tablespoons. When you tap this button after tapping another unit of measure, it converts the value to tablespoons.

Indicates the current value is entered in milliliters. When you tap this button after tapping another unit of measure, it converts the value to milliliters.

Indicates the current value is entered in liters. When you tap this button after tapping another unit of measure, it converts the value to liters.

Indicates the current value is entered in cubic inches. When you tap this button after tapping another unit of measure, it converts the value to cubic inches.

Indicates the current value is entered in cubic feet. When you tap this button after tapping another unit of measure, it converts the value to cubic feet.

Indicates the current value is entered in cubic meters. When you tap this button after tapping another unit of measure, it converts the value to cubic meters.
Creating a custom view
You can modify any existing Advanced Calculator view to create your own view. While customizing a view, you can change the button names as well as the button definitions.
To create a custom view:
- From the Advanced Calculator screen, press Menu .
- Under Program, select Export (/E).
- Tap the pick list and select the view you want to modify.
- Tap Export.
- Hold Option and press Return twice.
- In Memo Pad, open the memo containing the definition you selected in step 3.
- Modify the definition, and then hold Option and press Return
- From the Advanced Calculator screen, press Menu .
- Under Program, select Import (/I).
- Tap the pick list and select the view you modified.
- Tap Import.
- Tap Replace to change an existing definition, or tap Add to create an additional definition.
- Hold Option and press Return twice to finish.
Calculator menus
Calculator menus are shown here for your reference, and Calculator features that are not explained elsewhere in this guide are described here. See page 28 for information about choosing menu commands.
Options menus


About Calculator Shows version information for Calculator.
Program menu

Advanced Calculator
| Export | Opens the Export dialog box where you can select a view definition to export to Memo Pad. |
| Import | Opens the Import dialog box where you can select a view definition to import to Memo Pad. |
| Delete View | Opens the Delete View dialog box where you can delete a user-defined view. |
| Restore Defaults | Returns all the view definitions to the preset default values. |
Expense
Expense enables you to record the date, expense type, and the amount that you spent. A record in Expense is called an “item.” You can sort your Expense items into categories or add other information that you want to associate with the item.
To create an Expense item:
- Press Option and then press Menu to access the Applications Launcher.
- Tap the Expense icon
- Enter the amount of the expense.

- Tap the Expense type pick list and select a type from the list.

Note: As soon as you select an expense type, your phone saves the entry. If you don't select an expense type, it doesn't save the entry.
Tip: A quick way to create a new Expense item is to make sure that no Expense item is selected in the Expense list, enter the first letter(s) of the expense type, and then enter the numerical amount. This technique takes
advantage of the automatic fill feature. See the section that begins on page 187 for details.
Changing the date of an Expense item
Initially, Expense items appear with the date you enter them. You can use Expense to change the date associated with any Expense item.
To change the date of an Expense item:
-
Tap the Expense item you want to change.
-
Tap the date of the selected item.
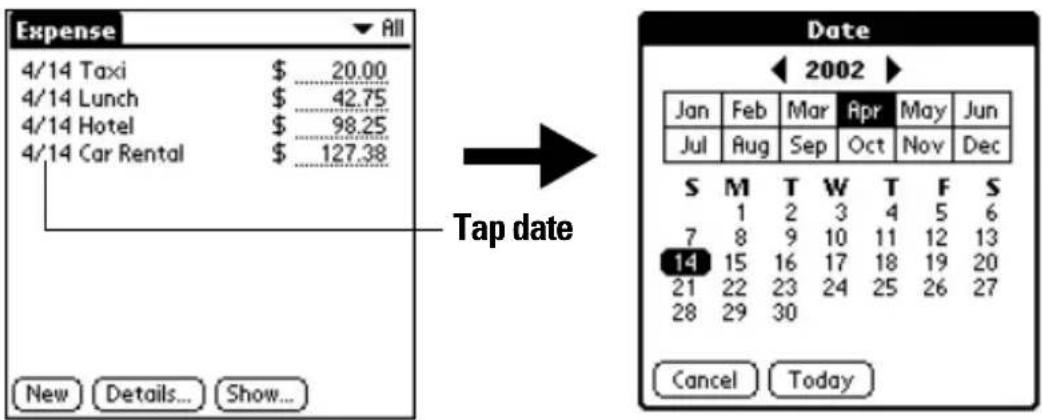
- Select the new date.
- Hold Option and press Return to finish.
Entering receipt details
Expense provides a variety of options that you can associate with an item. These options appear in the Receipt Details dialog box.
To open the Receipt Details dialog box:
- Tap the Expense item to which you want to assign details.
- Tap Details.

3. Select any of the following options:
| Category | See the section that begins on page 62 for details. |
| Type | Opens a pick list of expense types. |
| Payment | Lets you choose the payment method used to pay the Expense item. If the item is prepaid (such as airline tickets supplied by your company), you can choose Prepaid to place your expense in the appropriate company-paid cell of your printed expense report spreadsheet. See the section that begins on page 182 for more information. |
| Currency | Enables you to choose the type of currency used to pay the Expense item. The default currency unit is defined in the Preferences dialog (see page 187). You can also display up to four other common types of currency. See the next section in this chapter for more information. |
| Vendor and City | Lets you record the name of the vendor (usually a company) associated with the expense and the city where the expense was incurred. For example, a business lunch might be at Rosie's Cafe (Vendor) in San Francisco (City). |
| Attendees | See the section that begins on page 70 for details. |
4. Hold Option and press Return to finish.
Customizing the Currency pick list
You can select the currencies and symbols that appear in the Currency pick list.
To customize the Currency pick list:
- In the Receipt Details dialog box, tap the Currency pick list and select Edit currencies.
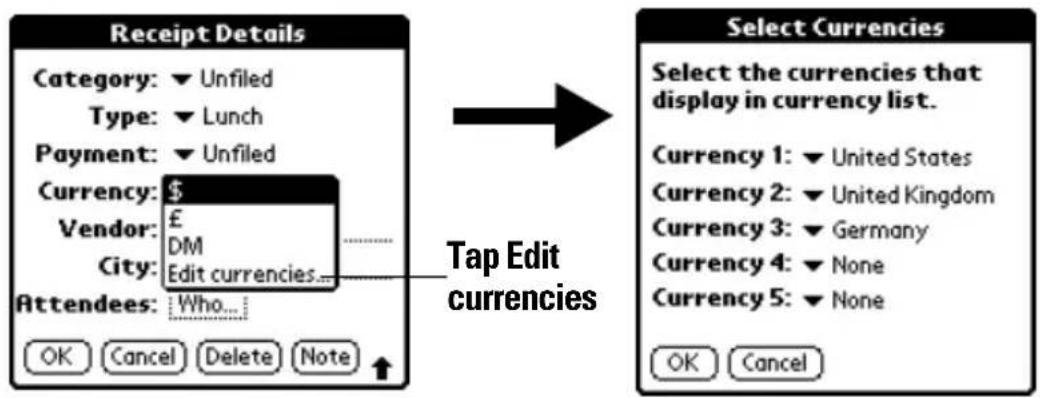

- Tap each Currency pick list and select the country whose currency you want to display on that line.
- Hold Option and press Return twice to finish.
Defining a custom currency symbol
If the currency you want to use is not in the list of countries, you can create your own custom country and currency symbol.
To define a custom currency symbol:
- Press Menu .
- Under Options, select Custom Currencies (/Y).
- Tap one of the four Country boxes.

- Enter the name of the country and the symbol that you want to appear in Expense.

Note: If you want to use your custom currency symbol as the default for all Expense items, select the symbol in the Preferences dialog box. If you want to use your custom currency symbol only for a particular Expense item, select the symbol in the Receipt Details dialog box associated with that item.
Show Options
Show Options define the sort order and other settings that relate to your Expense items.
To open the Show Options dialog box:
- In the Expense list, tap Show.
- Select any of the options.

Sort by Enables you to sort expense items by date or type.
Distance Enables you to display Mileage entries in miles or kilometers.
Show Shows or hides the currency symbol in the Expense list.
- Hold Option and press Return to finish.
Transferring your data to Microsoft Excel
After you enter your expenses into the Expense application on your phone, you can view and print the data with your computer.
Note: You need Microsoft Excel version 5.0 (or later) to view and print your Expense data using one of the provided templates. Microsoft Excel is not included with the PCS Treo 300 package. The procedures in this section
also assume that you have installed Palm Desktop software as described on page 21.
Creating or printing an expense report
It is easy to view and print your Expense data in a Microsoft Excel spreadsheet.
To create or print an expense report:
- Perform a HotSync operation to transfer your latest Expense data to your computer.
- Do one of the following:
- Click Expense in Palm Desktop software to open Microsoft Excel and the Expense Report configuration dialog box.
- From the Windows Start menu, click Programs, Palm Desktop, Expense Reports, and then choose your user name.
- Click the expense category that you want.

Tip: You can press Ctrl+click to select multiple categories. To print the expenses associated with all of your Expense categories, select All in the Categories group.
- If you want to define an end date for the expense report, enter the date in the End Date box.
Note: If you do not specify an end date, all expense entries for the selected categories appear — up to the date of the last HotSync operation.
- Do one of the following:
- Click Print to display the expense report in the Print Preview window, and then click Print in the Microsoft Excel window to print your expense report.
- Click Create to display a Microsoft Excel spreadsheet containing your expense data. Your data appears in Microsoft Excel spreadsheet form. You can enter information, make formatting changes, and save and print the file in the normal manner.
Using expense report templates
Palm Desktop software includes several expense report templates. When you use one of these templates, you can edit your expense data in Microsoft Excel.
The templates have the extension .xlt and are stored in the template folder in the Palm Desktop software directory on your computer. To see what a template looks like before you use it, open the template in Microsoft Excel. For example, the template Sample2.xlt looks like this:

If you want to streamline or customize your expense reports, you can change these templates. For example, you can add your company name to a template.
To view your expense data using a Microsoft Excel template:
-
Display your expense data in a Microsoft Excel spreadsheet as described in the previous procedure.
-
Click Options.

- Enter name, department, and other information as necessary for your expense report.
- Click the Templates menu; then select an expense template.
- Click OK.
Expense menus
Expense menus are shown here for your reference, and Expense features that are not explained elsewhere in this guide are described here.
See page 28 for information about choosing menu commands.
Record menu

Options menu
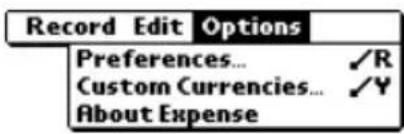
Preferences

Use automatic fill. Lets you select an expense type by entering the first letter of an expense type. For example, if you enter the letter “T,” it enters the “Taxi” expense type. Entering “T” and then “E” enters “Telephone” which is the first expense type beginning with the letters “TE.”
Default currency. Sets the default currency symbol for Expense.
About Expense Shows version information for Expense.
Setting Preferences for Your Phone
The Preferences screens enable you to customize the configuration options on your PCS Phone Handspring ® Treo TM 300.
In the Preferences screens, you can do the following:
| Buttons | Assign different applications to many of the buttons and icons on your phone and the HotSync® cable. |
| Connection | Configure your phone for use with a HotSync cable, for infrared communication, or for wireless data communication. |
| Digitizer | Calibrate the screen on your phone. |
| Formats | Set the country default and the formats for dates, times, calendar, and numbers. |
| General | Set the current date and time, the auto shut-off interval, the Beam Receive feature, and the system, alarm, and game sounds. |
| Network | Configure your phone for use with a high-speed wireless data network. |
| Owner | Assign your name, phone number, and other owner information to your phone. |
| Ringer | Set the ringer volume level and vibrate settings and set unique ring tones for different types of calls. |
| ShortCuts | Define a list of abbreviations. |
Viewing Preferences
To open the Preferences screens:
- Press Option and then press Menu to access the Applications Launcher.
- Tap the Preferences icon
- Tap the pick list in the upper-right corner of the screen.
- Select the Preferences screen you want to view.
Buttons Preferences
The Buttons Preferences screen enables you to associate different applications with the application buttons on the front of your phone and the HotSync button on the cable. For example, if you find that you seldom use Memo Pad and often use SMS, you can assign the button to start SMS. Any changes you make in the Buttons Preferences screen become effective immediately; you do not have to change to a different screen or application. If you assign a different application to a button, you can still access the original application using the Applications Launcher.
To change the Buttons Preferences:
- Tap the pick list next to the button or icon you want to re-assign.
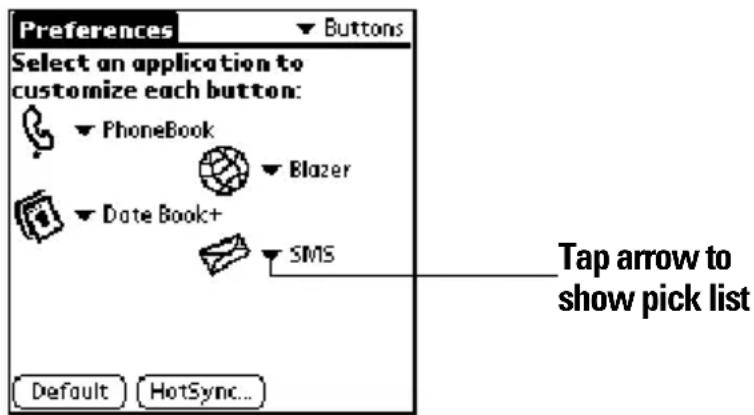
- Tap the application that you want to assign to the button.
Tip: To restore all of the buttons to their factory settings, tap Default.
HotSync Buttons Preferences
The HotSync Buttons Preferences screen also enables you to associate a different application with the button on the HotSync cable. Any changes that you make in the HotSync Buttons dialog box become effective immediately; you do not have to change to a different screen or application.
To change the HotSync Buttons Preferences:
- From the Buttons Preferences screen, tap HotSync.
- Tap the pick list.

-
Tap the application that you want to assign to the button.
The default setting for the button is the HotSync setting, which means the cable performs its normal HotSync functions. -
Hold Option and press Return to finish.
Connection Preferences
The Connection Preferences screen lets you create configurations for communicating with other hardware devices: PC, Modem, or Infrared. Configurations, or profiles, once activated are available to applications on your phone. The Connection Preferences screen displays a list of available configurations that you can select as needed. This list will vary depending on the software you have added to your phone. You can also define a custom Connection configuration to meet your specific needs.
Predefined configurations
Your phone comes with the following predefined Connection configurations:
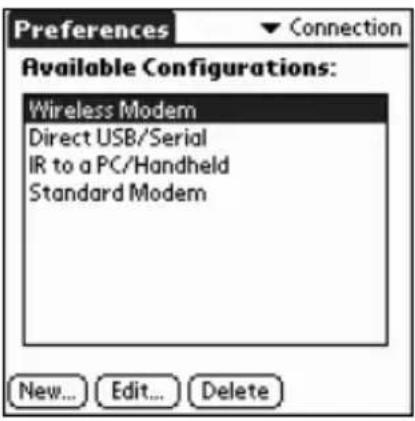
| Wireless Modem | Enables you to connect your phone to the PCS network using the built-in wireless modem. |
| Standard Modem | Enables you to connect your phone with a modem on your computer or laptop. |
| Direct USB/Serial | Enables you to connect your phone directly to your computer or laptop with the HotSync cable. When you choose this option, your phone detects whether the HotSync cable uses a USB or serial connector. |
| IR to a PC/Handheld | Enables you to connect the IR port on your phone with the infrared device on your computer or laptop. |
Connection Methods
There are several types of device connections you can choose when configuring Preferences:
| Serial to PC | Defines the direct serial connection between your phone and your desktop computer. It is used to perform a local HotSync operation when your phone is connected by its serial connector to the cable. The cable is attached to a serial (COM) port on your desktop computer. |
| Serial to Modem | Defines a connection between a modem attached to the serial connector of your phone and a modem that is part of your computer or laptop. |
| Auto Detect to PC | Defines a dynamic serial connection between your phone and your desktop computer. Use this connection type with third-party applications that need to reconfigure the serial port when communicating with a computer. |
| Auto Detect to Modem | Defines a dynamic serial connection between your phone and a modem. Use this connection type with third-party applications that need to reconfigure the serial port when communicating with a modem. |
| USB/ Serial to PC | Defines a direct serial or USB connection between your phone and your desktop computer. When you select this option, your phone detects which type of cable you have connected to your computer. |
| USB/ Serial to Modem | Defines a direct serial or USB connection between your phone and a modem. When you select this option, your phone detects which type of cable is connected to the modem. |
| Wireless Modem to PC | Defines a connection between your phone's built-in wireless modem and a computer. |
| Wireless Modem to Modem | Defines a connection between your phone's built-in wireless modem and a wireless high-speed packet data network. |
| USB to PC | Defines the direct USB connection between your phone and your desktop computer. It is used to perform a local HotSync operation when your phone is connected by its USB connector to the cable. The cable is attached to a USB port on your desktop computer. |
| IrCOMM to PC | Defines a connection between the IR port of your phone and the infrared device of your computer or laptop. |
| IrCOMM to Modem | Defines a connection between the IR port of your phone and a modem. The modem can be attached to a computer or some other device containing an IR port. |
Setting an infrared to modem configuration
The following steps demonstrate how to create a modem connection that enables IR HotSync through an IR enabled modem. This modem would then dial a modem attached to your desktop to perform the remote HotSync operation.
To create an IrCOMM to Modem connection:
- In the Connection Preferences screen, tap New.
- Enter a name for this configuration.
- Tap the Connection Method pick list and select IrCOMM to Modem.

- Tap the Dialing pick list and select TouchTone or Rotary.
Note: Select Rotary only if your telephone service does not support TouchTone dialing.
- Tap the Volume pick list and select the speaker volume.
- Tap Details.
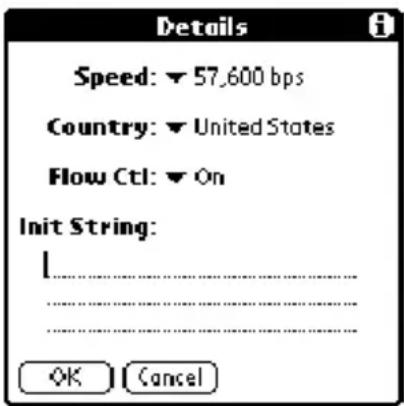
- Enter the initialization string appropriate for your phone.
- Hold Option and press Return twice to return to the Connection Preferences screen.
Digitizer Preferences
The Digitizer Preferences screen opens the digitizer calibration screen. This is the same screen that appears when you start your phone for the first time. You can recalibrate your screen after a hard reset, or if your digitizer drifts.
Formats Preferences
Use the Formats Preferences screen to set the country default and the display format of the dates, times, and numbers on your phone.
Country default
The country default sets date, time, week start day, and number conventions based on geographic regions where you might use your phone. For example, in the United Kingdom, time often is expressed using a 24-hour clock. In the United States, time is expressed using a 12-hour clock with an AM or PM suffix.
All your phone applications use the Country default settings. See the next section in this chapter for information on customizing these settings.
To set the country default:
- Tap the country name pick list.

- Tap the setting you want to use.
Time, date, week start, and numbers formats
The Time setting defines the format for the time of day. The time format that you select appears in all applications on your phone.
To select the time, date, week start, and numbers format:
- Tap the Time pick list and select a format.
- Tap the Date pick list and select a format.
- Tap the Week starts pick list, and select whether you want the first day of the week to be Sunday or Monday.
Note: This setting controls the Day, Week, Month, Year, and List views in Date Book Plus and all other aspects of your phone that display a calendar.
- Tap the Numbers pick list, and select formats for the decimal point and thousands separator.
General Preferences
The General Preferences screen enables you to set the time, date, auto shutoff interval, the beam receive feature, and sounds for your phone. See the section that begins on page 15 for information on setting the time and date.
Auto-off delay
Your phone has an automatic shutoff feature that turns off the power after a period of inactivity. This feature conserves battery power if you forget to turn off your phone. If you find that your phone shuts itself off before you finish viewing information on the screen, increase the auto-off setting.
To set the Auto-off delay:
-
Tap the Auto-off pick list.
-
Tap the setting you want to use for the automatic shutoff feature: 30 seconds, 1 minute, 2 minutes, or 3 minutes.

Note: The Auto-off setting turns off only the handheld mode on your phone. It does not turn off your phone's wireless mode. So, you can still receive calls, e-mail and text messages after the automatic shutoff period.
System, alarm, and game sounds
Your phone uses a variety of sounds. The System, Alarm, and Game Sound settings enable you to turn the sounds on or off, and to adjust the volume level.
Note: If the ringer switch is set to no sound, the ringer setting overrides the sound settings and all sounds are turned off. The system, alarm, and game sounds are used when the ringer switch is set to the ring position.
To set the system, alarm, and game sounds:
- Tap the System Sound pick list and select the sound level.
Note: When you turn off the System Sounds, you also turn off the "chime" tones associated with the HotSync operation.
- Tap the Alarm Sound pick list and select the sound level.
- Tap the Game Sound pick list and select the sound level.
Note: The Game Sound setting works only with games that are programmed to respond to this setting. Older games typically do not respond to this setting.
Network Preferences
When you activate the voice and PCS Vision services on your phone (see the Activation Guide for details), the activation process automatically configures your phone to connect to the PCS high-speed data network. After activation, your phone is ready to access the Internet or send and receive data using the PCS settings and any Palm OS wireless application. Visit the web site www.sprintpcs.com for information on third-party wireless applications.
Network Preferences let you configure your phone to connect to any packet data network that supports Simple or Mobile IP (Internet Protocols). Dialing into your ISP (Internet Service Provider) through a circuit switched connection is not supported at this time.
Connecting automatically
To take advantage of the persistent data connections available on your phone, you can choose to automatically connect to the PCS high-speed data network whenever you are inside a coverage area and you turn on wireless mode.
Tip: To connect to a Simple or Mobile IP template which you define using the Network Preferences screens, select the desired template before beginning these steps.
To choose an automatic connection:
- Press Menu .
- Under Options, select Preferences (/R).

Tap check box
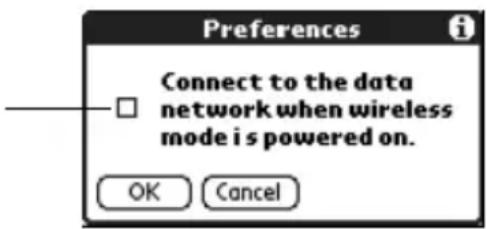
- Tap the check box.
- Hold Option and press Return to finish.
Creating a new packet data configuration
A service template stores Network Preferences settings that you can save and reuse. Use the Service setting to create a new service template for your packet data configuration.
You can create additional service templates from scratch or by duplicating another template you created and editing information. After you create a new or duplicate template, you can add and edit settings by tapping the Modify button which appears on the screen after you create the template.
Note: You cannot duplicate the Sprint service template, and you must obtain a special unlock code from Sprint to modify the Details and Advanced Network Preferences settings.
To create a packet data service template:
-
Press Menu .
-
Under Service, select New (/N).

A new service template (called Untitled) is added to the Service pick list and the Unlock icon appears at the bottom of the screen.
- Enter the Service name.
To duplicate an existing service template:
- Tap the Service pick list.
- Tap the predefined service template you want to duplicate.
- Press Menu .
- Under Service, select Duplicate (/L).
A copy of the service template is added to the Service pick list.
Entering a user name
The User Name setting identifies the name you use when you log into your packet data network. Although this field can contain multiple lines of text, only two lines appear onscreen.
To enter a user name:
- Tap the User Name field.
- Enter your user name.
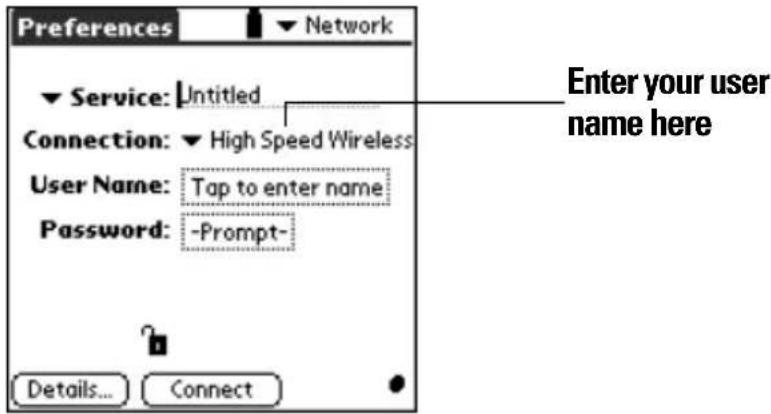
Note: Most packet data servers do not accept spaces in the user name.
Entering a password
The Password box identifies the password you use to log into your packet data network. Your entry in this field determines whether your phone prompts you to enter a password each time you log into your network:
▶ If you do not enter a password, your phone displays the word “Prompt” in this field and asks you to enter a password during the login procedure.
If you enter a password, your phone displays the word “Assigned” in this field and does not prompt you to enter a password during the login procedure.
Note: If you are concerned about security, select the Prompt option and do not enter a password.
To enter a password:
- Tap the Password field.
- Enter the password you use to log into your server.

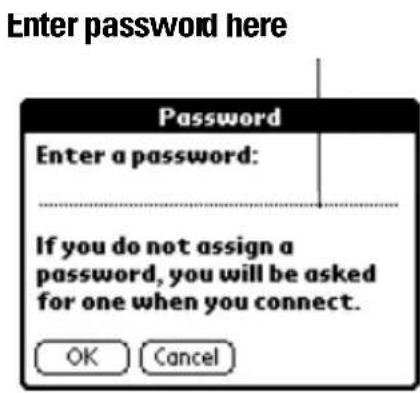

- Hold Option and press Return to finish.
Note: The Password field updates to display the word "Assigned."
Selecting a connection
The Connection Preferences settings tell your phone about the hardware you are using for remote data connections. Normally you'll use your phone's built-in wireless modem to establish a data connection, but you can also use the infrared port or connect an external modem to the USB port. See the section that begins on page 191 for details on how to configure Connection Preferences.
To select a connection:
- Tap the Connection pick list.
The list displays the configurations in your Connection Preferences panel.

- Select the appropriate Connection.
Tip: To connect to your packet data network using your phone's built-in wireless modem, select High Speed Wireless as the Connection.
Connecting to your service
After you set your Connection and Network Preferences, establishing a connection to your packet data network is easy.
To establish a connection:
Tap Connect to sign on to the packet data network defined in the current service template.
Your communication displays Service Connection Progress messages.
Tip: To see expanded Service Connection Progress messages, press the bottom scroll button.
To close a connection:
Tap Disconnect to terminate the connection between your phone and your packet data network.
Adding detailed information to a Mobile IP service template
A Mobile IP service template provides a persistent data connection to your packet data network while moving between data service regions within your home network. Mobile IP networks require you to supply an HA (Home Agent) server address which acts like a forwarding address. The HA server translates the IP address on your phone into a “care of” address and enables other devices to locate you as you roam through the network.
If you are creating a new Mobile IP service template, you need to provide additional information to connect to your packet data network. You use the Details and Advanced dialog boxes to add additional information to the selected service template.
To define a Mobile IP service template:
-
Tap Details.
-
Make sure the Mobile IP check box is selected.

- Tap HA Password and enter your Home Agent password.
- Tap the space to the left of the first period in the Primary HA field, and then enter the first section of the primary HA address.
Note: Each section must be a number from 0 to 255.
- Tap and enter the remaining sections of the Primary HA field.
- Tap and enter all sections of the Secondary HA address.
Defining an IP address for a Mobile IP service template
Everyone who logs on to the Internet needs to have a unique identifier (an IP address), whether permanent or temporary. Some networks dynamically assign a temporary IP address when clients log in. The IP Address field lets you identify whether your network provides automatic (dynamic) temporary IP addressing.
Note: Most networks automatically assign IP addresses. Leave the Automatic IP Address option checked unless you are certain you need to manually enter IP address information.
To identify dynamic IP addressing:
- Tap Advanced.
- Tap the IP Address check box to select it.
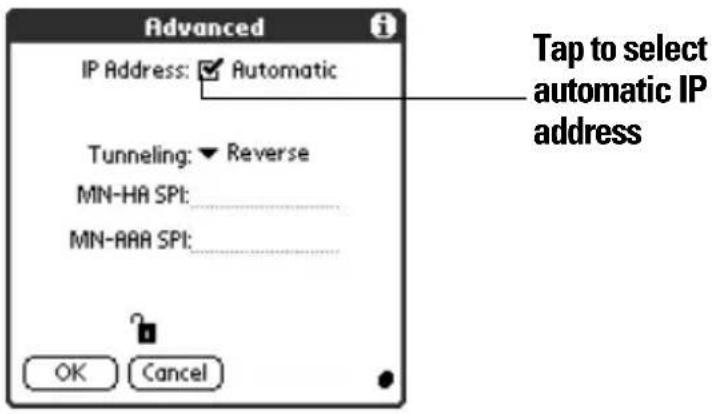
To enter a permanent IP address:
-
Tap Advanced.
-
Tap the IP Address check box to deselect it and display a permanent IP address field below the check box.
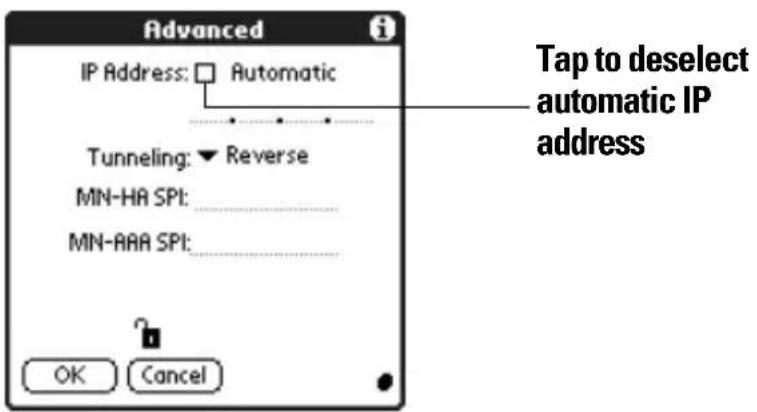
- Tap the space to the left of the first period, and then enter the first section of the IP address.
Note: Each section must be a number from 0 to 255.
-
Tap and enter the remaining sections of the IP address.
-
Hold Option and press Return to finish.
Defining Tunneling and SPI in a Mobile IP service template
Tunneling and SPI (Security Parameter Index) are advanced parameters that you can use to configure a Mobile IP service template. Consult your System Administrator to obtain the correct settings.
To enter Tunneling and SPI:
- Tap the Tunneling pick list and select Reverse or Forward.

- Tap the MN-HA-SPI field and enter the Home Agent security parameter index.
- Tap the MN-AAA-SPI field and enter the AAA security parameter index.
- Hold Option and press Return to finish.
Adding detailed information to a Simple IP service template
A Simple IP service template provides a persistent data connection while inside your home service area. A Simple IP configuration does not support a persistent data connection as you move between data service regions.
If you are creating a new Simple IP service template, you need to provide additional information to connect to your packet data network. You use the Details and Advanced dialog boxes to add additional information to the selected service template.
To define a Simple IP service template:
- Tap Details.

- Deselect the Mobile IP check box.
Defining the IP address in a Simple IP service template
Everyone who logs on to the Internet needs to have a unique identifier (an IP address), whether permanent or temporary. Some networks dynamically assign a temporary IP address when clients log in. The IP Address field lets you identify whether your network provides automatic (dynamic) temporary IP addressing.
Note: Most networks automatically assign IP addresses. Leave the Automatic IP Address option checked unless you are certain you need to manually enter IP address information.
To identify dynamic IP addressing:
-
Tap Advanced.
-
Tap the IP Address check box to select it.

To enter a permanent IP address:
- Tap Advanced.
- Tap the IP Address check box to deselect it and display a permanent IP address field below the check box.

- Tap the space to the left of the first period, and then enter the first section of the IP address.
Note: Each section must be a number from 0 to 255.
- Tap and enter the remaining sections of the IP address.
- Hold Option and press Return to finish.
Defining DNS addresses in a Simple IP service template
The Domain Naming System (DNS) is a mechanism in the Internet for translating the names of host computers into IP addresses. When you enter a DNS number (or IP address), you are identifying a specific server that handles the translation services.
Each IP address has four sections, separated by periods. In the Details dialog box, you enter each section separately. Each section of an IP address is made up of a number from 0 to 255; numbers are the only allowable characters in this field.
Ask your System Administrator for the correct Primary or Secondary DNS IP numbers.
Note: Most networks automatically provide DNS information. Leave the Query DNS option checked unless you are certain you need to manually enter DNS information.
To enter a primary and secondary DNS:
- Tap the Query DNS check box to deselect it.
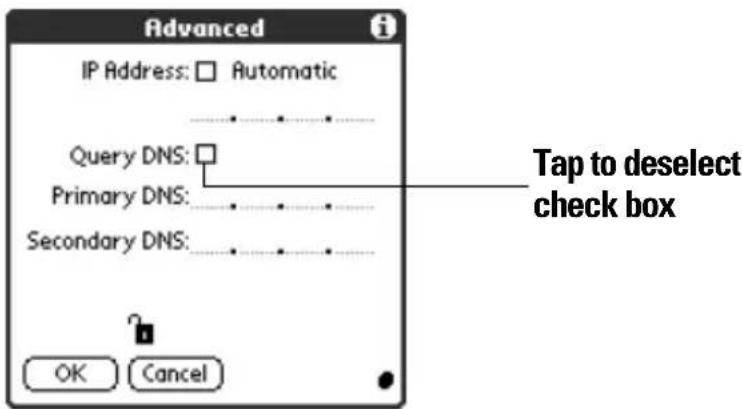
- Tap the space to the left of the first period in the Primary DNS field, and then enter the first section of the IP address.
Note: Each section must be a number from 0 to 255.
- Repeat step 2 for the second, third, and last sections of the Primary DNS field.
- Repeat steps 2 and 3 for the Secondary DNS number.
- Hold Option and press Return to finish.
Deleting a service template
There is only one way to delete a service template: use the Delete command from the Service menu.
To delete a service template:
- Tap the Service pick list.
- Tap the service template you want to delete.
Note: You cannot delete the predefined Sprint templates.
- Press Menu
- Under Service, select Delete (/D).
- Hold Option and press Return to finish.

Network Preferences menu commands
The Network Preferences screen includes menu commands to make it fast and easy to create and edit service templates. Network Preferences menus are show here for your reference.
See page 28 for more information about choosing menu commands.
Service menu

Options menu

Troubleshooting network connections
If you are having a problem establishing a network connection, check this section and try the suggestions listed.
Checking your wireless service status
Make sure the wireless mode on your phone is active and that you are in a coverage area. The LED on the top of your phone and the signal bars at the top of the PhoneBook screen provide visual cues about the wireless mode status. See page 7 and page 82 for details.
Displaying expanded Service Connection Progress messages
It's helpful to identify at what point in the login procedure the connection fails. An easy way to do this is to display the expanded Service Connection Progress messages. Expanded Service Connection Progress messages describe the current stage of the login procedure. Press the bottom scroll button at any point during login to display these messages.
Viewing the Network Log
If viewing the expanded Service Connection Progress messages does not give you enough information to find out why you cannot connect to your packet data network, take a look at the Network Log. The Network Log lists all of the communication that occurs between your phone and your server during the login procedure. The information in the Network Log can help your System Administrator pinpoint where the login procedure fails and why.
To view the Network Log:
- Press Menu
- Under Options, select View Log (/V).
- Use the scroll buttons to see the entire Network Log.
- Hold Option and press Return to finish.

Adding a DNS number
If your packet data server requires a DNS number and you did not enter that information in the Network Preferences screen, it will appear that you successfully logged into your network. When you try to use an application or look up information, however, the connection fails. If this occurs, try adding a DNS number. Ask your System Administrator for the correct Primary and Secondary DNS IP numbers.
Owner Preferences
The Owner Preferences screen enables you to record a name, company name, phone number, or any other information that you want to associate with your phone.
If you use the Security application to turn off and lock your phone with a password, information that you put in the Owner Preferences displays the next time you turn on your phone.
To enter the Owner Preferences:
▶ Enter the text that you want to associate with your phone in the Owner Preferences screen. If you enter more text than can fit on one screen, a scroll bar automatically appears on the right side of the screen.
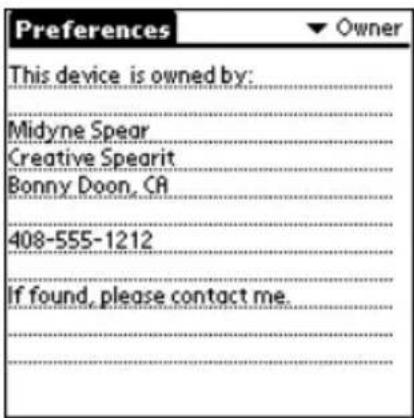
If you assign a password with the Security application, the information in the Owner Preferences screen cannot be changed. In this case, an Unlock button appears at the bottom of the screen.
To unlock the Owner Preferences screen:
- Tap Unlock.
- Enter the password that you defined in the Security application.
- Hold Option and press Return to finish.
Ringer Preferences
The Ringer Preferences screen controls the behavior of the ringer on your phone. You can control the ring volume, select unique ring tones for various types of incoming calls and notifications, and turn the vibrate option on and off for each of the two ringer switch positions.
To select ring volume settings:
- Tap the Volume box.
- Tap the Ring Volume pick list and select the ring volume level you want to use.
Note: When you change the ring volume, the Known Caller tone plays once. To avoid playing the tone, move the ringer switch to the silent position before changing the volume.
- Tap the Vibrate pick lists to enable or disable the vibrate option for the corresponding ringer switch position: Sound Mode and Silent Mode

- Hold Option and press Return to finish.
To select ring tone settings:
- Tap the Tone box.

- Tap the various call tone pick lists and select a ringer sound for each of the following types of incoming calls:
| Known Caller | Plays this sound when you receive a call that matches any number stored in your Speed Dial or Contacts list. This setting is independent from the unique ring you can assign to specific numbers in your Speed Dial list. |
| Unknown Caller | Plays this sound when you receive a call from a number that does not match any of the numbers stored in your Speed Dial or Contacts list. |
| Roaming | Plays this sound when you receive a call while roaming outside a PCS coverage area. |
| Message | Plays this sound when you have a text message. |
| Voicemail | Plays this sound when you have a new voicemail message. |
| Service | Plays this sound for PCS related notifications. |
Note: When you select a ringer sound, the sound plays once. To avoid playing the sound, move the ringer switch to the silent position before selecting a new ringer sound.
- Hold Option and press Return to finish.
ShortCuts Preferences
The ShortCuts Preferences screen enables you to define abbreviations for entering text. This section describes how to create, edit, and delete a ShortCut. See page 30 for information on the use of ShortCuts.
Creating a ShortCut
You can create a ShortCut for any words, letters, or numbers. All ShortCuts you create appear on the list in the ShortCut Preferences screen. All the ShortCuts are available in any of your phone applications and are backed up on your computer when you perform a HotSync operation.
To create a ShortCut:
-
Tap New.
-
On the ShortCut Name line, enter the letters you want to use to activate the ShortCut.

flowchart
graph LR
    A["br - Breakfast<br>di - Dinner<br>ds - [Date Stamp"]
dts_-["Date and Time Stamp"]
lu - Lunch
me - Meeting
ts_-["Time Stamp"]] --> B["New"]
    A --> C["Edit"]
    A --> D["Delete..."]
    E["Start"] --> F["→ Tap New"]
    G["Start"] --> H["ShortCut Entry"]
    H --> I["ShortCut Name:_______________________________"]
    H --> J["ShortCut Text:_______________________________"]
    H --> K["OK"]
    H --> L["Cancel"]
- Tap the ShortCut Text area and enter the text that you want to appear when you type the ShortCut characters.
Tip: You may want to add a space (space character) after the last word in your ShortCut text. This way, a space automatically follows the ShortCut text.
- Hold Option and press Return to finish.
Tip: To use a ShortCut, enter the ShortCut symbol followed by the ShortCut characters. See page 30 for details.
Editing a ShortCut
After you create a ShortCut, you can modify it at any time.
To edit a ShortCut:
- Tap the ShortCut you want to edit.
- Tap Edit.
- Make the changes you want.
- Hold Option and press Return to finish.
Deleting a ShortCut
If you no longer need a ShortCut, you can delete it from the list of ShortCuts.
To delete a ShortCut:
- Tap the ShortCut you want to delete.
- Tap Delete.
- Hold Option and press Return for Yes.
Advanced HotSync® Operations
HotSync® Manager enables you to synchronize data between one or more Palm OS® devices and Palm™ Desktop software or another PIM such as Microsoft Outlook. To synchronize data, you must connect your PCS Phone Handspring® Treo™ 300 and your desktop software either directly, by connecting your phone to the HotSync cable attached to your computer or using infrared communication, or indirectly, using the a network.
This chapter describes how to select HotSync options and perform a HotSync operation via the infrared port or a network. See page 76 for information about performing your first and subsequent local HotSync operations.
Selecting HotSync setup options
You can choose when you want HotSync Manager to run. If necessary, you can adjust the local and modem HotSync settings as well.
To set the HotSync options:
- Click the HotSync Manager icon

in the Windows system tray.
- Choose Setup.

- Click the General tab and select one of the following options:
| Always available | Adds HotSync Manager to the Startup folder and constantly monitors the communication port for synchronization requests from your phone. With this option, the HotSync Manager synchronizes data even when Palm Desktop software is not running. |
| Available only when Palm Desktop software is running | Starts HotSync Manager and monitors requests automatically when you open Palm Desktop software. |
| Manual | Monitors requests only when you select HotSync Manager from the Start menu. |
Tip: If you're not sure which option to use, keep the default setting: Always available.
- Click the Local tab to display the settings for the connection between your computer and the HotSync cable, and adjust the following options as needed.
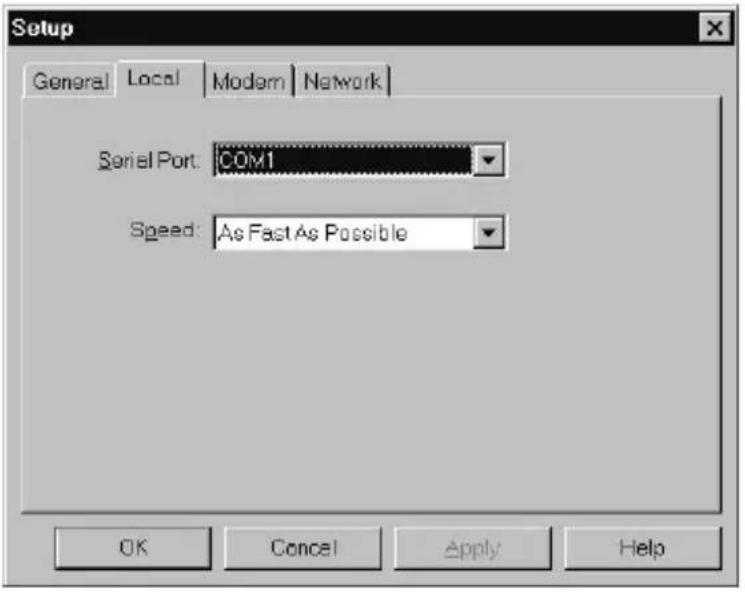
Serial Port
Identifies the port that your desktop software uses to communicate with the optional serial HotSync cable. This selection should match the number of the port to which you connected the optional cable.
Note: Your phone cannot share this port with an internal modem or other device.
Speed
Determines the speed at which data is transferred between your phone and your desktop software. Try the As Fast As Possible rate first, and adjust downward if you experience problems. This setting allows your desktop software and your phone to find and use the fastest speed.
- If you are attached to a network, click the Network tab to display the network settings and adjust the options as needed. See page 225 for more information.
- Click OK.
Customizing HotSync application settings
For each application, you can define a set of options that determines how records are handled during synchronization. These options are called a “conduit.” By default, a HotSync operation synchronizes all files between the phone and your desktop software.
In general, you should leave the settings to synchronize all files. The only reason you might want to change these settings is to overwrite data on either your phone or your desktop software, or to avoid synchronizing a particular type of file because you don't use it.
In addition to the conduits for the applications on your phone, HotSync Manager includes System and Install conduits. The System conduit backs up the system information stored on your phone, including keyboard ShortCuts. The Install conduit installs applications on your phone.
To customize HotSync application settings:
- Click the HotSync Manager icon in the Windows system tray (bottom-right corner of the taskbar).
Tip: You can also click the HotSync command on the Palm Desktop software menu bar.
- From the HotSync Manager menu, choose Custom.
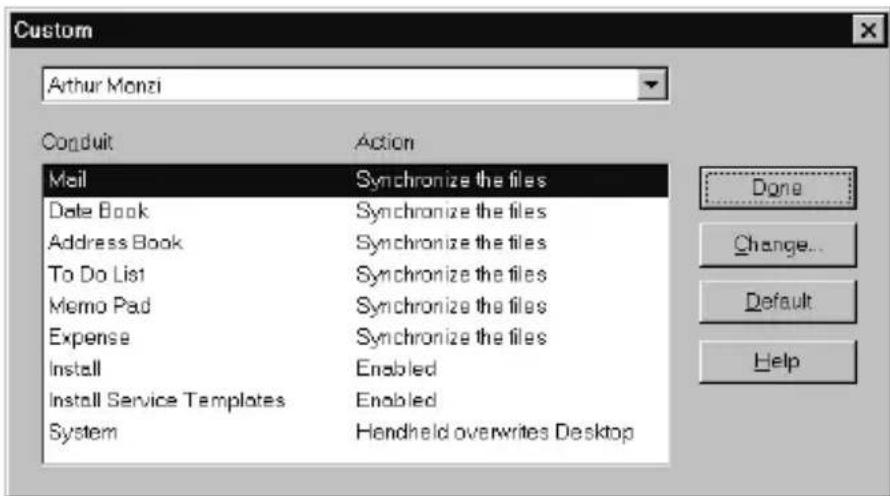
-
Select the appropriate user name from the list.
-
Select an application in the Conduit list.
5. Click Change.
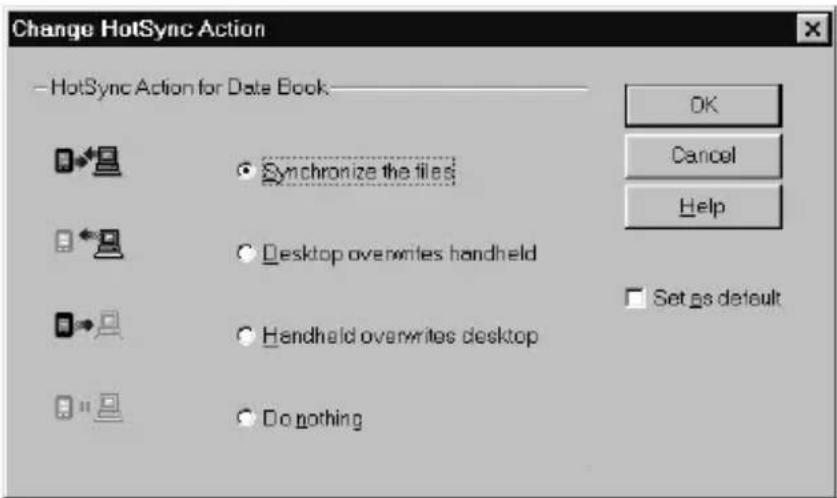
- Click the direction in which you want to write data, or click Do Nothing to skip data transfer for an application.
Note: Changing the HotSync setting from the default affects only the next HotSync operation. Thereafter, the HotSync Actions revert to their default settings. To use a new setting on an ongoing basis, select the Set As Default box. Thereafter, whatever you selected as the default setting is used when you click the Default button in the Custom dialog.
- Click OK.
- Repeat steps 4 through 7 to change conduit settings for other applications.
- Click Done to activate your settings.
IR HotSync operations
Your phone is equipped with an infrared (IR) port that supports the IrCOMM implementation of the standards for infrared communication established by the Infrared Data Association (IrDA). This means that you can beam data to any other device that supports the IrCOMM implementation of the IrDA standards. Most importantly, you can use the IR port to perform HotSync operations. When you use the IR port on your phone to perform HotSync operations, you don't need your HotSync cable. You simply enable infrared communication on your computer and your phone and then perform an IR HotSync operation. So there's no need to carry your cable when you're on the road with an infrared-enabled laptop.

Preparing your computer for infrared communication
To perform an IR HotSync operation, the computer you want to synchronize with must have an enabled infrared port or be connected to an infrared device that supports the IrCOMM implementation of the IrDA standards.
Desktop computers are likely to require an infrared device attached to a physical COM port. Laptops are likely to have a built-in IR port. Your computer must also have an installed infrared driver.
Does your computer support infrared communication?
If your computer uses Microsoft Windows 98, Windows Me, or Windows 2000, infrared communication is built into the operating system. Some versions of Windows 95 also have built-in infrared communication. If you are using another type of computer, check the documentation that came with your computer to see if it supports infrared communication.
To check the ports used for infrared communication with Windows 98 and Me:
- In the Windows taskbar click Start, choose Settings, and then choose Control Panel.
- Double-click the Infrared icon.
Note: If you do not see the Infrared icon, you need to install an infrared driver.
- Click the Options tab.
- Select Enable infrared communication.
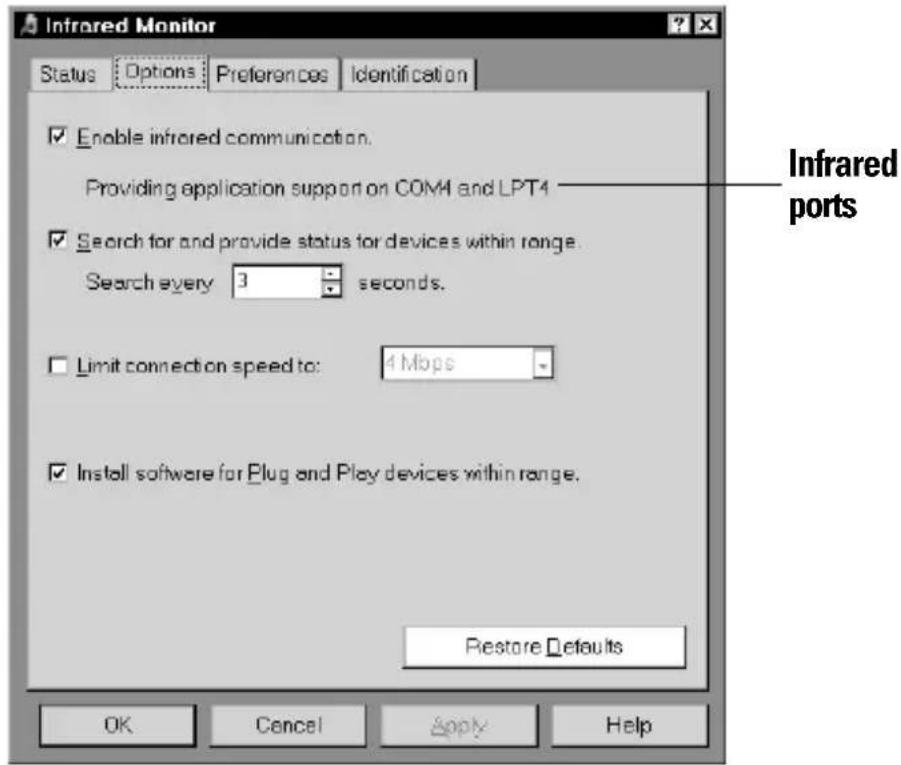

The COM port displayed on this screen is the port associated with your infrared device. It should be different from the port currently defined for cable synchronization.
- Write down the port listed as “Providing application support” so you can configure HotSync Manager for infrared communication.
This port is the simulated port. It is the channel through which the actual infrared communication takes place between your computer and your phone.
-
Deselect all other check boxes in the Options tab.
-
Click Apply and then click OK.
To enable infrared communication with Windows 2000:
- Click the HotSync Manager icon in the Windows system tray (bottom-right corner of the taskbar).
- Choose Exit to close HotSync Manager.
- In the Windows taskbar click Start, choose Settings, and then choose Control Panel.
- Double-click the Wireless Link icon.
- Click the Image Transfer tab and deselect the Use Wireless Link to transfer images from a digital camera to your computer check box.
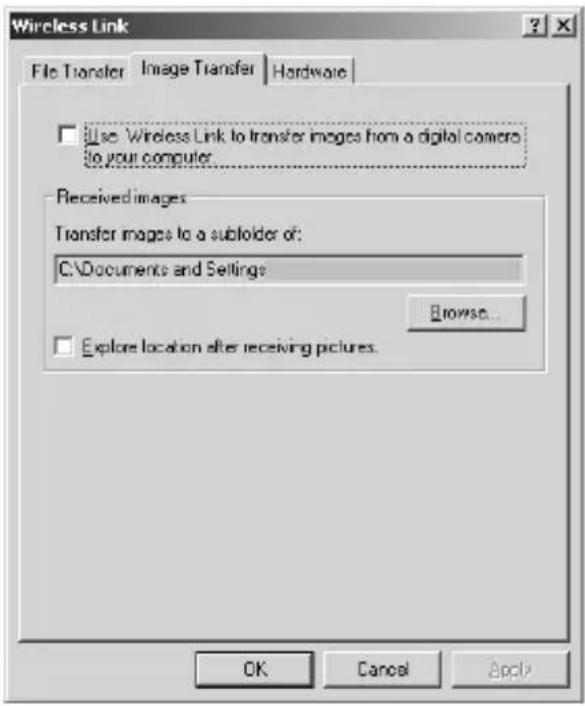
- Click OK.
- Disable any other application that opens the IR port.
Configuring HotSync Manager for infrared communication
Next you need to go to the HotSync Manager and configure it for infrared communication. In Windows 98 and Me, you need to specify the simulated port used for infrared communication. In Windows 2000, you simply need to activate the infrared menu item.
To configure HotSync Manager for infrared communication with Windows 98 and Me:
- Click the HotSync Manager icon in the Windows system tray.
- Make sure Local Serial is checked on the menu.
- Choose Setup.
- Click the Local tab.
- In the Serial Port list, select the simulated port used for infrared communication. See the previous section for instructions on identifying the simulated port.

6. Click OK.
The HotSync Manager is now communicating with the simulated port defined for infrared communication.
Note: You cannot use your cable again until you reconfigure the HotSync Manager to communicate with the port defined for cable synchronization.
To configure HotSync Manager for infrared communication with Windows 2000:
- If necessary, start HotSync Manager.
- Click the HotSync Manager icon in the Windows system tray.
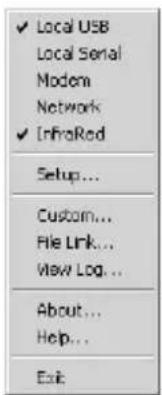
- Choose InfraRed from the HotSync Manager menu.
Performing an IR HotSync operation
After you complete the steps to prepare for an IR HotSync operation it is easy to perform the actual operation.
To perform an IR HotSync operation:
-
Press Option and then press Menu to access the Applications Launcher.
-
Tap the HotSync icon Ⓗ.
-
Tap Local.
-
Tap the pick list below the HotSync icon and select IR to a PC/Handheld.

-
Position your phone's IR port within a couple of inches of your computer's infrared port.
-
Tap the HotSync icon to start the IR HotSync operation.
Returning to serial cable HotSync operations
It's easy to return to using the cable for HotSync operations.
Note: If you're using a USB cable and the Local USB option is already selected on the HotSync Manager menu, you don't need to do anything to return to cable operations.
To return to serial cable HotSync operations with Windows 98 and Me:
- If needed, connect the cable to your computer.
- Click the HotSync Manager icon in the Windows system tray.
- Choose Setup, and then click Local.
- In the Serial Port list, select the COM port where your cable is connected.
- Click OK.
To disable infrared communication with Windows 2000:
- Click the HotSync Manager icon in the Windows system tray.
- Uncheck InfraRed on the menu.
- In the Windows taskbar click Start, choose Settings, and then choose Control Panel.
- Double-click the Wireless Link icon.
- Click the Image transfer tab, and select the Use Wireless Link to transfer images from a digital camera to your computer check box.
The next time you want to perform a HotSync operation just press the HotSync button on the cable. You can leave the HotSync application on your phone set to perform IR HotSync operations and still use the cable. This is useful if you perform HotSync operations with both your desktop computer and a laptop. When you are in the office just connect your phone to the cable and press the HotSync button. When you travel, you don't have to carry a cable.
Conducting a HotSync operation via a network
When you use the Network HotSync software, you can take advantage of the Local Area Network (LAN) connectivity available in many office environments. The Network HotSync software enables you to perform a HotSync operation by using a cable that is connected to any computer on your LAN (provided that the computer connected to the cable also has the Network HotSync software installed, your computer is on, and the HotSync Manager is running).
To prepare your computer for a network HotSync operation:
- Click the HotSync Manager icon in the Windows system tray (bottom-right corner of the taskbar).
- From the HotSync Manager menu, choose Network.

Note: To perform a Network HotSync from another computer on your network, you must select Network from the HotSync Manager menu on both your primary computer and the computer you want to use.
- From the HotSync Manager menu, choose Setup.
- Click the Network tab and make sure your user name has a check mark next to it. If the check mark is not there, click the check box next to your user name.
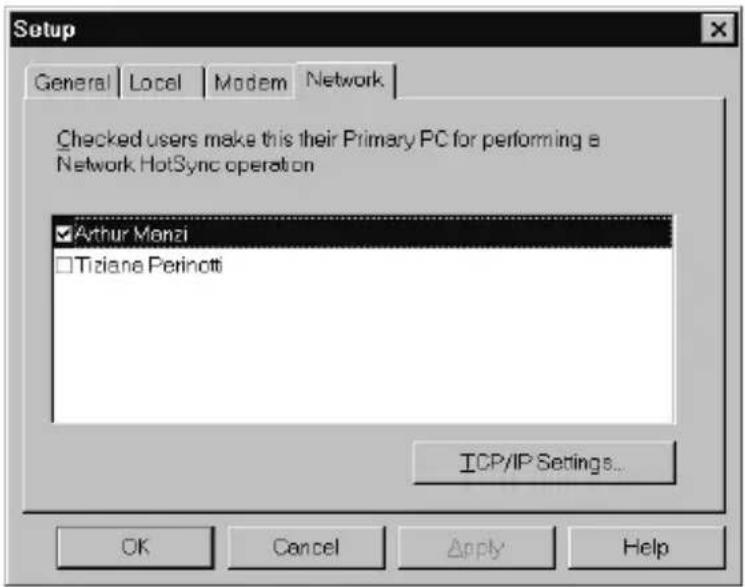
- Click OK.
- Connect your phone to the cable and press the HotSync button.
The HotSync operation records network information about your computer on your phone. With this information, your phone can locate your computer when you perform a HotSync operation over the network.
Performing a network HotSync operation via a LAN
You are ready to perform a network HotSync from another computer on your network after you select Network from the HotSync Manager menu on both your primary computer and the computer you want to use for the network HotSync operation.
To perform a network HotSync operation via a LAN:
-
Connect your phone to a HotSync cable that is connected to a computer on the LAN.
-
Press the HotSync button on the cable.
HotSync Manager finds your primary computer on the LAN and synchronizes with the data on your primary computer.
Using File Link
The File Link feature enables you to import PhoneBook and Memo Pad information onto your phone from a separate external file such as a company phone list. HotSync Manager stores the data in a separate category on your Palm Desktop software and your phone. You can configure the File Link feature to check for changes to the external file when you perform a HotSync operation.
With File Link, you can import data stored in any of the following formats:
▶ Comma delimited (.csv)
▶ Tab delimited (.tsv)
▶ Memo Pad archive (.mpa)
▶ Address archive (.aba)
▶ Text (.txt)
For information on how to set up a file link, see the Palm Desktop online Help.
Creating a user profile
If you need to configure several Palm OS® phones with specific information (such as a company phone list) before distributing them to their actual users, you can create a user profile to load the data into a phone without associating that data with a user name. The User Profile feature is designed only for the first-time HotSync operation, before you assign a User ID to a particular phone.
To create a user profile:
- Open Palm Desktop software.
- From the Tools menu, choose Users.
- Click Profiles.
- Click New.

- Enter a unique name for the profile, and click OK.
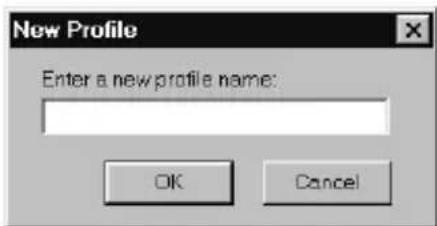
-
Repeat steps 3 and 4 for each profile that you want to create, and then click OK to return to Palm Desktop software.
-
Select the profile from the User list and create the data for the profile (e.g., company phone list, etc.).

To use a profile for the first-time HotSync operation:
- Connect the new phone to the HotSync cable.
- Press the HotSync button on the cable.
- Click Profiles.
- Select the profile that you want to load on the phone, and click OK.

- Click Yes to transfer all the profile data to the phone.
The next time you perform a HotSync operation, Palm Desktop software prompts you to assign a user name to the phone.

Maintaining Your Phone
This chapter provides information on the following: ▶Proper care of your PCS Phone Handspring® Treo™ 300
▶ Maximizing battery life
▶ Resetting your phone
Caring for your phone
Your phone is designed to be rugged and reliable and to provide years of trouble-free service. Please observe the following general tips when using your phone:
▶ Take care not to scratch the screen of your phone. Keep the screen clean. When working with your phone, use the supplied stylus or plastic-tipped pens intended for use with a touch-sensitive screen. Never use an actual pen or pencil or other sharp object on the surface of the phone screen.
▶ Your phone is not waterproof and should not be exposed to rain or moisture. Under extreme conditions, water may enter the circuitry through the front panel buttons. In general, treat your phone as you would a pocket calculator or other small electronic instrument.
The touch-sensitive screen of your phone contains a glass element. Take care not to drop your phone or subject it to any strong impact. Do not carry your phone in your back pocket: if you sit on it, the glass may break.
▶ Protect your phone from temperature extremes. Do not leave your phone on the dashboard of a car on a hot day, and keep it away from heaters and other heat sources.
▶ Do not store or use your phone in any location that is extremely dusty, damp, or wet.
▶ Use a soft, damp cloth to clean your phone. If the surface of the phone screen becomes soiled, clean it with a soft cloth moistened with a diluted window-cleaning solution.
Battery considerations
Please note the following considerations when using the rechargeable battery in your phone:
When wireless mode is on, your phone battery should provide 150 hours of stand-by time, or 2.5 hours of talk time between charges. When you use your phone in handheld mode and wireless mode is off, your phone battery provides approximately one week of use between charges.
▶ You can conserve battery life by minimizing use of the keyboard backlight feature and by choosing a lower Auto-off setting which automatically turns the phone off after a period of inactivity. See page 196 and page 10 for more information.
▶ If the battery becomes low in the course of normal use, an alert appears on the phone screen describing the low battery condition. If this alert appears, connect your phone to the HotSync cable or travel charger to charge the battery.
If the battery drains to the point where your phone does not turn on, it stores your data safely for about three days. In this case, there is enough residual energy in the battery to store the data, but not enough to turn on your phone. If your phone does not turn on when you press the power button, you should charge the battery immediately.
▶ If you leave a drained battery in your phone for an extended period of time, you can lose all of the stored data. If this happens, charge the battery and use the reset button to reset your phone as described in the next section. After you reset your phone, perform a HotSync operation to restore the data from your computer.
Resetting your phone
Under normal circumstances, you will not have to use the reset button. On rare occasions, however, your phone may no longer respond to buttons or the screen. In this case, you need to perform a reset to get your phone running again.
Performing a soft reset
A soft reset tells your phone to stop what it's doing and start over again. All records and entries stored in your phone are retained with a soft reset. After a soft reset, the Welcome screen appears, followed by the General Preferences screen (to set time and date).
To perform a soft reset:
- Unscrew the tip of the stylus to access the reset tool.

- Use the reset tool to gently press the reset button inside the hole on the back panel of your phone.
Tip: You can also use the tip of an unfolded paper clip (or similar object without a sharp tip).
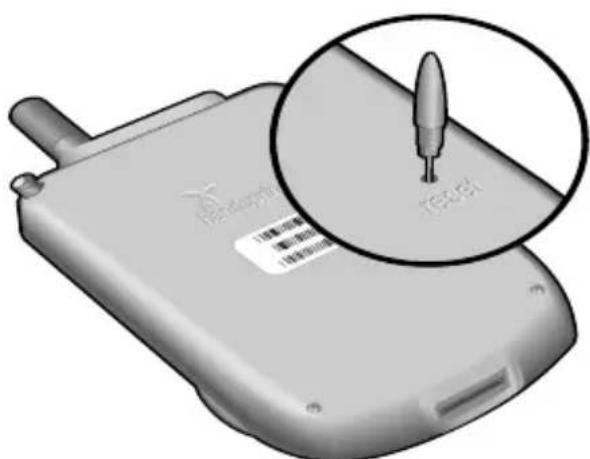
Performing a warm (or safe) reset
A warm (or safe) reset bypasses system extensions on your phone, such as HackMaster hacks or system patches. Performing a warm reset enables you to uninstall a third-party application that may be causing a problem.
To perform a warm (or safe) reset:
-
Press and hold the top scroll button on the front panel of your phone.
-
While holding down the top scroll button, use the reset tool (or similar object without a sharp tip) to gently press the reset button.
-
When the system screen appears, release the top scroll button.
Performing a hard reset
With a hard reset, all records and entries stored in your phone are erased. Never perform a hard reset unless a soft or warm reset does not solve your problem.
Note: You can restore any data previously synchronized with your computer during the next HotSync operation.
To perform a hard reset:
- Press and hold the power button on the top of the phone.
- While holding down the power button, use the reset tool (or similar object without a sharp tip) to gently press and release the reset button.
- When the system screen appears, release the power button.
- When a message appears on the phone screen warning that you are about to erase all the data stored on your phone, do one of the following:
- Press the top scroll button on the front panel of your phone to complete the hard reset and display the Digitizer screen.
- Press any other button to perform a soft reset.
Note: With a hard reset, the current date and time are retained. Formats Preferences and other settings are restored to their factory default settings.
- If the language selection screen appears, select the same language you selected for your desktop software. Choosing a different language may result in loss of data.
To restore your data after a hard reset:
- Click the HotSync Manager icon (bottom-right corner of the task)

in the Windows system tray
Tip: You can also click the HotSync command on the Palm Desktop software menu bar.
- From the HotSync Manager menu, choose Custom.

- Select the appropriate user name from the list.
- Select an application in the Conduit list.
- Click Change.

- Select Desktop overwrites handheld.
Note: Changing the HotSync setting from the default affects only the next HotSync operation. Thereafter, the HotSync Actions revert to their default settings.
- Click OK.
- Repeat steps 4 through 7 to change conduit settings for other applications.
- Click Done to activate your settings.
- Perform a HotSync operation.
Troubleshooting Tips
I f you encounter a problem with your PCS Phone Handspring ® Treo TM 300:
▶ Review this section to see if your problem is listed
▶ Check our web site at www.sprintpcs.com for the latest technical support information
Note: Thousands of third-party add-on applications have been written for Palm OS ® devices. Unfortunately, we are not able to support such a large number of third-party applications. If you are having a problem with a third-party application, please contact the developer or publisher of that software.
Software installation problems
Problem Solution
Palm TM Desktop software will not install successfully. Disable any anti-virus software, close any open applications or utilities, and then perform the installation again.
If you are installing on a computer at your workplace, make sure your System Administrator grants you the rights to install software.
If you are still having problems installing the Handspring software, try these steps:
- Download the latest version of the software from the Customer Support or Product Support section of www.sprintpcs.com.
- Restart your computer in “safe mode.” In most versions of Windows you can do this by pressing F8 on the keyboard as the computer boots.
- Install the file you downloaded in step 1. If the installation finishes, restart your computer in the normal operating mode and start using Palm Desktop software.
Operating problems
Problem Solution
My phone won't turn on. Try each of these in turn:
▶ Adjust the display settings.
▶ Make sure the battery is fully charged.
▶ Perform a soft reset. See page 233 for details.
▶ If your phone still does not operate, try a hard reset. See page 235 for details.
My phone keeps turning itself off.
Your phone is designed to turn itself off after a period of inactivity. This period can be set at one, two, or three minutes. Check the Auto-off setting. See page 196 for details.
Myphone is not making any sounds.
▶ Check the ringer switch setting on top of your phone. The setting turns off all sounds on your phone.
▶ Check the System Sound setting. See page 196 for details.
My phone has frozen. This is most commonly attributed to conflicts with third-party software. Try each of these in turn:
▶ Perform a soft reset. See page 233 for details.
▶ Delete any application you recently installed. See page 42 for details.
▶ Perform a warm reset. See page 234 for details.
▶ Perform a hard reset. See page 235 for details.
I don't see anything on my phone's screen.
▶ Adjust the display settings.
▶ Charge the battery.
▶ Perform a soft reset.
Tapping and keyboard problems
Problem Solution
When I tap the buttons or screen icons, it activates the wrong feature.
Calibrate the screen. See page 194 for details.
When I press Menu nothing happens.

Not all applications or screens have menus. Try changing to a different application.
Wireless communication problems
Problem Solution
I can't use the wireless features
▶ Make sure your PCS Treo 300 battery is charged.
▶ Make sure wireless mode is on. To turn on wireless mode, press and hold the power button for at least two seconds, until you hear a confirmation tone. An ascending tone means wireless mode is now on, a descending tone means wireless mode is now off.
▶ Sprint may have set the locking code before you received your PCS Treo 300. Enter the default unlocking code and then tap OK. In North America, the default unlocking code is usually the last four digits of your phone number. If this doesn't work, contact Sprint.
My PCS Treo 300 requires an unlocking code, but I didn't set one
I called Sprint to activate my service, but wireless mode still doesn't work My phone number isn't on the Phone Info screen
Sometimes it requires 24 hours or more to activate your wireless service. If it has been longer than the standard activation period, report the problem to your Sprint representative. Sprint may need to install your phone number onto your phone. Contact your Sprint representative to see if they can send a message to your PCS Treo 300 that writes your phone number onto your phone.
My PCS Treo 300 won't register to the network
▶ You are probably outside a PCS network coverage area. Try enabling roaming as described on page 109 or try another Sprint phone to verify whether coverage is available in your current location.
▶ Turn off the wireless mode on your phone, and then turn it on again. If a dialog appears asking if you want to search for a network, tap Yes.
The voicemail icon appears when I don't have any new voice messages.
▶ Check your messages to confirm that you've listened to all your new messages.
▶ Turn wireless mode off and then turn it on again.
▶ If the icon still appears, follow these steps:
-
From the Speed Dial, Dial Pad, or Call History view, press Menu.
-
Under Options, select Call Preferences (/A).
-
Tap Clear Voicemail Icon.
-
Hold Option and press Return to finish.
I tried dialing a phone number, but my PCS Treo 300 just beeps at me
▶ Make sure you dialed the correct number.
▶ Wait a few minutes and try again. If the network is very busy, calls cannot connect.
▶ Verify that you are in a network coverage area and then move a few yards away and try the call again. If you are in a weak coverage area (1 bar of signal strength or less), you may not be able to complete calls even though you are registered to the network.
I can't dial international numbers
For security purposes, some service plans require you to enable international calling on your account. Call your Sprint representative for details.
Caller ID blocking for my outgoing calls doesn't work
▶ Some service plans require you to enable this feature on your account. Call your Sprint representative to enable blocking your Caller ID.
▶ Make sure you enter *67 before dialing the number.
Some incoming caller's names don't appear in Call History
If a caller has blocked or restricted their Caller ID, the text “Blocked Caller ID” or “Restricted Caller ID” appears instead of the name and number.
If a caller ID information is not available, the text “No caller ID” appears instead of the name and number.
▶ Call History does not show names for records you marked hidden in your Contacts list.
I frequently miss incoming voice calls when I'm browsing the web.
Whenever you send and receive data with any wireless Palm OS application, incoming voice calls are automatically sent to voicemail. You cannot send and receive data and receive voice calls at the same time.
How do I know when I'm sending and receiving data?
When you're connected to the PCS Vision network, gray arrows appear over the signal strength bars. The gray arrows turn green when you browse the web, download e-mail, or use other applications that send or receive data across the PCS Vision network. You are billed by the number of data packets that you send and receive. When the arrows are green, your calls are forwarded to voicemail. When the arrows are gray, the PCS Vision network services are available to you, but you are not sending and receiving data so you can receive calls.
The Blazer® application won’t connect to the Internet
▶ Confirm that your service plan includes PCS Vision and not just voice minutes.
▶ Confirm that your Network Preferences settings are properly configured.
- Press Option and then press Menu to access the Applications Launcher.

- Tap the Preferences icon

- Select Network from the pick list in the upper-right corner.
- Make sure that you selected a Sprint profile.
- Tap Connect. If the Connect button changes to a Disconnect button after the connection dialogs finish, your Network Preferences settings are working. If the Connect button does not change, make sure that you are in a coverage area and that wireless mode is on.
- Contact Sprint Customer Care if you continue to have trouble.
I get an error when making data calls
▶ Check with Sprint to make sure that PCS Vision services are enabled on your account.
▶ Verify that you are in a coverage area.
The PCS Vision network automatically logs you off when you don't send or receive data for a couple hours.
▶ During peak usage periods, you may experience drops in the network connection.
Why do I sometimes get disconnected from the PCS Vision network?
I like sure you are using the correct password. If you enter the long password six times or more while attempting to connect the PCS Vision network, the network locks you out for a period 14 hours. To correct this problem, contact Sprint to obtain the correct password and reenter the password in the Sprint service file on the Network Preferences screen. See page 197 for instructions.
I get an error when connecting to the PCS Vision network.
Your phone is pre configured for a persistent connection to the PCS Vision network. Dial-up connections are not currently available.
I can't dial into my RAS, ISP, or corporate dial-up account.
Application problems
Problem Solution
I tapped the Today button, but it does not show the correct date.
I know I entered some records, but they do not appear in the application.
Your phone is not set to the current date. Make sure the Set Date box in the General Preferences screen displays the current date. See page 17 and page 196 for details.
▶ Check the Categories pick list (upper-right corner of the screen). Choose All to display all of the records for the application.
▶ Check Security and make sure that the Private Records setting is set to Show private records.
In To Do List, tap Show and check whether Show Only Due Items is selected.
▶ If you cannot manually arrange the order of the memos in the list screen, check the Memo Preferences setting. Make sure that Sort by is set to Manual.
If you choose to view your memos alphabetically on Palm Desktop software and then perform a HotSync® operation, the memos on your phone still appear in the order defined in the Memo Preferences setting. In other words, the sort settings that you use with Palm Desktop software are not transferred to your phone.
I am having problems listing memos the way I want to see them.
I created an event in Date Book Plus, but it doesn't appear in the Week View.
In the Week View, you cannot select overlapping events that have the same start time. If you have two or more events with the same start time, choose the Day View for the particular day to see the overlapping events.
HotSync problems
Problem Solution
Why can't I synchronize my phone with my computer?
Try each of these in turn. After each step, try to synchronize to see if the problem persists:
▶ Make sure you installed the software that came with your phone. You must install this software even if you upgraded from another Palm OS handheld.
▶ Make sure there are no active calls on your PCS Treo 300 before you begin a HotSync operation. You cannot synchronize while you have an active call, and you cannot make or receive calls during a HotSync operation.
▶ Make sure you selected your user name in Palm Desktop software before beginning the HotSync operation.
▶ Perform a soft reset. See page 233 for details.
▶ Make sure the HotSync Manager icon 📋' appears in the Windows system tray in the lower-right corner of the screen. If it does not appear, open the Start menu, select Programs, Handspring, and then HotSync Manager.
▶ Click the HotSync Manager icon and make sure that the Local USB option has a check next to it. If you are using an optional serial cable, make sure that the Local Serial has a check next to it, then select Setup and confirm that the COM port setting matches the port where you attached the serial cable.
▶ Make sure the cable is connected securely to your computer and your phone.
▶ Make sure you are using the correct type of cable. If your computer does not have a USB port, or is running Windows 95 or Windows NT 4.0, you must use a serial cable.
If you're using a USB cable, insert the Handspring CD into your computer, use Windows Explorer or My Computer to navigate to the Utilities folder, and then run the Visor USB registry utility.
If you are using a USB cable, disconnect any other USB devices you are using. If you're connecting your cable to a USB hub, disconnect it and connect your cable directly to your computer.
▶ If you are using a serial cable, try a lower baud rate setting on the Local tab in the Setup dialog box.
▶ Restart your computer.
▶ If you installed a conduit from a third-party software developer, contact the developer for support.
I did a HotSync operation, but one of my applications did not synchronize.
I cannot launch the HotSync Manager.
I am using Outlook as my PIM, but I cannot do a HotSync operation.
Click the HotSync Manager and choose Custom. Make sure that the conduit appears on the list and that it is set to Synchronize the files. See page 218 for details.
▶ Make sure you are not running another program, such as America Online, CompuServe, or WinFax, that uses the port you selected in the Setup dialog box.
▶ Reinstall the Palm Desktop software.
Click the HotSync Manager and choose Custom. Make sure that the following Outlook conduits are installed and that the Action is set to “Synchronize the files” for each conduit: Outlook Contacts, Outlook Calendar, Outlook Tasks, and Outlook Notes.
▶ Reinstall the Palm Desktop software and make sure you select the option to synchronize with MS Outlook.
Beaming problems
Problem Solution
I cannot beam data to another IR-equipped Palm OS device.
When someone beams data to my phone, I get a message telling me it is out of memory.
▶ Confirm that your phone and the other device are between ten centimeters (approximately 4") and one meter (approximately 39") apart, and that the path between the two devices is clear of obstacles. Beaming distance to other Palm OS devices may be different.
▶ Check the General Preferences screen and make sure the Beam Receive setting is on.
▶ Move your phone closer to the receiving device.
▶ Move your phone farther away from the receiving device.
▶ Angle the sides of the two devices towards each other.
▶ Perform a soft reset. See page 233 for details.
▶ Your phone requires at least twice the amount of memory available as the data you are receiving. For example, if you are receiving a 30K application, you must have at least 60K free.
▶ Perform a soft reset. See page 233 for details.
Password problems
Problem Solution
I forgot the password to show my hidden or masked records.
You can use Security to delete the password. If you do this, your phone deletes all entries marked as private. You can, however, perform a HotSync operation before you delete the password: the HotSync process backs up all entries, whether or not they are marked private. In this case, the following procedure restores your private entries and lets you access them:
- Use the Palm Desktop software and the cable to synchronize your data.
- Tap Forgotten Password in Security to remove the password and delete all private records.
- Perform a HotSync operation to synchronize your data and restore the private records by transferring them from your computer to your phone.
I forgot the password and my phone is locked.
The default password for your phone is the last four-digits of your phone number.
▶ If Wireless Mode Lock is on, you can use the handheld mode features of your phone, but you must contact Sprint to unlock wireless mode.
▶ If Communicator Lock is on, you must perform a hard reset (see page 235 for details) to access the handheld mode features of your phone, and you must contact Sprint to unlock wireless mode.
Technical support
If you cannot solve your problem after reviewing the sources listed at the beginning of this appendix, check our web site www.sprintpcs.com for the latest technical support information, or call *2 if you have questions.
Before requesting support, please experiment a bit to reproduce and isolate the problem. When you do contact support, please be ready to provide the following information:
The name and version of the operating system you are using
The actual error message or state you are experiencing
▶ The steps you take to reproduce the problem
Other Product Information
Performance and Safety
Important Information About Your Phone and Service
Keeping Tabs on Signal Strength
The quality of each call you make or receive depends on the signal strength in your area. Your phone informs you of the current signal strength by displaying a number of bars next to the signal strength icon. The more bars displayed, the stronger the signal. If you're inside a building, being near a window may give you better reception.
Understanding the Power Save Feature
If your phone is unable to find a signal after 15 minutes of searching, a Power Save feature is automatically activated and “No Service” appears in the Status Bar of the PhoneBook application. If your phone is active, it periodically rechecks service availability. When a signal is found, your phone returns to Standby mode and the time appears in place of “No Service” in the Status Bar of the PhoneBook application.
Understanding How Your Phone Operates
Your phone is basically a radio transmitter and receiver. When it's turned on, it receives and transmits radio frequency (RF) signals. When you use your phone, the system handling your call controls the power level. This power can range from 0.006 watts to 0.2 watts in digital mode.
Knowing Radio Frequency Safety
The design of your phone complies with updated NCRP standards described below. To further limit RF exposure, you can limit the duration of your calls and operate your phone in the most power-efficient manner. In 1991-92, the Institute of Electrical and Electronics Engineers (IEEE) and the American National Standards Institute (ANSI) joined in updating ANSI's 1982 standard for safety levels with respect to human exposure to RF signals. More than 120 scientists, engineers and physicians from universities, government health agencies and industries developed this updated standard after reviewing the available body of research. In 1993, the Federal Communications Commission (FCC) adopted this updated standard in a regulation. In August 1996, the FCC adopted hybrid standard consisting of the existing ANSI/IEEE standard and the guidelines published by the National Council of Radiation Protections and Measurements (NCRP).
Maintaining Your Phone's Peak Performance
There are several simple guidelines to operating your phone properly and maintaining safe, satisfactory service.
Try not to hold the phone's antenna and don't twist the antenna; this will damage the antenna.
- Don't use the phone if the antenna is damaged.
▶ Speak directly into the mouthpiece.
Avoid exposing your phone and accessories to rain or liquid spills. If your phone does get wet, immediately turn the power off. If it's inoperable, return it to a Sprint Store or call PCS Customer Service Solutions for service.
Note: For the best care of your phone, only Sprint Authorized Personnel should service your phone and accessories. Faulty service may void the warranty.
Maintaining Safe Use of and Access to Your Phone
FAILURE TO FOLLOW THE INSTRUCTIONS OUTLINED MAY LEAD TO SERIOUS PERSONAL INJURY AND POSSIBLE PROPERTY DAMAGE
Using Your Phone While Driving
Talking on your phone while driving (or operating the phone without a hands-free device) is prohibited in some jurisdictions. Laws vary as to specific restrictions. Remember that safety always comes first.
When using your phone in the car:
▶ Get to know your phone and its features, such as speed dial and redial.
▶ When available, use a hands-free device.
▶ Position your phone within easy reach.
Let the person you are speaking to know you are driving; if necessary, suspend the call in heavy traffic or hazardous weather conditions.
▶ Do not take notes or look up phone numbers while driving.
▶ Dial sensibly and assess the traffic; if possible, place calls when stationary or before pulling into traffic.
Do not engage in stressful or emotional conversations that may divert your attention from the road.
▶ Dial 911 to report serious emergencies. It’s free from your wireless phone.
▶ Use your phone to help others in emergencies.
▶ Call roadside assistance or a special non-emergency wireless number when necessary.
Following Safety Guidelines
To operate your phone safely and efficiently, always follow any special regulations in a given area. Turn your phone off in areas where use is forbidden or when it may cause interference or danger.
Using Your Phone Near Other Electronic Devices
Most modern electronic equipment is shielded from radio frequency (RF) signals. However, RF signals from wireless phones may affect inadequately shielded electronic equipment.
RF signals may affect improperly installed or inadequately shielded electronic operating systems and/or entertainment systems in motor vehicles. Check with the manufacturer or their representative to determine if these systems are adequately shielded from external RF signals. Also check with the manufacturer regarding any equipment that has been added to your vehicle.
Consult the manufacturer of any personal medical devices, such as pacemakers and hearing aids, to determine if they are adequately shielded from external RF signals.
Note: Always turn off the phone in health care facilities and request permission before using the phone near medical equipment.
Turning Off Wireless Mode Before Flying
Turn off wireless mode before boarding any aircraft. To prevent possible interference with aircraft systems, the U.S. Federal Aviation Administration (FAA) regulations require you to have permission from a crew member to use wireless mode while the plane is on the ground. To prevent any risk of interference, FCC regulations prohibit using wireless mode while the plane is in the air.
Turning Off Wireless Mode in Dangerous Areas
To avoid interfering with blasting operations, turn off wireless mode when in a blasting area or in other areas with signs indicating two-way radios should be turned off. Construction crews often use remote-control RF devices to set off explosives.
Turn off wireless mode when you're in any area that has a potentially explosive atmosphere. Although it's rare, your phone and accessories could generate sparks. Sparks can cause an explosion or fire, resulting in bodily injury or even death. These areas are often, but not always, clearly marked. They include:
▶ Fueling areas such as gas stations.
▶ Below deck on boats.
▶ Fuel or chemical transfer or storage facilities.
Areas where the air contains chemicals or particles such as grain, dust or metal powders.
Any other area where you would normally be advised to turn off your vehicle's engine.
Note: Never transport or store flammable gas, liquid or explosives in the compartment of your vehicle that contains your phone or accessories.
Restricting Children's Access to Your Phone
Your phone is not a toy. Do not allow children to play with it as they could hurt themselves and others, damage the phone or make calls that increase your phone bill.
Caring for and Protecting Your Phone Battery
The guidelines listed below help you get the most out of your battery's performance.
▶ Use only Sprint-approved chargers. These chargers are designed to maximize battery life. Using other chargers voids your warranty and may cause damage.
In order to avoid damage, charge the battery only in temperatures that range from 32irc F to 113irc F
( 0irc C to 45irc C).
Don't use the battery charger in direct sunlight or in high humidity areas, such as the bathroom.
▶ Keep the metal contacts on the bottom of the phone clean.
The battery may need recharging if it has not been used for a long period of time.
Don't store the battery in high temperature areas for long periods of time. It's best to follow these storage rules:
▶ 32irc F to 122irc F ( 0irc C to 50irc C)
Acknowledging Special Precautions and the FCC Notice FCC Notice
This phone may cause TV or radio interference if used in close proximity to receiving equipment. The FCC can require you to stop using the phone if such interference cannot be eliminated. Vehicles using liquefied petroleum gas (propane or butane) must comply with the National Fire Protection Standard (NFPA-58). For a copy of this standard, contact the National Fire Protections Association, One Batterymarch Park, Quincy, MA 02269, Attn: Publication Sales Division.
Cautions
Any changes or modifications to your phone not expressly approved in this document could void your warranty for this equipment and void your authority to operate this equipment. Only use approved batteries, antennas, and chargers. Although your phone is quite sturdy, it is a complex piece of equipment and can be broken. Avoid dropping, hitting, bending or sitting on it.
Exposure to Radio Frequency Energy (SAR)
In order to comply with FCC RF exposure safety guidelines, users MUST use a Sprint-approved body-worn accessory during body-worn operation. Use of accessories not approved by Sprint or that have not been tested for RF exposure compliance with this product may not comply with the FCC RF exposure safety guidelines and should not be used.
See http://www.fcc.gov/oet/rfsafety for more information on RF exposure safety.
User Guide Proprietary Notice
CDMA Technology is licensed by QUALCOMM Incorporated under one or more of the following patents:
4,901,307 5,109,390 5,267,262 5,416,797
5,506,865 5,544,196 5,657,420 5,101,501
5,267,261 5,414,796 5,504,773 5,535,239
5,600,754 5,778,338 5,228,054 5,337,338
5,710,784 5,056,109 5,568,483 5,659,569
5,490,165 5,511,073
T9 Text Input is licensed by Tegic Communications and is covered by U.S. Pat. 5,818,437, U.S. Pat. 5,953,541, U.S. Pat. 6,011,554 and other patents pending.
Handspring Product Warranty
Warranty. Handspring warrants to you that at the date of purchase, the product is free of defects in workmanship and materials, and the software included in the product will perform in substantial compliance to its program specifications.
Exclusions from Warranty. This warranty does not cover physical damage to the surface of the product, including, without limitation, breakage, cracks, dents, scratches or adhesive marks on the LCD touchscreen or outside casing of the product caused by you or a third party. In addition, this warranty shall not apply (i) if the casing for the product is opened by someone other than an authorized Handspring representative; (ii) if the defect or malfunction is caused by your or a third party's misuse, accident, modification of the product's components, or operation of the product in an unsuitable environment or in a manner for which it is not intended; (iii) if Handspring's testing and examination discloses that the alleged defect or malfunction in the product does not exist, (iv) if the defect or malfunction results from the use of the product in conjunction with accessories, other products, or ancillary or peripheral equipment and Handspring determines that there is no fault with the product itself; or (v) if the defect or malfunction is due to any communication service you may subscribe to or use with the product. Handspring shall not be responsible for software, firmware, information, or memory data contained in, stored on, or integrated with any products returned to Handspring for repair, whether under warranty or not. Handspring makes no warranty or representation that its software products will meet your requirements or will work in combination with any hardware or applications software products provided by third parties, that the operation of the software products will be uninterrupted or error free, or that all defects in the software products will be corrected.
Remedies. Handspring shall, at its discretion, either replace the product with a comparable product, repair the product, or refund the purchase price paid for the product. Replacement products may be new or reconditioned.
Warranty Period. The warranty period is one (1) year from your date of purchase. Handspring warrants any replaced or repaired product for a period of ninety (90) days from the date of shipment back to you, or through the end of the original warranty period, whichever is longer.
Obtaining Warranty Service. In order to obtain warranty service, you must receive warranty service authorization within the warranty period and provide dated proof of original purchase. Contact Sprint PCS for warranty service authorization except if you purchased product from www.handspring.com. For purchases made through www.handspring.com, contact Handspring for warranty service authorization. For further information about the warranty service procedure, please visit our website at http://www.handspring.com.
Warranty Exclusive. This warranty is exclusive and Handspring will not assume and hereby expressly disclaims any further warranties, including, but not limited to, any warranty of merchantability, fitness for a particular purpose and non-infringement.
Limitation of Liability. To the full extent allowed by law, Handspring's liability is limited to repair or replacement of the product, or refund of the purchase price paid. Handspring shall not be liable for any incidental, consequential, indirect, special or punitive damages of any kind, or for loss of revenue or profits, loss of business, loss of information or data, or other financial loss arising out of or in connection with the sale, installation, maintenance, use, performance, failure, or interruption of this product.
Governing Law. This warranty will be governed by the laws of California, and excluding the United Nations Convention on Contracts for the International Sale of Goods. The courts of California shall have exclusive personal jurisdiction in case of any disputes arising out of or in connection with this warranty.
Handspring, Inc.
End User Software License Agreement
THIS PRODUCT CONTAINS SOFTWARE, THE USE OF WHICH IS LICENSED BY HANDSPRING, INC. AND ITS SUPPLIERS (COLLECTIVELY, "HANDSPRING"), TO ITS CUSTOMERS FOR THEIR USE ONLY AS SET FORTH BELOW.
Software License: Handspring grants you a nonexclusive license to use the accompanying software program(s) (the "Software") subject to the terms and restrictions set forth in this End User Software License Agreement ("License Agreement"). You are not permitted to lease or rent, distribute or sublicense the Software or to use the Software in a time-sharing arrangement or in any other unauthorized manner. Further, no license is granted to you in the human readable code of the Software (source code). Except as provided below, this License Agreement does not grant you any rights to patents, copyrights, trade secrets, trademarks, or any other rights in respect to the Software.
The Software is licensed to be used solely on or in connection with Handspring products. With respect to the Desktop Software, you may reproduce and provide one (1) copy of such Software for each personal computer on which such Software is used as permitted hereunder. With respect to the Device Software, you may use such Software only on one (1) Handspring product. Otherwise, the Software and supporting documentation may be copied only as essential for backup or archive purposes in support of your use of the Software as permitted hereunder. You must reproduce and include all copyright notices and any other proprietary rights notices appearing on the Software on any copies that you make.
Notwithstanding any other provision of this License Agreement, this License Agreement shall not be deemed to apply to any applications software licensed to you by third parties that is included on the same media as Handspring's Software (“Other Software”) if the Other Software provides that the use of the Other Software is subject to the terms and conditions of the third party's license agreement.
Portions of the Software are licensed to Handspring, and from Handspring to you, pursuant to the GNU Library General Public License (“GNU Software”), a copy of which is supplied herewith and incorporated herein in its entirety by this reference. Notwithstanding any other provision of this License Agreement, this License Agreement shall not be deemed to apply to the GNU Software. Source code versions of the GNU Software are available at Handspring's web site, currently located at www.handspring.com.
Payment of Fees: The effectiveness of the licenses granted hereunder is conditioned on the receipt by Handspring of any applicable fees.
No Assignment; No Reverse Engineering: You may transfer the Software and this License Agreement to another party in connection with a transfer of the Handspring product upon which the Software is used, if the other party agrees in writing to accept the terms and conditions of this License Agreement. If you transfer the Software, you must at the same time either transfer all copies of the Software as well as the supporting documentation to the same party or destroy any such materials not transferred. Except as set forth above, you may not transfer or assign the Software or your rights under this License Agreement.
Modification, reverse engineering, reverse compiling, or disassembly of the Software is expressly prohibited. However, if you are a European Union (“EU”) resident, information necessary to achieve interoperability of the Software with other programs within the meaning of the EU Directive on the Legal Protection of Computer Programs is available to you from Handspring upon written request.
Export Restrictions: You agree that you will not export or re-export the Software or accompanying documentation (or any copies thereof) or any products utilizing the Software or such documentation in violation of any applicable laws or regulations of the United States or the country in which you obtained them. The software covered by this License Agreement may contain strong data encryption code which cannot be exported outside of the U.S. or Canada. You agree that you will not export/reexport, either physically or electronically, the encryption software or accompanying documentation without obtaining written authorization from the U.S. Department of Commerce.
United States Government Legend: If you are acquiring the Software on behalf of any unit or agency of the United States Government, the following provisions apply. The Software constitutes a “commercial item”, as that term is defined at Federal Acquisition Regulation (FAR) 2.101 (Oct. 1995), consisting of “commercial computer software” and “commercial computer software documentation”, as such terms are used in FAR 12.212 (Sept. 1995), and is provided to the U.S. Government only as commercial software (with “Restricted Rights”, if applicable). Use, duplication, or disclosure by the U.S. Government is subject to restrictions set forth in this License Agreement and as provided in DFARS 227.7202-1(a) and 227.7202-3(a) (1995), DFARS 252.227-7013(c)(1)(ii) (OCT 1988), FAR 12.212(a) (1995), FAR 52.227-19, or FAR 52.227-14 (ALT III), as applicable.
Term and Termination: This License Agreement is effective until terminated. You may terminate it at any time by destroying the Software and documentation together with all copies and merged portions in any form. It will also terminate immediately if you fail to comply with any term or condition of this License Agreement. Upon such termination you agree to destroy the Software and documentation, together with all copies and merged portions in any form.
Governing Law: This License Agreement shall be governed by the laws of the State of California as such laws are applied to agreements entered into and to be performed entirely within California between California residents and by the laws of the United States. You agree that the conflicts of laws principles of such laws and the United Nations Convention on Contracts for the International Sale of Goods (1980) are hereby excluded in its entirety from application to this License Agreement.
Limited Warranty; Limitation of Liability: All warranties and limitations of liability applicable to the Software are as stated on the Limited Warranty or in the product manual accompanying the Software. Such warranties and limitations of liability are incorporated herein in their entirety by this reference.
Severability: In the event any provision of this License Agreement is found to be invalid, illegal or unenforceable, the validity, legality and enforceability of any of the remaining provisions shall not in any way be affected or impaired and a valid, legal and enforceable provision of similar intent and economic impact shall be substituted therefor.
Entire Agreement This License Agreement sets forth the entire understanding and agreement between you and Handspring, supersedes all prior agreements, whether written or oral, with respect to the Software, and may be amended only in a writing signed by both parties.
GNU Library General Public License
Version 2, June 1991
Copyright (C) 1991 Free Software Foundation, Inc.
59 Temple Place - Suite 330, Boston, MA 02111-1307, USA.
Everyone is permitted to copy and distribute verbatim copies of this license document, but changing it is not allowed.
[This is the first released version of the library GPL. It is numbered 2 because it goes with version 2 of the ordinary GPL.]
Preamble: The licenses for most software are designed to take away your freedom to share and change it. By contrast, the GNU General Public Licenses are intended to guarantee your freedom to share and change free software--to make sure the software is free for all its users.
This license, the Library General Public License, applies to some specially designated Free Software Foundation software, and to any other libraries whose authors decide to use it. You can use it for your libraries, too.
When we speak of free software, we are referring to freedom, not price. Our General Public Licenses are designed to make sure that you have the freedom to distribute copies of free software (and charge for this service if you wish), that you receive source code or can get it if you want it, that you can change the software or use pieces of it in new free programs; and that you know you can do these things.
To protect your rights, we need to make restrictions that forbid anyone to deny you these rights or to ask you to surrender the rights. These restrictions translate to certain responsibilities for you if you distribute copies of the library, or if you modify it. For example, if you distribute copies of the library, whether gratis or for a fee, you must give the recipients all the rights that we gave you. You must make sure that they, too, receive or can get the source code. If you link a program with the library, you must provide complete object files to the recipients so that they can relink them with the library, after making changes to the library and recompiling it. And you must show them these terms so they know their rights.
Our method of protecting your rights has two steps: (1) copyright the library, and (2) offer you this license which gives you legal permission to copy, distribute and/or modify the library.
Also, for each distributor's protection, we want to make certain that everyone understands that there is no warranty for this free library. If the library is modified by someone else and passed on, we want its recipients to know that what they have is not the original version, so that any problems introduced by others will not reflect on the original authors' reputations.
Finally, any free program is threatened constantly by software patents. We wish to avoid the danger that companies distributing free software will individually obtain patent licenses, thus in effect transforming the program into proprietary software. To prevent this, we have made it clear that any patent must be licensed for everyone's free use or not licensed at all.
Most GNU software, including some libraries, is covered by the ordinary GNU General Public License, which was designed for utility programs. This license, the GNU Library General Public License, applies to certain designated libraries. This license is quite different from the ordinary one; be sure to read it in full, and don't assume that anything in it is the same as in the ordinary license.
The reason we have a separate public license for some libraries is that they blur the distinction we usually make between modifying or adding to a program and simply using it. Linking a program with a library, without changing the library, is in some sense simply using the library,
and is analogous to running a utility program or application program. However, in a textual and legal sense, the linked executable is a combined work, a derivative of the original library, and the ordinary General Public License treats it as such.
Because of this blurred distinction, using the ordinary General Public License for libraries did not effectively promote software sharing, because most developers did not use the libraries. We concluded that weaker conditions might promote sharing better.
However, unrestricted linking of non-free programs would deprive the users of those programs of all benefit from the free status of the libraries themselves. This Library General Public License is intended to permit developers of non-free programs to use free libraries, while preserving your freedom as a user of such programs to change the free libraries that are incorporated in them. (We have not seen how to achieve this as regards changes in header files, but we have achieved it as regards changes in the actual functions of the Library.) The hope is that this will lead to faster development of free libraries.
The precise terms and conditions for copying, distribution and modification follow. Pay close attention to the difference between a “work based on the library” and a “work that uses the library”. The former contains code derived from the library, while the latter only works together with the library.
Note that it is possible for a library to be covered by the ordinary General Public License rather than by this special one.
Terms and Conditions for Copying, Distribution and Modification
- This License Agreement applies to any software library which contains a notice placed by the copyright holder or other authorized party saying it may be distributed under the terms of this Library General Public License (also called “this License”). Each licensee is addressed as “you”.
A “library” means a collection of software functions and/or data prepared so as to be conveniently linked with application programs (which use some of those functions and data) to form executables.
The “Library”, below, refers to any such software library or work which has been distributed under these terms. A “work based on the Library” means either the Library or any derivative work under copyright law: that is to say, a work containing the Library or a portion of it, either verbatim or with modifications and/or translated straightforwardly into another language. (Hereinafter, translation is included without limitation in the term “modification”.)
“Source code” for a work means the preferred form of the work for making modifications to it. For a library, complete source code means all the source code for all modules it contains, plus any associated interface definition files, plus the scripts used to control compilation and installation of the library.
Activities other than copying, distribution and modification are not covered by this License; they are outside its scope. The act of running a program using the Library is not restricted, and output from such a program is covered only if its contents constitute a work based on the Library (independent of the use of the Library in a tool for writing it).
Whether that is true depends on what the Library does and what the program that uses the Library does.
-
You may copy and distribute verbatim copies of the Library's complete source code as you receive it, in any medium, provided that you conspicuously and appropriately publish on each copy an appropriate copyright notice and disclaimer of warranty; keep intact all the notices that refer to this License and to the absence of any warranty; and distribute a copy of this License along with the Library.
-
You may charge a fee for the physical act of transferring a copy, and you may at your option offer warranty protection in exchange for a fee.
- You may modify your copy or copies of the Library or any portion of it, thus forming a work based on the Library, and copy and distribute such modifications or work under the terms of Section 1 above, provided that you also meet all of these conditions:
a) The modified work must itself be a software library.
b) You must cause the files modified to carry prominent notices stating that you changed the files and the date of any change.
c) You must cause the whole of the work to be licensed at no charge to all third parties under the terms of this License.
d) If a facility in the modified Library refers to a function or a table of data to be supplied by an application program that uses the facility, other than as an argument passed when the facility is invoked, then you must make a good faith effort to ensure that, in the event an application does not supply such function or table, the facility still operates, and performs whatever part of its purpose remains meaningful. (For example, a function in a library to compute square roots has a purpose that is entirely well-defined independent of the application. Therefore, Subsection 2d requires that any application-supplied function or table used by this function must be optional: if the application does not supply it, the square root function must still compute square roots.)
These requirements apply to the modified work as a whole. If identifiable sections of that work are not derived from the Library, and can be reasonably considered independent and separate works in themselves, then this License, and its terms, do not apply to those sections when you distribute them as separate works. But when you distribute the same sections as part of a whole which is a work based on the Library, the distribution of the whole must be on the terms of this License, whose permissions for other licensees extend to the entire whole, and thus to each and every part regardless of who wrote it.
Thus, it is not the intent of this section to claim rights or contest your rights to work written entirely by you; rather, the intent is to exercise the right to control the distribution of derivative or collective works based on the Library.
In addition, mere aggregation of another work not based on the Library with the Library (or with a work based on the Library) on a volume of a storage or distribution medium does not bring the other work under the scope of this License.
- You may opt to apply the terms of the ordinary GNU General Public License instead of this License to a given copy of the Library. To do this, you must alter all the notices that refer to this License, so that they refer to the ordinary GNU General Public License, version 2, instead of to this License. (If a newer version than version 2 of the ordinary GNU General Public License has appeared, then you can specify that version instead if you wish.) Do not make any other change in these notices.
Once this change is made in a given copy, it is irreversible for that copy, so the ordinary GNU General Public License applies to all subsequent copies and derivative works made from that copy.
This option is useful when you wish to copy part of the code of the Library into a program that is not a library.
- You may copy and distribute the Library (or a portion or derivative of it, under Section 2) in object code or executable form under the terms of Sections 1 and 2 above provided that you accompany it with the complete corresponding machine-readable source code, which must be distributed under the terms of Sections 1 and 2 above on a medium customarily
used for software interchange.
If distribution of object code is made by offering access to copy from a designated place, then offering equivalent access to copy the source code from the same place satisfies the requirement to distribute the source code, even though third parties are not compelled to copy the source along with the object code.
- A program that contains no derivative of any portion of the Library, but is designed to work with the Library by being compiled or linked with it, is called a “work that uses the Library”. Such a work, in isolation, is not a derivative work of the Library, and therefore falls outside the scope of this License.
However, linking a “work that uses the Library” with the Library creates an executable that is a derivative of the Library (because it contains portions of the Library), rather than a “work that uses the library”. The executable is therefore covered by this License. Section 6 states terms for distribution of such executables.
When a “work that uses the Library” uses material from a header file that is part of the Library, the object code for the work may be a derivative work of the Library even though the source code is not. Whether this is true is especially significant if the work can be linked without the Library, or if the work is itself a library. The threshold for this to be true is not precisely defined by law.
If such an object file uses only numerical parameters, data structure layouts and accessors, and small macros and small inline functions (ten lines or less in length), then the use of the object file is unrestricted, regardless of whether it is legally a derivative work.
(Executables containing this object code plus portions of the Library will still fall under Section 6.)
Otherwise, if the work is a derivative of the Library, you may distribute the object code for the work under the terms of Section 6. Any executables containing that work also fall under Section 6, whether or not they are linked directly with the Library itself.
- As an exception to the Sections above, you may also compile or link a “work that uses the Library” with the Library to produce a work containing portions of the Library, and distribute that work under terms of your choice, provided that the terms permit modification of the work for the customer's own use and reverse engineering for debugging such modifications.
You must give prominent notice with each copy of the work that the Library is used in it and that the Library and its use are covered by this License. You must supply a copy of this License. If the work during execution displays copyright notices, you must include the copyright notice for the Library among them, as well as a reference directing the user to the copy of this License. Also, you must do one of these things:
a) Accompany the work with the complete corresponding machine-readable source code for the Library including whatever changes were used in the work (which must be distributed under Sections 1 and 2 above); and, if the work is an executable linked with the Library, with the complete machine-readable “work that uses the Library”, as object code and/or source code, so that the user can modify the Library and then relink to produce a modified executable containing the modified Library. (It is understood that the user who changes the contents of definitions files in the Library will not necessarily be able to recompile the application to use the modified definitions.)
b) Accompany the work with a written offer, valid for at least three years, to give the same user the materials specified in Subsection 6a, above, for a charge no more than the cost of performing this distribution.
c) If distribution of the work is made by offering access to copy from a designated place, offer equivalent access to copy the above specified materials from the same place. d) Verify that the user has already received a copy of these materials or that you have already sent this user a copy.
For an executable, the required form of the “work that uses the Library” must include any data and utility programs needed for reproducing the executable from it. However, as a special exception, the source code distributed need not include anything that is normally distributed (in either source or binary form) with the major components (compiler, kernel, and so on) of the operating system on which the executable runs, unless that component itself accompanies the executable.
It may happen that this requirement contradicts the license restrictions of other proprietary libraries that do not normally accompany the operating system. Such a contradiction means you cannot use both them and the Library together in an executable that you distribute.
- You may place library facilities that are a work based on the Library side-by-side in a single library together with other library facilities not covered by this License, and distribute such a combined library, provided that the separate distribution of the work based on the Library and of the other library facilities is otherwise permitted, and provided that you do these two things:
a) Accompany the combined library with a copy of the same work based on the Library, uncombined with any other library facilities. This must be distributed under the terms of the Sections above. b) Give prominent notice with the combined library of the fact that part of it is a work based on the Library, and explaining where to find the accompanying uncombined form of the same work.
-
You may not copy, modify, sublicense, link with, or distribute the Library except as expressly provided under this License. Any attempt otherwise to copy, modify, sublicense, link with, or distribute the Library is void, and will automatically terminate your rights under this License. However, parties who have received copies, or rights, from you under this License will not have their licenses terminated so long as such parties remain in full compliance.
-
You are not required to accept this License, since you have not signed it. However, nothing else grants you permission to modify or distribute the Library or its derivative works. These actions are prohibited by law if you do not accept this License. Therefore, by modifying or distributing the Library (or any work based on the Library), you indicate your acceptance of this License to do so, and all its terms and conditions for copying, distributing or modifying the Library or works based on it.
-
Each time you redistribute the Library (or any work based on the Library), the recipient automatically receives a license from the original licensor to copy, distribute, link with or modify the Library subject to these terms and conditions. You may not impose any further restrictions on the recipients' exercise of the rights granted herein. You are not responsible for enforcing compliance by third parties to this License.
-
If, as a consequence of a court judgment or allegation of patent infringement or for any other reason (not limited to patent issues), conditions are imposed on you (whether by court order, agreement or otherwise) that contradict the conditions of this License, they do not excuse you from the conditions of this License. If you cannot distribute so as to satisfy simultaneously your obligations under this License and any other pertinent obligations,
then as a consequence you may not distribute the Library at all. For example, if a patent license would not permit royalty-free redistribution of the Library by all those who receive copies directly or indirectly through you, then the only way you could satisfy both it and this License would be to refrain entirely from distribution of the Library.
If any portion of this section is held invalid or unenforceable under any particular circumstance, the balance of the section is intended to apply, and the section as a whole is intended to apply in other circumstances.
It is not the purpose of this section to induce you to infringe any patents or other property right claims or to contest validity of any such claims; this section has the sole purpose of protecting the integrity of the free software distribution system which is implemented by public license practices. Many people have made generous contributions to the wide range of software distributed through that system in reliance on consistent application of that system; it is up to the author/donor to decide if he or she is willing to distribute software through any other system and a licensee cannot impose that choice.
This section is intended to make thoroughly clear what is believed to be a consequence of the rest of this License.
-
If the distribution and/or use of the Library is restricted in certain countries either by patents or by copyrighted interfaces, the original copyright holder who places the Library under this License may add an explicit geographical distribution limitation excluding those countries, so that distribution is permitted only in or among countries not thus excluded. In such case, this License incorporates the limitation as if written in the body of this License.
-
The Free Software Foundation may publish revised and/or new versions of the Library General Public License from time to time. Such new versions will be similar in spirit to the present version, but may differ in detail to address new problems or concerns.
Each version is given a distinguishing version number. If the Library specifies a version number of this License which applies to it and “any later version”, you have the option of following the terms and conditions either of that version or of any later version published by the Free Software Foundation. If the Library does not specify a license version number, you may choose any version ever published by the Free Software Foundation.
- If you wish to incorporate parts of the Library into other free programs whose distribution conditions are incompatible with these, write to the author to ask for permission. For software which is copyrighted by the Free Software Foundation, write to the Free Software Foundation; we sometimes make exceptions for this. Our decision will be guided by the two goals of preserving the free status of all derivatives of our free software and of promoting the sharing and reuse of software generally.
NO WARRANTY
-
BECAUSE THE LIBRARY IS LICENSED FREE OF CHARGE, THERE IS NO WARRANTY FOR THE LIBRARY, TO THE EXTENT PERMITTED BY APPLICABLE LAW. EXCEPT WHEN OTHERWISE STATED IN WRITING THE COPYRIGHT HOLDERS AND/OR OTHER PARTIES PROVIDE THE LIBRARY "AS IS" WITHOUT WARRANTY OF ANY KIND, EITHER EXPRESSED OR IMPLIED, INCLUDING, BUT NOT LIMITED TO, THE IMPLIED WARRANTIES OF MERCHANTABILITY AND FITNESS FOR A PARTICULAR PURPOSE. THE ENTIRE RISK AS TO THE QUALITY AND PERFORMANCE OF THE LIBRARY IS WITH YOU. SHOULD THE LIBRARY PROVE DEFECTIVE, YOU ASSUME THE COST OF ALL NECESSARY SERVICING, REPAIR OR CORRECTION.
-
IN NO EVENT UNLESS REQUIRED BY APPLICABLE LAW OR AGREED TO IN WRITING
WILL ANY COPYRIGHT HOLDER, OR ANY OTHER PARTY WHO MAY MODIFY AND/OR REDISTRIBUTE THE LIBRARY AS PERMITTED ABOVE, BE LIABLE TO YOU FOR DAMAGES, INCLUDING ANY GENERAL, SPECIAL, INCIDENTAL OR CONSEQUENTIAL DAMAGES ARISING OUT OF THE USE OR INABILITY TO USE THE LIBRARY (INCLUDING BUT NOT LIMITED TO LOSS OF DATA OR DATA BEING RENDERED INACCURATE OR LOSSES SUSTAINED BY YOU OR THIRD PARTIES OR A FAILURE OF THE LIBRARY TO OPERATE WITH ANY OTHER SOFTWARE), EVEN IF SUCH HOLDER OR OTHER PARTY HAS BEEN ADVISED OF THE POSSIBILITY OF SUCH DAMAGES.
END OF TERMS AND CONDITIONS
How to Apply These Terms to Your New Library
If you develop a new library, and you want it to be of the greatest possible use to the public, we recommend making it free software that everyone can redistribute and change. You can do so by permitting redistribution under these terms (or, alternatively, under the terms of the ordinary General Public License).
To apply these terms, attach the following notices to the library. It is safest to attach them to the start of each source file to most effectively convey the exclusion of warranty; and each file should have at least the “copyright” line and a pointer to where the full notice is found.
One line to give the library's name and an idea of what it does.
Copyright (C) year name of author
This library is free software; you can redistribute it and/or modify it under the terms of the GNU Library General Public License as published by the Free Software Foundation; either version 2 of the License, or (at your option) any later version.
This library is distributed in the hope that it will be useful, but WITHOUT ANY WARRANTY; without even the implied warranty of MERCHANTABILITY or FITNESS FOR A PARTICULAR PURPOSE. See the GNU Library General Public License for more details.
You should have received a copy of the GNU Library General Public License along with this library; if not, write to the Free Software Foundation, Inc., 59 Temple Place - Suite 330, Boston, MA 02111-1307, USA.
Also add information on how to contact you by electronic and paper mail. You should also get your employer (if you work as a programmer) or your school, if any, to sign a “copyright disclaimer” for the library, if necessary. Here is a sample; alter the names:
Yoyodyne, Inc., hereby disclaims all copyright interest in the library 'Frob' (a library for tweaking knobs) written by James Random Hacker.
Signature of Ty Coon, 1 April 1990
Ty Coon, President of Vice
That's all there is to it!
Acknowledgments
We would like to thank the following developers whose contributions were an integral part of the Handspring product:
C.E. Steuart Dewar
Pimlico Software, Inc.
www.gorilla-haven.org/pimlico
Darren Beck
Code City
www.codecity.com.au
Rick Huebner
www.probe.net/\~rhuebner/index.html
Index
Numerics
3-way calling 102
A
ABA (Address Book archive file) 32
Accented characters entering 26 onscreen keyboard 32
Active call 97, 101
Add-on applications 39–42
Address Book archive files (.aba) 32
Address Book.See PhoneBook
Adjusting volume 6
Alarm preset 134 reminder 134 setting 117 sound 134, 197, 241 for untimed events 117
Anniversaries. See Repeating events
Answering calls 97–99
Antenna 7
Application buttons 6, 10, 36, 48, 49, 50, 52, 190
Applications beaming 78–79 Blazer 50, 139 Calculator 55 categories 37–38 CityTime 54 Date Book Plus 49
Expense 56
font style 75
installing 39–42
Memo Pad 51
opening 36
PhoneBook 48
preferences for 39
removing 42
security 43
SMS Messaging 52
To Do List 53
viewing as icons 38
viewing as list 38
See also Add-on applications
Applications Launcher 36–39
Appointments. See Date Book Plus
Archive files importing data from 32
for main applications 32
saving deleted records 61
saving purged records 62
Automatic fill, in Expense 187
Auto-off delay 196
Autotext. See Keyboard Short-Cuts
B
Backlight, keyboard 10
Backup. See HotSync
Battery
charging 9
conserving power 196
gauge 36, 83
Beaming
See also Infrared
Beaming information 78–80
location of IR port 7
problems with 247
Beep tone 101
Birthdays. See Repeating events
Blazer
adding bookmarks 141, 142
Bookmark view 140
deleting bookmarks 143
editing bookmarks 143
menus 145
opening 50
organizing bookmarks 144
overview 50
Preferences 147
Properties 146
Web Page view 139
Bold font for text 75
Bookmarks
adding 141, 142
arranging 144
deleting 143
editing 143
Brightness control 6, 11
Business card for beaming 78
Buttons
power 7
ringer 7
scroll 6, 89, 140
Buttons preferences 190
C
Cable
connecting to computer 19
for local HotSync operations 76
serial 2, 19, 217, 246
USB 2,19
Calculator
Advanced mode 167
Area view 174
Basic mode 166
buttons explained 166–167, 168–176
Finance view 170
Length view 174
Logic view 172
Math view 169
memory 167
menus 177
opening 55, 166
overview 55
recent calculations 55, 167
selecting mode 166
Statistics view 172
Trigonometry view 169
Volume view 175
Weight/Temp view 173
Calibration 12, 194, 241
Call
Preferences 104, 109, 242
status 101
waiting 101
Call History 105
adding to PhoneBook 95
adding to Speed Dial list 96
deleting items 96
dialing from 95
displaying 94
incoming calls 94
missed calls 94, 105
outgoing calls 94
purging 96
Caller ID 98, 102, 105
Calls
3-way 102
active 97, 101
answering 97–99
answering call waiting 101
conference 102
forwarding 104
ignoring 98
incoming 94, 97–104
missed 94, 105
outgoing 94, 104–105
placing a second 102
placing on hold 100
switching 102
Capital letters 24
Caring for the communicator 232
Categories
application 37–38
assigning records to 62–63
beaming 78–79
creating 64–65
default 62
displaying 64, 108, 245
merging 65
renaming 65
using in Applications Launcher 37, 38
Chain calculations 167
Charger
connecting 9, 19
connector on communicator 8
Charging battery 9
Check boxes 13
CityTime
adding cities 164
home city 163
menus 164
opening 54
overview 163
remote cities 163
Clearing Calculator entries 166, 168
Color control 6, 11 depth 147
COM port. See USB, port and Serial port
Combining categories 65
Comma delimited files, importing data from 32
Command buttons 13
Command equivalents (keyboard) 29
Communicator contrast control 6, 11 overview 2 turning on/off 10
Compressing Day view 133
Conduits 218
for connecting to PIMs 22
for synchronizing applications 247, 218–219, 237
See also HotSync
Conference calls 102
Conflicting events 126
Connecting
headset 18
HotSync cable 19
service templates 198
to packet data network 202
travel charger 9, 19
Connection preferences 191
Contact information. See Phone-Book
Contacts
copying 91
Continuous events
changing 119
deleting from Date Book Plus 61, 119
scheduling 118
Copying
contact information 91
Copying text 60
Country default setting 195
Coverage area 94, 97, 104, 105
Cradle. See Cable
Creating
categories 37–38, 64–65
contact entries 89–90
currency symbols 181
custom fields in PhoneBook 110
Date Book Plus events 113
Expense items 178
expense reports in Excel 183–186
memos 149
notes for records 74
records 58
To Do List items 158
Currency
default 187
defining 181
for Expense items 180
Current date 17, 245
Current time 36
displaying in Date Book Plus 122
setting 16
Customizing
categories 65
currencies and symbols 181
fields in PhoneBook 110
HotSync settings 218
See also Preferences
Cutting text 60
Cycling through views 48, 49, 50
D
Daily
calendar 113–116
events. See Repeating events
Journal 129
Data
entry. See Entering data
transfer. See HotSync
Date Book
archive files (.dba) 32
Date Book Plus
adding PhoneBook data to
records 68–69
alarm 117
changing event time 116
changing event to untimed 116
changing repeating events 119
conflicting events 126
continuous events 118–121
creating records 58, 114–116
Daily Journal 129
Day view 121
deleting records 60
deleting repeating events 119
end time for Day view 132
Event tracking 129
floating events 127
fonts 75
List View 125
menus 130
Month view 124
notes for records 74–75
opening 49
overview 49
private records 72
purging records 61–62
repeating events 61, 118–121
scheduling events 113–116
selecting dates 113
start time for Day view 132
Sunday or Monday to start
week 195
switching views 121
templates 129
To Do List items 128
untimed events 114, 115
Week view 122, 195, 245
Week View with Text 123
Year View 125
Dates
Expense item 179
setting current 17, 245
To Do List record due 159–160, 160
Day (Date Book Plus view) 114, 133
DBA (Date Book archive file) 32
Decimal point 196
Default
categories 62
currency in Expense 187
settings. See Preferences
Deleted
data, saving in archive files 61
Deleting
applications 40, 42
Bookmarks 143
Call History 96
Desktop software 43
passwords 45
records 60
service templates 208
SMS messages 155
Speed Dial entries 88
text 60
See also Purging records
Desktop software 21
linking to external files 227
removing 43
saving deleted data to an archive file 61
system requirements 2
upgrading 3
See also PIM
Dial Pad
dialing numbers 89
icon 89
Dialing
applications 110
emergency numbers 105
from Call History 95
from Contacts list 91
last number 105
previous numbers 89, 94
with Dial Pad 89
with Speed Dial 86
Digital roaming 109
Digitizer 12, 194, 241
Display control 6, 11
Display, contrast (brightness) control 6
DNS (Domain Naming System) 207
Docking station. See Cable
Double-booked events 126
Dragging
memos into other applications 51
using the stylus 12
E
Edit
call forwarding number 104
phone number 86
Speed Dial 87, 88
Editing
records 59–60
Electronic Serial Number 8
E-mail addresses
in PhoneBook 92
Email messages 151
Emergency numbers 105
Entering data 23–33
importing from other applications 32–33
using communicator keyboard 24–31
using the computer keyboard 32
using the onscreen keyboard 31
Entries. See PhoneBook
Events. See Date Book Plus
Excel, transferring Expense data to 182–186
Exchanging data. See HotSync
Exclamation marks in To Do List 162
Expense
adding PhoneBook data to records 70
categorizing records 63
creating records 58, 178
currency 180, 187
date of item 179
defining new currency 181
deleting records 60
menus 186
notes for records 74–75
opening 56
overview 56
purging records 61–62
receipt details 179
reports in Excel 183–186
sorting records 71
templates for reports 185
type 180, 187
vendor 180
F
Files, linking to external 227
Finding
applications 36
information in applications 66–70
phone numbers 68–69
using the Find application 67
Floating events 127
Fonts 75
Formats preferences 195
Forwarding
calls 104
Frozen communicator 241
G
Games 197
General preferences
alarm sounds 197
auto-off delay 196
system sounds 197
Glossary. See Keyboard Short-
Cuts
H
Handheld mode 10
Hard reset 235
Headset
connecting 18
Headset jack 6
Help
Keyboard 60
online tips 15
Hiding
records 72
See also Private records
Hold button 100
HotSync
buttons preferences 191
conduits for synchronizing applications 218–219, 237
customizing 218
defined 76
first-time operation 76–77, 228–229
HotSync Manager 76
IR operation 219–225
linking to external files 227
local operation 77, 217
network operation 225
operations using IR port 219–225
problems with 246–247
setting options 216–217
for synchronizing data 20
|
Icons
alarm 117
application 38
battery 83
Call History 94
Dial Pad 89
note 74
online Tips 15
onscreen 241
repeating event 119
signal strength 83
Voicemail 83
Ignoring calls 98
Importing data 32–33
Incoming calls 94, 97–104
Indicators
battery 8, 83
call status 101
missed call 105
signal strength 83
time 83
voicemail 83
wireless mode 83
Infrared
HotSync operations 219–225
port 219
requirements for computer 220
Infrared port. See IR port
Installing
applications 39–42
conduit to install applications 218
Desktop software 21, 240
International characters
entering 26
onscreen keyboard 32
IP address 202, 203, 205, 206
IR port 7
See also Beaming information
IR. See Infrared
Items. See To Do List or Expense
K
Key Pad 87, 97
Keyboard
accented characters 26
capital letters 24
computer 32
location 7
menu commands 29
moving the cursor 28
numbers 25
online Help 60
onscreen 31, 32
ShortCuts for entering data 30, 213–214
Keyboard backlight 10
L
LED 8,9
Letters
font style 75
onscreen keyboard 31
Light, see LED 8
Linking
external file 227
with desktop software. See HotSync
List (Date Book Plus view) 125
List, in Applications Launcher 38
Locking
communicator with a pass-word 210
records. See Security
Looking up PhoneBook data
to add to other records 68–69
scrolling in Contacts view 66
Looking up. See Finding
Lost communicator, contact for 91
Lost records 245
Lotus
Organizer, importing data from 32
M
Main applications 36
Maintenance information 232
Meetings. See Date Book Plus
Memo Pad
adding PhoneBook data to records 68–69
archive files (.mpa) 33
categorizing records 62
creating records 58, 149
deleting records 60
dragging memos into other applications 51
fonts 75
menus 150
opening 51
overview 51
private records 72
reviewing memos 149
sorting records 71, 245
See also Notes
Memory
for beaming 247
Calculator 167
regaining 61
Memos. See Memo Pad
Menus 28–30, 241
Blazer 145
choosing 29
command equivalents (keyboard) 29
Date Book Plus 130
Edit menu 59–60
Expense 186
Memo Pad 150, 164, 177
menu bar 13, 29
Network Preferences 209
PhoneBook 106
SMS Messaging 156
To Do List 162
Messages
checking 94
missed call 105
purging SMS 155
receiving 151
replying 153
sorting SMS 155
text 152
Microphone 6
Microsoft
Excel, transferring Expense data to 182–186
Outlook, connecting to 247
Windows 95, 98 220
Missed calls 94, 105
Mobile IP 197, 202
Modes
handheld 10
wireless 10
Monday, to start week 195
Month (Date Book Plus view) 124
Moving
Date Book Plus events 116
the cursor 28
MPA (Memo Pad archive file) 33
Multi-day events. See Repeating events
N
Network
connecting 202
password 200
preferences 197–210
primary DNS 207
secondary DNS 207
selecting service 198
Simple IP 197
status 8
time 83
user name 199
Network HotSync operation 225
Network status 104
Notes
attaching to records 74–75
See also Memo Pad
Numbers
decimal point and thousands
separator 196
entering 25
onscreen keyboard 31
0
Onscreen keyboard 31, 60
Opening
applications 36
Blazer 50
Calculator 55, 166
CityTime 54
Date Book Plus 49
Expense 56
Memo Pad 51
PhoneBook 48
SMS Messaging 52
To Do List 53
Organizer (Lotus PIM) 32
Outgoing calls 94, 104–105
Outlook, connecting to 247
Overlapping events 126
Overview
communicator 2
Owner preferences 210
P
Palm Desktop software. See
Desktop software
Passwords 44–46
changing 45
creating 44
deleting 45
for network 200
forgotten 46, 248
Pasting text 60
Payment, Expense item 180
Personal information managers.
See PIM
Phone application
starting 86, 105
Phone Lookup 68–69
Phone numbers
selecting types 92
PhoneBook
*If Found Call* entry 91
adding contact to Speed Dial 85
adding custom fields 110
adding entry from Call History 95
business card for beaming 78
categorizing Contacts records 63
copying records 91
creating contact records 85–86, 89–91
creating records 58, 89–90
deleting Contacts records 60
dialing from Contacts list 91
Dialing Preferences 110
displaying category 108
finding Contacts records 66–67
fonts 75
menus 106
notes for Contacts records 74–75
opening 48
overview 48
private Contacts records 72
sorting Contacts records 71
Pick lists 13
PIM (personal information manager)
using with communicator 22
Ports
IR on communicator 219
Ports. See USB, port and Serial port
Power button 7, 10
PPP 202, 205
PRC (application file extension) 41
Preferences 15
Blazer 147
Buttons 190
choosing 39
Connection 191
dialing 110
Digitizer 194
Formats 195
General 196
HotSync buttons 191
Network 197–210
Owner 210
roaming 109
ShortCuts 213
Primary DNS 207
Printing
expense reports from Excel 183–186
records from applications 21
Prioritizing To Do List records 158, 162
Private records
displaying and creating 72, 245
lost with forgotten password 46
See also Security
Profiles 228
Proxy server 148
Punctuation marks
onscreen keyboard 31
typing 25
Purging
Call History 96
records 61–62
See also Deleting
SMS messages 155
R
Range of times in Day view 132
Receipts, recording in Expense 179
Receiving data. See Beaming information
Records
beaming 78–79
choosing categories 62
creating 58
Date Book Plus 114
defined 57
deleting 60, 119
displaying a category of 64
editing 59–60
Expense 178
fonts 75
hiding private 44, 72
lost 245
Memo Pad 149
notes for 74–75
PhoneBook 82, 89
private 72
purging 61–62
sorting 71
To Do List 158
Recurring events
deleting 61
scheduling 118
Redialing a number 105
Reminder. See Alarm
Removing
applications 42
Desktop software 43
Renaming categories 65
Repeating events
deleting from Date Book Plus 61
scheduling 118
Rescheduling events 116
Reset button 8
Resetting communicator
hard reset 235
location of reset button 8, 233
soft reset 233
warm reset 234
Ringer
settings 211
switch 7
Roaming 109
Rocker switch 6, 10, 15
S
Saving
data 37, 58, 61
Scheduling events 113–116
Screen
blank 241
brightness control 6, 11
calibrating 12, 194
caring for 232
contrast control 6, 11
touching 7
Scroll bar 14
Scroll buttons 6, 15, 89, 140
Searching. See Finding
Secondary DNS 207
Security 43–46
changing password 45
deleting password 45
displaying owner's name 210
forgotten password 46
private records 72
Selecting
date for event 113
phone numbers in Contacts list 92
text 59, 60
Sending
data. See Beaming information
Serial port 2, 8, 217, 246
Service templates 198, 208
Service, selecting for network 198
Settings. See Preferences
ShortCuts
backing up 218
managing 213–214
menu commands 29
predefined 30
using 30
Signal strength 83
Simple IP 197, 205
Slider 211
SMS
calling sender 153
copying text 154
deleting messages 155
Inbox 152
purging messages 155
receiving messages 151
replying to messages 153
sorting messages 155
SMS Messaging
menus 156
opening 52
overview 52
Soft reset 233
Sorting
applications 37
records 71, 245
Sorting messages 155
Sounds. See Alarm and System sounds
Speaker 6
Speakerphone 100
Speed Dial
adding Call History entries 96
adding contact entries 85
changing entries 87
defining buttons 84
deleting entries 88
dialing numbers 86
list 84–88
organizing 84, 88
voicemail 84
Standing Meetings. See Repeating events
Starting applications 36
Stylus 7
dragging with 12
holding 7
tapping with 12
Sunday, to start week 195
Switching calls 102
Symbols
for currency 180
Synchronizing data. See HotSync
System conduit 218
System requirements for Desktop software 2
System sounds 197
T
Tab delimited files, importing data from 32
Tapping 12, 241
Task. See To Do List
TCP/IP 209
TDA (To Do List archive file) 33
Technical Support 249
Templates
for Date Book Plus 129
for expense reports 185
Text
copying 60
cutting 60
entry. See Entering data
finding 66
fonts for 75
importing data from files 32
selecting all 60
Thousands separator 196
Time
alarm setting 117
format 195
setting current 16
setting event 114
start and end for Date Book Plus Day view 132
Time bars in Date Book Plus 133
Time stamps 129
Tips, online 15
To Do List
adding PhoneBook data to records 68–69
archive files (.tda) 33
categorizing records 62, 135, 162
checking off items 128, 160
completed items 161
completion date 162
creating items in Date Book Plus 128
creating records 58, 158
deleting records 60
due date 159–160, 160, 161, 162
fonts 75
menus 162
notes for records 74–75
opening 53
overview 53
prioritizing records 158, 162
private records 72
purging records 61–62, 161
sorting records 71
viewing items in Date Book Plus 123, 125
Today. See Current date
Tracking events 129
Transferring data. See HotSync
Transmitting data. See Beaming information
Turning off communicator automatically 196 problems with 241
Turning on and off 10
Turning on communicator application buttons 7 displaying owner's name 210 problems with 241
Typing punctuation marks 25
Typing. See Entering data
U
Undoing actions 60
Uninstalling Desktop software 43
Unlock code 242
Unresponsive communicator 241
Untimed events 114, 115, 116, 117
Updating data. See HotSync
Upgrading Desktop software 3
USB
connector 8
HotSync operations 246
port 20
User name
for packet data network 199
identifying communicator 210
User profiles 228
V
Vendor for Expense item 180
Vibrate 211
Voicemail 84, 97, 105 icon 83
Volume 6
W
Warm reset 234
Web pages bookmarking 140 viewing 139
Web sites 22
Week (Date Book Plus view) 122–123, 195, 245
Week with Text (Date Book Plus view) 123
Windows 95, NT 2, 19, 246
Wireless mode 10 indicator 83 troubleshooting 242–244
X
XLT (Expense report template in Excel) 185
Y
Year (Date Book Plus view) 125
- Sprint®
- Online User's Guide
- Copyright
- Disclaimer and limitation of liability
- Warranty and License Agreement
- Software download available
- Contents
- Introduction to Your PCS Phone Handspring Treo TM 300 .... . . . . . . . 1
- Entering Data in Your Phone 23
- Managing Your Applications .... 35
- Applications Overview 47
- Common Tasks ...... 57
- Application-Specific Tasks 81
- Setting Preferences for Your Phone .... 189
- Advanced HotSync Operations ..... 215
- Maintaining Your Phone 231
- Troubleshooting Tips 239
- Other Product Information ...... 251
- Introduction to Your PCS Phone Handspring® Treo™ 300
- What is a PCS Treo 300?
- System requirements
- Minimum requirements
- Upgrade information
- To upgrade:
- Each device must have a unique name
- PCS Treo 300 components
- Locating front panel controls
- Locating back panel components
- Charging the battery
- To charge the battery with the travel charger:
- Turning your PCS Treo 300 on and off
- To turn handheld mode on and off, do any of the following:
- To turn wireless mode on and off:
- Using the keyboard backlight
- To turn the keyboard backlight on and off:
- Backlight tips:
- Adjusting the display
- To adjust the display:
- Using the stylus to get things done
- Elements of the phone interface
- Moving around the screen
- To move around the screen do one of the following:
- Displaying online tips
- To display an online tip:
- Customizing your phone
- To open the Preferences screens:
- To automatically set the current date and time:
- To manually set the current time:
- To manually set the current date:
- Using the headset
- To use the headset:
- Connecting the HotSync cable
- To connect the HotSync cable:
- Using desktop software
- Using your phone with Palm Desktop software
- To install Palm Desktop software:
- Using your phone with Microsoft Outlook
- Using your phone with another PIM
- Using an e-mail application with your phone
- To install Palm Mail:
- Entering Data in Your Phone
- Using the PCS Treo 300 keyboard
- Typing capital letters
- To type a single capital letter (Caps Shift):
- To enter only capital letters (Caps Lock):
- Press Shift twice.
- Typing numbers and symbols
- To enter a single number or symbol (Option Shift):
- Press Option .
- To enter only numbers or symbols (Option Lock):
- Typing accented characters
- To enter accented characters:
- Typing extended characters
- To enter extended characters:
- Navigation keystrokes
- Using menus
- To use the menu bar:
- Keyboard shortcut menu commands
- To use keyboard shortcuts for menu commands:
- Using text ShortCuts
- To use a ShortCut:
- Using the onscreen keyboard
- To use the onscreen keyboard:
- Using your computer keyboard
- Importing data
- To import data:
- Managing Your Applications
- Using the Applications Launcher
- Opening applications
- To open an application:
- Switching between applications
- Categorizing applications
- To categorize an application:
- To display applications by category:
- Changing the Applications Launcher display
- To change the Applications Launcher display:
- To open the Applications Launcher to the last opened category:
- Choosing preferences
- To change preferences for an application:
- Installing and removing applications
- Installing add-on applications
- To install add-on software on your phone:
- Removing applications
- To remove an add-on application:
- Removing Palm Desktop software
- To remove Palm Desktop software:
- Security
- In Security, you can do the following:
- Assigning a password
- To assign a password:
- Changing or deleting a password
- To change or delete your password:
- Recovering from a forgotten password
- To delete a forgotten password:
- Applications Overview
- PhoneBook
- In PhoneBook, you can do the following:
- To open PhoneBook:
- Date Book Plus
- In Date Book Plus, you can do the following:
- To open Date Book Plus:
- Blazer Web Browser
- In Blazer, you can do the following:
- To open Blazer:
- Memo Pad
- In Memo Pad, you can do the following:
- To open Memo Pad:
- SMS
- In SMS, you can do the following:
- To open SMS:
- To Do List
- In To Do List, you can do the following:
- To open To Do List:
- CityTime
- In CityTime, you can do the following:
- To open CityTime:
- Calculator
- In Calculator, you can do the following:
- To open Calculator:
- Expense
- In Expense, you can do the following:
- To open Expense:
- Common Tasks
- Creating records
- To create a record:
- Editing records
- Entering text
- Edit menu
- To select text in an application:
- Deleting records
- To delete a record in any of the PIM applications:
- Hold Option and press Return to finish.
- Other ways to delete records
- Purging records
- To purge records:
- Categorizing records
- System-defined and user-defined categories
- To move a record into a category:
- To display a category of records:
- To define a new category:
- To rename a category:
- Finding records
- Looking up Contacts records in PhoneBook
- To use Instant Lookup to find a Contacts record:
- Using Find
- To use Find:
- Using Phone Number Lookup
- To use Phone Number Lookup:
- Press Space or Return .
- Phone Number Lookup tips
- Looking up names to add to expense records
- To add names to an Expense record:
- Sorting lists of records
- To sort records in To Do List and Expense:
- To sort records in Contacts view in PhoneBook and Memo Pad:
- Making records private
- Hiding and masking private records
- To make a record private:
- To hide or mask all private records:
- To display all private records:
- To display a specific masked record:
- To display all private records in a specific application:
- Attaching notes
- To attach a note to a record:
- To review or edit a note:
- To delete a note:
- Choosing fonts
- To change the font style:
- Exchanging and updating data: HotSync operations
- Performing a HotSync operation for the first time
- To perform a local HotSync operation:
- Beaming information
- To select a business card:
- To beam a record, business card, or category of records:
- To beam an application:
- To receive beamed information:
- Chapter 6
- Application-Specific Tasks
- To change the PhoneBook view, do one of the following:
- Using the Speed Dial view
- Defining a Speed Dial button
- To define a Speed Dial button:
- Adding Contacts list entries to your Speed Dial list
- To add an entry from your Contacts list to your Speed Dial list:
- Calling a Speed Dial number
- To dial a number from the Speed Dial view:
- Changing a Speed Dial entry
- To change a Speed Dial entry:
- Deleting Speed Dial entries
- To delete a Speed Dial entry:
- Arranging the Speed Dial list
- To arrange the Speed Dial list:
- Using the Dial Pad view
- To dial a number with the Dial Pad:
- Using the Contacts view
- Creating a Contacts entry
- To create a new Contacts entry:
- Duplicating a Contacts entry
- To duplicate an entry:
- Calling a number in your Contacts list
- To dial a number in your Contacts list:
- Selecting types of phone numbers
- To select other types of phone numbers in an entry:
- Changing Contact entry details
- To open the Contact Entry Details dialog box:
- Using the Call History view
- Reviewing Call History
- To review Call History:
- Calling a number in your Call History list
- To dial a number from the Call History view:
- Adding a Call History entry to your Contacts list
- To add a Call History entry to your Contacts list:
- Purging Call History
- To purge entries in Call History view:
- Using the Active Call view
- Receiving Calls
- To answer a call while it is ringing, do any of the following:
- To ignore a call and send it directly to voicemail, do any of the following:
- To silence the ring, do any of the following:
- To end a call, do any of the following:
- Adjusting call volume
- To adjust the call volume, do one of the following:
- Muting the microphone
- To toggle mute on and off, do one of the following:
- Using the speakerphone
- To use the speakerphone:
- Placing calls on hold
- To place a call on hold:
- Handling Multiple Calls
- To respond to call waiting, do one of the following:
- To dial another number while a call is in progress:
- To use 3-way calling:
- Checking voicemail
- To check voicemail:
- Forwarding calls
- To forward calls to another number:
- Other ways to make a call
- Application-Specific Tasks
- Redialing the last number
- To redial the last number, do one of the following:
- Returning a missed call
- Calling an emergency number
- To call an emergency number:
- PhoneBook menus
- Record menus
- Contacts list view
- Contacts edit view
- Contacts record view
- Options menus
- Call History view
- Dial Pad & Speed Dial views
- Contacts view
- Contacts record & edit views
- Preferences
- Call Preferences
- Dial Preferences
- Rename Custom Fields
- Security Prefs
- Phone Info
- Working in Day View
- To view or select a date, do one of the following:
- Scheduling an event
- To schedule an event:
- To schedule an untimed event:
- Rescheduling an event
- To reschedule an event:
- Setting an alarm for an event
- To set an alarm for an event:
- To dismiss the alarm reminder, do one of the following:
- Scheduling repeating or continuous events
- To schedule a repeating or continuous event:
- Changing and deleting repeating or continuous events
- To change or delete repeating events:
- Considerations for repeating or continuous events
- Changing the Date Book Plus view
- To cycle through Day, Week, Week with Text, Month, Year, and List views:
- To display the current time:
- Working in Week View
- Tips for using Week View
- Working in Week View with Text
- Tips for using Week View with Text
- Working in Month View
- Tips for using Month View
- Working in Year View
- Tips for using Year View
- Working in List View
- Selected week's dates
- Scroll to other weeks
- Tips for using List View
- Spotting event conflicts
- Working with floating events
- To create a floating event:
- To mark a floating event complete:
- Tips for using floating events:
- Working with To Do items
- To create To Do items in Date Book Plus:
- To mark a To Do item complete:
- Tips for using To Do items:
- Using the Daily Journal
- To create a Daily Journal entry:
- Using templates
- To create a template:
- To schedule a template event:
- Date Book Plus menus
- Record menu
- Day View
- Options menu
- Preferences (Day View)
- Alarm Preferences
- UnDelete from Archive
- Go to Week
- Week Preferences
- Month
- Year
- List View Preferences
- Blazer
- Viewing web pages
- To view a web page:
- Working with bookmarks
- Viewing bookmarked pages
- To view a bookmark:
- Adding bookmarks
- To bookmark the current page:
- To define a bookmark:
- Editing bookmarks
- To edit a bookmark:
- Deleting bookmarks
- To delete a bookmark:
- Arranging your bookmarks
- To assign page category titles:
- To rearrange bookmark entries:
- To rearrange bookmark pages:
- Drag a page to another slot
- Blazer menus
- Page menu
- Page view
- Bookmarks menu
- Bookmark view
- Go menus
- Browser tab:
- Note: Some service providers may not support the default Home Page setting.
- Preferences (continued)
- Advanced tab:
- To create a new memo:
- Reviewing memos
- To review a memo:
- Memo Pad menus
- Receiving text messages
- Tips:
- Viewing text messages
- To view text messages in the List view:
- To view one message at a time:
- Application-Specific Tasks
- Responding to text messages
- Calling the sender
- To call the sender:
- Selecting other ways to respond to text messages
- To select other the response method:
- Copying text messages
- To copy an entire message:
- To copy specific text within a message:
- Sorting messages
- Deleting messages
- To delete a single message:
- To delete a group of messages:
- SMS menus
- To create a To Do item:
- Setting priority
- To set the priority of a To Do item:
- Setting a due date
- To set a due date for a To Do item:
- Assigning a category
- To assign a category for a To Do item:
- Checking off a To Do item
- To check off a To Do item:
- To Do Show Options
- To change the Show Options settings:
- To Do List menus
- Setting your home city
- To set your home city:
- Selecting remote cities
- To set your remote cities:
- Adding cities
- To add a city to the list:
- CityTime menus
- Utilities menu
- Selecting the Calculator mode
- To select the Calculator mode:
- Using the Basic Calculator buttons
- Displaying Recent Calculations
- To display recent calculations:
- Using the Advanced Calculator mode
- Using the Advanced Calculator buttons
- Primary buttons
- Math buttons
- Trigonometry buttons
- Finance buttons
- To solve this example:
- Logic buttons
- Statistics buttons
- Weight/Temp buttons
- Length buttons
- Area buttons
- Volume buttons
- Creating a custom view
- To create a custom view:
- Calculator menus
- Program menu
- Advanced Calculator
- To create an Expense item:
- Changing the date of an Expense item
- To change the date of an Expense item:
- Entering receipt details
- To open the Receipt Details dialog box:
- Select any of the following options:
- Customizing the Currency pick list
- To customize the Currency pick list:
- Defining a custom currency symbol
- To define a custom currency symbol:
- Show Options
- To open the Show Options dialog box:
- Transferring your data to Microsoft Excel
- Creating or printing an expense report
- To create or print an expense report:
- Using expense report templates
- To view your expense data using a Microsoft Excel template:
- Expense menus
- Setting Preferences for Your Phone
- Viewing Preferences
- Buttons Preferences
- To change the Buttons Preferences:
- HotSync Buttons Preferences
- To change the HotSync Buttons Preferences:
- Connection Preferences
- Predefined configurations
- Connection Methods
- Setting an infrared to modem configuration
- To create an IrCOMM to Modem connection:
- Digitizer Preferences
- Formats Preferences
- Country default
- To set the country default:
- Time, date, week start, and numbers formats
- To select the time, date, week start, and numbers format:
- General Preferences
- Auto-off delay
- To set the Auto-off delay:
- System, alarm, and game sounds
- To set the system, alarm, and game sounds:
- Network Preferences
- Connecting automatically
- To choose an automatic connection:
- Creating a new packet data configuration
- To create a packet data service template:
- To duplicate an existing service template:
- Entering a user name
- To enter a user name:
- Entering a password
- To enter a password:
- Selecting a connection
- To select a connection:
- Connecting to your service
- To establish a connection:
- To close a connection:
- Adding detailed information to a Mobile IP service template
- To define a Mobile IP service template:
- Defining an IP address for a Mobile IP service template
- To identify dynamic IP addressing:
- To enter a permanent IP address:
- Defining Tunneling and SPI in a Mobile IP service template
- To enter Tunneling and SPI:
- Adding detailed information to a Simple IP service template
- To define a Simple IP service template:
- Defining the IP address in a Simple IP service template
- Defining DNS addresses in a Simple IP service template
- To enter a primary and secondary DNS:
- Deleting a service template
- To delete a service template:
- Network Preferences menu commands
- Service menu
- Troubleshooting network connections
- Checking your wireless service status
- Displaying expanded Service Connection Progress messages
- Viewing the Network Log
- To view the Network Log:
- Adding a DNS number
- Owner Preferences
- To enter the Owner Preferences:
- To unlock the Owner Preferences screen:
- Ringer Preferences
- To select ring volume settings:
- To select ring tone settings:
- ShortCuts Preferences
- Creating a ShortCut
- To create a ShortCut:
- Editing a ShortCut
- To edit a ShortCut:
- Deleting a ShortCut
- To delete a ShortCut:
- Advanced HotSync® Operations
- Selecting HotSync setup options
- To set the HotSync options:
- Serial Port
- Speed
- Customizing HotSync application settings
- To customize HotSync application settings:
- Click Change.
- IR HotSync operations
- Preparing your computer for infrared communication
- Does your computer support infrared communication?
- To check the ports used for infrared communication with Windows 98 and Me:
- To enable infrared communication with Windows 2000:
- Configuring HotSync Manager for infrared communication
- To configure HotSync Manager for infrared communication with Windows 98 and Me:
- Click OK.
- To configure HotSync Manager for infrared communication with Windows 2000:
- Performing an IR HotSync operation
- To perform an IR HotSync operation:
- Returning to serial cable HotSync operations
- To return to serial cable HotSync operations with Windows 98 and Me:
- To disable infrared communication with Windows 2000:
- Conducting a HotSync operation via a network
- To prepare your computer for a network HotSync operation:
- Performing a network HotSync operation via a LAN
- To perform a network HotSync operation via a LAN:
- Using File Link
- Creating a user profile
- To create a user profile:
- To use a profile for the first-time HotSync operation:
- Maintaining Your Phone
- Caring for your phone
- Battery considerations
- Resetting your phone
- Performing a soft reset
- To perform a soft reset:
- Performing a warm (or safe) reset
- To perform a warm (or safe) reset:
- Performing a hard reset
- To perform a hard reset:
- To restore your data after a hard reset:
- Troubleshooting Tips
- Software installation problems
- Problem Solution
- Operating problems
- Tapping and keyboard problems
- Wireless communication problems
- Application problems
- HotSync problems
- Beaming problems
- Password problems
- Technical support
- Other Product Information
- Performance and Safety
- Important Information About Your Phone and Service
- Keeping Tabs on Signal Strength
- Understanding the Power Save Feature
- Understanding How Your Phone Operates
- Knowing Radio Frequency Safety
- Maintaining Your Phone's Peak Performance
- Maintaining Safe Use of and Access to Your Phone
- Using Your Phone While Driving
- Following Safety Guidelines
- Using Your Phone Near Other Electronic Devices
- Turning Off Wireless Mode Before Flying
- Turning Off Wireless Mode in Dangerous Areas
- Restricting Children's Access to Your Phone
- Caring for and Protecting Your Phone Battery
- Acknowledging Special Precautions and the FCC Notice FCC Notice
- Cautions
- Exposure to Radio Frequency Energy (SAR)
- User Guide Proprietary Notice
- Handspring Product Warranty
- Handspring, Inc.
- End User Software License Agreement
- GNU Library General Public License
- Terms and Conditions for Copying, Distribution and Modification
- NO WARRANTY
- How to Apply These Terms to Your New Library
- Acknowledgments
- Index
- Numerics
- A
- B
- C
- Call
- D
- E
- F
- G
- H
- |
- K
- L
- M
- N
- 0
- P
- R
- S
- T
- U
- V
- W
- X
- Y
Brand : PALM
Model : Treo 300
Category : Mobile Phone