
TS40GPB - Data Storage TRANSCEND - Free user manual and instructions
Find the device manual for free TS40GPB TRANSCEND in PDF.
User questions about TS40GPB TRANSCEND
0 question about this device. Answer the ones you know or ask your own.
Ask a new question about this device
Download the instructions for your Data Storage in PDF format for free! Find your manual TS40GPB - TRANSCEND and take your electronic device back in hand. On this page are published all the documents necessary for the use of your device. TS40GPB by TRANSCEND.
USER MANUAL TS40GPB TRANSCEND
Your Supplier, Your Partner, Your Friend.
Table of Contents
Introduction
Package Contents 1
Features 1
System Requirements 1
Product Overview 2
Using the PhotoBank in Stand-Alone Mode
System Information 3
Copying Files from Memory Card to PhotoBank 3
Copying Files from PhotoBank to Memory Card 4
Erasing the Memory Card 5
Deleting Folders in PhotoBank 6
Charging the Battery 7
Using the AC Adapter
Configuration Instructions 7
Adapter Configuration by Country 9
Connecting to Your Computer
Driver Installation for Windows 98/98SE 10
Disconnecting PhotoBank in Windows 98/98SE 11
Uninstall Driver 12
Using in Windows 2000, Me, and XP 12
Disconnecting PhotoBank in Windows Me/2000/XP 12
Using the PhotoBank in Mac OS. 13
Changing the Battery 14
Updating the firmware
Setup the Firmware Upgrade Tool 15
Uninstall the Firmware Upgrade Tool 16
Troubleshooting 17
Warning 18
Specifications 18
Ordering Information 18
PhotoBank Limited Warranty
Introduction
Thank you for purchasing Transcend's PhotoBank, a small device designed for fast and easy data storage. It supports multi types of storage media: CompactFlash™, Microdrive™, SmartMedia™, Secure Digital, miniSD (with adapter), MultiMediaCard™, RS-MMC (with adapter), Memory Stick® / Memory Stick PRO®, Memory Stick Duo® (with adapter), Memory Stick PRO Duo® (with adapter) and also features a built-in 1.8" Hard Disk (20GB or 40GB). Your transcend PhotoBank is an easy-to-install device that needs only a USB interface to use on any PC, Mac, or notebook computer. In addition, its mobility, strong data retention ability, and impressive appearance will provide you with a brand-new experience.
Package Contents
PhotoBank (TS20GPB/ TS40GPB)
- Leather Case
- Driver CD
USB Cable
Multi-regional AC Adapter
- Quick Installation Guide
Features
- Fully compatible with USB 2.0 and backwards compatible with USB 1.1
High transfer rate: Up to 480Mbps - Stand-alone storage device. Desktop/Laptop not required
Supports CF Type I, CF Type II including MicroDrive, SM, SD, miniSD (with adapter), MMC, RS-MMC (with adapter), MS, MS Pro, MS Duo (with adapter), MS PRO Duo (with adapter) - Black and White LCD displays status with blue backlight
- Easy file transfer and storage of data.
- Become external HDD and USB card reader/writer when connected to a computer
- Auto shutdown (idle 10 mins) in stand-alone mode
- Li-lon rechargeable battery lasts approximately 3 hours on a full charge
System Requirements
Desktop or notebook computer with USB port and one of the following operating systems:
- Windows® 98/98SE(Driver needed)
- Windows® 2000
- Windows® Me
- Windows® XP
MacTM OS 10.2 or later
Product Overview
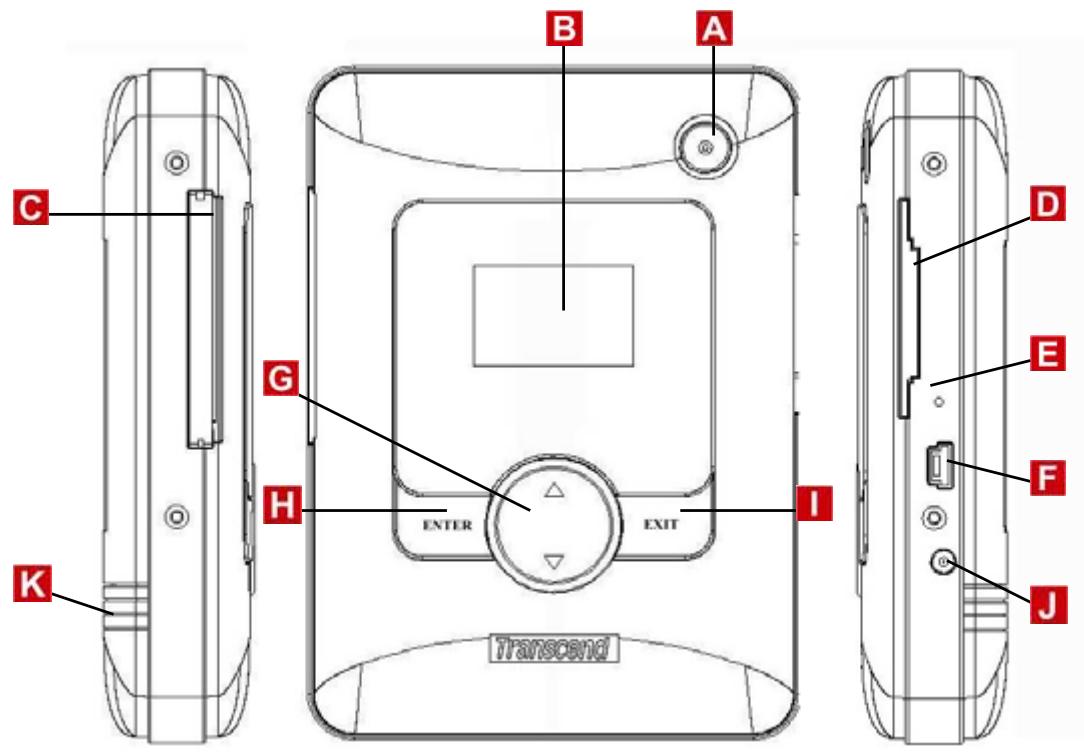
A Power Button
B LCD Screen
CF Type I/II Slot
SM/ MMC/ SD /MS Card Slot
E Reset Button
F USB Connector
G Select Button
Enter Button
1 Exit Button
J Power DC Jack
K Battery Cover
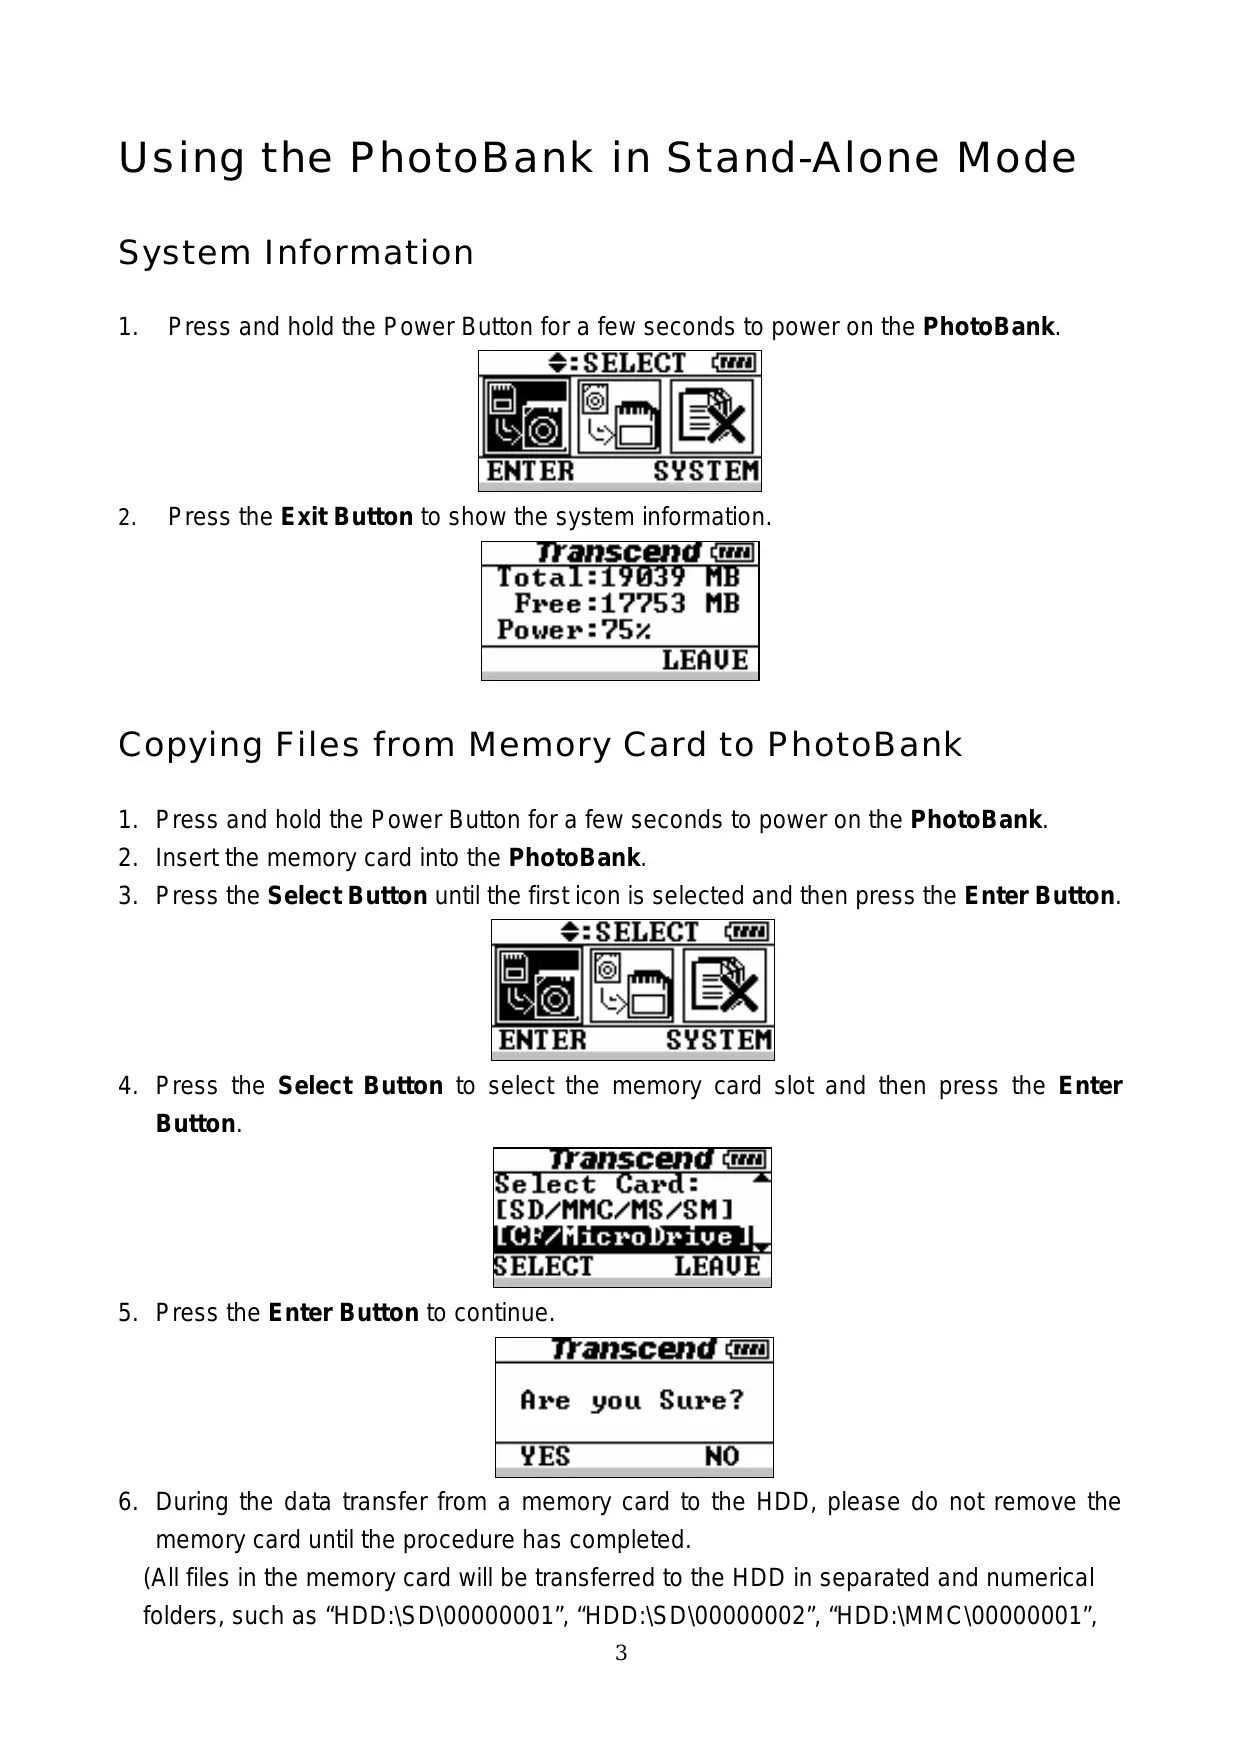
Using the PhotoBank in Stand-Alone Mode
System Information
- Press and hold the Power Button for a few seconds to power on the PhotoBank.
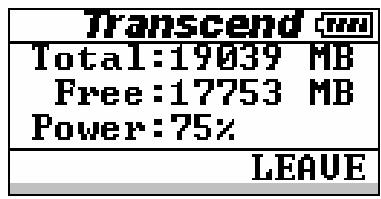
- Press the Exit Button to show the system information.
Copying Files from Memory Card to PhotoBank
- Press and hold the Power Button for a few seconds to power on the PhotoBank.
- Insert the memory card into the PhotoBank.
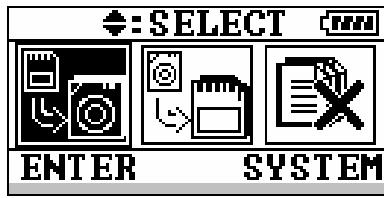
- Press the Select Button until the first icon is selected and then press the Enter Button.
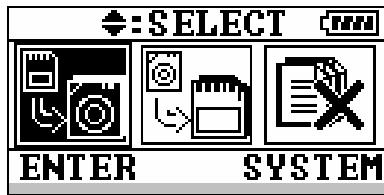
- Press the Select Button to select the memory card slot and then press the Enter Button.
- Press the Enter Button to continue.

- During the data transfer from a memory card to the HDD, please do not remove the memory card until the procedure has completed.
(All files in the memory card will be transferred to the HDD in separated and numerical folders, such as “HDD:\SD\00000001”, “HDD:\SD\00000002”, “HDD:\MMC\00000001”,
etc.)

- Transfer is complete.

*To power off the PhotoBank, press and hold the Power Button for a few seconds until the LCD turns off.
Copying Files from PhotoBank to Memory Card
- Press and hold the Power Button for a few seconds to power on the PhotoBank.
- Insert the memory card into the PhotoBank.
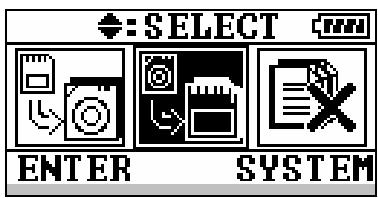
- Press the Select Button until the second icon is selected and then press the Enter Button.
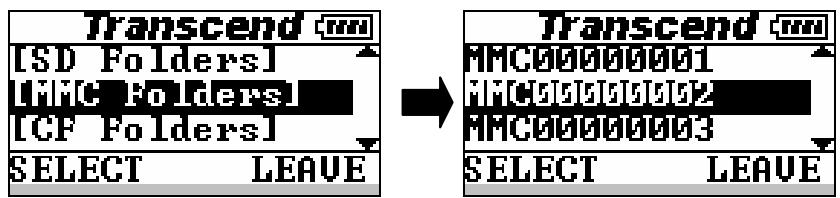
- Select the folder (by memory card) in the HDD you want to transfer from and then press the Enter Button. (The procedure will copy all files in the folder.)
- Select the memory card you want to transfer the data to and then press the Enter Button.

- Press the Enter Button to continue. PhotoBank will delete all data in card before start to copy.
| Transcend | |
| WARNING Will delete card before copy? | |
| YES | NO |
- During data transfers from the HDD to the memory card, please do not remove the memory card until the procedure has completed. (All files in the folder will be transferred to the memory card in the root directory using the same folder name.)
| Transcend |
| 50% |
| DONT REMOVE CARD! |
- Transfer is complete.
| Transcend |
| Work Complete!! |
| OK |
Erasing the Memory Card
- Press and hold the Power Button for a few seconds to power on the PhotoBank.
- Insert the memory card into the PhotoBank.
- Press the Select Button until the third icon is selected and then press the Enter Button.
| ←:SELECT mm |
| ENTER SYSTEM |
- Select "Delete Card" and then press the Enter Button.
| Transcend | |
| [Delete Card] | |
| [Delete Folder] | |
| SELECT LEAUE |
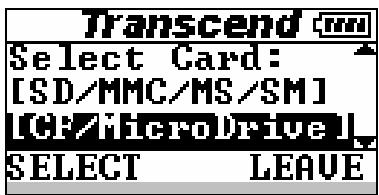
- Press the Select Button to select which card you want to delete and then press the Enter Button.
| Transcend mm |
| Select Card: |
| [SD/MMC/MS/SM] |
| [GE/NicroDrive] |
| SELECT LEAVE |
- Press the Enter Button to continue.
| Transcend |
| Are you Sure? |
| YES NO |
- When deleting all the data from the memory card, please do not remove the memory card before the procedure is complete.
| Transcend |
| 50% |
| DONT REMOUE CARD! |
- Work is complete.
| Transcend |
| Work Complete!! |
| OK |
Deleting Folders in Photo Bank
- Press and hold the Power Button for a few seconds to power on the PhotoBank.
- Press the Select Button until the third icon is selected and then press the Enter Button.
| ←:SELECT mm |
| ENTER SYSTEM |
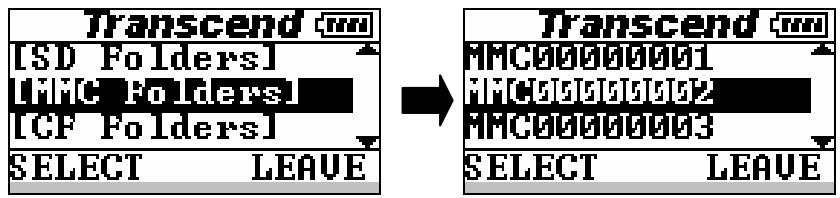
- Select "Delete folder" and then press the Enter Button.
| Transcend |
| [Delete Card] |
| [Delete Folder] |
| SELECT LEAUE |
- Select the folder you want to delete and then press the Enter Button.
(SD / MMC / MS / SM or CF)
- Press the Enter Button to continue.
| Transcend |
| Are you Sure? |
| YES NO |
- When deleting a folder from the memory card, please do not remove the memory card before the procedure is complete.
| Transcend |
| 50% |
| DONT REMOUE CARD! |
- Deletion complete.
| Transcend |
| Work Complete!! |
| OK |
Charging the Battery
PhotoBank uses a high capacity Li-ion rechargeable battery (2200mAh). To charge the battery, please plug the AC adapter (Output Power: DC 5V 2A) to the Power DC Jack. While the battery is charging, the LCD Screen will display the charging percentage. It takes approximately 4 hours to completely recharge the battery.
PhotoBank work normally when Battery recharging, LCD Screen will show the charging percentage when power off.
Using the AC Adapter
Configuration Instructions
North America
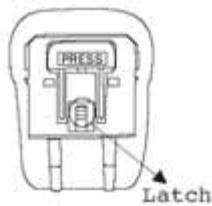
- Slide down the latch found on the back of the adapter, and PLUG A will release. Ensure that the plug locks into a 90 angle. (See chart for applicable countries.)
- Insert PLUG A into the wall outlet to begin charging.

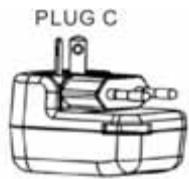
Oceania
- Slide down the latch found on the back of the adapter, and PLUG A will release. Ensure that the plug locks into a 90 angle.
- Twist the left prong in a clockwise motion and twist the right prong in a counterclockwise motion until they are both in a 45 angle. (See chart for applicable countries.)
- Insert PLUG C into the wall outlet to begin charging.
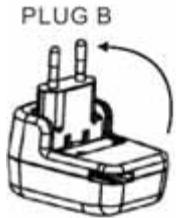
Europe / Asia
- Grasp PLUG B and lift it up until it locks into a 90 angle. (See chart for applicable countries.)
- Insert PLUG B into the wall outlet to begin charging.
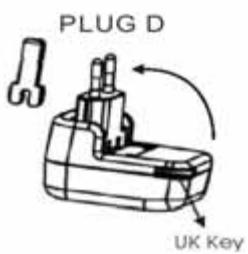
United Kingdom
- Grasp PLUG B and lift it up until it locks into a 90 angle.
- Remove the UK Key found in the bottom left corner on the backside of adapter.
- Insert the UK Key into the ground socket of the electrical outlet to open the two top power sockets. (See chart for applicable countries.)
- Insert PLUG D into the wall outlet to begin charging.
Adapter Configuration by Country
| Country | Hz | Volt | Code | Country | Hz | Volt | Code | Country | Hz | Volt | Code | Socket | Plug |
| Oceania | Taiwan | 60 | 110 | A | Spain | 50 | 127/220 | A.B | A | A | |||
| Australia | 50 | 240/250 | C | Vietnam | 50 | 120/220/230 | A.B | Sweden | 50 | 220 | B | ||
| Fiji | 50 | 240 | C | Middle East | Switzerland | 50 | 220 | B | |||||
| New Zealand | 50 | 230 | C | Iran | 50 | 220 | B.D | The Netherlands | 50 | 220 | B | ||
| Tahiti | 50 | 127 | A | Irag | 50 | 220 | B.D | U.S.S.R | 50 | 127/220 | A.B | ||
| Africa | Jordan | 50 | 220 | B.D | West Germany | 50 | 220 | B | |||||
| Egypt | 50 | 220 | B.D | Kuwait | 50 | 240 | B.D | Yugoslavia | 50 | 220 | B | B | B |
| Kenya | 50 | 240 | B.D | Saudi Arabia | 50/60 | 127/220 | A.B.D | North & South America | |||||
| Mauritius | 50 | 230 | B.D | Turkey | 50 | 220 | B | Alaska | 60 | 120/240 | A | ||
| Morocco | 50 | 115/127/220 | B | U.A.E. | 50 | 220/230/240 | B.D | Argentina | 50 | 220 | B.D | ||
| Nigeria | 50 | 230 | D | Europe | Belize | 60 | 110/220 | A.D | |||||
| R.S.A. | 50 | 220/230/250 | B.D | Austria | 50 | 220 | B | Bolivia | 50 | 110/220 | A.B | ||
| Zambia | 50 | 230 | D | Belgium | 50 | 127/220 | B | Brazil | 60 | 127/220 | A.B | ||
| Asia | Bulgaria | 50 | 220 | B | Canada | 60 | 120 | A.D | |||||
| Bangladesh | 50 | 230 | B | Czechoslovakia | 50 | 220 | B | Chile | 50 | 220 | B | C | C |
| Brunel | 50 | 240 | B.D | Denmark | 50 | 220 | B | Colombia | 60 | 110 | A | ||
| Hong Kong | 50 | 200 | B | East Germany | 50 | 127/220 | B | Costa Rica | 60 | 120 | A.D | ||
| India | 50 | 230 | B | England | 50 | 240 | C.D | Cuba | 60 | 110 | A.B.D | ||
| Indonesia | 50 | 127/230 | B | Finland | 50 | 220 | B | Dominican Rep. | 60 | 110 | A | ||
| Japan | 50/60 | 100 | A | France | 50 | 127/220 | B.C | El Salvador | 60 | 115 | A | ||
| Korea | 60 | 100/220 | A.B.C | Greece | 50 | 220 | B | Guatemala | 60 | 120 | A | ||
| Macao | 50 | 115/127/220 | B | Hungary | 50 | 220 | B | Mexico | 60 | 125 | A | D | D |
| Mainland China | 50 | 110/200 | A.B.C.D | Italy | 50 | 127/220 | B | Nisaragua | 60 | 120 | A | ||
| Malaysia | 50 | 240 | D | Luxemburg | 50 | 120/220 | B | Panama | 60 | 110/115/220 | A | ||
| Nepal | 50 | 220 | B | Malta | 50 | 240 | D | Paraguay | 50 | 220 | B | ||
| Parkistan | 50 | 220/230 | B | Norway | 50 | 220/230 | B | Peru | 60 | 220 | A.B | ||
| Philippines | 50 | 115/200 | A.B.C | Poland | 50 | 220 | B | Uruguay | 50 | 220 | B.D | ||
| Singapore | 50 | 230 | D | Portugal | 50 | 220 | B | U.S.A. | 60 | 120 | A | ||
| Thailand | 50 | 220 | A.B.D | Rumania | 50 | 220 | B | Venezuela | 60 | 120 | A | ||
Note: This sheet is for your reference based on the different continents, countries, and voltages. Please verify the plug configuration and voltage for the country before use.
Connecting to the Computer
Driver Installation for Windows 98/98SE
- Power on the computer. Verify the USB port is enabled and working properly.
*Note: If you are using Windows 98/98SE, please don’t connect your PhotoBank to the computer before the driver is installed.
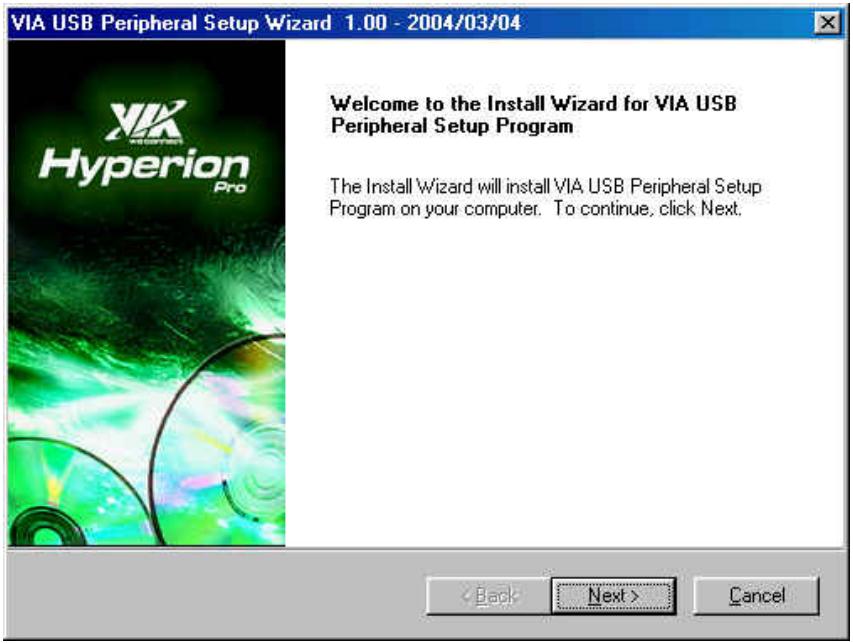
- Insert the Driver CD into the CD-ROM drive. Run the Setup.exe program located within the folder D:\Driver\Win98\ of the Driver CD (Where “D” is the CD-ROM drive letter).
- The Setup Wizard will guide you through the installation process. Select 'Next' to install the driver.
- Select OK to complete driver installation and restart your computer.
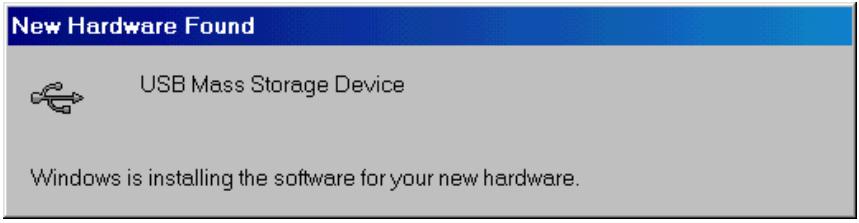
- Using the included USB cable, connect the PhotoBank to the computer. Your computer will automatically detect the PhotoBank and install the files needed to use this device.
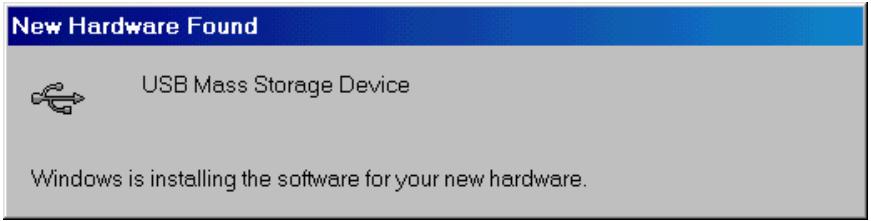
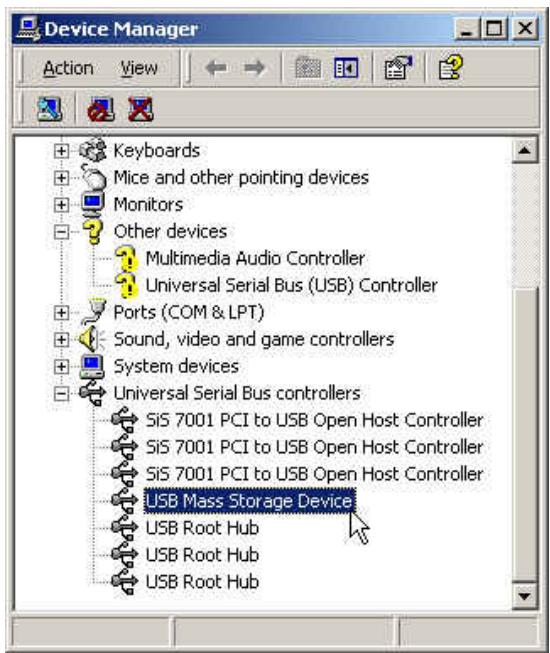
- The PhotoBank is now ready for use. You can find a new USB device in the Device Manager in the System Properties window.

Disconnecting PhotoBank in Windows 98/98SE
- Locate the green arrow icon on the icon.

in the system tray. Click the left button of your mouse

- The Stop USB Mass Storage Device pop-up menu will appear. Select to disconnect your PhotoBank.

- An Information dialogue window will appear. Select OK to continue.
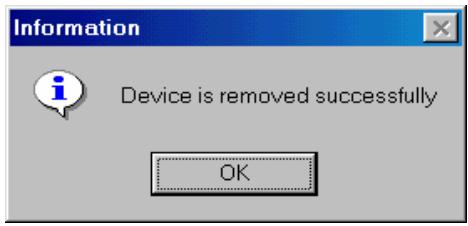
- Your PhotoBank is now ready to be disconnected from your computer.
Uninstall Driver
To uninstall the driver for the PhotoBank, run Add/Remove Programs from the Settings/Control Panel. Please follow the on-screen instructions to complete the process.
Using in Windows Me/2000/XP
- Power on the computer. Verify the USB port is enabled and working properly.
- Using the included USB cable, connect the PhotoBank to the USB port of your computer. Your computer will automatically detect the PhotoBank and install the files needed to use this device.
- Your PhotoBank is now ready for use. You can find a new USB device in the Device Manager in the System Properties window.
Disconnecting PhotoBank in Windows Me/2000/XP
-
Locate the green arrow icon in the system tray. Click the left button of the mouse on the icon.
-
The Stop USB Mass Storage Device pop-up menu will appear. Select to disconnect your PhotoBank.

- The Safe To Remove Hardware window will appear. Select OK.
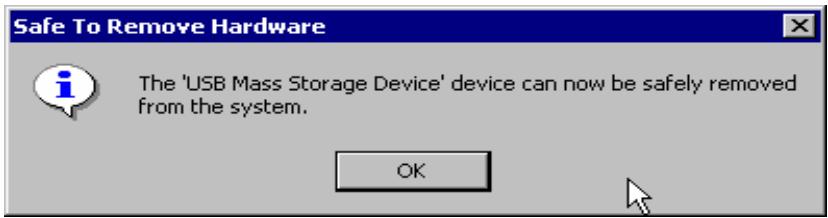
- Your PhotoBank is now ready to be removed.
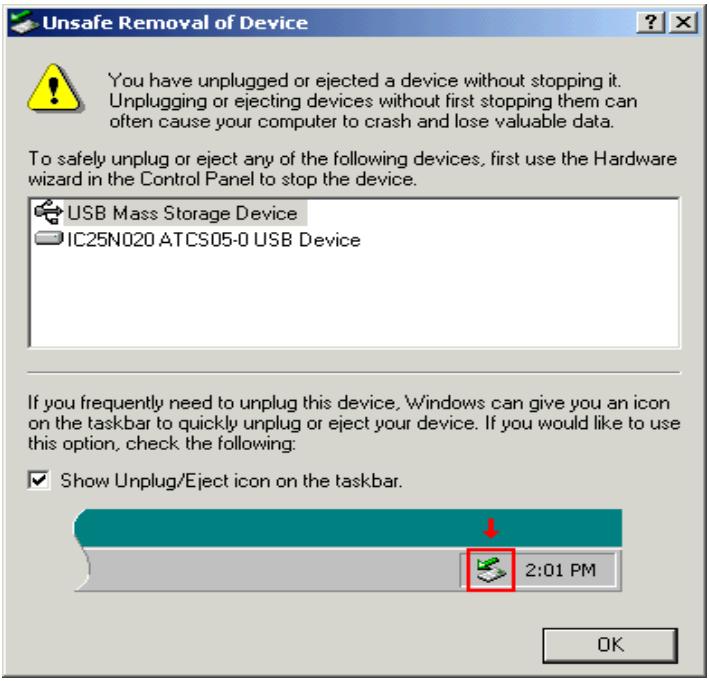
*Note: If you don't follow the above steps to remove the PhotoBank in Windows 2000, the Unsafe Removal of Device message will appear.
Using the PhotoBank in Mac OS
- Complete the hardware setup. Drivers are not required for the Mac.
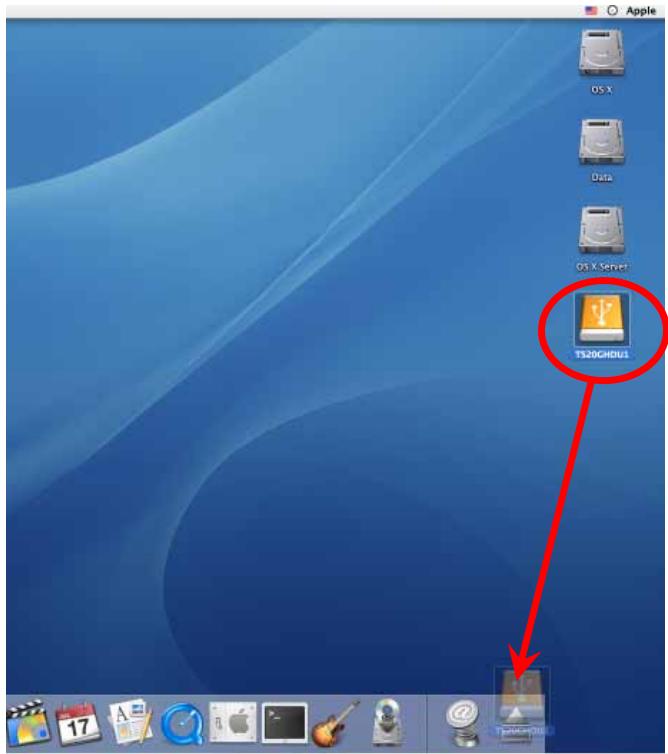
-
Using the included USB cable, connect the PhotoBank to your Mac. A disk icon will appear on the desktop. You may use this device as if it were a Mac Hard Disk.
-
If you want to remove the PhotoBank, you must first drag and drop the corresponding disk icon into the trashcan. After the disk icon disappears, you can disconnect the PhotoBank.
Changing the Battery
- Remove the screw and then the battery cover.
- Unplug the battery wire from the connector.
- Replace the battery.
- Reattach the battery cover. Insert the screw to secure the battery cover.
Updating the Firmware
Setup the Firmware Upgrade Tool
- Power on the computer. Verify the USB port is enabled and working properly
- Insert the Driver CD into the CD-ROM drive. Run the Setup.exe program located within folder “D:\Firmware\Upgrade” of the Driver CD (Where “D” is the CD-ROM drive letter).
- The Setup Wizard will guide you through the installation process. Select 'Next' to install the upgrade tool.
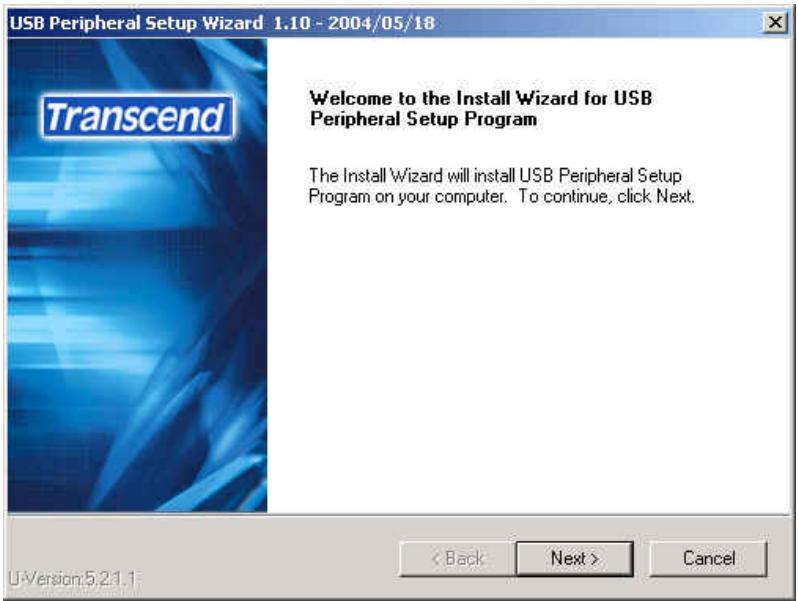
- Select "Finish" to complete the Firmware Upgrade Tool installation.
- Select the Firmware Upgrade Tool icon from "Start menu Programs Transcend fwupg".
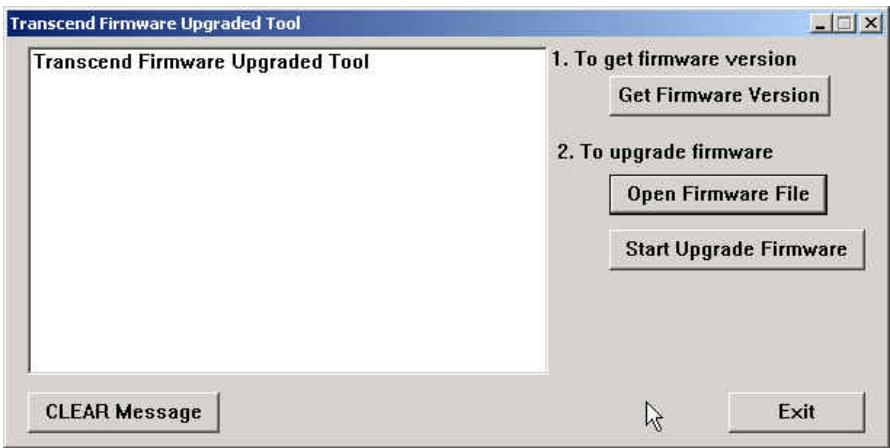
- Select "Open Firmware File" to select the ROM file.
- Select "Start Upgrade Firmware" to start upgrade firmware.
*Note: The Firmware Upgrade Tool supports the following operating systems:
- Windows® 2000
- Windows® XP
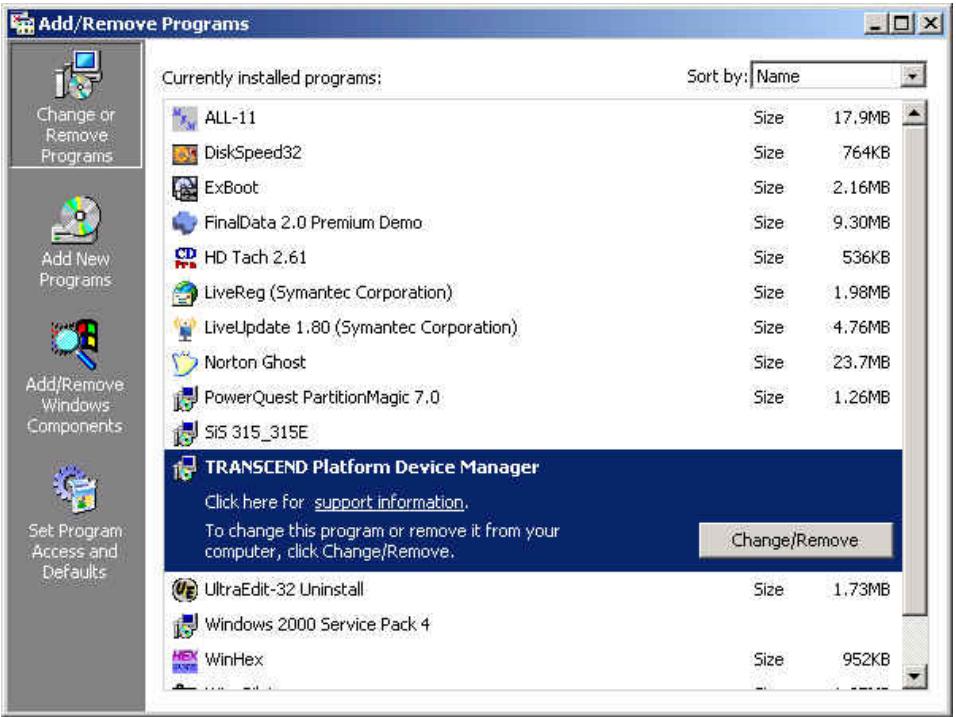
Uninstall the Firmware Upgrade Tool
To uninstall the Firmware Upgrade Tool, run Add / Remove Programs from the Settings / Control Panel. Please select the TRANSCEND Platform Device Manager and follow the on-screen instructions to complete the process.
Troubleshooting
WARNING
Do not try to open the case of the PhotoBank else you will void the warranty. If a fault occurs, check the points listed below first. If you are unable to solve the problem with this information, please consult your dealer or service center.
Q: While copying data from memory card to HDD or reversely, the PhotoBank always displays "Operation Error".
A: The memory card might be unformatted or damaged. Use your digital camera to format the memory card to verify if the memory card is good.
Q: Under Windows, there are two removable drives, but the memory card can't read/write via the PhotoBank.
A: The memory card might be unformatted or damaged. Use your digital camera to verify if the memory card is good. The memory card might need to be re-formatted.
Q: PhotoBank can't boot in standalone mode.
A: You might have reformatted the HDD with the wrong format. PhotoBank can only operate in the FAT32 format. You must connect the PhotoBank to the computer and reformat the HDD using the FAT32 format.
Q: Windows 98 can't setup the PhotoBank properly.
A: Under Windows 98, the "New Hardware Install Wizard" does not find a suitable driver in the CDROM. It is because the PhotoBank has been connected to the computer before installing the driver and Windows 98 has installed the wrong driver. You should disconnect the PhotoBank from the computer, uninstall the wrong driver, install the correct driver from CDROM, and then connect your PhotoBank to the computer.
Q: Mac OS can recognize 2 removable drives, but the HDD can't be detected.
A: This might because you have formatted the HDD with NTFS format. Mac OS can't recognize this format. This will also cause the PhotoBank not to boot in standalone mode. You must connect the PhotoBank to a computer using a Microsoft Windows OS and reformat the HDD using the FAT32 format.
Q: The PhotoBank hangs/lags/stalls.
A: Whenever the PhotoBank hangs, you can press the Reset button to reboot the PhotoBank.
Warning
Any unauthorized attempt to disassemble the PhotoBank will void the limited warranty.
Specifications
Power Supply DC 5V from USB port
5V / 2A AC Adapter
Li-ion rechargeable battery (2200mAh)
Storage media 1.8"HDD
Slots for memory cards 1. CF Card Type I / II
2. SM/MMC/SD/MS
LCD Indicators Black and White with blue back light
Operating Temperature 5°C - 60°C
Storage Temperature -40°C - 70°C
Humidity 8% - 90% RH
Emission / Safety FCC Class B, CE, BSMI
Dimensions 110mm x 85mm x 22mm
Weight 235g / 247g (20GB / 40GB)
Ordering Information
HDD Capacity
20GB
40GB
Transcend P/N
TS20GPB
TS40GPB
PhotoBank Limited Warranty
"Above and beyond" is the standard we set ourselves for customer service at Transcend. We consistently position ourselves to be significantly above the industry norm. It's all part of our commitment to Customer Satisfaction.
All Transcend Information, Inc. (Transcend) products are warranted and tested to be free from defects in material and workmanship and to conform to the published specifications. During the warranty period should this Transcend PhotoBank fail under normal use in the recommended environment due to improper workmanship or materials, Transcend will repair the product or replace it with a comparable one. This warranty is subject to the conditions and limitations set forth herein.
Duration of Warranty: Transcend PhotoBank is covered by this warranty for a period of two (2) years and the Li-ion battery is covered by this warranty for a period of six (6) months from the date of purchase. Proof on the date of purchase is required. Transcend will inspect the product and make the decision for repair or replacement. Transcend reserves the right to provide a functionally equivalent refurbished replacement product.
Limitations: This warranty does not apply to product failure due to accident, abuse, mishandling, improper installation, alteration, acts of nature, improper usage, or problems with electrical power. Transcend products must be used with devices that conform to the recommended industry standards. Transcend will not be liable for damages resulting from a third party device that causes the Transcend product to fail. Transcend shall in no event be liable for any consequential, indirect, or incidental damages, lost profits, lost business investments, lost goodwill, or interference with business relationships as a result of lost data. Transcend is also not responsible for damage or failure of any third party equipment, even if Transcend has been advised of the possibility. This limitation does not apply to the extent that it is illegal or unenforceable under applicable law. Transcend does not perform any data recovery services when the hard drive is defective.
Disclaimer: The foregoing limited warranty is exclusive. There are no other warranties, including any implied warranty of merchantability or fitness for a particular purpose. This warranty is not affected in any part by Transcend providing technical support or advice.
Online Registration: To expedite warranty service, please register your Transcend Product within 30 days of purchase.
Register online at http://www.transcendusa.com/registration.

Your Supplier, Your Partner, Your Friend.
Transcend Information, Inc.
www.transcendusa.com