
TS256MMP620 - Flash Memory TRANSCEND - Free user manual and instructions
Find the device manual for free TS256MMP620 TRANSCEND in PDF.

User questions about TS256MMP620 TRANSCEND
0 question about this device. Answer the ones you know or ask your own.
Ask a new question about this device
Download the instructions for your Flash Memory in PDF format for free! Find your manual TS256MMP620 - TRANSCEND and take your electronic device back in hand. On this page are published all the documents necessary for the use of your device. TS256MMP620 by TRANSCEND.
USER MANUAL TS256MMP620 TRANSCEND
System Requirements....2
Reminders 2
Caution: Risk of Deafness 2
Product Overview .... 3
OLED Display 4
AAA Battery Insertion....5
Basic Operation....6
Power On....6
Power Off....6
Play a Track....6
Pause a Track 6
Advance to the Next Track 6
Return to the Previous Track 6
Fast Forward 6
Fast Rewind 7
Increase Volume 7
Decrease Volume 7
Repeat a Track ....7
Repeat All Tracks....7
Repeat Random Tracks 7
Repeat a Portion of a Track (A-B Repeat)....8
Lock 8
Data Storage....9
Data Storage in Windows ^® 98SE....9
Data Storage in Windows ^® Me, 2000 and XP ....10
Data Storage in Mac™ OS 9.0, or Later....10
Data Storage in Linux™ Kernel 2.4, or Later ....10
Warning....10
Music Functions....12
Download or Upload MP3/WMA Files....12
Play MP3/WMA Music 12
File/Folder Navigation....13
Quick Settings....13
A-B Repeat Function 14
FM Functions....15
Scan for a Channel 15
Preset a Channel....15
Select a Preset Channel....16
Record an FM Channel 16
Voice Recording Function 18
Record a Voice....18
Play the Recorded Files....19
Settings....20
REC Quality....20
REC Environment....20
Contrast 21
Language....21
Power Saving 22
Screen Saver....22
USER EQ....23
Auto Lock 23
About 24
Delete MP3/WMA/WAV Files....25
Safely Removing Your T.sonic....26
Removing the T.sonic in Windows ^® 98SE....26
Removing the T.sonic in Windows ^® Me, 2000, and XP ..... 26
Removing the T.sonic in Mac ^TM OS....26
Removing the T.sonic in Linux™ 26
Recovering Your T.sonic 27
Recovering the T.sonic in Windows ^® 98SE 27
Recovering the T.sonic in Windows ^® Me, 2000, and XP....29
Functions MENU Tree....33
Troubleshooting 34
Specifications....37
Ordering Information 37
T.sonic Limited Warranty....38
Introduction
Thank you for purchasing Transcend's T.sonic™ 620. A totally new generation of Flash MP3 players. This small device is more than just a USB Flash Drive. It combines a USB Flash Drive with an MP3 player, A-B repeat function, voice recorder and an FM radio. With the T.sonic™, you can upload and download music files to and from a computer and then play the tracks on the device. Using the A-B repeat function, you can continuously replay a designated section of a track, which can be used as a handy language-learning tool. Also, you can record memos to yourself or from others using the digital recorder. With an FM radio built-in, you can always listen to your favorite radio station. Transcend's latest T.sonic™ 620 are a step above the usual MP3 players.
Package Contents
The T.sonic package includes the following items:
• T.sonic MP3 Player
- Earphones
- Driver CD
• USB extension cable
- Leather Case
• One AAA battery
• Quick Installation Guide
Features
- The T.sonic is powered using a AAA battery (One AAA alkaline battery can support up to 15 hours of operation)
• MP3 Player which supports MP3, WMA, and WAV formats
• Digital Voice Recorder
• A-B repeat function allows you to continuously replay a designated section of a track - Ability to Preset 20 FM channels and record directly from an FM channel to a WAV file
• Auto-powers off after five or ten minutes of no use - Auto-keypad lock protects against accidental operation by mistakenly touching the player's controls
- Self-luminous OLED Display provides users with a vibrant clear display and vivid colors, that can easily be viewed at any angle and in any light
- Automatic screen saver function runs if the unit is idle for a few seconds; this acts as a power saving measure
- Operating Systems Supported: Windows® 98SE, Windows® Me, Windows® 2000, Windows® XP, Mac™ OS 9.0 or later, and Linux™ Kernel 2.4 or later. Only Windows® 98SE needs the enclosed driver.
System Requirements
Desktop or notebook computer with a working USB port
One of following operating systems:
- Windows® 98SE
- Windows® Me
- Windows® 2000
- Windows® XP
• Mac™ OS 9.0 or later
• Linux™ Kernel 2.4 or later
Reminders
- Keep your T.sonic away from heat, direct sunlight, and moisture. Do not bend, flex, or drop your T.sonic.
- Always plug or unplug your T.sonic by grasping the unit's sides.
- Never use the "Quick Format" or "Full Format" in Windows to format your T.sonic.
- Follow the procedures in "Safely Removing Your T.sonic" section to remove your T.sonic from the system.
Caution: Risk of Deafness
- Repeated or regular use of headphones or earphones at volume levels above 80 decibels can give a false impression that the audio level is not high enough. End users may try to progressively increase the volume control therefore risking a dangerous noise level for their ears.
- To protect your health and your hearing, keep the volume for your MP3 player below 80 decibels and do not use for an extended period of time. Stop use if symptoms like headaches, nausea, or hearing disorders occur.
- Your MP3 player is limited to a volume level of 100 decibels.
- Both the MP3 player and the earphones are compliant with the French regulation concerning musical Walkmans (24 ^th July 1998 Order).
- Before using other headphones, confirm that their technical specifications are compatible with the original set.
Product Overview
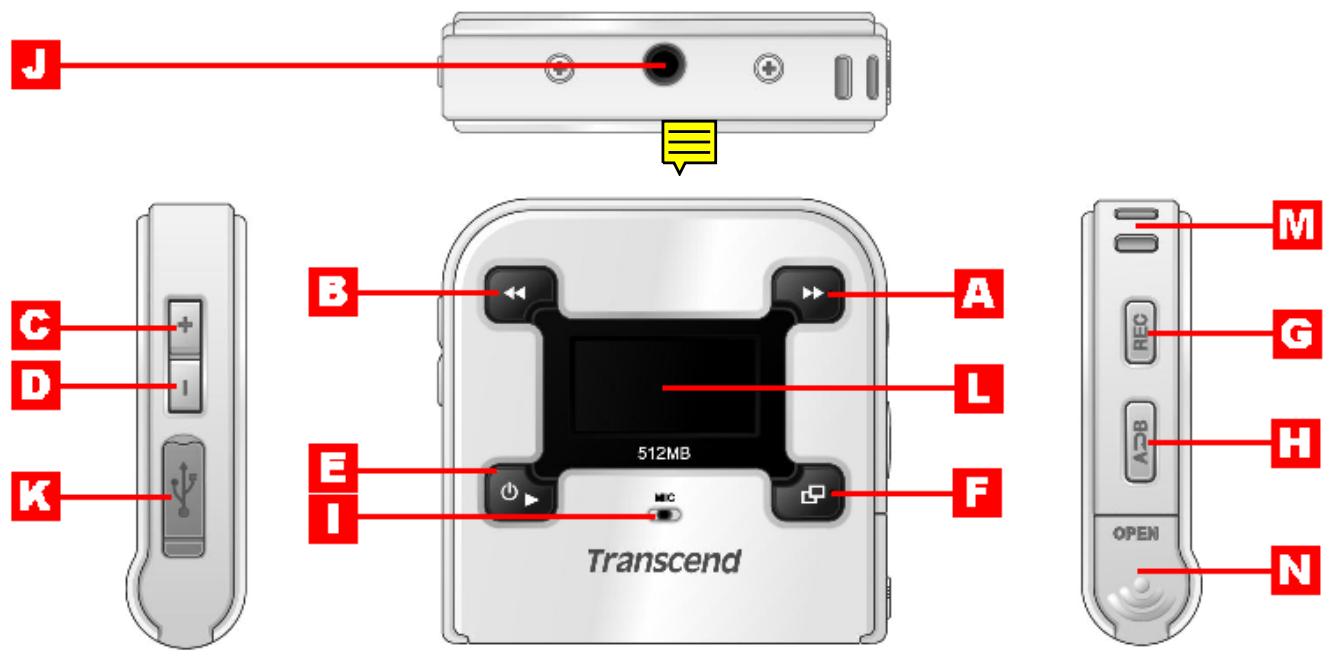
A Right (Next) Button
B Left (Previous) Button
C Up (Volume Up) Button
D Down (Volume Down) Button
E PLAY Button
F MENU Button
G REC Button
H A-B Repeat Button
Microphone
J Earphone Jack
K Mini USB Connector
L OLED Display
M Neck Strap Hole
N Battery Cover
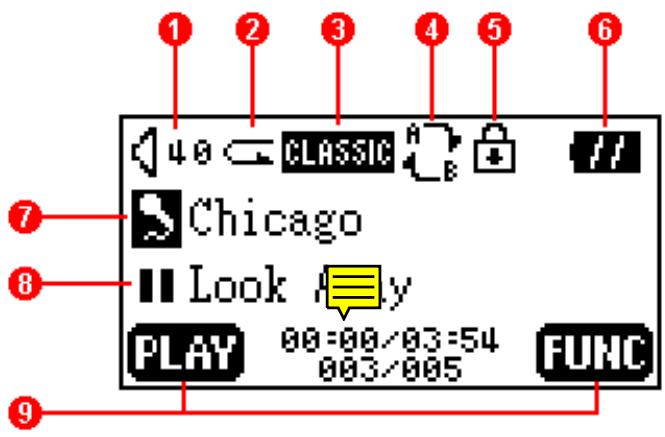
OLED Display
text_image
1 2 3 4 5 6 40 CLASSIC Chicago Look PLAY 00:00/03:54 003/005 FUNC 7 8 9| Icons | Indications |
| 1 Volume | Displays the volume level. |
| 2 Repeat Mode | Indicates the repeat mode that includes Normal, Repeat One, Repeat All and Random. |
| 3 Equalizer (EQ) Mode | Indicates the EQ mode settings that includes Normal, Classical, POP, Rock, Jazz, and USER EQ. |
| 4 A-B Repeat | Indicates when A-B repeat function is enabled. |
| 5 Lock | Indicates when the Lock function is enabled. |
| 6 Battery Status | Indicates the Battery Status. |
| 7 File Information | Indicates the File/Album and details. |
| 8 Operating Mode | Displays the operational status, which includes Play, Pause, Fast Forward, and Fast Reverse. |
| 9 Button Indicator | Indicates the current Button Function. |

T.sonic™ 620 MP3 Players only accept AAA Batteries.
- Flip open the battery cover of the T.sonic as indicated in the below diagram.
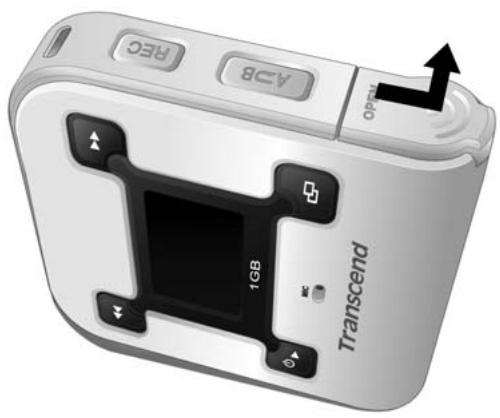
natural_image
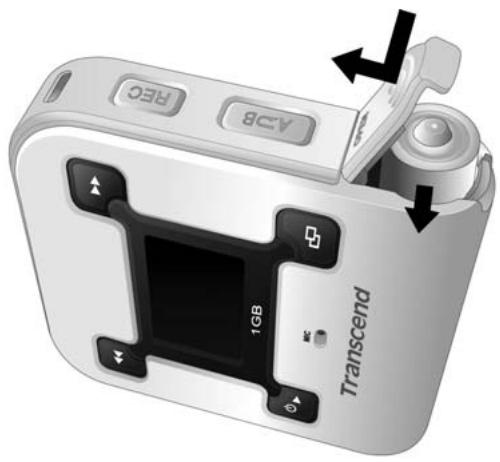
White digital camera with black control buttons and a 1GB display, no visible text or symbols on the device body.- Insert one AAA battery (preferably alkaline) into the compartment, ensuring that the correct polarities (+/-) are aligned (the end of the battery with the bump on it should be facing you) properly. Close the battery cover as indicated in the diagram.
text_image
AGB 1GB TranscendDo NOT attempt to replace the battery when the power is on; this may cause the device to malfunction.
T.sonic™ 620 models do NOT have an on board function for rechargeable batteries.
The battery icon on screen will flicker when the battery power is very low. Any recording activity stops, and the device will shutdown automatically. Please follow the “AAA Battery Insertion” steps to replace the AAA battery.
Basic Operation
Power On
Press and hold the PLAY button to turn the power on. An animated logo will appear on the OLED Display, and then you can start to use the T.sonic.
T.sonic Family Initializing......
Transcend
Transcend
Transcend
m : x = 1 或 3x + 4y + 1 = 0
T.sonic 620 VER 1.0 FREE: 256 MB
The waiting time for the power to turn on depends on how many files are on the T.sonic. More files, means a longer waiting period when powering on your T.sonic.
Power Off
Press and hold the PLAY button to turn the power off. In about three seconds the Power Off Status Bar will appear on the OLED display to show you the Power Off status. Release the PLAY button and the power will turn off.


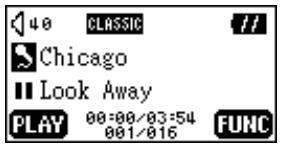
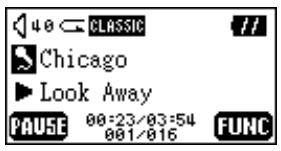
Play a Track
Press the PLAY button to play a selected MP3/WMA, or WAV track.

text_image
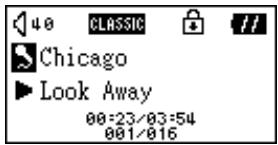
40 CLASSIC // Chicago ► Look Away PAUSE 00:23/03:54 001/016 FUNCPause a Track
Press the PLAY button to pause the track during playback.
text_image
40 CLASSIC // Chicago Look Away PLAY 00:00/03:54 001/016 FUNCAdvance to the Next Track
Press the Right (Next) ▶ button to skip to the next track.
Return to the Previous Track
Press the Left (Previous) ◀ button to go back to the previous track.
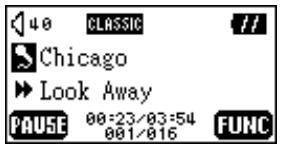
Fast Forward
Press and hold the Right (Next) ▶ button to fast-forward the track.
text_image
40 CLASSIC // Chicago ► Look Away PAUSE 00:23/03:54 001/016 FUNCFast Rewind
Press and hold the Left (Previous) ◀ button to rewind the track.
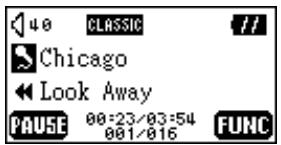
text_image
40 CLASSIC // Chicago Look Away PAUSE 00:23/03:54 001/016 FUNCIncrease Volume
Press once or press and hold the Up (Volume Up) + button until you have reached the desired volume level.
Decrease Volume
Press once or press and hold the Down (Volume Down) — button until you have reached the desired volume level.
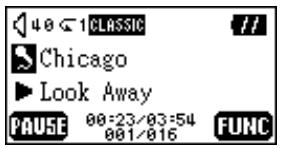
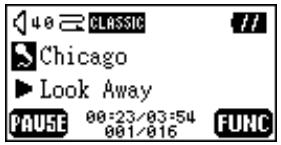
Repeat a Track
Please see the "Quick Settings" in the "Music Functions" section for detailed instructions.
text_image
40 <1 CLASSIC Chicago ► Look Away PAUSE 00:23/03:54 001/016 FUNCRepeat All Tracks
Please see the “Quick Settings” in the “Music Functions” section for detailed instructions.
text_image
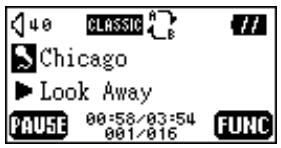
40 CLASSIC Chicago ► Look Away PAUSE 00:23/03:54 001/016 FUNCRepeat Random Tracks
Please see the “Quick Settings” in the “Music Functions” section for detailed instructions.
text_image
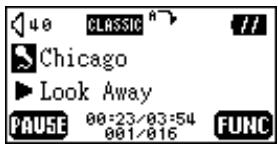
40 CLASSIC Chicago ► Look Away PAUSE 00:23/03:54 001/016 FUNCRepeat a Portion of a Track (A-B Repeat)
Press the A-B button to mark the beginning of the portion you wish to repeat and then press the button again to mark the end of the portion you wish to repeat. The marked portion is played as a continuous loop when playing an MP3, WMA, or WAV track.
text_image
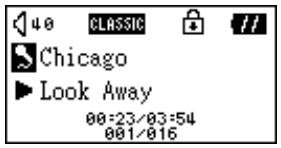
40 CLASSIC Chicago ► Look Away PAUSE 00:58/03:54 001/016 FUNCLock
When you press and hold the A-B button to enable the "LOCK" function, or "Auto-Lock" function in "Settings" is enabled, all of the player's buttons are disabled.
text_image
40 CLASSIC // Chicago ►Look Away 00:23/03:54 001/016Data Storage
Data Storage in Windows® 98SE
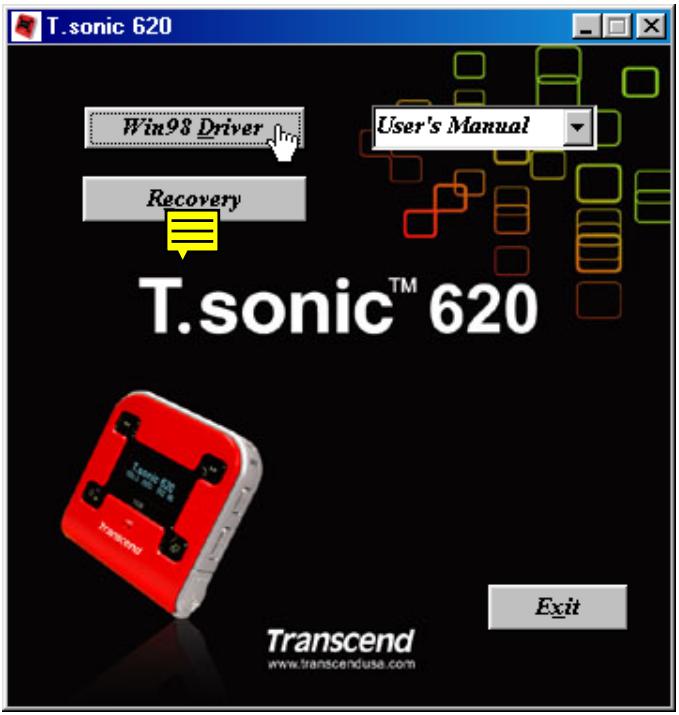
- Put the Driver CD into the CD-ROM (Auto-Run supported). Select the Win98 Driver button.
text_image
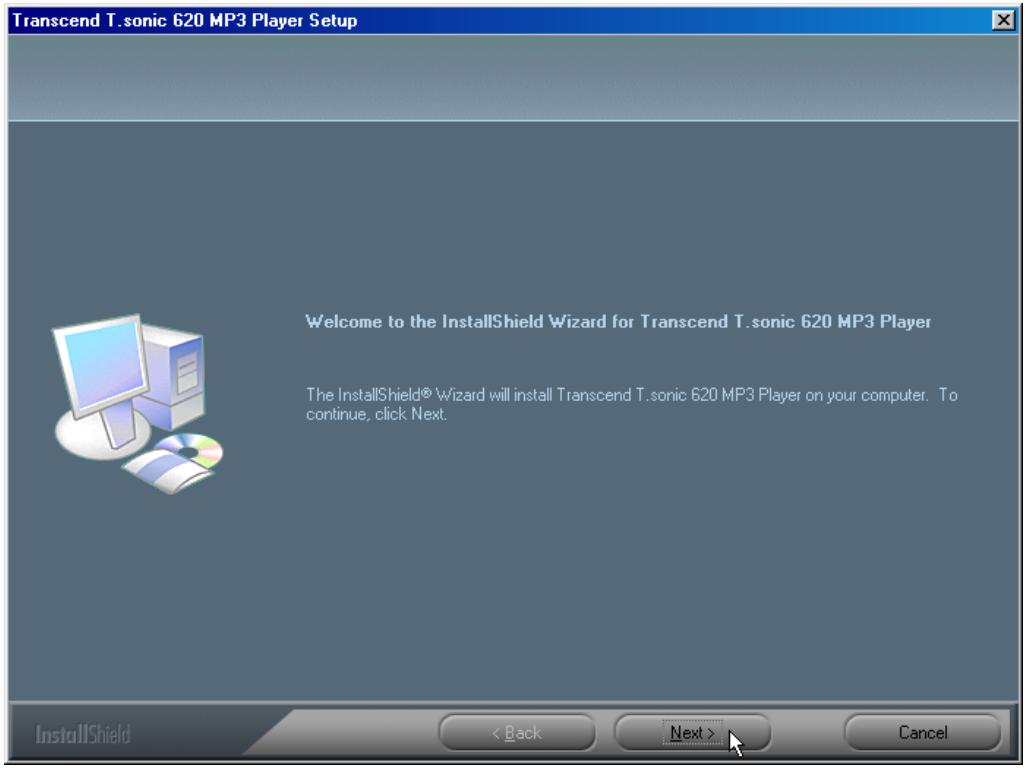
T.sonic 620 Win98 Driver User's Manual Recovery T.sonic™ 620 Transcend www.transcenduse.com Exit- Select "Next" to continue.
text_image
Transcend T.sonic 620 MP3 Player Setup Welcome to the InstallShield Wizard for Transcend T.sonic 620 MP3 Player The InstallShield® Wizard will install Transcend T.sonic 620 MP3 Player on your computer. To continue, click Next. InstallShield < Back Next > Cancel- The InstallShield Wizard will guide you through the installation process.
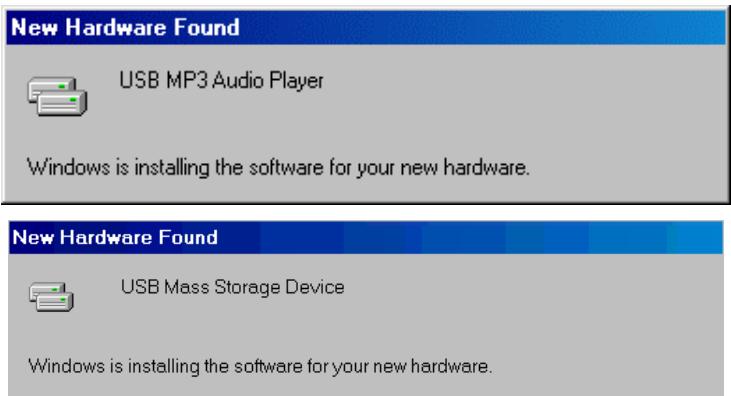
- After the drivers have been installed, plug your T.sonic into an available USB port. The New Hardware Found dialogue boxes will appear.
text_image
New Hardware Found USB MP3 Audio Player Windows is installing the software for your new hardware. New Hardware Found USB Mass Storage Device Windows is installing the software for your new hardware.- Your computer will automatically detect this new device. A new Removable Disk drive with a newly assigned drive letter will appear in the My Computer window.
Data Storage in Windows ^® Me, 2000 and XP
No drivers are required. These Windows operating systems have built-in drivers to support the T.sonic. Simply plug your T.sonic into an available USB port and Windows will install the files needed. A new Removable Disk drive with a newly assigned drive letter will appear in the My Computer window.
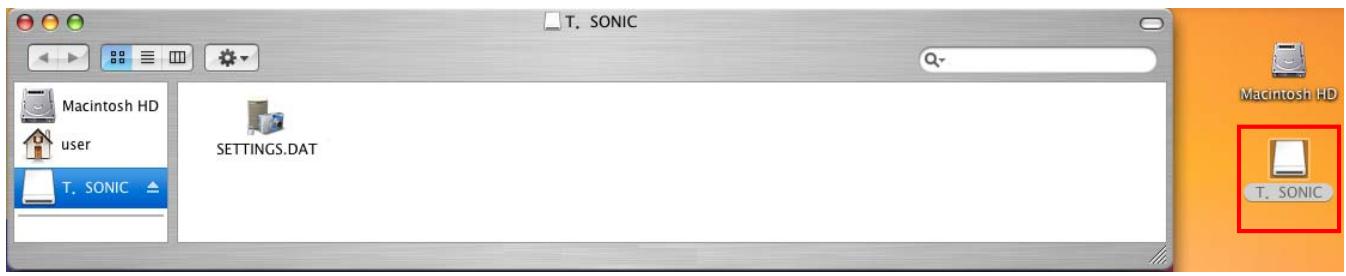
Data Storage in Mac™ OS 9.0, or Later
No drivers are required. Just plug your T.sonic into an available USB port and your computer will automatically detect it.
text_image
T. SONIC Macintosh HD user T. SONIC SETTINGS.DAT Macintosh HD T. SONICData Storage in Linux™ Kernel 2.4, or Later
No drivers are required. Just plug your T.sonic into the USB port and mount it.
Example: 1. Create directory for /mnt/T.sonic first:
mkdir /mnt/T.sonic
- mount T.sonic:
mount - a - t msdos /dev/sda1 /mnt/T.sonic
Warning
- When connected to a computer, the T.sonic is locked into transferring files only. It will not be able to play or record any files at this time. Please disconnect your T.sonic from the computer to play or record files.

- To avoid destruction of T.sonic files/folders, NEVER format your T.sonic in Windows.
- There is a hidden file called "settings.dat" in the root directory of your T.sonic, please don't delete it.
- T.sonic is limited to 50 folders and 450 audio files (MP3/WMA/WAV).
- T.sonic is limited to 80 characters for a file name.
Music Functions
Download or Upload MP3/WMA Files
- Open the rubber cap on the side of the T.sonic you can see a mini USB port inside. Insert the small end of the USB cable into the T.sonic USB port, and plug the other end of the cable into a computer's USB port.
- A new Removable Disk drive with a newly assigned drive letter will appear in the My Computer window. The OLED Display will show the image below to indicate the ready status.
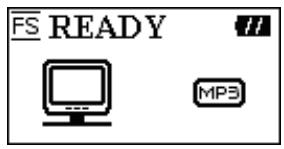
text_image
FS READY MP3- If you download MP3/WMA files from the computer by clicking and dragging the file names/icons to the desired directories. The OLED Display will show the WRITING message as below.
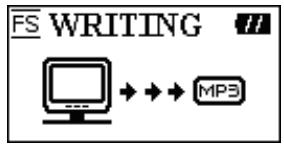
text_image
FS WRITING MP3- If you upload MP3/WMA files to the computer. The OLED Display will show the READING message as below.
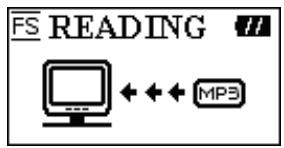
text_image
FS READING ←←← MP3- When finished downloading or uploading, the OLED Display will return to the ready status message.
T.sonic only supports Mpeg I Layer 3 and WMA files compressed at a rate of between 32K bps–320Kbps.
Play MP3/WMA Music
- Press and hold the PLAY button to turn the power on. The default screen is the play music function.

text_image
40 CLASSIC // Chicago Look Away PLAY 00:00:03:54 001/016 FUNCYou can also select the Music icon, and then press the PLAY button to enter the play music function.
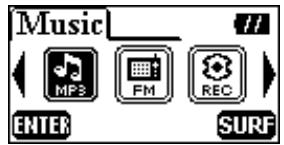
text_image
Music MP3 FM REC ENTER SURF- If there are no MP3 or WMA files available, the “**No Files**” message will be displayed on the OLED screen.
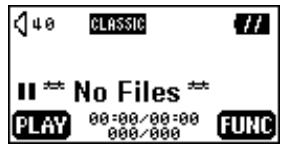
text_image
40 CLASSIC // II ** No Files ** PLAY 00:00/00:00 000/000 FUNC- Press the Right (Next) ▶, or Left (Previous) ◀ button, to select a desired MP3/WMA file. The files are listed in access order.
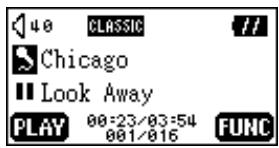
text_image
40 CLASSIC // Chicago Look Away PLAY 00:23/03:54 001/016 FUNC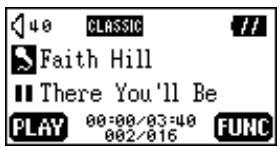
text_image
40 CLASSIC // Faith Hill There You'll Be PLAY 00:00/03:40 002/016 FUNC- Press the PLAY button to play the selected MP3/WMA file.
- Press and hold the MENU button to switch between play music, file/folder navigation, and quick settings functions.
File/Folder Navigation
- In the play music function, you can press and hold the MENU button and change to the file/folder navigation function.
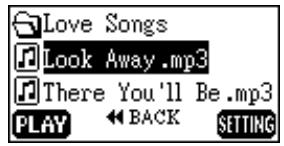
text_image
Love Songs Look Away.mp3 There You'll Be.mp3 PLAY BACK SETTING- Press the Right (Next) ▶, Left (Previous) ◀, Up (Volume Up) +, or Down (Volume Down) — button to select a desired MP3/WMA file.
- Press the PLAY button to play the selected MP3/WMA file. You can also press and hold the MENU button and change to the quick settings.
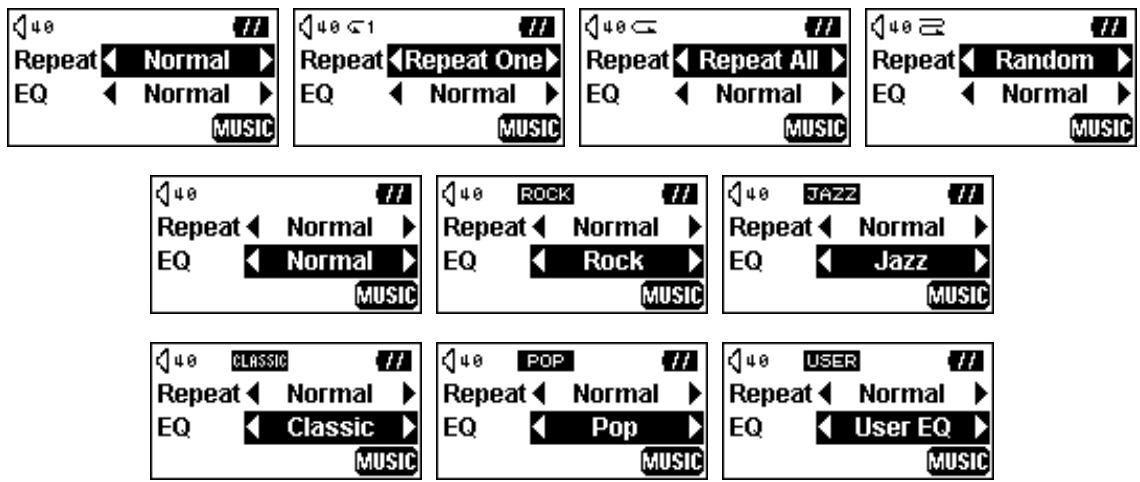
Quick Settings
- You can press and hold the MENU button in the file/folder navigation function, and transfer to the quick settings function.
- Press the Right (Next) ▶, or Left (Previous) ◀ button to select a desired mode. Press the Up (Volume Up) +, or Down (Volume Down) — button to change between the REPEAT and the EQ functions.
text_image
40 Repeat Normal EQ Normal MUSIC 40 <1 Repeat Repeat One EQ Normal MUSIC 40 Repeat Repeat All EQ Normal MUSIC 40 Repeat Random EQ Normal MUSIC 40 Rock Repeat Normal EQ Rock MUSIC 40 JAZZ Repeat Normal EQ Jazz MUSIC 40 CLASSIC Repeat Normal EQ Classic MUSIC 40 POP Repeat Normal EQ Pop MUSIC 40 USER Repeat Normal EQ User EQ MUSICSelect a desired EQ mode to suit your personal taste: NORMAL, POP, JAZZ, CLASSICAL, ROCK, or the USER specified EQ mode.
If you select USER EQ, please see the "USER EQ" function in the "Settings" section for detailed settings and instructions.
3. Press and hold the MENU button to return to the play music function.
A-B Repeat Function
Follow the procedures below to repeat a portion of a track.
- While Playing an MP3/WMA, or WAV track.
- Press the A-B button to tag the beginning portion of the track you wish to repeat. The 'A-' symbol will be displayed on the OLED screen.
text_image
40 CLASSIC Chicago Look Away PAUSE 00:23/03:54 001/016 FUNC- Press the A-B button again to tag the end of the track's portion you wish to repeat. The 'A-B' symbol will be displayed on the OLED screen, and the tagged portion will play as a continuous loop.
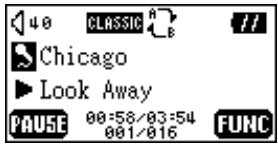
text_image
40 CLASSIC Chicago ► Look Away PAUSE 00:58/03:54 001/016 FUNC- To resume normal playback, press the A-B button again.
FM Functions
- Select the FM Tuner icon, and then press the PLAY button to enter the FM function.
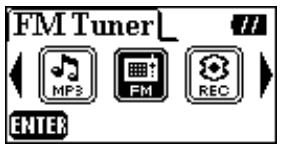
text_image
FM Tuner MP3 FM REC ENTER- On the OLED Display, the FM radio frequency will be displayed on the screen.
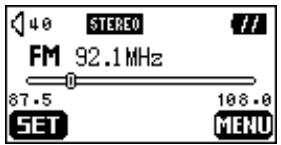
text_image
40 STEREO FM 92.1 MHz 87.5 106.0 SET MENU- Press the MENU button to go to the main menu.
On the first time of usage and for your convenience all the FM channels will be auto scanned once and the first 20 channels with a strong signal will be preset.
For the best possible reception in the FM mode, please ensure that the earphones are securely plugged into the T.sonic.
Scan for a Channel
Press the Right (Next) ▶ or Left (Previous) ◀ button once to step through selecting the channel. Alternatively, press and hold the Right (Next) ▶ or Left (Previous) ◀ button to quickly auto-scan for the next channel.
Preset a Channel
You can save your 20 favorite radio channels from CH01 to CH20 in the unit's memory.
- Select a desired channel (frequency) first.
- Press the PLAY button, the message "SET CH" will appear on the display.
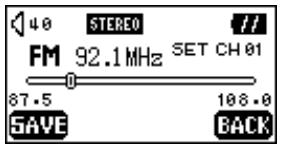
text_image
40 STEREO FM 92.1 MHz SET CH 01 87.5 106.0 SAVE BACK- Press the Right (Next) ▶ or Left (Previous) ◀ button to select the favorite channel station (CH01 to CH20), and press the PLAY button to save the selected channel to the selected favorite channel number. You can also press the MENU button to abort setting a channel.
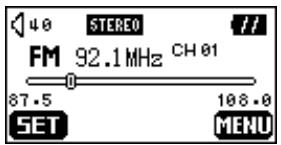
text_image
48 STEREO FM 92.1 MHz CH 01 87.5 108.0 SET MENUSelect a Preset Channel
- Press the A-B button and change to the channel mode.
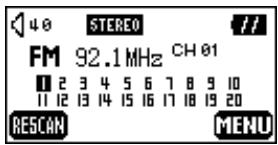
text_image
40 STEREO FM 92.1 MHz CH 01 1 2 3 4 5 6 7 8 9 10 11 12 13 14 15 16 17 18 19 20 RESCAN MENU- Press the Right (Next) ▶ or Left (Previous) ◀ button to select the desired stored favorite channel (CH01 to CH20).

text_image
40 STEREO // FM 92.1MHz CH 01 1 2 3 4 5 6 7 8 9 10 11 12 13 14 15 16 17 18 19 20 RESCAN MENU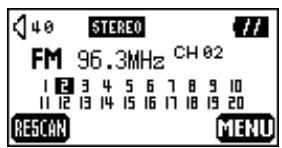
text_image
40 STEREO // FM 96.3MHz CH 02 1 2 3 4 5 6 7 8 9 10 11 12 13 14 15 16 17 18 19 20 RESCAN MENU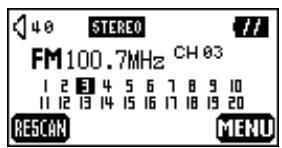
text_image
40 STEREO // FM100.7MHz CH 03 1 2 3 4 5 6 7 8 9 10 11 12 13 14 15 16 17 18 19 20 RESCAN MENU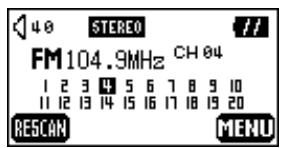
text_image
40 STEREO // FM104.9MHz CH 04 1 2 3 4 5 6 7 8 9 10 11 12 13 14 15 16 17 18 19 20 RESCAN MENUIn the channel mode, you can only select from the stored channels (CH01 to CH20), or press PLAY button to rescan the preset channels. If you want to scan other channels manually, please return to the preset a channel mode.
3. Press the A-B button again to return to the preset a channel mode.
Record an FM Channel
- Select a desired channel.
- Press and hold the REC button for 2 seconds.
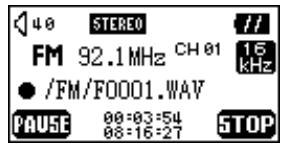
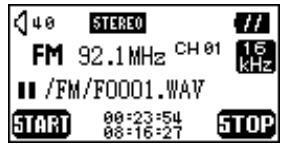
- Once the REC button is pressed, the selected channel will start being recorded. On the display screen, a recording FM file is generated and placed in the folder name of [/FM/]. The recording file name sequence starts at [F0001.WAV], then [F0002.WAV], and so forth.
text_image
40 STEREO FM 92.1MHz CH 01 16 kHz ● /FM/F0001.WAV PAUSE 00:03:54 08:16:27 STOPOn the display, the total recording time is shown below the current recording time.
In record mode, Screen Saver and Auto Lock functions will be disabled, and the contrast of screen become lower to save power.
4. Press the PLAY button to pause the recording and press the PLAY button again to continue.
text_image
40 STEREO FM 92.1MHz CH 01 16 kHz // // // /FM/F0001.WAV START 00:23:54 08:16:27 STOP- Press the MENU button to stop the recording and the display will return to the previous FM status that displayed before the recording began.
| FM Record | Record level | Channels | Sample rate | 512MB | 1 GB |
| Low | 2 (stereo) | 8 KHz | 16 hrs | 32 hrs | |
| Normal | 2 (stereo) | 16 KHz | 8 hrs | 16 hrs | |
| High | 2 (stereo) | 32 KHz | 4 hrs | 8 hrs |
Based on the available memory space of the T.sonic, and enough battery power to support the recording.
Voice Recording Function
Record a Voice
To record a voice using the in-built microphone:
- Except during the FM function, pressing and holding the REC button for 2 seconds in any mode will initiate the starting of the record voice function.
In the FM function, pressing and holding the REC button for 2 seconds will start the record an FM station function.
In record mode, Screen Saver and Auto Lock functions will be disabled, and the contrast of screen become lower to save power. - On the OLED Display, a recording file is generated and placed in the folder name of [/VOICE/]. The recording file name sequence starts at [V0001.WAV], then [V0002.WAV] and so forth.
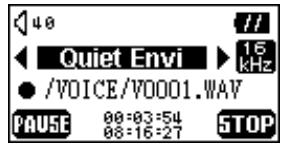
text_image
40 Quiet Envi /VOICE/V0001.WAV PAUSE 00:03:54 08:16:27 STOPIf using the recording feature in a noisy environment, you can press the Right (Next) ▶ or Left (Previous) ◀ button to select the “Noisy Envi” record setting, this setting helps to improve the quality of the recording.
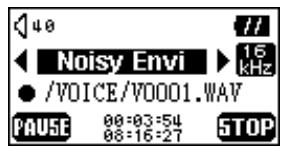
text_image
40 // Noisy Envi 16 kHz ● /VOICE/V0001.WAV PAUSE 00:03:54 08:16:27 STOP- Press the PLAY button to pause the recording and press the PLAY button again to continue recording.
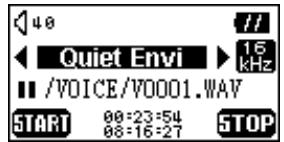
text_image
40 Quiet Envi 16 kHz /VOICE/V0001.WAV START 09:23:54 08:16:27 STOP- Press the MENU button to stop the recording and the display will return to the record function screen.
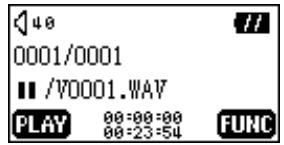
text_image
40 0001/0001 ■ /V0001.WAV PLAY 00:00:00 00:23:54 FUNC- Press the PLAY button to play the recorded file, or press and hold the MENU button and go to the file/folder navigation and quick settings. (A detailed description is listed in the "File/Folder Navigation" and "Quick Settings" sections of the Music Functions Chapter)
◆ Storage Approximations: 512MB memory can store up to 32 hours of recorded voice.
| Voice Record | Record level | Channels | Sample rate | 512MB | 1 GB |
| Low | 1 (mono) | 8 KHz | 32 hrs | 64 hrs | |
| Normal | 1 (mono) | 16 KHz | 16 hrs | 32 hrs | |
| High | 1 (mono) | 32 KHz | 8 hrs | 16 hrs |
Based on the available memory space of the T.sonic, and enough battery power to support the recording.
For a better quality recording, move the microphone of your T.sonic closer to the source of the sound.

In Recording Mode, the screen saver function will be disabled.
Play the Recorded Files
To play the files recorded using the microphone, or in the FM radio mode.
- Select the Record icon, and then press the PLAY button to enter the record function.
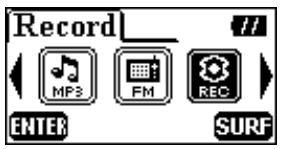
text_image
Record MP3 FM REC ENTER SURF- If there are no MP3 or WMA files available, the “**No Files**” message will be shown on the OLED display.
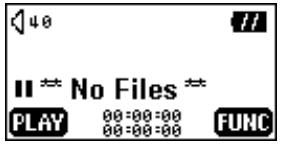
text_image
40 // # II ** No Files ** PLAY 00:00:00 00:00:00 FUNC- Press the Right (Next) ▶ or Left (Previous) ◀ button, to select a desired recorded file.
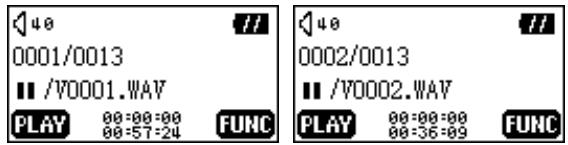
text_image
40 0001/0013 // /V0001.WAV PLAY 08:08:08 08:57:24 FUNC 40 0002/0013 // /V0002.WAV PLAY 08:08:08 08:36:09 FUNC- Press the PLAY button to play the recorded file, or press and hold the MENU button and go to the file/folder navigation and quick settings (A detailed description is listed in the "File/Folder Navigation" and "Quick Settings" sections of the Music Functions Chapter).
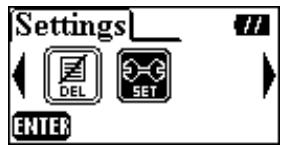
Settings
Select the Settings icon, and then press the PLAY button to enter the settings menu.
text_image
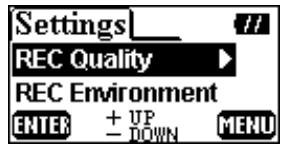
Settings DEL SET ENTERREC Quality
Sets the Record Quality Level to NORMAL, HIGH, or LOW. The higher the recording quality level, the better the recording quality (higher recording levels require more memory).
- Press the Up (Volume Up) +, or Down (Volume Down) — button to select the REC Quality icon in the Settings menu, and then press the PLAY or Right (Next) ▶ button to enter.
text_image
Settings REC Quality REC Environment ENTER + UP - DOWN MENU- Press the Up (Volume Up) +, or Down (Volume Down) - button to select and then press the PLAY button to save the Quality level. The selected level will be marked with a tick.
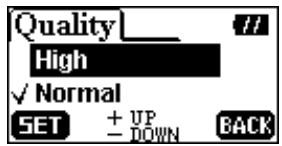
text_image
Quality High ✓ Normal SET + UP - DOWN BACK
text_image
Quality Low SET + UP - DOWN BACK- Press the MENU or Left (Previous) ◀ button to return to the Settings menu.
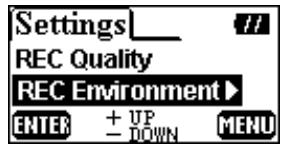
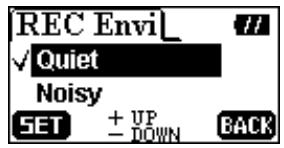
REC Environment
Sets the Record Environment to Quiet or Noisy to suit your surroundings.
- Press the Up (Volume Up) +, or Down (Volume Down) - button to select the REC Environment icon in the Settings menu, then press the PLAY or Right (Next) ▶ button to enter.
text_image
Settings REC Quality REC Environment ENTER + UP - DOWN MENU- Press the Up (Volume Up) +, or Down (Volume Down) - button to select and then press the PLAY button to save the REC Environment. The selected preference will be marked with a tick.
text_image
REC Envi ✓ Quiet Noisy SET + UP - DOWN BACK- Press the MENU or Left (Previous) ◀ button to return to the Settings menu.
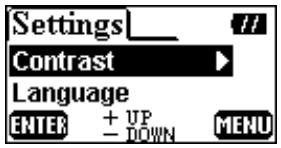
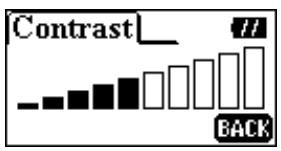
Contrast
Sets the contrast of the OLED display.
- Press the Up (Volume Up) +, or Down (Volume Down) - button to select the Contrast icon in the Settings menu, then press the PLAY or right (Next) ▶ button to enter the setting levels.
text_image
Settings Contrast Language ENTER + UP - DOWN MENU- Press the Up (Volume Up) +, or Down (Volume Down) - button to change the Contrast setting.
text_image
Contrast_ //\ BACK- Press the MENU button to return to the Settings menu.
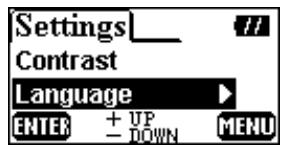
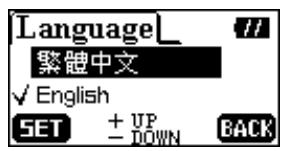
Language
Sets the language option to support the filename or ID3 (ID3 provides textual information about the music file, such as title, artist etc.) tag/title display of the MP3/WMA files. If there is an ID3 tag/title for the MP3/WMA file, it will be displayed first, otherwise the display will just show the filename.
- Press the Up (Volume Up) +, or Down (Volume Down) — button to select the Language icon in the Settings menu, then press the PLAY or right (Next) ▶ button to enter.
text_image
Settings Contrast Language ENTER + UP - DOWN MENU- Press the Up (Volume Up) +, or Down (Volume Down) - button to select and then press the PLAY button to save the Language setting. The selected language will be marked with a tick.
text_image
Language 繁體中文 ✓ English SET + UP - DOWN BACK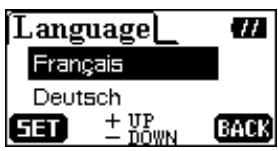
text_image
Language_ Français Deutsch SET + UP - DOWN BACK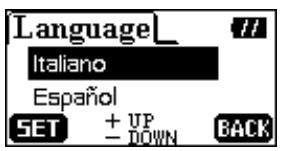
text_image
Language_ Italiano Español SET + UP - DOWN BACK
text_image
Language Português Русский SET + UP - DOWN BACK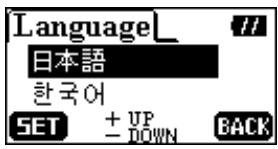
text_image
Language_ 日本語 한국어 SET + UP BACK - DOWN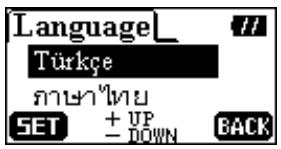
text_image
Language_ Türkçe Pennsylvania SET + UP - DOWN BACK- Press the MENU or Left (Previous) ◀ button to return to the Settings menu.
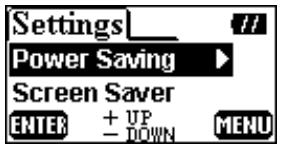
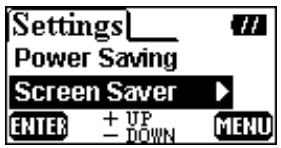
Power Saving
Sets a power saving timer to turn off your T.sonic automatically.
- Press the Up (Volume Up) +, or Down (Volume Down) — button to select the Power Saving icon in the Settings menu, then press the PLAY or right (Next) ▶ button to enter.
text_image
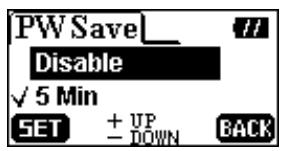
Settings Power Saving Screen Saver ENTER + UP - DOWN MENU- Press the Up (Volume Up) +, or Down (Volume Down) - button to select the option and then press the PLAY button to save the Power Saving time. The selected time will be marked with a tick.
text_image
PW Save_ Disable ✓ 5 Min SET + UP - DOWN BACK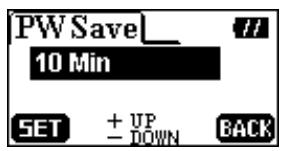
text_image
PW Save_ 10 Min SET + UP - DOWN BACK- If you select 5 MIN or 10 MIN, the T.sonic will power off automatically after 5 or 10mins of idle time (not playing music). If you select DISABLE, the T.sonic will always remain on.
- Press the MENU or left (Previous) ← button to return to the Settings menu.
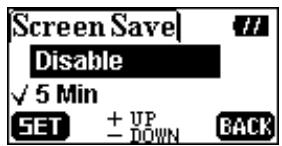
Screen Saver
Sets a timer to turn off the OLED display automatically.
- Press the Up (Volume Up) +, or Down (Volume Down) — button to select the Screen Saver icon in the Settings menu, then press the PLAY or right (Next) ▶ button to enter.
text_image
Settings Power Saving Screen Saver ENTER + UP - DOWN MENU- Press the Up (Volume Up) +, or Down (Volume Down) - button to select and then press the PLAY button to save the Screen Saver time. The selected time will be marked with a tick.
text_image
Screen Save Disable ✓ 5 Min SET + UP DOWN BACK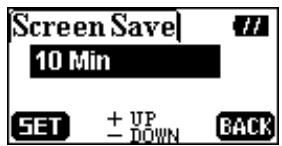
text_image
Screen Save 10 Min SET + UP DOWN BACK- If you select 5 MIN or 10 MIN, the T.sonic will enter the screen saver mode automatically after 5 or 10mins of idle time (not pressing any buttons). You can press any button to leave the screen saver. If you select DISABLE, the OLED display will always remain on.
- Press the MENU or Left (Previous) ◀ button to return to the Settings menu.

In the Recording Mode, the screen saver function will be disabled.
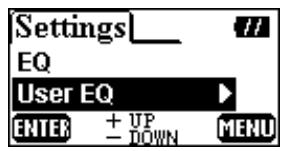
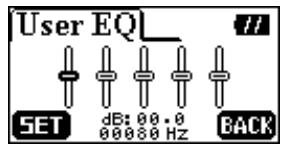
USER EQ
In the USER EQ setting mode, you can adjust the sound of the equalizer to your preference.
- Press the Up (Volume Up) +, or Down (Volume Down) — button to select the USER EQ icon in the Settings menu, then press the PLAY or Right (Next) ▶ button to enter.
text_image
Settings EQ User EQ ENTER + UP - DOWN MENU- Press the right (Next) ▶ or left (Previous) ◀ button to switch between the 80Hz/250Hz/1KHz/4KHz/12KHz frequency bands, and press the Up (Volume Up) +, or Down (Volume Down) — button to set the EQ level from -14dB to +14dB in 0.5dB steps.
text_image
User EQ SET dB: 00.0 00000 Hz BACK- Press the PLAY button to save the settings and change your EQ mode to the USER EQ. You can press the MENU button to return to the Settings menu.
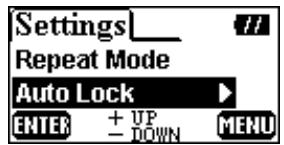
Auto Lock
Sets a timer for the device buttons to lock automatically.
- Press the Up (Volume Up) +, or Down (Volume Down) - button to select the Auto Lock icon in the Settings menu, and then press the PLAY or Right (Next) ▶ button to enter.
text_image
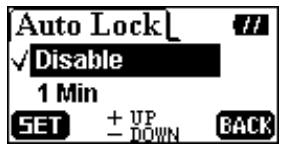
Settings_ Repeat Mode Auto Lock ENTER + UP - DOWN MENU- Press the Up (Volume Up) +, or Down (Volume Down) - button to select and then press the PLAY button to save the Auto Lock time. The selected preference will be marked with a tick.
text_image
Auto Lock ✓ Disable 1 Min SET + UP DOWN BACK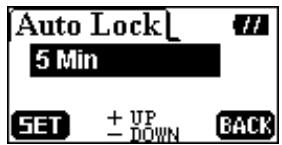
text_image
Auto Lock 5 Min SET + UP - DOWN BACK- If you select 1 MIN or 5 MIN, the T.sonic will lock the device buttons automatically after 1 or 5 mins of idle time (not pressing any buttons). If you select DISABLE, the device buttons will always remain active.
text_image
40 CLASSIC // Chicago ► Look Away 00:23/03:54 001/016- If the Auto-Lock function is enabled, you can press and hold the A-B button to unlock the device.
- Press the MENU or Left (Previous) ◀ button to return to the Settings menu.
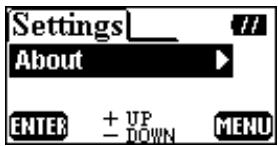
About
- Press the Up (Volume Up) +, or Down (Volume Down) — button to select the About icon in the Settings menu, then press the PLAY or Right (Next) ▶ button to enter.
text_image
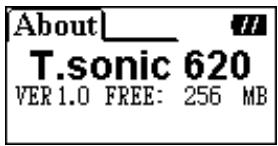
Settings About ENTER + UP - DOWN MENU- The firmware version and available memory of your T.sonic will be displayed on the OLED screen.
text_image
About T.sonic 620 VER 1.0 FREE: 256 MB- Press the MENU or Left (Previous) ◀ button to return to the Settings menu.

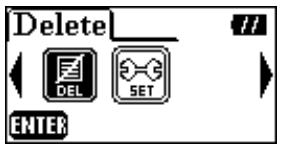
Delete MP3/WMA/WAV Files
To delete an MP3/WMA or recorded files:
- Press the MENU button to enter the main menu. Select the Delete icon, and then press the PLAY button to enter the delete function.
text_image
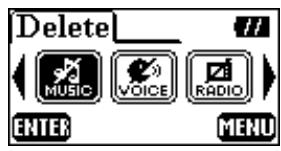
Delete DEL SET ENTER- Press the Right (Next) ▶ or Left (Previous) ◀ button to select, and press the PLAY button to enter.
text_image
Delete MUSIC VOICE RADIO ENTER MENU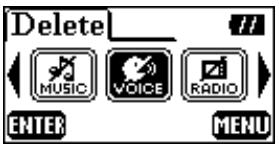
text_image
Delete MUSIC VOICE RADIO ENTER MENU
text_image
Delete MUSIC VOICE RADIO ENTER MENUIf you want to delete music files (MP3 or WMA), please select the "MUSIC FILES" icon.
If you want to delete voice recording files (WAV), please select the "VOICE FILES" icon.
If you want to delete FM recording files (WAV), please select the "RADIO FILES" icon.
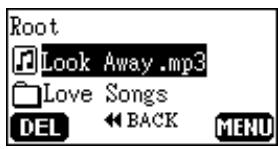
- Press the Right (Next) ▶, Left (Previous) ◀, Up (Volume Up) +, or Down Volume Down) button to select the file (MP3/WMA/WAV), and then press the PLAY button to delete it.
text_image
Root Look Away.mp3 Love Songs DEL ← BACK MENU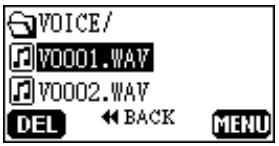
text_image
VOICE/ V0001.WAV V0002.WAV DEL ← BACK MENU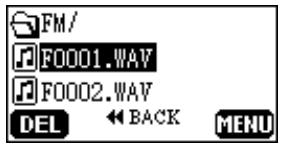
text_image
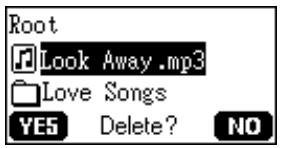
FM/ F0001.WAV F0002.WAV DEL ← BACK MENU- After you press the PLAY button, the "Delete?" message will be displayed on the OLED screen. Press the PLAY button to confirm deletion, or select the MENU button to abort.
text_image
Root Look Away.mp3 Love Songs YES Delete? NO- If you select "YES", the deletion will start and the display shows the following message.

text_image
File Deleted
text_image
File Deleted
text_image
File Deleted
text_image
File Deleted◆ Deleting a greater number of files will take more time.
Besides MP3/WMA/WAV audio files, T.sonic cannot support deleting other file types. If you want to use other file types, you will need to do the file deletion procedure on your computer.
- T.sonic can only directly delete MP3/WMA/WAV audio files.
- Press the MENU button to go to the main menu.
Safely Removing Your T.sonic

Before removing your T.sonic, please make sure the OLED Display is not in the READ/WRITE status or unpredictable damage to the files or your T.sonic may occur.
Removing the T.sonic in Windows® 98SE
Unplug your T.sonic from your system directly when data is not transferring.
Removing the T.sonic in Windows ^® Me, 2000, and XP
- Select the icon on the system tray.
- The Safely remove Hardware pop-up menu will appear. Select it to continue.

text_image
Safely Remove Hardware EN 1 12:04 PM- A message box will appear: The ‘USB Mass Storage Device’ device can now be safely removed from the system.
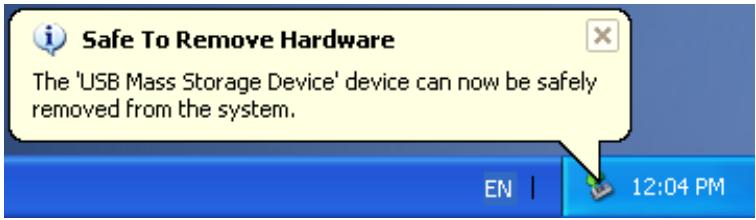
text_image
Safe To Remove Hardware The 'USB Mass Storage Device' device can now be safely removed from the system. EN | 12:04 PMRemoving the T.sonic in Mac™ OS
Drag and drop the Disk icon corresponding to your T.sonic into the trashcan. Then unplug your T.sonic from the USB port.
Removing the T.sonic in Linux™
Execute umount /mnt/ T.sonic to un-mount the device.
Recovering Your T.sonic
If your T.sonic ever stops responding or locks up, you can use the Recovery program to restore it to its default settings. You can also use this function to update the unit's Firmware.
Running the Recovery program will erase all of the data currently on the T.sonic.
If there are bad blocks in the flash memory chip of the T.sonic, the memory size of your T.sonic will be smaller than the original memory size after running the Recovery program.
Recovering the T.sonic in Windows® 98SE
- Remove the battery from your T.sonic and plug your T.sonic into an available USB port on your computer. Select the Start button on the task bar and select Programs > Transcend T.sonic 620 >> T.sonic 620 Firmware Update to run the T.sonic 620 Firmware Update program.

text_image
Transcend T.sonic 620 T.sonic 620 Firmware Update UninstallerIf you have not installed the Windows® 98SE driver yet, please install it first.
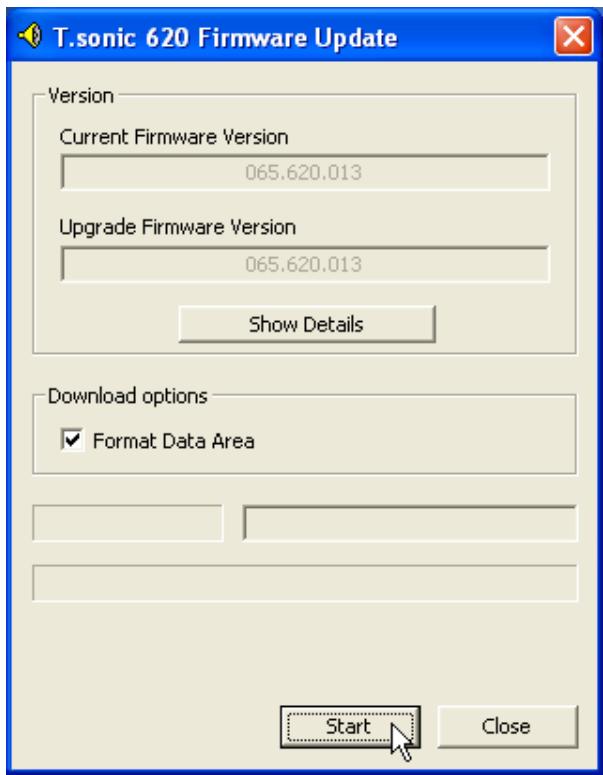
2. The T.sonic 620 Firmware Update dialog box appears.
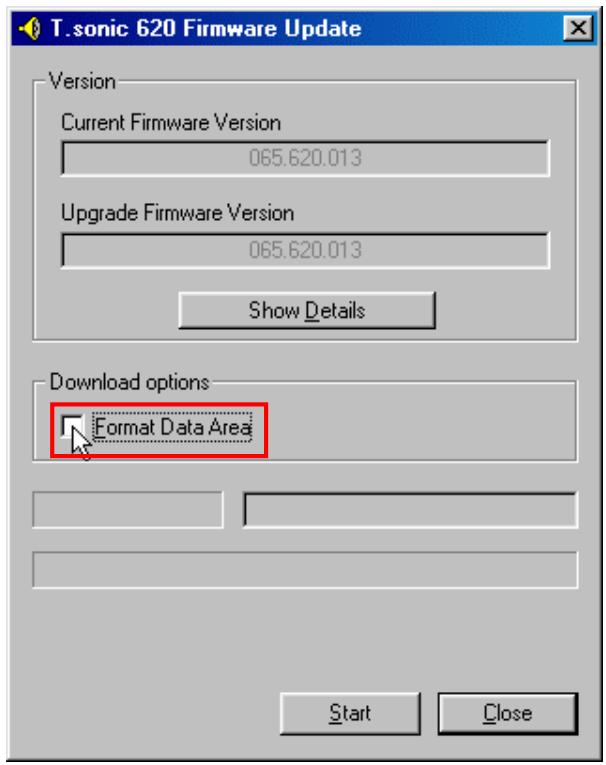
text_image
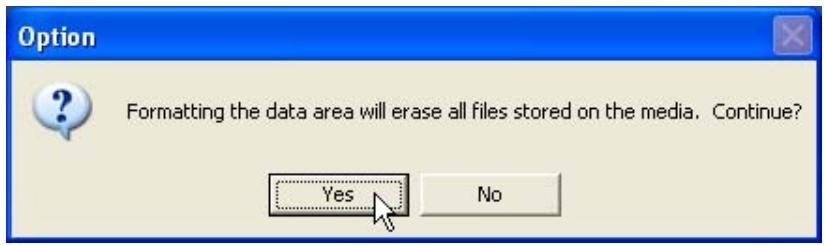
T. sonic 620 Firmware Update Version Current Firmware Version 065.620.013 Upgrade Firmware Version 065.620.013 Show Details Download options Format Data Area Start Close- If the Format Data Area checkbox is checked. The Option message box will appear. Select Yes to continue.
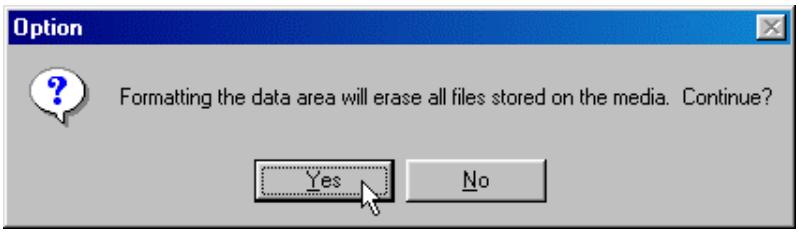
text_image
Option Formatting the data area will erase all files stored on the media. Continue? Yes NoRunning this program will erase all the data on the T.sonic. Please backup all of the data on the T.sonic first.
- Select Start to initiate the Firmware Update.
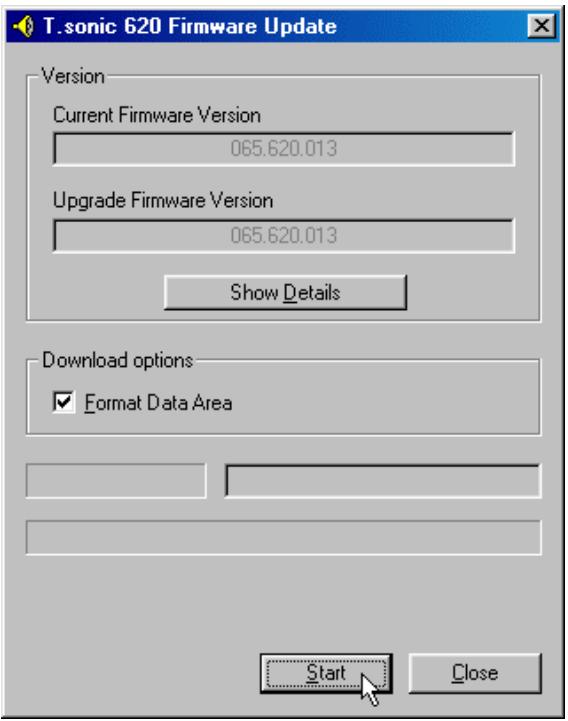
text_image
T.sonic 620 Firmware Update Version Current Firmware Version 065.620.013 Upgrade Firmware Version 065.620.013 Show Details Download options ✓ Format Data Area Start Close- The Complete message will appear. Select Close to complete the Recovery procedure. Your T.sonic has been returned to its initial status.
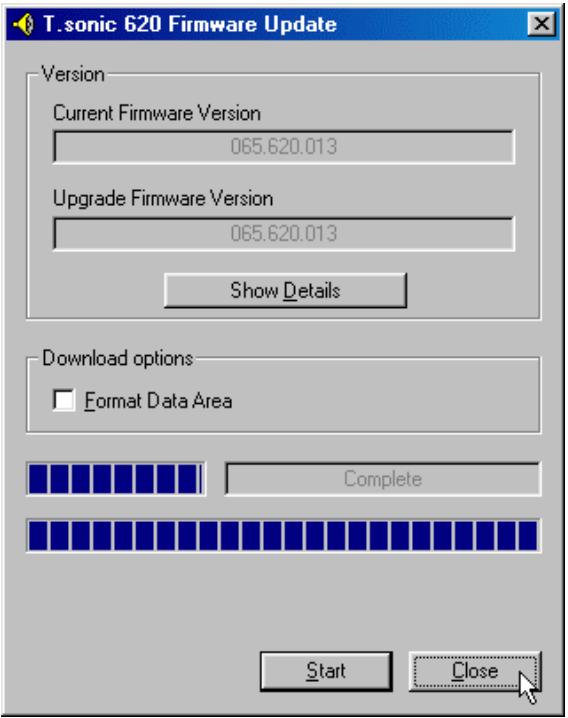
text_image
T.sonic 620 Firmware Update Version Current Firmware Version 065.620.013 Upgrade Firmware Version 065.620.013 Show Details Download options Format Data Area Complete Start CloseRecovering the T.sonic in Windows ^® Me, 2000, and XP
You may skip steps 1-3 if the Recovery program has already been installed.
- Put the Driver CD into the CD-ROM (Auto-Run supported) and then select the Recovery button on the T.sonic splash screen.
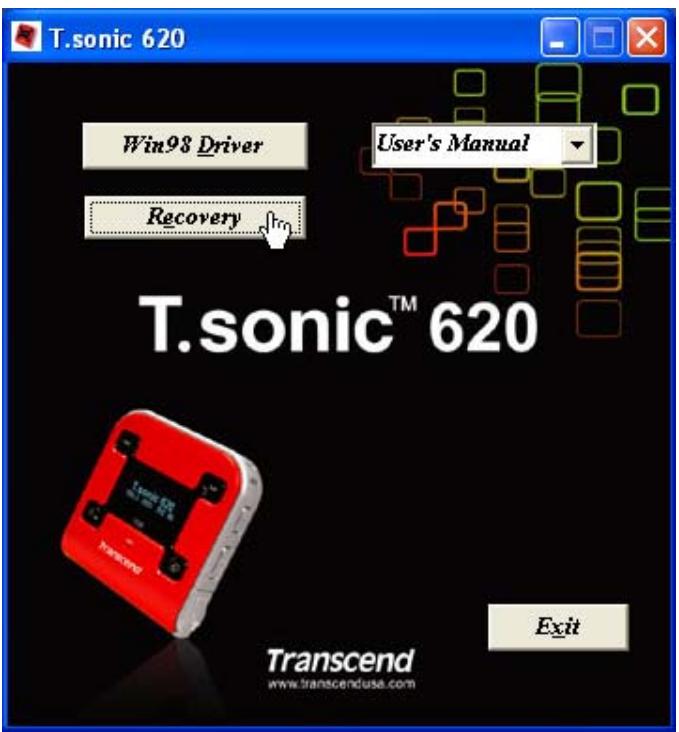
text_image
T.sonic 620 Win98 Driver User's Manual Recovery T.sonic™ 620 Transcend www.transcenduse.com Exit- Select Next to continue.

text_image
Transcend T.sonic 620 MP3 Player Setup Welcome to the InstallShield Wizard for Transcend T.sonic 620 MP3 Player The InstallShield® Wizard will install Transcend T.sonic 620 MP3 Player on your computer. To continue, click Next. InstallShield < Back Next > Cancel- The InstallShield Wizard will guide you through the installation process.
-
Remove the battery from your T.sonic and plug it into an available USB port.
-
The Found New Hardware messages will appear.
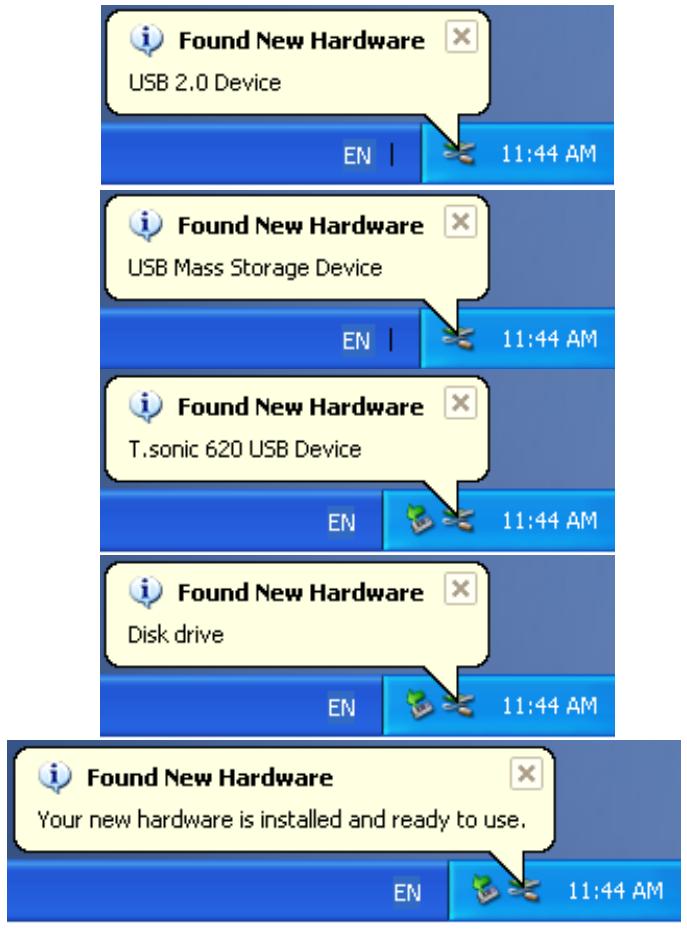
text_image
Found New Hardware USB 2.0 Device EN | 11:44 AM Found New Hardware USB Mass Storage Device EN | 11:44 AM Found New Hardware T.sonic 620 USB Device EN | 11:44 AM Found New Hardware Disk drive EN | 11:44 AM Found New Hardware Your new hardware is installed and ready to use. EN | 11:44 AM- Select the button on the task bar and select Programs > Transcend T.sonic 620 >> T.sonic 620 Firmware Update to run the T.sonic 620 Firmware Update program.

text_image
Transcend T.sonic 620 T.sonic 620 Firmware Update Uninstaller- The T.sonic 620 Firmware Update dialog box will appear.
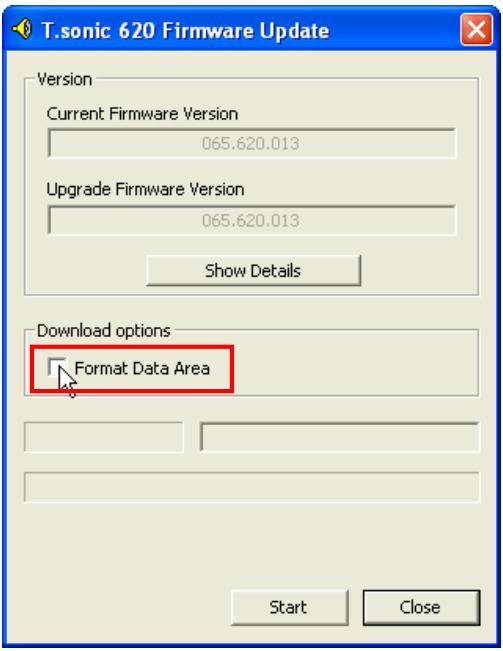
text_image
T.sonic 620 Firmware Update Version Current Firmware Version 065.620.013 Upgrade Firmware Version 065.620.013 Show Details Download options Format Data Area Start Close- If the Format Data Area checkbox is checked. The Option message box will appear. Select Yes to continue.
text_image
Option Formatting the data area will erase all files stored on the media. Continue? Yes NoRunning this program will erase all the data currently on the T.sonic. Please backup all of the data on the T.sonic first.
- Select Start to initiate the Firmware Update.
text_image
T.sonic 620 Firmware Update Version Current Firmware Version 065.620.013 Upgrade Firmware Version 065.620.013 Show Details Download options ✓ Format Data Area Start Close- The Complete message box will appear. Select Close to complete the Recovery procedure. Your T.sonic has been returned to its initial status.
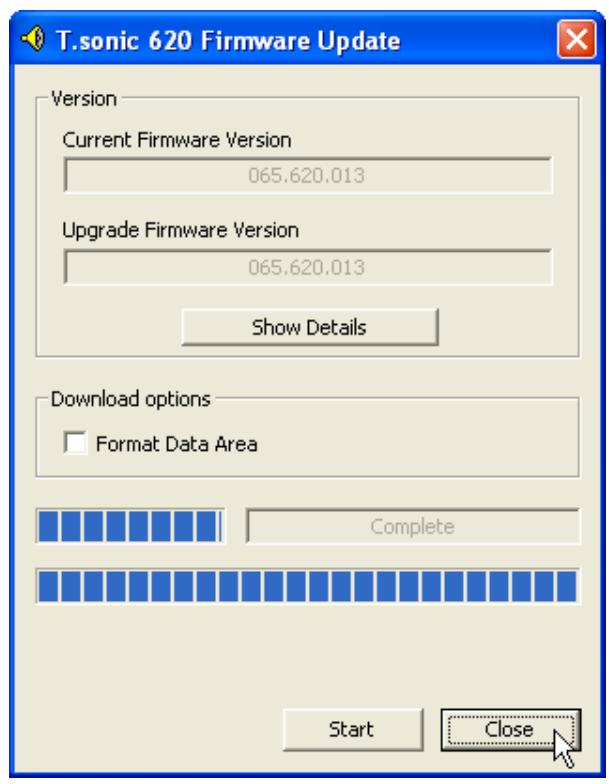
text_image
T.sonic 620 Firmware Update Version Current Firmware Version 065.620.013 Upgrade Firmware Version 065.620.013 Show Details Download options Format Data Area Complete Start CloseFunctions MENU Tree
■ Music > Press "ENTER"
Play Music > Press "PLAY"
File List > Press & Hold "FUNC" 1 sec
Quick Set > Press & Hold "FUNC" 2 secs
■ FM Tuner > Press "ENTER"
Scan CH > Press (Next) or (Previous)
Preset CH > Press "SET" >> Press "SAVE"
Select a Preset CH:
Press "A-B"
Press (Next) or (Previous)
Press "A-B"
Record FM > Press & Hold "REC" >>Press "STOP"
Record > Press "ENTER"
Play a Recording > Press "PLAY"
File List > Press & Hold "FUNC" 1 sec
Quick Set > Press & Hold "FUNC" 2 secs
■ Lock > Press & Hold "A-B" 2 secs
■ REC > Press & Hold "REC" 2 secs
Delete > Press "ENTER"
Delete Music Files > Press "DEL" >> "NO/YES"
Delete Voice Files > Press "DEL" >> "NO/YES"
Delete Radio Files :
Press "DEL" >> "NO/YES"
■ Settings > Press "ENTER"
REC Quality > Press (Next) >> Press "SET"
REC Environment:
Press (Next) >> Press "SET"
Contrast > Press (Next)
Press (Next) or (Previous)
Language > Press (Next)
Press (Vol Up) + / (Vol Down) -
Press "SET"
Power Saving > Press (Next)
Press (Vol Up) + / (Vol Down) -
Press "SET"
Screen Saving > Press (Next)
Press (Vol Up) + / (Vol Down) -
Press "SET"
User EQ > Press (Next)
Press (Vol Up) + / (Vol Down) -
Press (Next) ▶ or (Previous) ◀
Auto Lock > Press (Next)
Press (Vol Up) + / (Vol Down) -
Press "SET"
About > Press (Next)
Troubleshooting
If an error occurs with your T.sonic, please first check the information listed below before taking your T.sonic for repair. If you are unable to remedy a problem from the following hints, please consult your dealer, service center, or local Transcend branch office. We also have a FAQ and Support on our websites.
Driver CD cannot auto-run in Windows
Enter Device Manager in the Control Panel and enable the Auto-Insert function of the CD-ROM drive. Alternatively, you can manually execute the T.sonic.EXE from the driver CD.
Operating system cannot detect the T.sonic
Check the following:
- Is your T.sonic properly connected to the USB port? If not, unplug it and plug it in again.
- Is your T.sonic connected to the Mac keyboard? If yes, unplug it and plug it into an available USB port on your Mac Desktop instead.
- Is the USB port enabled? If not, refer to the user's manual of your computer (or motherboard) to enable it.
- Is the necessary driver installed? If your computer is using Windows ^® 98SE, you must insert the Driver CD into the CD-ROM and refer to the “Driver Installation for Windows ^® 98SE” section to complete the driver installation before using your T.sonic. A driver is not required for Win ^® ME/2000/XP, Mac ^TM OS 9.0 or later, or Linux ^TM Kernel 2.4 or later.
- Is there a battery in the T.sonic? If yes, remove the battery and plug it into the port again.
Cannot power on
Check the following:
- Is the T.sonic connected to your computer? If yes, unplug it.
- Is the battery inserted correctly? If not, reverse the battery direction.
- Is the battery power used up? If yes, replace it with a new one.
Cannot download MP3 or WMA files to the T.sonic
As required, uninstall the driver and re-install it. If this doesn't work, see the Recovering Your T.sonic Chapter to format your T.sonic.
Buttons don't work
Check to see if the LOCK icon is displayed on screen. If yes, press and hold the A-B button to unlock it.
Cannot hear track playback
Check the following:
- Are there any MP3 or WMA files in the root directory of your T.sonic? If not, you must download music files from your computer or the Internet first (Only Mpeg I Layer 3 and WMA files compressed at a rate of 32Kbps–320Kbps are supported).
- Are the earphones properly connected to the earphone jack? If not, connect them properly.
- Is the volume loud enough? If not, press the Up (Volume Up) + button until the music playback can be heard.
Cannot display the track name correctly on the screen
- The default language of the T.sonic is English. Please set the language option first.
- ID3 tag information has the first display priority on the screen of the T.sonic. You could modify the ID3 tag by using Windows Media Player or Winamp.
- If the ID3 tag is empty, just the file name will be shown on the screen.
Cannot enter the Record mode
To make sure a recorded file will not be lost, two safety mechanisms are provided.
- If the remaining battery capacity is less than 10%, you cannot enter the Record mode.
- During recording, if the remaining battery capacity goes below 10% the T.sonic will automatically save the recording.
Track playback sounds intermittent
Plug the earphones into the earphones jack again to make sure they are properly connected.
Volume becomes softer and softer
Battery power is too low. Replace the battery with a new one.
T.sonic turns off automatically
T.sonic features a power saving function. If your T.sonic is idle (not playing music or radio) for 5 or 10 minutes, the power saving is triggered and your T.sonic will turn off automatically. Please refer to the “Power Saving” section to change the power saving settings.
Cannot find the file that was just copied to the T.sonic
Re-copy the file and refer to the “Safely Removing Your T.sonic” section to remove the T.sonic after the copy process is completed.
A File that was just deleted still appears
Re-delete the file and refer to the "Safely Removing Your T.sonic" section to remove the T.sonic after the delete process is completed.
T.sonic automatically removed from the operating system
This problem occurs when you press the PLAY button while your T.sonic is still connected to a USB port. Unplug your T.sonic from the USB port and then plug it back in again.
T.sonic cannot operate after it was formatted in Windows
Formatting T.sonic using the “Quick Format” or “Full Format” option in Windows destroys the default format of the T.sonic. To retrieve the default format, you must link to http://www.transcendusa.com/ and download the firmware updates for the T.sonic.
Specifications
| Size: | 57 mm × 57 mm × 14 mm |
| Weight: | 36g (without battery) |
| Data Retention: | Up to 10 years |
| Signal-to-Noise Ratio: | 90dB |
Output Frequency:  | 20Hz–20KHz |
| Estimated Battery Life: | 15 hours (one alkaline AAA battery) |
| Music Formats: | MP3 and WMA |
| Recording Format: | ADPCM (WAV) |
| Compression Rates: | 32Kbps–320Kbps |
| Certificates: | CE, FCC, BSMI |
Ordering Information
| Memory Size | Transcend P/N |
| 512MB | TS512MMP620 |
| 1GB | TS1GMP620 |
T.sonic Limited Warranty
“Above and beyond” is the set standard for customer service at Transcend. We consistently position ourselves to be significantly above the industry norm, which is all part of our commitment to Customer Satisfaction.
All Transcend Information, Inc. (Transcend) products are warranted and tested to be free from defects in material and workmanship and to conform to the published specifications. During the warranty period, should your Transcend T.sonic fail under normal use in the recommended environment due to improper workmanship or materials, Transcend will repair or replace it with a comparable product. This warranty is subject to the conditions and limitations set forth herein.
Duration of Warranty: The Transcend product warranty is valid for a specific period, which begins on the date of purchase. Proof of purchase including the date of purchase, is required to collect on the warranty. Transcend will inspect the product and decide whether to repair or replace it. Transcend reserves the right to provide a functional equivalent product or a refurbished replacement product.
Limitations: This warranty does not apply to product failure caused by accidents, abuse, mishandling, improper installation, alteration, acts of nature, improper usage, or problems with electrical power. In addition, opening or tampering with the product casing, or any physical damage, abuse or alteration to the product's surface, including all warranty or quality stickers, product serial or electronic numbers will also void the product warranty. Transcend is not responsible for recovering any data lost due to the failure of a hard drive or flash memory device. Transcend's T.sonic must be used with devices that conform to the recommended industry standards. Transcend will not be liable for damages resulting from a third party device that causes the Transcend product to fail. Transcend shall in no event be liable for any consequential, indirect, or incidental damages, lost profits, lost business investments, lost goodwill, or interference with business relationships as a result of lost data. Transcend is also not responsible for damage or failure of any third party equipment, even if Transcend has been advised of the possibility. This limitation does not apply to the extent that it is illegal or unenforceable under applicable law.
Disclaimer: The foregoing limited warranty is exclusive. There are no other warranties, including any implied warranty of merchantability or fitness for a particular purpose. This warranty is not affected in any part by Transcend providing technical support or advice.
Online Registration: To expedite the warranty service, please register your Transcend Product within 30 days of purchase.
Register online at http://www.transcendusa.com/registration
Transcend
Exceeding Your Expectations
Transcend Information, Inc.
www.transcendusa.com
*The Transcend logo is a registered trademark of Transcend Information, Inc.
*All logos and marks are trademarks of their respective companies.