
ES3037CCS - Color printer OKI - Free user manual and instructions
Find the device manual for free ES3037CCS OKI in PDF.
| Product type | Color LED printer |
| Brand | OKI |
| Model | ES3037CCS |
| Dimensions (W × D × H) | 430 × 340 × 400 mm |
| Weight | 22 kg |
| Power supply | 220–240 V, 50/60 Hz |
| Power consumption (average) | 800 W printing, 15 W standby |
| Main functions | Color printing, automatic duplex, paper management |
| Printing technology | Single drum LED |
| Max. print resolution | 1200 × 1200 dpi |
| Print speed (A4) | Up to 28 ppm color, 30 ppm black |
| Standard paper capacity | 250 sheets (main tray) + 100 sheets (multipurpose tray) |
| Compatible materials | Paper, labels, transparencies, envelopes |
| Connectivity | USB 2.0, Ethernet 10/100/1000, Wi-Fi (optional) |
| Ink cartridges | 4 toner cartridges (CMYK) |
| Monthly duty cycle | 60,000 pages max. |
| Maintenance and cleaning | Cleaning of drum and rollers via control panel |
| Security | Password protection, secure printing (option) |
| Spare parts and repairability | Maintenance kit, drum, fuser available |
| General information | User manual available in PDF (53 pages) |
Frequently Asked Questions - ES3037CCS OKI
User questions about ES3037CCS OKI
0 question about this device. Answer the ones you know or ask your own.
Ask a new question about this device
Download the instructions for your Color printer in PDF format for free! Find your manual ES3037CCS - OKI and take your electronic device back in hand. On this page are published all the documents necessary for the use of your device. ES3037CCS by OKI.
USER MANUAL ES3037CCS OKI
Ordering Replacement Supplies ....3
Media Settings 4
Why Change Settings?...... 4
Default Media Settings 4
Changing Settings for Individual Print Jobs...... 4
Ranges for Printer Media Weight Settings ..... 5
Media Settings
Changing Default Settings for Trays 1 to 5 ...... 6
Changing Default Settings for MP Tray ....8
Loading Print Media
Trays and High Capacity Feeder (HCF) .....11
Media Specifications: Tray 1 .... 11
Media Specifications: Auxiliary Trays 2
and 3, High Capacity Feeder (Optional)......11
Multi-Purpose (MP) Tray ....14
Media Specifications: MP Tray ....14
Selecting/Using
Paper 16
Labels 18
Transparencies 19
Thick Paper (Cards, Index) 21
Envelopes 23
OKI Print Media 24
Secure Print
(Printing Confidential Documents) 27
Proof and Print 28
Printing Built-In Reports 29
Setting Power Save Parameters .... 31
Contents (continued)
Control Panel
Buttons 33
Lights 36
Clearing Paper Jams 37
Jam 380.... 37
Jam 381.... 38
Jam 382.... 39
Jam 390....41
Jam 391....41
Duplex Paper Jams.... 42
Changing Toner Cartridges 46
Error Messages 49
Service and Support 53
Ordering Replacement Supplies
How to Order
- Consult the dealer where you purchased your printer/color copy system.
- To locate the dealer closest to you, call 1-800-OKI-DATA (1-800-654-3282).
Take Advantage of OKI's Supply Manager
Don't run out of supplies!
• Calculates your usage based on information you provide.
- Sends you an email when it’s time to reorder.
To register, go to
www.okidata.com.
Order Numbers
Important!
Use only Type C5 consumables with these printers.
Toner Cartridges, Type C5
natural_image
Exterior view of a metallic rectangular electronic device (no visible text or symbols)Color OKI #
Black......52115001
Cyan....52115002
Magenta 52115003
Yellow 52115004
Image Drums, Type C5
natural_image
Exterior view of a cylindrical mechanical device with metallic casing and mounting bracket (no visible text or symbols)Color OKI #
Black......56118001
Cyan....56118002
Magenta 56118003
Yellow 56118004
Media Settings
Why Change Settings?
Improper media settings:
- cause poor quality printing
- cause flaking
• can damage the printer
Default Media Settings
The Default Setting
The default media weight setting for all trays is AUTO.
Changing Defaults
To change the printer's default media settings, see pages 6 through 10.
Resetting to the Original Defaults
Note: The ... which appears in these steps indicates that you should keep pressing the button repeatedly until you see the display indicated.
- Press

...
MAINTENANCE MENU
- Press

...
EEPROM RESET EXECUTE
- Press

Changing Settings for Individual Print Jobs
If you are printing a job on special media, you can temporarily load the media in a tray and change the media settings for that tray in the driver as you print the job.
Media Settings (cont.)
Ranges for Printer Media Weight Settings
Note: To determine if a paper weight is US Bond or Index, check the metric equivalent. E.g., 35 lb. US Bond = 132 g/m ^2 . 35 lb. Index = 64 g/m ^2 .
For more information, go to www.paper-paper.com/weight.html.
Table 1: MediaWeight Range, US Bond
| Setting | US Bond (Metric) |
| Auto (default) | 17 to 54 lb. (64 to 203 g/m2) |
| Light | 17 lb. (64 g/m2) |
| Medium Light | 18 to 19 lb. (68 to 71 g/m2) |
| Medium | 20 to 24 lb. (75 to 90 g/m2) |
| Medium Heavy | 25 to 27 lb. (94 to 101 g/m2) |
| Heavy | 28 to 32 lb. (105 to 120 g/m2) |
| Ultra Heavy | 33 to 54 lb. (124 to 203 g/m2) |
Table 2: MediaWeight Range, Index
| Setting | Index (Metric) |
| Auto (default) | 35 to 113 lb. (64 to 203 g/m2) |
| Light | 35 lb. (64 g/m2) |
| Medium Light | 37 to 40 lb. (68 to 71 g/m2) |
| Medium | 42 to 50 lb. (75 to 90 g/m2) |
| Medium Heavy | 52 to 56 lb. (75 to 90 g/m2) |
| Heavy | 52 to 67 lb. (94 to 120 g/m2) |
| Ultra Heavy | 69 to 113 lb. (124 to 203 g/m2) |
Media Settings: Changing Default Settings for Trays 1 to 5
Note: The “...” in these steps indicates that you should keep pressing the button repeatedly until you see the display indicated.
To Set Transparencies as the Default Media: Tray 1 Only
Note: Transparencies can only be used in Tray1 or the MP Tray (see page 8).
Set the Media Type
- Press

MEDIA MENU
- Press

...
TRAY1 MEDIATYPE XXXX*
- Press

...
TRAY1 MEDIATYPE TRANSPARENCY
- Press

, press

* XXXX = current media type setting.
Media Settings: Changing Default Settings for Trays 1 to 5 (cont.)
Note: The “...” in these steps indicates that you should keep pressing the button repeatedly until you see the display indicated.
To Set Labels, Heavy Paper, etc., as the Default Media: Trays 1 through 5
Set the Media Weight
- Press

...
MEDIA MENU
- Press

...
TRAYZ* MEDIAWEIGHT AUTO
- Press

...
TRAYZ* MEDIAWEIGHT YYYY**
- Press

- Press
* Z = 1, 2, 3, 4 or 5, depending on which tray you are changing. ** YYYY = Medium, Medium Heavy, Heavy, or Ultra Heavy)
Media Settings: Changing Default Settings for MP Tray
To Set Transparencies as the Default Media: MP Tray
Note: The “...” in these steps indicates that you should keep pressing the button repeatedly until you see the display indicated.
First, Check/Set the Media Size
(Default = Letter Long Edge)

- Press
...
MEDIA MENU
- Press

...
MP TRAY PAPERSIZE XXXX*
- Press

...
MP TRAY PAPERSIZE YYYY ^

- Press
* XXXX = current setting.
^ YYYY = LETTER LONG EDGE, LETTER SHORT EDGE, A4 LONG EDGE, or A4 SHORT EDGE.
Media Settings: Changing Default Settings for MP Tray (cont.)
Then, Set the Media Type to Transparency
(Default = Plain)
- Press

...
MP TRAY MEDIATYPE XXXX*
- Press

...
MP TRAY MEDIATYPE TRANSPARENCY
- Press

, press

* XXXX = current setting.
To Set Labels, Heavy Paper, etc., as the Default Media: MP Tray
Note: The “...” in these steps indicates that you should keep pressing the button repeatedly until you see the display indicated.
First, Check/Set the Media Size
(Default = Letter Long Edge)
- Press

...
MEDIA MENU
Media Settings: Changing Default Settings for MP Tray (cont.)
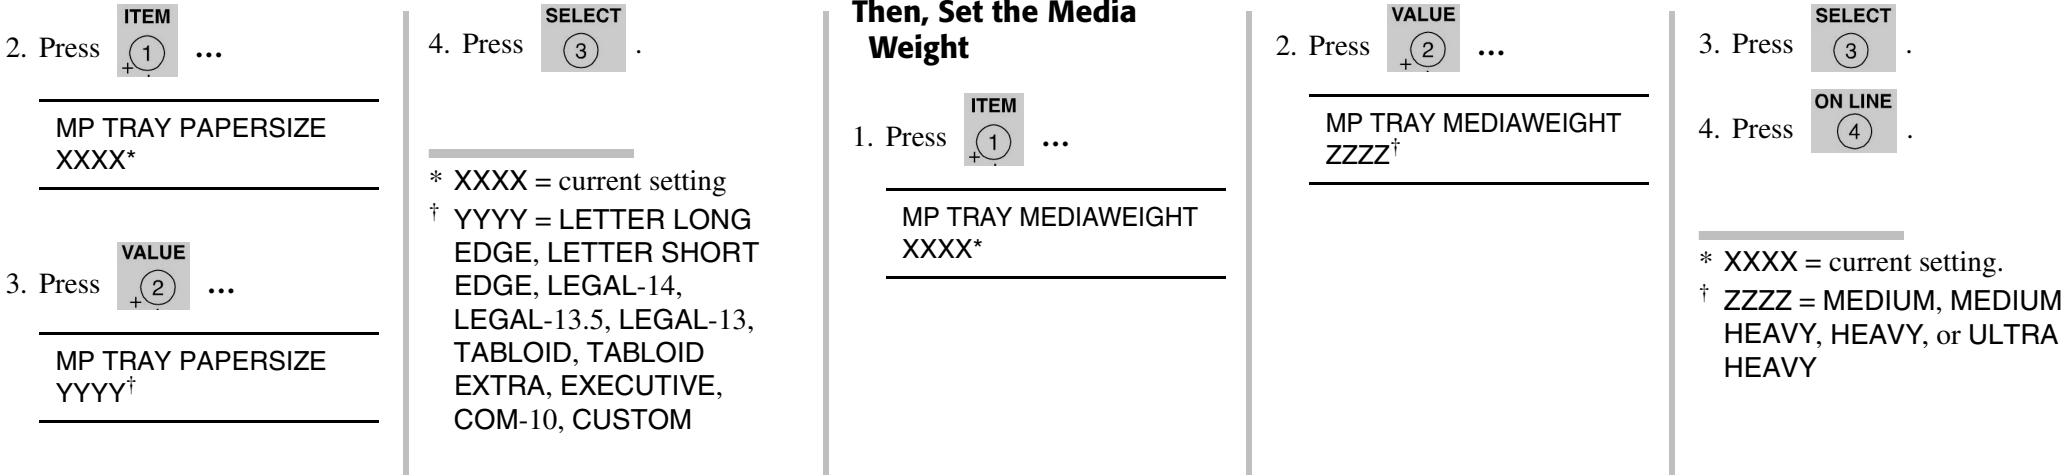
text_image
2. Press ⬤① ... MP TRAY PAPERSIZE XXXX* 3. Press ⬤② ... MP TRAY PAPERSIZE YYYY† 4. Press ⬤③ . * XXXX = current setting † YYYY = LETTER LONG EDGE, LETTER SHORT EDGE, LEGAL-14, LEGAL-13.5, LEGAL-13, TABLOID, TABLOID EXTRA, EXECUTIVE, COM-10, CUSTOM Then, Set the Media Weight 1. Press ⬤① ... MP TRAY MEDIAWEIGHT XXXX* 2. Press ⬤② ... MP TRAY MEDIAWEIGHT ZZZZ† 3. Press ⬤③ . 4. Press ⬤④ . * XXXX = current setting. † ZZZZ = MEDIUM, MEDIUM HEAVY, HEAVY, or ULTRA HEAVYLoading Print Media: Trays and High Capacity Feeder (HCF)
Media Specifications: Tray 1
| Media Weight | 17 to 54 lb. US Bond (64 to 203 g/m ^2 )Duplexing: 20 to 28 lb. US Bond (75 to 105 g/m ^2 ) |
| Media Size | Paper: min. 4.13" x 5.83"; max. 8.5" x 14". Non-standard sizes must be defined in driver before printing (see your on-line User's Guide).Transparencies: letter or A4 |
| Takes | 530 Sheets 20 lb. paper250 transparencies |
Media Specifications: Auxiliary Trays 2 and 3, High Capacity Feeder (Optional)
| Media Weight | 17 to 54 lb. US Bond (64 to 203 g/m ^2 )Duplexing: 20 to 28 lb. US Bond (75 to 105 g/m ^2 ) |
| Media Size | Paper: min. 4.13" x 5.83"; max. 8.5" x 14". Non-standard sizes must be defined in driver before printing (see your on-line User's Guide). |
| Take | 530 Sheets 20 lb. paper(no transparencies) |
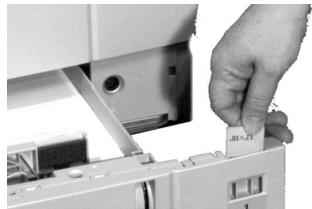
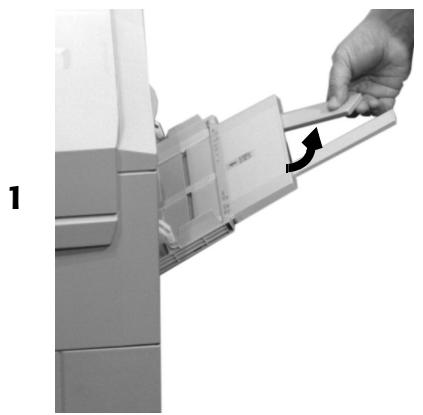
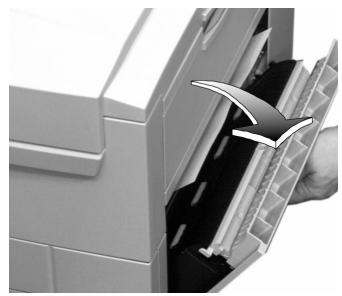
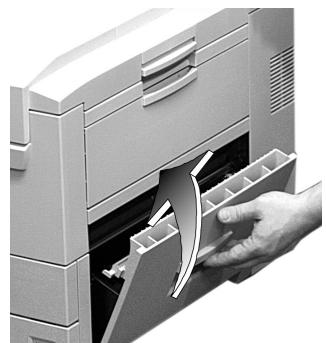
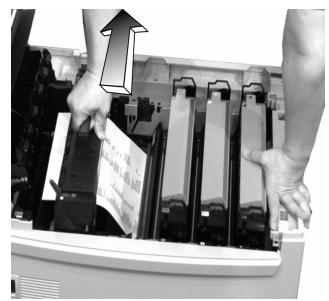
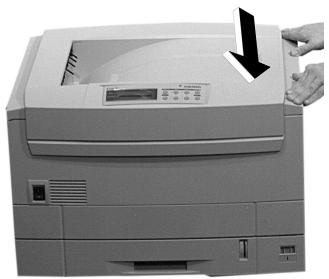
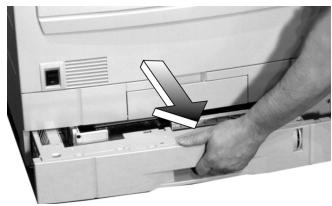
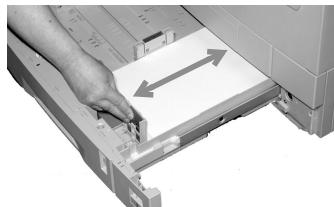
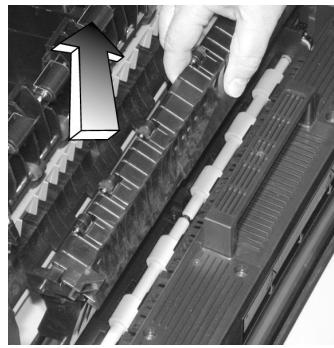
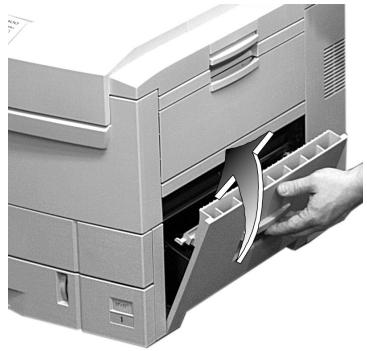
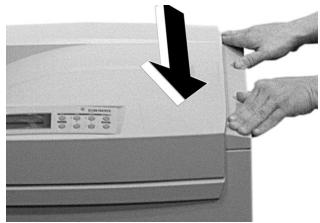
Loading Print Media: Trays and High Capacity Feeder (cont.)
1
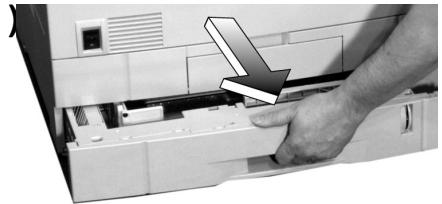
natural_image
Close-up of a hand inserting a printer into a rack, with an arrow pointing to the printer's side panel (no text or symbols visible)3
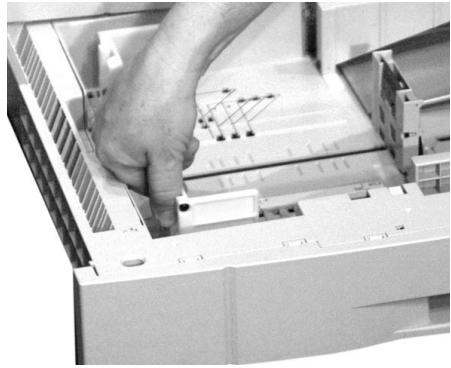
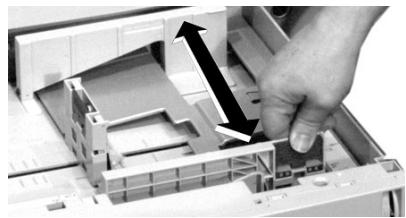
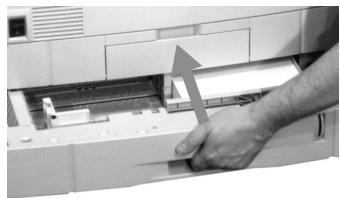
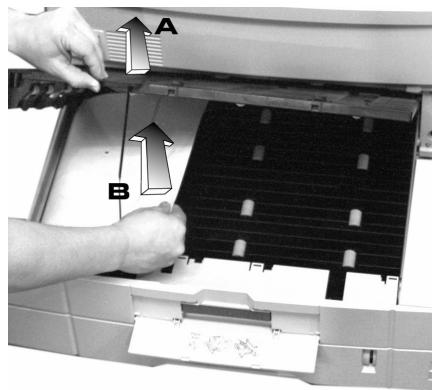
natural_image
Close-up of a hand operating a printer's internal circuit board (no visible text or symbols)4 Legal size and larger only:
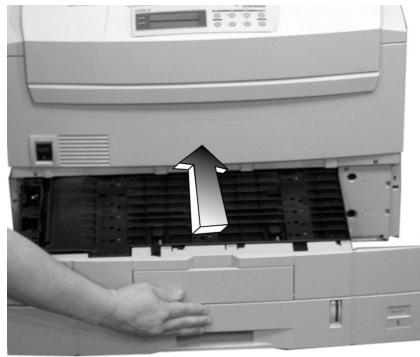
natural_image
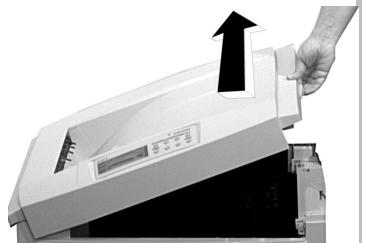
Close-up of a hand inserting into a computer printer into a rack (no visible text or symbols)5
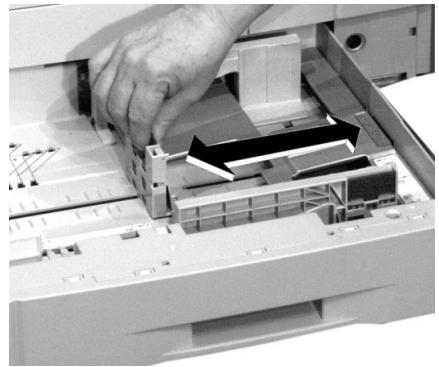
natural_image
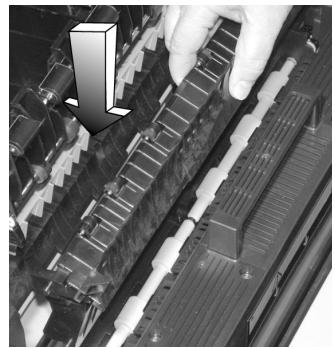
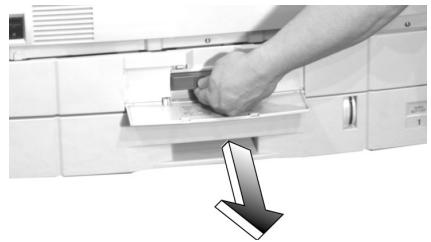
Close-up of a hand inserting a small electronic component into a computer drive (no visible text or symbols)2
natural_image
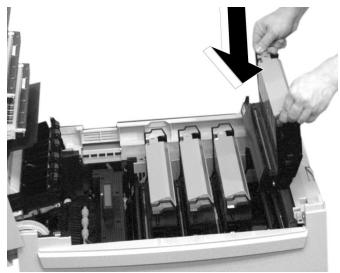
Close-up of a hand inserting a component into a printer case, showing internal structure and part number 2 (no text or symbols visible)6
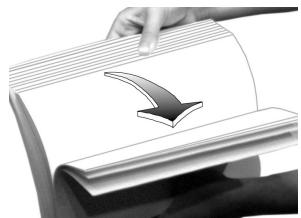
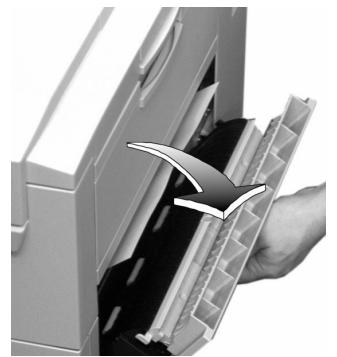
natural_image
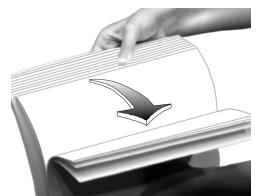
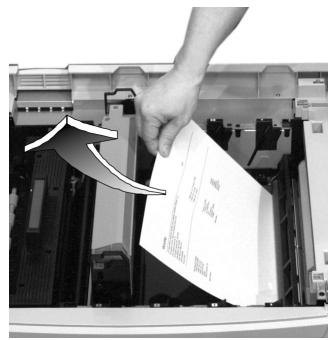
Hand holding a rolled-up document with a downward arrow icon (no text or symbols visible)Loading Print Media: Trays and High Capacity Feeder (cont.)
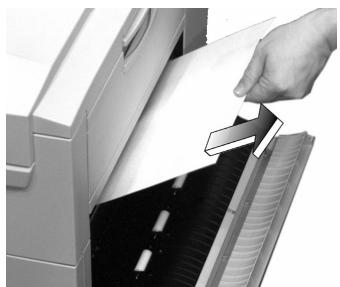
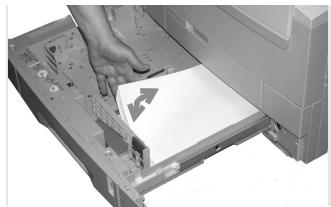
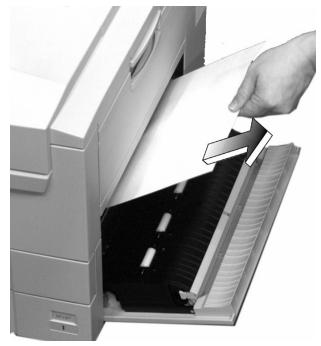
7 Print side down:
natural_image
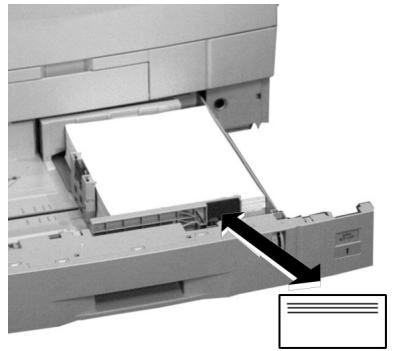
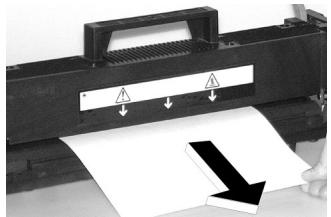
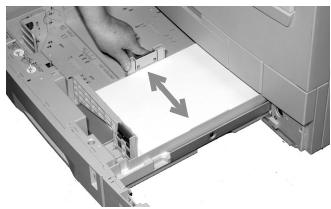
Close-up of a printer's internal structure showing paper feeding into a slot (no visible text or symbols)8
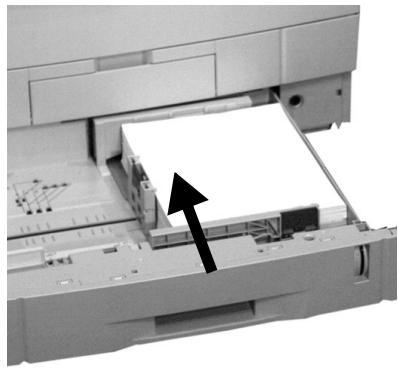
natural_image
Close-up of a printer's internal structure showing paper feed and printer tray, with an arrow pointing to the paper (no visible text or symbols)Note: Letterhead stationery (letter, A4 or B5 size):
Long edge feed—load face down, top aimed toward the back of the printer.
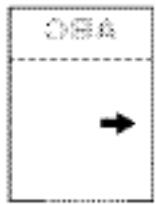
text_image
OBA →Short edge feed—load face down, top to the right:
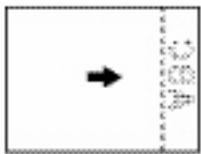
text_image
Diagram showing a black arrow pointing right, with vertical lines labeled 'E' and 'x', possibly indicating a transformation or mapping process.Loading Print Media: Multi-Purpose (MP) Tray
Media Specifications: MP Tray
| Media Weight | Paper: 17 to 54 lb. US Bond (64 to 203 g/m ^2 ), up to 113 lb. IndexDuplexing: 20 to 28 lb. US Bond (75 to 105 g/m ^2 Banners: 20 to 34 lb. US Bond (75 to 128 g/m ^2 ) |
| Media Size | Paper: min. 4.13" x 5.83"; max. 8.5" x 14". Non-standard sizes must be defined in driver before printing (see your on-line User's Guide).Banners: up to 12.9 W x 47.2" L (328 mm x1.2 m)Transparencies: letter or A4 |
| Takes | 100 Sheets 20 lb. [US Bond] paper, 50 transparencies, 10 envelopes, 3/8" (1 cm) stack of labels |
natural_image
Hand inserting a card into a printer device (no text or symbols visible)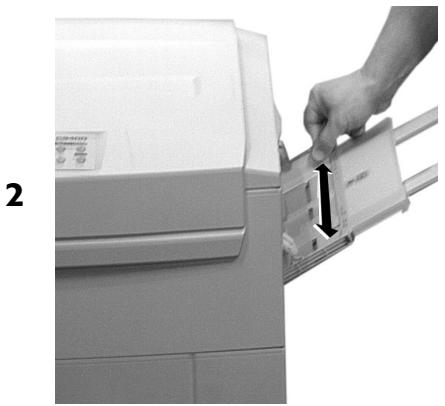
natural_image
Hand inserting a card into a printer (no visible text or symbols)Loading Print Media: Multi-Purpose (MP) Tray (cont.)
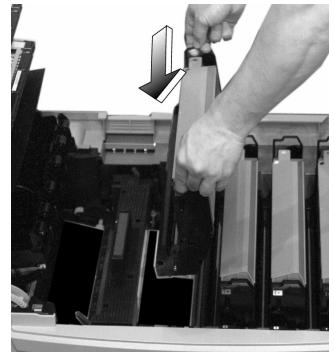
3
natural_image
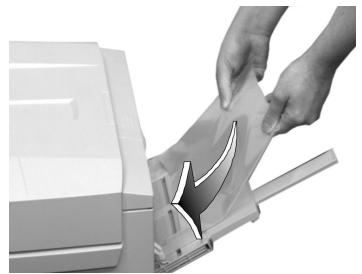
Hand holding a curved object with a downward arrow, no text or symbols visibleNote: Letterhead Stationery (Letter, A4 or B5): Price side up.
Long edge feed—aim top toward the back of the printer:
4
natural_image
Close-up of a hand printing a document into a printer (no visible text or symbols)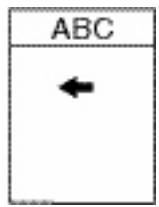
text_image
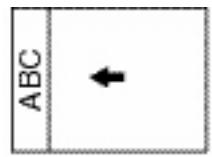
ABC ←Short edge feed—aim the top into the printer:
text_image
ABCNote: Transparencies & Labels: Print side up. Default = long edge feed.
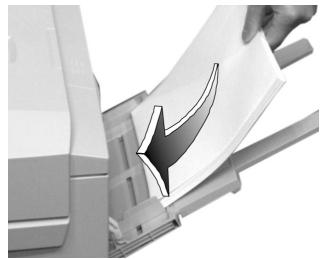
natural_image
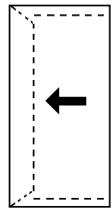
Close-up of hands opening a document with a paper airplane (no visible text or symbols)Note: Envelopes: Flap down, aimed into the printer:
natural_image
Simple diagram with a dashed rectangle and a black arrow pointing left (no text or symbols)Selecting/Using Paper
Important Information
For optimum results make sure that the paper you use conforms to the specifications outlined in the following pages.
We do not recommend the following paper types for use in your printer:
- Paper with cutouts, perforations, or excessive paper dust.
- Heavily coated, glossy, or smooth paper
-
Recycled paper
-
Embossed, rough, or heavily textured paper
- Paper, inks, and dyes that cannot withstand pressure and heat
Sample Media Label
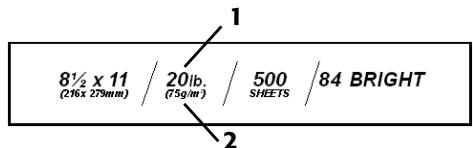
text_image
8½ x 11 / 20lb. / 500 SHEETS / 84 BRIGHT (236x 279mm) (75gm) 1 21 Media Weight, US Bond (see page 4)
2 Media Weight, Metric
Recommended Papers
Letter
- OKI Bright White, 32 lb. US Bond, Letter
- HammerMill® Laser Print Radiant White, 24 lb. US Bond, Letter
• Xerox 4024. 20 lb. US Bond, Letter
Tabloid/Tabloid Extra
- OKI Bright White, 32 lb. US Bond, Tabloid or Tabloid Extra
- HammerMill® Laser Print Radiant White, 24 lb. US Bond, Tabloid
Selecting/Using Paper (cont.)
Usable Sizes
- Tabloid, Tabloid Extra
- Letter, Executive
- Legal-14, -13.5, -13
- A3, A3 Wide
• A3 Nobi:
- Cannot be used for duplex printing.)
• A4, A5
• A6:
- Tray1 and MP Tray only.
- Cannot be used for duplex printing.
• B4, B5
- Custom:
- MP Tray only
- Must be defined in the driver.
- Cannot be used for duplex printing.
Usable Weight Range
17 to 54 lb. (64 to 203 g/m ^2 )
Important!
Duplex printing is restricted to paper only, 20 to 28 lb. US Bond
If you experience curling with 20 or 24 lb. paper, switch to 28 lb.
Feed Paths
- Tray 1
• Multi-Purpose (MP) Tray - Trays 2 or 3 (optional)
• High Capacity Feeder (HCF, optional)
Exit Paths
- Top (Face down)
- Straight-Through (Face up) required for MP Tray
Selecting/Using Labels
Caution!
- Labels must be able to withstand 446°F (230°C) for 0.2 second, including mechanical pressures to 25 psi (1.8 kg/cm ^2 ).
- Use labels designated for laser printers.
- Labels must cover the entire carrier sheet; adhesive must not be exposed.
Recommended Labels
Avery ^® White Laser:
-
5161 (letter) • #7162, 7664, or 7666 (A4)
Usable Sizes
- Letter, A4
Feed Path
Multi-Purpose Tray only
Exit Path
Straight-through (face up) only. Maximum depth of label sheet stack: about 3/8" (10 mm).
Printing Labels
For Individual Print Jobs
Select the following settings in the driver as you print the job:
- Source = MP Tray
- Size = Letter or A4
- Type = Labels
- Set Media Size (Windows® Adobe® PostScript® driver only: see “Printing Transparencies” on page 20).
Making Labels the Default: MP Tray
Set the printer menu as follows (see page 9):
- MP Tray MediaType = Labels
- MP Tray MediaWeight = Heavy (sheets less than 170 m thick) or Ultra Heavy (sheets 170 to 200 m thick)
- MP Tray PaperSize = Letter or A4
Selecting/Using Transparencies
Caution!
Transparencies must be able to withstand 446^ F ( 230^ C) for 0.2 second, including mechanical pressures to 25 psi ( 1.8 kg/cm^2 ).
Recommended Transparencies
- OKI® 52205701, Letter
- 3M ^ CG3720, Letter
Usable Sizes
- Letter
• A4
Feed Paths
- Tray 1 (max. = 250, print side down)
- MP Tray (max. = 50, print side up)
Note: Transparencies can not be fed from the optional Auxiliary Trays or from the optional High Capacity Feeder (HCF)
Exit Path
Straight-Through (face up) only
Selecting/Using Transparencies (cont.)
Printing Transparencies
For Individual Print Jobs
Select the following settings in the driver as you print the job:
- Source = Tray 1 or MP Tray
- Size = Letter or A4
-
Type = Transparency
-
Set Media Size to Off:
Windows ^® Adobe ^®
PostScript ^® driver only:
Windows 2000/XP
Printing Preferences →
Advanced → Document
Options → Printer
Features → Media Check
= Off.
Windows Me/98/95
Properties → Setup tab →
Paper Feed Options →
deselect Media Check.
Windows NT 4.0
Document Defaults →
Input Slot Option →
Media Check = Off
Making Transparencies the Default
Tray 1
Set the printer menu as follows (see page 6):
- Tray 1 MediaType = Transparency
MP Tray
Set the printer menu as follows (see page 8).
- MP Tray PaperSize = Letter or A4
- MP Tray MediaType = Transparency
Selecting/Using Thick Paper (Cards, Index)
Caution!
To prevent damage to the printer, it is very important to check the printer's media settings before printing on thick paper. It must be set to Medium, Heavy, or Ultra Heavy—depending on the thickness of the paper being used—or to Auto (see pages 5 and 22).
Sample Ream Label
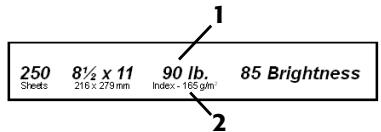
text_image
250 Sheets 8½ x 11 90 lb. Index - 165 gm/2 85 Brightness 1 21 Media Weight, Index (see page 5).
2 Media Weight, Metric: This confirms Index vs. US Bond (see page 5)
Recommended Letter
- OKI® Premium Card Stock
- 60 lb. Cover*
- 90 lb. Index*
- 110 lb. Index*
- Wausau Exact® Index
- #49108, 90 lb. Index*
- #49508, 110 lb. Index*
* For conversion table, see p. 4.
Usable Sizes
- Tabloid, Tabloid Extra
- Letter, Executive
- Legal-14, -13.5, -13
• A3, A3 Wide, A3 Nobi - A4, A5, A6
• B4, B5 - Custom
- MP Tray only
- Must be defined in the driver
Usable Weight Range
- Up to 113 lb. Index (203 g/m ^2 )
Selecting/Using Thick Paper (cont.)
Feed Path
- Tray 1
Note: For duplexing, weight range is restricted to 42 to 58 lb. Index (75 to 105 g/m ^2 )
- MP Tray
Exit Path
Straight-through (face up) only.
Printing on Thick Paper
For Individual Print Jobs
Select the following settings in the driver as you print the job:
- Source = Tray 1 or MP Tray
- Size = Tabloid, Tabloid Extra, Letter, Executive, Legal-14, Legal-13.5, Legal-13, A3, A3 Wide, A3 Nobi, A4, A5, A6, B4, B5, Custom (MP Tray only)
- Type = Medium Heavy, Heavy, or Ultra Heavy (see page 4)
Making Thick Paper the Default
Tray 1, 2, 3, 4, or 5
Set the printer menu as follows (see page 7).
- TrayZ MediaWeight = Medium Heavy, Heavy or Ultra Heavy (see page 4).
MP Tray
Set the printer menu as follows (see page 9).
- MP Tray PaperSize = Tabloid, Tabloid Extra, Letter, Executive, Legal-14, Legal-13.5, Legal-13, A3, A3 Wide, A3 Nobi, A4, A5, A6, B4, B5, Custom (must be defined in the driver)
- MP Tray MediaWeight = Medium Heavy, Heavy or Ultra Heavy (see page 4).
Selecting/Using Envelopes
General Information
Caution!
Envelopes must be able to withstand 446^ F ( 230^ C) for 0.2 second, including mechanical pressures to 25 psi ( 1.8 kg/cm^2 )
Important!
For the best print results, use only the recommended envelopes.
Never use envelopes with metal clasps, snaps, windows, or V-flap seals:
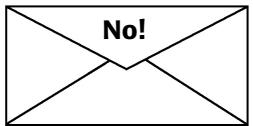
text_image
No!Recommended Envelopes)
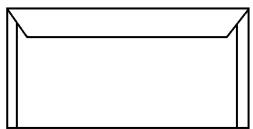
natural_image
Simple line drawing of a rectangular frame with no text or symbols- OKI Premium Envelopes (see page 26)
-
52206301
-
52206302
Printing Envelopes
To Print an Individual Job on Envelopes
Select the following settings in the driver as you print the job:
- Source = MP Tray
- Size = COM-10
Making Envelopes the Default Print Media for the MP Tray
Set the printer menu to (see pages 7 and 9):
- PaperSize = COM-10
Selecting/Using OKI Print Media
OKI® Banner\*
Order # 52206001

natural_image
Black and white exterior view of a vintage 19th-century car with flame-like design (no visible text or symbols)▶ 70 lb. Index (128 g/m2)
▶ White, 35.4" x 12.9" (900 x 328 mm)
▶ 100 sheets/box
Use Printer Settings
- Feed Tray = MP Tray Only
- Exit Tray = Rear Only
• Media Type = Plain
• Media Weight = Ultra Heavy
Important!
Banner paper must be fed in one sheet at a time.
* For best print results: Temperature range = 65 to 77°F Humidity = 40 to 65%RH
OKI SynFlex™\*
Order # 52205901

text_image
ec Copyrighting This Work's Top Listing OTHER NEW LISTING OKI▶ Waterproof and tearproof
▶ White, 8½" x 11" (216 x 279 mm)
▶ 100 sheets/box
Use Printer Settings
- Feed Tray = MP Tray
- Exit Tray = Rear
• Media Type = Plain
• Media Weight = Ultra Heavy
To purchase OKI Media, contact your local OKI dealer or visit us at www.okidata.com.
Selecting/Using OKI Print Media (cont.)
OKI Bright White Proofing Paper*
| Size | OKI Order # |
| 8 12 x 11" | 52206101 |
| 11 x 17" | 52206102 |
| 12 x 18" | 52206103 |
Order # 52206101
▶ White, 32 lb.
▶ 500 sheets/box
Use Printer Settings
- Feed Tray = Any
- Exit Tray = Top or Rear
- MediaType = Plain
• MediaWeight = Auto
OKI Premium Card Stock*
| Weight | OKI Order # |
| 60 lb. (Cover) | 52205601 |
| 90 lb. (Index) | 52205602 |
| 110 lb. (Index) | 52205603 |
▶ Acid-free archival quality
▶ White, letter size
▶ 250 sheets/box
Use Printer Parameters
- Feed Tray = MP Tray
-
Exit Tray = Rear
-
Printer Menu Settings:
- MP Tray MediaType = Plain
- MP Tray MediaWeight = Heavy (60 lb.) or Ultra Heavy (90 lb., 110 lb.)
Selecting/Using OKI Print Media (cont.)
OKI Premium Color Transparencies
Order # 52205701
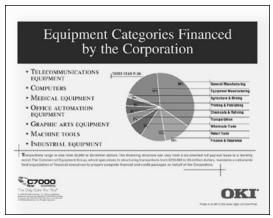
pie
Equipment Categories Financed by the Corporation | Equipment Type | Percentage (%) | |---|---| | Telecommunications Equipment | 100 | | Computers | 25 | | Medical Equipment | 30 | | Office Automation Equipment | 35 | | Graphic Arts Equipment | 40 | | Machine Tools | 45 | | Industrial Equipment | 50 | The company is a large segment of business clients, the manufacturing sector, etc., which is a licensed product or service for a company's business. The company is also a major component of manufacturing products for business clients and other companies in the Corporation. The company is a smaller segment of business clients. OKT is highlighted as a key entity based on its business structure. E7000 is noted at the bottom.▶ Letter Size
▶ 50 sheets/box
Use Printer Parameters
- Feed Tray = Tray 1 or MP Tray
- Exit Tray = Rear
- Printer Menu Settings:
- MediaType = Transparency
- MediaWeight = Any (ignored)
OKI Premium Envelopes
natural_image
Stack of blank white paper sheets on a plain background (no text or symbols)Order #s
52206301 (Box 100)
52206302 (Box 500)COM-10 (#10)
▶ White wove
▶ Security tinted
▶ Redi-Strip seal
Use Printer Parameters
- Feed Tray = MP Tray
- Exit Tray = Rear
- Printer Menu Setting:
- MP Tray MediaSize = COM-10 Envelope LEF
Secure Print (Printing Confidential Documents)
To print out a confidential document, you must know:
- the document name
- your 4-digit personal password (PIN)
To Print a Confidential Document
Note: The “...” in these steps indicates that you should keep pressing the button repeatedly until you see the display indicated.
- Press

[Non-Text]
PRINT JOBS MENU
- Press

PRINT JOBS MENU PIN:
- Enter your PIN:
press
SELECT JOB ALL JOBS
- Press

[Non-Text]
PRINT JOBS MENU [JOB NAME]
- Press

-
The document prints and is deleted from the printer's hard drive.
-
The printer goes back on line.
To Delete the Document before Printing It
Follow steps 1 through 4 above, then:
- Press

- Press
Proof and Print
To print a document which has been proofed, you must know:
- the document name
- your 4-digit personal password (PIN)
To Print a Proofed Document
Note: The “...” in these steps indicates that you should keep pressing the button repeatedly until you see the display indicated.
- Press

PRINT JOBS MENU
- Press

PRINT JOBS MENU PIN:
- Enter your PIN:
SELECT JOB ALL JOBS
- Press

PRINT JOBS MENU [JOB NAME]

-
Press
-
The document prints and is deleted from the printer's hard drive.
- The printer goes back on line.
To Delete the Document before Printing It
Follow steps 1 through 4 above, then:
- Press


Printing Built-In Reports
Note: The “...” in these steps indicates that you should keep pressing the button repeatedly until you see the display indicated.
Printing the Menu Defaults (MenuMap)
To print a list of the current menu settings:
- Press

...
INFORMATION MENU
- Press

...
PRINT MENU MAP
- Press

Printing the File List
To print a list of the files stored on the printer's hard drive:
- Press

...
INFORMATION MENU
- Press

...
PRINT FILE LIST
- Press

Printing Built-In Reports (cont.)
Note: The “...” in these steps indicates that you should keep pressing the button repeatedly until you see the display indicated.
Printing the Demo Page
- Press

...
INFORMATION MENU
- Press

...
PRINT DEMO1
- Press

Printing Lists of Fonts
(PCL, PostScript, IBM Proprinter, or Epson FX Emulation)
- Press

...
INFORMATION MENU
- Press

...
PRINT XXXX* FONTS
- Press

* XXXX = PCL, PS, IBM PPR, or Epson FX.
Setting Power Save Parameters
Power Save
Power Save sets how long the printer waits before going into standby mode. This saves energy, but the printer requires time to warm up when it receives a print job or if you want to enter the menu and change settings.
Setting the Time Interval before the Printer Enters Power Save Mode
- Press

...
SYSTEM CONFIG MENU
- Press

...
POWER SAVE DELAY TIME 60 MIN
- Press

...
POWER SAVE DELAY TIME XX* MIN
- Press

,

.
* XX = 5, 15, 30, 60 (default), 240 minutes.
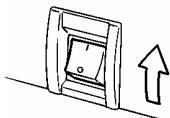
Setting Power Save Parameters (cont.)
To Disable/Enable Power Save
- Press

...
MAINTENANCE MENU
- Press

...
POWER SAVE ENABLE ^†
- Press

...
POWER SAVE DISABLE ^†
- Press


† Pressing ITEM toggles back and forth between Enable and Disable.
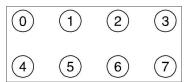
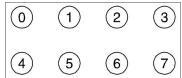
Control Panel Buttons

flowchart
graph TD
    A["0 ON LINE"] --> B["1"]
    B --> C["2"]
    C --> D["3"]
    B --> E["5"]
    E --> F["6"]
    D --> G["CANCEL"]
MENU

Printer On Line or Off Line
Press to enter the Menu mode.
Menu Mode
- Press to advance to the next Category in the Menu
- Press and hold for 2 seconds or longer to go back to the previous Category.
Password (PIN) Mode
Press to enter a zero in the password.
ON LINE

Printer On Line/Off Line
Press to place the printer off line/on line.
Menu Mode
Press to exit the Menu mode and go back on line.
Password (PIN) Mode
Press to enter the number 4 in the password.
Error Mode
(Attention light blinking)
- If the paper size requested by the print job is different from the paper specified as in the tray, press ON LINE to force the job to print.
- If you have selected manual print in the driver, load paper in the MP tray, then press ON LINE to print the job.
Control Panel Buttons (cont.)
ITEM

Menu Mode
- Press to advance to the next Item in the Menu.
- Press and hold to advance through the menu Items quickly.
Password (PIN) Mode
Press to enter the number 1 in the password

Menu Mode
- Press to go back to the previous Item in the Menu.
- Press and hold to advance backward through the menu Items quickly.
Password (PIN) Mode
Press to enter the number 5 in the password.
VALUE
Menu Mode
- Press to advance to the next Value for an Item in the Menu.
- Press and hold to advance through the Values quickly.
Password (PIN) Mode
Press to enter the number 2 in the password.

Menu Mode
- Press to go to the previous Value for an Item in the Menu.
- Press and hold to advance backward through the Values quickly.
Password (PIN) Mode
Press to enter the number 6 in the password.
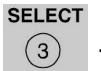
Control Panel Buttons (cont.)
SELECT

Menu Mode
- Press to engage a new value for an Item (An asterisk appears next to the new setting).
- Press to initiate the action indicated on the display (e.g., print MenuMap).
Password (PIN) Mode
Press to enter the number 3 in the password.
CANCEL

Printer On Line
Press to delete a job being processed:
- If the job is being printed, it will be cancelled and deleted.
- If the job is still being received, it continues until all the data is received, then is deleted.
Menu Mode
Press to exit the Menu mode and place the printer back on line.
Password (PIN) Mode
Press to enter the number 7 in the password.
Error Mode
(Attention light blinking)
Press to delete a job being processed. Once the job has been deleted, the printer will return to the original error status.
Control Panel Lights
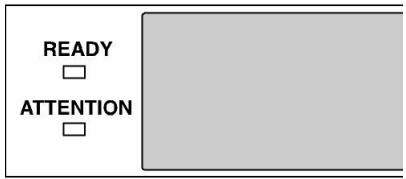
text_image
READY ATTENTIONReady LED (Green)
On
The printer is on line.
Off
The printer is off line.
Flashing
The printer is receiving data.
Attention LED (Red)
On: Warning!
The printer needs attention, but can continue to operate.
The display message indicates the nature of the problem: e.g., TONER LOW, PAPER NEAR END, etc.
Off
Normal.
Blinking: Alarm!
The printer needs attention immediately.
The display message indicates the nature of the problem: e.g., PAPER JAM, TRAY1 EMPTY, etc.
Clearing Paper Jams
Jam 380
OPEN FRONT COVER
380:PAPER JAM
1
natural_image
Close-up of a hand inserting a card into a device (no visible text or symbols)2
natural_image
Close-up of a hand inserting a card into a printer drawer (no text or symbols visible)3
natural_image
Hand inserting a curved arrow into a file holder (no text or symbols visible)Clearing Paper Jams (cont.)
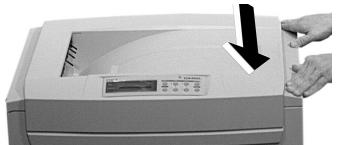
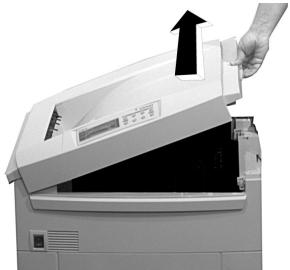
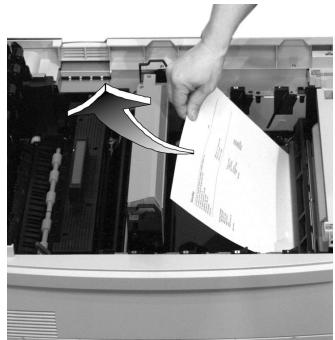
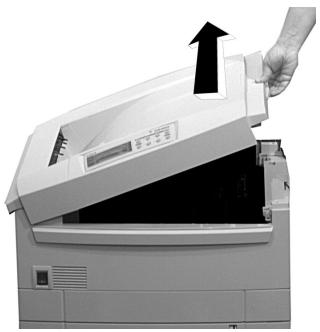
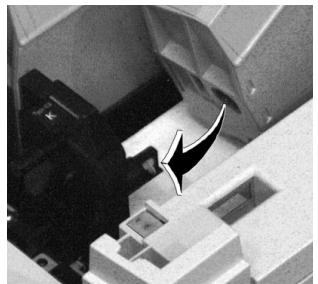
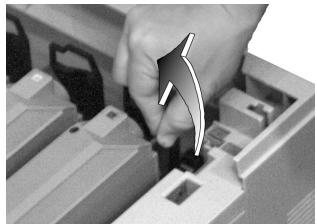
Jam 381
OPEN UPPER COVER 381:PAPER JAM
1
natural_image
Hand inserting a printer into a paper airplane (no text or symbols visible)Caution!
To avoid damage to the drums:
- Be sure to set the drum on a flat surface
- Do not touch the shiny green area on the bottom of the drum.
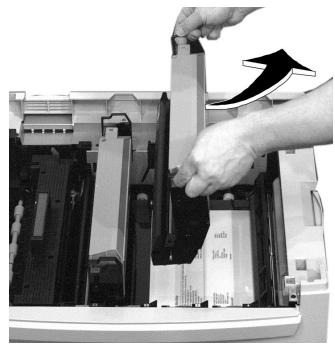
2

natural_image
Close-up of hands inserting a card into an open computer motherboard (no visible text or symbols)3
text_image
Instructional image showing a hand inserting a document into an open printer, with arrows indicating the process.4
natural_image
Close-up of a hand inserting a device into an open storage unit (no visible text or symbols)5
natural_image
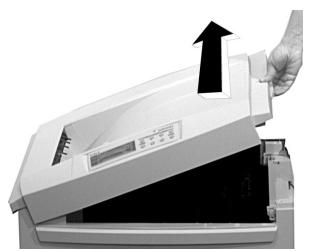
Hand holding a printer with a black arrow pointing to the lid area (no visible text or symbols)Clearing Paper Jams (cont.)
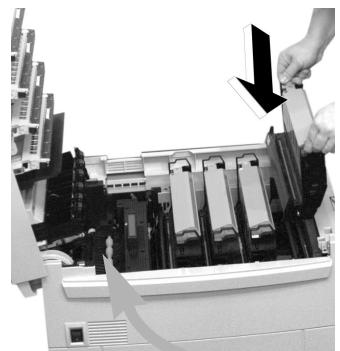
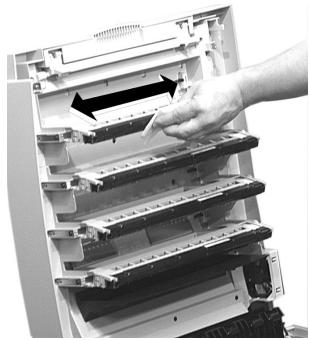
Jam 382
OPEN UPPER COVER 382:PAPER JAM
1
natural_image
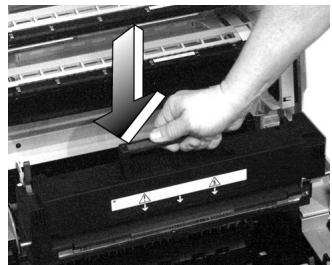
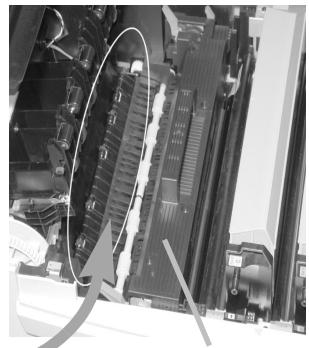
Hand inserting a printer into an open scanner, with an upward arrow indicating the process (no text or symbols visible)2
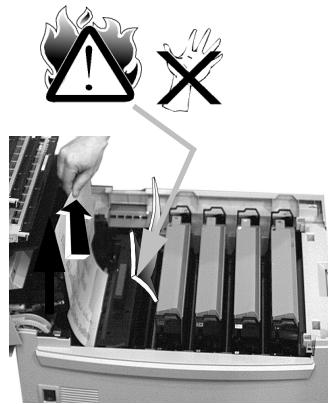
text_image
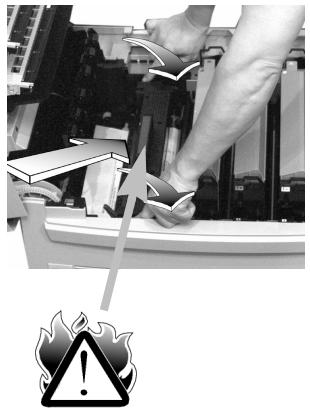
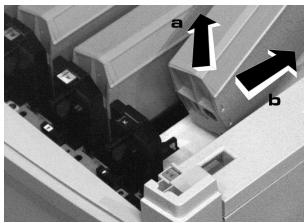
Diagram showing a hand pressing into a printer with warning symbols indicating explosion and explosion hazardIf the sheet is caught in the fuser
Caution!
To avoid damage to the drums:
- Be sure to set the drum on a flat surface
- Do not touch the shiny green area on the bottom of the drum.
a

natural_image
Close-up of hands operating a computer interface with an upward arrow indicating action (no visible text or symbols)b
natural_image
Close-up of hands using a tool to press or install electronic components, with warning symbol (no text or labels)Clearing Paper Jams (cont.)
C
natural_image
Person inserting a card into a printer holder, with an arrow indicating the device's direction (no text or symbols visible)d
natural_image
Close-up of a printer's paper being cut with warning labels (no readable text or symbols)e
natural_image
Close-up of a hand pressing down on a black electronic device with a white arrow pointing to the component (no visible text or symbols)f
natural_image
Close-up of hands installing or adjusting a device into a computer chassis (no visible text or symbols)3
natural_image
Close-up of a printer with a hand inserting a paper into it, showing the printer's front panel and control panel (no visible text or symbols)Clearing Paper Jams (cont.)
Jam 390
CHECK MP TRAY 390:PAPER JAM

natural_image
Person inserting a document into a printer (no visible text or symbols)Jam 391
CHECK TRAY 1 391:PAPER JAM
1
natural_image
Close-up of a hand inserting a card into a printer's case (no visible text or symbols)2
natural_image
Close-up of a hand pressing down on a printer's paper (no visible text or symbols)3
natural_image
Close-up of a printer's paper feed being inserted into a paper holder, showing paper movement arrows (no text or symbols)4
natural_image
Hand inserting a card into a printer case, showing paper movement arrows (no text or symbols)5
natural_image
Close-up of a hand inserting a printer into a slot, with an arrow indicating the insertion direction (no text or symbols visible)Clearing Paper Jams (cont.)
Duplex Paper Jams
CHECK DUPLEX
370: PAPER JAM
CHECK DUPLEX
371: PAPER JAM
CHECK DUPLEX
372: PAPER JAM
CHECK DUPLEX
383: PAPER JAM
1
natural_image
Person opening a printer with an arrow indicating the open lid (no visible text or symbols)Caution!
To avoid damage to the drums:
- Be sure to set the drum on a flat surface
- Do not touch the shiny green area on the bottom of the drum.
2
natural_image
Close-up of hands inserting a device into an open storage unit (no visible text or symbols)3
text_image
Black-and-white photo showing a hand inserting a paper into an open printer, with visible text and arrows indicating the process.Clearing Paper Jams (cont.
4
natural_image
Close-up of a printer's internal structure being cut with scissors, showing no visible text or symbols5
natural_image
Close-up of a mechanical assembly with visible components and a curved arrow indicating motion (no text or symbols)
6
natural_image
Close-up of a mechanical component with a hand adjusting a slot, showing internal structure and no visible text or symbols.7
Remove the jammed sheet.
8
natural_image
Close-up of a hand pressing down on a mechanical component with no visible text or symbols9

natural_image
Close-up of a printer with a hand pressing down on the cover (no visible text or symbols)Clearing Paper Jams (cont.)
10
natural_image
Close-up of a hand inserting a device into a plastic container with a curved arrow indicating the process (no text or symbols visible)11
natural_image
Close-up of a hand inserting a card into an open printer (no text or symbols visible)12
natural_image
Close-up of a hand inserting a card into a filelet into a printer (no visible text or symbols)13
natural_image
Close-up of a hand inserting a card into a printer drawer, with a downward arrow indicating compression (no text or symbols visible)Clearing Paper Jams (cont.)
14
text_image
Diagram showing printer operation with labeled parts A and B, indicating file or print direction15
natural_image
Person operating a printer with a paper filter being inserted (no visible text or symbols)Changing Toner Cartridges
INSTALL NEW TONER XXX: YYYY* TONER EMPTY
Toner Cartridge Order #s
- Black = 52114901
- Cyan = 52114902
- Magenta = 52114903
• Yellow = 52114904
Caution! Use only Type C5 Toner!
1
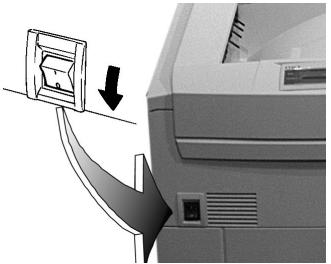
natural_image
Diagram showing a printer's front panel with a paperclip and arrow indicating compression or disassembly (no text or symbols present)2
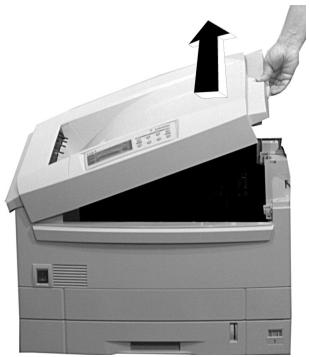
natural_image
Hand inserting a printer into an open slot, showing the paper's front panel and control panel (no text or symbols visible)3
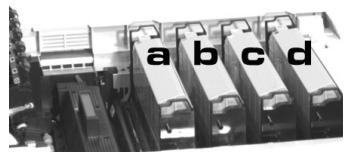
text_image
a b c da Yellow
b Magenta
c Cyan
d Black
4
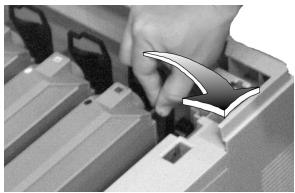
natural_image
Close-up of a hand inserting a component into a device casing (no visible text or symbols)5
natural_image
Close-up of mechanical components with labeled arrows (a and b) indicating specific parts, no readable text or symbols present.Changing Toner Cartridges (cont.)
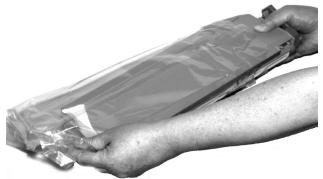
Important!! Discard the cartridge in accordance with local regulations.

natural_image
Hand inserting a printer into an open scanner, showing the printer's internal structure and the paper tray (no text or symbols visible)7
natural_image
Close-up of hands holding a transparent plastic bag with a small object, no visible text or symbols8
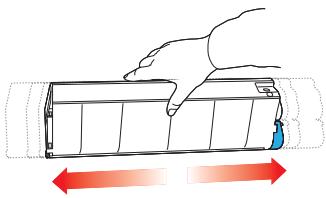
natural_image
Illustration of a hand pressing down on a cylindrical device with red directional arrows indicating movement (no text or symbols)9

natural_image
Technical line drawing of a mechanical component with a downward arrow indicating force or motion (no text or symbols)10
natural_image
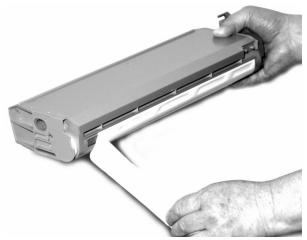
Hand holding a U-shaped paper or scroll with a metallic device, no visible text or symbols11
natural_image
Hand inserting a paper into an open printer with an arrow indicating the process (no visible text or symbols)12
natural_image
Close-up of a mechanical component with a black arrow pointing to a feature (no visible text or symbols)Changing Toner Cartridges (cont.)
13

natural_image
Close-up of a hand operating a mechanical device with gears and a base plate (no visible text or symbols)Caution!
Make sure the toner cartridge is firmly seated in the drum before moving the lever: the lever should move easily.
14
natural_image
Close-up of a hand inserting a component into a device casing (no visible text or symbols)15
natural_image
Close-up of a hand inserting a component into a server rack (no visible text or symbols)Caution!
Make sure the lock lever is pushed back as far as it will go before you close the cover. If you don't, the cover could damage the LED printhead.
16
natural_image
Close-up of hands operating a printer with a black arrow pointing to the lid (no visible text or symbols)17
natural_image
Simple line drawing of a mechanical component with an upward arrow, no text or symbols present.Important!
The TONER LOW or TONER EMPTY message should disappear. If it doesn't, try printing a page. If it still doesn't, reinstall the toner cartridge.
Error Messages
Some of the more common error messages appear below. For additional error messages, see your on-line User's Guide.
XXX TONER LOW
Appears on the second line of the display to indicate that color XXX toner cartridge is getting low.
What to Do
Be sure you have a replacement cartridge on hand.
Note: If you have changed the LOW TONER item in the SYSTEM CONFIG MENU to STOP, the Attention light will blink and you must either replace the toner cartridge immediately or press ON LINE to continue printing.
INSTALL NEW TONER nnn: XXX TONER EMPTY
The toner cartridge indicated (XXX) has run out of toner.
What to Do
Replace the toner cartridge (see page 46).
CHANGE XXX IMAGE DRUM
Appears on the second line of the display: color XXX image drum needs to be replaced.
What to Do
Replace the image drum, (See the instructions provided with the drum).
Error Messages (cont.)
INSTALL ADDITL MEMORY 420:MEMORY OVERFLOW
The amount of data in the file being printed has exceeded the printer's memory
What to Do
- Reduce the size of the file.
- Install additional memory (see your on-line User's Guide.)
LOAD mmmmmm 500:MANUAL PRINT
The printer has received a print job for printing from the MP Tray and no media is loaded in the tray.
What to Do
Load the requested media in the MP Tray, then press ON LINE.
tttttt NEAR END
Appears on the second line of the display to indicate that the media in feed path tttttt is almost out.
What to Do
Load more media before printing any large print jobs.
REMOVE THE PAPER 480:STACKER FULL
The top (face down) output tray is full.
What to Do
Remove the stack of printed sheets from the tray.
Error Messages (cont.)
REMOVE THE PAPER
nnn:FINISHER STACKER FULL
One of the stacker trays in the finisher is full:
- nnn = 481 Top (face up) Stacker Tray
- nnn = 482 Main (face down) Stacker Tray
What to Do
Remove the stack of printed sheets from the appropriate finisher tray.
REMOVE THE PAPER
nnn:TRAYX UNSUITABLE SIZE
The paper in Tray X is not a size that can be fed through the tray.
What to Do
Replace the paper in the tray with an appropriate size.
FUSER MISSING
Appears on the second line of the display to indicate that the fuser is not properly installed.
What to Do
- Open the top cover
- Press down on the fuser to he sure it is firmly in place.
Note: If the message still appears, push the blue release latches at either end of the fuser (between the fuser and the sides of the printer) toward the open cover and lift the fuser out. Then lower it back into the printer pushing down firmly. You should feel the latches at either end engage.
- Close the cover.
Error Messages (cont.)
XXX TONER SENSOR ERROR
Appears on the second line of the display to indicate that there is a problem with the color XXX toner sensor.
What to Do
Turn the printer off, then on again. If this does not clear the message, try doing it again. If the message still persists, call your local service dealer.
DISK FILE SYSTEM IS FULL
The printer's internal hard disk drive does not have enough memory to print the current document.
What to Do
Print out or delete some of the files on the printer's hard drive (see pages 27 and 28).
Note: You can also use OKI Storage Device Manager to print/delete files from the printer's hard disk drive: see your On-line User's Guide.
PRESS ONLINE SW INVALID DATA
The hard disk drive is no available and job spooling cannot take place.
What to DO
Press ON LINE.
Service and Support
First ...
Consult the dealer where you purchased your printer/color copy system.
Additional OKI Resources
▶ Available 24/7 (24 Hours a Day, 7 Days a Week)
- Visit http://my.okidata.com
- Call 1-800-654-3282.
OKI is a registered trademark of Oki Electric Industry Company, Ltd.
3M is a trademark or registered trademark of 3M. Adobe, and PostScript are trademarks of Adobe Systems, Inc. which may be registered in certain jurisdictions. American Express is a registered trademark of American Express Co.
Folex is a registered trademark of Foley Imaging. Great White is a registered trademark of Great White Consumer. HammerMill is a registered trademark of HammerMill. MasterCard is a registered trademark of MasterCard International, Inc.
Springhill is a registered trademark of International Paper. Strobe is a trademark of Sappi Limited. VISA is a registered trademark of Visa. Wausau Exact is a registered trademark of Wausau-Mosinee Paper Corp.