
XPJ - Projector Nextar - Free user manual and instructions
Find the device manual for free XPJ Nextar in PDF.
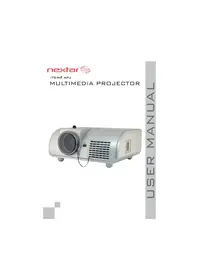


| Product Type | Video Projector |
| Brand | Nextar |
| Model | XPJ |
| Native Resolution | HD (1280 x 720) |
| Brightness | 2000 Lumens |
| Contrast Ratio | 1000:1 |
| Projection Size | 40 - 200 Inches |
| Throw Distance | 1.5 - 5 m |
| Aspect Ratio | 16:9 / 4:3 |
| Light Source | LED |
| Lamp Life | 30,000 Hours |
| Inputs | HDMI, USB, VGA, AV |
| Audio Output | 3.5 mm Jack |
| Built-in Speaker | 3W |
| Keystone Correction | ±15° Vertical |
| Focus Control | Manual Ring |
| Remote Control | Yes |
| Dimensions | 24 x 16.5 x 9 cm |
| Weight | 1.6 kg |
| Power Supply | AC 100-240V, 50/60Hz |
| Power Consumption | 120W |
| Maintenance & Cleaning | Clean lens with soft dry cloth; keep vents dust-free |
| Safety & Warnings | Do not look directly at light source; ensure ventilation |
| Spare Parts & Repairability | Replacement lamp, remote and power cable available |
| General Information | Portable multimedia projector for home entertainment |
Frequently Asked Questions - XPJ Nextar
User questions about XPJ Nextar
0 question about this device. Answer the ones you know or ask your own.
Ask a new question about this device
Download the instructions for your Projector in PDF format for free! Find your manual XPJ - Nextar and take your electronic device back in hand. On this page are published all the documents necessary for the use of your device. XPJ by Nextar.
USER MANUAL XPJ Nextar
Warning Statement
All contents subject to change without prior notice
WARNING
This equipment has been tested and found to comply with the limits for a Class A digital device, pursuant to Part 15 of the FCC Rules. These limits are designed to provide reasonable protection against harmful interference when the equipment is operated in a commercial environment. This equipment generates, uses, and can radiate radio frequency energy and, if not installed and used in accordance with the instruction manual, may cause harmful interference to radio communications. Operation of this equipment in a residential area is likely to cause harmful interference, in which case the user will be required to correct the interference at his/her own expense.
You are cautioned that any changes or modifications not expressly approved in this manual could void your authority to operate this equipment. The shielded interface cable recommended in this manual must be used with this equipment in order to comply with the limits for a digital device pursuant to Subpart B of Part 15 of FCC Rules.
WARNING
This is a Class A product. In a domestic environment, this product may cause radio interference, in which case the user may be required to take adequate measures.


CONTENT
Important Safety Instructions 4
Introduction 5
PROJECTOR FEATURES 5
SHIPPING CONTENTS----6
PROJECTOR EXTERIOR VIEW----7
Front / Upper View ----7
Left Side View 7
Right Side View 8
Lower / Bottom View 8
CONTROLS AND FUNCTIONS 9
External Control Panel 9
Remote Control 10
Remote control effective range---- 11
Replacing the remote control battery 11
Connection----12
CABLE CONNECTION 12
Connecting video source devices 12
Operation 14
START-UP 14
SWITCHING INPUT SIGNAL 14
SHUTDOWN 15
MENU OPERATION 16
PICTURE MENUS 18
Troubleshooting 20
Maintenance----21
Specifications----22
PROJECTOR SPECIFICATIONS 22
Dimensions 23
Warranty----24
LIMITED WARRANTY 24
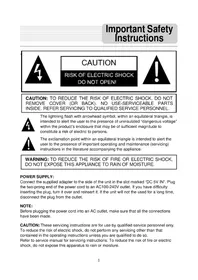
Important Safety Instructions
λ Operate the unit on 100–240 V AC, 50/60 Hz to DC 12V 7A power adaptor.
λ Should any liquid or solid object fall into the cabinet, unplug the unit and have it checked by qualified personnel before operating it further.
λ Unplug the unit from the wall outlet or set the power switch to the OFF position if it is not to be used for several days.
λ To disconnect the cord, pull it out by the plug. Never pull the cord itself.
λ The wall outlet should be near the unit and easily accessible.
The unit is not disconnected from the AC power source (mains) as long as it is connected to the wall outlet with the power switch set to the OFF position.
λ Do not look into the lens while the lamp is on.
Do not place your hand or objects near the ventilation holes. The air coming out is hot.
λ Avoid using an extension cord with a low voltage limit, as it may cause short-circuiting and physical injury.
Do not catch your finger between the unit and surface of the floor when moving the projector installed on the floor.
λ Be careful not to catch your finger in the cooling fan.
Introduction
Projector Features
The projector integrates high-performance optical engine projection and a user-friendly design to deliver high reliability and ease of use.
The projector offers the following features:
λ Quick cooling function for reducing projector cooling time;
λ Compact and portable unit;
λ High quality short throw lens;
λ Adjustable color balance control for data/video display;
λ Halogen 75W projection lamp with 3200K color;
λ Ability to display 16.7 million colors;
λ Multi-language on-screen menus;
λ Built-in speaker providing mixed mono audio when an audio input is connected;
λ Powerful AV function to provide a high quality AV picture;
λ External Power Adapter with Universal AC Voltage input 100–240V, 12VDC at 7A output;
λ The apparent brightness of the projected image will vary depending on the ambient lighting conditions, selected input source contrast/brightness settings, and the projection distance (to which it is directly proportional).
The lamp brightness will decline over time and may vary within the lamp manufacturer's specifications. This is normal behavior and should be expected.
Shipping Contents
The projector is shipped with the cables required for connection to a PC and video output devices. Carefully unpack the box and verify that you have all of the items shown below. If any of these items are missing, please contact your place of purchase.
The supplied accessories will be suitable for your region, and may differ from those illustrated.

Projector

User's manual

AC power adapter

Audio cable Power cord S-Video cable


Remote control with battery
Pull the tab before using the remote control.

Projector exterior view
Front / Upper View
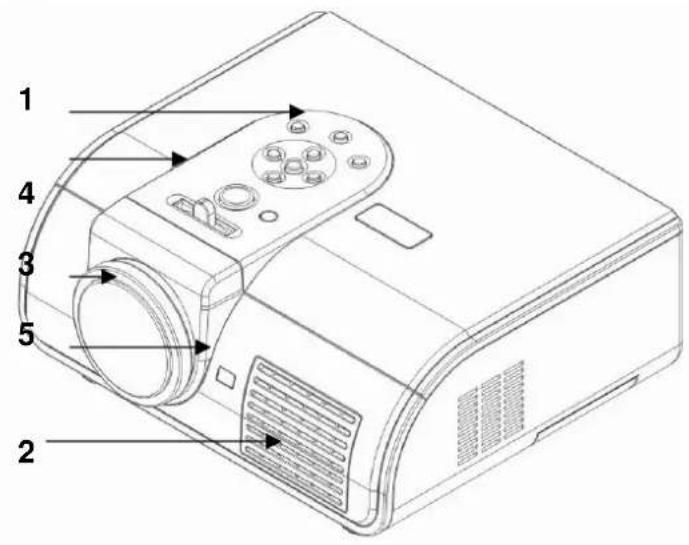
- External control panel
(See "External control panel" on
page 9 for detailed information.) - Ventilation grill
- Lens cap
- Focus adjuster
- Front IR remote sensor
Left Side View
Refer to "Connection" on page 12 for more information on making connections to various equipment.

-
12VDC Power jet input
-
Main Power Switch
-
3.5mm Audio in Phone Jack
-
Video input socket
- S-Video input socket
Right Side View

- 2W mono speaker 12. Lamp cover
Lower / Bottom View

- Lamp Cover 14. Ceiling mount and adjustable feet
Controls and Functions
External Control Panel

- Focus adjuster (lens focus can be adjusted by this key).
- Power (Refer to "Start up" on page 14 and "Shutdown" on page 15 for more information.)
Turns the projector on or off. - Right key. (OSD control only).
- Down key. (OSD control only).
- Volume increase. Digital volume control.
- OSD Menu. Menu recalls for OSD.
- Volume decrease. Digital volume control.
- OSD Enter/Source (Refer to "Switching input signal" on page 14 for more information.)
Sequentially selects the input signal Video, S-Video, Component Video, or RGB. - Left Key. (OSD control only).
- Up key. (OSD control only).
- Top infrared sensor.
Remote Control

POWER – Turns the projector on or off.
SOURCE – Sequentially selects the input signal Video, S-Video, Component Video, or RGB.
MUTE – Audio mute on or off.
Display – Display the video standard and mode.
UP – Up key for OSD control.
LEFT – Left key for OSD control.
RIGHT – Right key for OSD control.
DOWN – Down key for OSD control.
ENTER – Enter key for OSD control.
VOL+ – Volume increase. Digital volume control.
VOL- – Volume decrease. Digital volume control.
MODE – Sequentially selects video mode Dynamic, Static, Theater, or Game.
MENU – OSD menu recall.
ALIGNMENT – Display alignment signal for focus adjustment.
Remote control effective range
Infra-Red (IR) remote control sensors are located on the front and the back of the projector.
The remote control must be held at an angle within 30 degrees of the projector's IR remote control sensors to function correctly. The distance between the remote control and the sensors should not exceed 6 meters (\~20 feet).

Make sure that there are no obstacles between the remote control and the IR sensors on the projector that might obstruct the infra-red beam.
Replacing the remote control battery
- Pull out the battery holder.
- Insert the new battery into the holder. Note:
The positive polarity should face outward. - Push the holder into the remote control until it clicks into place.
λ Avoid excessive heat and humidity. There may be battery damage if the battery is incorrectly replaced.
λ Replace only with the same or equivalent type

battery, as recommended by the battery manufacturer.
λ Dispose of the used battery according to the manufacturer's instructions.
λ Never throw a battery into a fire. There may be danger of an explosion.
If the battery is dead, or if you will not be using the remote control for a long time, remove the battery to prevent damage to the remote control from the possibility of battery leakage.
Connection
When connecting a signal source to the projector, be sure to:
- Turn all equipment off before making any connections;
- Use the correct signal cables for each source; and
- Ensure that the cables are firmly inserted.
In the connections shown below, some cables may not be included with the projector (see "Shipping Contents" on page 6). They are commercially available from electronics stores.
Cable connection
Connecting video source devices
This section describes how to connect the projector to video source devices using video cables. Video cable connections are recommended for video presentations.
You can connect your projector to various video source devices that provide any one of the following output sockets:
λ S-Video
λ Video (composite)
You need only connect the projector to a video source device using just one of the above connecting methods; however, each provides a different level of video quality. The method you choose will most likely depend upon the availability of matching terminals on both the projector and the video source device as described below:
Better video quality
The S-Video method provides a better quality analog video than standard composite video.
If you have both composite Video and S-Video output terminals on your video source device, you should elect to use the S-Video option.
Lesser video quality
Composite Video is an analog video and will result in a perfectly acceptable, but less than optimal, result from your projector, being the lesser video quality of the available methods described here.
Connecting audio
The projector has a built-in mono speaker that is designed to provide basic audio functionality accompanying data presentations for business purposes only. It is not designed for, nor intended for, stereo audio reproduction use as might be expected in home theatre or home cinema applications. Any stereo audio input (if provided) is mixed into a common mono audio output through the projector speaker.
If you have a separate sound system, you will most likely want to connect the audio output of your video source device to that sound system, instead of to the mono audio projector.
The audio connections illustrated in the following sections are provided for informational purposes only. You need not connect audio to the projector if there is an alternate sound system available, or if audio is not required.
Operation
Start-up
- Plug the power cord into the projector and into a wall socket. Turn on the wall socket switch (where fitted). Check that the Power indicator on our projector adapter lights orange after power has been applied.
- Plug the DC plug into the projector's 12VDC socket. Remove the lens cap. If it is left on, it could become deformed due to the heat produced by the projection lamp.
- Switch on the main power at the left side of the projector. Check that the Power inductor on the projector lights green.
- Press the Power button on the remote control or projector to start the unit. The Power indicator lights off and lights green after 3 seconds when the unit is on.
- The start-up procedure takes about 5 seconds after pressing Power, and the image will appear as normal (If necessary). Rotate the focus ring to adjust the image clearness.
If the projector is still hot from previous activity, it will run the cooling fan for approximately 45 seconds before energizing the lamp.
-
Switch all of the connected equipment on.
-
You can also press Source on the projector or remote control to select your desired input signal. For more information, please refer to "Switching input signal" on page 14.
If the frequency/ resolution of the input signal exceed the projector's operating range, you will see the message "Out Range" displayed on a blue screen.
Switching input signal
The projector can be connected to multiple devices at the same time; however, it can only display one at a time. To cycle through the available input sources, press the Enter button on the projector control panel, or the Source button on the remote control. The selected source name will display at the Top-Left of the screen for 10 seconds after each button press.
The brightness level of the projected image will change accordingly when you switch between different input signals. Data (graphic) "PC" presentations using mostly static images are generally brighter than "Video" presentations using mostly moving images (movies).

The input type affects the options available for the Application Mode. See "Selecting an application mode" on page 18 for details.
Shutdown
- Press Power to turn the projector off.
- The Power indicator light flashes green and the lamp shuts down. The fans continue to run for approximately 45 seconds to cool down the projector.
To protect the lamp, the projector will not respond to any commands during the cooling process.
To shorten the cooling time, you can also activate the Quick Cooling function.
3. Switch off the main Power at the left side and disconnect the power cord at the adaptor from the wall socket.
Do not unplug the adaptor or power cord before the projector shutdown sequence is complete, or during the 45-second cooling down process.
If the projector is not properly shut down, you risk damaging the lamp. Do not move the projector while the lamp is hot.
Menu operation
Menu system
OSD MENU1
 | VideoS-Vide |
 | DynamicStaticTheaterGame |
 | Front/UpFront/DownRear/UpRear/Down |
OSD Menu 2
 | 0 to 100 Brightness (Default 50) |
 | 0 to 100 Contrast (Default 50) |
 | 0 to 100 Color (Default 50) |
| OSD Menu 3 | |
 | 0 to 100 Hue (Default 50) |
 | EnglishFrenchGermanSpanishPortugueseItalian |
 | System Default |
Picture menus
Some picture adjustments are available only when certain input sources are in use.
FUNCTION
(Default setting
DESCRIPTION
/ Value)
Source Input 1. Video Input: RCA composite video
- S-Video Input: Mini DIN5 S-Video
Video Mode
- Dynamic (Default): Is suitable for enjoying colorful movies and TV in a blackened living room lighting level environment.
- Static Mode: Is suitable for enjoying DVD movies and TV best viewed in a darkened (not bright) lounge room environment.
- Theater Mode: Is suitable for playing cinema movies in a totally darkened living room lighting level environment.
- Gaming Mode: Is suitable for playing gamebox-based video games in a normal living room lighting level environment.
Flip/Mirror
-
Front/Down: Front projection on floor
-
Front/Up: Front projection on ceiling
- Rear/Up: Rear projection on ceiling
- Rear/Down: Rear projection on floor
Brightness
Adjusts the brightness of the image. The higher the value, the brighter the image; the lower the setting, the darker the image. Adjust this control so that the black areas of the image appear as black and the detail in the dark areas is visible.


Contrast
Adjusts the degree of difference between dark and light in the image. The higher the value, the greater the contrast. Use this to set the peak white level after you have previously adjusted the Brightness setting to suit your selected input and viewing environment.


Color Increases or decreases the color intensity of the image.
| Hue Adjusts the color tones of the image. The higher the value, the more greenish the image becomes. The lower the value, the more reddish the image becomes. |
| Language Language sets the language for the OSD control menus.Use Left / Right on the projector, or Left / Right on the remote control, to select your desired language. |
| Default Returns all settings to the factory preset values. |
Troubleshooting
THE PROJECTOR DOES NOT TURN ON.
| Cause Remedy | |
| There is no power from the power cable. | Plug the power cord into the AC inlet on the projector, and plug the power cord from the power outlet. If the power outlet has a switch, make sure that it is switched on. |
| Attempting to turn the projector on again during the cooling process. | Wait until the cooling down process has completed. |
NO PICTURE.
| Cause Remedy | |
| The video source is not turned on or connected correctly. | Turn the video source on and check that the signal cable is connected correctly. |
| The projector is not correctly connected to the input source device. | Check the connection. |
| The input signal has not been correctly selected. | Select the correct input signal with the Source key on the projector or remote control. |
| The lens cap is still attached to the lens. | Remove the lens cap. |
BLURRED IMAGE.
| Cause Remedy | |
| The projection lens is not correctly focused. | Adjust the focus of the lens using the focus adjuster. |
| The projector and the screen are not aligned properly. | Adjust the projection angle and direction, as well as the height of the unit (if necessary). |
| The lens cap is still attached to the lens. | Remove the lens cap. |
REMOTE CONTROL DOES NOT WORK.
| Cause Remedy | |
| The battery is out of power. | Replace the battery with a new one. |
| There is an obstacle between the remote control and the projector. | Remove the obstacle. |
| You are too far away from the projector. | Stand within 6 meters (19.5 feet) of the projector. |
Maintenance
Care of the projector
Your projector needs little maintenance. The only thing you need to do on a regular basis is to keep the lens clean.
Never remove any parts of the projector except the lamp. Contact your dealer if other parts need replacing.
Cleaning the lens
Clean the lens whenever you notice dirt or dust on the surface.
λ Use a canister of compressed air to remove dust.
If there is dirt or smearing, use lens-cleaning paper or moisten a soft cloth with lens cleaner and gently wipe the lens surface.
Never rub the lens with abrasive materials.
Cleaning the projector case
Before you clean the case, turn the projector off using the proper shutdown procedure as described in "Shutdown" on page 15, and unplug the power cord.
To remove dirt or dust, wipe the case with the supplied cleaning cloth.
To remove stubborn dirt or stains, moisten a soft cloth with water and a neutral PH detergent. Then wipe the case.
Never use wax, alcohol, benzene, thinner or other chemical detergents. These can damage the case
Storing the projector
If you need to store the projector for an extended time, please follow the instructions below:
λ Make sure the temperature and humidity of the storage area are within the recommended range for the projector. Please refer to "Specifications" on page 22, or consult your dealer about the range.
λ Retract the adjuster feet.
λ Remove the batteries from the remote control.
λ Pack the projector in its original packing or equivalent.
Transporting the projector
It is recommended that you ship the projector with its original packing or equivalent. When you carry the projector yourself, please use the original box or the soft carry case that is provided.
Specifications
Projector specifications
* All specifications are subject to change without notice.
| Display Technology | Single Liquid Crystal on Silicon (LCoS) Display |
| Resolution | 640 x 480 x RGB |
| Contrast Ratio | 600:1 (Full On/Full Off) |
| Lamp Type and Life | 75W Halogen, 1000 hours STD |
| Maximum Resolution | Video: 480i, 576i |
| Dimensions (WxHxD) | 9.44 x 3.54 x 7.9 inches240mm x 90mm x 200mm |
| Aspect Ratio | 4:3 Standard |
| Noise Level | <32dB |
| Projection Lens | f=24.0 - 30.1 mm, F/2.4-2.50 |
| Image Size | 30 to 90 inch (1.5 to 3 meters) |
| Video Compatibility | NTSC, PAL, 480i, 576i |
| Displayable Colors | 8-bit per channel color processing |
| Projection Method | Front/rear/ceiling mount/table top |
| Power Supply | AC/DC Adapter, 100~240VAC, 50-60Hz, 12VDC 7A |
| Power Consumption | 84 watts,<5 watts in standby mode |
| Operating Temperature | 23 to 102 F (-5 to 42C), 80% maximum humidity |
| I/O Connectors | S-Video, 3.5mm Line-in, Triple IR receivers |
| OSD Language | English, French, German, Spanish, Portuguese, Italian |
Dimensions

Unit: mm
Warranty
Limited Warranty
NEXTAR warrants this product against any defects in material and workmanship, under normal usage and storage.
Proof of purchase date will be required with any warranty claim. In the event this product is found to be defective within the warranty period, NEXTAR's only obligation—and your exclusive remedy—shall be replacement of any defective parts (labor included). To obtain warranty service, immediately notify the dealer from which you purchased the product of any defects.
Important: The above warranty shall be void if the customer fails to operate the product in accordance with NEXTAR's written instructions, especially the requirement that ambient humidity must be between 10% and 90%, temperature between 0 degrees centigrade and 40 degrees centigrade, altitude lower than 10000 feet, and avoidance of operation of the projector in a dusty environment. This warranty gives you specific legal rights, and you may have other rights that vary from country to country.
Please refer to the warranty card. Limited warranty is subject to change without notice.
Nextar may find it necessary to modify, amend or otherwise change or update this manual.
We reserve the right to do this any time, without any prior notice. All specifications and features are subject to change without notice.
All screen shots shown are simulated and may not represent the actual screen on production units sold to consumers.
For instruction manuals, updated drivers or other information, be sure to visit our website at:
www.Nextar.com
Or write us at:
Nextar
1661 Fairplex Dr.
La Verne, CA USA 91750



- WARNING STATEMENT
- WARNING
- CONTENT
- IMPORTANT SAFETY INSTRUCTIONS
- INTRODUCTION
- CONNECTION
- OPERATION
- TROUBLESHOOTING
- MAINTENANCE
- SPECIFICATIONS
- DIMENSIONS
- WARRANTY
- PROJECTOR FEATURES
- SHIPPING CONTENTS
- PROJECTOR EXTERIOR VIEW
- FRONT / UPPER VIEW
- LEFT SIDE VIEW
- CONTROLS AND FUNCTIONS
- EXTERNAL CONTROL PANEL
- REMOTE CONTROL
- REMOTE CONTROL EFFECTIVE RANGE
- REPLACING THE REMOTE CONTROL BATTERY
- CABLE CONNECTION
- CONNECTING VIDEO SOURCE DEVICES
- BETTER VIDEO QUALITY
- LESSER VIDEO QUALITY
- CONNECTING AUDIO
- START-UP
- SWITCHING INPUT SIGNAL
- SHUTDOWN
- MENU OPERATION
- MENU SYSTEM
- OSD MENU
- PICTURE MENUS
- CARE OF THE PROJECTOR
- CLEANING THE LENS
- CLEANING THE PROJECTOR CASE
- STORING THE PROJECTOR
- TRANSPORTING THE PROJECTOR
- PROJECTOR SPECIFICATIONS
- LIMITED WARRANTY
Brand : Nextar
Model : XPJ
Category : Projector