OPTOMA EP727 - Projector

EP727 - Projector OPTOMA - Free user manual and instructions

Find the device manual for free EP727 OPTOMA in PDF.

📄 57 pages English EN Download 💬 AI Question 12 questions ⚙️ Specs
Notice OPTOMA EP727 - page 1
Pick your language and provide your email: we'll send you a specifically translated version.
Product type DLP projector
Brand Optoma
Model EP727
Technology TI DLP 0.55" single chip
Supported resolutions VGA (640x480) to UXGA (1600x1200), Mac compatible
Video compatibility NTSC, PAL, SECAM, HDTV (720p, 1080i)
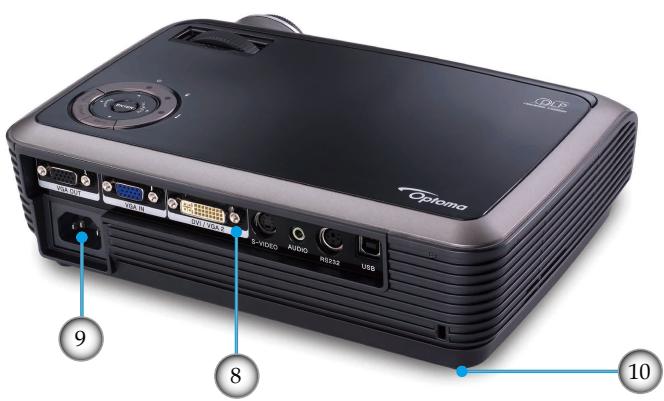
Video inputs DVI-I (HDCP), VGA, S-Video, composite (via Y cable)
Audio inputs 1 x audio input jack
Output 1 x VGA (monitor loop-through)
Built-in speaker 1 Watt
Control IR remote with laser pointer, control panel
Keystone correction Digital vertical, +/- 18 degrees
Image functions Digital zoom, manual focus, display modes (Presentation, Brightness, Film, RGB, User)
Light source Lamp (replaceable)
Power consumption Standard or Bright mode (extends lamp life)
Power supply Mains plug (1.8m power cord)
Dimensions (approx.) Not specified in the manual, typical for a portable projector
Weight (approx.) Not specified in the manual, approximately 2-3 kg
Security 4-digit password lock, timer security, Kensington lock
Cleaning Soft dry cloth, mild detergents only, do not use solvents
Maintenance Lamp replacement (read manual), lamp counter reset via OSD
Included accessories 1.8m power cord, VGA cable, USB cable (EMEA), Y-type cable (EMEA/ASIA), remote with batteries, carrying case, manual
Installation Ceiling mount possible (optional kit)

Frequently Asked Questions - EP727 OPTOMA

How to turn on the Optoma EP727 projector?
Remove the lens cap, plug in the power cord. The power LED turns orange. Press the Power button on the control panel or remote. The LED blinks green, then the startup screen appears. Then turn on your source.
How to turn off the projector?
Press the Power button. A message 'Power Off?' appears. Press again to confirm. The cooling cycle lasts about 10 seconds, the LED turns orange. You can then unplug the power cord.
How to clean the projector lens?
Turn off the projector and unplug it. Use a soft dry cloth to wipe the lens. Do not use abrasive products, solvents, or liquid cleaners. For the casing, a cloth dampened with mild detergent is sufficient.
How to correct a tilted image (keystone)?
Use the Keystone +/- buttons on the remote to adjust the image vertically. The adjustment is digital, +/- 18 degrees. You can also adjust the height with the elevator feet under the projector.
What is the maximum supported resolution?
The projector supports up to UXGA (1600 x 1200) in sub-sampling mode. It is compatible with VGA, SVGA, XGA, SXGA+, and WXGA resolutions, as well as Mac signals.
How to connect a computer to the projector?
Use a VGA cable (included) to connect the computer output to the VGA input of the projector. You can also use the DVI-I port (with DVI-VGA adapter). The projector automatically detects the source. If necessary, press Source to select.
How to replace the projector lamp?
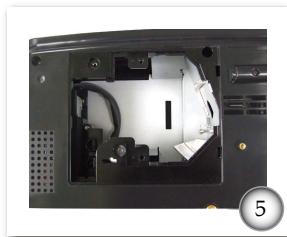
Turn off the projector and let it cool for at least 30 minutes. Unplug the power cord. Remove the lamp cover by unscrewing 2 screws, then remove the 2 screws of the lamp module. Pull the handle to extract the module. Install the new module in reverse order. Reset the lamp counter via the menu Options > Lamp Settings > Lamp Reset.
What to do if the image is blurry?
Remove the lens cap. Turn the focus (focal) ring on the lens until the image is sharp. The projection distance should be between 1.2 and 12 meters. If necessary, use the zoom ring to adjust the size.
How to use the password security function?
Go to the menu Options > Security. Enable security by selecting On. Enter a 4-digit password (default 1234). You can also set a Timer security to limit usage time. Use the numeric keys on the remote.
Why is the remote not working?
Check that the batteries are inserted correctly and are not low. Make sure there are no obstacles between the remote and the projector (IR receivers). Stay within 6 meters and within an angle of +/- 22.5 degrees from the projector.

User questions about EP727 OPTOMA

2 questions about this device. Answer the ones you know or ask your own.

Ask a new question about this device

The email remains private: it is only used to notify you if someone responds to your question.

What is the native resolution of the OPTOMA EP727 projector?
Frequently Asked Questions - 01/01/2026
Response Notice-Facile

The native resolution of the OPTOMA EP727 projector is 1024 x 768 pixels, corresponding to the XGA (Extended Graphics Array) standard. This native resolution represents the exact number of pixels physically displayed by the projector's DMD (Digital Micromirror Device) sensor, ensuring the best image quality and maximum clarity.

To achieve optimal display quality, it is recommended to set your video source (desktop computer, laptop, media player, etc.) to the native XGA resolution. The projector supports sync frequencies of 60, 70, 75, and 85 Hz in XGA mode, whether connected via analog (VGA) or digital (DVI).

If your source uses a different resolution, the projector will automatically resize. This may result in a slight loss of sharpness or image distortion. The projector remains compatible with other standard resolutions (VGA at 640x480, SVGA at 800x600, WXGA, SXGA, etc.), but the native XGA resolution always provides the best result.

To benefit from the best performance, avoid input sources with resolutions that are very different from XGA, such as very high resolutions (UXGA 1600x1200) which will undergo significant compression.

Respond (be the first)
How to resolve the 'partial image' message on an OPTOMA EP727 projector with a VGA source?
Frequently Asked Questions - 01/01/2026
Response Notice-Facile

The 'partial image' message on the OPTOMA EP727 projector connected via VGA means that the image is not displayed correctly or does not fill the screen. The EP727 projector has a native resolution of 1024x768 pixels (XGA) and accepts VGA inputs up to UXGA (1600x1200).

Step 1: Use the projector's Re-Sync function

  • Press the Re-Sync button located on the projector's control panel or on the remote control. This function automatically synchronizes the projector with the VGA input signal and often resolves the partial display issue.

Step 2: Check and adjust your computer's resolution

  • The computer or VGA device must send a compatible resolution. For Windows: go to Control Panel > Display > Settings and ensure that the resolution is set to 1024x768 or lower (such as 800x600 or 640x480).
  • If you are using a resolution higher than UXGA (1600x1200), you must reduce it.
  • If you are using a laptop, press the key combination to switch the video output (for example, [Fn]+[F4] for Compaq/Gateway/IBM, [Fn]+[F8] for Dell, [Fn]+[F7] for Hewlett-Packard).

Step 3: Adjust the image format settings in the projector menu

  • Press Menu on the remote control or control panel.
  • Go to Image > Search.
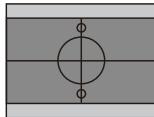
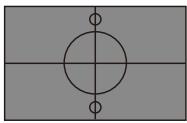
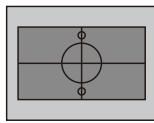
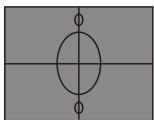
  • Try the different available formats: 4:3 (standard), 16:9-I or 16:9-II (wide screen), or Window. Select the format that matches your content.
  • You can also use Image > Zoom or Image > H Position/V Position to adjust the size and position of the projected image.

Step 4: Check the VGA connection

  • Ensure that the VGA cable is securely connected at both ends (VGA/PERITEL connector on the projector and VGA output from the computer).
  • Test with another VGA cable if possible to rule out a faulty cable issue.
  • Check that no pin on the connector is bent or broken.

Step 5: Restart the equipment

  • If the problem persists after the previous steps, turn off the OPTOMA EP727 projector, wait 10 seconds, and then turn it back on. Also, restart your computer or source device.

If the partial image issue persists after these checks, contact Optoma support, as this may indicate a fault with the display module or the VGA input of the projector.

Respond (be the first)

Download the instructions for your Projector in PDF format for free! Find your manual EP727 - OPTOMA and take your electronic device back in hand. On this page are published all the documents necessary for the use of your device. EP727 by OPTOMA.

USER MANUAL EP727 OPTOMA

natural_image Symbolic illustration of a computer monitor with a red X mark and eye, enclosed in an oval (no text or symbols)

UXGA, SXGA+, SXGA, WXGA, XGA, SVGA, VGA

natural_image Exterior view of a projector with visible lens and control knobs (no text or symbols)
natural_image Black compact electronic device case with 'Optoma' branding on front (no other text or symbols visible)
Optica 9 8 10

OPTOMA EP727 - 2

Press power key again.

OPTOMA EP727 - 3

natural_image Close-up of a projector lens with blue indicator lights (no text or symbols visible)
natural_image Simple geometric diagram with a circle centered at the intersection of two perpendicular lines, no text or symbols present.

ou
OPTOMA EP727 - 4

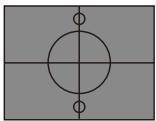
16:9-I Recherche
OPTOMA EP727 - 5

OPTOMA EP727 - 6

natural_image Simple geometric diagram with a circle centered at the intersection of two perpendicular lines, no text or symbols present.

ou
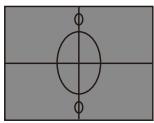
OPTOMA EP727 - 7

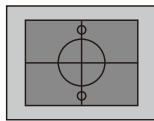
16:9-II Recherche
OPTOMA EP727 - 8

OPTOMA EP727 - 9

window Recherche
OPTOMA EP727 - 10

Image

Luminosité Image MENU OPTIONS Image Recherche 4:3 Suivi 0 Zoom 0 Position H 0 Position V 0 Trapèze V 0 UpDown Select Menu Off

Suivi

  1. Make sure air in and outlets are not blocked.

  2. Make sure the environment temperature is under 40 degree C.

If the problem persists in spite of the above.

Please contact a service centre for repair.

Remplacement de la lampe:

OPTOMA EP727 - Suivi - 1

If ceiling mounted, use caution when opening lamp panel - Please see user manual for details

natural_image Close-up of a device with green arrows indicating motion or force, showing a screen and antenna (no text or symbols)
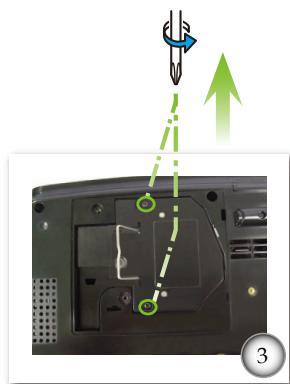
OPTOMA EP727 - Suivi - 2

natural_image Close-up of a computer monitor showing internal components and a green upward arrow indicating motion (no text or symbols)
OPTOMA EP727 - Suivi - 3

natural_image Interior view of a device casing with internal components and ventilation slots (no visible text or symbols)

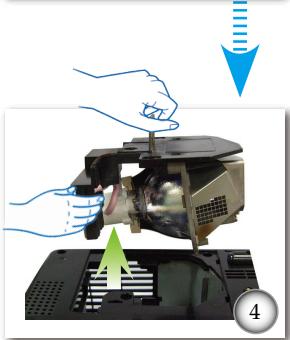
OPTOMA EP727 - Suivi - 4

OPTOMA EP727 - Suivi - 5

natural_image Illustration of a hand using a device to press or install an electronic device, with no visible text or symbols.
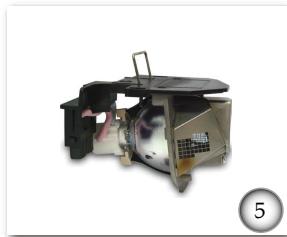
OPTOMA EP727 - Suivi - 6

natural_image Exterior view of a portable electronic device with open lid and internal compartments (no visible text or symbols)
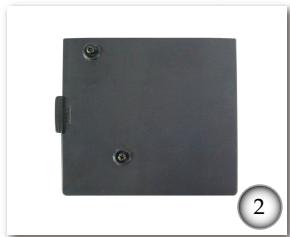
OPTOMA EP727 - Suivi - 7

natural_image Black rectangular object with three small circular holes, labeled '2' in a circle (no text or symbols on the object itself)
natural_image Line drawing of a 16-pin D-sub connector (no text or symbols)

5

SEND from projector automatically

232 ASCII CodeHEX CodeFunctionProjector ReturnDescription
when standby/warming/cooling/out of rangeINFOnn : 0/1/2/3 = Standby / Warming / Cooling / Out of Range

READ from projector

232 ASCII CodeHEX CodeFunctionProjector ReturnDescription
~XX150 17E 30 30 31 35 30 20 31InformationOKabbbcddddea: 1/0=On/Offbbb: LampHourc: source 0/1/2/3/4/5/6= None/DVI-D/VGA1/VGA2/SCART/S-Video/Videodddd: FW versione: Ddisplay mode
~XX151 17E 30 30 31 35 31 20 31Model nameOKnn: 0/1/2/3 EP721 / EP723 / EP727 / EP728

Unit A, 27/F Dragon Centre,

79 Wing Hong Street, Tél : +852-2396-8968

Table of contents Click a title to access it
Manual assistant
Powered by Anthropic
Waiting for your message
Product information

Brand : OPTOMA

Model : EP727

Category : Projector