
Eee Slate - Tablet ASUS - Free user manual and instructions
Find the device manual for free Eee Slate ASUS in PDF.


| Product Type | Tablet |
| Brand | Asus |
| Model | Eee Slate (EP121) |
| Display Size | 12.1 inches |
| Display Resolution | 1280 x 800 pixels |
| Processor | Intel Atom Z670 (1.5 GHz) |
| RAM | 2 GB DDR2 |
| Storage | 32 GB SSD |
| Operating System | Windows 7 Home Premium |
| Battery Type | 2-cell Li-polymer (33 Whr) |
| Battery Life | Up to 8 hours (typical usage) |
| Dimensions (W x D x H) | 325 x 220 x 17 mm |
| Weight | 1.16 kg |
| Connectivity | Wi-Fi 802.11 b/g/n, Bluetooth 3.0 |
| Ports | 1 x USB 2.0, 1 x mini HDMI, 1 x microSD slot, 1 x audio combo |
| Camera | Front-facing 1.3 MP |
| Stylus | Integrated digitizer with Wacom technology (battery-free pen) |
| Audio | Built-in stereo speakers and microphone |
| Power Supply | 30 W AC adapter |
| Color | Silver |
| Warranty | 1-year limited |
| Cleaning Instructions | Use a soft, lint-free cloth slightly dampened with water or screen cleaner. Avoid abrasives. |
| Safety Notice | Do not expose to liquids or extreme temperatures. Use only the provided charger. |
Frequently Asked Questions - Eee Slate ASUS
User questions about Eee Slate ASUS
0 question about this device. Answer the ones you know or ask your own.
Ask a new question about this device
Download the instructions for your Tablet in PDF format for free! Find your manual Eee Slate - ASUS and take your electronic device back in hand. On this page are published all the documents necessary for the use of your device. Eee Slate by ASUS.
USER MANUAL Eee Slate ASUS
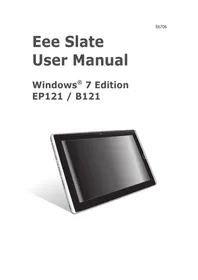
Eee Slate User Manual
Windows® 7 Edition EP121 / B121

Table of Contents
About This User's Manual ....iv
Notes for This Manual ....v
Safety Precautions......vi
Chapter 1: A Quick Look
Package Contents....1-2
Your Eee Slate 1-3
Chapter 2: Getting Started
Charging the Eee Slate 2-2
Turning your Eee Slate ON/OFF 2-3
Starting up for the first time....2-3
Desktop....2-5
Getting connected wirelessly 2-6
Chapter 3: Using the Eee Slate
Adjusting Eee Slate with ControlDeck 3-2
Using Bluetooth....3-3
System Recovery....3-5
Using the Recovery DVD 3-5
Creating and using the USB recovery disk 3-6
Trusted Platform Module (TPM)(on selected models) 3-7
TPM Applications 3-7
Enabling / disabling TPM Support....3-8
Clearing TPM Secured Data 3-8
Initializing the Infineon Security Platform Software....3-9
Chapter 4: Accessories
Eee Slate Case....4-2
Refill Nibs and Nib Remover....4-4
Appendix
Declarations and Safety Statements ......A-2
FCC Regulations:......A-2
RF Exposure Information (SAR)......A-3
IC Regulations:....A-4
IMPORTANT NOTE:....A-4
Declaration of Conformity (R&TTE directive 1999/5/EC) ......A-5
IC Radiation Exposure Statement for Canada ......A-6
Wireless Operation Channel for Different Domains ......A-7
France Restricted Wireless Frequency Bands ......A-7
UL Safety Notices....A-8
Power Safety Requirement ......A-9
REACH Notice....A-9
Global Environmental Regulation Compliance and Declaration .....A-10
Takeback Services....A-10
Nordic Lithium Cautions (for lithium-ion batteries)....A-11
Copyright Information......A-13
Limitation of Liability....A-14
Service and Support......A-14
Notice on Upgrading EP121 / B121 ......A-14
About This User's Manual
You are reading the Eee Slate User's Manual. This User's Manual provides information regarding the various components in the Eee Slate and how to use them. The following are major sections of this User's Manual:
1. A Quick Look
Provides information on the Eee Slate's package contents and components.
2. Getting Started
Provides information on getting started with the Eee Slate.
3. Using the Eee Slate
Provides information on using the Eee Slate's utilities and gives you information about system recovery.
4. Accessories
Provides information on using the accessories that come with the Eee Slate.
5. Appendix
Provides safety statements.

The pre-installed operating system, applications and functionality of the Eee Slate may differ by model and territory. Differences may also exist between the photos and illustrations in this user manual and the actual Eee Slate product. In all instances, the actual Eee Slate product shall be deemed as correct.
Notes for This Manual
A few notes and warnings are used throughout this guide, allowing you to complete certain tasks safely and effectively. These notes have different degrees of importance as follows:

WARNING! Important information that must be followed for safe operation.

IMPORTANT! Vital information that must be followed to prevent damage to data, components, or persons.

TIP: Tips for completing tasks.

NOTE: Information for special situations.
Safety Precautions
The following safety precautions will increase the life of the Eee Slate. Follow all precautions and instructions. Except as described in this manual, refer all servicing to qualified personnel. Do not use damaged power cords, accessories, or other peripherals. Do not use strong solvents such as thinners, benzene, or other chemicals on or near the surface.

Disconnect the AC power before cleaning. Wipe the Eee Slate using a clean cellulose sponge or chamois cloth dampened with a solution of nonabrasive detergent and a few drops of warm water and remove any extra moisture with a dry cloth.

DO NOT place on uneven or unstable work surfaces. Seek servicing if the casing has been damaged. Refer all servicing to qualified service personnel.

DO NOT place or drop items that may damage or scratch the device.

DO NOT expose to dirty or dusty environments. DO NOT operate during a gas leak.

DO NOT expose to or use near liquids, rain, or moisture.

DO NOT expose to strong magnetic or electrical fields.

SAFE TEMP: This device should only be used in environments with ambient temperatures between 5°C (41°F) and 35°C (95°F).

DO NOT expose to extreme high temperature or to direct sunlight.
Charging Your Batteries
If you intend to use battery power, be sure to fully charge your battery pack before going on long trips. Remember that the power adapter charges the battery pack as long as it is plugged into the computer and an AC power source. Be aware that it takes much longer to charge the battery pack when the Eee Slate is in use.
Remember to fully charge the battery (8 hours or more) before first use and whenever it is depleted to prolong battery life. The battery reaches its maximum capacity after a few full charging and discharging cycles.
Airplane Precautions
Ask an airline personnel if you want to use your Eee Slate onboard an aircraft. Most airlines have restrictions for using electronic devices. Most airlines allow electronic use only between and not during takeoffs and landings.

There are three main types of airport security devices: X-ray machines (used on items placed on conveyor belts), magnetic detectors (used on people walking through security checks), and magnetic wands (hand-held devices used on people or individual items). You can send your Eee Slate through airport X-ray machines. But do not send your Eee Slate through airport magnetic detectors or expose it to magnetic wands.
Package Contents
Your Eee Slate
A Quick Look
Package Contents
 |  |
| Eee Slate and Digitizer Pen Case | |
 | 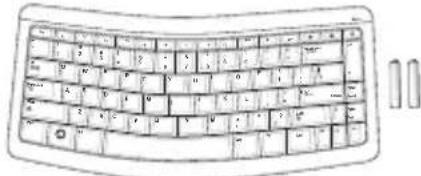 |
| Power Adapter with USB port charging function | Bluetooth Keyboard with two AAA Size Batteries (on selected model) |
 |  |
| Power Cord Refill Nibs and Nib Remover | |
 |  |
| Wiping Cloth Recovery DVDs | |
 |  |
| User Manual Warranty Card | |

If any of the items is damaged or missing, contact your retailer.
Your Eee Slate

Power switch
The power switch turns your Eee Slate on/off, puts it to sleep, and wakes it up from sleep mode. Slide and release the switch to turn on or wake the Eee Slate. Slide and release it again to put the
Eee Slate into sleep mode. If the system becomes unresponsive, sliding and holding the power switch will force the Eee Slate to power off. Note that forcing the system to power off may result in data loss. Please inspect your data to ensure there is no data loss. It is strongly recommended that important data be backed up regularly.
Power Indicator
2 The power indicator lights when the Eee Slate is turned ON and blinks slowly when the Eee Slate is in the sleep mode.
| 3 | Virtual Keyboard ButtonThe virtual keyboard button displays or hides the virtual keyboard on the screen.Press and hold this button for ESC. |
| 4 | Orientation Lock SwitchTo lock the screen in the current orientation, slide this switch to the left (red dot will be visible). To unlock, slide this switch to the right. |
| 5 | Built-in CameraUse the built-in camera for picture taking, video recording, video conferencing, and other interactive applications. |
| 6 | Touch Screen PanelThe touch screen panel allows you to operate your Eee Slate using up to two fingers or with the included digitizer pen. |
| 7 | Digitizer Pen and Digitizer Pen CompartmentThe digitizer pen compartment allows storage of the digitizer pen that may be used to interact with the touch screen panel. |
| 8 | Home ButtonWhen the Eee Slate is in Windows® mode, press this button to preview and switch your open windows, or press and hold it for two seconds to enter the secure logon screen (CTRL-ALT-DEL). When the Eee Slate is not in Windows® mode, this button acts as the ENTER key. |
| 9 | Audio Speaker SystemThe built-in stereo speaker system allows you to hear audio without additional attachments. Audio features are software controlled. |
| 10 | Memory Card SlotInsert SD/SDHC/SDXC/MMC card into this slot. |
| 11 | USB Port (2.0/1.1)Insert USB 2.0 or USB 1.1 devices such as keyboards, pointing devices, cameras, and storage devices into this port. |
| 12 | Emergency Shutdown KeyIf the system cannot properly turn OFF or restart, press this key using a paperclip to shut down your Eee Slate. |
| 13 | Headphone Output/Microphone Input Combo JackThe stereo combo jack (3.5mm) connects the Eee Slate's audio out signal to amplified speakers or headphones. Using this jack automatically disables the built-in speaker.The jack is also designed to connect the microphone used for Skype, voice narrations, or simple audio recordings. |
| 14 | mini HDMI portInsert a mini HDMI cable into this port to connect to a high-definition multimedia interface (HDMI) device. |
| 15 | Built-in MicrophoneThe built-in mono microphone can be used for video conferencing, voice narrations, or simple audio recordings. |
| 16 | Volume Down ButtonPress this button to decrease the volume in Windows® mode, or as a cursor down key in non-Windows® mode. |
| 17 | Volume Up ButtonPress this button to increase the volume in Windows® mode, or as a cursor up key in non-Windows® mode. |
Power (DC) Input
18
Insert the power adapter into this port to supply power to your Eee Slate and charge the internal battery pack. To prevent damage to your Eee Slate and battery pack, always use the bundled power adapter.
Battery Charge Indicator
The battery charge indicator (LED) shows the battery charging status as follows:
Powered ON
| With Adapter Without Adapter | ||
| High battery power (95%-100%) | Green ON Off | |
| Medium battery power (11%-94%) | Orange ON Off | |
| Low battery power (0%-10%) | Orange Blinking Orange Blinking | |
19
Powered OFF / Standby mode
| With Adapter Without Adapter | ||
| High battery power (95%-100%) | Green ON Off | |
| Medium battery power (11%-94%) | Orange ON Off | |
| Low battery power (0%-10%) | Orange Blinking Off | |
Charging the Eee Slate
Turning your Eee Slate ON/OFF
Starting up for the first time
Desktop
Getting connected wirelessly
Getting Started
Charging the Eee Slate


- Use only the power adapter that comes with your device. Using a different power adapter may damage your device.
- The input voltage range between the wall outlet and this adapter is AC 100V–240V, and the output voltage of this adapter is 19.5V, 3.08A.

To prolong battery life, fully charge the battery for up to 8 hours when using the Eee Slate for the first time and whenever the battery power is fully depleted.
Turning your Eee Slate ON/OFF
Slide and release the power switch to toggle the Eee Slate on and off.

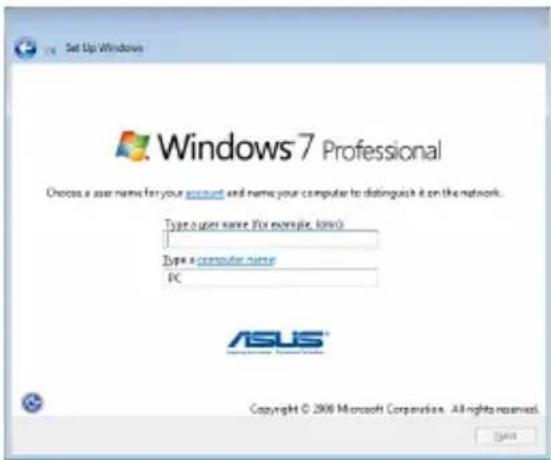
Starting up for the first time
When you use your Eee Slate for the first time, the Windows® wizard launches automatically to guide you in configuring the basic Windows® operating system settings of your Eee Slate.

The actual Windows OS version may vary according to different models.
To start up for the first time:
-
Select your preferred language, then tap Next.
-
Select your country or region, time and currency, and keyboard layout. Tap Next to continue.


-
Key in your user name and computer name, then tap Next to continue.
-
Create a password for your user account. Tap Next to continue.

-
Carefully read the end-user license agreement and tick the two checkboxes if you agree with the terms. Tap Next to continue.
-
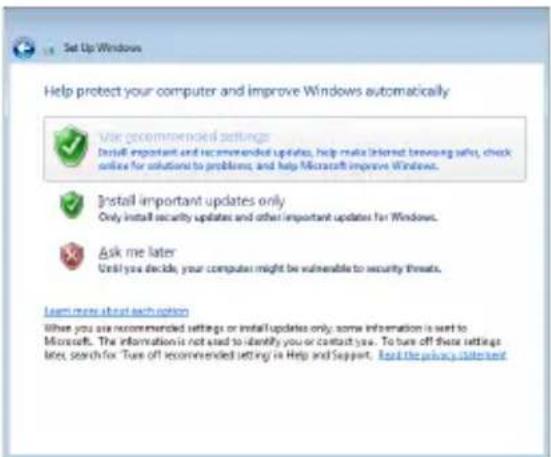
Tap Use recommended settings to install important and recommended updates.

-
Select your area's time zone, and set up your area's date and time. Tap Next to continue.
-
Select a wireless network and tap Next to continue. Tap Skip to set up the wireless connection later.


-
Select the network's location. Tap Next to continue.
-
Windows® operating system setup is completed.


Desktop
There are several items in the Windows® Notification area. Tap the icons to launch them.

The actual Desktop screen may vary according to different models.
Getting connected wirelessly
Use your device's built-in Wi-Fi capability to connect to a wireless network. This enables you to wirelessly access websites or Internet-related applications.
To use the Wi-Fi function:
-
Tap the wireless network icon in the Windows® Notification area.
-
From the list, select the network, then tap Connect.


Tap the Refresh icon on the upper right corner to refresh the list.

You may need to key in a password or passkey to access a secured network.
- You may now start to surf the Internet or do Internet-related activities such as send and receive e-mail messages, or chat online.

Register at http://vip.asus.com for full service of your device.
Adjusting Eee Slate with ControlDeck
Using Bluetooth
System Recovery
Trusted Platform Module (TPM)
(on selected models)
Using the Eee Slate
Adjusting Eee Slate with ControlDeck
ASUS ControlDeck allows you to fast adjust screen brightness and system volume, enable or disable wireless settings, and switch the presentation mode. To launch ASUS ControlDeck, click Start > All Programs > ASUS Utility > ControlDeck.

Items Description
1 Tap to exit ControlDeck
2 Slide to adjust screen brightness and system volume
3 Tap to enable or disable bluetooth
4 Tap to enable or disable Wi-Fi
5 Tap to select a presentation mode
6 Tap to enable or disable Flight Mode
7 Tap to mute
Using Bluetooth
Bluetooth® allows your Eee Slate to wirelessly communicate with Bluetooth-enabled devices, such as computers, mobile phones, PDAs, and Bluetooth keyboard, within a short range of about ten meters or 30 feet.
To connect to a Bluetooth-enabled device:
- Ensure that the Bluetooth function is activated.
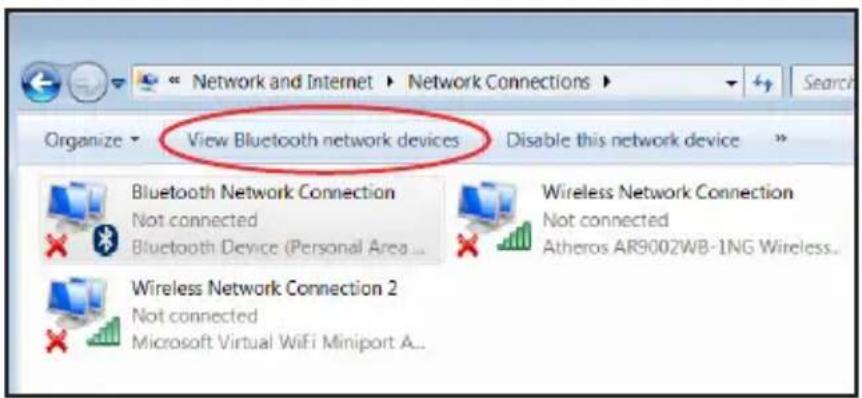
- From Control Panel, go to Network and Internet > Network and Sharing Center and select Change adapter settings in the left blue pane.

- Click or touch Bluetooth Network Connection and click View Bluetooth Network Devices.
- Select Add a device to search for Bluetooth devices.

- From the list, select the Bluetooth device that you want your Eee Slate to communicate with, then tap Next.

- Key in the Bluetooth security code or passcode into the Bluetooth device to pair the Bluetooth device with your Eee Slate.

The security code shown in the right figure is for reference only. Please key in the code shown on your Eee Slate.

- The Bluetooth device is successfully paired with your Eee Slate. Tap Close to exit the Bluetooth wizard.

System Recovery

- Ensure that the power adapter is connected to your Eee Slate and is plugged to a power outlet. Unstable power may cause the system recovery process to fail.
- All data will be lost during the system recovery process. Ensure that you back up all your data before doing the system recovery process.
Using the Recovery DVD
The Recovery DVD allows you to quickly restore the operating system, drivers, and utilities of your Eee Slate. Before using the Recovery DVD, copy your data/files to a USB storage device or to a network drive and take note of any customized configuration settings (such as network settings).

After the system recovery process using the Recovery DVD, visit the Windows® Update site at http://www.update.microsoft.com or the ASUS Support site at http://support.asus.com to get the latest driver and security updates.
To use the Recovery DVD:
- Connect an external optical drive to your Eee Slate and insert the Recovery DVD into the optical drive. Ensure that your Eee Slate is turned on.
- Restart your Eee Slate when a dialog box appears asking you to restart your device. The system recovery screen appears.
- Follow the onscreen instructions to complete the recovery process.

DO NOT remove the Recovery DVD or terminate the system recovery process. Doing so will cause damage to your system.
-
After the system recovery is completed, restart your Eee Slate.
-
Set up your language, time zone, keyboard, computer name, and user name to enter the Windows® OS.

This Recovery DVD is for Eee Slate only. DO NOT use it on other devices.
Creating and using the USB recovery disk
You can copy the system recovery files from the Recovery DVD to a USB storage device such as USB flash disk or a USB hard disk drive. You can then use the USB recovery disk to recover the system of your Eee Slate.

- The USB storage device should be more than 16GB.
• Memory cards are not supported for this function. - The computer that you use to create the USB recovery disk must be installed with either Windows® 7 or Vista OS.
To create the USB recovery disk:
- Using a computer with Windows Vista/7 OS, connect the USB storage device to the computer's USB port.
- Place the Recovery DVD into the optical drive. The make recovery disk screen appears.

An alert message appears if you have not connected a USB storage device to the computer.
- Locate the USB storage device where you want to copy the system recovery files.

All data in your USB storage device will be lost during the copying process. Ensure that you back up all your data before creating the USB recovery disk.
- Follow the onscreen instructions to complete creating the USB recovery disk.
To use the USB recovery disk:
- Connect the USB recovery disk to your Eee Slate, and then turn on your Eee Slate. The system recovery screen appears.
- Follow the onscreen instructions to complete the recovery process.
Trusted Platform Module (TPM) (on selected models)
The TPM, or Trusted Platform Module, is a security hardware device on the system board that will hold computer-generated keys for encryption. It is a hardware-based solution that an help avoid attacks by hackers looking to capture passwords and encryption keys to sensitive data. The TPM provides the ability to Eee Slate to run applications more secure and to make transactions and communication more trustworthy.
The security features provided by the TPM are internally supported by the following cryptographic capabilities of each TPM: hashing, random number generation, asymmetric key generation, and asymmetric encryption/decryption. Each individual TPM on each individual computer system has a unique signature initialized during the silicon manufacturing process that further enhances its trust/security effectiveness. Each individual TPM must have an Owner before it is useful as a security device.
TPM Applications
TPM is useful for any customer that is interested in providing an addition layer of security to the computer system. The TPM, when bundled with an optional security software package, can provide overall system security, file protection capabilities and protect against email/privacy concerns. TPM helps provide security that can be stronger than that contained in the system BIOS, operating system, or any non-TPM application.
Enabling / disabling TPM Support
TPM is enabled by system default. To modify TPM setting, connect a USB keyboard to the USB port and enter BIOS Setup (press [F2] on system startup). Set TPM Support to [Enable] or [Disable] in BIOS setup Advanced > Trusted Computing.
![Aptio Setup Utility - Copyright ( C) 2008 American Megatre n ds, Inc . Adva n ced T P M Config ur ration TP M Support . [Ena b le] TPM State [Ena b led] P e nding TP M oper at i on [Non e ] C u rrent TP M Status Informa t ion TP M Enable d Status: [Disabled ] TP M Active S status: [Dea c tivated] TP…](/content/2026/07/1524163/images/842c1c63024cb0bdab554431eda0d0ee0b691ee4a9892fda91a7328a59813023.jpg)

IMPORTANT! Use your TPM application's "Backup" or "Migration" function to backup your TPM security data.
Clearing TPM Secured Data
When TPM State is set to [Enabled], Pending TPM Operation will appear. Set this item to [TPM Clear] to clear all data secured by TPM or [None] to discard the selection.
| Aptio Setup Util i ty - Cop yright ( C) 2008 American Megatre n ds, Inc . | |
| Adva n ced | |
| TP M Config ur ration TP M Support [Ena b le] TPM State [Ena b led] P e nding TP M operation [Non e ] | Sche d ule TPM o peratio n . NOTE: Your Computer will re b oot duri n g restar t in ord e r to chang e State of TPM. |
| C u rrent TP M Status Information TP M Enable d Status: [Disabled ] TP M Active S status: [Dea c tivated] TP M Enable d Status: [UnOwned] | |

IMPORTANT! You should routinely backup your TPM secured data.
Initializing the Infineon Security Platform Software
When you start Windows, you can see a balloon tip above the TPM icon on the Windows notification area reminding you to initialize the security platform.

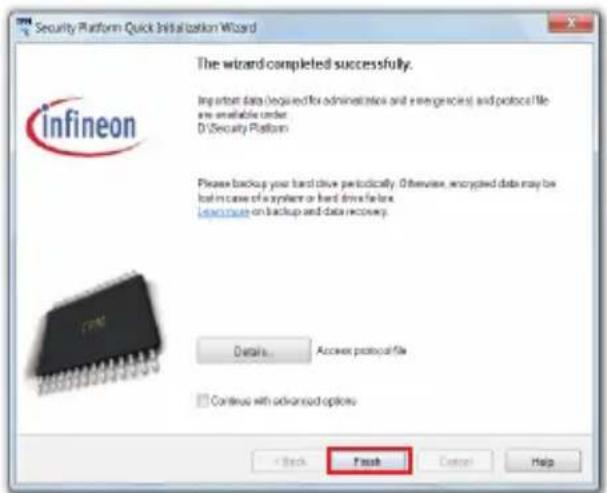
The Infineon Security Platform Quick Initialization Wizard is used to initialize the Security Platform and to configure Security Platform Features (backup including Emergency Recovery, Password Reset, Enhanced Authentication). These operations are needed to enable the Infineon Security Platform functionality and provide the basis for all further activities on the Infineon Security Platform.
To use the Security Platform Quick Initialization Wizard
-
Click the TPM icon on the Windows notification area. The Infineon Security Platform Initialization Wizard appears.
-
Select Quick initialization. It is recommended to store the user passwords and data on a removable device. Select the drive you want to use and click Next.

- Configure the security platform settings according to your need and click Next.

- Click Next to start security platform initialization.

- When finished, click Finish to exit the Quick Initialization Wizard.
Launching the Infineon Security Platform Settings Tool
With the Security Platform Settings Tool, you can get various information about the Trusted Platform Module of your system. Also, you are able to carry out several administrative tasks. This component is designed as a Control Panel Applet. It provides a central access point for administrating the Infineon Security Platform.
You can launch the Infineon Security Platform Settings Tool by right-clicking the TPM icon on the Windows notification area and select Manage Security Platform.


For detailed Infineon Security Platform Software instructions, refer to the Online Help of the Infineon Security Platform Solution by right-clicking the TPM icon on the Windows notificatino area and select How to use the Security Platform Features.
Eee Slate Case
Refill Nibs and Nib Remover
Accessories
Eee Slate Case
Your device comes with the durable Eee Slate Case for easy storage and to protect your device from scratches and dents.
To store your device with the Eee Slate Case:
- Open the Eee Slate Case.
- Follow the steps below to place your device into the Eee Slate Case.

To use the Eee Slate Case:

Refill Nibs and Nib Remover
To replace the digitizer pen nib with the nib remover:

Declarations and Safety Statements
Copyright Information
Limitation of Liability
Service and Support
Declarations and Safety Statements
FCC Regulations:
This device complies with part 15 of the FCC Rules. Operation is subject to the following two conditions: (1) This device may not cause harmful interference, and (2) this device must accept any interference received, including interference that may cause undesired operation.
This device has been tested and found to comply with the limits for a Class B digital device, pursuant to Part 15 of the FCC Rules. These limits are designed to provide reasonable protection against harmful interference in a residential installation. This equipment generates, uses and can radiate radio frequency energy and, if not installed and used in accordance with the instructions, may cause harmful interference to radio communications.
However, there is no guarantee that interference will not occur in a particular installation. If this equipment does cause harmful interference to radio or television reception, which can be determined by turning the equipment off and on, the user is encouraged to try to correct the interference by one or more of the following measures:
- Reorient or relocate the receiving antenna.
- Increase the separation between the equipment and receiver.
- Connect the equipment into an outlet on a circuit different from that to which the receiver is connected.
- Consult the dealer or an experienced radio/TV technician for help.
Changes or modifications not expressly approved by the party responsible for compliance could void the user's authority to operate the equipment.
The antenna(s) used for this transmitter must not be co-located or operating in conjunction with any other antenna or transmitter.
RF Exposure Information (SAR)
This device meets the government's requirements for exposure to radio waves. This device is designed and manufactured not to exceed the emission limits for exposure to radio frequency (RF) energy set by the Federal Communications Commission of the U.S. Government.
The exposure standard employs a unit of measurement known as the Specific Absorption Rate, or SAR. The SAR limit set by the FCC is 1.6W/kg. Tests for SAR are conducted using standard operating positions accepted by the FCC with the EUT transmitting at the specified power level in different channels.
The highest SAR value for the device as reported to the FCC is 0.645 W/kg when placed next to the body.
The FCC has granted an Equipment Authorization for this device with all reported SAR levels evaluated as in compliance with the FCC RF exposure guidelines. SAR information on this device is on file with the FCC and can be found under the Display Grant section of www.fcc.gov/oet/ea/fccid after searching on FCC ID: PPD-AR5B195.
This device is compliance with SAR for general population /uncontrolled exposure limits in ANSI/IEEE C95.1-1999 and had been tested in accordance with the measurement methods and procedures specified in OET Bulletin 65 Supplement C.
IC Regulations:
This device complies with Industry Canada licence-exempt RSS standard(s).
Operation is subject to the following two conditions:
(1) this device may not cause interference, and
(2) this device must accept any interference, including interference that may cause undesired operation of the device.
This Class B digital apparatus complies with Canadian ICES-003.
This Category II radiocommunication device complies with Industry Canada Standard RSS-310.
This EUT is compliance with SAR for general population/uncontrolled exposure limits in IC RSS-102 and had been tested in accordance with the measurement methods and procedures specified in IEEE 1528. This equipment should be installed and operated with minimum distance 0cm between the radiator & your body.
This device and its antenna(s) must not be co-located or operating in conjunction with any other antenna or transmitter.
The County Code Selection feature is disabled for products marketed in the US/Canada.
For product available in the USA/ Canada markets, only channel 1\~11 can be operated. Selection of other channels is not possible.
Declaration of Conformity (R&TTE directive 1999/5/EC)
The following items were completed and are considered relevant and sufficient:
• Essential requirements as in [Article 3]
- Protection requirements for health and safety as in [Article 3.1a]
- Testing for electric safety according to [EN 60950]
- Protection requirements for electromagnetic compatibility in [Article 3.1b]
- Testing for electromagnetic compatibility in [EN 301 489-1] & [EN 301 489-17]
• Effective use of the radio spectrum as in [Article 3.2]
• Radio test suites according to [EN 300 328-2]
CE Mark Warning
CE
CE marking for devices without wireless LAN/Bluetooth
The shipped version of this device complies with the requirements of the EEC directives 2004/108/EC "Electromagnetic compatibility" and 2006/95/EC "Low voltage directive".
CE!
CE marking for devices with wireless LAN/ Bluetooth
This equipment complies with the requirements of Directive 1999/5/EC of the European Parliament and Commission from 9 March, 1999 governing Radio and Telecommunications Equipment and mutual recognition of conformity.
IC Radiation Exposure Statement for Canada
This equipment complies with IC radiation exposure limits set forth for an uncontrolled environment. To maintain compliance with IC RF exposure compliance requirements, please avoid direct contact to the transmitting antenna during transmitting. End users must follow the specific operating instructions for satisfying RF exposure compliance.
Operation is subject to the following two conditions:
• This device may not cause interference and
- This device must accept any interference, including interference that may cause undesired operation of the device.
To prevent radio interference to the licensed service (i.e. co-channel Mobile Satellite systems) this device is intended to be operated indoors and away from windows to provide maximum shielding. Equipment (or its transmit antenna) that is installed outdoors is subject to licensing.
This device and its antenna(s) must not be co-located or operating in conjunction with any other antenna or transmitter.
Country Code selection feature to be disabled for products marketed to the US/CANADA.
This Class [B] digital apparatus complies with Canadian ICES-003.
Wireless Operation Channel for Different Domains
N. America 2.412-2.462 GHz Ch01 through CH11
Japan 2.412-2.484 GHz Ch01 through Ch14
Europe ETSI 2.412-2.472 GHz Ch01 through Ch13
France Restricted Wireless Frequency Bands
Some areas of France have a restricted frequency band. The worst case maximum authorized power indoors are:
- 10mW for the entire 2.4 GHz band (2400 MHz–2483.5 MHz)
• 100mW for frequencies between 2446.5 MHz and 2483.5 MHz

Channels 10 through 13 inclusive operate in the band 2446.6 MHz to 2483.5 MHz.
There are few possibilities for outdoor use: On private property or on the private property of public persons, use is subject to a preliminary authorization procedure by the Ministry of Defense, with maximum authorized power of 100mW in the 2446.5–2483.5 MHz band. Use outdoors on public property is not permitted.
In the departments listed below, for the entire 2.4 GHz band:
• Maximum authorized power indoors is 100mW
• Maximum authorized power outdoors is 10mW
Departments in which the use of the 2400–2483.5 MHz band is permitted with an EIRP of less than 100mW indoors and less than 10mW outdoors:
01 Ain 02 Aisne 03 Allier
05 Hautes Alpes 08 Ardennes 09 Ariège
11 Aude 12 Aveyron 16 Charente
24 Dordogne 25 Doubs 26 Drôme
This requirement is likely to change over time, allowing you to use your wireless LAN card in more areas within France. Please check with ART for the latest information (www.art-telecom.fr)

Your WLAN Card transmits less than 100mW, but more than 10mW.
UL Safety Notices
Required for UL 1459 covering telecommunications (telephone) equipment intended to be electrically connected to a telecommunication network that has an operating voltage to ground that does not exceed 200V peak, 300V peak-to-peak, and 105V rms, and installed or used in accordance with the National Electrical Code (NFPA 70).
When using the Eee Slate modem, basic safety precautions should always be followed to reduce the risk of fire, electric shock, and injury to persons, including the following:
- DO NOT use the Eee Slate near water, for example, near a bath tub, wash bowl, kitchen sink or laundry tub, in a wet basement or near a swimming pool.
- DO NOT use the Eee Slate during an electrical storm. There may be a remote risk of electric shock from lightning.
- DO NOT use the Eee Slate in the vicinity of a gas leak.
Required for UL 1642 covering primary (nonrechargeable) and secondary (rechargeable) lithium batteries for use as power sources in products. These batteries contain metallic lithium, or a lithium alloy, or a lithium ion, and may consist of a single electrochemical cell or two or more cells connected in series, parallel, or both, that convert chemical energy into electrical energy by an irreversible or reversible chemical reaction.
- Do not dispose the Eee Slate battery pack in a fire, as they may explode. Check with local codes for possible special disposal instructions to reduce the risk of injury to persons due to fire or explosion.
- Do not use power adapters or batteries from other devices to reduce the risk of injury to persons due to fire or explosion. Use only UL certified power adapters or batteries supplied by the manufacturer or authorized retailers.
Power Safety Requirement
Products with electrical current ratings up to 6A and weighing more than 3Kg must use approved power cords greater than or equal to: H05VV-F, 3G, 0.75mm 2 or H05VV-F, 2G, 0.75mm 2 .
REACH Notice
Complying with the REACH (Registration, Evaluation, Authorisation, and Restriction of Chemicals) regulatory framework, we published the chemical substances in our products at ASUS REACH website at http://csr.asus.com/english/REACH.htm.

DO NOT throw the Eee Slate in municipal waste. This product has been designed to enable proper reuse of parts and recycling. The symbol of the crossed out wheeled bin indicates that the product (electrical, electronic equipment and mercury-containing button cell battery) should not be placed in municipal waste. Check local regulations for disposal of electronic products.

DO NOT throw the battery in municipal waste. The symbol of the crossed out wheeled bin indicates that the battery should not be placed in municipal waste.
Global Environmental Regulation Compliance and Declaration
ASUS follows the green design concept to design and manufacture our products, and makes sure that each stage of the product life cycle of ASUS product is in line with global environmental regulations. In addition, ASUS disclose the relevant information based on regulation requirements.
Please refer to http://csr.asus.com/english/Compliance.htm for information disclosure based on regulation requirements ASUS is complied with:
• Japan JIS-C-0950 Material Declarations
• EU REACH SVHC
- Korea RoHS
- Swiss Energy Laws
Takeback Services
ASUS recycling and takeback programs come from our commitment to the highest standards for protecting our environment. We believe in providing solutions for our customers to be able to responsibly recycle our products, batteries and other components as well as the packaging materials. Please go to http://csr.asus.com/english/Takeback.htm for detail recycling information in different region.
Nordic Lithium Cautions (for lithium-ion batteries)

CAUTION! Danger of explosion if battery is incorrectly replaced. Replace only with the same or equivalent type recommended by the manufacturer. Dispose of used batteries according to the manufacturer's instructions.
(English)

No part of this manual, including the products and software described in it, may be reproduced, transmitted, transcribed, stored in a retrieval system, or translated into any language in any form or by any means, except documentation kept by the purchaser for backup purposes, without the express written permission of ASUSTeK COMPUTER INC. ("ASUS").
ASUS PROVIDES THIS MANUAL "AS IS" WITHOUT WARRANTY OF ANY KIND, EITHER EXPRESS OR IMPLIED, INCLUDING BUT NOT LIMITED TO THE IMPLIED WARRANTIES OR CONDITIONS OF MERCHANTABILITY OR FITNESS FOR A PARTICULAR PURPOSE. IN NO EVENT SHALL ASUS, ITS DIRECTORS, OFFICERS, EMPLOYEES OR AGENTS BE LIABLE FOR ANY INDIRECT, SPECIAL, INCIDENTAL, OR CONSEQUENTIAL DAMAGES (INCLUDING DAMAGES FOR LOSS OF PROFITS, LOSS OF BUSINESS, LOSS OF USE OR DATA, INTERRUPTION OF BUSINESS AND THE LIKE), EVEN IF ASUS HAS BEEN ADVISED OF THE POSSIBILITY OF SUCH DAMAGES ARISING FROM ANY DEFECT OR ERROR IN THIS MANUAL OR PRODUCT.
Products and corporate names appearing in this manual may or may not be registered trademarks or copyrights of their respective companies, and are used only for identification or explanation and to the owners' benefit, without intent to infringe.
SPECIFICATIONS AND INFORMATION CONTAINED IN THIS MANUAL ARE FURNISHED FOR INFORMATIONAL USE ONLY, AND ARE SUBJECT TO CHANGE AT ANY TIME WITHOUT NOTICE, AND SHOULD NOT BE CONSTRUED AS A COMMITMENT BY ASUS. ASUS ASSUMES NO RESPONSIBILITY OR LIABILITY FOR ANY ERRORS OR INACCURACIES THAT MAY APPEAR IN THIS MANUAL, INCLUDING THE PRODUCTS AND SOFTWARE DESCRIBED IN IT.
Copyright © 2011 ASUSTeK COMPUTER INC. All Rights Reserved.
Limitation of Liability
Circumstances may arise where because of a default on ASUS' part or other liability, you are entitled to recover damages from ASUS. In each such instance, regardless of the basis on which you are entitled to claim damages from ASUS, ASUS is liable for no more than damages for bodily injury (including death) and damage to real property and tangible personal property; or any other actual and direct damages resulted from omission or failure of performing legal duties under this Warranty Statement, up to the listed contract price of each product.
ASUS will only be responsible for or indemnify you for loss, damages or claims based in contract, tort or infringement under this Warranty Statement.
This limit also applies to ASUS' suppliers and its reseller. It is the maximum for which ASUS, its suppliers, and your reseller are collectively responsible.
UNDER NO CIRCUMSTANCES IS ASUS LIABLE FOR ANY OF THE FOLLOWING: (1) THIRD-PARTY CLAIMS AGAINST YOU FOR DAMAGES; (2) LOSS OF, OR DAMAGE TO, YOUR RECORDS OR DATA; OR (3) SPECIAL, INCIDENTAL, OR INDIRECT DAMAGES OR FOR ANY ECONOMIC CONSEQUENTIAL DAMAGES (INCLUDING LOST PROFITS OR SAVINGS), EVEN IF ASUS, ITS SUPPLIERS OR YOUR RESELLER IS INFORMED OF THEIR POSSIBILITY.
Service and Support
Visit our multi-language web site at http://www.asus.com
Notice on Upgrading EP121 / B121
To upgrade your Eee Slate, please always contact our support line and they will give you the instructions regarding how to upgrade.
A surcharge may be required according to the local service regulation. Any damage that is caused by yourself upgrading, could be subject to charge and the service classified as out of warranty.
| Manufacturer ASUSTek COMPUTER INC. | |
| Address, City No. 150, LI-TE RD., PEITOU, TAIPEI 112, TAIWAN R.O.C | |
| Country TAIWAN | |
| Authorized Representative in Europe | ASUS COMPUTER GmbH |
| Address, City HARKORT STR. 21-23, 40880 RATINGEN | |
| Country GERMANY | |



- EEE SLATE USER MANUAL
- WINDOWS® 7 EDITION EP121 / B
- TABLE OF CONTENTS
- CHAPTER 1: A QUICK LOOK
- CHAPTER 2: GETTING STARTED
- CHAPTER 3: USING THE EEE SLATE
- CHAPTER 4: ACCESSORIES
- APPENDIX
- ABOUT THIS USER'S MANUAL
- A QUICK LOOK
- GETTING STARTED
- USING THE EEE SLATE
- ACCESSORIES
- NOTES FOR THIS MANUAL
- SAFETY PRECAUTIONS
- CHARGING YOUR BATTERIES
- AIRPLANE PRECAUTIONS
- PACKAGE CONTENTS
- YOUR EEE SLATE
- POWER SWITCH
- POWER INDICATOR
- POWER (DC) INPUT
- BATTERY CHARGE INDICATOR
- CHARGING THE EEE SLATE
- TURNING YOUR EEE SLATE ON/OFF
- STARTING UP FOR THE FIRST TIME
- DESKTOP
- GETTING CONNECTED WIRELESSLY
- ADJUSTING EEE SLATE WITH CONTROLDECK
- ITEMS DESCRIPTION
- USING BLUETOOTH
- TO CONNECT TO A BLUETOOTH-ENABLED DEVICE
- SYSTEM RECOVERY
- USING THE RECOVERY DVD
- TO USE THE RECOVERY DVD
- CREATING AND USING THE USB RECOVERY DISK
- TO CREATE THE USB RECOVERY DISK
- TO USE THE USB RECOVERY DISK
- TRUSTED PLATFORM MODULE (TPM) (ON SELECTED MODELS)
- TPM APPLICATIONS
- ENABLING / DISABLING TPM SUPPORT
- CLEARING TPM SECURED DATA
- INITIALIZING THE INFINEON SECURITY PLATFORM SOFTWARE
- LAUNCHING THE INFINEON SECURITY PLATFORM SETTINGS TOOL
- EEE SLATE CASE
- TO STORE YOUR DEVICE WITH THE EEE SLATE CASE
- TO USE THE EEE SLATE CASE
- REFILL NIBS AND NIB REMOVER
- DECLARATIONS AND SAFETY STATEMENTS
- FCC REGULATIONS
- RF EXPOSURE INFORMATION (SAR)
- IC REGULATIONS
- DECLARATION OF CONFORMITY (R&TTE DIRECTIVE 1999/5/EC)
- CE MARK WARNING
- CE
- CE MARKING FOR DEVICES WITHOUT WIRELESS LAN/BLUETOOTH
- CE MARKING FOR DEVICES WITH WIRELESS LAN/ BLUETOOTH
- IC RADIATION EXPOSURE STATEMENT FOR CANADA
- WIRELESS OPERATION CHANNEL FOR DIFFERENT DOMAINS
- FRANCE RESTRICTED WIRELESS FREQUENCY BANDS
- UL SAFETY NOTICES
- POWER SAFETY REQUIREMENT
- REACH NOTICE
- GLOBAL ENVIRONMENTAL REGULATION COMPLIANCE AND DECLARATION
- TAKEBACK SERVICES
- NORDIC LITHIUM CAUTIONS (FOR LITHIUM-ION BATTERIES)
- LIMITATION OF LIABILITY
- SERVICE AND SUPPORT
- NOTICE ON UPGRADING EP121 / B
Brand : ASUS
Model : Eee Slate
Category : Tablet