PEBH 900 - Electric drill PARKSIDE - Free user manual and instructions
Find the device manual for free PEBH 900 PARKSIDE in PDF.
Download the instructions for your Electric drill in PDF format for free! Find your manual PEBH 900 - PARKSIDE and take your electronic device back in hand. On this page are published all the documents necessary for the use of your device. PEBH 900 by PARKSIDE.
USER MANUAL PEBH 900 PARKSIDE
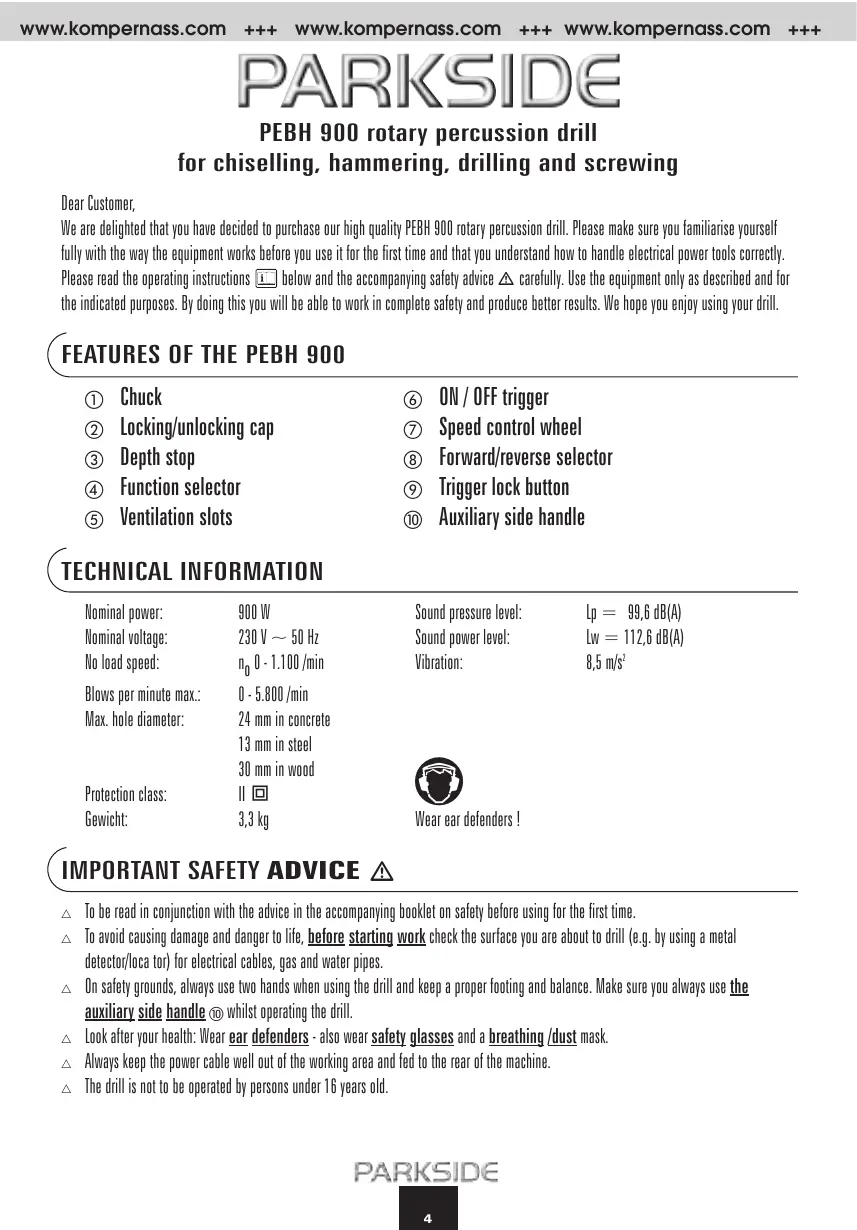
Wwww.kompernass.com +++ www.kompernass.com +++ www.kompernass.com +++ PARKSIDE PEBH 900 rotary percussion drill for chiselling, hammering, drilling and screwing Dear Customer, We are delighted that you have decided to purchase our high quality PEBH 900 rotary percussion drill. Please make sure you familiarise yourself fully with the way the equipment works before you use it for the first time and that you understand how to handle electrical power tools correctly. Please read the operating instructions CL] below and the accompanying safety adhice À carelully. Use the equipment only as described and for the indicated purposes. By doing this you will be able to work in complete safety and produce better results. We hope you enjoy using your dl
(FEATURES OF THE PEBH 900
© Chuck © ON/OFF trigger © Lockinglunlocking cap © Speed control wheel © Depth stop Forward/reverse selector @ Function selector © Trigger lock button @ Ventilation slots Auxiliary side handle (TECHNICAL INFORMATION Nominal power: 900 W Sound pressure level: = 98.6 dB(A) Iominal voltage: 20 V — 50 Sound power level: Lu = 112,6 dB(A) Ao load speed: 09 0-1.100/min Vibration: 8,5 ms Blows per minute max: O-5.800/min Max. hole diameter: 4 mm in concrete 13 mm in steel 30 mm in wood Protection class: 15 Gewicht 33ky Wear ear defenders !
(IMPORTANT SAFETY ADVICE À
To be read in conjunetion with the advice in the accompanying booklet on safety before using for the rt time. To avoid causing damage and danger to life, before starting work check the surface you are about to dell (e.g. by using à metal detectorloca tor) fr electrical cables, gas and water pipes. On safety grounds, always use two hands when using the drll and keep a proper footing and balance. Make sure you always use the auxiliary side handle @ whilst operating the dll Look after your health: Wear ear defenders - also wear safety glasses and a breathing /dust mask. Always keep the power cable well out of the working area and Fed to the rear of the machine. The dll is not to be operated by persons under 16 years old. PARKSID
The PEBH 900 rotary percussion drill can be used successfully for light chiselling work. The drill can also be used for rotary percussion diling in brick, concrete, and natural stone as well as for breaking off plaster or rendering. The area of use of the drill also includes drlling holes in wood, plastic and metal, and its use as à screwdriver. (OPERATION Take note of the mains voltage. The voltage must agree with that shown on the identification plate (equipment shown as 230 V can also be used with 220 V).
SWITCHING ON AND OFF
Whilst operating the dl you can select between instantaneous and continuous operation. For short periods of operation choose the instantaneous mode and for longer periods of operation choose the continuous mode. This is how to operate the dell at your chosen setting INSTANTANEOUS OPERATION ON: Press ON/DFF © trigger INSTANTANEOUS OPERATION OFF: Release ON/OF @ tigger CONTINUOUS OPERATION ON: Press ONDFF @ trgger and lock in position with the tgger lock button @> CONTINUQUS OPERATION ON: Press ON/DFF © tiger once more and release. (insenrine 1 REMOVING TOOLS INSERTING TOOL Before inserting the tool, lightly grease the chuck and clean if necessary. To insert pull the locking/unlocking cap @ hackwards and insert the tool. Vou should be able to hear clearly the tool engaging if it has been inserted correct. Releasing the locking/unlocking cap locks the mechanism. Check by pulling the tool that it is correct locked. The device is designed so that tool has à certain amount of radial and axial play. The centring takes place automatically once the motor is started. REMOVING TOOL To remove the tool, pull the locking/unlocking cap @ backwards again and remove the tool. (aoprrionaL CHUCK FOR STRAIGHT SHANK DRILL BITS INSTALLING ADDITIONAL CHUCK FOR STRAIGHT SHANK DRILL BITS To install the additional chuck for straight shank dell bits (see Fig. @ pull the locking/unlocking cap @ backwards and insert the additional chuck. You should be able to hear clearly the additional chuck engaging if it has been inserted correct. Releasing the locking/unlocking cap @ locks the mechanism. Check by puling the tool that it has correctly locked. REMOVING ADDITIONAL CHUCK FOR STRAIGHT SHANK DRILL BITS To remove the additional chuck, pull the locking/unlocking cap @> backwards again and remove the additional chuck. PARKSID
Wwww.kompernass.com +++ www.kompernass.com +++ www.kompernass.com +++ (SELECT FUNCTION ZX WARHING ! Only use / set the function selector @ after the motor has reached à standstil! You can set the function selector @ to the symbol appropriate to the area of use. There are three function settings as follows: T_8 T 2 TV 2 T 8 T 8 T 8 _— D _
CHISELLING ROTARY PERCUSSION DRILLING DRILLING / SCREWING
ZX WARHING ! Only use / set the forward / reverse selector @ after the motor has reached a standstil Aote: The maximum speed for heavy work is only available in forward mode. The drll always works at a lower speed in reverse mode. (PRESELECT SPEED Z\ WARNING ! Only use set the speed control wheel c> alter the motor has reached à standstil. You can use the speed control wheel @ to preselect the operating speed to the exact value appropriate to your work. lis infinitely variable. This means you can easily and conveniently del into e.g. smooth surfaces such as tles etc. In addition, it allows you to avoid the dll bit lip ping and breaking material out around the hole whilst diling. Note: you select a low speed, this means the ON / OFF tgger @ will only press in a limited amount {as à result of the reduced speed pre selected). you need the maximum power for your work, use the highest preselected speed (turn speed control wheel down (w)}. LOW (-) SPEED: tum the speed control wheel up (A) HIGH (+) SPEED: tum the speed control wheel @ doun (vw) (usine THE AUXILIARY HANDLE Z\ Uaring ! On safety grounds, make sure you always use the auxiliary side handle @ whilst operating the PEBH rotary percussion dl You can alter the position of the auxiliary side handle @ by loosening the wingnut and swivelling the handle. The handle can be engaged in various positions. Tighten the wingnut again. Recommendation: Set the handle in the horizontal position (at 90° to the dll body). This will provide you with a safe position and one in which you can operate the drill without becoming tred.
Wwww.kompernass.com +++ www.kompernass.com +++ www.kompernass.com +++ (SAFETY CLUTCH For your safety, the PEBH 900 rotary percussion dl is fited with a saety clutch. This has the effect that when the drlling tool becomes tapped the drive is automatically interrupted. This means you can work more safely. However, you should always seek to keep à proper footing and balance, hold the drll with two hands and always use the auxiliary side handle ©. (DEPTH SToP Use the depth stop @ to set the diling depth to produce à hole of the exact depth required. Simply loosen the wingnut and set the depth stop @ using the scale, before tightening the wingnut again.
(MAINTENANCE OF YOUR ROTARY PERCUSSION DRILL
ZA Before doing anÿ work on the dll, always pull out the plug,
1. Clean the del regular. For the best results do this straight after the work has been completed.
2. Do not allow liquid to get inside the dell. Use à soft cloth for cleaning the housing. Do not use petrol, solvents or cleaners that might attack he plastic.
3. Airvents © must always be clear and clean
Further practical tips for power tools can be found in the accompanying booklet on safety advice. Ve raser eight mae technical moins in te couse other development
(STATEMENT OF CONFORMITY CE
Warranty This piece of equipment is covered by a 36-month warranty as-abthe date of purchase. The equipment was produced with the greatest of care and underwent thorough testing before delivery. In the unlikely eventofdetecting.a functionahdelect, please return the equipment in its arginal packaging with the proof of purchase (if available) tale closest senvice.adüress. Damage caused due to improper handling as well as regular wear afthe pars aresnot covered by this warranty. Beaver Electronic Services - The Lodge, Premier Business Park Long Street, Walsall- West Midlands, WUSZ 9DY Tel: 0870787677 - Far: 01922/728417 Warranty This piece of equipment is covered by a 36-month warrantÿas of the date of purchase. The equipment was produced with the greatest of care and underwentthorough testing before delivery. In the unlikely event of detecting ablunctional defect please return the equipment in its original packaging with the proof of purchase (if available) to the closest serviceradéress. Damage caused due to improper handling as well as regular wear of the pans are not cowéred by this warranty. Irish Web Specialists 1 Verbena Auenue - Dublin 13 Tel. 01/8320492 - Fax: 01/8346829 PARKSIDE