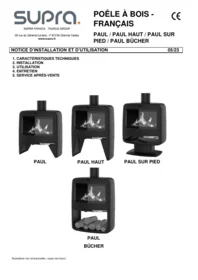
PAUL HAUT BUCHER SUR PIED 1 - Wood stove SUPRA - Free user manual and instructions
Find the device manual for free PAUL HAUT BUCHER SUR PIED 1 SUPRA in PDF.


| Brand | Supra |
| Model | PAUL HAUT BUCHER SUR PIED 1 |
| Product type | Wood-burning stove on stand |
| Fuel | Wood logs (recommended length 50 cm) |
| Rated power | 8 kW |
| Energy efficiency | 78 % |
| Dimensions (H x W x D) | 85 x 50 x 40 cm |
| Weight | 85 kg |
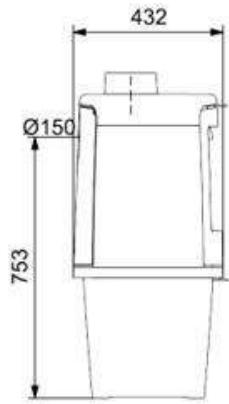
| Flue outlet diameter | 150 mm |
| Main material | Steel and cast iron |
| Glass | Easy-to-clean ceramic glass |
| Main function | Supplementary or primary heating |
| Maintenance and cleaning | Regular cleaning of the firebox and flue ducts |
| Safety | Double combustion, self-cleaning glass, insulated handle |
| Spare parts and repairability | Available from the manufacturer or authorized dealer |
| General information | Compliant with standard EN 13240 |
| Warranty | 2 years (parts and labor) |
Frequently Asked Questions - PAUL HAUT BUCHER SUR PIED 1 SUPRA
User questions about PAUL HAUT BUCHER SUR PIED 1 SUPRA
0 question about this device. Answer the ones you know or ask your own.
Ask a new question about this device
Download the instructions for your Wood stove in PDF format for free! Find your manual PAUL HAUT BUCHER SUR PIED 1 - SUPRA and take your electronic device back in hand. On this page are published all the documents necessary for the use of your device. PAUL HAUT BUCHER SUR PIED 1 by SUPRA.
USER MANUAL PAUL HAUT BUCHER SUR PIED 1 SUPRA
natural_image
Black outdoor stove with visible flames and smoke, no text or symbols on the device itselfPAUL

natural_image
Black and white photo of a modern outdoor stove with visible flames and smoke, no text or symbols present.PAUL HAUT
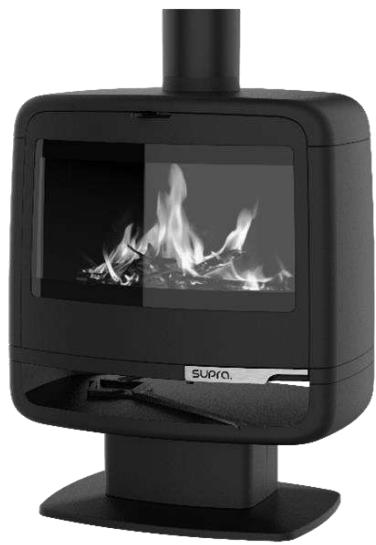
natural_image
Black industrial stove burner with visible flames and a chimney, no text or symbols on the device itselfPAUL SUR PIED

natural_image
Modern black portable stove with visible flames and wooden logs, no text or symbols on the device itself.PAUL
BÜCHER
-IMPORTANT-
natural_image
Line drawing of a modern industrial stove with internal grilles and a top vent (no text or symbols)natural_image
Cross-sectional diagram of a mechanical component with internal channels and structural details (no text or symbols)
natural_image
Cross-sectional view of a mechanical component with internal cavities and a black arrow indicating direction (no text or symbols)RACCORDEMENT
ENTRÉE D'AIR
https://www.youtube.com/watch?v=ebOr4vMj2Jo
INSTALLATION INSTRUCTIONS AND USER MANUAL
05/23
- TECHNICAL SPECIFICATIONS
- INSTALLATION
- USE
- MAINTENANCE
- AFTER-SALES SERVICE

natural_image
Black and white photo of a modern outdoor stove with visible flames and smoke (no text or symbols)PAUL

natural_image
Black outdoor stove with visible flames and smoke, no text or symbols on the device itselfPAUL HAUT

natural_image
Black outdoor portable stove with visible flames and a chimney (no text or symbols)PAUL SUR PIED

natural_image
Black portable stove with visible flames and a wooden log stack (no text or symbols)PAUL
BÜCHER
- IMPORTANT -
You have just purchased a wood burning stove from our range. We would first like to congratulate you on your choice. This appliance has been carefully designed. In order to make the most of all its advantages, we would advise you to request the services of one of our specialists. This will ensure that the installation is made in accordance with good practices and will guarantee the best operating and safety conditions, bearing all the responsibility for the final installation.
Before lighting the fire for the first time, please read these installation instructions and user manual carefully. Retain the manual and warranty (which indicates the model and serial No.). The person performing the installation work shall be fully responsible for any failure to comply with the instructions set out in these documents.
- IMPORTANT ASSEMBLY INSTRUCTIONS -
Your stove has a "good draw" but you do not know its draught value. The chimney draught is measured in Pascal (Pa). The inserts, fireboxes and stoves have been designed, optimised and manufactured in accordance with standards NF EN 13229 (or NF EN 13240) to operate connected to a chimney with a draught of 12 Pa. It frequently happens (in more than one in two chimneys) that the draught is far too high (over 20 Pa) due to the fact that the chimney is either too high or due to the flue liner. In this case, the appliances will operate in abnormal conditions which may lead to:
- Excessive wood consumption: this can be three times as much as an appliance with a draught of 12 Pa.
- A fire that "does not last" and burns too quickly while producing insufficient heat.
- A quick and inevitable deterioration of the appliance (cracks in the cast iron panels or in the refractory bricks)
- A voided warranty.
To avoid all these problems, there is only one solution!
Get a professional to check the chimney draught (with the appliance operating) and, if it is above 20 Pa, then install a damperor an adaptor at the flue connection. If the chimney is cold or the weather conditions are unfavorable, it is possible to compensate by increasing the air supply to the stove and lighting it from above (see “SERVICE” in section “3. USE”).
1. TECHNICAL SPECIFICATIONS
| SWIVEL STOVE | PAUL / P. HAUT / P. SUR PIED / P. BÜCHER |
| Stove category | Intermittent |
| Rated heat output (1) | 10 kW |
| Operating mode | Only with the door closed |
| Connection type | Vertical / Horizontal |
| Mean flue gas temperature | 314 °C |
| Efficiency | 78 % |
| Seasonal efficiency | 68 % |
| CO concentration (13 % 02) | 0.10 % |
| CO2 concentration (13 % 02) | 10.37 % |
| Dust concentration (13 % 02) | 18 mg/Nm ^3 . |
| COV | 99 mg/Nm3 |
| NOX | 105 mg/Nm3 |
| Fuel | Wood |
| Log size | 50 cm. |
| Nominal load per hour approx. | 2.9 kg |
| Refuelling | 45 min. |
| Prohibited fuels | All the rest, including coal and its derivatives |
| Approx. flue gas mass flow | 7.2 g/sec |
| Fluepipe nominal diameter | 150 mm. |
| Flue pipe specifications | |
| Minimum dimensions of the chimney terminal | 20 x 20 cm |
| ∅ mín flue lining or insulated metal duct | 150 mm. |
| Minimum height of the pipe above the appliance | 4 m. |
| Ventilation of the room | 1.2 dm ^2 |
| Draught (10 Pa = 1 mm CE) | |
| Nominal efficiency | 12 Pa ± 2 Pa |
| Performance in slumber mode (min. permitted) | 6 Pa ± 1 Pa |
| Max. permitted | 20 Pa |
| Nameplate | On the rear of the appliance |
| Accessorires supplied | |
| Grippers; Insulating glove | |
| Option available | |
| AT15 Draught adaptor | |
CE
- WARNINGS -
This appliance is designed to burn wood. Liquid fuels, coal and its derivatives are not permitted and the stove must not be used as a garbage incinerator.
When installing and using the stove, you must comply with local and national regulations as well as with European standards (2).
The stove heats up during operation, particularly the glass window. It remains hot for a long time, even when the flames are no longer visible. Take care to prevent any contact with the stove (prevent children from going near it).
Before accessing the electrical connection devices, the power supply must be disconnected.
This appliance must be installed in accordance with the specifications of the applicable standards (2). Professional installation is recommended.
The instructions provided in this manual must be carefully followed. Keep this manual in a safe place.
The manufacturer's liability is limited to the supply of the appliance. The manufacturer is not liable for failure to comply with these instructions.
It is particularly forbidden to:
Position materials that could be damaged or affected by the heat (furniture, wallpaper, woodwork, etc.) close to the appliance.
Install any type of heat recovery system.
Use any fuel other than natural wood or lignite.
Make any changes to the appliance or installation not indicated by the manufacturer. This would exempt the manufacturer from liability and void the warranty. Only the spares recommended by the manufacturer should be used.
The person performing the installation work shall be fully liable for any failure to comply with the instructions set out in these documents. Installations in public places are subject to the municipal health regulations of your local authorities.
The manufacturer reserves the right to change without prior notice the presentation and dimensions of the models, as well as their assembly, if necessary. The diagrams and texts hereof are the sole property of the manufacturer and must not be reproduced without the manufacturer's written authorisation.


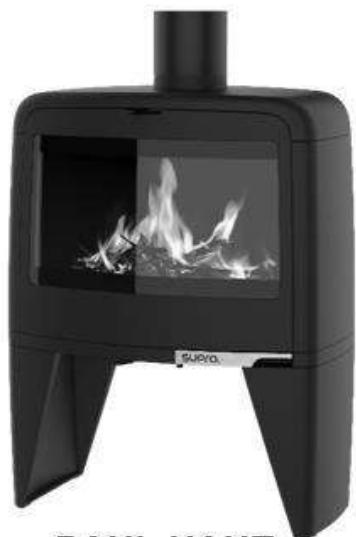
PAUL

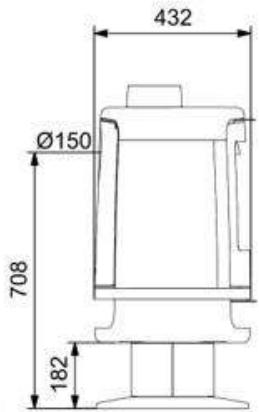
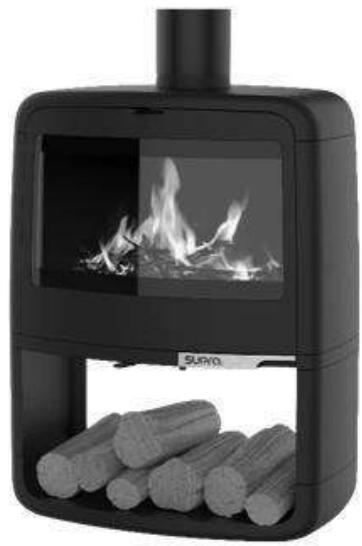
PAUL BÜCHER
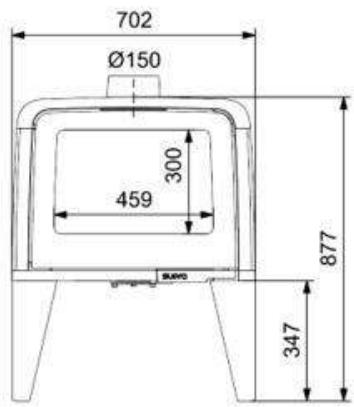
PAUL HAUT
PAUL SUR PIED

2. INSTALLATION
DEFINITION
Wood burning stove designed for installation close to a wall, and which can be moved with no need for additional work. The connection to the flue pipe is made through stainless steel or vitreous enamel pipes conforming to standard NFD 35-302. The connection must be made to an individual flue pipe.
SAFETY CLEARANCE
Comply with the safety clearances indicated between the wall and the sides or the back of the appliance. If the wall is non-combustible, then the safety clearance does not apply. Regardless of the orientation of the stove, there must be a clearance of 2 m between the glass and the wall or any flammable material.

PREPARATION OF THE STOVE
Unpack the appliance: remove the screws securing it to the pallet. Install the stove on a floor with sufficient load-bearing capacity. If the floor cannot support the load, then measures should first be taken (for example, the installation of a load distribution plate). Position the stove in its definitive location and level it. For ease of maintenance, it is recommended to lay tiles or some other type of covering in the load-bearing area.
natural_image
Line drawing of a modern industrial stove with internal grilles and a top vent (no text or symbols)BAFFLE PLATE
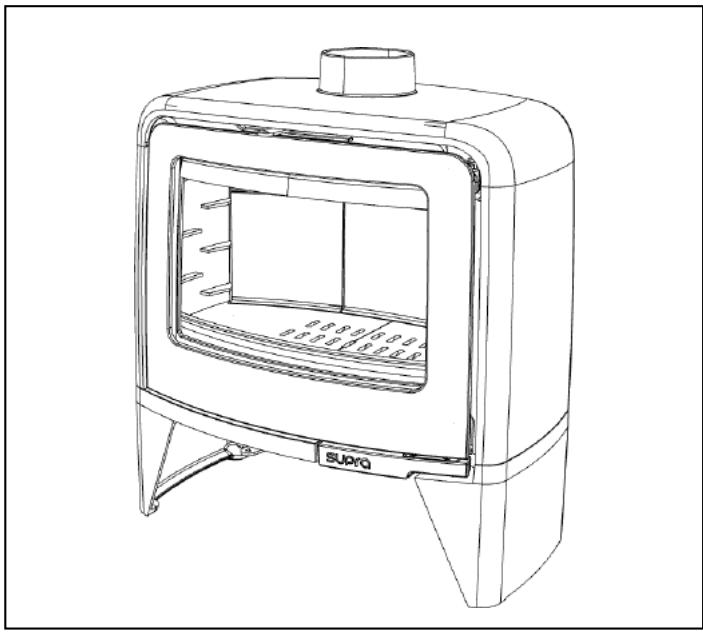
The baffle plate comprises 2 vermiculate plates. It ensures improved heat transfer and facilitates the recovery of the soot during sweeping. The baffle plate is mounted when the appliance is delivered. Before definitively installing the appliance, the baffle plate should be mounted and dismounted a number of times in order to become familiar with its operation.
Mounting the baffle plate
- Open the door
- Lift up the 2 halves of the baffle plate.
- Move them towards the rear of the stove.
- Tilt the right baffle plate half downwards and take it out.
- Tilt the left baffle plate half downwards and take it out.
Mounting the baffle plate
- Mount the left baffle plate half.
- Mount the right baffle plate half.
Left cross section. Left baffle plate half

Mounting the second baffle plate
- Remove the vermiculite baffle plates.
- The procedure is as follows:
- Unscrew from the inside of the heating chamber the 2 fixing screws of the deflector
- Remove the deflector
For reassembly, proceed in the reverse order

natural_image
Cross-sectional diagram of a mechanical component with internal channels and highlighted parts (no text or symbols)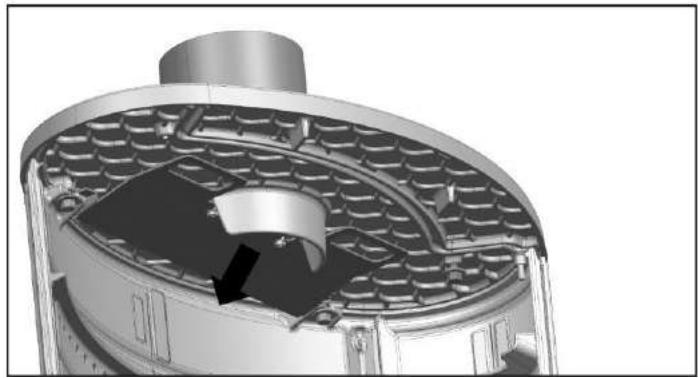
natural_image
Cross-sectional view of a mechanical component with internal cavities and a black arrow indicating direction (no text or symbols)CONNECTION
AIR INLET
It will be necessary to get a fresh air intake positioned facing the prevailing winds to permit correct combustion, particularly if the house is heavily insulated and/or fitted with a controlled
mechanical ventilation system (C. M.V.) It must have a minimum air passage of 1 dm ^2 . Do not operate the stove if a smoke extractor hood is operating.
This air inlet must be non-blockable, and positioned in the room where the device is installed.
FLUE PIPE
Treat this point of the installation with great care and attention. This appliance must not be connected to a shared flue system. For ducts that are already in place: get it cleaned (mechanical chimney brush). Get an authorised stove-maker to check its condition (stability, air tightness, compatibility of materials, diameter, etc.).
If the flue is not compatible (old, cracked, considerable blockage): contact a specialist so that it can be repaired in order to comply with the regulations in force.
CONNECTING PIPES
Use pipes made from enameled T450 stainless steel or 316 stainless steel (available at your stockist), without reducing their length.
The connection to the flue must be made in the room in which the appliance is installed. Provide access for chimney sweeping and to clean the flue pipe. The pipe must not stick out of the flue pipe and the connections must be removable and airtight.
Maintain a minimum distance of 3 x diameter between the connecting pipe and the wall.
Avoid having a long horizontal section in front of the flue. If this is inevitable, then give it a rising slope of 5 cm per metre.
To facilitate the adjustment of the stove in the event of a strong draught, the user is recommended to install an AT15 draught adaptor, as an option.
3. USE
TAKE NOTE:
This wood burning stove is designed to be used with the door closed. The door must remain closed except for refuelling.
To avoid burns, do not touch the appliance and use the grippers to operate the controls.
The heat emitted through the glass makes it necessary to maintain a safety clearance with any material that could be damaged by the heat (furniture, wallpaper, woodwork, etc.). A 2 m clearance will avoid any risk.
FUEL
Wood
Only burn air-dried logs (2 to 3 years, stored in a sheltered and well-ventilated place) with a maximum humidity of 15 to 20%.
Preferably hardwoods (birch, hornbeam, beech, etc.).
Avoid softwoods (lime, chestnut, willow, poplar).
It is strictly forbidden to permanently use softwoods (pine, fir, etc.) as well as the use of waste from processed wood (railway sleepers, woodworking waste, etc.) and household scraps (vegetables or plastics).
Never use small wood, boxes, woodchips and vine shoots as these will lead to sudden overheating.
Lignite
Lignite briquettes can be used by themselves or with wood for slow burning. Place the briquettes in a single layer on a bed of embers, limited to the surface area of the grid.
TAKE NOTE! The use of coal or its derivatives is strictly prohibited, even on an occasional basis. This appliance must not be used to burn domestic waste.
DRAUGHT
The hot draught in the flue pipe of the appliance must never be greater than 20 Pa. Should it be more than this, then install a draught adaptor. Ask your dealer to measure the draught during the installation of the appliance. Controlled mechanical ventilation (CMV) may affect the draught and even reverse it. For this reason, the CMV must be connected during the measurement of the draught.
LIGHTING THE FIRE FOR THE FIRST TIME
Remove the self-adhesive labels (except for the nameplate), any possible blocking cards, and make sure that the ash tray is empty. Start with a small fire and gradually indcrease the load. This progressive heating allows the materials to expand slowly and to stabilise. There may be some fumes and odours, due to the paintwork. These will gradually disappear. Do this for a few days until normal use. Open the windows during the first hours of operation.
When heating up for the first time, check the draught according to the technical specifications table.
SERVICE
Lighting the fire
To light your appliance, preferably follow the fire lighting procedure described above. This fire lighting technique makes it possible to heat up the flue and to remove any blockages (negative pressure) that may form when the weather is bad or cold, thereby preventing the air from blowing back into the room when the fire is lit.
The procedure is as follows:
- Put the air combustion control to the maximum setting.
- Place 2 logs on the firebox grid.
- Place the kindling wood in the shape of a tower on top of the logs.
- Put 1 or 2 fire-lighter cubes on the wood and set alight.
- Close the door.
For further information, view the Supra video on youtube at: https://www.youtube.com/watch?v=ebOr4vMj2Jo
TAKE NOTE! Never use petrol, alcohol or fuel-oil, etc.
| TABLE (*) | COMBUSTION AIR | WINDOW AIR |
| Lighting the fire | Left | Left |
| Nominal efficiency | Medium | Medium |
| Reduced efficiency | Adjust | Medium |

Reloading
Reload the appliance once there is only a bed of embers and the flames have gone out. Open the draught adaptor (optional). Gently open the loading door (with the grippers), to prevent fumes from getting out or embers from falling. Once loaded, close the door. Load the fire at regular intervals instead of putting too many logs in at once. Place the wood to the back of the appliance, to preven embers from falling out. 2 to 3 logs (2.9 kg per hour, approx.) are sufficient to reach nominal efficiency.
Nominal efficiency
Adjust the controls according to the table (*). The intensity of the fire will be determined by the amount of fuel. The correct operation of the appliance depends on a suitable air supply. Operating at nominal efficiency leads to less maintenance work.
Adjustment of reduced power
To adjust the power of the appliance, instead of reducing/closing the combustion air, reduce the logs loaded (2 logs 2 to 2.5 kg/hour).
Performance in slumber mode
Do not operate the appliance in slumber mode for long periods of time. The temperature of the combustion gases is insufficient and, instead of being eliminated, they condense in the flue pipe. This increases the amount of dirt in the chimney and appliance (walls and glass).
Caution: In time, this operating mode can cause fires in the chimney.
IN THE EVENT OF AN INCIDENT
In the event of an incident in the room (fire in the chimney, fire in the room, etc.), quickly close the loading door and all the stove controls. Do not pour water into the firebox. Call the fire brigade.
4. MAINTENANCE - RECOMMENDATIONS
ASH REMOVAL
Ensure that there is unobstructed access for cleaning the appliance and the flue pipe. Wait for the appliance to cool down.
- Clean the firebox grid.
- Regularly empty the ash tray. The build-up of ashes hinders the air flow under the grid, distorting the flow and affecting combustion.
- Put the ash tray back before reloading.
CLEANING THE FRONT AND SIDES
Do not use water, solvents or abrasive products (not even slightly) to clean the stove, only a soft, dry cloth.
CLEANING THE GLASS WINDOW
Clean the glass when it is cold, with a damp cloth dipped in wood ashes. The air sweep system keeps the glass as clean as possible. However, during normal operation, there may be a slight darkening in some areas of the glass. In slumber mode, the air sweep is less efficient.
SOOT REMOVAL
The legislation provides for 2 chimney sweeps a year (including one during the heating period) to be performed with mechanical means (rotary brush). Keep the documents signed by the company responsible for this work as proof that this has been done.
ANNUAL MAINTENANCE
After each heating season, clean the stove thoroughly and check that all moving parts of the appliance are operating correctly.
Check the conditions of the seals and the parts in contact with the flames.
Caution : be sure to check that there is no obstruction before switching on after a long shutdown period.
5. AFTER-SALES SERVICE
The appliance has parts that are subject to wear and tear and should be checked during the annual maintenance. Your stockist will supply you with the necessary spares.
When requesting information or spares, you need to indicate the part number and the serial number of the appliance, which can be found on the nameplate. Only use the spares supplied by the manufacturer.
natural_image
Black outdoor stove with visible flames and smoke, no text or symbols presentPAUL
natural_image
Black outdoor stove with visible flames and smoke, no text or symbols on the device itselfPAUL HAUT

natural_image
Black portable stove with visible flames and a chimney, no text or symbols on the device itselfPAUL SUR PIED

natural_image
Black outdoor stove with visible flames and a wooden log stack (no text or symbols)PAUL
BÜCHER
- IMPORTANTE-
natural_image
Line drawing of a modern industrial stove with open door and side legs (no text or symbols)DEFLECTOR DE HUMOS
natural_image
Cross-sectional diagram of a mechanical component with internal channels and highlighted parts (no text or symbols)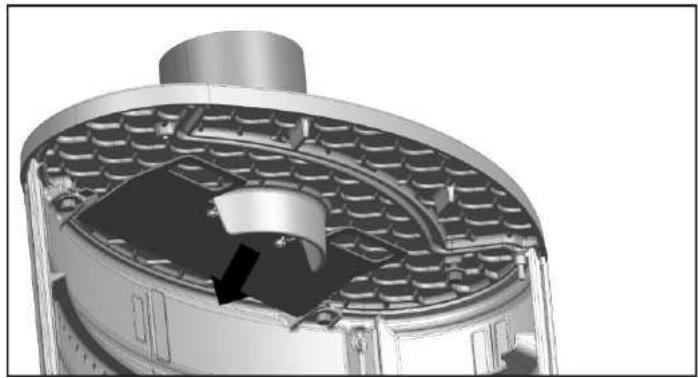
natural_image
Cross-sectional view of a mechanical component with internal gear and housing (no visible text or symbols)CONEXIÓN
ENTRADA DE AIRE
natural_image
Black outdoor stove with visible flames and a chimney (no text or symbols)PAUL
natural_image
Black outdoor stove with visible flames and smoke, no text or symbols presentPAUL HAUT

natural_image
Black industrial stove burner with visible flames and a chimney (no text or symbols)PAUL SUR PIED

natural_image
Modern black portable stove with visible flames and a wooden log stack (no text or symbols)PAUL
BÜCHER
- IMPORTANTE-
natural_image
Line drawing of a modern heating oven with labeled components (no text or symbols beyond branding)DEFLETOR DE FUMOS
natural_image
Cross-sectional diagram of a mechanical component with internal cavities and two inset views showing internal components (no text or symbols)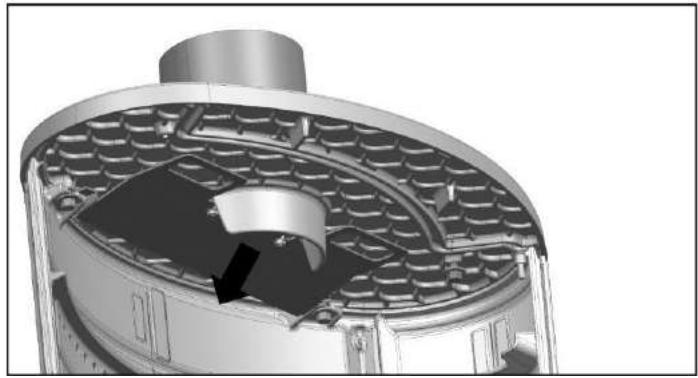
natural_image
Cross-sectional view of a mechanical component with internal cavities and a central hub (no text or symbols visible)CONEXÃO
ENTRADA DE AR
natural_image
Black industrial stove burner with visible flame display and smoke cover (no text or symbols)PAUL

natural_image
Black outdoor stove with visible flames and smoke, no text or symbols on the device itselfPAUL HAUT

natural_image
Black portable stove with visible flames and a chimney, no text or symbols on the device itselfPAUL SUR PIED
natural_image
Black portable stove with visible flames and a cylindrical wood base (no text or symbols)PAUL
BÜCHER
- IMPORTANTE-
natural_image
Line drawing of a modern heating oven with internal compartments and a labeled 'SUPRQ' on the side (no text or symbols beyond label)DEFLETTORE DEI FUMI
natural_image
Cross-sectional diagram of a mechanical component with internal channels and highlighted parts (no text or symbols)
natural_image
Cross-sectional view of a mechanical component with internal cavities and a black arrow indicating direction (no text or symbols)COLLEGAMENTO
ENTRATA DELL'ARIA
natural_image
Black outdoor stove with visible flames and smoke, no text or symbols presentPAUL

natural_image
Black outdoor stove with visible flames and a chimney, no text or symbols presentPAUL HAUT

natural_image
Black portable stove with visible flames and a chimney, no text or symbols on the device itselfPAUL SUR PIED

natural_image
Black industrial stove with visible flames and a wooden log stack (no text or symbols)PAUL BÜCHER
-WICHTIG-
natural_image
Line drawing of a modern heating oven with internal compartments and a labeled base (no text or symbols on the device itself)RAUCHDEFLEKTOR
natural_image
Cross-sectional diagram of a mechanical component with internal channels and highlighted parts (no text or symbols)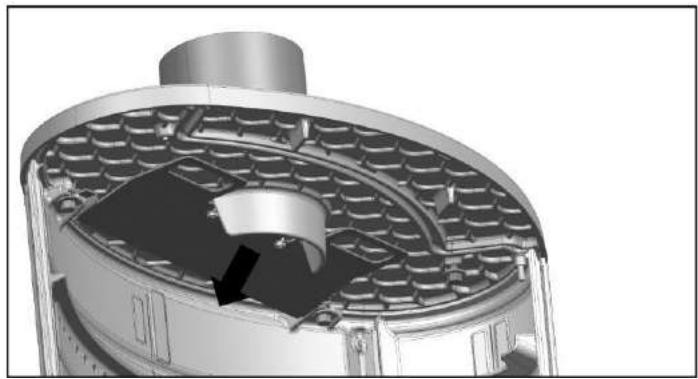
natural_image
Cross-sectional view of a mechanical component with internal cavities and a black arrow indicating direction (no text or symbols)ANSCHLUSS
LUFTEINLASS


- -IMPORTANT-
- RACCORDEMENT
- ENTRÉE D'AIR
- INSTALLATION INSTRUCTIONS AND USER MANUAL
- - IMPORTANT -
- - IMPORTANT ASSEMBLY INSTRUCTIONS -
- TECHNICAL SPECIFICATIONS
- - WARNINGS -
- INSTALLATION
- DEFINITION
- SAFETY CLEARANCE
- PREPARATION OF THE STOVE
- BAFFLE PLATE
- Mounting the baffle plate
- Mounting the second baffle plate
- CONNECTION
- AIR INLET
- FLUE PIPE
- CONNECTING PIPES
- USE
- TAKE NOTE:
- FUEL
- Wood
- Lignite
- DRAUGHT
- LIGHTING THE FIRE FOR THE FIRST TIME
- SERVICE
- Lighting the fire
- The procedure is as follows:
- Reloading
- Nominal efficiency
- Adjustment of reduced power
- Performance in slumber mode
- IN THE EVENT OF AN INCIDENT
- MAINTENANCE - RECOMMENDATIONS
- ASH REMOVAL
- CLEANING THE FRONT AND SIDES
- CLEANING THE GLASS WINDOW
- SOOT REMOVAL
- ANNUAL MAINTENANCE
- AFTER-SALES SERVICE
- - IMPORTANTE-
- DEFLECTOR DE HUMOS
- CONEXIÓN
- ENTRADA DE AIRE
- DEFLETOR DE FUMOS
- CONEXÃO
- ENTRADA DE AR
- DEFLETTORE DEI FUMI
- COLLEGAMENTO
- ENTRATA DELL'ARIA
- -WICHTIG-
- RAUCHDEFLEKTOR
- ANSCHLUSS
- LUFTEINLASS
Brand : SUPRA
Model : PAUL HAUT BUCHER SUR PIED 1
Category : Wood stove