KH 230 LAMINATING DEVICE - Laminating device LERVIA - Free user manual and instructions
Find the device manual for free KH 230 LAMINATING DEVICE LERVIA in PDF.


| Product type | Hot and cold laminating device |
| Brand | LERVIA |
| Model | KH 230 |
| Dimensions (L×W×H) | 336 × 146 × 75 mm |
| Net weight | 1.56 kg |
| Power supply | AC 230 V, 50 Hz |
| Power | 200 W |
| Max. laminating width | 230 mm |
| Max. laminating thickness | 1.0 mm |
| Laminating speed | 0.3 m/min |
| Roller temperature | 120 °C |
| Max. pouch format | DIN A4 |
| Laminating modes | Hot and cold |
| Recommended pouch type | Standard quality pouches |
| Unsuitable materials | Flammable, heat-sensitive, thickness >1 mm, valuables |
| Safety | Hot surface during operation, do not touch |
| Roller cleaning | Pass a folded A4 sheet (not fax paper) |
| Housing cleaning | Soft cloth and mild soap, device turned off and unplugged |
| Repairability | Contact your local representative or after-sales service |
| Included accessories | Laminating pouches (standard quality) |
Frequently Asked Questions - KH 230 LAMINATING DEVICE LERVIA
User questions about KH 230 LAMINATING DEVICE LERVIA
0 question about this device. Answer the ones you know or ask your own.
Ask a new question about this device
Download the instructions for your Laminating device in PDF format for free! Find your manual KH 230 LAMINATING DEVICE - LERVIA and take your electronic device back in hand. On this page are published all the documents necessary for the use of your device. KH 230 LAMINATING DEVICE by LERVIA.
USER MANUAL KH 230 LAMINATING DEVICE LERVIA
Operating instructions
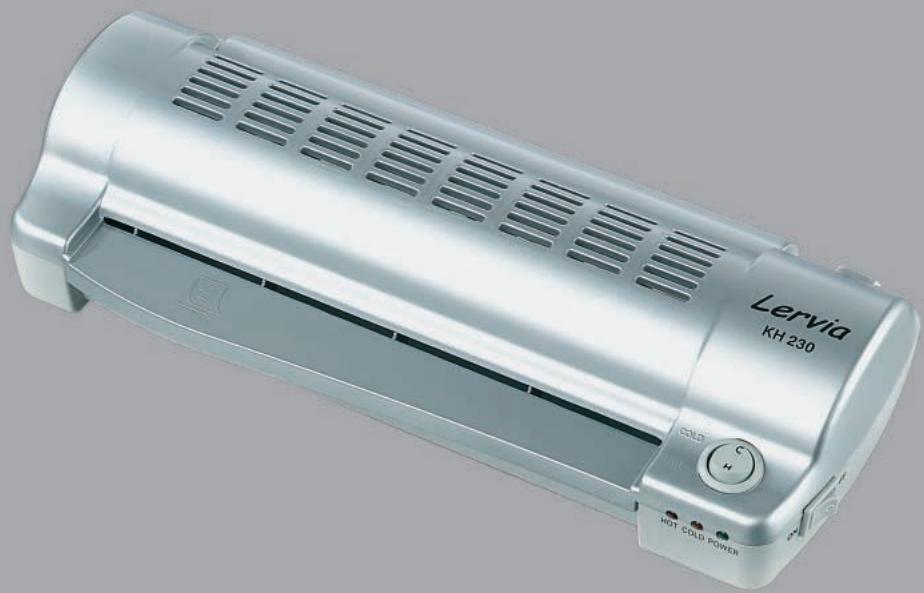
Operating instructions
Your new Lervia laminating device can be used for hot and cold laminating of plastic film for protection of pictures, cards, documents, etc.
The laminating device is suitable for film pouch sizes of up to format DIN A4.
Technical data
Power supply AC 230V 50Hz
Power 200W
- Dimensions L x W x H 336 x 146 x 75 mm
Net weight 1,56 kg
Max. laminating width 230 mm
Max. laminating thickness 1,0 mm
- Laminating speed 0,3 m/Minute
- Roller temperature 120°C
Safety information
Setting up the laminating device:
- The machine should not be set up in a damp area or in the vicinity of an air conditioning outlet in order to prevent the occurrence of surface leakages.
- Ensure that the laminating device is set up upon a level, rigid and non-slip surface. There must be sufficient space behind the device to allow laminated films to exit. Therefore it is important to ensure sufficient space between the rear-side of the device and any walls, objects, etc..
- Never cover the laminating device and do not store any objects on it.
- The laminating device may only be connected to (230V 50Hz) power sources. Multi-plug systems may not be used.
- Please do not use extension cables.
Caution: The surface of the laminating device can get very hot during operation. Therefore the surface of the device should not be touched when in operation - danger of burning!
Prior to laminating
1. Film pouches
1.1. Ensure that there is sufficient room between the edges of the film pouch and the edges of the material being laminated (3-5 mm). Always select a suitable film pouch size for the material being laminated.
1.2. We recommend using only standard quality film pouches (as supplied with the device), due to the very real danger of creasing when using sub-standard film quality.
1.3. Please note that a film pouch can only be used once.
1.4. The maximum film pouch width is 230 mm
2. Non-suitable laminating material
The following materials should not be laminated in order to prevent film creasing and to reduce the danger of accidents and damage to a minimum:
2.1. Inflammable or materials that can melt (e.g. photographs etc.; these must be cold-laminated)
2.2. Valuable, unique objects
2.3. Materials thicker than 1,0 mm
2.4. Drawings on heat-sensitive paper and/or material, whose colour and/or quality can be effected by heat
Operating the laminating device
1. Cold laminating
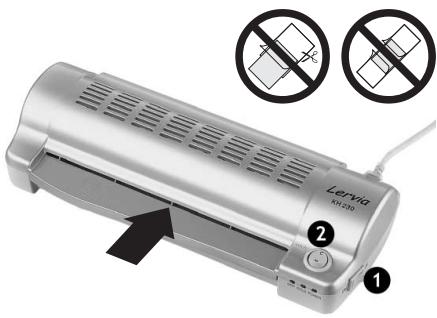
Plug the laminating device's plug into the power supply socket. Switch on the device using the power supply switch (1). The green light designating "POWER" shines, showing that the device is switched on. Set the selector switch (2) on the front-side of the device to COLD. The yellow light designating "COLD" shines. Place the material to be laminated in a suitably sized film pouch and feed it into the laminating device. The laminating can now take place automatically.
2. Hot laminating
Plug the laminating device's plug into the power supply socket. Switch on the device using the power supply switch (1). The green light designating "POWER" shines, showing that the device is switched on. Set the selector switch (2) on the upper cover to HOT. The motor starts to run and the device warms up to its operating temperature. The red light shines after a warm-up phase of 4-8 minutes; the rollers have now reached their operating temperature. Place the material to be laminated in a suitably sized film pouch. Then feed the film pouch into the laminating device's infeed opening. The laminating can now take place automatically. Ensure that the material being laminated lies directly on the fold of the film pouch prior to the laminating. The film pouch must be fed into the laminating device with the fold in front.
In order to prevent creasing do not feed the film pouch in with the open side facing into the laminating device. Thus the pocket should not be cut-off prior to being used. Pay attention to the pictograph on the infeed opening in order to ensure that the film pouch is fed into the device correctly.
3. Additional processing of the laminated film pouch
When the film pouch comes out of the machine after the laminating process it is very hot and can easily lose its shape. Take great care when removing the film pouch to prevent injury to oneself or damage to the film pouch. Place a book or other heavy object upon the film pouch prior to it cooling down. This will ensure a smooth and perfect surface.
4. Laminating device maintenance
The rollers should always be cleaned after use because the laminating performance sinks proportionally with the amount of residue left on the rollers. Feed in a folded A4 sized piece of paper in the laminating device opening. Carry out the normal laminating cycle as already described. The residue on the rollers will now transfer and stay on the paper. Repeat this process a few times until the rollers are completely clean. Caution: do not use fax paper when cleaning the rollers. It is too smooth and too thin and can thus roll off the rollers too easily.
Clean the device's housing and covers with a soft cloth and a mild soap. Caution: Switch off the device and pull the plug out of the power supply prior to cleaning. The device must be completely dry prior to being used for laminating again!
If the paper gets jammed and blocks the movement of the rollers because the paper can not be pulled out of the device, switch the machine off immediately and pull out the plug. Then contact your local laminating device representative or the local service partner.
Declaration of conformance
We, Kompernaß Handelsgesellschaft mbH, Burgstr. 21, D-44867 Bochum, Germany, declare this appliance to be in conformance with all applicable international standards, safety requirements and the EC Directives.
No. of appliance/Type: KH 230
Bochum, 30-11-2002
Hans Kompernaß
- Manager -

- OPERATING INSTRUCTIONS
- TECHNICAL DATA
- SAFETY INFORMATION
- SETTING UP THE LAMINATING DEVICE
- PRIOR TO LAMINATING
- FILM POUCHES
- NON-SUITABLE LAMINATING MATERIAL
- OPERATING THE LAMINATING DEVICE
- COLD LAMINATING
- HOT LAMINATING
- ADDITIONAL PROCESSING OF THE LAMINATED FILM POUCH
- LAMINATING DEVICE MAINTENANCE
- DECLARATION OF CONFORMANCE
Brand : LERVIA
Model : KH 230 LAMINATING DEVICE
Category : Laminating device