
P639 - Heating ZIBRO - Free user manual and instructions
Find the device manual for free P639 ZIBRO in PDF.
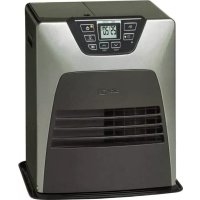
| Product type | Electric supplemental heater |
| Brand | ZIBRO |
| Model | P639 |
| Power supply | 220-240 V ~ 50 Hz |
| Power | 2000 W |
| Dimensions (W × D × H) | 25 × 15 × 35 cm |
| Weight | 2.5 kg |
| Main functions | Fan-forced heating, temperature adjustment, tip-over safety shut-off |
| Heating type | Forced convection (fan + heating element) |
| Thermostat | Yes, progressive adjustment |
| Overheat protection | Yes, automatic shut-off |
| Tip-over protection | Yes, automatic shut-off |
| Maintenance and cleaning | Unplug and wipe with a dry cloth. Do not immerse. |
| Spare parts | Not specified, contact customer service |
| Repairability | Do not repair yourself, consult a professional |
| General information | Indoor use only. Do not use with an extension cord. |
Frequently Asked Questions - P639 ZIBRO
User questions about P639 ZIBRO
0 question about this device. Answer the ones you know or ask your own.
Ask a new question about this device
Download the instructions for your Heating in PDF format for free! Find your manual P639 - ZIBRO and take your electronic device back in hand. On this page are published all the documents necessary for the use of your device. P639 by ZIBRO.
USER MANUAL P639 ZIBRO
For safety reasons, please read this manual carefully before operating. Persons who are not familiar with this manual must not use this air conditioner. We strongly recommend keeping this manual in a safe place for future reference.
A. Do not use a damaged cable.
B. Do not clamp or bend the cable.
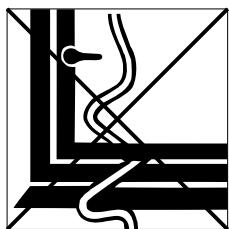
C. Do not place unevenly.
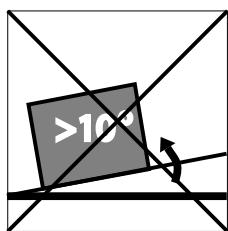
D. Do not place in front of an open window.
E. Do not bring in contact with chemicals.
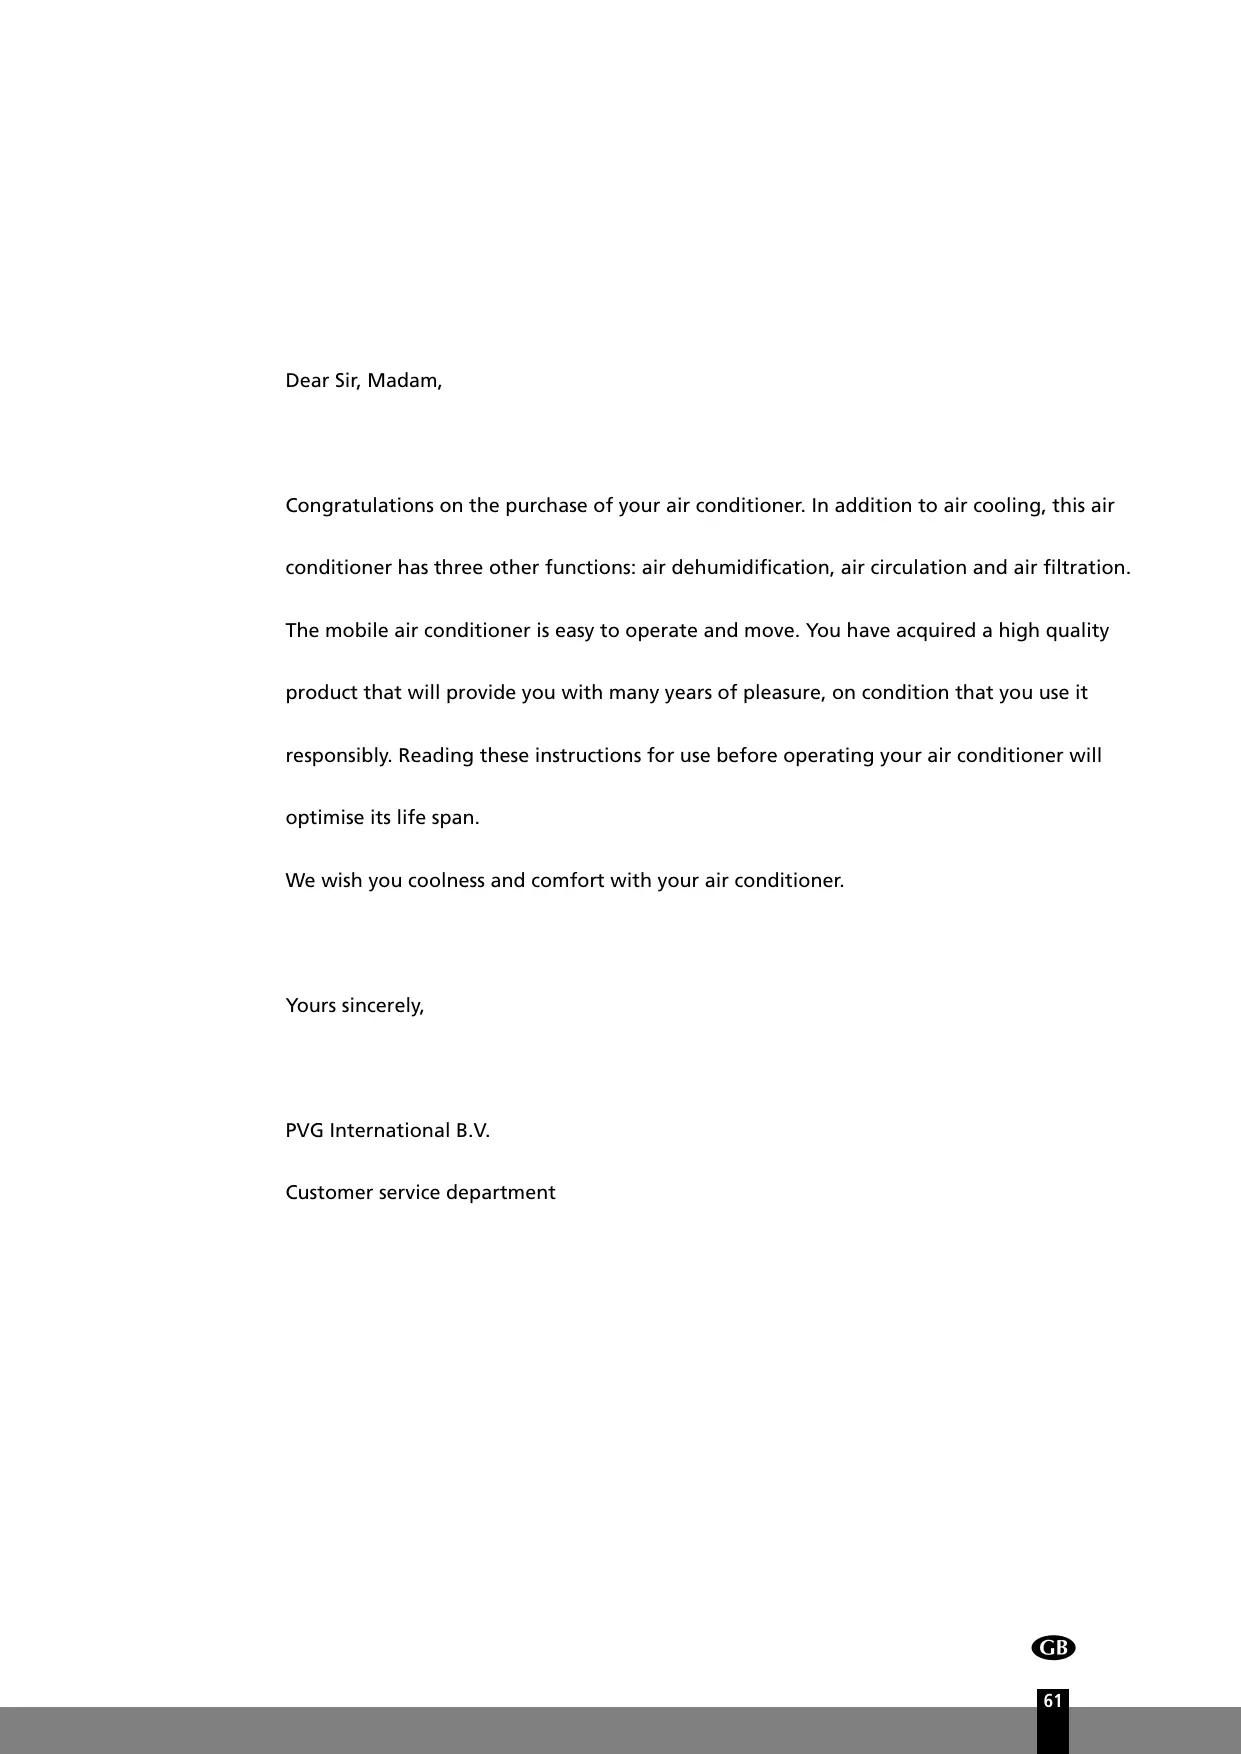
F. Do not place near a heat source.
G. Do not immerse in water.
H. Do not spill.
I. Do not insert anything.
J. Do not use an extension cord.
K. Keep out of the reach of children.
L. Do not repair.

A
B
C
D

E

F

G

SICUREZZA
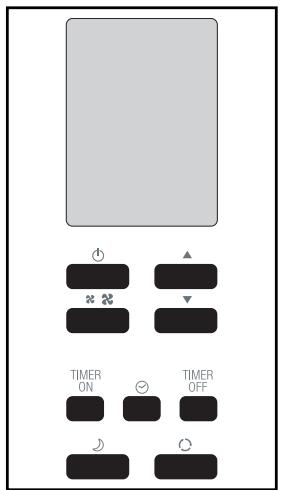
Control Panel
Air outlet
3 Carrying handle
Caster wheels
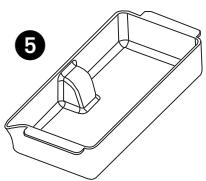
Water container
6 Air filter
Air inlet
8 Exhaust air outlet
9 Cord storage
Water stopper / drainage point
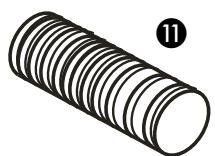
Hose
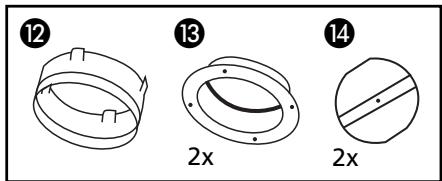
Hose connector (optional)
13 Hose adapter (optional)
Caps for hose adapter (optional)
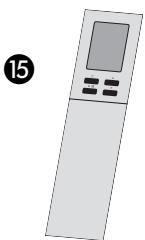
Remote control
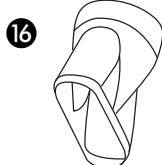
16 Slidebar connector
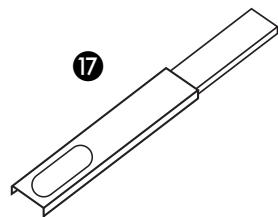
17 Telescopic slidebar

(optional)
- READ THE DIRECTIONS FOR USE FIRST.
- IN CASE OF ANY DOUBT, CONTACT YOUR DEALER.
Dear Sir, Madam,
Congratulations on the purchase of your air conditioner. In addition to air cooling, this air conditioner has three other functions: air dehumidification, air circulation and air filtration.
The mobile air conditioner is easy to operate and move. You have acquired a high quality product that will provide you with many years of pleasure, on condition that you use it responsibly. Reading these instructions for use before operating your air conditioner will optimise its life span.
We wish you coolness and comfort with your air conditioner.
Yours sincerely,
PVG International B.V.
Customer service department
A SAFETY INSTRUCTIONS
Install the device only when it complies with local regulations, by-laws and standards. The unit is only suitable for use in dry locations, indoors. Check the mains voltage and frequency. This unit is only suitable for earthed sockets, connection voltage 220-240 V. / 50 Hz.

IMPORTANT
The device MUST always have an earthed connection. If the power supply is not earthed, you may not connect the unit. The plug must always be easily accessible when the unit is connected. Read these instructions carefully and follow the instructions.
Before connecting the unit, check the following:
- The voltage supply must correspond with the mains voltage stated on the rating label.
- The socket and power supply must be suitable for the current stated on the rating label.
The plug on the cable of the device must fit into the wall socket.
The device must be placed on a flat and stable surface.
The electricity supply to the device must be checked by a recognised professional if you have any doubts regarding the compatibility.
- This device is manufactured according to CE safety standards. Nevertheless, you must take care, as with any other electrical device.
- Do not cover the air inlet and outlet grill.
- Empty the water reservoir before moving the unit.
- Never allow the device to come into contact with chemicals.
- Never spray the unit with or submerge in water
- Do not insert objects into the openings of the unit.
- Always remove the plug from the electric power supply before cleaning or replacing the unit or components of the unit.
- Never use an extension cable to connect the device to the electric power supply. If there is no suitable, earthed wall socket available, have one installed by a recognised electrician.
- For safety reasons take care when children are in the surrounding of the device, as with any other electrical device.
- Have any repairs only carried out by a recognised service engineer or your supplier. Follow the instructions for use and maintenance as indicated in the user manual of this device.
Always remove the plug of the unit from the wall socket when it is not in use. - A damaged power cord or plug must always be replaced by a recognised electrician or your supplier.


ATTENTION!
- Never use the device with a damaged power cord, plug, cabinet or control panel. Never trap the power cord or allow it to come into contact with sharp edges.
- Never seal the room - where this device will be used - completely airtight. This will prevent under pressure in this room. Under pressure can disrupt the safe operation of geysers, ventilation systems, ovens, etc.
- Failing to follow the instructions may lead to nullification of the guarantee on this device.

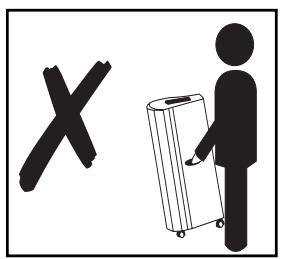
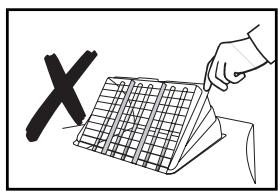
WARNING
Don't lift, or move by pushing, the air conditioner at the back side, but always at the front side (see pictures).
B INSTALLATION

WARNING
Before using the air conditioner it should be left in an upright position for at least 2 hours.
This unit is portable and can easily be moved from one room to another. In doing so keep this in mind:
1 Ensure that the unit is positioned upright and on a level surface.
2 Place the loose filters in the filter holder.
Take the filter holder out of the air conditioner
- Open the filter holder and place the active carbon filter (black) and 3M^TM FiltreteTM filter (white) in the filter holder.
- Place the filter fixing component back in the holder.
- Place the filter holder back in the air conditioner.
3 Do not operate the unit inside the bathroom, shower, or in any other very humid environment.
4 Please keep a distance of 50~cm between the unit and the wall or other objects to ensure proper air circulation.
5 Connect the hose to the unit by turning it clockwise (at least 5 turns).
6 Connect the hose 1 to the slider connector 16 as far as possible.

7 Fit the telescopic slide bar to the window and adjust the length. Put the slider connector in the opening in the telescopic slide bar. Close the window or door as much as possible to prevent outside air entering the room. Ensure that the slider connector has a free flow outside.

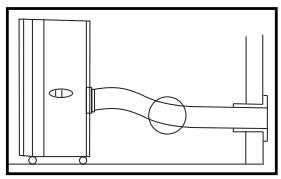
IMPORTANT
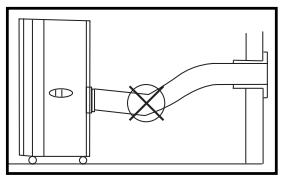
The flexible exhaust hose can be extended from 500 to 1500mm for mounting. This length has been designed especially according to the specifications of the air conditioner. Do not use an extension or exchange for a different hose as that may lead to malfunctioning. The exhaust air must flow freely, any blockage can lead to overheating of the air conditioner. Take care to prevent any sharp bow or bend in the exhaust (see pictures).
C OPERATION
1. CONNECTING TO THE MAIN
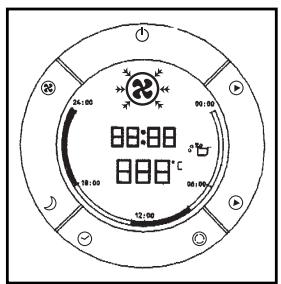
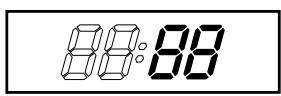
Insert the plug in the wall socket. Then press to switch the unit on or off. A buzzer will beep, and the LCD will display 12:00 o'clock as default.
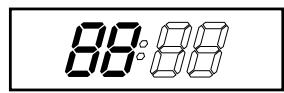
2. SETTING THE CLOCK
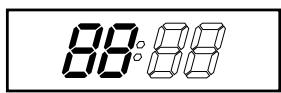
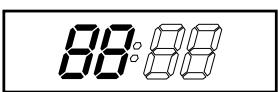
Press the push button for 3 seconds to set the clock. The 2 left digits of the 4 digits on the LCD-display will flash.
Press or to adjust the hour.
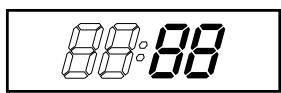
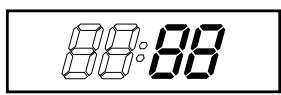
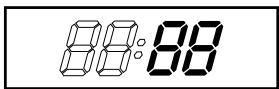
Press momentarily, the 2 right digits of the 4 digits will flash.
4 Press or to adjust the minutes of the clock.
Press the push button for 3 seconds again to activate the clock.
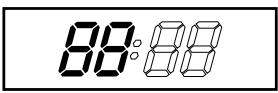
3. TEMPERATURE SETTING UP/DOWN
If you want to change the set temperature press or to set the temperature. The 2 digit display will indicate the set temperature.

NOTE
Reaching the set temperature is up to surrounding room conditions.
4. MODE SWITCH
Push the button successively until the icon representing the desired mode is appearing ( => Cool => Fan => Cool => etc).
On the LCD-display you will see:
Cooling

Fan only

Each time the unit starts, it starts operating in coolmode with a set temperature of 22^ . The fan speed will be selected automatically.
5. FAN SPEED SETTING
If you prefer a constant fan speed instead of the auto fan speed, push the push button successively; the fan icon on the LCD-display will rotate accordingly.
- Fast - for the turbo speed
Normal -for the medium speed - Slow - for the slow speed
- Alternating - for the auto fan speed (In the cooling mode only!)
6. TIMER SETTING
The timer can be set in the following configurations:
ON
Programming the timer for ON - when the unit is OFF.
Press the push button; the 2 left digits of the 4 digits on the LCD display are flashing.
Press or to adjust the hour.
3 Press the push button again, the 2 right digits of the 4 digits are flashing.
Press or to adjust the minutes of the clock in intervals of 5 minutes. The timer is set. After 10 seconds the time display returns.
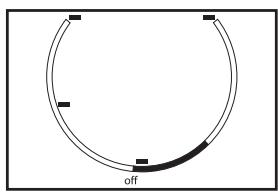
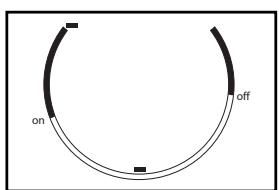
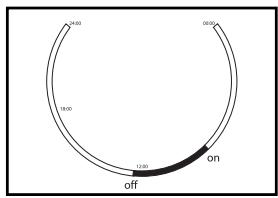
The circular time scale will be on between the ON programmed times until 24:00. The flashing bar on the time scale indicates the real time and moving a phase every 30 minutes ahead until it reaches the ON timer time, then the black segments in the circular time scale will disappear.
OFF
Programming the timer for OFF - when the unit is running.
Press the push button; the 2 left digits of the 4 digits on the LCD display are flashing.
Press or to adjust the hour.
Press the push button again, the 2 right digits of the 4 digits are flashing.
Press l or l to adjust the minutes of the clock in intervals of 5 minutes. The timer is set. After 10 seconds the time display returns.
The circular time scale will be on between the present time to the OFF programmed time. The flashing bar on the time scale indicates the real time and moving a phase every 30 minutes ahead until it reaches the OFF timer time, then the black segments in the circular time scale will disappear.
Repeat OFF & ON
Programming the timer for repeat OFF & ON - when the unit is running.
Press the push button; the 2 left digits of the 4 digits on the LCD display are flashing.
Press or to adjust the hour.
Press the push button again, the 2 right digits of the 4 digits are flashing.
Press or to adjust the minutes of the clock in intervals of 5 minutes. The timer is set. After 10 seconds the time display returns.
Repeat the above procedure while the digits are still flashing for setting the ON.
The circular time scale will be on between the 00:00 time to the timer time off, and from the time on till 24:00. The flashing bar on the time scale indicates the real time and moving a phase every 30 minutes ahead. The unit will operate according to the timer setting daily.
Repeat ON & OFF
Programming the timer for repeat ON & OFF - when the unit is not running.
Press the push button; the 2 left digits of the 4 digits on the LCD display are flashing.

Press or to adjust the hour.
Press the push button again, the 2 right digits of the 4 digits are flashing.
Press or to adjust the minutes of the clock in intervals of 5 minutes. The timer is set. After 10 seconds the time display returns.
Repeat the above procedure while the digits are still flashing for setting the OFF.
The circular time scale will be OFF between the 00:00 time to the timer time ON, and from the time OFF until 24:00. The flashing bar on the time scale indicates the real time and moving a phase every 30 minutes ahead. The unit will operate according to the timer setting daily.
After a power failure (e.g. after plug out of the wall socket) you have to program the timer setting again.
In order to cancel the timer programming press the push button momentarily, then it will return to the time display. The daily mode will be cancelled as well. The black segments in the circular time scale will disappear.
8. AIRFLOW
Direct the airflow by adjusting the grill on top of the air conditioner. Move the grill, by pushing or pulling, in the middle (see illustration). This to avoid a false position of the grill. Adjusting the airflow is as well possible by moving the direction of the vertical louvers.
9. SLEEP MODE FUNCTION
The sleep mode function adjusts the set temperature of the unit to the thermal needs of the body falling asleep as follow:
- In the COOL or AUTO COOL mode
- The set temperature will increase 1^ after 1 hour and a further 1^ after 2 hours.
- No FAN mode under SLEEP mode operation
Default fan speed: LOW
Press the push button to operate the sleep mode.
Press the push button again in order to cancel the sleep mode.
10. DEHUMIDIFICATION
If the unit will be used mainly as dehumidifier, do not connect the exhaust hose and let the warm air return in the room. Continuous drainage is then necessary and more efficient.
For continuous drainage:
1 Switch off the unit and remove the plug from the mains
2 Remove the water stopper and rubber plug 10.
3 Connect a drain tube (ø 20 mm inner dimension) onto the water outlet and extend with extra water tube if needed.
Place the other end in a normal drain. Make sure that the tube is free from twists and bends. The tube must decline over its entire length.
AIR FILTER
This air-conditioner is equipped with a 3 layer filter to clean the circulated room air.
a. Screen filter; to remove bigger dust particles.
b. 3M^TM Filtrete™ filter; to remove unhealthy particles from the air such as pollen, bacteria, animal dander and dust.
c. Active carbon filter; to remove odours.

NOTE!
The active carbon filter and the 3M^TM FiltreteTM filter are delivered in a plastic packaging. Don't forget to install these filters. These filters take away unhealthy particles out of the room environment.
The filter frame on the backside of the unit can be opened. The active carbon filter and 3M^TM FiltreteTM filter can be installed or removed. The screen filter is part of the filter frame (see illustration).
a. The screen filter has to be cleaned regularly with a vacuum cleaner to avoid blocking of the air flow.
b. The positive/negative electrostatically charged 3M^TM FiltreteTM filter is recommended to be changed every 3 months. Unusual dirt, construction work, pets, the presence of smoke and running the air-conditioning unit continuously can shorten the life time of the 3M^TM FiltreteTM filter.
New filter
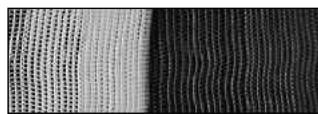
Recommended change of filter
c. The active carbon filter can be cleaned with a vacuum cleaner when dusty but has to be changed at the same time as the 3M^TM FiltreteTM filter.
Filter installation:
1 Slide out the filter frame from the unit.
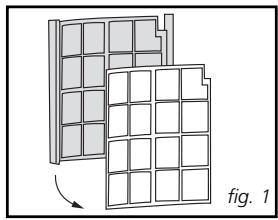
2 Separate the filter fixer from the filter frame (see fig. 1).
3 Remove the active carbon filter and the 3M^TM FiltreteTM filter from its plastic bag.
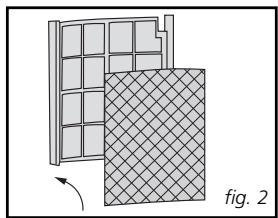
4 Insert the active carbon filter into the filter frame (see fig. 2).
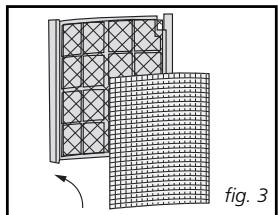
5 Insert the 3M^TM FiltreteTM filter into the filter frame (see fig. 3).
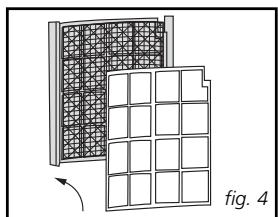
Fix the filter by reassembling the fixer into the filter frame (see fig. 4).

NOTE!
- Remove the 3M^TM Filtrete™ filter and active carbon filter before seasonal storage and install new filters at the beginning of the new season. The old filters can be disposed in the 'Non-biological garbage container'.
- Replacement filter packages are available at your dealer.
- To run the unit without active carbon filter and/or 3M^TM Filtrete™ filter does not bring any harm to the air conditioner. In that case odours and unhealthy dust are not removed from the circulated air.

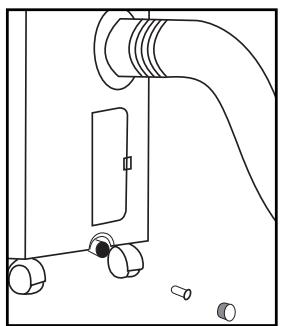
E EMPTY INTERNAL WATER CONTAINER
Under extreme (humidity) circumstances it may be necessary to empty the internal water container. When the internal water container is full the backlight on the LCD-display will be flashing. The unit will switch off automatically. To empty the water container do the following:
1 Switch off the unit and remove the plug from the wall socket.
2 Do not move the unit. Doing this can result in water leakage, damaging your floor or carpet.
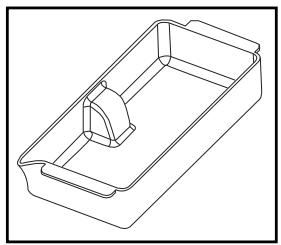
3 Place the water container 5 on the floor underneath the permanent drainage point 10.
4 Remove the water stopper 10 and rubber plug from the drain and let the water run out. The water container has to be emptied several times before all water will be drained (ca. 1,5 ltrs).
Replace the rubber plug and water stopper 0, put the plug into the wall socket, and switch the unit on. The warning signal should be off.

NOTE!
When the air conditioner is in use, under normal circumstances the condensed water will be discharged through the hot air outlet-hose 11.
F REMOTE CONTROL
The unit responds to all signals that are sent by the remote control ⑤. There will be a beep sound from the unit after receiving the signal. The operation of the unit (see chapter C) by remote control, is almost identical to the operation by the circular control panel.
The only exception is the clock function.
Instead of the common push button for setting the actual time and for programming the timer, there are 3 push buttons on the remote control as follows:
- for programming the time for the unit ON
TIMER OFF
- for programming the time for the unit OFF
G CLEANING

WARNING!
First of all switch off the unit and pull the plug out of the wall socket.
Clean the housing with a soft, damp cloth. Never use aggressive chemicals, petrol, detergents or other cleansing solutions. Clean the screen filter regularly with a vacuum cleaner. See also chapter D "Air filter".

NOTE!
Never use the air conditioner without the screen filter.
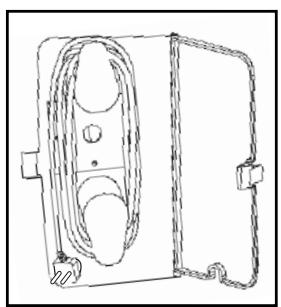
H STORAGE
1 Empty the internal water container (refer to Chapter E).
2 Clean the screen filter (refer to Chapter G). Remove 3M^TM FiltreteTM filter and Active carbon filter.
- Remove the 3M^TM Filtrete™ filter and Active carbon filter before seasonal storage and install new filters at the beginning of the new season. The old filters can be disposed in the 'Non-biological garbage container'.
- Replacement filter packages are available at your dealer.
3 Put the unit in air circulation mode for a few hours to ensure that the inside becomes completely dry.
Store the cable as shown. Protect the unit against dust and store in a dry place, not accessible to children.
TROUBLE SHOOTING
| Problem | Cause | Solution |
| The unit does not function. | No power supply. | Connect to a functioning outlet and switch on. |
| Is the LCD light flashing. | Empty the internal water container (refer to Chapter E). | |
| Timer function is active. | De-activate Timer function (refer to Chapter C). | |
| Internal watertank is full. | Empty internal watertank (refer to Chapter E). | |
| The unit does not seem to perform. | In direct sunlight. | Close curtains. |
| Windows or doors open, many people or heat sources in room. | Close doors and windows, or place an extra air conditioner. | |
| Dirty filter. | Clean or replace filter (refer to Chapter D). | |
| Air inlet or air outlet blocked. | Remove blockage. | |
| Room temperature lower than selected value. | Change temperature selection. | |
| The unit is noisy. | Unit stands uneven. | Place on even surface (less vibrations). |
| The compressor does not work. | Overheat protection probably activated. | Wait 3 minutes until the temperature has decreased, and turn on the unit again. |
| Remote control does not function. | Distance too big. | Make sure the remote control is correctly aimed at the control panel. |
| Remote control signal not detected by control panel. | ||
| Batteries empty. | Replace the batteries. |
Never try to repair or dismantle the air conditioner yourself. Incompetent repairs result in loss of warranty and can endanger the user.
J GUARANTEE CONDITIONS
The air conditioner is supplied with a 24-month guarantee, commencing on the date of purchase. All material and manufacturing defects will be repaired or replaced free of charge within this period. The following rules apply:
- We expressly refuse all further damage claims, including claims for collateral damage.
- Repairs to or replacement of components within the guarantee period will not result in an extension of the guarantee.
- The guarantee is invalidated if any modifications have been made, non genuine parts are fitted or repairs are carried out by third parties.
- Components subject to normal wear, such as the filter, are not covered by the guarantee.
- The guarantee is valid only when you present the original, dated purchase invoice and if no modifications have been made.
- The guarantee is invalid for damage caused by neglect or by actions that deviate from those in this instruction booklet.
- Transportation costs and the risks involved during the transportation of the air conditioner or air conditioner components shall always be for the account of the purchaser.
To prevent unnecessary expense, we recommend that you always first carefully consult the instructions for use. Take the air conditioner to your dealer for repairs if these instructions do not provide a solution.
K TECHNICAL DATA
To be used as indication, subject to modifications
| Model | P 622 | P 629 | P 639 | |
| Cooling capacity* | kW | 2.2 | 2.9 | 3.9 |
| EER* | 2.8 | 2.6 | 3.0 | |
| Power consumption | kW | 0.8 | 1.1 | 1.3 |
| Current | A | 3.9 | 5.0 | 6.0 |
| Mains | V/Hz/PH | 220 - 240 / 50 / 1 | ||
| Air delivery max. | m³/h | 450 | 490 | 530 |
| Dehumidification max.** | L/24h | 20 | 26 | 36 |
| For rooms up to | m³ | 75 | 90 | 120 |
| Compressor model | Rotary | |||
| Fan speeds | 3 (2+1 turbo) | |||
| Thermostatic range | °C | 18 - 32 | ||
| Noise level | dB | 49 / 60 | ||
| Protection class | IP 21 | |||
| Refrigerant charge | type/gr | R407C / 480 | R407C / 580 | R407C / 720 |
| Dimensions (w x h x d) | mm | 540 x 800 x 480 | ||
| Net weight | Kg | 32 | 34 | 39 |
| Fuse rating | F2A 250V | |||
* conform EN 14511.
** moisture removal at 32^ , 80% RH.
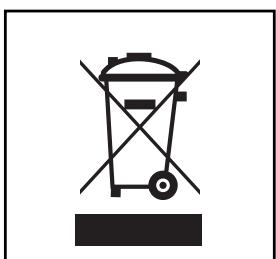
Waste electrical products should not be disposed with household waste. Please recycle where facilities exist. Check with your local authority or retailer for recycling advice.
A ÖSTERREICH
Holloway Bank, Wednesbury
West Midlands WS10 OAW
tel.: +44 121 506 1818
fax: +44 121 505 1744
email: gases@lister.co.uk
ITALIA
PVG Italy SRL
Via Niccolò Copernico 5
50051 CASTELFIORENTINO (FI)
tel: +39 571 628 500
fax: +39 571 628 504
email: pvgitaly@zibro.com
N NORGE
Sunwind - Gylling A/S
Rudsetta 71-75 / P.O. Box 64
N-1309 RUD
tel: +47 67 17 13 70
fax: +47 67 17 13 80
email: pvgint@zibro.com
NEDERLAND
PVG International B.V.
P.O.Box 96
5340 AB OSS
tel: +31 412 694 694
fax: +31 412 622 893
email: pvgnl@zibro.com
PORTUGAL
Gardena, Lda


- SICUREZZA
- A SAFETY INSTRUCTIONS
- IMPORTANT
- ATTENTION!
- WARNING
- B INSTALLATION
- C OPERATION
- CONNECTING TO THE MAIN
- SETTING THE CLOCK
- TEMPERATURE SETTING UP/DOWN
- NOTE
- MODE SWITCH
- FAN SPEED SETTING
- TIMER SETTING
- ON
- OFF
- Repeat OFF & ON
- Repeat ON & OFF
- AIRFLOW
- SLEEP MODE FUNCTION
- DEHUMIDIFICATION
- For continuous drainage:
- AIR FILTER
- NOTE!
- Filter installation:
- E EMPTY INTERNAL WATER CONTAINER
- F REMOTE CONTROL
- G CLEANING
- WARNING!
- H STORAGE
- TROUBLE SHOOTING
- J GUARANTEE CONDITIONS
- K TECHNICAL DATA
- A ÖSTERREICH
- ITALIA
- N NORGE
- NEDERLAND
- PORTUGAL
Brand : ZIBRO
Model : P639
Category : Heating