
EVOKE D2 MAPLE - Bluetooth Radio PURE - Free user manual and instructions
Find the device manual for free EVOKE D2 MAPLE PURE in PDF.


| Product type | Bluetooth Radio |
| Brand | PURE |
| Model | EVOKE D2 MAPLE |
| Dimensions (approx.) | 220 x 130 x 140 mm |
| Weight (approx.) | 1.2 kg |
| Power supply | Mains adapter 5.5V DC (supplied); rechargeable battery ChargePAK B1 (optional) |
| Main functions | DAB+ digital radio, FM radio, auxiliary input, 10 DAB and 10 FM presets, alarm, sleep timer, volume control, mute function, scrolling text |
| Display | LCD screen with indicators: signal strength, alarm, timer, source, volume, battery |
| Controls | On/Standby button, Source button, Menu button, rotary volume control, rotary Select button, preset buttons (1-4+) |
| Connections | Stereo headphone mini-jack socket, auxiliary input mini-jack, USB mini-B connector (for updates), telescopic aerial |
| Battery life (optional) | Varies with use; rechargeable ChargePAK B1 battery |
| Care and cleaning | Clean with a soft, dry cloth; avoid moisture and abrasive products |
| Safety | Keep away from heat sources and water; do not open the case; use only the supplied adapter; battery precautions |
| Spare parts and repairability | ChargePAK B1 battery available separately; software updates via USB; professional repair recommended |
| General information | Manual available in multiple languages (FR, DA, DE, EN, ES, IT, NL, etc.); online support at www.pure.com; manual contents: 120 pages |
Frequently Asked Questions - EVOKE D2 MAPLE PURE
User questions about EVOKE D2 MAPLE PURE
0 question about this device. Answer the ones you know or ask your own.
Ask a new question about this device
Download the instructions for your Bluetooth Radio in PDF format for free! Find your manual EVOKE D2 MAPLE - PURE and take your electronic device back in hand. On this page are published all the documents necessary for the use of your device. EVOKE D2 MAPLE by PURE.
USER MANUAL EVOKE D2 MAPLE PURE
Thank you for choosing Evoke D2. This manual will help you get your product up and running in no time and explains how to get the best out of all its great features. If you need any further assistance, please visit the support pages on our website at www.pure.com.
Safety information
- Read these instructions.
- Keep these instructions.
- Heed all warnings.
- Follow all instructions.
- Keep the unit away from heat sources such as radiators, heaters or other appliances that produce heat.
- Do not expose the unit to direct sunlight.
- Do not use the unit near water.
- Avoid objects or liquids getting into the unit.
- Do not remove screws from or open the unit casing.
- Fit the mains adaptor to an easily accessible socket, located near the radio and ONLY use the mains power adapter supplied by Pure.
- Should not be immersed in water, used in shower or bathroom if plugged into the mains.
ChargePAK B1 Safety Instructions
- Read the instructions for ChargePAK use in this document.
- Only use your ChargePAK with original Pure products.
- Store ChargePAK in a cool, dry place at normal room temperature. Remove from devices that will be stored unused for extended periods.
- Do not puncture, modify, drop, throw, or cause other unnecessary shocks to your ChargePAK. May present a risk of fire, explosion, or chemical burn if mistreated.
- Do not dispose of ChargePAK in a fire or incinerator, or leave in hot places such as a motor car under direct sunlight. Do not store near oven, stove, or other heat source.
- Do not connect ChargePAK directly to an electrical source, such as a building outlet or automobile power-point. Do not place into a microwave oven, or any other high-pressure container.
- Do not immerse ChargePAK in water or otherwise expose it to liquids.
- Do not short circuit ChargePAK.
- Do not use or charge a ChargePAK that appears to be leaking, discoloured, rusty, deformed; emitting an odour; or is otherwise abnormal.
- Do not touch a leaking ChargePAK directly; wear protective material to remove and dispose of it properly immediately.
- Do not store where children may have access.
- Dispos of ChargePAK as per normal rechargeable batteries according to the local laws and regulations of your region. Some batteries may be recycled, and may be accepted for disposal at your local recycling centre.

Damage to hearing can occur with consistent exposure to high volume when using headphones. Always check the volume level before inserting headphones into your ears.
Use of headphones while operating a vehicle is not recommended and is illegal in some areas. Stop listening to your Evoke if you find it distracting while operating any type of vehicle or performing any other activity that requires your full attention.
Contents
4 Introduction
4 Front panel controls
4 Display
5 Rear panel
6 Getting started
6 Quick set up
7 Using your Evoke
7 Selecting digital radio
7 Selecting FM radio
7 Pausing and controlling scrolling text
8 Storing and selecting presets
8 To quick-store a station to a preset button (1-3)
8 To store a station to the preset list (1-10)
8 To recall a preset when listening to digital radio or FM radio
9 Setting the alarm and sleep timer
9 Setting the alarm
10 Cancelling a sounding alarm
10 Snoozing a sounding alarm
10 Disabling an alarm
10 Setting the sleep timer
11 Options and settings
11 General settings
12 Digital radio settings
12 FM settings
13 Display settings
13 Audio settings
14Clock settings
15 Appendix
15 Installing the ChargePAK B1
15 Technical specifications
Introduction
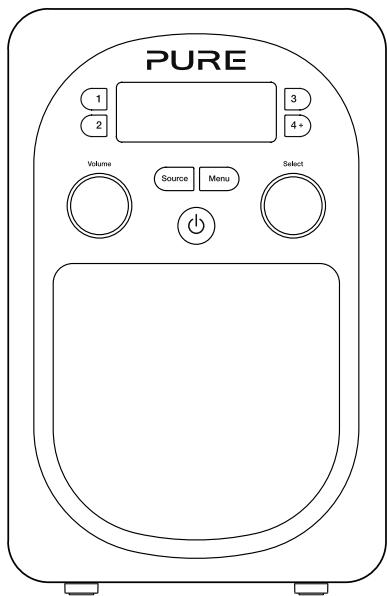
Front panel controls
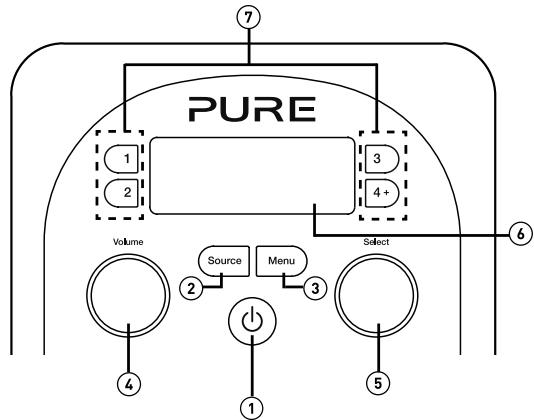
- Standby: On/standby switch (mains powered) or on/off switch (ChargePAK powered).
- Source: Press to switch between Digital radio, FM radio and Auxiliary input.
- Menu: Press to access setup options.
- Volume: Turn to adjust volume. Push to mute and un-mute.
- Select: Turn and press to browse and select radio stations (see page 7), select and adjust menu options or pause and control scrolling text (see page 7).
- Display: See below for more information on the display options.
- Presets 1 - 4+: Store up to 10 digital or 10 FM radio preset stations.
Display

- Displays station name.
- Displays date, scrolling text, settings and station information (see page 13).
- Signal strength.
- Alarm set indicator (see page 9).
- Alarm snooze indicator (see page 10).
- Sleep and kitchen timer indicator (see page 10).
- AM/PM indicator.
- Current time.
- ChargePAK indicator.
- Source indicator.
- Volume/mute indicator.
Rear panel
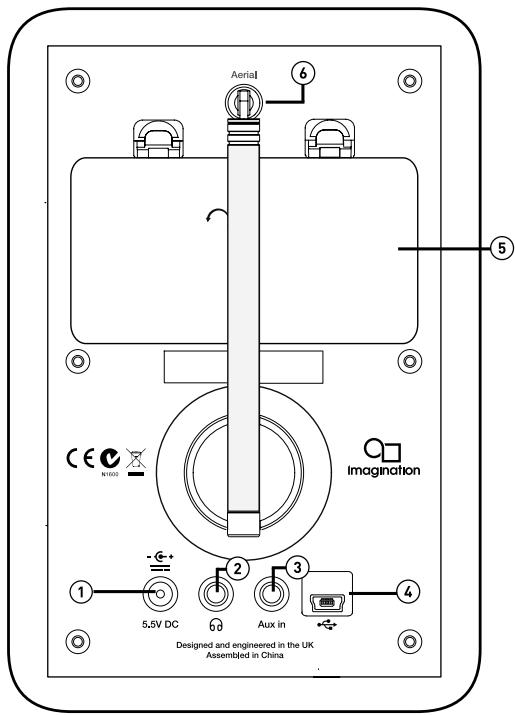
- 5.5V DC input connection for supplied mains adapter.
- 3.5mm stereo headphone socket.
- 3.5mm auxiliary input connection for an iPod, MP3 player, etc.
- Mini-B type USB connector for USB software updates.
- Compartment for ChargePAK B1 rechargeable battery (sold separately).
- Telescopic antenna.
Getting started
Quick set up
Note: If you have a ChargePAK B1 rechargeable battery (sold separately) fit it now before plugging Evoke in. See page 15 for more information.
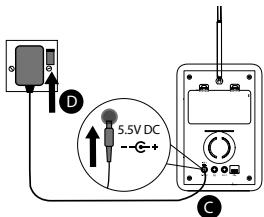
1 - Unclip the aerial and fully extend it (steps A and B).

- Insert the jack of the supplied mains adapter into the socket on the rear of the radio (C).
- Plug the mains adapter into the mains supply (D) and press the Standby (O) button.
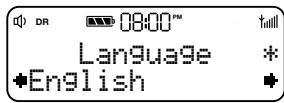
2 Select your language when prompted. Turn the Select dial to select a language (English/French/German/Italian/Spanish) and push to confirm.


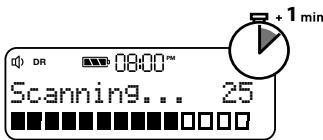
3 Wait for the radio to complete an Autotune for all available stations. When the Autotune is complete, a station will be selected.


Using your Evoke
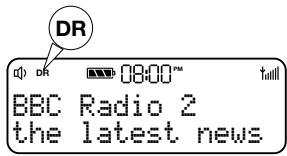


Selecting digital radio
Press Source to switch to digital radio.
Changing digital stations
- Turn the Select dial to the station you want to listen to.
- Push the Select dial to tune into the station.
Selecting FM radio
Press Source to switch to FM radio.
Seek tuning
Turn and release the Select dial right or left to seek to the next or previous FM radio station that has a strong signal.
Manual tuning
- Change the FM radio tuning mode to 'Manual' (see page 12).
- Turn the Select dial right or left to step up or down 0.05 MHz.
Pausing and controlling scrolling text
- When 'Scrolling text' information is displayed in either digital or FM radio, push the Select dial to pause the scrolling text.
- Turn the Select dial to scroll forwards and backwards through the text. To exit push the Select dial again.
Using the auxiliary input
- Connect the line out or headphone socket of your auxiliary device to the Aux In socket on your Evoke using a suitable cable.
- Press Source to switch to auxiliary input.
- The Auxiliary input screen will display and Evoke will play any audio that is playing on the auxiliary device.
Storing and selecting presets
Store up to 10 digital and 10 FM radio stations for quick access.



To quick-store a station to a preset button (1-3)
Tune to the digital or FM radio station you want to store. Press and hold one of the numbered preset buttons (1-3) for two seconds to save the current station as a preset. You can save over existing presets.
To store a station to the preset list (1-10)
- Tune to the digital radio or FM radio station you want to store.
- Press and release the 4+ button to view the numerical list of stored presets, then turn the Select dial to choose any preset number between 1 and 10. You can overwrite existing presets.
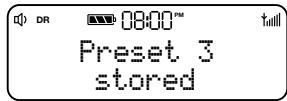
- Press and hold the Select dial until you see the 'Preset stored' message.
To recall a preset when listening to digital radio or FM radio
To tune to presets 1 to 3, press the corresponding numbered button on Evoke (1 to 3).
To access the full list of presets (from 1 to 10):
- Press and release the 4+ button.
- Turn the Select dial right or left to scroll through the list of presets and push the Select dial to tune to the selected preset.
Setting the alarm and sleep timer
The alarm in Evoke switches the radio on (if in standby) and tunes to a digital or FM radio station or sounds a tone.
Note: The alarm function does not work when Evoke is being powered by the ChargePAK B1.
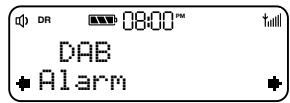
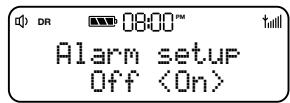
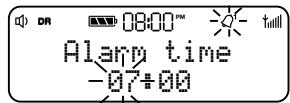
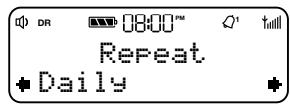
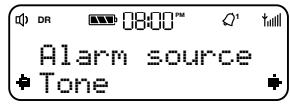
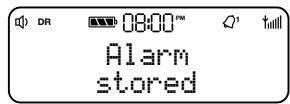
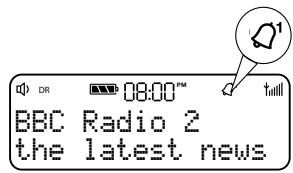
Setting the alarm
- Press Menu.
- Turn and press the Select dial to choose 'Alarm'.
- Turn and press the Select dial to choose 'On'.
- Turn and press the Select dial to set the hour for the alarm. Repeat to set the minutes for the alarm.
- Turn and press the Select dial to specify one of the following alarm repeat options: 'Once', 'Daily', 'Weekdays', 'Weekends', 'Every Saturday' or every 'Every Sunday' and press Select to confirm.
- Turn and press the Select dial to specify 'FM', 'DAB' or 'Tone'. If you are specifying a tone alarm, skip to step 9.
- Turn and press the Select dial to specify which station should be played when the alarm goes off. You have the option of selecting one of your preset stations or you can select 'Last Used' to select the station that you were last listening to.
- Turn and press the Select dial to set the volume that the radio will play at when the alarm sounds.
- The alarm icon will appear on the display to show that the alarm is set.
Cancelling a sounding alarm
To cancel a sounding tone alarm, press either the 3, 4+, Menu or Source button, or push the Select dial.
Note: If you have set up your alarm to tune into a radio station, you can only cancel the alarm by pressing the Standby (D) button.
Snoozing a sounding alarm
To snooze a sounding alarm, press either the preset number 1 or preset number 2 button.
Disabling an alarm
- Press Menu.
- Turn and press the Select dial to choose 'Alarm'.
- Turn and press the Select dial to choose 'Off'.
- The alarm icon on the display will disappear.
Setting the sleep timer
The sleep timer can be set to switch Evoke off after a period of time.
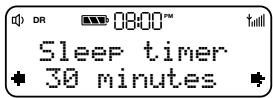
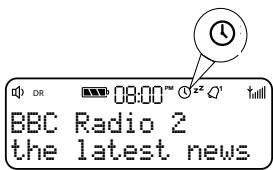
- Press Menu.
- Turn and press the Select dial to choose 'Sleep timer'.
- Turn and press the Select dial to set the timer for up to 90 minutes or choose Sleep off to cancel.
- The sleep timer icon will appear on the display to show that the sleep timer is set.
Options and settings
General settings
Changing the language
- Press Menu.
- Turn and press the Select dial to choose 'Settings'.
- Turn and press the Select dial to choose 'Language'.
- Turn and press the Select dial to select a menu language from 'English', 'French', 'German', 'Italian' or 'Spanish'.
Factory reset
Resetting your Evoke removes all presets, stored stations, alarms and resets all other options to default settings.
- Press Menu.
- Turn and press the Select dial to 'Settings'.
- Turn and press the Select dial to 'Factory reset'.
- Turn and press the Select dial to confirm that you want to reset the Evoke to default settings.
Version
To display the software version:
- Press Menu.
- Turn and press the Select dial to 'Settings'.
- Turn and press the Select dial to 'Version'.
Update
Contact Pure technical support (http://support.pure.com) for more information on how to update Evoke to the latest software version.
Digital radio settings
Autotune
You can use the autotune function to automatically scan for new digital radio stations and remove inactive ones.
Note: Autotune is only available when you have selected 'Digital' as the radio source.
To carry out an autotune:
- Press Menu.
- Turn and press the Select dial to choose 'Autotune'. The number of stations found will be displayed during the autotune.
When the autotune has finished, Evoke will tune to the last station that you were listening to.
FM settings
FM stereo option
You can choose between 'Stereo' or 'Mono' reception when listening to FM radio. You may want to choose Stereo if listening using headphones.
Note: The FM stereo option is only available when you have selected 'FM' as the radio source.
To change between Stereo or Mono reception:
- Press Menu.
- Turn and press the Select dial to choose FM stereo'.
- Turn and press the Select dial to choose between 'Stereo' or 'Mono' FM reception.
FM tuning mode
Press Menu and turn and press the Select dial to choose 'FM Tuning Mode'. Choose from the following two modes:
Seek: When you turn the Select dial, the radio tunes to the next station with a good signal.
Manual: When you turn the Select dial, the radio tunes up or down the FM radio frequency range by 0.05 MHz.
Audio settings
To adjust the bass and treble settings:
- Press Menu.
- Turn and press the Select dial to choose 'Audio'.
- Turn and press the Select dial to choose 'Bass' or 'Treble'.
- Turn and press the Select dial to set the level from -6 (low) to 6 (high).
Display settings
Changing the backlight brightness level
- Press Menu and turn and press the Select dial to choose 'Display'.
- Turn and press the Select dial to choose 'Backlight'.
- Turn and press the Select dial to adjust the brightness level when Evoke's display is 'Active' or in 'Standby'.
- Turn and press the Select dial to select 'Level'.
- Turn and press the Select dial to set a brightness level between '1' (dim) and '5' (bright).
Changing the duration that the backlight is illuminated
- Press Menu and turn and press the Select dial to choose 'Display'.
- Turn and press the Select dial to choose 'Backlight'.
- Turn and press the Select dial to adjust the duration the backlight is illuminated for when Evoke's display is 'Active' or in 'Standby'.
- Turn and press the Select dial to select 'Duration'.
- Turn and press the Select dial to choose one of the following options:
Always on: The backlight will always be illuminated at your preferred brightness level.
Timed off: The backlight will always be illuminated at your preferred brightness level when a button is pressed and then switch off after 7 seconds of inactivity.
Changing the information shown on the display
- Press Menu and turn and press the Select dial to choose 'Display'.
- Press Menu and turn and press the Select dial to choose 'Information'.
- Turn and press the Select dial to choose one of the following options:
Scrolling text: Provided by the broadcaster.
Signal strength: The clear block indicates reliable reception level.
Date: Displays the current date.
Signal quality: (Digital radio only) From 0 (low) to 100 (high).
Clock settings
Setting the time and date
The time and date on Evoke are automatically set by the FM or digital radio signal. If the time/date does not update automatically, you can manually set it using this option.
Note: Any time or date updates received by an FM or a digital broadcast will override manual settings, if clock synchronisation is enabled (see the following page for more information).
Setting the time and date manually
- Press Menu and turn and press the Select dial to choose 'Clock'.
- Turn and press the Select dial to choose 'Set Time/Date'.
- Turn and press the Select dial to set the hour. Repeat to adjust the minutes.
- Turn and press the Select dial to set the day of the month. Repeat to set the month and year.
Changing the time format
- Press Menu and press the Select dial to choose 'Clock'.
- Turn and press the Select dial to choose 'Set 12/24 hour'. Repeat to set the required time format.
Changing the date format
- Press Menu and turn and press the Select dial to choose 'Clock'.
- Turn and press the Select dial to choose 'Set date format'. Repeat to set the required date format.
Changing the alarm snooze time
- Press Menu and press the Select dial to choose 'Clock'.
- Turn and press the Select dial to choose 'Set snooze time'.
- Turn and press the Select dial to choose a snooze time between 5 and 59 minutes.
Clock synchronisation options
You can select the radio sources that you want to use for setting the time. By default, Evoke uses both the FM and digital radio signals to synchronise the time.
Turn and press the Select dial to specify the synchronisation options:
- Press Menu and turn and press the Select dial to choose 'Clock'.
- Turn and press the Select dial to choose 'Clock synch'.
- Turn and press the Select dial to choose the required clock synchronisation option and press Select.
Installing the ChargePAK B1
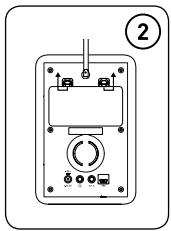
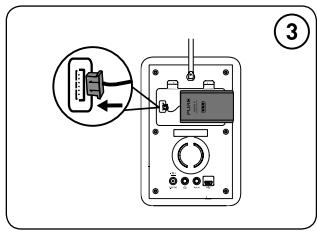
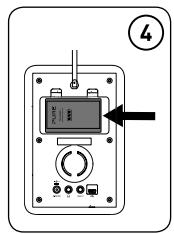

- Switch Evoke off and disconnect from the mains power supply.
- Open the battery compartment.
- Insert the ChargePAK connector plug into the socket in the compartment. Line up the ridges on the plug with the slots in the socket to ensure correct orientation. Do not force the plug.
- Insert ChargePAK into the battery compartment, logo side out.
- Replace the battery cover and connect Evoke to the mains.
- ChargePAK will begin charging.
Note: If you are charging ChargePAK for the first time or after an extended period of inactivity it is recommended that it is charged for around 24 hours to ensure full battery power. If ChargePAK is flat there may be a slight delay before the battery charging indicator is displayed.
Technical specifications
Radio:
Digital and FM, UK products receive DAB and FM; non-UK products receive DAB/DAB+/DMB-Radio/ FM depending on region.
Audio:
1.6W RMS. Full-range 3" drive unit.
Input Connectors:
5.5V DC power adaptor socket (230V supplied), Mini USB connector for product updates, 3.5mm Line-in for auxiliary devices
Output Connectors:
3.5mm stereo headphone socket.
Power:
230V AC to 5.5V (1.0A) DC external power adapter optional ChargePAK B1.
Power Consumption:
Standby: 0.7W, Active: 1.6W.
Dimensions:
115 mm wide x 180 mm high x 120 mm deep
Approvals:
CE marked. Compliant with the EMC and Low Voltage Directives (2004/108/EC and 2006/95/ EC) ETSI EN 300 401 compliant.
Australian C-Tick N1600 and Electrical Safety.
Warranty information
Imagination Technologies Limited warrants to the end user that this product will be free from defects in materials and workmanship in the course of normal use for a period of two years from the date of purchase. This guarantee covers breakdowns due to manufacturing or design faults; it does not apply in cases such as accidental damage, however caused, wear and tear, negligence, adjustment, modification or repair not authorised by us. Should you have a problem with your unit please contact your supplier or contact Pure Support at http://support.pure.com.
Disclaimer
Imagination Technologies Limited makes no representation or warranties with respect to the content of this document and specifically disclaims any implied warranties of merchantability or fitness for any particular purpose. Further, Imagination Technologies Limited reserves the right to revise this publication and to make changes in it from time to time without obligation of Imagination Technologies Limited to notify any person or organization of such revisions or changes.
Trademarks
Evoke D2, ChargePAK, Pure, the Pure logo, Imagination Technologies, and the Imagination Technologies logo are trademarks or registered trademarks of Imagination Technologies Limited.
Copyright
Copyright © 2015 Imagination Technologies Limited. All rights reserved. No part of this publication may be copied or distributed, transmitted, transcribed, stored in a retrieval system, or translated into any human or computer language, in any form or by any means, electronic, mechanical, magnetic, manual or otherwise, or disclosed to third parties without the express written permission of Imagination Technologies Limited. Version 4 October 2015.
Disposal of Waste Electrical & Electronic Equipment
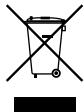
This symbol on the product or on its packaging indicates that this product should not be treated as household waste. Instead it should be handed over to a suitable collection point for the recycling of electrical and electronic equipment. By ensuring this product is disposed of correctly, you will help prevent potential negative consequences for the environment and human health, which could otherwise be caused by inappropriate waste handling of this product. The recycling of materials will help to conserve natural resources. For more detailed information about recycling of this product, please contact your local council office, your household waste disposal service or the shop where you purchased the product.
Evoke
D2
- Safety information
- ChargePAK B1 Safety Instructions
- Contents
- Introduction
- Getting started
- Using your Evoke
- Storing and selecting presets
- Setting the alarm and sleep timer
- Options and settings
- Appendix
- Introduction
- Front panel controls
- Display
- Rear panel
- Getting started
- Quick set up
- Using your Evoke
- Selecting digital radio
- Changing digital stations
- Selecting FM radio
- Seek tuning
- Manual tuning
- Pausing and controlling scrolling text
- Using the auxiliary input
- Storing and selecting presets
- To quick-store a station to a preset button (1-3)
- To store a station to the preset list (1-10)
- To recall a preset when listening to digital radio or FM radio
- Setting the alarm and sleep timer
- Setting the alarm
- Cancelling a sounding alarm
- Snoozing a sounding alarm
- Disabling an alarm
- Setting the sleep timer
- Options and settings
- General settings
- Changing the language
- Factory reset
- Version
- Update
- Digital radio settings
- Autotune
- FM settings
- FM stereo option
- FM tuning mode
- Audio settings
- Display settings
- Changing the backlight brightness level
- Changing the duration that the backlight is illuminated
- Changing the information shown on the display
- Clock settings
- Setting the time and date
- Setting the time and date manually
- Changing the time format
- Changing the date format
- Changing the alarm snooze time
- Clock synchronisation options
- Installing the ChargePAK B1
- Technical specifications
- Radio:
- Audio:
- Input Connectors:
- Output Connectors:
- Power:
- Power Consumption:
- Dimensions:
- Approvals:
- Warranty information
- Disclaimer
- Trademarks
- Copyright
- Disposal of Waste Electrical & Electronic Equipment
- Evoke
Brand : PURE
Model : EVOKE D2 MAPLE
Category : Bluetooth Radio