
DRX 600 - Car stereo SCOTT - Free user manual and instructions
Find the device manual for free DRX 600 SCOTT in PDF.
| Product type | Car radio with motorized TFT screen |
| Brand and model | SCOTT DRX 600 |
| Dimensions (W x D x H) | 192 x 178 x 50 mm |
| Weight | 1.75 kg |
| Power supply | 14.4 V DC (11-16 V allowable) |
| Maximum output power | 40 W x 4 |
| RMS power | 35 W x 4 |
| Load impedance | 4 Ω |
| Screen | TFT 3-inch (16:9), resolution 960 x 240 pixels |
| Playable formats | DVD, VCD, CD, MP3, MP4, Xvid, JPEG, USB |
| Radio tuner | AM/FM stereo with RDS (AF, TP, TA, PTY) |
| Station memory | 30 stations (18 FM, 12 AM) |
| Audio functions | Equalizer (Pop, Classic, Rock), Loudness, Balance, Fader, Bass/Treble |
| Connectivity | Front/rear audio outputs (2V), subwoofer output (0.8V), video output (2x1V), AUX audio input (2V) and video input (1V), USB 2.0, antenna |
| Included accessories | Remote control, USB cable, ISO harness, outer frame, removal keys, user manual |
| Safety | Protection fuse, grounding, handbrake signal for video, battery precautions |
| Maintenance | Cleaning connectors with alcohol, cleaning discs from center to edge |
| Repairability | Fuse replacement (same amperage), remote control battery replacement CR2025 |
| Manual available | French, English, German (PDF download) |
Frequently Asked Questions - DRX 600 SCOTT
User questions about DRX 600 SCOTT
0 question about this device. Answer the ones you know or ask your own.
Ask a new question about this device
Download the instructions for your Car stereo in PDF format for free! Find your manual DRX 600 - SCOTT and take your electronic device back in hand. On this page are published all the documents necessary for the use of your device. DRX 600 by SCOTT.
USER MANUAL DRX 600 SCOTT
USER MANUAL AND INSTALLATION INSTRUCTIONS
CONTENTS
1.Accessories. GB-2
2.SAFETY PRECAUTIONS. .GB-3
3. INSTALLATION. GB-5
4.WIRING CONNECTION. GB-9
5.MAINTENANCE. GB-11
6.DESCRIPTION OF FUNCTIONS. .GB-12
7. REMOTE CONTROL. GB-13
8.COMMON OPERATIONS. .GB-14
9.TUNER. .GB-17
10. VCD/CD/MP3/MPEG-4/USB. GB-23
11.DVD. GB-29
12. MAIN MENU.. .GB-39
13. SPECIFICATIONS.. .GB-46
14. SIMPLE TROUBLESHOOTING GUIDE.. .GB-48
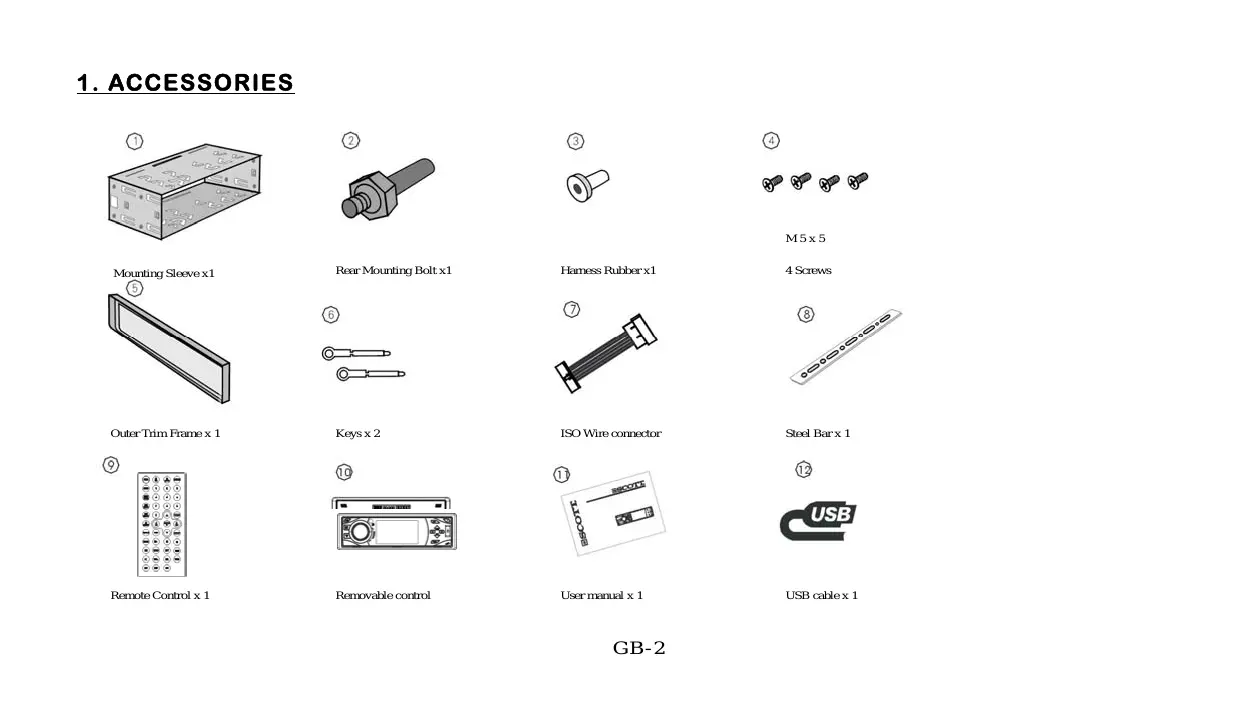
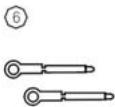
1. ACCESSORIES
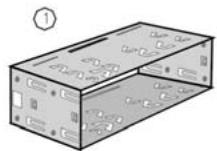
Mounting Sleeve x1

Rear Mounting Bolt x1

Harness Rubber x1
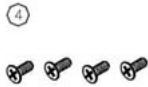
M5x5
4 Screws
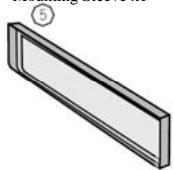
Outer Trim Frame x 1
Keys x 2
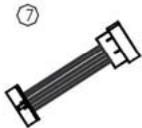
ISO Wire connector

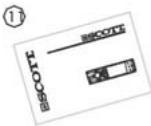
Steel Bar x 1
Remote Control x 1
Removable control
User manual x 1

USB cable x 1
2. SAFETY PRECAUTIONS
- Be sure to connect the color-coded leads according to the diagram. Incorrect connections may cause the unit to malfunction or damage the vehicle's electrical system.
- Be sure to connect the speaker leads to the speaker terminal using the correct polarity. Never connect the left and right channel speaker cables to each other or to a metal part of the vehicle.
- Make sure all the connections are correct before turning on your unit.
- When replacing the fuse(s), the replacement must be of the same amperage as shown on the fuse holder.
- Do not block vents or radiator panels. Blocking them will cause heat to build up inside and may result in fire.
- Do not use the unit for too long after the car has stopped in order to avoid using up the electric energy of the car battery.
- Keep the unit away from direct sunlight.
- Do not expose the unit to extreme temperatures, and avoid humidity and direct sunlight. Ensure that the temperature inside the vehicle is between -10^ and +60^ .
- Be careful of the unit's magnetic field. Do no put the credit cards, cassettes or watches around the unit, or they may break or lose some information.
- In order to avoid interference, stay away from the unit when using a mobile phone.
- Do not expose the remote control to high temperatures or direct sunlight as this may cause it to malfunction.
About this manual
This unit features a number of sophisticated functions ensuring superior operation. All the functions have been designed for the easiest possible use, but many are not self-explanatory. This manual will help you understand the functions and operations of the unit. This manual mainly explains remote control operation. However, in addition to those functions related to DVD/VCD/CD/MP3/MP4 operation that can only be operated by the remote control, there are also functions that can be operated by the buttons on the main unit.
PRECAUTIONS
This unit can play the following discs and formats only:
| Type of disc | Label on the disc | Recorded material | Size of disc |
| DVD | VIDEO VIDEO CD | Sound and Video | 12cm |
| VCD | COMPACT DIGITAL VIDEO | Sound and Video | 12 cm |
| CD | COMPACT DIGITAL AUDIO | Sound only | 12 cm |
| MP3 | COMPACT DIGITAL AUDIO MP3 | Sound only | 12 cm |
| MP4 | COMPACT DIGITAL AUDIO MPEG-4 | Sound and Video | 12 cm |
| NOTE: The unit is compatible with VCD1.0/2.0/3.0 version and DVD disc. | |||
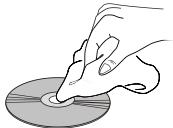
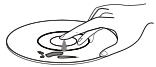
- Handle the disc by its edge to keep the disc clean, and do not touch the surface.

Clean the discs with a cleaning cloth. Wipe each disc from the center outwards. (As shown in the picture)
Note:
- Besides playing the discs above, the unit also can use other sources.
3. INSTALLATION
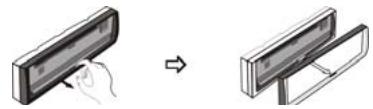
Installation of the front panel
Put notch A (shown in the picture) onto shaft B at right side. And then press the front panel to right in order to put the notch onto the shaft at left side. Then push the front panel upwards until it clicks to the main unit.

GB-5
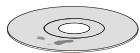
- Do not place stickers on your CDs or write on them.
- Do not use CDs with labels or stickers attached, which may leave a sticky residue when they begin to peel off. (As shown in the picture)

Note:
Never put any objects between the main unit and the front panel
DETACHING THE FRONT PANEL
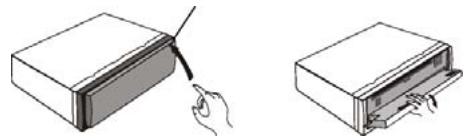
Press RELEASE button in the upper right hand corner, and then the front panel will be folded down.
When the front panel is turned down to a position of 90^ , hold and slide the front panel to right, and then pull it out.
INSTALLATION OF THE UNIT
Take Out Screws Before Installation
Before install the unit, must remove the two screws with label "WARNING".
Installation Method : DIN Front-Mount
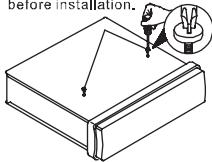
Take out screw before installation,
Precautions
- Choose the location of the unit carefully so that the unit does not hinder the normal functioning of the vehicle.
- Before installing the unit, make sure that the front panel can move freely and can be easily removed.
- Do not install the unit in a location where it could be exposed to high temperatures, to direct sunlight, to hot air from the heating system, to dust, dirt or excessive vibrations.
- For successful installation, only use equipment intended for this purpose.
- Be sure to remove the front panel before installing the unit.
- In order to avoid certain problems relating to disc playback, the unit must be installed at an angle of less than 30^ .

After inserting the mounting bracket in the dashboard (1), select the appropriate claws according to the width of the dashboard and bend the claws outward in order to keep the rack as shown in the diagram (2). Plug in the connectors (please see page 10) and insert the car radio into the rack. Put the outer trim frame as shown in the diagram (4). If necessary, use the metal assembly bar, rear mounting bolt with its screw guider.
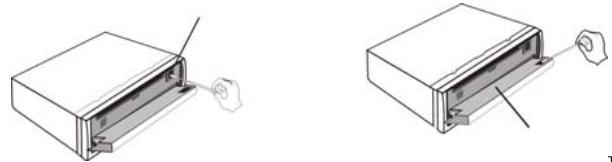
Removing the Unit
Detach the front panel before removing the unit. For more details, refer to
"DETACHING THE FRONT PANEL".
- Take out the Outer Trim Frame after detaching the front panel.
- Insert the keys supplied into the unit at both sides of the unit (shown as illustrated) until they click.
Pulling the keys makes it possible to remove the unit from the dashboard.

Cleaning the Connector
If the connector is dirty, it may result in the unit not working properly. To avoid such problem happening, please detach the front panel, and clean the connector with an alcohol swab. Gently clean the connector and avoid damaging it.
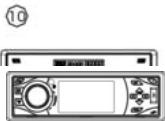
The main unit
The backside of the front panel
Notes
- For security reasons, always shut down the engine and remove the key from the ignition before cleaning.
- Never let your finger or any metal device touch the connector directly.
4.Wiring Connection
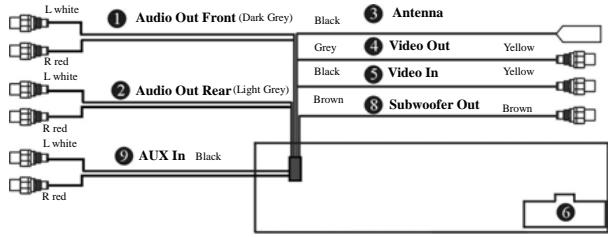
Audio Out Front 6 Output Socket (Female)
Audio Out Rear Output Plug (Male)
Antenna Receptacle 8 Subwoofer
Video Out 9 AUX In
Video In

Note:
- The brown wire is connected to the handbrake signal; for safety, the programs and MP3 navigation menu can be seen on the monitor after the handbrake is activated, but the menu and RCA output do not have this constraint.
- If you do not want to use this function, connect it to the negative pole.
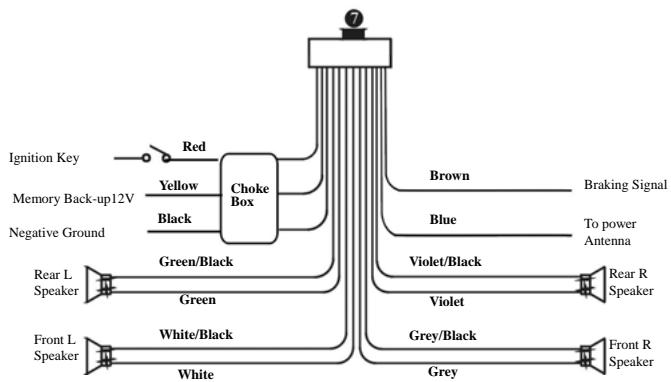
Many vehicles are pre-fitted with ISO connectors behind the dashboard, including all the electrical cabling for a car radio. In such cases, the connections fitted to the vehicle can be directly plugged into the car radio connectors. Should your car not be pre-fitted with these connectors, we strongly advise you to obtain the ISO wiring loom fitted with the male connector for connection to your car radio either from a specialist shop or from the car dealer for your vehicle. Once obtained, you will only need to connect your loudspeakers and the power supply to the ISO connector, following the connection instructions below.
Speaker Connector
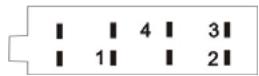
Power Supply Connector
Power Supply Connector
1.Battery (yellow)
2.Ground (black)
3.Power +12 volt (red)
4. Electrical Antenna (blue)
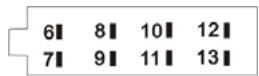
- Speaker Connector
6.Rear right speaker ^+ (violet)
7.Rear right speaker - (violet/black)
8.Front right speaker ^+ (grey)
9.Front right speaker - (grey/black)
10.Front left speaker + (white)
11.Front left speaker - (white/black)
12.Rear left speaker ^+ (green)
13.Rear left speaker - (green/black)
1) Make sure your car battery is a 12 volt (6 filter caps) negative ground system (if not, a converter will be necessary).
2) Before starting wiring connections, disconnect the power supply by removing the fuse from the fuse holder.
3) Connect the power wire to one of the extra terminal of the car.
4) Connect the black ground wire to a metal part of the car. It is important to make good contact.
5) Make other wiring connections as shown.
6) Connect the battery of the car.
7) Replace the fuse holder of the unit.
NOTE IN CORRECT WIRING OR OPERATION WILL VOID THE WARRANTY OF THIS UNIT.
5. Maintenance
Replacing the Fuse
Make sure the amperage matches the specified value when replacing the fuses. If the fuse is blown, check the power connection and replace with a new one. If the same problem occurs, there must be a malfunction. In such cases, please consult the nearest repairs center.

Never use the fuse with a rated amperage over the one specified, otherwise you risk damaging the unit.
Replacing the Battery
When the operation range of the remote control becomes short or if it no longer works, replace the lithium battery with a new button cell (CR2025). Make sure the battery polarities match before replacing it.
| Gently pull out the battery holder whilst pressing the side | Put the button-type battery with The + facing upward into the battery holder. | Insert the battery holder into the remote control. | Warning: Improper handling of the battery may lead to explosion. Do not charge, disassemble or throw the battery into a fire. |
Precautions on Using Lithium Batteries
Always keep the lithium battery out of the reach of children. If it is swallowed, see a doctor immediately. In order to ensure optimum performance, clean the battery with a dry cloth.
Make sure that the polarities are correct when loading the battery. To prevent short circuits, do not use metal tweezers to insert the battery.
6. Description of functions
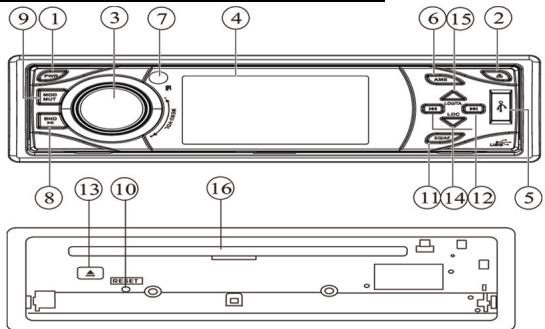
(1) PWR button
Press PWR to turn on the unit, press it again to go to standby mode.
(2) RELEASE button
Press it to release the front panel.
(3) MENU-VOL button
Rotate clockwise to increase the volume level; and rotate anticlockwise to decrease the volume level. Press it repeatedly to set the sound effects; press and hold it to show the system menu; rotate it to set the item and then press to enter.
(4) LCD (LIQUID CRYSTAL DISPLAY)
To display current status and also used to view movies.
(5) USB Port
(6) AMS(RPT) button
During radio mode, briefly press it and use 串 / 串 buttons to select the preset station number to save current frequency; press and hold it to memorize stations automatically.
During playback, press it to activate the repeat play function.
(7) Remote Infrared Sensor
(8) BND/ button
During radio mode, press it to select different bands.
During playback, press it to pause or resume playback.
(9) MOD/MUT button
Briefly press it to select the mode: RADIO, DVD, AUX IN; Hold and press it to mute the sound output.
⑩ RESET button
Press to reset the unit to default settings.
(1) EQ/AF button
Briefly press it to select the alternative frequency; press and hold it to select the EQ preset mode: POP, CLASSIC and ROCK.
(12) / button
Press to do manual tuning or go to next/ previous track/ chapter.
(3) EJECT button
Press it to eject the disc.
(4) LOC button
During radio mode, press it to select the distant or local station.
(15) LOU/TA button
Briefly press it to activate the traffic alarm function; press and hold it to activate the loudness function
(16) Disc Loading Slot
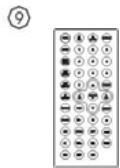
7. Remote Control
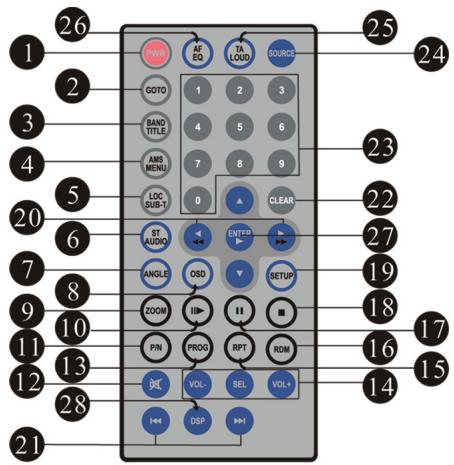
1 PWR (on/standby)
2 GOTO (playing time/track)
3 BAND/TITLE (band selection/ title menu)
4 AMS/MENU (preset stations, automatic memorization of stations/menu)
5 LOC/SUB-T (distant or local station selection/subtitle display)
6 ST/AUDIO (stereo or mono /language, audio channel selection)
7 ANGLE (play angle/PTY)
8 OSD (On Screen Display)
9 ZOOM (briefly press it to zoom in or out/ hold and press it to adjust the screen ratio: normal/ wide)
10 (slow forward/backward)
11 P/N (system adjustment)
12 (mute)
13 PROG (program play)
14 VOL+/VOL-/SEL (volume control/sound effects)
15 RPT (repeat play)
16 RDM (play at random)
17 II (Play/pause)
18 (Stop play)
19 SETUP
20 (F.REW/F.F)
21 (Previous/next track/chapter)
22 CLEAR
23 Number buttons (0~9)
24 SOURCE (mode selection)
25 TA/LOUD (traffic alarm/ loudness)
26 AF/EQ (alternative frequency/equalizer)
27 / / ENTER (Left/Right/Up/Down ENTER)
28 DSP button Under the video mode, press it to hide the OSD character on the screen, to avoid interrupting watching the video. After hiding the OSD character, if there are other characters displayed (for example: volume), it will hides automatically after 8 seconds.
8. Common Operations
1. Reset the Unit
When operating the unit for the first time or after replacing the car battery, you must reset it.
Press the RESET button (10) on the main unit with a pointed object, (such as a ballpoint pen) to reset it.

Note:
- When errors occur on the display, you can press RESET button to resolve the problem, The clock setting and any memorized functions will be erased.
- Only the RESET button on the main unit can be used to reset the unit.
2. Turning the Unit On/Standby
Press the PWR button (1) on the remote control to turn on the unit at last mode. When the unit is on and a disc or USB device is inserted, it will automatically switch to this mode and start playback. Press it again to go to standby mode.

Note:
- Pressing the PWR button on the main unit will perform the same function.
3. Volume Control
Press the VOL+ button (14) on the remote control to increase the sound level and press the VOL- button (14) to lower the sound level.

- The volume can also be adjusted by rotating the VOL + / - button (3) on the main unit.
4. Setting the Sound
Repeatedly press the SEL button (14) to select the desired mode, in the following order:

After selecting the desired mode, use the VOL buttons (14) on the remote control adjust the settings.
Note:
The VOL+/- button (3) can also be used to adjust the volume, balance, fader, bass and treble of the main unit.
5. Selehttp://lady.qq.com/a/20071011/000003.htm EQ Setting
While listening to pop, classic or rock music, you can select the corresponding preset modes to adjust the sound quality by using EQ button (26).
Press and hold the EQ button (26) to choose the following modes in turn:

Note:
- The EQ button (11) on the main unit also can perform the same function.
6. Turning Loudness On/Off
Hold down the LOUD button (25) on the remote control to activate the loudness function. You can press this button to increase the low frequency, which can improve sensitivity for your ears. Keep pressing it again to switch off this function.
Note:
- The LOUD button (15) on the main unit also can perform the same function.
7. Mute Function
Press the MUTE button (12) to shut off the sound output. The button appears on the LCD. Press it again to resume previous volume level.

- Press and hold MUT (9) on the main unit also performs the same function.
8. Clear
If you make a mistake when entering your selection, press the CLEAR button (22) on the remote control to clear it. Note:
- This function can only be carried out with the remote control.
9. Mode Selector
Repeatedly press the SOURCE button (24) on the remote control to select the different modes available.

- Briefly pressing the MOD (9) button on the main unit performs the same function.
10. Display Mode
During video playback, press and hold ZOOM button (9) on the remote control to select the display mode: NORMAL (4:3) and WIDE (16:9), press and hold it again to switch back the previous display mode.
11. Remote Infrared Sensor:
The remote infrared sensor (7) on the main unit receives the remote control signal.
12. AUX In
You can input the external source into the main unit through AUX IN plugs at the back of the unit.
13. Eject a Disc Compulsively
During playback, if a disc cannot be played normally or cannot eject, close the front panel and briefly press the SOURCE button to switch to radio mode. Then press RELEASE button (2) to release the front panel, hold down the EJECT button (13) on the main unit for 3 seconds and the disc will be forced to eject.
9. Tuner
1. Band Selector
In radio mode, repeatedly press the BAND button (3) to select bands in the following order:

Note:
* The BND buttons on the main unit (8) perform the same function.
2. Manual/Automatic Tuning
Manual Tuning: Briefly press the or button (20) on the remote control continuously to increase or decrease the frequency and search for a station. Automatic Tuning: Press and hold down the or button (20) for more than 3 seconds to automatically search for lower or higher frequencies.
Note:
* The buttons on the main unit (12) perform the same function.
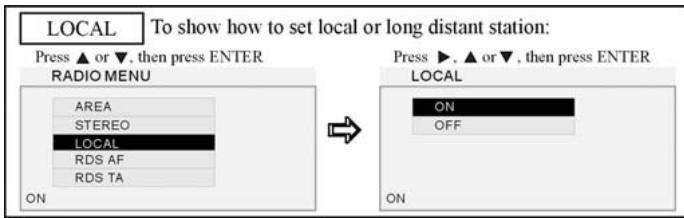
3. DX/LOC Selector
In radio mode, press the LOC button (5) on the remote control to select the reception of local stations. "LO" appears on the display and only local stations are available. Press this button again to switch off this function. "DX" appears and both distant and local stations can be received.
Note:
The function can only be carried out with the remote control.
The function is invalid in AM tuning.
* The default mode is DX mode.
4. Selecting the Stored Station
In radio mode, press the or button (27) to select the next or previous stored station.
Note:
* The function can only be carried out with the remote control.
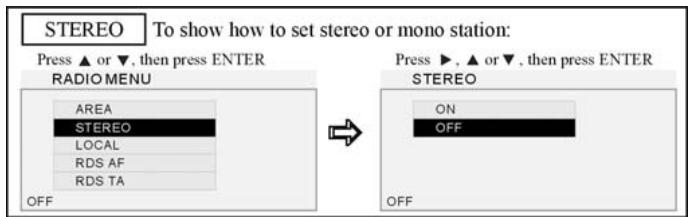
5. MONO/STEREO Selector
In radio FM mode, press the ST button (6) on the remote control to select MONO or STEREO mode. When mono mode is selected, the letters "MO" appear. It is switched to stereo mode when "MO" disappears.
Note:
* This function can only be carried out with the remote control.
6. Scanning/Memorizing Stations Automatically
In radio mode, press the AMS button (4) on the remote control to listen to each station that is stored in the memory for 5 seconds. Press the corresponding number buttons or the AMS button when you hear the desired station. The radio will stop the scan at this station. (Note: The AMS button (6) on the main unit has different function, refer to section (4) Descriptions of functions item (6).) Press and hold down the AMS button (4) for more than 2 seconds to activate the automatic memory storing function. The radio automatically selects a station stored under the 6 preset numbers (number buttons 1 to 6).

- The unit can memorize up to 6 stations for each band.
7. Using the Number Buttons
In radio mode, use the number buttons to select the stored stations.
The number Buttons (from 1 to 6) can help you store your favorite station. Follow the steps below:
- When listening to a station, press and hold any one of the Number buttons (23) until "PCH X" appears in the LCD, which indicates that station is already stored in the corresponding number button "X".
- You can store up to 18 FM stations (6 each for FM1, FM2, FM3),up to 12AM stations (6 each for MW1 and MW2).

- This function can only be carried out with the remote control.
8. On Screen Display
In radio mode, briefly press OSD button (8) on the remote control to show the RDS setup, press and hold it to display the edition information.

- This function can only be carried out with the remote control.
9. Selecting Station Directly By Frequency Key-In
Press GOTO button (2) on the remote control, the display shows: "FR:", input the frequency value to receive the station directly. All the digits must be input. For example, in FM mode, five digits (e.g. 100.00) must be input or it (e.g. 100.0) does not work.

- This function can only be carried out with the remote control.
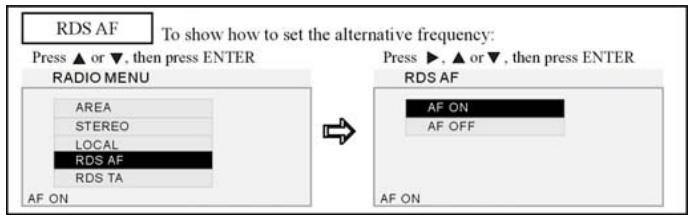
10. Alternative Frequencies
Briefly press the AF button (26) on the remote control to switch the AF function on/off. With this function, if the RDS signal is weak or even no signal, the unit will search for the best alternative frequency available for the current station. And AS or AF: SCH displays on the LCD at the same time. When the strong RDS signal is received, the AF or AF:ON or AF:OFF displays.
Note:
- The AF on the unit (11) performs the same operation.
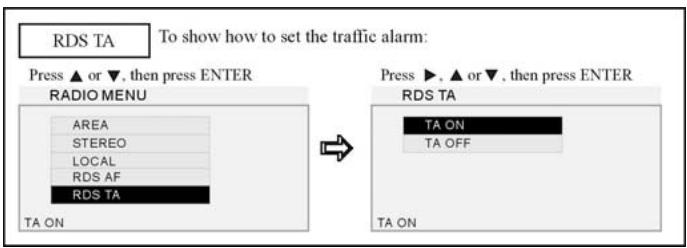
11. Traffic Alarm
Briefly press TA button (25) on the remote control to activate the traffic alarm function, LCD displays "TA", and revealing the TA status by TP by the following three conditions:
When TP didn't display, there are no TA and EON program; when TP display, TA program is playing now. if a disc is being played, it will switch to TA program at once, TRAFFIC and PS information appears on LCD, when it is off, the unit will return to the initial status.
Note:
- Briefly pressing TA button (15) on the main unit performs the same function.
12. Program Type
Briefly press the ANGLE button (7) to activate the PTY function.
When this function is on, press the and buttons to select your desired item, after that, press and hold ANGLE to start PTY searching or press ANGLE then it will start automatically after 3 seconds.
Note:
- This function can only be carried out with the remote control.
- Briefly press OSD button (8) on the remote control to show the setup information before setup.
- The ANGLE button for this function is activated only in FM RDS mode.
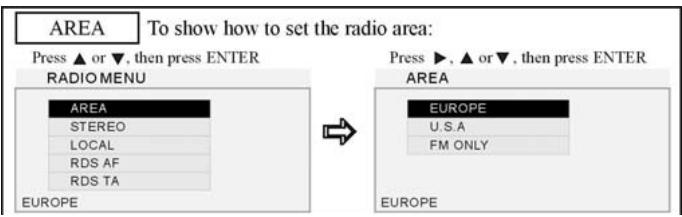
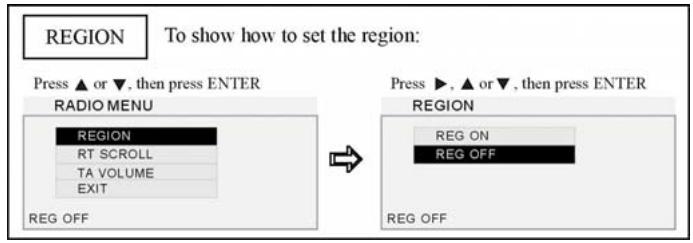
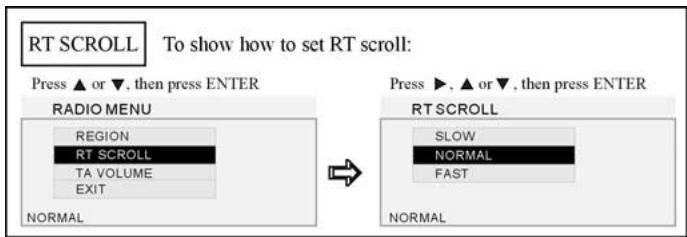
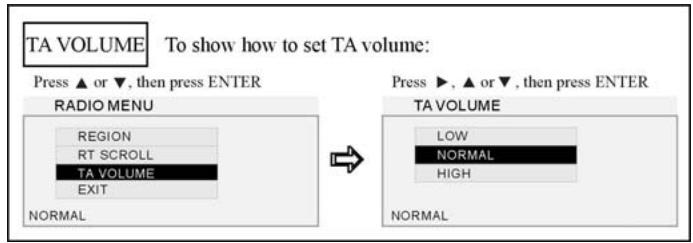
13. RADIO MENU
Press the SET UP button (19) on remote control, the display shows the radio setup menu, Use the / / / buttons on the remote control (27) to select your desired item, then press ENTER on the remote control to confirm. Press / / / to select EXIT, then press ENTER to exit the setup or simply press SETUP button again to exit.
Note:
- This function can only be carried out with the remote control.
10.VCD/CD/MP3/MPEG-4/USB
1. Playing a disc/USB device
Play disc: Press PWR button to turn on the unit and then press RELEASE button to release the front panel. Then, insert a disc (with label side up) into the disc loading slot and close the front panel. It will automatically switch to the DVD mode. If USB is inserted, press SOURCE button to select the DVD mode.
Play USB device: firstly open the rubber cover, then insert USB device with supplied USB cable if necessary in USB port, it will automatically start playback.
If it contains folders, at STOP mode, use the or buttons (21) to select the required folder. Then confirm using the ENTER button. Then select the desired file using the or buttons.
Note:
- USB mode is at priority: when closing the front panel, the unit will switch to the USB mode if the USB device is inserted.
- You can eject the disc by using RELEEASE button to open the front panel and then pressing the button on the main unit.
2. Quick track selection
Play MP3/MPEG-4 files: At STOP mode, press the or button on the remote control to go to the next or previous track and then press ENTER to play;
During VCD/CD/MP3/MPEG-4 playback, press the or button on the remote control to play the previous or next track.
Note:
- The and button on the main unit performs the same function.
3. Repeat Playing
During playback, press RPT button(15) on the remote control to replay the current track. Press it again to cancel this function.
Note:
- Press AMS button(6) on the main unit can be used to operate repeat play.
4. Number Buttons
During playback, you can select any track directly by using Number buttons (23). The selected track will be played automatically.

- This function can only be operated using the remote control.
5. Stop Playing
During MP3/MPEG-4 files playback, press button (18) on the remote control to stop playback.
During VCD/CD mode, firstly pressing button to pause playing, press button (17) on the remote control to resume play, press button twice to stop playing completely.

- This function can only be operated using the remote control.
6. Selecting a Track
During CD playback, firstly press GOTO button (2) on the remote control, and TFT shows : disc playback time: --:--, press your desired time of the disc by using number buttons. Press GOTO button twice, the track time: --:-- appears on TFT, also input your desired time to play the current track.
During VCD mode, press GOTO button to display the menu: Track/Disc time/Track time/Repeat playing/Time Display. Press , to select the option and press ENTER to access. Then press NUMBER buttons or · , to set.
During MP3 mode, press GOTO firstly to display : ---/all track, input the numbers to play the desired track. Press GOTO twice : ---/to adjust the playing time.
During MPEG-4 mode, press GOTO firstly to display: ---, input the numbers to play the desired track. Press GOTO twice : time---:--- to select the track playing time.

- This function can only be operated using the remote control.
7. Pause the Playback
During playback, press button (17) to pause the playback, Press it again to resume normal playback.
Note:
- The on the main unit also performs the same function.
8. F.F/F.REW the playback
Press the or button (20) on the remote control to perform fast rewind or fast forward.
- This function can only be operated using the remote control.
9. On Screen Display
During VCD/CD playback, press OSD button (8) on the remote control, the display shows:

During VCD/CD/MP3/MPEG-4 playback, hold and press this button to display the current source and setup information.
Note:
- This function can only be operated using the remote control.
10. Uninstall an USB
During USB mode, it would switch to RADIO mode when unstalling the USB device. During other modes, it will keep the previous mode when unstalling the USB device.
11. Playing Tracks at Random
During VCD/CD/MP3/MPEG-4 playback, when pressing RDM button (16) on the remote control, the unit plays any track at random in the directory. Press RDM button again to resume normal playback.
Note:
- This function can only be operated by using the remote control.
12. Slow motion playback
In VCD mode, press the button (10) to play slow forward or slow backward. The following speeds are available:

Note:
- This function can only be carried out with remote control.
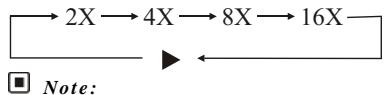
13. Increase the size of the picture
In VCD mode, Press the ZOOM button (9) to increase the picture size. Press this button repeatedly to change the zoom size.

Note:
- This function can only be carried out with the remote control.
- To remove the image by pressing (27) button on the remote control.
14. Selecting an audio mode
In VCD mode, press the AUDIO button (6) repeatedly to select an audio mode in the following order:

Note:
* This function can only be carried out with remote control.
15. PBC Selector
In VCD mode, press the TITLE button (3). PBC playback starts and the menu of the entire disc appears on the LCD. Then you can select the desired track by using the number button (23). When a track is playing, you can press the MENU button (4) to return to the menu, if you want to stop the track and select another. To cancel the PBC function, press the TITLE button (3) again.
Note:
- PBC playing confirms to version 2.0 or above disc only.
- This function can only be carried out with remote control.
16. Programmed Playback
In VCD/CD mode, press the PROG button (13) and the program menu will be displayed. Press the number buttons to select the track number. Move the cursor to EXIT and press ENTER to exit the programmed playback. Move the cursor to and press ENTER to go to the previous page; move the cursor to and press ENTER to go to the next page. During this process, press (18) or press PROG (13) to cancel the programmed playback.
Note:
- This function can only be carried out with remote control.
- To input the single digit track number, "01", "02", ..., "09" must be entered, instead of "1", "2", ..., "9".
17. Changing audio language (Multi-audio)
With the MP4 (AVI,MPEG4) file has multi-audio recordings, you can press AUDIO (6) to switch between language and audio output during playback as follows:
- This function can only be carried out with remote control.
- This function only operates with files having multi-audio recordings.
- The number in the “ Ⓞ”symbol on a disc packaging indicates the number of recorded languages/audio output.
Note:
- Some external hard disks may not be supported. Hard disks that have built-in power supply should be favored.
- Some models of USB storage devices or MP3 players may not be played.
- The quality and speed for reading JPEG photos depend on the resolution and compression ratio of the photos. Some JPEG photos may not be played due to the disc quality and the formats.
- Some DVD+R/RW, DVD-R/RW, CD-R/RW disc may not be played due to the quality on burning conditions.
11. DVD
1. Playing a DVD
Follow the operation in section 8 - VCD/CD/MP3/MPEG-4/USB - 1. Playing a disc/USB device.
2. Quick chapter selection
During DVD playback, press the button (21) to return to the beginning of the current chapter. Press this button again to play previous chapter. Press the button to go to the next chapter.
Note:
- The and buttons on the main unit also perform the same function.
3. Stop playback
During DVD playback, first press the button (18) on the remote control to stop play. Then press the ENTER button (27) on the button (17) on the remote control to resume play. Press the button (18) again to stop playback completely.
Note:
- This function can only be carried out with remote control.
4. PausePlayback
During DVD playback, press button (17) to pause or resume play. In stop mode, press this button to start playback.
Note:
- The on the main unit also performs the same function.
5. F.F/F.REW the playback
Press the or button (20) on the remote control to perform fast rewind or fast forward. Press repeatedly to change speed in the following order:

Note:
- This function can only be carried out with remote control.
6. Number Buttons
Use the number buttons (23) to select a chapter directly.

- This function can only be carried out with remote control.
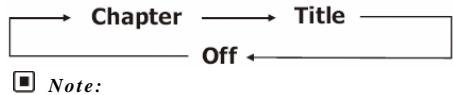
7. Repeat Playing
During DVD playback, press the RPT button (15) on the remote control to select a repeat mode from in:
- Press AMS button on the main unit also performs the same function.
8. System Switch
During playback mode, Press the P/N button (11) on the remote control to set the system to PAL, NTSC or AUTO.

Note:
- This function can only be carried out with remote control.
9. Slow motion playback
In DVD mode, press the button (10) to play forward or backward in slow motion. The following speeds are available:

Note:
- This function can only be carried out with the remote control.
10. Increase the size of the picture
In DVD mode, Press the ZOOM button (9) to increase the picture size. Press this button repeatedly to change the size of zoom in the following order:

Note:
- This function can only be carried out with the remote control.
- To move the picture during zooming, press , , , , button (27) on the remote control.
11. On Screen Display
In DVD mode, press the OSD button (8) on the remote control to display the following information:

Hold down the OSD button (8) to display the source and setup information.
Note:
- This function can only be operated by using the remote control.
12. DVD Options
In DVD mode, press GOTO button (2) on the remote control to set the playing time and the following options will be displayed: title/chapter/sound/captions/angle/title time/chapter time/repeat playing/time. Use the and buttons to select the options, press ENTER to confirm. Then press the number buttons (23) or and buttons (27) to set the current status.
Note:
- This function is operated by using the remote control.
13. Changing the viewing angle (Multi-angle)
With DVDs featuring multi-angle (scenes shot from multiple angles) recordings, press the ANGLE button to switch between viewing angles during playback.
The viewing angle changes in the following order: ANGLE 1 - ANGLE 2 - ANGLE 3
Note:
- This function is operated by using the remote control.
- This function is only available with DVDs featuring multi-angle recordings.
- The “ 串 ^ 串 ” symbol on a DVD packaging indicates that it features multi-angle scenes. The number in the 串 ^ 串 symbol indicates the number of angles from which scenes were shot..
- The ANGLE button does not function during fast forward/fast rewind or pause.
14. Changing audio language (Multi-audio)
DVDs can provide audio playback with different languages. With DVDs featuring multi-audio recordings, you can press the AUDIO button (6) to switch between language and audio output during playback.
Selection options switch as follows: AUDIO 1 — AUDIO 2 — AUDIO 3
Note:
- This function is operated by using the remote control.
- This function only operates with DVDs featuring multi-audio recordings.
- The number in the “ ②D ”symbol on a DVD packaging indicates the number of recorded languages/audio outputs.
15. Changing the subtitle language (Multi-subtitle)
With DVDs featuring multi-subtitle recordings, press the SUB-T button(5) to switch between subtitle languages during playback..
Note:
- This function is operated by using the remote control.
- This function only operates with DVDs featuring multi-subtitle recordings.
- The number in the symbol on a DVD packaging indicates the number of recorded subtitle languages.
16. Using the menus
In DVD mode, press the MENU button (4) to return to the root menu. Press the TITLE (3) button on the remote control to display the title menu. You can press the direction buttons (27) or the number buttons (23) to select the chapter.
Note:
- This function is operated by using the remote control.
17. DVD SETUP MENU
During DVD playback, press the SET UP button (19) on remote control to display the DVD player setup menu. Use the / / / buttons (27) on the remote control to select the desired option, and press the ENTER button (27) on the remote control to confirm your choice.
Note:
- you can select your preferred options. These options will be chosen if they are available on a disc. If the disc does not have the preferred option then the default setting will be used.
- Regarding the DVD setup menu, please refer to the following pages for more details.
- Some functions vary depending on the types of models or disc formats.
- Press the SETUP button (19) on the remote control to exit the menu setup.
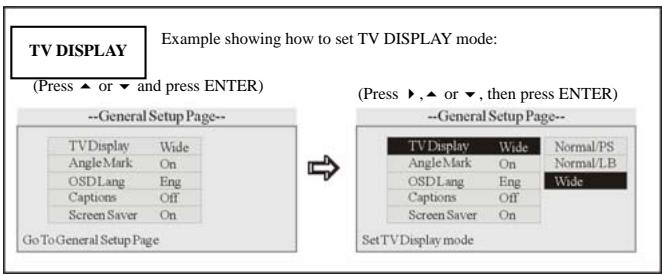
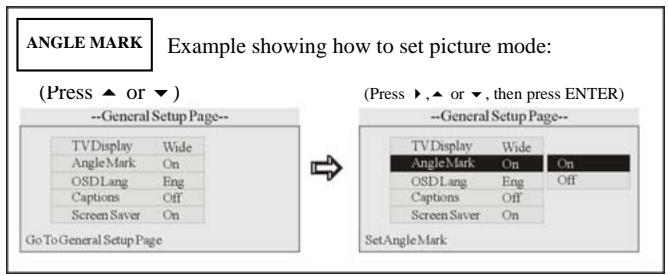
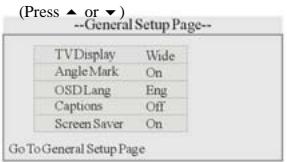
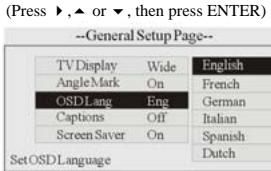
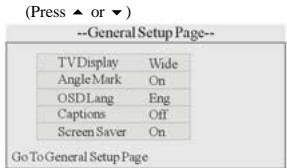
--General Setup page
OSD Language
Example showing how to set language mode:

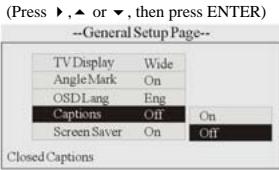
Captions
Example showing how to set captions on/off:

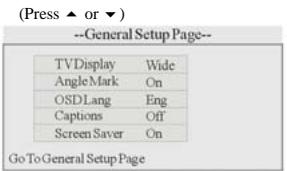
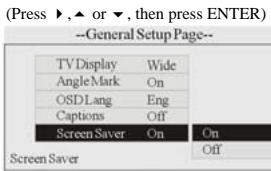
Screen Saver
Example showing how to set Screen Saver on/off:

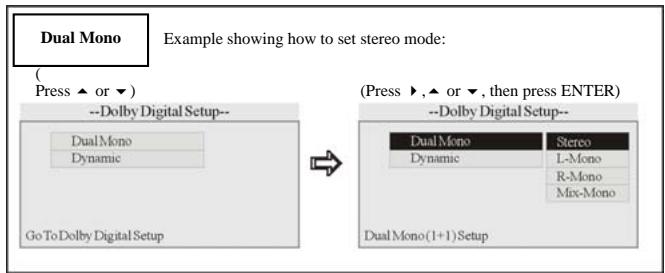
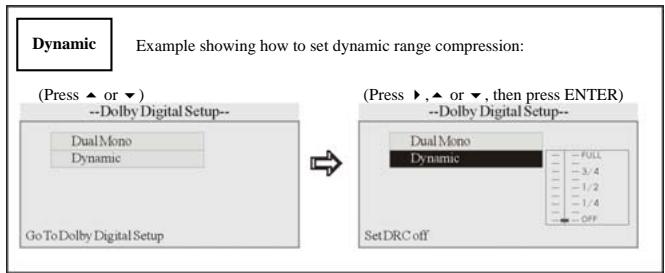
-- Audio Setup --
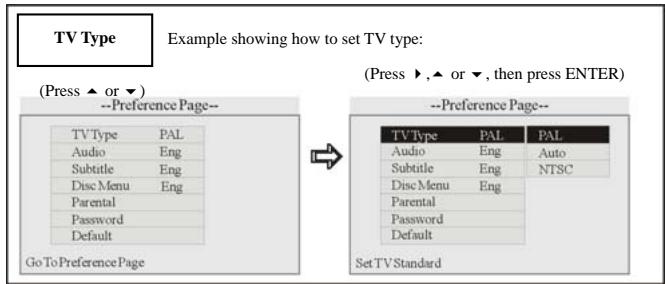
--- Preference page --
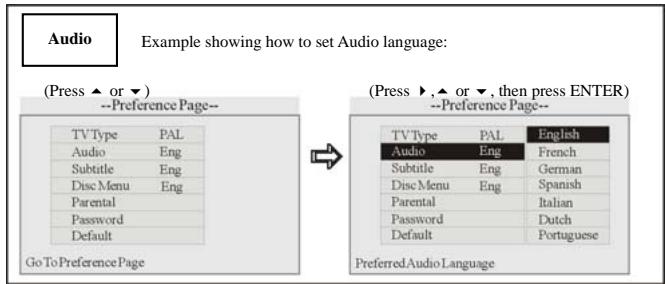
Subtitle
Example showing how to set subtitle language:
Example showing how to set Disc Menu language:
Example showing how to set parental control:
Example showing how to set password, and the default password is 8888:
Example showing how to set load factory setting:
Press and hold SETUP button (19) on the remote control or MENU-VOL button (3) on the front panel to display the following menu:
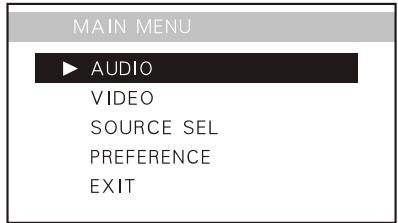
The main menu includes five options above, press or button to select the option and press ENTER or to assess. Press can return to previous menu.

Note:
- Use ▲/▼/◇/▶/ENTER (27) buttons on the remote control.
- Rotate and press VOL button on the main unit performs the same function. Select “EXIT” to exit the main menu
2. AUDIO SETUP
After Selecting AUDIO, press ENTER to enter the setting system:
MAIN MENU
AUDIO
VIDEO
SOURCE SEL
PREFERENCE
EXIT

BALANCE

You can adjust BALANCE, FAD, BASS, TREBLLE, EQUALIZER, LOUDNESS, press then press ENTER (or BACK then press ENTER) to return to the previous menu. For example, press , then press ENTER to select BALANCE, the setting menu will appear as follow:
Press to adjust the balance, and then press ENTER to confirm. Press to return to the previous menu.
Note:
- Proceed in the same way to adjust the other options.
EQUALIZER
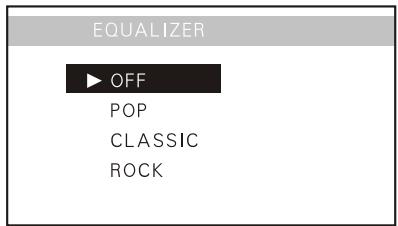
You can select the EQ effects: Pop, Classic and Rock.
LOUDNESS
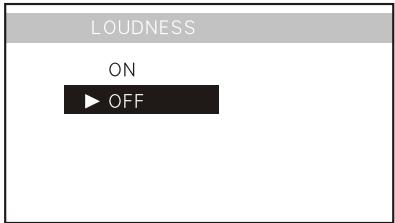
You can select the loudness on or off.
3.VIDEO SETUP
SelectingVIDEO in main menu, press ENTER to access.
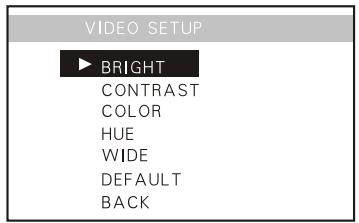
The main menu includes items above.
CONTRAST
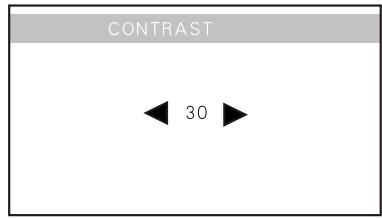
Select "Contrast" option and press ENTER to confirm. Press , to adjust the contrast, and then press ENTER to confirm. Press to return to the previous menu. Proceed in the same way to adjust the other options: Bright, Color and Hue..
WIDE

You can select the screen picture display ratio:
WIDE: The default setting is 16:9 that is same as the actual screen size ratio.
NORMAL: It is 4:3 that the black bands will be on left and right sides of the screen.
DEFAULT
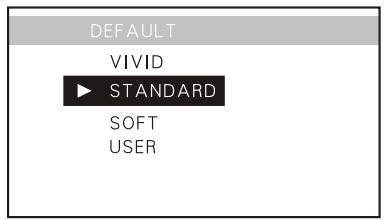
You can select the picture mode according to personal desire.
4 . SOURCE SELECTION
Selecting SOURCE SEL in main menu, press ENTER to assess.
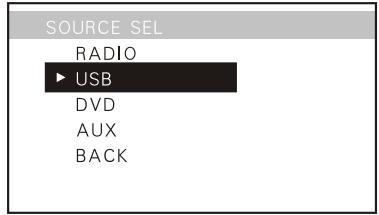
If you set it OFF, this source is invalid. i.e. Pressing SOURCE button cannot activate it. During playback mode, you cannot set it OFF.

Note:
* RADIO mode can't be set OFF
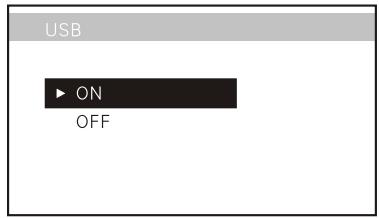
USB ON/OFF
DVD ON/OFF
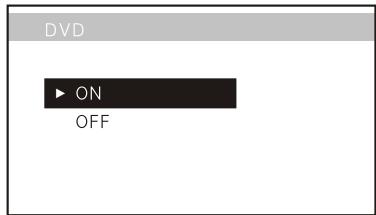
Turning on or off the DVD mode can be set In this menu, the default setting is ON.
AUX IN ON/OFF

Turning on or off the AUX IN mode can be set in this menu, the default setting is ON.
5. PREFERENCE SETUP
Select PREFERENCE in main menu, then press ENTER to access.
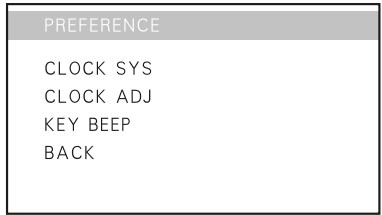
CLOCK SYSTEM
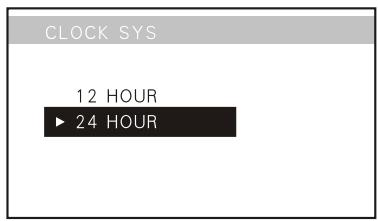
Setting CLOCK SYS in this menu, to 12 HOUR or 24 HOUR display, the default setting is 24 HOUR.
CLOCK ADJUSTMENT
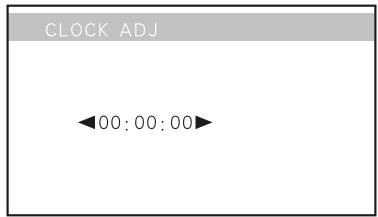
Setting CLOCK ADJ in this menu, Use and to adjust the clock.
KEY BEEP
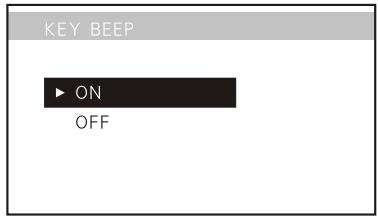
Setting KEY BEEP ON or OFF in this menu, the default setting is OFF. If it is set to ON, you will hear a beep sound when a key is pressed.
13. Specifications
General
| Power Requirement | 14.4V DC (11-16V allowable) |
| Load Impedance | 4Ω |
| Max.Power Output | 40W x 4 |
| RMS output power | 35W x 4 |
| Tone Controls | ±10 dB Bass 100Hz Treble 10KHz |
| Dimensions | Approx.192x178 x 50mm (D/W/H) |
| TFT Sizes | 3.0” diagonal (16:9) |
| Weight | Approx.1.75kg |
| Display Format (DOT) | 960(H) X 240(V) |
| Active Area (MM) | 65.31(H) X 36.84(V) |
| Contrast ratio | 450 |
| Brightness (cd/m2) | 250 |
| Dot Pitch (MM) | 0.068(H) X 0.1535(V) |
| Response Time (MS) | RISE 30(typ) FALL 10(typ) |
FM Section
| Tuning Range | 87.5-108(MHz)(Europe) |
| (Optional) | 87.5-107.9(MHz)(U.S.A) |
| 65-74(MHz)(Russia) | |
| IF Range | 10.7MHz |
| Usable Sensitivity | 10dBuV |
| (-30dB) | |
| Signal-to-noise Ratio | 60dB |
| Stereo Separation | 30dB (1KHz) |
| Frequency Response | 30Hz-15KHz |
AM Tuner Section
| Frequency Range | 522-1620(KHz)(Europe) |
| (Optional) | 530-1710 (KHz)(U.S.A.) |
| IF Range | 450KHz |
| Usable Sensitivity | 38dBuV |
| (-20dB) |
CD Player Section
Signal-to-noise Ratio
Separation
Distortion
65dB
60dB(1KHz)
0.1%
DVD Player Section
Color system
Compatible disc/file
PAL/NTSC
DVD + R / RW DVD-R/RW, MP4,
Xvid, CD-DA, CD-R/RW, MP3,
JPEG, VCD2.0
Number of channel
Frequency Response
Dynamic Range
Signal-to-Noise Ratio
2 channels
5Hz to 20,000Hz
98dB
73dB
USB Section
USB port type
USB port handling capacity
2.0
2 GB
Output Terminals
Video output x2 1V
Rear/Front Wire out (4x) 2V
Subwoofer x1 0.8V
Audio AUX IN x1 2V
Video AUX IN x1 1V
To Antenna x1
Note:
- Due to continuous product improvement, specifications and design are subject to change without prior notice.
14. Simple Troubleshooting Guide
The following checklist can help you solve the problems which you may encounter when using the unit. Before consulting it, check the connections and follow the instructions in the user manual.
Problem
| No power. | ·Check and make sure whether the fuses are blown (unit and car), if so, replace with equivalent fuses. |
| Some errors occur in the LCD or it does not work when buttons are pressed. | ·Press the RESET button. |
| Unable to receive stations. | ·Check whether the antenna is inserted and properly connected, if not, insert the antenna or connect it properly. |
| Poor quality of radio station. | ·Check the antenna is fully extended; if broken, replace the antenna with a new one. Check whether the antenna plug on the car is properly connected to the radio connector. ·The antenna is not properly grounded. |
| Discs cannot be loaded. | ·A disc is already loaded in the mechanism. |
| Sound skips. | ·The disc is dirty or damaged. |
| No video images. | ·Check that the brown cable is properly connected (connection to the braking signal). |
| Poor quality images. | ·The color system is not set properly. Set the color system correctly. |
Note:
* If any of the problem cannot be solved using the checklist, consult your nearest retailer. Never try to disassemble the unit.
If at any time in the future you should need to dispose of this product please note that electrical products should not be disposed of with household waste. Please recycle where facilities exist. Check with your Local Authority or retailer for recycling advice. (Waste Electrical and Electronic Equipment Directive)