
BT-US 240 - Sander EINHELL - Free user manual and instructions
Find the device manual for free BT-US 240 EINHELL in PDF.


| Product Type | Random Orbital Sander |
| Model | BT-US 240 |
| Brand | Einhell |
| Power Supply | 230 V ~ 50 Hz |
| Power Consumption | 240 W |
| No-Load Speed | 6,000 – 12,000 rpm |
| Orbit Diameter | 2.5 mm |
| Sandpaper Attachment | Hook and loop (Velcro) |
| Pad Size | 125 mm (5 in) |
| Dust Extraction | Integrated dust bag with microfilter |
| Soft Grip Handle | Yes |
| Variable Speed | Adjustable via thumbwheel |
| Weight | 1.5 kg |
| Dimensions (L x W x H) | 200 x 120 x 150 mm |
| Main Functions | Sanding, polishing, surface finishing |
| Maintenance | Clean dust bag regularly; check carbon brushes |
| Safety Features | Double insulation, lock-on switch, dust protection |
| Spare Parts Available | Sandpaper, dust bag, carbon brushes |
| Repairability | Designed for simple brush replacement |
| Certifications | CE, GS |
Frequently Asked Questions - BT-US 240 EINHELL
User questions about BT-US 240 EINHELL
0 question about this device. Answer the ones you know or ask your own.
Ask a new question about this device
Download the instructions for your Sander in PDF format for free! Find your manual BT-US 240 - EINHELL and take your electronic device back in hand. On this page are published all the documents necessary for the use of your device. BT-US 240 by EINHELL.
USER MANUAL BT-US 240 EINHELL
Original operating instructions Belt and Disk Sander
Einhell®


3


"Caution - Read the operating instructions to reduce the risk of injury"

Wear ear-muffs.
The impact of noise can cause damage to hearing.

Wear a breathing mask.
Dust which is injurious to health can be generated when working on wood and other materials. Never use the device to work on any materials containing asbestos!

Wear safety goggles.
Sparks generated during working or splinters, chips and dust emitted by the device can cause loss of sight.
⚠️ Important!
When using equipment, a few safety precautions
must be observed to avoid injuries and damage. Please read the complete operating manual with due care. Keep this manual in a safe place, so that the information is available at all times. If you give the equipment to any other person, give them these operating instructions as well.
We accept no liability for damage or accidents which arise due to non-observance of these instructions and the safety information.
1. Safety regulations
The corresponding safety information can be found in the enclosed booklet.
2. Layout (Fig. 1)
1 ON/OFF switch
2 Safety window
3 Spark deflector
4 Safety hood
5 Grinding wheel
6 Workpiece support fastening screw
7 Workpiece support
8 Mounting holes
9 Foot
10 Spark deflector adjusting screw
11 Sanding/grinding belt
12 Clamp screw for the top belt roller
13 Clamping lever
14 Fastening screw for side cover
3. Items supplied
- Open the packaging and take out the equipment with care.
- Remove the packaging material and any packaging and/or transportation braces (if available).
- Check to see if all items are supplied.
- Inspect the equipment and accessories for transport damage.
- If possible, please keep the packaging until the end of the guarantee period.
• Original operating instructions - Safety instructions
4. Proper use
The grinder/sander is a combination device for the coarse and fine grinding/sanding of metals, woods of all kinds and other materials using the appropriate grinding/sanding wheel or belt.
The machine may only be used with grinding/sanding wheels or belts which are suitable for it and comply with the characteristic data in these instructions.
The machine must only be used for its intended purpose! Even if the machine is used as intended, certain residual risk factors cannot be completely eliminated. The following hazards may arise in connection with the machine's construction and layout:
- Contact with the grinding wheel where it is not covered.
- Catapulting of parts from damaged grinding wheels • Catapulting of workpieces and parts of workpieces from the machine.
- Damage to hearing if ear-muffs are not used as necessary. ● Harmful emissions of wood dust when used in closed rooms.
- The rotating parts of the device cannot be covered for functional reasons. Therefore you must exercise care and hold the workpiece firmly to prevent it slipping which could result in your hands coming into contact with the grinding/sanding belt.
The machine is to be used only for its prescribed purpose. Any other use is deemed to be a case of misuse. The user / operator and not the manufacturer will be liable for any damage or injuries of any kind caused as a result of this.
Please note that our equipment has not been designed for use in commercial, trade or industrial applications. Our warranty will be voided if the machine is used in commercial, trade or industrial businesses or for equivalent purposes.
IMPORTANT
The equipment and packaging material are not toys. Do not let children play with plastic bags, foils or small parts. There is a danger of swallowing or suffocating!
- Technical data
Residual risks
Even if you use this electric power tool in
accordance with instructions, certain residual
- risks cannot be ruled out. The following hazards
may arise in connection with the equipment's
may arise in connection with the equipment's construction and layout:
| Power rating: 240 W S2 30 min | |
| Idle speed nb | min |
| Grinding wheel diameter: 150 mm | |
| Grinding wheel thickness: 20 mm | |
| Grinding wheel hole diameter: 12.7 mm | |
| Max. peripheral speed: | 21.98 m/s |
| Sanding/grinding belt | 50 x 686 mm |
| thgieW | g/k |
- Lung damage if no suitable protective dust mask is used.
- Damage to hearing if no suitable ear protection is used.
- Health damage caused by hand-arm vibrations if the equipment is used over a prolonged period or is not properly guided and maintained.
6. Before starting the equipment
Pull the power plug before doing any maintenance or assembly work on the equipment.
- The machine must be set up so that it stands firmly, i.e. it must be securely screwed to a work bench or similar.
- All covers and safety devices have to be properly fitted before the machine is switched on.
- It must be possible for the grinding wheel to run freely.
- Check that the voltage on the rating plate is the same as your supply voltage before you connect the machine to the power supply.
Load factor:
A load factor of S2 30 min (intermittent periodic duty) means that you may operate the motor continuously at its nominal power level (240 W) for no longer than the time stipulated on the specifications label (30 minutes ON period). If you fail to observe this time limit the motor will overheat. During the OFF period the motor will cool again to its starting temperature.
Sound and vibration
Sound and vibration values were measured in accordance with EN 61029.
| LpA sound pressure level | 70,8 dB(A) | |
| KpA | ytniatecnu | B |
| LWA sound power level | 83,8 dB(A) | |
| KWA | ytniatecnu | B |
6.1 Assembling the spark deflector
(Figs. 1/3/4/5/6)
- Slide the spark deflector (3) under the safety hood (4). Screw the spark deflector (3) to the safety hood from above (4) using the screws (15).
- Adjust the spark deflector (3) using the adjusting screw (10) so that the distance between the dry grinding wheel (5) and the spark deflector (3) is as small as possible and certainly does not exceed 2 mm.
- Adjust the spark deflector (3) periodically to compensate for wear on the wheel.
Wear ear-muffs.
The impact of noise can cause damage to hearing.
Keep the noise emissions and vibrations to a minimum.
- Only use appliances which are in perfect working order. • Service and clean the appliance regularly. • Adapt your working style to suit the appliance. • Do not overload the appliance.
- Have the appliance serviced whenever necessary.
- Switch the appliance off when it is not in use.
- Wear protective gloves.
6.2 Fitting the workpiece supports (Fig. 7-8 / Item 7) - Undo the fastening screws (6). Secure the workpiece supports (7) to the grinder/sander using the fastening screws (6).
6.3 Adjusting the workpiece supports (Fig. 8-9 / Item 7)
- Adjust the workpiece supports (7) using the fastening screws (6) so that the distance between the dry grinding wheel (5) and the workpiece support (7) is as small as possible and certainly does not exceed 2 mm.
- Adjust the workpiece supports (7) periodically to compensate for wear on the dry grinding wheel.
6.4 Changing the grinding wheel (Figs. 10-11) Remove the 3 screws (A) holding the side section of the safety hood (B) and remove the safety hood.
Undo the nut (D) (Important: The grinding/sanding wheel is fastened with a left handed thread), by holding the nut of the grinding/sanding wheel mount on the opposite side. Remove the flange (C). and replace the grinding wheel (5). To assemble, proceed in reverse order.
6.5. Changing the grinding/sanding belt (Fig. 1/12)
Undo the three screws (4) and remove the side safety guard. Undo the clamp screw for the top belt roller (12) by a few turns.
Push the clamping lever (13) downwards and pull the grinding/sanding bolt off the rollers.
Place the new grinding/sanding belt (11) in the center of the top and bottom rollers and release the clamping lever (13). Now tighten the clamp screw (12) and fit the side safety guard.
7. Operation
7.1 ON/OFF switch (1)
To switch on the equipment set the On/Off switch (1) to position 1.
Move the ON/OFF switch (1) to position 0 to switch off the equipment.
After switching on the equipment wait for the equipment to reach its maximum speed of rotation before commencing with the sanding/grinding work.
7.2 Grinding
We recommend that you use the fine-grained grinding wheel for fine sanding/grinding work and the coarse-grained grinding wheel for coarse sanding/grinding work. - Place the workpiece onto the workpiece support (7) and slowly guide the workpiece towards the grinding wheel (5) at the desired angle to the point where workpiece and grinding wheel make contact. - Move the workpiece slightly back and forth to
produce an optimal grinding result. This way the grinding wheel (5) is evenly worn. Allow the workpiece to cool every now and then.
7.3 Grinding/Sanding
● Always hold the workpiece firmly during grinding/sanding. - Do not exert excessive pressure. - The workpiece should be moved to and fro on the belt as you grind/sand it to prevent the paper wearing on one side. ● Important! Pieces of wood should always be sanded with the grain to prevent them splitting.
8. Cleaning, maintenance and ordering of spare parts
Always pull out the mains power plug before starting any cleaning work.
8.1 Cleaning
- Keep all safety devices, air vents and the motor housing free of dirt and dust as far as possible. Wipe the equipment with a clean cloth or blow it with compressed air at low pressure. • We recommend that you clean the device
- Clean the equipment regularly with a moist cloth and some soft soap. Do not use cleaning agents or solvents; these could attack the plastic parts of the equipment. Ensure that no water can seep into the device.
8.2 Maintenance
- There are no parts inside the equipment which require additional maintenance.
8.3 Ordering replacement parts:
Please quote the following data when ordering replacement parts:
- Type of machine • Article number of the machine • Identification number of the machine ● Replacement part number of the part required For our latest prices and information please go to www.einhell.com.au
GB
9. Storage
Store the equipment and accessories out of children's reach in a dark and dry place at above freezing temperature. The ideal storage temperature is between 5 and 30 °C. Store the electric tool in its original packaging.
10. Disposal and recycling
The unit is supplied in packaging to prevent its being damaged in transit. This packaging is raw material and can therefore be reused or can be returned to the raw material system. The unit and its accessories are made of various types of material, such as metal and plastic. Defective components must be disposed of as special waste. Ask your dealer or your local council.
9
The guarantee provided in this Guarantee Certificate is given by Einhell Australia Pty Limited
ACN 134 632 858 of 6/166 Wellington Street, Collingwood, Victoria (Telephone number 1300 922 271)
(Einhell Express Guarantee).
GB GUARANTEE CERTIFICATE
Dear Customer,
All of our products undergo strict quality checks. In the unlikely event that your device develops a fault, please contact our service department at the address shown on this guarantee certificate. Of course, if you would prefer to call us then we are also happy to offer our assistance under the service number printed below. Please note the following terms under which claims under the Einhell Express Guarantee can be made:
- The benefits conferred by the Einhell Express Guarantee are in addition to all rights and remedies which you may be entitled to under the Australian Consumer Law, and any other statutory rights you may have under other applicable laws. This Einhell Express Guarantee does not exclude, restrict or modify any such rights or remedies. We do not charge you for the Einhell Express Guarantee.
- Our goods come with guarantees that cannot be excluded under the Australian Consumer Law. You are entitled to a replacement or refund for a major failure and for compensation for any other reasonably foreseeable loss or damage. You are also entitled to have the goods repaired or replaced if the goods fail to be of acceptable quality and the failure does not amount to a major failure.
- The Einhell Express Guarantee only covers problems caused by material or manufacturing defects, and our liability under the Einhell Express Guarantee is limited, at our discretion, to the rectification of these defects or replacement of the product. Please note that the product has not been designed for use in commercial, trade or industrial applications. Consequently, the Einhell Express Guarantee will not apply if the product is used in commercial, trade or industrial applications or for other equivalent activities.
- The following are also excluded from the Einhell Express Guarantee: compensation for transport damage, damage caused by failure to comply with the installation/assembly instructions or damage caused by unprofessional installation, failure to comply with the operating instructions (e.g. connection to the wrong mains voltage or current type), misuse or inappropriate use (such as overloading of the product or use of non-approved tools or accessories), failure to comply with the maintenance and safety regulations, ingress of foreign bodies into the product (e.g. sand, stones or dust), effects of force or external influences (e.g. damage caused by the product being dropped) and normal wear resulting from proper operation of the product. The Einhell Express Guarantee will also not apply if any attempt is made to tamper with the product.
- The Einhell Express Guarantee is valid for a period of 2 years starting from the purchase date of the product. Claims made under the Einhell Express Guarantee should be submitted before the end of this guarantee period and within two weeks of the defect being noticed. No claims under the Einhell Express Guarantee will be accepted if submitted after the end of this guarantee period. The original guarantee period remains applicable to the device even if repairs are carried out or parts are replaced. In such cases, the work performed or parts fitted will not result in an extension of the guarantee period for the Einhell Express Guarantee, and the Einhell Express Guarantee will not apply for the work performed or parts fitted. This also applies when an on-site service is used.
- To make a claim under the Einhell Express Guarantee, please send the relevant product postage-free to the address shown below and enclose either the original or a copy of your sales receipt or another dated proof of purchase. It would help us if you could describe the nature of the problem in as much detail as possible. If the defect is covered by the Einhell Express Guarantee, your product will be repaired immediately and returned to you, or we will send you a new device (at our election). Any costs incurred by you in making a claim under this Einhell Express Guarantee, unless specified otherwise in this guarantee certificate, must be borne by you.
Of course, we are also happy to offer a chargeable repair service for any defects which are not covered by the scope of the Einhell Express Guarantee or for products which are no longer covered by the Einhell Express Guarantee. To take advantage of this service, please send the product to our service address.
EINHELL AUSTRALIA PTY LTD
6/166 Wellington Street
Collingwood VIC 3066
Australia
Phone: 1300 922 271


EH 09/2012 (01)
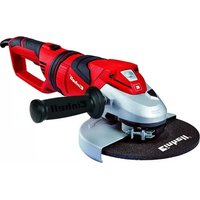

Brand : EINHELL
Model : BT-US 240
Category : Sander