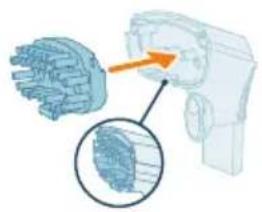
3000 Series XW3193 - Vacuum Cleaner PHILIPS - Free user manual and instructions

Find the device manual for free 3000 Series XW3193 PHILIPS in PDF.

PHILIPS 3000 Series XW3193 - Vacuum Cleaner
📄 536 pages English EN Download 💬 AI Question 10 questions ⚙️ Specs
Notice PHILIPS 3000 Series XW3193 - page 5
Pick your language and provide your email: we'll send you a specifically translated version.
Product type Bagless canister vacuum cleaner
Brand Philips
Model 3000 Series XW3193
Dimensions (L x W x H) 40 x 28 x 22 cm
Weight 4.5 kg
Power supply Mains, 220-240 V, 50-60 Hz
Maximum power 750 W
Tank capacity 1.5 L
Filtration type Washable HEPA filter
Noise level 78 dB(A)
Operating radius 8 m
Main functions Floor and carpet vacuuming, crevice tool for furniture, brush for parquet floors
Maintenance and cleaning Tank and filter washable with water
Safety Automatic shut-off in case of overheating
Spare parts and repairability Replacement filter, crevice tool, brush available
General information 2-year warranty, repairability index 8/10

Frequently Asked Questions - 3000 Series XW3193 PHILIPS

How to empty the vacuum cleaner tank?
To empty the tank, press the release button located on top of the device, remove the tank and empty the contents into a trash bin. You can then rinse the tank with clean water if necessary.
How often should I clean the filter?
It is recommended to clean the filter every two months or when the filter cleaning indicator lights up. To clean it, remove the filter, gently tap it to remove dust, then rinse under cold water and let it dry completely for 24 hours before reinstalling.
Can I use the vacuum on parquet floors?
Yes, the vacuum is suitable for parquet floors. Use the provided parquet brush or set the main brush to parquet position to avoid scratches.
What to do if the vacuum loses suction?
First check that the tank is not full and that the filter is not clogged. Clean the filter if necessary. Also inspect the hose and suction tube for possible blockages.
How to change the HEPA filter?
Open the filter compartment, remove the old filter and insert the new one. Make sure the filter is properly engaged. Replace the filter every 6 to 12 months depending on usage.
The vacuum smells burnt, what to do?
Immediately turn off the vacuum and unplug it. Check if the filter is very dirty or if an object has been sucked in (like a piece of fabric). Clean the filter and remove any obstruction. If the smell persists, contact customer service.
What accessories are included with the vacuum?
The vacuum comes with a crevice tool for furniture, a parquet brush, a crevice tool for baseboards, and a hose. Check the manual for the complete list.
Can I use the vacuum without a filter?
No, never use the vacuum without a filter. This could damage the motor and reduce air quality. Always replace the filter with a suitable model.
How to rewind the power cord?
Press the rewind pedal located on the back of the vacuum. Guide the cord with your hand to prevent it from tangling.
Where to find spare parts for this model?
Spare parts are available on the Philips website or from authorized dealers. Use the model number XW3193 to identify compatible parts.

User questions about 3000 Series XW3193 PHILIPS

0 question about this device. Answer the ones you know or ask your own.

Ask a new question about this device

Your email remains private: it is only used to notify you if someone answers your question.

No questions yet. Be the first to ask one.

Download the instructions for your Vacuum Cleaner in PDF format for free! Find your manual 3000 Series XW3193 - PHILIPS and take your electronic device back in hand. On this page are published all the documents necessary for the use of your device. 3000 Series XW3193 by PHILIPS.

USER MANUAL 3000 Series XW3193 PHILIPS

English 6

Czech 23

Danish 40

German 57

Estonian 74

Spanish 91

French 108

Croatian 125

Italian 142

Latvian 159

Lithuanian 176

Hungarian 193

Dutch 210

Norwegian 227

Polish 244

Portuguese 261

Romanian 278

Albanian 295

Slovenian 312

Slovak 329

Serbian 346

Finnish 363

Swedish 380

Turkish 397

Greek 414

Bulgarian 432

Macedonian 450

Russian 468

Ukrainian 486

Kazakh 503

Bride 520

① x1 XW3193 ② ③ x1 XW3192 XW3193 ④ ⑤ ⑥ x1 XV1732 ⑦ ⑧ ⑨ ⑩ a b ⑪ ⑫

Contents

Introduction 6

General description 6

Before first use 7

Preparing for use 7

Filling the water tank 7

Initial setup and connections 8

Using the appliance with 3-in-1 Nozzle (9cm) 10

Using the appliance with Wide Nozzle (15cm) 11

Maintenance after each cleaning cycle 13

Cleaning the hose 13

Cleaning the dirty water tank 13

Storing the power cable, hose and nozzle 15

Periodic maintenance 16

Cleaning the water tank with clean detergent-added water (every month) 16

Cleaning the dirty water tank connection point (every three months) 17

Cleaning the nozzles (every month or as needed) 18

Replacement 20

User signals and their meanings 20

Troubleshooting 21

Dry cleaning 21

Introduction

Thank you for buying this product! To fully benefit from the support that we offer, register your product at www.philips.com/welcome.

General description

1 Wide nozzle (XW3193 only)

2 3-in-1 nozzle

3 3-in-1 nozzle cap

4 Hose

5 Power cord

6 250mL XV1732 detergent

7 Swivel winding hook

8 Power cable release button

9 Dirty water tank

10 Dirty water tank lid

11 LED display

a on/off button

b DWT full indicator

12 Clean water tank

Before first use

PHILIPS 3000 Series XW3193 - Before first use - 1

1 Attach nozzle to the hose.

Preparing for use

Filling the water tank

1 Lift the clean water tank handle.

Illustration of a portable gas pump device with handle and hose (no text or symbols)

2 Remove the clean water tank by lifting it out of the appliance.

Illustration of a kitchen appliance with a handle and fan, showing a stand with an orange arrow (no text or symbols)

PHILIPS 3000 Series XW3193 - Filling the water tank - 3

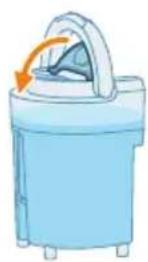
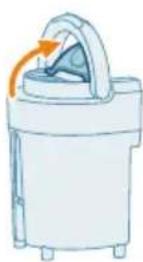
3 Lift the water tank cap to reveal tank opening.

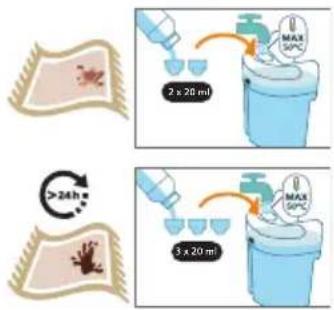
2 x 20 ml MAX 50°C 3 x 20 ml MAX 50°C >24 h

4 Based on your cleaning need, fill tap water to the MAX line. Add detergent formula Philips Stain Remover: 40 ml (2 dosage caps) for fresh stains or 60 ml (3 dosage caps) for dried / colorful stains.

Caution: The tap water that is poured into the clean water tank must not be warmer than 50°C.

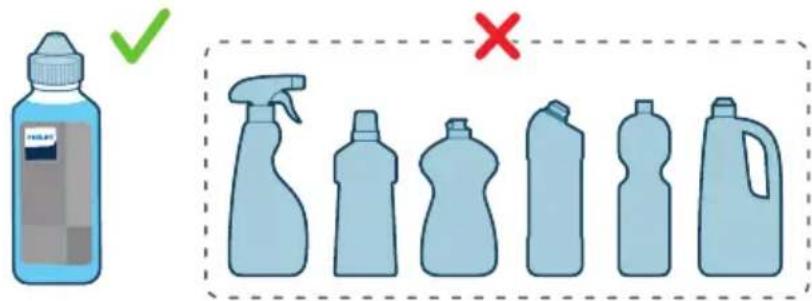
Caution: Philips has only tested this appliance with XV1732 Philips Stain Remover. Other detergents may lead to excessive foaming, which reduces performance and may cause the appliance to malfunction.

Illustration showing a blue bottle with a green checkmark and a row of six plastic bottles, one marked with a red X.

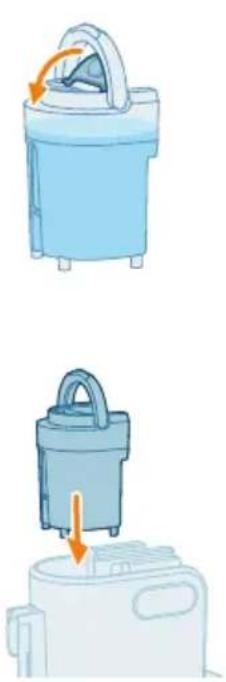
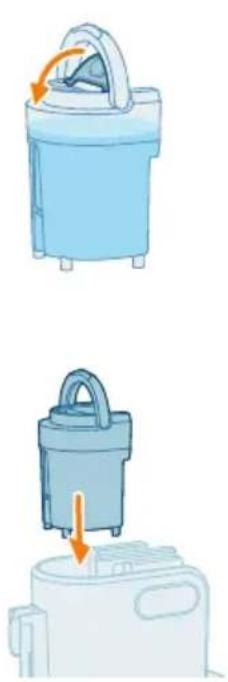
5 Close the cap of the clean water tank.

PHILIPS 3000 Series XW3193 - Filling the water tank - 6

Illustration of a blue appliance with a handle and arrow indicating downward motion, next to a smaller kitchen appliance (no text or symbols)

6 Place the clean water tank back in the appliance. Press down firmly on the tank to secure in position.

Initial setup and connections

Diagram showing a hair dryer with labeled parts and directional arrows indicating motion or assembly.

1 Release the hose from the hose grip bracket.

Diagram of a mechanical device with numbered parts showing rotational flow around a central component

2 Unwrap the hose completely. Insert the desired nozzle on the end of the hose until it clicks into place.

Illustration of a hand interacting with a device via a finger, showing orange laser lines radiating from the button (no text or symbols)

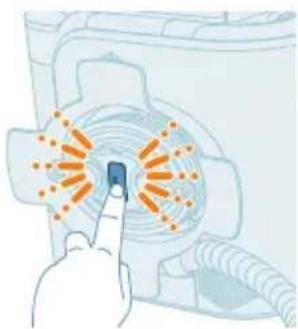
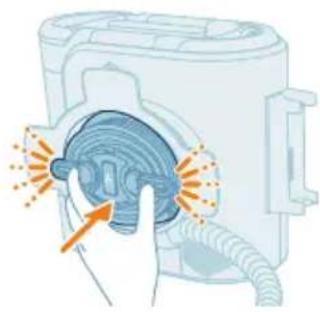
3 Press the button on the cable holder to release the cable. Unwrap the power cable from the holder.

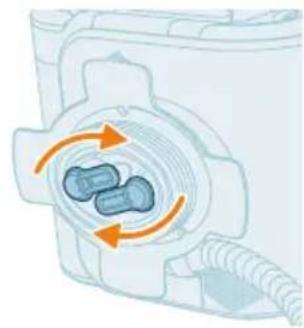
Diagram of a mechanical component with two circular features and directional arrows indicating rotation or flow (no text or symbols)

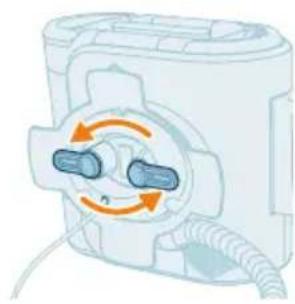
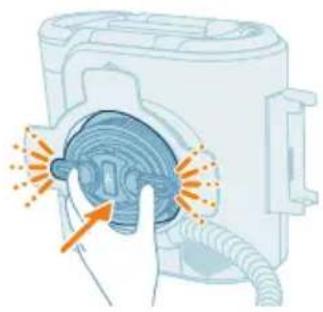
4 Rotate the swivel winding hook in the direction indicated by the arrows.

Illustration of a hand holding a blue cable inside a washing machine (no text or symbols visible)

5 Unwrap the power cable from the holder.

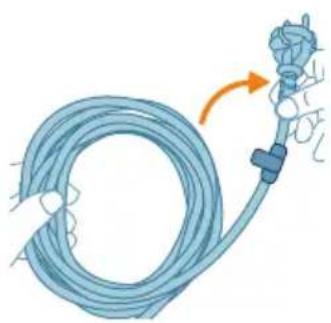
Illustration of a blue medical tube with a hand holding it, showing a curved cord and an orange arrow indicating direction (no text or symbols)

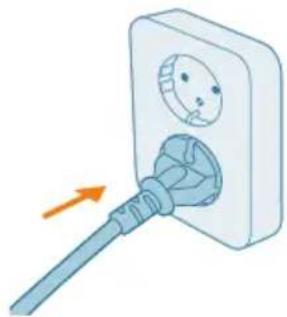
Illustration of a plug inserted into a wall socket with an arrow indicating direction (no text or symbols)

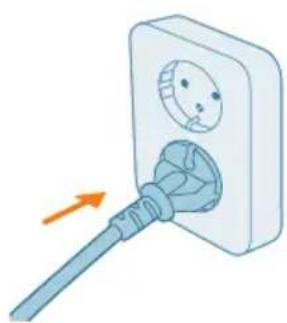
6 Plug the unit in.

Using the appliance with 3-in-1 Nozzle (9cm)

Illustration of a hand pressing a button with a power button (no text or symbols)

The 3-in-1 nozzle removes stains from a wide variety of soft surfaces.

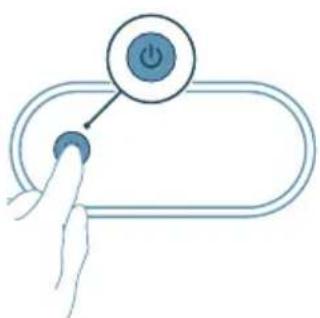
1 Turn the appliance on by pressing the power icon on the LED screen.

Diagram showing a device with labeled parts and directional arrows indicating rotation or movement.

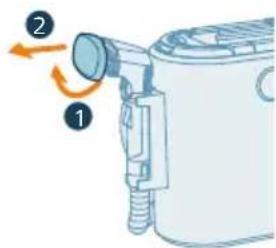
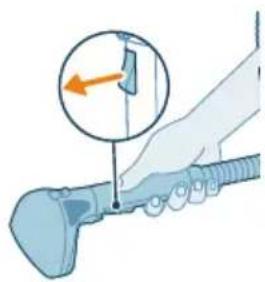
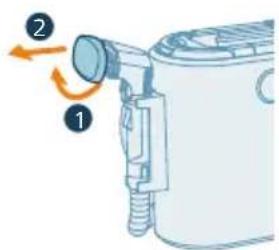
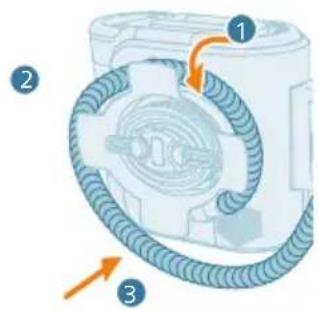
2 Remove the cap of the 3-in-1 Nozzle by pulling the bottom side (1) forward (2).

Illustration of a spray gun with an arrow indicating motion, showing spray and spray particles (no text or symbols).

3 Tip: Test on an invisible spot first to check how the detergent reacts with the surface.

Illustration of a hand pouring liquid into a container with arrows indicating flow direction (no text or symbols).

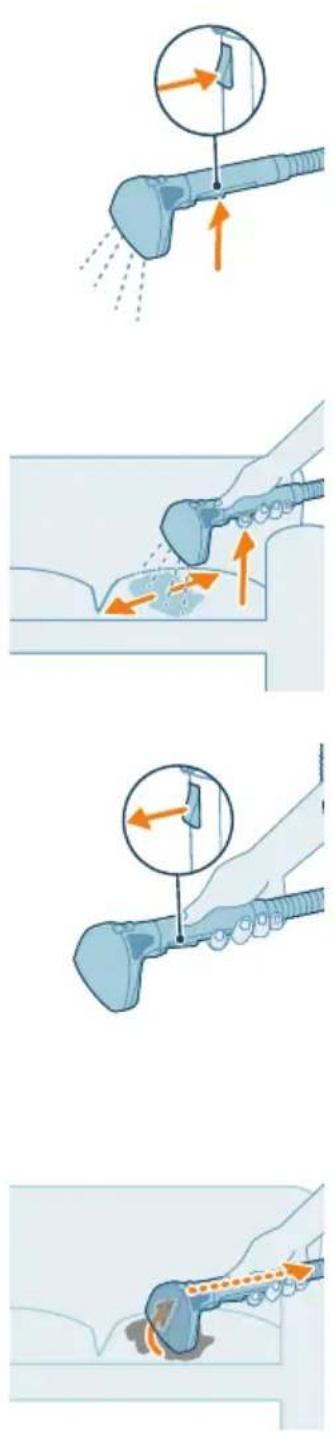
4 Hold the nozzle approximately 5 cm above the surface you want to clean. Press the spray button to apply cleaning solution to the surface.

Illustration of a mechanical device with an arrow indicating direction (no text or symbols present).

5 Release the spray button to stop the water flow.

Tip: Cleaning effectiveness on heavily stained or highly soiled areas will be enhanced if you wait 3-5 minutes before you start cleaning (step 6).

Illustration of a hand holding a tool with an orange arrow indicating motion or force (no text or symbols present).

6 Gently scrub the area to be cleaned. Apply downward pressure on the nozzle and pull it toward you. The suction will remove the dirt and detergent-added water. For extra thorough cleaning, repeat the cleaning procedure.

Using the appliance with the Wide Nozzle (15cm)

Hand holding a button with a power button icon (no text or symbols).

The wide nozzle has the same functionality as the 3-in-1 Nozzle, but can be used for larger areas.

1 Turn the appliance on by pressing the power icon on the LED screen.

PHILIPS 3000 Series XW3193 - Using the appliance with the Wide Nozzle (15cm) - 2

2 Tip: Test on an invisible spot first to check how the detergent reacts with the surface.

3 Hold the nozzle approximately 5 cm above the surface you want to clean. Press the spray button to apply cleaning solution to the surface.

4 Release the spray button to stop the water flow.

Tip: Cleaning effectiveness on heavily stained or highly soiled areas will be enhanced if you wait 3-5 minutes before you start cleaning (step 5).

5 Gently scrub the area to be cleaned. Apply downward pressure on the nozzle and pull it toward you. The suction will remove the dirt and detergent-added water. For extra thorough cleaning, repeat the cleaning procedure.

Maintenance after each cleaning cycle

Cleaning the hose

1 To clean the hose, connect the 3-in-1 Nozzle to the hose and close the cap.

Diagram showing a device with two labeled parts (1 and 2) indicating directional movement or operation.

3 x 10 sec

2 Press the button on the brush 3 times for 10 seconds to run water through the hose and the nozzle.

Cleaning the dirty water tank

Diagram showing a hand pressing a button on an electrical switch with power symbol and directional arrow indicating action.

Turn off the appliance by pressing the power icon on the LED screen. Before turning off the appliance, proceed with the Delayed Shut Off function to lift water from the hose and prevent leakage. Unplug the power cable from the electrical socket.

MAX

1 Remove the dirty water tank by lifting it out of the appliance.

PHILIPS 3000 Series XW3193 - Cleaning the dirty water tank - 3

2 Remove the lid from the dirty water tank by lifting it out of the tank.

3 Pour out any remaining water from the dirty water tank.

4 Rinse the dirty water tank and its lid under the tap.

5 Close the lid of the dirty water tank.

6 Place the dirty water tank back in the appliance.

Storing the power cable, hose and nozzle

Diagram of a mechanical device with rotating components and wiring (no text or symbols).

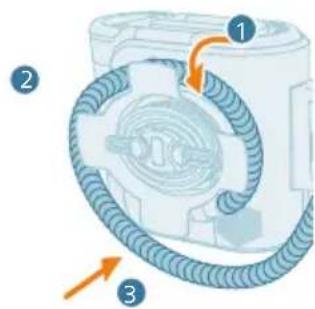
1 Rotate the swivel winding hook in the direction indicated by the arrows.

Diagram of a washing machine with orange and blue circular arrows indicating airflow or circulation (no text or symbols).

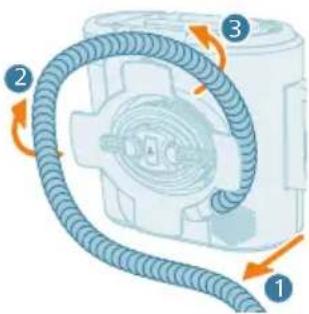
2 Wrap the power cable around the cable holder on the back of the appliance.

Illustration of a hand inserting a component into a washing machine (no text or symbols visible).

3 Press the cable grip bracket to fix the cable on the holder.

Diagram of a washing machine with labeled parts and directional arrows indicating motion or flow.

4 Wrap the hose around the hose grip bracket on the back of the appliance.

Diagram of a portable air purifier with labeled parts and directional arrows indicating flow or movement.

5 Put the handle with the 3-in-1 nozzle in the holder on the side of the appliance.

Periodic maintenance

Cleaning the water tank with clean detergent-added water (every month)

Illustration of a blue appliance with a handle and an orange arrow indicating upward motion, next to a white rectangular device.

1 Remove the clean water tank by lifting it out of the appliance.

PHILIPS 3000 Series XW3193 - Cleaning the water tank with clean detergent-added water (every month) - 2

2 Lift the water tank cap to reveal the tank opening.

Illustration of a mechanical component pouring liquid into a container.

3 Pour out any remaining water from the clean water tank.

Illustration of a water purifier with a faucet and swirling airflow.

4 Rinse the water tank.

PHILIPS 3000 Series XW3193 - Cleaning the water tank with clean detergent-added water (every month) - 5

5 Close the cap of the clean water tank.

6 Place the clean water tank back in the appliance. Press down firmly on the tank to secure it in position.

Cleaning the dirty water tank connection point (every three months)

Diagram of a mechanical component with a blue cylindrical part and two circular holes.

1 Remove the dirty water tank connection point.

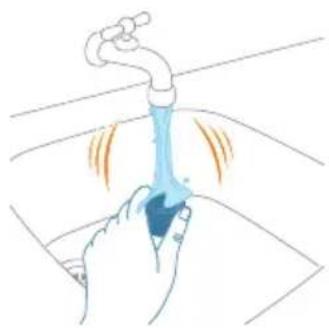
Illustration of a hand holding a blue object with motion lines indicating flow or movement.

2 Rinse the part under a running tap.

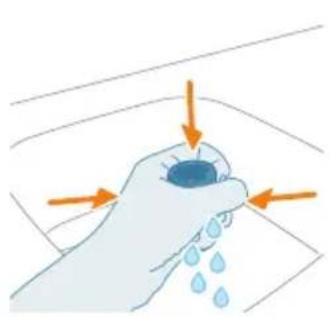
Illustration of a hand holding a small object with water droplets, emitting downward arrows.

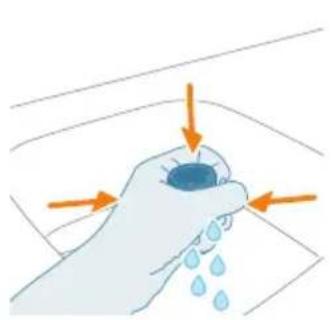
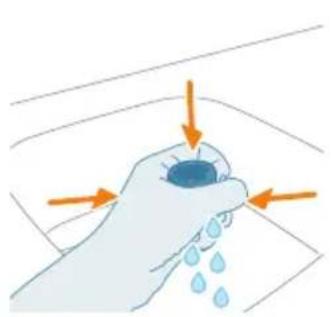
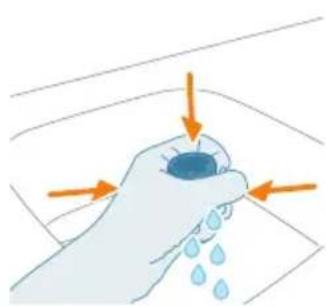
3 Squeeze it until clean water comes out.

Diagram of a mechanical component with a blue base and circular base, showing an arrow indicating direction.

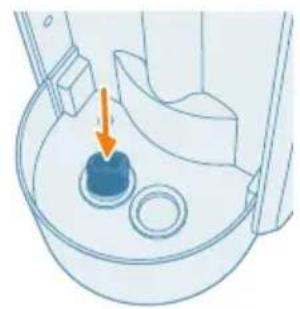
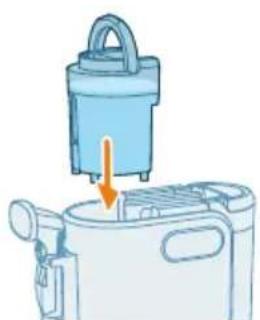
4 Place back the dirty water tank connection points.

Cleaning the nozzles (every month or as needed)

Diagram showing a device with labeled parts and directional arrows indicating motion or rotation.

1 Remove the cap of the 3-in-1 Nozzle by pulling the bottom side (1) forward (2).

Diagram showing two labeled parts of a device with orange arrows indicating directional movement or assembly.

2 Remove nozzle from the hose by pressing the button (1) and pulling up the nozzle (2).

Diagram showing a device with an attached sensor and a magnified inset of the sensor component.

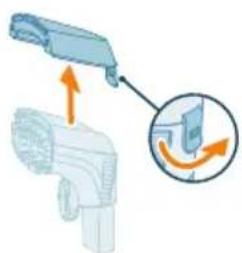
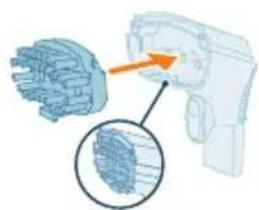
3 Remove the top part of nozzle by pulling the tab.

PHILIPS 3000 Series XW3193 - Cleaning the nozzles (every month or as needed) - 4

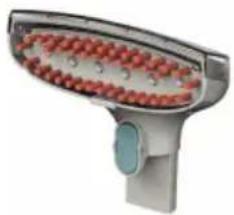
4 Remove the brush of nozzle by pulling the tab.

5 Rinse the parts under a running tap.

6 Place back the brush to the nozzle.

7 Place back the top part of nozzle by clicking it.

8 Attach the cap of the 3-in-1 Nozzle.

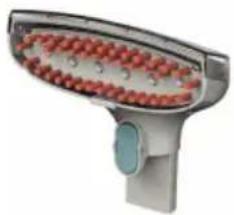
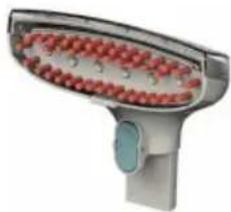
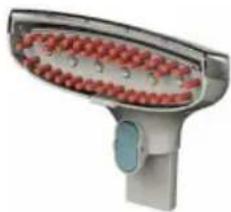
3D rendered image of a cleaning tool handle with red circular components and a blue handle.

9 For the wide nozzle, follow step 2-7.

Replacement

To buy accessories or spare parts, visit www.philips.com/parts-and-accessories or go to your Philips dealer. You can also contact the Philips Consumer Care Center in your country.

Replacement parts and type numbers:

3-in-1 Nozzle brush *CRP1056/01*

3D rendering of a medical device with red spherical components and a white lid.

Wide nozzle brush *CRP1056/02*

3D rendering of a showerhead with red spherical beads and a blue handle.

User signals and their meanings

Signal Cause Solution

graph TD A["Power"] --> B["File Icon"] style A fill:#f9f,stroke:#333 style B fill:#ccf,stroke:#333

Dirty water tank is full Empty dirty water tank

Pure electrical button diagram without any text, numbers, or symbols.

After pressing the On/off button to turn off the appliance the Delayed Shut Off function is activated

This is normal behavior of the appliance. To clean the hose, remaining water in the hose will be moved to the dirty water tank for 3 seconds. After this, the appliance will turn off

Troubleshooting

This chapter summarizes the most common problems you could encounter with the appliance. If you are unable to solve the problem with the information below, visit www.philips.com/support for a list of frequently asked questions or contact the Consumer Care Center in your country.

Dry cleaning Problem Possible cause Solution

Reduced spray or no spraySpray nozzle is clogged Clean spray nozzle holes using an unfolded paper clip
Clean water tank is empty Check and fill the tank
Stain Cleaner won’t pick up cleaning solutionPoor cleaning nozzle position Reposition cleaning nozzle on surface, follow recommended cleaning procedures
Dirty water tank is full Empty the dirty water tank
Nozzle brush is worn Replace brush inside cleaning nozzle
Remaining dirt in hose Clean the hose (see chapter 1 “Maintenance after each cleaning cycle”) to remove the blockage
Incorrect detergent Only use Philips Stain Cleaner 3000 Series
The Stain Cleaner cannot be switched onThe mains plug is not properly connected to socket outletConnect the mains plug to socket outlet
The dirty water tank is full Empty the dirty water tank
The dirty water tank is not placed back properlyPlace the dirty water tank back in cleaner properly
The suction is weak / The surface being cleaned is too wetThe brush head is clogged Remove the brush head from handgrip and clean brush head
Too much detergent water is dispensed on the cleaning surfaceDispense less detergent water while brush cleaning the surface
The hose is clogged Clean the hose (see chapter 1 “Maintenance after each cleaning cycle”) to remove the blockage
No detergent water is dispensed from the brushThe dispense button is not kept pressedKeep pressing dispensing button on the handgrip
The clean water tank is empty Fill up clean water tank

Stain is not removed

Not enough detergent used Cover the complete stain with detergent. Dilute the detergent before applying. Let it soak for two minutes, then scrub again

Not enough strokes performed Make a few more strokes over the stain until extensive flow of liquid stops going through the nozzle

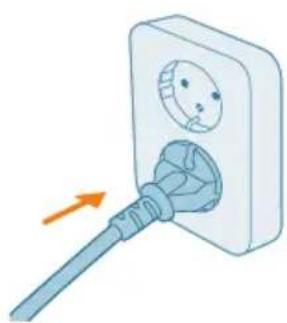
Illustration of a plug inserted into a wall socket with an arrow indicating direction (no text or symbols).

3D rendered image of a cleaning tool handle with red spherical components and a blue handle (no text or symbols visible)

Wide nozzle with brush *CRP1056/02*

3D rendering of a medical or laboratory device with red spherical components and a blue handle (no text or symbols visible)

Illustration showing a bottle with a green checkmark and a set of plastic bottles with a red 'X' indicating incorrect labeling.

5 Close the lid of the clean water tank.

PHILIPS 3000 Series XW3193 - Troubleshooting - 5

Illustration of a blue appliance with a handle and arrow indicating downward motion, next to a white electric fan (no text or symbols)

Diagram of a mechanical device with numbered parts showing rotational flow around a central component

Illustration of a plug inserted into an electrical outlet with a magnified inset showing internal components (no text or symbols)

6 Connect the device.

5 Release the spray button to stop the water flow.

3 x 10 sec

4 Rinse the water tank.

PHILIPS 3000 Series XW3193 - Troubleshooting - 10

5 Close the lid of the clean water tank.

1 Remove the connection point of the dirty water tank.

Illustration of a hand holding a blue object with motion lines indicating flow or movement.

2 Rinse the part under running water.

Illustration of a hand holding a small object with water droplets, emitting downward arrows.

3D rendered image of a cleaning brush with red circular components and a blue handle.

Brush for wide nozzle *CRP1056/02*

3D rendered image of a medical or laboratory device with red spherical components and a blue circular button.

Illustration showing a bottle with a green checkmark and a series of plastic bottles with a red 'X' indicating cancellation or rejection.

Wide brush nozzle *CRP1056/02*

3D rendered image of a medical or laboratory device with red spherical components and a blue circular button.

Illustration showing a bottle with a green checkmark and a series of plastic bottles with a red 'X' indicating cancellation or rejection.

5 Close the lid of the clean water tank.

PHILIPS 3000 Series XW3193 - Troubleshooting - 18

Illustration of a blue appliance with a handle and arrow indicating a process or operation.

6 Place the clean water tank back into the device. Press the tank firmly down to secure it in place.

Illustration of a plug inserted into a wall socket with an arrow indicating direction.

The 3-in-1 nozzle removes stains from various soft surfaces.

1 Turn on the device by pressing the power icon on the LED screen.

Diagram showing a device with labeled parts and directional arrows indicating rotation or movement.

2 Remove the cap of the 3-in-1 nozzle by pulling the lower part (1) forward (2).

Illustration of a spray gun emitting powder, with an inset showing airflow direction (no text or symbols).

4 Rinse the clean water tank.

PHILIPS 3000 Series XW3193 - Troubleshooting - 23

5 Close the cap of the clean water tank.

2 Rinse the part under running tap water.

Illustration of a hand holding a small object with water droplets, emitting downward arrows.

PHILIPS 3000 Series XW3193 - Troubleshooting - 25

4 Remove the nozzle brush by pulling the tab.

Wide nozzle brush *CRP1056/02*

3D rendered image of a medical or laboratory device with red spherical components and a blue circular button.

Diagram of a device with labeled parts showing directional rotation and component positioning

1 Wide nozzle (XW3193 only)

2 3-in-1 nozzle

3 Cap of the 3-in-1 nozzle

4 Hose

Installation and connections

Diagram showing a hair dryer with labeled parts and directional arrows indicating movement or flow.

Illustration of a plug inserted into an electrical socket with a cartoon face on the socket (no text or symbols).

2 Tilt the clean water tank to lift it out of the appliance.

Illustration of a kitchen appliance with a handle and fan, showing a cooking step.

3 Lift the water tank lid to reveal the tank opening.

PHILIPS 3000 Series XW3193 - Installation and connections - 4

PHILIPS 3000 Series XW3193 - Installation and connections - 5

4 Depending on your cleaning needs, fill it with tap water up to the MAX line. Add Philips stain remover: 40 ml (2 dosing caps) for fresh stains or 60 ml (3 dosing caps) for dried/set stains.

Caution: The tap water poured into the clean water tank must not be hotter than 50 °C.

Caution: Philips has tested the appliance only with Philips stain remover XV1732. Other detergents may cause excessive foaming, which weakens performance and may cause malfunction of the appliance.

Illustration showing a bottle with a green checkmark and a series of plastic bottles with a red 'X' indicating cancellation or rejection.

5 Close the lid of the clean water tank.

PHILIPS 3000 Series XW3193 - Installation and connections - 7

Illustration of a blue appliance being placed on top of a white electric stove burner, with an arrow indicating the component.

6 Return the clean water tank to the appliance. Press the tank firmly to secure it in place.

Initial setup and connections

Diagram showing a hair dryer with labeled parts and directional arrows indicating movement or flow.

The 3-in-1 accessory removes stains from various soft surfaces.

1 Turn on the appliance by pressing the power icon on the LED display.

Diagram of a device with labeled parts and directional arrows indicating rotation or movement.

2 Remove the 3-in-1 accessory cover by pulling the bottom side (1) forward (2).

Illustration of a hairdryer with spray and motion arrows indicating airflow.

5 Release the spray button to stop the water flow.

1 To clean the hose, connect the 3-in-1 accessory to the hose and close the cover.

3 x 10 sec

2 Press the button on the brush three times and hold it for 10 seconds to start the water flow through the hose and accessory.

Cleaning the dirty water tank

Diagram showing a hand pressing a button on an electrical switch with a power symbol and a directional arrow indicating the action.

2 Remove the lid from the dirty water tank by lifting it off the tank.

3 Pour out any remaining water from the dirty water tank.

4 Rinse the dirty water tank and its lid under running water.

1 Rotate the swivel hook for winding in the direction indicated by the arrows.

Diagram of a washing machine with orange and blue circular arrows indicating airflow or circulation, with no text or symbols.

2 Wrap the power cord around the cord holder on the back of the appliance.

Illustration of a hand inserting a component into a washing machine, with no text or symbols.

3 Press the cable holder to attach the cable to the holder.

Diagram of a washing machine with labeled parts and directional arrows indicating motion or flow.

4 Wrap the hose around the cable holder on the back of the device.

Diagram of a portable air purifier with labeled parts and directional arrows indicating flow or movement.

5 Place the handle with the 3-in-1 nozzle into the holder on the side of the device.

Periodic maintenance

Clean the water tank with clean water and a little detergent (every month)

Illustration of a blue plastic container with a handle and an orange arrow pointing to it, next to a smaller white container, with no text or symbols.

4 Rinse the water tank.

PHILIPS 3000 Series XW3193 - Clean the water tank with clean water and a little detergent (every month) - 2

5 Close the lid of the clean water tank.

6 Put the clean water tank back into the device. Press the tank firmly to secure it in place.

1 Remove the connector of the dirty water tank.

Illustration of a hand holding a blue object with motion lines indicating flow or movement, with no text or symbols.

2 Rinse the part under running water.

Illustration of a hand holding a droplet with arrows indicating water flow, with no text or symbols.

3 Squeeze it until clean water comes out.

Diagram of a mechanical component with a blue circular base and an arrow indicating direction, with no text or symbols.

1 Remove the cover of the 3-in-1 nozzle by pulling the bottom side (1) forward (2).

Diagram showing two labeled parts of a device with arrows indicating direction, likely illustrating a mechanical or electrical component.

2 Remove the nozzle from the hose by pressing the button (1) and pulling the nozzle (2).

Diagram showing a device with an attached sensor and a magnified inset of the sensor component. No text or symbols.

3 Remove the top part of the nozzle by pulling the tab.

3D rendered image of a cleaning tool with red spherical components and a blue handle. No text or symbols visible.

9 For the wide nozzle, follow steps 2 – 7.

Replacing parts

To purchase accessories or spare parts, visit

www.shop.philips.com/parts-and-accessories or contact your Philips dealer.

Wide nozzle brush *CRP1056/02*

3D rendered image of a medical or laboratory device with red spherical components and a blue handle. No text or symbols visible.

Illustration of a plug inserted into an electrical socket with a cartoon face on the socket. No text or symbols.

Wide nozzle brush *CRP1056/02*

3D rendered image of a medical or laboratory device with red spherical components and a blue-green handle (no text or symbols visible)

Illustration of a blue medical tube with an orange arrow indicating direction.

3 x 10 sec

2 3 Press the button on the brush 10 times to let water flow through the hose and nozzles.

4 Rinse the water tank.

Diagram of a mechanical component with a blue cylindrical part and two circular holes, no text or symbols present.

2 Rinse the part under running water.

Illustration of a hand holding a small object with water droplets, emitting downward arrows (no text or symbols).

2 Remove the nozzle from the hose by pressing the button (1) and pulling the nozzle upwards (2).

Diagram showing two labeled parts of a device with orange arrows indicating directional movement or force vectors.

PHILIPS 3000 Series XW3193 - Replacing parts - 9

4 Remove the brush from the nozzle by pulling the tab.

9 When using the wide nozzle, repeat steps 2-7.

Replacement

3 Lift the water tank lid to expose the tank opening.

PHILIPS 3000 Series XW3193 - Replacement - 1

2 x 20 ml MAX 50°C 3 x 20 ml MAX 50°C >24h

5 Close the water tank lid.

PHILIPS 3000 Series XW3193 - Replacement - 3

Illustration of a kitchen appliance with a handle and outlet, showing a downward arrow indicating a process (no text or symbols present).

Illustration of a plug inserted into an electrical socket with a cartoon face on the socket.

4 Rinse the water tank.

PHILIPS 3000 Series XW3193 - Replacement - 6

5 Close the water tank lid.

1 Remove the connection part of the dirty water tank.

Illustration of a hand holding a blue object with motion lines indicating flow or movement (no text or symbols).

4 Reattach the connection parts of the dirty water tank.

Wide nozzle brush *CRP1056/02*

3D rendered image of a medical device with red spherical components and a blue circular button.

Illustration of a plug inserted into a wall socket with an arrow indicating direction.

3D rendered image of a cleaning tool with red spherical components and a blue handle.

12 Clean water reservoir

Illustration showing a bottle with a green checkmark and a set of plastic bottles with a red 'X' indicating incorrect labeling.

1 Detach the hose from the hanging bracket.

Diagram of a mechanical device with numbered parts showing rotational flow around a central component.

5 Unwind the power cord from the holder.

Illustration of a blue medical tube with a hand holding it, showing a curved arrow indicating direction.

Illustration of a plug inserted into an electrical socket with a cartoon face on the socket.

6 Put the clean water reservoir back into the appliance. Press the reservoir firmly down until it is properly seated.

Illustration of a plug inserted into a wall socket with an arrow indicating direction (no text or symbols).

3 Press the cable bracket to secure the cable in the holder.

Diagram of a washing machine with labeled parts and directional arrows indicating motion or flow.

4 Rinse the water reservoir.

Diagram of a mechanical component with a blue cylindrical part and two circular holes.

1 Remove the connection point of the dirty water reservoir.

Illustration of a hand holding a blue object with motion lines indicating flow or movement.

2 Rinse the part under the tap.

Illustration of a hand holding a small object with liquid droplets, emitting arrows.

Diagram showing a mechanical component with an arrow indicating rotation, and a magnified inset showing the same component.

5 Rinse the parts under the tap.

Diagram of a device with internal components and an orange arrow indicating direction.

3D rendered image of a cleaning tool with red spherical components and a blue handle (no text or symbols visible)

Dirty water reservoir is full. Empty the dirty water reservoir.

Simple diagram with a star icon and a power button inside an oval shape (no text or symbols)

Diagram of a mechanical device with numbered parts showing rotational flow around a central component

Illustration of a plug inserted into an electrical socket with a cartoon face on the socket (no text or symbols).

3D rendered image of a cleaning tool handle with red circular components and a blue handle.

Illustration of a plug inserted into a wall socket with an arrow indicating direction (no text or symbols)

6 Connect the unit.

3 x 10 sec

3D rendered image of a cleaning brush head with red circular components and a blue handle, no text or symbols.

9 For the wide nozzle, follow steps 2 to 7.

Replacement

Wide nozzle brush *CRP1056/02*

3D rendered image of a showerhead with red spherical objects and a blue-green handle, no text or symbols.

Illustration of a plug inserted into a wall socket with an arrow indicating direction.

3D rendered image of a cleaning tool with red circular components and a blue handle (no text or symbols visible).

Wide cleaning head *CRP1056/02*

3D rendered image of a medical or laboratory device with red spherical components and a blue handle (no text or symbols visible).

1 Remove the hose from the hose clip.

Diagram of a mechanical device with numbered parts showing rotational flow around a central component.

Illustration of a plug inserted into a wall socket with an arrow indicating direction.

4 Rinse the water tank.

Diagram of a mechanical component with a blue cylindrical part and two circular holes, no text or symbols present.

2 Remove the clean water tank by lifting it out of the appliance.

Illustration of a kitchen appliance with a handle and fan, showing a cooking step (no text or symbols).

5 Close the lid of the clean water tank.

PHILIPS 3000 Series XW3193 - Replacement - 9

Illustration of a blue appliance with a handle and arrow indicating a process or operation (no text or symbols).

6 Insert the clean water tank back into the appliance. Press firmly on the tank until it clicks into place.

Diagram of a mechanical device with numbered parts showing a coiled cable and housing structure.

2 Fully unwind the hose. Insert the desired accessory into the end of the hose and push it until it clicks into place.

Illustration of a hand interacting with a device via a finger, showing orange laser lines radiating from the button (no text or symbols)

3 Press the button on the cord holder to release the cord. Unwind the power cord from the holder.

Diagram of a mechanical component with two circular features and directional arrows indicating rotation or flow (no text or symbols)

5 Unwind the power cord from the holder.

Illustration of a blue medical tube with an orange arrow indicating direction (no text or symbols)

Illustration of a plug inserted into a wall socket with an arrow indicating direction (no text or symbols)

6 Connect the unit.

Using the appliance with the 3-in-1 nozzle (9 cm)

Hand holding a button with a power symbol and arrow, no text or labels present

2 Remove the cap of the 3-in-1 nozzle by pulling the bottom side (1) forward (2).

Illustration of a spray gun emitting powder, with an inset showing airflow direction (no text or symbols)

3 Tip: First test on an inconspicuous spot to see how the cleaning agent reacts with the surface.

Illustration of a hand pouring liquid into a container with arrows indicating flow direction (no text or symbols)

4 Hold the nozzle about 5 cm above the surface you want to clean. Press the spray button to apply the cleaning solution to the surface.

Illustration of a mechanical device with an arrow indicating direction (no text or symbols present)

5 Release the spray button to stop the water flow.

1 To clean the hose, attach the 3-in-1 nozzle to the hose and close the cap.

3 x 10 sec

2 Wrap the power cord around the cord holder on the back of the appliance.

Illustration of a hand inserting a component into a washing machine. No text or symbols.

3 Press the power cord holder to secure the cord firmly on the holder.

Diagram of a washing machine with labeled parts and directional arrows indicating motion or flow.

4 Wrap the hose around the hose holder on the back of the appliance.

Diagram of a portable air purifier with labeled parts and directional arrows indicating flow or movement.

5 Insert the handle with the 3-in-1 nozzle into the holder on the side of the appliance.

Regular maintenance

1 Remove the clean water tank by lifting it out of the appliance.

Illustration of a blue mechanical component pouring liquid into a container. No text or symbols.

3 Pour out any remaining water from the clean water tank.

Illustration of a water purifier with a pipe and fan, emitting sound waves. No text or symbols.

4 Rinse the water tank.

PHILIPS 3000 Series XW3193 - Regular maintenance - 3

5 Close the lid on the clean water tank.

6 Insert the clean water tank back into the appliance. Press firmly on the tank until it clicks into place.

1 Remove the connection element of the dirty water tank.

Illustration of a hand holding a blue object with motion lines indicating flow or movement. No text or symbols.

2 Rinse it under running tap water.

Illustration of a hand holding a small object with water droplets. No text or symbols.

3 Squeeze it until clean water comes out.

Diagram of a kitchen sink with a blue bowl and an orange arrow indicating a drop or direction. No text or symbols.

4 Reinsert the connection elements of the dirty water tank.

1 Remove the cap of the 3-in-1 nozzle by pulling the bottom side (1) forward (2).

Diagram showing two labeled parts of a device with orange arrows indicating directional movement or force vectors.

2 Remove the nozzle from the hose by pressing the button (1) and pulling the nozzle upward (2).

Illustration of a handheld device with an arrow indicating rotation. No text or symbols.

3 Remove the top part of the nozzle by pulling the tab.

PHILIPS 3000 Series XW3193 - Regular maintenance - 9

4 Remove the brush of the nozzle by pulling the tab.

User signals and their meaning

2 Remove the clean water tank from the device.

Illustration of a kitchen appliance with a handle and fan, showing a cooking step (no text or symbols)

5 Close the cap of the clean water tank.

PHILIPS 3000 Series XW3193 - User signals and their meaning - 2

Illustration of a blue appliance with a downward arrow indicating a drop or change, next to a smaller white appliance (no text or symbols)

6 Insert the clean water tank back into the device. Press firmly on the tank so that it fits properly into place.

Diagram of a mechanical device with numbered parts showing rotational flow around a central component

2 Unwind the hose completely. Insert the desired nozzle onto the end of the hose until it clicks into place.

Illustration of a hand interacting with a device via a finger, showing orange laser lines radiating from a circular component (no text or symbols)

Illustration of a blue medical tube with an orange arrow indicating direction (no text or symbols)

6 Plug the unit into the power outlet.

Using the device with the 3-in-1 nozzle (9 cm)

Hand holding a button with a power symbol and an arrow pointing to it.

1 To clean the hose, attach the 3-in-1 nozzle to the hose and close the cap.

3 x 10 sec

2 Press the button on the brush 3 times within 10 seconds to allow water to flow through the hose and nozzle.

2 Wrap the power cord around the cord holder on the back of the device.

Illustration of a hand inserting a component into a washing machine.

3 Press the cord handle holder to secure the cord to the holder.

Diagram of a washing machine with labeled parts and directional arrows indicating motion or flow.

1 Remove the clean water tank from the device.

Illustration of a blue mechanical component pouring liquid into a container. No text or symbols.

3D rendered image of a cleaning tool handle with red spherical components and a blue handle. No text or symbols visible.

Wide nozzle brush *CRP1056/02*

3D rendered image of a medical or laboratory device with red spherical components and a blue handle. No text or symbols visible.

3 Lift the water tank lid to reveal the tank opening.

PHILIPS 3000 Series XW3193 - Using the device with the 3-in-1 nozzle (9 cm) - 8

PHILIPS 3000 Series XW3193 - Using the device with the 3-in-1 nozzle (9 cm) - 9

4 Fill with tap water up to the MAX line, according to your cleaning needs. Add detergent (Philips stain remover): 40 ml (2 dosing caps) for fresh stains or 60 ml (3 dosing caps) for dried/set-in stains.

Caution: The tap water poured into the clean water tank must not be hotter than 50 °C.

Caution: Philips has tested the operation of the device only with the Philips XV1732 stain remover. Other detergents may create too much foam, which reduces performance and may lead to malfunction of the appliance.

Illustration showing a blue bottle with a green checkmark and a series of plastic bottles with a red 'X' indicating cancellation or rejection.

5 Close the clean water tank lid.

PHILIPS 3000 Series XW3193 - Using the device with the 3-in-1 nozzle (9 cm) - 11

Illustration of a blue appliance being placed on top of a white grater, with an arrow indicating the process.

6 Return the clean water tank to the device. Press the tank firmly to secure it in place.

Initial setup and connections

Diagram of a mechanical device with numbered parts showing a coiled cable and housing assembly.

2 Fully unwind the hose. Insert the desired nozzle onto the end of the hose until it clicks into place.

Illustration of a hand interacting with a device via a finger, showing orange laser lines radiating from the button.

3 Press the button on the cord holder to release the cord. Unwind the power cord from the holder.

Diagram of a mechanical component with two blue components and orange circular arrows indicating rotation or flow.

4 Rotate the winding hook in the direction indicated by the arrows.

Illustration of a hand inserting a blue cable into a washing machine.

5 Unwind the power cord from the holder.

Illustration of a blue medical tube with an orange arrow indicating direction.

Illustration of a plug inserted into a wall socket with an arrow indicating direction.

2 Remove the 3-in-1 nozzle cover by pulling the bottom side (1) forward (2).

Illustration of a spray gun emitting powder, with an inset showing airflow direction.

3 Tip: First test the detergent on an inconspicuous area to see how it affects the surface.

Illustration of a hand pouring liquid into a container with arrows indicating flow direction.

4 Hold the nozzle about 5 cm above the surface you want to clean. Press the spray button to apply the cleaning solution to the surface.

Illustration of a mechanical device with an arrow indicating direction.

5 Release the spray button to stop the water flow.

1 To clean the hose, connect the 3-in-1 nozzle to the hose and close the cover.

3 x 10 sec

2 Press the button on the brush 3 times for 10 seconds to run water through the hose and nozzle.

Cleaning the dirty water tank

Diagram showing a hand pressing a button on an electrical switch with a power symbol and a blue plug, indicating disassembly or disassembly.

1 Rotate the winding hook in the direction indicated by the arrows.

Diagram of a washing machine with orange and blue circular arrows indicating airflow or circulation (no text or symbols)

2 Wrap the power cord around the cord holder on the back of the device.

Illustration of a hand inserting a component into a washing machine (no text or symbols)

3 Press the cord holder to secure the cord on the holder.

Diagram of a washing machine with labeled parts and directional arrows indicating motion or flow.

4 Wrap the hose around the hose holder on the back of the device.

Diagram of a portable air purifier with labeled parts and directional arrows indicating flow or movement.

5 Place the handle with the 3-in-1 nozzle in the holder on the side of the device.

Periodic maintenance

3 Pour out any remaining water from the clean water tank.

Illustration of a water purifier with airflow indicators (no text or symbols)

1 Remove the dirty water tank connection point.

Illustration of a hand holding a blue object with motion lines indicating flow or movement (no text or symbols)

2 Rinse the part under running water from the tap.

Illustration of a hand holding a small object with water droplets, emitting arrows (no text or symbols).

3 Squeeze it until clean water comes out.
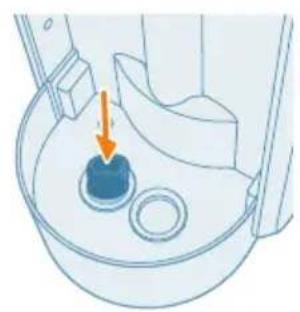
Diagram of a mechanical component with a blue base and circular base, showing an arrow indicating direction (no text or symbols present).

3D rendered image of a cleaning tool handle with red spherical components and a blue handle (no text or symbols visible).

9 For the wide nozzle, follow steps 2–7.

Replacement

Wide nozzle brush *CRP1056/02*

3D rendered image of a medical or laboratory device with red spherical components and a blue handle (no text or symbols visible).

Illustration showing a blue bottle with a green checkmark and a series of plastic bottles with a red 'X' indicating cancellation or rejection.

Illustration of a blue medical tube with an orange arrow indicating direction (no text or symbols).

3D rendered image of a cleaning tool handle with red circular components and a blue handle (no text or symbols visible)

2 x 20 ml MAX SPC 3 x 20 ml MAX SPC >24h

Illustration of a plug inserted into an electrical outlet with a magnified view showing internal components (no text or symbols)

6 Connect the device.

3D rendered image of a cleaning brush head with red circular components and a blue handle (no text or symbols).

Brush for wide nozzle *CRP1056/02*

3D rendered image of a medical or laboratory device with red spherical components and a blue circular button (no text or symbols visible).

Illustration of a blue medical tube with an orange arrow indicating direction, no text or symbols.

3D rendered image of a cleaning brush head with red circular components and a blue handle (no text or symbols)

Illustration of a kitchen appliance with a handle and fan, showing a stand with an orange arrow (no text or symbols).

Illustration of a blue medical tube being inserted into a bulb, with an arrow indicating the insertion direction (no text or symbols present).

3D rendered image of a cleaning tool with red spherical components and a blue handle.

Illustration showing a bottle with a green checkmark and a series of plastic bottles with a red 'X' indicating cancellation or rejection.

Illustration of a plug inserted into an electrical outlet with a magnified inset showing internal components, no text or symbols.

6 Plug the device into the outlet.

Diagram of a device with labeled parts and directional arrows indicating motion or rotation.

3D rendered image of a cleaning tool with red spherical components and a blue handle (no text or symbols visible)

Illustration showing a bottle with a green checkmark and a series of plastic bottles with a red X mark, indicating incorrect labeling or classification.

Illustration of a plug inserted into a wall socket with an arrow indicating direction (no text or symbols)

Illustration of a blue medical tube being inserted into a wire, with an orange arrow indicating the insertion direction.

4 Rinse the tank.

Diagram of a mechanical component with a blue cylindrical part and two circular holes, no text or symbols present.

Illustration of a kitchen appliance with a handle and fan, showing a stand with an orange arrow.

Illustration of a blue medical tube being inserted into a catheter, with an orange arrow indicating the insertion direction (no text or symbols present).

3D rendered image of a cleaning tool handle with red spherical components and a blue handle (no text or symbols visible).

Illustration showing a bottle with a green checkmark and a set of six plastic bottles, one marked with a red X.

Illustration of a blue appliance being placed on top of a white electric stove burner, with an arrow indicating the process (no text or symbols present).

Illustration of a plug inserted into an electrical outlet with a magnified view showing internal components (no text or symbols)

4 Rinse the water tank.

Diagram of a mechanical component with a blue cylindrical part inserted into a circular base, showing an orange arrow indicating direction (no text or symbols present)

6 Reinsert the brush into the holder.
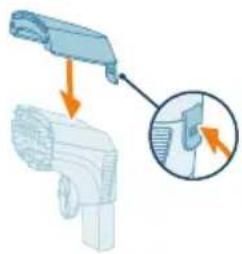
Diagram showing a mechanical component being inserted into a housing, with an inset magnified view highlighting the detail.

2.

Illustration of a kitchen appliance with a handle and fan, showing a highlighted interior component.

3.70n

PHILIPS 3000 Series XW3193 - Replacement - 31

2 x 20 ml MAX 50% CPG 3 x 20 ml MAX 50% CPG >24 h

47'0r

PHILIPS 3000 Series XW3193 - Replacement - 33

Illustration of a kitchen appliance with a handle and outlet, showing a drop in the air.

PHILIPS 3000 Series XW3193 - Replacement - 35

Illustration of a plug inserted into a wall socket with a magnified view showing internal components.

Diagram showing a device with labeled parts and directional arrows indicating rotation or movement.

Illustration of a hairdryer with spray and motion arrows indicating action.

Illustration of a mechanical tool with a magnified inset showing an arrow and a circular detail.

Diagram showing a device with two labeled parts (1 and 2) indicating directional movement or operation.

3 x 10 sec

Illustration of a hand pressing a button on a power switch.

Illustration of a portable device with a handle and a labeled 'MAX' indicator.

Diagram of a mechanical component with a blue cylindrical part inserted into a container, showing an orange arrow pointing to it.

Illustration of a hand holding a blue object with motion lines indicating flow or movement.

Illustration of a hand cleaning a surface with raindrops and arrows indicating water flow.

Diagram of a toilet sink with a blue component and an arrow indicating flow or movement.

Diagram showing two labeled parts of a device with arrows indicating direction, likely illustrating a mechanical or electrical component.

Diagram showing a device with an attached panel and a magnified inset of its internal rotation (no text or symbols).

Diagram illustrating a mechanical assembly with labeled parts and directional arrows indicating motion or force directions.

Illustration of a faucet pouring liquid into a washing machine (no text or symbols).

Diagram of a mechanical component with an inset close-up showing internal detail (no text or symbols).

Diagram showing a device being processed with an arrow, highlighting a detail (no text or symbols present).

Illustration of a handheld device with a circular button and an orange arrow pointing to it (no text or symbols).

3D rendered image of a medical or laboratory device with red spherical components and a blue-green handle (no text or symbols visible).

www.philips.com/parts-and

Philips

3D rendered image of a cleaning brush head with red circular components and a blue handle (no text or symbols).

*CRP1056/02*

www.philips.com/support

PHILIPS and the Philips Shield Emblem are registered trademarks of Koninklijke Philips N.V. and are used under license.

This product has been manufactured by and is sold under the responsibility of Versuni Holding B.V., and Versuni Holding B.V. is the warrantor in relation to this product.

(12/2024)

Manual assistant
Powered by Anthropic
Waiting for your message
Product information

Brand : PHILIPS

Model : 3000 Series XW3193

Category : Vacuum Cleaner