
ROG Chariot - Gaming chair ASUS - Free user manual and instructions
Find the device manual for free ROG Chariot ASUS in PDF.


| Product Type | Gaming Chair |
| Brand | ASUS |
| Model | ROG Chariot |
| Material | High-quality PU leather with memory foam padding |
| Base Material | Die-cast aluminum alloy |
| Armrest Type | 4D Adjustable (height, angle, rotation, width) |
| Recline Angle | 90° to 180° (full flat) |
| Tilt Lock | Yes, multi-position lock |
| Seat Height Adjustment | Gas lift, 45–55 cm (17.7–21.7 in) |
| Weight Capacity | 150 kg (330 lbs) |
| Net Weight | 28.5 kg (63 lbs) |
| Overall Dimensions (WxDxH) | 70 x 68 x 130–140 cm (27.6 x 26.8 x 51.2–55.1 in) |
| Lumbar Support | Adjustable 2D (height and depth) |
| Headrest | Adjustable height and angle |
| Caster Size | 60 mm (2.36 in) nylon |
| Seat Width | 55 cm (21.65 in) |
| Backrest Width | 52 cm (20.47 in) |
| Warranty | 2 years from date of purchase |
| Maintenance | Clean with soft damp cloth; avoid harsh chemicals |
| Assembly Required | Yes, manual included |
Frequently Asked Questions - ROG Chariot ASUS
User questions about ROG Chariot ASUS
0 question about this device. Answer the ones you know or ask your own.
Ask a new question about this device
Download the instructions for your Gaming chair in PDF format for free! Find your manual ROG Chariot - ASUS and take your electronic device back in hand. On this page are published all the documents necessary for the use of your device. ROG Chariot by ASUS.
USER MANUAL ROG Chariot ASUS
SL300C ROG CHARIOT INSTALLATION GUIDE
Contents
English....3 简体中文....16 繁體中文....29 Français 42 Deutsch....55 Italiano 68 Русский....81 العربية 94 Čeština....107 120 Magyar 133 한국어 146 Bahasa Melayu....159 Norsk....172 Português....185 Polski....198 Română 211 Español....224 Slovensky.... 237 Türkçe 250 ไทย....263
Safety Notices
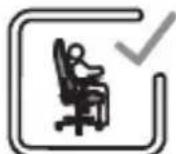
- Sit in the center of the chair with your back against the backrest.

- Do not sit on the edge of the chair.

- Do not stand on the chair.

- Do not push down on the reclined backrest when a person is on it.

- Keep your hands and fingers away from the recline mechanism.
WARNING!
- This chair should only be used in a normal and non-abusive manner. We are not liable for any damages resulting from improper assembly and/or usage.
- The maximum recommended weight load is 120KG (264.5 pounds).
- Never assemble or disassemble your chair in an improper manner.
- Please keep your chair out of direct sunlight to protect its leather.
- Please watch your back when the backrest returns back to its original position from a reclined position.
- To avoid damage to your chair, please do not use excessive force to pull up your headrest.
- Never try to open and touch the LED module as this will void the warranty.
- The power input rating for this product is 5V/1A. Do not use a power adapter with an output exceeding 5V/3A.

| 1. | Backrest | 5. | Wheels | 9. | Hydraulic lift cylinder |
| 2. | Seat base | 6. | Side covers with bolts | 10. | Telescoping cover |
| 3. | Lumbar cushion | 7. | Control unit | 11. | Hex Key |
| 4. | Wheel base | 8. | Gloves | 12. | Spare bolt |
Note: The illustrations are for reference only and may differ from your actual chair in appearance and features.

Assembling your chair
Put on the gloves before installation.

One by one, insert and push the wheels into the base.

2 Insert the hydraulic lift cylinder into the center hole of the base. Remove the red protective cap on top if there was any.

3 Place the telescoping cover on the top of the hydraulic lift cylinder.
Armrests normally do not distinguish sides unless labeled otherwise.
For models with armrest pre-assembled, please skip this step.

4 Remove the pre-assembled bolts and washers (1 & 3). Place the 4 large washers (1) between the armrest mounting bar (2) and the seat base. Hold the armrest in place, then insert and tighten all 4 bolts (3). Use the hex key to tighten them all, and repeat on the other side.
5 Use the hex key to remove the pre-assembled bolts and washers from the backrest.

6 Remove the protective foam covers from the brackets of the seat base. Then position the backrest carefully between the brackets. Insert and attach the 4 bolts (2 on each side) you removed in step 5 by hand first. Then use the hex key to tighten them. Start with the two bolts on the top of each side, then the bottom two.

7 Install the side covers and tighten the bolts. (The covers are marked "L" for the left side and "R" for the right on the inside.)

8 Now flip the chair over, facing down. Then remove the 4 pre-mounted bolts from the underside with washers.

9 Repeat the step above to install the control unit, and then place the nut to mount the hydraulic lift cylinder facing the back of the seat (where the backrest is installed).

10 Insert top of the hydraulic lift cylinder into the mounting hole on the control unit, and then turn the chair over in upright position. (Two-person handling required for your safety).


Lighting up your chair
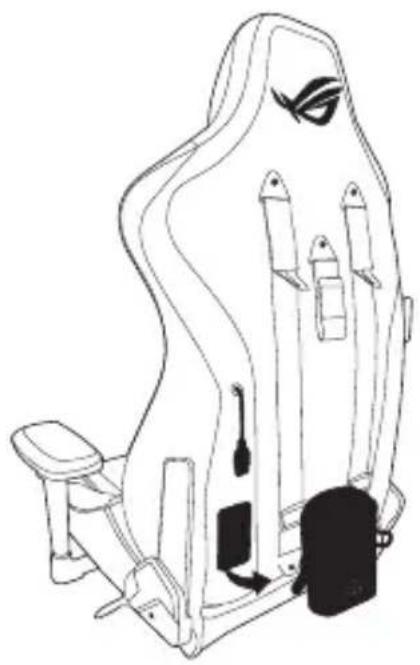
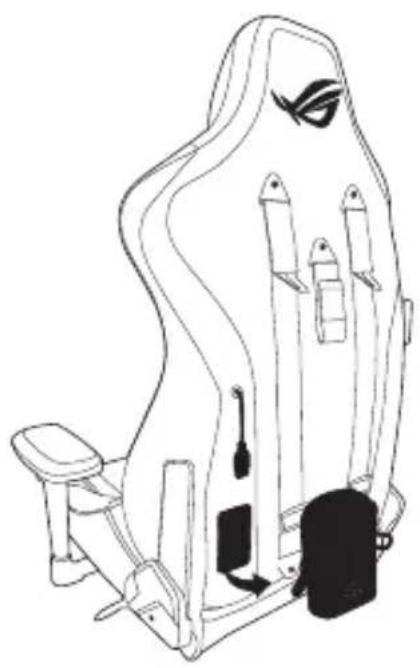
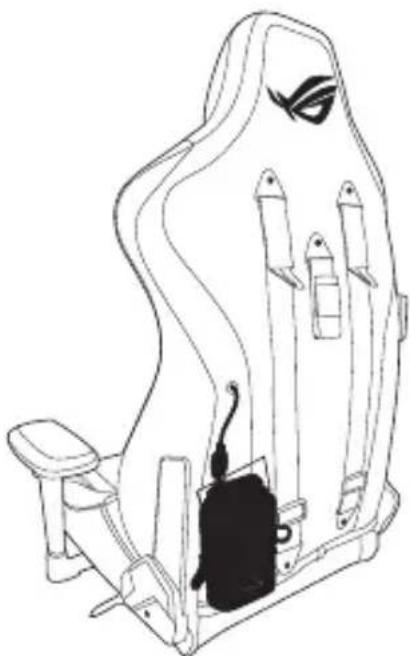
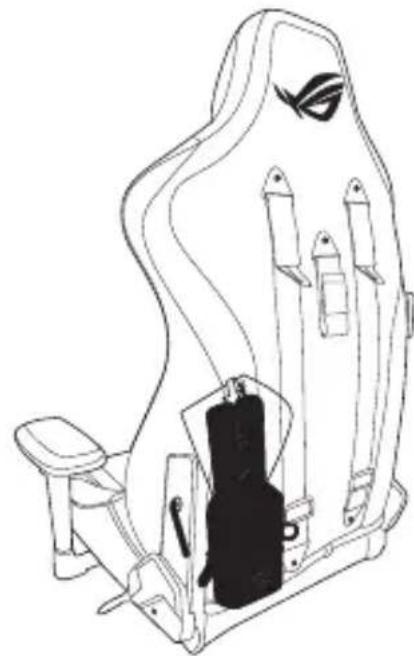
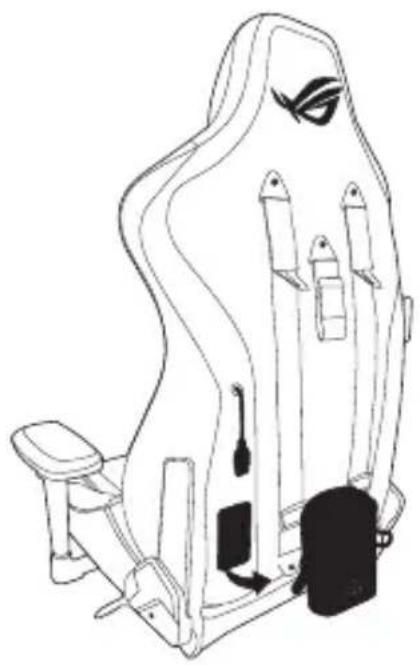
- Place your power bank into the packet at the back of the chair.
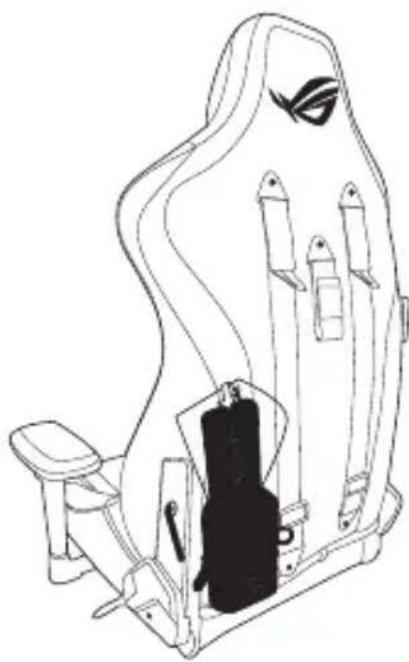
- Connect the USB Type-A connector to your power bank.

- The packet is attached to your chair with Velcro. You can easily remove and take it away.

Other features

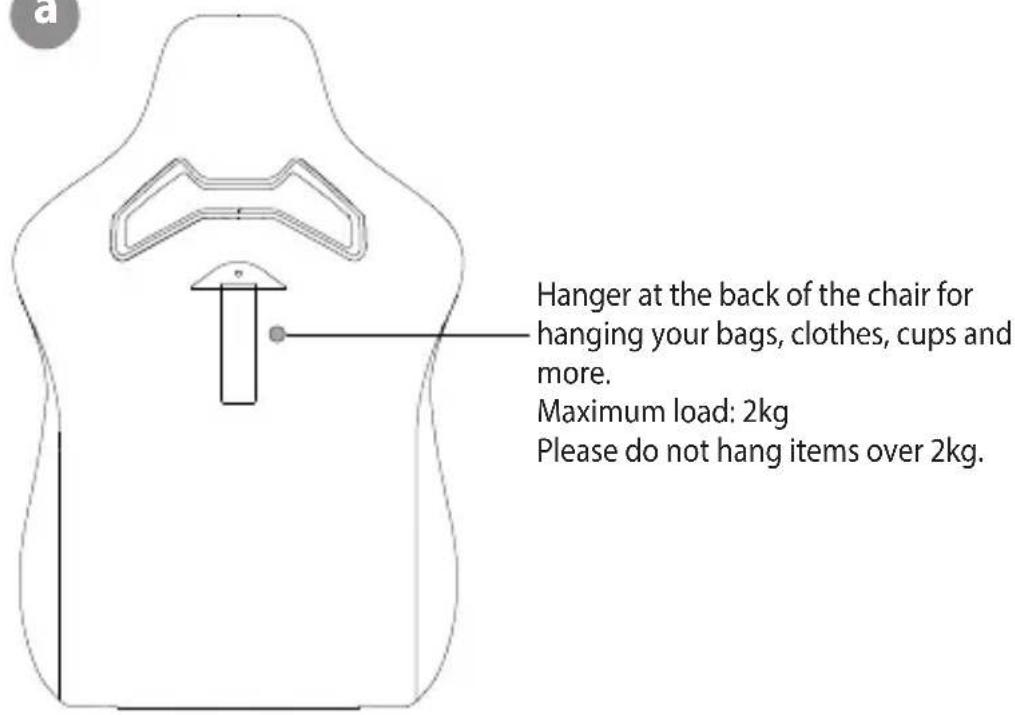

Using the RGB controller

DO NOT remove the non-detachable controller as this will void the warranty.
- Aura RGB Lighting: On / Effect / Off
Press repeatedly to power the Aura RGB LEDs on or off, or cycle through the current 7 effects: (1) rainbow (2) breathing (3) color cycle (4) wave (5) glowing Yo-Yo (6) strobing (7) static
Press the Aura RGB Lighting button for 3 seconds to terminate the lighting.
Press it to wake up again or reconnect your powerbank will keep its previous setting.
NOTE: Your powerbank may automatically adjust its output when the lighting is terminated. Disconnect and reconnect it if the Aura RGB Lighting cannot wake up after toggling it back on.
- Aura RGB color
Press repeatedly to cycle through the following 8 striking colors: (1) red (2) orange (3) yellow (4) green (5) blue (6) indigo (7) purple (8) pink
NOTE: This feature is only available on the following Aura RGB effects: (2) breathing (6) strobing (7) static
- Aura RGB speed: Slow / Medium / Fast
Press repeatedly to cycle through the following 3 color effect speeds: (1) Slow (2) Medium (3) Fast
NOTE: This feature is only available on the following Aura RGB effects: (1) rainbow (2) breathing (3) color cycle (4) wave (5) glowing Yo-Yo (6) strobing
- Aura RGB brightness: 50% / 75% / 100%
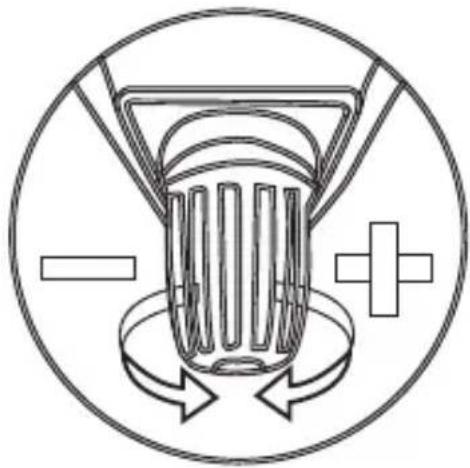
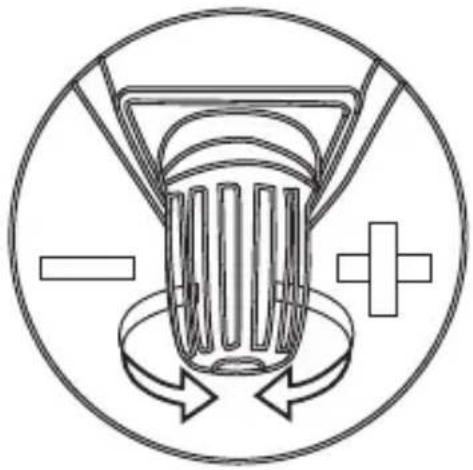
Three brightness levels. The brightness can be switch by simple tap to fit the environment lighting and preference.
- Reset to factory mode
Press the button (2) and button (4) simultaneously to reset your chair to its factory defaults.
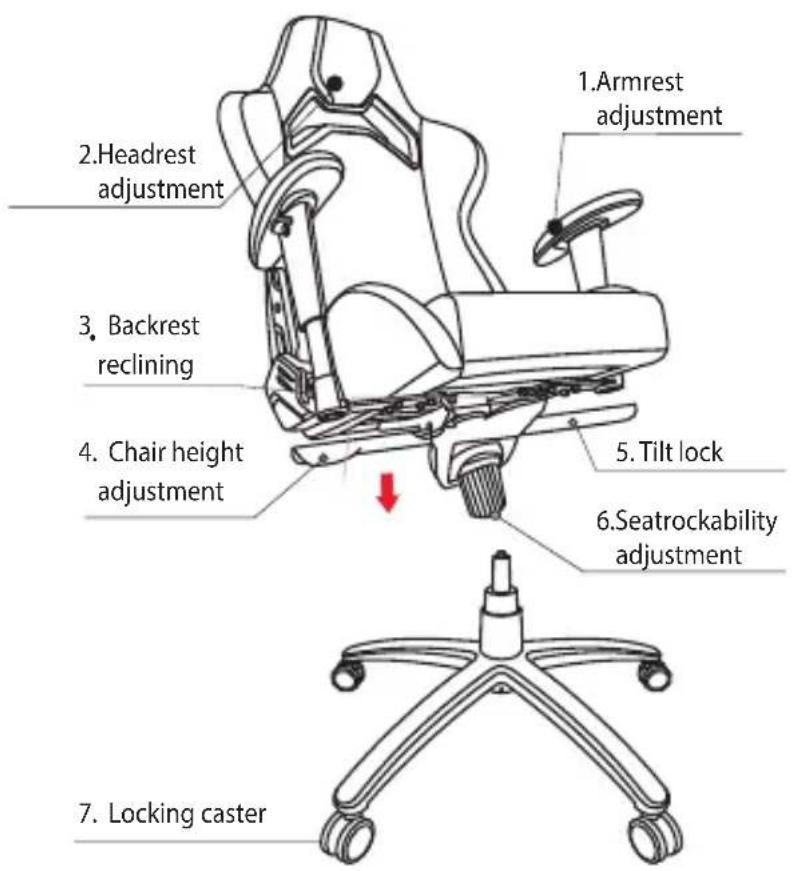
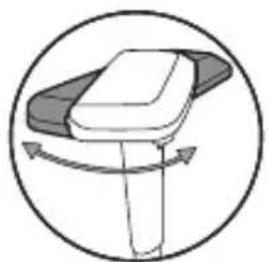
1. Armrest adjustment

Height adjustment

Forward and backward

Rotation adjustment Inward and outward


2. Headrest adjustment

- Height adjustment (6cm)
- Please do not excessively raise your headrest.
4. Chair height adjustment

3. Pull up the lever and slowly lean back.

5. Lock/unlock the tilt mechanism
![graph TD A["Component 1"] --> B["Component 2"] B --> C["Lock"] C --> D["Component 3"] D --> E["Switch"] style A fill:#f9f,stroke:#333 style B fill:#ccf,stroke:#333 style C fill:#cfc,stroke:#333 style D fill:#fcc,stroke:#333 style E fill:#ffc,stroke:#333](/content/2026/06/1405222/images/e92e506f88d6e39c71932a1363a64ac6e12a32f7e7c74cb2815e4a7bb517ede5.jpg)
6. Seat rockability adjustment

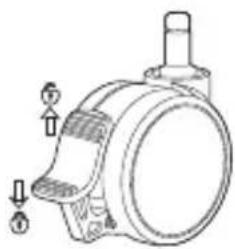
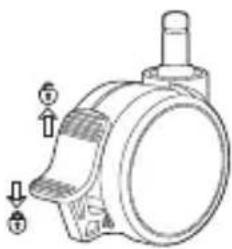
7. Locking caster

Safety instructions

Please sit in the center of the seat and keep your back against the backrest.

- Do not sit on the edge of the seat.

- Do not stand on the seat.
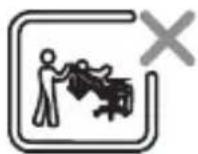
- Do not lower the backrest while someone is sitting on the chair.

Do not insert hands or fingers into the seat adjustment accessories.
Warning!
③ Fit the gas lift cover.


Light up your seat
- Place the power bank in the portable bag on the back of the seat.


Other functions


Vertical height adjustment
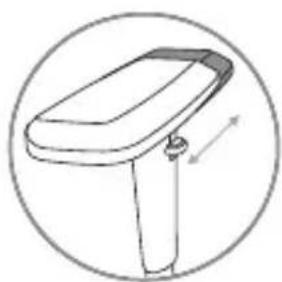
Front and back extension adjustment

Horizontal angle adjustment


2. Headrest adjustment
- Pull up the gas cylinder and slowly lean back.

- Seat height adjustment
- Fixed tilt angle
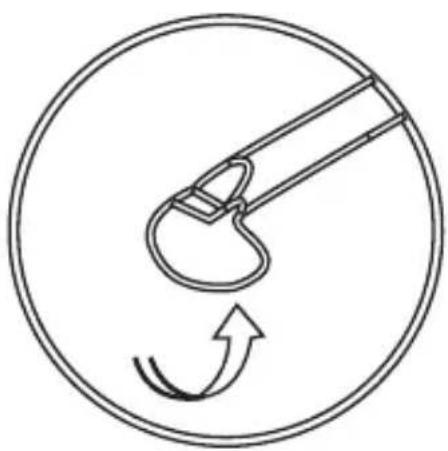

- Seat rocking adjustment

- Lock the swivel casters

Safety precautions

③ Attach the gas lift cover.


Illuminate your seat
- Place the power bank in the portable bag on the back side of the seat.


Other functions


Vertical height adjustment

Front-back extension adjustment

Horizontal angle adjustment

④
4. Seat height adjustment
5. Fixed tilt angle

![graph TD A["Component 1"] -->|Rotation Arrow| B["Component 2"] B -->|Return Arrow| A C["Component 3"] -->|Rotation Arrow| B D["Component 4"] -->|Return Arrow| C](/content/2026/06/1405222/images/ba8bf91e40a48854c4951cfd7f4f960599021dabb87c34babba8d4642a01ccc9.jpg)
6. Seat wobble adjustment

7. Lock the swivel casters

Safety instructions


Height adjustment


Height adjustment

Back and forth

3. Place the cover on the top of the gas cartridge.
10


Other functions


Height

② Forward/backward

Side adjustment
- Wheel lock




1. Adjust the height

④


7. Lock the chair wheel


- Connect the USB Type-A connector to the power bank.

Other features


Height adjustment

Forward and backward
4
| הכלההוּרָהוּרָהוּרָהוּרָהוּרָהוּרָהוּרָהוּרָהוּרָהוּרָהוּרָהוּרָהוּרָהוּרָהוּרָה�ּוּרָהוּרָהוּרָהוּרָהוּרָהוּרָהוּרָהוּרָהוּרָהוּרָהוּרָהוּרָהוּרָהוּרָהו' | 9. | בְבַלְעֹן | 5. | בְבַלְעֹן | 1. |
| בְבַלְעֹןוּרָהוּרָהוּרָהוּרָהוּרָהוּרָהוּרָהוּרָהוּרָהוּרָהוּרָהוּרָהוּרָהוּרָהו: | 10. | בְבַלְעֹןוּרָהוּרָהוּרָהוּרָהוּרָהוּרָהוּרָהוּרָהוּרָהוּרָהוּרָהוּרָהו: | 6. | בְבַלְעֹןוּרָהוּרָהוּרָהוּרָהוּרָהוּרָהוּרָהוּרָהוּרָהוּרָהוּרָהוּרָהsf: | 2. |
| בְבַלְעֹןוּרָהוּרָהוּרָהוּרָהוּרָהוּרָהוּרָהוּרָהוּרָהוּרָהוּרָהוּרֵ: | 11. | בְבַלְעֹןוּרָהוּרָהוּרָהוּרָהוּרָהוּרָהוּרָהוּרָהוּרָהוּרָהוּרָהוּרָה:P: | 7. | בְבַלְעֹןוּרָהוּרָהוּרָהוּרָהוּרָהוּרָהוּרָהוּרָהוּרָהוּרָהוּרָה:P: | 3. |
| בְבַלְעֹןוּרָהוּרָהוּרָהוּרָהוּרָהוּרָהוּרָהוּרָהוּרָהוּרָהוּרָהוּרִ: | 12. | בְבַלְעֹן | 8. | בְבַלְעֹןוּרָהוּרָהוּרָהוּרָהוּרָהוּרָהוּרָהוּרָהוּרָהוּרָהוּרָה:P: | 4. |

a
RGB b
②


④




Additional functions


Height adjustment

Forward and backward

④
2. Headrest adjustment

7. Locking saddle

Safety notice


Turning on the chair light
D Other features
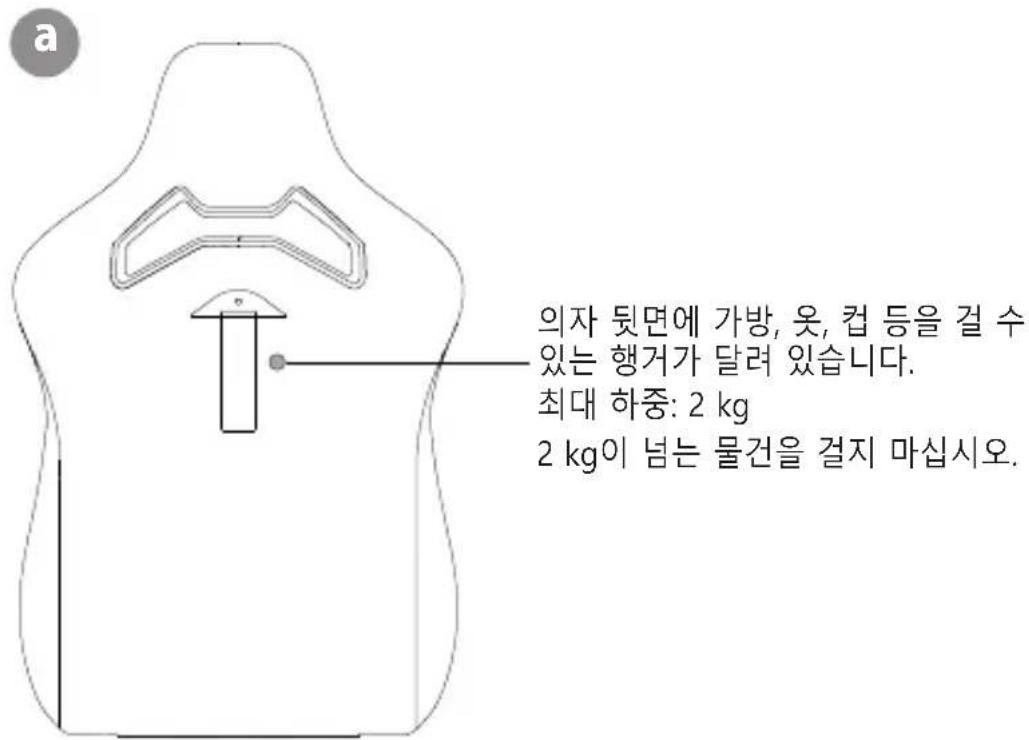
① Height adjustment

② Forward and backward

③ Rotation adjustment

④ Inward or outward movement
2. Headrest adjustment
4. Chair height adjustment
![graph TD A["Step 1: Two curved arrows indicating rotation"] --> B["Step 2: Two curved arrows indicating cycle"] B --> C["Padlock icon"] C --> D["Step 3: Two curved arrows indicating rotation"] D --> E["Step 4: Two curved arrows indicating cycle"]](/content/2026/06/1405222/images/195f2d3dd8cb8301bcd2163d5d418cf38661ce9fd3b587d050602a36800de601.jpg)
- Adjusting the seat locking possibility

- Locking the casters

| 1. | Tempat sandar | 5. | Roda | 9. | Silinder pengangkut hidraulik |
| 2. | Tapak tempat duduk | 6. | Penutup tepi dengan bolt | 10. | Penutup teleskop |
| 3. | Kusyen lumbar | 7. | Unit kawalan | 11. | Kunci Alien |
| 4. | Tapak roda | 8. | Sarung tangan | 12. | Bolt ganti |


Other features


Height adjustment
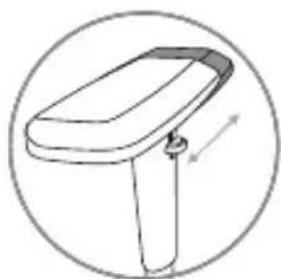
Forward and backward

④
4. Chair height adjustment
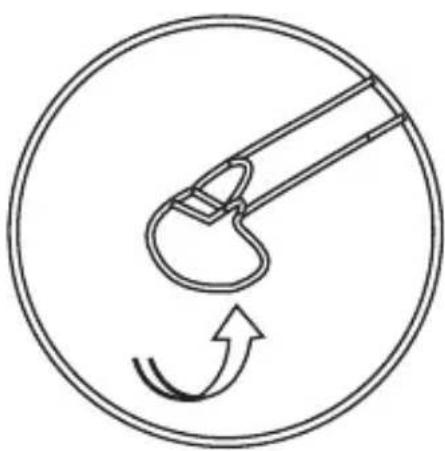
5. Tilt lock/unlock mechanism
![graph TD A["Left Side"] --> B["Inner Ring"] B --> C["Right Side Lock"] C --> D["Bottom Ring"] D --> E["Left Side"] style A fill:#f9f,stroke:#333 style E fill:#bbf,stroke:#333](/content/2026/06/1405222/images/f4ee2c65fb1a346c0565613a373ba5e009c25650472642080d3f1876686be9dc.jpg)
7. Locking the slopes

Safety notices

| 1. | Ryggstøtte | 5. | Hjul | 9. | Hydraulisk løftesylinder |
| 2. | Setebase | 6. | Sidedeksler med bolter | 10. | Teleskopdeksel |
| 3. | Korsryggpute | 7. | Kontrollenhet | 11. | Unbrakonøkkel |
| 4. | Hjulbase | 8. | Hansker | 12. | Reservebolt |

- Place the power bank in the pocket on the back of the chair.

- Connect the USB Type-A connector to the power bank.


Other functions


① Height adjustment

Forward and backward

③ Rotation adjustment

Inward and outward
7. Locking the wheel

Safety notices


Other features


Height adjustment

④


Other properties


Height adjustment

outside
7. Wheel lock


Other features


Height adjustment

② Forward and backward

④
2. Headrest adjustment

7. Locking wheel
Safety notices
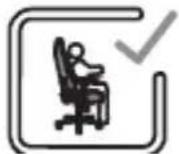

Height adjustment


- Connect the USB Type-A connector to the Power Bank source.


Other functions


Height adjustment

Forward and backward
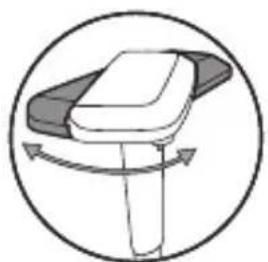
④
- Headrest adjustment

• Height adjustment (6 cm) - Do not raise the headrest excessively high.
- Pull the lever and slowly lean back

7. Locking caster


Other features


Height adjustment

Forward and backward

④
7. Locking caster
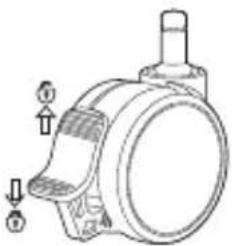
Safety notice

10

D Other features

Height adjustment

Adjusting the rotation

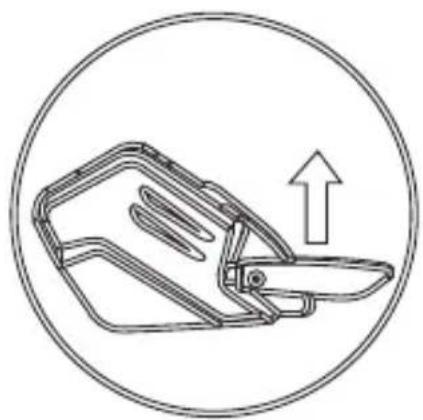
- Locking the caster

Federal Communications Commission Statement
This device has been tested and found to comply with the limits for a Class B device, pursuant to Part 15 of the FCC Rules.
These limits are designed to provide reasonable protection against harmful interference in a residential installation. This equipment generates, uses and can radiate radio frequency energy and, if not installed and used in accordance with manufacturer's instructions, may cause harmful interference to radio communications.
However, there is no guarantee that interference will not occur in a particular installation. If this equipment does cause harmful interference to radio or television reception, which can be determined by turning the equipment off and on, the user is encouraged to try to correct the interference by one or more of the following measures:
• Reorient or relocate the receiving antenna. - Increase the separation between the equipment and receiver. - Connect the equipment to an outlet on a circuit different from that to which the receiver is connected. - Consult the dealer or an experienced radio/TV technician for help.
This device complies with Part 15 of the FCC Rules. Operation is subject to the following two conditions:
• This device may not cause harmful interference; and • This device must accept any interference received including interference that may cause undesired operation.
CAUTION! Any changes or modifications not expressly approved by the grantee of this device could void the user's authority to operate the equipment.
Voluntary Radio Wave Interference Regulations
Cancer and Reproductive Harm- www.P65Warnings.ca.gov

ASUS recycling and takeback programs come from our commitment to the highest standards for protecting our environment. We believe in providing solutions for you to be able to responsibly recycle our products, batteries, other components, as well as the packaging materials. Please go to http://csr.asus.com/english/Takeback.htm for the detailed recycling information in different regions.

CAUTION! DO NOT throw the product in municipal waste. This product has been designed to enable proper reuse of parts and recycling. This symbol of the crossed out wheeled bin indicates that the product (electrical and electronic equipment) should not be placed in municipal waste. Check local regulations for disposal of electronic products.
Authorised distributors in Turkey
PENTA TEKNOLOJI URUNLERI DAGITIM TICARET A.S.
Address, City: DUDULLU ORGANIZE SANAYI BOLGESI NATO YOLU 4.CAD. NO:1 DUDULLU UMRANIYE 34775 ISTANBUL TURKEY
Distributor Tel: 0216 645 82 00
Country: TURKEY
Manufacturer Tel: 886-2-2894-3447
ASUS COMPUTER GmbH
Address: HARKORT STR. 21-23, 40880 RATINGEN, GERMANY
Tel: +49-2102-5789555
This is a Class B product. In a domestic environment, this product may cause radio interference, in which case the user may be required to take adequate measures.
English Simplified EU Declaration of Conformity
ASUSTeK Computer Inc. hereby declares that this device is in compliance with the essential requirements and other relevant provisions of related Directives. Full text of EU declaration of conformity is available at: www.asus.com/support
You acknowledge that all rights of this Manual remain with ASUS. Any and all rights, including without limitation, in the Manual or website, are and shall remain the exclusive property of ASUS and/or its licensors. Nothing in this Manual intends to transfer any such rights, or to vest any such rights to you.
ASUS PROVIDES THIS MANUAL "AS IS" WITHOUT WARRANTY OF ANY KIND. SPECIFICATIONS AND INFORMATION CONTAINED IN THIS MANUAL ARE FURNISHED FOR INFORMATIONAL USE ONLY, AND ARE SUBJECT TO CHANGE AT ANY TIME WITHOUT NOTICE, AND SHOULD NOT BE CONSTRUED AS A COMMITMENT BY ASUS.
Limitation of Liability
Circumstances may arise where because of a default on ASUS' part or other liability, you are entitled to recover damages from ASUS. In each such instance, regardless of the basis on which you are entitled to claim damages from ASUS, ASUS is liable for no more than damages for bodily injury (including death) and damage to real property and tangible personal property; or any other actual and direct damages resulted from omission or failure of performing legal duties under this Warranty Statement, up to the listed contract price of each product.
ASUS will only be responsible for or indemnify you for loss, damages or claims based in contract, tort or infringement under this Warranty Statement.
This limit also applies to ASUS' suppliers and its reseller. It is the maximum for which ASUS, its suppliers, and your reseller are collectively responsible.
UNDER NO CIRCUMSTANCES IS ASUS LIABLE FOR ANY OF THE FOLLOWING: (1) THIRD-PARTY CLAIMS AGAINST YOU FOR DAMAGES; (2) LOSS OF, OR DAMAGE TO, YOUR RECORDS OR DATA; OR (3) SPECIAL, INCIDENTAL, OR INDIRECT DAMAGES OR FOR ANY ECONOMIC CONSEQUENTIAL DAMAGES (INCLUDING LOST PROFITS OR SAVINGS), EVEN IF ASUS, ITS SUPPLIERS OR YOUR RESELLER IS INFORMED OF THEIR POSSIBILITY.
Service and Support
For multi-language manuals, please refer to ASUS web site: http://www.asus.com/support/
REPUBLIC OF GAMERS
- SL300C ROG CHARIOT INSTALLATION GUIDE
- CONTENTS
- SAFETY NOTICES
- WARNING
- ASSEMBLING YOUR CHAIR
- LIGHTING UP YOUR CHAIR
- OTHER FEATURES
- USING THE RGB CONTROLLER
- ARMREST ADJUSTMENT
- HEADREST ADJUSTMENT
- CHAIR HEIGHT ADJUSTMENT
- PULL UP THE LEVER AND SLOWLY LEAN BACK
- LOCK/UNLOCK THE TILT MECHANISM
- SEAT ROCKABILITY ADJUSTMENT
- LOCKING CASTER
- SAFETY INSTRUCTIONS
- LIGHT UP YOUR SEAT
- SAFETY PRECAUTIONS
- ILLUMINATE YOUR SEAT
- OTHER FUNCTIONS
- SEAT HEIGHT ADJUSTMENT
- FIXED TILT ANGLE
- SEAT WOBBLE ADJUSTMENT
- LOCK THE SWIVEL CASTERS
- ADDITIONAL FUNCTIONS
- LOCKING SADDLE
- SAFETY NOTICE
- TURNING ON THE CHAIR LIGHT
- D OTHER FEATURES
- TILT LOCK/UNLOCK MECHANISM
- LOCKING THE SLOPES
- LOCKING THE WHEEL
- OTHER PROPERTIES
- WHEEL LOCK
- LOCKING WHEEL
- FEDERAL COMMUNICATIONS COMMISSION STATEMENT
- VOLUNTARY RADIO WAVE INTERFERENCE REGULATIONS
- AUTHORISED DISTRIBUTORS IN TURKEY
- PENTA TEKNOLOJI URUNLERI DAGITIM TICARET A.S
- ASUS COMPUTER GMBH
- ENGLISH SIMPLIFIED EU DECLARATION OF CONFORMITY
- LIMITATION OF LIABILITY
- SERVICE AND SUPPORT
Brand : ASUS
Model : ROG Chariot
Category : Gaming chair