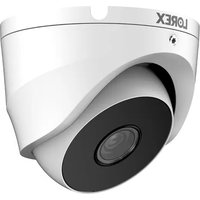
C221NC - Surveillance Camera Lorex - Free user manual and instructions
Find the device manual for free C221NC Lorex in PDF.


| Product Type | Surveillance Camera |
| Brand | Lorex |
| Model | C221NC |
| Category | Security Camera |
| Resolution | 1080p Full HD (1920x1080) |
| Lens | 3.6mm fixed lens |
| Night Vision | Infrared LEDs up to 30ft (9m) |
| Field of View | 78° diagonal |
| Connectivity | Wired (BNC and power) |
| Power Input | 12V DC, 1A (adapter included) |
| Dimensions | 3.1 x 2.4 x 2.0 inches (79 x 61 x 51 mm) |
| Weight | 0.3 lbs (136 g) |
| Mounting | Wall or ceiling mount bracket included |
| Operating Temperature | -4°F to 122°F (-20°C to 50°C) |
| Weatherproof Rating | IP67 (weatherproof for outdoor use) |
| Motion Detection | Yes, with adjustable sensitivity |
| Audio | Built-in microphone |
| Storage | NVR (Network Video Recorder) compatible, no onboard storage |
| App Support | Lorex Home app (iOS/Android) |
| Warranty | 2-year limited |
Frequently Asked Questions - C221NC Lorex
User questions about C221NC Lorex
0 question about this device. Answer the ones you know or ask your own.
Ask a new question about this device
Download the instructions for your Surveillance Camera in PDF format for free! Find your manual C221NC - Lorex and take your electronic device back in hand. On this page are published all the documents necessary for the use of your device. C221NC by Lorex.
USER MANUAL C221NC Lorex
natural_image
Diagram of a device labeled 'LOREX' with three dots on its body (no other text or symbols)
C221NCC221NA
Quick Start Guide (EN)
Guide de configuration rapide (FR)
- Follow all instructions for safe use and handling of the product.
- Use the camera within given temperature, humidity and voltage levels noted in the camera specifications.
- Do not disassemble the camera.
- Do not point the camera directly at the sun or a source of intense light.
- You may need to clean periodically using a damp cloth. Do not use harsh, chemical-based cleaners.
- The supplied cable is rated for surface mounting only (Non-UL). Cables for in-wall and floor-to-floor installations are sold separately (CMR type). These and other cables are available at lorex.com.
- A REGULATED UL / CSA APPROVED power supply is REQUIRED for use with this camera (included). Use of a non-regulated, non-conforming power supply can damage this product and voids the warranty.
Disclaimers
• Use the camera only with compatible Lorex recorders. For a full list, visit lorex.com/compatibility.
- Not intended for submersion in water. Installation in a sheltered location recommended.
- The camera includes an Auto Mechanical IR Cut Filter. When the camera changes between Day/Night viewing modes, an audible clicking noise may be heard from the camera. This clicking is normal, and indicates that the camera filter is working.
- Audio recording and/or face recording without consent is illegal in certain jurisdictions. Lorex Corporation assumes no liability for use of its products that do not conform with local laws.
natural_image
Technical line drawing of a device labeled 'LAREX' with three circular ports and a curved top section (no text or symbols beyond label)BNC/DC Cable Câble BNC/CC Cable para BNC/CC
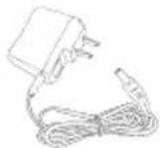
12V/1A Power Adapter Bloc d'alimentation 12 V/1 A Adaptador de corriente 12 V/1 A

BNC/DC Cable Câble BNC/CC Cable para BNC/CC
12V/1A Power Adapter Bloc d'alimentation 12 V/1 A Adaptador de corriente 12 V/1 A

Before installing, ensure the camera is ready to capture footage by connecting it to your DVR's video input with the BNC/DC cable.
- Consider what you want to monitor and find the best area for coverage.
- Place the camera close to the area of interest.
- Avoid placing the camera directly in front of obstructions like trees, bricks, rain gutters, or reflective surfaces.
• Install the camera where it is difficult for thieves and vandals to reach. - Ensure the mounting surface can support at least 3× the camera's weight.
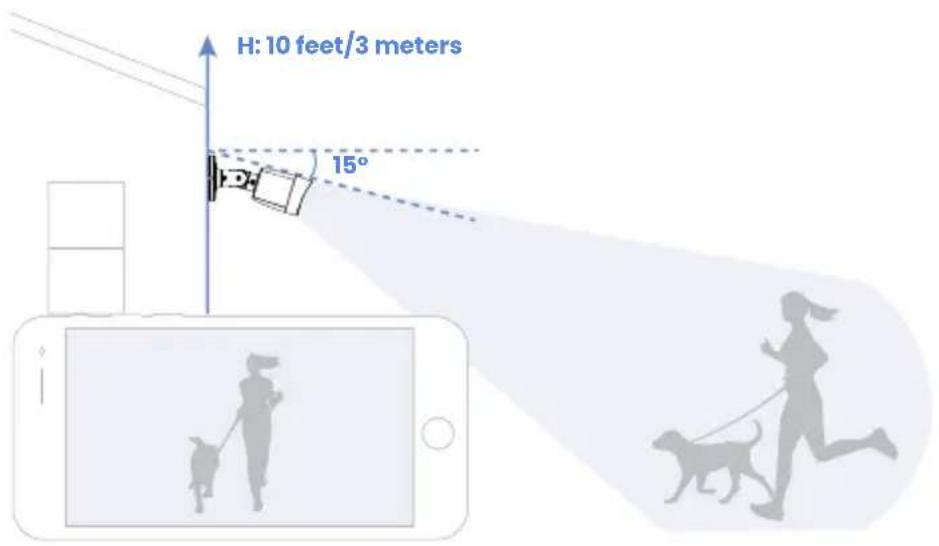
- The ideal position is about 10 ft/3 m above ground, angled 15^ downward.
- Secure the cables so they cannot be seen or easily cut.
Warning! Ensure the mounting surface supports 1.65 lbs (0.72 kg), 3× the camera's weight.
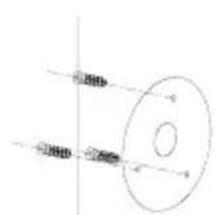
- Use the mounting template to mark and drill holes for screws and the camera's cable.
Note: To route cables along a wall, use the camera's cable notch. - Insert anchors for surfaces like drywall, wood, brick, masonry, or concrete.
- Guide the camera's cable through the surface opening or cable notch.
- Connect one end of the BNC cable to the camera's video output and the other end to the DVR's video input. Then, plug the camera's power adapter into its port and connect it to a power outlet to turn on the camera.
natural_image
Pure diagram of a ring with internal lines and arrows, no text or symbols present
- Attach the camera's bracket to the surface using the provided screws and a screwdriver.
- Loosen the adjustment screws with a screwdriver to position the camera, then securely tighten it in place.
- Important! Remove the vinyl film from the camera lens for a clear view.


Warning! Ensure the mounting surface supports 1.8 lbs (0.84 kg), 3× the camera's weight.
- Use the mounting template to mark and drill holes for screws and the camera's cable.
Note: To route cables along a wall, use the camera's cable notch. - Insert anchors for surfaces like drywall, wood, brick, masonry, or concrete.
- Use the T10 Torx Key to loosen the adjustment screw and remove the camera from the mounting bracket.
- Attach the mounting bracket to the surface using the provided screws and a screwdriver.

- Guide the camera's cable through the surface opening or cable notch.
- Connect one end of the BNC cable to the camera's video output and the other end to the DVR's video input. Then, plug the camera's power adapter into its port and connect it to a power outlet to turn on the camera.
- Align the camera and its cover flush with the mounting bracket. Adjust the camera's angle as needed. Then, use the T10 Torx Key to securely tighten the adjustment screw and keep it in place.
- Important! Remove the vinyl film from the camera lens for a clear view.

Why does my camera have a blurry picture?
If your camera's picture appears blurry, make sure to remove any protective vinyl film from the lens. Clean the lens with a soft cloth to remove any dirt or dust. Ensure that the cable length falls within the recommended limits: 60 ft (18 m) for the included BNC cable, 200 ft (61 m) for 'RG59' or 'Coax' Siamese cables (for both video and power), and 800 ft (242 m) for 'RG59' or 'Coax' cables for video only.
How do I access the camera's footage from my phone?
To view the camera's footage from your phone, ensure that your DVR is connected to your home router (internet). Ensure that the cameras are properly connected to the DVR so that you can seamlessly view both live and recorded footage. Next, remotely access the footage using the DVR's compatible app. Follow the DVR's guide to download the app and add the security system to your account.
How do I reduce false alerts?
First, manage notifications by scheduling them or snoozing alerts in the app's or DVR's settings. Then, optimize the camera's performance by fine-tuning person and vehicle detection settings and drawing motion zones to receive alerts only for motion detected within those designated areas.
How can I set up person and vehicle detection?
Go to the DVR's settings for Events > Event Settings > Motion Detection > Smart Motion Detection. Enable 'Person' and 'Vehicle' detection, draw motion zones to create designated areas for detection, and choose how the system will react to detection events. For detailed instructions, refer to the DVR's manual at help.lorex.com and search for the DVR's model number.
FR - FAQ
For additional support, scan the QR code or visit:
See our full Terms of Service and Limited Hardware Warranty Policy at:
Copyright © 2024 Lorex Technology Inc.
As our products are subject to continuous improvement, Lorex reserves the right to modify product design, specifications and prices, without notice and without incurring any obligation. E&OE. All rights reserved.
lorex.com
help.lorex.com/C221NA-series
help.lorex.com/C221NC-series
C221NA-C221NC_QSG_EN-FR-ES_R1
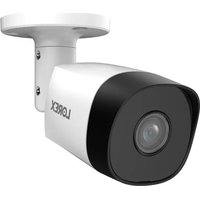

Brand : Lorex
Model : C221NC
Category : Surveillance Camera