NESCUP NC 1000 - Coffee maker BRAUN - Free user manual and instructions
Find the device manual for free NESCUP NC 1000 BRAUN in PDF.

| Brand | BRAUN |
| Model | NESCUP NC 1000 |
| Product type | Automatic coffee maker |
| Main functions | Short coffee (80-125 ml), long coffee (125-220 ml), cappuccino (160-210 ml), hot water, manual mode |
| Water tank | Removable, maximum capacity 1.7 L (for descaling) |
| Coffee container | Removable, for soluble coffee (max 30 g per cup in manual mode) |
| Water filter | Included, to be replaced every approx. 50 L |
| Power supply | 220-240 V, 50-60 Hz (typical) |
| Power | Not specified |
| Dimensions (approx.) | 30 x 25 x 35 cm (estimate) |
| Weight (approx.) | 4 kg (estimate) |
| Maintenance and cleaning | Daily cleaning of removable parts (preparation compartment, coffee nozzle, rotor support, seal); descaling every 100 L (without filter) or 300 L (with filter) |
| Safety | Do not immerse; use on a flat surface; do not use without preparation compartment; hot water/steam production |
| Spare parts and repairability | Repairs by Braun Authorized Service Center |
| Warranty | 2 years from the date of purchase |
Frequently Asked Questions - NESCUP NC 1000 BRAUN
User questions about NESCUP NC 1000 BRAUN
0 question about this device. Answer the ones you know or ask your own.
Ask a new question about this device
Download the instructions for your Coffee maker in PDF format for free! Find your manual NESCUP NC 1000 - BRAUN and take your electronic device back in hand. On this page are published all the documents necessary for the use of your device. NESCUP NC 1000 by BRAUN.
USER MANUAL NESCUP NC 1000 BRAUN
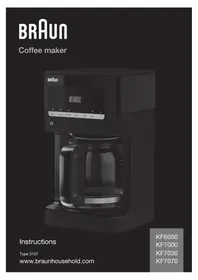
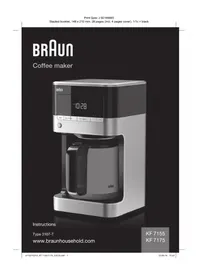
Thank you for purchasing the Braun Nescafé Nescup® Automatic Coffee System. Nescafé and Braun have jointly developed this revolutionary and high-quality system to enable you to prepare a great choice of coffees – either a small cup or a mug with a perfect crema, a cappuccino always topped with a delicious froth made from fresh milk – or hot water for tea, and more.
Each cup is individually brewed to your personal taste ensuring the fullest aroma and pleasure.
Please read these use instructions carefully & completely before using the machine.
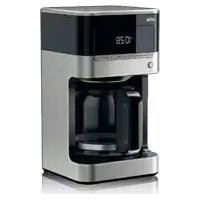
Description
A Coffee container
B Water filter compartment
C Water tank
D “stop” button
E Water filter exchange signal
F Water signal
G Power/stand-by signal
H Manual button
1 Cappuccino button
J Mug button
K Cup button
L Water filter
M Liquid content selector
N Drip tray
O Water pipe
P Brewing chamber lid
Q Coffee/water selector
R Coffee strength selector
S Measuring beaker
T On/off switch
U Brewing unit
V Brewing mechanism seal
W Brewing mechanism lid
X Coffee pipe
Y Dosing tube
Important
- This machine is intended for household use only. Keep out of the reach of children.
- Place the machine on a dry, flat and fixed surface.
- Never immerse the machine in water.
- Never carry the machine with the water tank (C) attached. The tank may fall off.
- Before plugging in, check that your voltage corresponds with the voltage printed on the bottom of the machine.
-
Always use fresh, cold drinking water to fill the water tank. Never fill the water tank with any other liquids.
-
Only fill pure instant coffee in the coffee container.
- Never use ground coffee or soluble product with hard non-soluble pieces (e.g. toffee pieces) as this blocks and damages the unit.
- Only use the machine with a completely assembled brewing unit (U).
- Do not fill the brewing unit (U) with more than 30g soluble product or 60ml milk.
- If you want to stop the machine, press the "stop" button (D). If liquid remains inside, press the cup button (K) until the brewing unit is empty. Then press the "stop" button again to continue.
- The machine produces hot water and steam – use with care to avoid scalding.
- Cleaning the machine regularly is important. Rinse at least before first cup of the day. For more details refer to the «Cleaning» section.
- People suffering from milk allergy should not use the machine if it is also used for beverages containing milk.
- Braun electrical appliances meet the applicable safety standards. Repairs to electrical appliances including cord replacement must only be carried out by authorised Braun service centres. Faulty, unqualified repair work may cause accidents or injury to the users.
Preparing the Machine for Use
- Rinse the water tank (C), the brewing unit (U) and the glass container (A) with water and ensure they are completely dry before you reassemble them.
-
For optimum taste we also recommend rinsing the machine interior by following the procedure below:
-
Remove the water filter (L) from its foil and immerse it in a large glass or cup filled with water for 10 minutes. Then insert it in the water filter compartment (B) (see I) by firmly pressing down.
- Fill the water tank (C) to the maximum mark with fresh, cold drinking water (see II).
- Plug in the machine and switch it on (T).
- The power/stand-by signal (G) indicates that Braun Nescafé Nescup® is on standby and ready to be rinsed.
- Place a large cup on the drip tray (N) (see III) and ensure that the coffee/water selector (Q) is in the «coffee» position.
- Select the manual button (H) first, then press the mug button (J). After brewing has stopped, empty the cup and repeat once more.
- Now turn the coffee/water selector (Q) into
the «water» position, place a cup on the drip tray and press the mug button (J). After brewing has stopped, empty the cup and repeat once more.
- Pull the coffee container (A) upwards without turning. Hold it with the glass bottom down and remove the plastic lid by turning anti-clockwise. Fill the coffee container with instant coffee. Then close the lid by tightly turning clockwise. Re-insert the coffee container into the machine. (see IV, 1-5)
The machine is now ready for use.
Preparing Hot Beverages
-
Rinse and fill the water tank with fresh, cold drinking water and place your cup on the drip tray (N). Ensure you choose the right cup size to avoid overflowing. Cup: 80 ml - 125 ml Mug: 125 ml - 220 ml Cappuccino: 160 ml - 210 ml
-
The liquid content selector (M) is set on «min» and can be adjusted to suit larger cup sizes. Ensure that the coffee/water selector (Q) is in the «coffee» position.
3a. Auto Mode (see V)
Adjust the coffee strength selector (R) between 1 (= mild) and 8 (= strong). For your first cup of Nescafé Gold Blend we recommend you start with setting 2.5. Then press the cup (K) or mug (J) button.
b.Manual Mode (see VI)
The manual mode allows you to use a different coffee from the one in the coffee container. Open the brewing chamber lid (P) and insert the coffee of your choice, e.g., Nescafé Decaffeinated according to the dosage indicated on the coffee packaging. Be careful not to overfill the brewing unit (maximum 30 g). Select the manual button (H) first, then press the cup (K) or mug (J) button.
The cup or mug signal lights up indicating that coffee preparation is in process. Your cup is ready when the signal is no longer lit. Now, you can prepare another cup.
The flashing power/stand-by signal indicates that the integrated ventilator is running. When it lights up continuously, the machine has switched to the energy saving stand-by mode. Please do not switch off the machine earlier.
Cappuccino
Follow steps 1. and 2. and choose the coffee strength. Open the brewing chamber lid (P). Using the measuring beaker, fill milk into the brewing unit (U) (maximum 60ml ) and close the brewing chamber lid. By pressing the cappuccino button (I), freshly frothed milk automatically flows into the cup followed by the coffee. Your cup is ready when the cappuccino signal is no longer lit. You can now prepare another cup.
To use a different soluble coffee for your cappuccino instead of the coffee in the coffee container, choose the manual cappuccino mode and proceed as follows:
- Open the brewing chamber lid (P) and fill in milk. First press the manual button (H), then the cappuccino button (I) (see VII). Frothed milk flows into the cup.
- Open the brewing chamber lid again and insert the coffee of your choice, according to the dosage indicated on the coffee packaging. Press the cup button (K).
Please note:
- To remove traces of milk, remaining in the brewing unit, always rinse it after using milk.
- In case you want to use instant cappuccino or other instant beverages containing milk powder, please note that some residue can remain in the brewing unit and need to be removed.
Tea
Follow steps 1. and 2. and switch the coffee/water selector (Q) to the «water» position. The water signal (F) becomes visible. Then place a tea bag in your cup and press either the cup (K) or mug (J) button.
Using the manual mode, you can also prepare soluble tea. Fill the instant tea into the brewing unit, close the lid, press the manual button (H) and then the cup (K) or mug button (J).
Tips for the Perfect Cup
- If you change the coffee you use in the container, check the coffee strength setting as this may vary between different coffees.
- If the machine has not been used for a longer period of time (2-3 weeks), rinse and refill the water tank (C), rinse the interior of the machine and check whether you may want to exchange the remaining coffee in the container (A) before using it the next time.
- To ensure best coffee quality, Nescafé Nescup® by Braun has been optimised for use with the premium Nescafé Gold Blend.
-
For best results we recommend always using filtered water.
-
Clean and descale the machine regularly (see sections «Cleaning» and «Descalating»).
Water Filter
Braun Nescafé Nescup® is equipped with a water filter that filters unfavourable chemicals out of the water to improve the quality of your beverage significantly. Moreover, it protects your machine against scale build-up and extends its lifetime. The water filter should be replaced regularly (approx. after 50 l of water have run through). When the water filter exchange signal (E) lights up, you need to replace the water filter to ensure best quality of your coffee. To insert the water filter cartridge, proceed as follows:
- Unpack the water filter cartridge, and immerse it in a large glass or cup filled with water for 10 minutes.
- Remove the water tank.
- Switch the coffee/water selector (Q) to the «water» position and place a cup on the tray to capture potential water spill.
- Open the water filter compartment (B) and insert the new water filter by firmly pressing it down.
- To reset the water filter exchange signal, press the «stop» button (D) for 5 seconds.
- Empty the cup if needed, place it back on the drip tray and press the mug button (J). After brewing has stopped, empty the cup and repeat twice more.
Rinsing
Rinse the machine daily before the first cup.
- Place an empty cup on the drip tray (N).
- Ensure that the coffee/water selector (Q) is in the «coffee» position.
- Press the manual button (H) without adding any instant coffee and press the mug button (J).
Cleaning
Always unplug the machine before cleaning.
Clean the detachable parts of the brewing unit daily after your last cup of the day and always after milk has been used:
- Remove the brewing unit (U) by pulling it towards you (see VIII).
- Detach the coffee pipe (X) and the brewing mechanism lid (W) by unscrewing it from the brewing unit (U).
- Remove the seal (V).
-
Clean all parts with hot water and washing-up liquid. Alternatively, the brewing unit can be cleaned in the dishwasher.
-
Remember to replace the seal (V) when re-assembling the brewing unit (U).
- Ensure that all parts are completely dry before re-assembly.
- When re-inserting the brewing unit, ensure it is firmly inserted by pressing against its back panel.
Coffee Container
- Disassemble the coffee container (A) and clean the glass either with a dry cloth or in hot water (see X). The other parts should be wiped with a dry cloth or paper towel.
- After cleaning the coffee container make sure it is completely dry prior to re-filling with instant coffee. Otherwise, the coffee powder may congeal and block the machine.
- If the lid of the coffee container is blocked with caked coffee, disassemble it by taking out the stopper, turning the ring left and pulling out the piston (see IX, 1-4). Remove the rubber sealing ring to avoid it from getting wet. Clean all other parts with hot water and ensure everything is dry before reassembly. Especially the rubber sealing ring needs to be completely dry. In case of doubt, use one of the spare sealing rings.
Machine Exterior
- Never clean the machine under running water and never immerse it in water.
- Only use a clean kitchen towel for cleaning. If necessary, you may use some washing-up liquid.
- When moving the machine, remove the water tank (C) from the unit first.
- Clean the water tank (C) regularly. To avoid scratching use a soft cloth soaked in vinegar and water.
Dscaling
If you are using a water filter the cup, mug, cappuccino and manual signals light up simultaneously to indicate that descending is necessary (ca every 300l). If you are not using a water filter you need to descale the machine more often (ca every 100l). The red water filter exchange signal lights up every 50 l and you can use this as a reference and descale every second time it lights up.
The descending process works in 4 phases. After each step the blinking cup, mug, cappuccino and manual signals will show you that you need to initiate the next phase:
1.
-
Remove the water filter from the appliance and ensure the brewing unit is in place.
-
Dissolve descending agent in 1.7 l water and fill this mixture in the water tank (C) up to «max». Please use 50g of a descending powder based on amidosulphonic acid and citric acid.
- Remove the drip tray (N) and position a kitchen container in its place (capacity 2 litres or more).
- Ensure that the coffee/water selector (Q) is in the «water» position.
- Press the “stop” button (D) and keep it depressed while pressing the manual button (H).
- The unit will start the descending cycle. During the whole descending process power/stand-by signal is flashing and the water filter exchange signal is lit permanently.
2.
- After approx. 20 minutes, the process stops and the cup, mug, cappuccino and manual signals will blink. You need to switch the coffee/water selector to the «coffee» position.
- In the «coffee» position, the above sequence is repeated again until the tank (C) is empty.
3.
- Then the cup, mug, cappuccino and manual signals will blink again. Empty the kitchen container and place it back underneath the pipes.
- Clean the water tank (C) and refill it with fresh, cold water up to «max».
- To start the «automatic rinsing cycle» of the water pipe switch the coffee/water selector to the «water» position.
4.
- When the cup, mug, cappuccino and manual signals blink again, start the «automatic rinsing cycle» of the coffee pipe by switching the coffee/water selector to the «coffee» position. A manual coffee cycle is run every 2 minutes until the tank (C) is empty.
- The descending process is finished when the power/stand-by signal is permanently lit.
Troubleshooting
| Problem | Situation | Solution |
| The machine runs out of water during brewing. | Water tank (C) is empty. Quantity in cup lower than normal. | Fill the water tank (C). Press the cup/mug or cappuccino button to start a new coffee. |
| Nothing happens when the cup button (K), mug button (J) or cappuccino button (I) is pressed. | No beverage delivery. | Make sure that the unit is plugged in, switched on and the water tank (C) is full. |
| Cup lights are blinking one after the other. | Brewing process has been interrupted. | Check if liquid remains inside the brewing unit. If yes, press cup button (K) until empty. Then press the “stop” button to reset. Proceed as per section «Preparing Hot Beverages». |
| Coffee is too weak even if coffee selector is in «max» strength or only hot water is coming out. | 1. Coffee container is blocked.2. Dosing tube (Y) is blocked. | 1. Disassemble the coffee container (A) and clean the lid (see «Cleaning - Coffee Container»). Disassemble and clean the brewing unit (U).2. Remove the brewing unit and the coffee container. Then remove the dosing tube (Y) and clean it in hot water. Ensure all parts are completely dry before re-assembly. |
| Machine does not produce coffee, only hot water is coming out. The water signal is lit. | Coffee/water selector (Q) not in correct position. | Turn the coffee/water selector (Q) to «coffee» and make sure that the coffee container (A) is firmly inserted in the machine. |
| The water signal (F) is blinking. | Water tank (C) is empty or it is not firmly inserted in the machine. | Ensure there is enough water in the tank (C). The signal disappears when any of the cup buttons is pressed. |
| I need to stop the preparation process. How do I empty the brewing unit (U)? | I realise that my cup is too small for my desired drink. | Press the «stop» button (D). The cup lights are blinking one after the other and the machine stops immediately. Press the cup button (K) until the brewing unit (U) is empty. |
| The water filter exchange signal (E) lights up. | The signal is a reminder to change water filter. | Change the water filter (see «Water Filter») then press the «stop» button (D) for 5 seconds to reset the signal. |
| All cup signals are lit. | Machine is calcified. | Descale the machine (see «Descalging»). |
| Coffee has spilt over the machine. | I have spilt dry coffee over the machine. | Coffee residue can be removed using a vacuum cleaner or another dry cleaning method. |
| All the lights are blinking. | Error detection. | Contact an authorised Braun service centre. |
If you cannot find a solution to your problem, please contact Braun customer service.
Transport
The machine must be completely empty before carrying it. Never attempt to empty the machine immediately after preparation. Allow unit to cool down for 20 minutes first.
- Remove the water tank (C), the drip tray (N) and the coffee container (A).
- Carry the unit to a sink.
- Switch the coffee/water selector (Q) to the «water» position.
- Open the water filter compartment (B) and remove the water filter (L).
- Tip the machine onto its rear right-hand corner to allow the water to pour into the sink through the water filter compartment (B).
- Move the machine back into its vertical position. Water will run out of the machine through the pure water pipe (O).
- Repeat these steps until no more water runs out.
This product conforms to the European Directives EMC 89/336/EEC and Low Voltage 73/23/EEC.
Please do not dispose of the product in the household waste at the end of its useful life. Disposal can take place at a Braun Service Centre or at appropriate collection points provided in your country.


Guarantee
We grant 2 years guarantee on the product commencing on the date of purchase. Within the guarantee period we will eliminate, free of charge, any defects in the appliance resulting from faults in materials or workmanship, either by repairing or replacing the complete appliance as we may choose.
This guarantee extends to every country where this appliance is supplied by Braun or its appointed distributor.
This guarantee does not cover: damage due to improper use, normal wear or use as well as defects that have a negligible effect on the value or operation of the appliance. The guarantee becomes void if repairs are undertaken by unauthorised persons and if original Braun parts are not used.
To obtain service within the guarantee period, hand in or send the complete appliance with your sales receipt to an authorised Braun Customer Service Centre.
For UK only:
This guarantee in no way affects your rights under statutory law.
Guarantee and Service Centers
Deutschland
Gillette Australia Pty. Ltd.,
Scoresby, 5 Caribbean Drive
Melbourne, Victoria 3179
1800641820
Bahrain
Yaquby Stores,
Bab ALBahrain,
P.O.Box 158
Manama,
02-28 887
Barbados
Dacosta Mannings Inc.,
P.O.Box 176,Pier Head,Bridgetown,
431-8700
Belarus
Electro Service & Co LLC,
Chernyshevskogo str. 10 A,
220015 Minsk,
2856922
Belgium
Gillette Group Belgium NV,
J. E. Mommaertslaan 18 A,
1831 Diegem,
02-71 19 104
Bermuda
Gibbons Company
21 Reid Street
P.O.Box HM 11
Hamilton
2950022
Brasil
Gillette Canada Company,
Braun Consumer Service
4 Robert Speck Parkway,
Mississauga L4Z 4C5,
Ontario,
18003876657
Ceská Republika
PH SERVIS sro.,
V Mezihori 2,
18000 Praha 8,
266 310 574
Chile
Viseelec,
Braun Service Center Chile,
Av. Conchay Toro #4399,
Puente Alto,
Santiago,
02 288 25 18
China
Gillette (Shanghai) Sales Co. Ltd.
550 Sanlin Road, Pudong,
Shanghai 200124,
00862158498000
Colombia
Gillette de Colombia S.A.,
Calle 100 No. 9A-45 Piso 3.
Bogotá, D.C.,
018000527286
Croatia
Iskra elektronika d.o.o.,
Bozidara Magovca 63,
10020 Zagreb
1-6601777
Cyprus
Kyriakos Papavasiliou Trading
70, Kennedy Ave.,
1663 Nicosia,
02314111
Danmark
Gillette Group Danmark A/S,
Teglholm Allè 15,
2450 Kobenhavn SV,
70150013
25 Makram Ebied Street,
P.O.Box 7607
Cairo
02-2740652
Espana
Braun Espanola S.A.,
Braun Service.
Enrique Granados, 46
Audio Supplies Company,
Room 506,
St. George Building,
2 ICE House Street,
Hong Kong,
(852) 2524 9377
Hungary
Gillette Group Hungary
Kereskedelmi Kft.,
1037 Budapest,
Szépvölgyi ut 35-37
1801-3800
Iceland
Verslunin Pfaff hf.,
Grenasvegur 13,
Box 714, 121 Reykjavik,
533222
India
Braun Division,
c/o Gillette Div. Op. Pvt. Ltd.,
34, Okhla Industrial Estate,
New Delhi 110 020,
116830218
Iran
Tehran Bouran Company
145 Ghaem Magham Farahani
Tehran
+98218312766
Ireland (Republic of)
Gavin's Electronics,
83-84, Lower Camden Street,
Dublin 2,
1800509448
Israel
S. Schestowitz Ltd.,
8 Shacham Str.,
Tel-Aviv, 49517
1800335959
Italia
Gillette Group Italy S.p.A.,
Via G.B. Pirelli, 18
20124 Milano,
02/6678623
Jordan
Interbrands
Wadi Al-Sir, Adwiat alhekmah
St. Mekadabi bld.
Amman
+6925827567
Kenya
Radbone-Clark Kenya Ltd.,
P.O.Box 40833
Mombasa Road,
Nairobi.
2821276
Korea
Gillette Korea Ltd.
144-27 Samsung-dong,
Kangnam-ku,
Seoul, Korea
080-920-6000
Kuwait
Union Trading Company,
Braun Service Center,
P.O.Box 28 Safat,
Safat Code 13001, Kuwait,
04833274
Latvia
72 Bullu Street, House 2, Riga 1067.
2403911
Lebanon
Magnet SAL - Fattal HLDG,
Lot 24 Rawang Housing
& Industrial Estate
Mukim Rawang, PO No 210
48,000 Rawang
Selangor Malaysia
(603) 6091 4343
Malta
Kind's.
- Republic Street.
Valletta VLT04,
247118
Morocco
FMG
depot TMTA
Rue Chefchaouen, Oukacha
Casablanca
+212022664769
Martinique
Decius Absalon,
J. Kalachand & Co. Ltd.,
DBM Industrial Estate, Stage 11,
P.O.B.634
Plaine Lauzun,
2 12 84 10
Mexico
Braun de Mexico y Cia. de C.V.
Calle Cuatro No.4,
Fraccionamento Industrial Alce Blanco,
Naucalpan de Juarez,
Estado de Mexico.
C.P. 53370
01-800-508-58-00
Nederland
Netherlands Antilles
Rupchand Sons n.v. (ram's),
Front Street 67, P.O. Box 79
St.Maarten,Philipsburg
052 29 31
New Zealand
Key Service Ltd.,
69 Druces Road.,
Manakau City,
09-2625838
Nippon
Gillette Japan Inc.,
Queens Tower, 13F
3-1, Minato Mirai 2-Chome
Nishi-Ku,
Yokohama 220-6013
Japan
045-6803700
Norge
Naranjee Hirjee & Co.,
10 Ruwi High,
P.O.Box 9,Muscat 113
703660
Pakistan
Gillette Pakistan Limited,
Dr. Ziauddin Ahmend Road,
Karachi 74200,
215688930
Paraguay
Paraguay Trading S.A.,
Gillette Philippines Inc.,
Corporate Corner Commerce Avenues
20/F Tower 1, IL Corporate Centre
1770 Muntinlupa city
02-771071 02-06/-16
Poland
Gillette Group Poland
Sp.zo.o.
ul. Domaniewska 41,
02-672 Warszawa,
225488888
Portugal
Grupo Gillette Portugal, Lda.,
Braun Service,
Gillette Romania srl.
opposite to Fetihi center,
Al Forsan
P.O.Box:269
21411 Jeddah
02-6518670
Singapore (Republic of)
Beste (S) Pte. Ltd.
No. 6 Tagore Drive,
03-04 Tagore Industrial Building,
Singapore 787623,
(65) 6552 2422
Slovakia
Techno Servis Bratislava
Trhová ul.
841 02 Bratislava IV
02/64463643
Slovenija
Iskra Prins d.d.
South Africa (Republic of)
Fixnet After Sales Service,
159 Queen Street, Kensington South,
P.O.Box 751770
Johannesburg 2094,
Kensington South,
116156765
St.Maarten
Rupchand Sons n.v. (ram's),
P.O.Box 79
Philipsburg,
Netherlands Antilles,
52 29 31
St. Thomas
Boolchand's Ltd.,
31 Main Street,
P.O.Box 5667
00803 St. Thomas,
US Virgin Islands,
3407760302
Suomi
Gillette Group Finland Oy,
P.O.Box 9
Nittykatu 8,PL 9,02200 Espoo
09-45 2871
Sverige
Gillette Group Sverige AB,
Dept. Sweden,
Stockholm Gillette
Rasundavagen 12,
Box 702,
16927 Solna,
020-21 33 21
Syria
Ahmed Hadaya Company
Hadayabuilding
Ain Keresh
Unisyria, P.O. Box 35002
Damascus,
963 011-231433
Taiwan
Audio & Electr. Supplies Ltd.,
Brothers Bldq., 10th Floor,
85 Chung Shan N Rd., Sec. 1,
Taipei (104),
(886) 02 2523 3283
Thailand
Gillette Thailand Ltd.,
175 South Sathorn Road,
Tungmahamek, Sathorn,
11/1 Floor,
Sathorn City Tower
Bangkok 10520
(66) 2344 9191/ Exten. 9135
Tunesie
Hlybotchytska str.53, Kyiv
380-44-417-24-15
United Arab Emirates
The New Store LLC,
Burjman shopping mall,
Bur Dubai
Dubai,
+97143591919
Uruguay
Driva S.A.,
Marcelilno Sosa 2064,
11800 Montevideo,
29249576
USA
The Gillette Company
Braun Consumer Service,
1, Gillette Park 4k-16,
Boston, MA 02127-1096
1-800-272-8611
Venezuela
Gillette de Venezuela S.A.,
Av. Blandin,
Centro San Ignacio
Torre Copernico, Piso 5
La Castellana, Caracas
0800-4455388
Yemen (Republic of)
Saba Stores for Trading,
26th September Street,
P.O.Box 5278
Taiz,
4-25 2388
For latest updates, please refer to
www.Braun.com.