
T-Air - Range hood FABER - Free user manual and instructions
Find the device manual for free T-Air FABER in PDF.


| Product type | Range hood |
| Brand | Faber |
| Model | T-Air |
| Dimensions (W x D x H) | 60 x 50 x 15 cm |
| Weight | 12 kg |
| Supply voltage | 230 V / 50 Hz |
| Extraction power | 250 m³/h |
| Noise level | 55 dB (max) |
| Energy class | A |
| Filter type | Metal grease filter + charcoal filter (optional) |
| Number of speeds | 3 |
| Lighting | Integrated LED |
| Control type | Push buttons |
| Outlet diameter | 150 mm |
| Evacuation mode | External evacuation or recirculation |
| Maintenance | Regular cleaning of grease filters |
| Material | Stainless steel |
| Warranty | 2 years |
| Repairability | Spare parts available (motor, filters, bulb) |
Frequently Asked Questions - T-Air FABER
User questions about T-Air FABER
0 question about this device. Answer the ones you know or ask your own.
Ask a new question about this device
Download the instructions for your Range hood in PDF format for free! Find your manual T-Air - FABER and take your electronic device back in hand. On this page are published all the documents necessary for the use of your device. T-Air by FABER.
USER MANUAL T-Air FABER
SK 104
RO 111
LV 118
LT 124
HU 131
MK 138
AL 146
SR 153
EN
1. SAFETY INFORMATION
For your own safety and to ensure proper operation of the appliance, please read this manual carefully before installation and operation. Keep these instructions together with the appliance, even if it is sold or transferred to third parties. It is important that users know all the appliance's operating and safety characteristics.
The cables must be connected by a trained technician.
- The manufacturer shall not be considered responsible for any injury or damage caused by improper installation or use.
- The minimum safety distance between the hob and the suction hood is 650 mm (some models may be fitted at a lower height; please see the paragraph relating to working dimensions and installation).
- If the instructions for installation of the gas hob specify a distance greater than the one indicated, this must be taken into account.
- Check that the mains power supply corresponds to the one indicated on the data plate affixed inside the hood.
- The cut-out devices must be installed in the fixed system according to wiring system
regulations.
- For Class I appliances, check that the domestic power supply is adequately earthed.
- Connect the hood to the flue using a pipe with a minimum diameter of 120 mm. The fumes must travel the shortest distance possible.
- All the air venting regulations must be complied with.
- Do not connect the ducting hood to flues that also carry combustion fumes (e.g. boilers, chimneys, etc.).
- If the hood is used in combination with non electric appliances (e.g. gas appliances), a sufficient level of ventilation must be guaranteed in the room to prevent any exhaust backflow. If the kitchen hood is used in combination with appliances that are not electrically powered, the negative pressure in the room must not exceed 0.04 mbar to avoid any risk of the fumes being sucked back into the room by the hood.
- The air must not be extracted through a flue that is also used as an exhaust flue for fumes from gas or other fuel powered combustion devices.
- If it is damaged, the power cable must be replaced by the manufacturer or by a service technician.
- Connect the plug to a socket that complies with current regulations and is in an accessible position.
- As regards the technical and safety measures to be taken for exhausting of fumes, it is important that the regulations set by local authorities be complied with scrupulously.

CAUTION: remove the protective films before installing the hood.
- Only use screws and hardware of a sort suitable for the hood.

CAUTION: failure to install the screws or fixing devices as described in these instructions may mean there is a risk of electric shocks.
- Do not look directly at the light through optical devices (binoculars, magnifying glasses...).
- Do not flambé food under the hood: you might cause a fire.
- This appliance may be used by children over the age of 8 years and by persons with limited psycho-physical and sensory abilities or with insufficient experience and knowledge, provided they are carefully supervised and instructed on how to use the appliance safely and on the dangers that it involves. Make sure that children are not allowed to play with the appliance. Cleaning and maintenance to be performed by the user must not be carried out by children, unless they are under supervision.
- Supervise children to make
sure they do not play with the appliance.
- The appliance must not be used by persons (including children) with limited psycho-physical or sensory capacities or with insufficient experience and knowledge, unless they are carefully supervised and instructed.

Accessible parts may become extremely hot during the use of cooking appliances.
- Clean and/or replace the filters after the period of time indicated (danger of fire). See the paragraph on Maintenance and cleaning.
- The room must be adequately ventilated when the hood is used simultaneously with appliances that use gas or other fuels (not applicable to appliances that only discharge air into the room).
- The symbol ⚡ on the product or on its packaging indicates that the product must not be disposed of with the normal domestic waste. The product must be disposed of at a specialist recycling centre for electrical and electronic components. By making sure that this product is disposed of properly, you will help prevent possible negative consequences for the environment and for health that might result from its improper disposal. For more detailed information on how to recycle
this product, please contact your local municipal offices, local waste disposal service or the shop in which the product was purchased.
Declaration of Conformity
The manufacturer declares that this appliance with K-Link + Wi-Fi radio functionality complies with Directive 2014/53/EU.
The complete text of the EU declaration of conformity is available at the following link by searching for the product code:
"https://www.faberspa.com/en/product-documentation/"
This code can be found on the label located inside the product.
| Fre-quency bands | Maximum transmit-ted power |
| 2.4 GHz 100 mW max. | |
| 5 GHz 100 mW max. | |
2. USE
- The suction hood has been designed exclusively for domestic use, to eliminate kitchen odours.
- Never use the hood for purposes other than those for which it was designed.
- Never leave high flames under the hood when it is in operation.
- Adjust the intensity of the flame so that it is directed onto the bottom of the cooking pan, making sure it does not wrap around the sides.
- Deep-fryers must be kept under constant supervision when in use: the oil may catch fire if it gets too hot.
3. CLEANING AND MAINTENANCE
- The activated charcoal filter cannot be washed or regenerated, and must be changed approximately every 4 months of operation, or more frequently in the case of particularly intensive use (W).

- The grease filters must be cleaned every 2 months of operation, or more frequently in the case of particularly intensive use. They can be washed in a dishwasher (Z).

- Clean the hood using a damp cloth and neutral liquid detergent.
- Avoid using alcohol or silicone-based products to clean the inside and outside of the cooker hood.
4. CONTROLS
| Key | Key press | Function | Display/Led |
| A | Short | Hold the key pressed to turn the hood on/off at the first speed. | The display shows 1. |
| B | Short Press or move your finger from left to right to increase the speed from 1 to 2, 3, Intensive.The intensive speed is timed for 6 minutes. At the end of this time the system automatically returns to the previously set speed.Repeat the operation in reverse to decrease the speed (from right to left). | The display shows the selected speed.If the Intensive speed is selected the display shows an animation. | |
| Long press on the leftmost lines when all loads are off (motor and lights) | Keypad Lock functionActivates/deactivates the keypad lock for hood cleaning. | All LEDs flashing | |
| Long press on the rightmost lines when all loads are off (motor and lights) | Induction/Gas Cooktop SelectionSelect the type of cooktop in use, either Induction or Gas.The Induction Cooktop is set by default. | 1 Flashing LED A: confirms the Induction Cooktop selection.2 Flashing LED A: confirms the Gas Cooktop selection. | |
| C | Short Switches the lights on/off at maximum intensity.If there is an induction cooktop paired with the hood and the hood is off, as soon as the induction cooktop is turned on, the hood lights automatically turn on at the maximum intensity. | Fixed | |
| Long press with all loads off (motor and lights) | K-Link pairingBefore starting the procedure follow the specific instructions of the manuals of the devices to be paired.Starts the pairing procedure between the hood and compatible K-Link devices (induction cooktop or remote control). Up to 3 induction cooktops can be paired and only one remote control. See the manual of the devices for details of the operations that need to be performed on these.The pairing procedure takes 2 minutes. If no devices are recognised within this time check that you have previously activated the procedure for the devices to be paired. The maximum number of linkable devices may have been reached. | The display shows an animation:Pairing in progress.Upon successful completion of the procedure all the LEDs will light up for 2 seconds. | |
| D | Short Switches the lights on/off at medium intensity. Fixed | ||
| Long press with all loads off (motor and lights) | Performs a saturated Filters alarm reset. | The display shows F 3 times, indicating that the filter reset has been completed. | |
| Signals the saturated Metal Grease Filters alarm and the need to wash them. The alarm is activated after 100 hours of effective hood operation. | With the motor off, the display shows F + 1 multiple times alternately. | ||
| Signals the saturated Activated Carbon Odour Filter alarm. The alarm is activated after 200 hours of effective hood operation. | With the motor off, the display shows F + 2 multiple times alternately. | ||
| E | Short | Delay FunctionActivates/Deactivates the Delay function (automatic shutdown of the Motor and of the lighting delayed by 30').Cannot be activated with Intensive or 24h function.Deactivate the function by pressing the same key or press the A key for about 1 second to shut down the motor. | LED A remains lit (fixed) and LED E lights up. The display shows an animation. |
| Long press with light or motor on | 24h FunctionActivates/Deactivates the motor in the 24h Air Exchange mode, a speed that allows suction of 10 minutes every hour, for a 24-hour cycle.Cannot be activated if the Intensive or Delay modes are active. | LED A remains lit (fixed) and LED E flashes. The display shows an animation. | |
| Long press with all loads off (motor and lights) | K-Link unpairingstarts the procedure for the cancellation of all compatible K-Link devices previously paired with the K-Link pairing function.Wi-Fi connectionActivates/Deactivates the Wi-Fi Connection function.Note: the Wi-Fi function is automatically activated when the user re-quests the Wi-Fi configuration procedure. | Upon successful completion of the procedure all the LEDs flash 5 times.Flashing:connection to domestic network in progress.Fixed:Wi-Fi connection activ-ated | |
| F Short | |||
| Long press with all loads off (mo-tor and lights) | Wi-Fi configurationActivates/Deactivates the Wi-Fi set-up procedure.Before starting the procedure use the Faber Cloud App to register with the IOT Faber system. Then follow the instructions to add a new device and register the domestic router.If the procedure is not successfully completed within a few minutes, deactivate it by long pressing the key again, then make another at-tempt. The hood will nonetheless abandon the procedure if it is not successfully completed within 15 minutes. | The display shows an animation:configuration procedure in progress.Upon confirmation that the procedure was suc-cessful, all the LEDs will light up for 2 seconds. | |
| G | Short | AUTO ModeActivates/Deactivates the Automatic operating mode.AUTO mode is deactivated whenever any other keys are pressed.AUTO mode is activated when the key is pressed or the Paired Induction Cooktop is turned on. The hood speed is automatically set using the highest power level present on the hob. When the induction cooktop is turned off the last activated speed is held for 5 seconds, then speed 1 for 15 minutes. Once the 15 minutes have passed the motor turns off. The light status does not change.Thanks to the presence of the Air Quality Sensor an algorithm able to modulate the speed based on the intake air quality level.CAUTION: The algorithm function is optimised for the most common types of cooking. Uncommon preparations may produce a non-optimised response. | Fixed:AUTO mode activated.Off:AUTO mode temporarily deactivated.is |
| Long press with all loads off (mo-tor and lights) | Activates/Deactivates the Activated Carbon Filters alarm. | With the motor off, the display shows F + 2 multiple times altern-ately:alarm activated.With the motor off, the display shows F + 0 multiple times altern-ately:alarm deactivated. | |
| Recommended device pairing sequence:1 - K-Link Mode (See remote control manual)2 - K-Link Pairing (See hood manual)3 - Remote Control-Hood Pairing (See remote control manual)4 - K-Link Pairing (See hood manual)5 - Cooktop-Hood Pairing (See induction cooktop manual) | |||
5. FABER CLOUD APP
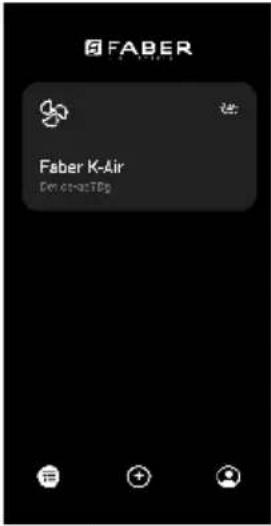
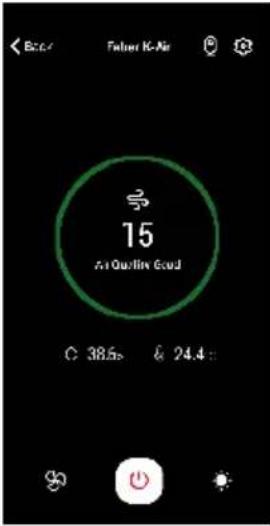
The Faber Cloud App is available for iOS and Android smartphones and allows remote access to all hood functions.
 |  | |
| Icon Function | ||
| Home page | ||
| Add new device | ||
| User profile management | ||
| Connected to Faber Wi-Fi network | ||
| Hood on/off | ||
| Lighting system management | ||
| Motor speed management | ||
| Intensive Function | ||
| 24h Function | ||
| Delay Function | ||
| AUTO | Automatic Function | |
| App settings management | ||
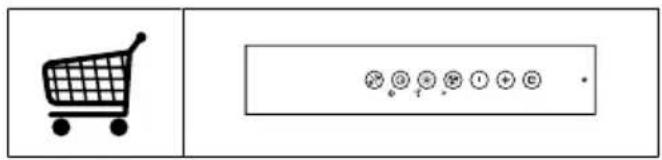
6. REMOTE CONTROL (OPTIONAL)
7. LIGHTING
- Please contact the Service Department to change it ("Please contact the service department to purchase it").
1. SAFETY INFORMATION
"https://www.faberspa.com/en/product-documentation/"
7. LIGHTING
"https://www.faberspa.com/en/product-documentation/"
"https://www.faberspa.com/en/product-documentation/"
7. LIGHTING
"https://www.faberspa.com/en/product-documentation/"
7. LIGHTING
"https://www.faberspa.com/en/product-documentation/"
7. LIGHTING
https://www.faberspa.com/en/product-documentation/
https://www.faberspa.com/en/product-documentation/
https://www.faberspa.com/en/product-documentation/
7. LIGHTING
https://www.faberspa.com/en/product-documentation/
7. LIGHTING
https://www.faberspa.com/en/product-documentation/
7. LIGHTING
https://www.faberspa.com/en/product-documentation/
7. LIGHTING
https://www.faberspa.com/en/product-documentation/
This code is located on the label placed inside the product.
| Frekven-cijski op-sezi | Maksimalna emiti-rana snaga |
| 2,4 GHz 10 | 0 mW maks. |
| 5 GHz 100 | mW maks. |
2. USE
7. LIGHTING
7. LIGHTING
The product code can be found on the label inside the product.
7. LIGHTING
7. LIGHTING
7. LIGHTING
7. LIGHTING
To replace it, please contact the service department ("To purchase, please contact the service department").
7. LIGHTING
7. LIGHTING

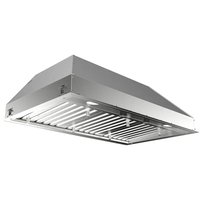
Brand : FABER
Model : T-Air
Category : Range hood