
Osmo Mobile SE - Tripod DJI - Free user manual and instructions
Find the device manual for free Osmo Mobile SE DJI in PDF.
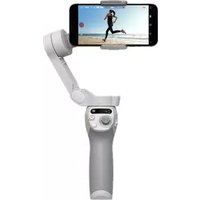


| Product Type | Smartphone Gimbal Stabilizer with Integrated Tripod |
| Brand | DJI |
| Model | Osmo Mobile SE |
| Dimensions (Folded) | 311 × 98 × 43 mm |
| Weight | 352 g (including tripod) |
| Battery Capacity | Li-ion 2450 mAh |
| Charging Time | Approx. 2.5 hours via USB-C |
| Operating Time | Up to 6 hours (with tripod folded) |
| Compatible Phone Width | 67–84 mm |
| Max. Phone Weight | 290 g |
| Main Functions | ActiveTrack 5.0, SpinShot, DynamicZoom, Timelapse, Panorama, Motionlapse |
| Bluetooth | Bluetooth 5.1 |
| Working Temperature | 0–40 °C |
| Maintenance | Wipe with a soft, dry cloth. Avoid liquids. |
| Safety Precautions | Do not disassemble; keep away from heat sources; use only DJI approved chargers. |
| Spare Parts Availability | Official DJI accessories and replacement parts available online |
| General Information | Automatically unfolds and starts when the tripod legs are extended. Compatible with DJI Mimo app. |
Frequently Asked Questions - Osmo Mobile SE DJI
User questions about Osmo Mobile SE DJI
0 question about this device. Answer the ones you know or ask your own.
Ask a new question about this device
Download the instructions for your Tripod in PDF format for free! Find your manual Osmo Mobile SE - DJI and take your electronic device back in hand. On this page are published all the documents necessary for the use of your device. Osmo Mobile SE by DJI.
USER MANUAL Osmo Mobile SE DJI

Searching for Keywords
Search for keywords such as "battery" and "install" to find a topic. If you are using Adobe Acrobat Reader to read this document, press Ctrl+F on Windows or Command+F on Mac to begin a search.

Navigating to a Topic
View a complete list of topics in the table of contents. Click on a topic to navigate to that section.

Printing this Document
This document supports high resolution printing.
Using this Manual
Legend

Important Hints and Tips
Before Use
Read the following documents before using DJI™ OSMO™ Mobile SE:
- Safety Guidelines
- Quick Start Guide
- User Manual

It is recommended to watch all tutorial videos on the official DJI website (www.dji.com/osmo-mobile-se/video) or in the DJI Mimo app. Read the safety guidelines and quick start guide before using for the first time. Refer to this user manual for more information.
Downloading the DJI Mimo App
Scan the QR code above to download the latest version of the DJI Mimo app.

The iOS version of DJI Mimo is compatible with iOS v12.0 and later. The Android version of DJI Mimo is compatible with Android v8.0 and later.
Contents
Using this Manual 2
Legend 2
Before Use 2
Downloading the DJI Mimo App 2
Introduction 4
Overview 4
Getting Started 5
Charging 5
Attaching the Phone 5
Using Osmo Mobile SE 7
On-board Features 7
Operating Mode 10
DJI Mimo App 11
Connecting to the DJI Mimo App 12
Camera View 12
Firmware Update 16
How to Update 16
Storage 16
Specifications 17
Introduction
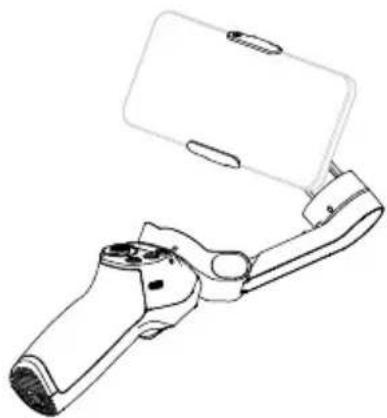
Boasting 3-axis stabilization, the lightweight Osmo Mobile SE unlocks the full potential of your mobile phone. The foldable magnetic design makes setup easier than ever, transportation and storage more convenient. Osmo Mobile SE can be operated in both portrait and landscape, while the upright, underslung, side grip, and low position modes help capture the perfect shot. Take content to the next level through DJI Mimo with ActiveTrack™ 5.0, DynamicZoom, and Pano. The Story mode, Timelapse, and ShotGuides provide step-by-step tutorials according to the scenario and help generate a video that can be shared on social media.
Overview

- Magnetic Phone Clamp 3
- Roll Motor
- M3×0.5 Screw Hole
- Pan Motor
- Status Panel
- Joystick
- Zoom Slider
- 1/4"-20 UNC Port
- Charging Port (USB-C)
- Switch Button
- Shutter/Record Button
- Power/M Button
- Tilt Motor
- Trigger

Osmo Mobile SE is compatible with DJI OM Fill Light Phone Clamp, which can be purchased in the DJI Store.
Getting Started
Charging
To charge Osmo Mobile SE, connect a USB adapter (not included) to the charging port using the power cable. The battery is fully charged when the battery level indicator turns off on the status panel.
Charging time: approx. 2 hours and 12 minutes (tested in the environment temperature of 25° C when using a 10 W charger)
Max runtime: approx. 8 hours (tested with the gimbal balanced and held steadily. This value should be taken as a reference only)

Attaching the Phone
- Attach the magnetic phone clamp in the center of the phone. The magnetic phone clamp can be stretched to adapt to the mobile phone width. The camera mark should point towards the camera of the phone.
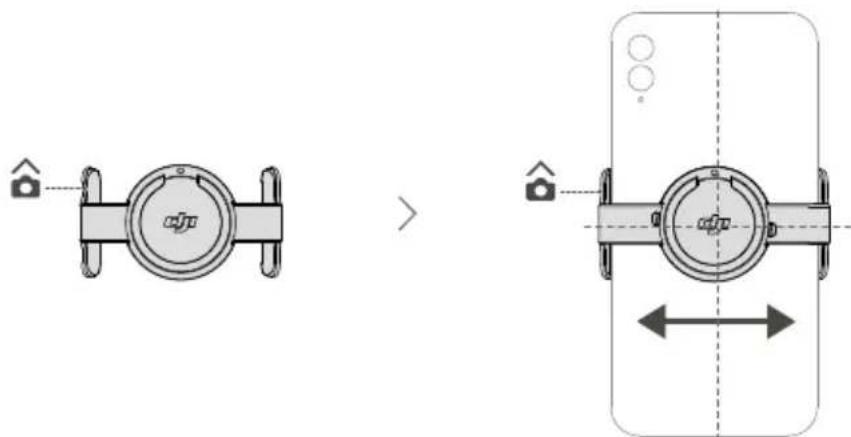
- Align the marks on the phone clamp and the phone clamp mounting plate. Attach the mobile phone to Osmo Mobile SE.
- Unfold the gimbal as shown. Press and hold the M button to power on. Osmo Mobile SE will stabilize once the gimbal mode indicator lights up on the status panel.
![graph TD A["Device with sensor icon"] --> B["Inserted device with switch"] B --> C["Rotate device with camera module"] C --> D["Time-lapse: 2s, 1s, 2s"] D --> E["Hand holding camera with M button"]](/content/2026/06/1397303/images/7fca5d8e6cba981641faf8a5e43c0b0e03df9a02a6050ce83cc474f163e8ef60.jpg)
Magnetic Phone Clamp Tips
Make sure the direction of the magnetic phone clamp is the same as shown in the figure above. For optimal performance, make sure the magnetic phone clamp is in the middle of the mobile phone, and the distance between the clamp arms is the same.

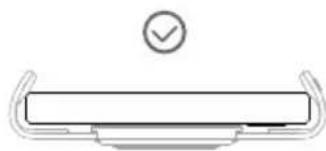
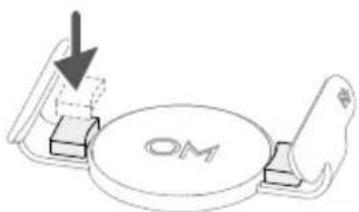
The anti-slip pads help to secure the mobile phone and the magnetic phone clamp. Attach the anti-slip pad to the magnetic phone clamp as shown in the figure below and press down firmly.
Using Osmo Mobile SE
On-board Features
Status Panel
Displays the System Status Indicator, Battery Level Indicator, and Gimbal Mode.
● System Status Indicator Descriptions
Blinking Pattern Descriptions
Solid yellow: Bluetooth disconnected
Solid green: Bluetooth connected
Pulses yellow or green: Standby mode
Blinks red and green alternately: Firmware updating/firmware update failed
Solid red: Abnormal status detected
Battery Level Indicator Descriptions
Blinking Pattern: Battery Level
Blinks red quickly: ≤5%
Solid red: 6%-19%
Solid yellow: 20%-60%
Solid green: >60%
Gimbal Mode
Follow: pan and tilt axes follow, where both the pan and tilt axes follow the movement of the grip. Suitable for scenarios when moving up and down or on a slant.
- Tilt Locked: only the pan axis follows, where only the pan axis follows the movement of the grip. Suitable for scenarios such as arc shots or moving from left to right.
FPV: pan, tilt, and roll axes follow, where all three axes follow the movement of the grip. Suitable for shooting the first-person view.
SpinShot: pan, tilt, and roll axes follow. The joystick can be used to control the roll axis rotation. SpinShot enables footage to be shot while rotating the camera 360°. This is suitable for shooting push, pull, and down.

M Button
When powered off
Press once: check the battery level
Press and hold: power on
When powered on
Press once: switch between gimbal modes
Press three times: enter standby mode (press any button to exit)
Press and hold: power off. Press and hold for 20 seconds to force power off

Zoom Slider
Move the slider to the + direction to enlarge the subject and move the slider to the - direction to shrink. Push the slider once to change the zoom once. Push the slider continuously to change the zoom continuously.
Joystick
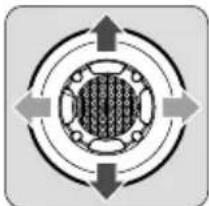
Move vertically and horizontally to tilt and pan the mobile phone. The joystick control direction can be set in DJI Mimo. Use the joystick to navigate through settings on the Quick Settings page.

Shutter/Record Button
Press once: take a photo or start or stop recording.
Press and hold: for burst shooting when in photo mode.

Switch Button
Press once: switch between front and rear cameras.
Press twice: switch between landscape and portrait mode.
Press three times: switch between photo and record mode. The feature can be set to control Quick Settings in DJI Mimo.
Trigger
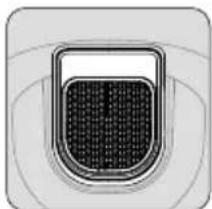
Press once to start or stop ActiveTrack 5.0 (requires used with Mimo).
Press twice to recenter the gimbal. When using ActiveTrack 5.0, the gimbal will recenter to the center of the camera view.
Press once, and then press and hold to adjust the follow speed to fast mode, release to exit.
Press and hold to enter lock mode. In lock mode, the gimbal will not follow the handle movements. Release to exit lock mode.
Charging Port (USB-C)
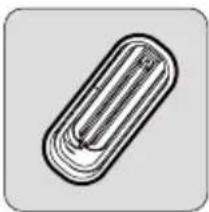
Charge Osmo Mobile SE by connecting a USB adapter to this port.

1/4"-20 UNC Port
The 1/4"-20 UNC port can be used to attach a tripod.

M3×0.5 Screw Hole
Used to mount counterweights. Counterweights should be used if a camera lens or microphone is mounted on the mobile phone. Make sure the total weight of these accessories is less than 290 g.
Combination Operation
Press the switch button, shutter/record button, and trigger simultaneously for more than one second to reset the Bluetooth name and connection and reconnect.

Osmo Mobile SE will be powered off automatically if there is no operation for three minutes in standby mode.
Operating Mode
Operation modes apply when used in portrait and landscape mode.
Upright Mode
Upright mode can be used without any further user input. In this mode, press the trigger twice quickly to center the mobile phone.
Underslung Mode
Hold Osmo Mobile SE upside down to enter Underslung mode, in which the mobile phone can easily capture images from a lower position. Press the trigger twice to center the mobile phone.

Side Grip Mode
Rotate Osmo Mobile SE to the right or left by 90° to go from Upright to Side Grip mode. Press the trigger twice to center the mobile phone.
Low Position Mode
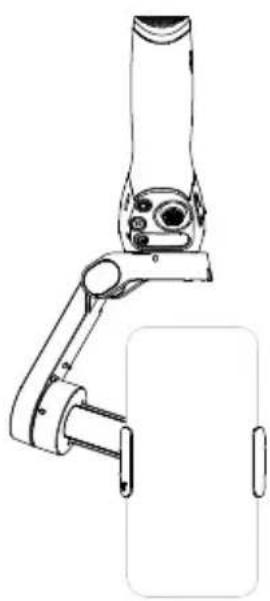
Press and hold the trigger, then tilt Osmo Mobile SE forward to enter Low Position mode. The tilt angle is enlarged, making it more suitable for shooting from a low position.

DJI Mimo App
Watch a live HD video feed on your mobile phone screen through the DJI Mimo app. The app also allows you to use ShotGuides, Story mode, Hyperlapse, Timelapse, ActiveTrack 5.0, DynamicZoom, and Pano, or configure camera and gimbal settings in just a few taps.
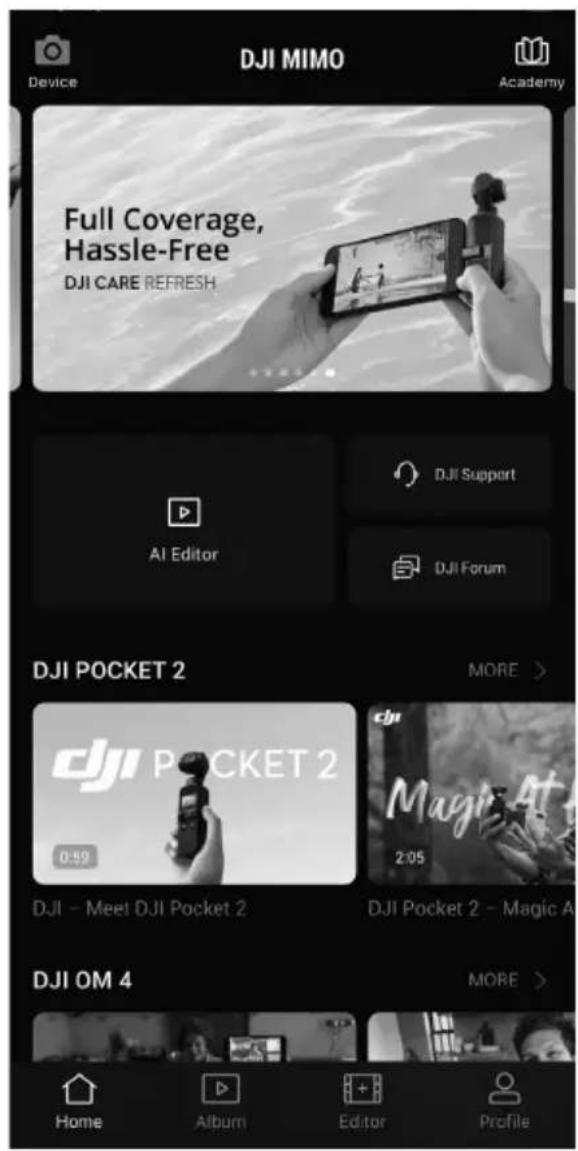
Device: tap to connect to Osmo Mobile SE. Once connected, DJI Mimo enters camera view. Academy: tap to watch tutorials and view manuals. Scan the QR code on the gimbal to access Academy directly. AI Editor: provides several templates to edit photos or videos. Home: tap to return to the home screen. Album: manage and view footage from the phone or DJI devices. Editor: tap to edit photos or videos from Osmo Mobile SE or import and edit from a mobile device. Profile: register or log in to a DJI account. Tap the setting icon to access more settings.
Connecting to the DJI Mimo App
- Power on Osmo Mobile SE.
- Enable Bluetooth on the mobile phone and connect to the device with an OMSE prefix name in DJI Mimo.
- Users are required to allow access to certain information when using DJI Mimo for the first time. The exact information will be listed in the prompt. An internet connection is required. Osmo Mobile SE will be activated after authorization and the app will enter the camera view.

When connected via Bluetooth, Osmo Mobile SE is able to control the mobile phone camera without DJI Mimo. Refer to the Mobile Phone Compatibility List for details at www.dji.com/osmo-mobile-se.
Camera View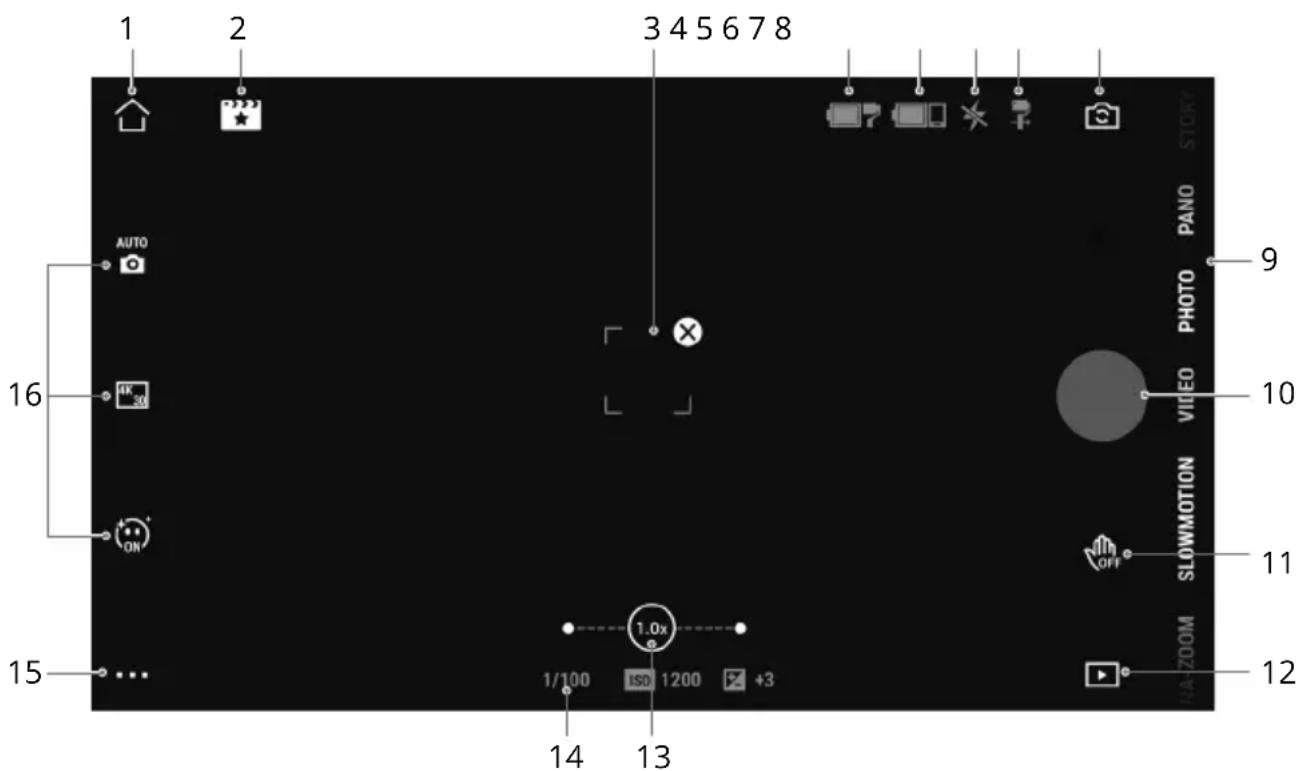
1. Home
☐: Tap to return to the home screen.
2. ShotGuides
ShotGuides provides step-by-step shooting tutorials according to the scenario, and users can edit the video using AI Editor.
3. ActiveTrack Select Box
•:ActiveTrack 5.0 has been optimized for tracking subjects. The subject will remain in the center of the camera view by default. The camera view can be adjusted manually.
There are three ways to use ActiveTrack 5.0:
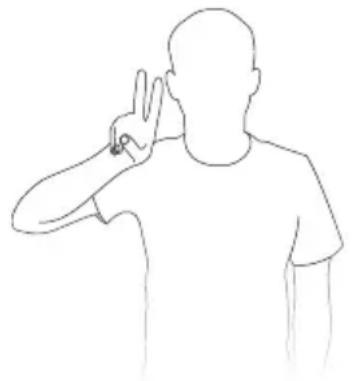
a. Drag a box on the screen in the camera view in DJI Mimo. A green box around the subject indicates ActiveTrack 5.0 is successfully enabled. Tap the ✗ icon on the top corner to stop tracking. b. Enable Gesture Control Off, select "Follow and Shoot" in DJI Mimo, and perform a palm or V gesture for one to two seconds when facing the camera. The gimbal will follow the subject closest to the camera. The detection range between the rear camera and the gesture is 0.5 to 4 m. Note that ActiveTrack 5.0 may consume more power and cause the temperature of the mobile phone to increase. Perform a palm or V gesture to stop recording.

c. Press the trigger once to start or stop ActiveTrack 5.0. The gimbal will follow the subject in the center of the screen by default. When using ActiveTrack 5.0 move the joystick to adjust the camera view.
4. Gimbal Battery Level
☐:Displays the current battery level of the gimbal.
5. Mobile Phone Battery Level
:Displays the current battery level of the mobile phone.
6. Flash
*:Displays the flash status.
7. Gimbal Mode
:Displays the current gimbal mode: Follow, Tilt Locked, FPV, or SpinShot.
8. Front/Rear Camera Switch
:Tap to switch between the front and rear cameras of your mobile phone. Selfie, Follow, and glamour effects are automatically enabled when switching to the front camera. Note: glamour effects are not supported when recording at 4K or 60fps.
9. Shooting Modes
Scroll to select the shooting mode.
Hyperlapse: enable to shoot a Timelapse photo while moving the mobile phone. Tap the shutter button to begin.
Timelapse: there are four types of timelapse (Fixed Angle, L to R, R to L, and Custom Motion). After selecting the timelapse, tap the settings at the top of the screen. For Fixed Angle, L to R, and R to L, set the interval and duration and start to shoot. For Custom Motion, select up to four positions and the gimbal will move to each position in sequence.
DynamicZoom: choose from Move Out and Move In mode. After selecting a mode, drag a box to select a subject, and tap the shutter button to start shooting.
Slow Motion: tap to shoot video at 4x and 8x slow motion. Check the mobile phone compatibility list for more information.
Video: tap to shoot a normal video.
Photos: tap to take a single shot photo. Press and hold for burst shooting.
Pano: tap to take a 3x3, 240°, or CloneMe panorama photo. The camera will take nine, seven, or three photos separately and generate a pano.
Story: provides several templates for recording video.
10. Shutter/Record Button
● :Tap to take a photo or to start or stop recording video.
11. Gesture Control Switch

:Tap to access Gesture Control settings.
12. Playback

Tap to preview photos and videos.
13. Zoom

Displays the current zoom ratio. Place two fingers on the screen and spread to zoom in, pinch to zoom out, or slide the bar to control zoom.
14. Shooting Parameters
1/100 ISO 80 ☒ 0: Displays the shutter speed, ISO, and EV values (Compatible with most mobile phones).
15. Settings ...
Camera Settings
The settings vary depending on the shooting mode. Note that the flash, white balance, and grid settings are only available when using the rear camera. For iOS devices, Selfie Flip is available when using the front camera in photo and video mode. For Android devices, Selfie Flip is only available in photo mode.

Gimbal Settings
Gimbal Mode: choose from Follow, Tilt Locked, FPV, and Spinshot.
Follow Speed: provides Fast, Medium, and Slow follow speed.
Gimbal Auto Calibration: reduces drift caused by nearby magnetic interference or human error. Before calibrating, place Osmo Mobile SE on a flat surface using a tripod. Do not touch the gimbal during calibration.
Horizontal Gimbal Adjustment: make sure the magnetic phone clamp is level before adjusting the gimbal.
Press Switch Button 3 Times: features can be set to take photos, record, or enter Quick Settings.
Joystick Speed: tap to set the maximum speed when controlling the joystick. There are Fast, Medium, and Slow options.
Joystick Control Direction: choose from Free and Horiz/Vert. Free enables the gimbal to be controlled in horizontal and vertical direction simultaneously. Horiz/Vert enables
the gimbal to be controlled in a horizontal or vertical direction.
Invert Joystick: after enabling this feature, the gimbal movement direction is inverted. Select from Off, Horizontal, Vertical, and All. After enabling Horizontal, the pan axis movement direction is inverted. After enabling Vertical, the tilt axis movement direction is inverted.
Sound: the sound of the gimbal can be turned on/off.
General Settings
Includes information such as Device Management, Device Name, Version Information, and Device Serial Number.
16. Shooting Parameters Settings
Shooting Parameters can be set according to the shooting mode. Tap the icon to access settings.

- Gesture Control and ActiveTrack 5.0 are not available in the following scenarios:
a. Gimbal mode is set to FPV or SpinShot.
b. The zoom ratio exceeds 3x.
- Selfie and Follow is not available in the following scenarios:
a. Gimbal mode is set to FPV or SpinShot.
b. Gesture Control is enabled.
c. The zoom ratio of the front camera exceeds 3x.
Shooting parameter settings vary depending on the model of the mobile phone. Refer to the Mobile Phone Compatibility List (www.dji.com/osmo-mobile-se) for more information.
Firmware Update
Use DJI Mimo to update the Osmo Mobile SE firmware. It takes approximately three minutes to complete an update.
How to Update
Before starting an update, make sure that the battery level indicator shows green or yellow. Connect Osmo Mobile SE to your mobile device and launch DJI Mimo. You will be prompted if a new firmware update is available. To start updating, connect the mobile device to the internet and follow the on-screen instructions.
Do not exit DJI Mimo while updating the firmware. Pay attention to on-screen prompts. The system status indicator will blink green and red alternatively and become solid green once the firmware update has completed successfully.
If an update is unsuccessful, restart DJI Mimo, reconnect the Bluetooth, and retry.
Storage
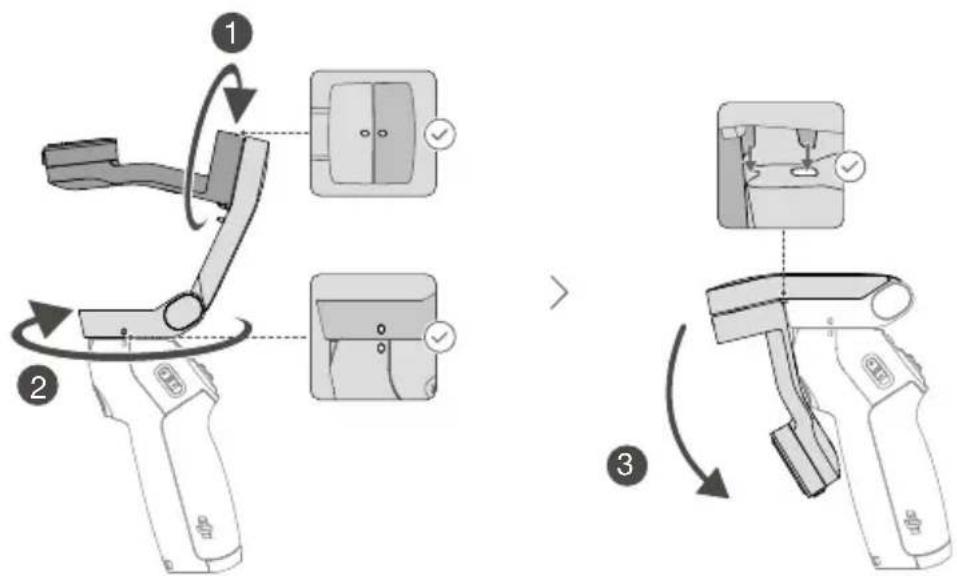
Osmo Mobile SE is designed to be folded for easier storage and transportation. Make sure to fold the Osmo Mobile SE after powering off. Rotate the tilt and pan axis as shown and fold the gimbal.
Specifications
| General | |
| Gimbal Dimensions | Unfolded: 262.5×119.5×104 mm (L×W×H)Folded: 167×108.5×46.5 mm (L×W×H) |
| Weight | Gimbal: Approx. 352 gMagnetic Phone Clamp: Approx. 31 g |
| Compatible Phone Weight 170-290 g | |
| Compatible Phone Thickness 6.9-10 mm | |
| Compatible Phone Width 67-84 mm | |
| Battery | |
| Type 18650 Li-ion | |
| Chemical System LiNiMnCoO2 | |
| Capacity 2600 mAh | |
| Energy 9.36 Wh | |
| Voltage 2.75-4.2 V | |
| Charging Temperature 5° to 40°C (41° to 104°F) | |
| Operating Temperature 0° to 40°C (32° to 104°F) | |
| Operating Time | Approx. 8 hours (under ideal conditions with the gimbal fully balanced) |
| Charging Time | Approx. 2 hours and 12 minutes (measured with a 10W USB-C charger) |
| Gimbal Charging Port USB-C | |
| Power Output Port N/A | |
| Bottom Port 1/4"-20 Screw Hole | |
| Gimbal | |
| Power Consumption 1 W (under ideal conditions with the gimbal fully balanced) | |
| Controllable Range | Pan: -115° to 115°Roll: -85° to 160°Tilt: -43° to 53° |
| Mechanical Range | Pan: -161.2° to 171.95°Roll: -136.7° to 198°Tilt: -106.54° to 235.5° |
| Max Control Speed 120°/s | |
| Wireless Mode | |
| Model Bluetooth 5.1 | |
| Other | |
| App | DJI Mimo |
| Grip Tripod | |
| Dimensions | Length: 138 mmDiameter: 32 mm |
| Weight | Approx. 72 g |
WE ARE HERE FOR YOU
Contact
DJI SUPPORT

https://www.dji.com/osmo-mobile-se/downloads
If you have any questions about this document, please contact DJI by sending a message to DocSupport@dji.com.
Copyright © 2022 DJI All Rights Reserved.
- SEARCHING FOR KEYWORDS
- NAVIGATING TO A TOPIC
- PRINTING THIS DOCUMENT
- USING THIS MANUAL
- LEGEND
- BEFORE USE
- DOWNLOADING THE DJI MIMO APP
- CONTENTS
- INTRODUCTION
- GETTING STARTED
- USING OSMO MOBILE SE
- DJI MIMO APP
- FIRMWARE UPDATE
- STORAGE
- SPECIFICATIONS
- OVERVIEW
- CHARGING
- ATTACHING THE PHONE
- MAGNETIC PHONE CLAMP TIPS
- ON-BOARD FEATURES
- STATUS PANEL
- BLINKING PATTERN DESCRIPTIONS
- BLINKING PATTERN: BATTERY LEVEL
- GIMBAL MODE
- M BUTTON
- WHEN POWERED OFF
- WHEN POWERED ON
- ZOOM SLIDER
- JOYSTICK
- SHUTTER/RECORD BUTTON
- SWITCH BUTTON
- TRIGGER
- CHARGING PORT (USB-C)
- UNC PORT
- M3×0.5 SCREW HOLE
- COMBINATION OPERATION
- OPERATING MODE
- UPRIGHT MODE
- UNDERSLUNG MODE
- SIDE GRIP MODE
- LOW POSITION MODE
- CONNECTING TO THE DJI MIMO APP
- HOME
- SHOTGUIDES
- ACTIVETRACK SELECT BOX
- GIMBAL BATTERY LEVEL
- MOBILE PHONE BATTERY LEVEL
- FLASH
- FRONT/REAR CAMERA SWITCH
- SHOOTING MODES
- GESTURE CONTROL SWITCH
- PLAYBACK
- ZOOM
- SHOOTING PARAMETERS
- SETTINGS
- CAMERA SETTINGS
- GIMBAL SETTINGS
- GENERAL SETTINGS
- SHOOTING PARAMETERS SETTINGS
- HOW TO UPDATE
Brand : DJI
Model : Osmo Mobile SE
Category : Tripod