RCPRT-2D7DR390 - Workbench Royal Catering - Free user manual and instructions
Find the device manual for free RCPRT-2D7DR390 Royal Catering in PDF.


| Product type | Professional kitchen workbench |
| Brand | Royal Catering |
| Model | RCPRT-2D7DR390 |
| Main material | Stainless steel 18/10 |
| Dimensions (L x D x H) | 150 cm x 70 cm x 90 cm |
| Worktop thickness | 1.5 mm |
| Net weight | 45 kg |
| Maximum load capacity | 200 kg |
| Number of shelves | 1 lower shelf |
| Adjustable height | No (fixed height) |
| Power supply | None (non-electric appliance) |
| Main functions | Worktop for food preparation, storage |
| Maintenance and cleaning | Clean with a damp cloth and mild detergent, dry |
| Safety | Rounded edges, reinforced stability |
| Spare parts and repairability | Adjustable feet, removable shelf, fixing screws |
| General information | Intensive professional use, hygienic material |
Frequently Asked Questions - RCPRT-2D7DR390 Royal Catering
User questions about RCPRT-2D7DR390 Royal Catering
0 question about this device. Answer the ones you know or ask your own.
Ask a new question about this device
Download the instructions for your Workbench in PDF format for free! Find your manual RCPRT-2D7DR390 - Royal Catering and take your electronic device back in hand. On this page are published all the documents necessary for the use of your device. RCPRT-2D7DR390 by Royal Catering.
USER MANUAL RCPRT-2D7DR390 Royal Catering
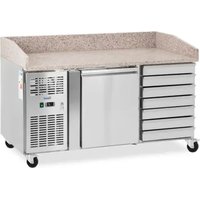
PIZZA COOLING TABLE WITH DRAWERS AND DOOR

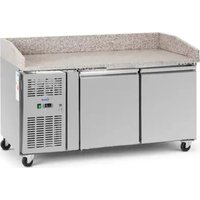
| DE | Produktname Pizzakühltisch mit 2 Türen | |
| Pizzakühltisch mit 7 Schubladen und 1 TürPizza refrigerated table with 3 doorsPizzakühltisch mit 7 Schubladen und 2 Türen | ||
| EN | Product name Pizza refrigerated table with 2 doors | Pizza cooling table with 7 drawers and 1 doorPizza refrigerated table with 3 doorsPizza cooling table with 7 drawers and 2 doors |
| PL | Nazwa produktu | Stół chłodniczy do pizzy z 2 drzwiamiStół chłodniczy do pizzy z 7 szufladami i 1 drzwiamiStół chłodniczy do pizzy z 3 drzwiamiStół chłodniczy do pizzy z 7 szufladami i 2 drzwiami |
| CZ | Název výrobku | Chladící stůl na pizzu se 2 dveřmiChladící stůl na pizzu se 7 zásuvkami a 1 dvířkyChladící stůl na pizzu se 3 dveřmiChladící stůl na pizzu se 7 zásuvkami a 2 dvířky |
| FR | Nom du produit Table réfrigérée pour pizza avec 2 portes | Table réfrigérée à pizza avec 7 tiroirs et 1 porteTable réfrigérée pour pizza avec 3 portesTable réfrigérée pour pizza avec 7 tiroirs et 2 portes |
| IT | Nome del prodotto Tavolo refrigerato per pizza con 2 porte | Tavolo raffredda pizza con 7 cassetti e 1 portaTavolo refrigerato per pizza con 3 porteTavolo raffredda pizza con 7 cassetti e 2 ante |
| ES | Nombre del producto | Mesa refrigerada para pizza con 2 puertasMesa de enfriamiento para pizza con 7 cajones y 1 puertaMesa refrigerada para pizza con 3 puertasMesa de enfriamiento para pizza con 7 cajones y 2 puertas |
| HU | Termék neve | Pizza hűtőasztal 2 ajtóvalPizza hűtőasztal 7 fiókkal és 1 ajtóvalPizza hűtőasztal 3 ajtóvalPizza hűtőasztal 7 fiókkal és 2 ajtóval |
| DA | Produktnavn Pizza-kølebord med 2 døre | Pizzakølebord med 7 skuffer og 1 lågePizza-kølebord med 3 dørePizzakølebord med 7 skuffer og 2 låger |
| FI | Tuotteen nimi Pizza-jäähdytyspöytä 2 ovella | Pizzan jäähdytyspöytä, jossa 7 laatikkoa ja 1 oviPizza-jäähdytyspöytä 3 ovellaPizzan jäähdytyspöytä 7 laatikolla ja 2 ovella |
| NL | Productnaam | Pizzakoelkast met 2 deurenPizzakoeltafel met 7 lades en 1 deurPizzakoelkast met 3 deurenPizzakoeltafel met 7 lades en 2 deuren |
| NO | Produktnavn Pizza kjølebord med 2 dører | Pizza kjølebord med 7 skuffer og 1 dørPizza kjølebord med 3 dørerPizza kjølebord med 7 skuffer og 2 dører |
| SE | Produktnamn Pizza kylbord med 2 dörrar | Pizzakylbord med 7 lådor och 1 luckaPizza kylbord med 3 dörrarPizzakylbord med 7 lådor och 2 luckor |
| PT | Nome do produto | Mesa refrigerada para pizza com 2 portasMesa de resfriamento para pizza com 7 gavetas e 1 portaMesa refrigerada para pizza com 3 portasMesa de resfriamento para pizza com 7 gavetas e 2 portas |
| SK | Názov produktu Chladiaci stôl na pizzu s 2 dverami | Chladiaci stôl na pizzu so 7 zásuvkami a 1 dvierkamiChladiaci stôl na pizzu s 3 dveramiChladiaci stôl na pizzu so 7 zásuvkami a 2 dvierkami |
| BG | Име на продукта | Хладилна маса за пица с 2 вратиОхладителна маса за пица със 7 чекмеджета и 1 вратаХладилна маса за пица с 3 вратиОхладителна маса за пица със 7 чекмеджета и 2 врати |
| EL | Όνομα προϊόντος | Трапέζι ψυγείο για πίτσα με 2 πόρτεςТрапέζι ψύξης πίτσας με 7 συρτάρια και 1 πόρταТрапέζι ψυγείο για πίτσα με 3 πόρτεςТрапέζι ψύξης πίτσας με 7 συρτάρια και 2 πόρτες |
| HR Naziv proizvoda Pizza rashladni stol sa 2 | vrataStol za hlađenje pizze sa 7 ladica i 1 vratimaPizza rashladni stol sa 3 vrataStol za hlađenje pizze sa 7 ladica i 2 vrata | |
| LT Produkto pavadinimas Picos šaldymo stalas su 2 durimisPicos šaldymo stalas su 7 stalčiais ir 1 durelėmisPicos šaldymo stalas su 3 durimisPicos šaldymo stalas su 7 stalčiais ir 2 durelėmis | ||
| RO Numele produsului Masa frigorifica pizza cu 2 usiMasa de racire pizza cu 7 sertare si 1 usaMasa frigorifica pizza cu 3 usiMasa de racire pizza cu 7 sertare si 2 usi | ||
| SL Ime izdelka Pizza hladilna miza z 2 vrati | Hladilna miza za pico s 7 predali in 1 vratiPizza hladilna miza s 3 vratiHladilna miza za pico s 7 predali in 2 vrati | |
| DE Modell | EN Product model |PL Model produktu |CZ Model výrobku | FR Modèle |IT Modello | ES Modelo | HU Modell |DA Model | FI Tuotteen malli |NL Productmodel | NO Produktmodell |SE Produktmodell | PT Modelo do produto| SK Model | BG Модел на продукт |EL Movtéλo προϊόντος | HR Modelproizvoda | LT: Gaminio modelis | RO:Model de produs | SL: Model izdelka | RCPRT-2D390RCPRT-1D7DR390RCPRT-3D390RCPRT-2D7DR390 | |
| DE Hersteller | EN Manufacturer |PL Producent | CZ Výrobce |FR Fabricant | IT Produttore |ES Fabricante | HU Termelő |DA Producent | FI Valmistaja |NL Producent | NO Produsent |SE Tillverkare | PT Fabricante |SK Výrobca | BG Производител |EL Κατασκευαστής | HR Proizvođač |LT Gamintojas | RO Producător |SL Proizvajalec | expondo Polska sp. z o.o. sp. k. | |
| DE Anschrift des Herstellers |EN Manufacturer Address | PL Adresproducenta | CZ Adresa výrobce |FR Adresse du fabricant | IT Indirizzo delproduttore | ES Dirección del fabricante |HU A gyártó címe | DA Producentensadresse | FI Valmistajan osoite |NL Adres producent | NO Produsentensadresse | SE Tillverkarens adress |PT Endereço do fabricante | SK Adresavýrobcu | BG Адрес на производителя |EL: Διεύθυνοη κατασκευαστή | HR Adresaproizvođača | LT Gamintojo adresas |RO Adresa producătorului | SL Naslovproizvajalca | ul. Nowy Kisielin – Innowacyjna 7, 66-002 Zielona Góra | Poland, EU | |

A- Power plug
B- Power switch
This User Manual has been translated using machine translation. We have made every effort to ensure the translation is accurate, but please note that automated translations are not perfect and are not meant to replace human translators. The official version of the User Manual is in English. Any differences between the translated version and the original English are not legally binding. If you have any questions about the accuracy of the translation, please refer to the English version, which is the official reference. More language versions are available upon request via info@expondo.com.
Technical data
| Parameter description Parameter value | ||||
| Product name | Pizza refrigerated table with 2 doors | Pizza cooling table with 7 drawers and 1 door | Pizza refrigerated table with 3 doors | Pizza cooling table with 7 drawers and 2 doors |
| Model | RCPRT-2D390 | RCPRT-1D7DR390 | RCPRT-3D390 | RCPRT-2D7DR390 |
| Rated voltage [V~] / frequency [Hz] | 230 / 50 | |||
| Rated current | [A] | 1.27 | 1.27 | |
| Climate class 4 | ||||
| Insulation blowing gas Cyclopentane | ||||
| Refrigerant | R290/85g | R290/85g | ||
| Dimensions [length * width * height; mm] | 1505*800*1000 | 1540*820*1050 | 2015*800*1000 | 2020*800*1000 |
| Weight [kg] 203.4 270 263.6 295 | ||||
1.77
R290/105
Description
The product is designed to ensure fresh ingredients are readily available for quick preparation. It is ideal for use in restaurants, hotels, and food shops such as kebab and falafel establishments.
The user is liable for any damage resulting from unintended use of the device.
Installation
Installation instructions
- Unpack the appliance, ensuring that all protective plastic film and coatings are fully removed from all surfaces. To prevent injury or damage, two people should handle the unpacking and setup of the appliance.
- Maintain at least 20 cm (7 inches) of clearance between the appliance and nearby walls or objects for proper ventilation. Increase this distance if the object is a heat source.
- Level the appliance by adjusting the screw feet. It should be placed on a stable, level surface to minimize vibration and noise.
- The temperature where the appliance is located should be between 10°C and 32°C. Avoid placing it in direct sunlight or near heat sources such as ovens or radiators.
- Ensure the appliance is properly ventilated.
- Verify that the power supply and voltage at the installation site match the details on the rating label. The plug must remain accessible after installation.
- Correctly connect and disconnect the plug. Ensure the plug is securely inserted. When unplugging, hold the plug itself. Never pull the cord directly.
- If the appliance will be unused for an extended period, switch it off, disconnect it from the power source, clean it, and leave the door or lid open to prevent odours.
- Important: For your safety, the appliance must be properly grounded. It is equipped with a grounding wire and plug, which must be connected to a properly grounded outlet. If you are unsure about the grounding, consult a qualified electrician or service centre.
- If the power cord does not reach the nearest socket, either rearrange your setup or have a qualified electrician install a new socket.
- After a power outage, wait at least 3 minutes before restarting the appliance to avoid damaging the compressor.
- When storing food, each shelf should hold no more than 88 lbs (40 kg), and items should not extend over the front or rear edges of the shelf.
Fit the shelves/drawers
- Install a set of shelf guides on each side of the cabinet at the desired height.
- Slide the shelf or drawer into position.
- Repeat the process for the remaining shelves or drawers.

NOTICE!
- If the unit has been stored or transported in a non-upright position, allow it to stand upright for approximately 12 hours before operating. • Before the first use, clean the shelves and interior with soapy water. • These steps are crucial to ensure proper condensation drainage.
Operation
Basic instructions
To get the best results from your appliance, please follow these instructions:
- Only store food in the appliance once it has reached the correct operating temperature.
- Ensure GN container bays are always filled, even if the containers are empty or not in use. Empty bays will significantly reduce the appliance's efficiency.
- Always keep the door and lid closed when not in use.
- Do not place uncovered hot food or liquids inside the appliance.
- Wrap or cover food whenever possible.
- Do not block the internal fans of the appliance.
- Avoid keeping the doors open for extended periods.
- The maximum load capacity for each shelf is 40 kg.
- Food must be placed in a container before being put into the cabinet or on a shelf. Direct placement of food into the cabinet is not allowed.
- When wet food/vegetable is put in the appliance, it's normal that ice (snow) appears on the surface.
Turn on the appliance
- Close the appliance door(s).
- Ensure the power switch is in the [O] position, then turn on the socket.
- Switch the power to [i]. The current internal temperature of the appliance will be displayed.
- The thermostat on the control panel will flash for 3 minutes, indicating the anti-short cycle delay between the compressor stopping and restarting.
Open/close the lid/drawer

WARNING! The sliding lid does not have a locking mechanism. Always ensure the lid is in the half-open position before attempting to open it.
Temperature setting and control panel

1- Defrosting light
2- Compressor operation light
3- Digital thermostat
4- Programming key (not accessible to the user) Selection key
5- Temperature modification keys
See the set point
- Short press and release the SET key to display the set point.
- Short press and release the SET key again or wait approximately 5 seconds for the display to return to normal.
Change the set point
- Hold the SET key for more than 2 seconds to modify the set point value.
- The current set point value will be displayed, and the "C" symbol will start blinking.
- Use the UP or DOWN arrows within 10 seconds to adjust the value.
- Press the SET key again, or wait 10 seconds, to save the new set point value.
Defrost
This refrigerator requires manual defrosting at least once a month, as it does not have an automatic defrost function.
This freezer features an automatic defrost function, eliminating the need for manual defrosting. The system automatically removes frost every 6 hours.

NOTICE! The defrost cycle begins from the moment the appliance is first powered on.
Method to manually defrost the appliance:
- Press and hold the DEFROST button for 5 seconds.
- The defrost cycle will begin immediately, and the defrost LED will light up. The cycle will run for 20 minutes.

NOTICE! Initiating a manual defrost will reset the automatic defrost timer. The next automatic defrost occur 12 hours after the manual defrost cycle is completed.
Cleaning and maintenance
Routine maintenance
- Switch off and disconnect the appliance from the power supply before cleaning.
- Regularly clean both the exterior and interior of the appliance.
- Wipe the unit with a damp cloth. Ensure the switch, control panel, cable, and plug remain dry.
- Do not use abrasive cleaning products, as they may leave harmful residues. Use only mild soapy water.
- Clean the door seal with water only.
- Ensure no cleaning water enters the electrical components.
- Do not clean the appliance with a water jet.
- After cleaning, always dry the appliance using a soft cloth.
- Avoid allowing cleaning water to run through the drain hole into the evaporation pan.
- Exercise caution when cleaning the rear of the appliance.
- If repairs are needed, consult a qualified technician or service agent.
- If the appliance will be inactive for an extended period, turn the switch to the OFF position, unplug it, empty the refrigeration compartment, and clean thoroughly.
Special periodic maintenance

NOTICE! The following instructions are intended for SKILLED PERSONNEL.
- Periodically clean the condenser using appropriate tools, such as a vacuum cleaner or soft brushes.
- Ensure all electrical connections are secure and not loose.
- Check that the thermostat and sensor are functioning correctly.
- Periodically cleaning the condenser can help prolong the lifespan of the appliance.
- It is recommended that a qualified technician or agent perform the condenser cleaning.
- The key to the electrical cabinet should be kept out of reach of children and unauthorized users.
- Use the key only to unlock the cabinet.
Disposing of used devices
The packaging is designed to protect the appliance and its components during transport and is made from recyclable materials. Please return the packaging to an official collection point for recycling, rather than discarding it, to promote material reuse. Old appliances contain reusable materials and should not be disposed of with household or bulk waste.
Before discarding the appliance, make any locks unusable and, if possible, remove the door(s). If the appliance has spring-action or bolt catches, remove or disable them to prevent children from becoming trapped inside.
The refrigeration system contains gases and refrigerants that require special disposal methods. Ensure the refrigerant circuit is not damaged before disposal. By choosing environmentally responsible disposal methods, you contribute to environmental protection. Information about the refrigerant and insulation materials used can be found on the appliance's rating label.
For information on collection dates or disposal locations, contact local waste disposal authorities or your local council. The symbol on the product or packaging indicates that it must not be disposed of as household waste but should be taken to a designated recycling center for electrical and electronic equipment. Proper disposal helps prevent potential harm to the environment and human health due to improper waste handling.
For more details about recycling this product, contact your local city office, waste disposal service, or the retailer where the product was purchased.
Electrical diagram
Refrigerator

A- Power plug
B- Power switch
C- Temperature controller
D- Room
E- Supply 230V 50-60Hz
F- Condenser fan
G- Compressor
H- Evaporator fan
I- Overload protector
Freezer

A- Power plug
B- Power switch
G- Starting capacitor
H- Current relay
I- Compressor
J- Run capacitor
K- Fuse
L- Defrost heater
M- Defrost indicator
N- Fan comp
O- Supply 230V, 50-60Hz
P- Temperature controller
Q- Digital input
Troubleshooting
| Problem Possible cause Solution | ||
| The appliance is not working | 1. The unit is not switched on2. The plug and lead are damaged | 1. Check if the unit is plugged in correctly and switched on2. Call your agent or a qualified technician for an inspection |
| 3. The fuse in the plug has blown | 3. Replace the fuse (UK plug) | |
| 4. Power supply issues | 4. Check the power supply | |
| 5. Internal wiring fault | 5. Call your agent or a qualified technician for an inspection | |
| The appliance is on, but the temperature is too high/low | 1. Too much ice on the evaporator | 1. Defrost the appliance |
| 2. Condenser blocked with dust | 2. Call your agent or a qualified technician for an inspection | |
| 3. Doors are not shut properly | 3. Check the doors are shut, and the seals are not damaged | |
| 4. Appliance is located near a heat source or airflow to the condenser is being interrupted | 4. Move the refrigerator to a more suitable location | |
| 5. The ambient temperature is too high | 5. Increase ventilation or move the appliance to a cooler | |
| 6. Unsuitable foodstuffs are being stored in the appliance | 6. Remove any excessive hot foodstuffs or blockages to the fan | |
| 7. Appliance is overloaded | 7. Reduce the amount of food stored in the appliance | |
| The appliance produces an unusually high level of noise | 1. Loose nut/screw | 1. Check and tighten all nuts and screws |
| 2. The appliance has not been installed in a level or stable position | 2. Check the installation position and change it if necessary | |
| The appliance is leaking water | 1. The appliance is not properly leveled | 1. Adjust the screw feet to level the appliance (if applicable) |
| 2. The discharge outlet is blocked | 2. Clear the discharge outlet | |
| 3. The movement of water to the drain is obstructed | 3. Clear the floor of the appliance (if applicable) | |
| 4. The water container is damaged | 4. Call your agent or a qualified technician for an inspection | |
| 5. The drip tray is overflowing | 5. Empty the drip tray with a sponge | |

A- Power plug
B- Circuit breaker
C- Temperature control
D- Room
E- Power supply 230V 50-60Hz
F- Condenser fan
G- Compressor
H- Evaporator fan
I- Overload protection
Freezer

A- Power plug B- Power switch C- Circuit fan motor D- Condenser fan motor E- Heater F- Overload protection G- Start capacitor H- Current relay I- Compressor J- Run capacitor K- Fuse L- Defrost heater M- Defrost indicator N- Fan compressor O- Power supply 230V, 50-60Hz P- Temperature control Q- Digital input
Troubleshooting
A- Power plug
B- Power switch
A- Plug B- Power connection C- Temperature controller D- Chamber E- Power supply 230V 50-60Hz F- Condenser fan G- Compressor H- Evaporator fan I- Overload protection
Freezer

A- Plug
A- Power plug
B- Power switch
C- Temperature regulator
D- Room
E- Supply 230V 50-60Hz
F- Condenser fan
G- Compressor
H- Evaporator fan
I- Overload protector
Freezer box

A- Power plug
B- Power switch
C- Circulating fan motor
D- Condenser fan motor
E- Heater
F- Overload protector
G- Start capacitor
H- Current relay
I- Compressor
J- Run capacitor
K- Fuse
L- Defrost heater
M- Defrost indicator
N- Fan capacitor
O- Supply 230V, 50-60Hz
P- Temperature controller
Q- Digital input
A- Power connector
B- Power switch
C- Temperature controller
D- Room
E- Supply 230V 50-60Hz
F- Condenser fan
G- Compressor
H- Evaporator fan
A- Power plug
B- Power switch
P- Temperature regulator
Q- Air inlet
Troubleshooting
Fit the shelves/drawers
A- Power plug
A- Power plug
A- Power plug
A- Power plug
A- Power plug
C- Temperature regulator
D- Room
E- Power supply 230V 50-60Hz
F- Condenser fan
G- Compressor
H- Evaporator fan
P- Temperature controller
Q- Digital input
Troubleshooting
| Problem | Mogući uzrok | Otopina |
| Aparat ne radi | 1. Jedinica nije uključena | 1. Provjerite je li jedinica ispravno priključena i uključena |
| 2. Utikač i kabel su oštećeni | 2. Nazovite svog agenta ili kvalificiranog tehničara za pregled | |
| 3. Pregorio je osigurač u utikaču | 3. Zamijenite osigurač (UK utikač) | |
| 4. Problemi s napajanjem | 4. Provjerite napajanje | |
| 5. Unutarnji kvar ožičenja | 5. Nazovite svog agenta ili kvalificiranog tehničara za pregled | |
| Aparat je uključen, ali je temperatura previsoka/niska | 1. Previše leda na isparivaču | 1. Odmrznite uređaj |
| 2. Kondenzator začepljen prašinom | 2. Nazovite svog agenta ili kvalificiranog tehničara za pregled | |
| 3. Vrata nisu dobro zatvorena | 3. Provjerite jesu li vrata zatvorena i jesu li brtve oštećene | |
| 4. Uređaj se nalazi u blizini izvora topline ili je protok zraka u kondenzatoru prekinut | 4. Premjestite hladnjak na prikladnije mjesto | |
| 5. Temperatura okoline je previsoka | 5. Pojačajte ventilaciju ili premjestite uređaj u hladnjak | |
| 6. U uređaju se nalaze neprikladne namirnice | 6. Uklonite sve prevruće namirnice ili začepljenja ventilatora | |
| 7. Aparat je preopterećen | 7. Smanjite količinu hrane pohranjene u uređaju | |
| Uređaj proizvodi neobično visoku razinu buke | 1. Olabavljena matica/vijak | 1. Provjerite i zategnite sve matice i vijke |
| 2. Uređaj nije instaliran u ravnom ili stabilnom položaju | 2. Provjerite položaj ugradnje i promijenite ga ako je potrebno | |
| Iz uređaja curi voda | 1. Uređaj nije pravilno niveliran | 1. Podesite nožice za vijke kako biste poravnali uređaj (ako postoji) |
| 2. Ispusni otvor je blokiran | 2. Očistite izlaz za pražnjenje | |
| 3. Kretanje vode do odvoda je ometeno | 3. Očistite pod uređaja (ako postoji) | |
| 4. Spremnik za vodu je oštećen | 4. Nazovite svog agenta ili kvalificiranog tehničara za pregled | |
| 5. Posuda za kapanje je prepuna | 5. Spužvom ispraznite posudu za sakupljanje tekućine |

A- Power plug B- Power switch C- Temperature controller D- Chamber E- Power supply 230V 50-60Hz F- Condenser fan G- Compressor H- Evaporator fan I- Overload protector
Freezer

A- Power plug
B- Power switch
C- Temperature controller
D- Room
E- Power supply 230V 50-60Hz
F- Condenser fan
G- Compressor
H- Evaporator fan
A- Power plug
B- Power switch
P- Temperature controller
Q- Digital input
Troubleshooting
For the disposal of the device, please consider and act according to the national and local rules and regulations.
CONTACT
expondo Polska sp. z o.o. sp. k.


Brand : Royal Catering
Model : RCPRT-2D7DR390
Category : Workbench