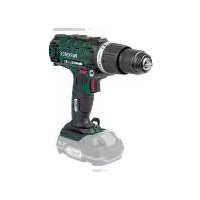
PSBSA 20-Li C33 - Cordless drill driver PARKSIDE - Free user manual and instructions
Find the device manual for free PSBSA 20-Li C33 PARKSIDE in PDF.


| Product Type | Cordless Drill Driver |
| Brand | Parkside |
| Model | PSBSA 20-Li C33 |
| Battery Voltage | 20 V (Li-Ion) |
| Chuck Type | Keyless, 1/4" hex (approx.) |
| Max Torque | 30 Nm (approx.) |
| Speed Settings | 2-speed gearbox |
| No-Load Speed | 0-450 / 0-1500 rpm (approx.) |
| Drilling Capacity (Steel) | 10 mm (approx.) |
| Drilling Capacity (Wood) | 25 mm (approx.) |
| Screwdriving Capacity | Up to 6 mm screws (approx.) |
| Weight (with battery) | 1.2 kg (approx.) |
| Dimensions (LxWxH) | 200 x 65 x 200 mm (approx.) |
| Power Supply | Battery: 20 V Li-Ion, 2.0 Ah (typical) |
| Charger | Compatible with Parkside X20V series charger |
| Main Functions | Drilling, screwdriving, variable speed, forward/reverse, LED light |
| Maintenance | Clean with dry cloth; keep ventilation slots free; check chuck regularly |
| Safety Features | Overload protection, lock-on button, safety switch |
| Spare Parts | Chuck, battery, charger, carbon brushes available from Parkside service |
| Repairability | User-replaceable brushes; other repairs by authorized service |
| General Information | Part of Parkside X20V family; compatible with other X20V tools |
Frequently Asked Questions - PSBSA 20-Li C33 PARKSIDE
User questions about PSBSA 20-Li C33 PARKSIDE
0 question about this device. Answer the ones you know or ask your own.
Ask a new question about this device
Download the instructions for your Cordless drill driver in PDF format for free! Find your manual PSBSA 20-Li C33 - PARKSIDE and take your electronic device back in hand. On this page are published all the documents necessary for the use of your device. PSBSA 20-Li C33 by PARKSIDE.
USER MANUAL PSBSA 20-Li C33 PARKSIDE


3-in-1 Cordless Impact Driver 20V PSBSA 20-Li C3
GB CY
Translation of the original instructions
RS
3 u 1 aku udarna bušilica- odvijač 20 V
Before reading, unfold the page containing the illustrations and familiarise yourself with all functions of the device.
HR
Prije nego što pročitate tekst, otvorite stranicu sa slikama i upoznajte se na osnovu toga sa svim funkcijama uređaja.
RS
Intended purpose......4
General description......5
Extent of the delivery 5
Functional description......5
Overview....5
Technical data....5
Safety instructions......6
Symbols and icons 6
General Safety Directions for Power Tools....7
Safety information for drilling machines ....10
Residual risks....10
Operation 10
Checking the battery charge level....11
Recharging the battery......11
Inserting / removing the device's battery pack....11
Choice of gear 11
Set the direction of rotation .....11
Torque setting....12
Tool change 12
Mounting the additional handle .....12
Switching on/off 12
Cleaning and maintenance......13
Cleaning....13
Maintenance 13
Storage....13
Disposal and protection of the environment ....13
Replacement parts/accessories...14
Guarantee 14
Repair Service....15
Service-Center....15
Importer 15
Translation of the original EC declaration of conformity .....98
Exploded drawing ......105
Introduction
Congratulations on the purchase of your new device. With it, you have chosen a high quality product.
During production, this equipment has been checked for quality and subjected to a final inspection. The functionality of your equipment is therefore guaranteed.

The operating instructions constitute part of this product. They contain important information on safety, use and disposal. Before using the product, familiarise yourself with all of the operating and safety instructions. Use the product only as described and for the applications specified.
Keep this manual safely and in the event that the product is passed on, hand over all documents to the third party.
Intended purpose
The tool is intended for tightening and releasing screws and for drilling holes in wood, metal or plastic and for drilling walls.
Any other use that is not explicitly approved in these instructions may result in damage to the equipment and represent a serious danger to the user.
The user or operator is responsible for accidents causing injury to other people or damage to property.
This equipment is not suitable for commercial use. Commercial use will invalidate the guarantee.
The device is part of the Parkside X 20 V TEAM series and can be operated using Parkside X 20 V TEAM series batteries. The batteries may only be charged using chargers from the Parkside X 20 V TEAM series.
General description

An illustration of the most important functional components can be found on the fold-out page.
Extent of the delivery
Carefully unpack the appliance and check that it is complete:
- 3-in-1 Cordless Impact Drill
- 2 Bits (PZ1 + PZ2, 50 mm)
- 1 Auxiliary handle
- 1 Storage case
- Instruction Manual

Battery and charger are not included.

Observe the safety information and notes on charging and proper use as shown in the instruction manual for your battery and charger from the Parkside X 20 V Team series. A detailed description of the charging process and further information can be found in the separate operating instructions.
Functional description
The 3-in-1 cordless Impact Drill screwdriver with two-speed gearbox has 20 torque settings, as well as one drill setting and one impact setting, right/left rotation. The tool is equipped with a keyless chuck and an LED work light.
Please refer to the descriptions below for information on how the operating elements work.
Overview
1 Drill chuck aperture
2 Keyless drill chuck
3 Torque adjustment ring
4 Speed selector
5 Bit holder
6 Direction of rotation switch
7 LED working light
8 On/off switch
9 Thread
10 Screw bits
11 Additional handle 12 Charger 13 Battery
14 Soft button
15 Battery Indicator
16 Battery release button
17 Storage case
18 Metal clip
Technical data
3-in-1 Cordless
Impact Drill ......PSBSA 20-Li C3
Motor voltage U ....20 V==
Idling speed n0
1st gear 0-440 min -1
2nd gear 0-1650 min -1
Maximum torque....45 Nm
Span-chuck 1.5-13 mm
Impact function .....26400 strikes/minute
Weight (without battery/charger) .. 1.45 kg Drilling capacity
for wood......max. 30 mm
for steel .... max. 13 mm
Drill diameter for brick.....max. 15 mm
max. screw diameter 10 mm
Protection category......IPXO
Temperature.....max. 50 °C
Charging process....4 - 40 °C
Operation....-20 - 50 °C
Storage....0 - 45 °C
GBCY
Sound pressure level ( LpA )
Idle .... 73.1 dB(A), KpA = 5 dB
Impact drilling .... 96.8 dB(A), KpA = 5 dB
Sound power level ( LWA )
Idle .... 84.1 dB(A); KWA = 5 dB
Impact drilling . 107.8 dB(A); KWA = 5 dB
Vibration ( ah )
Idle .... 2.71 m/s²; K= 1.5 m/s²
Impact drilling 10.24 m/s²; K= 1.5 m/s²
Noise and vibration values have been determined according to the standards and regulations mentioned in the declaration of conformity.
The stated vibration emission value was measured in accordance with a standard testing procedure and may be used to compare one power tool to another. The stated vibration emission value may also be used for a preliminary exposure assessment.

Warning: The vibration emission value may differ during actual use of the power tool from the stated value depending on the manner in which the power tool is used.
Try to keep the exposure to vibrations as low as possible.
An example of how to reduce vibration exposure is limiting the working hours. For this purpose all parts of the operating cycle have to be considered (for example, times when the electric tool is switched off and times when it is switched on but running without any load).

Attention! An up-to-date list of battery compatibility can be found at: www.lidl.de/akku
The device is part of the Parkside X 20 V TEAM series and can be operated with batteries of the Parkside X 20 V TEAM series.
Batteries of the Parkside X 20 V TEAM series may only be charged using chargers of the Parkside X 20 V TEAM series.
We recommend that you operate this appliance with the following batteries only: PAP 20 A1, PAP 20 A3.
We recommend charging these batteries with the following chargers:PLG 20 A1, PLG 20 A3, PDSLG 20 A1.
| Charging time (Min.) | PLG 20 A1 | PLG 20 A3PDSLG 20 A1 |
| PAP 20 A1 | 60 30 | |
| PAP 20 A3 | 120 60 |
Safety instructions
Ensure that the safety instructions are observed when operating the appliance.
Symbols and icons
Symbols on the appliance:

Carefully read these operating instructions.

Screwing
Drilling
Impact drilling

Electrical appliances must not be disposed of with the domestic waste.

This device is part of the Parkside X 20 V TEAM series
Symbols in the manual

Warning symbols with in- formation on damage and injury prevention.

Instruction symbols with information on preventing damage.

Help symbols with information on improving tool handling.
General Safety Directions for Power Tools

WARNING! Read all safety notices, instructions, illustrations and technical data that have been provided with this power tool. Omissions in the compliance with safety directions and instructions can cause electrical shock, fire and/or severe injuries.
Retain all safety directions and instructions for future use.
The term „power tool“ in the warnings refers to your mains-operated (corded) power tool or battery-operated (cordless) power tool).
1) WORK AREA SAFETY
a) Keep work area clean and well lit. Cluttered or dark areas invite accidents.
b) Do not operate power tools in explosive atmospheres, such as in the presence of fl ammable liquids, gases or dust. Power tools create sparks which may ignite the dust or fumes.
c) Keep children and bystanders away while operating a power tool. Distractions can cause you to lose control.
2) ELECTRICAL SAFETY
a) Power tool plugs must match the outlet. Never modify the plug in any way. Do not use any adapter plugs with earthed (grounded) power tools. Unmodified plugs and matching outlets will reduce risk of electric shock.
b) Avoid body contact with earthed or grounded surfaces, such as pipes, radiators, ranges and refrigerators. There is an increased risk of electric shock if your body is earthed or grounded.
c) Do not expose power tools to rain or wet conditions. Water entering a power tool will increase the risk of electric shock.
d) Do not abuse the cord. Never use the cord for carrying, pulling or unplugging the power tool. Keep cord away from heat, oil, sharp edges or moving parts. Damaged or entangled cords increase the risk of electric shock.
e) When operating a power tool outdoors, use an extension cord suitable for outdoor use. Use of a cord suitable for outdoor use reduces the risk of electric shock.
f) If operation of the power tool in a damp environment is unavoidable, please use a residual current circuitry. The use of a residual current circuitry reduces the risk of an electric shock.
3) PERSONAL SAFETY
a) Stay alert, watch what you are doing and use common sense when operating a power tool. Do not use a power tool while you are tired or under the influence of drugs, alcohol or medication. A moment of inattention white operating power tools may result in serious personal injury.
b) Use personal protective equipment. Always wear eye protection. Protective equipment such as dust mask, non-skid safety shoes, hard hat, or hearing protection used for appropriate conditions will reduce personal injuries.
c) Prevent unintentional starting. Ensure the switch is in the off-position before connecting to power source and/or battery pack, picking up or carrying the tool. Carrying power tools with your finger on the switch or energising power tools that have the switch on invites accidents.
d) Remove any adjusting key or wrench before turning the power tool on. A wrench or a key left attached to a rotating part of the power tool may result in personal injury.
e) Do not overreach. Keep proper footing and balance at all times. This enables better control of the power tool in unexpected situations.
f) Dress properly. Do not wear loose clothing or jewellery. Keep your hair, clothing and gloves away from moving parts. Loose clothes, jewellery or long hair can be caught in moving parts.
g) If dust extraction and collection devices can be installed, make sure that these are connected and used correctly. Use of dust collection can reduce dust-related hazards.
h) Do not allow yourself to be lulled into a false sense of security and do not disregard the safety rules for power tools, even if you are familiar with the power tool after using it many times. Careless action can lead to serious injuries within a fraction of a second.
4) POWER TOOL USE AND CARE
a) Do not force the power tool. Use the correct power tool for your application. The correct power tool will do the job better and safer at the rate for which it was designed.
b) Do not use the power tool if the switch does not turn it on and off. Any power tool that cannot be controlled with the switch is dangerous and must be repaired.
c) Remove the plug from the wall socket and/or remove the rechargeable battery before you change the device's settings, change accessory parts or put away the power tool. Such preventive safety measures reduce the risk of starting the power tool accidentally.
d) Store idle power tools out of the reach of children and do not allow persons unfamiliar with the power tool or these instructions to operate the power tool. Power tools are dangerous in the hands of untrained users.
e) Look after the power tool and application tool carefully. Check for misalignment or binding of moving parts, breakage of parts and any other condition that may affect the power tool's operation. If damaged, have the power tool repaired before use. Many accidents are caused by poorly maintained power tools.
f) Keep cutting tools sharp and clean. Properly maintained cutting tools with sharp cutting edges are less likely to bind and are easier to control.
g) Use the power tool, accessories and tool bits etc. in accordance with these instructions, taking into account the working conditions and the work to be performed. Use of the power tool for operations different from those intended could result in a hazardous situation.
h) Keep handles and grip surfaces dry, clean and free from oil and grease. Slippery handles and grip surfaces do not permit safe operation and control over the power tool in unexpected situations.
5) CAREFUL HANDLING AND USE OF BATTERY DEVICES
a) Charge the batteries only in chargers that are recommended by the manufacturer. Risk of fire if a charger that is suitable for a specific type of battery is used with other batteries.
b) In the power tools, use only the batteries designed for the purpose. The use of other batteries may result in injuries and risk of fire.
c) Keep the unused battery away
from paper clips, coins, keys, nails, screws and other small metal objects, which could cause bridging of the contacts.
A short circuit between the battery contacts may cause burns or fi re.
d) If used incorrectly, liquid may leak from the battery. Avoid contact with this. In the event of accidental contact, rinse off with water. If the liquid gets into eyes, seek medical assistance. Leaking battery fluid may cause skin irritations or burns.
e) Do not use damaged or altered batteries. Damaged or altered batteries can be unpredictable and lead to fi re, explosion or risk of injury.
f) Do not expose batteries to fi re or elevated temperatures. Fire or temperatures over 130 °C can cause an explosion.
g) Follow all instructions for charging and never charge the battery or the battery-powered tool outside the temperature range stated in the operating instructions. Incorrect charging or charging outside the permitted temperature range may destroy the battery and increase the risk of fi re.
6) SERVICE
a) Have your power tool serviced by a qualified repair person using only identical replacement parts. This will ensure that the safety of the power tool is maintained.
b) Never repair damaged batteries. All battery repairs should be carried out by the manufacturer or authorised customer service centres only.
Safety information for drilling machines
1) SAFETY INSTRUCTIONS FOR ALL WORK
a) Wear ear protection when impact drilling. Exposure to noise can cause hearing loss.
b) Use the additional handle(s).
Loss of control can result in injuries.
c) Hold the electric tool by the insulated handle surfaces when performing work where the insert tool or screws may come into contact with hidden wiring.
Contact with a live wire can also cause a charge in metal parts of the tool and result in an electric shock.
2) SAFETY INFORMATION FOR USING LONG DRILLS
a) Do not work at a speed higher than the maximum permissible speed for the drill. Higher speeds can cause the drill to bend slightly when rotating freely without contact with the workpiece and can also cause injury.
b) Always begin drilling at a low speed and when the drill is in contact with the workpiece. Higher speeds can cause the drill to bend slightly when rotating freely without contact with the workpiece and can also cause injury.
c) Do not apply excessive pressure to the drill. Only apply pressure lengthwise along the drill. Drills can bend and break or cause a loss in control, thus resulting in injuries.
3) ADDITIONAL SAFETY INSTRUCTIONS
a) Do not use any accessories that are not recommended by PARKSIDE. This can result in electric shock or fire.
Residual risks
Even if properly operating and handling this electric tool, some residual risks will remain. Due to its construction and build, this electric tool may present the following hazards:
a) Cuts b) Ear damage if working without ear protection.
c) Damage to your health caused by swinging your hands and arms when operating the appliance for longer periods of time or if the unit is not held or maintained properly.

Warning! During operation, this electric tool generates an electromagnetic fi eld which, under certain circumstances, may impair the functionality of active or passive medical implants. To reduce the risk of serious or lethal injuries, we recommend that persons with medical implants consult their doctor and the manufacturer of their medical implant before operating the machine.
Operation

Remove the battery from the device to prevent accidental operation. Risk of injury!

Ensure that the ambient temperature does not exceed 50°C or fall below -20°C during work.

Checking the battery charge level
The battery's (13) charge level is indicated by the charge state indicator (15).
The LEDs indicate the battery's charge level, when the device is in operation. To do this, press the softkey (14) of the charge level indicator.
red-yellow-green => Battery fully charged red and yellow => Battery half charged red => Battery needs
to be charged

Recharging the battery

Allow a hot battery to cool before charging.

Only charge the battery (13) when the red LED on the charge status indicator (15) is on.
-
Remove the battery (13) from the appliance, as necessary (see „Removing/inserting the battery“).
-
Insert the battery (13) in the charging compartment of the battery charger (12).
-
Plug the battery charger (12) into a mains outlet.
-
Once charging is complete, disconnect the charger (12) from the mains supply.
-
Remove the battery (13) from the charger (12).
Overview of the control display on the charger (12):
Green LED lights up without battery inserted: Charger ready.
Green LED lights up:
Battery such alleged charged.
Red LED lights up: Battery charging.
Red LED fl ashes: Battery overheated
Red + green LEDs flash:
Defective battery
Inserting / removing the device's battery pack
Inserting the battery pack:
-
Move the rotation direction switch (6) onto its middle setting (lock).
-
Slide the foot of the device onto the battery pack (13) until it clicks into place.
Removing the battery pack:
- Push the release button (16) and pull the battery pack (13) out towards the front of the device.

Choice of gear
Slide the gear selector (4) to 1 or 2, corresponding to a low or high torque selection.
1st gear 0-440 min -1
2nd gear 0-1650 min -1

A gear change may only be performed in standstill mode!

Set the direction of rotation
You can select the direction of rotation with the direction switch (clockwise and
GBCY
anticlockwise direction) and secure the device against accidental start up.
The arrow on the direction switch indicates the working direction.
- Wait for the device to shut-down.
-
- Push the direction switch (6) into the desired position:
Press the direction switch to the right with the arrow pointing forwards
Press the direction switch to the left with the arrow pointing backwards
- Push the direction switch (6) into the desired position:
- Switch lock: Bring direction switch to neutral position.
Clockwise direction:
To drill and screw in screws.
Counter-clockwise direction:
To unscrew screws.

The direction changed may only be performed in standstill mode.

Torque setting
You can preset the maximum torque by rotating the torque adjustment ring (3).
20 torque settings + 1 drill setting + 1 impact drill setting are provided.
- Turn the adjusting ring (3) to select the desired torque:
Screwing: Settings 1 - 20
Drilling: Setting
Impact drilling: Setting

- Start with a lower torque step and increase according to requirement.

Torque adjustment should only be performed in standstill mode.

Reaching the preset torque limit produces a noticeable rasping sound. This sound is caused by the slip clutch.

Tool change
The automatic spindle lock enables the tool to be changed even when the motor is at a standstill.
- Rotate the keyless chuck (2) counterclockwise, until the drill chuck aperture (1) is large enough to accommodate the tool.
- Push the tool as far as possible into the keyless chuck (2).
- Rotate the chuck clockwise to clamp the tool firmly.
- To remove the tool again, rotate the keyless chuck (2) and pull out the tool.

There is a magnet bit holder (A5). on the left and right of the housing. You can attach one bit at a time to the magnetic bit holder.

Mounting the additional handle
- Screw the additional handle (11) into the right or left thread (9) of the tool head.
- Tighten the additional handle (11) by hand.

Switching on/off
By using the on/off switch (8) you can progressively control the speed. The longer you push the on-off button, the higher the speed.
- Press the on/off switch (8) to start the device. The LED work light (7) lights up during operation.
- To turn it off, release the on/off switch (8).
When you move the direction switch (6) to the middle position, the device is secured against being switched on.

During breaks in work, the device can be hung from a belt, using the integral metal clip (18). Take care to ensure that the device is switched off and secured against accidental activation.
The metal clip is also suitable for opening bottles with bottle caps.
Cleaning and maintenance

Contact our Service Centre about repairs and servicing not described in this manual. Only use OEM parts. Risk of injury!

Turn off the appliance and, before doing any servicing, remove the battery.
The following cleaning and servicing should be done regularly. This will ensure a long and reliable service life.
Cleaning

Do not spray the appliance with water and do not immerse it in water. Electric shock hazard!
- Keep clean the ventilation slots, motor housing and handles of the appliance. Use a damp cloth or a brush.
Do not use cleaning agents or solvents. You may otherwise irreparably damage the appliance.
Maintenance
The appliance cleaner is maintenance free.
Storage
- Store the equipment in a dry place well out of reach of children.
Disposal and protection of the environment
Remove the rechargeable battery before disposing of the device!
The device, accessories and packaging should be properly recycled.
Instruction on how to dispose of the rechargeable battery can be found in the separate instruction manual for your battery and charger

Machines do not belong with domestic waste.
- Return the unit to a recycling centre. The plastics and metals in the unit can be sorted and appropriately recycled. Ask our Service Centre for details.
- Defective units returned to us will be disposed of for free.
Replacement parts/accessories
Spare parts and accessories can be obtained at www.grizzlytools.shop
If you have issues ordering, please use the contact form. If you have any other questions, contact the "Service-Center" (see page 15).
Keyless drill chuck....91105885
Guarantee
Dear Customer,
This equipment is provided with a 3-year guarantee from the date of purchase.
In case of defects, you have statutory rights against the seller of the product.
These statutory rights are not restricted by our guarantee presented below.
Terms of Guarantee
The term of the guarantee begins on the date of purchase. Please retain the original receipt. This document is required as proof of purchase.
If a material or manufacturing defect occurs within three years of the date of purchase of this product, we will repair or replace at our choice the product for you free of charge. This guarantee requires the defective equipment and proof of purchase to be presented within the three-year period with a brief written description of what constitutes the defect and when it occurred.
If the defect is covered by our guarantee, you will receive either the repaired product or a new product. No new guarantee period begins on repair or replacement of the product.
Guarantee Period and Statutory Claims for Defects
The guarantee period is not extended by the guarantee service. This also applies for replaced or repaired parts. Any damages and defects already present at the time of purchase must be reported immediately after unpacking. Repairs arising after expiry of the guarantee period are chargeable.
Guarantee Cover
The equipment has been carefully produced in accordance with strict quality guidelines and conscientiously checked prior to delivery.
The guarantee applies for all material and manufacturing defects. This guarantee does not extend to cover product parts that are subject to normal wear and may therefore be considered as wearing parts (e.g. keyless drill chuck) or to cover damage to breakable parts (e.g. switches).
This guarantee shall be invalid if the product has been damaged, used incorrectly or not maintained. Precise adherence to all of the instructions specified in the operating manual is required for proper use of the product. Intended uses and actions against
which the operating manual advises or warns must be categorically avoided. The product is designed only for private and not commercial use. The guarantee will be invalidated in case of misuse or improper handling, use of force, or interventions not undertaken by our authorised service branch.
Processing in Case of Guarantee
To ensure efficient handling of your query, please follow the directions below:
- Please have the receipt and item number (IAN 373420_2104) ready as proof of purchase for all enquiries.
- Please find the item number on the rating plate.
- Should functional errors or other defects occur, please initially contact the service department specified below by telephone or by e-mail. You will then receive further information on the processing of your complaint.
- After consultation with our customer service, a product recorded as defective can be sent postage paid to the service address communicated to you, with the proof of purchase (receipt) and specification of what constitutes the defect and when it occurred. In order to avoid acceptance problems and additional costs, please be sure to use only the address communicated to you. Ensure that the consignment is not sent carriage forward or by bulky goods, express or other special freight. Please send the equipment inc. all accessories supplied at the time of purchase and ensure adequate, safe transport packaging.
Repair Service
For a charge, repairs not covered by the guarantee can be carried out by our service branch, which will be happy to issue a cost estimate for you.
We can handle only equipment that has been sent with adequate packaging and postage.
Attention: Please send your equipment to our service branch in clean condition and with an indication of the defect.
Equipment sent carriage forward or by bulky goods, express or other special freight will not be accepted.
We will dispose of your defective devices free of charge when you send them to us.
Service-Center
Service Great Britain Tel.: 0800 4047 657
E-Mail: grizzly@lidl.co.uk
IAN 373420_2104
CY Service Cyprus
Tel.: 8009 4409
E-Mail: grizzly@lidl.com.cy
IAN 373420_2104
Importer
Please note that the following address is not a service address. Please initially contact the service centre specified above.
Service-Center....28
Proizvođač......28
Prijevod originalne CE Izjave o
podudarnosti 99
Razina snage zvuka (L WA )
Prazni hod ..... 84,1 dB(A); KWA=5 dB
Udarno bušenje 107,8 dB(A); KWA=5 dB
Vibracija (a h ) prilikom
Prazni hod .....2,71 m/s²; K= 1,5 m/s²
Udarno bušenje
10,24m / s2;K = 1,5m / s2
Navedena emisijska vrijednost vibracija je izmjerena prema jednom normiranom ispitnom postupku i može se primijeniti za usporedbu jednog električnog alata s ne-kim drugim. Navedena emisijska vrijednost vibracija se također može primijeniti za uvodnu procjenu prekida.

Upozorenje:
Service-Center....54
Importer 54
Traducerea Declaratiei Originale de Conformitate CE ......101
Service-Center....97
Importeur 97
  | Translation of the original EC declaration of conformity | |
| We hereby confi rm that the 3-in-1 Cordless Impact DrillPSBSA 20-Li C3 seriesSerial number000001 - 580000conforms with the following applicable relevant version of the EU guidelines: | ||
| 2006/42/EC • 2014/30/EU • 2011/65/EU* • (EU) 2015/863 | ||
| In order to guarantee consistency, the following harmonised standards as well as national standards and stipulations have been applied: | ||
| EN 62841-1:2015 • EN 62841-2-1:2018/A11:2019 • IEC 62471:2006EN 55014-1:2017 • EN 55014-2:2015 • EN IEC 63000:2018 | ||
| This declaration of conformity is issued under the sole responsibility of the manufacturer: | ||
 Grizzly Tools GmbH & Co. KGStockstädter Straße 2063762 Großostheim, Germany31.10.2021 Grizzly Tools GmbH & Co. KGStockstädter Straße 2063762 Großostheim, Germany31.10.2021 |  Christian FrankDocumentation Representative Christian FrankDocumentation Representative | |
* The object of the declaration described above satisfies the provisions of Directive 2011/65/EU of the European Parliament and the Council of 8 June 2011 on limiting the use of certain harmful substances in electrical and electronic appliances.
| HR | Prijevod originalne CEIzjave o podudarnosti |
| Ovim mi potvrđujemo da3-u-1 aku udarna bušilica-odvijač 20 Vserije PSBSA 20-Li C3Serijski broj:000001 - 580000odgovara sljedećim odgovarajućim direktivama EU-a u njihovoj valjanoj verziji: | |
| 2006/42/EC • 2014/30/EU • 2011/65/EU* • (EU) 2015/863 | |
| Za jamčenje sukladnosti primijenjene su sljedeće uskladene norme kao i nacionalne norme i odredbe: | |
| EN 62841-1:2015 • EN 62841-2-1:2018/A11:2019 • IEC 62471:2006EN 55014-1:2017 • EN 55014-2:2015 • EN IEC 63000:2018 | |
| Isključivu odgovornost za izdavanje ove izjave o sukladnosti nosi proizvođač : | |
| CE Grizzly Tools GmbH & Co. KGStockstädter Straße 2063762 Großostheim,Germany31.10.2021 | Christian FrankOpunomoćenik za dokumentaciju |


- 3-IN-1 CORDLESS IMPACT DRIVER 20V PSBSA 20-LI C3
- 3 U 1 AKU UDARNA BUŠILICA- ODVIJAČ 20 V
- HR
- RS
- INTRODUCTION
- INTENDED PURPOSE
- GENERAL DESCRIPTION
- EXTENT OF THE DELIVERY
- FUNCTIONAL DESCRIPTION
- OVERVIEW
- TECHNICAL DATA
- 3-IN-1 CORDLESS
- GBCY
- SAFETY INSTRUCTIONS
- SYMBOLS AND ICONS
- SYMBOLS ON THE APPLIANCE
- SYMBOLS IN THE MANUAL
- GENERAL SAFETY DIRECTIONS FOR POWER TOOLS
- RETAIN ALL SAFETY DIRECTIONS AND INSTRUCTIONS FOR FUTURE USE
- WORK AREA SAFETY
- ELECTRICAL SAFETY
- PERSONAL SAFETY
- POWER TOOL USE AND CARE
- SAFETY INFORMATION FOR DRILLING MACHINES
- RESIDUAL RISKS
- OPERATION
- CHECKING THE BATTERY CHARGE LEVEL
- RECHARGING THE BATTERY
- OVERVIEW OF THE CONTROL DISPLAY ON THE CHARGER (12)
- INSERTING / REMOVING THE DEVICE'S BATTERY PACK
- INSERTING THE BATTERY PACK
- REMOVING THE BATTERY PACK
- CHOICE OF GEAR
- SET THE DIRECTION OF ROTATION
- CLOCKWISE DIRECTION
- TO DRILL AND SCREW IN SCREWS
- COUNTER-CLOCKWISE DIRECTION
- TO UNSCREW SCREWS
- TORQUE SETTING
- TOOL CHANGE
- MOUNTING THE ADDITIONAL HANDLE
- SWITCHING ON/OFF
- CLEANING AND MAINTENANCE
- CLEANING
- MAINTENANCE
- STORAGE
- DISPOSAL AND PROTECTION OF THE ENVIRONMENT
- REPLACEMENT PARTS/ACCESSORIES
- SPARE PARTS AND ACCESSORIES CAN BE OBTAINED AT WWW.GRIZZLYTOOLS.SHOP
- GUARANTEE
- TERMS OF GUARANTEE
- GUARANTEE PERIOD AND STATUTORY CLAIMS FOR DEFECTS
- GUARANTEE COVER
- PROCESSING IN CASE OF GUARANTEE
- REPAIR SERVICE
- SERVICE-CENTER
- IMPORTER
- UPOZORENJE
Brand : PARKSIDE
Model : PSBSA 20-Li C33
Category : Cordless drill driver