
HAI63DC - Cooker HAIER - Free user manual and instructions
Find the device manual for free HAI63DC HAIER in PDF.


| Product Type | Freestanding Cooker |
| Brand | Haier |
| Model | HAI63DC |
| Energy Source | Gas (Natural Gas / LPG) |
| Number of Burners | 4 Gas Burners |
| Oven Type | Gas Oven with Grill |
| Dimensions (W x D x H) | 60 cm x 60 cm x 85 cm |
| Net Weight | Approx. 50 kg |
| Electrical Supply | 220-240 V, 50/60 Hz (for ignition and oven light) |
| Oven Capacity | Approx. 70 Liters |
| Main Functions | Baking, Roasting, Grilling, Top Heat, Bottom Heat |
| Control Type | Rotary Knobs with Push-to-Turn Safety |
| Safety Features | Flame Failure Device, Child Lock (optional), Overheat Protection |
| Cleaning & Maintenance | Removable burner caps, enamel interior, easy-clean oven door |
| Spare Parts Availability | Authorized service centers; order online via Haier support |
| Repairability | Modular design; user-replaceable knobs, handles, and burner heads |
| Warranty | Standard 2 years (may vary by region) |
| Energy Class | A (for oven) — typical for gas cookers |
| Special Features | Auto-ignition, telescopic oven rails (optional), timer |
Frequently Asked Questions - HAI63DC HAIER
User questions about HAI63DC HAIER
0 question about this device. Answer the ones you know or ask your own.
Ask a new question about this device
Download the instructions for your Cooker in PDF format for free! Find your manual HAI63DC - HAIER and take your electronic device back in hand. On this page are published all the documents necessary for the use of your device. HAI63DC by HAIER.
USER MANUAL HAI63DC HAIER
Instructions Manual For Induction Hob
ENGLISH
Thank you for purchasing the HAIER induction hob. Please read this instruction manual carefully before using the hob and keep it in a safe place for future reference.
By placing the CE marking on this product, we declare, on our own responsibility, compliance to all the European safety, health and environmental requirements stated in the legislation for this product.
As applicable, the parts of this appliance are compliant to:
REGULATION (EC) No 1935/2004 on materials and articles intended to come into contact with food.
Safety Reminding and Maintenance:
- WARNING: The appliance and its accessible parts become hot during use. Care should be taken to avoid touching heating elements.
- Children under 8 years of age must be kept away from the appliance unless they are continuously supervised.
- This appliance can be used by children aged from 8 years and above and persons with reduced physical, sensory or mental capabilities or lack of experience and knowledge if they have been given supervision or instruction concerning use of the appliance in a safe way and understand the hazards involved.
- Children must not play with the appliance.
- Cleaning and user maintenance shall not be made by children without supervision.
- WARNING: Unattended cooking on a hob with fat or oil can be dangerous and may result in fire.
- NEVER try to extinguish a fire with water, but switch off the appliance and then cover flame e.g. with a lid or a fire blanket.
- WARNING: Danger of fire: do not store items on the cooking surfaces.
- WARNING: If the surface is cracked, switch off the appliance to avoid the possibility of electric shock.
- Do not use a steam cleaner for cleaning operations.
- Metallic objects such as knives, forks, spoons and saucepan lids must not be placed on the hob surface as they can get hot. Any spillage should be removed from the lid before opening.
- The hob surface must be allowed to cool down before closing the lid.
- After use, switch off the hob element by its control. Do not rely on the pan detector.
- This appliance is not intended to be operated by means of an external timer or separate remote-control system.
- The means for disconnection must be incorporated in the fixed wiring in accordance with the wiring rules.
- The instructions state the type of cord to be used, taking into account the temperature of the rear surface of the appliance.
- If the supply cord is damaged, it must be replaced by the manufacturer's service agent or similarly qualified persons in order to avoid a hazard.
- CAUTION: In order to avoid a hazard due to inadvertent resetting of the thermal cutout, this appliance must not be supplied through an external switching device, such as a timer, or connected to a circuit that is regularly switched on and off by the utility.
WARNING: Use only hob guards designed by the manufacturer of the cooking appliance or indicated by the manufacturer of the appliance in the instructions for use as suitable or hob guards incorporated in the appliance. The use of inappropriate guards can cause accidents.
- Always use the appropriate cookware.
- Always place the pan in the center of the unit that you are cooking on.
- Do not place anything on control panel.
- Do not use the surface as a cutting board.
- The hob surface must be allowed to cool down before closing the lid.
- CAUTION: the cooking process must be supervised. A short term cooking process has to be supervised continuously
Dear Customer,
Thank you for purchasing the HAdERion hob. We hope it will give many years of good service.
Please read this instruction manual carefully before using the hob and keep it in a safe place for future reference.
Product Introduction
The induction hob caters for all kind of cooking, with its electromagnetic cooking zones, and its micro-computerised controls and multi-functions, making it the ideal choice for today's family.
Manufactured with specially imported materials, the HAdEftion hob is extremely user-friendly, durable and safe.
Working Principle
The induction hob comprises a coil, a hotplate made of ferromagnetic material and a control system. Electrical current generates a powerful magnetic field through the coil. This produces a large number of vortices which in turn generate heat which is then transmitted through the cooking zone to the cooking vessel.

Safety
This hob was specially designed for domestic use.
In its constant search to improve its products, HAIER reserves the right to modify any technical, programme or aesthetic aspects of the appliance at any time.
• Protection from over-heating
A sensor monitors the temperature in the cooking zones. When the temperature exceeds a safe level, the cooking zone is automatically switched off.
- Detection of small or non-magnetic items
When a pan with a diameter of less than 80 mm, or some other small item (e.g. knife, fork, key) or a non-magnetic pan (e.g. aluminium) has been left on the hob, a buzzer sounds for approximately one minute, after which the hob goes automatically on to standby.
• Residual heat warning
When the hob has been operating for some time, there will be some residual heat. The letter "H" appears to warn you to keep away from it.
Auto shutdown
Another safety feature of the induction hob is auto shutdown. This occurs whenever you forget to switch off a cooking zone.
The default shutdown times are shown in the table below:
| Power level | The heating zone shut down automatically after |
| 1~3 8 hours | |
| 4~6 4 hours | |
| 7~9 2 hours |
When the pan is removed from the cooking zone, it stops heating immediately and switches itself off after the buzzer has sounded for one minute.
Warning: Anyone who has been fitted with a heart pacemaker should consult a doctor before using the induction hotplate.
Installation
- Cut a hole in the worktop of the dimension shown in the diagram below. A minimum of 50 mm space should be left around the hole. The worktop should be at least 30 mm thick and made of heat-resistant material.
As shown in Figure (1)

Flush installation: Feasible only if the oven is not installed under the counter
- It is essential that the induction hob is well ventilated and that the air intake and exit are not blocked.
Make sure the hob is correctly installed as shown in Figure 2.
Figure (2)
NB: For safety, the gap between the hob and any cupboard above it should be at least 760 mm.
- Fix the hob to the worktop using the 2 brackets on the base of the hob. The position of the brackets can be adjusted according to the thickness of the top.

Warnings:
(1) The induction hob must be installed by a properly qualified person. We have our own qualified installers. Never try to install the appliance yourself. (2) The induction hob must not be installed above refrigerators, freezers, dishwashers or tumble dryers. (3) The induction hob should be installed so that optimum radiation of heat is possible. (4) The wall and the area above the hob should be able to withstand heat. (5) To avoid any damage, the sandwich layer and adhesive should be heat-resistant.
4. Connection to power supply
The socket should be connected in compliance with the relevant standard, to a single-pole circuit breaker. The method of connection is shown in Figure 3.
| Voltage Wire | connection | ||||
| 380-415V 3N~ | 1L1Black Brown | 2L2Blue | 3NYellow/Green | 4 | 5 |
| 220-240V~ | 1LBlack & Brown | 2Blue | 3NYellow/Green | 4 | 5 |
Figure (3)
If the cable is damaged or needs replacing, this should be done by an after-sales technician using the proper tools, so as to avoid any accidents.
If the appliance is being connected directly to the mains supply, an omnipolar circuit breaker must be installed with a minimum gap of 3 mm between the contacts.
The installer must ensure that the correct electrical connection has been made and that it complies with safety regulations.
The cable must not be bent or compressed.
The cable must be checked regularly and only replaced by a properly qualified person.
Diagram of induction hob:
- Max. 1500/2000 W zone 4. Glass plate
- Max. 1500/2000 W zone 5. Control panel
- Max. 3000/3600 W zone
Schematic diagram of the control panel
- Heating zone selection controls 4. ON/OFF control
- Timer regulating key
- Keylock/Pause control
Operation of Product
Touch Controls
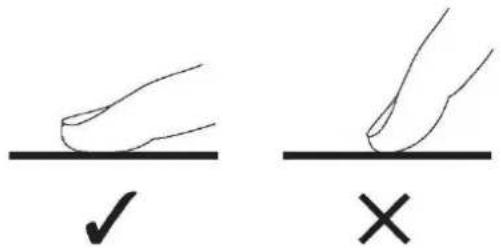
• The controls respond to touch, so you don't need to apply any pressure. - Use the ball of your finger, not its tip. - You will hear a beep each time a touch is registered. - Make sure the controls are always clean, dry, and that there is no object (e.g. a utensil or a cloth) covering them. Even a thin film of water may make the controls difficult to operate.
Choosing the right Cookware

- Only use cookware with a base suitable for induction cooking. Look for the induction symbol on the packaging or on the bottom of the pan.
- You can check whether your cookware is suitable by carrying out a magnet test.
Move a magnet towards the base of the pan. If it is attracted, the pan is suitable for induction.
• If you do not have a magnet:
- Put some water in the pan you want to check.
- If U does not flash in the display and the water is heating, the pan is suitable.
- Cookware made from the following materials is not suitable: pure stainless steel, aluminium or copper without a magnetic base, glass, wood, porcelain, ceramic, and earthenware.

Do not use cookware with jagged edges or a curved base.

Make sure that the base of your pan is smooth, sits flat against the glass, and is the same size as the cooking zone. Use pans whose diameter is as large as the graphic of the zone selected. Using a pot slightly wider will use energy at its maximum efficiency. If you use a smaller pot, efficiency could be less than expected. Pots less than 140 mm could be undetected by the hob. Always centre your pan on the cooking zone.

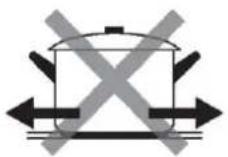
Always lift pans off the Induction hob - do not slide, or they may scratch the glass.

How to use
Start cooking
Touch the ON/OFF control for three seconds. After power on, the buzzer beeps once, all displays show "-" or "-" , indicating that the induction hob has entered the state of standby mode.
Place a suitable pan on the cooking zone that you wish to use.
- Make sure the bottom of the pan and the surface of the cooking zone are clean and dry.
Select a heat setting by touching the "-" or "+" control.
- If you don't choose a heat setting within 1 minute, the Induction hob will automatically switch off. You will need to start again at step 1.
- You can modify the heat setting at any time during cooking.


If the display flashes alternately with the heat setting
This means that:
- you have not placed a pan on the correct cooking zone or,
- the pan you're using is not suitable for induction cooking or,
- the pan is too small or not properly centered on the cooking zone.
No heating takes place unless there is a suitable pan on the cooking zone.
The display will automatically disappear after 1 minute if no suitable pan is placed on it.
Finish cooking
Turn the cooking zone off by scrolling down to "0" or touching "-" and "+" controls together. Make sure the display shows "0".

Turn the whole cooktop off by touching the ON/OFF control.
Beware of hot surfaces
H will show which cooking zone is hot to touch. It will disappear when the surface has cooled down to a safe temperature. It can also be used as an energy saving function if you want to heat further pans, use the hotplate that is still hot.
Using the Boost function
Activate the boost function

Touching the power regulating key "+" to set the power of the heating zone to Level 9
Touching the power regulating key "+" again, the zone indicator shows "b" and the power reaches Max

Cancel the Boost function
Touching the "-" button to cancel the Boost function, then the cooking zone will revert to level 9.
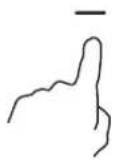
Touching "-" and "+" controls together. The cooking zone switches off and the boost function cancels automatically

• The function can work in any cooking zone. • The cooking zone returns to its original setting after 5 minutes.
Locking the Controls
- You can lock the controls to prevent unintended use (for example, children accidentally turning the cooking zones on).
- When the controls are locked, all the controls except the ON/OFF control are disabled.
| To lock the controls | |
| Touch the lock control for a while. | The timer indicator will show “ Lo ” |
| To unlock the controls | |
| Touch and hold the lock control for a while. | |

When the hob is in the lock mode, all the controls are disabled except the ON/OFF (you can always turn the induction hob off with the ON/OFF control in an emergency, but you shall unlock the hob first in the next operation).
Pause Mode
- You can pause the heating instead of shutting the hob off.
- When entering the Pause mode, all the controls except the ON/OFF control are disabled.
| To enter pause mode | |
| Touch the lock/pause control. All the indicator will show “11” | |
| To exit pause mode | |
| Touch the lock/pause control. |

When the hob is in the pause mode, all the controls are disabled except the ON/OFF (you can always turn the induction hob off with the ON/OFF control in an emergency. The hob will shut down after 10 minutes if you don't exit the pause mode).
Power Management Function
- It is possible to set a maximum power absorption level for the induction hob, choosing up to different power ranges.
- Induction hobs are able to limit themselves automatically in order to work at a lower power level, to avoid the risk of overloading.
| To enter Power Management Function | |
Turn on the hob, then Press at the same time the “+” (timer) and key lock.  | The timer indicator will show “P5” which means power level 5. The default mode is on 7.1 kW. |
| To switch to another level | |
| press +/- from the timer There are 5 power levels, from “P1” to “p5”. The timer indicator will show one of them. "P1": the maximum power is 2.5kW. "P2": the maximum power is 3.5kW. "P3": the maximum power is 4.5kW. "P4": the maximum power is 5.5kW. "P5": the maximum power is 7.1kW. | |
| Confirmation and Exit Power Management Function | |
Press at the same time + (timer) and key lock for confirmation.  | Then the hob will be turned off. |
Timer Control
You can use the timer in two different ways:
a) You can use it as a minute minder. In this case, the timer will not turn any cooking zone off when the set time is up. b) You can set it to turn one or more cooking zones off after the set time is up. The timer maximum is 99 minutes.
a) Using the Timer as a Minute Minder
If you are not selecting any cooking zone
Make sure the cooktop is turned on.
Note: you can use the minute minder even if you're not selecting any cooking zone.
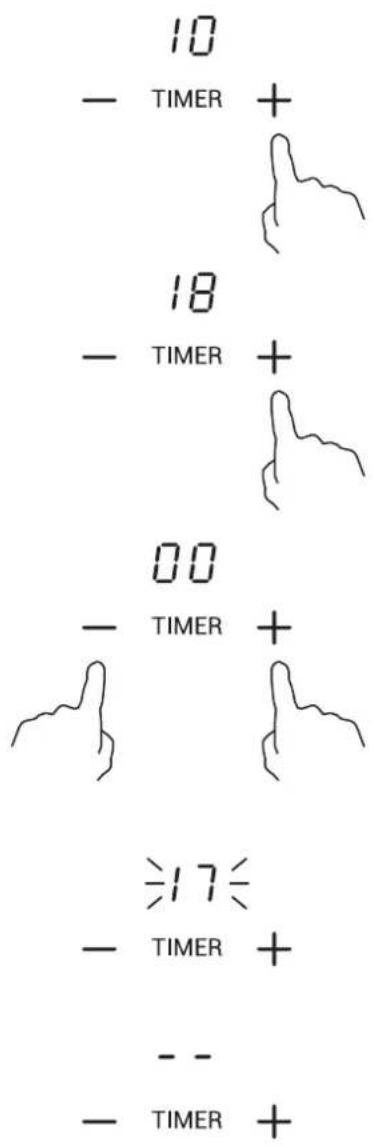
Touch "+" on the timer controls. The minder indicator will start flashing and "10" will show in the timer display.
Set the time by touching the "-" or "+" control of the timer. Hint: Touch the "-" or "+" control of the timer once to decrease or increase by 1 minute.
Touch and hold the "-" or "+" control of the timer to decrease or increase by 10 minutes.
Touching the "-" and "+" together cancels the timer, and "00" will show in the minute display.
When the time is set, it will begin to count down immediately. The display will show the remaining time and the timer indicator will flash for 5 seconds.
The buzzer will beep for 30 seconds and the timer indicator shows "- -" when the set time finishes.
b) Setting the timer to turn one zone off
Set one zone
Touch the "-" or "+" of the corresponding cooking zone you want to set the timer for.
Set the time by touching the "-" or "+" control of the timer. Hint: Touch the "-" or "+" control of the timer once to decrease or increase by 1 minute. Touch and hold the "-" or "+" control of the timer to decrease or increase by 10 minutes.
Touching the "-" and "+" together cancels the timer, and "00" will show in the minute display.
When the time is set, it will begin to count down immediately. The display will show the remaining time and the timer indicator will flash for 5 seconds. NOTE: The red dot next to the power level indicator will illuminate indicating that zone is selected.
When cooking timer expires, the corresponding cooking zone will be switched off automatically.


Other cooking zones will keep operating if they were turned on previously.
Default working times
Auto shut down is a safety protection function for your induction hob. It shuts down automatically if you ever forget to turn off your cooking. The default working times for various power levels are shown in the table below:
| Power level 1 2 3 4 5 6 7 8 9 | |||||||||
| Default working timer (hour) 8 8 8 4 4 4 2 | 2 2 |
When the pot is removed, the induction hob can stop heating immediately and the hob automatically switches off after 2 minutes.

People with a heart pacemaker should consult with their doctor before using this unit.
Selection of cooking vessels

Iron oil frying pan, stainless steel pan, iron pan, iron kettle


Enamel stainless steel kettle
Enamel cooking utensil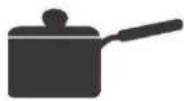
Iron plate
You may have a number of different cooking vessels.
- This induction hob can identify a variety of cooking vessels, which you can test by one of the following methods:
Place the vessel on the cooking zone. If the corresponding cooking zone displays a power level, then the vessel is suitable. If "U" flashes, then the vessel is not suitable for use with the induction hob.
- Hold a magnet to the vessel. If the magnet is attracted to the vessel, it is suitable for use with the induction hob.
NB: The base of the vessel must contain magnetic material.
It must have a flat bottom with a diameter according to table 1 below.
- Use only ferromagnetic cookware made from enameled steel, cast iron, or stainless steel that is compatible with induction.
- Use pans whose diameter of the ferromagnetic area (base of the pan) is within the range of dimensions in the table below. (Table 1)
- If you use smaller pots, performance could be affected.
- If you use a pot with a diameter smaller than the one indicated in table 1, the pot may not be detected.
According to the dimension of the zone, you can use pots of different diameters as shown in the picture below:


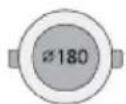


- If the ferromagnetic part covers only partially the base of the pan, only the ferromagnetic area will heat up; the rest of the base may not reach a sufficient temperature for cooking.
- If the ferromagnetic area is not homogeneous but contains other materials such as aluminum, this may affect heating and pan detection.
If the base of the pan is similar to the pictures below, the pan may not be detected.

| The base diameter of induction cookware | ||
| Cooking zone Minimum | Maximum | |
| 1 & 2 140 180 | ||
| 3 180 320 | ||
The above may vary according to the size of the pan and the material it is made from.
Cleaning and Maintenance
The surface of the induction hob can be easily cleaned in the following way:
| Type of contamination | Method of cleaning Cleaning materials | |
| Light Immerse in hot water and wipe dry Cleaning sponge | ||
| Rings and lime scale | Apply white vinegar to the area, wipe with a soft cloth or use a commercially available product | Special adhesive for ceramic glass |
| Sweetmeat, melted aluminium or plastics | Use a special scraper for ceramic glass to remove residue (a silicon product is best) | Special adhesive for ceramic glass |
NB: Disconnect the power supply before cleaning.
Failure Display and Inspection
If any abnormality occurs, the induction hob will automatically go into protective mode and display one of the following codes:
| Failure code | Problem Solution | ||
| Auto-Recovery | |||
| E1 Supply | voltage is above the rated voltage. | Please inspect whether power supply is normal. Power on after the power supply is normal. | |
| E2 Supply | voltage is below the rated voltage. | ||
| E3 High temperature of ceramic plate sensor. (1#) | Wait for the temperature of ceramic plate return to normal. Touch “ON/OFF” button to restart unit. | ||
| E4 High temperature of ceramic plate sensor. (2#) | |||
| E5 High temperature of IGBT. (1#) Wait for the temperature of IGBT return to normal. | |||
| E6 High temperature of IGBT. (2#) | Touch “ON/OFF” button to restart unit. Check whether the fan runs smoothly; if not, replace the fan. | ||
| No Auto-Recovery | |||
| F3/F6 | Ceramic plate temperature sensor failure--short circuit. (F3 for 1#,F6 for2#) | Check the connection or replace the ceramic plate temperature sensor. | |
| F4/F7 | Ceramic plate temperature sensor failure--open circuit. (F4 for 1#,F7 for2#) | ||
| F5/F8 | Ceramic plate temperature sensor failure--invalid. (F5 for 1#,F8 for2#) | ||
| F9/FA | Temperature sensor of the IGBT failure, (short circuit/open circuit for 1#) | Replace the power board. | |
| FC/FD | Temperature sensor of the IGBT failure, (short circuit/open circuit for 2#) | ||
| Failure Problem Solution A Solution B | |||
| The LED does not come on when unit is plugged in. | No power supplied. Check to see if plug is secured tightly in outlet and that outlet is working. | ||
| The accessorial power board and the display board connected failure. | Check the connection. | ||
| The accessorial power board is damaged. | Replace the accessorial power board. | ||
| The display board is damaged. | Replace the display board. | ||
| Some buttons can't work, or the LED display is not normal. | The display board is damaged. | Replace the power board | |
| The Cooking Mode Indicator comes on, but heating does not start. | High temperature of the hob. Ambient temperature may be too high. Air Intake or Air Vent may be blocked. | ||
| There is something wrong with the fan. | Check whether the fan runs smoothly; if not, replace the fan. | ||
| The power board is damaged. | Replace the power board. | ||
| Heating stops suddenly during operation and the display flashes “u”. | Pan Type is wrong. | Use the proper pot (refer to the instruction manual.) | Pan detection circuit is damaged, replace the power board. |
| Pot diameter is too small. | |||
| Cooker has overheated; Unit is overheated. Wait for temperature to return to normal.Push “ON/OFF” button to restart unit. | |||
| Heating zones of the same side (Such as the first and the second zone) would display “u”. | The power board and the display board connected failure; | Check the connection. | |
| The display board of communicate part is damaged. | Replace the display board. | ||
| The Main board is damaged. | Replace the power board. | ||
| Fan motor sounds abnormal. | The fan motor is damaged. Replace the fan. | ||
The above table shows how to assess and check common faults. Do not dismantle the appliance yourself, otherwise you may damage the induction hob.
Customer Care Service
If a fault should occur, before calling After Sales Service, please do the following:
- Check that the appliance is correctly plugged in
- Read the failure and display table above
If you are still unable to resolve the problem, switch off the appliance, do not try to dismantle it, and call
After Sales Service.
Special Declaration
The contents of this manual have been carefully checked. However, the company cannot be held responsible for any misprints or omissions.
Also, any technical modifications may be included in a revised version of the manual without notice. The appearance and colour of the appliance in this manual may differ from the actual one.

DISPOSAL: Do not dispose this product as unsorted municipal waste. Collection of such waste separately for special treatment is necessary.
This appliance is labelled in compliance with European directive 2012/19/EC for Waste Electrical and Electronic Equipment (WEEE).
By ensuring that this appliance is disposed of correctly, you will help prevent any possible damage to the environment and to human health, which might otherwise be caused if it were disposed of in the wrong way.
The symbol on the product indicates that it may not be treated as normal household waste. It should be taken to a collection point for the recycling of electrical and electronic goods.
This appliance requires specialist waste disposal. For further information regarding the treatment, recovery and recycling of this product please contact your local council, your household waste disposal service, or the shop where you purchased it.
For more detailed information about treatment, recovery and recycling of this product, please contact your local city office, your household waste disposal service or the shop where you purchased the product.
Valid only for Cyprus
| Product Information for Domestic Electric Hobs Compliant to Commission Regulation (EU) No 66/2014 | |||||
| Position Symbol Value Unit | |||||
| Model identification | |||||
| Type of hob: | HAI63DC | ||||
| Number of cooking zones and/or areas | zones 3 | ||||
| areas | |||||
| Heating technology (induction cooking zones and cooking areas, radiant cooking zones, solid plates) | Induction cooking zones X | ||||
| Induction cooking cooking areas | |||||
| radiant cooking zones | |||||
| solid plates | |||||
| For circular cooking zones or areas: diameter of useful surface area per electric heated cooking zone, rounded to the nearest 5mm | Rear left ∅ 18,0 | cm | |||
| Rear central ∅ cm | |||||
| Rear right ∅ cm | |||||
| Central left ∅ cm | |||||
| Central central ∅ cm | |||||
| Central right ∅ 32,0 cm | |||||
| Front left ∅ 18,0 cm | |||||
| Front central ∅ cm | |||||
| Front right ∅ cm | |||||
| For non-circular cooking zones or areas: length and width of useful surface area per electric heated cooking zone or area, rounded to the nearest 5mm | Rear left | LW | cm | ||
| Rear central | LW | cm | |||
| Rear right | LW | cm | |||
| Central left | LW | cm | |||
| Central central | LW | cm | |||
| Central right | LW | cm | |||
| Front left | LW | cm | |||
| Front central | LW | cm | |||
| Front right | LW | cm | |||
| Energy consumption for cooking zone or area calculated per kg | Rear left EC | electric cooking | 189,5 Wh/kg | ||
| Rear central | ECElectric cooking | Wh/kg | |||
| Rear right | ECElectric cooking | Wh/kg | |||
| Central left | ECElectric cooking | Wh/kg | |||
| Central central | ECElectric cooking | Wh/kg | |||
| Central right | ECElectric cooking | 179,4 | Wh/kg | ||
| Front left | ECElectric cooking | 190,2 | Wh/kg | ||
| Front central | ECElectric cooking | Wh/kg | |||
| Front right | ECElectric cooking | Wh/kg | |||
| Energy consumption for the hob calculated per kg | ECElectric hob 186,4 Wh/kg | ||||
| Standard applied: EN 60350-2 Household electric cooking appliances - Part 2: Hobs - Methods for measuring performance | |||||
| Suggestions for Energy Saving:To obtain the best efficiency of your hob, please place the pan in the centre of the cooking zone.Using a lid will reduce cooking times and save energy by retaining the heat.Minimise the amount of liquid or fat to reduce cooking times.Start cooking on a high setting and reduce the setting when the food has heated through.Use pans whose diameter is as large as the graphic of the zone selected. | |||||
| These information are to be considered as part of the appliance user manual. | |||||

- SAFETY REMINDING AND MAINTENANCE
- DEAR CUSTOMER
- PRODUCT INTRODUCTION
- WORKING PRINCIPLE
- SAFETY
- INSTALLATION
- WARNINGS
- CONNECTION TO POWER SUPPLY
- OPERATION OF PRODUCT
- TOUCH CONTROLS
- CHOOSING THE RIGHT COOKWARE
- HOW TO USE
- START COOKING
- IF THE DISPLAY FLASHES ALTERNATELY WITH THE HEAT SETTING
- FINISH COOKING
- USING THE BOOST FUNCTION
- CANCEL THE BOOST FUNCTION
- LOCKING THE CONTROLS
- PAUSE MODE
- POWER MANAGEMENT FUNCTION
- TIMER CONTROL
- USING THE TIMER AS A MINUTE MINDER
- IF YOU ARE NOT SELECTING ANY COOKING ZONE
- SETTING THE TIMER TO TURN ONE ZONE OFF
- DEFAULT WORKING TIMES
- SELECTION OF COOKING VESSELS
- CLEANING AND MAINTENANCE
- FAILURE DISPLAY AND INSPECTION
- CUSTOMER CARE SERVICE
- SPECIAL DECLARATION
Brand : HAIER
Model : HAI63DC
Category : Cooker